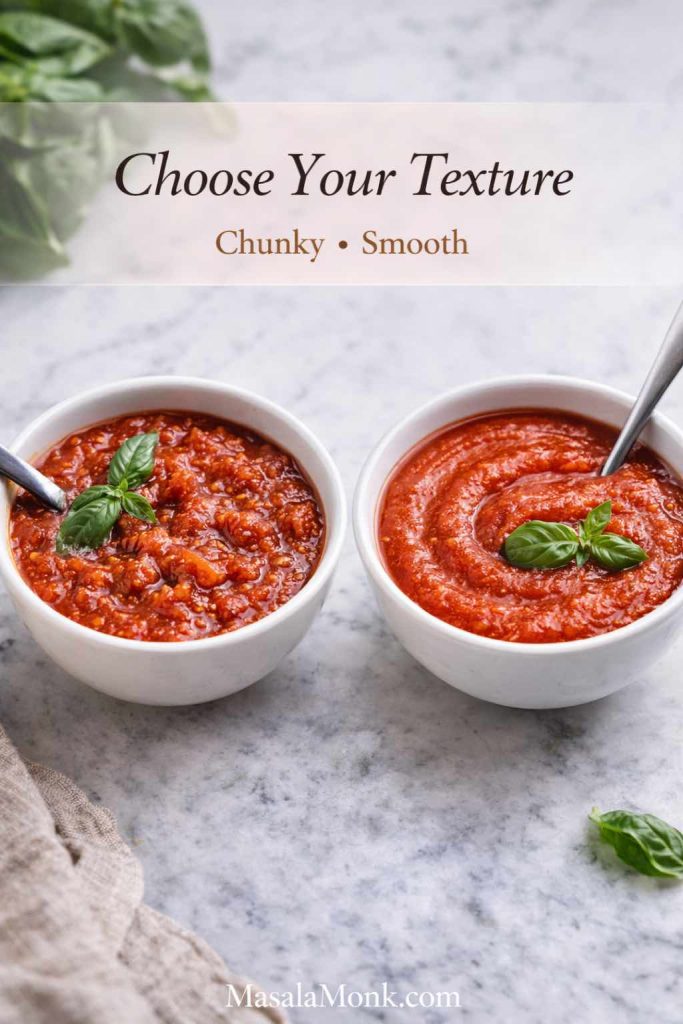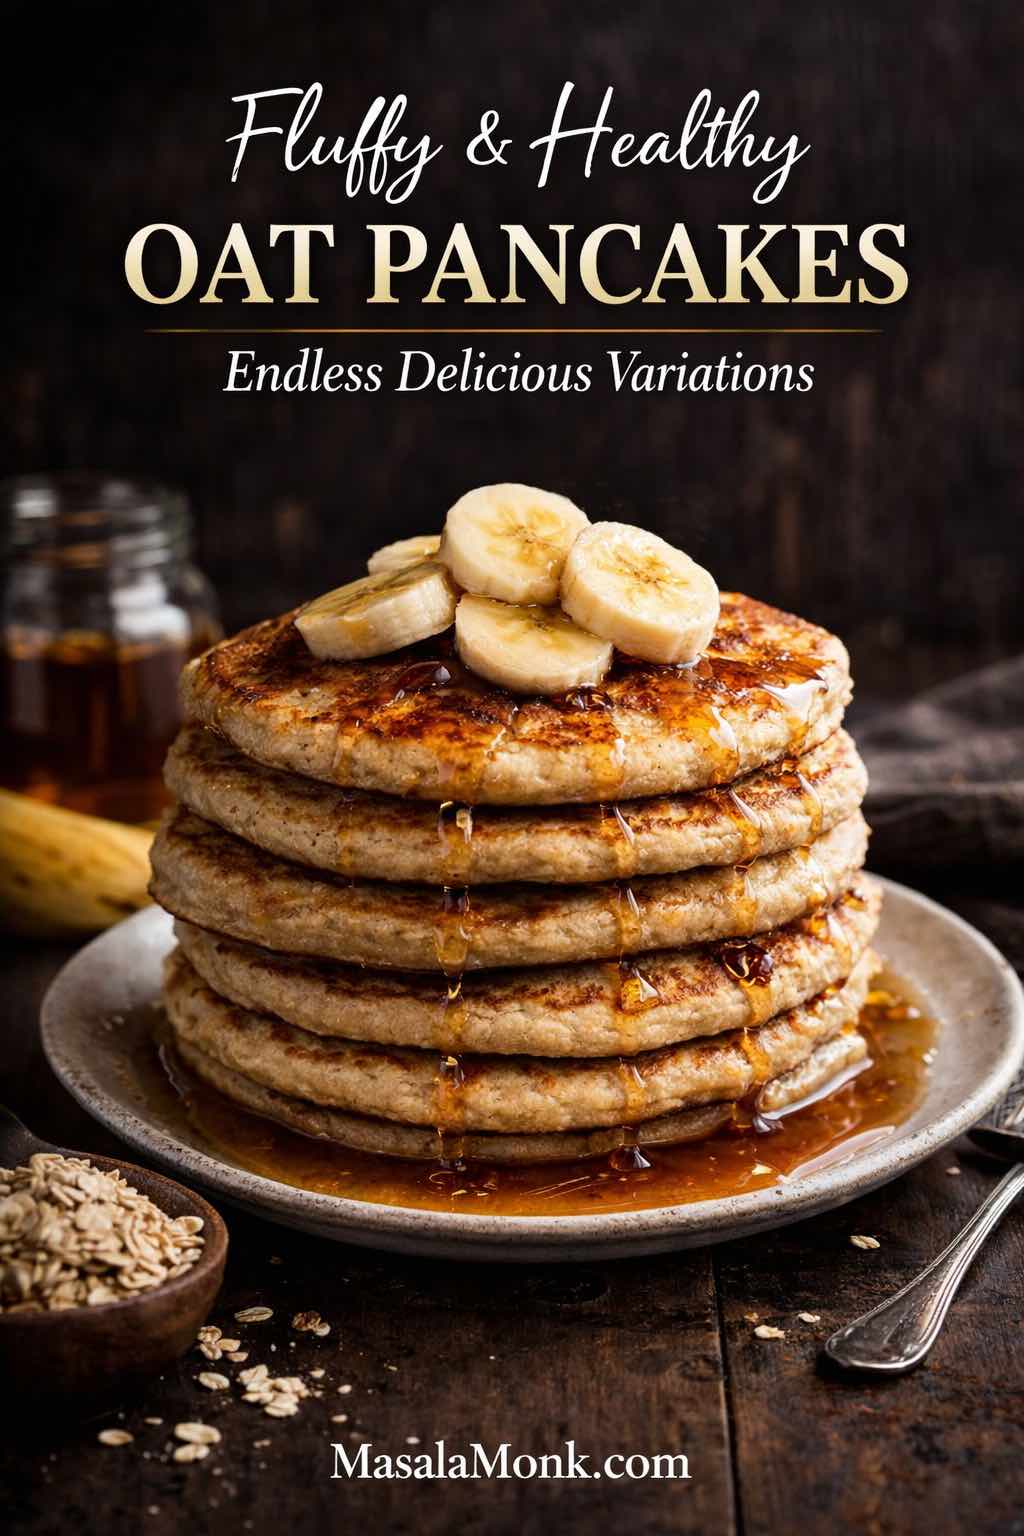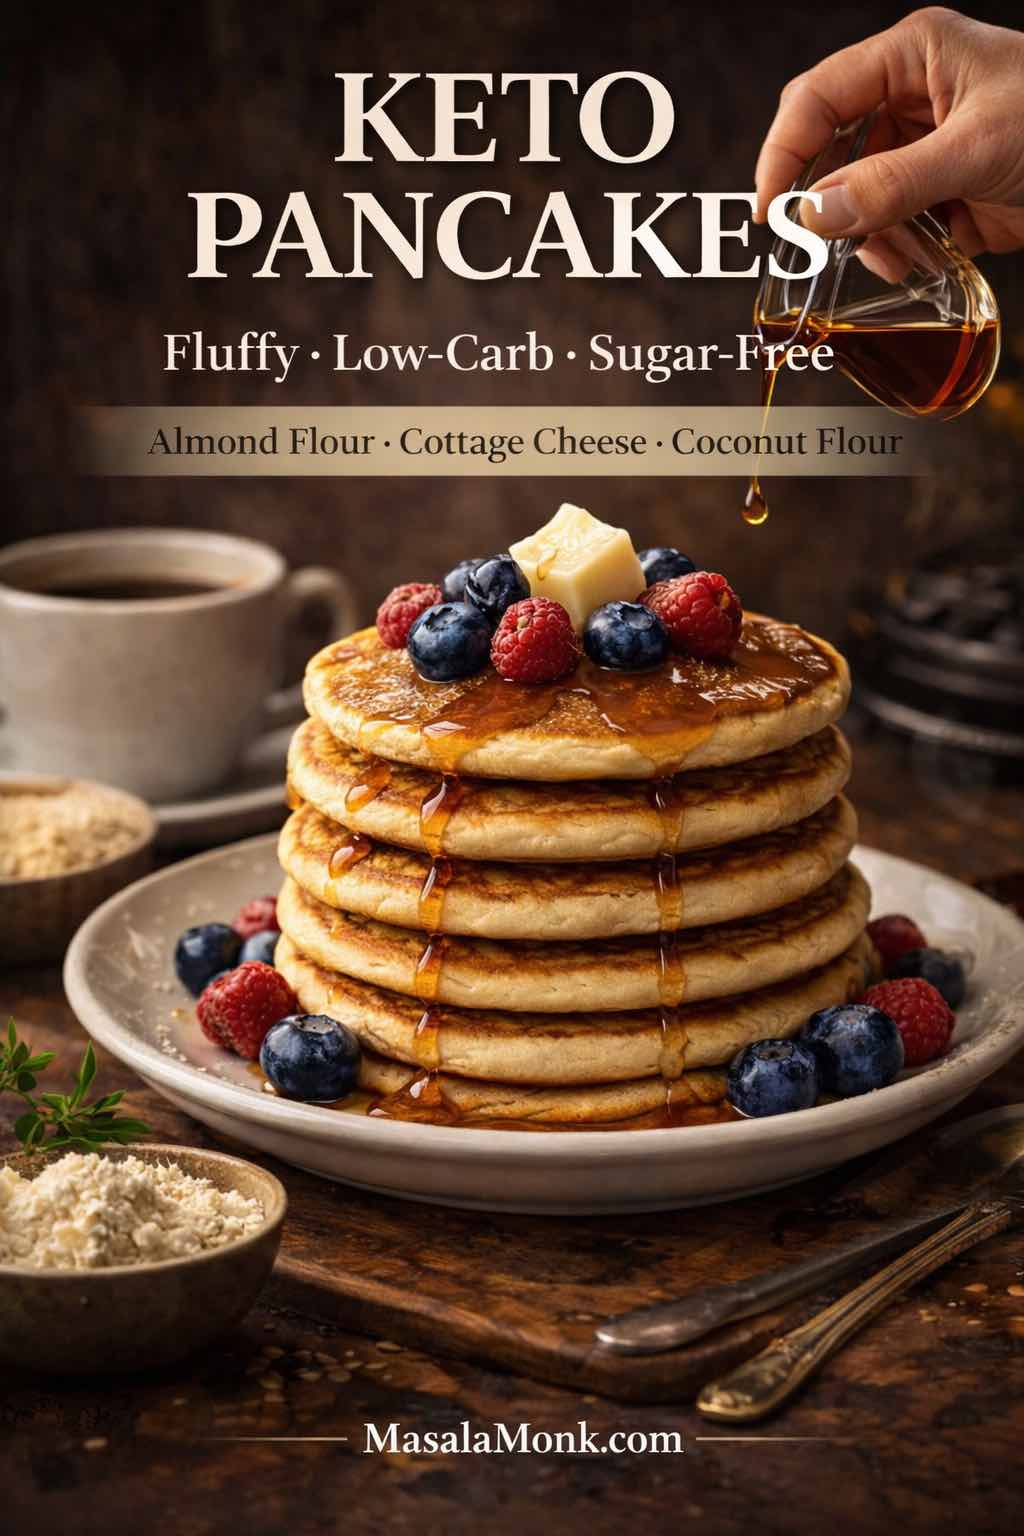
Keto pancakes have a way of testing patience. You mix a batter that looks promising, you flip with confidence, and then—somehow—you end up with something that feels like an egg patty wearing a pancake costume. Even worse, the next attempt might taste fine but crumble the moment you slide a spatula underneath. After a few tries, it’s tempting to decide that low carb pancakes are doomed to be disappointing.
Fortunately, that’s not how it has to go. With a handful of reliable principles, keto friendly pancakes can be fluffy, tender, and genuinely comforting. Moreover, once you’ve mastered a base, you can branch into gluten free keto pancakes, sugar free keto pancakes, keto protein pancakes, low glycemic pancakes, and even frozen keto pancakes that reheat like they were cooked minutes ago. Better yet, the same core batter can become a keto pancake and waffle mix, a keto waffle mix, or a thin crepe keto style breakfast when you want something lighter.
So, rather than chasing perfection with a single rigid formula, this post gives you a framework: a set of batters you can trust, plus variations that keep breakfast interesting without adding stress. Along the way, you’ll get specific ingredient ratios, pan cues, storage steps, and topping ideas—because texture is only half the joy. Meanwhile, flavor is what makes you come back for a second stack.
Keto pancakes vs low carb pancakes: what changes in the batter
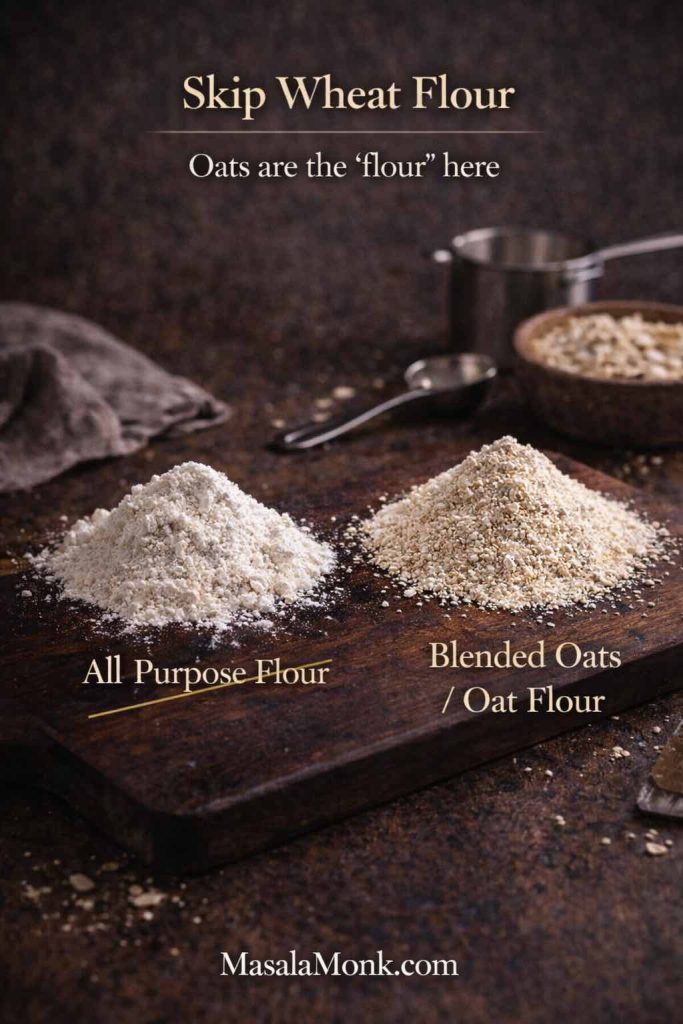
Traditional pancakes work so well because wheat flour does a lot of invisible labor. It hydrates predictably, builds structure, and traps air so your batter rises into a familiar, soft crumb. In contrast, keto pancakes swap wheat flour for ingredients that behave differently:
- Almond flour creates tenderness, yet it doesn’t build gluten.
- Coconut flour absorbs liquid aggressively, so a small measuring mistake can swing the batter from silky to paste-like.
- Eggs provide lift and strength, but too many eggs can turn pancakes rubbery or egg-forward.
- Sugar-free sweeteners often brown fast, so the outside can darken before the inside sets.
- Dairy (or creamy substitutes) becomes the texture “insurance policy,” keeping the bite soft instead of dry.
Consequently, keto pancake batter succeeds when you build structure deliberately and protect moisture from the start. Rather than trying to mimic a wheat pancake exactly, you’re building a pancake that wants to work on these ingredients. Once you accept that shift, the results improve quickly.
Also Read: Healthy Tuna Salad – 10 Easy Recipes (Avocado, Mediterranean, No Mayo & More)
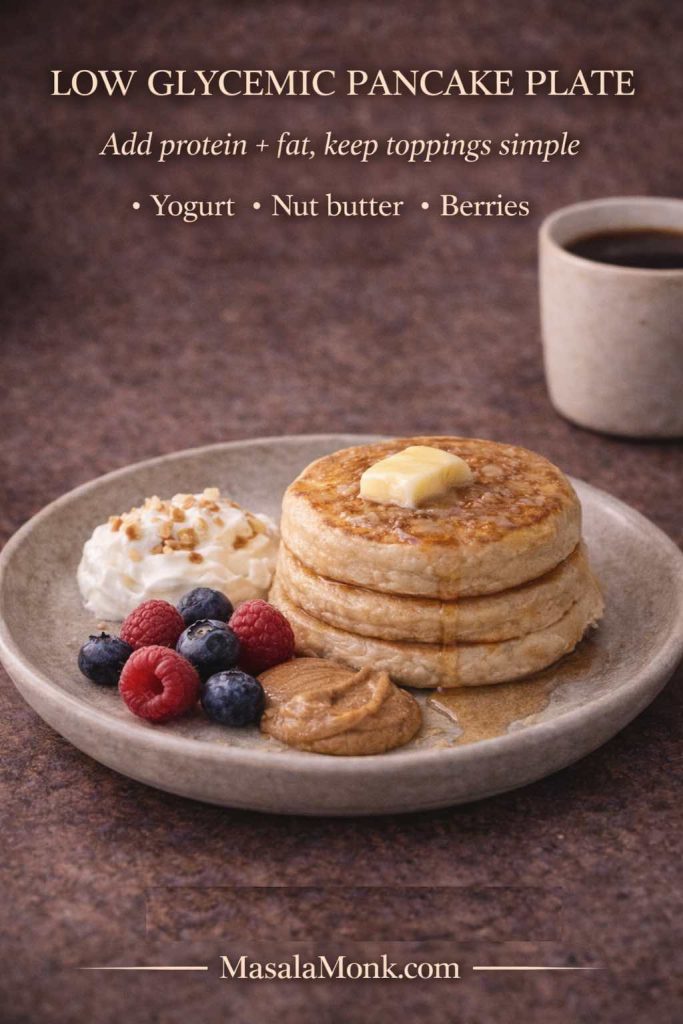
Low glycemic pancakes: a practical way to think about it
“Low glycemic pancakes” can mean different things to different people. Still, the goal is usually the same: breakfast that feels steady and satisfying rather than spiky and crashy. To make the phrase useful, it helps to understand glycemic index and glycemic load, because they describe related but different ideas. For a quick explanation, this guide on glycemic index vs glycemic load makes the distinction approachable. Likewise, Harvard Health offers a clear overview of glycemic index and glycemic load.
In everyday cooking, low glycemic pancakes often come down to three simple levers:
- Keep the base low in starch (almond flour and coconut flour help).
- Add protein and fat (eggs, cottage cheese, yogurt, nut butter).
- Choose toppings with intention, because toppings can change the entire impact.
If you enjoy having a quick reference list, MasalaMonk’s low GI foods list PDF can be a handy bookmark. On the research side, the International Tables of Glycemic Index and Glycemic Load is a widely cited reference. However, you don’t need to memorize tables to make better pancakes; you just need to build a balanced plate around them.
Also Read: Benefits of Nuts and Seeds – Protein-Packed Superfoods
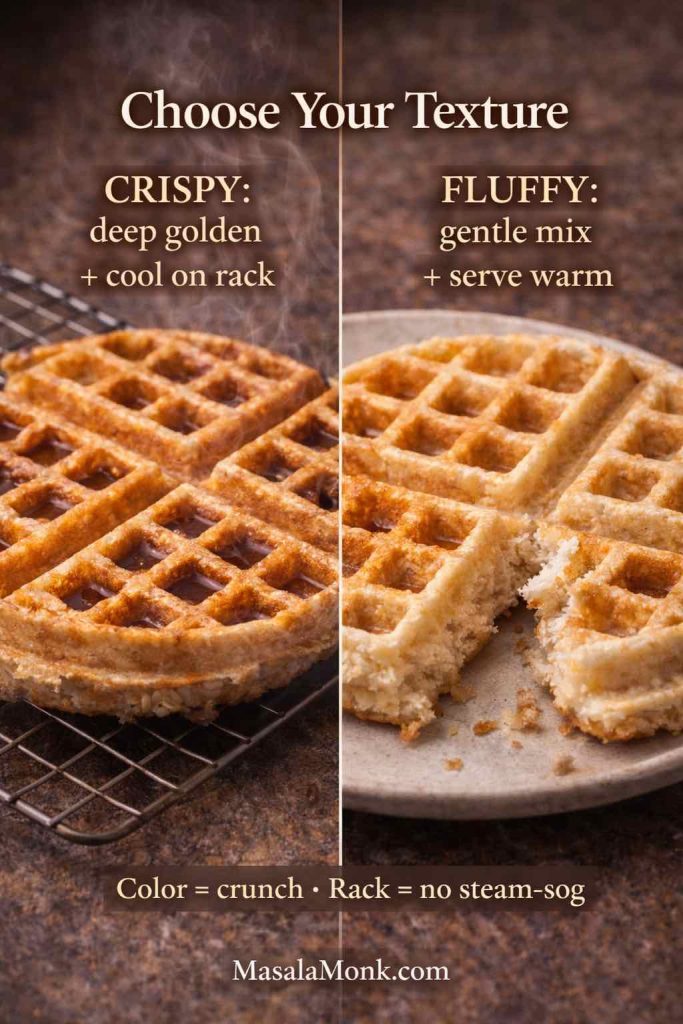
Keto pancakes: the texture rules that make everything easier
Before diving into multiple batters, lock in these rules. In fact, they’re the reason the recipes below stay fluffy instead of fragile.
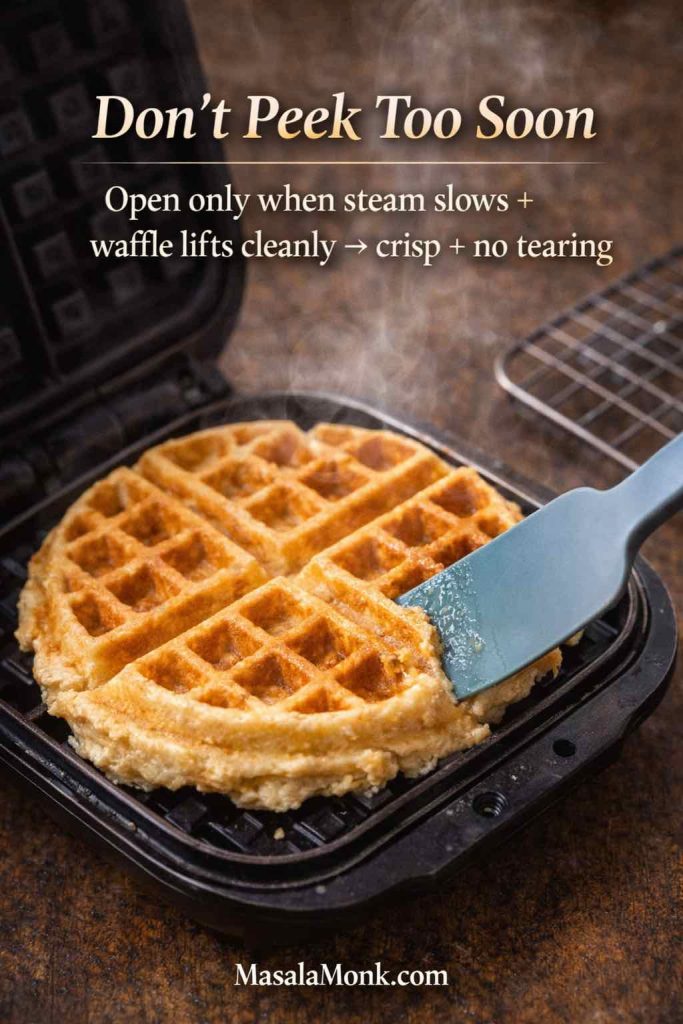
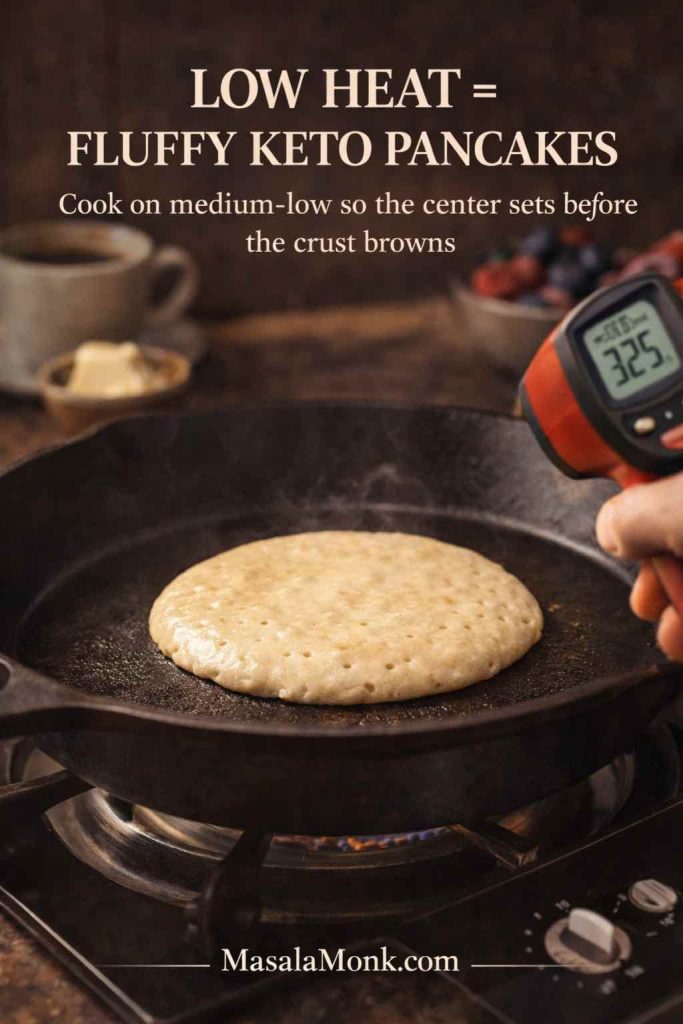
Cook keto pancakes on gentler heat than you expect
Medium-low heat gives the center time to set. Meanwhile, the outside browns gradually rather than racing ahead.
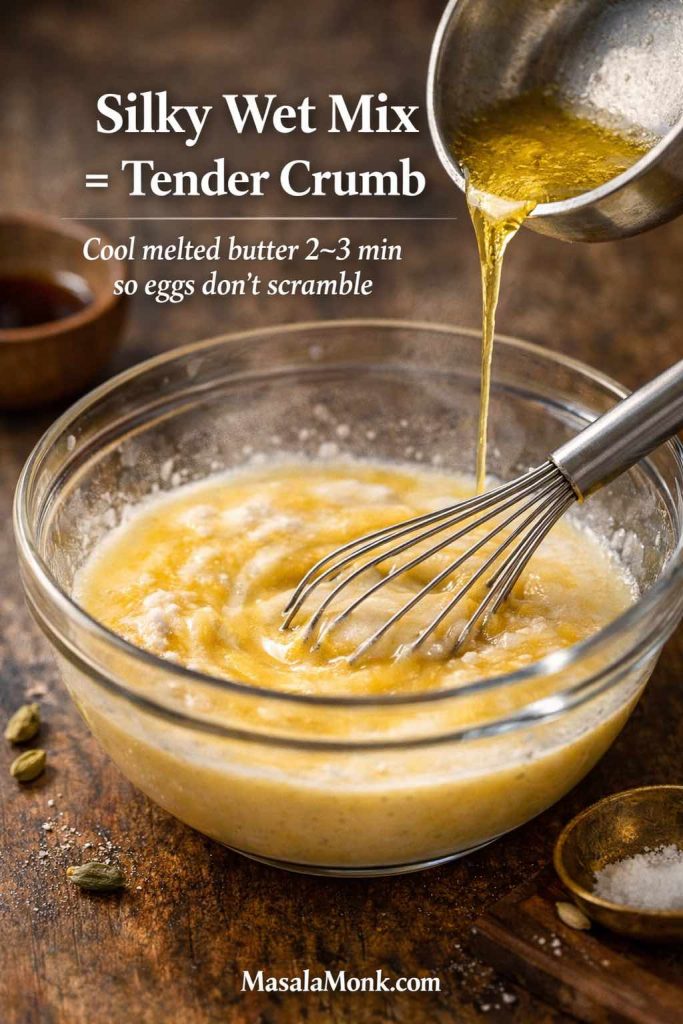
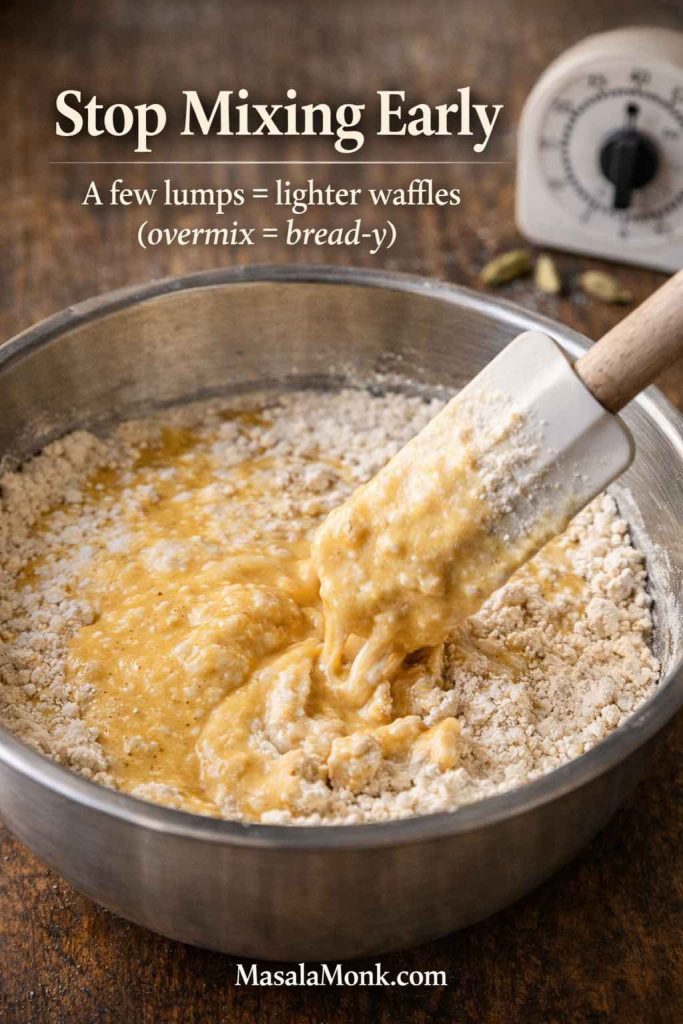
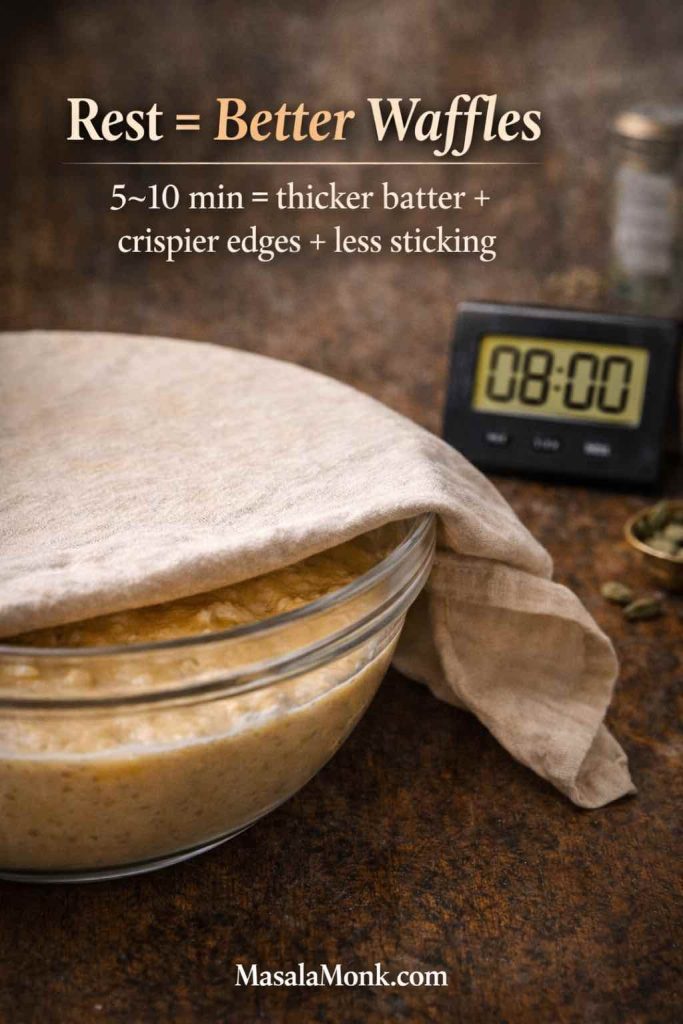
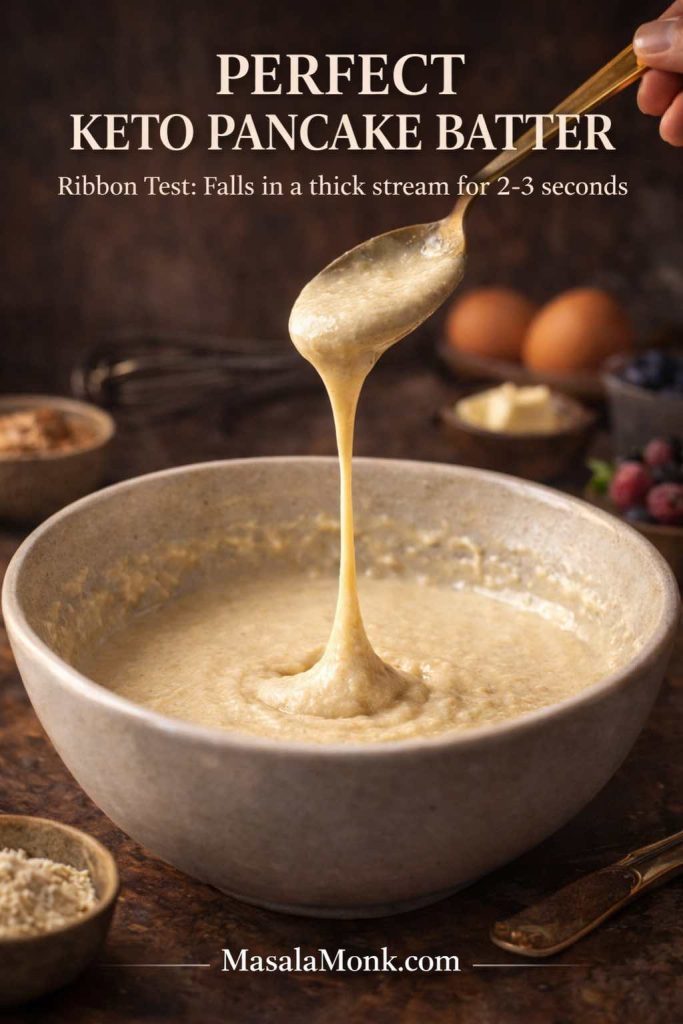
Give keto pancake batter a short rest
Resting helps almond flour hydrate and coconut flour thicken. As a result, the batter spreads more evenly and flips more cleanly.
Make smaller keto pancakes for better structure
Silver-dollar pancakes flip easily and cook evenly. Conversely, oversized pancakes tend to tear or undercook in the middle.
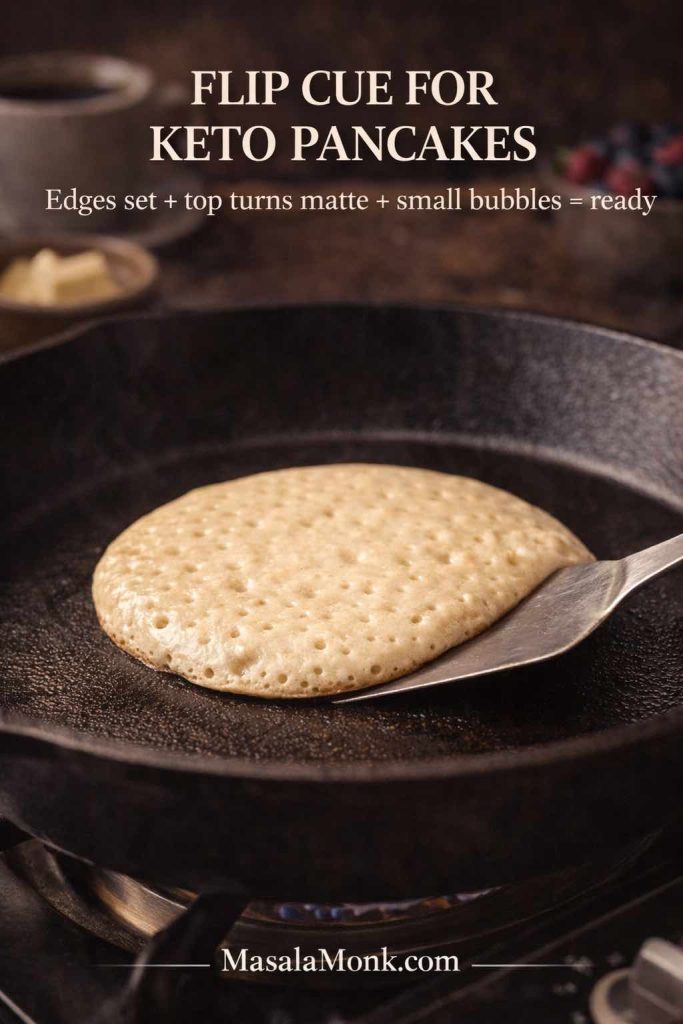
Flip once, later than your instincts suggest
Wait until the surface looks less glossy and the edges look set. Then flip confidently and leave the second side alone.
Build moisture into keto pancakes, not just on top
Moisture is what keeps low carb pancakes from tasting dry. Yogurt, cottage cheese, cream cheese, or coconut milk can all help. Additionally, these ingredients make pancakes reheat better later.
If you use dairy-heavy batters, it’s helpful to understand how carbs vary across cheeses. MasalaMonk’s overview of carbs in cheese for a keto diet is a useful companion when you’re choosing between cream cheese, cottage cheese, and other options.
Also Read: Creamy Cauliflower Soup—Keto-Friendly, Ultra-Comforting (Vegan Option)
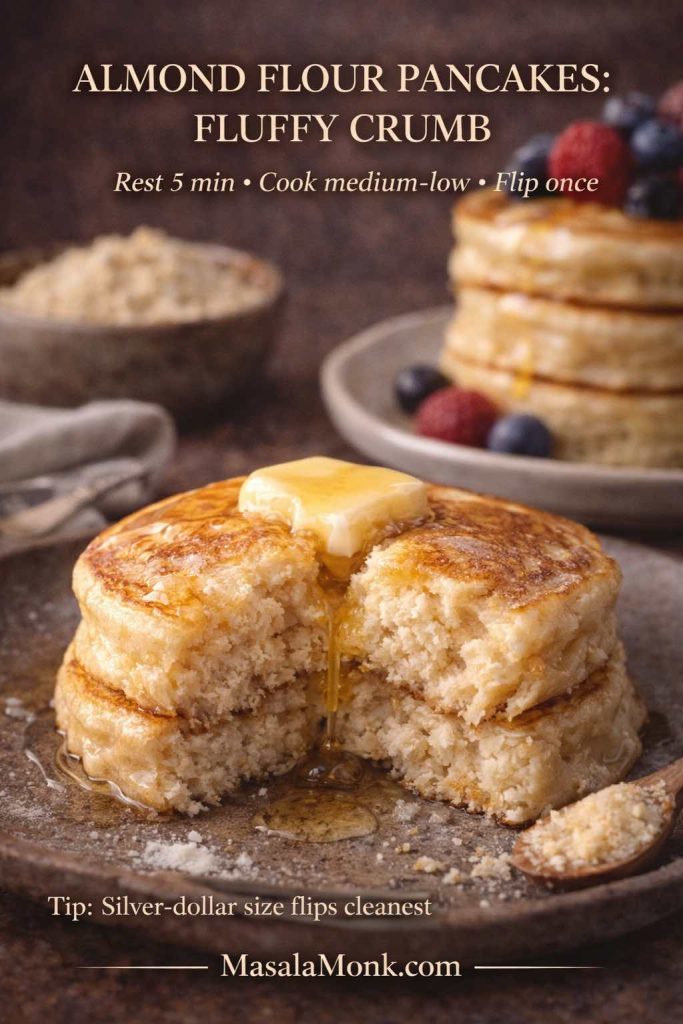
Keto pancakes almond flour: the classic, fluffy foundation
If you want the most “normal” pancake feel, almond flour is usually the best starting point. It’s naturally gluten-free, it tastes pleasant without bitterness, and it creates a tender crumb when handled gently. Moreover, almond flour keto pancakes adapt easily into sugar free keto pancakes, low carb protein pancakes, or a keto pancake mix you can prep in advance.
Almond flour keto pancakes (simple, reliable)
Ingredients (makes 10–12 small pancakes)
- 1 cup almond flour
- 2 eggs
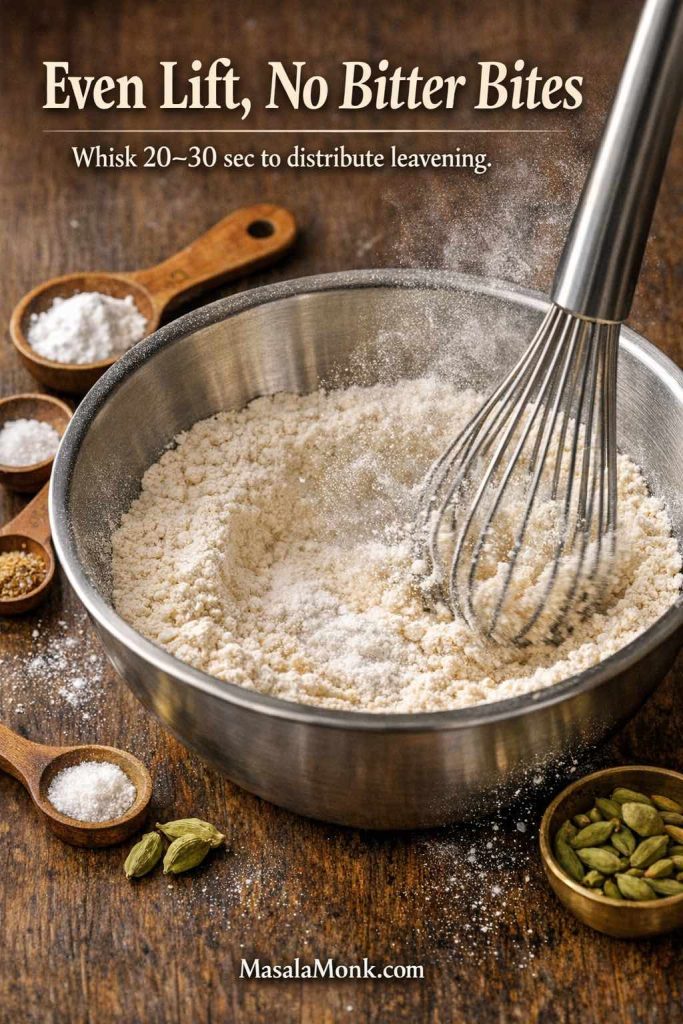
- 1½ teaspoons baking powder
- ¼ teaspoon salt
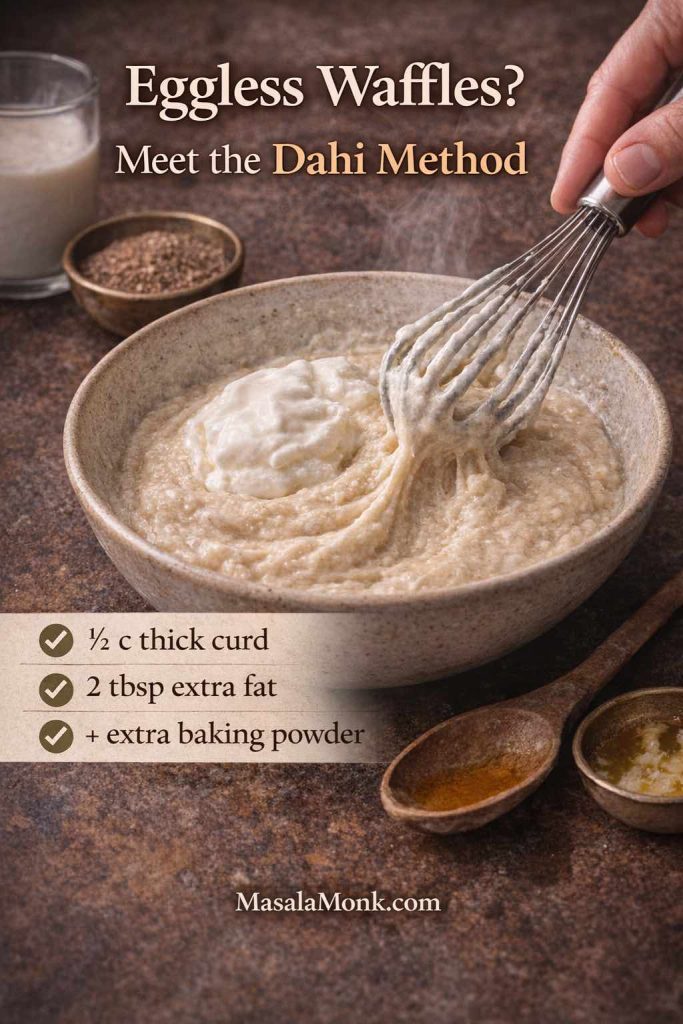
- ⅓ cup thick Greek yogurt (or sour cream)
- ¼ cup unsweetened milk (add a splash more if needed)
- Optional: vanilla, cinnamon, sweetener to taste
Method
- Mix almond flour, baking powder, and salt in a bowl.
- In a second bowl, whisk eggs and yogurt until smooth; then add milk and vanilla if using.
- Combine wet into dry. Stir until thick but spoonable.
- Rest 5 minutes. If the batter tightens too much, loosen with a tablespoon of milk.
- Cook on medium-low heat in small rounds. Flip once the edges look set and the top is less glossy.
Why this works
The yogurt adds moisture and softness. Meanwhile, baking powder provides lift so the pancakes don’t cook dense.
Easy variations
- Add cinnamon and vanilla for a cozy “classic diner” profile.
- Stir in lemon zest for brightness.
- Add a spoon of pumpkin purée for seasonal warmth.
If you’d like a deeper set of almond flour variations to play with, MasalaMonk’s almond flour pancakes guide is a helpful companion. Additionally, if you’re curious about almond flour in a blood-sugar context, this article on almond flour and blood sugar adds extra perspective.
Keto pancakes 3 ingredients: minimalist recipe that still taste good
Minimal recipes can be satisfying, provided each ingredient has a clear job. However, “three ingredients” can go wrong if the result becomes too egg-forward. Accordingly, these versions aim for simplicity without sacrificing texture.
3 ingredient almond flour pancakes
- 1 cup almond flour
- 2 eggs
- 1½ teaspoons baking powder
Mix, rest briefly, then cook on medium-low heat in small pancakes. For better flavor, a pinch of salt helps a lot—even if you keep everything else minimal.
3 ingredient cream cheese keto pancakes
- 2 eggs
- 3 tablespoons cream cheese
- 2 tablespoons almond flour
Blend or whisk smooth, rest a few minutes, then cook gently. This is richer and closer to dessert pancakes.
3 ingredient cottage cheese keto pancakes
- 2 eggs
- ½ cup cottage cheese
- ¼ cup almond flour
Blend the cottage cheese and eggs first, then stir in almond flour. These reheat well and feel satisfying.
Notably, these minimalist pancakes cover a lot of everyday needs: quick mornings, fewer measuring cups, and an easy base for sugar free keto pancakes when you want something lightly sweet.
Also Read: Keto Chia Pudding Recipe with Almond Milk
Cottage cheese keto pancakes: high protein, soft texture, and great reheating
When people want keto protein pancakes, they often look for “more protein” without relying on powders. Cottage cheese delivers that in a naturally creamy way, and it improves texture at the same time. In other words, it solves two problems at once: protein and tenderness.
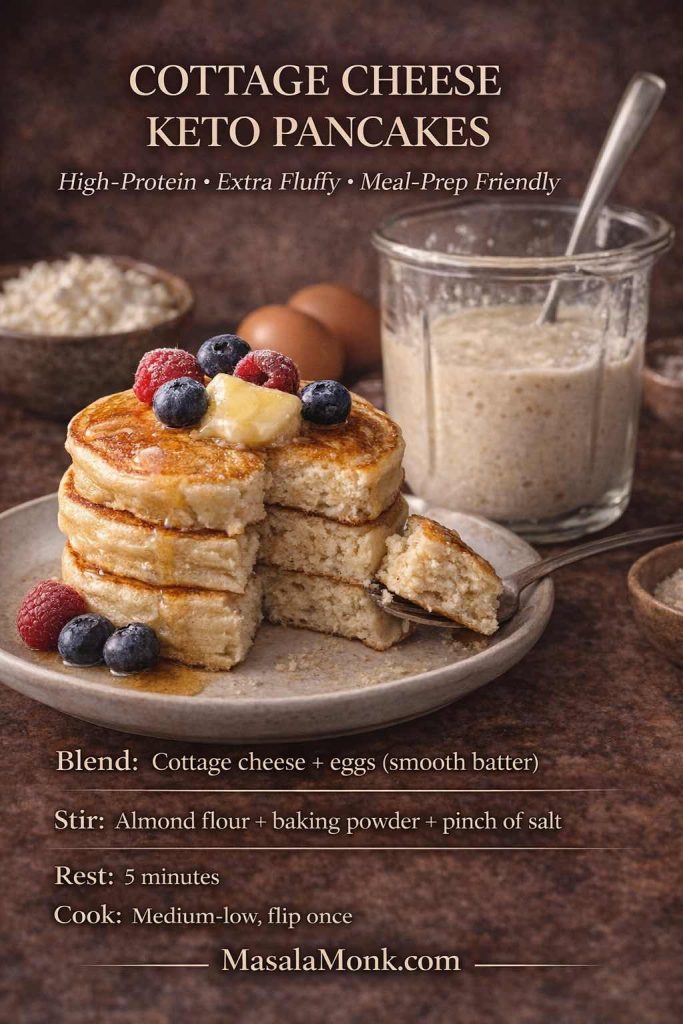
Cottage cheese keto pancakes (high protein, fluffy)
Ingredients (makes 8–10 pancakes)
- ½ cup cottage cheese (blended smooth for best texture)
- 2 eggs
- ½ cup almond flour
- 1 teaspoon baking powder
- Pinch of salt
- Optional: vanilla, cinnamon, sweetener
Method
- Blend cottage cheese and eggs until smooth.
- Stir in almond flour, baking powder, and salt.
- Rest 5 minutes.
- Cook on medium-low heat in small rounds.
- Flip once and finish gently.
Why these are so forgiving
Cottage cheese adds moisture and structure, so the pancakes are less likely to crumble. Furthermore, they tend to stay soft even after refrigeration.
For more ways to use cottage cheese at breakfast, MasalaMonk’s cottage cheese for breakfast pairs naturally here, and is a recommended read.
Cream cheese keto pancakes: rich, tender, ultra-low carb leaning
Cream cheese pancakes occupy a special niche. They’re comforting, they feel indulgent, and they often satisfy the same craving that people associate with “no carb pancakes,” even though most real foods have at least trace carbs. Regardless, this style can be very low carb while still feeling pancake-like.

Cream cheese keto pancakes (rich and tender)
Ingredients (makes 6–8 small pancakes)
- 2 eggs
- 3 tablespoons cream cheese (softened)
- 2 tablespoons almond flour (or 1 tablespoon coconut flour)
- ½ teaspoon baking powder
- Pinch of salt
- Optional: vanilla, sweetener
Method
- Whisk eggs and cream cheese until smooth (a blender makes this effortless).
- Add flour, baking powder, and salt; stir to combine.
- Rest 3 minutes.
- Cook on medium-low heat in small pancakes.
- Flip once and keep the second side brief.
Flavor direction
These shine with butter and cinnamon. Alternatively, they work beautifully with savory toppings, especially when you skip sweetener in the batter.
Also Read: 5 Irresistible Keto Strawberry Low-Carb Desserts Ideas
Coconut flour keto pancakes: light, delicate, and best in small batches
Coconut flour is powerful. Because it absorbs liquid rapidly, you need less than you expect, plus a longer rest. Consequently, coconut flour keto pancakes do best when cooked small and patiently.
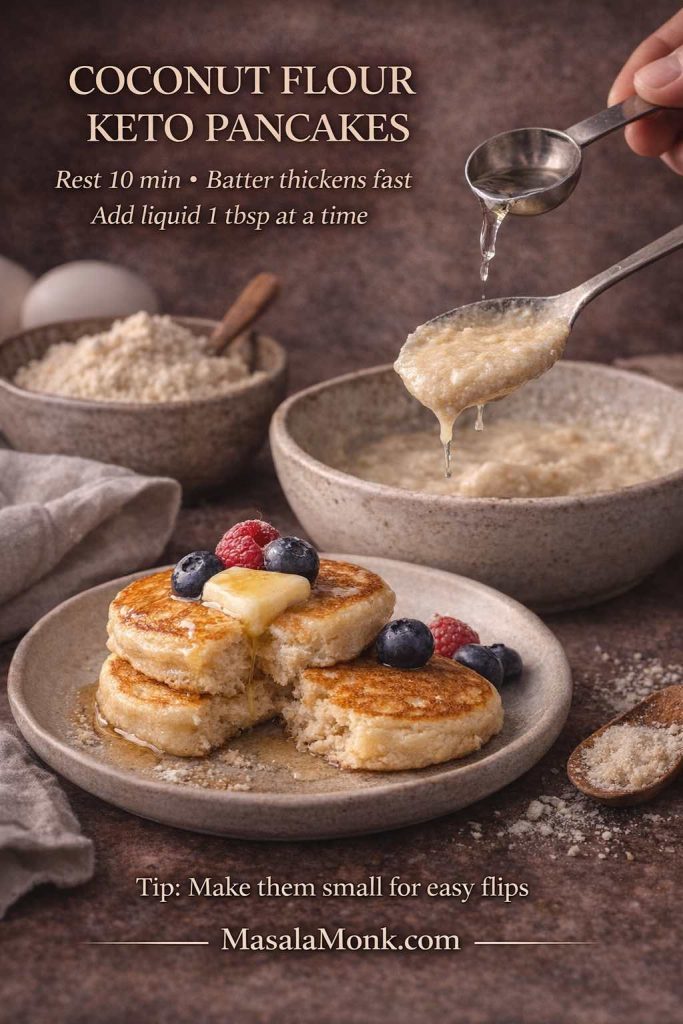
Coconut flour keto pancakes (light, low carb)
Ingredients (makes 6–8 small pancakes)
- 2 eggs
- 2 tablespoons coconut flour
- ¼ cup unsweetened milk or unsweetened coconut milk
- 1 teaspoon baking powder
- Pinch of salt
- Optional: vanilla, cinnamon, sweetener
Method
- Whisk eggs and milk together.
- Stir in coconut flour, baking powder, and salt.
- Rest 7–10 minutes.
- If the batter becomes too thick, add milk a tablespoon at a time.
- Cook on medium-low heat, making smaller pancakes.
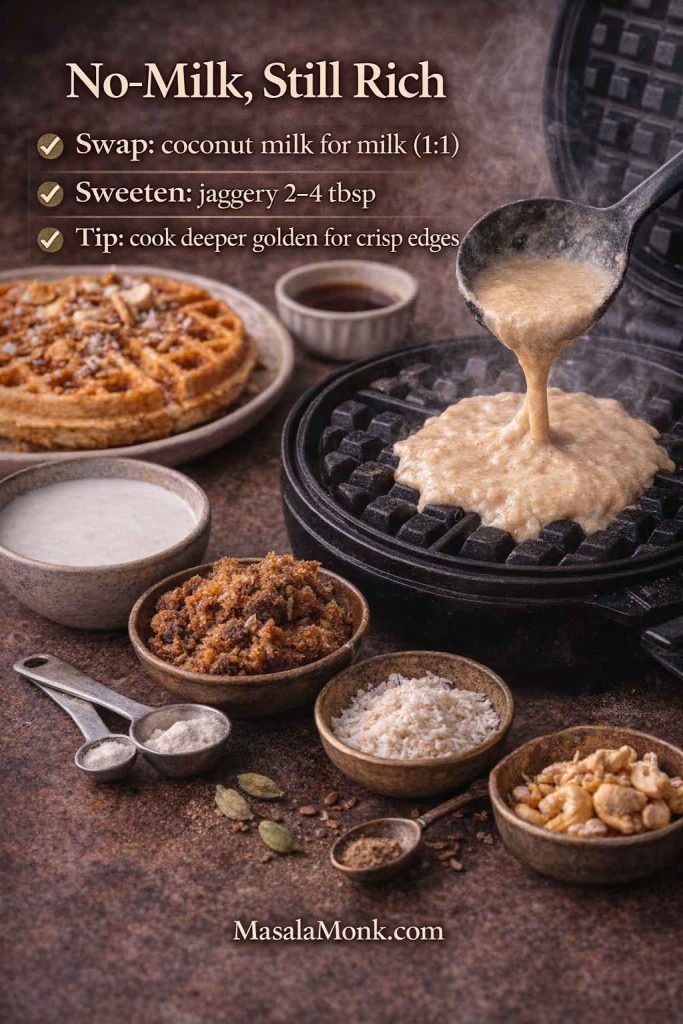
If you enjoy using coconut milk in batters, MasalaMonk’s overview of coconut milk nutrition and glycemic impact is a useful blog post.
Also Read: How to make Coconut Milk at Home
Low carb crepes: a crepe keto style breakfast that feels totally different
Sometimes the problem isn’t pancakes—it’s repetition. In that case, a thin crepe can reset the whole experience. Moreover, you can make low carb crepes using ingredients you already use for keto pancakes.
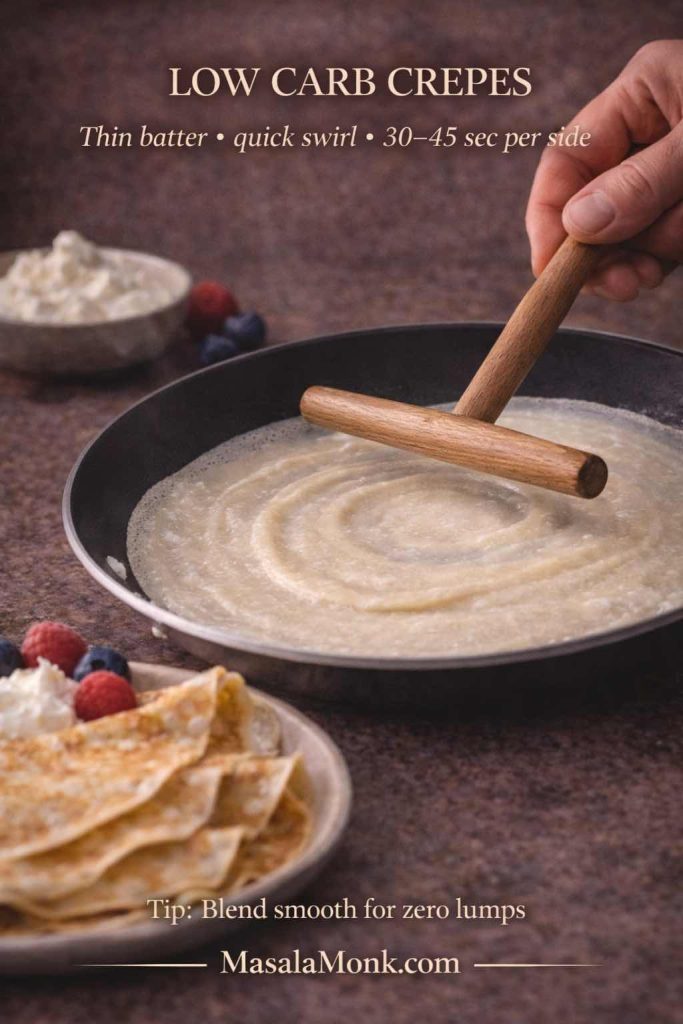
Low carb crepes (thin and flexible)
Ingredients (makes 6–8 crepes)
- 2 eggs
- ¼ cup cottage cheese or cream cheese
- 2 tablespoons almond flour
- ½ cup unsweetened milk (adjust as needed)
- Pinch of salt
- Optional: vanilla, sweetener
Method
- Blend everything until smooth.
- Rest 5 minutes.
- Heat a pan on medium-low and lightly grease it.
- Pour a small amount of batter and swirl quickly.
- Cook briefly, flip, then cook the other side for a short time.
Sweet direction
Fill with yogurt and cinnamon, then add a small handful of berries.
Savory direction
Use eggs, spinach, and cheese, then fold like a wrap.
Thus, you get a low carb crepe option that feels fresh without learning a whole new ingredient set.
Also Read: 5 Keto-Friendly Salami Dishes That Promote Weight Loss
Sugar free keto pancakes: sweeteners, flavor balance, and clean taste
Sugar free keto pancakes are easiest when you treat sweetness as background rather than a spotlight. Vanilla, cinnamon, and a pinch of salt do a surprising amount of work. Meanwhile, sweetener can be used lightly, simply to round out the flavor.
It’s also helpful to understand why sugar-free labels can confuse people. Sugar alcohols show up in many sugar-free products, and they can affect people differently. The American Diabetes Association’s overview of sugar alcohols is straightforward. For a broad reference on sweeteners used in foods, the FDA’s page on aspartame and other sweeteners provides a general overview.
If you’d like a comparison that reads like a calm explainer rather than a debate, MasalaMonk’s stevia vs aspartame is an easy reading recommendation. Additionally, for anyone specifically wondering about keto compatibility, MasalaMonk’s aspartame and ketosis addresses that directly.
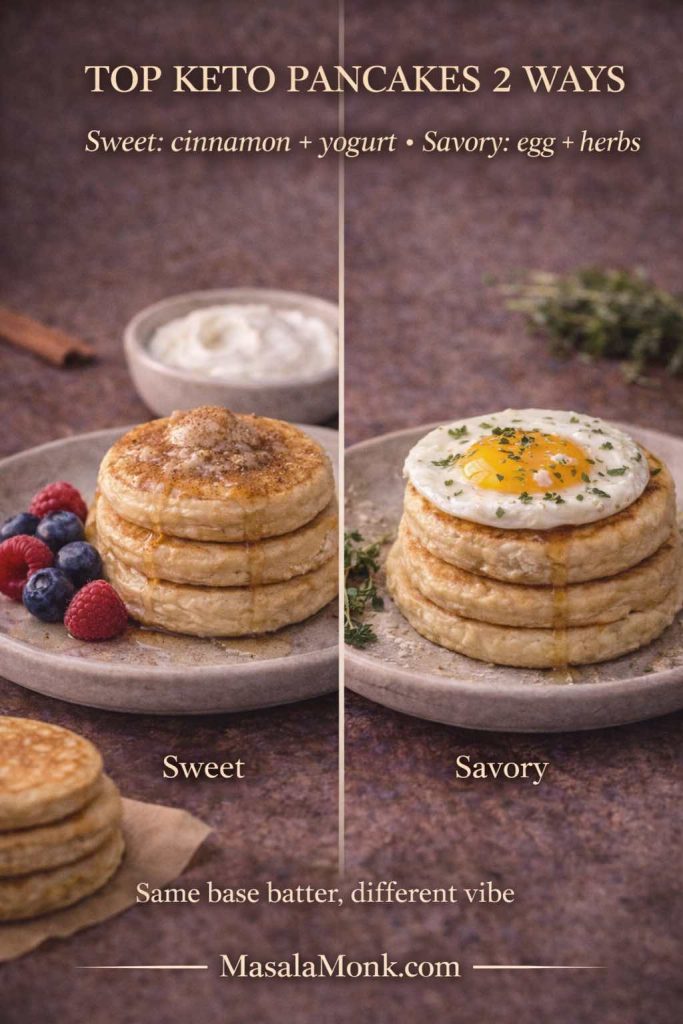
A flavor-first approach to sugar free keto pancakes
- Add vanilla and cinnamon before you add more sweetener.
- Use salt intentionally; it enhances perceived sweetness.
- Choose toppings that bring aroma, such as cinnamon butter, rather than relying entirely on syrup.
Ultimately, sugar free keto pancakes taste best when the batter has character even before toppings arrive.
Also Read: 5 Facts about Besan (Chickpea Flour) and Its Place in the Keto Diet
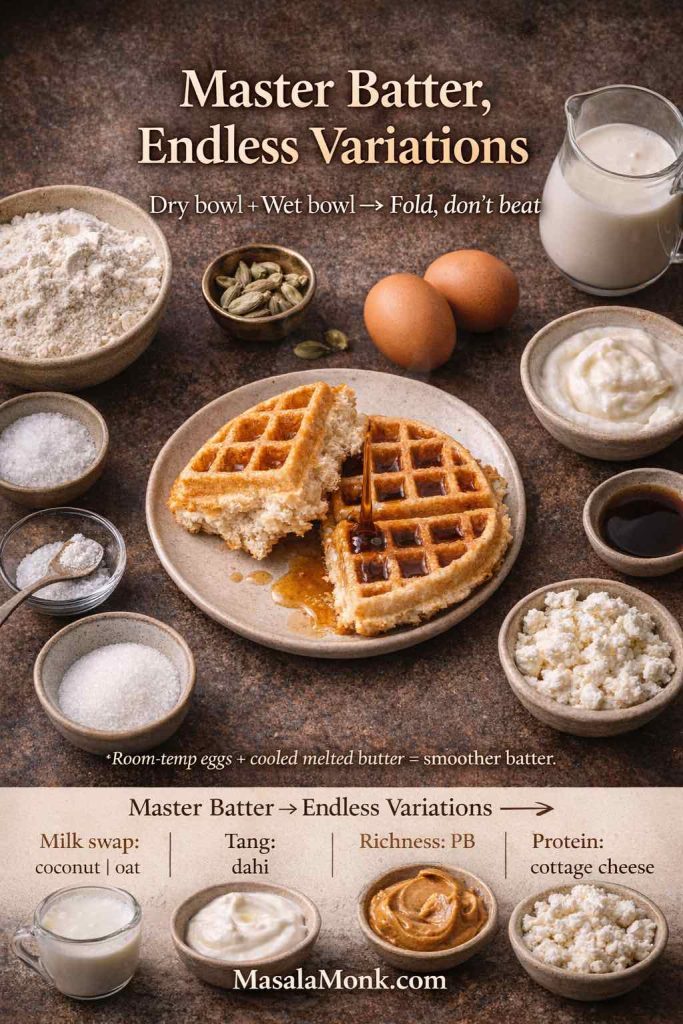
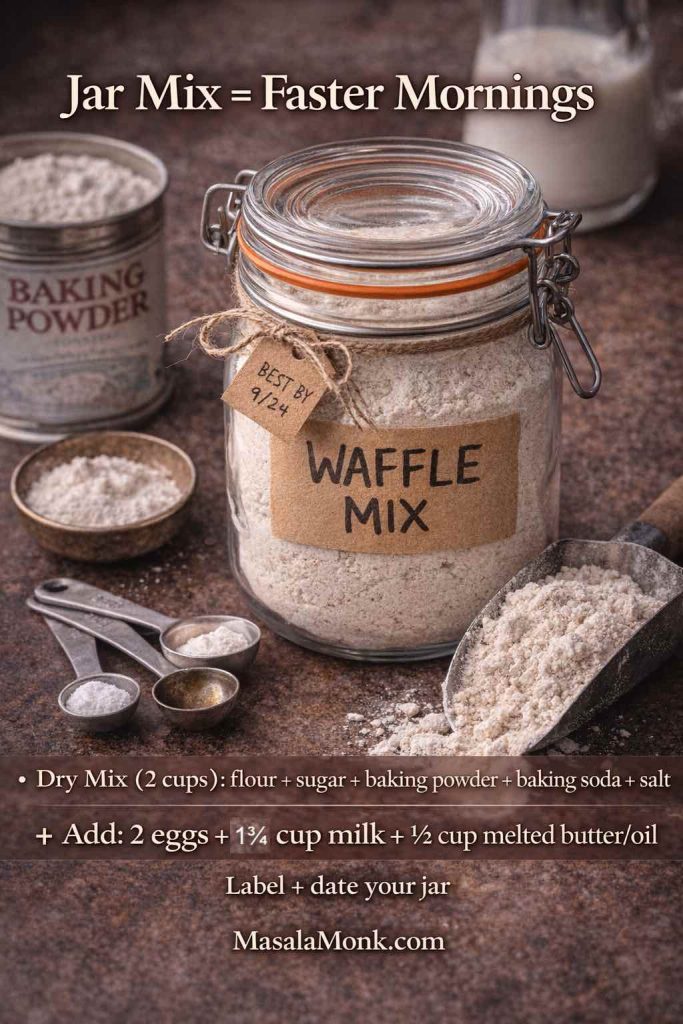
Keto pancake mix: a dry mix that makes mornings effortless
A homemade keto pancake mix gives you the convenience of “mix” mornings without handing over control of ingredients. Besides, it’s the simplest way to create consistent keto pancake batter on busy days. Furthermore, the same dry mix can become a keto pancake and waffle mix with a small adjustment in liquid.

Keto pancake mix (dry)
Makes: about 6 servings
Dry ingredients
- 2 cups almond flour
- ⅓ cup coconut flour
- 2 tablespoons baking powder
- 1 teaspoon salt
- Optional: sweetener and cinnamon
To make keto pancake batter (per serving)
- ⅓ cup dry mix
- 1 egg
- ¼ cup unsweetened milk (add gradually)
- Optional: 1 tablespoon yogurt or melted butter for tenderness
Method
- Mix dry ingredients thoroughly and store in a jar.
- For batter, combine one portion of dry mix with egg and milk.
- Rest 5 minutes.
- Cook on medium-low heat in small pancakes.
To make keto waffle mix batter
Use slightly less milk so the batter stays thicker; then cook in a waffle iron.
If you want a related “homemade pancake mix” read that feels like a natural continuation, MasalaMonk’s post on blueberry pancakes and homemade pancake mix fits neatly here—especially if you sometimes cook for people who aren’t eating low carb.
Also Read: Navigating Beans on the Keto Diet: Which Varieties Are Suitable?
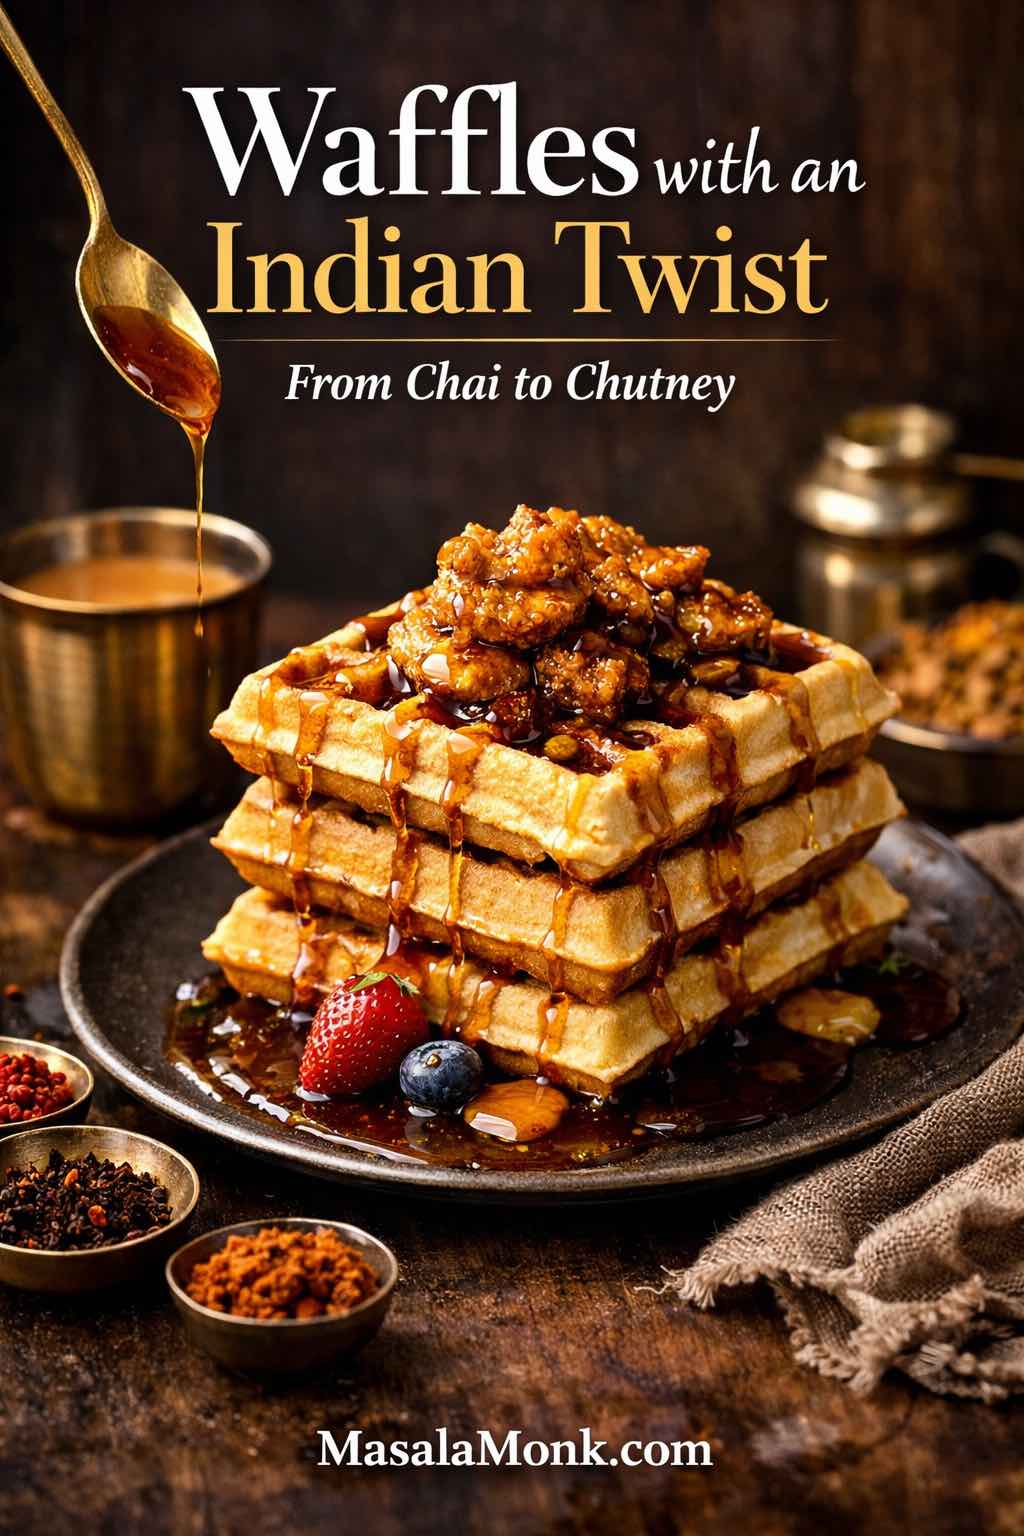
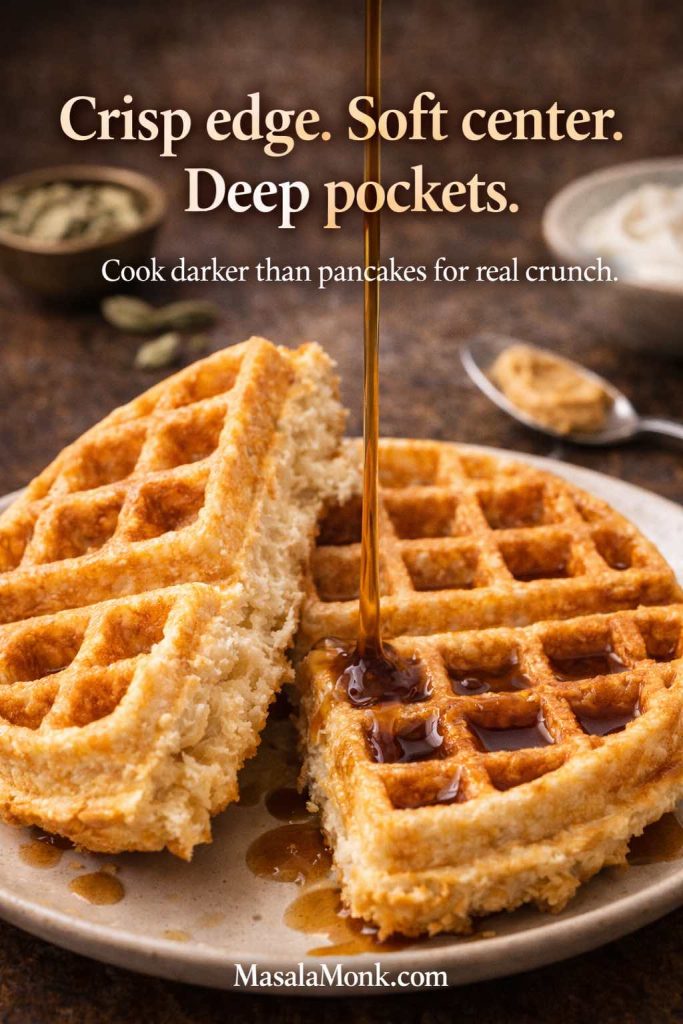
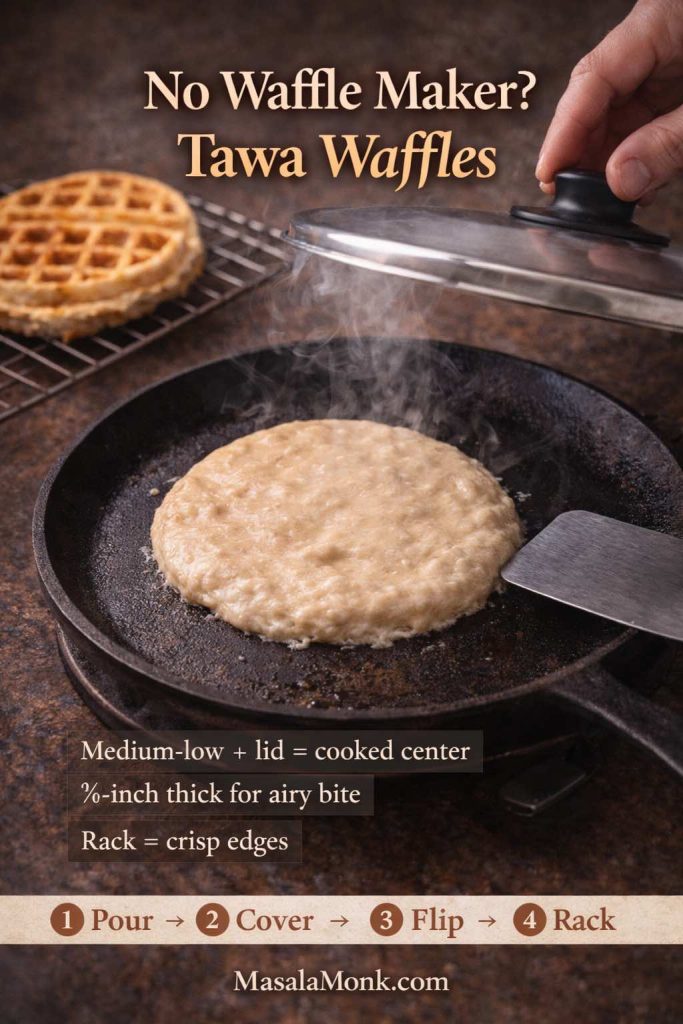
Keto waffle mix: crisp edges, soft centers, and a better topping experience
Waffles do something pancakes can’t: they hold toppings in little pockets. Accordingly, a keto waffle mix moment can feel more indulgent even with the same ingredients. Most keto pancake batter can become waffle batter; you just make it slightly thicker and add a bit of fat for crispness.
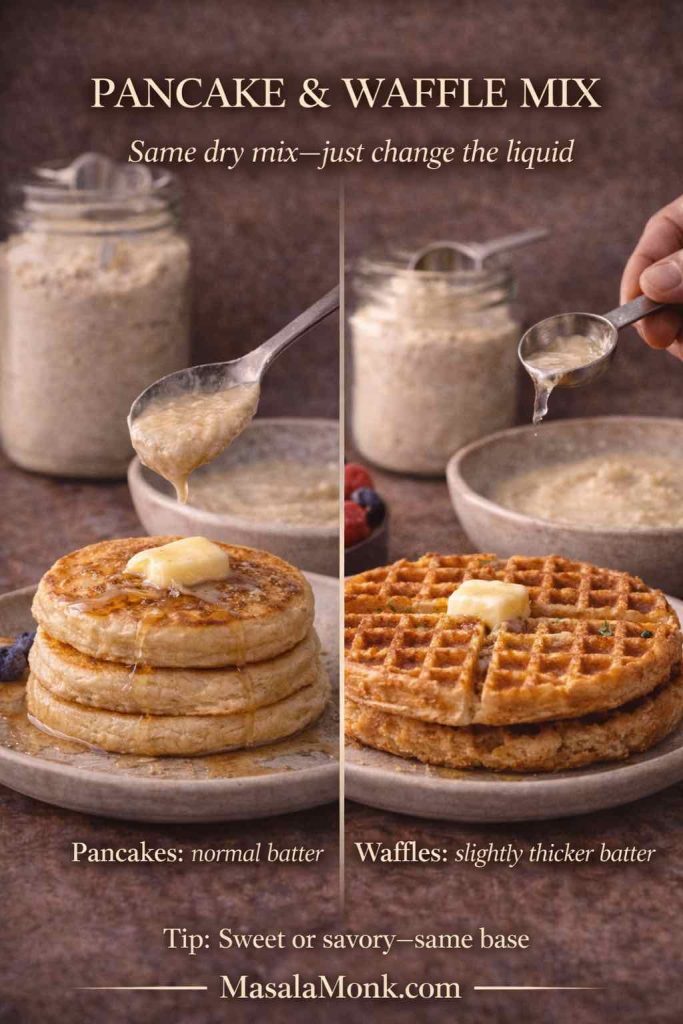
Simple keto waffle batter adjustments
- Reduce liquid slightly compared to pancake batter.
- Add a teaspoon of melted butter or oil to help crisp and release.
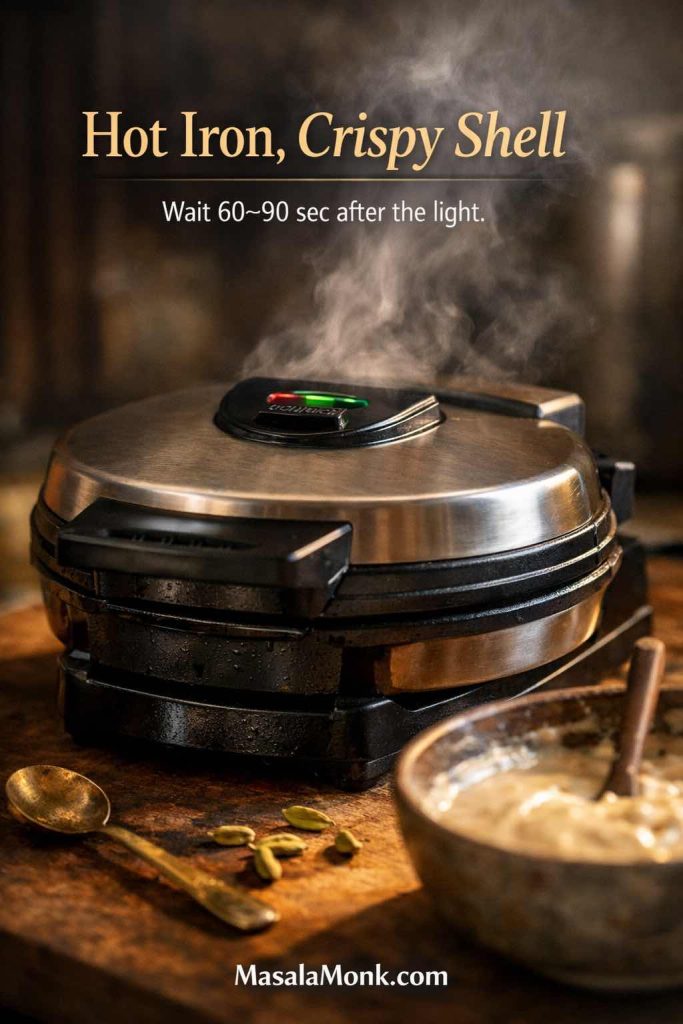
- Let the waffle iron fully preheat.
If you want a dairy-free reference point for waffle technique, MasalaMonk’s post waffle recipe without milk is a useful reading link without derailing the focus.
Chaffles and waffle-style rounds: the crisp alternative when you want something different
Chaffles aren’t pancakes, yet they often satisfy the same craving: warm, round, and topped with something delicious. Moreover, they bring crispness that’s hard to achieve with flour-based keto pancakes.
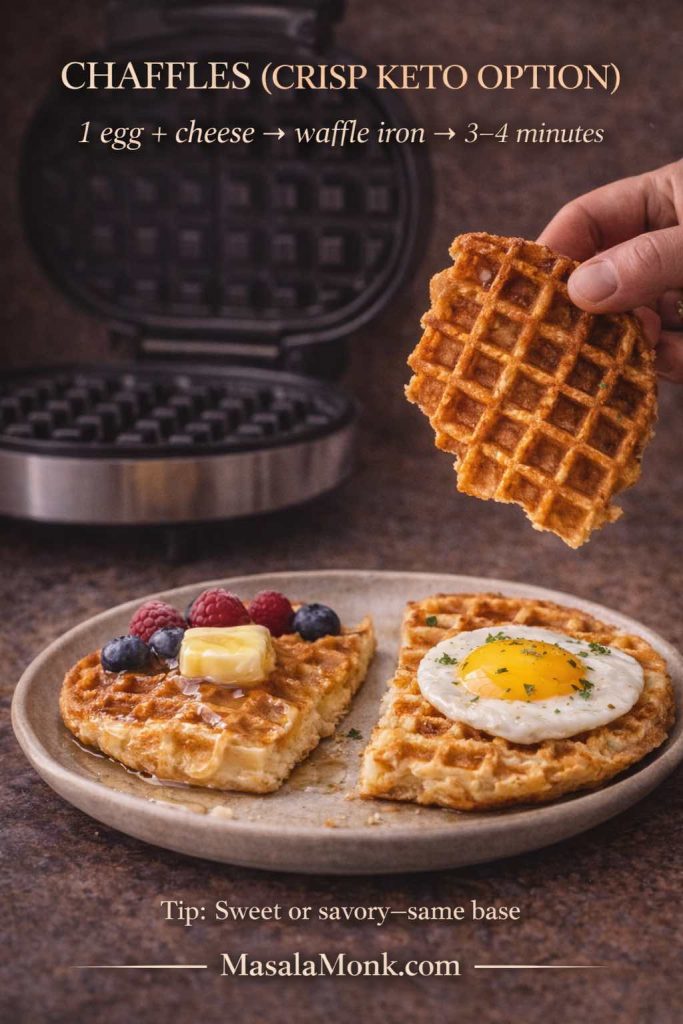
Basic chaffle (sweet or savory)
Ingredients
- 1 egg
- ½ cup shredded cheese
- Optional: vanilla and sweetener for sweet chaffles
- Optional: pinch of baking powder for extra lift
Method
- Preheat a waffle iron.
- Mix egg and cheese (plus optional flavorings).
- Cook until golden and crisp.
Savory direction
Add herbs and serve with eggs.
Sweet direction
Use cinnamon and a sugar-free syrup.
For a playful savory angle that still fits a low carb breakfast, MasalaMonk’s mustard on keto can be linked naturally alongside savory topping ideas.
Also Read: 5 Irresistible Keto Strawberry Low-Carb Desserts Ideas
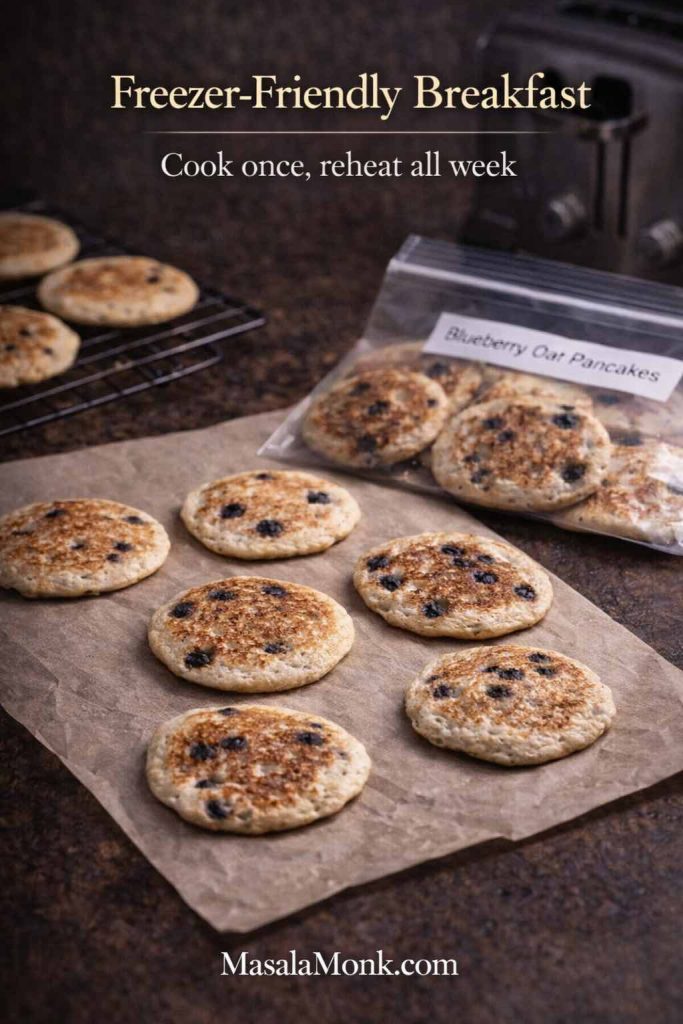
Frozen keto pancakes: how to freeze and reheat without rubberiness
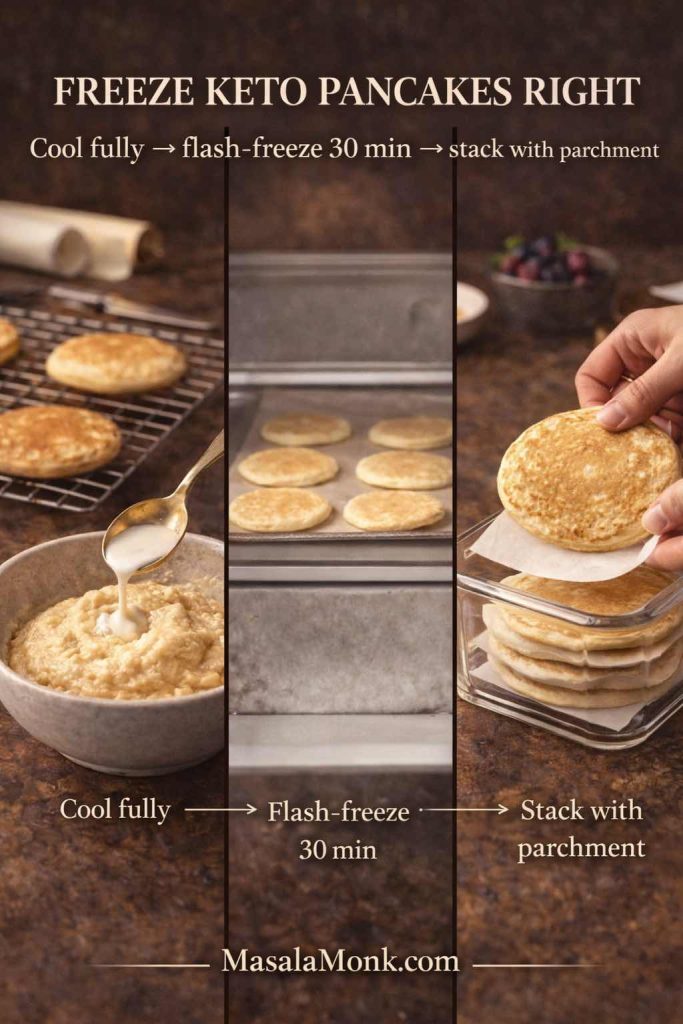
Frozen keto pancakes can be genuinely excellent, provided you freeze them correctly. The enemy is steam: if you freeze warm pancakes, that steam becomes ice, and then the pancakes reheat soggy. Therefore, the cooling step is non-negotiable.
How to freeze keto pancakes properly
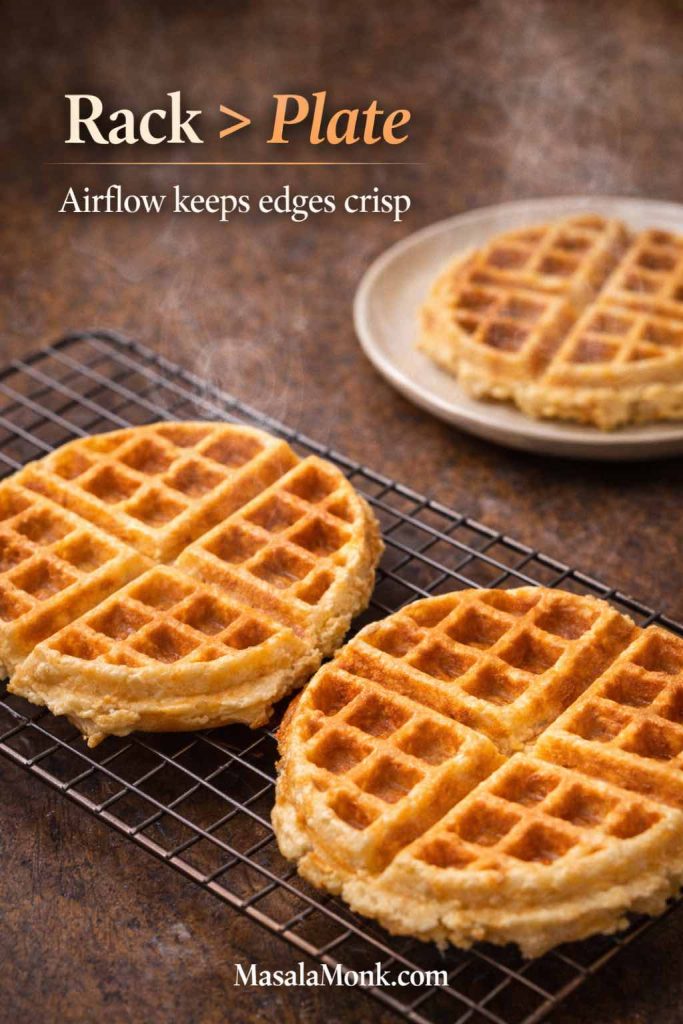
- Cool pancakes completely on a rack or plate.
- Freeze in a single layer on a tray for 30–60 minutes.
- Stack with parchment between layers and store in a sealed container or freezer bag.
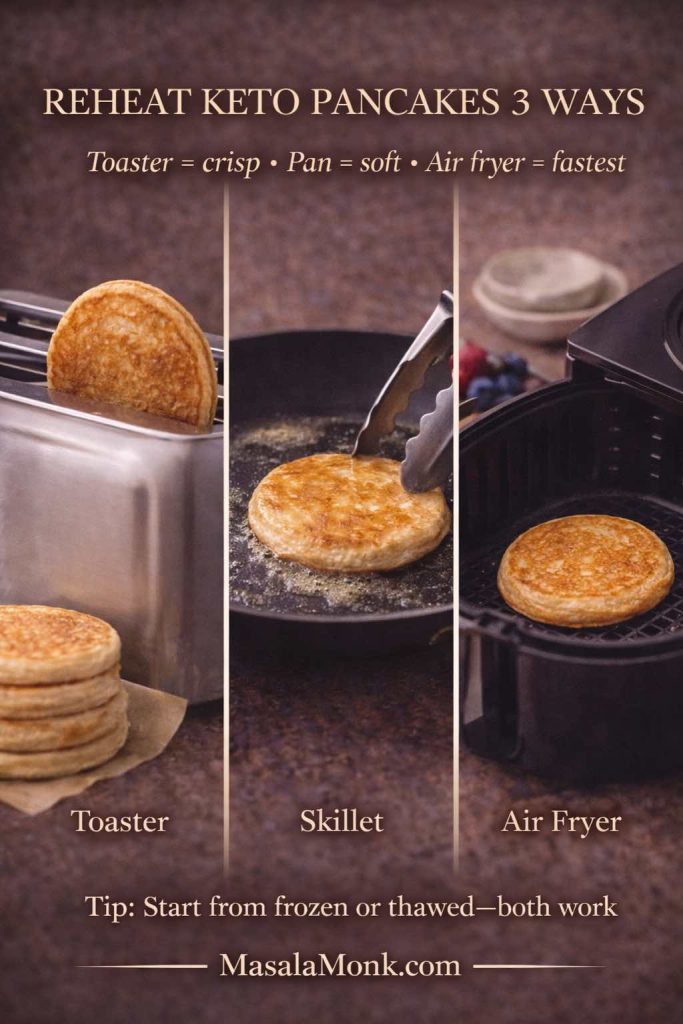
How to reheat keto pancakes so they taste fresh
- Toaster: best for thinner pancakes and crepes; crisp edges, quick timing.
- Pan: low heat with a little butter; cover briefly to warm the center.
- Air fryer: quick crisping with minimal effort.
For food safety guidance on reheating cooked foods, FoodSafety.gov provides charts on safe minimum internal temperatures. While pancakes aren’t as risky as some leftovers, it’s still useful to have a sensible reference.
Also Read: How to Keto – 5 Ways Butter Chicken can be Made Keto-Friendly
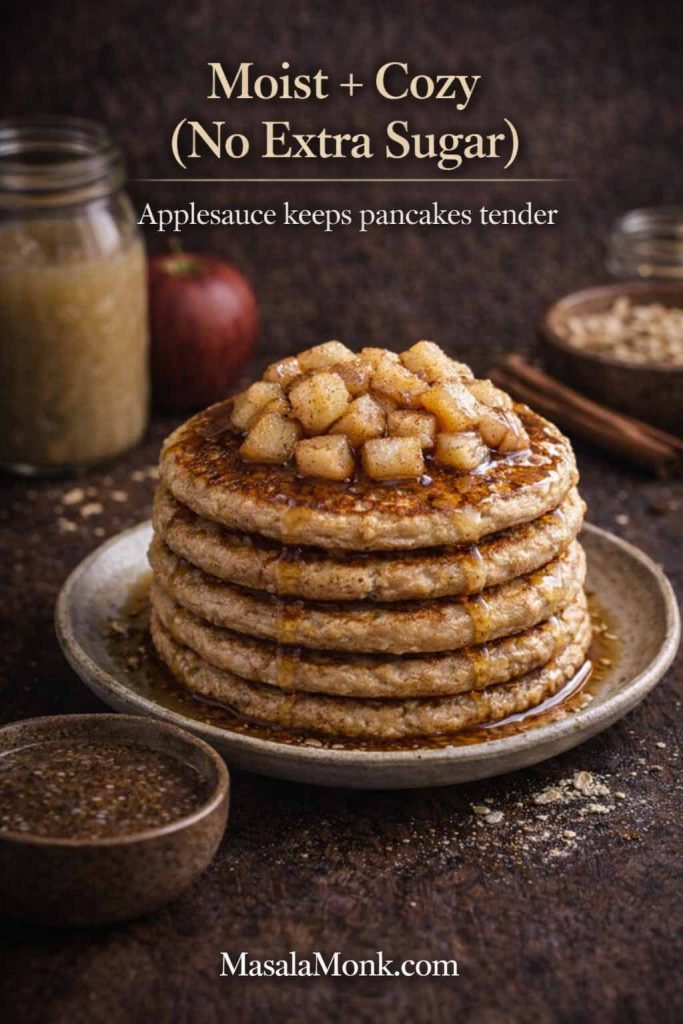
Keto pumpkin pancakes: cozy flavor without heavy batter
Pumpkin can make keto pancakes feel like a treat. Still, too much pumpkin can make the batter heavy, so the trick is restraint. Additionally, spices do most of the “pumpkin pie” magic, so you don’t need a large amount of purée.
Keto pumpkin pancakes (almond flour base)
Ingredients
- Almond flour keto pancake batter (from earlier)
- ¼ cup pumpkin purée
- 1–2 teaspoons cinnamon or pumpkin spice
- Optional: extra vanilla
Method
- Stir pumpkin and spices into the finished batter.
- Rest 5 minutes.
- Cook on medium-low, making small pancakes and giving them a little extra time on the first side.
This gives you warm, fragrant pancakes without sacrificing fluff.
Chocolate chip style keto pancakes: dessert feel, breakfast structure
Chocolate chip pancakes are comfort food. You can keep that vibe by using sugar-free chips or a chopped low-sugar chocolate, and then keeping the batter lightly sweet rather than heavily sweet. Notably, the best trick is adding chips after you pour the batter so they don’t sink and burn.
Chocolate chip style method
- Make almond flour keto pancakes batter.
- Pour pancakes onto the pan.
- Sprinkle chips on top before flipping.
As a result, you get the look and taste people love, while the texture stays pancake-like instead of dense.
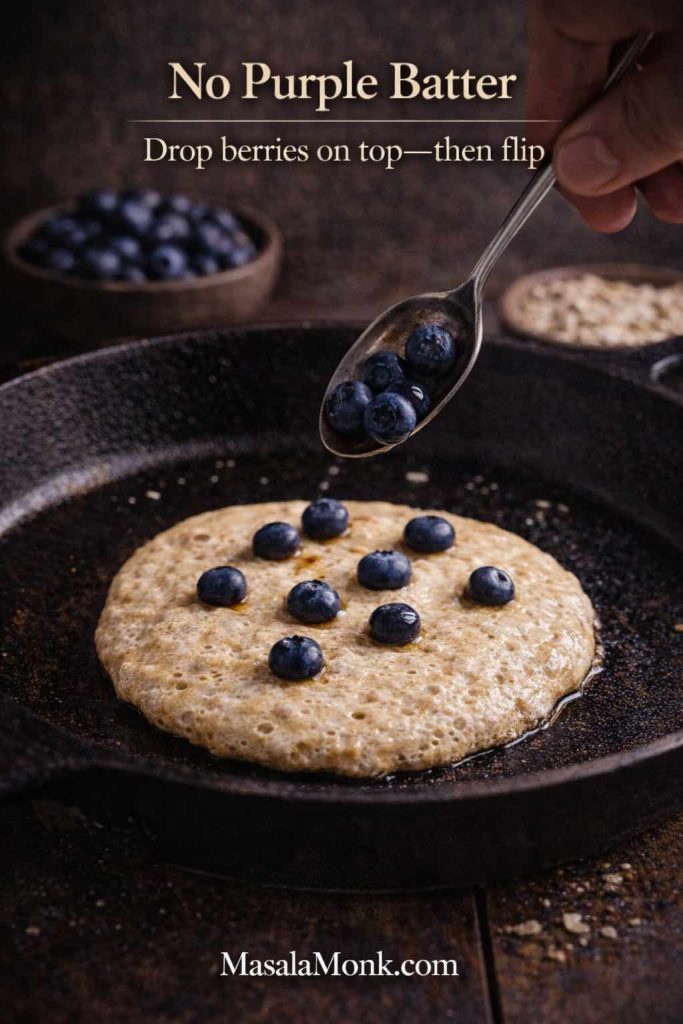
Blueberry-style keto pancakes: bright flavor without turning the batter watery
Fresh berries add brightness, but they also add moisture. Consequently, it helps to use smaller berries or to add them carefully.
Blueberry-style approach
- Fold a small handful of blueberries into the batter right before cooking.
- Alternatively, sprinkle berries onto each pancake after pouring batter into the pan.
Either method keeps the batter stable while adding that classic burst of flavor. If you want a more traditional blueberry pancake read (especially for non-keto mornings), MasalaMonk’s blueberry pancakes post is a natural read to suggest.
Savory keto pancakes: brunch energy without sweeteners
Sweet pancakes are great—until you’re not in the mood. That’s where savory keto pancakes can feel like a reset. Moreover, savory pancakes often pair beautifully with cheese-based batters and chaffles.
Savory directions that work well
- Skip sweetener and vanilla.
- Add black pepper, herbs, or garlic powder.
- Use cheddar or mozzarella in the batter (especially for chaffles).
- Top with eggs, spinach, avocado, or a dollop of sour cream.
Surprisingly, savory toppings can make keto pancakes feel more filling and less like “diet dessert.”
Also Read: Chia Seed Delights: 5 Energizing Breakfast Meal Replacement Ideas for a Keto Start
Toppings for keto pancakes: sugar-free, low carb, and genuinely satisfying
A pancake is a canvas. However, toppings can also turn a reasonable pancake into something that feels heavy or overly sweet. Accordingly, it helps to choose toppings that complement the batter rather than overpower it.
Butter and cinnamon
Simple, fragrant, and classic. Add a tiny pinch of salt and it tastes even more “pancake shop.”
Yogurt cream
Thick Greek yogurt plus vanilla and cinnamon creates a creamy topping that adds protein. In addition, it pairs beautifully with coconut flour keto pancakes.
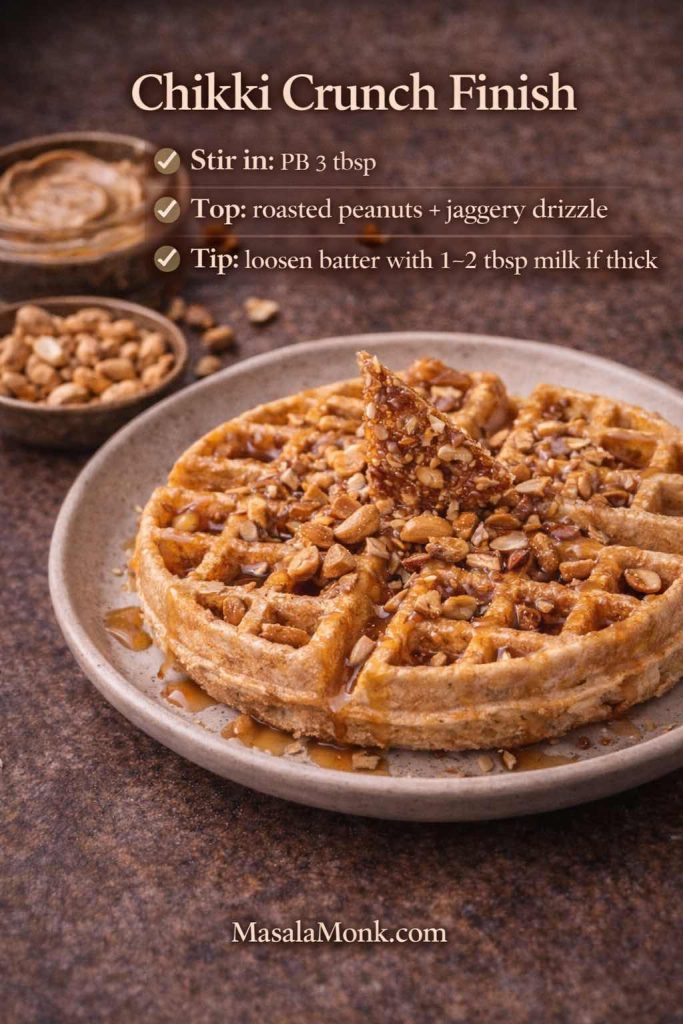
Nut butter drizzle
Almond butter or peanut butter adds richness and helps keep the meal satisfying longer.
Berry strategy
A small handful of berries adds freshness without turning the whole plate into sugar.
Savory finishing
If you lean savory, mustard can be a surprisingly good accent with egg-and-cheese flavors; MasalaMonk’s keto mustard guide is a fun read in that direction.
Also Read: Flaxseed Powerhouse: 5 Keto Lunch Meal Replacement Shakes to Boost Your Day
Keto pancakes troubleshooting: how to fix the most common problems
Even a great recipe can have an off day. Fortunately, most keto pancake issues come from a short list of causes.
Keto pancakes are eggy
- Add vanilla and cinnamon.
- Add a spoon of yogurt or cottage cheese for balance.
- Reduce heat so the outside doesn’t “set” too fast.
Low carb pancakes are dry
- Add moisture to the batter: yogurt, cottage cheese, cream cheese, or coconut milk.
- Avoid overcooking; medium-low heat is the fix.
- Use a little more fat in the pan for tenderness.
Gluten free keto pancakes crumble
- Rest the batter longer.
- Make smaller pancakes.
- Add a binder-like ingredient such as yogurt or a bit more egg.
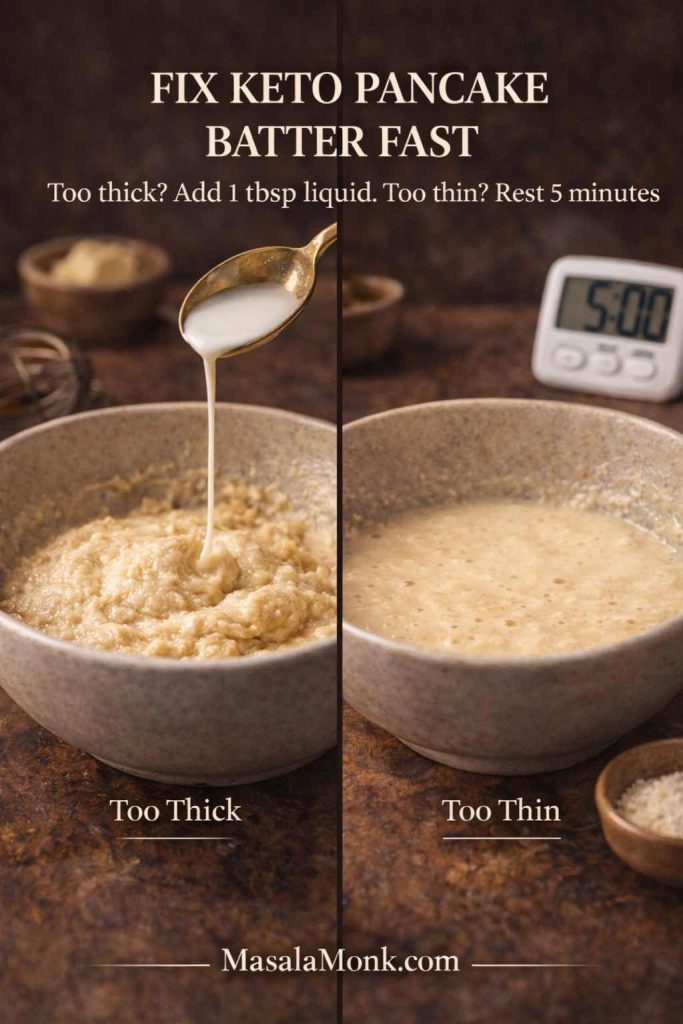
Keto pancake batter is too thick
- Add liquid a tablespoon at a time.
- Rest, then re-check thickness; coconut flour especially changes as it sits.
Keto pancakes brown too fast
- Lower heat.
- Reduce sweetener slightly if you used a lot.
- Cook smaller pancakes so the center sets more easily.
Once you know these fixes, you can confidently experiment without fear of wasting a morning.
Also Read: Brazil Nut Bliss: 5 Rich and Creamy Dinner Meal Replacement Shakes for a Keto Feast
Keto pancakes and label-reading: a calm approach to carbs and fiber
Even if you cook most of your batter from scratch, you’ll still encounter packaged ingredients: sweeteners, chocolate chips, dairy products, or syrups. In that case, being able to scan a label quickly is helpful.
The FDA’s guide on how to understand and use the Nutrition Facts label is a useful refresher. Additionally, if fiber matters to how you interpret carbs, the FDA’s Q&A on dietary fiber clarifies how fiber is defined for labeling.
Rather than overthinking every gram, focus on the big picture: a batter you tolerate, a topping strategy that feels good, and a portion that fits your day.
Also Read: Fiber in Food
Keto pancakes for different mornings: quick, cozy, and meal-prep friendly
Not every morning wants the same pancake. Sometimes you want quick pancakes that cook fast. Other times you want a cozy stack that feels like a weekend. Meanwhile, on busy weeks, you might want keto pancakes frozen and ready to toast.
Quick weekday keto pancakes
- Use a simple almond flour batter.
- Keep pancakes small so they cook quickly.
- Choose a simple topping like butter and cinnamon.
Weekend keto pancakes with extra comfort
- Use yogurt in the batter for softness.
- Add pumpkin spice or chocolate chip style add-ins.
- Pair with a savory side like eggs for balance.
Meal prep keto pancakes
- Choose cottage cheese keto pancakes for better reheating.
- Freeze pancakes in single layers first.
- Reheat in a toaster or pan depending on thickness.
As a result, keto pancakes stop being a one-off experiment and become a repeatable breakfast.
Also Read: Keto Mocktails: 10 Low-Carb Recipes for Guilt-Free Happy Hour Indulgence
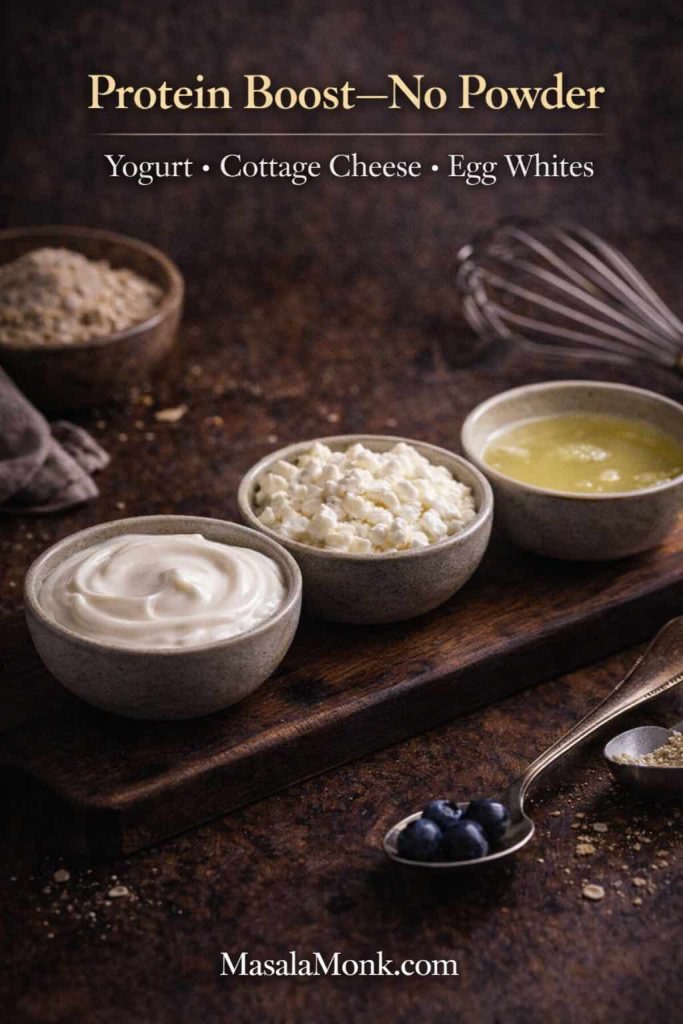
Keto protein pancakes beyond powders: a satisfying breakfast rhythm
Protein powders can work, but they aren’t required. Cottage cheese, yogurt, and eggs already provide plenty of protein—and they improve texture at the same time. Consequently, keto protein pancakes can feel like real food rather than a supplement in pancake form.
If you like a broader “high-protein breakfast” direction beyond pancakes, MasalaMonk’s high protein oatmeal guide can be a useful alternative for mixed households, especially on days when you want something warm and spoonable.
A gentle word on “zero carb pancakes” and “no carb pancakes”
It’s understandable to want no carb pancakes. Still, real food rarely behaves in absolutes, because eggs and dairy contain small amounts of carbohydrate. Rather than chasing an exact label, it tends to work better to chase outcomes: pancakes that taste good, feel satisfying, and fit your routine.
Cream cheese keto pancakes and chaffles often satisfy the same craving that people associate with “no carb,” while still tasting genuinely enjoyable. Therefore, you can meet the spirit of that goal without forcing a misleading promise.
Also Read: Garlic Bread Reimagined: Elevating the Classic with a Keto Twist and Irresistible Variations!
Bringing it all together: keto pancakes that stay in your life
Once you stop expecting keto pancakes to behave exactly like wheat pancakes, things get easier. Almond flour keto pancakes give you classic comfort. Coconut flour keto pancakes offer a lighter bite. Cottage cheese keto pancakes deliver high-protein softness and excellent reheating. Cream cheese keto pancakes bring rich, ultra-low carb leaning indulgence. Low carb crepes change the format entirely when you want a reset. Meanwhile, a homemade keto pancake mix keeps busy mornings simple, and frozen keto pancakes turn meal prep into a real advantage.
In the end, keto pancakes don’t need to be a compromise. Instead, they can be a reliable, repeatable breakfast—warm, satisfying, and flexible enough to match whatever kind of morning you’re having.
Also Read: Healthy Oat Protein Bars – 5 Easy No Sugar Recipes for Snacks
FAQs
1) Are keto pancakes actually low carb, or do they still have carbs?
Keto pancakes are typically low carb compared with traditional pancakes because they replace wheat flour with ingredients like almond flour, coconut flour, eggs, and dairy. Even so, they usually aren’t truly “no carb pancakes,” since eggs and many dairy ingredients have small amounts of carbs. Instead of aiming for perfection, it’s more realistic to think in terms of low carb pancakes that fit your daily carb target.
2) What’s the difference between keto pancakes and low carb pancakes?
Keto pancakes are usually designed to stay within ketogenic macros, which generally means fewer carbs and a higher fat profile. Low carb pancakes can be broader—they might still use ingredients like oats or other higher-carb items in smaller amounts. Consequently, two recipes can both be “low carb,” yet only one might feel truly keto friendly.
3) Are keto pancakes gluten free by default?
Often, yes. Many gluten free keto pancakes rely on almond flour or coconut flour, which contain no gluten. However, if you use any packaged ingredients, it’s still worth checking labels to ensure they’re gluten free, especially with baking powder, flavorings, and add-ins.
4) Can I make sugar free keto pancakes that still taste sweet?
Absolutely. Sugar free keto pancakes can taste balanced when you lean on vanilla, cinnamon, and a pinch of salt to round out flavor. Then, if needed, add a keto-friendly sweetener to taste rather than dumping it in. As a result, the pancakes feel naturally sweet instead of aggressively sweet.
5) Why do my keto pancakes taste eggy?
That usually happens when eggs provide most of the structure without enough moisture or flavor support. To smooth that out, add a creamy ingredient like yogurt, cottage cheese, or cream cheese, plus vanilla and cinnamon. Additionally, keep the heat lower—overcooking can amplify the eggy note.
6) Why are my low carb pancakes dry or crumbly?
Dryness often comes from too much flour substitute, not enough moisture, or cooking on heat that’s too high. Almond flour and coconut flour behave differently than wheat flour, so the batter needs built-in moisture. If your pancakes are crumbling, try smaller pancakes, a short batter rest, and slightly more liquid or dairy.
7) What’s the best keto pancake mix: homemade or store-bought?
Homemade keto pancake mix gives you control over sweetness, texture, and ingredients, which can help you fine-tune results. Store-bought mixes are convenient, though they vary widely. Either way, a short batter rest and medium-low heat are still the biggest factors for good pancakes.
8) How do I make a keto pancake mix recipe that also works as a keto waffle mix?
Use a dry mix based on almond flour and a smaller amount of coconut flour plus leavening. When you turn it into batter, keep waffle batter a bit thicker than pancake batter and add a touch of fat for crispness. That way, a single keto pancake and waffle mix approach can cover both breakfasts.
9) Are there any truly zero carb pancakes?
In practice, “zero carb pancakes” are rare because eggs and dairy typically contain trace carbs. What most people mean is ultra-low carb pancakes. If you want the closest feel, cream cheese keto pancakes or cheese-and-egg waffle-style options tend to match that goal more closely than flour-based pancakes.
10) How do I make no carb pancakes without flour?
If you’re avoiding flour entirely, your best bet is a batter built around eggs and a creamy binder like cream cheese or cottage cheese. You can keep them thin like a crepe keto style breakfast, or cook them as small pancakes. Keep expectations realistic: you’ll get something delicious, but it won’t behave exactly like a wheat pancake.
11) Which is better for keto pancakes: almond flour or coconut flour?
Almond flour usually produces a softer, more classic pancake crumb. Coconut flour can be lighter, yet it’s more absorbent and can turn dense if the batter isn’t balanced. If you’re new to keto pancakes with almond flour, almond flour is often the easier starting point. Meanwhile, coconut flour keto pancake recipes reward patience and careful liquid adjustments.
12) Can I make keto pancakes with cottage cheese and almond flour?
Yes, cottage cheese almond flour pancakes are a great option, especially if you want keto protein pancakes without using powders. When you blend cottage cheese smooth, the batter cooks up tender and reheats well, which makes it ideal for meal prep.
13) Are keto protein pancakes always made with protein powder?
Not necessarily. Keto protein pancakes can get protein from eggs, cottage cheese, Greek yogurt, or even certain cheeses. In many cases, those options taste more like “real” pancakes and avoid the chalky texture some protein powders create.
14) How can I make high protein low carb pancakes recipe-style without changing the taste too much?
Start with a base you already like, then increase protein by swapping part of the liquid for Greek yogurt or adding blended cottage cheese. Next, keep sweetener light and rely on flavorings like vanilla and cinnamon. This approach lifts protein while keeping the pancake flavor familiar.
15) What’s the best way to make frozen keto pancakes for the week?
First, cool pancakes completely. Then freeze them in a single layer before stacking. After that, store them tightly sealed to avoid freezer burn. For reheating, a toaster works well for thinner pancakes, while a pan on low heat helps thicker pancakes warm through without drying out.
16) Why do my keto pancakes fall apart when I flip them?
Usually, the batter is too wet, the pancakes are too large, or the first side hasn’t set long enough. Try resting the batter longer, cooking smaller pancakes, and waiting until the edges look firm before flipping. In addition, lowering the heat often helps the center set before you turn them.
17) Can I make keto pancakes 3 ingredients and still get fluffy results?
Yes, although fluffiness depends on which three ingredients you pick. For example, almond flour + eggs + baking powder often yields a good texture. If you choose ingredients that don’t provide lift, the pancakes can turn flat. Therefore, baking powder (or another leavening) is the easiest way to keep 3 ingredient low carb pancakes from feeling dense.
18) How do I make keto pancake batter in advance?
You can mix dry ingredients ahead as a keto pancake powder (dry mix) and store it in a jar. Then, when you’re ready to cook, add eggs and liquid and rest the batter briefly. If you want to refrigerate mixed batter, it can work, yet it may thicken; so you’ll often need a small splash of liquid before cooking.
19) Are low glycemic pancakes the same thing as keto pancakes?
They can overlap, but they aren’t identical. Keto pancakes are typically very low in carbs, which often supports a low glycemic approach. Still, low glycemic pancakes are more about the blood sugar response of the meal, including toppings and portion size. Accordingly, even keto friendly pancakes can become less “low glycemic” if the toppings add a lot of sugar.
20) Can I make low carb crepes instead of pancakes?
Definitely. Low carb crepes are a great alternative when you want something thin and flexible. You can take a keto pancake batter and thin it with extra liquid, then cook it quickly in a wide pan. This crepe keto approach also works nicely for savory fillings.
21) Are there low carb pancakes that are also low calorie?
There can be. To make low calorie low carb pancakes, use higher-protein, lower-fat ingredients like Greek yogurt, reduce added fats, and keep portion sizes modest. That said, many people find keto pancakes more satisfying because of fat, so it’s about choosing the balance that fits you.
22) Can I make keto pancakes without dairy?
Yes. You can swap yogurt and milk for unsweetened coconut milk or another unsweetened non-dairy option. The key is maintaining moisture. If the batter gets dry, add a bit more liquid or a dairy-free creamy ingredient so the pancakes don’t turn crumbly.
23) Why do my sugar free pancakes brown too fast?
Many sugar-free sweeteners caramelize or brown differently than sugar. Also, almond flour browns quickly. To fix it, lower the heat, cook smaller pancakes, and use less sweetener in the batter—then add sweetness with toppings if needed.
24) What are the best toppings for keto friendly pancakes?
Butter and cinnamon are classic. Nut butters add richness and staying power. Greek yogurt can serve as a creamy topping, especially for keto protein pancakes. If you prefer fruit, small portions of berries often fit better than higher-sugar options. For a savory twist, eggs, cheese, and herbs can turn keto pancakes into a brunch-style plate.
25) Can I make pancakes that are both keto and “no sugar” for everyday breakfasts?
Yes—sugar free keto pancakes are very doable as an everyday option. Begin with a consistent base batter, keep sweetener minimal, and rotate flavors using cinnamon, vanilla, citrus zest, or cocoa. Over time, this keeps keto breakfast pancake routines from feeling repetitive while still staying low carb.