The spoon breaks through the warm chocolate cake and the middle gives. Glossy chocolate slips onto the plate, a streak of marshmallow follows, and toasted graham gives the soft cake a little crackle.
That reveal is half the fun of this S’mores Lava Cake. For it to actually taste like a s’more, the chocolate, marshmallow and graham need to stay recognizable instead of disappearing into one very sweet chocolate dessert.
If Domino’s S’mores Lava Cakes sent you looking, think of this as a homemade take rather than an exact copycat. Here, the center is molten chocolate, the marshmallow gets properly toasted, and some of the graham stays crisp.
Once the cakes reach the oven, remember one thing: set outside, moving inside.
This recipe makes 4 individual cakes in 6-ounce / 175–180 ml ramekins. Bake at 425°F / 218°C. Start checking at 11 minutes; most should be ready somewhere around 11–13 minutes. Let the cake, not the clock, decide that final minute.
The separate chocolate center earns its extra step. It lets the outside become cake while melted chocolate waits in the middle instead of asking barely baked batter to provide all the lava.
Yield
4 individual cakes
Ramekins
4 × 6 oz / 175–180 ml
Ganache
Chill until thick enough to portion and shape
Bake
About 11–13 minutes; start checking at 11
Rest
1–2 minutes before unmolding
Best served
Immediately
You need 220 g / about 8 oz semisweet or bittersweet chocolate altogether, ideally around 60–65% cacao. Chop it all at once, set aside 50 g for the ganache, and use the remaining 170 g in the cake.
If you’re choosing one chocolate for the whole recipe, 60–65% semisweet or bittersweet chocolate is the useful middle ground: dark enough to balance the marshmallow while still working smoothly in both the cake and ganache. Chopped bar chocolate also melts more freely than chips.
For the molten chocolate centers
50 g (1¾ oz) of the chopped semisweet or bittersweet chocolate
30 ml (2 tablespoons) heavy cream
Small pinch of fine salt
For the graham cracker layer and crunch
45 g (about ½ cup) graham cracker crumbs
18 g (about 1¼ tablespoons) unsalted butter, melted
5 g (about 1¼ teaspoons) granulated sugar
Small pinch of fine salt
For the chocolate cake
170 g (6 oz) of the chopped chocolate
113 g (½ cup / 4 oz) unsalted butter, plus more for the ramekins
2 large eggs
2 large egg yolks
55 g (about ¼ cup plus 1 teaspoon) granulated sugar
24 g (about 3 tablespoons) all-purpose flour
1 teaspoon (5 ml) vanilla extract
¼ teaspoon fine salt
26 g marshmallow creme or fluff, divided among the 4 cakes; if you are not weighing it, divide into 4 small, roughly equal spoonfuls
Unsweetened cocoa powder, for the ramekins
For finishing
4 large marshmallows, or enough mini marshmallows or marshmallow creme to top 4 cakes
Reserved toasted graham cracker crumbs
Dark or semisweet chocolate shavings, or a light chocolate drizzle
Optional tiny pinch of flaky salt
What you need
Use four 6-ounce / 175–180 ml ceramic ramekins, a baking sheet, heatproof bowl, whisk and silicone spatula. A kitchen scale gives the most even results, but the cakes can still be divided carefully by eye. A thin knife or small offset spatula helps with unmolding, and you will want an oven mitt or folded dry kitchen towel for the hot ramekins.
If your oven tends to run hot or cool, an oven thermometer is worth using. In a bake this short, a minute can change the center noticeably.
Not sure how large your ramekins are? Fill one to the rim with water, then pour that water into a measuring jug.
Put the reserved 50 g chopped chocolate in a small heatproof bowl.
Heat the cream until steaming. Pour it over the chocolate, wait about a minute, then stir slowly from the middle until smooth and glossy. Add a small pinch of salt.
Let the ganache cool for a few minutes, then refrigerate it until thick enough to scoop and hold a shape. How quickly that happens depends on the bowl, the chocolate and the refrigerator, so judge the texture rather than the clock.
Divide the thickened ganache into 4 roughly equal portions and flatten each into a small, low disc.
They don’t need to be perfect circles. Small and flat matters more.
For a lava cake ganache center, that low shape is about heat rather than neatness. A flat disc gives the oven less cold thickness to warm through than a round ball, so the surrounding cake can set while the middle melts.
If shaping softens them, return the discs to the refrigerator until they are firm enough to lift cleanly.
2. Toast the graham cracker crumbs
Mix the graham cracker crumbs with the melted butter, sugar and salt. Toast over medium-low heat for a few minutes, stirring often, until the crumbs smell nutty and deepen slightly in color.
Reserve roughly half for serving. The other half will be divided among the four ramekins in thin layers.
3. Prepare the oven and ramekins
Place an oven rack in the middle of the oven and heat to 425°F / 218°C. The timing here assumes a conventional oven. With fan or convection, use your oven’s usual adjustment and start looking sooner.
Set the ramekins on a baking sheet. Butter the interiors thoroughly, including around the upper edge, then dust lightly with cocoa and tap out the excess.
Divide the graham mixture meant for baking among the four ramekins and press it into thin layers across the bottoms. Once the cakes are inverted, the graham ends up on top beneath the marshmallow.
This is lava cake, not a miniature pie crust, so don’t build the layer up thickly.
Graham has two different jobs in this recipe. The thin baked layer carries graham flavor into the cake; meanwhile, the crumbs saved for serving restore the crisp texture that warm chocolate and marshmallow quickly soften.
4. Make the chocolate batter
Melt the remaining 170 g chocolate with the 113 g butter, either over barely simmering water or in short microwave bursts. Stir until smooth and let it cool for a few minutes.
In another bowl, whisk the whole eggs, yolks and sugar until the mixture looks smooth, slightly paler and a little thicker than when you started. Whisk in the vanilla and salt, then the warm chocolate mixture.
The side-by-side comparison is the checkpoint for this chocolate lava cake batter. Judge the eggs by the change from the starting bowl—not a fixed whisking time—and move on once they have reached the slightly paler, thicker stage the recipe calls for.
Add the flour and fold just until the last dry streak disappears.
Twenty-four grams looks like very little flour. It is. A heavy scoop can make a real difference in a cake this small, so weigh it if you can.
5. Fill the ramekins
For the most even cakes, weigh the finished batter and divide it into 4 equal portions. No scale? Divide the batter as evenly as you can by eye.
Put roughly half of one batter portion into a ramekin. Set a chilled ganache disc in the middle, then add one-quarter of the marshmallow filling. Cover the center with the remaining batter from that portion, then repeat with the other ramekins.
Before they go into the oven, look around the sides. If chocolate or marshmallow is touching the ramekin wall, nudge it inward and cover the spot with batter.
That border lets the cake survive the flip and still spill warm chocolate when the spoon reaches the middle.
Before baking, treat any s’mores lava cake filling visible at the side or surface as a warning sign. Re-center it and cover it with batter now, because leaks later usually begin where ganache or marshmallow reaches the edge.
The outer edge should look set and most of the wet shine on top should be gone. Movement should be concentrated in the middle rather than running across the entire surface.
Many 6-ounce ramekins will land somewhere around 11–13 minutes, but don’t force the cake to match the clock. A completely firm, motionless top usually means the center is already thickening.
Use this visual as the endpoint for lava cake doneness, not the 11–13 minute range as a promise. Because ovens and ramekins vary, the appearance of the cake is what tells you whether that final minute belongs in the oven or not.
Rest the cakes for 1–2 minutes. If one spot is hanging on, loosen it gently with a thin knife.
The flip is the slightly nerve-racking bit. Using an oven mitt or folded dry kitchen towel to protect your hand, put a serving plate over the hot ramekin, hold the two firmly together and turn them in one confident motion. Leave the ramekin upside down for about 10 seconds, then lift it straight up.
If the cake stands cleanly, finish it while the middle is still hot. If it feels too fragile to turn out, do not destroy dessert for the sake of presentation. Leave it in the ramekin and serve it warm there.
A clean lava cake release starts before the flip. Thorough buttering and cocoa dusting help, while an exterior that is still too soft is more likely to stick—so a difficult unmolding is not always a problem with the flipping motion itself.
Top with a large marshmallow, a few minis or a spoonful of marshmallow creme and toast until browned in spots. Scatter over the reserved graham crumbs and, if you like, add chocolate shavings or a light drizzle of homemade chocolate syrup.
No kitchen torch? Brown whole or mini marshmallows briefly on lightly greased foil under a hot broiler, watching constantly, then move them onto the cakes.
A torch browns the marshmallow exactly where it sits. No torch? Broil the marshmallows separately and transfer them afterward, so you still get the toasted s’mores finish without exposing an already-baked lava cake to another blast of intense heat.
Add a tiny pinch of flaky salt if the sweetness needs it.
Serve immediately. Put the cakes down whole and let everyone break into their own.
The Moment to Pull Them From the Oven
A lava cake is ready when the outer edge is set, the top has mostly lost its wet shine, and the remaining movement is concentrated in the center.
Molten, Not Raw: Read the Crumb
Don’t wait for the middle to become as still as the edge. The cakes keep cooking while they rest and while you get them onto the plate.
When you break it open
What happened
Next batch
Glossy melted chocolate flows from the middle, with some marshmallow through it; the cake around it looks baked
Right where you want it
Keep the timing
The cake itself looks wet, thin or streaky with uncooked batter
It came out too soon
Give the next batch about 1 minute more
The middle is soft and fudgy, but the chocolate barely spreads
A little too long in the oven
Check about 1 minute earlier
The middle looks much like the outside
The cake baked through
Start checking earlier and check the oven temperature
For lava cake doneness, remember one useful rule: flow belongs to the filling, not the crumb. A dramatic molten center is right only when the chocolate cake surrounding it looks baked rather than wet or streaky.
The liquid you want is melted chocolate and marshmallow from the middle. The cake around it should look cooked.
If you have made fudgy brownies, the judgment is similar: soft and chocolatey is not the same thing as wet, uncooked batter.
If you’re using an unfamiliar oven for an important dinner, a trial bake on another day is more useful than sacrificing one of the four cakes at serving time.
A large frozen ball of ganache can still be cold when the cake around it is ready. A small, flat chilled piece warms more readily.
The marshmallow doesn’t need to be generous either. A small portion gives you the sticky streak without crowding the chocolate filling.
Then give both fillings room: batter underneath, batter above, clean batter around the sides.
Think of the center as architecture: chocolate cake forms the shell, ganache creates the molten flow, marshmallow adds the sticky pull, and the thin graham layer keeps the s’mores flavor recognizable instead of letting everything merge into one texture.
Chocolate, Marshmallow & Graham Each Need a Job
Semisweet or bittersweet chocolate around 60–65% cacao is a good middle ground. Milk chocolate can work, but beside marshmallow it pushes the finished cake much sweeter.
Chocolate chips can work in a pinch, though chopped bar chocolate usually melts more freely—especially useful in a molten chocolate cake where you actually want movement in the middle.
Marshmallow creme gives you the sticky pull inside. Browned marshmallow on top gives you something else entirely: caramelized edges and the toasted smell that makes the dessert register as s’mores before the first bite.
The center works because the chocolate and marshmallow stay distinct: one flows, the other stretches, while the surrounding cake gives the spoon something to break through.
Graham is the awkward one because moisture wins eventually. The thin baked layer carries the graham flavor; the crumbs saved for serving bring back the crunch. Trying to keep buried cracker crumbs crisp inside warm chocolate and marshmallow is a losing argument with physics.
Your Ramekin Changes the Bake
Two 6-ounce ramekins are not necessarily the same bake. A broad, shallow dish spreads the batter thinner; a narrow, deeper one puts more distance between the heat and the middle.
The 11–13 minute range above is meant for the stated 6-ounce capacity, but even within that size the physical cues matter more than hitting one exact minute.
How to measure your ramekin
Fill it to the rim with water, then pour that water into a measuring jug.
4 oz ramekin: roughly 120 ml
6 oz ramekin: roughly 175–180 ml
8 oz ramekin: roughly 235 ml
Use those numbers to identify what you own. The 4-ounce and 8-ounce sizes are not direct substitutes for the timing above; changing the capacity changes the depth of the cake and therefore the bake.
Capacity tells you what the dish holds; shape tells you how that capacity is distributed. That is why two 6-ounce lava cake ramekins can reach the same visual doneness cues at different moments even though both pass the water test.
No ramekins? A muffin pan is possible
A metal muffin pan is a possible variation, but this recipe’s timing is written for 6-ounce ceramic ramekins. Standard muffin wells are smaller and metal heats faster.
If you try it, use smaller portions of cake and filling and begin checking several minutes earlier. Treat the first batch as a separate variation rather than borrowing another lava-cake recipe’s timing.
Most of this dessert can be organized before the moment you want to serve it. The few minutes after baking are the part you can’t pause.
You can assemble the cakes earlier the same day, cover them and refrigerate them. Let them lose some of their refrigerator chill before baking, and expect fully cold cakes to behave differently from freshly assembled ones.
I wouldn’t promise a fixed extra bake time for a fully chilled cake. Use the set edge and movement in the middle to decide when it is ready.
Set out the plates, marshmallow and graham crumbs before the tray goes in. You don’t want to be hunting through a cupboard while four lava cakes quietly become four chocolate cakes.
Fix the Cake in Front of You
No flowing center? The usual culprits are too much oven time, an oven running hot, too much flour, or simply waiting too long to serve.
The fastest way to troubleshoot lava cake is to ask where the failure happened: the outer cake, the release, the filling or the center. Each points toward a different adjustment, so simply baking every failed batch longer can create a new problem.
What you see
Likely cause
What to change
The cake around the filling looks raw
It needed a little longer
Add about 1 minute to the next batch
The cake collapses when flipped
The outside needed longer, or there was too much filling
Give it a little more oven time or reduce the filling next time
The cake sticks
The ramekin was not coated thoroughly, or the outside is very soft
Loosen the stuck area; serve in the ramekin if necessary
Chocolate or marshmallow leaks during baking
The filling reached the side or top
Center the filling more carefully next time
The chocolate barely melts
The ganache piece was too large, thick or very cold
Make smaller, flatter chilled pieces
Too sweet? Use bittersweet rather than milk chocolate, measure the marshmallow instead of heaping it in, and skip powdered sugar unless you specifically want it. A little salt usually helps more.
Chocolatey, but not really s’mores? One of the three has probably gone quiet. Brown the marshmallow more deeply, bring back the reserved graham crumbs, or use chocolate with a little more cocoa character.
Graham went soft? Some softening is normal anywhere crumbs touch warm cake or marshmallow. Add the reserved crumbs at the very end for the contrast that matters.
Chocolate chips: yes, though chopped bar chocolate generally melts more freely in both the batter and ganache.
Digestive biscuits: yes. Use plain digestives by weight. If yours are already quite sweet and buttery, leave the extra sugar out of the crumb mixture.
Cocoa powder for the melted chocolate: not gram for gram. Melted chocolate contributes cocoa butter as well as cocoa solids, so a direct dry-cocoa swap changes the way the cake sets.
Regular marshmallows inside: possible, but less predictable. They expand and melt unevenly. I would rather put them on top, where those toasted edges are useful.
Eggless, vegan or gluten-free: those versions need their own formula rather than a casual swap. If eggs or dairy are the issue, this vegan chocolate cake collection includes a dedicated vegan chocolate lava cake.
Leftovers & Reheating
These are much better freshly baked. The contrast between set cake and a flowing middle does not last forever.
Refrigerate leftovers once cool. For the best texture, keep it short and eat them within 1–2 days. Reheat gently in short microwave bursts until warm. The middle can become gooey again, but it won’t be quite the same cake.
If you’re planning ahead, assembling and baking later makes more sense than baking the cakes early and trying to rebuild the lava at serving time.
Take the cakes to the table while the centers are still loose. The marshmallow should smell toasted, the graham should crackle here and there, and once the spoon breaks through the cake, the chocolate should not need much introduction.
The payoff is contrast: a cake that stands long enough to serve, then gives way when the spoon reaches the center.
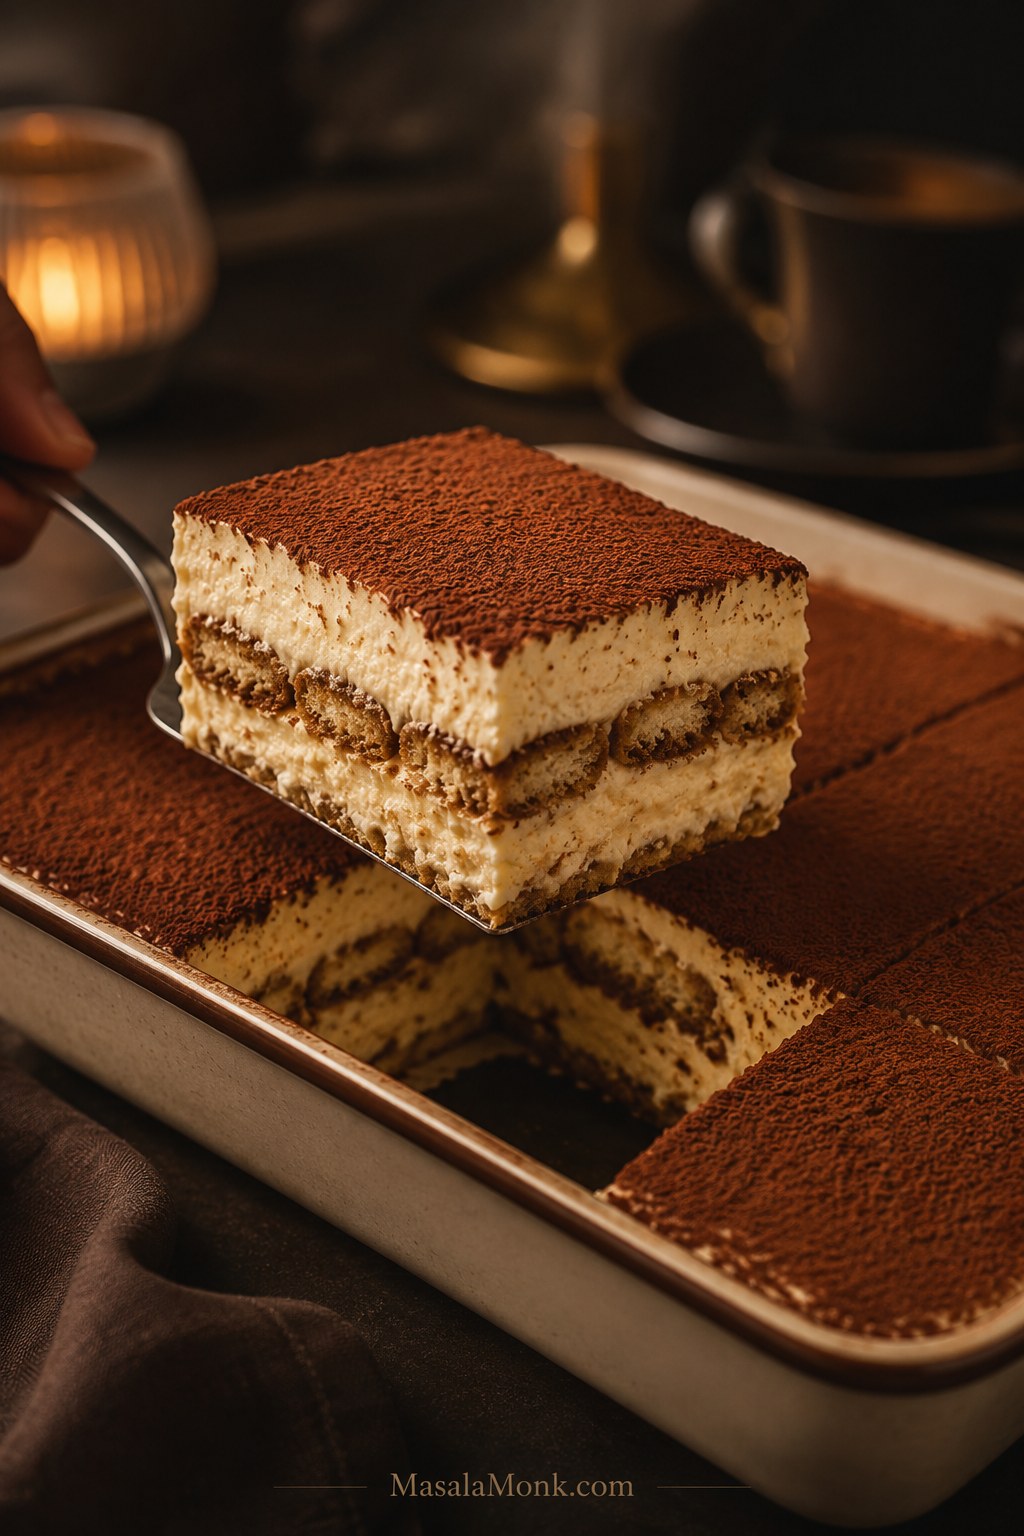
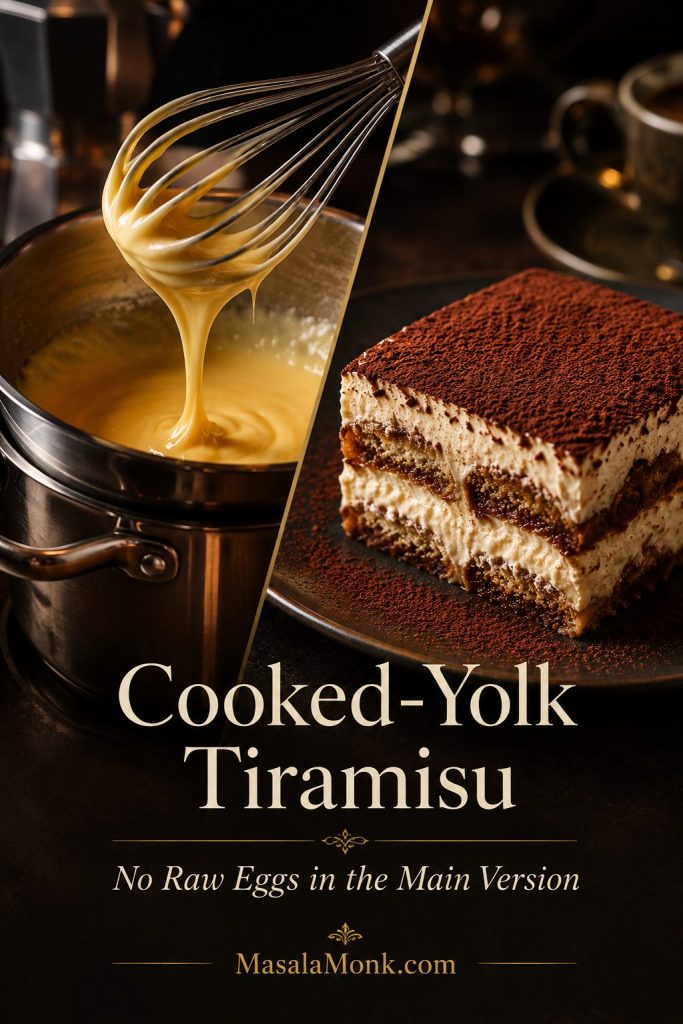
This tiramisu recipe gives you creamy, coffee-soaked layers with rich mascarpone cream, firm savoiardi, deep espresso flavor, and a cocoa finish that cuts through the sweetness. The main version uses cooked yolks and whipped cream, so it does not rely on raw eggs for structure, and it is built for a generous 9×13-inch pan that slices cleanly after an overnight chill.
Here, the goal is not the fastest 10-minute shortcut. It is a reliable make-ahead tiramisu you can serve to guests tomorrow: soft but visible layers, coffee-soaked ladyfingers that are not wet, and a cream filling that holds on the plate without turning stiff or heavy.
Think of it as a modern home-kitchen tiramisu built around the classic structure: savoiardi, mascarpone, eggs, coffee, and cocoa, with a cooked-yolk cream method for more confidence.
You will also get a smaller 8×8 half-batch, a no-alcohol option, a more traditional no-cream direction, mascarpone substitute notes, pan-size guidance, and practical fixes for tiramisu that turns wet, dry, bitter, grainy, or too loose to slice.
Good tiramisu feels quietly luxurious: the spoon meets soft cream, the coffee has soaked into the ladyfingers without leaking into the dish, and the cocoa gives each bite a slightly bitter finish. Once the layers are built, the fridge does most of the work.
To make tiramisu, quickly dip firm ladyfingers in cooled espresso or strong coffee, layer them with mascarpone cream, chill until set, and dust the top with cocoa before serving. This cooked-yolk version gives you classic coffee-mascarpone flavor without relying on raw eggs in the main recipe.
For a full 9×13-inch pan, use about 40–45 firm ladyfingers, 500 g mascarpone, 4 egg yolks, 100–120 g sugar, 360 ml heavy cream, 300–360 ml strong cooled coffee, optional alcohol, and cocoa. Then dip the ladyfingers quickly rather than soaking them, and chill the finished tiramisu overnight for the cleanest slices.
Tiramisu at a Glance
Detail
Use this
Best dish
9×13-inch / 33×23 cm dish for the full recipe
Best ladyfingers
Firm dry savoiardi, not soft cake-style fingers
Best coffee
Strong espresso, moka coffee, or bold brewed coffee, fully cooled
Egg method
Cooked yolks in the main version; pasteurized eggs for raw-egg variations
Alcohol
Optional; rum, Marsala, brandy, coffee liqueur, or no alcohol all work
Chill time
8 hours minimum; overnight is best
Texture goal
Creamy, soft, coffee-rich, and sliceable
Biggest mistake
Soaking the ladyfingers too long
If you are nervous about wet layers, start with the ladyfinger dip test before you assemble the pan.
What This Tiramisu Should Look Like
This cooked-yolk version gives you the familiar coffee, mascarpone, and cocoa flavor of tiramisu while keeping the main method more comfortable for a home kitchen.
The cooked-yolk method keeps the familiar coffee, mascarpone, and cocoa flavor while giving the main tiramisu recipe a more confident home-kitchen structure.
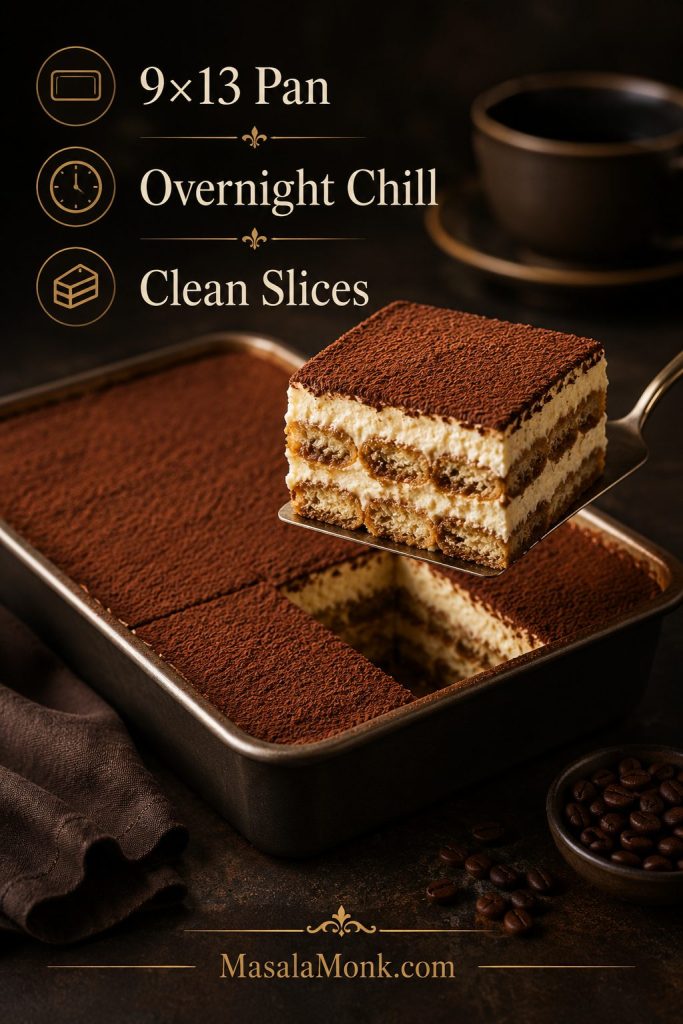
For a full 9×13 pan, the goal is a generous make-ahead tiramisu that chills overnight and lifts into clean, guest-friendly squares.
Because the dessert is built in a 9×13 pan, it is easier to serve clean squares for guests, holidays, and make-ahead dessert tables.
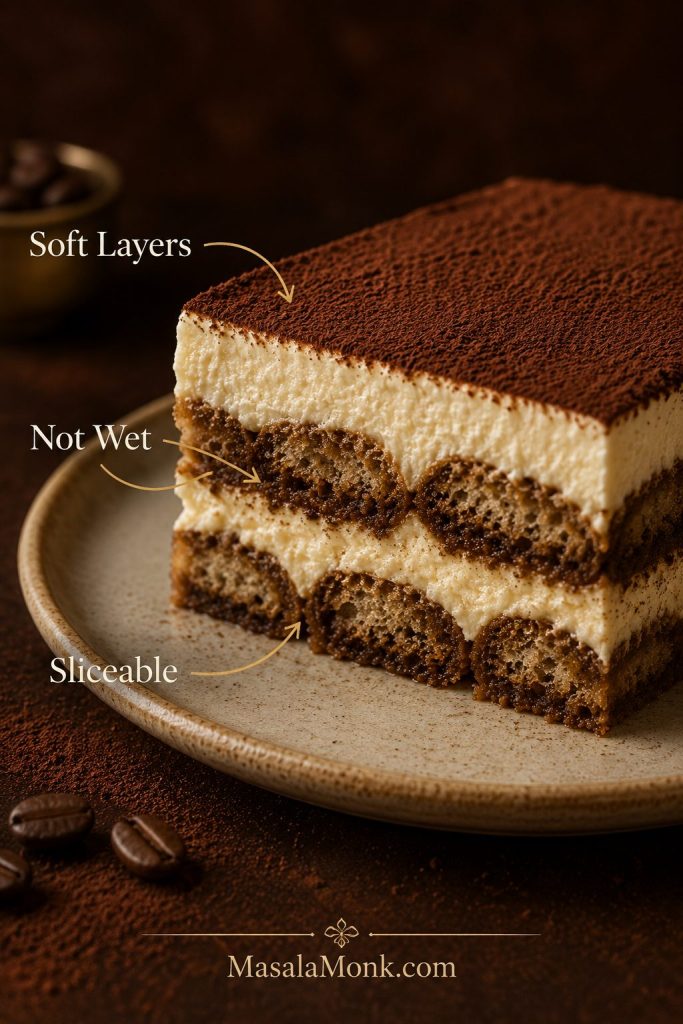
Before you move deeper into the method, it helps to know the texture target: creamy layers, coffee-soaked ladyfingers, and no liquid pooling at the bottom.
The best tiramisu texture is creamy but controlled: the ladyfingers taste coffee-soaked, yet the bottom of the dish should not look flooded.
Why This Tiramisu Recipe Works
Tiramisu looks simple, but small details decide whether it slices cleanly or turns soft and wet. Because the yolks are gently cooked, the cream is folded carefully, and the dessert chills overnight, the flavor stays familiar while the texture becomes more reliable for a home kitchen.
Cooked yolks give richness without making fully raw eggs the only option.
Mascarpone keeps the cream layer thick, smooth, and lightly sweet.
Whipped cream adds stability for clean slices.
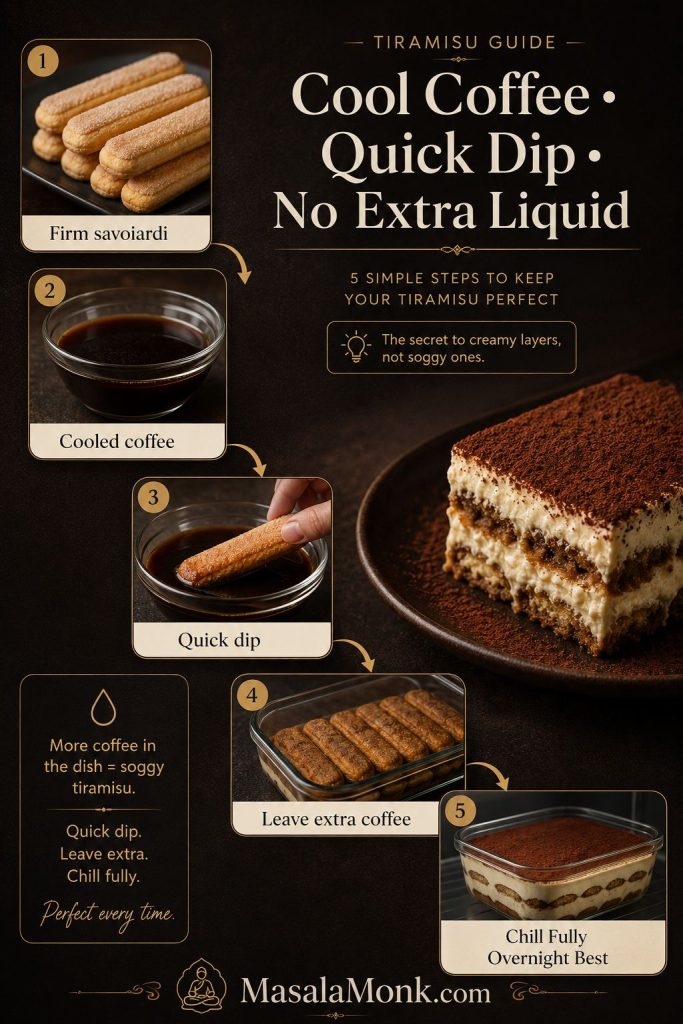
A quick coffee dip keeps the ladyfingers soft but not soggy.
Overnight chilling lets the dessert set instead of collapsing into a loose spoon dessert.
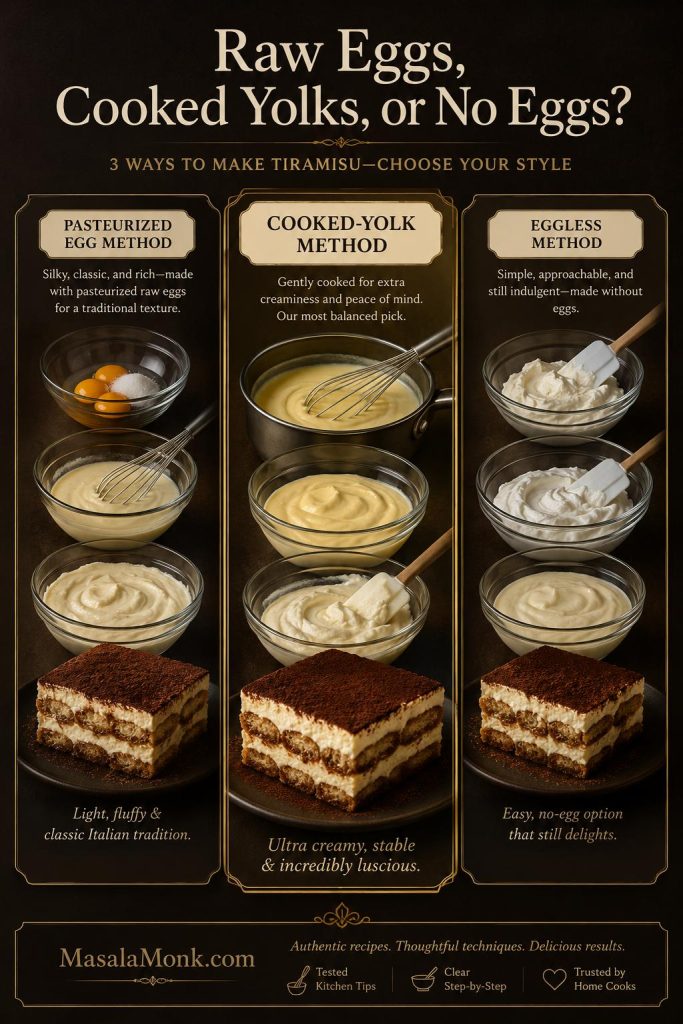
Choose Your Method
There is no single tiramisu method that suits every kitchen. The right choice depends on how traditional you want the texture to be, how comfortable you are with eggs, and whether you need the dessert to slice neatly for guests.
If you want…
Use this path
Classic lightness
Pasteurized eggs and whipped egg whites
Stable guest-friendly slices
Cooked yolks and whipped cream
No alcohol
Strong coffee plus vanilla in the cream
No eggs at all
Use an eggless tiramisu method
This version is slightly more work than a no-egg shortcut, but it tastes more classic and gives you a creamier, more stable dessert that can be sliced cleanly the next day.
If you like make-ahead desserts that set in the fridge, MasalaMonk’s no bake cheesecake recipe follows a similar patience-first logic.
What Is Tiramisu?
Tiramisu is a no-bake Italian dessert made with coffee-soaked ladyfingers layered with mascarpone cream and finished with cocoa powder. It should taste creamy, lightly sweet, coffee-rich, and just bitter enough at the end.
This version keeps that coffee-mascarpone-cocoa structure, but adapts the cream method for a modern home kitchen. Instead of relying on fully raw eggs, it uses gently cooked yolks and whipped cream for a filling that is rich, stable, and easier to slice.
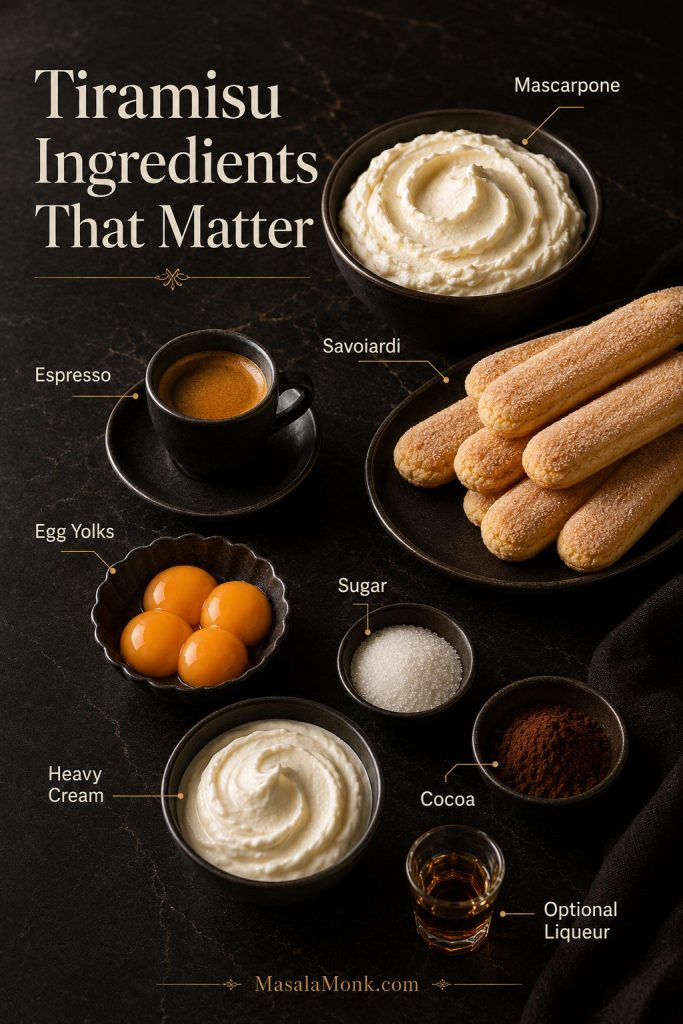
Tiramisu Ingredients: What Matters Most
The ingredient list is short, so every choice matters. Tiramisu is not a dessert where you can hide weak coffee, watery mascarpone, or soggy biscuits under decoration. The flavor and texture come directly from the basics.
Mascarpone gives body, savoiardi hold structure, coffee drives flavor, and cocoa adds the bitter finish that keeps tiramisu balanced.
Mascarpone
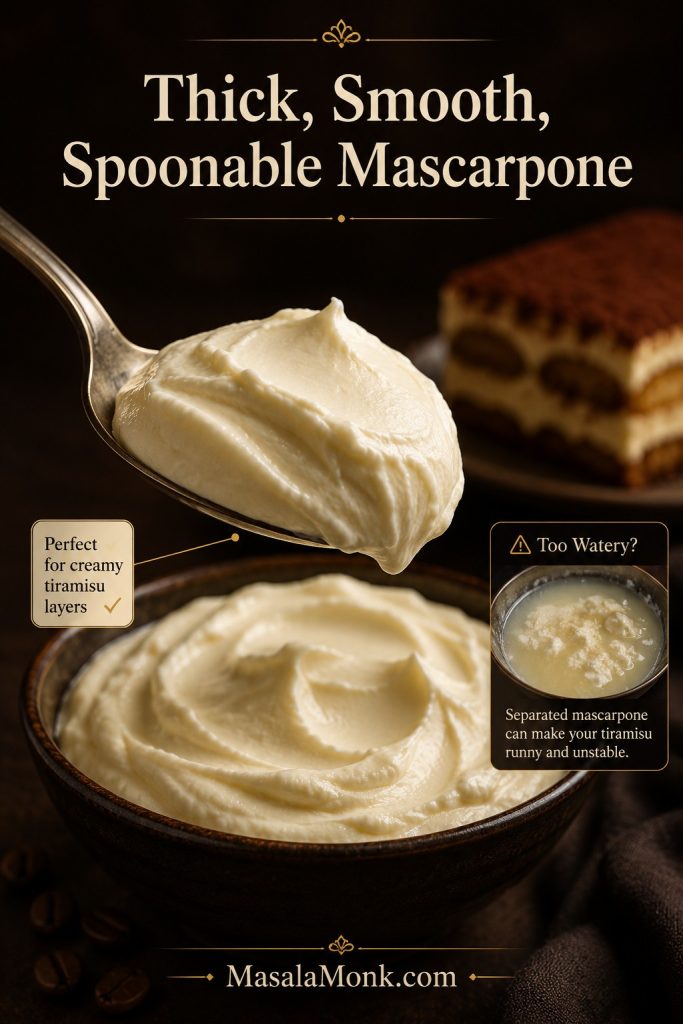
Mascarpone gives tiramisu its rich, creamy body. Look for mascarpone that is thick, smooth, and spoonable, not watery or loose. A little separated liquid can usually be stirred back in gently. Mascarpone that still looks pourable after stirring is more risky, because the finished dessert may not slice cleanly.
Thick mascarpone helps the cream layer hold softly; however, watery mascarpone can loosen the filling before the tiramisu has time to set.
Meanwhile, keep mascarpone cold until you are ready to mix, but do not beat it aggressively. Once mascarpone loosens, overmixing can make it grainy or split. In this method, you only need to smooth it briefly before folding in the cooked yolk mixture and whipped cream.
Mascarpone is worth using when you can find it because it gives tiramisu that soft, rich, almost cloud-like cream that tangier substitutes cannot fully copy.
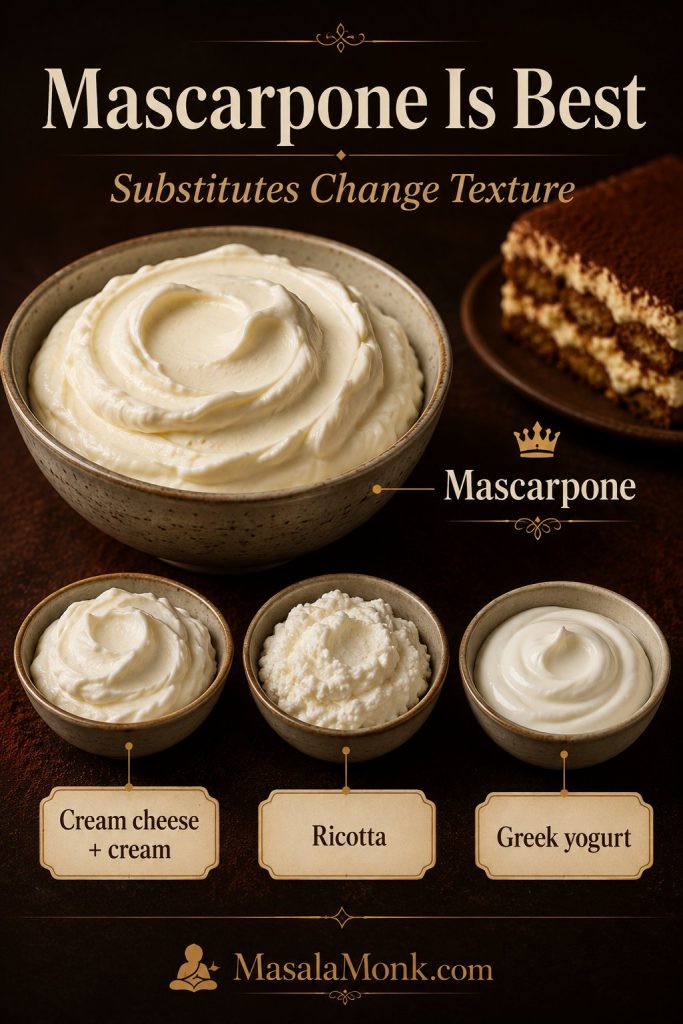
Cream cheese, ricotta, and Greek yogurt can all make tiramisu-style desserts, but they are not one-for-one replacements. Cream cheese is tangier and denser, ricotta can be grainy unless blended very smooth, and Greek yogurt creates a lighter, tangier dessert rather than classic tiramisu. For a dessert where cream cheese is meant to be the star instead of a substitute, MasalaMonk’s New York cheesecake recipe is the better direction.
Ladyfingers / Savoiardi
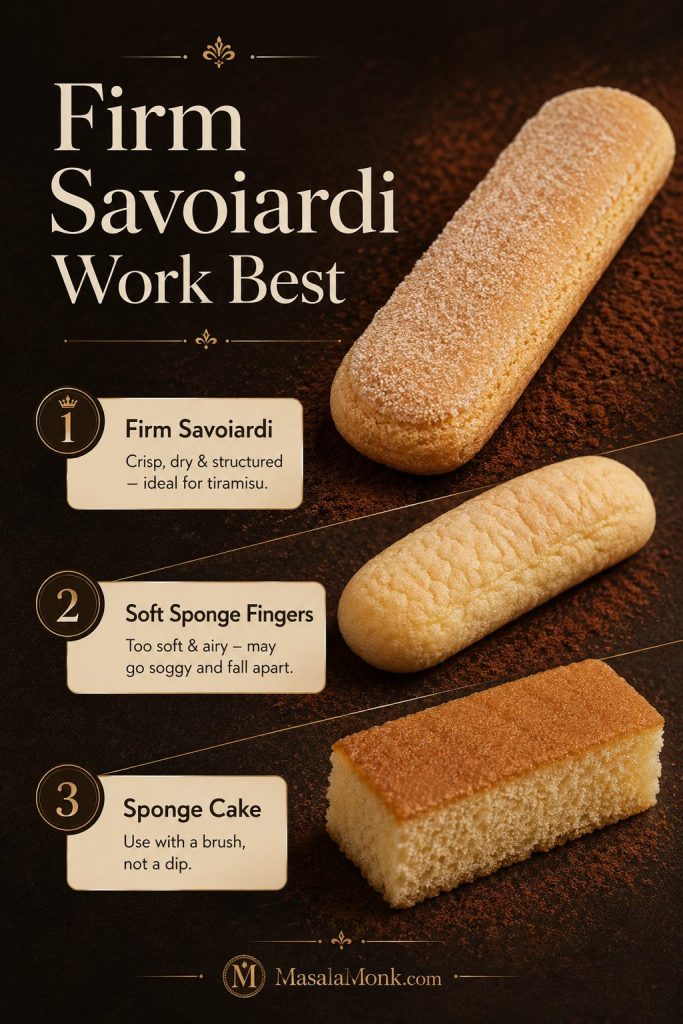
Firm dry savoiardi are the best choice because they soften slowly and help the layers hold together. They absorb coffee quickly, soften during the chill, and still give the dessert structure. Soft sponge fingers can work, but they need an even faster dip because they collapse more easily.
Firm dry savoiardi are ideal because they absorb coffee quickly, then soften gradually while the tiramisu chills.
If the package says savoiardi, that is usually what you want. They should feel dry and crisp before dipping. If your ladyfingers are soft and cake-like, treat them more gently: brush or barely dip them instead of dunking them like firm savoiardi.
For a 9×13-inch tiramisu, you will usually need 40–45 ladyfingers. Do not worry if you have to trim a few pieces to fill the corners of the dish; neat layers matter more than perfect whole biscuits.
Coffee or Espresso
Espresso is ideal, but moka coffee, bold brewed coffee, or strong instant espresso can also work. The coffee should taste a little too strong on its own because the mascarpone cream will soften it into balance. Weak coffee disappears under the cream and makes tiramisu taste flat.
Use coffee that tastes slightly stronger than usual because the mascarpone cream will soften the bitterness and bring it into balance.
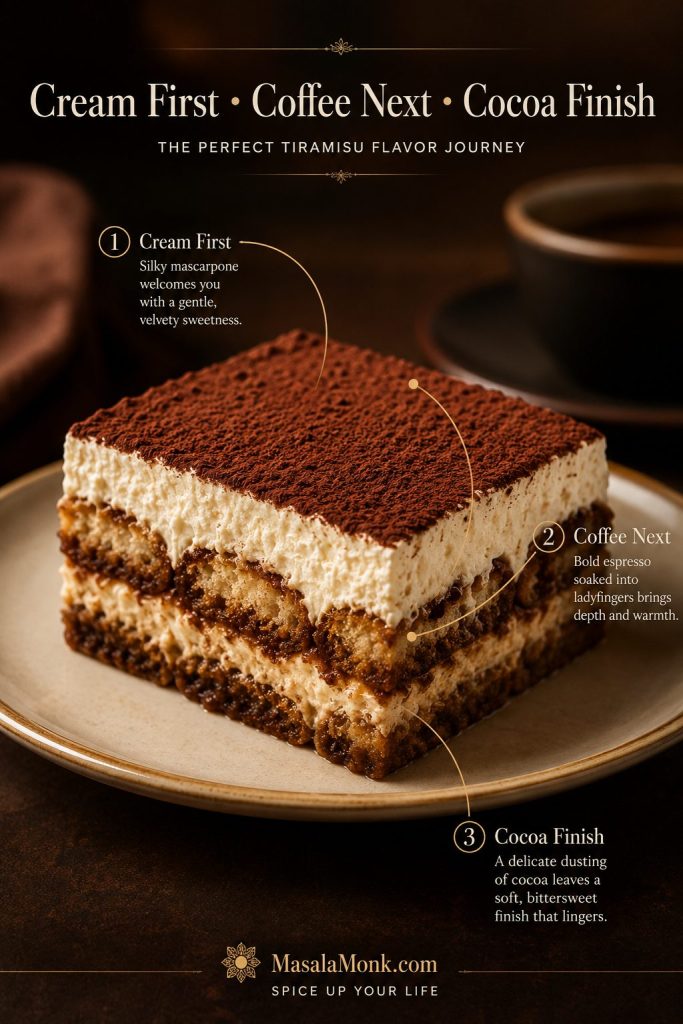
When the coffee is right, you should smell it as soon as the tiramisu is sliced. It should support the cream, not disappear under it. The first forkful should taste creamy first, then coffee, then cocoa bitterness at the end.
Before dipping, let the coffee cool completely. Otherwise, hot coffee can make the biscuits soften too quickly, and it can also loosen the cream if the dessert is assembled while everything is warm.
Eggs
Classic tiramisu uses eggs. This cooked-yolk version gives the filling richness without making fully raw yolks the default. The yolks are heated gently with sugar over a double boiler, then folded into mascarpone and whipped cream.
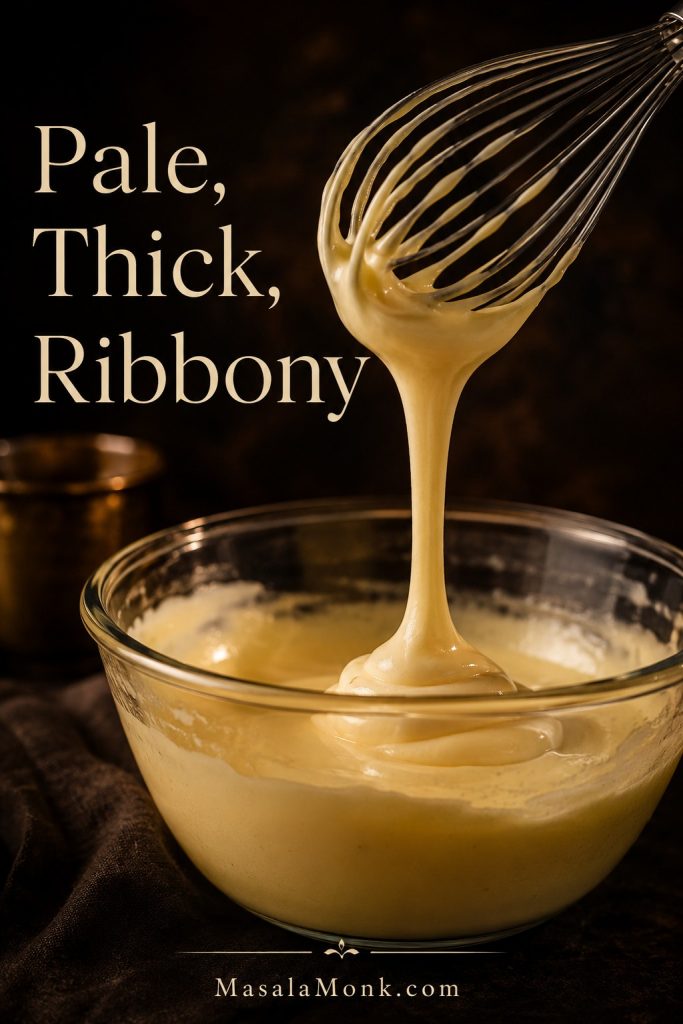
Once the yolks look pale, glossy, and ribbony, they are ready to enrich the mascarpone cream without making it loose.
Heavy cream is a modern home-kitchen choice, not the strict Treviso-style path. Here, it helps the mascarpone layer stay stable and sliceable while still keeping the familiar coffee, cocoa, and mascarpone flavor profile.
For a more traditional no-cream direction, use pasteurized egg whites instead of whipped cream. That option is lighter and closer to old-school tiramisu, but it needs more care because the egg whites are not cooked.
Sugar, Salt, Cocoa, and Alcohol
Sugar softens the bitterness of coffee and cocoa. Use 100 g if you prefer a balanced, less-sweet tiramisu, or up to 120 g if you want a rounder dessert.
A small pinch of salt helps the mascarpone cream taste fuller rather than simply sweet. It should not make the dessert salty; instead, it should make the coffee and cream taste more complete.
Use unsweetened cocoa powder for the top. Dust it shortly before serving if you want the cleanest finish. If you dust it before a long chill, the cocoa will darken and hydrate into the surface, which some people enjoy but others find less polished.
Alcohol is optional. Dark rum, Marsala, brandy, coffee liqueur, amaretto, or Grand Marnier can all work, but coffee-only tiramisu is completely valid.
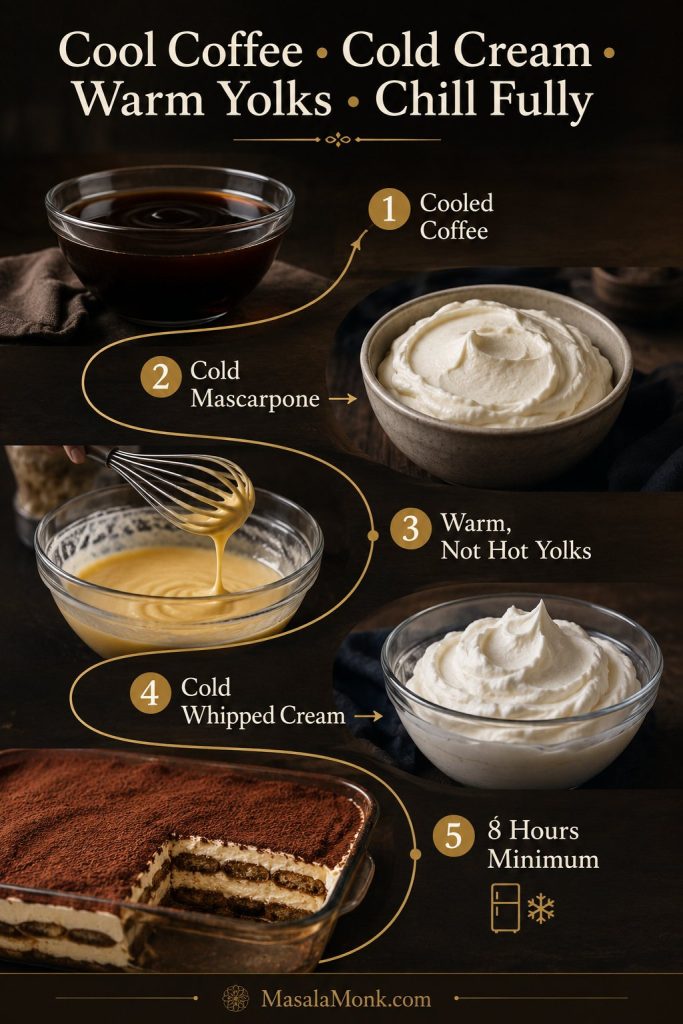
Temperature Cues That Prevent Problems
Ingredient or layer
Best temperature
Why it matters
Coffee
Fully cooled before dipping
Hot coffee softens ladyfingers too fast and can loosen the cream.
Mascarpone
Cold but stirrable
Too warm can turn loose; too cold can stay lumpy.
Yolk mixture
Warm, not hot, before folding
Hot yolks can loosen the mascarpone layer.
Heavy cream
Cold before whipping
Cold cream whips better and holds structure.
Finished tiramisu
Fully chilled before slicing
Cold layers cut more cleanly and hold on the plate.
Once those temperatures are right, the recipe becomes much calmer. The cream folds more smoothly, the ladyfingers behave better, and the finished tiramisu sets with less drama.
Cool coffee protects the ladyfingers, cold cream whips better, and warm-not-hot yolks keep the mascarpone filling smooth.
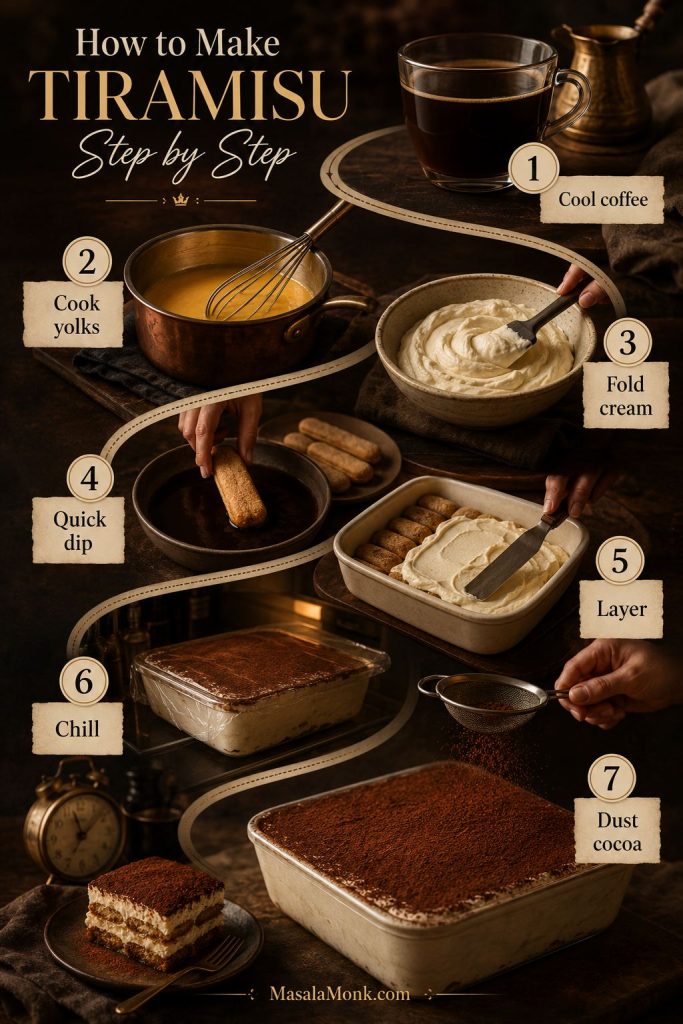
How to Make This Tiramisu Step by Step
Once the coffee is cooled and the cream is ready, tiramisu is mostly assembly. The only technical step is the cooked yolk base, and even that is simple if you keep the heat gentle.
Move slowly through the cream, then quickly through the dipping. That is the rhythm of good tiramisu: gentle mixing, fast dipping, patient chilling.
Most tiramisu problems are avoided before assembly: cool the coffee, build a stable cream, dip briefly, and give the pan time to chill.
1. Brew and Cool the Coffee
Make espresso, moka coffee, or bold brewed coffee. Pour it into a shallow bowl and let it cool completely. If using rum, Marsala, brandy, or coffee liqueur, stir it in after the coffee has cooled.
2. Cook the Egg Yolks and Sugar
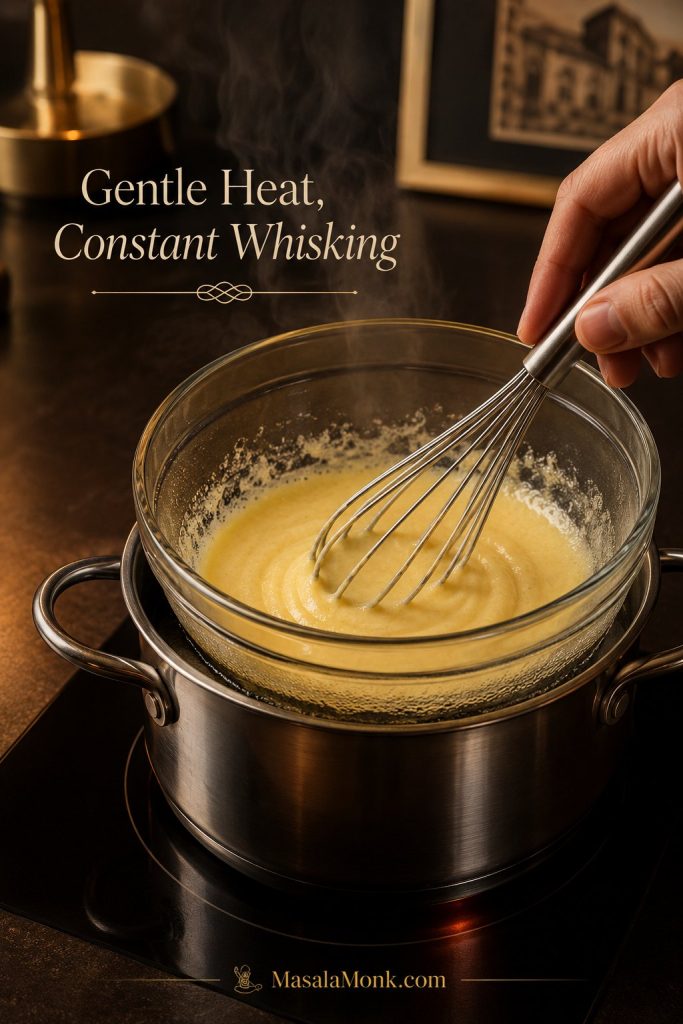
Set a heatproof bowl over a saucepan of barely simmering water. The bottom of the bowl should not touch the water. Add the egg yolks and sugar, then whisk constantly.
Gentle heat and steady whisking turn yolks and sugar into a smooth base, which gives the mascarpone filling richness and stability.
Whisk for 3–5 minutes, until the mixture becomes pale, thick, and ribbony. When you lift the whisk, the mixture should fall back into the bowl in a thick ribbon for a second before disappearing. For extra confidence, aim for about 160°F / 71°C while keeping the heat gentle.
Remove the bowl from the heat and let the mixture cool until warm, not hot. If the yolk mixture is too hot when it meets the mascarpone, the cream can loosen.
3. Loosen the Mascarpone
In a large bowl, beat the mascarpone only until it looks smooth and spreadable. Stop as soon as the lumps disappear. If you keep beating after it loosens, the cream can turn grainy later.
4. Whip the Cream
In another bowl, whip the cold heavy cream to medium-stiff peaks. The cream should hold a soft point on the whisk, but the surface should still look smooth and glossy. If it looks rough, dry, or clumpy, it has gone too far.
5. Fold the Cream Together
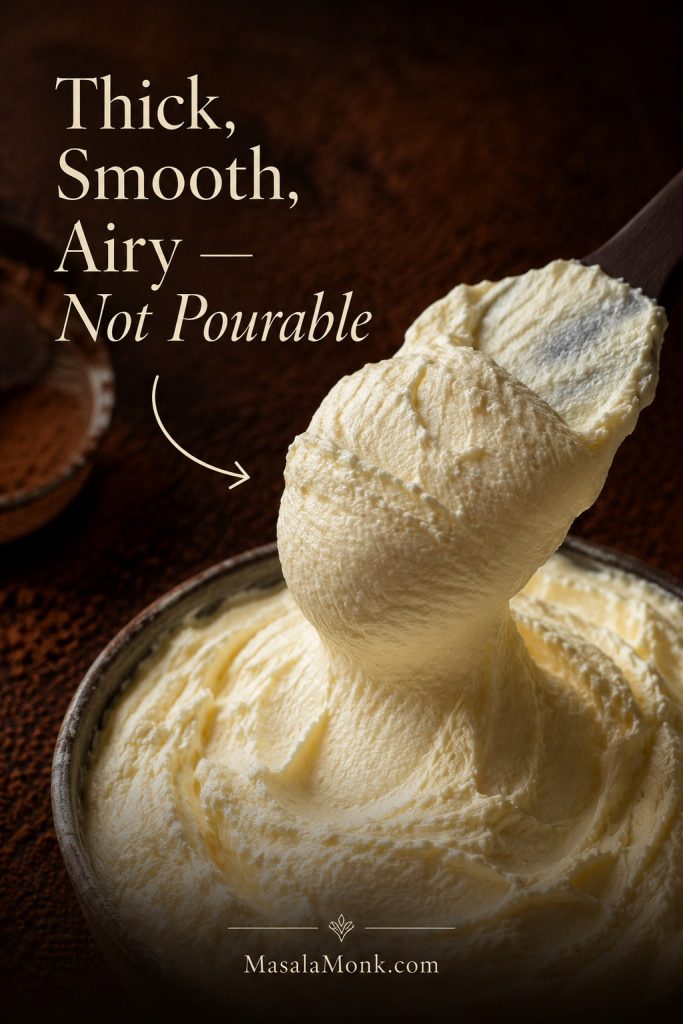
Fold the cooled yolk mixture into the mascarpone. Then fold in the whipped cream in two additions. Fold slowly until no obvious white streaks remain, then stop. The goal is a filling that looks thick, smooth, and airy, not something stirred until it turns loose or pourable.
When you lift the spatula, the cream should mound softly before settling. If it runs like sauce, chill it briefly before assembly and check that the whipped cream reached medium-stiff peaks.
Before you start assembling, use the texture checkpoint below to make sure the filling is thick, smooth, and airy rather than pourable.
Texture Target Before You Layer
The cream should be thick enough to mound on a spatula, the dipped ladyfingers should still lift without bending, and the chilled tiramisu should cut into soft but visible layers.
This is the texture checkpoint before assembly: thick enough to spread, light enough to fold, and stable enough to support two layers.
6. Dip the Ladyfingers
Working one at a time, dip each ladyfinger into the cooled coffee for about one second per side. Arrange the dipped ladyfingers in a single layer in the dish. Trim pieces as needed to fill gaps.
Leave any extra coffee behind instead of adding it to the pan. Too much added liquid is one of the main causes of soggy tiramisu.
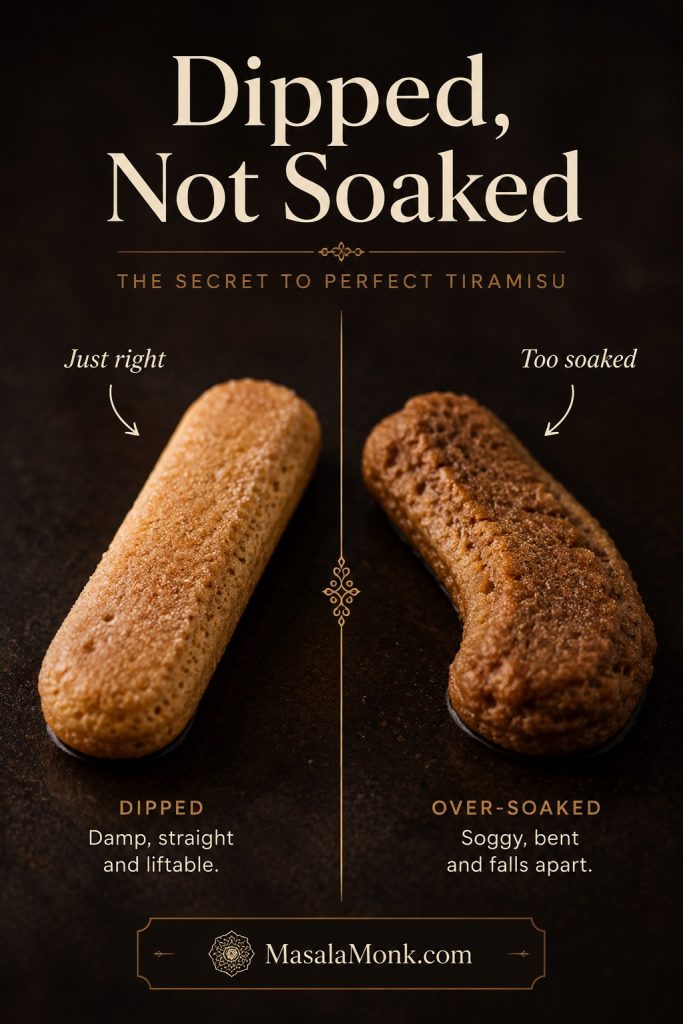
Ladyfingers should be dipped, not soaked; as a result, they soften during chilling without releasing excess coffee into the pan.
7. Layer the Tiramisu
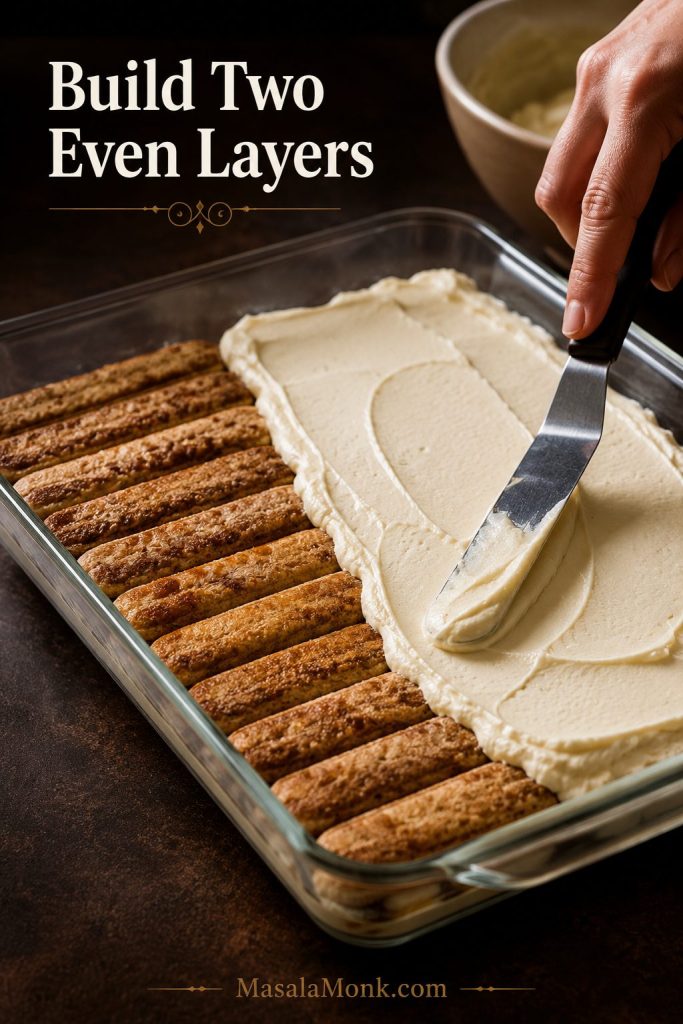
Spread half of the mascarpone cream over the first ladyfinger layer. Add a second layer of dipped ladyfingers, then spread the remaining cream over the top. Smooth the surface with an offset spatula.
Even layers help the coffee, cream, and savoiardi settle together, so the finished tiramisu cuts more neatly after chilling.
8. Chill Until Set
Cover the dish and refrigerate for at least 8 hours. Overnight is best. During this time, the ladyfingers soften, the coffee flavor settles, and the mascarpone cream firms enough to slice.
9. Dust with Cocoa and Serve
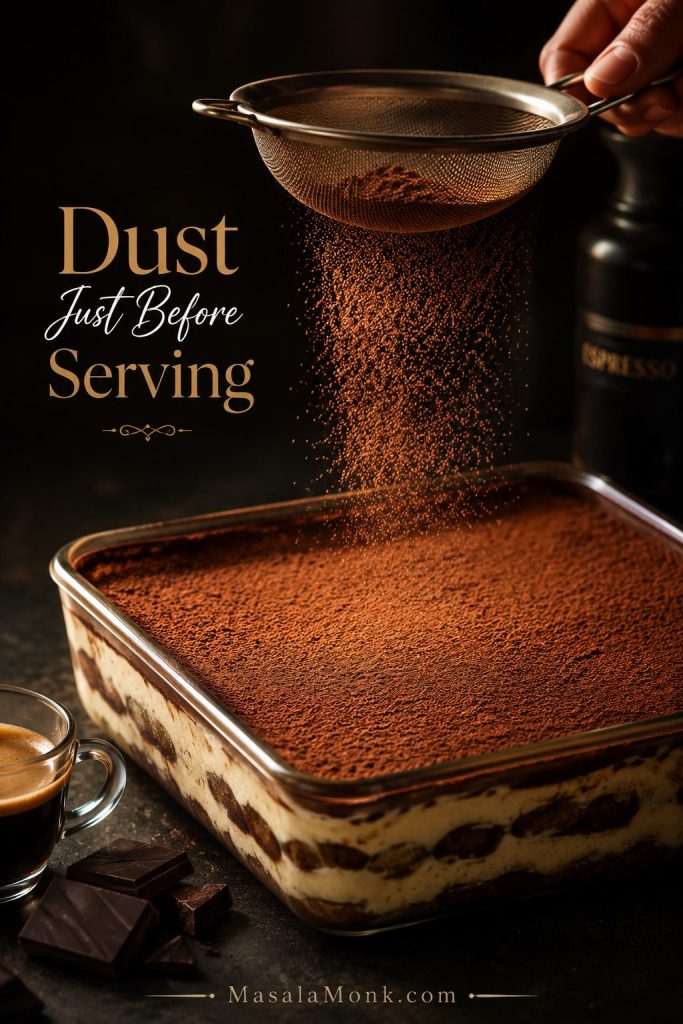
Just before serving, sift unsweetened cocoa powder over the top. Slice the tiramisu cold, wiping the knife between cuts for cleaner pieces.
Fresh cocoa should sit lightly on top, so add it after chilling rather than letting it hydrate into a dark, damp layer.
Recipe Card: Tiramisu with Cooked Yolks
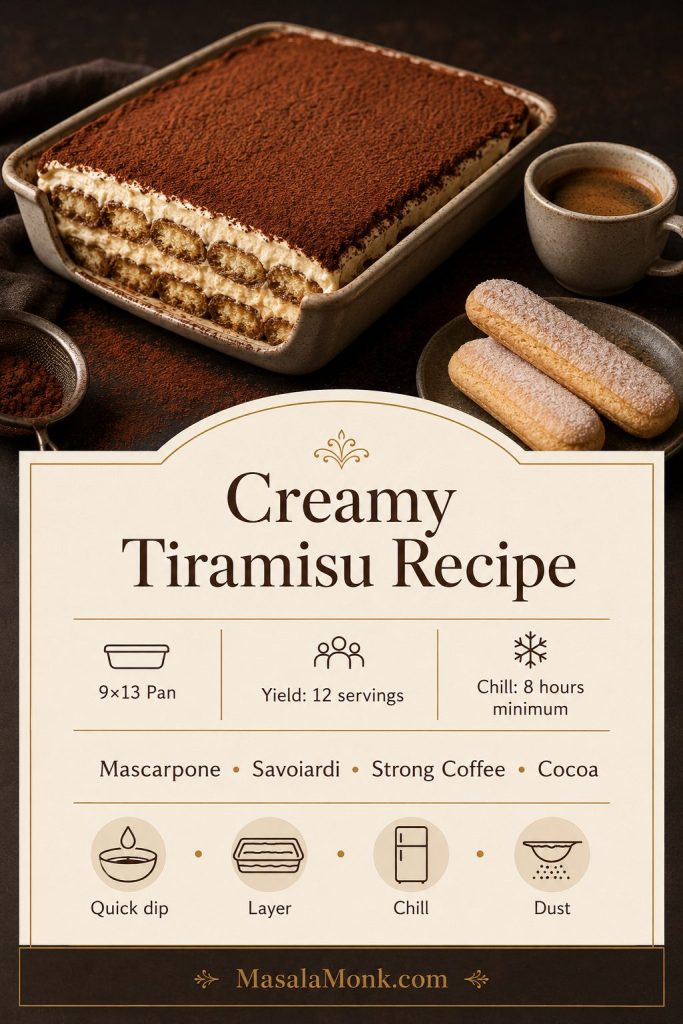
This saveable tiramisu recipe card keeps the essential assembly details close: 9×13 pan, cooked-yolk cream, quick dipping, and overnight chilling.
Creamy Tiramisu Recipe
This tiramisu gives you soft coffee-soaked ladyfingers, cooked-yolk mascarpone cream, and a cocoa-dusted top that slices cleanly after an overnight chill. It is rich and creamy without relying on raw eggs in the main version, with notes for no alcohol, an 8×8 half-batch, and a more traditional no-cream option.
Quick Texture Rule
Dip each ladyfinger for about 1 second per side. It should be damp outside but still firm enough to lift into the dish.
Yield12 servings
Dish9×13 inch / 33×23 cm
Prep Time40 minutes
Cook Time5 minutes
Chill Time8 hours minimum
Total Time8 hr 45 min+
Equipment
9×13-inch / 33×23 cm dish
Hand mixer or stand mixer
Heatproof bowl and small saucepan for double boiler
Shallow bowl for coffee dipping
Rubber spatula
Offset spatula
Fine mesh sieve
Kitchen scale, recommended
Instant-read thermometer, optional
Ingredients
Coffee Dip
300–360 ml / 1¼–1½ cups strong espresso or very strong coffee, cooled
30–45 ml / 2–3 tablespoons dark rum, Marsala, brandy, or coffee liqueur, optional
1–2 teaspoons sugar, optional, only if the coffee tastes very bitter
Mascarpone Cream
4 large egg yolks
100 g / ½ cup granulated sugar for a balanced tiramisu, or up to 120 g / ½ cup plus 2 tablespoons for a sweeter version
500 g / 17.6 oz mascarpone, cold but stirrable
360 ml / 1½ cups heavy cream, cold
1 teaspoon vanilla extract, optional
⅛–¼ teaspoon fine salt
Assembly Ingredients
40–45 firm savoiardi ladyfingers / about 300–350 g
2–3 tablespoons unsweetened cocoa powder, for dusting
Instructions
Make the Coffee and Cream
Make and cool the coffee. Brew strong espresso, moka coffee, or very strong coffee. Pour into a shallow bowl and cool completely. Stir in optional alcohol once cool.
Cook the yolks and sugar. Set a heatproof bowl over a saucepan of barely simmering water, making sure the bowl does not touch the water. Add egg yolks and sugar. Whisk constantly for 3–5 minutes, until pale, thick, and ribbony. For extra confidence, aim for about 160°F / 71°C.
Cool slightly. Remove the yolk mixture from the heat and let it cool until warm, not hot.
Loosen the mascarpone. In a large bowl, beat the mascarpone briefly until smooth. Stop as soon as it is spreadable.
Add the yolk mixture. Fold the cooled yolk mixture into the mascarpone until smooth.
Whip the cream. In a separate bowl, whip cold heavy cream to medium-stiff peaks. It should hold shape but still look smooth.
Fold the filling. Fold the whipped cream into the mascarpone mixture in two additions. Add vanilla and salt if using. The filling should look thick and airy, not pourable.
Layer the Tiramisu
Dip the ladyfingers. Dip each ladyfinger into the cooled coffee for about 1 second per side. Keep the dip brief; the biscuit should still lift easily into the dish.
Build the first layer. Arrange dipped ladyfingers in a single layer in the dish, trimming pieces to fit if needed.
Add cream. Spread half of the mascarpone cream over the ladyfingers.
Repeat. Add a second layer of dipped ladyfingers, then spread the remaining cream over the top.
Leave extra coffee behind. Once the ladyfingers are dipped and arranged, do not pour leftover coffee into the dish. Extra liquid is one of the main causes of soggy tiramisu.
Chill, Finish, and Serve
Chill. Cover and refrigerate for at least 8 hours, preferably overnight.
Finish. Just before serving, sift unsweetened cocoa powder over the top.
Serve cold. Slice straight from the fridge, wiping the knife between cuts for cleaner pieces.
8×8 Half-Batch
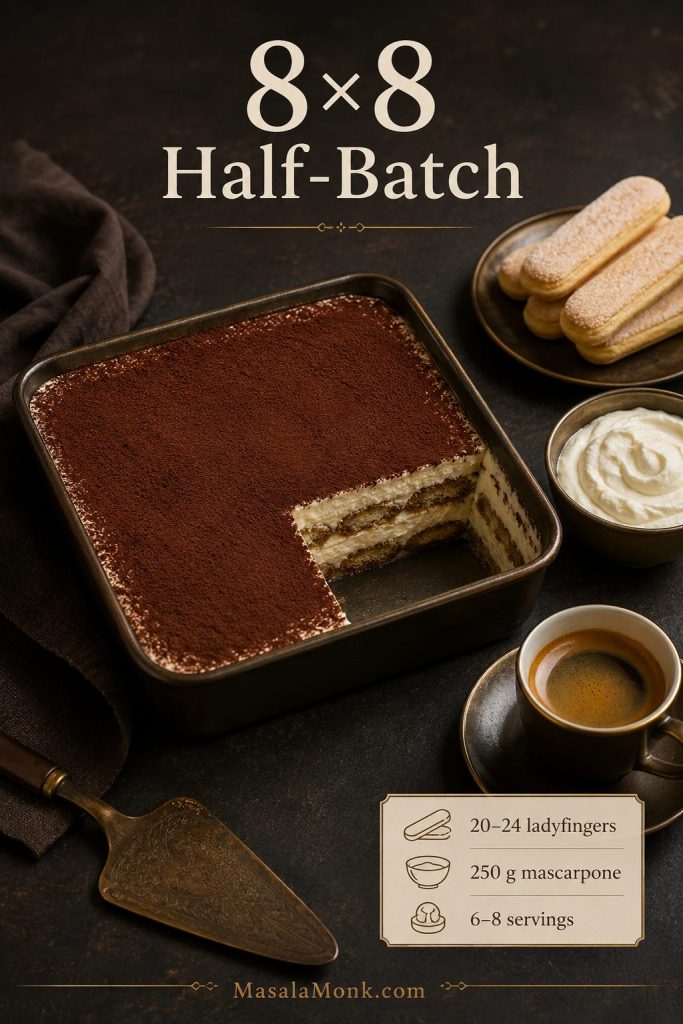
For an 8×8-inch / 20 cm dish, use 20–24 ladyfingers, 250 g mascarpone, 2 egg yolks, 50–60 g sugar, 180 ml / ¾ cup heavy cream, 180 ml / ¾ cup strong coffee, 15–22 ml / 1–1½ tablespoons optional alcohol, and cocoa as needed.
The 8×8 half-batch keeps the same tiramisu structure in a smaller dish, which is useful when you want fewer servings.
Skip the alcohol and use strong coffee only. Add 1 teaspoon vanilla to the mascarpone cream for a rounder flavor.
More Traditional No-Cream Option
For a lighter, more traditional-style version, replace the 360 ml / 1½ cups heavy cream with 4 large pasteurized egg whites. Whip the egg whites to stiff but glossy peaks, then fold them gently into the mascarpone-yolk mixture. Use pasteurized eggs because the whites are not cooked.
Storage
Keep tiramisu covered and refrigerated. It is best within 2–3 days. Do not leave it at room temperature for more than 2 hours. Freeze only if needed, preferably before the final cocoa dusting.
This is the kind of dessert that rewards patience. It looks simple when it goes into the fridge, then comes out the next day with softer layers, deeper coffee flavor, and a cleaner slice. That first lifted piece may never be the neatest, but once the pan opens up, the layers show beautifully.
Raw Eggs, Cooked Eggs, or No Eggs?
This is one of the most important decisions in tiramisu. Raw eggs are traditional in many versions, but not every guest is comfortable with them. Pregnant people, young children, older adults, and anyone with a weakened immune system should be especially careful with raw or undercooked eggs.
The cooked-yolk method gives the filling richness without making fully raw yolks the default. The yolks and sugar are whisked over gentle heat into a simple zabaglione-style base until pale, thick, and ribbony.
While you whisk, keep the heat gentle. If the bowl gets too hot or the mixture starts steaming heavily, lift it off the pan for a few seconds. That way, the yolks thicken into a glossy ribbon instead of scrambling into bits.
If you prefer the more traditional raw-egg method, use pasteurized eggs. To avoid eggs completely, use an eggless tiramisu method rather than simply leaving the eggs out of this recipe, because the cream structure will change.
Choose the egg method around your kitchen needs: cooked yolks for stability, pasteurized eggs for a classic path, or eggless cream for no-egg needs.
Which Egg Method Should You Use?
Method
Egg-safety note
Texture
Best use
Raw yolks and raw whites
Use pasteurized eggs
Light and classic
Traditional-style tiramisu
Cooked yolks + whipped cream
Higher confidence if yolks are heated properly
Creamy and stable
Main recipe
Cooked yolks + pasteurized egg whites
Use pasteurized whites because they are not cooked
Lighter and more traditional
No-cream variation
No eggs
No raw eggs, but the cream structure changes
Creamier, less classic
Eggless tiramisu
Important egg note
If you serve tiramisu made with raw or lightly cooked eggs, use pasteurized eggs or pasteurized egg products. That is especially important when serving higher-risk guests.
Classic vs Easy Tiramisu: Which Method Should You Use?
The biggest difference between classic Italian tiramisu and many easy versions is the cream layer. Traditionally, tiramisu relies on mascarpone, eggs, sugar, coffee, ladyfingers, and cocoa. Easier modern versions often use whipped cream for stability or skip eggs completely.
If you are looking for the strictest traditional version, use mascarpone, eggs, sugar, coffee, savoiardi, and cocoa without heavy cream. The version here keeps that flavor structure, but uses whipped cream for a more stable filling that many home cooks find easier to serve.
Both approaches have a place. A traditional egg-white version gives a lighter cream, while the cooked-yolk and whipped-cream method is more predictable when you want neat slices for guests.
Style
Uses
Best for
Tradeoff
Traditional raw/pasteurized egg tiramisu
Mascarpone, yolks, whipped whites
Classic lightness
Raw egg concern unless pasteurized eggs are used
Cooked-yolk modern classic
Mascarpone, cooked yolks, whipped cream
Reliable home tiramisu
Modern, stable, and guest-friendly
Easy no-egg tiramisu
Mascarpone and whipped cream
Speed and no raw eggs
Creamier and simpler, but less traditional
Eggless tiramisu
Cream, mascarpone, or substitutes
No-egg dietary needs
Needs its own method
Classic tiramisu leans lighter, while the cooked-yolk version gives more predictable slices for guests and make-ahead serving.
Best Ladyfingers for Tiramisu
The best ladyfingers for tiramisu are firm, dry savoiardi. They are crisp enough to absorb coffee without falling apart immediately, then they soften during the fridge rest.
Firm savoiardi are the safest first choice because they can take a quick coffee dip without falling apart before the tiramisu sets.
Soft cake-style ladyfingers are more delicate. They can still work, but you should barely touch them to the coffee rather than giving them a full dip. If you use sponge cake instead of ladyfingers, brush it with coffee rather than dunking it.
The Ladyfinger Dip Test
After dipping, a ladyfinger should feel damp on the outside but still firm enough to lift without bending. If it starts sagging before it reaches the dish, it has absorbed too much coffee. If it still feels completely dry and chalky, the dip was too shallow.
A good rule is one second per side for firm savoiardi. For softer sponge fingers, touch them to the coffee and lift immediately. For sponge cake, do not dip at all; brush the coffee over the surface instead.
Do not worry if the first one feels awkward; after two or three ladyfingers, the rhythm becomes obvious.
Finally, remember the simplest rule: dip, do not soak. Each ladyfinger should touch the cooled coffee briefly and come out before it softens in your hand.
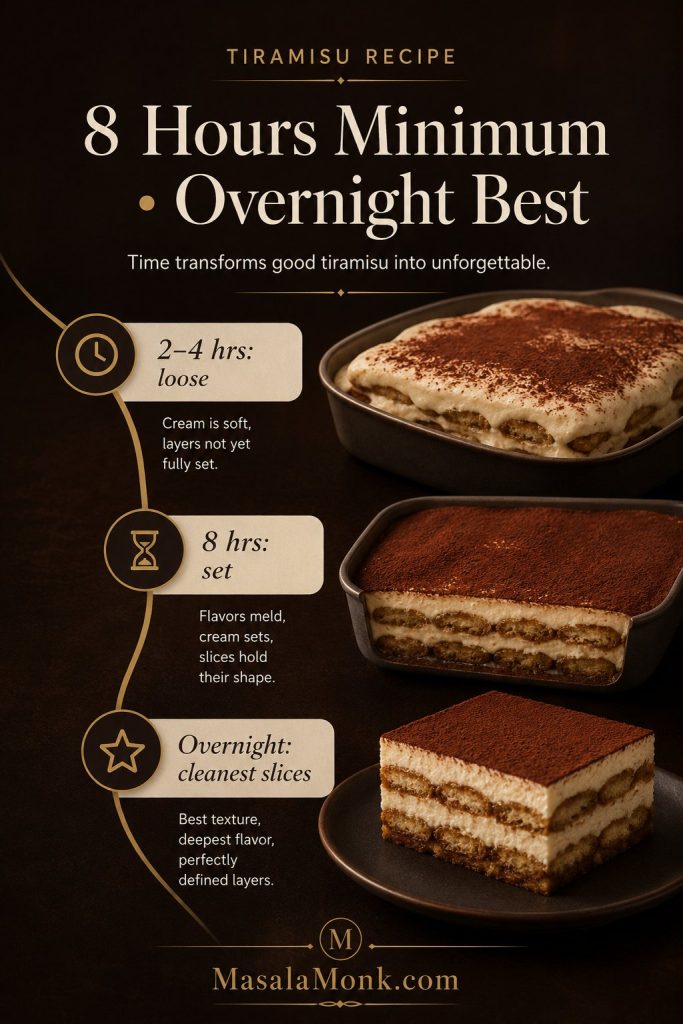
Because tiramisu needs time, a short chill may taste fine but rarely gives the same soft, sliceable texture. For the best result, make it the day before serving.
You can serve tiramisu the same day if it has at least 8 hours to chill, but it is noticeably better the next day. The coffee flavor settles, the ladyfingers soften evenly, and the cream cuts more cleanly.
This is why tiramisu is such a good hosting dessert: you are not rushing around while people are at the table. The hard work is already done, and all that is left is cocoa, a cold knife, and the first clean slice.
Chill time
Result
2–4 hours
Edible, but often loose or uneven
6 hours
Better set, but not always ideal
8 hours
Reliable minimum for this recipe
Overnight
Best flavor and cleanest texture
2–3 days
Still good if covered, but softer
The fridge turns separate layers into one dessert; therefore, overnight chilling gives tiramisu its cleanest texture and deeper coffee flavor.
That same patience matters in other make-ahead desserts too. MasalaMonk’s no bake mango cheesecake recipe is another good example, especially because fruit can make a chilled filling softer if the texture is not controlled.
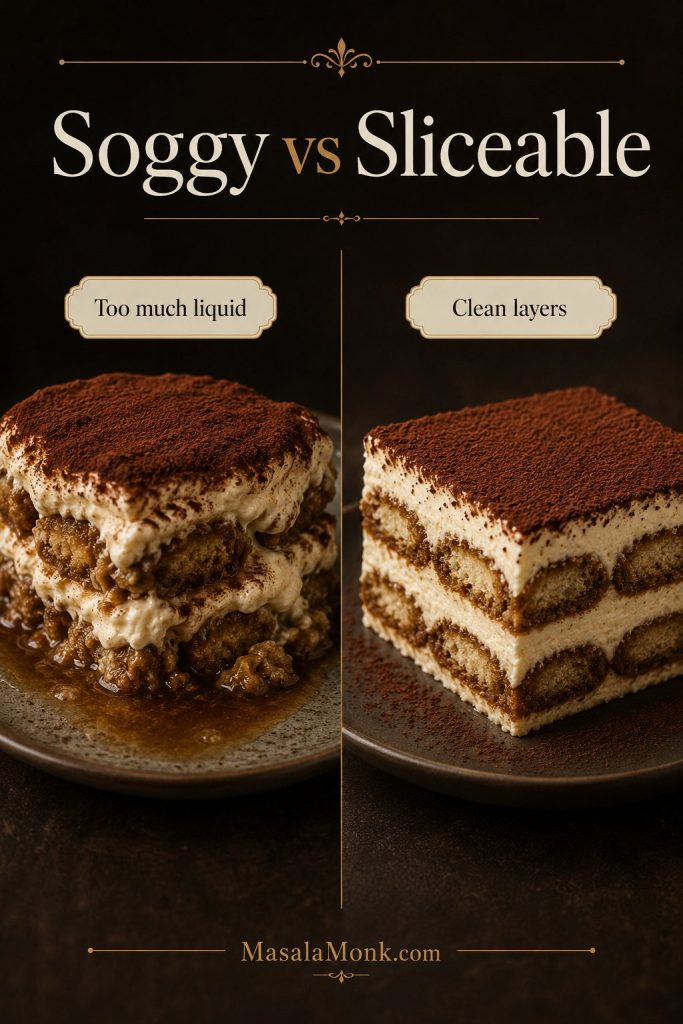
How to Keep Tiramisu from Getting Soggy
In most cases, soggy tiramisu comes from too much liquid, weak structure, or not enough chill time. Fortunately, the fix starts before the dessert goes into the fridge.
Soft ladyfingers are not the problem; wet ladyfingers are. A good tiramisu should have tender layers after chilling, but the bottom of the pan should not be swimming in coffee. If you see liquid pooling, the ladyfingers were soaked too long or too much coffee was added to the dish.
Soggy tiramisu usually comes from too much liquid; instead, aim for tender coffee-soaked layers that still hold their shape.
How to Prevent Soggy Tiramisu
Choose firm dry savoiardi instead of soft cake-style fingers.
Cool the coffee completely before dipping.
Dip one ladyfinger at a time for about one second per side, then move it straight into the dish.
Leave any extra coffee behind instead of adding it to the pan.
Keep the mascarpone thick, cold, and smooth.
Whip the cream to medium-stiff peaks.
Chill the tiramisu for at least 8 hours.
Soggy tiramisu is usually a liquid-control problem, so the safest path is dry savoiardi, cooled coffee, a fast dip, and patience.
If you love a wetter tiramisu, you can dip slightly longer, but be careful. A few extra seconds can turn firm ladyfingers into a soft pudding layer.
Alcohol, Coffee, and Cocoa: How to Balance the Flavor
Tiramisu should taste like cream, coffee, cocoa, and a little bitterness. It should not taste like plain whipped cream, wet cake, or a glass of liqueur.
The best version should not taste like sugar first. It should open with cold cream, move into coffee, and finish with enough cocoa bitterness to make the next bite feel tempting.
A balanced tiramisu should taste creamy first, then coffee-rich, and finally just bitter enough from cocoa to make the next bite tempting.
Does Tiramisu Need Alcohol?
No. Alcohol is optional. Marsala, dark rum, brandy, coffee liqueur, amaretto, or Grand Marnier can add aroma and depth, but the dessert works beautifully with coffee only.
For a family-friendly tiramisu, skip the alcohol and add 1 teaspoon vanilla to the mascarpone cream. You can also stir a teaspoon of sugar into the coffee if it tastes too bitter.
Flavor goal
What to use
Classic and clean
Strong coffee only
Warm and traditional
Marsala or dark rum
Coffee-shop style
Coffee liqueur
Nutty
Amaretto or Frangelico
Brighter and citrusy
Grand Marnier or orange liqueur
Family-friendly
No alcohol, plus vanilla in the cream
What Coffee Works Best?
Espresso is ideal, but moka coffee, bold brewed coffee, or strong instant espresso can also work. The coffee should taste a little stronger than something you would casually drink, because the mascarpone cream softens its bitterness.
Avoid weak coffee. It makes tiramisu taste flat and sweet instead of balanced.
Can You Make Tiramisu Without Coffee?
You can, but it becomes a tiramisu-style dessert rather than classic tiramisu. For a no-coffee version, use hot chocolate, matcha, chai, or a fruit syrup as the soak. Keep the liquid strong and not too sweet, and dip even more carefully because many non-coffee soaks are thinner or sweeter than espresso.
When to Add Cocoa Powder
Dust cocoa just before serving if you want a clean, powdery finish. Dust it earlier if you prefer a darker, hydrated cocoa top. Both are acceptable, but the just-before-serving version looks fresher.
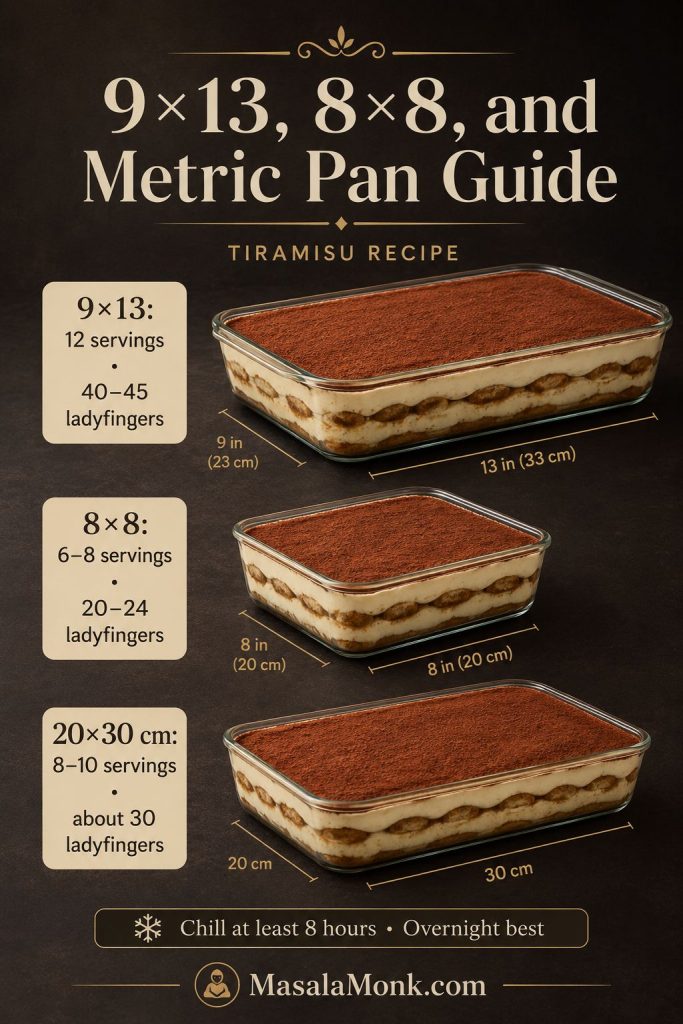
Tiramisu Pan Sizes: 9×13, 8×8, and Metric Baking Dishes
One reason tiramisu recipes feel confusing is that different recipes use different dish sizes. A small 8×8 tiramisu and a large 9×13 tiramisu cannot use the same number of ladyfingers or the same amount of mascarpone cream.
Dish size
Serves
Ladyfingers
Mascarpone
Coffee
Best use
9×13 inch / 33×23 cm
12
40–45
500 g
300–360 ml
Full recipe, parties, holidays
8×8 inch / 20 cm
6–8
20–24
250 g
180 ml
Small batch
20×30 cm / about 8×12 inch
8–10
About 30
500 g
300 ml
Medium, slightly taller tiramisu
Pan size affects the number of ladyfingers, cream depth, and serving yield, so choose the dish before dipping and layering.
A 9×13-inch dish is the easiest default here because it gives you a generous dessert for guests and enough room for two clean layers. Use the half-batch note in the recipe card for an 8×8 pan.
A dish that is slightly larger or smaller is workable. Build two even layers, keep the coffee controlled, and prioritize balance over forcing every last drop into the pan.
Tiramisu Without Mascarpone
Mascarpone is best for classic tiramisu. It is rich, lightly sweet, and less tangy than cream cheese. If you replace it, the dessert can still be good, but it will not taste exactly the same.
When mascarpone is missing, you can still make a good layered coffee dessert, but it is better to be honest about the result: it will be tiramisu-style, not the same classic texture.
As a practical backup, cream cheese plus cream is the closest option. For something lighter, Greek yogurt works better as a healthy variation. Very smooth ricotta can give a more Italian-adjacent dairy flavor, but it will not create the same silky cream.
Mascarpone gives tiramisu its classic soft richness; meanwhile, cream cheese, ricotta, and Greek yogurt can work only as texture-changing substitutes.
If the lighter dairy angle is what interests you most, MasalaMonk’s cottage cheese cheesecake recipe is a better fit than forcing cottage cheese or yogurt into classic tiramisu.
Substitute
What changes
Best use
Cream cheese
Tangier, denser, less classic
Emergency substitute
Ricotta
Lighter but can be grainy unless blended smooth
Ricotta-style tiramisu
Greek yogurt
Tangy, lighter, more “healthy dessert” than classic tiramisu
Healthy tiramisu variation
Cream cheese + cream
Closer body, still tangier
Better than plain cream cheese
Homemade mascarpone
Closest replacement if made well
Best planned substitute
How to Fix Runny or Soggy Tiramisu
Most tiramisu problems come from the same few places: thin mascarpone, too much coffee, underwhipped cream, overmixed filling, or not enough time in the fridge.
Although some tiramisu problems can be improved after assembly, they cannot always be fully reversed. For example, a runny tiramisu can often be chilled longer and served in softer scoops or cups, but it will not magically become a firm slice if the cream was too loose or the ladyfingers were oversoaked. The real fix is usually in the next batch.
Most tiramisu problems trace back to cream texture, coffee control, mixing, or chill time, so troubleshooting starts with the structure of the layers.
If the issue is wet layers, revisit the dip test. If the cream is loose or grainy, the temperature cues are usually the better place to start.
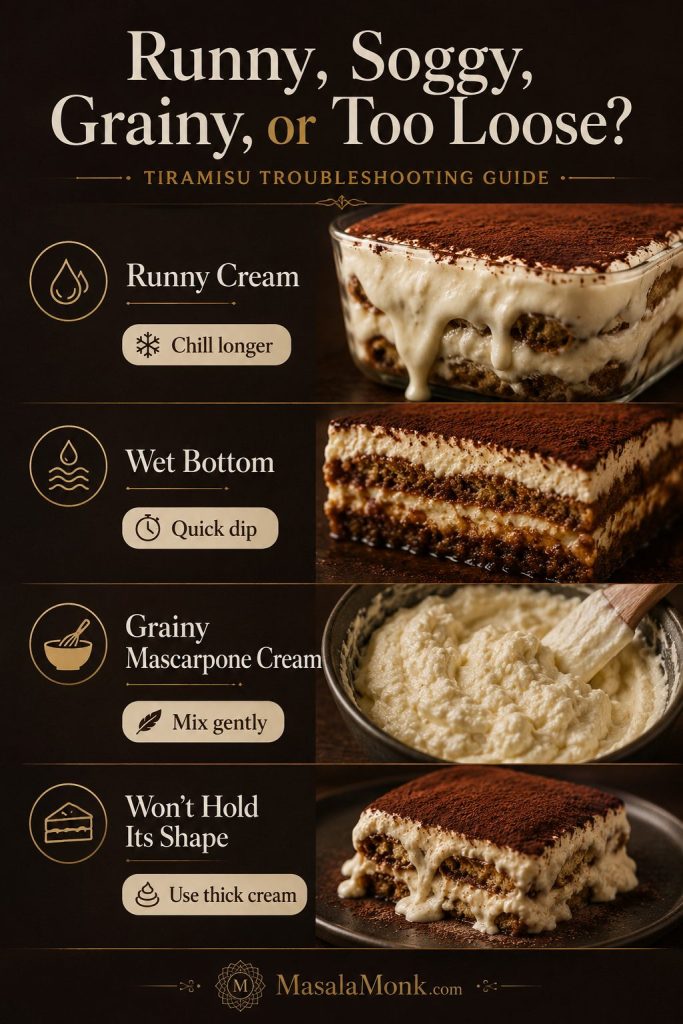
Tiramisu Troubleshooting Guide
Problem
Likely cause
Fix now
Fix next time
Runny cream
Loose mascarpone, underwhipped cream, or warm yolk mixture
Chill longer; serve in cups if it still will not slice
Use thick mascarpone and medium-stiff whipped cream
Grainy cream
Overmixed mascarpone or overheated egg mixture
Do not try to beat it smooth after assembly
Mix mascarpone briefly and use gentle heat
Wet bottom
Ladyfingers soaked too long or extra coffee added
Chill well and serve as a softer spoon dessert
Use a 1-second dip per side and never pour coffee into the pan
Dry ladyfingers
Dip was too quick or chill time was too short
Chill longer
Dip slightly deeper next time
Too bitter
Coffee too harsh or too much cocoa
Serve with lightly sweetened cream or reduce cocoa on top
Use smoother coffee and a lighter cocoa dusting
Too sweet
Too much sugar or sweet liqueur
Add a heavier cocoa dusting and serve with unsweetened coffee
Use 100 g sugar instead of 120 g
Won’t slice cleanly
Under-chilled or too much liquid
Chill longer
Rest overnight and reduce soaking
Flat flavor
Weak coffee
Serve with espresso
Use stronger coffee next time
Grainy mascarpone cream
Overmixed mascarpone, overheated yolks, or temperature shock
Chill and serve gently; do not keep beating it
Mix mascarpone briefly and fold only after the yolks cool
Most tiramisu mistakes are not dramatic failures. They usually become softer, spoonable desserts instead of clean slices. That is still delicious, but the next batch will be better once you know which detail caused the problem.
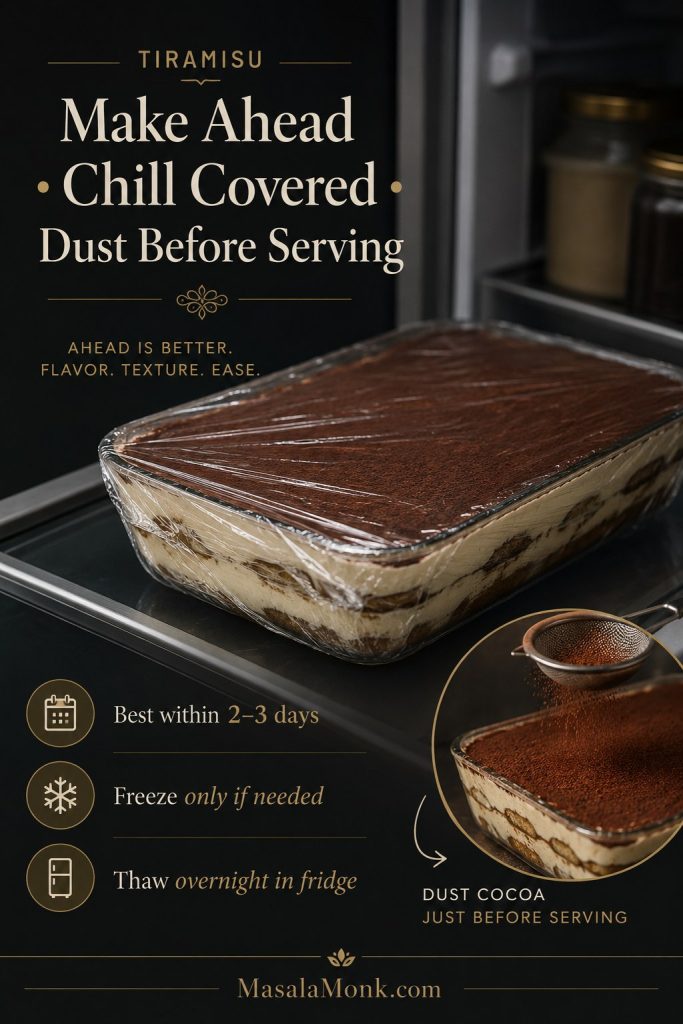
Make Ahead, Storage, and Freezing
Tiramisu is one of the best make-ahead desserts because it improves as it rests. The ladyfingers soften, the cream sets, and the coffee flavor becomes more even.
Best make-ahead timing: assemble the tiramisu the day before serving.
Fridge storage: keep it covered and refrigerated.
Best quality: eat within 2–3 days.
Serving: keep chilled until close to serving time.
Freezing: freeze only if needed; texture may soften after thawing.
Freezing tip: freeze before the final cocoa dusting, then dust after thawing.
Make tiramisu ahead for better texture, but keep it covered, cold, and cocoa-free until serving for the cleanest finish.
Do not leave tiramisu at room temperature for more than 2 hours. In hot weather or warm rooms, keep the serving window shorter and return leftovers to the refrigerator promptly.
After freezing, thaw tiramisu overnight in the refrigerator and dust with fresh cocoa after thawing. Do not thaw it at room temperature.
For the more traditional version with raw pasteurized egg whites, be stricter with storage. Keep it chilled the entire time and serve it within 24–48 hours for best quality.
For another chilled dessert that depends on layer structure, MasalaMonk’s banoffee pie recipe is a no-bake style dessert where the base, cream, and filling need to hold together before serving.
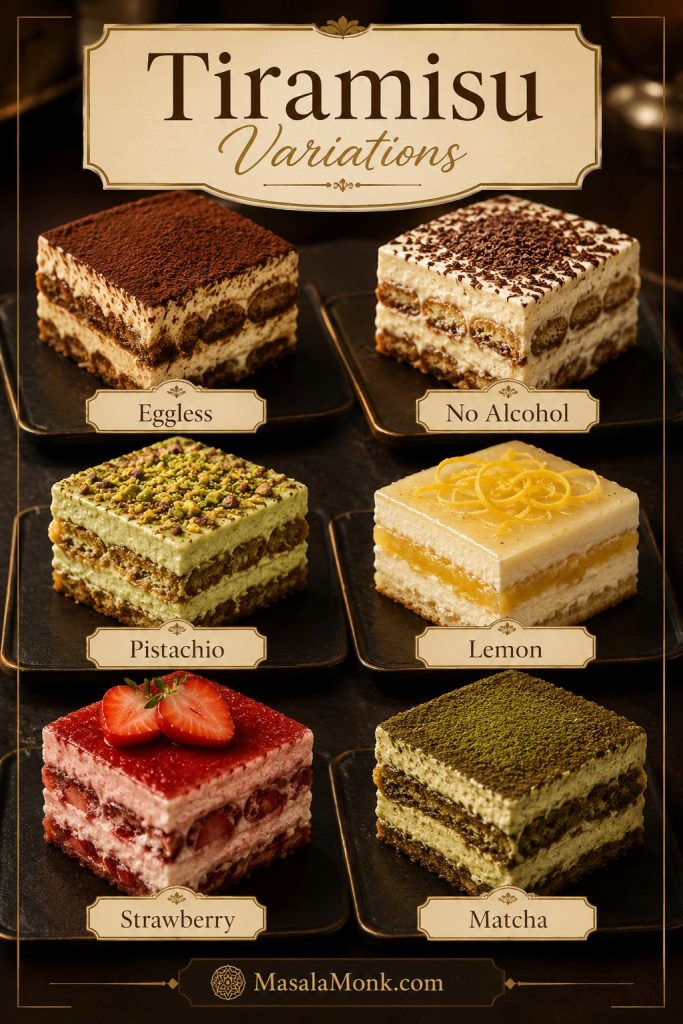
Tiramisu Variations
Once you understand the basic structure, tiramisu is easy to adapt. The trick is to keep the balance: a creamy layer, a soaked base, a bitter or bright finish, and enough chill time to bring everything together.
If you are changing the flavor, change only one major thing at a time: the soak, the cream, or the topping. Changing all three can make the dessert stop feeling like tiramisu.
Before changing flavors, it helps to understand the cream, coffee, and cocoa balance so the variation still tastes like tiramisu.
For the best tiramisu variations, change only one major element at a time so the dessert still tastes layered, creamy, and balanced.
Eggless Tiramisu
Use mascarpone and whipped cream without eggs. This is the best direction for readers who want no raw eggs and no cooked yolks at all, but the dessert will taste creamier and less classic than the cooked-yolk version.
No-Alcohol Tiramisu
Skip the rum or liqueur and use strong coffee only. Add vanilla to the cream if you want a rounder flavor.
For another family-friendly layered dessert, MasalaMonk’s no-bake banana pudding has a softer vanilla-banana profile built around cookies, cream, fruit, and chill time.
Pistachio Tiramisu
For pistachio tiramisu, fold a small amount of pistachio cream into the mascarpone layer and keep the coffee dip brief. Pistachio paste is rich, so start modestly and taste before adding more. Finish with chopped pistachios for texture.
Lemon or Limoncello Tiramisu
Use lemon syrup, lemon curd, or limoncello instead of a coffee-heavy profile. Keep the soak controlled so the dessert does not turn watery, and balance the lemon with enough mascarpone cream so it still feels lush.
Strawberry Tiramisu
Use a thick strawberry sauce or roasted strawberry layer rather than very juicy fresh berries. Fresh strawberries release liquid as they sit, so the fruit layer needs to be controlled if you want clean slices.
Matcha Tiramisu
Replace the coffee dip with a matcha soak and dust the top with matcha or a cocoa-matcha blend. Keep the matcha balanced so it does not taste bitter.
Cake-Style Tiramisu
A cake-style version is usually built with cake layers, mascarpone filling, coffee syrup, and cocoa instead of dipped savoiardi.
FAQs
Does tiramisu have raw eggs?
Traditional tiramisu often uses raw eggs, but this version uses cooked egg yolks for a more comfortable home method. If you make a raw-egg version, use pasteurized eggs.
What is a safer way to make tiramisu at home?
Use cooked yolks or pasteurized eggs, keep the dessert refrigerated, and do not leave it at room temperature for more than 2 hours. The cooked-yolk method gives you a good balance of classic flavor, texture, and home-kitchen confidence.
How long should tiramisu chill before serving?
Chill tiramisu for at least 8 hours. Overnight is best because the ladyfingers soften evenly and the mascarpone cream sets enough to slice.
Can I make tiramisu the same day?
Yes, if you can give it at least 8 hours in the refrigerator. However, overnight tiramisu usually tastes better and slices more cleanly because the coffee flavor settles and the layers soften evenly.
Why did my tiramisu turn runny?
Runny tiramisu usually comes from watery mascarpone, underwhipped cream, warm filling, oversoaked ladyfingers, or too little chill time. Chill it longer if it is already assembled, and use thicker mascarpone next time.
How do I stop ladyfingers from getting soggy?
Use firm dry savoiardi, cool the coffee completely, and dip each ladyfinger for about one second per side. Keep the dip brief and leave extra coffee behind instead of pouring it into the dish.
Why is my mascarpone cream grainy?
Grainy mascarpone cream usually comes from overmixing mascarpone, overheating the yolk mixture, or folding ingredients together at very different temperatures. Mix mascarpone briefly, cool the yolks until warm rather than hot, and fold gently.
Can I use instant coffee for tiramisu?
Yes. Instant espresso is better than weak brewed coffee. Make it strong, let it cool completely, and taste it before dipping the ladyfingers.
Can kids eat tiramisu?
For a kid-friendly tiramisu, skip the alcohol, use the cooked-yolk version or pasteurized eggs, and consider decaf coffee or a lighter coffee dip. Keep in mind that classic tiramisu still has a coffee flavor.
Does tiramisu need alcohol?
No. Alcohol is optional. Coffee-only tiramisu is valid and works well for a family-friendly version.
What alcohol is best in tiramisu?
Dark rum, Marsala, brandy, coffee liqueur, amaretto, and Grand Marnier can all work. Use only a small amount so the alcohol supports the coffee rather than overpowering it.
What can replace mascarpone in tiramisu?
Cream cheese, ricotta, or Greek yogurt can be used in tiramisu-style desserts, but they change the flavor and texture. Mascarpone is still the best choice for classic tiramisu.
Are ladyfingers and savoiardi the same thing?
Savoiardi are Italian ladyfingers. They are usually firm and dry, which makes them ideal for tiramisu. Some soft sponge-style ladyfingers are more delicate and need a much quicker dip.
Should cocoa powder go on before or after chilling?
Dust cocoa just before serving for the cleanest finish. If you dust before chilling, the cocoa will darken and hydrate into the top layer.
How long does tiramisu last in the fridge?
Tiramisu is best within 2–3 days when covered and refrigerated. It becomes softer as it sits. If you use raw pasteurized egg whites in the traditional option, serve it within 24–48 hours for best quality.
Is tiramisu better the next day?
Yes. Tiramisu is usually better the next day because the layers have time to soften, set, and absorb the coffee flavor evenly.
In Indian tradition, Coconut ladoos or Nariyal ladoos are offered to God or deities during Hindu festivals. Eating homemade sweets that are traditionally prepared, especially during festivals, is a way to bring families together. Sweets prepared at home in the traditional way are wholesome and nourishing that are not going to affect your health or weight.
Unlike commercial sweets, homemade sweets give you a complete control over what you are going to add. Celebrity nutritionist Rujuta Diwekar is of the belief that, if you go completely off sugar, then it can increase cravings and make you switch to artificial sweeteners-which come with their share of side effects and health risks.
Thus you can have homemade sweets prepared with natural and quality ingredients, used in right quantity. Portion control and moderation is the key to everything.
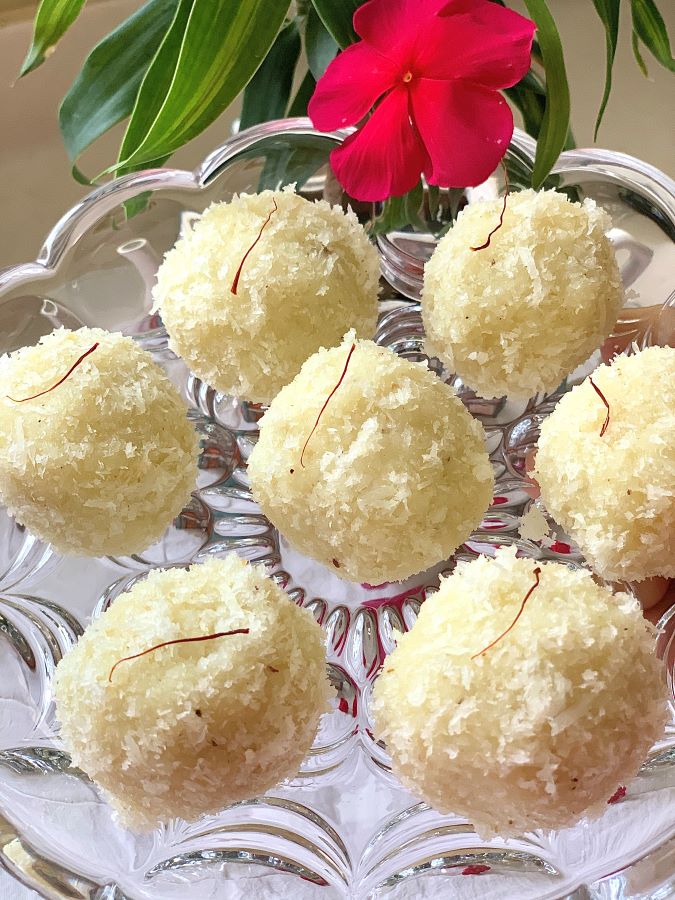
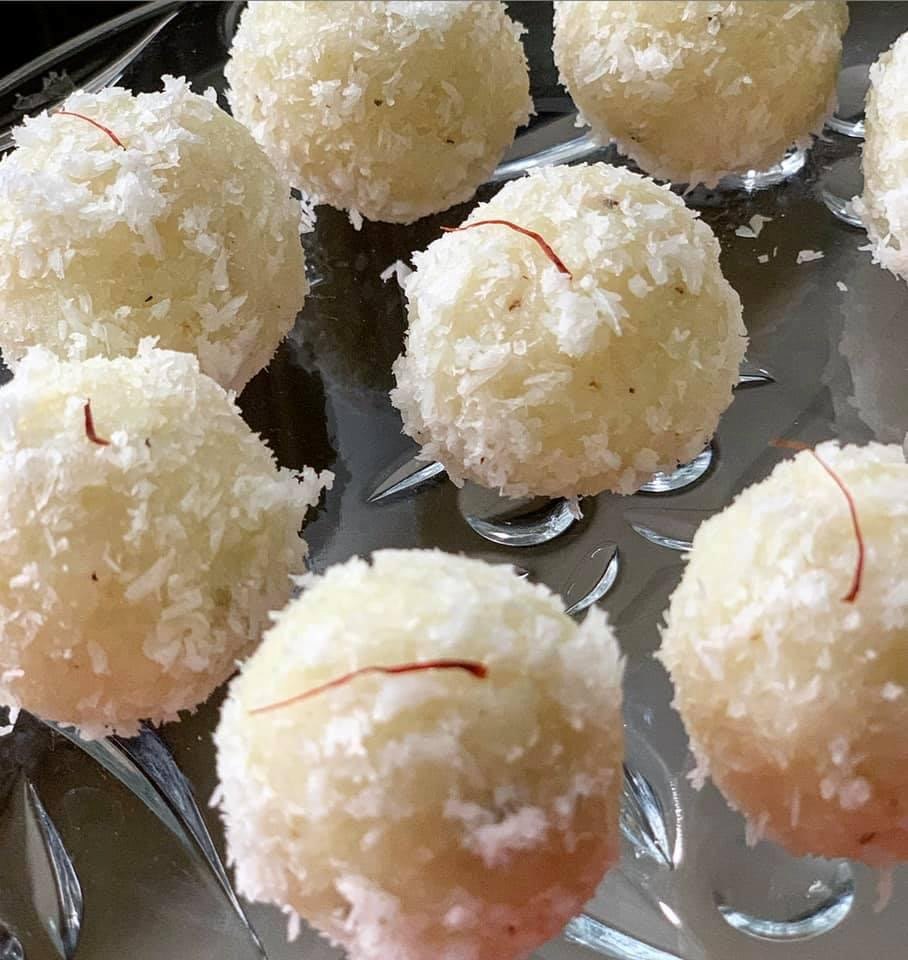
Coconut ladoos are traditional sweet balls made primarily with coconut and a sweetener like sugar and jaggery. They are flavoured with cardamom. Some prefer adding nuts like cashews and almonds to it as well. These are traditionally made with milk, ghee and fresh coconut. However, there are other variations that use condensed milk or milk powder to reduce the cooking time and fresh coconut is replaced with store-bought desiccated coconut.
In this recipe, we will be making traditional coconut ladoos with fresh coconut, unprocessed sugar, milk and ghee.
They come out absolutely delicious, juicy and soft and they are so easy to make. These ladoos taste best with freshly prepared desiccated coconut at home instead of store-bought desiccated coconut. Preparing desiccated coconut at home is super easy and will hardly take you 10 minutes to prepare it.
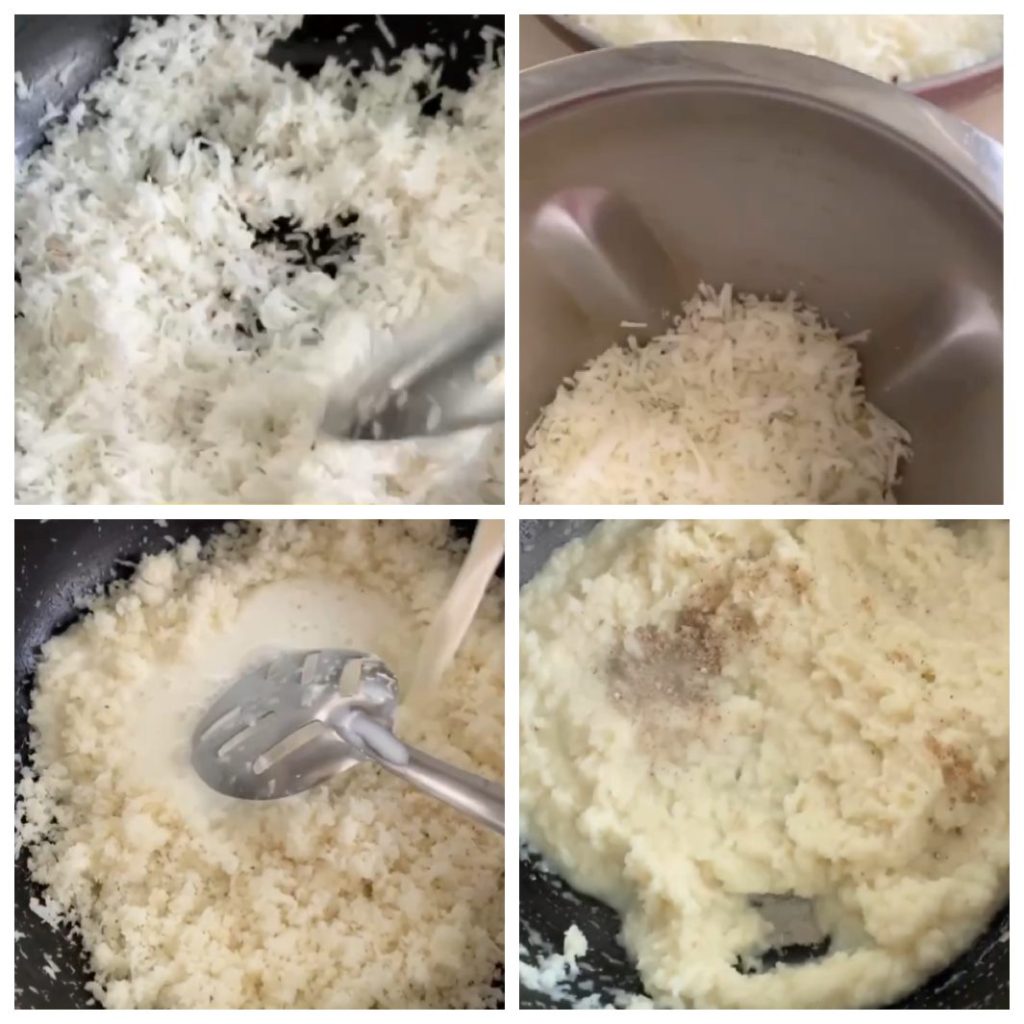
Heat a heavy bottom wok. Put ghee and coconut in it and roast for a minute. Keep stirring continuously on lowest flame.
Now add milk and sugar. Mix well. The mixture at this point will be watery. Keep stirring and cook on lowest flame till milk completely evaporates. It’ll take roughly 25 minutes.
Once the mixture thickens and gets a crumbly texture, add cardamom powder and chopped nuts if using. Mix well.
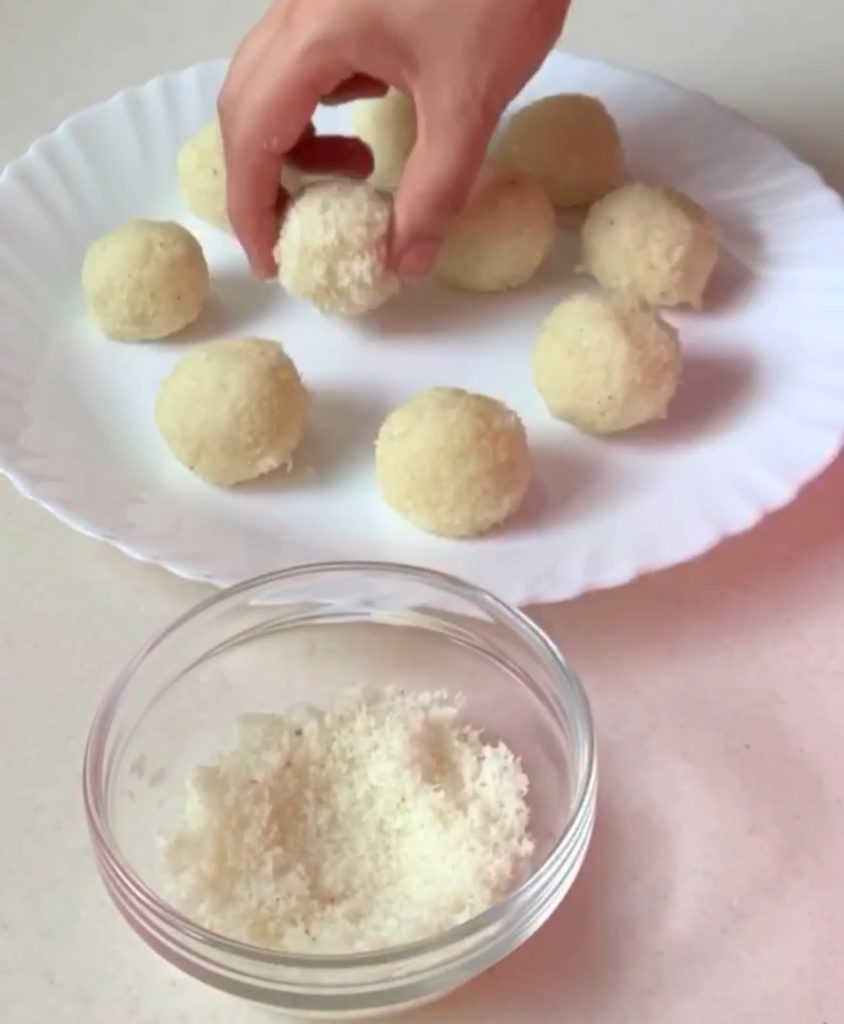
Allow it to cool for couple of minutes. Now shape them into small balls.
Put remaining desiccated coconut on a plate. Roll the laddoo over it till it coats well.
Garnish it with kesar strands.
Refrigerate it for atleast an hour or overnight to set.
How to make desiccated coconut at home with fresh coconut
Peel the brown husk from the coconut. Either grate or finely chop it and shred it in a blender. Heat a heavy bottom wok. Put the grated/shredded coconut in it and roast on lowest flame, stirring continuously till moisture from coconut evaporates. It’ll take you anywhere between 7 to 10 minutes.
It’s done when you will feel that it has really gone light while stirring and separates easily from each other.
Notes:
Sweetener: You can use a sweetener of your choice. If you can’t find raw unprocessed sugar, you can make this with jaggery as well.
Flavour: Traditionally cardamom powder is used to flavour coconut ladoos. However, if you don’t want to add it, you can skip it as well. In winter, you can flavour it be adding dry ginger powder or nutmeg.
Choosing Coconut: Though this recipe tastes best with fresh desiccated coconut but if you can’t find fresh coconut, you can use store-bought desiccated coconut. Make sure the desiccated coconut is raw and not steamed or frozen.
Vegan Version: For vegan version skip, ghee and milk and instead add coconut oil and coconut milk to this recipe.