Posted on 6 Comments

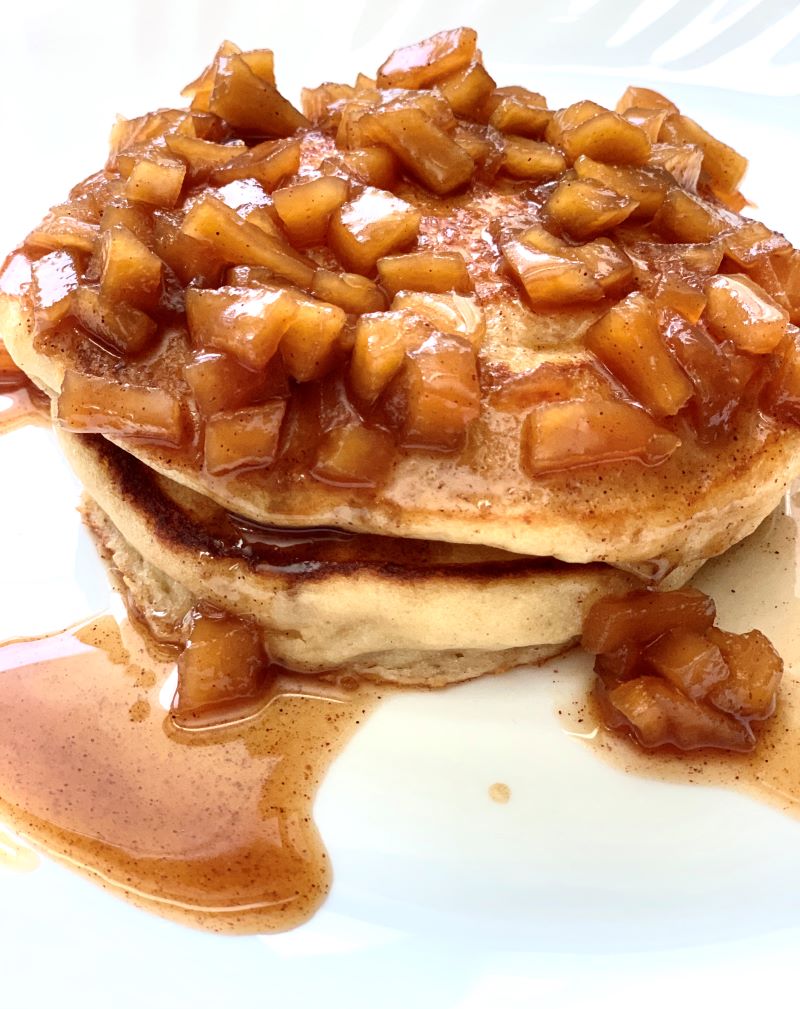
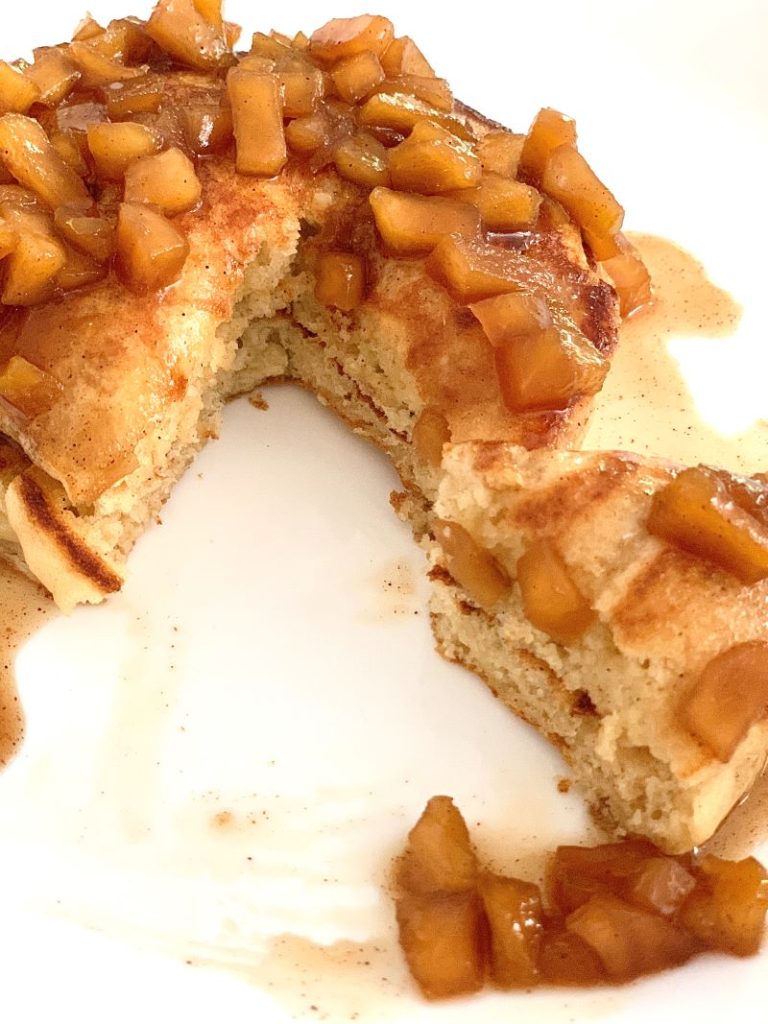
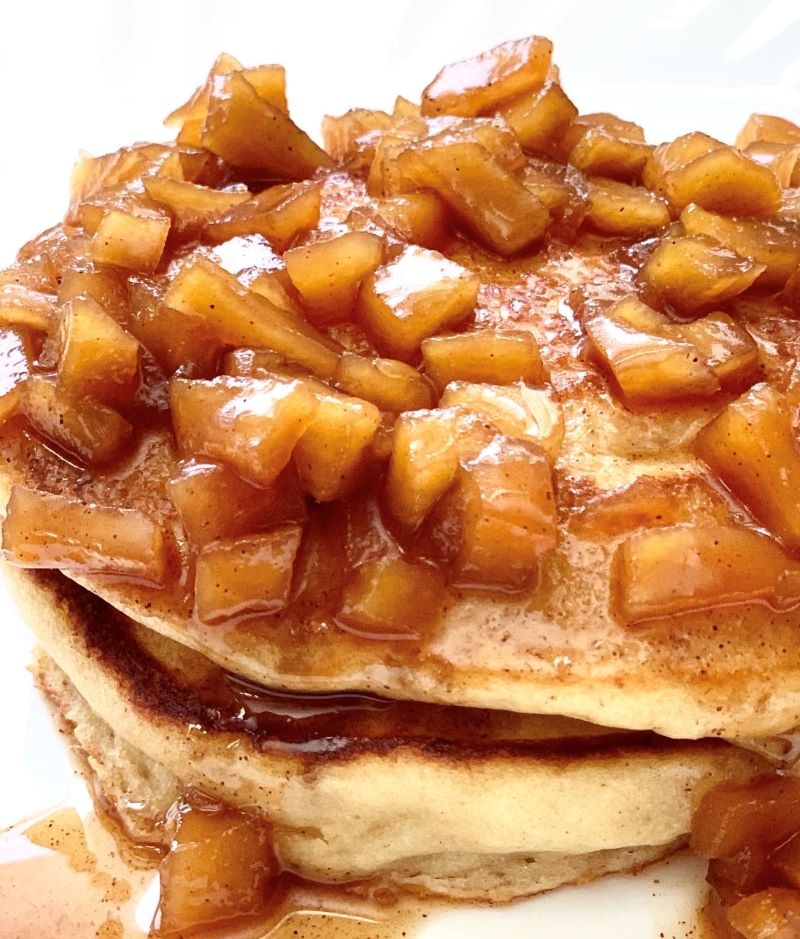
Fluffy Buttermilk Pancakes with Stewed Cinnamon Apples

I take breakfast very seriously. This is my favorite meal and I need a good start to the day. If you ask my family, what I specialize in, it would definitely be breakfast.

When it comes to pancakes, nothing beats Buttermilk Pancakes. Though classic American pancakes are made with milk but the secret ingredient to best, fluffy, moist & tender pancakes is buttermilk. Buttermilk when combined with baking soda and powder gives pancakes a nice lift making them fluffy and thick. Also, I love the slight tang it adds to the pancakes balancing the sweetness so well. 

These pancakes are good enough on their own but nothing compared to how wonderful they are when piled on gooey caramely stewed apples. This is what I call breakfast any time of the year! Mmmmm… time to dig in!

Recipe: makes approx 12 pancakes

Ingredients for pancakes: 

  • Flour: 2 cups (you can use All Purpose Flour, Wholewheat flour or a mix of both)
  • Buttermilk: 2 cups 
  • Eggs: 2 large, separated 
  • Vanilla extract: 1 tsp
  • Baking soda: 1 tsp
  • Baking powder: 1 tsp  
  • Oil for cooking
  • Salt: 1/4th tsp
  • Castor sugar: 2 tbsps
  • Unsalted Butter: 2 tbsps (melted and cooled)

For Apple Stew:

  • 2 large Apples (any apples will do)
  • 2 tbsps Unsalted Butter
  • 1/4th cup Brown Sugar or Jaggery powder
  • 1/2 tsp Cinnamon powder
  • 3 tbsps Maple Syrup
  • A pinch of Nutmeg
  • 1 cup Water

Instructions for Pancakes: 

  • In a large bowl sieve flour, baking powder, baking soda, cinnamon and salt. Mix all the dry ingredients. Set aside.
  • In a separate large bowl, add egg yolks & half the sugar. Whisk till sugar combines. Now add butter, buttermilk & vanilla extract. Mix till everything incorporates well.
  • Add dry ingredients to wet ingredients in batches gently mixing each time. The batter at this stage will be thick & lumpy. Set aside
  • Now add the remaining sugar to egg whites and whip them till you get soft peaks. Do not go for stiff peaks. Soft peak is what we are looking at.
  • Very gently combine egg whites to the rest of the batter in 2 batches. Cut and fold gently. Do not over mix the batter or the pancakes will be flat. Use a light hand while mixing. Few flour streaks in the batter are absolutely fine.
  • Heat a non-stick skillet or a cast iron pan on a medium to low heat. Brush it with any non-fragrant oil. Allow the skillet to preheat for 3 to 4 minutes before adding the batter.
  • Scoop 1/3rd cup of the pancake batter into the pan. Allow it to cook till edges begin to appear cooked and top sets with bubbles forming on top. Using a spatula, flip the pancake and continue to cook the other side for 2 more minutes or until pancake is golden brown.
  • Repeat until all the batter is used. Keeping brushing the pan between each batch of pancakes.

For Apple stew:

  • Finely chop apples. Heat a pan to a medium heat.
  • Add butter and allow it to melt. Tip in apples, brown sugar or jaggery powder (I used jaggery powder), maple syrup, cinnamon powder, nutmeg & water. Give it a good mix. Increase the heat and bring it to a boil.
  • Once boiled, lower the heat, cover and cook apples for 10 minutes or till they become tender & mushy. If you want a thicker stew, mix 1/2 tsp of cornflour in 2 tbsps of cold water & add when the apples are perfectly cooked. Cook for 1 more minute after adding the cornflour.
  • When your pancakes are ready, serve it with warm apple stew topping and enjoy that perfect cozy breakfast.

Notes:

  1. Make sure you don’t over mix the batter. We don’t want to lose that whole fluffiness factor.
  2. Measuring your pancakes out into the pan is the best way to ensure you get uniform size of pancakes and they will take the same time to cook.
  3. You can store the topping for 3-5 days in the refrigerator. The leftover topping can be used for oatmeal, served with Greek yogurt or vanilla ice cream, can be used to make apple muffins.
  4. If you don’t have buttermilk on hand, then you can substitute buttermilk with 2 cups of milk mixed with a tsp of apple cider vinegar and kept aside for 5 minutes or till milk starts showing signs of curdling.
  5. If you are using wholewheat flour for this recipe, you might have to increase the amount of buttermilk. I would suggest you to slowly add more buttermilk till you get a thick but runny batter consistency.
  6. If the apples you are using have soft or mealy texture, it may take less time to cook. In that case reduce the water to 1/2 a cup at first. In case you need to add more water, gradually add a little.
Posted on 3 Comments

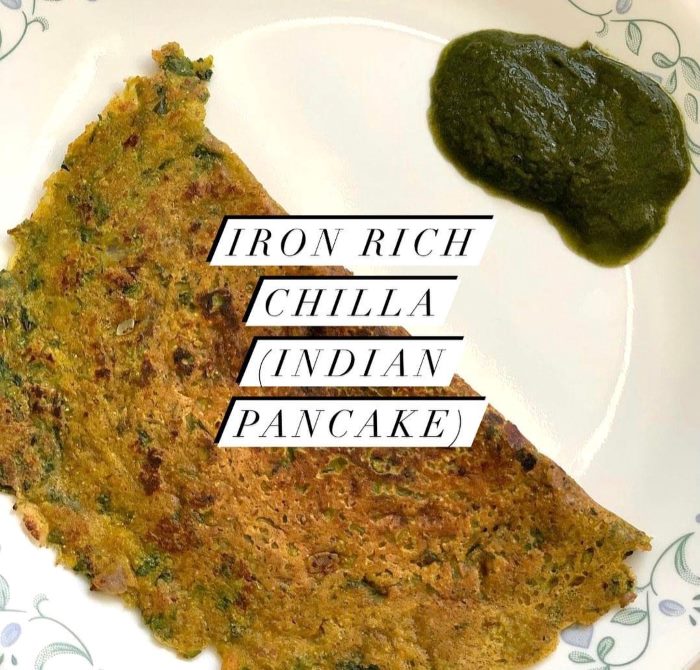
Healthy Iron Rich Pancake- Kid Friendly Recipe

Kids have limited appetite. Give your child the best nutrition in that little food that they eat. The biggest struggle for vegetarians or vegans is to fulfill their child’s iron needs. While balanced diet here is the key but we all know how balanced it gets with the children especially the ones who are picky eaters.

So, I am going to share with you a simple recipe which has a great balance of protein and iron.

We all make BESAN CHEELAS at home. Sharing with you a simple way wherein you can make the best out that one Cheela that your child eats. 😊 And trust me it comes out delicious and packed with flavours. Also, this makes a great lunch box recipe too.

This recipe requires no elaborate preparations, so don’t need to plan ahead either. Just stir together the ingredients to make a batter, pour it on a hot griddle & cook up a delicious healthy meal.

What is Cheela?

Cheela is a sweet or savory Indian Pancakes made using lentils, cereal or grain flour. They are often made without any leavening agents, so they are considered to be healthy.

What is Besan?

Besan is a Hindi word which means “gram flour”. It is a pulse flour made using channa dal or chickpea flour. So besan cheela is gram flour pancakes. These pancakes are Gluten Free, vegan and nutritious. Gram flour is a fabulous source of protein, iron, magnesium, potassium, vitamin B6. Just 100 grams of gram flour can give you 22 grams of easy to digest natural protein. You can make these pancakes with basic ingredients as well but when you add green leafy vegetables to it, it not only enhances the taste but also makes it wholesome and an amazing source of iron for your kids.

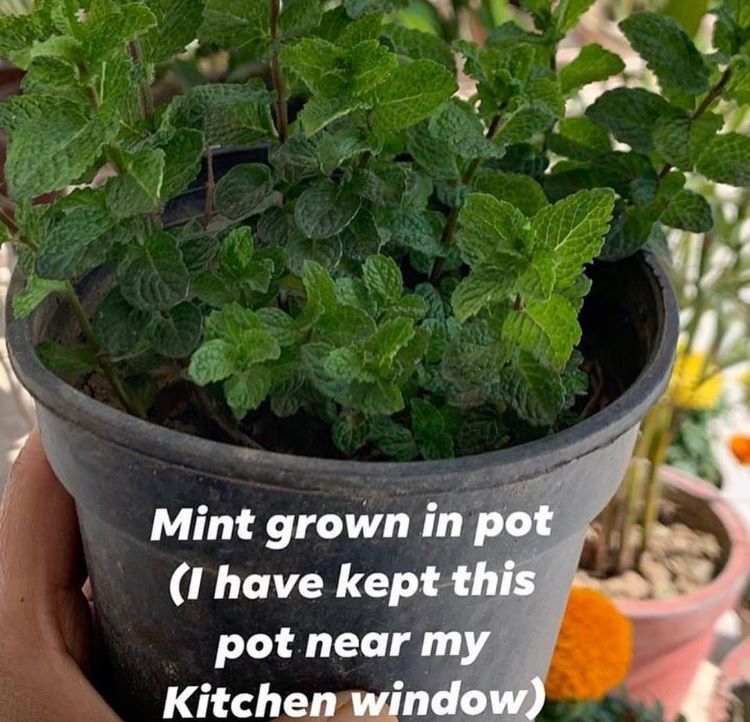
Also the vegetables I have added are all homegrown. If you don’t have enough space, grow them in small pots. It’s no rocket science. Just get a few pots or grow bags, potting soil and seeds from any nursery near your house. Engage your children while planting it. The satisfaction of eating your homegrown organic vegetables is unmatchable. Try it!

Ingredients

Prep time: 5 minsServing: makes 3 Pancakes
Cook time: 5 mins
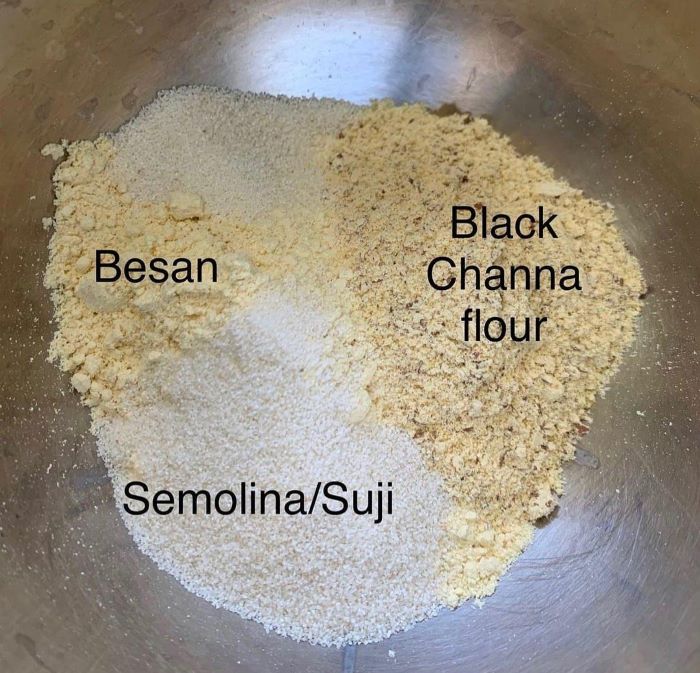
  • Besan/Chickpea flour: 1/2 cup
  • Sattu/Roasted Gram flour: 1/4th cup
  • Semolina/Suji: 1/4th cup
  • Cumin seeds/Jeera:  1/8th tsp
  • Bishop seeds/Ajwain: 1/8th tsp
  • Garam Masala: 1/4th tsp
  • Roasted Cumin powder: 1/4th tsp
  • Turmeric: 1/4th tsp
  • Salt & Black pepper to taste
  • Chat Masala to taste (optional)
  • Coriander powder: 1/2 tsp
  • Water as required 
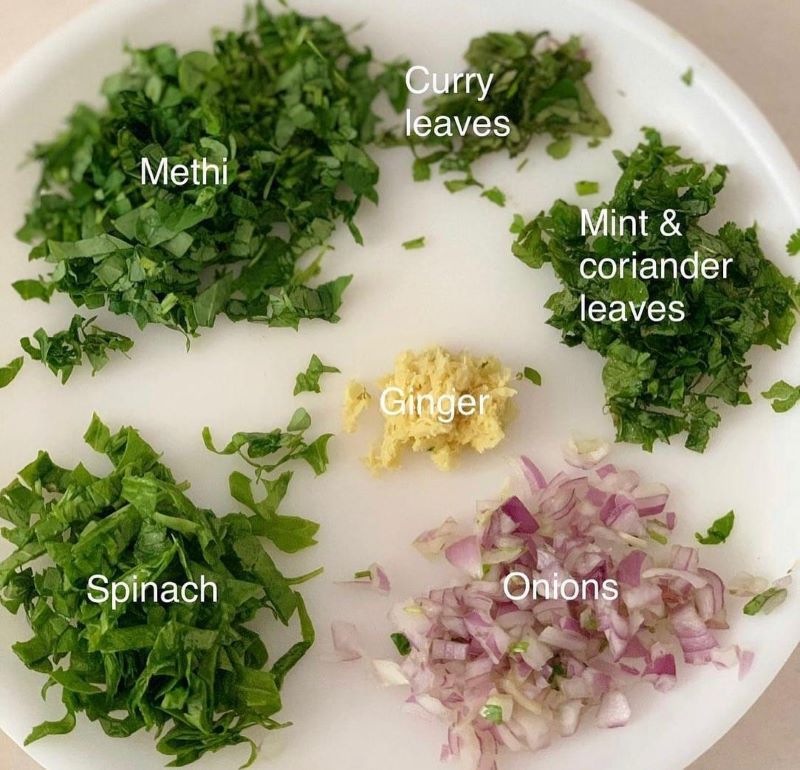
  • Chopped Methi (Fenugreek), Spinach, Radish leaves, Mint leaves, Curry leaves & Coriander leaves: 1 cup
  • Onion: 2 tbsp, finely chopped
  • Ginger: 2” long, grated
  • Ghee or Oil as required 

Method

1 Take Besan/Chickpeas flour, Sattu or Roasted Gram flour (great source of protein) and Semolina/Suji (for crispiness) in a bowl.

2. To this add turmeric, cumin seeds, ajwain/bishop seeds, garam masala, roasted cumin powder, black pepper, salt, chaat masala and coriander powder. Mix it well. Add enough water to make a thin but not a runny batter. Start with 1/4th cup water and the gradually add more as required. Continue whisking until the batter has a smooth, flowing consistency. There shouldn’t be any lumps, so make sure to break those up while mixing the batter.

Tip: Use a wire whisk to whisk the batter. This will ensure that your batter is lump free.

3. Now add chopped methi (fenugreek) leaves, spinach leaves, onion, grated ginger (fabulous food for digestion), curry leaves, coriander & mint leaves. Use the leaves that are in season. All the green leaves are a great source of iron and this is one of the best ways to incorporate this in your child’s and your diet.

4. Keep the batter aside for 10 minutes. Heat a cast iron tawa on a medium to low heat. I have made it on normal tawa in which we make rotis but if you can’t make it on tawa then you can use a non stick pan as well.

5. Brush the tawa with desi ghee or oil. Add generously to avoid dry cheelas because besan tends to soak ghee/oil. Take a ladle or ¼ to ⅓ of a measuring cup full of the batter and pour on the pan. Spread the batter evenly with the back of your ladle to make thin cheelas.

6. Then continue to cook the chilla on a low to medium-low heat until the top begins to set. You can drizzle some more oil or ghee along the edges for a crispy cheela.

7. You can flip the chilla once or twice for even cooking.
Once the base gets golden brown, it’s time to flip the cheela. Cook the other sides till you see golden spots on cheela. You can flip the cheela once or twice for even cooking.

8. Finally, fold it and then serve it mint chutney, homemade ketchup or the way your child likes it.

Enjoy!! 😊

Notes:

  • If some of the spices mentioned above are not available, feel free to skip them.
  • Incase you don’t find sattu or roasted gram flour, feel free to skip it and add more besan or chickpea flour. However, sattu is a great source of protein and iron, so it’ll be great if you can get your hands on it.
Posted on 2 Comments

Quick and Healthy Oatmeal Bread for Breakfast

bread on plate beside glas

Hello, Eatlo community! 🍽️👋 We’re back with another exciting video for all the health-conscious foodies out there. This time, we’re bringing you a fantastic recipe from Kochen zu Hause, titled “My Fastest Oatmeal Bread for a Healthy Breakfast! No Flour No Butter”.🍞🌞

About Kochen zu Hause 🎥🍴

Kochen zu Hause is a wonderful platform that features a plethora of healthy, easy-to-make recipes. Their mission is to make cooking accessible and enjoyable, with a focus on health and simplicity. In this video, they take us through the process of making a healthy oatmeal bread using simple ingredients and no refined flour or butter.

The Magic of Oatmeal Bread 🍞✨

Oatmeal bread is a fantastic alternative to traditional wheat bread. It’s packed with fiber and protein, making it a great choice for a healthy breakfast or snack. This recipe is not only healthy but also quick and easy to make, perfect for those busy mornings.

The Recipe 📝🍞

The recipe starts with a cup of long-cooked oatmeal. To this, an egg, salt to taste, a tablespoon of sunflower seeds, and a tablespoon of pumpkin seeds are added.

Next, 200 ml of kefir or yogurt is mixed in, followed by a teaspoon of baking soda. Half a tablespoon of apple cider vinegar is added last to activate the baking soda.

The mixture is quickly stirred and poured into a baking dish. It’s then baked in a preheated oven at 180°C for about 30-35 minutes.

The result is a soft, delicious oatmeal bread that’s perfect for a healthy breakfast.

Nutritional Information 🍞📊

Per 100 grams of this oatmeal bread, you get:

  • Calories: 199 kcal
  • Protein: 8.64 g
  • Fat: 9.76 g
  • Carbohydrates: 18.54 g

Join the Conversation! 🗣️👥

This video is a must-watch for anyone interested in healthy baking and looking for a delicious, easy-to-make oatmeal bread recipe. The recipe is detailed, easy to follow, and results in a delicious, healthy oatmeal bread that’s perfect for breakfast or a snack.

Don’t forget to join our Facebook community for more discussions on food, recipes, and well-being. We’d love to hear your thoughts on this video and any experiences you’ve had with making healthy oatmeal bread. See you there! 😊