This poha recipe is for the morning you want soft, fluffy kanda batata poha without guessing whether to soak, rinse, steam, or rescue a pan of sticky yellow flakes. It is quick, comforting, and built around the one detail that makes or breaks poha: moisture control.
The method uses thick flattened rice, onion, potato, peanuts, curry leaves, green chilli, turmeric, lemon, and fresh coriander. The poha is rinsed briefly, rested until tender, then folded through a hot tempering so the flakes stay loose and spoonable instead of turning heavy or paste-like.
If your poha has ever looked fine in the sieve and then clumped up in the pan, the problem was probably not your spices. It was too much water too early. Once that part clicks, the rest of the recipe becomes simple. You can read the full method below or go straight to the recipe card.
Table of Contents
Quick Answer: How to Make Poha
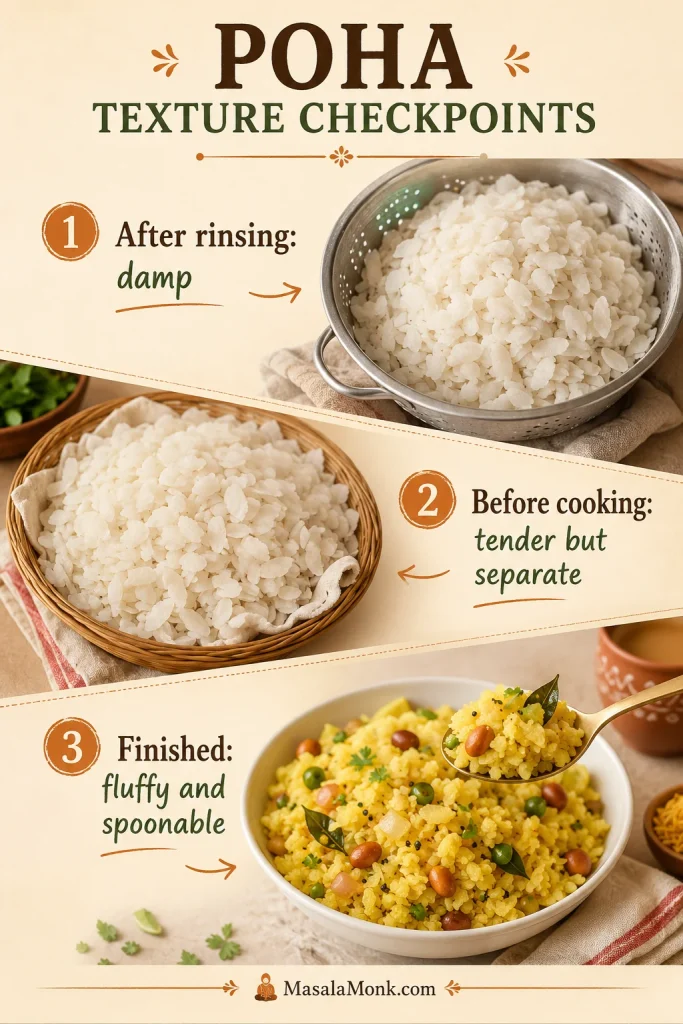
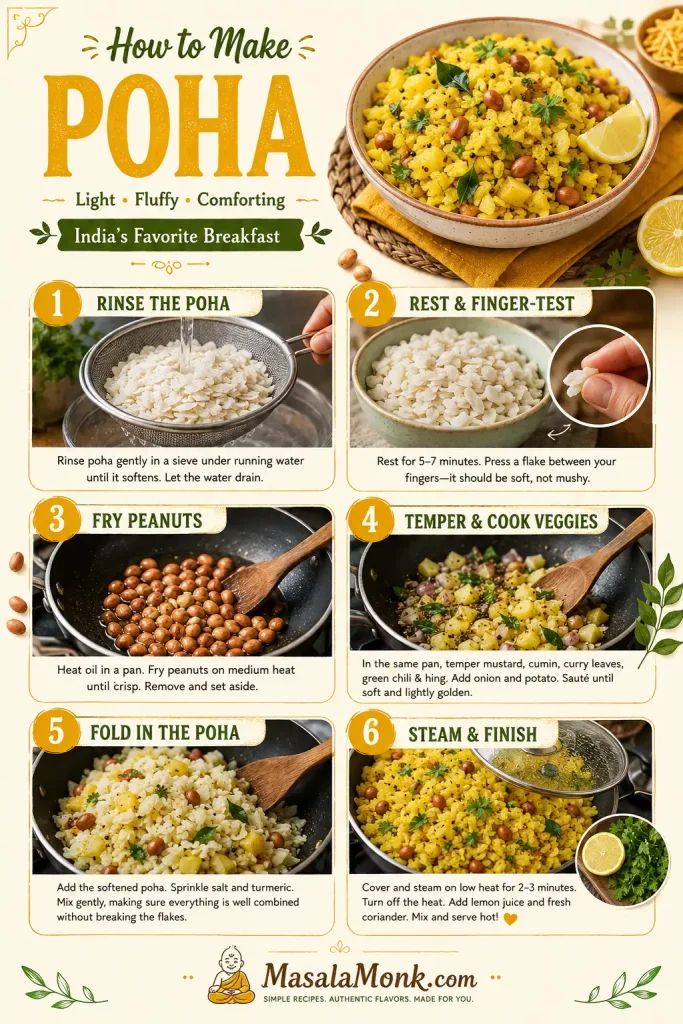
To make poha for 2 generous servings, use 1½ cups / about 110–120 g thick or medium poha. Rinse it briefly in a sieve, drain it well, and let it rest until the flakes soften. For fluffy poha, the flakes should feel tender before cooking but still look separate.
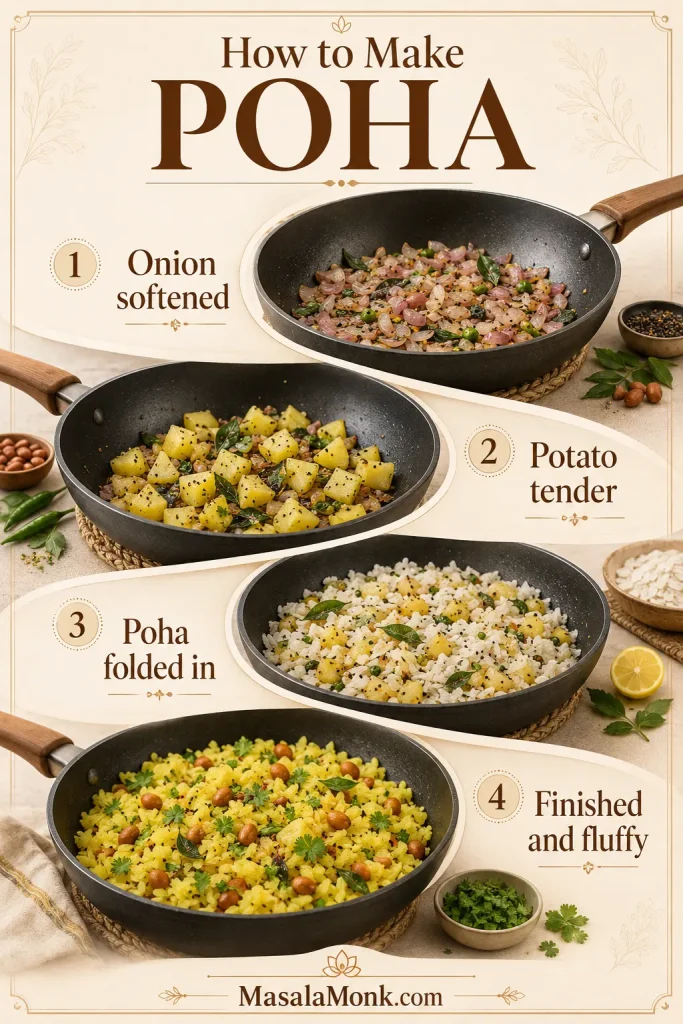
Fry the peanuts first, then temper mustard seeds, cumin, curry leaves, and green chilli in the same pan. Add onion and small diced potato, cook until the potato is tender, then stir in turmeric, salt, and a little sugar. Fold in the softened poha, steam on low heat for 2–3 minutes, and finish with lemon and coriander.
The key is to treat poha differently from raw rice. It does not need a long soak. A quick rinse gives the flakes moisture, and the short rest lets them soften without collapsing. The finger-press test is the easiest way to know when they are ready.
Why This Poha Works
This method works because it controls moisture before the poha reaches the pan. Sturdy flakes can handle a quick rinse, the short rest lets them soften evenly, and the finger-press test tells you when they are ready. By the time the poha is folded into the tempering, the onion and potato are already cooked, so the flakes only need a brief covered steam.
Poha should be softened before it cooks, not cooked until it softens. That is why the finished dish stays loose and tender instead of clumping together. The pan gives flavor; the rinse-rest method gives structure. If your batch has already gone wrong, the troubleshooting table will help you fix it.
What Is Poha?
Poha is one of those words that means both the ingredient and the dish. As an ingredient, it is flattened rice, also called beaten rice or rice flakes. In different parts of India, you may also see names like avalakki, aval, atukulu, chuda, or chira.
As a breakfast dish, poha usually means those flakes cooked with a quick tempering, onions, potatoes, peanuts, lemon, and herbs. For this recipe, the ingredient matters as much as the seasoning. A good breakfast poha should feel tender and light, but the flakes should still look separate. If the poha is too thin or too wet before cooking, it can turn sticky before the first bite.
For a deeper look at flattened rice as an ingredient, this poha explainer is useful for understanding why thick poha behaves differently from thin poha. MasalaMonk’s guide to regional Indian breakfasts is also helpful if you want to place poha among other Indian morning dishes.
Best Poha to Use for This Recipe
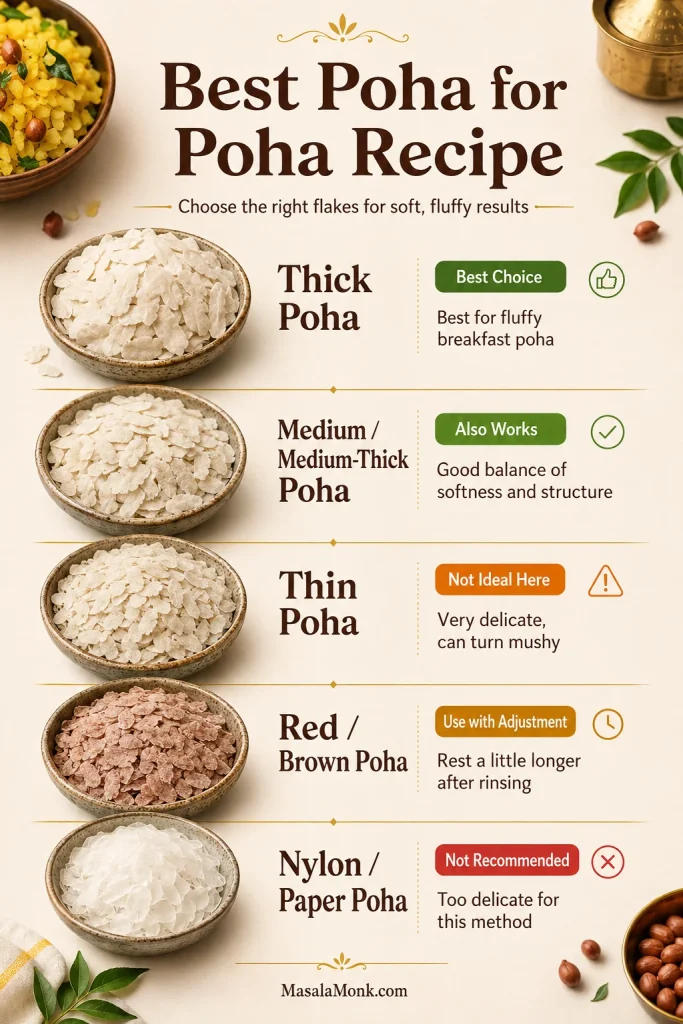
For a hot breakfast version, thick poha or medium-thick poha is the safest choice. These flakes give you a little room to work. They can handle rinsing, resting, and gentle steaming without falling apart.
If you are buying poha mainly for this breakfast dish, choose thick or medium-thick flakes. Thin poha is useful in crisp mixtures and quick snacks, but it is not the safest choice for kanda batata poha.
| Poha Type | Use It Here? | Best Use | Texture Note |
|---|---|---|---|
| Thick poha | Yes, best choice | Kanda poha, batata poha, vegetable poha | Softens well and stays separate when rinsed correctly. |
| Medium / medium-thick poha | Yes | Everyday breakfast poha | Works well if you rinse briefly and handle gently. |
| Thin poha | Not recommended | Chivda, snacks, very quick preparations | Absorbs water fast and can turn mushy in this recipe. |
| Red or brown poha | Yes, with adjustment | Nutty, slightly heartier poha | May need a little longer resting time after rinsing. |
| Nylon or paper poha | Not recommended | Light snacks and crisp mixtures | Too delicate for a steamed breakfast poha. |
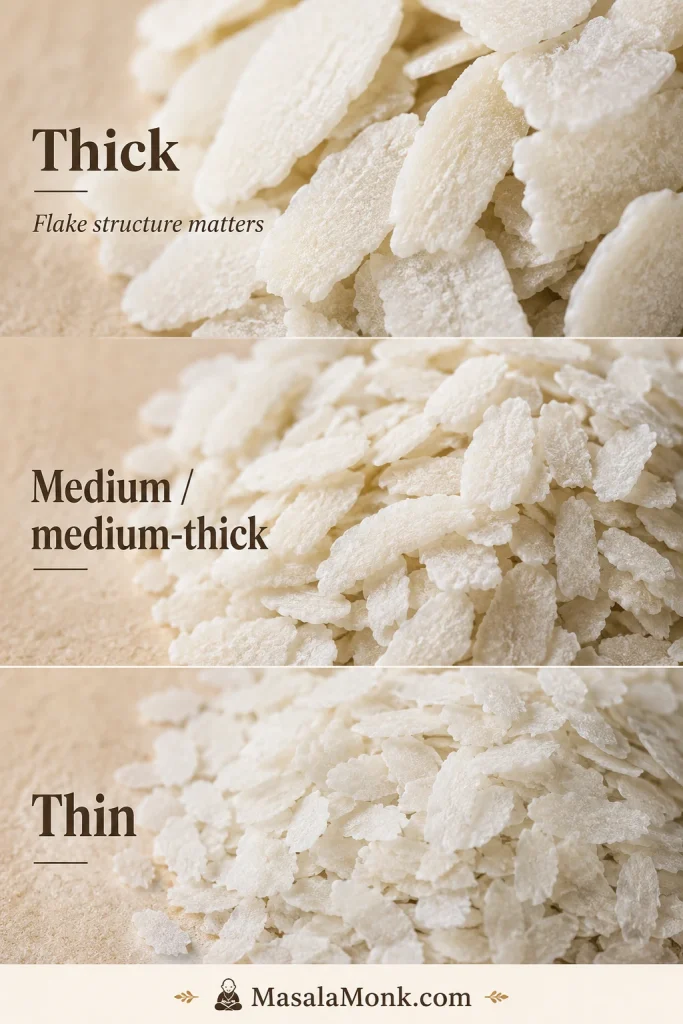
Why Flake Structure Matters
Think of this as a texture decision, not just a grocery decision. Thin flakes are the fastest route to mushy poha because they absorb water quickly and lose structure. Thicker flakes give you a better chance of getting a tender, spoonable finish.
For the full texture checklist, see how to keep poha soft, fluffy, and not mushy.
Ingredients You’ll Need
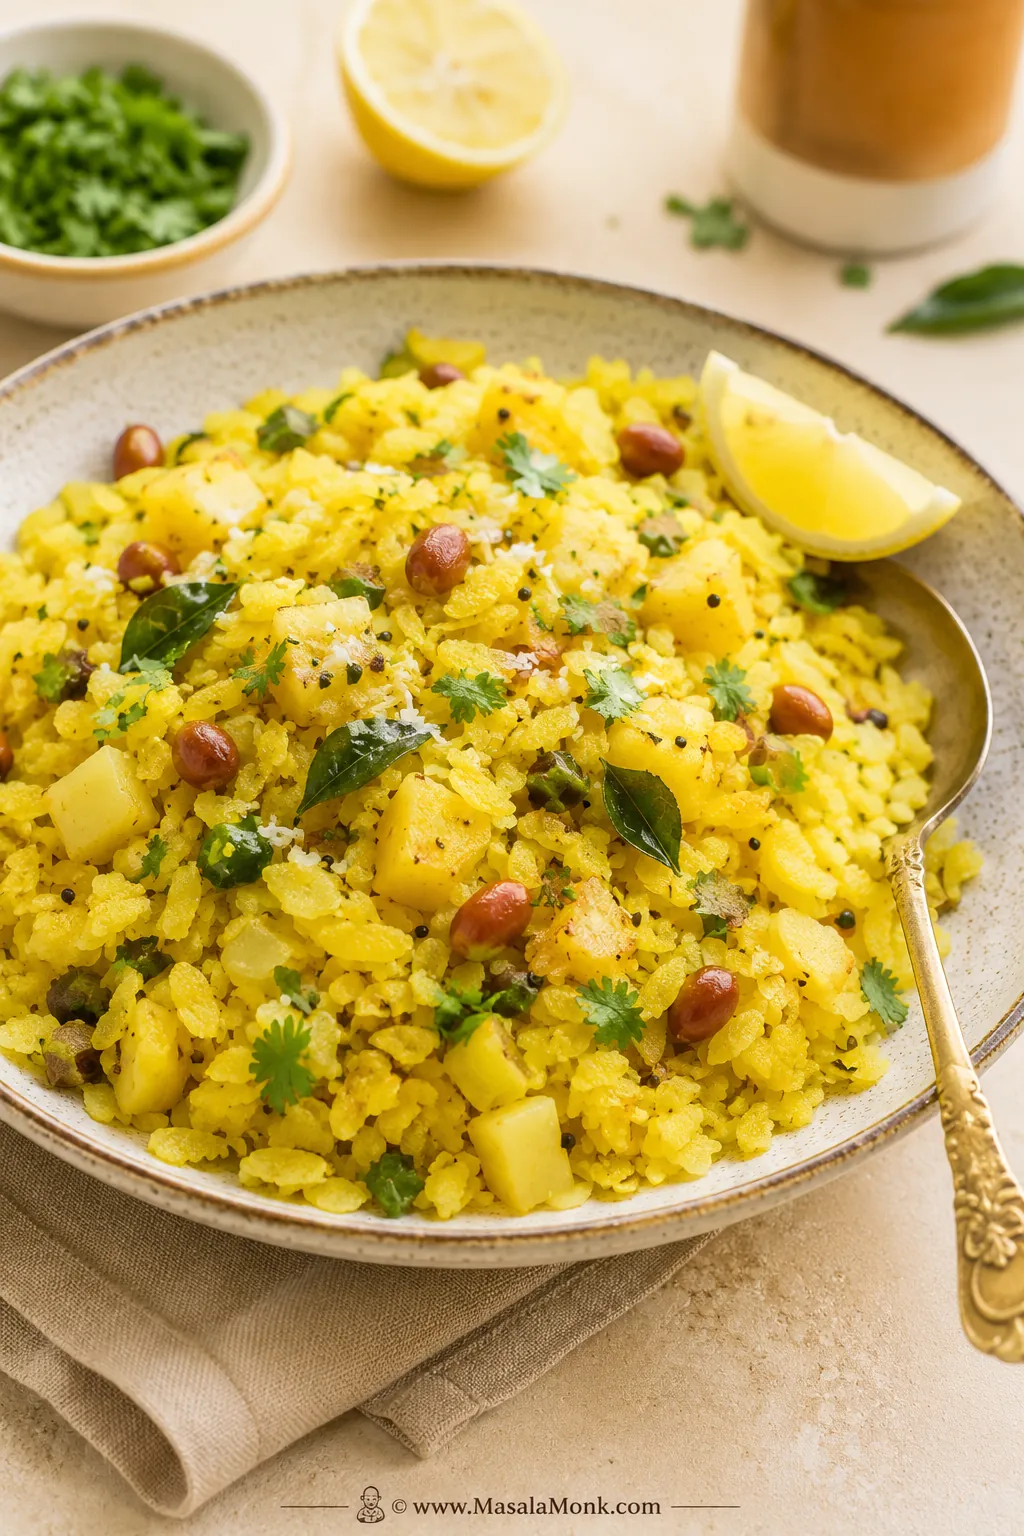
The ingredient list is short, so each piece has a job: peanuts for crunch, potato for body, lemon for brightness, and curry leaves for that familiar breakfast aroma. This version is a classic kanda batata poha, which means it uses both onion and potato. Kanda brings sweetness, batata makes the bowl more satisfying, and the final coriander-lemon finish keeps the poha fresh instead of flat.
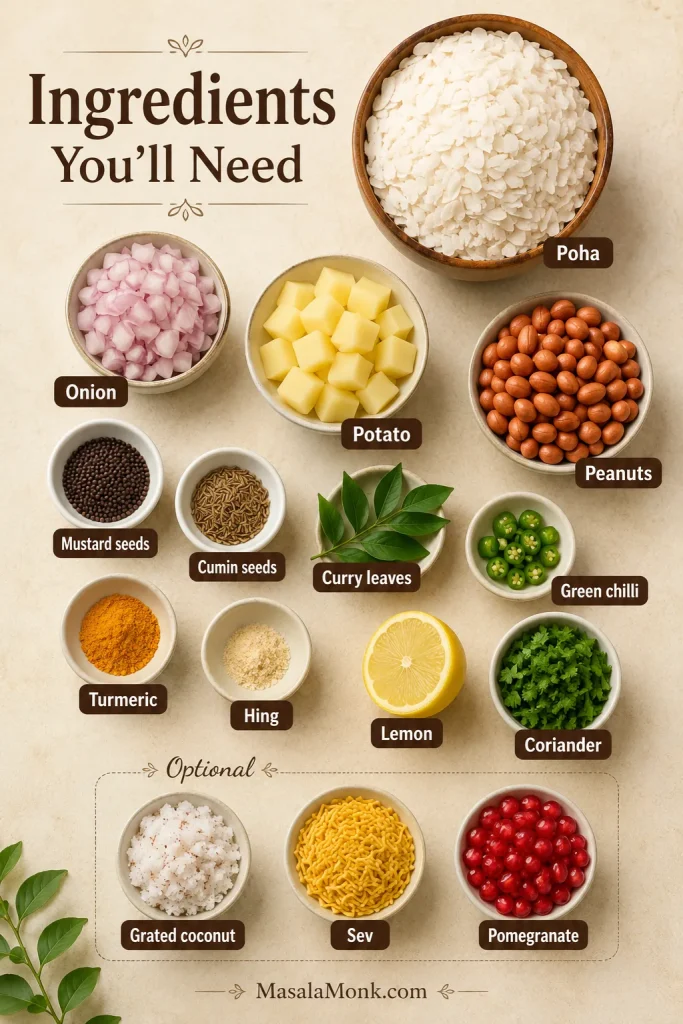
The recipe card has the full list, and the measurements table below gives the main cups, grams, ounces, and ml conversions.
Poha
Use 1½ cups, or about 110–120 grams, of thick or medium poha. The flakes should be sturdy enough to rinse without breaking down. Do not soak them in a bowl; a short rinse and a proper rest are enough.
Onion and Potato
Use one small to medium onion and one small potato. Dice raw potato small, about ½ inch or 1 to 1.25 cm, so it can cook through before the poha goes into the pan. Large potato chunks are one of the easiest ways to end up with either raw potato or overworked poha.

Boiled potato can go in after the onion and only needs enough time to coat in the tempering. If you start with raw potato, give it the full covered cooking time.
Raw vs Boiled Potato Timing

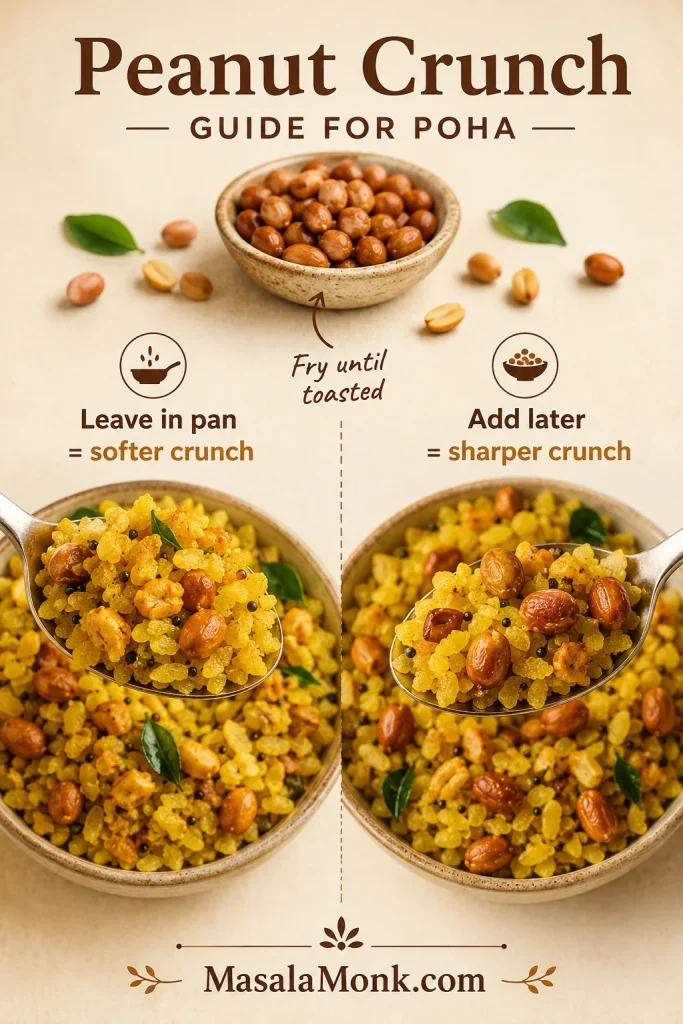
Peanuts
Peanuts add crunch, nuttiness, and a little protein. For softer homestyle poha, leave them in the pan after frying. For sharper crunch, remove them once they smell toasted and add them back at the end. If you need to avoid peanuts, use cashews, roasted chana dal, or sev for crunch.
Tempering
Mustard seeds, cumin seeds, curry leaves, green chilli, turmeric, and a pinch of hing give poha its familiar breakfast aroma. Hing is optional. If you need the recipe to be gluten-free, use certified gluten-free hing or skip it.
Lemon, Coriander, and Garnish
Lemon and coriander are what wake the poha up at the end. Add them after cooking so the flavor stays fresh. Sev, grated coconut, pomegranate, or extra peanuts can be added depending on whether you want a homestyle, Maharashtrian, or Indori-style finish.
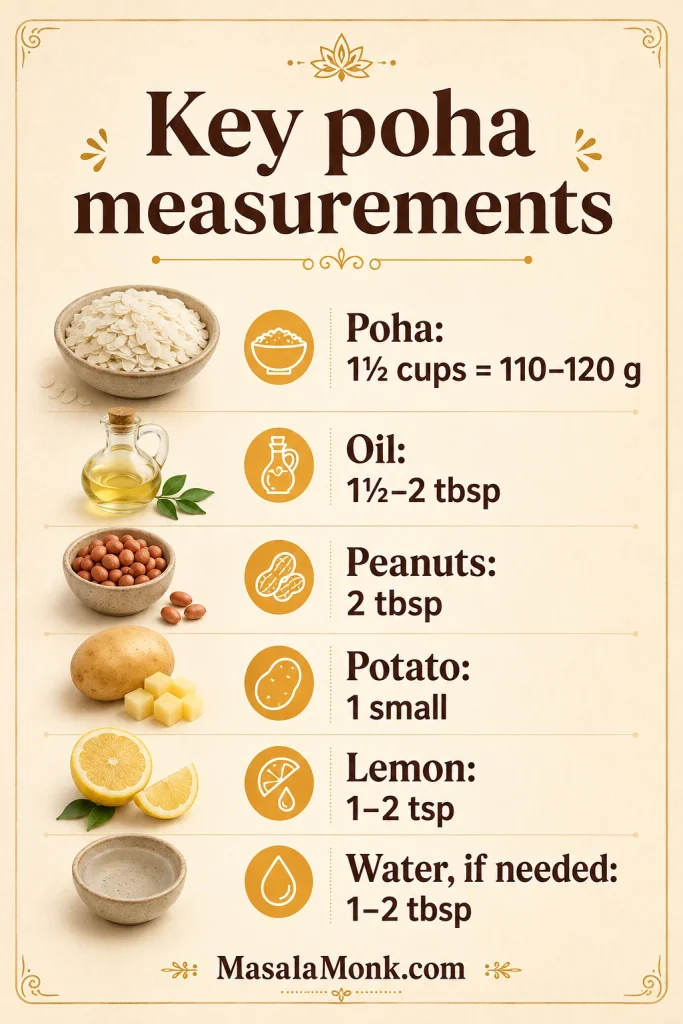
Key Measurements and Conversions
Because poha flakes vary by brand and thickness, cup measurements are not perfectly identical everywhere. Still, these conversions are practical enough for home cooking.
| Ingredient | US Measure | Metric | Notes |
|---|---|---|---|
| Thick or medium poha | 1½ cups | 110–120 g / about 4 oz | The main recipe amount for 2 generous servings. |
| Oil | 1½–2 tbsp | 22–30 ml | Use the higher amount for richer, street-style poha. |
| Raw peanuts | 2 tbsp | 18–22 g | Add more if you want extra crunch. |
| Onion | 1 small to medium | 75–100 g | Finely chopped or small diced. |
| Potato | 1 small | 100–120 g | Dice ½ inch / 1–1.25 cm or smaller. |
| Lemon or lime juice | 1–2 tsp | 5–10 ml | Add off heat and adjust to taste. |
| Water, if needed | 1–2 tbsp | 15–30 ml | Use only if the poha feels hard or dry. |
How to Make Poha Step by Step
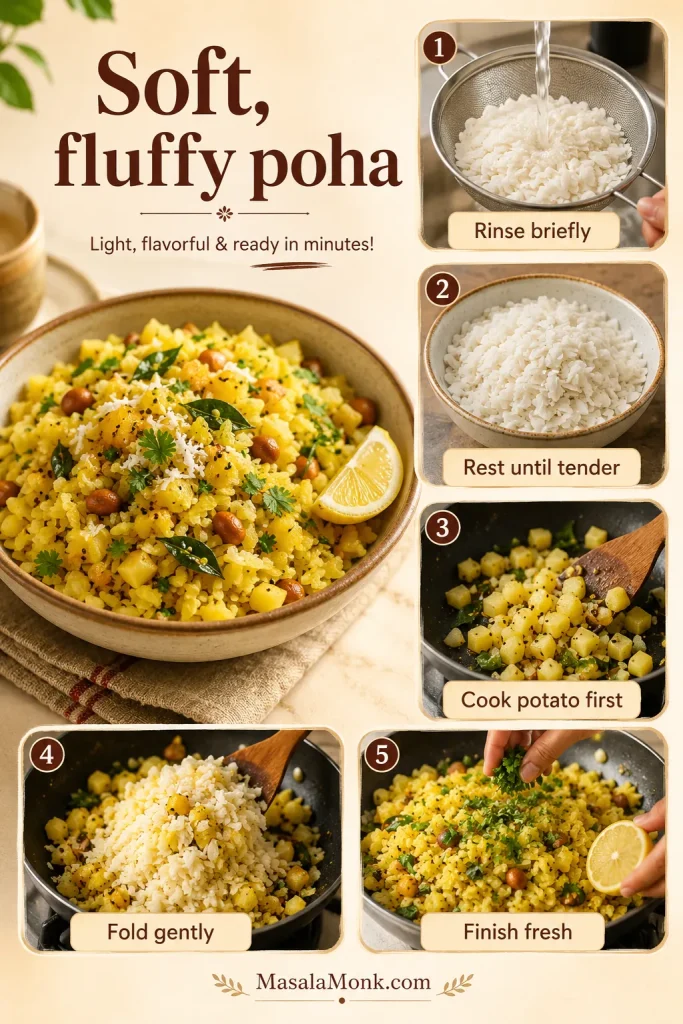
The method is easiest when you treat it as three small jobs: soften the poha without drowning it, cook the tempering and vegetables until they are ready, then fold everything together gently at the end. Once the flakes go into the pan, the recipe is almost done.
Do not rush the potato, but do not overwork the flakes. A wide spatula is better than a spoon here because poha needs lifting, not hard stirring.
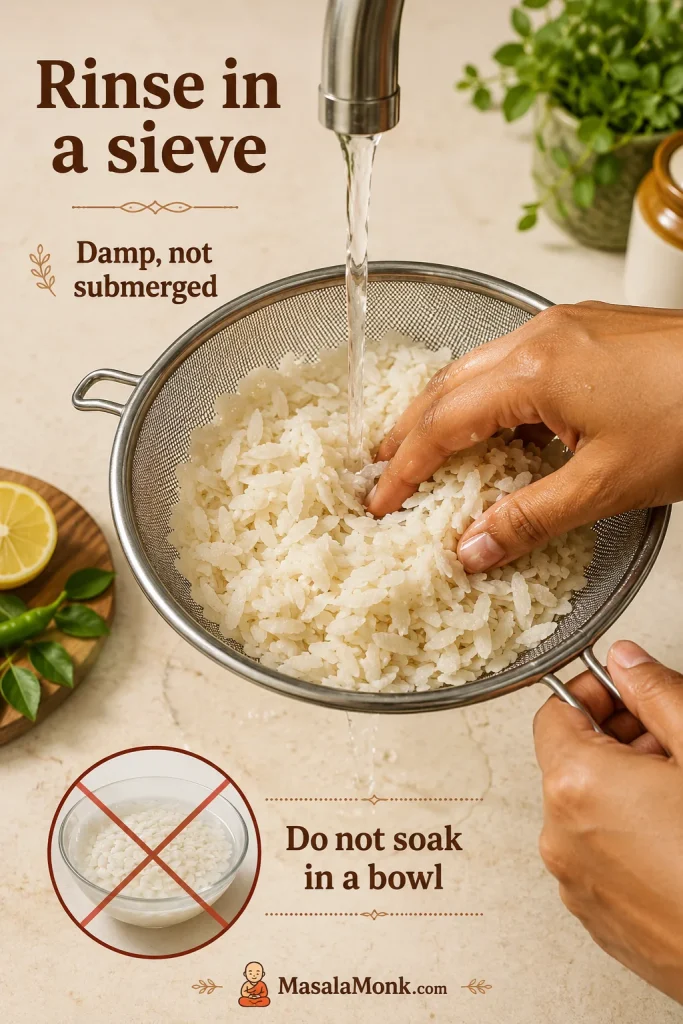
1. Rinse and Rest the Poha
Add the poha to a sieve or colander. Rinse under cold running water for 20–30 seconds, moving the flakes gently with your fingers so all of them get wet. Stop before the flakes start breaking. They should look damp, not submerged.
Let the poha drain completely, then leave it in the sieve or spread it in a bowl for 8–15 minutes while you prep and cook the tempering. This resting time lets residual moisture do the work slowly, which is much safer than soaking the flakes in a bowl.
The Finger-Press Test
Before the poha goes into the pan, press a few flakes between your thumb and finger. A ready flake should break softly, almost like cooked rice, but it should not smear into paste. If it feels hard, rest it longer or sprinkle over 1–2 tablespoons water. If it feels wet and sticky, it has gone too far.
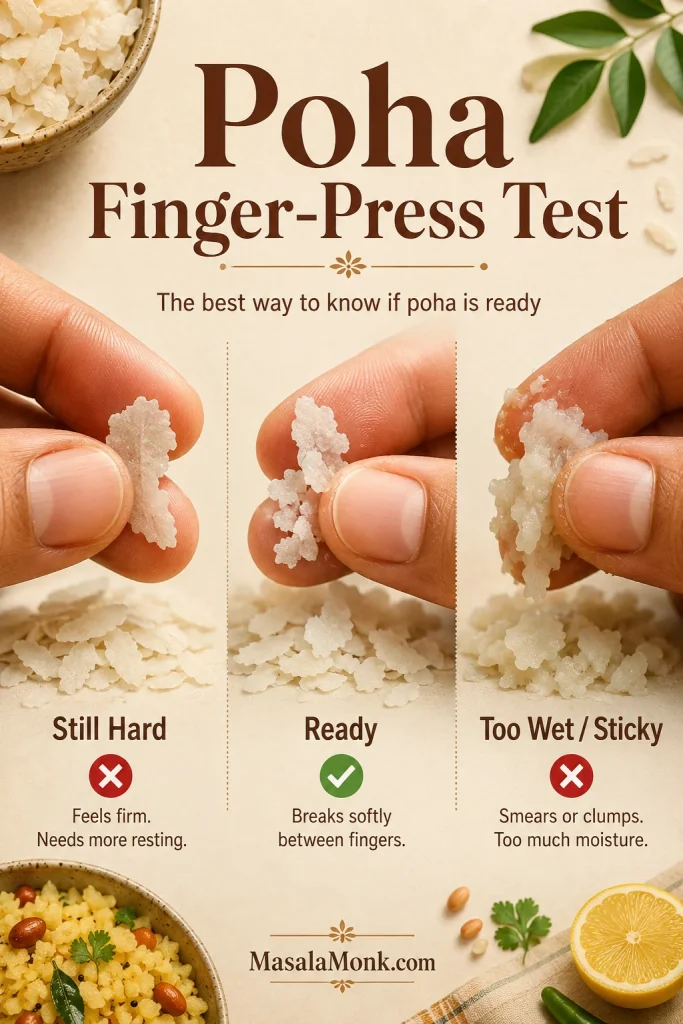
Use the feel of the flakes, not the clock alone. Very thick poha may need closer to 15 minutes; medium poha may be ready closer to 8 minutes.
Texture Checkpoints Before Cooking
2. Fry the Peanuts
Heat oil in a heavy-bottomed kadai, skillet, or sauté pan over medium heat. Add the peanuts and fry for 1–2 minutes, stirring often, until they smell nutty and turn a shade darker. Remove them to a plate if you want the crunch to stay sharper.
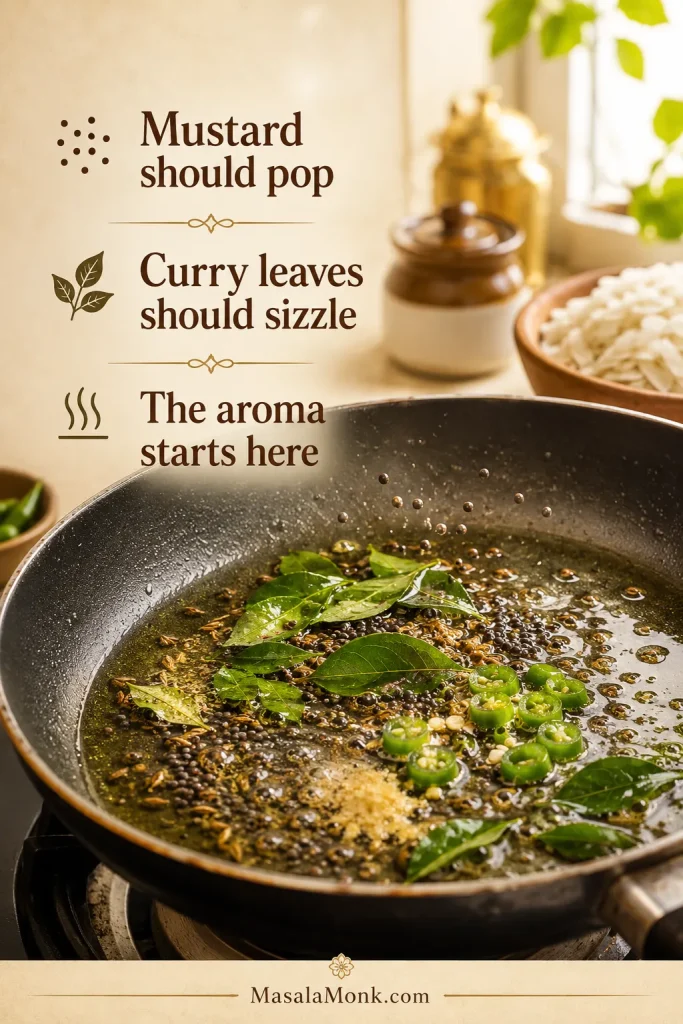
3. Temper the Spices
Add mustard seeds to the hot oil and let them pop. Add cumin seeds, curry leaves, green chilli, and hing if using. The curry leaves should sizzle, and the pan should smell sharp, nutty, and aromatic within a few seconds.
4. Cook the Onion and Potato
Add the chopped onion and cook for 2–3 minutes, until it softens but does not brown deeply. Add the small diced potato, stir well, cover the pan, and cook on medium-low heat for 5–7 minutes, or until the potato is tender. A knife should slide through a potato cube without resistance.
The potato should be cooked before the poha goes in. If you add the flakes too early, you will either overcook the poha while waiting for the potato or end up with raw potato in an otherwise finished dish.
5. Add Turmeric, Salt, Sugar, and Poha
Lower the heat. Add turmeric, salt, and sugar, then stir for a few seconds. Add the softened poha and fold gently with a wide spatula. The flakes should turn yellow as they pick up the turmeric, but they should still move loosely through the pan rather than dragging as one mass.
6. Steam and Finish
Cover the pan and steam the poha on low heat for 2–3 minutes. Turn off the heat and let it rest, covered, for another 2 minutes. The finished poha should be hot, yellow, tender, and lightly glossy. Add lemon juice, chopped coriander, and the fried peanuts if you removed them earlier. Toss lightly and serve hot.
Add the lemon at the end, not while the pan is still cooking hard. That keeps the final flavor fresh, bright, and clean. Once you understand the flow, the shorter recipe card is easiest to follow while cooking.
What the Pan Should Look Like
Recipe Card: Poha Recipe
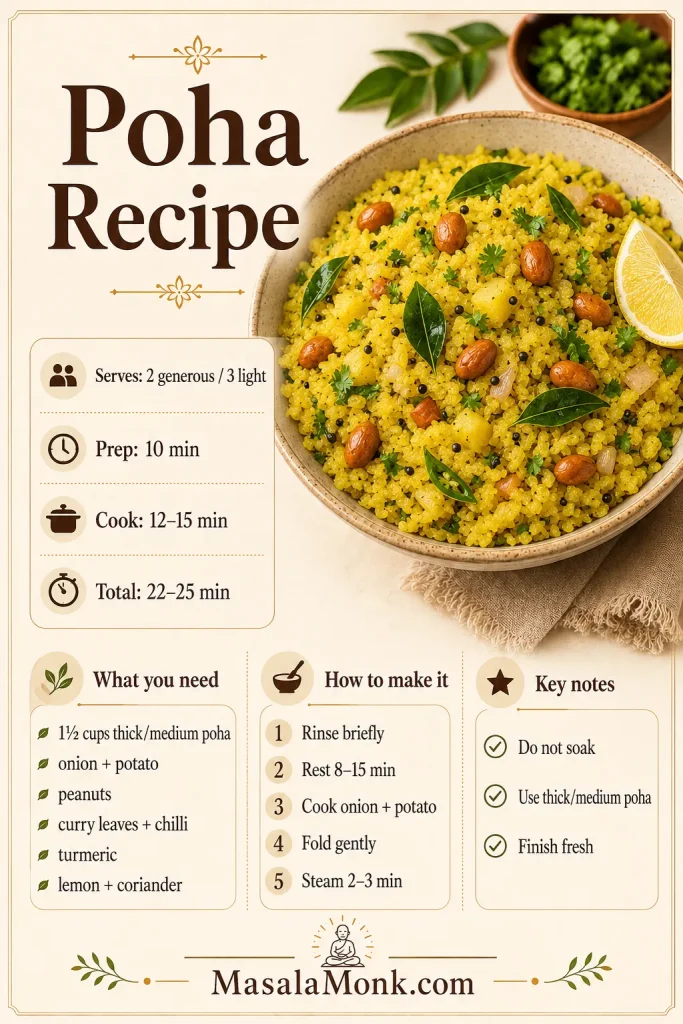
This kanda batata poha recipe makes 2 generous breakfast servings or 3 lighter servings with thick flattened rice, onion, potato, peanuts, curry leaves, lemon, and coriander.
Equipment
- Sieve or colander
- Heavy-bottomed kadai, skillet, wok, or sauté pan
- Lid
- Wide spatula
- Knife and chopping board
- Measuring cups and spoons
- Kitchen scale, optional
Ingredients
- 1½ cups thick or medium poha, about 110–120 g / 4 oz
- 1½–2 tablespoons oil, about 22–30 ml
- 2 tablespoons raw peanuts, about 18–22 g
- ½ teaspoon mustard seeds
- ½ teaspoon cumin seeds
- 1 pinch hing, optional
- 8–10 curry leaves
- 1–2 green chillies, finely chopped or slit
- 1 small to medium onion, finely chopped, about 75–100 g
- 1 small potato, diced ½ inch / 1–1.25 cm, about 100–120 g
- ¼ teaspoon turmeric powder
- ½ teaspoon salt to start, then more to taste
- ½ teaspoon sugar, optional
- 1–2 teaspoons lemon or lime juice
- 2 tablespoons chopped coriander / cilantro
- Sev, grated coconut, or pomegranate for garnish, optional
Instructions
- Add poha to a sieve or colander. Rinse under cold running water for 20–30 seconds, moving the flakes gently. Drain completely.
- Let the rinsed poha rest for 8–15 minutes. Press a flake between your fingers; it should break softly without turning pasty.
- Heat oil in a heavy-bottomed pan over medium heat. Fry the peanuts for 1–2 minutes until crunchy. Remove them to a plate if you want them extra crisp.
- Add mustard seeds to the same oil. Once they pop, add cumin seeds, hing, curry leaves, and green chillies. Stir briefly.
- Add onion and cook for 2–3 minutes until softened.
- Add diced potato, cover, and cook on medium-low heat for 5–7 minutes, or until tender.
- Lower the heat. Add turmeric, salt, and sugar. Stir for a few seconds.
- Add the softened poha and fold gently until evenly coated. Do not mash the flakes.
- Cover and steam on low heat for 2–3 minutes. Turn off the heat and rest covered for 2 minutes.
- Finish with lemon juice, coriander, and fried peanuts. Garnish with sev, coconut, or pomegranate if using. Serve hot.
Notes
- Use thick or medium poha; thin poha turns mushy more easily in this method.
- Rinse, drain, and rest the poha instead of soaking it in a bowl.
- The resting time overlaps with chopping and cooking. Very thick poha may need closer to 15 minutes; medium poha may be ready around 8 minutes.
- If the poha feels hard before cooking, sprinkle 1–2 tablespoons water over it and rest for a few more minutes.
- Keep potato pieces small so they cook before the poha goes in.
- Taste before serving. If the poha feels flat, add lemon, salt, coriander, or sev rather than cooking it longer.
- Vegan as written if using oil. Gluten-free if the hing is certified gluten-free or skipped.
How to Keep Poha Soft, Fluffy, and Not Mushy
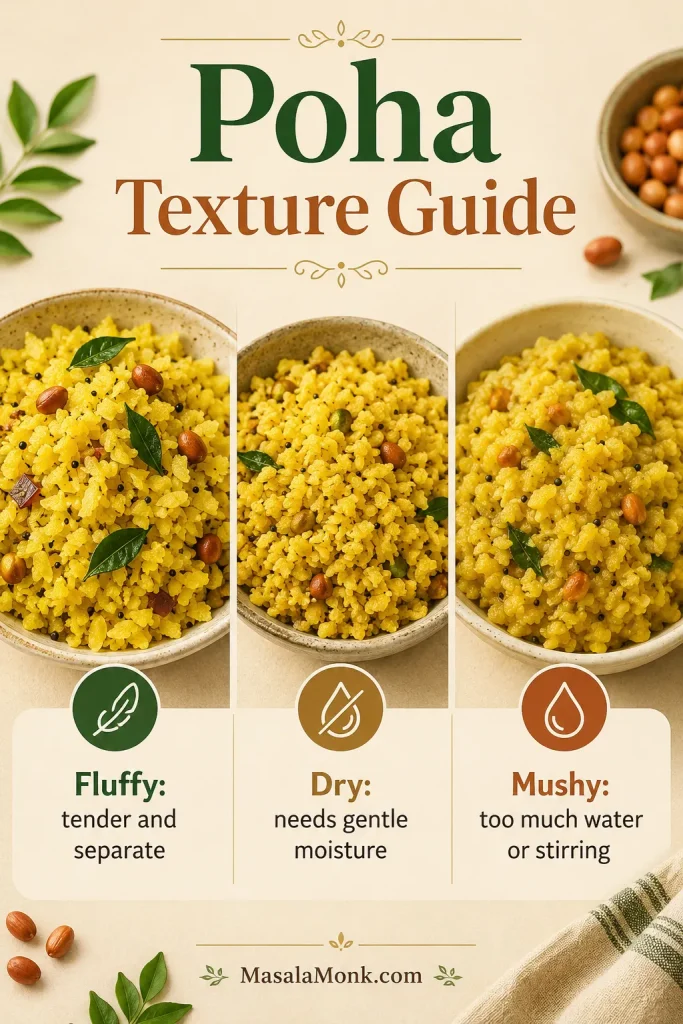
Most mushy poha problems begin before the pan gets hot. The flakes either absorb too much water, sit too wet, or get stirred too aggressively after they soften. The goal is not to soak the flakes; the goal is to make them tender while they still hold their shape.
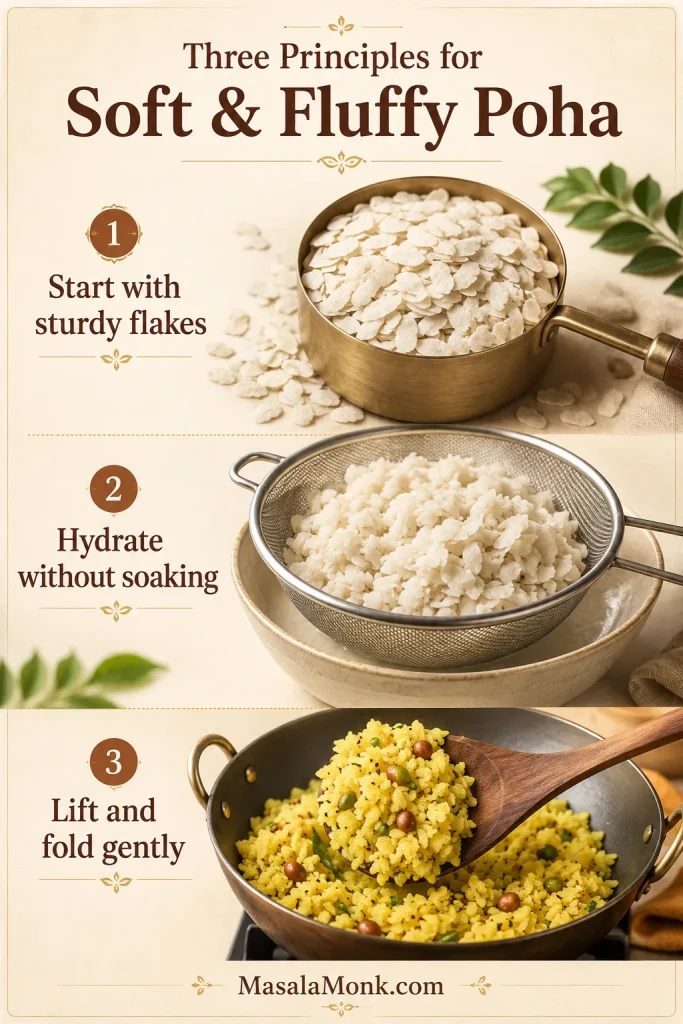
Start with Flakes That Can Hold Their Shape
Thin poha collapses quickly once wet. Thick or medium flakes give you more margin for rinsing, resting, folding, and steaming, which is why they work better for this hot breakfast version.
Hydrate the Poha Without Soaking
Poha should be tender before it enters the pan. A quick rinse and rest gives the flakes moisture without drowning them. If the flakes are already sticky in the sieve, the pan will not save them.
Lift and Fold Instead of Stirring Hard
Once the flakes are soft, rough stirring breaks them down. Use a wide spatula and lift the poha through the tempering until it is evenly yellow and hot. Stop once everything is combined and warmed through.
The Three Rules at a Glance
Common Poha Mistakes and Fixes
Poha is forgiving once you know what went wrong. A sticky batch, a dry batch, or a bland batch usually points to one small fix. Use the sections below to rescue what you have and make the next batch easier.
Texture and Moisture Fixes
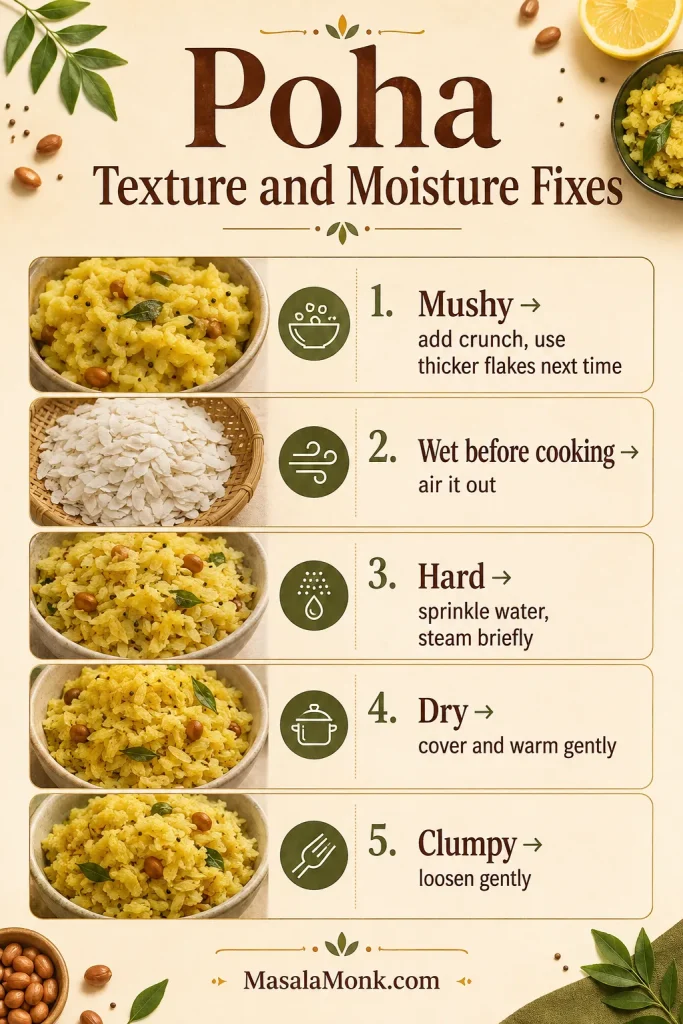
| Problem | Why It Happened | Fix It Now | Fix It Next Time |
|---|---|---|---|
| Poha is mushy | Thin poha, over-rinsing, soaking, or rough mixing | Spread it out in the pan, keep the heat low, and add crunchy peanuts or sev for contrast | Use thicker flakes and rinse only briefly |
| Poha looks wet before cooking | Too much water after rinsing or not enough draining time | Spread it out and let it air for a few minutes before adding it to the pan | Rinse for less time and drain fully before resting |
| Poha is hard | Not hydrated or rested enough | Sprinkle 1–2 tablespoons water, cover, and steam for 2 minutes | Rest longer after rinsing and use the finger-press test |
| Poha is dry | Too little moisture or too much cooking after adding poha | Sprinkle a little water, cover, and warm gently | Steam briefly on low and do not overcook |
| Poha clumps together | Poha was too wet or stirred too hard | Loosen gently with a fork or wide spatula | Drain fully and fold gently on low heat |
Flavor and Cooking Fixes
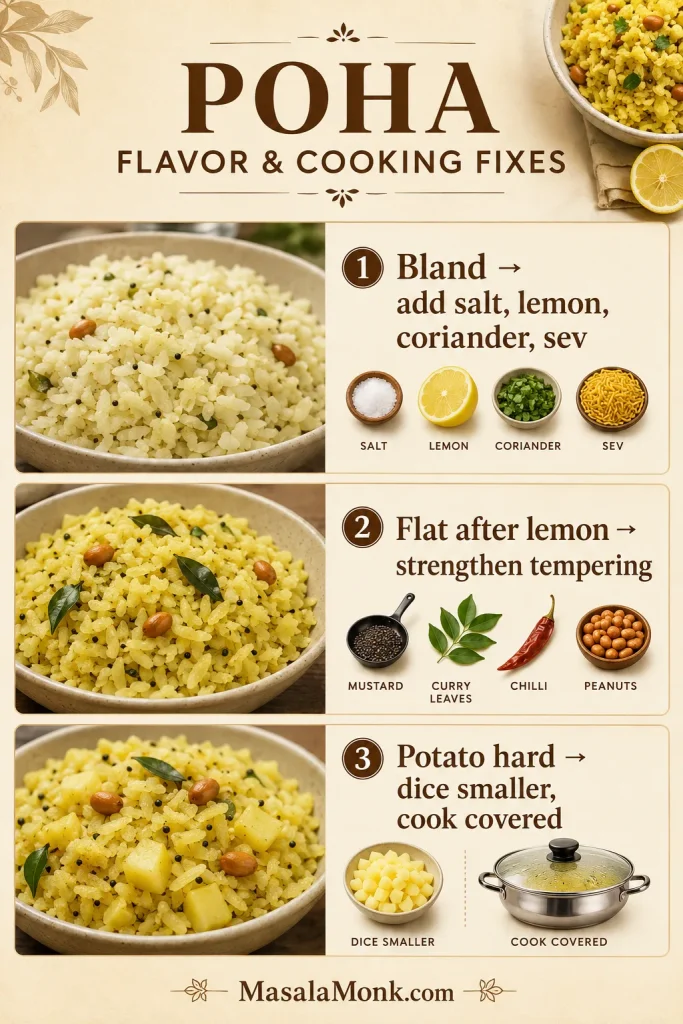
| Problem | Why It Happened | Fix It Now | Fix It Next Time |
|---|---|---|---|
| Poha tastes bland | Not enough salt, lemon, chilli, or garnish | Add lemon, salt, coriander, sev, or roasted peanuts | Season the onion-potato base well before adding poha |
| Poha tastes flat even after lemon | Weak tempering or under-seasoning | Add a little salt, sev, coriander, or a small pinch of sugar | Let the mustard, curry leaves, chilli, and peanuts flavor the oil properly before adding vegetables |
| Potato is undercooked | Pieces were too large or cooked on high heat without enough time | Cover and cook a few more minutes before adding lemon | Dice potato ½ inch / 1–1.25 cm or smaller |
Poha Variations
Once you understand the hydration step, poha is easy to adapt. Change the vegetables, garnish, or seasoning, but keep the flakes tender and separate.
Kanda Poha vs Kanda Batata Poha
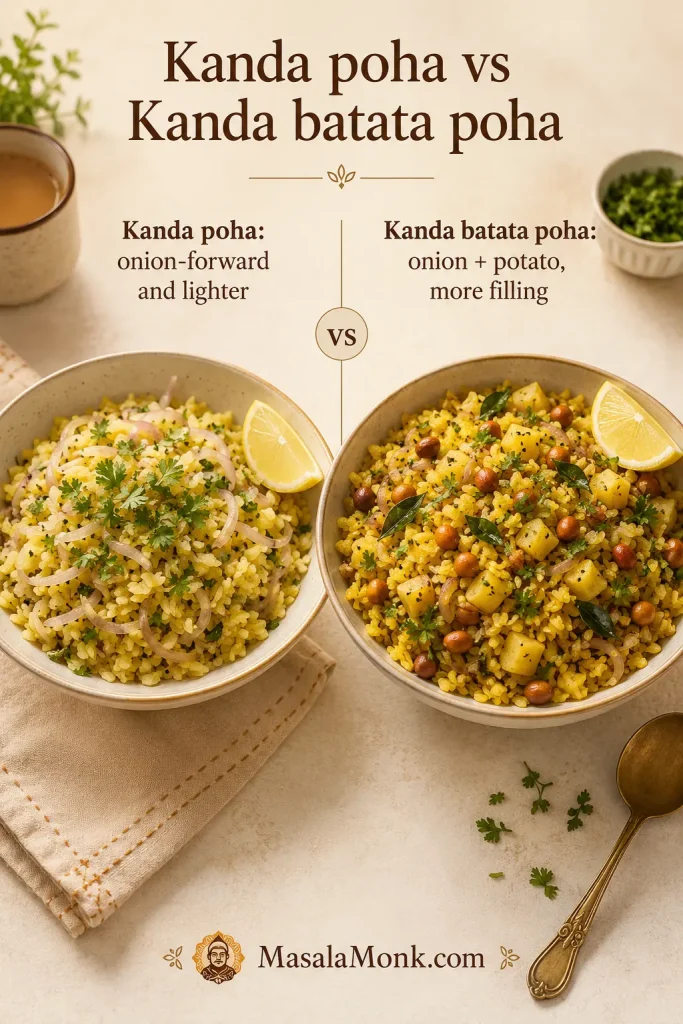
Kanda Poha
For the lighter kanda poha version, skip the potato and let the onion, peanuts, curry leaves, lemon, and coriander do the work. It cooks faster and feels especially good when you want breakfast without heaviness.
Batata Poha
Batata poha is heartier because of the potato. Keep the pieces small so they turn tender before the poha goes in. This is the version to make when you want the bowl to feel more filling without adding much else.
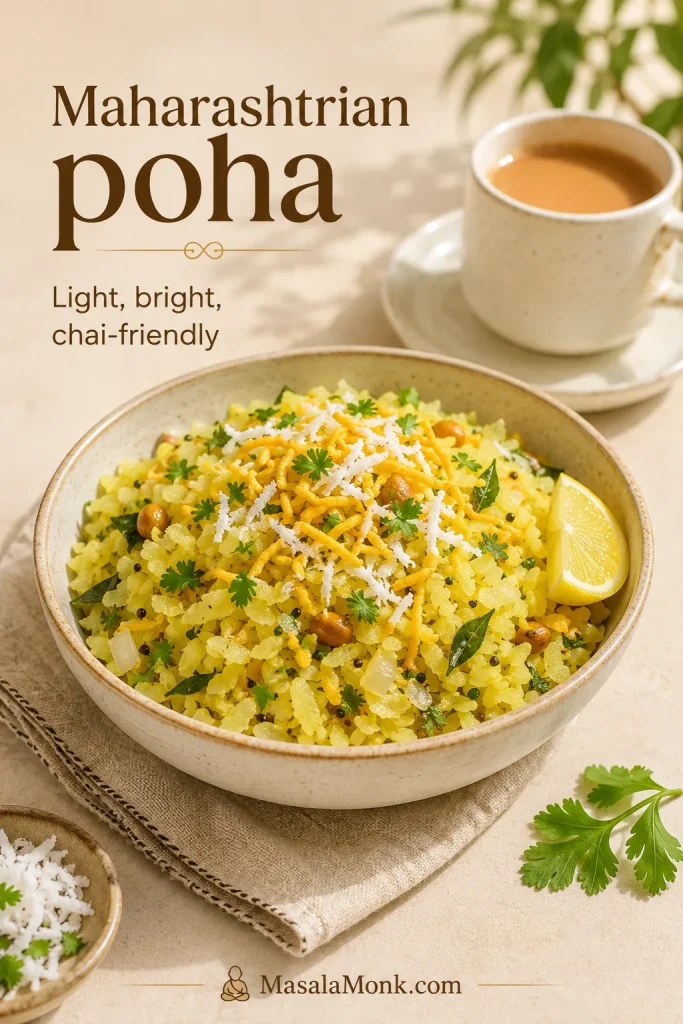
Maharashtrian Poha
In many Maharashtrian homes, kanda poha or kanda batata poha is finished simply with lemon, coriander, fresh coconut, and sometimes sev. This is the version many people think of with morning chai: light yellow poha, softened onions, a little sweetness, and a bright garnish at the end.
Kanda Batata Poha
This is the version in the recipe card: onion, potato, peanuts, turmeric, lemon, and coriander. It gives the best balance of flavor, texture, and breakfast satisfaction.
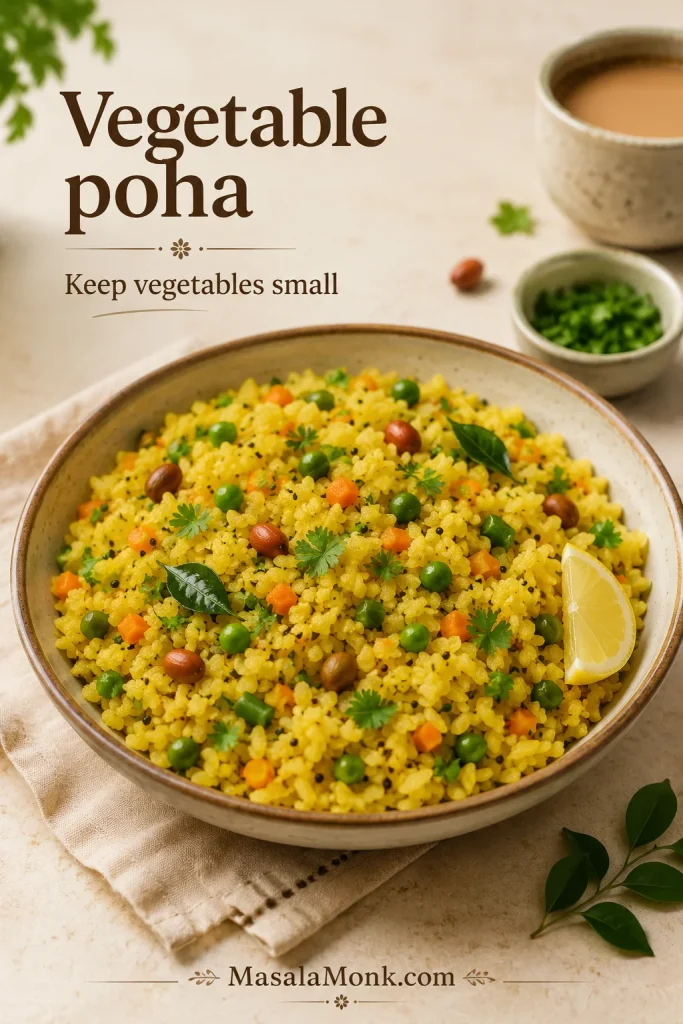
Vegetable Poha
Add peas, finely diced carrots, beans, or capsicum after the onion. Keep the vegetables small so they cook quickly. Avoid adding watery vegetables in large amounts because they can make the flakes damp and clumpy.
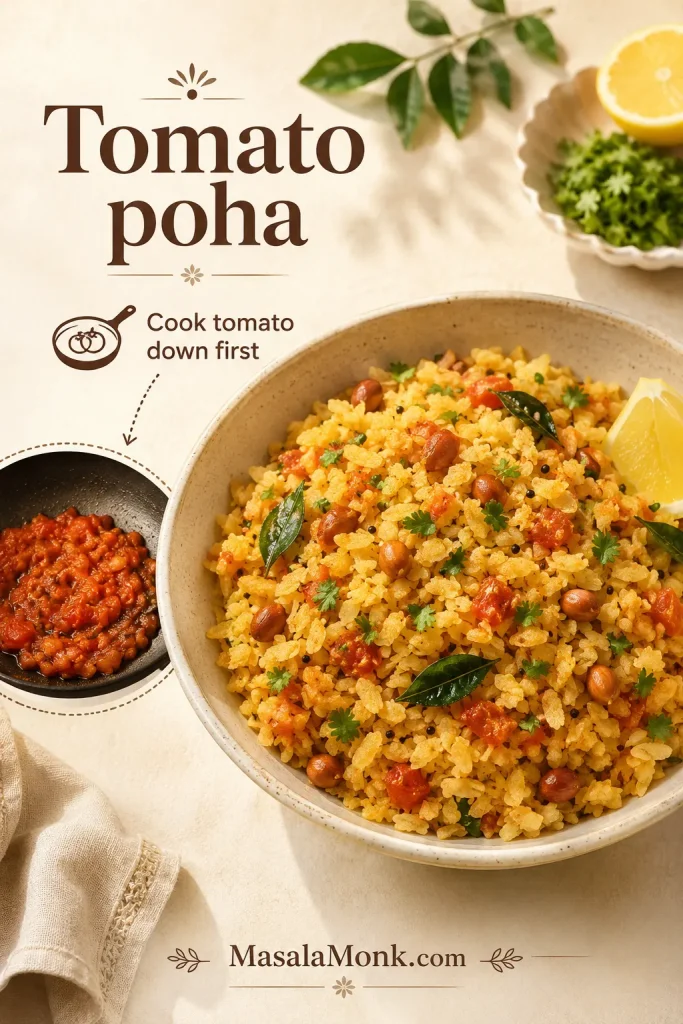
Tomato Poha
For a tomato poha variation, add 1 small chopped tomato after the onion has softened and cook it down until most of its moisture evaporates. Do not add tomato at the same time as the poha, or the flakes can turn wet and clumpy.
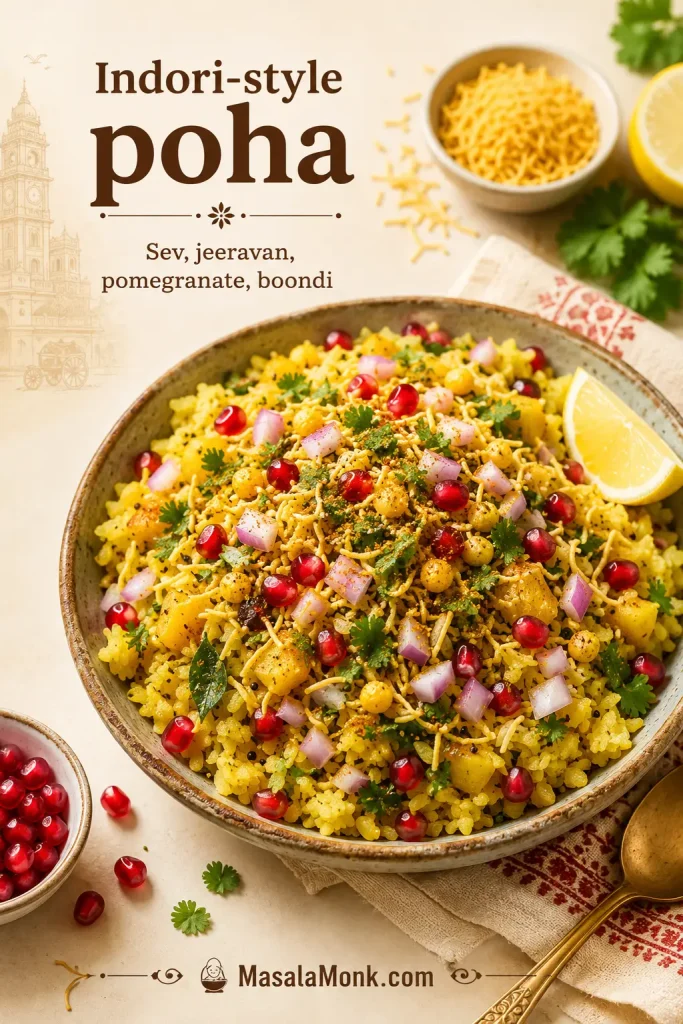
Indori-Style Poha
For an Indori-style finish, take the basic poha slightly sweeter and brighter, then pile on sev, jeeravan masala, chopped onion, coriander, lemon, and pomegranate. Add boondi too if you want a fuller street-style topping mix. This is an Indori-style finish rather than a full dedicated Indori poha recipe, but the toppings take the bowl in that direction.
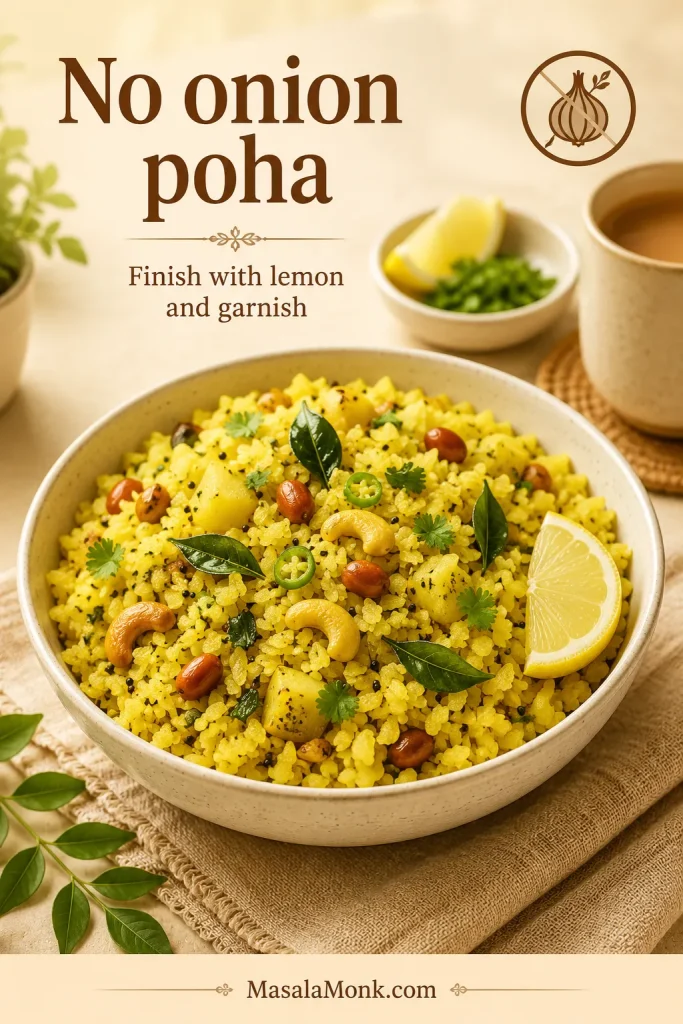
No Onion Poha
Skip the onion and use potato, curry leaves, green chilli, turmeric, lemon, coriander, and either peanuts or another crunchy garnish. The flavor will be simpler, so finish with enough lemon, salt, and garnish to keep the bowl lively.
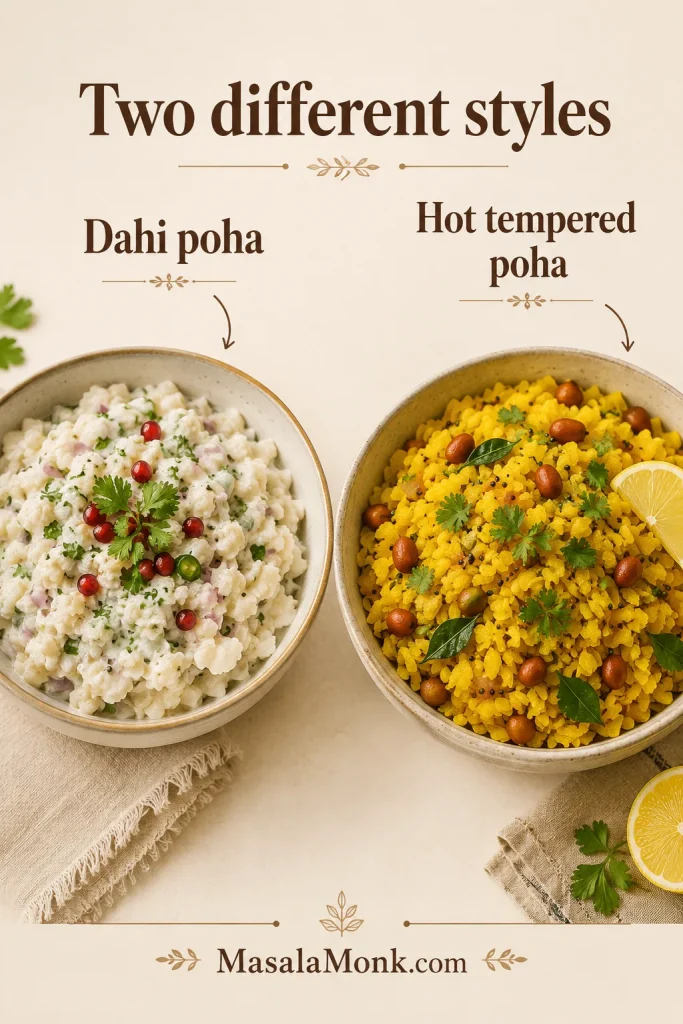
Dahi Poha
Dahi poha is a cooler curd-based variation rather than a hot tempered poha. The flakes are softened and mixed with curd instead of being folded into a hot pan, so it belongs closer to no-cook breakfast territory. In warm weather, these no-cook recipes for hot summer days fit the same cooling breakfast mood.
What to Serve with Poha
Poha is best served hot, while the flakes are still light and the peanuts are crisp. Add lemon just before serving, then finish with something fresh or crunchy so the bowl does not feel one-note.
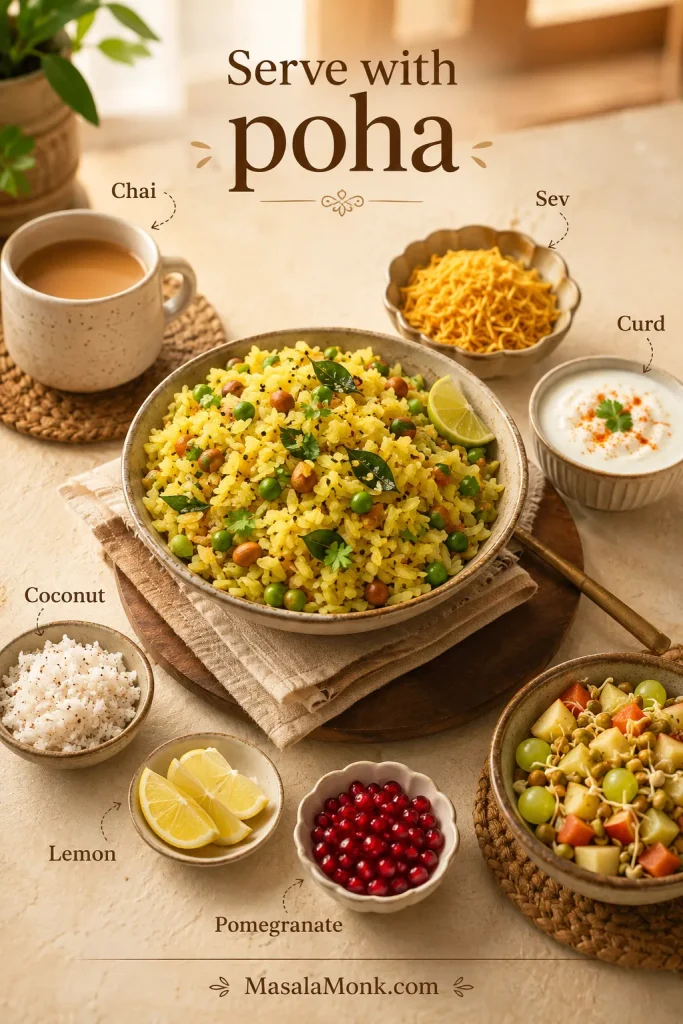
- Chai: the classic breakfast pairing.
- Sev: adds crunch and a street-style finish.
- Fresh coconut: adds softness and gentle sweetness.
- Lemon wedges: let each person brighten their plate.
- Curd: useful if you want a cooler, more filling breakfast.
- Pomegranate: works especially well with Indori-style poha.
- Sprouts or fruit: make the meal feel more complete.
If you like something fresh on the side, a spoon of green chutney also works well with poha, especially when the plate needs a sharper coriander-mint finish.
Storage, Reheating, and Make-Ahead Tips
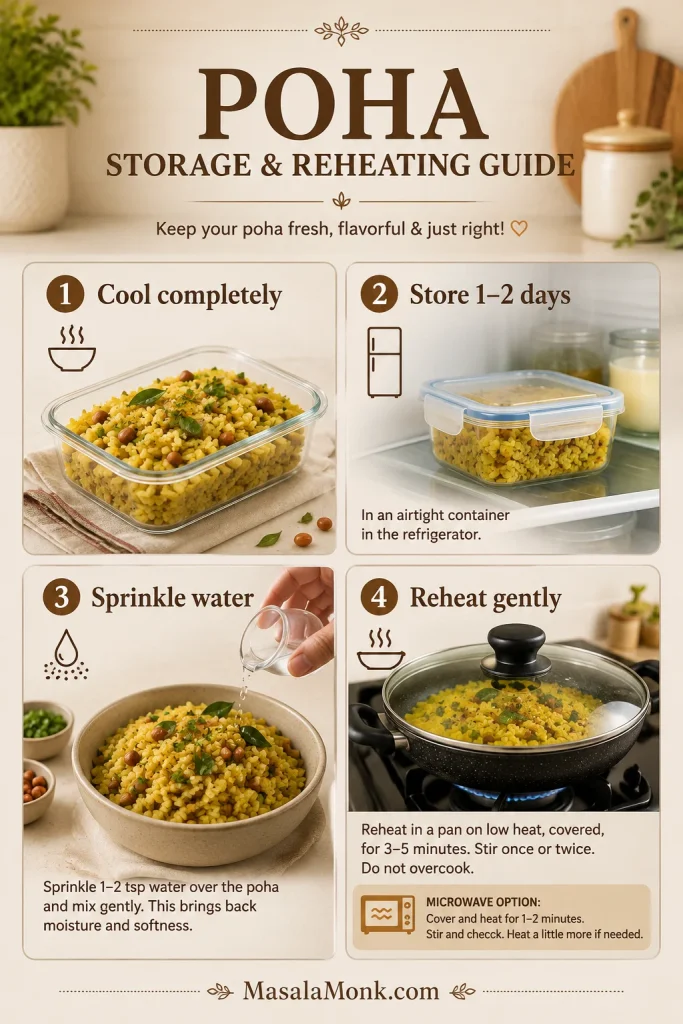
Poha tastes best fresh because the flakes continue to absorb moisture as they sit. It will never be quite as lively after refrigeration, but it can still make a good next-day breakfast if you store and reheat it gently.
How to Store Leftover Poha
Cool the poha completely, then store it in an airtight container in the refrigerator for 1–2 days. Do not pack it while steaming hot, or condensation can make the flakes damp and clumpy.
How to Reheat Poha
Sprinkle 1–2 teaspoons water over the poha, cover, and warm gently in a pan on low heat. You can also microwave it covered in short bursts, but avoid overheating because that can make the flakes dry at the edges and dense in the center.
Make-Ahead Tip
For the best make-ahead version, cook the onion-potato tempering ahead and refrigerate it. When you are ready to eat, rinse and rest the poha fresh, warm the tempering, fold in the poha, steam briefly, and finish with lemon and coriander.
FAQs About Poha
What is poha called in English?
Poha is usually called flattened rice, beaten rice, pressed rice, or rice flakes in English. The word poha also refers to the cooked Indian breakfast dish made from those flattened rice flakes.
What kind of poha works best for this recipe?
Thick poha or medium-thick poha works best because it softens without falling apart. Thin poha is better for snacks like chivda, not for this hot breakfast method.
Should poha be soaked or rinsed?
Rinse it, drain it, and let it rest. Do not soak poha in a bowl for this recipe, because the flakes absorb water quickly and can turn heavy before cooking.
Why did my poha become mushy?
Poha usually becomes mushy because the flakes were too thin, soaked too long, over-rinsed, or mixed too roughly. Use sturdier flakes, rinse briefly, drain completely, and fold gently on low heat.
Why is my poha hard?
Hard poha was not hydrated enough before cooking. Sprinkle a tablespoon or two of water over it, cover the pan, and steam gently for a couple of minutes. Next time, let the rinsed poha rest until it passes the finger-press test.
Do you need potato in poha?
Potato is optional. Skip it for a lighter kanda poha; the recipe will cook faster because you only need to soften the onion before adding the poha.
How do you make poha without onion?
For a no-onion version, keep the potato, peanuts or another crunchy garnish, curry leaves, green chilli, turmeric, lemon, and coriander. The flavor will be simpler, so finish with enough lemon, salt, and garnish.
What can replace peanuts in poha?
Cashews, roasted chana dal, sev, or extra vegetables can replace the crunch from peanuts. The recipe will still work, but the finished poha will have a softer bite.
Is poha healthy for breakfast?
Poha can be a light and useful breakfast, especially when paired with peanuts, vegetables, curd, sprouts, or another protein-rich side. Plain poha is mostly carbohydrate, so toppings and portion size matter if you want a more balanced meal. These high-protein Indian vegetarian meal prep ideas can help if you want to pair poha with more protein through the week.
Does red poha work for this recipe?
Red poha works, but it often needs a slightly longer resting time after rinsing. Check the flakes before cooking; they should be tender enough to break, but not wet or sticky.
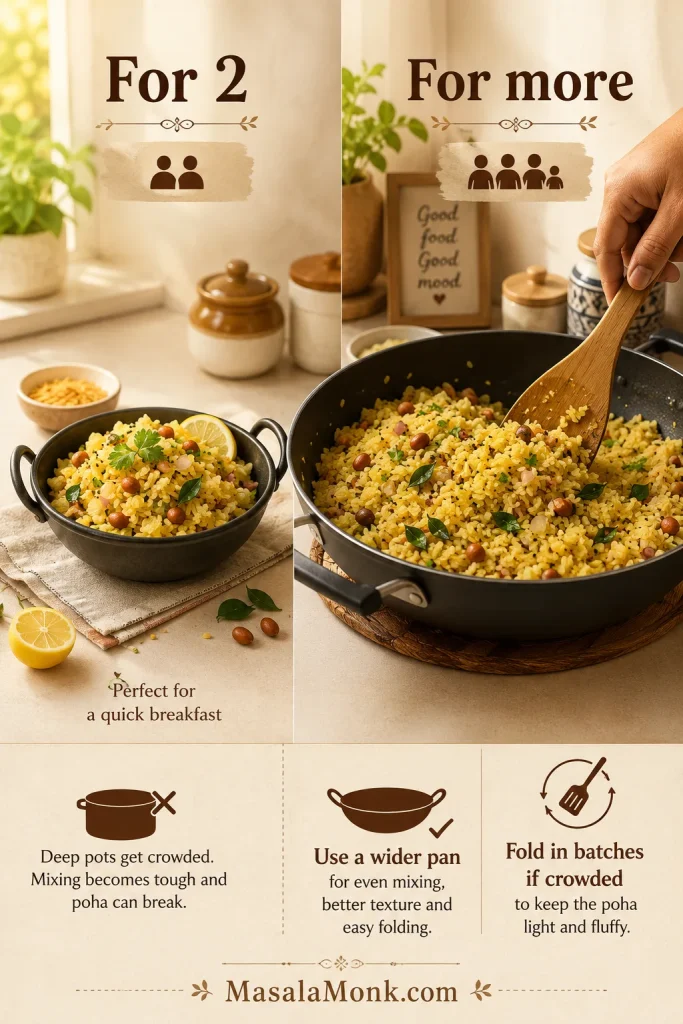
How do you scale this recipe for more poha?
Use a wider pan rather than a deeper one so the flakes can be folded gently without mashing. Double the ingredients, cook the onion and potato fully, then add the softened poha in batches if the pan feels crowded.
What is the difference between kanda poha and batata poha?
Kanda poha is made mainly with onion, while batata poha includes potato. Kanda batata poha uses both onion and potato, which is why it tastes fuller and feels more satisfying as breakfast.
Final Tips for Better Poha
Good poha is about timing and touch. The flakes do not want to be drowned, the potato does not want to be rushed, and the finished poha does not want rough stirring. Keep the heat low once the poha goes in, fold gently, and finish fresh once everything is hot and fluffy.
After that, the recipe becomes easy to personalize. Keep it simple as kanda poha, make it heartier with potato, add vegetables, or finish it Indori-style with sev, pomegranate, and jeeravan. Once you get the texture right, poha becomes the kind of breakfast you can make from memory.
If you want another warm, savory Indian breakfast to rotate with poha, this upma recipe guide is a natural next stop.


