Posted on Leave a comment

Homemade Granola Recipe

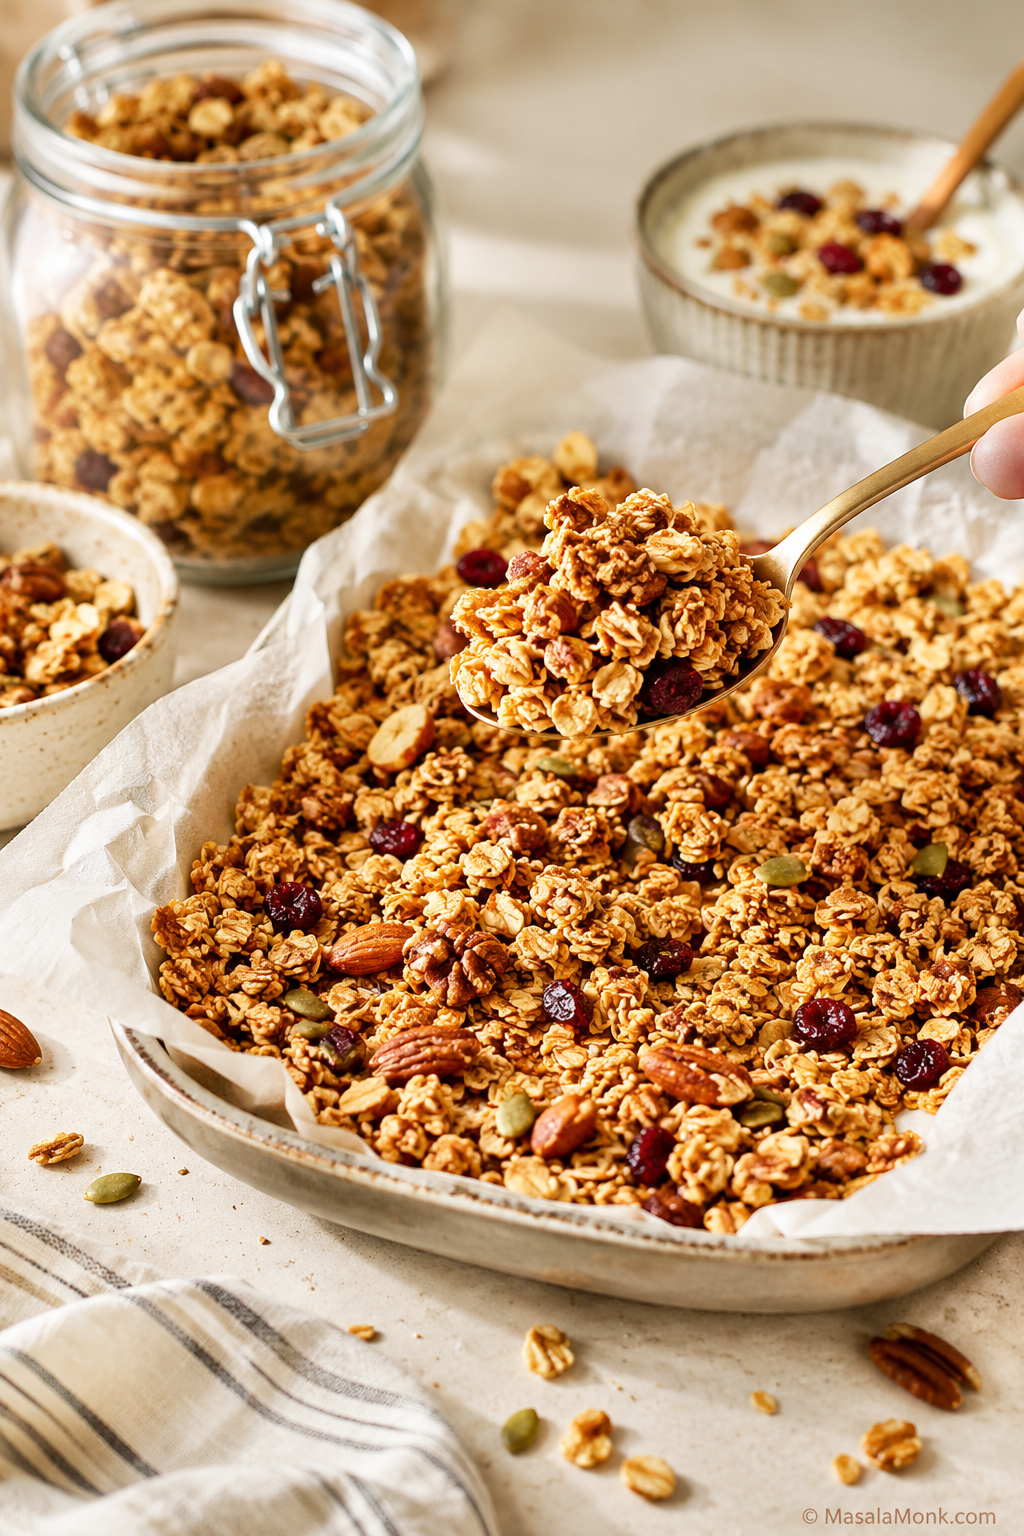
Golden homemade granola with oats, nuts, seeds, and clusters being lifted with a spoon, with a jar and yogurt bowl in the background.

Homemade granola is one of those small kitchen wins that feels much bigger than the effort. A tray of oats, nuts, maple syrup or honey, cinnamon, and vanilla goes into the oven, and soon the kitchen smells like breakfast for the whole week.

It is especially satisfying if you have ever bought a bag of granola that looked beautiful but tasted too sweet, too bland, or too dusty by the time it reached the bowl. The goal here is simple: crunchy granola that does not burn, clusters that actually hold, and a jar you will want to use all week.

This is a base-ratio recipe first. Once you understand the method, you can make the granola crunchier, chunkier, less sweet, nut-free, vegan, gluten-free, or better for yogurt without starting from scratch.

The base uses old-fashioned rolled oats, nuts or seeds, oil, maple syrup or honey, salt, cinnamon, and vanilla. It bakes low and steady at 300°F / 150°C, which gives the oats time to crisp while keeping the nuts and coconut from browning too aggressively.

The first batch teaches the method. The second batch starts to become your house granola: almonds and cranberries one week, peanut butter and chocolate the next, or pumpkin seeds and coconut when you want something nut-free.

Homemade Granola at a Glance Quick Answer
Oats to use Old-fashioned rolled oats
Oven temperature 300°F / 150°C
Bake time 35–40 minutes
Yield 7–8 cups granola
Servings 14–16 larger ½-cup servings or 28–32 smaller ¼-cup topping portions
Pan to use Large rimmed baking sheet lined with parchment
For clusters Press after stirring and cool fully before breaking
Add dried fruit After baking, not before
How to use it Yogurt bowls, parfaits, milk, smoothie bowls, snack jars, and make-ahead breakfasts

Quick Answer: The Best Homemade Granola Ratio

The easiest homemade granola ratio is:

4 cups / about 320–360g rolled oats + 1½ cups / 150–180g nuts or seeds + ½ cup / 120ml oil + ½ cup / 120ml maple syrup or honey.

Mix that with salt, cinnamon, and vanilla, then bake it on a parchment-lined rimmed baking sheet at 300°F / 150°C for 35–40 minutes. Stir once halfway through, press it back down if you want clusters, and let it cool fully on the pan before breaking it apart.

Hot granola lies a little. It often feels slightly soft when it first comes out of the oven, then crisps as it cools. If you bake it until it feels fully crunchy while hot, the edges and nuts can turn bitter.

That is the real appeal of homemade granola: one pan, one jar, and several breakfasts that feel easier before the week even starts.

Want the exact measurements without the full guide? Skip to the recipe card. If your last batch stayed soft, the troubleshooting section has the quick re-crisp fix.

Homemade granola ratio guide
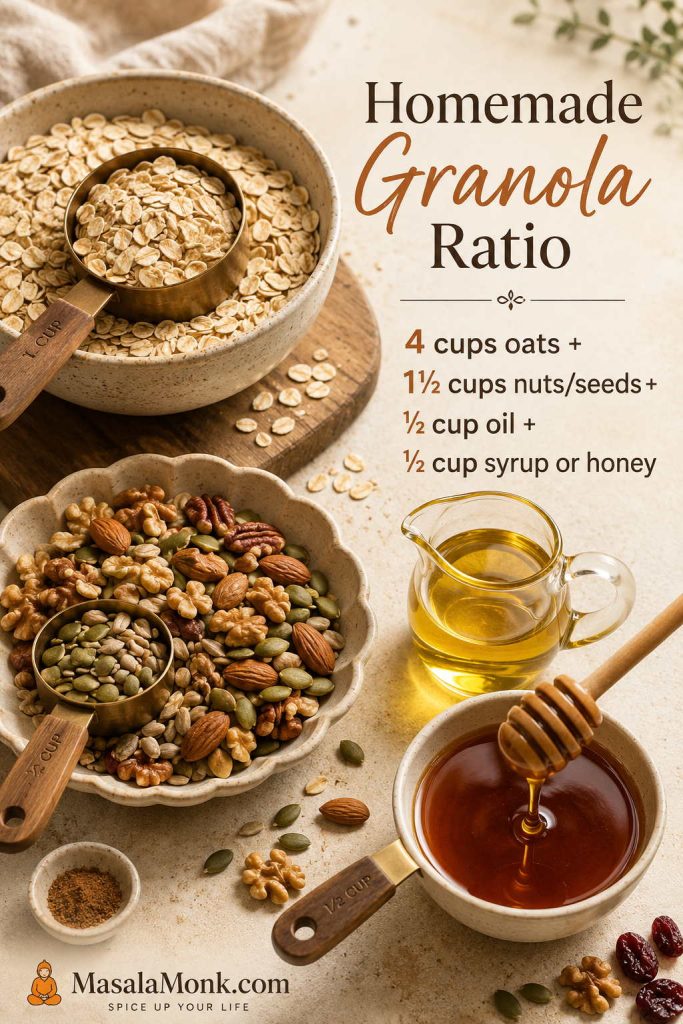
Homemade granola ratio guide showing rolled oats, nuts and seeds, oil, and maple syrup or honey arranged in separate ingredient zones.
Once the base granola ratio makes sense, the recipe becomes flexible: keep the oats, oil, and sweetener balanced, then change the nuts, seeds, spices, or fruit.

Why This Homemade Granola Recipe Works

The promise here is straightforward: granola should be easy, but texture should not be left to luck. This recipe keeps the ratio steady and shows you how to read the four things that matter most: heat, coating, space on the pan, and cooling.

A lower oven protects the edges

Many granola recipes bake hotter, but nuts, coconut, and the edges of the tray can brown quickly. At 300°F / 150°C, the oats have time to dry and crisp before the mix-ins over-toast.

Oil and sweetener do different jobs

Oil helps the oats toast evenly instead of turning dry and dusty. Maple syrup or honey adds sweetness, but it also helps bind the oats into clusters. Reduce either one too much and the batch will still work, but the texture will change.

Cooling is part of the cook time

The hardest part is leaving the pan alone. If you break the granola while it is warm, you get smaller pieces. If you wait until it firms up, the clusters hold better.

The base is flexible without becoming vague

Because nuts, seeds, honey, maple syrup, and dried fruit are not ingredients you want to waste, the recipe leans on clear signs instead of guesswork: glossy coated oats, an even layer, dry-looking edges, a warm nutty smell, and a full cool-down before breaking.

Once you know those signs, you can make the batch more snack-like, more yogurt-friendly, less sweet, vegan, gluten-free, nut-free, or cluster-heavy without losing the basic structure.

Ingredients for Homemade Granola

The ingredients are simple, but each one has a job. Once you understand those jobs, granola stops feeling like a strict formula and becomes something you can adjust with confidence.

Homemade granola ingredients at a glance
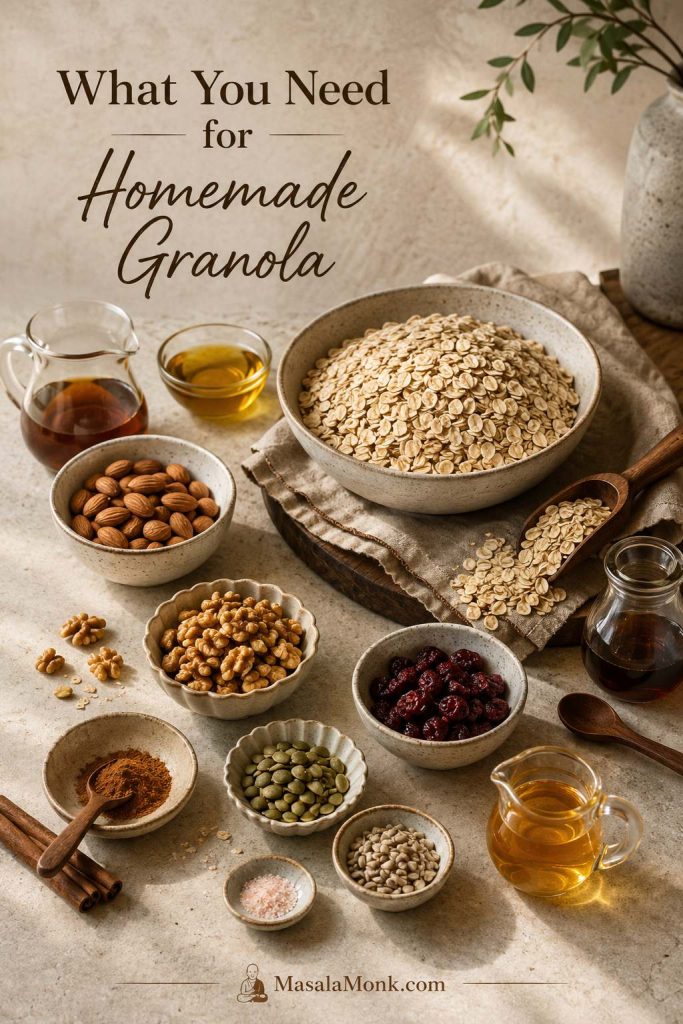
Homemade granola ingredients including rolled oats, nuts, seeds, oil, maple syrup or honey, cinnamon, vanilla, salt, and dried fruit.
The best homemade granola starts with simple ingredients doing different jobs: oats give structure, oil helps crispness, sweetener binds, and dried fruit adds chew after baking.
Ingredient Amount Why it matters
Old-fashioned rolled oats 4 cups / about 320–360g The main base. They toast well and create the best classic granola texture.
Nuts and seeds 1½ cups / 150–180g Add crunch, richness, flavor, and a more satisfying bite.
Oil ½ cup / 120ml Helps the oats crisp and brown evenly.
Maple syrup or honey ½ cup / 120ml Sweetens the granola and helps bind clusters.
Fine salt ¾ teaspoon, plus more to taste Balances the sweetness and keeps the granola from tasting flat.
Cinnamon 1–2 teaspoons / about 3–5g Adds warm breakfast flavor.
Vanilla extract 1 teaspoon / 5ml Rounds out the flavor and makes the granola smell bakery-like.
Dried fruit ⅔ cup / 80–100g Add after baking so it stays chewy instead of hard or burnt.

Rolled oats or old-fashioned oats

Old-fashioned rolled oats are the best oats for homemade granola. They are sturdy enough to toast, but thin enough to become crisp. They also hold their shape, which helps the granola feel like granola instead of powdery cereal crumbs.

If you are unsure about oat types, MasalaMonk’s guide to oats explains the differences between rolled oats, quick oats, instant oats, and steel-cut oats in more detail.

Nuts and seeds

Use almost any mix you like. Almonds, walnuts, pecans, cashews, pistachios, pumpkin seeds, sunflower seeds, sesame seeds, flaxseed, chia seeds, and hemp hearts all work.

For the best texture, use both larger pieces and smaller seeds. Sliced almonds plus pumpkin seeds give you crisp flakes and deeper crunch, while a good mix of nuts and seeds makes the granola more satisfying. For nut-free granola, skip the tree nuts and use seeds, coconut, and hemp hearts instead.

Oil

Coconut oil gives a classic sweet breakfast flavor. Olive oil tastes a little more savory and grown-up. Avocado oil or a neutral oil stays quieter in the background. Melted butter is delicious too, but it makes the batch richer and more dessert-like.

Do not remove the oil completely unless you are intentionally making an oil-free version. It is one of the reasons granola becomes crisp instead of papery.

Trying to skip oil completely? Read the oil-free granola notes before swapping it out, because fruit binders change the final texture.

Maple syrup or honey

Both work, but they give slightly different results. Use maple syrup if you want vegan granola, cleaner sweetness, and a lighter flavor. Use honey if you want deeper sweetness, a more golden finish, and slightly stickier clusters.
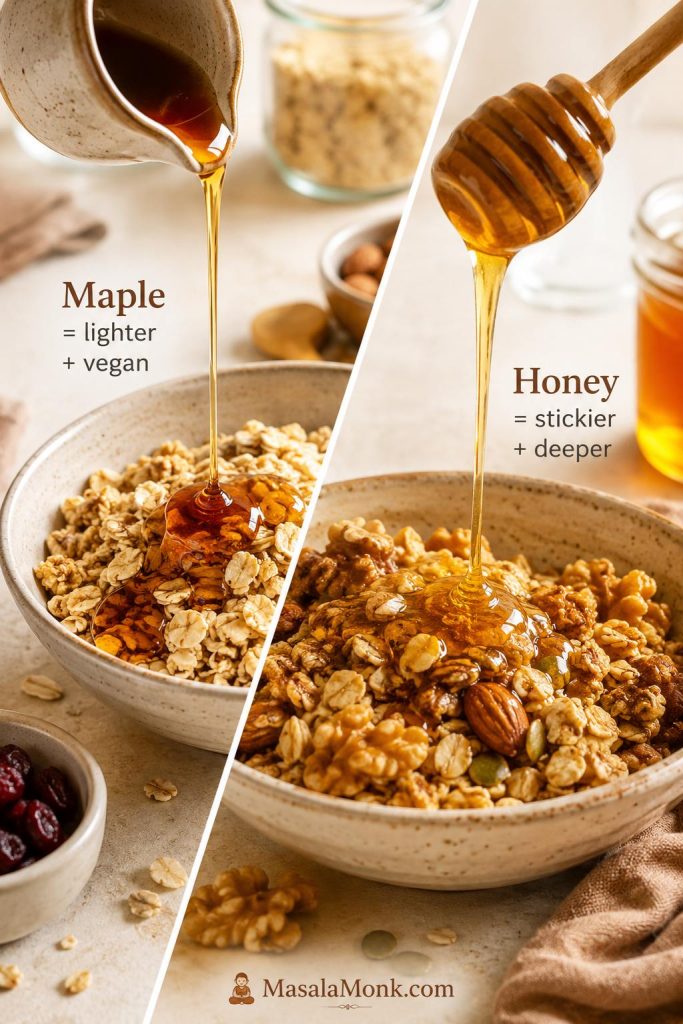
Side-by-side comparison of maple syrup and honey being poured over oats and nuts for homemade granola.
Maple syrup gives homemade granola a lighter flavor and keeps it vegan, while honey brings a deeper sweetness and can help clusters feel slightly stickier.

Using maple syrup for a vegan batch? The variation guide shows how to keep the texture flexible without relying on honey.

Salt, cinnamon, and vanilla

These small ingredients make a big difference. Salt keeps the granola from tasting one-dimensional. Cinnamon adds warmth. Vanilla makes the finished batch smell like something you bought from a very good bakery.

Dried fruit and chocolate

Raisins, cranberries, chopped dates, apricots, figs, cherries, and dried blueberries all work well. Stir them in after baking so they stay chewy instead of turning hard or bitter.

Chocolate chips should also go in after the granola cools. Add them while the tray is hot and they will melt through the batch, which can be delicious, but it is not the same as little chocolate pieces scattered through crisp granola.

Best Oats for Granola

The best oats for granola are old-fashioned rolled oats. They toast evenly, hold their shape, and give the finished granola a crisp but hearty texture.
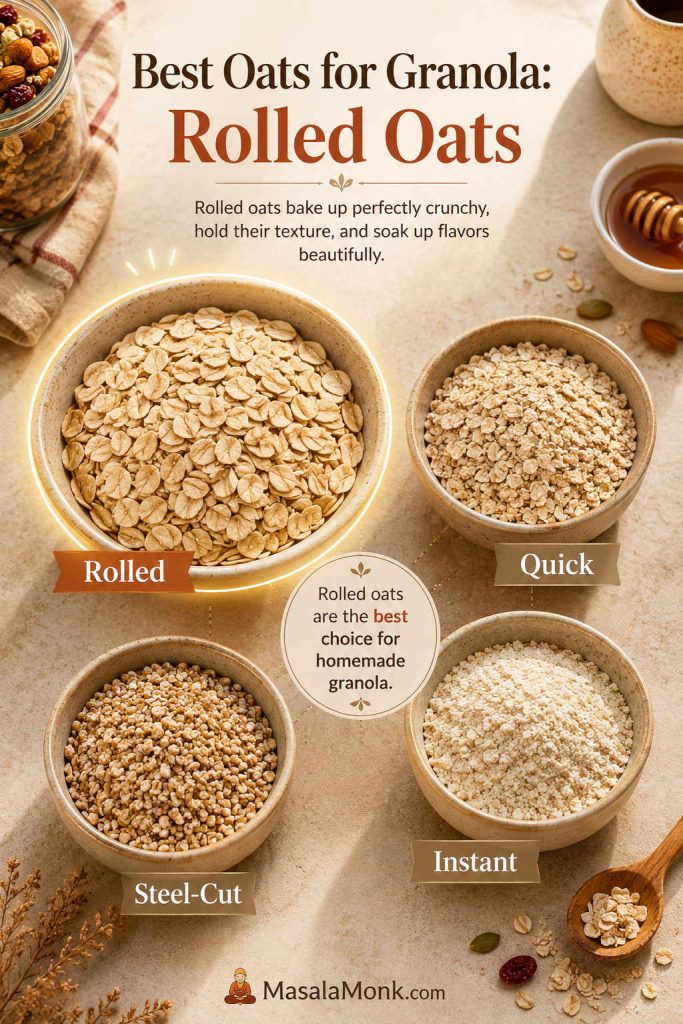
Oat comparison guide showing rolled oats, quick oats, instant oats, and steel-cut oats for choosing the best oats for granola.
Rolled oats are the safest choice for crunchy homemade granola because they toast evenly, hold their shape, and avoid the soft or powdery texture of finer oats.
Oat type Use for granola? Best answer
Rolled oats / old-fashioned oats Yes Use for classic homemade granola, clusters, and crunch.
Quick oats Only in a pinch They make softer, less defined granola and fewer sturdy clusters.
Instant oats No Too fine and powdery for good granola texture.
Steel-cut oats Not for classic granola Too hard and not a direct swap for rolled oats.
Certified gluten-free rolled oats Yes Best choice for gluten-free homemade granola.

Rolled oats and old-fashioned oats are usually the same style of oat for recipe purposes, while steel-cut oats are cut pieces of the oat groat and do not behave the same way on a baking sheet. For more detail, see MasalaMonk’s guide to old-fashioned oats and rolled oats.

How to Make Homemade Granola

The method is simple, but a few small choices decide whether the tray comes out crisp and chunky or pale and soft. Think of it as controlled drying: coat the oats well, spread them evenly, bake low and steady, stir once, and let cooling do the final crisping.
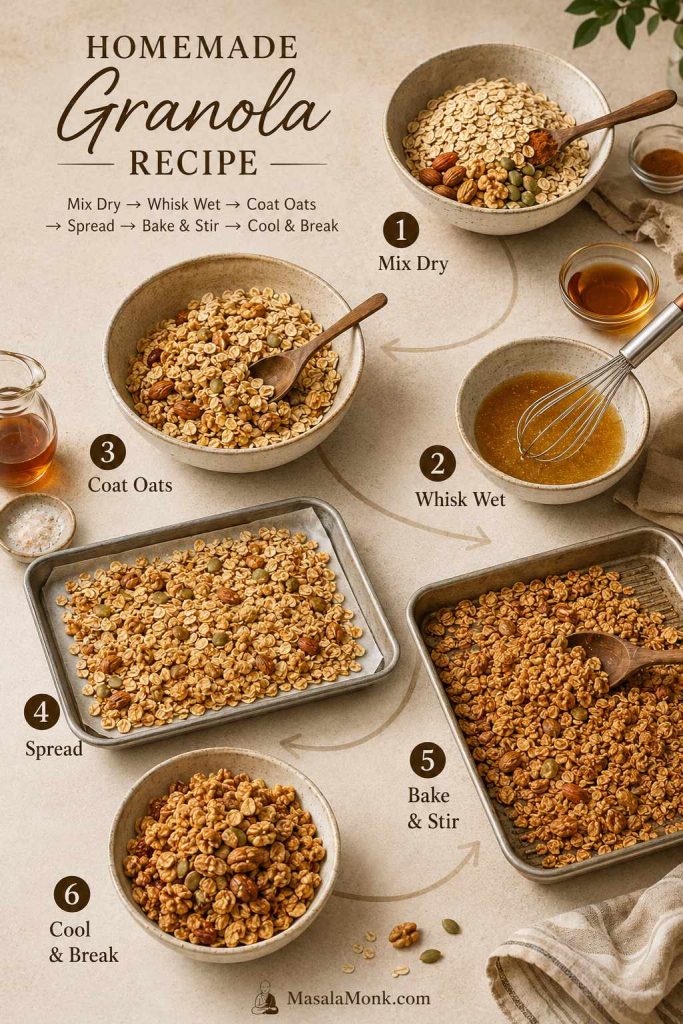
Step-by-step homemade granola process board showing dry ingredients, wet ingredients, coated oats, spreading, baking, stirring, cooling, and breaking.
Granola is less about complicated steps and more about order: coat first, spread evenly, bake gently, and let the tray cool before breaking it into clusters.

Step 1: Heat the oven and line the pan

Preheat the oven to 300°F / 150°C. Line a large rimmed baking sheet with parchment paper.

A rimmed pan keeps the granola from sliding off when you stir. Parchment prevents sticking and makes it easier to lift off bigger clusters later. If your baking sheet is small, divide the mixture between two pans. Crowded granola steams before it crisps.

If your baking sheet is very dark, start checking a few minutes early. Dark pans can brown granola faster than light-colored pans.

Step 2: Mix the dry ingredients

In a large bowl, combine the rolled oats, nuts, seeds, salt, and cinnamon. If your coconut flakes are delicate or already toasted, save them for the halfway stir so they do not brown too fast.

Step 3: Mix the wet ingredients

In a smaller bowl or measuring cup, whisk together the oil, maple syrup or honey, and vanilla. When honey is thick or coconut oil has solidified, warm the wet ingredients gently just until pourable, not hot.

Step 4: Coat the oats well

Pour the wet mixture over the oats and stir thoroughly. Every oat should look lightly glossy. Dry, dusty oats will not toast or cluster as well.
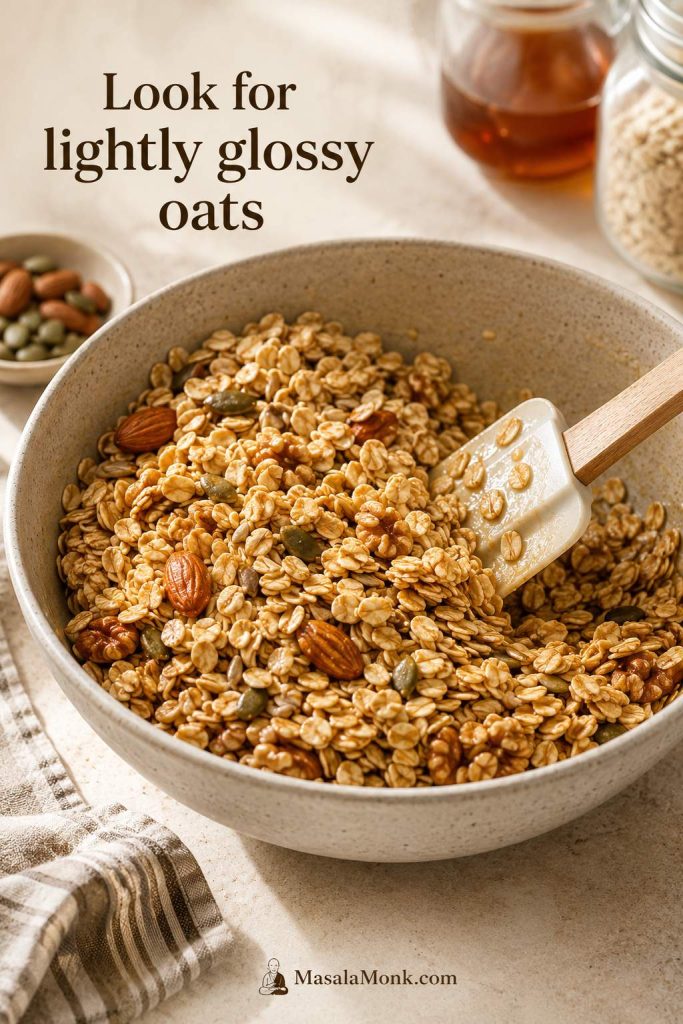
Close-up of rolled oats, nuts, and seeds lightly coated with oil and sweetener in a bowl with a spatula.
Lightly glossy oats are a good sign before baking. If the mixture looks dusty, the granola may toast unevenly and struggle to form crisp clusters.

Step 5: Spread and press

Tip the mixture onto the prepared pan and spread it into an even layer. For looser granola, spread it evenly and leave it alone. For clusters, press the mixture down gently with a spatula so the oats bake together.
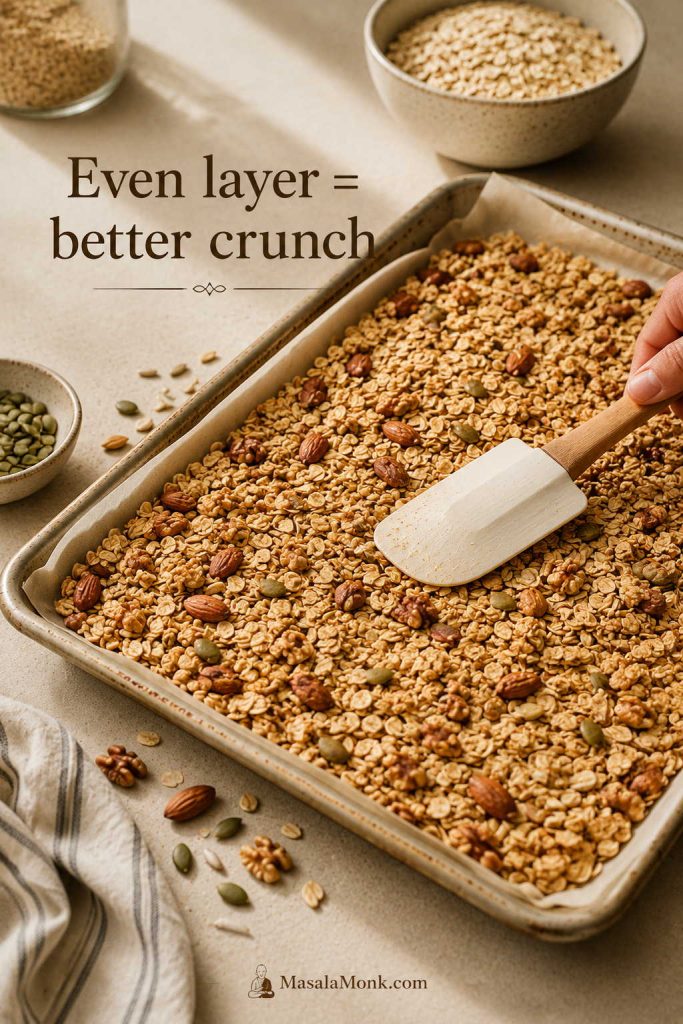
Granola mixture being spread into an even layer on a parchment-lined rimmed baking sheet with a spatula.
Give the oats room to dry and toast. If the pan is too crowded, the granola can steam before it gets crisp.

Step 6: Bake, stir once, and press again

Bake for 20 minutes. Remove the pan, stir once, add delicate coconut now if using, spread the granola back out, and press again for clusters.
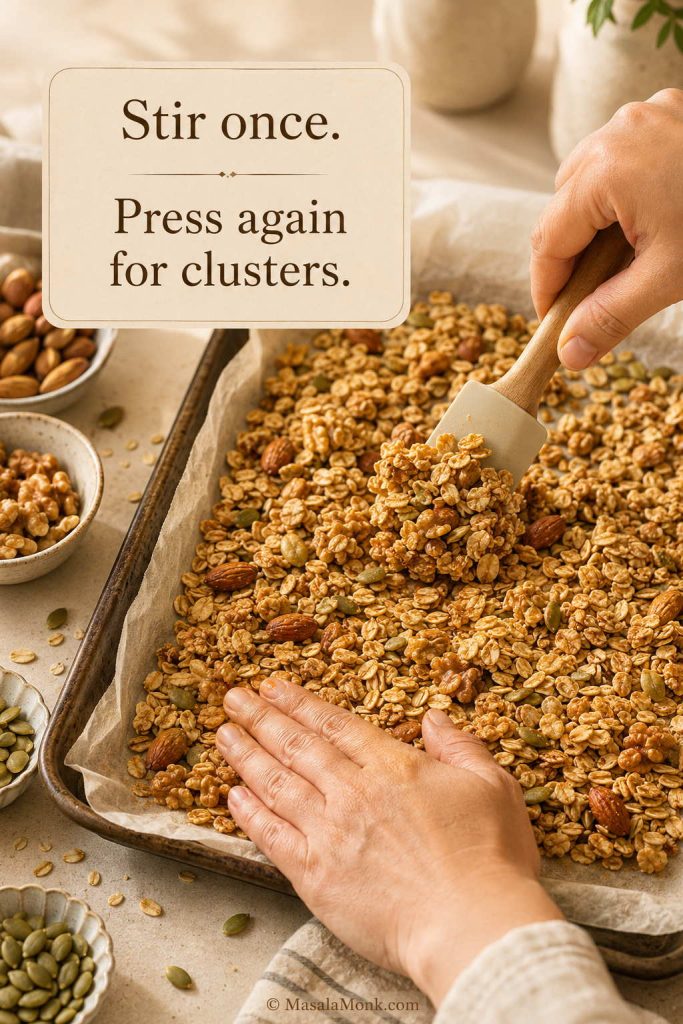
Partially baked granola on a tray being stirred and pressed down with a spatula to help clusters form.
The halfway stir keeps the batch even; pressing it back down afterward helps the coated oats cool into sturdier granola clusters.

For bigger pieces, check the granola clusters section before changing the binder or stirring pattern.

Return the pan to the oven and bake for another 15–20 minutes, until the kitchen smells toasted and warm, the surface looks dry, and the edges are lightly golden. It should smell nutty, not sharp or burnt, and the granola will still feel softer than it tastes later.

What finished granola should look like
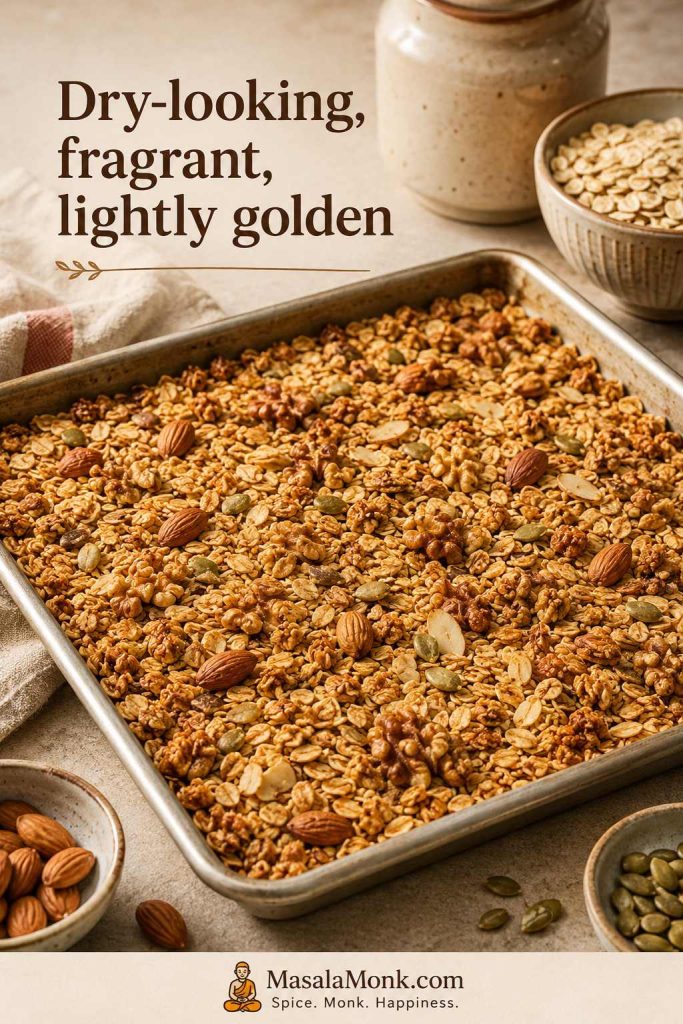
Tray of homemade granola with dry-looking oats, lightly golden edges, nuts, and seeds showing the doneness stage before cooling.
Finished granola does not need to look dark. Instead, stop when the surface looks dry, the edges are lightly golden, and the kitchen smells warm and toasted.

Step 7: Cool before breaking

Set the pan on a rack or heat-safe surface and leave it alone until the granola firms up, usually 35–45 minutes. Break it too early and the clusters will be smaller.
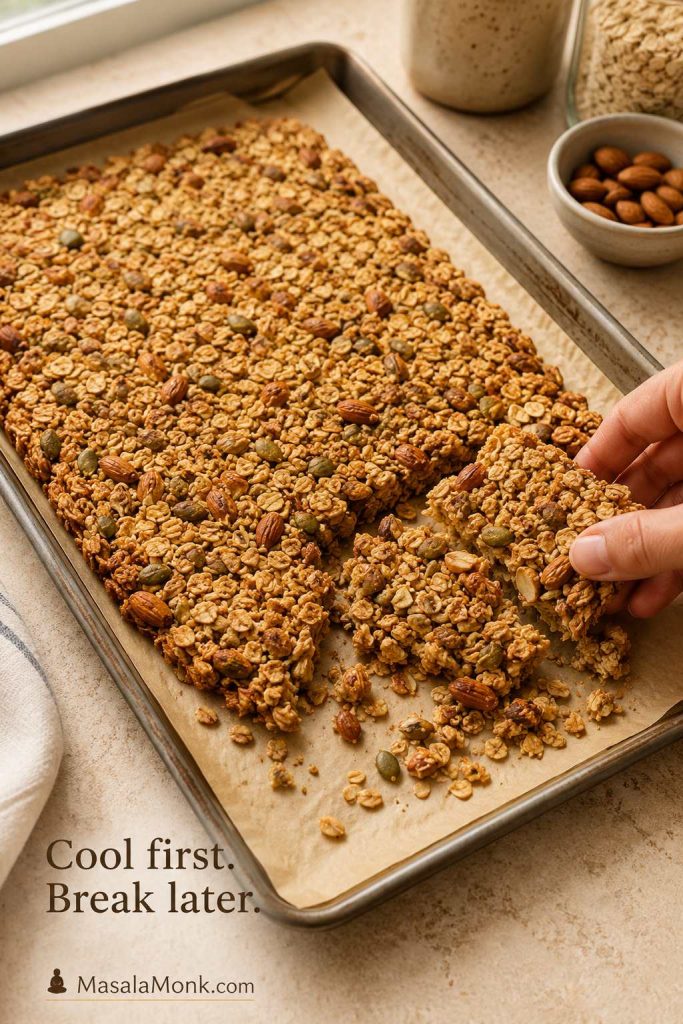
Cooled granola slab on parchment being broken by hand into large clusters on a baking sheet.
Cooling is part of the recipe, not a waiting penalty. Once the granola firms on the tray, it breaks into cleaner, crunchier clusters.

Step 8: Add dried fruit

Once the granola is cool or just barely warm, add dried fruit. Break the granola into the size you like, then transfer it to an airtight jar or container.
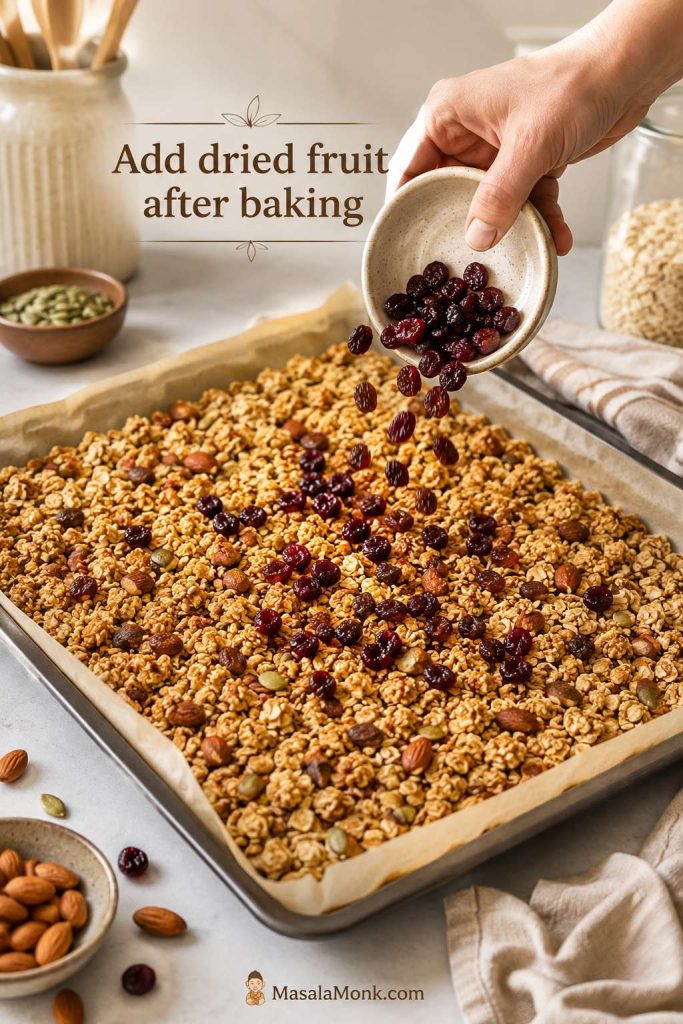
Dried cranberries and raisins being scattered over cooled baked granola on parchment paper.
Add dried fruit after baking because the oven can turn raisins, cranberries, dates, and apricots hard or bitter before the oats are finished.

How to Make Granola Crunchy

Crunchy granola comes from four things: enough coating, enough space on the pan, low, steady heat, and a full cool-down. If one of those is missing, the batch may taste soft, dusty, steamed, or overbaked.

The four controls for crunchy granola
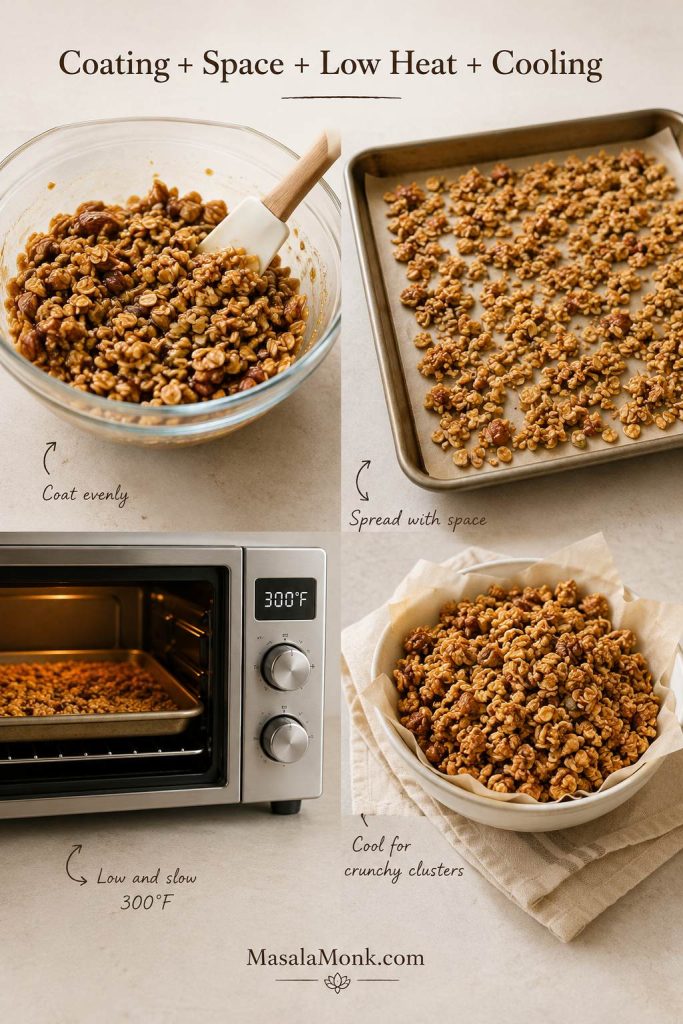
Granola texture guide showing coated oats, spaced granola on a tray, a low oven cue, and cooled clusters.
Crunchy granola comes from four small controls working together: glossy coating, space on the pan, gentle heat, and a full cool-down before storing.
Crunch factor What to do What it prevents
Good coating Stir until the oats look lightly glossy. Dry, papery oats.
Space on the pan Spread in an even layer; use two pans if needed. Steamed, soft granola.
Low heat Bake at 300°F / 150°C. Burnt nuts and dark edges.
Full cooling Let the tray rest before judging texture. Breaking clusters too soon.
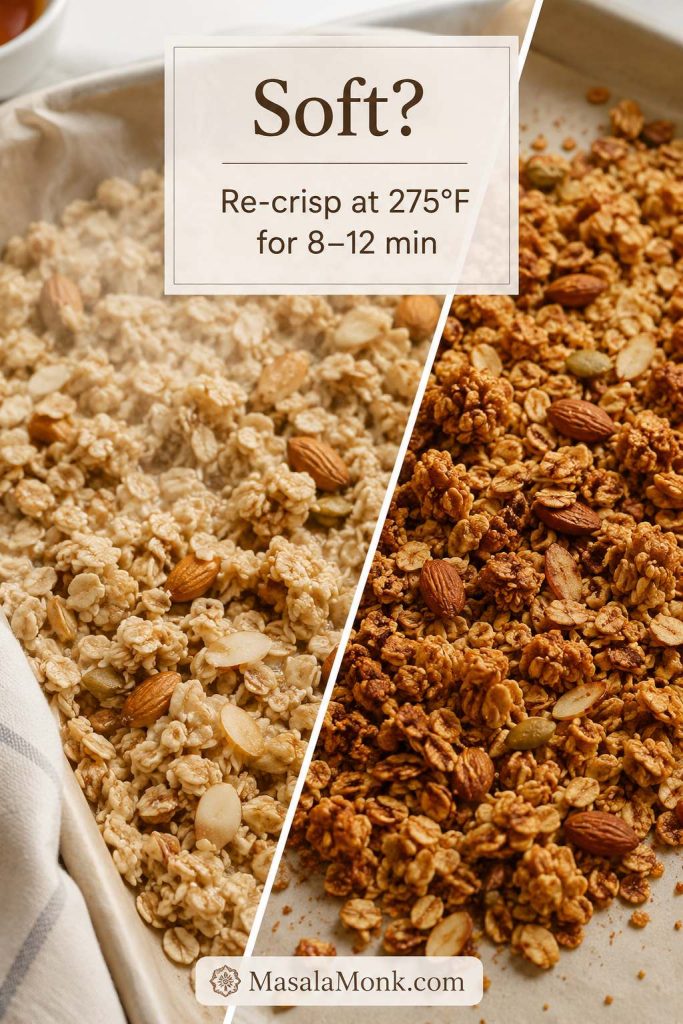
Quick fix: If your granola cooled and still tastes soft, spread it back on the pan and bake it at 275°F / 135°C for 8–12 minutes. Let it cool again before storing.

Soft vs crunchy granola

Diagonal comparison of pale soft granola and golden crunchy granola with a note about re-crisping at 275 degrees Fahrenheit.
Soft granola is usually fixable. Spread it back out, warm it gently at 275°F, and then cool it fully before deciding whether it needs more time.

How to Make Granola Clusters

Clusters are the pieces people pick out of the jar first. Some readers want loose, cereal-style granola they can scoop with milk; others want big crunchy chunks for yogurt, parfaits, snack jars, and smoothie bowls.

You can choose that texture instead of hoping for it.
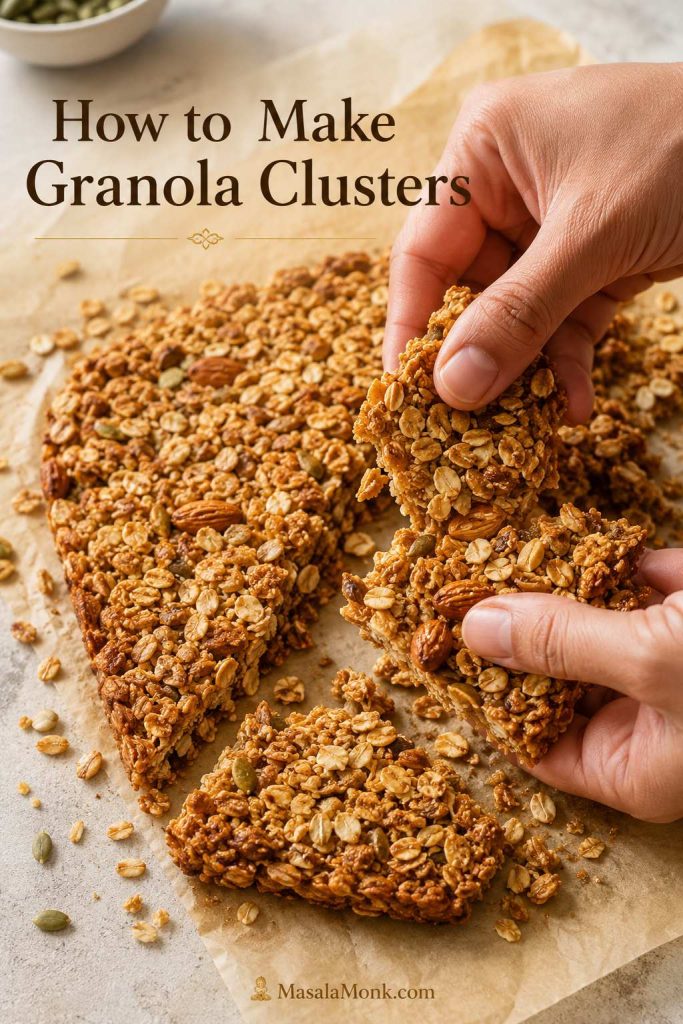
Hands breaking large homemade granola clusters from a cooled slab on parchment paper.
Bigger granola clusters come from restraint: stir less, press the mixture down, and wait until the slab cools before breaking it apart.

Choose your granola cluster size

Texture you want What to do
Loose cereal-style granola Stir twice, spread evenly, and break into smaller pieces after cooling.
Small everyday clusters Stir once, press down after stirring, and wait until firm before breaking.
Big bakery-style clusters Add 1 beaten egg white, press firmly, stir minimally, and cool completely.
Vegan clusters Add almond butter or peanut butter, press into a compact layer, and let the slab set before breaking.
Extra crisp clusters Bake 5 minutes longer if needed, then cool before breaking.
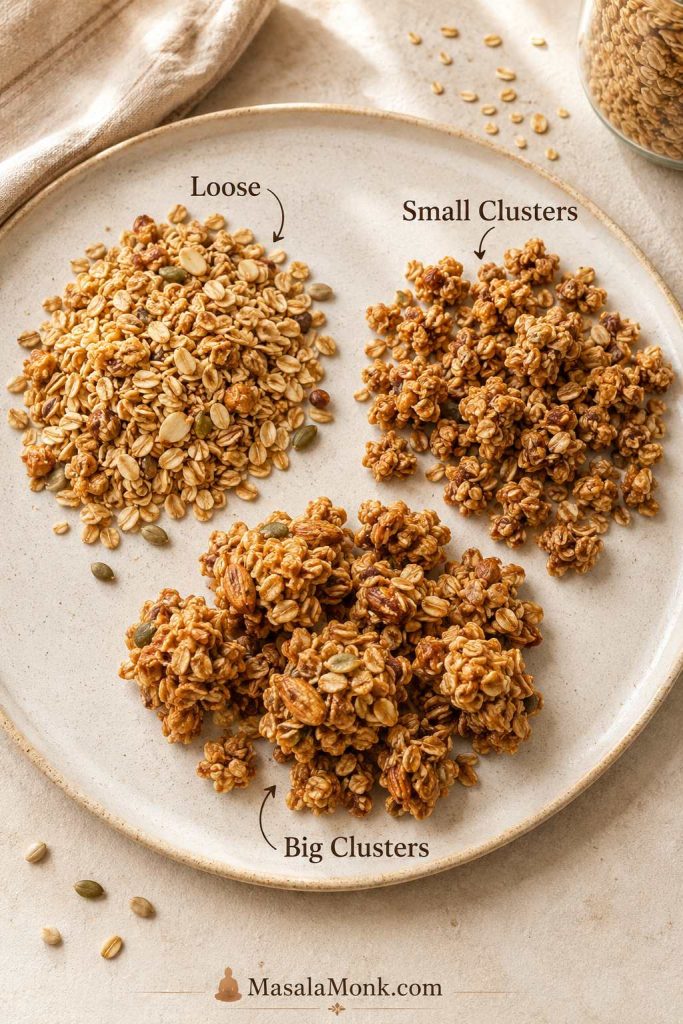
Cluster size guide showing loose granola, small granola clusters, and large bakery-style granola clusters.
Cluster size depends on how you bake and break the batch. Loose granola suits milk, small clusters work well on yogurt, and bigger pieces are best for snack jars.

The base recipe is enough for small everyday clusters. To make larger bakery-style clusters, add 1 beaten egg white to the coated oats before baking. A vegan version can use 2 tablespoons almond butter or peanut butter in the wet mixture instead.

Why too many add-ins break clusters

If you want bigger clusters, avoid overloading the mixture with too many loose add-ins. Extra nuts, seeds, coconut, and dried fruit can taste great, but heavy mix-ins make the slab easier to break apart.
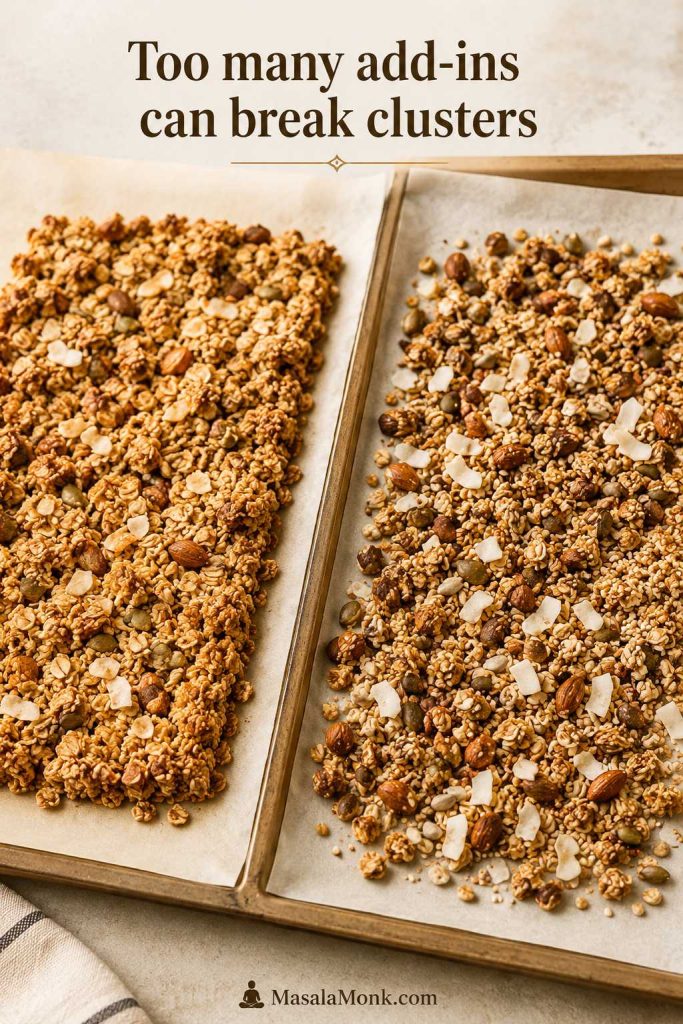
Comparison of balanced granola holding together and overloaded granola with too many nuts, seeds, and coconut breaking apart.
Extra mix-ins add flavor, but too many loose nuts, seeds, and coconut flakes can weaken the slab and make large granola clusters harder to keep.

If you warmed the oil and sweetener, let that mixture cool until just warm before adding egg white. Hot liquid can cook the egg white before it reaches the oats.

Loose granola is not a failure either. It is often better when you want a cereal-style bowl with milk or a lighter topping that scatters over fruit.

Homemade Granola for Yogurt, Parfaits, Bowls, and Milk

A spoonful of crunchy granola can turn plain yogurt into breakfast, make a smoothie bowl feel finished, and make a simple fruit bowl feel more satisfying. Granola is often best as the finishing crunch, not the base of the whole bowl.
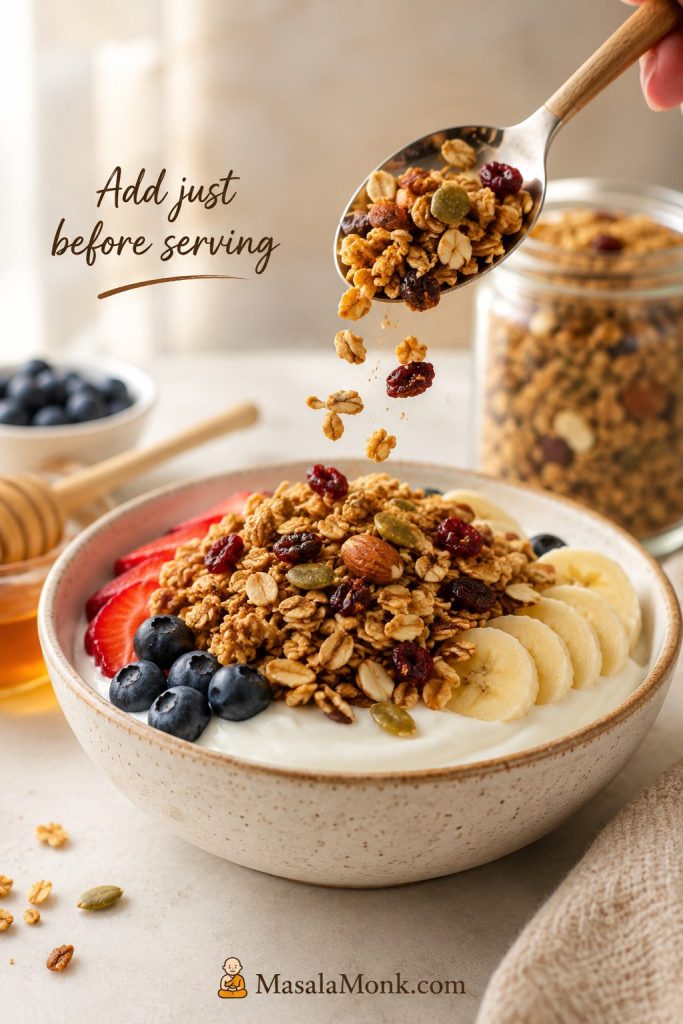
Spoonful of homemade granola being added over a bowl of thick yogurt with berries and banana slices.
Add granola to yogurt right before eating. That way, the oats stay crisp, the clusters hold longer, and the bowl keeps its contrast.

For crisp granola, timing matters: add it close to serving. Yogurt softens granola as it sits.

How much granola to use

Use Good starting amount Texture that works well Tip
Yogurt bowl ¾–1 cup yogurt + ¼ cup granola + fruit Loose granola or small clusters Add just before eating so it stays crisp.
Parfait jar ¾ cup Greek yogurt + ¼ cup fruit + ¼ cup granola Larger clusters Keep granola separate until serving if making ahead.
Larger breakfast bowl ½ cup granola + milk or yogurt + fruit Loose granola or small clusters Use a bigger bowl when granola is the main base.
Smoothie bowl 2–4 tablespoons granola Crunchy clusters Sprinkle on top instead of mixing in, especially with a thick fruit base like mango, banana, or berries.
Kids snack bowl ¼ cup granola + banana or berries Peanut butter or chocolate variation Add chocolate chips after cooling.
High-protein bowl Greek yogurt + ¼ cup granola + seeds Protein granola with small clusters Add hemp hearts, chia, flax, or nuts.
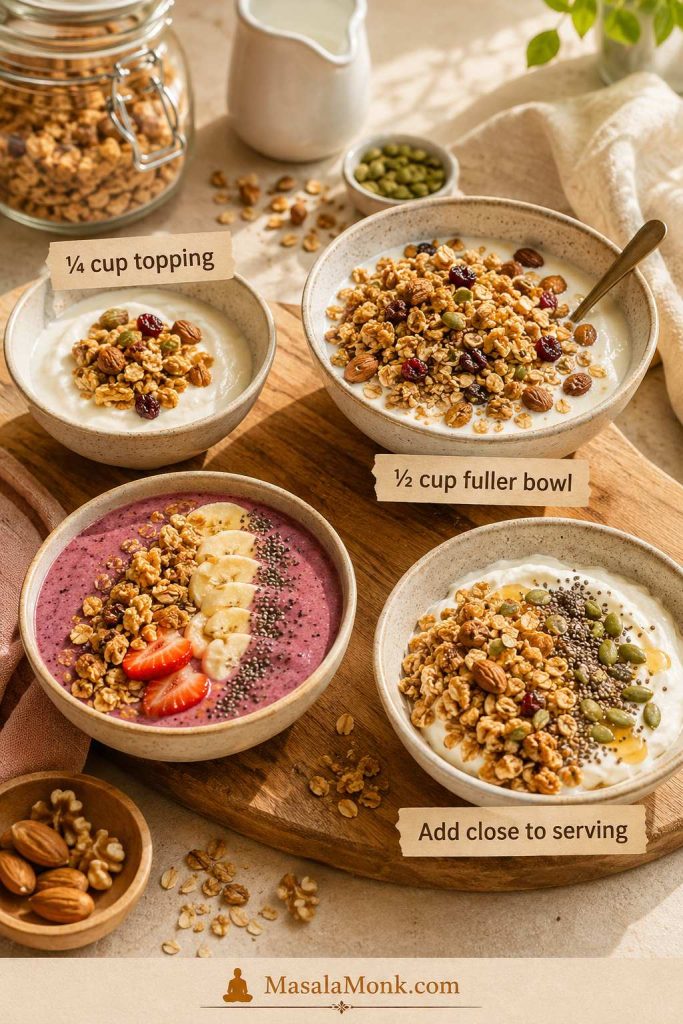
Granola portion guide showing yogurt topping, fuller granola bowl, smoothie bowl topping, and high-protein yogurt bowl ideas.
Use ¼ cup when granola is a crunchy topping and ½ cup when it is the main breakfast base. Then add yogurt, milk, fruit, or seeds around it.

Use these amounts as starting points, not rules. Granola is forgiving once you know whether you want it as a topping, a cereal-style bowl, or a snacky cluster.

Make-ahead parfaits without soggy granola

For meal-prepped yogurt parfaits, keep the granola separate unless you prefer a softer texture. If you layer it early, expect a softer, chewier granola layer rather than crisp clusters. The same rule applies to smoothie bowls: blend the fruit first, then finish with granola right before serving.
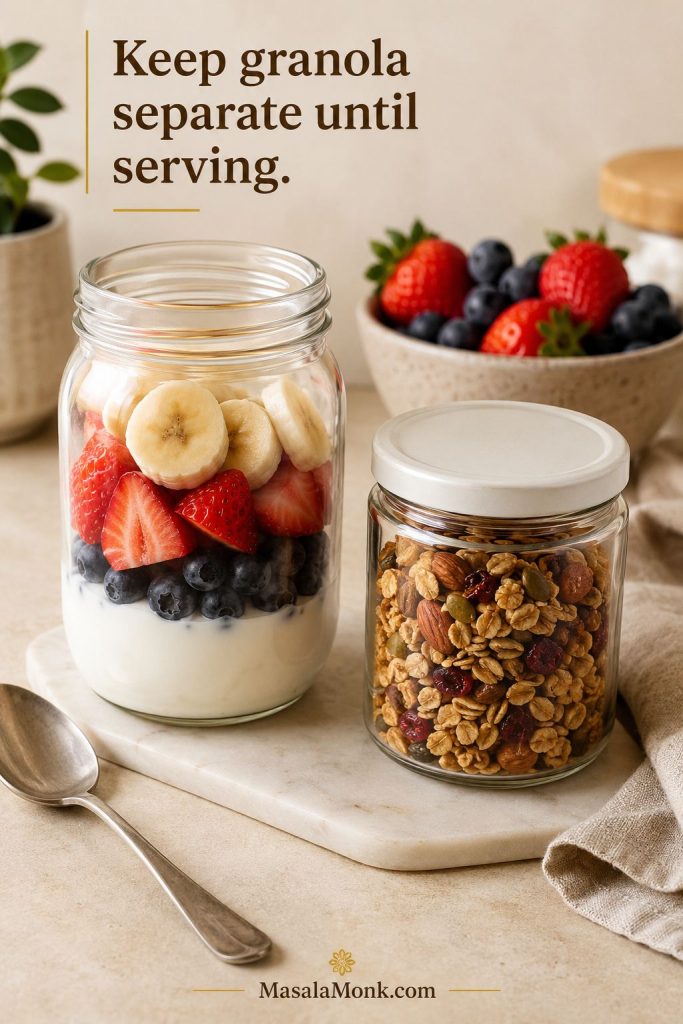
Meal-prep setup with a jar of yogurt and fruit beside a separate jar of homemade granola.
For make-ahead parfaits, prep the yogurt and fruit first, but keep the granola separate until serving so the clusters stay crisp.

If you are making a batch for the week, the storage section explains how to keep the main jar crisp.

This recipe also works beautifully as a topping for overnight oats. For a higher-protein breakfast, pair a smaller handful of granola with Greek yogurt or use it on high-protein overnight oats.

Homemade Granola Variations: Gluten-Free, Vegan, Nut-Free, Low-Sugar, and More

Homemade granola is not automatically low-calorie, but it can be a smarter everyday choice because you control the oats, nuts, seeds, oil, sweetener, and portion size. Starting with whole-grain oats gives the recipe a hearty base, while the rest of the mix-ins are up to you.

Think of granola as a flavorful crunch booster: a ¼-cup handful can make yogurt, fruit, oatmeal, or a smoothie bowl feel much more satisfying. For a fuller bowl, use ½ cup with milk or yogurt and add fresh fruit.
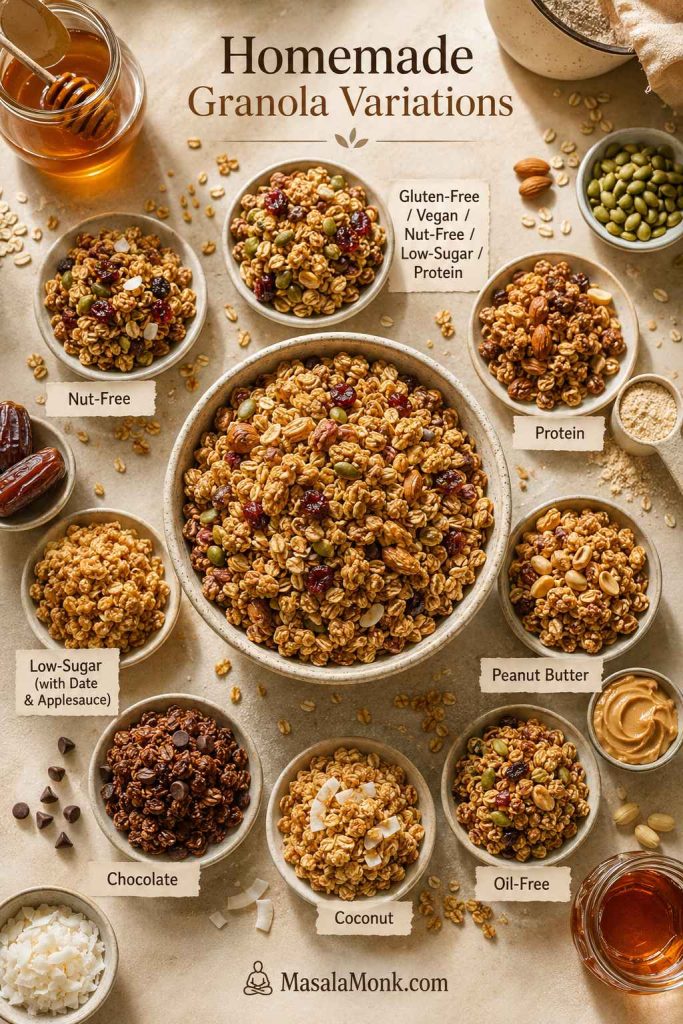
Homemade granola variations board with bowls for gluten-free, vegan, nut-free, low-sugar, protein, peanut butter, chocolate, coconut, and oil-free granola.
The same homemade granola base can move in several directions: gluten-free, vegan, nut-free, low-sugar, protein, peanut butter, chocolate, coconut, or oil-free.

Choose the variation you need

Variation How to adjust Texture note
Gluten-free granola Use certified gluten-free rolled oats. Texture stays close to the original.
Vegan granola Use maple syrup instead of honey. For vegan clusters, add almond butter or peanut butter.
Nut-free granola Use pumpkin seeds, sunflower seeds, sesame seeds, coconut, or hemp hearts. Still crunchy, but lighter than nut-based granola.
Protein granola Add more seeds and nuts, or start with ¼ cup protein powder. Too much protein powder can make granola dry or chalky.
Low-sugar granola Reduce maple syrup or honey to ⅓ cup. Less sweetener usually means fewer clusters.
Peanut butter granola Add 2–3 tablespoons peanut butter to the wet mixture. Better clusters and a stronger snack-like flavor.
Chocolate granola Add 2 tablespoons cocoa powder before baking; add chocolate chips after cooling. Do not bake chocolate chips unless you want them melted through.
Coconut granola Add coconut flakes halfway through baking if they brown quickly. Large coconut flakes can burn if added too early.
Oil-free granola Replace oil with mashed banana, applesauce, date paste, or extra nut butter. Softer and chewier than the main recipe.
No-added-sugar style Use mashed banana or date paste instead of syrup. Softer, less crisp, and less clumpy than the base recipe.

Use the variations as steering points, not separate recipes: a little more protein here, a little less sugar there, a different binder when you want clusters.

Gluten-free granola

Oats are naturally gluten-free, but cross-contact during processing can be an issue. For gluten-free homemade granola, use gluten-free oats and check the labels on nuts, seeds, dried fruit, chocolate, and other mix-ins.

Vegan granola

Use maple syrup instead of honey. For vegan clusters, use almond butter, peanut butter, or another nut or seed butter as the binder instead of egg white.

Protein granola

For a protein granola variation, start with ingredients that naturally improve texture: pumpkin seeds, sunflower seeds, hemp hearts, chia seeds, flaxseed, almonds, peanuts, or walnuts.
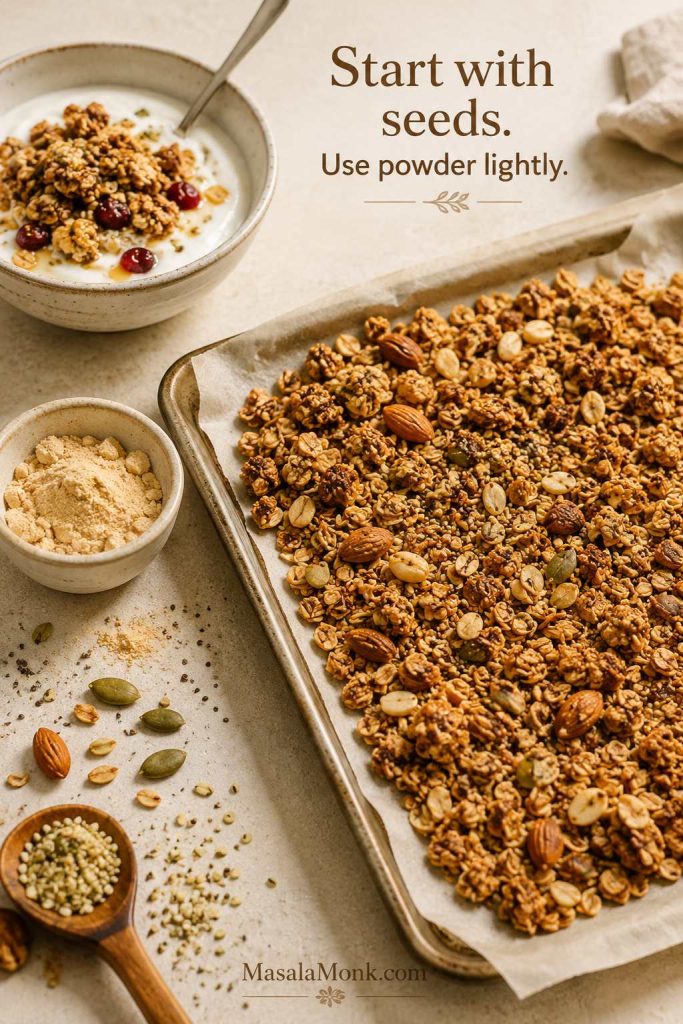
Protein granola with oats, nuts, seeds, a small bowl of protein powder, and a yogurt bowl in a warm breakfast setting.
Seeds and nuts are the easiest way to make protein granola feel natural. Protein powder can work too, but start small so the texture stays crisp instead of chalky.

With protein powder, start with ¼ cup, not ½ cup. Mix it into the dry ingredients before adding the wet mixture. If the oats look dusty or dry after mixing, add 1–2 extra tablespoons of maple syrup, honey, oil, or nut butter.

Plant-based powders usually absorb more moisture, while some whey powders brown faster, so start small before scaling up. Seeds and nuts are the safer protein boost if texture matters most.

If you enjoy protein-rich oat breakfasts, this high-protein oatmeal guide has more ideas for building a satisfying bowl.

Low-sugar granola

You can reduce the maple syrup or honey to ⅓ cup. The granola will be less sweet and may form fewer clusters, but it can still be crisp and flavorful.

To make it taste fuller, keep the salt, increase the cinnamon and vanilla slightly, use flavorful toasted nuts or seeds, and add dried fruit after baking if you want little pockets of sweetness.

Peanut butter granola

Add 2–3 tablespoons peanut butter to the wet mixture. If your peanut butter is thick, warm it gently with the oil and maple syrup or honey so it mixes smoothly. A spoonful of homemade peanut butter works especially well when you want a stronger roasted-peanut flavor.

Peanut butter granola is especially good with bananas, chocolate chips, raisins, Greek yogurt, or a splash of milk.

Oil-free granola

Oil-free granola is possible, but it will not have the same crisp texture as the main recipe. Use mashed banana, applesauce, date paste, or extra nut butter to help coat the oats, and expect a softer, chewier finish.
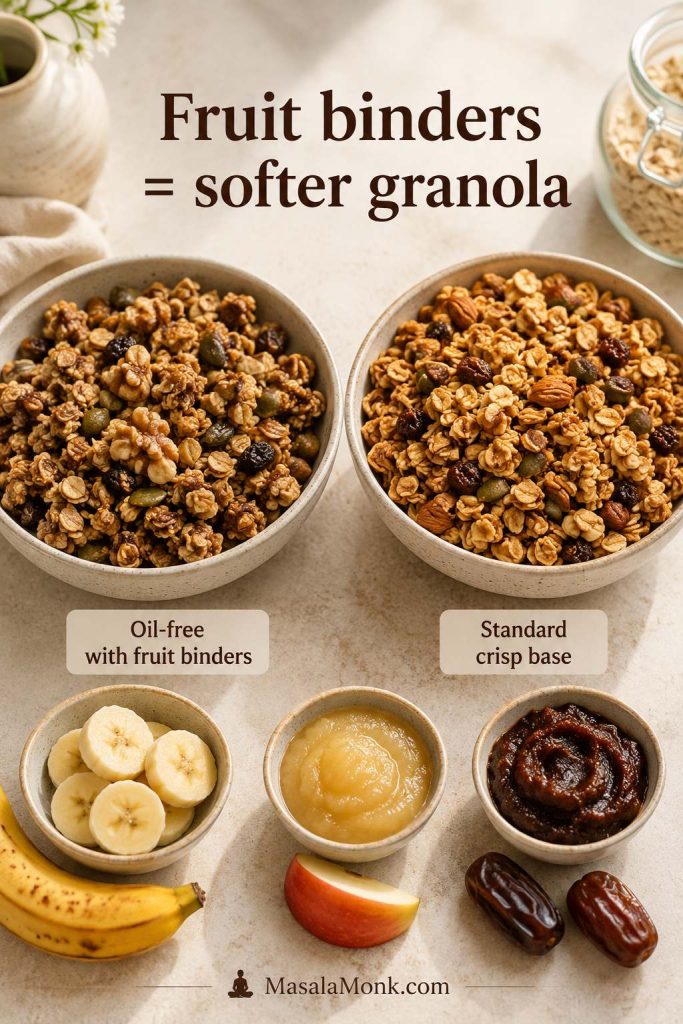
Oil-free granola comparison showing softer granola made with fruit binders beside a standard crisp granola base, with banana, applesauce, and date paste below.
Oil-free granola can still be delicious, but fruit binders like banana, applesauce, and date paste usually make it softer than the standard crisp base.

Fruit-based binders like banana, applesauce, and date paste add moisture, so the granola will usually be softer and less crisp than the maple or honey version. For a firmer oat-based snack that leans into fruit and dates instead of syrup, these healthy oat cookies are a better direction than trying to make this granola behave like a cookie.

Easy Homemade Granola Flavor Ideas

Once the base recipe feels familiar, the fun is in changing the flavor without changing the method. Keep the oats, oil, sweetener, and salt steady, then change the nuts, seeds, spices, fruit, or finishing mix-ins.

Pick one direction for each batch instead of adding everything at once; the best granola usually tastes intentional, not crowded.
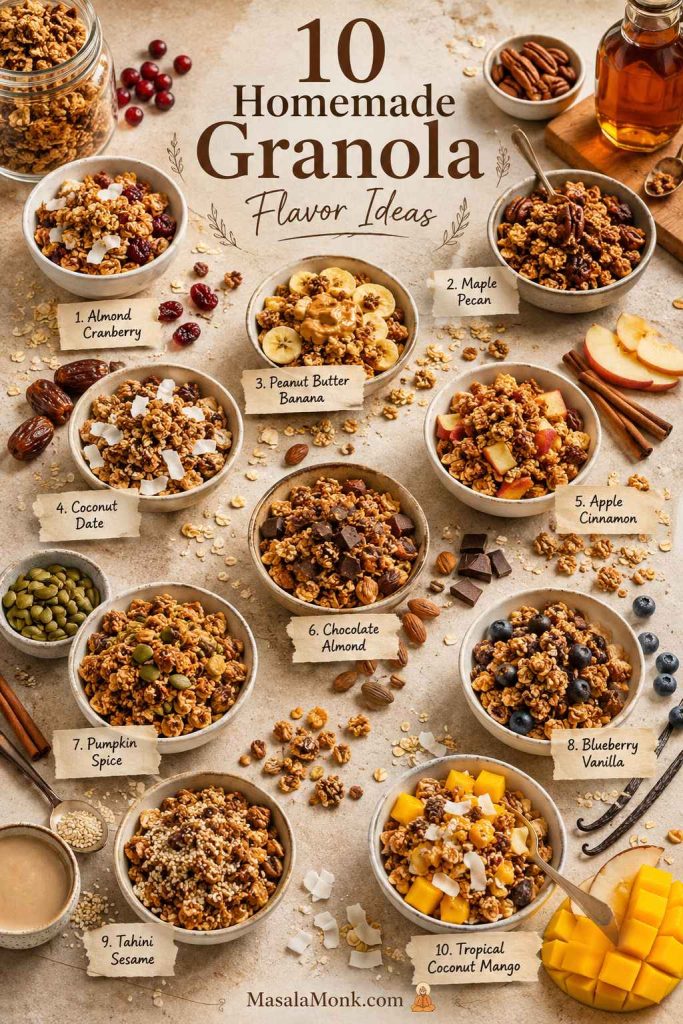
Board of ten homemade granola flavor ideas including almond cranberry, maple pecan, peanut butter banana, coconut date, apple cinnamon, chocolate almond, pumpkin spice, blueberry vanilla, tahini sesame, and tropical coconut mango.
Keep the base ratio steady, then change one flavor direction at a time. That is how maple pecan, apple cinnamon, chocolate almond, or tropical coconut mango still feel balanced.
Flavor idea What to add
Almond cranberry granola Sliced almonds, dried cranberries, vanilla, and a little orange zest after baking.
Maple pecan granola Pecans, maple syrup, cinnamon, and a pinch of nutmeg.
Peanut butter banana granola Peanut butter in the wet mixture, banana chips after baking, and optional chocolate chips once cool.
Coconut date granola Coconut flakes, chopped dates after baking, cinnamon, and a pinch of cardamom.
Apple cinnamon granola Extra cinnamon, walnuts, dried apple, and raisins after baking.
Chocolate almond granola Cocoa powder before baking, almonds, and chocolate chips after cooling.
Pumpkin spice granola Pumpkin pie spice, pecans or walnuts, pumpkin seeds, and dried cranberries after baking.
Blueberry vanilla granola Extra vanilla, almonds or cashews, and dried blueberries after baking.
Tahini sesame granola Tahini in the wet mixture, sesame seeds, pistachios, and a little honey or maple syrup.
Tropical coconut mango granola Coconut flakes, cashews or macadamias, and dried mango after baking.

If you make your own version, note what went in. Granola is one of those recipes where the second batch is often even better because you learn exactly how sweet, chunky, nutty, or fruit-heavy you like it. If one batch disappears faster than the others, write that combination down; that is usually your house granola trying to announce itself.

How to Store Homemade Granola

Cool the granola before storing it. This is the storage rule that matters most.

If you close the lid while the batch is still warm, steam gets trapped in the jar and softens the oats. Let the pan sit first, then move the granola to an airtight container.
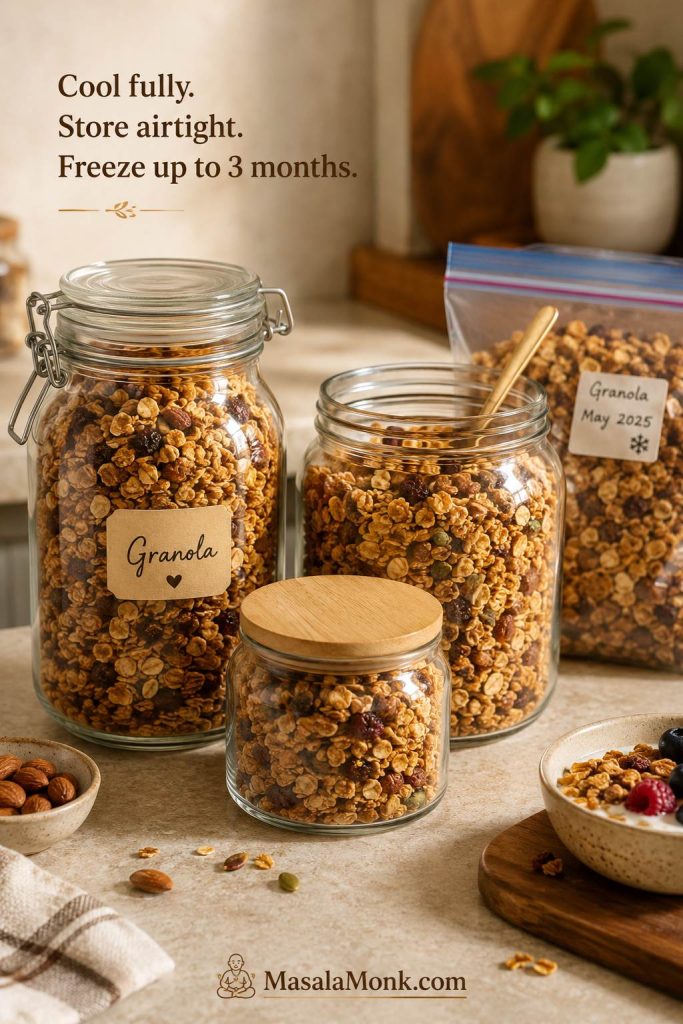
Airtight jars and a freezer bag of cooled homemade granola on a warm kitchen counter with storage guidance.
Store homemade granola only after it cools completely. Airtight jars protect the crunch, while freezer portions help a big batch last beyond the week.

For everyday use, store homemade granola in a clean airtight jar or container at room temperature. For the best texture, use it within 2 weeks. It may last longer in a sealed container, but the crunch is usually best earlier.

Once a jar is ready, it becomes the easiest breakfast helper in the kitchen: the thing that makes plain yogurt, fruit, or milk feel like you planned ahead.

For longer storage, freeze granola for up to 3 months in a freezer-safe bag or container. Let it come back to room temperature before serving, or refresh it briefly in a low oven if you want the crunch to come back more strongly.

Storage tip: If your kitchen is humid, smaller jars are better than one giant container that gets opened every day. Less air exposure helps the granola stay crisp.

Homemade Granola Troubleshooting

Most granola problems are fixable, and almost all of them come down to heat, moisture, binder, or timing. A less-than-perfect batch is rarely wasted: soft granola can usually be re-crisped, too-sweet granola can be balanced with yogurt or nuts, and a loose batch still works beautifully over fruit or milk.
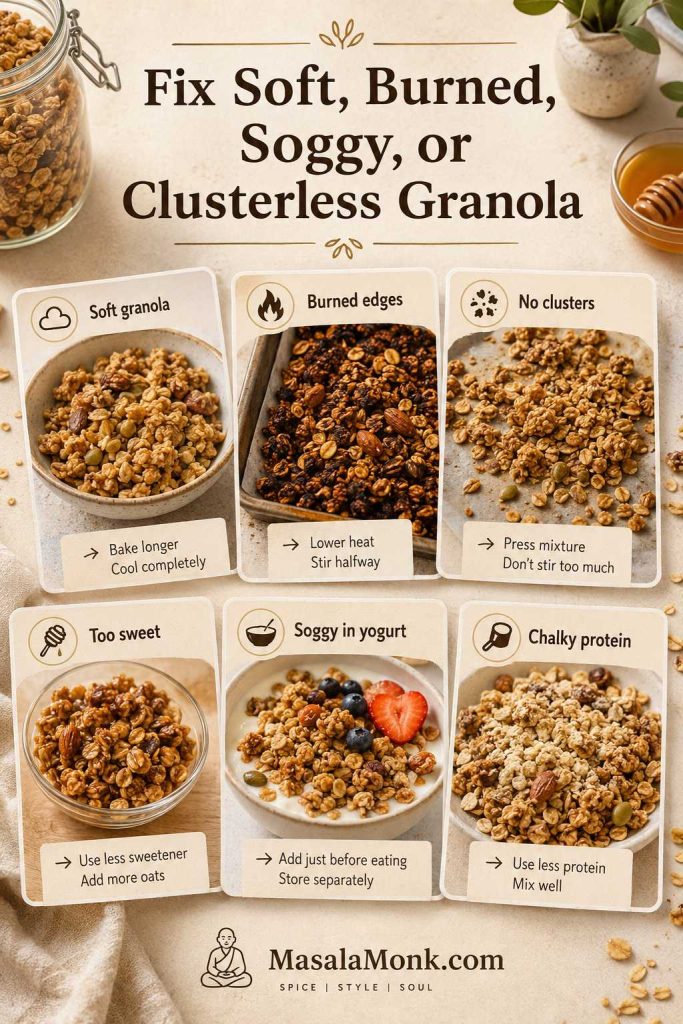
Homemade granola troubleshooting board showing soft granola, burned edges, no clusters, too sweet granola, soggy yogurt, and chalky protein granola.
Most granola problems are fixable: soft batches can be re-crisped, clusterless granola still works over yogurt, and too-sweet granola can be balanced with plain toppings.

Texture and cluster fixes

Start here if the problem is crunch, clusters, sticking, or sogginess. Most texture problems come from moisture, pan crowding, heat, or breaking the granola too soon.

Problem Fix this batch Adjust next time
Granola is soft Spread it out and bake at 275°F / 135°C for 8–12 minutes, then cool fully. Bake a few minutes longer, cool before storing, and avoid trapping steam in the jar.
Granola burned Pick out very dark or bitter pieces if needed. Use 300°F / 150°C, check early with dark pans, and add delicate coconut later.
No clusters Use it as loose granola for milk, yogurt, or fruit. Press after stirring, stir less, and add egg white or nut butter for more binding.
Granola stuck to the pan Let it cool, then lift gently with a spatula. Use parchment paper and avoid baking sticky sweetener directly onto the pan.
Granola got soggy in yogurt Eat it as a softer parfait layer. Keep granola separate and add it right before serving.

Flavor, fruit, and protein fixes

Use this section when the texture is fine but the flavor, sweetness, dried fruit, or protein add-ins need help. These fixes are mostly about balance rather than rebaking the whole batch.

Problem Fix this batch Adjust next time
Granola is too sweet Serve over unsweetened Greek yogurt or add plain toasted nuts for balance. Reduce syrup or honey slightly and use less dried fruit or chocolate.
Granola is not sweet enough Add dried fruit, a few chocolate chips, or a light drizzle of honey when serving. Use the full ½ cup sweetener or choose sweeter dried fruit.
It tastes bitter Remove scorched nuts, coconut, or dark edge pieces if possible. Lower heat, check earlier, and add coconut halfway through.
Dried fruit is hard Pick out the hardest pieces if they bother you. Add dried fruit after baking, not before.
Protein granola tastes chalky Use it over yogurt or with milk to soften the dryness. Start with ¼ cup protein powder and add extra wet binder only if needed.

By this point, the recipe is less about memorizing rules and more about knowing the signs: glossy coated oats, an even layer, dry-looking edges, a warm nutty smell, and a full cool-down before breaking.

If a fix points back to bake time or cooling, compare it with the step-by-step method or the recipe card.

Recipe Card: Easy Crunchy Homemade Granola
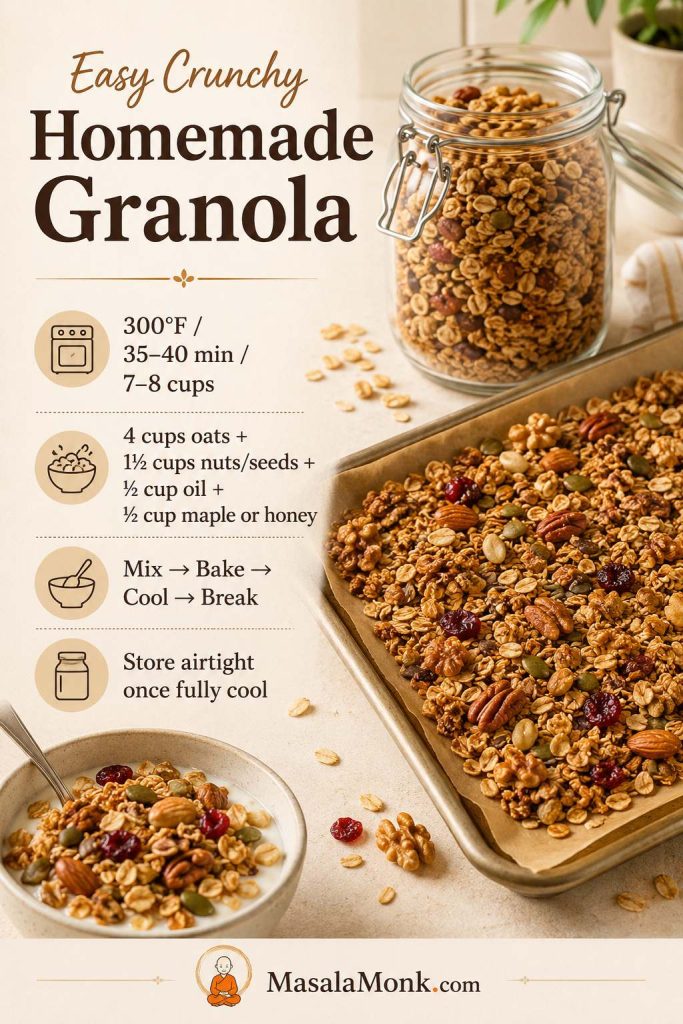
Saveable recipe card for easy crunchy homemade granola with oven temperature, bake time, yield, base ratio, method summary, and storage cue.
Save the core formula first: oats, nuts or seeds, oil, maple or honey, low oven heat, and a full cool-down before storing.

Easy Crunchy Homemade Granola

Crunchy homemade granola made with rolled oats, nuts, seeds, maple syrup or honey, oil, cinnamon, and vanilla. Bake it low and steady, then let it cool on the pan so the oats turn crisp and the clusters hold together.

Prep Time10 minutes
Cook Time35–40 minutes
Cooling Time35–45 minutes
Total Time1 hour 20 minutes to 1 hour 35 minutes
Yield7–8 cups
Servings14–16 larger ½-cup servings
Topping Portions28–32 smaller ¼-cup portions
Oven300°F / 150°C

Equipment

  • Large rimmed baking sheet or half-sheet pan
  • Parchment paper
  • Large mixing bowl
  • Small bowl or measuring cup for wet ingredients
  • Rubber spatula or flexible spatula
  • Measuring cups, measuring spoons, or kitchen scale
  • Airtight jar or container for storage

Ingredients

  • 4 cups old-fashioned rolled oats / about 320–360g
  • 1½ cups chopped nuts and/or seeds / 150–180g
  • ½ cup oil / 120ml, such as coconut oil, olive oil, avocado oil, or neutral oil
  • ½ cup maple syrup or honey / 120ml
  • ¾ teaspoon fine salt, plus more to taste
  • 1–2 teaspoons ground cinnamon / about 3–5g
  • 1 teaspoon vanilla extract / 5ml
  • ⅔ cup dried fruit / 80–100g, added after baking
  • Optional: ½–1 cup coconut flakes / 40–80g
  • Optional for bigger clusters: 1 large egg white, beaten
  • Optional for vegan clusters: 2 tablespoons almond butter or peanut butter / about 32g

Instructions

  1. Preheat the oven to 300°F / 150°C. Line a large rimmed baking sheet with parchment paper.
  2. In a large bowl, mix the rolled oats, nuts and/or seeds, salt, and cinnamon. If using delicate coconut flakes, stir them in when you stir the granola halfway through baking instead of adding them at the beginning.
  3. In a smaller bowl or measuring cup, whisk together the oil, maple syrup or honey, and vanilla. If using almond butter or peanut butter for vegan clusters, whisk it into this wet mixture.
  4. Pour the wet mixture over the oats. Stir thoroughly until every oat looks lightly coated and glossy.
  5. If using egg white for bigger clusters, make sure the oat mixture is not hot, then stir the beaten egg white into the coated oats.
  6. Spread the granola evenly on the prepared pan. Press it lightly with a spatula if you want clusters.
  7. Bake for 20 minutes. Stir once, spread the granola back out, and press it down again for clusters. Bake for another 15–20 minutes, until lightly golden, dry-looking, and fragrant.
  8. Let the granola cool on the pan until firm. Break it into the size you like, then stir in dried fruit. Store in an airtight jar or container once fully cool.

Notes

  • Do not judge the crunch straight from the oven. Granola firms and crisps as it cools.
  • For clusters, press after stirring and cool fully before breaking; for very big clusters, add 1 beaten egg white.
  • For vegan clusters, add 2 tablespoons almond butter or peanut butter to the wet mixture.
  • For gluten-free granola, use certified gluten-free rolled oats.
  • For low-sugar granola, reduce the maple syrup or honey to ⅓ cup, but expect fewer clusters.
  • Add delicate coconut halfway through baking if it browns quickly.
  • Divide between two pans if the baking sheet is crowded.
  • Store only once fully cool. Use within 2 weeks at room temperature or freeze for up to 3 months.

Use the recipe card as the base, then let the rest of the guide help you steer the texture, sweetness, and mix-ins.

FAQs About Homemade Granola

What are the best oats for homemade granola?

Old-fashioned rolled oats are best because they toast evenly, hold their shape, and create a crisp texture. Quick oats are softer, instant oats are too fine, and steel-cut oats are too hard for classic granola.

Why did my homemade granola turn soft?

Soft granola is usually underbaked, stored before cooling, or exposed to moisture. Re-crisp it at 275°F / 135°C for 8–12 minutes, then cool fully before storing.

How do I get bigger granola clusters?

Press before and after the halfway stir, then cool fully before breaking. For very large clusters, add egg white; for vegan clusters, use nut butter.

Is homemade granola healthy?

Homemade granola can be a better everyday choice because you control the oats, nuts, seeds, oil, sweetener, and portion size. It is still calorie-dense, so it works especially well as a measured topping for yogurt, fruit, or oatmeal.

When should I add dried fruit?

Add dried fruit after baking. If it bakes with the oats for the full time, it can become hard, bitter, or burnt.

How long does homemade granola keep?

Homemade granola is usually best within 2 weeks at room temperature when stored fully cool in an airtight container. For longer storage, freeze it for up to 3 months.

How do I make gluten-free granola?

Use certified gluten-free rolled oats and check that your nuts, seeds, dried fruit, chocolate, and other mix-ins are also labeled gluten-free if needed.

What granola texture is best for yogurt?

Small or medium clusters are best for yogurt. Add granola just before eating if you want crunch, or layer it earlier if you like a softer, chewier parfait texture.

What changes in oil-free granola?

Oil-free granola is usually softer and chewier than the base recipe. Mashed banana, applesauce, date paste, egg white, or nut butter can help coat the oats, but the finish will not be as crisp as granola made with oil.

Can I turn this granola into bars?

This recipe is not designed to slice into bars because granola bars need more binder. For that version, use MasalaMonk’s homemade granola bars recipe.

Your house granola for the week
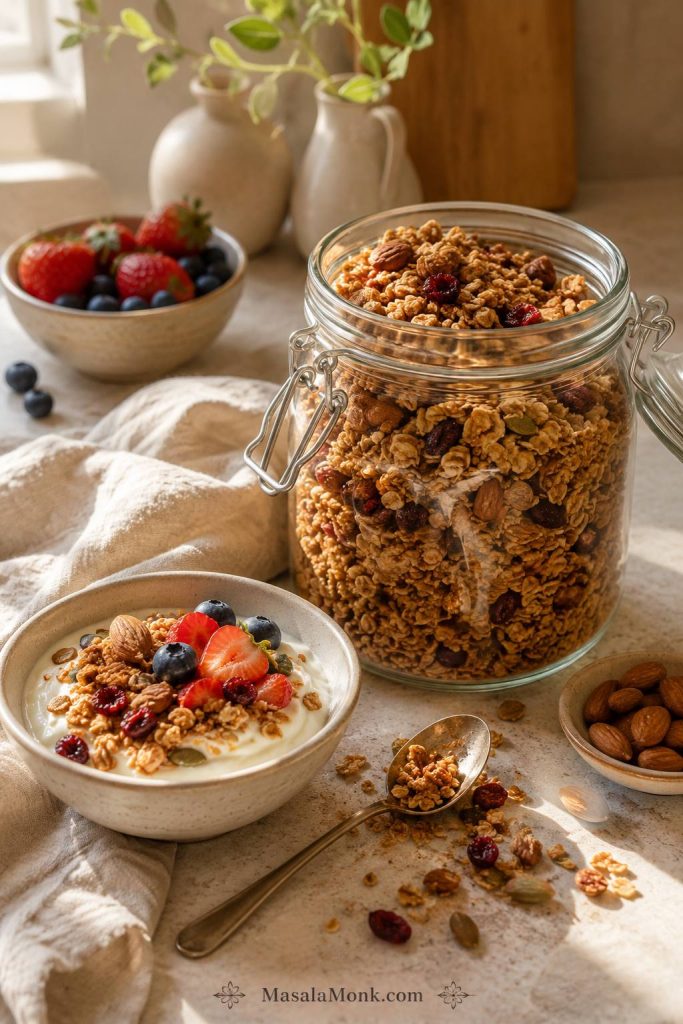
Jar of homemade granola beside a yogurt bowl with berries, spoon, linen, and warm morning light on a kitchen counter.
Once the jar is ready, breakfast gets easier: spoon homemade granola over yogurt, fruit, or milk whenever you want crunch without starting from scratch.

The first batch teaches you the method. After that, granola becomes a small weekly habit: the sweetness you like, the cluster size you reach for, and the jar that makes plain yogurt, fruit, or milk feel like breakfast without extra work.
Posted on 1 Comment

Tabbouleh Recipe: Fresh Lebanese Tabouli Salad with Bulgur

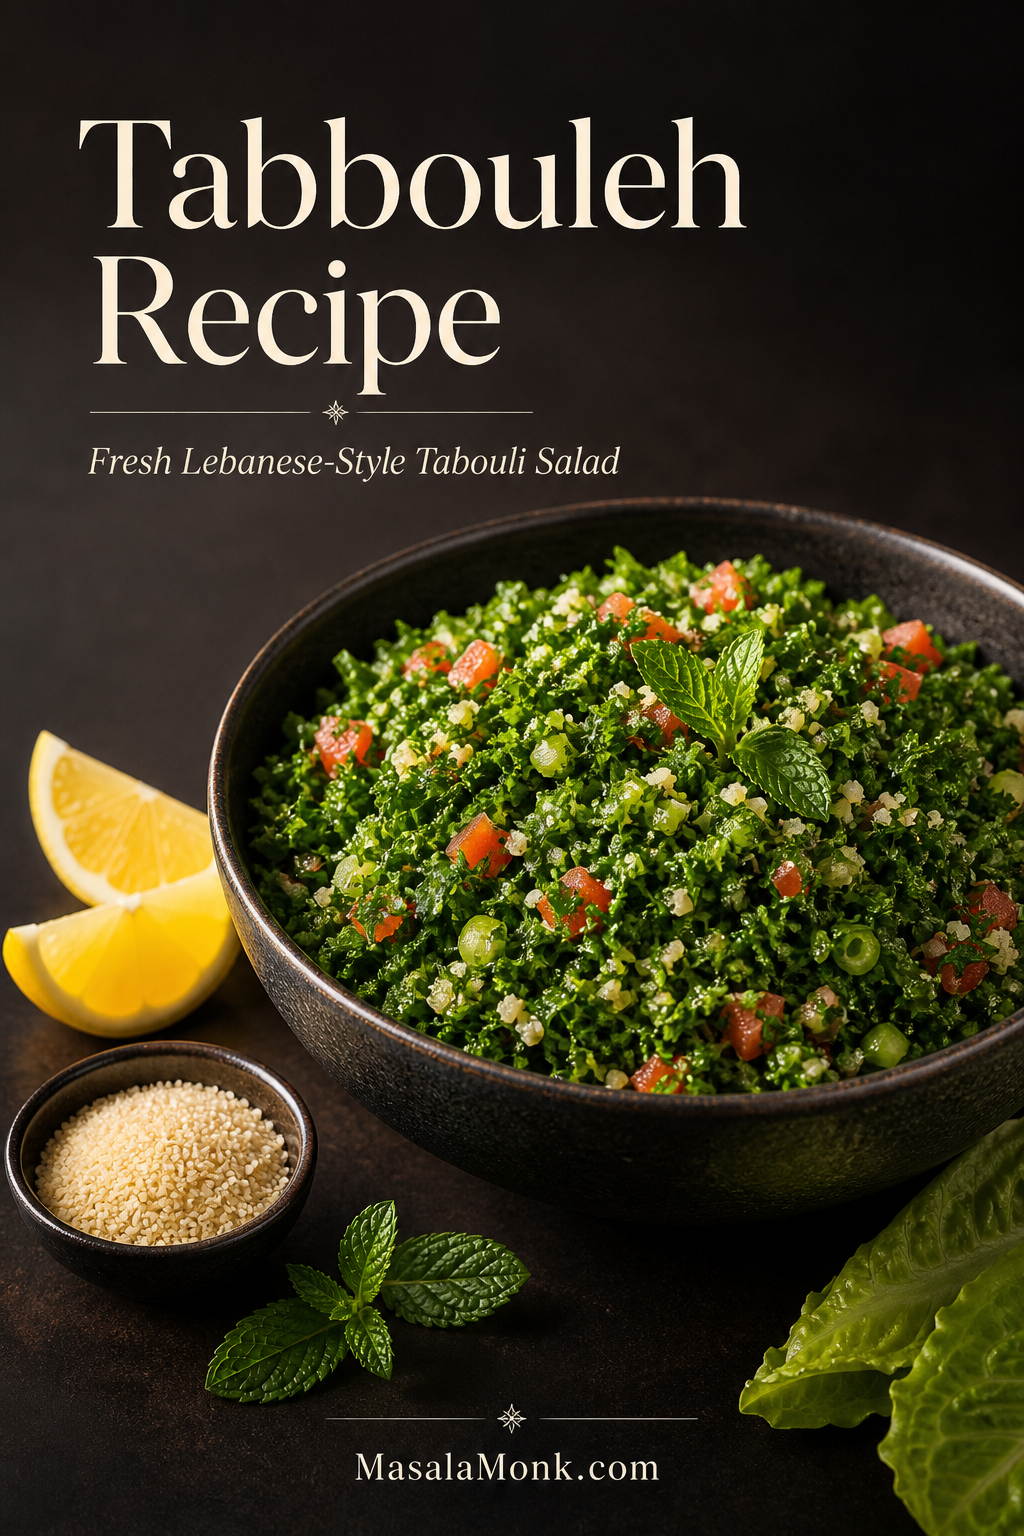
A dark bowl of parsley-heavy tabbouleh with tomato pieces, mint, lemon wedges, romaine leaves, and a small amount of fine bulgur.

This tabbouleh recipe is fresh, lemony, parsley-heavy, and built around the detail that matters most: tabbouleh should taste like a chopped herb salad, not a bowl of bulgur with a few herbs mixed in.

Also spelled tabouli, this Lebanese-style salad is made with finely chopped parsley, tomato, mint, green onion, fine bulgur, lemon juice, olive oil, salt, and pepper. Although the bulgur adds texture, parsley is the star.

To keep the recipe no-cook, the method below soaks fine bulgur directly in the lemon-olive oil dressing while you chop the herbs. As a result, the bulgur gets more flavor, the salad stays bright, and you avoid the watery, grain-heavy tabbouleh that often happens at home.

Table of Contents

Use this guide to make fresh tabbouleh, choose the right bulgur, keep it from turning watery, and adapt it for quinoa, cauliflower, or couscous versions.

Quick Answer: What Is Tabbouleh?

Tabbouleh is a fresh Middle Eastern parsley salad made with finely chopped parsley, tomato, mint, green onion, fine bulgur wheat, lemon juice, olive oil, salt, and pepper. In a good tabbouleh recipe, the herbs should lead and the bulgur should support.

Classic tabbouleh is usually served as part of a mezze spread with pita, hummus, falafel, grilled meats, or lettuce leaves. It is naturally vegan and dairy-free, though it is not gluten-free because bulgur is made from wheat.

Quick ratio: For a parsley-first tabbouleh, use about 3 packed cups finely chopped parsley with only 1/3 cup fine bulgur. That keeps the salad fresh and herb-heavy instead of turning it into a grain salad.

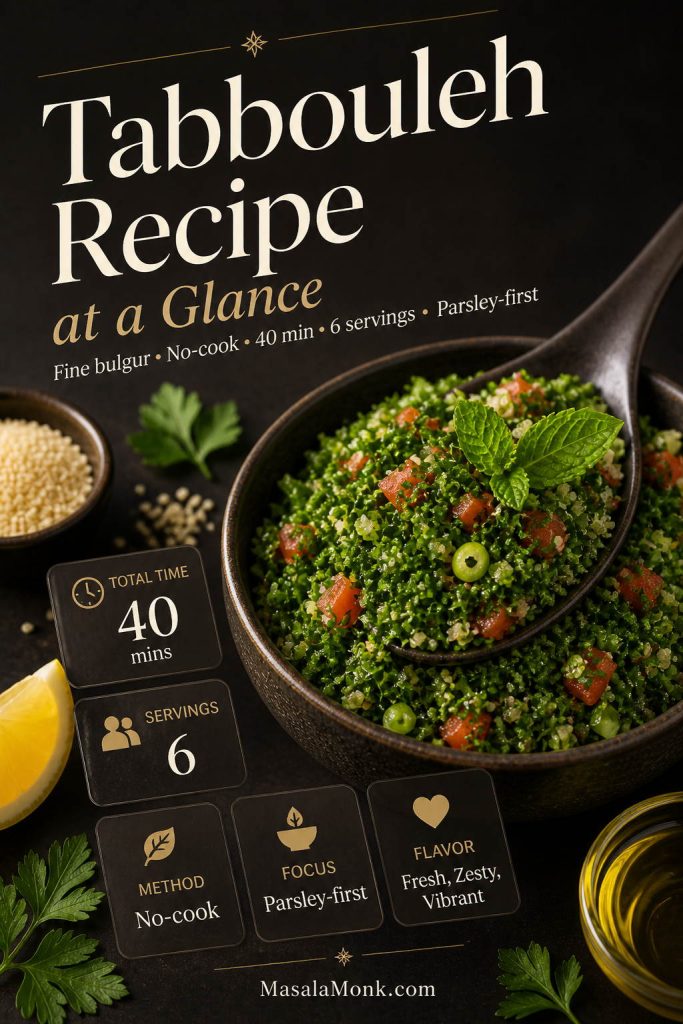
Tabbouleh Recipe at a Glance

This tabbouleh recipe is built for a fresh, parsley-heavy texture with fine bulgur, bright lemon dressing, and no cooking required when you use the right grain.

Best bulgur Fine #1 bulgur wheat
Cook time 0 minutes for fine bulgur
Total time About 40 minutes
Yield 6 servings, about 5–6 cups
Flavor Fresh, lemony, herb-heavy, lightly juicy
Best texture Finely chopped herbs, tender bulgur, no puddle of dressing
Make-ahead Best same day; leftovers keep 2–3 days
A tabbouleh recipe overview graphic with a finished salad, parsley, lemon, fine bulgur, and text showing no-cook method, 40 minutes, 6 servings, and parsley-first.
This tabbouleh recipe uses fine bulgur, needs no cooking, and takes about 40 minutes. The main texture goal is simple: plenty of parsley with just enough bulgur to support it.

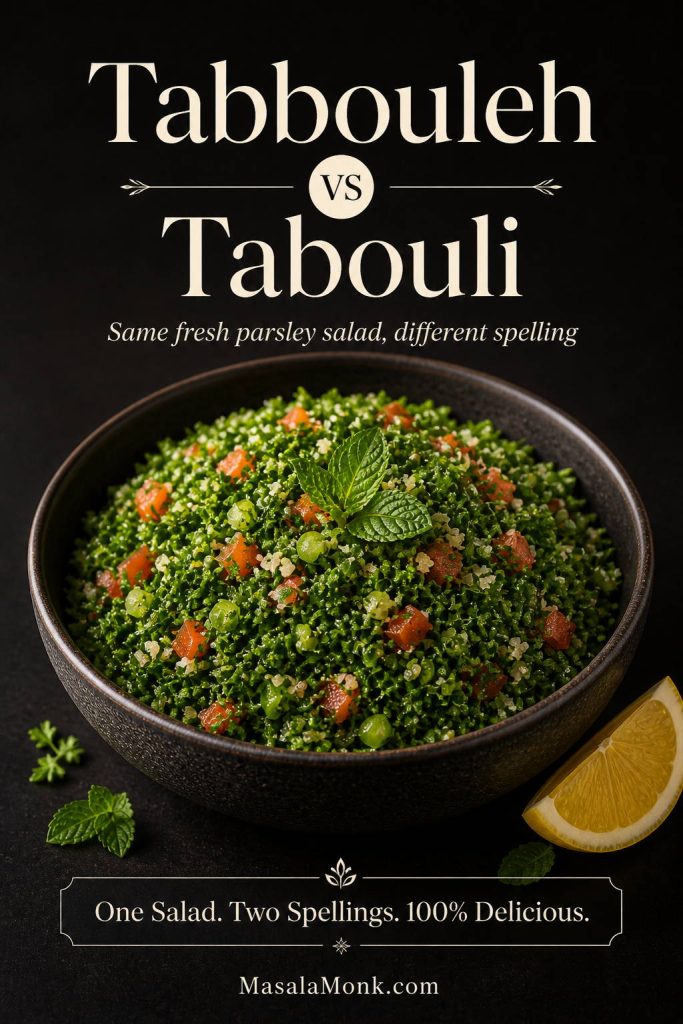
Tabbouleh vs Tabouli: Same Salad, Different Spelling

Tabbouleh and tabouli usually refer to the same salad. The spelling changes because the Arabic word is transliterated into English in different ways.

You may see it written as tabbouleh, tabouli, tabouleh, tabouli salad, or tabbouleh salad. The spellings vary by region, family tradition, and how the Arabic word is transliterated into English.

Here, the salad follows a Lebanese-style direction: finely chopped parsley, tomato, mint, green onion, fine bulgur, lemon juice, and olive oil.

A spelling comparison graphic showing one bowl of tabbouleh labeled with both “Tabbouleh” and “Tabouli.”
Tabbouleh and tabouli usually mean the same salad. The spelling changes, but the base stays familiar: parsley, tomato, mint, fine bulgur, lemon juice, and olive oil.

Why This Tabbouleh Recipe Works

Homemade tabbouleh usually goes wrong in a few predictable ways: too much bulgur, wet herbs, bland dressing, hard grains, or a watery bowl after 20 minutes. To avoid those problems, this version uses a parsley-first ratio, fine bulgur, careful draining, and a simple dressing that seasons the grain as it softens.

  • It is parsley-first. The salad tastes fresh and green, not heavy or grainy.
  • Fine bulgur keeps it no-cook. Fine #1 bulgur softens in lemon juice and olive oil while you chop the herbs.
  • The tomatoes are drained if needed. That keeps the salad juicy without turning soupy.
  • The dressing is simple. Lemon juice, olive oil, salt, and pepper are enough when the herbs are fresh.
  • The amounts are precise. Cups, grams, and milliliters are included so the parsley-to-bulgur balance stays right.

Best Parsley-to-Bulgur Ratio for Tabbouleh

The easiest way to keep tabbouleh fresh is to use a lot of parsley and only a small amount of bulgur. The bulgur should soften the bite and absorb flavor, but it should not make the salad heavy.

Style Parsley Bulgur Result
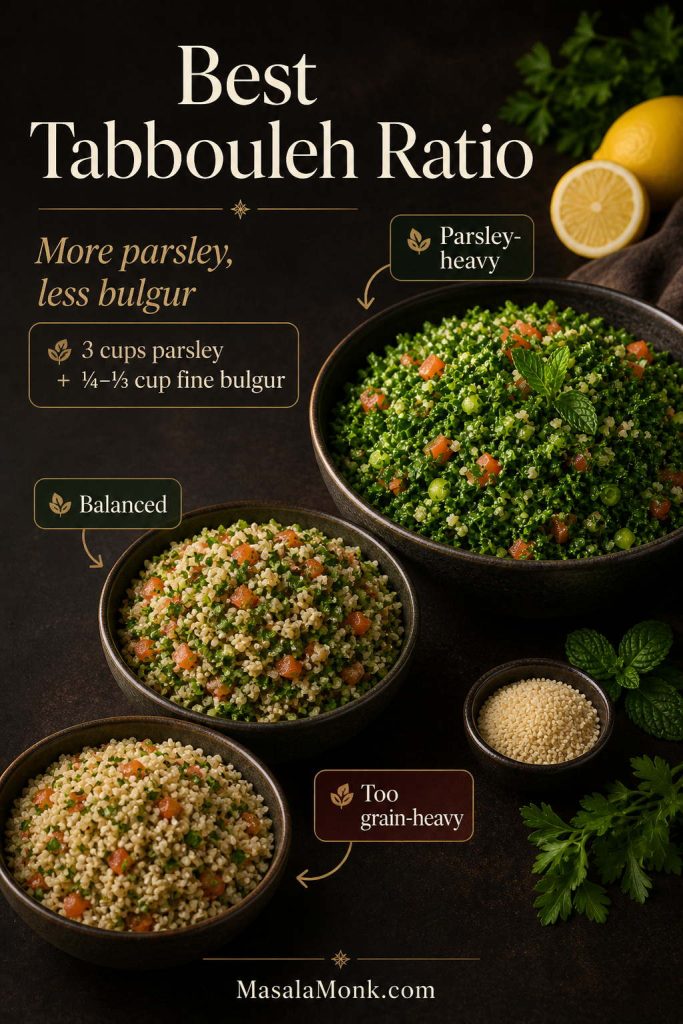
Parsley-heavy Lebanese-style 3 packed cups 1/4 to 1/3 cup fine bulgur Fresh, green, herb-led tabbouleh
Balanced everyday style 3 packed cups 1/2 cup fine bulgur Still fresh, but slightly more filling
Grain-heavy style 2–3 cups 3/4 cup or more More like bulgur salad than classic tabbouleh
A ratio comparison graphic with three tabbouleh bowls showing parsley-heavy, balanced, and grain-heavy versions.
For a Lebanese-style tabbouleh ratio, start with about 3 packed cups of chopped parsley and only ¼ to ⅓ cup fine bulgur. More bulgur makes the salad heavier and less herb-led.

Tabbouleh Ingredients

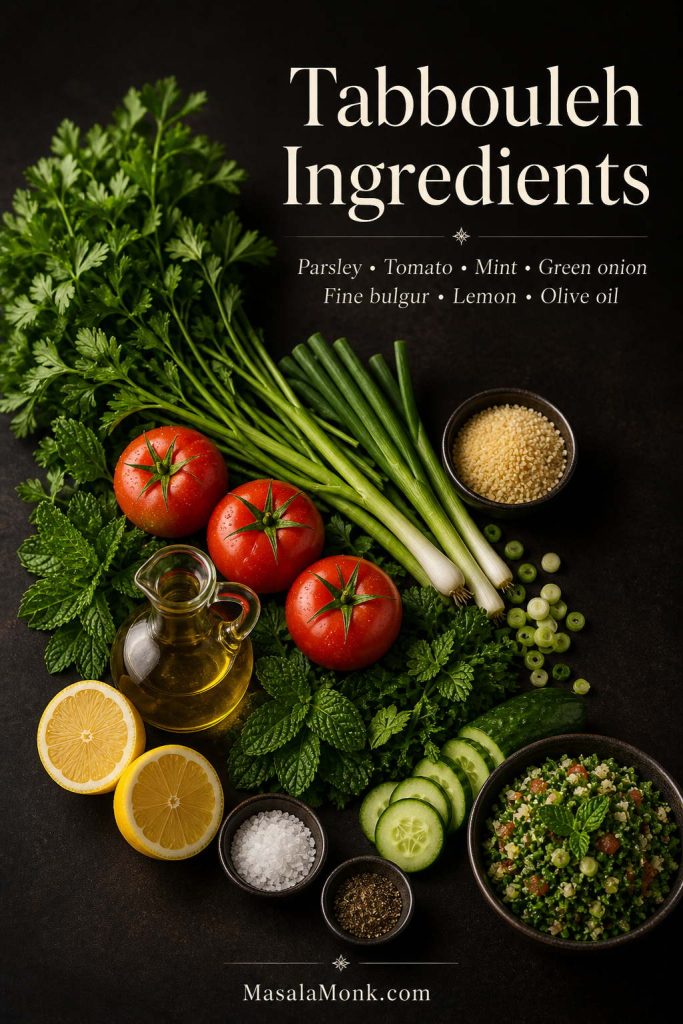
For tabbouleh, this recipe keeps the ingredient list simple but pays close attention to texture: dry herbs, firm tomatoes, fine bulgur, fresh lemon, and enough olive oil to round everything out.

A dark ingredient board with parsley, mint, tomatoes, green onions, fine bulgur, lemon, olive oil, salt, pepper, and optional cucumber for tabbouleh.
The best tabbouleh ingredients are simple, but prep matters. Dry the herbs, use firm tomatoes, choose fine bulgur, and rely on fresh lemon juice rather than bottled citrus.

Parsley

Because parsley is the main ingredient, its texture matters. You can use curly parsley or flat-leaf parsley, but the leaves need to be very dry before chopping. Wet parsley is one of the main reasons tabbouleh becomes watery.

Chop the parsley finely with a sharp knife. A food processor can bruise the herbs and turn them wet or pasty if you overdo it.

Tomatoes

Use firm Roma tomatoes or another firm, meaty tomato. Chop them small, then drain off extra liquid if they are very juicy. You want tomato freshness, not a pool of tomato water at the bottom of the bowl.

Mint

Fresh mint gives tabbouleh its cooling lift. Do not use dried mint as a full replacement here; it will not give the same fresh, bright finish.

Green Onions or Scallions

Green onions add mild onion flavor without overpowering the herbs. Slice them finely so they disappear into the salad rather than standing out in large pieces.

Fine Bulgur

Fine #1 bulgur is best for Lebanese-style tabbouleh. It softens quickly and blends into the herbs without making the salad feel heavy.

Lemon Juice and Olive Oil

Fresh lemon juice gives tabbouleh its sharp, clean brightness. Extra-virgin olive oil rounds out the dressing and helps soften the bulgur. Bottled lemon juice is not ideal because the salad depends on a fresh citrus flavor.

Cucumber, Optional

Cucumber is optional. It adds crunch and freshness, especially in modern tabouli salad versions, but the salad still works beautifully without it. If you use cucumber, dice it small and drain it if it is watery.

If cucumber is the part you love most, you may also like this crisp cucumber salad recipe with vinegar, dill, and onion.

Tabbouleh Dressing

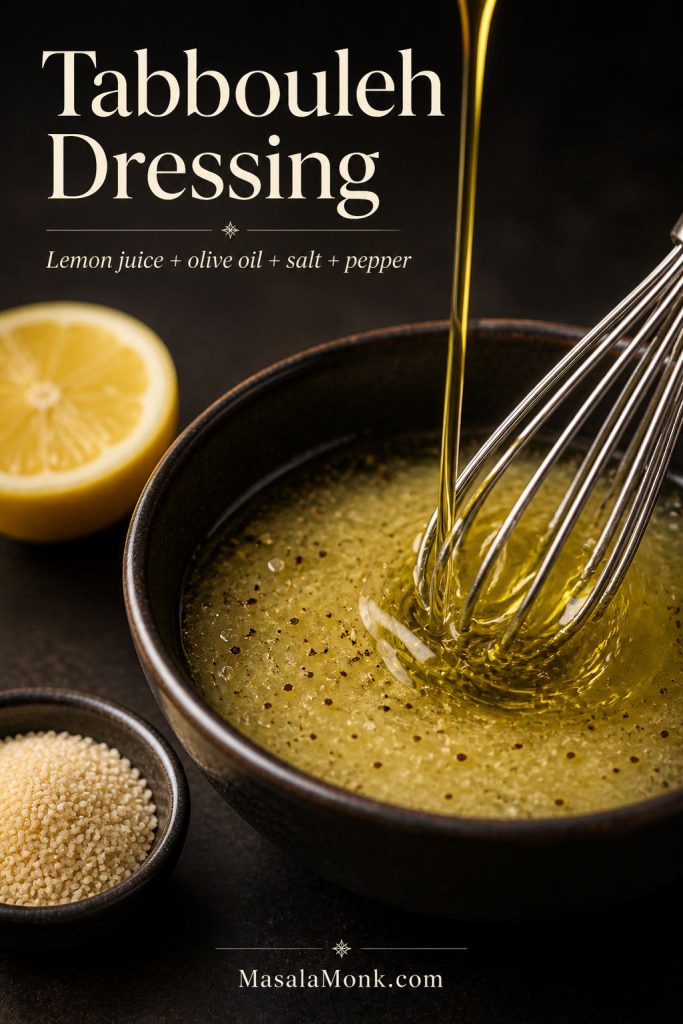
In this tabbouleh recipe, the dressing is simple: fresh lemon juice, extra-virgin olive oil, salt, and black pepper. It should lightly coat the herbs, season the tomatoes, and soften the fine bulgur without drowning the salad.

Lemon juice and olive oil being whisked into a tabbouleh dressing with salt, pepper, lemon halves, and fine bulgur nearby.
Tabbouleh dressing is not a thick vinaigrette. Lemon juice, olive oil, salt, and pepper should lightly coat the herbs and help fine bulgur soften without drowning the salad.

Here, the fine bulgur sits in the lemon-olive oil dressing while you chop the parsley, mint, tomatoes, and green onions. That gives the bulgur better flavor than soaking it in plain water.

Once the salad rests, taste before adding anything else. A pinch of salt usually fixes flat flavor, extra lemon brings brightness, and a small drizzle of olive oil softens a sharp edge.

Best Bulgur for Tabbouleh

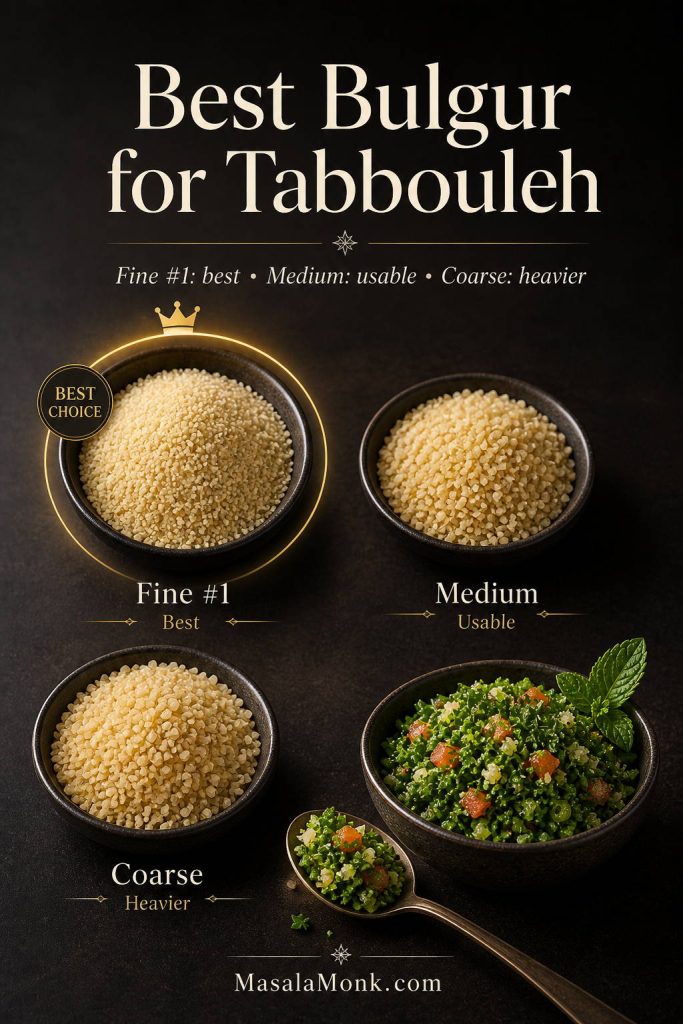
The best bulgur for tabbouleh is fine #1 bulgur. It is small enough to soften without boiling and delicate enough to stay in the background. That matters because tabbouleh should taste like a fresh herb salad, not a bulgur bowl.

Bulgur is wheat that has already been parboiled, dried, cracked, and sorted by size. That is why fine bulgur can soften quickly in dressing instead of needing a full boil. For more background, see the Whole Grains Council guide to bulgur and freekeh.

If your bulgur is medium or coarse, you can still use it, but the texture will be different and it usually needs hot water before mixing.

Bulgur or Swap Best For How to Prepare It
Extra-fine / #1 bulgur Best choice for Lebanese-style tabbouleh Soak in the lemon-olive oil dressing for 20–30 minutes. No cooking needed.
Fine bulgur Good everyday choice Soak until tender. Drain if you use water.
Medium bulgur Usable, but less delicate Soak in hot water, drain well, and cool before mixing.
Coarse bulgur More of a grain-salad texture Cook or hot-soak until tender, then cool completely. Use less than you would in a grain salad.
Cracked wheat Depends on grind and processing Usually needs longer soaking or cooking. Check texture before adding.
Quinoa Gluten-free tabbouleh variation Cook, cool completely, then mix with the herbs and dressing.
Cauliflower rice Grain-free variation Use raw or lightly salted and drained. Keep the pieces small and dry.
Couscous Quick variation, not classic tabbouleh Steam or soak, fluff, cool completely, then mix.
A bulgur comparison graphic showing fine, medium, and coarse bulgur, with fine bulgur marked as the best choice for tabbouleh.
Fine #1 bulgur is best for tabbouleh because it softens quickly and stays delicate. Medium or coarse bulgur can work, but it usually needs hot soaking and gives a heavier texture.
Do not overuse bulgur. If you add too much, the salad shifts from tabbouleh into a bulgur salad. For this recipe, 1/3 cup fine bulgur is enough for 6 servings.

What If You Only Have Medium or Coarse Bulgur?

If you only have medium or coarse bulgur, you can still make tabbouleh, but the texture will be less delicate. Put the medium or coarse bulgur in a bowl, cover it with hot water, and let it sit until tender. Drain it very well, press out excess moisture, and cool it completely before adding it to the herbs.

Use a smaller amount than you would in a grain salad. The goal is still a parsley-forward tabbouleh, not a heavy bulgur salad.

How to Buy Bulgur for Tabbouleh

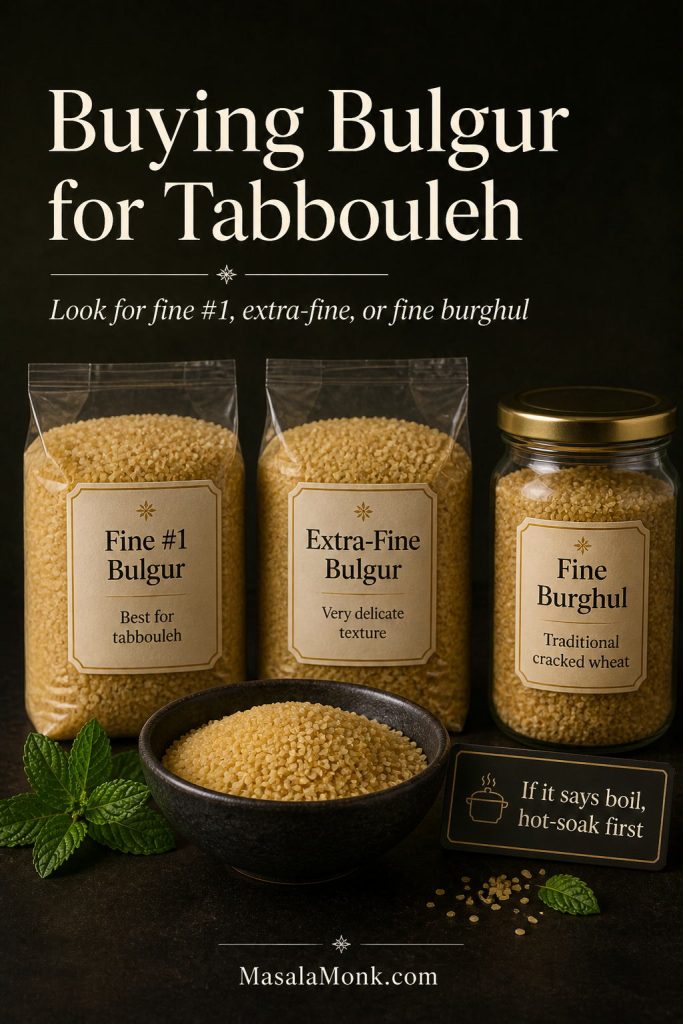
When shopping, look for fine #1 bulgur, extra-fine bulgur, or fine burghul. It is often easier to find in Middle Eastern grocery stores, international aisles, or natural-food stores than in the regular grain aisle. If the package says it must be boiled, treat it like medium or coarse bulgur and cool it before mixing.

A shopping guide graphic with bags or jars labeled fine #1 bulgur, extra-fine bulgur, and fine burghul for tabbouleh.
When buying bulgur for tabbouleh, look for fine #1, extra-fine bulgur, or fine burghul. If the package says it must be boiled, treat it like a coarser grain.

Equipment You’ll Need

You do not need special equipment, but a few basic tools make a big difference in the final texture.

  • Sharp chef’s knife: for finely chopping parsley without bruising it.
  • Large cutting board: tabbouleh uses a lot of herbs, so space helps.
  • Salad spinner or clean towels: for drying parsley and mint thoroughly.
  • Large mixing bowl: gives you room to toss without crushing the herbs.
  • Small bowl or measuring jug: for the lemon-olive oil dressing.
  • Fine-mesh strainer or colander: useful for draining tomatoes, cucumber, or soaked bulgur.

How to Make Tabbouleh

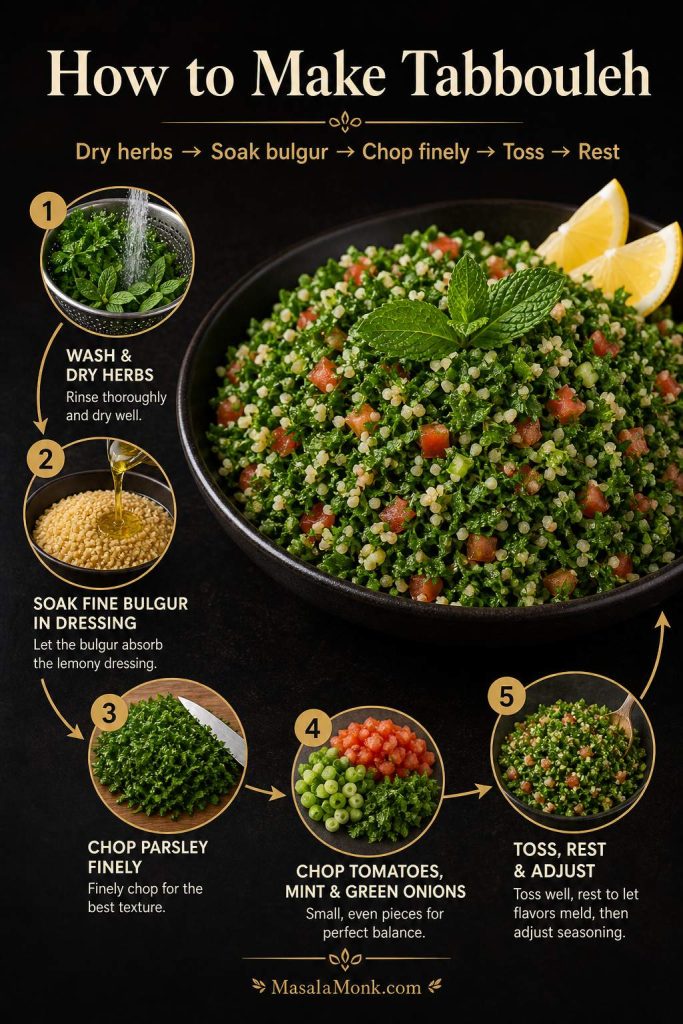
Good tabbouleh is mostly about prep. Although the ingredients are simple, the herbs need to be dry, the chopping needs to be fine, and the bulgur needs enough time to soften.

A step-by-step tabbouleh method graphic showing washing herbs, soaking bulgur, chopping parsley, chopping vegetables, and tossing the salad.
The tabbouleh method is mostly about order: dry the herbs first, soak fine bulgur in dressing, chop everything small, toss gently, then rest before the final seasoning check.

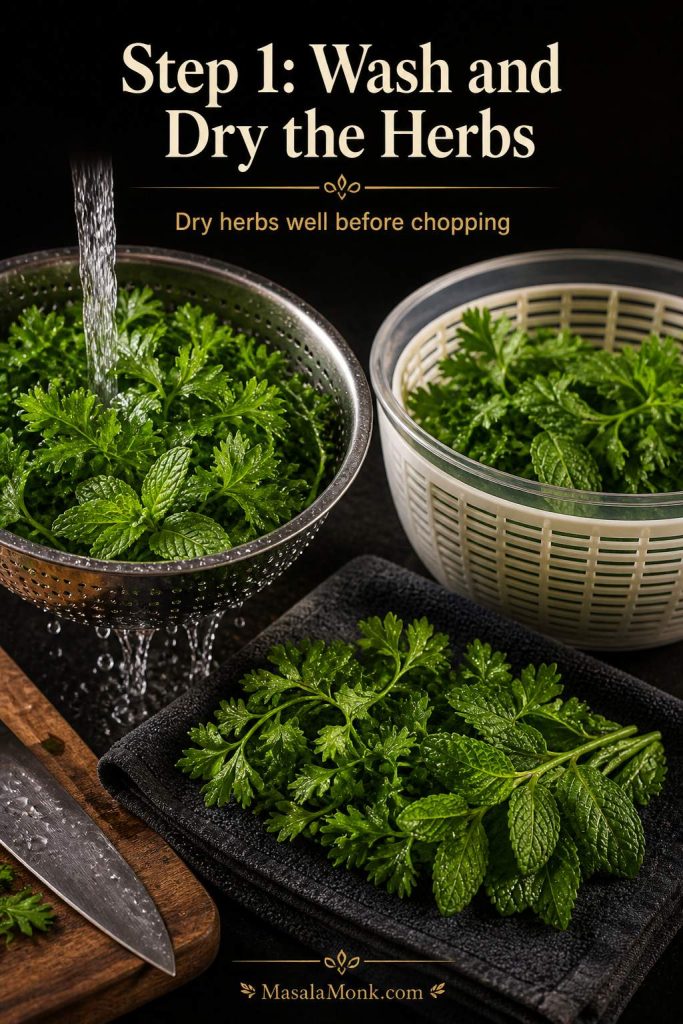
Step 1: Wash and Dry the Herbs

Wash the parsley and mint, then dry them very well. A salad spinner is helpful, but you can also spread the herbs on clean towels and pat them dry.

This step matters because wet herbs dilute the dressing and make the salad watery faster.

Fresh parsley and mint being washed, drained, and dried on a towel and in a salad spinner before making tabbouleh.
Dry parsley and mint thoroughly before chopping. Even a little extra water on the herbs can dilute the lemon-olive oil dressing and make tabbouleh turn watery.

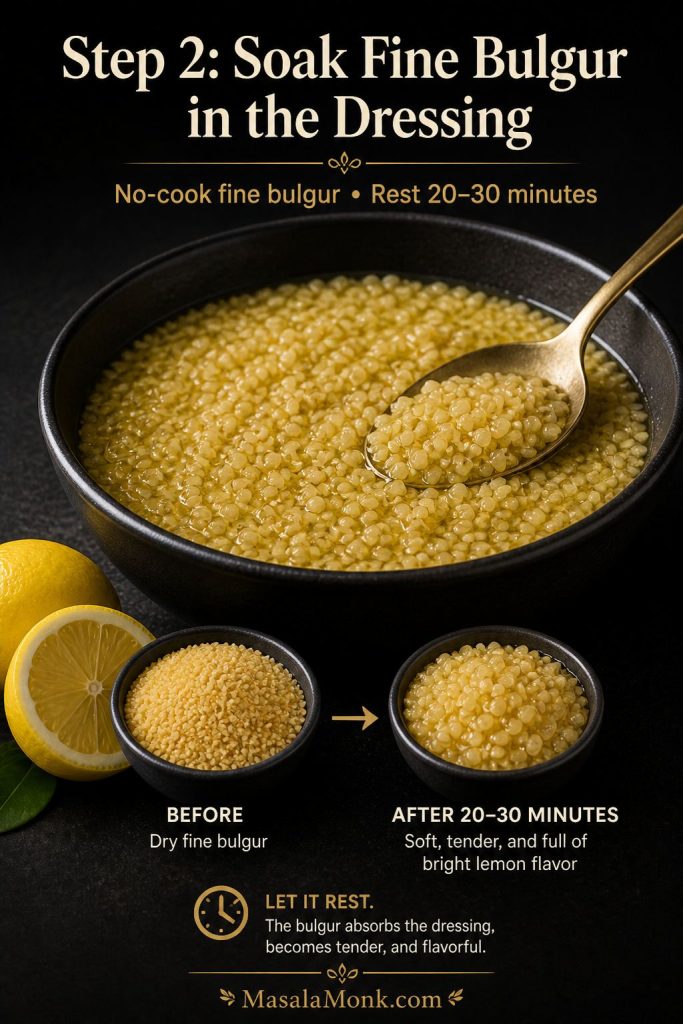
Step 2: Soak the Fine Bulgur in the Dressing

In a large mixing bowl, whisk together the lemon juice, 1/4 cup olive oil, salt, and pepper. Stir in the fine bulgur and let it sit for 20–30 minutes while you chop the herbs and vegetables.

The bulgur should soften but not become mushy. If it still tastes hard after resting, add 1 tablespoon of warm water or lemon juice, stir, and wait another 10 minutes.

Fine bulgur soaking in lemon and olive oil dressing in a dark bowl, with lemon and olive oil nearby.
Fine bulgur does not need boiling for this tabbouleh recipe. Let it sit in the lemon-olive oil dressing for 20–30 minutes so it becomes tender and better seasoned.

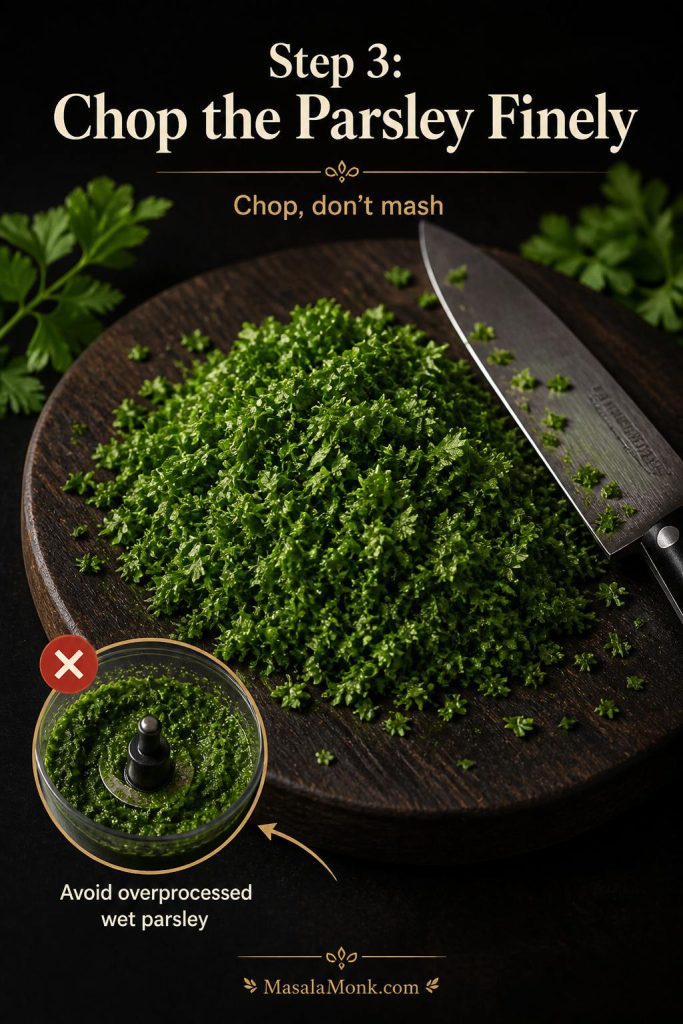
Step 3: Chop the Parsley Finely

Gather the dry parsley into small bunches and chop it finely with a sharp knife. You want small, even pieces, not large leaves and not a wet green paste.

Tender stems are fine if they are chopped very small. Thick stems should be removed.

A parsley chopping guide showing finely chopped parsley on a cutting board and an inset warning against overprocessed wet parsley.
Hand-chopped parsley gives tabbouleh a lighter texture. A food processor can work only if pulsed carefully, but overprocessing turns the herbs wet, dark, and pasty.

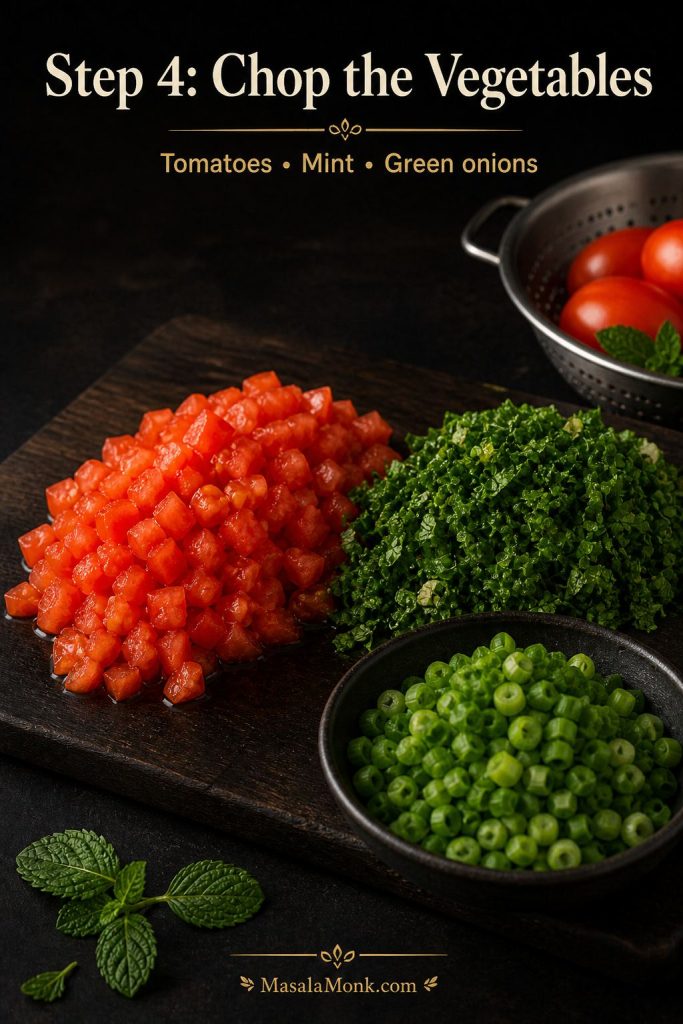
Step 4: Chop the Tomatoes, Mint, and Green Onions

Finely chop the tomatoes, mint, and green onions. If the tomatoes release a lot of juice, drain them briefly before adding them to the bowl. If using cucumber, dice it small and drain it too.

Finely chopped tomatoes, mint, and green onions arranged on a dark cutting board for tabbouleh.
Chop tomatoes, mint, and green onions small enough to blend into every bite. If the tomatoes are juicy, drain them before mixing so the salad stays fresh instead of soupy.

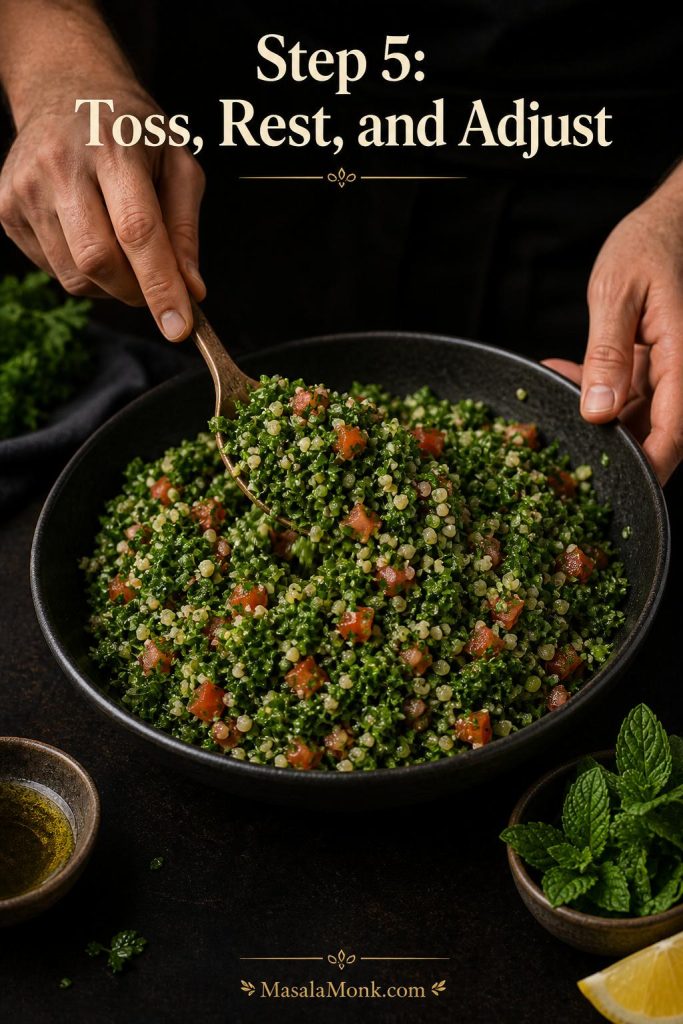
Step 5: Toss, Rest, and Adjust

Add the parsley, mint, tomatoes, green onions, and optional cucumber to the soaked bulgur. Toss gently until everything is evenly coated, but do not crush the herbs.

Let the tabbouleh rest for 10 minutes, then taste and adjust. Start with salt if the flavor feels flat, brighten it with lemon if needed, or round it out with a little olive oil if the salad tastes too sharp. Add the remaining olive oil only if the salad needs a softer finish.

Hands gently tossing parsley-heavy tabbouleh with a spoon in a dark bowl.
Once the herbs, tomatoes, and softened bulgur are combined, toss gently and let the salad rest for about 10 minutes. After that, adjust salt, lemon, or olive oil.

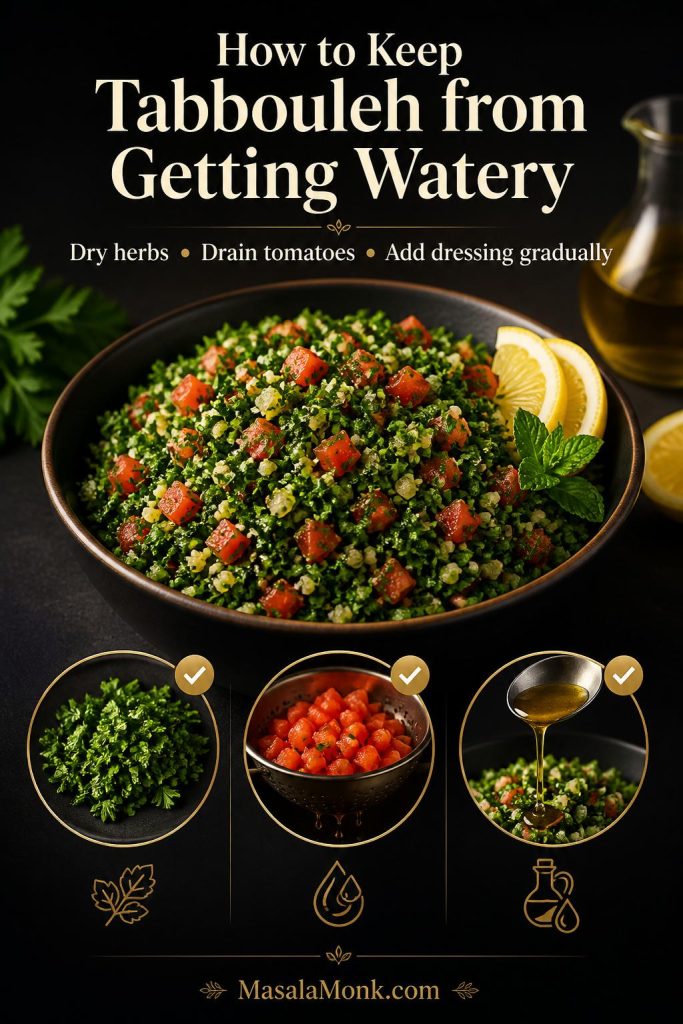
How to Keep Tabbouleh from Getting Watery

Watery tabbouleh usually comes from wet herbs, juicy tomatoes, too much dressing, or bulgur that has not been drained properly. The best fix is to control moisture before everything goes into the bowl.

Drain Juicy Tomatoes and Cucumber First

If your tomatoes or cucumber are very juicy, sprinkle them with a small pinch of salt and let them sit in a strainer for 10 minutes while you chop the herbs. After 10 minutes, drain the liquid before mixing. This keeps the salad fresh and juicy without creating a puddle at the bottom of the bowl.

A watery tabbouleh prevention graphic showing dry herbs, drained tomatoes, gradual dressing, and a finished bowl of tabbouleh.
Watery tabbouleh usually comes from wet herbs, juicy tomatoes, or too much dressing. Fix it before mixing by drying the herbs, draining the tomatoes, and adding dressing gradually.

Quick Fixes for Watery Tabbouleh

Problem Likely Cause Best Fix
Tabbouleh is watery Wet parsley, juicy tomatoes, or too much dressing Dry herbs thoroughly, drain tomatoes, and add dressing gradually.
Bulgur is hard Bulgur is too coarse or under-soaked Add 1–2 tablespoons warm water or lemon juice and rest 10–15 minutes.
Bulgur is soggy Too much soaking liquid Drain or blot if possible, then add more parsley, mint, or tomato.
Salad tastes flat Not enough salt or lemon Add salt first, then lemon juice in small amounts.
Salad tastes too sharp Too much lemon juice Add a little olive oil and extra tomato to round it out.
Parsley tastes harsh Pieces are too large or salad has not rested Chop finer next time and let the salad rest 10–20 minutes before serving.
Herbs look mushy Food processor overuse or wet herbs Chop by hand and dry herbs well before cutting.

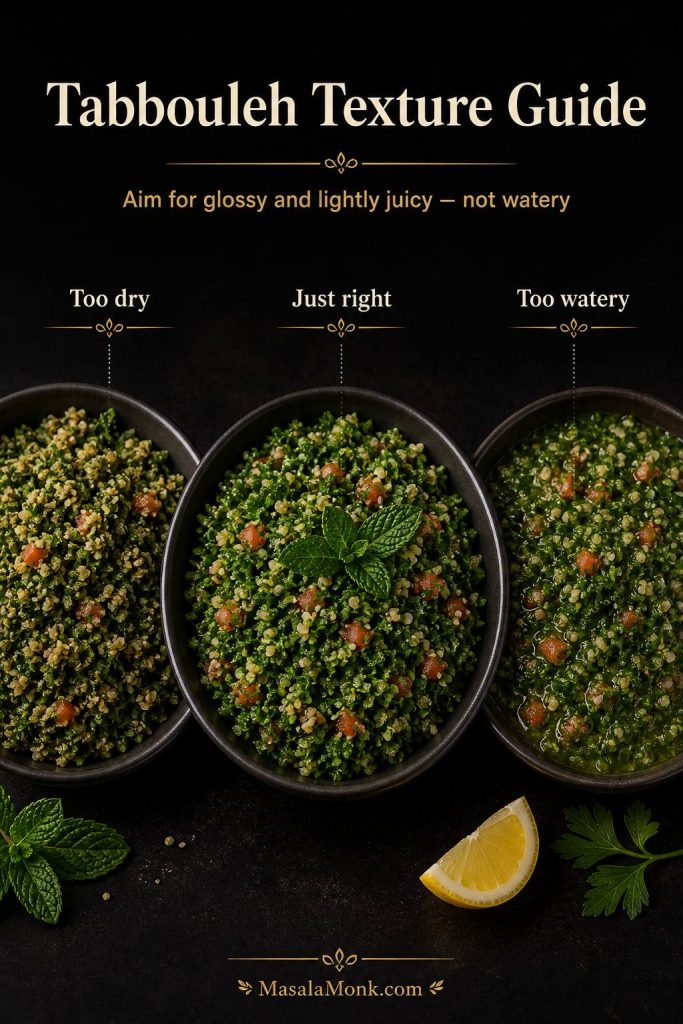
What the Finished Tabbouleh Should Look Like

For the best texture, serve tabbouleh the same day it is made. Although it keeps well for a couple of days, the herbs soften as they sit.

Best texture target: The finished tabbouleh should be finely chopped, glossy, lemony, and lightly juicy, but there should not be a puddle of dressing at the bottom of the bowl.

Do not worry if the herbs darken slightly after dressing. Proper tabbouleh should look moist and glossy, not dry and fluffy. The warning sign is excess liquid pooling underneath, not a lightly dressed herb texture.

A tabbouleh texture guide comparing too dry, just right, and too watery versions of the salad.
Finished tabbouleh should be glossy and lightly juicy, not dry and not puddled. If liquid collects at the bottom, lift the salad out with a slotted spoon and drain juicier vegetables next time.

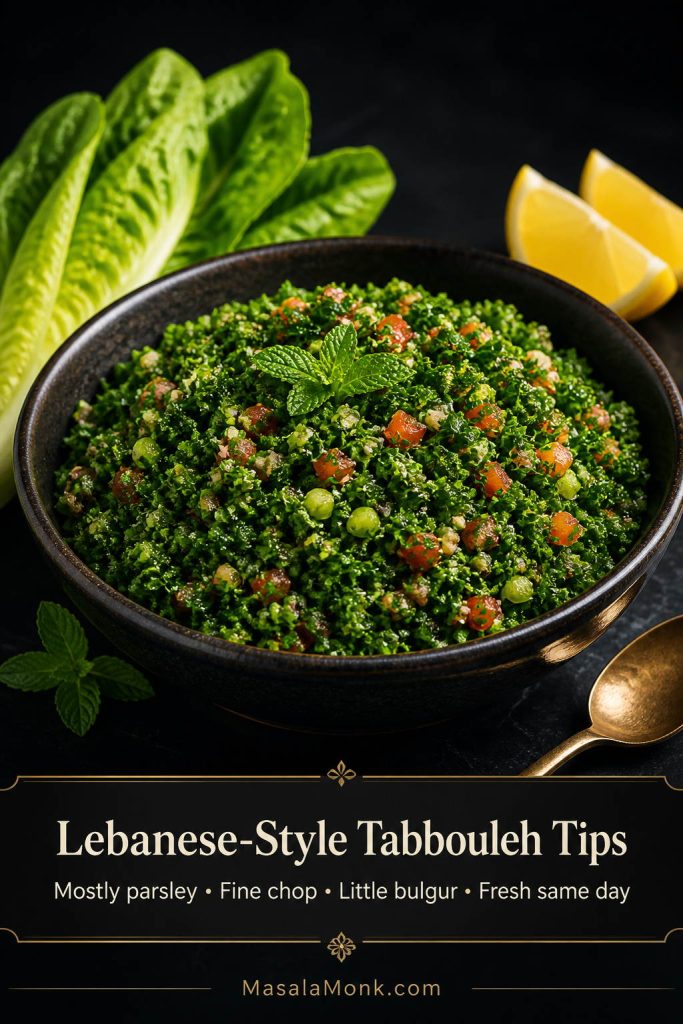
Authentic Lebanese-Style Tabbouleh Tips

Lebanese-style tabbouleh is usually much more herb-heavy than many restaurant or grocery-store versions. Parsley should be the main ingredient, while the bulgur should add texture in the background rather than making the salad feel like a grain bowl.

A Lebanese-style tabbouleh tips graphic showing a mostly green parsley-heavy bowl with lemon wedges and romaine leaves.
Lebanese-style tabbouleh is usually much more herb-led than many store-bought versions. Use fine bulgur sparingly so the salad stays light, fresh, and finely chopped.
  • Use more parsley than bulgur. A small amount of fine bulgur is enough to give texture without taking over.
  • Chop everything finely. The parsley, tomatoes, mint, and green onions should feel evenly mixed in every bite.
  • Use fine bulgur if possible. Fine #1 bulgur gives the most delicate texture and does not need boiling.
  • Keep cucumber optional. Cucumber is common in many modern tabouli salad versions, but the salad still works beautifully without it.
  • Serve it fresh. Tabbouleh can be stored, but the brightest flavor and best herb texture are usually the same day.
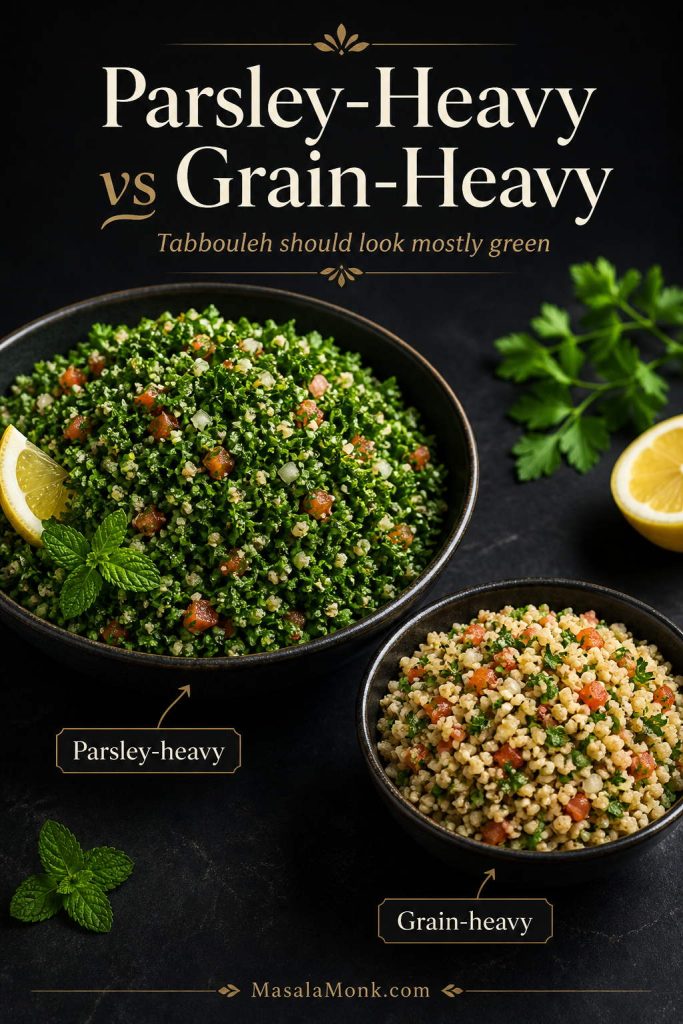
Texture cue: If the bowl looks mostly green with small flecks of tomato, mint, onion, and bulgur, you are close to a Lebanese-style tabbouleh texture. If it looks mostly grain-based, there is probably too much bulgur.
A comparison graphic with a green parsley-heavy tabbouleh bowl beside a beige grain-heavy bulgur salad bowl.
A parsley-heavy tabbouleh bowl looks green, fresh, and finely chopped. When the bowl looks beige or grain-led, the recipe has moved closer to bulgur salad.

Tabbouleh Recipe Card

Tabbouleh Recipe: Fresh Lebanese Tabouli Salad with Bulgur

This fresh tabbouleh recipe is parsley-first, lemony, and no-cook. Fine bulgur softens in the lemon-olive oil dressing while you chop the herbs, keeping the salad bright instead of watery.

Prep Time40 minutes
Cook Time0 minutes
Total Time40 minutes
Yield6 servings, about 5–6 cups

Ingredients

  • 1/3 cup fine #1 bulgur wheat, about 50g
  • 1/4 cup fresh lemon juice, 60ml
  • 1/4 to 1/3 cup extra-virgin olive oil, 60–80ml
  • 3/4 teaspoon fine salt, plus more to taste
  • 1/4 teaspoon black pepper
  • 3 packed cups finely chopped parsley, about 90–120g chopped leaves and tender stems
  • 2–3 firm Roma tomatoes, finely chopped and drained, about 250–300g
  • 3–4 green onions or scallions, finely chopped, about 45–60g
  • 1/4 to 1/3 cup finely chopped fresh mint, about 10–15g
  • 1 cup finely diced English cucumber, about 120–150g, optional
  • Romaine lettuce leaves, optional, for serving

Instructions

  1. Wash and dry the herbs. Wash the parsley and mint, then dry very well in a salad spinner or with clean kitchen towels.
  2. Soak the bulgur. In a large bowl, whisk lemon juice, 1/4 cup olive oil, salt, and pepper. Stir in the fine bulgur and let it sit for 20–30 minutes while you chop the herbs and vegetables.
  3. Chop the parsley. Finely chop the parsley by hand. Remove thick stems, but tender stems are fine if chopped small.
  4. Prepare the vegetables. Finely chop the tomatoes, green onions, mint, and optional cucumber. Drain tomatoes and cucumber if they release a lot of liquid.
  5. Mix the tabbouleh. Add the parsley, tomatoes, green onions, mint, and cucumber to the soaked bulgur. Toss gently until evenly combined.
  6. Rest and adjust. Let the salad rest for 10 minutes. Taste and adjust with more salt, lemon juice, or olive oil as needed. Use the remaining olive oil only if the salad needs a softer finish.
  7. Serve. Serve chilled or at room temperature, with romaine leaves, pita, hummus, falafel, or grilled dishes.

Notes

  • Fine #1 bulgur gives the best no-cook texture for tabbouleh.
  • If using medium or coarse bulgur, soak it separately in hot water, drain very well, and cool completely before mixing.
  • Dry the parsley thoroughly before chopping. Wet herbs make watery tabbouleh.
  • Drain juicy tomatoes and cucumber before adding them to the bowl.
  • For a stricter parsley-heavy version, skip the cucumber.
  • For gluten-free tabbouleh, use cooked and cooled quinoa or finely riced cauliflower instead of bulgur.
  • Best texture is the same day, but leftovers keep 2–3 days in the fridge.
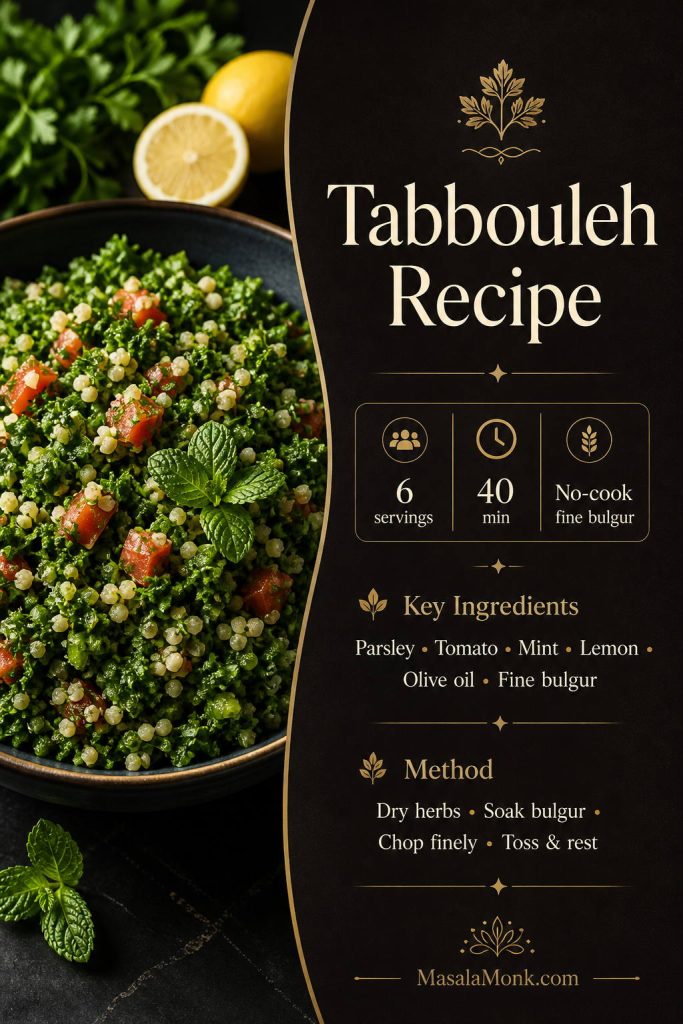
A visual tabbouleh recipe card with a finished salad, 6 servings, 40 minutes, no-cook fine bulgur, key ingredients, and method steps.
This tabbouleh recipe card keeps the essentials together: 6 servings, about 40 minutes, no-cook fine bulgur, fresh herbs, lemon dressing, and a short rest before serving.

Make-Ahead and Storage

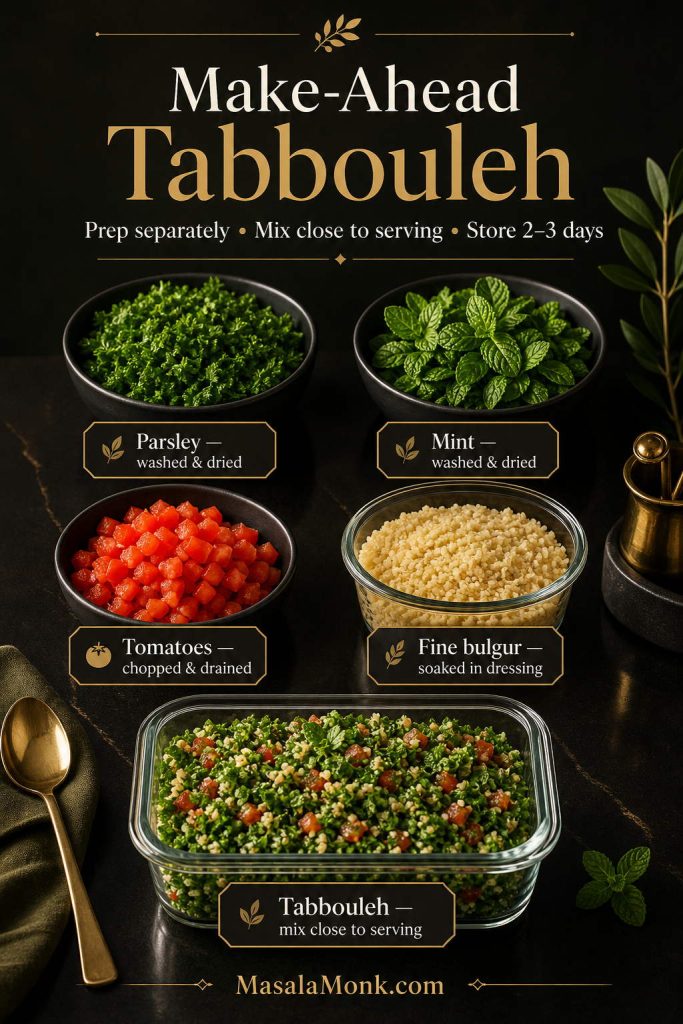
Although tabbouleh can be made ahead, it is best when the herbs still taste fresh and lively. If you want to prepare it early, wash and dry the herbs first, then chop and mix closer to serving.

For the freshest texture, keep the chopped herbs, drained tomatoes, and soaked bulgur separate until close to serving, then toss and adjust the seasoning. This is especially helpful if you are making tabbouleh for guests.

  • Best same day: Tabbouleh has the brightest texture and flavor within a few hours of mixing.
  • Best for guests: Mix the salad within 30–60 minutes of serving for the freshest herb texture.
  • Best for leftovers: Store dressed tabbouleh in an airtight container for 2–3 days, knowing the herbs will soften over time.
  • Make-ahead tip: Wash and dry parsley up to 1 day ahead. Keep it wrapped in towels in the fridge.
  • Do not freeze: The tomatoes and herbs turn limp and watery after thawing.
A make-ahead tabbouleh guide showing dried parsley, dried mint, drained tomatoes, fine bulgur soaked in dressing, and finished tabbouleh in a container.
For make-ahead tabbouleh, prep the herbs, tomatoes, and fine bulgur separately. Then mix close to serving and store leftovers in the fridge for 2–3 days.

If the salad tastes dull after sitting, refresh it with a small squeeze of lemon juice, a pinch of salt, and a drizzle of olive oil before serving. This brings back brightness without needing a full new batch of dressing.

What to Serve with Tabbouleh

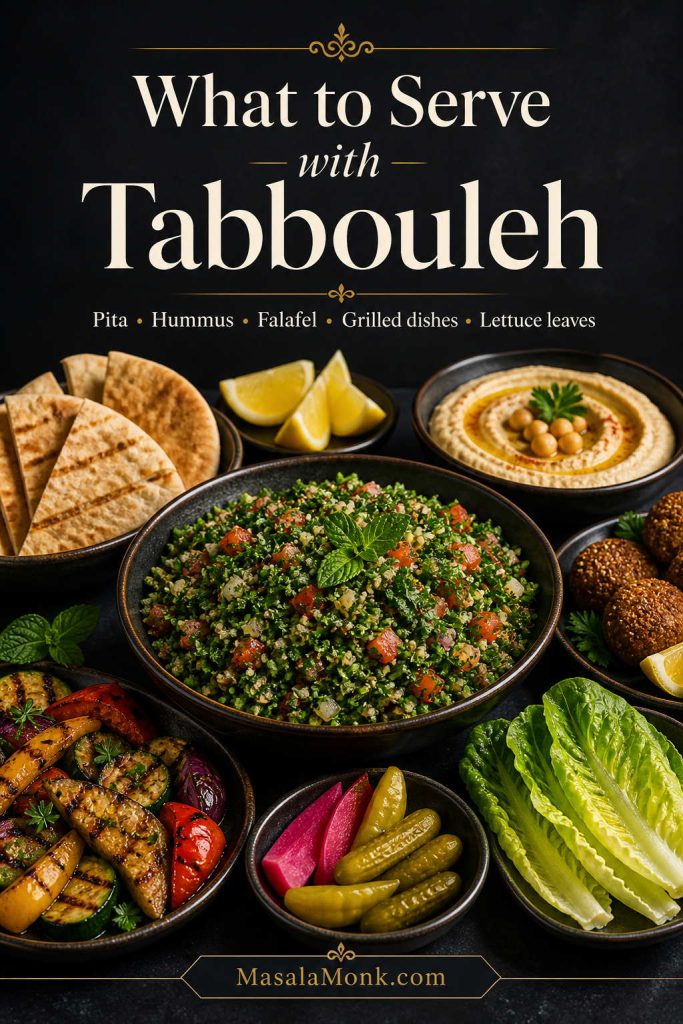
Tabbouleh works as a salad, side dish, or part of a mezze spread. Its bright lemon and herb flavor makes it especially good beside richer dishes.

  • Hummus and warm pita
  • Falafel
  • Grilled chicken, kebabs, or kofta
  • Lentil soup
  • Stuffed pita wraps
  • Roasted eggplant or grilled vegetables
  • Romaine lettuce leaves for scooping
  • Rice bowls or grain bowls
A mezze spread with tabbouleh, pita, hummus, falafel, pickles, grilled vegetables, lemon, and lettuce leaves.
Tabbouleh works well with mezze because its lemony herbs cut through richer foods. Serve it with pita, hummus, falafel, grilled dishes, pickles, or crisp lettuce leaves.

For a full mezze-style meal, serve tabbouleh with warm pita, hummus, pickles, and homemade falafel. If you are building a falafel, shawarma, or pita spread, a spoon of amba sauce adds a sharp, tangy contrast beside the fresh herbs.

For grilled chicken, wraps, or pita plates, tabbouleh also works well with a cooling tzatziki sauce. You can also spoon it into pita pockets with hummus, cucumber, and crisp vegetables, similar to this hummus veggie sandwich.

For a lighter plate, serve tabbouleh with hummus, raw vegetables, olives, and pita. For a fuller dinner, pair it with grilled chicken or lamb and a creamy yogurt sauce.

Tabbouleh Variations

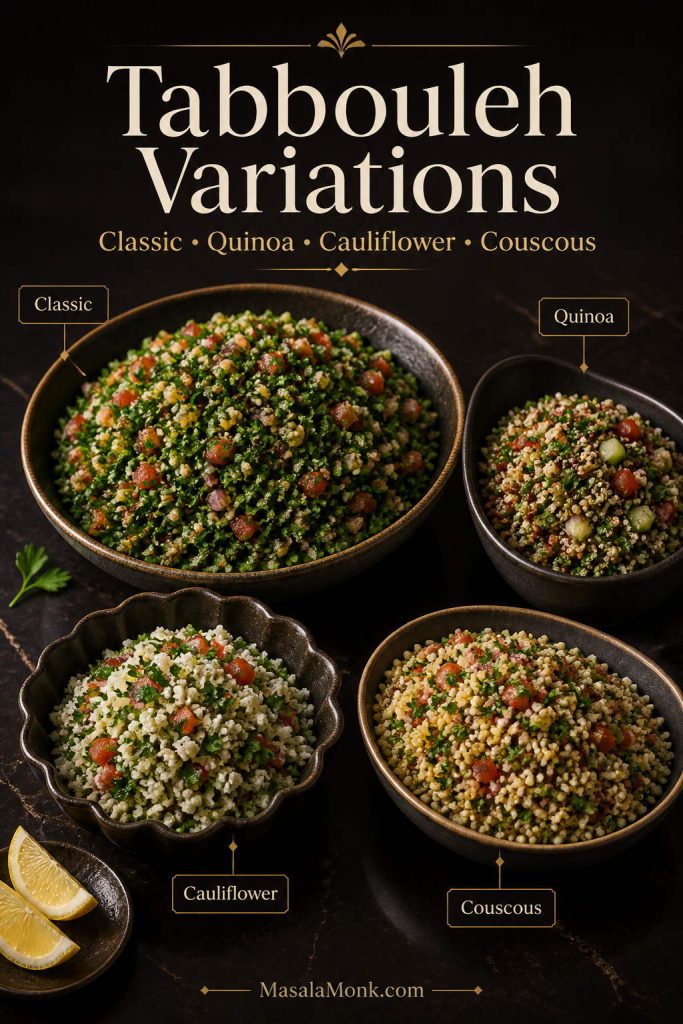
Once you understand the base recipe for tabbouleh, the variations are easy. For example, you can swap bulgur for quinoa, cauliflower rice, or couscous while keeping the herbs generous, the pieces small, and the lemon-olive oil balance bright.

A tabbouleh variations graphic showing classic bulgur, quinoa, cauliflower, and couscous versions in separate bowls.
Once the parsley-heavy base is clear, tabbouleh variations are easy. Use quinoa for gluten-free tabbouleh, cauliflower rice for grain-free tabbouleh, or couscous for a quick variation.

Quinoa Tabbouleh

Use cooked and fully cooled quinoa instead of bulgur. Quinoa tabbouleh is the best gluten-free version because quinoa has a small grain size and absorbs lemon dressing well. Keep the parsley generous so it still tastes like tabbouleh, not just quinoa salad.

If you are using quinoa for meal prep, this quinoa and chickpea salad idea shows how well quinoa works with cucumber, tomatoes, red onion, and lemon-tahini dressing.

Cauliflower Tabbouleh

Use finely riced cauliflower instead of bulgur for a grain-free version. Raw cauliflower rice works well if it is chopped small and not watery. For a softer texture, salt it lightly, let it sit for a few minutes, then squeeze out extra moisture before mixing.

Couscous Tabbouleh

Couscous tabbouleh is a quick variation, but it is not the traditional version. Cook or soak the couscous, fluff it, cool it completely, then mix with the herbs, tomato, lemon, and olive oil.

No-Bulgur Tabbouleh

You can skip the bulgur for a lighter herb salad. The texture will be less traditional, but it works if you want a very fresh salad with parsley, tomato, mint, lemon, and olive oil.

Extra-Lemony Tabbouleh

If you like a sharper salad, add another tablespoon of lemon juice after the salad rests. Add it gradually because too much lemon can overpower the herbs.

Tabbouleh FAQs

Is tabbouleh the same as tabouli?

Yes. Tabbouleh and tabouli usually mean the same parsley, tomato, mint, bulgur, lemon, and olive oil salad. The difference is mostly spelling.

What is tabbouleh made of?

Tabbouleh is made with parsley, tomatoes, mint, green onions, fine bulgur, lemon juice, olive oil, salt, and pepper. Some versions also include cucumber.

What kind of bulgur is best for tabbouleh?

Fine #1 bulgur is best for tabbouleh because it softens quickly and does not overpower the parsley. Medium or coarse bulgur can work, but it usually needs hot water and gives the salad a heavier texture.

Do you cook bulgur for tabbouleh?

You do not need to cook fine bulgur for tabbouleh. In this recipe, it softens in the lemon-olive oil dressing while you chop the herbs and vegetables. Medium or coarse bulgur should be hot-soaked or cooked, then cooled before mixing.

Can I make tabbouleh without bulgur?

Yes. You can leave out the bulgur for a lighter parsley salad, but the texture will be less traditional. If you want a gluten-free version with a similar small-grain feel, cooked and cooled quinoa is the best swap.

Is tabbouleh gluten-free?

Classic tabbouleh is not gluten-free because bulgur is made from wheat. For a gluten-free version, use cooked quinoa or cauliflower rice instead of bulgur.

Is tabbouleh vegan?

Yes. Traditional tabbouleh ingredients are plant-based, so the salad is naturally vegan and dairy-free.

Is tabbouleh healthy?

Tabbouleh is a fresh, herb- and vegetable-heavy salad made with parsley, tomatoes, mint, lemon juice, olive oil, and a small amount of bulgur. It can fit well into a balanced Mediterranean-style meal with vegetables, legumes, whole grains, and olive oil. For broader context, Harvard’s Nutrition Source has a useful overview of the Mediterranean diet pattern.

Why is my tabbouleh watery?

Tabbouleh becomes watery when the parsley is wet, the tomatoes are too juicy, the cucumber is not drained, or too much dressing is added. Dry the herbs well, drain juicy vegetables, and let the salad rest before adjusting the final seasoning.

Should tabbouleh be served cold?

Tabbouleh can be served chilled or at room temperature. It tastes best after a short rest, but it should not sit out for too long because the herbs soften and the tomatoes release more liquid.

How long should tabbouleh rest before serving?

Let tabbouleh rest for about 10–30 minutes after mixing. That gives the bulgur time to finish softening and lets the lemon, olive oil, herbs, and tomatoes settle into a brighter flavor.

Can I make tabbouleh ahead of time?

Yes, but it tastes freshest the same day. You can wash and dry the herbs ahead of time, then chop and mix the salad closer to serving. Leftovers keep 2–3 days in the fridge.

Can I freeze tabbouleh?

No. Tabbouleh does not freeze well because the herbs and tomatoes become limp and watery after thawing.

Can I use quinoa instead of bulgur?

Yes. Use cooked and cooled quinoa instead of bulgur for a gluten-free quinoa tabbouleh. Keep the herbs generous so the salad still tastes fresh and parsley-forward.

Can I use couscous instead of bulgur?

Yes, but couscous tabbouleh is a quick variation rather than the classic version. Cook or soak the couscous, cool it completely, then mix with the herbs, tomatoes, lemon, and olive oil.

Can I use cauliflower rice instead of bulgur?

Yes. Finely riced cauliflower makes a grain-free tabbouleh variation. Use it raw for crunch or salt and drain it lightly for a softer texture.

Should I use curly parsley or flat-leaf parsley?

Both can work. Curly parsley gives a fluffy, traditional-looking texture, while flat-leaf parsley has a stronger flavor and is easier to chop. Whichever you use, dry it very well before chopping.
Can I chop parsley in a food processor?

You can, but hand-chopping gives better texture. If using a food processor, pulse carefully and stop before the parsley becomes wet or pasty.

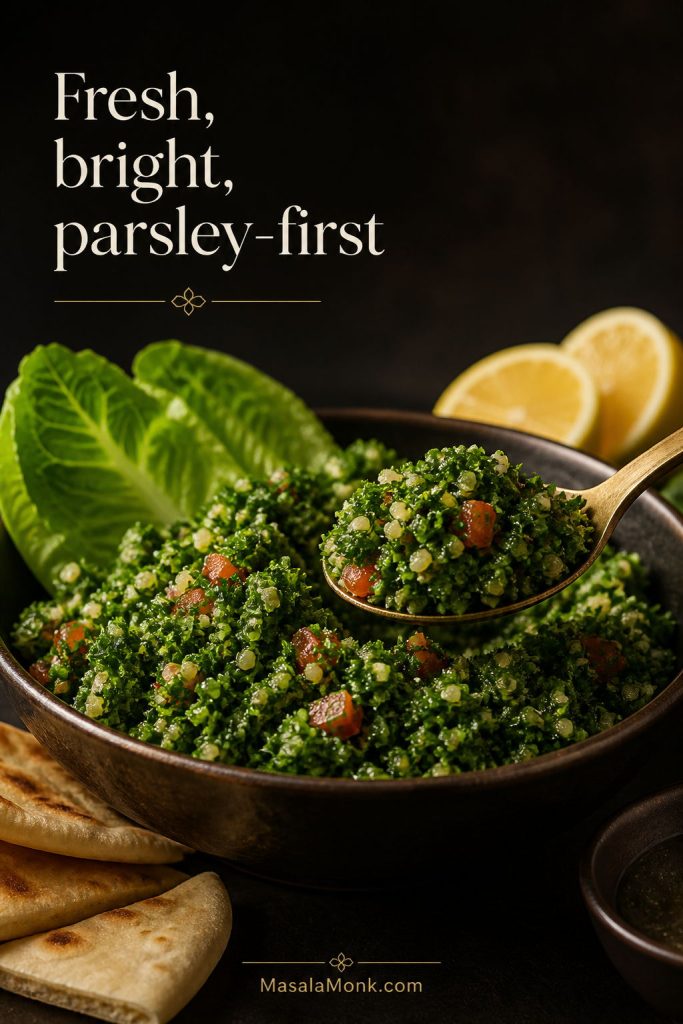
A close serving image of fresh parsley-first tabbouleh with a spoon, pita wedges, lemon, and romaine leaves.
Before serving, taste the rested tabbouleh one last time. Salt fixes flat flavor, lemon adds brightness, and a small drizzle of olive oil softens sharp edges.

Tabbouleh Recipe Tips to Remember

For the best tabbouleh, keep the salad parsley-first, use fine bulgur, dry the herbs thoroughly, drain juicy tomatoes, and taste after the salad rests. Those small details make the difference between a fresh, bright herb salad and a watery, grain-heavy bowl.

Posted on 1 Comment

Healthy Homemade Granola Bars Recipe

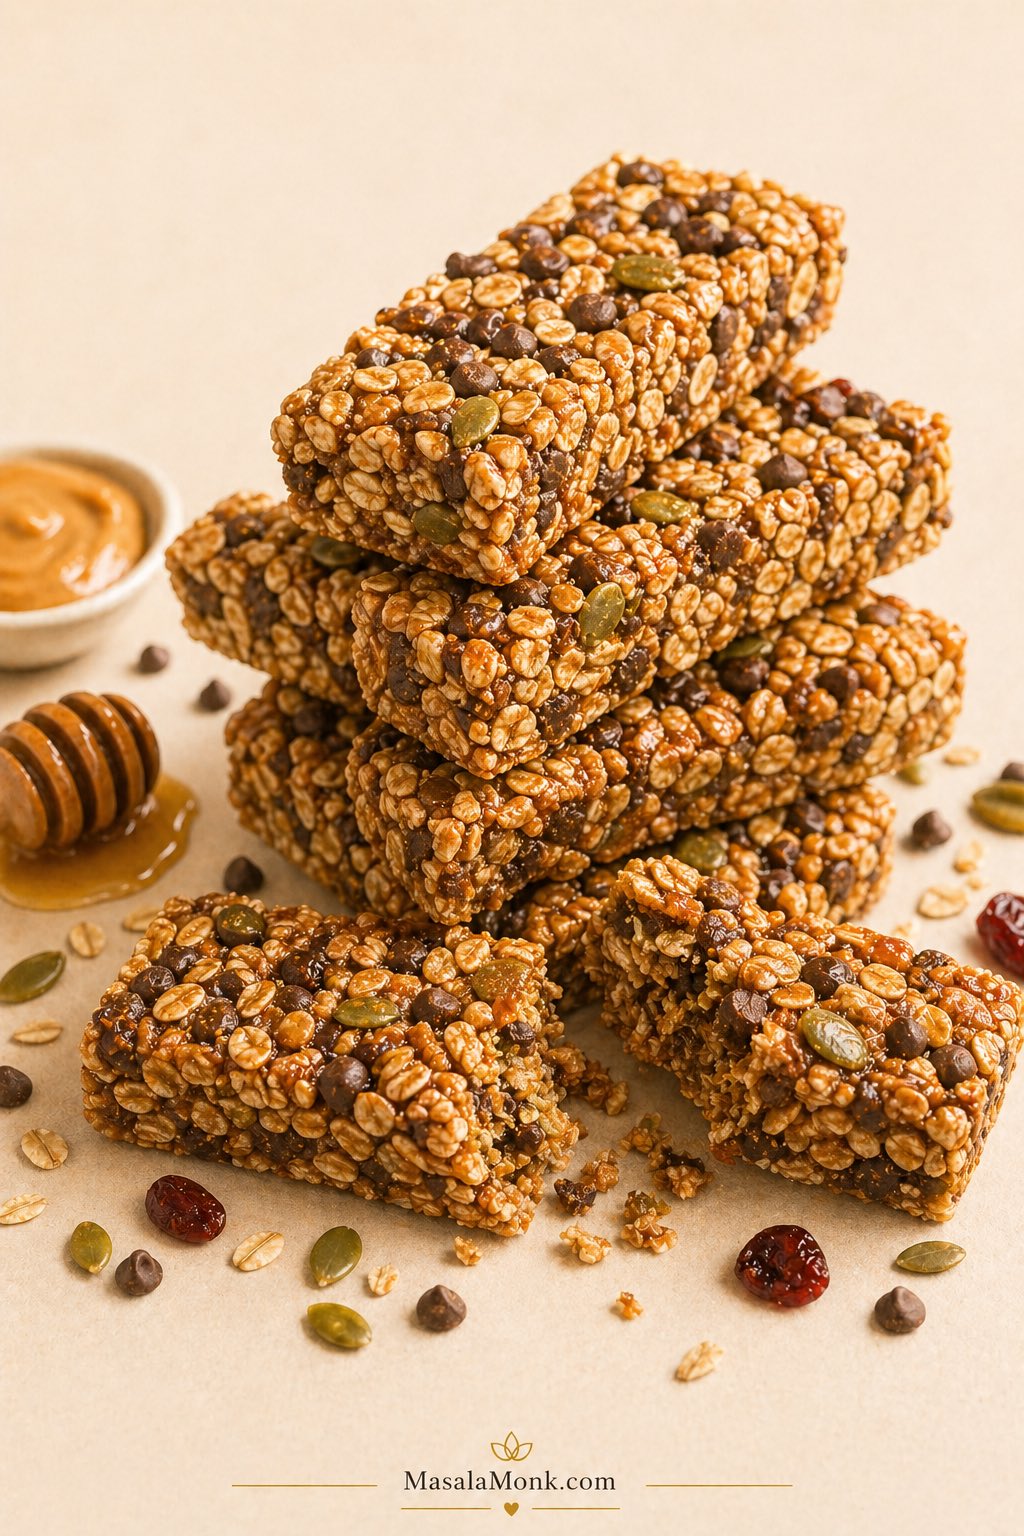
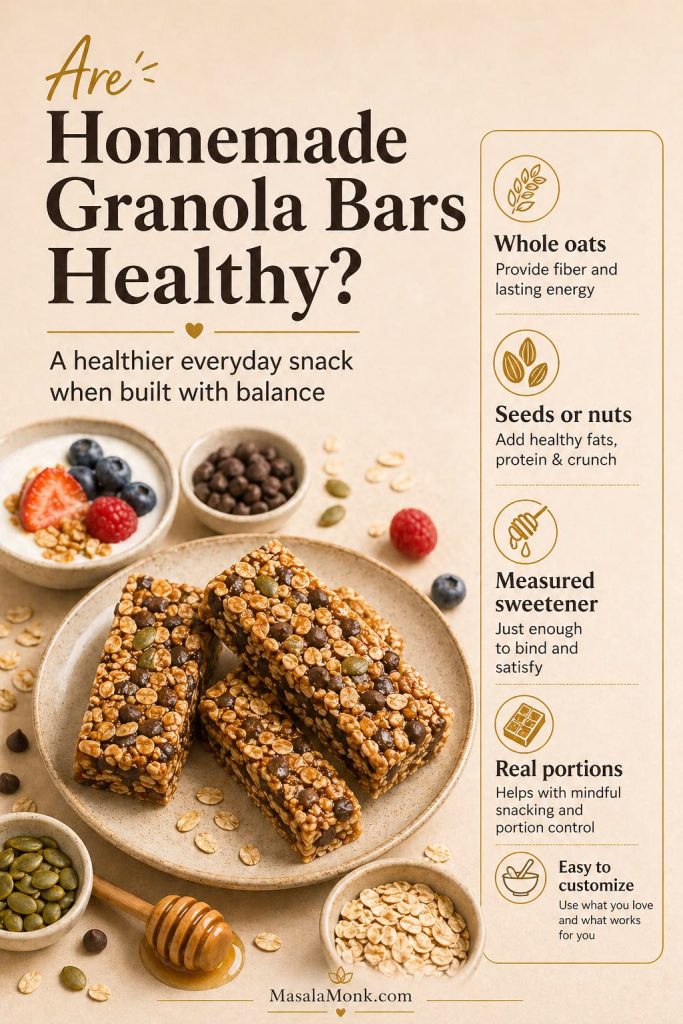
Stack of chewy homemade granola bars with oats, seeds, chocolate chips, honey, and nut butter on a warm neutral surface.

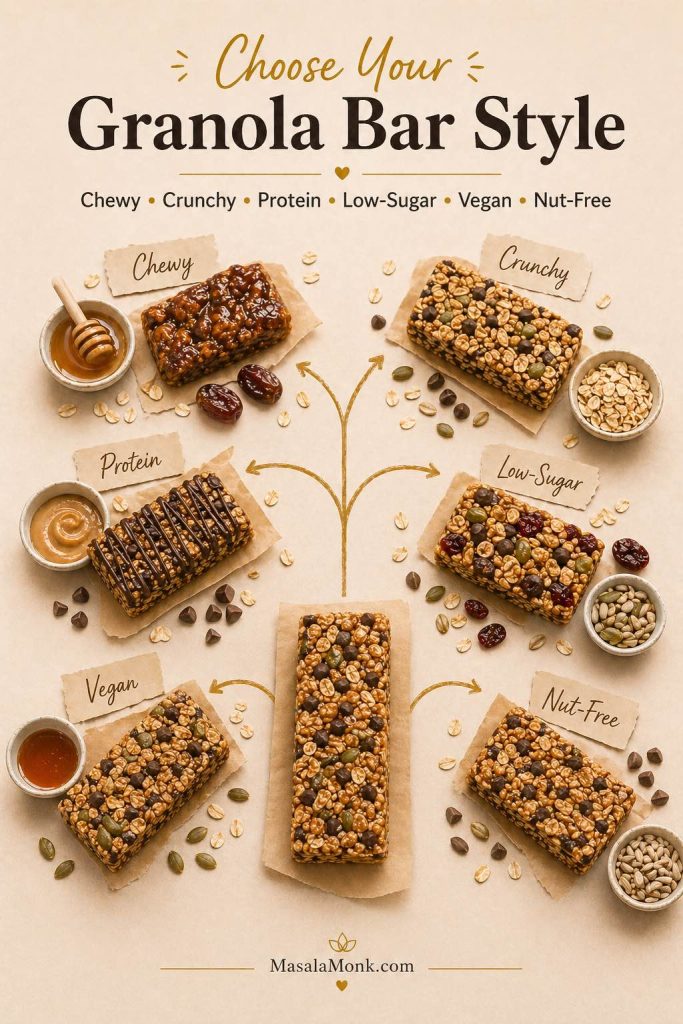
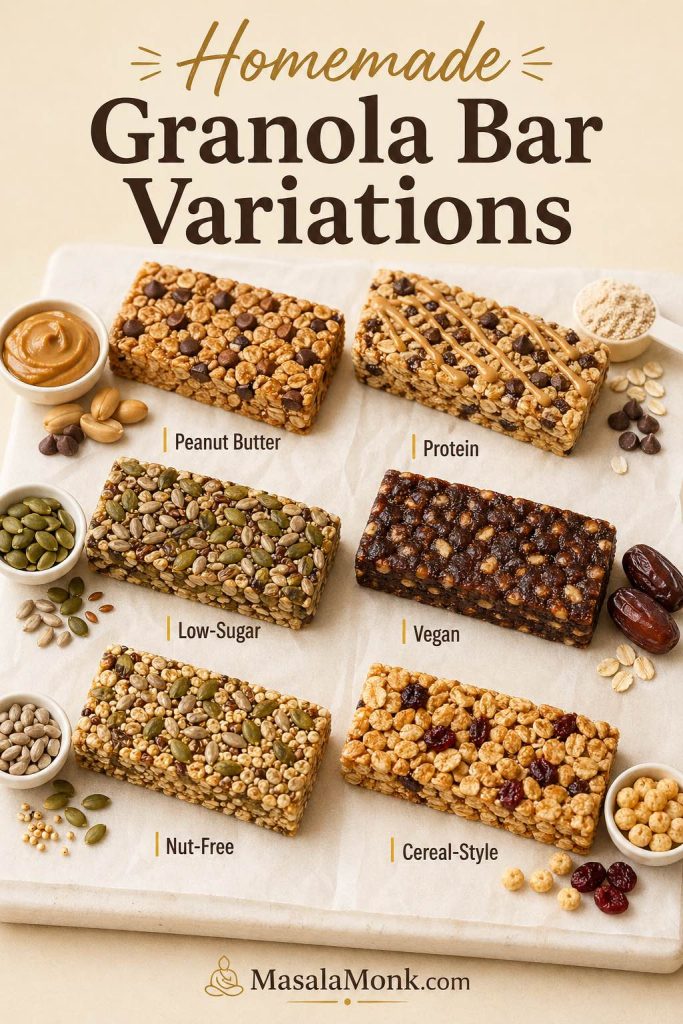
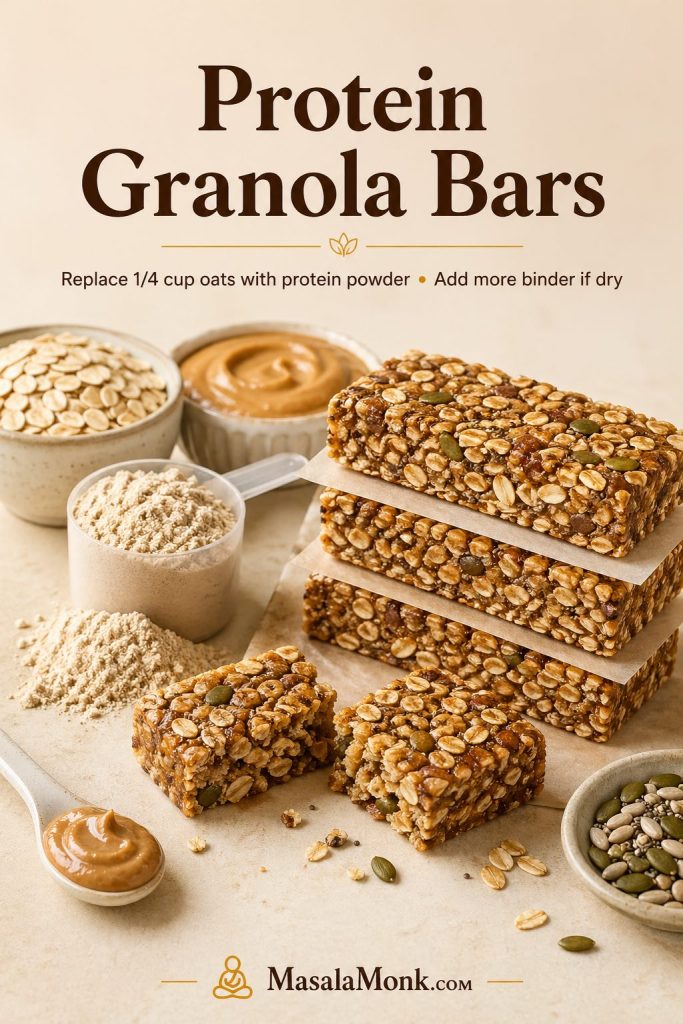
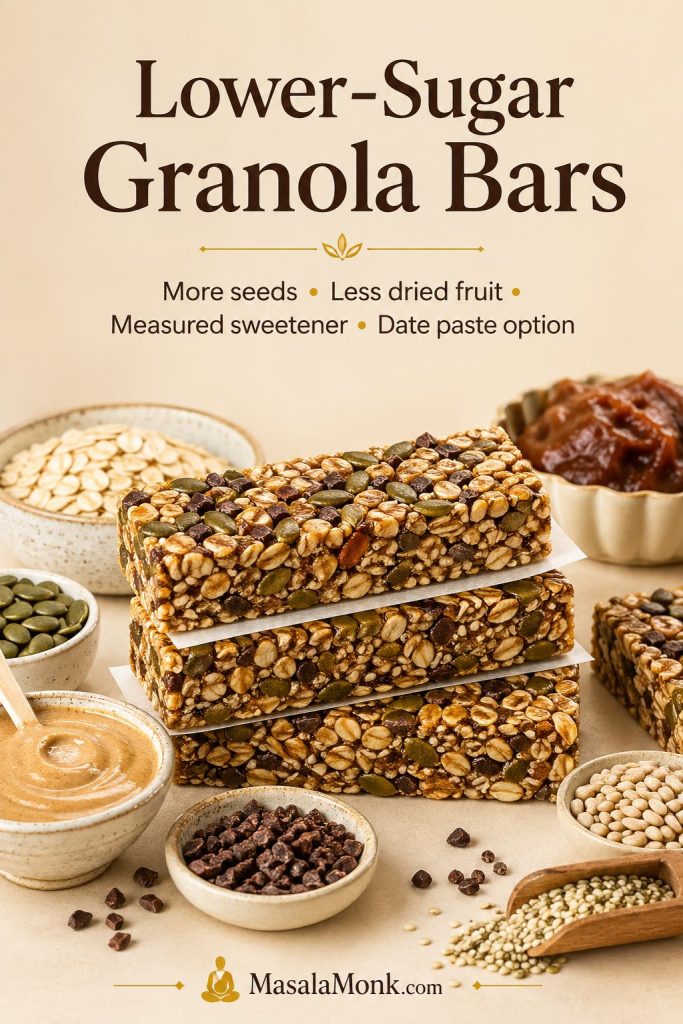
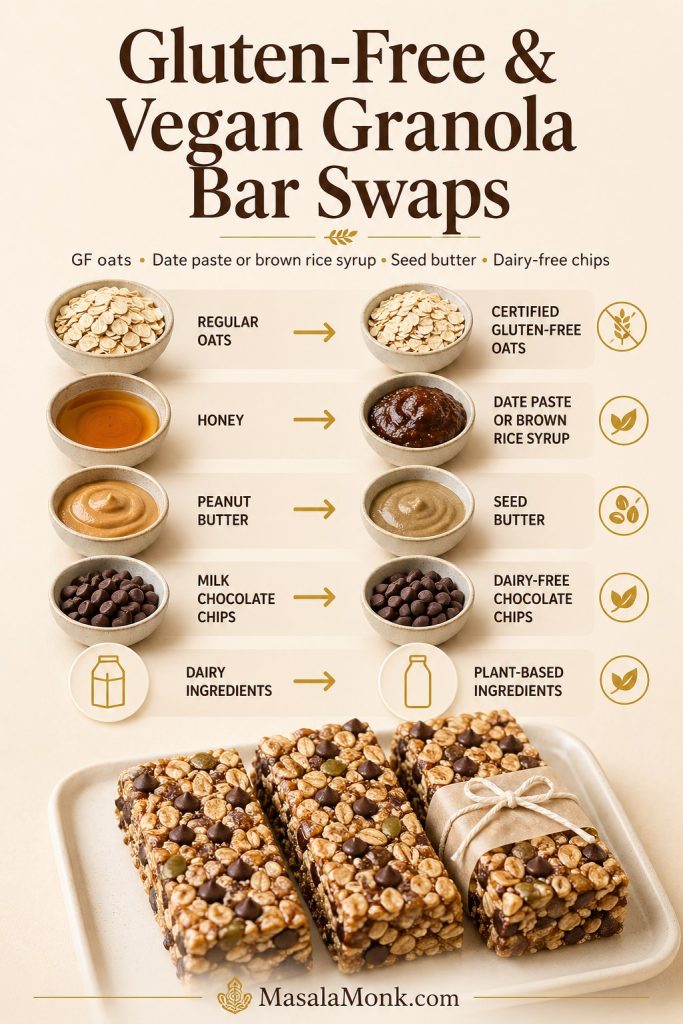
A good healthy homemade granola bars recipe should give you bars that are chewy, sturdy, lightly sweet, and easy to pack without crumbling into oat clusters. This version starts with a simple no-bake base of oats, nut butter, a sticky sweetener, salt, and mix-ins. Once that base works, you can adjust it for peanut butter, chocolate chip, protein, low-sugar, gluten-free, vegan, nut-free, cereal-style, or baked flapjack-style bars.

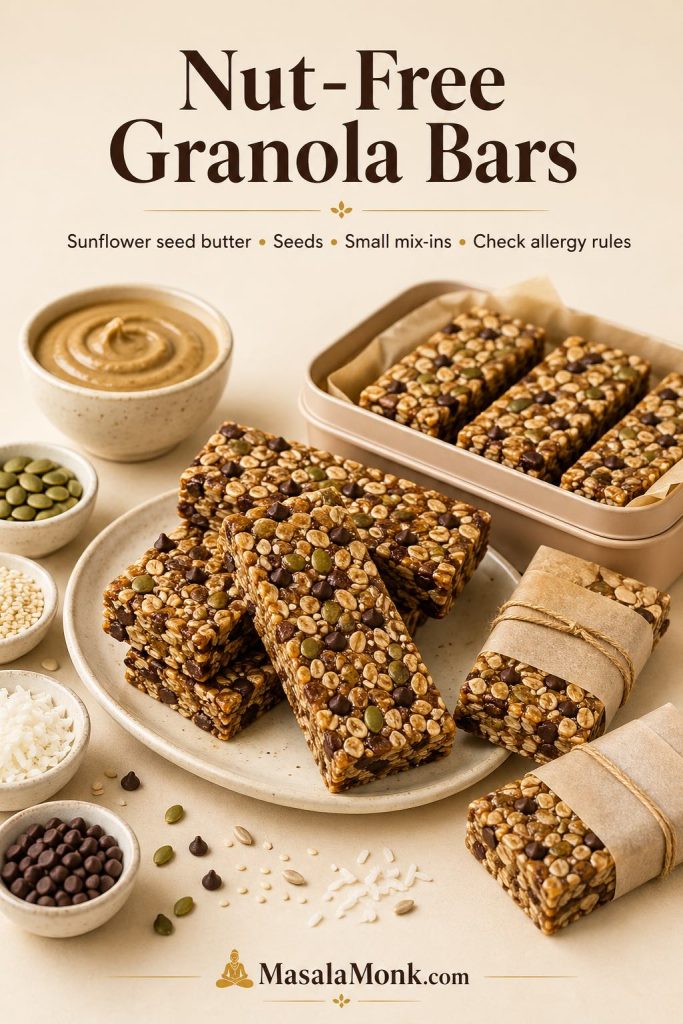
The best part is that these healthy homemade granola bars can fit the way you actually snack. Keep them simple for lunchboxes, add protein powder for a more filling post-workout bar, use sunflower seed butter for a nut-free lunchbox option, or bake the mixture briefly when you want a crunchier texture. Once you know how the oat-binder-sweetener formula works, homemade granola bars become much easier to customize.

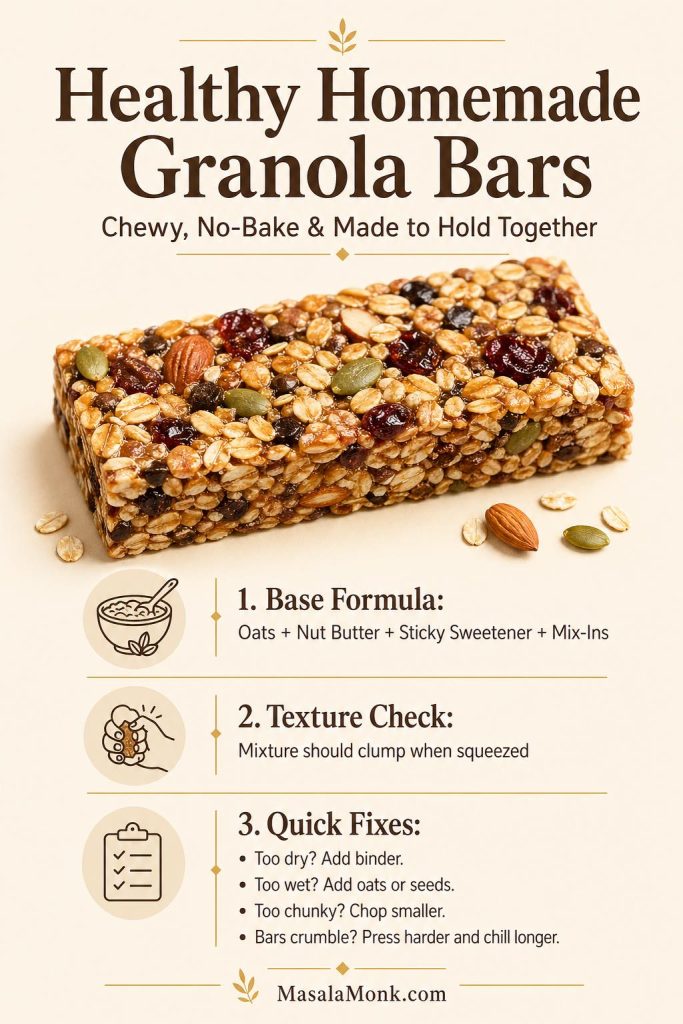
Summary guide for healthy homemade granola bars showing the base formula, texture check, and quick fixes for dry, wet, chunky, or crumbly bars.
If a reader only remembers three things, it should be these: use a balanced base formula, make sure the mixture clumps when squeezed, and fix problems before chilling by adjusting binder, oats, seeds, or mix-in size.

If this is your first batch, start with the basic chewy no-bake version. Do not try to make the bars protein-rich, vegan, low-sugar, crunchy, and nut-free all at once. Instead, make one reliable batch first, learn how the mixture should feel before pressing, and then use the variations to change the flavor, sweetness, texture, or diet fit.

Healthy Homemade Granola Bars Guide

Start with the chewy no-bake base, then use the guides below to make the bars firmer, softer, crunchier, lower in sugar, higher in protein, vegan, gluten-free, nut-free, cereal-style, or flapjack-style.

Quick Answer: Healthy Homemade Granola Bars Recipe

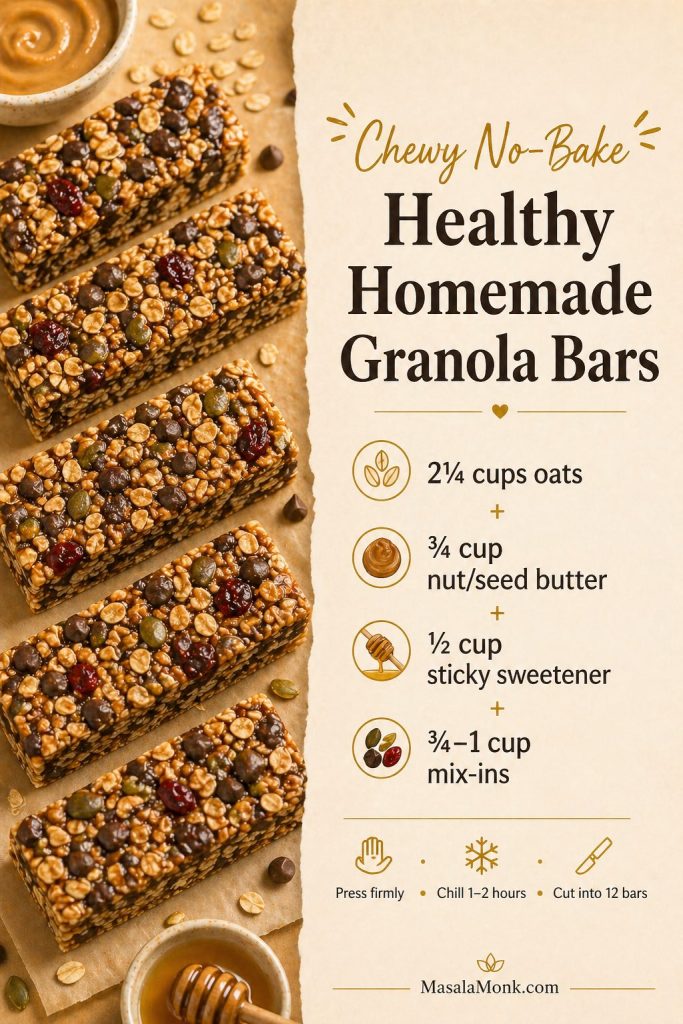
To make chewy, healthy homemade granola bars, mix rolled oats with creamy nut butter or seed butter, a sticky sweetener such as honey, brown rice syrup, or date paste, a little salt, and small mix-ins. Then, press the mixture very firmly into a lined pan, chill until set, and slice it into bars.

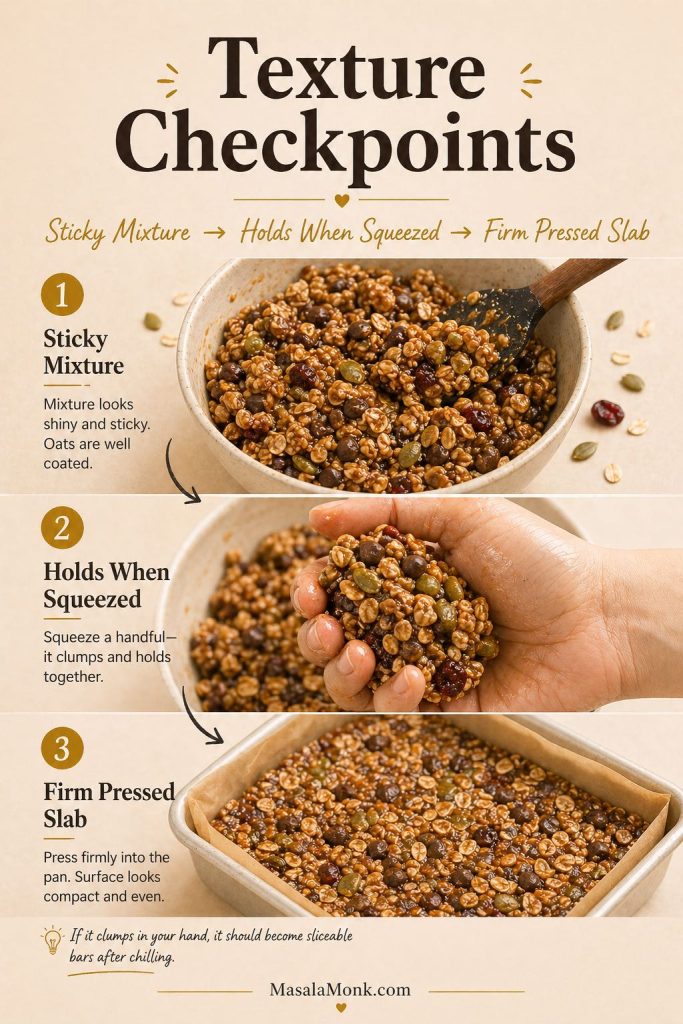
The bars hold together best when the mixture looks sticky and slightly glossy before it goes into the pan. However, if it looks dusty, it will probably slice dusty. If it feels wet and loose, add more oats, seeds, or ground flaxseed. In the end, the goal is a dense mixture that clumps when squeezed in your hand.

In this recipe, the homemade oat mixture turns into chewy granola-style bars once it is pressed firmly and chilled. That texture cue matters more than any single mix-in, especially if you want a healthier bar that still slices cleanly.

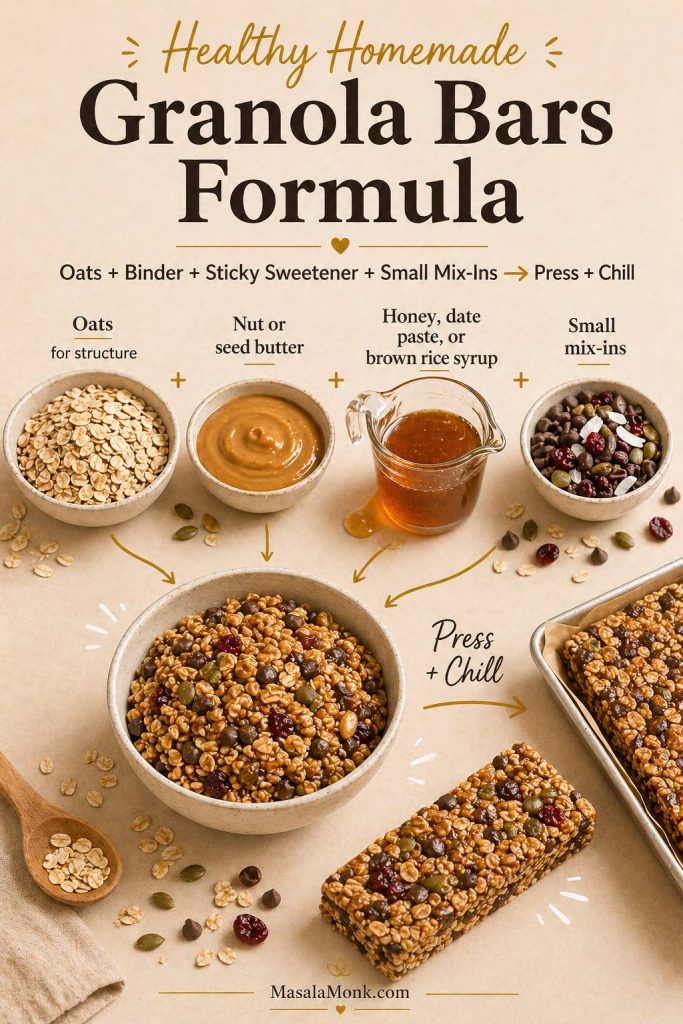
Formula guide showing oats, nut butter, sticky sweetener, small mix-ins, pressing, chilling, and finished homemade granola bars.
In short, the formula is simple: oats give structure, nut or seed butter adds richness, sticky sweetener helps the bars hold, and small mix-ins add flavor without breaking the slab.
At a glance: These are chewy no-bake granola bars made with rolled oats, creamy peanut butter or seed butter, honey or date paste, seeds, and mini chocolate chips. You need about 15 minutes of hands-on time, then the bars chill until firm. For the most reliable first batch, use peanut butter and honey, press the mixture firmly, and chill before slicing.

Why Make Granola Bars at Home?

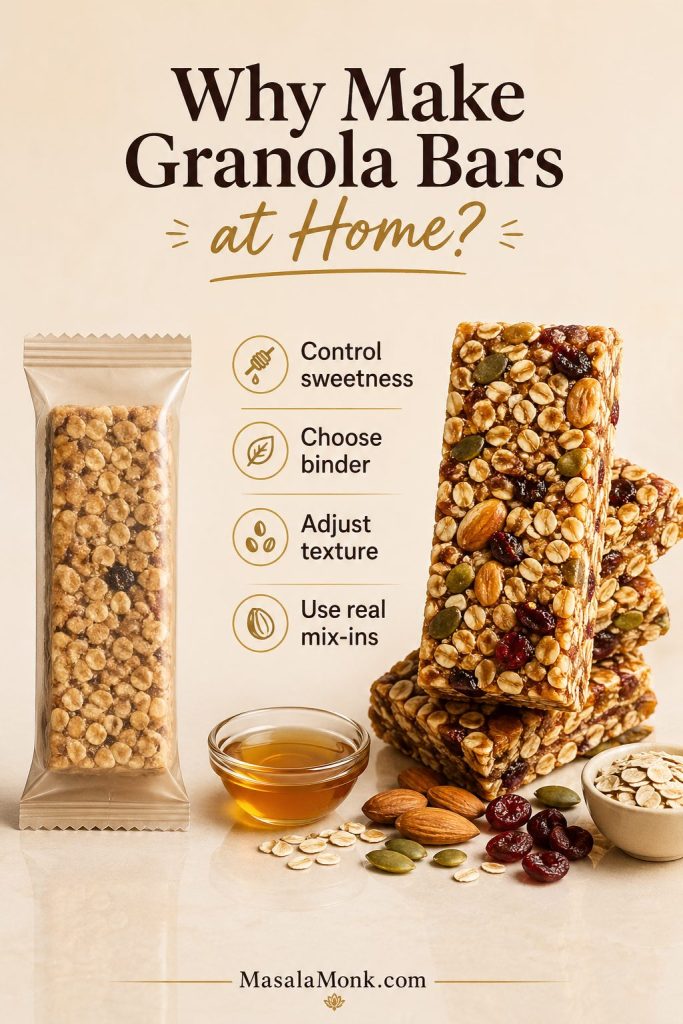
Making granola bars at home gives you more control over sweetness, texture, binder choice, and mix-ins. That matters because the same basic oat mixture can become a chewy snack bar, a firmer lunchbox bar, a lower-sugar seed bar, a vegan date bar, or a protein-focused bar once you know how to adjust the formula.

Guide image explaining why to make granola bars at home, highlighting control over sweetness, binder choice, texture adjustment, and real mix-ins.
One of the biggest advantages of making granola bars at home is control. You decide how sweet they are, what binder to use, how chewy or firm they feel, and which real mix-ins actually go into the batch.

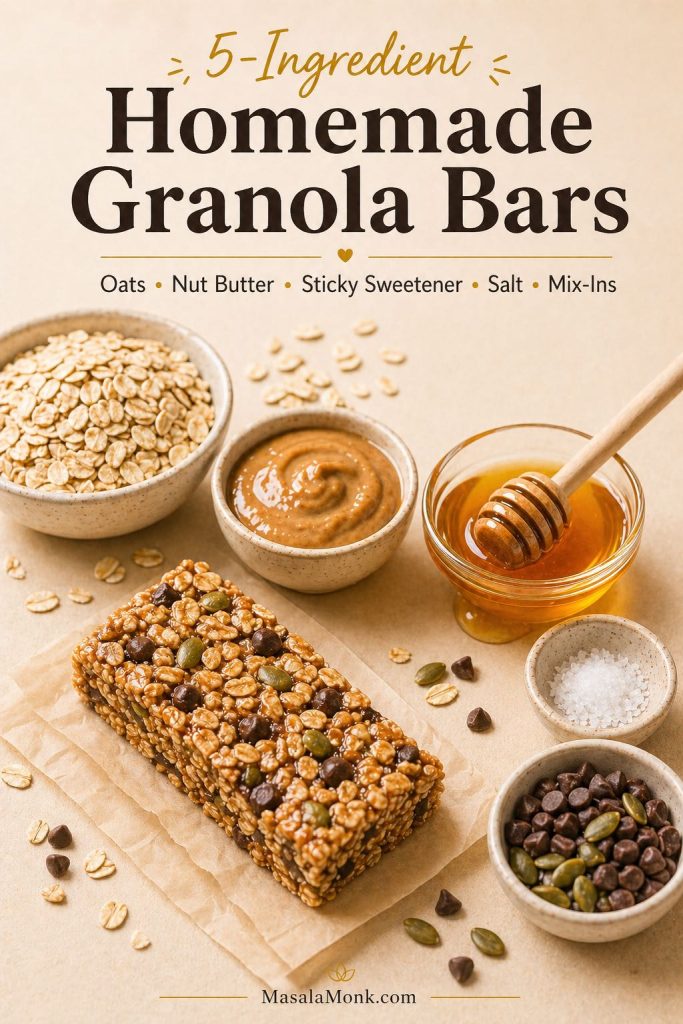
5-Ingredient Homemade Granola Bars

When you want the simplest possible version, use this 5-ingredient formula. It is the easiest way to make homemade granola bars without turning the recipe into a project.

Because this recipe keeps the bars homemade, you can control the granola-style base, the binder, and the final sweetness without relying on a packaged snack bar.

Five ingredients for homemade granola bars: oats, nut butter, honey, salt, mix-ins, and one finished granola bar.
Because this version starts with only five ingredients, it is the easiest place to learn how the oat mixture should look before you move into protein, vegan, nut-free, or low-sugar bars.
  • Oats for structure and chew
  • Peanut butter or sunflower seed butter for richness and binding
  • Honey, brown rice syrup, or date paste for stickiness
  • Salt for balance
  • Mini chocolate chips, seeds, raisins, or chopped nuts for flavor

If you are making these for older kids, start with oats, peanut butter, honey, salt, and mini chocolate chips. For a nut-free version, use sunflower seed butter and seeds instead. When you want a less sweet batch, use seeds or chopped nuts as the fifth ingredient instead of chocolate or dried fruit.

For a lighter, crispier bar, replace 1/2 to 1 cup of the oats with puffed rice cereal, crisp rice cereal, or crisp oat cereal. Since cereal is lighter than oats, keep the sticky binder strong so the bars hold together.

Choose Your Granola Bar Style

This recipe works because homemade granola bars do not all need the same texture. A lunchbox bar, breakfast bar, protein bar, cereal bar, and crunchy bar each need slightly different handling.

Granola bar style guide showing chewy, crunchy, protein, low-sugar, vegan, and nut-free homemade granola bar options.
Once the base recipe works, you can steer the same homemade granola bar formula toward chewy, crunchy, protein-rich, low-sugar, vegan, or nut-free versions.
You Want Best Version to Make What to Remember
Easiest first batch Chewy no-bake granola bars Use peanut butter and honey, then press hard and chill fully.
Bars that hold together best Honey or brown rice syrup + nut butter Brown rice syrup is especially sticky; honey is easier to find.
Prepared granola version Ready-made granola + sticky binder Crush large clusters first and use less added sweetener if the granola is already sweet.
Nut-free lunchbox option Sunflower seed butter + seeds Skip nuts and use pumpkin seeds, sunflower seeds, sesame, coconut, or mini chocolate chips.
Higher-protein bars Protein granola bars Start with a small amount of protein powder so the bars do not turn chalky.
Less sweet bars Seed-heavy bars with less dried fruit and chocolate Do not remove all sticky binder, or the bars will crumble.
Crunchy granola bars Toasted and briefly baked bars Cool completely before slicing; crunchy bars firm as they cool.
Cereal bars Oats + puffed rice or crisp cereal Use a strong binder and press firmly because cereal is lighter than oats.
Vegan granola bars Date paste or brown rice syrup bars Maple syrup can work, but it usually needs extra support from nut butter or flax.
Soft breakfast bars Oat bars with banana or applesauce These are softer and more breakfast-like than classic granola bars.
Flapjack-style oat bars Baked granola bar variation Use the crunchy baked method, but keep the sweetener measured for a lighter bar.

Recipe Card: Chewy No-Bake Healthy Homemade Granola Bars

Tip: Use your browser’s print option to save this recipe card, or screenshot it if you want to keep the basic formula on your phone.

Saveable recipe card for chewy no-bake homemade granola bars with oats, nut or seed butter, sticky sweetener, mix-ins, pressing, chilling, and slicing notes.
Use this base ratio as your starting point, then adjust the binder, sweetener, and mix-ins depending on whether you want softer bars, firmer lunchbox bars, or a more protein-focused batch.
Before you start: For the easiest chewy bars, use peanut butter and honey. If you have a kitchen scale, weigh the oats, nut butter, and sweetener for the most consistent texture. For vegan bars, use brown rice syrup or date paste instead of honey.

Chewy No-Bake Healthy Homemade Granola Bars Recipe

These healthy homemade granola bars are chewy, no-bake, easy to customize, and made with oats, nut butter, honey or date paste, seeds, and mini chocolate chips. Start with the base recipe, then use the variations below to change the flavor, texture, sweetness, or diet fit.

Yield12 bars
Prep Time15 minutes
Binder Warming2 minutes
Chill Time1 to 2 hours
Total TimeAbout 1 1/2 to 2 1/2 hours

Ingredients for Chewy Homemade Granola Bars

  • 2 1/4 cups rolled oats or old-fashioned oats, about 200 g / 7 oz
  • 3/4 cup creamy peanut butter, almond butter, sunflower seed butter, or tahini, about 190–205 g / 6.7–7.2 oz
  • 1/2 cup honey, brown rice syrup, or thick date paste, about 160–170 g / 5.6–6 oz / 120 ml
  • 1 teaspoon vanilla extract, 5 ml
  • 1/2 teaspoon cinnamon, optional
  • 1/2 teaspoon fine salt, about 3 g, or less if your nut butter is salted
  • 1/3 cup pumpkin seeds or sunflower seeds, about 45–55 g / 1.6–2 oz
  • 1/3 cup chopped nuts, chopped dried fruit, or extra seeds, about 40–55 g / 1.4–2 oz
  • 1/3 cup mini chocolate chips, about 55–60 g / 2 oz, optional
  • 1 to 2 tablespoons ground flaxseed or chia seeds, about 7–18 g, optional

Instructions for Homemade Granola Bars

  1. Line an 8-inch / 20 cm square pan with parchment paper, leaving overhang on two sides. For thinner bars, use a 9-inch / 23 cm square pan. For thicker bars, use a 9 x 5-inch / 23 x 13 cm loaf pan or press the mixture into only part of a larger pan.
  2. In a small saucepan over low heat, warm the nut butter and honey until smooth and pourable. Then, stir in vanilla, cinnamon, and salt. Do not boil for the basic no-bake version.
  3. In a large bowl, mix the oats, seeds, chopped nuts or dried fruit, and flaxseed or chia seeds if using.
  4. Pour the warm binder over the oat mixture. Stir thoroughly until every oat and mix-in is coated. At this point, the mixture should feel sticky and dense, not dry or dusty.
  5. Let the mixture cool for 3 to 5 minutes, then fold in the mini chocolate chips.
  6. Transfer to the lined pan. Cover with parchment and press very firmly into an even layer. Use the bottom of a measuring cup to compact the mixture into the corners.
  7. Chill for at least 1 hour, or 2 hours for firmer bars. Before slicing, the center should feel firm when pressed.
  8. Lift out of the pan and slice into 12 bars. Store chilled for the firmest texture.

Recipe Notes for Homemade Granola Bars

  • The mixture should look sticky and dense before pressing. If dry oats collect at the bottom of the bowl, add 1 tablespoon more nut butter or honey before pressing.
  • When the mixture crumbles before pressing, add more nut butter or honey. If it feels wet and sticky, add more oats, seeds, or ground flaxseed.
  • Use brown rice syrup or thick honey instead of thin maple syrup when you want firmer bars.
  • Vegan granola bars work best with brown rice syrup or date paste.
  • Nut-free bars need sunflower seed butter or tahini, plus seeds instead of nuts.
  • Gluten-free bars need certified gluten-free oats and checked labels on all mix-ins.
  • Protein granola bars work best when you replace 1/4 cup oats with protein powder and add 1 to 2 extra tablespoons nut butter if the mixture feels dry.
  • For a lighter crisp texture, replace 1/2 to 1 cup of the oats with puffed rice cereal, crisp rice cereal, or crisp oat cereal.
  • Bars made with ready-made granola need about 2 1/2 cups prepared granola in place of the oats, with less sweetener if the granola is already sweet.
  • A warm lunchbox needs a firmer binder, so use brown rice syrup or a short-cooked honey binder and pack with an ice pack.
  • Do not use honey in bars for children under 12 months old. Use date paste or another suitable sweetener instead.

Nutrition Estimate for Homemade Granola Bars

Nutrition will vary depending on the nut butter, sweetener, seeds, chocolate, dried fruit, and protein powder you use. As a rough estimate, one of 12 bars from the basic peanut butter and honey version will usually fall in the range of 180 to 230 calories, with most of the energy coming from oats, nut butter, seeds, and sweetener. For a lighter bar, cut the slab into 16 smaller squares.

How to Cut Homemade Granola Bars

Cut the slab into 12 rectangles when you want regular snack bars. For smaller lunchbox portions, slice it into 16 squares. Bite-size freezer snacks work well as 24 mini bars. In general, thicker bars hold together better, while thinner bars feel lighter and chill faster.

Texture Notes for Chewy Homemade Granola Bars

For the most reliable first batch, use peanut butter and honey because both help the oats stick together. Brown rice syrup makes firmer bars, especially if you need them to hold up longer outside the fridge. Maple syrup tastes good, but it usually makes softer, more fragile bars unless you add extra nut butter or ground flaxseed.

Texture checkpoint guide showing sticky granola bar mixture, a hand-squeezed cluster, and a firm pressed slab in a pan.
Before chilling, the mixture should look sticky, clump when squeezed, and press into a compact slab; otherwise, the bars may crumble when sliced.

The mixture should feel sticky before it goes into the pan. If dry oats are still sitting at the bottom of the bowl, do not press yet. Instead, add another spoonful of nut butter or honey, stir again, and test a small handful. Once it clumps when squeezed, it is ready to press.

Texture checkpoints: Before pressing, the mixture should look sticky, dense, and slightly glossy. After pressing, the slab should feel compact and flat, not loose or bumpy. After chilling, the center should feel firm when pressed. If the knife smears, chill longer. If the slab cracks sharply, let it sit for 5 minutes before slicing.

Best Pan Size for Homemade Granola Bars

An 8-inch / 20 cm square pan gives the best balance of thickness, chilling time, and clean slicing. A 9-inch / 23 cm square pan makes thinner bars that chill faster, but they can break more easily if the mixture is not pressed firmly. A 9 x 5-inch / 23 x 13 cm loaf pan makes thicker bars that hold together well, although the yield will be smaller.

Comparison guide showing homemade granola bars in an 8-inch square pan, 9-inch square pan, and 9x5-inch loaf pan, with notes about thickness and slicing.
Pan size changes the thickness of homemade granola bars more than most people expect. An 8-inch square pan usually gives the best balance, whereas a 9-inch square makes thinner bars and a loaf pan gives a thicker, taller bar.

Whatever pan you use, press the mixture into a tight, even layer before chilling. Otherwise, the slab may look set on top but crumble when sliced.

Why These Healthy Homemade Granola Bars Work

Granola bars are simple, but they can fail in frustrating ways. Sometimes they taste good but crumble as soon as you cut them. At other times, they are so sticky that they feel unfinished. Occasionally, they become hard because the binder was cooked too long.

These bars work because the oats, binder, sweetener, and mix-ins are balanced before anything goes into the pan. First, the oats give chew and structure. Then, the nut butter or seed butter adds richness and helps glue the mixture together. Meanwhile, the sticky sweetener holds the dry ingredients in place. Because small mix-ins spread through the bars instead of creating big break points, the slab cuts more cleanly. Finally, firm pressing and proper chilling turn the mixture into sliceable bars.

Guide showing how oats, binder, sticky sweetener, pressing, and chilling help homemade granola bars hold together and slice cleanly.
In other words, bars hold together because each part has a job: oats build structure, binder adds cohesion, sticky sweetener locks things in, pressing compacts the slab, and chilling firms everything up for cleaner slices.

Oats are also a strong base for a filling snack because they are a whole grain and contain beta-glucan, the main soluble fiber in oats. Harvard’s Nutrition Source notes that beta-glucan has been studied for slowing digestion and increasing satiety, which is one reason oats work so well in breakfasts and snacks. Read Harvard’s guide to oats and beta-glucan here.

Are Homemade Granola Bars Healthy?

Homemade granola bars can be a healthier everyday snack, especially when you build them around oats, nuts, seeds, and a measured amount of sweetener. Still, homemade does not automatically mean sugar-free, low-calorie, or high-protein. The real benefit is that you decide what goes in and how sweet, filling, or protein-rich the bars should be.

Plate of homemade granola bars with oats, seeds, chocolate chips, berries, and yogurt, alongside notes about why balanced homemade granola bars can be a healthier snack.
Homemade granola bars can be a healthier snack when they are built with balance. For example, whole oats, nuts or seeds, measured sweetener, and sensible portions make them easier to fit into everyday eating.

For a more balanced homemade granola bar, start with whole oats, a moderate amount of nut or seed butter, seeds for texture, a sticky sweetener used with restraint, and enough salt to make the flavors taste complete. If the bar is meant to replace breakfast, consider protein and fiber. However, if it is meant to be a small snack, keep the portion size realistic.

In practice, a healthy homemade granola bars recipe should not depend only on removing sugar. It should also help the bars stay satisfying, easy to portion, and sturdy enough to eat without falling apart.

Granola Bars vs Oat Bars vs Muesli Bars vs Cereal Bars

These names overlap, but they are not always used the same way. Knowing the difference helps you choose the right style instead of forcing one recipe to do everything.

Comparison image showing a granola bar, oat bar, muesli bar, and cereal bar, with notes on texture, ingredients, and style differences.
Although these snack bars often get grouped together, they are not exactly the same. Granola bars are usually chewier and chunkier, oat bars are softer, muesli bars lean more toward nuts and dried fruit, and cereal bars are lighter and crispier.
Bar Type What It Usually Means Best For
Granola bars Oat-based bars with nuts, seeds, dried fruit, chocolate, and a sticky binder. Classic snack bars, lunchboxes, road trips, meal prep.
Oat bars Often softer, more breakfast-like, and sometimes made with banana, applesauce, or baked oatmeal-style mixtures. Breakfast, kids’ snacks, softer meal-prep bars.
Muesli bars A common name in some regions for oat, nut, seed, and dried fruit bars. Chewy oat bars with fruit, nuts, and seeds.
Cereal bars Bars made with puffed rice, toasted cereal, oat cereal, or similar breakfast cereals. Quick no-bake lunchbox bars and kid-friendly snacks.
Protein bars Bars built around extra protein from protein powder, nuts, seeds, dairy, soy, or other protein-rich ingredients. Post-workout snacks, higher-protein breakfasts, gym bags.
Flapjacks In UK-style usage, usually baked oat bars made with oats, fat, sugar, and syrup. People who want a firmer baked oat bar texture.

For this recipe, rolled oats or old-fashioned oats are the best starting point because they give homemade granola-style bars visible texture and chew. If you are still deciding which oats to use, MasalaMonk’s guide to oats, types, nutrition, and differences explains rolled oats, quick oats, instant oats, and steel-cut oats in more detail.

Ingredients for Healthy Homemade Granola Bars

This recipe uses simple homemade granola bar ingredients, but each one has a job. Once you understand what each ingredient does, it becomes much easier to make substitutions without ending up with crumbly, sticky, or dry bars.

Ingredient guide for healthy homemade granola bars showing oats, nut or seed butter, sticky sweetener, seeds, mix-ins, salt, cinnamon, and sliced bars in a pan.
Before you start, it helps to see the building blocks clearly. Oats provide structure, nut or seed butter adds richness, sticky sweetener helps with hold, and mix-ins bring flavor, texture, and variety.

Rolled Oats or Old-Fashioned Oats

Rolled oats are the best all-purpose choice for chewy granola bars. They are flat enough to bind into the mixture, but they still keep enough texture to feel hearty. Old-fashioned oats and rolled oats are usually the same thing, so either label works here. MasalaMonk has a full guide on substituting old-fashioned oats for rolled oats if you want the details.

Quick oats can work when you want softer bars, although the texture will be less defined. On the other hand, steel-cut oats are not ideal for this no-bake recipe because they stay too hard and do not bind well unless they are cooked or processed first.

Nut Butter or Seed Butter

Creamy peanut butter is the easiest binder for a first batch because it is thick, flavorful, and sticky. Almond butter, cashew butter, sunflower seed butter, pumpkin seed butter, and tahini can also work. If you use natural nut butter, stir it very well before measuring, since separated oil can make some parts of the bars greasy while other parts stay dry.
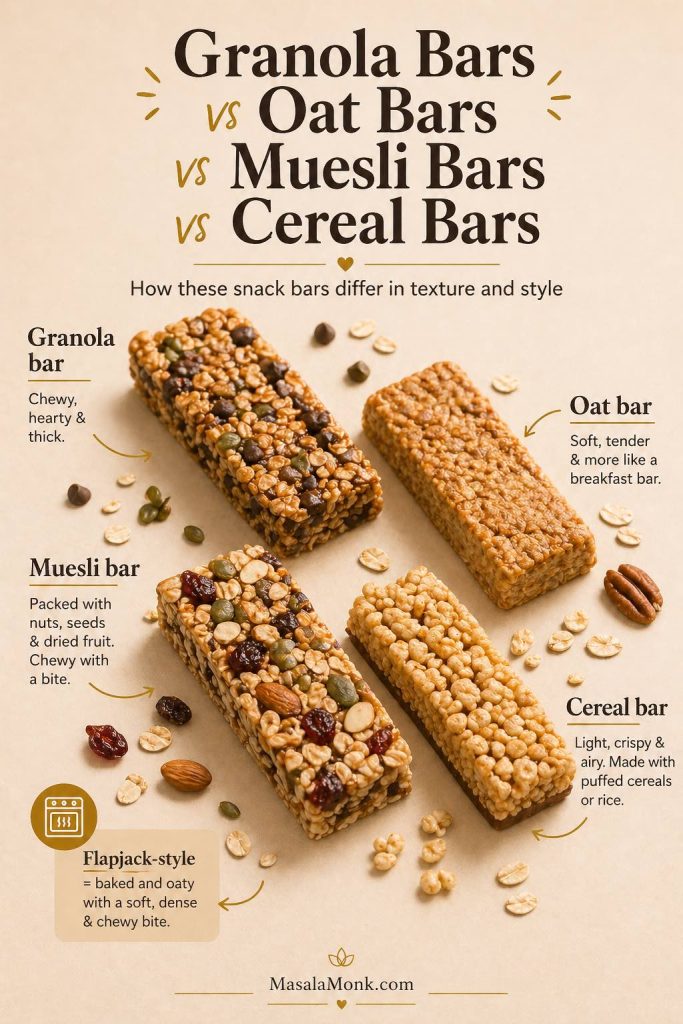
For peanut butter granola bars, use creamy peanut butter. For nut-free granola bars, use sunflower seed butter or tahini. If you want full control over salt, sweetness, and texture, you can also make peanut butter at home and use it as the binder.

Sticky Sweetener and Best Binders

A sticky sweetener turns oats and mix-ins into bars instead of loose granola. Honey is the easiest choice for chewy no-bake granola bars. Brown rice syrup is even stickier and can help bars hold together more firmly. Date paste works well for a no-refined-sugar version. Maple syrup tastes good, but it is thinner and less sticky, so bars made only with maple syrup can be more fragile unless you adjust the formula.

Binder comparison guide for granola bars showing honey, brown rice syrup, date paste, and maple syrup, with notes on firmness, sweetness, and texture.
Choosing the right binder changes how your granola bars feel and slice. Honey is easy to use, brown rice syrup gives the firmest hold, date paste avoids refined sugar, and maple syrup usually makes a softer bar.

For vegan granola bars, brown rice syrup and date paste usually give a better hold than maple syrup alone. If you use maple syrup, add extra nut butter, ground flaxseed, or a slightly longer chill time. Also, if you are making bars for a baby under 12 months old, do not use honey; the CDC advises against giving honey to children younger than 12 months because of infant botulism risk. Read the CDC guidance here.

The binder is where most granola bars succeed or fail. Use this quick guide when you are choosing between honey, maple syrup, date paste, brown rice syrup, peanut butter, tahini, or seed butter.

Binder Goal Best Choice Why It Works
Best first batch Peanut butter + honey Easy, sticky, familiar, and reliable.
Firmest vegan bars Seed butter + brown rice syrup Brown rice syrup is thick and sticky, so it holds better than thin maple syrup.
No-refined-sugar bars Nut butter + date paste Thick, sweet, and caramel-like, though still naturally sweet.
Flapjack-style bars Honey or golden syrup + butter or nut butter Gives a firmer baked oat-bar texture.
No-peanut-butter bars Almond butter, cashew butter, tahini, or sunflower seed butter Useful for allergies, taste preference, and lunchbox planning.
Lunchbox-firm bars Brown rice syrup or short-cooked honey binder Helps bars hold up better outside the fridge.

Nuts, Seeds, Dried Fruit, and Chocolate

Mix-ins make homemade granola bars more interesting, but they can also make the bars break apart. Large almonds, whole cashews, big chunks of dates, and oversized chocolate chips create weak spots in the slab. Therefore, chop nuts and dried fruit before mixing, and use mini chocolate chips when possible.

Good mix-ins include pumpkin seeds, sunflower seeds, chia seeds, flaxseed meal, sesame seeds, chopped nuts, shredded coconut, dried cranberries, raisins, dates, mini chocolate chips, cacao nibs, and a pinch of cinnamon. In general, smaller pieces make cleaner bars because they compress more evenly into the oat mixture.

Salt, Vanilla, and Cinnamon

Do not skip the salt. A small amount keeps the bars from tasting flat and makes the nut butter, oats, and sweetener taste more complete. Vanilla adds warmth, while cinnamon gives the bars a breakfast-like flavor. You can also use cardamom, ginger, cocoa powder, orange zest, or espresso powder in specific variations.

Optional Protein Powder

Protein powder can turn this into a homemade protein granola bars recipe, but it changes the texture quickly. Whey protein usually blends more smoothly than many plant proteins. Meanwhile, plant protein powders often absorb more moisture and can make bars dry or chalky. Start small, then add more nut butter or a splash of milk if the mixture feels dry before pressing.

For a more protein-focused oat recipe, MasalaMonk already has healthy oat protein bars. If you want to understand protein powder in oats more deeply, this protein oatmeal guide explains whey, plant protein, yogurt, egg whites, paneer, tofu, and other ways to raise protein in oat-based meals.

The Simple Formula Behind Homemade Granola Bars

Think of this recipe as a balance between dry structure and sticky glue. The oats and mix-ins give the bars body, while the nut butter and sweetener hold everything together. If either side gets too heavy, the texture suffers.

Formula guide for homemade granola bars showing oats, nut or seed butter, sticky sweetener, mix-ins, and a finished bar.
Once you understand the base formula, homemade granola bars become much easier to adjust. The oats build structure, while the binder and sticky sweetener help the mixture press into bars instead of crumbling apart.
Ingredient Type Starting Amount Purpose Best Choices
Oats 2 to 2 1/2 cups Structure and chew Rolled oats or old-fashioned oats
Nut or seed butter 3/4 cup Binder, richness, flavor Peanut butter, almond butter, sunflower seed butter, tahini
Sticky sweetener 1/2 cup Glue and sweetness Honey, brown rice syrup, date paste
Mix-ins 3/4 to 1 cup Flavor, crunch, chew Mini chips, seeds, chopped nuts, chopped dried fruit
Flavor boosters Small amounts Balance Salt, vanilla, cinnamon, cocoa, cardamom

As a rule, do not keep adding dry mix-ins just because they sound good. Too many seeds, nuts, dried fruit pieces, chocolate chips, or protein powder will overwhelm the binder. Ideally, the mixture should look compact and sticky before pressing, with no dry oats collecting at the bottom of the bowl.

Can You Make Granola Bars with Ready-Made Granola?

Yes, you can make granola bars with ready-made granola, but the texture depends on what is already in the granola. If your granola is very crunchy, very sweet, or full of large clusters, crush or pulse it lightly before mixing so the bars can compact properly. Large clusters taste good in a bowl, but they can make sliced bars break apart.

Because prepared granola is often already sweetened, use less added sweetener than the main recipe. As a starting point, use 2 1/2 cups granola, 1/2 cup creamy nut or seed butter, 1/3 cup honey or brown rice syrup, and 1/4 to 1/2 cup extra seeds, mini chocolate chips, or chopped dried fruit. After that, warm the binder, mix everything well, press very firmly into a lined pan, and chill before slicing.

Guide showing ready-made granola clusters being crushed smaller, mixed with binder, and pressed into a pan for granola bars.
Ready-made granola can work, but large clusters need to be broken down first. Then, add just enough binder and press the mixture firmly so it slices more like bars than loose clusters.

With ready-made granola, the recipe still works, but homemade-style bars need smaller clusters and a strong binder. Otherwise, the slab may taste good but crumble when sliced.

Texture tip: Granola bars made with ready-made granola work best when the granola pieces are small enough to compress. If the mixture looks like loose cereal even after adding the binder, crush the granola a little more or add another spoonful of nut butter.

How to Make Homemade Granola Bars Step by Step

This step-by-step recipe shows how a homemade granola mixture becomes firm, sliceable bars after warming, mixing, pressing, chilling, and cutting.

Step-by-step guide showing homemade granola bars being warmed, mixed, pressed into a pan, chilled, and sliced.
The method is simple, although the order matters. Warm the binder first, mix until the oats are coated, press the slab firmly, and then chill before slicing for cleaner homemade granola bars.

1. Line the Pan

Line an 8-inch / 20 cm square pan with parchment paper, leaving some overhang on two sides. This makes it easier to lift the chilled slab out cleanly. For thinner bars, use a 9-inch / 23 cm square pan. For thicker bars, use a 9 x 5-inch / 23 x 13 cm loaf pan or press the mixture into only part of a larger pan.

2. Warm the Binder

Add the nut butter, honey or other sticky sweetener, vanilla, and salt to a small saucepan. Warm over low heat just until smooth and pourable. For the basic no-bake version, you are not trying to boil the mixture. Instead, you only want it loose enough to coat the oats evenly.

If you need firmer room-temperature bars, gently simmer honey for about 1 minute before mixing it with the nut butter. This creates a stickier binder, but it can also make the bars harder if cooked too long.

3. Mix the Oats and Dry Ingredients

In a large bowl, combine the rolled oats, seeds, chopped nuts, chopped dried fruit, cinnamon, and any protein powder or flaxseed meal. Keep chocolate chips aside until the binder has cooled slightly, especially if you want visible chips instead of melted chocolate streaks.

4. Combine Wet and Dry

Pour the warm binder over the oat mixture. Stir until every oat and mix-in is coated. Scrape the bottom and sides of the bowl so there are no dry pockets. The mixture should look sticky, dense, and slightly glossy. If it still looks dusty, add another spoonful of nut butter or honey.

5. Add Chocolate Chips Last

Let the mixture cool for a few minutes before folding in mini chocolate chips. Small chips work better than large chips because they spread through the bars evenly and do not create big break points. If the mixture is very warm, the chips will melt, which is fine for flavor but less tidy for slicing.

6. Press Harder Than Feels Necessary

Transfer the mixture to the lined pan. Cover the top with another piece of parchment paper and press down firmly with your hands, the bottom of a measuring cup, or a flat spatula. Push into the corners and flatten the surface. Then press again. This step is what turns a sticky oat mixture into actual bars.

Close-up of a measuring cup pressing homemade granola bar mixture firmly into a parchment-lined pan.
Pressing is where many granola bars succeed or fail. For better structure, compact the corners, flatten the surface, and remove air gaps before the slab goes into the fridge.

7. Chill Before Slicing

Chill for at least 1 hour, or 2 hours if your kitchen is warm. Do not judge the final texture while the slab is still soft. After chilling, lift the slab out using the parchment, then slice with a sharp knife. Press straight down instead of sawing back and forth.

Common Mistakes When Making Homemade Granola Bars

Even a simple homemade granola bars recipe can fail when the mixture is too dry, too wet, too chunky, or not pressed firmly enough.

Common granola bar mistakes guide showing a dry mixture, chunky pieces, and a loose slab with fixes for each problem.
Most crumbly bars come from one of three issues: the mixture is too dry, the mix-ins are too large, or the slab was not pressed firmly enough. Fortunately, each problem is easy to fix before the next batch.
  • Avoid overloading the mix-ins. Too many nuts, seeds, dried fruit pieces, chocolate chips, or protein powder can overwhelm the binder.
  • Keep large chunks out of the mixture. Big almonds, dates, chocolate pieces, and granola clusters create weak spots.
  • Press harder than feels necessary. Otherwise, the mixture may stay loose instead of compacting into one slab.
  • Wait before slicing. No-bake granola bars need chilling time before they cut cleanly.
  • Keep some sticky sweetener in the recipe. Sweetener is part of the structure, not just the flavor.
  • Let protein bars rest before judging texture. Protein powder absorbs moisture as the mixture sits.

Why Homemade Granola Bars Fall Apart

If homemade granola bars fail, they usually fail here. The recipe may taste good, but the slab slices into crumbs. Fortunately, the fix is rarely complicated: use enough sticky binder, chop the mix-ins smaller, press harder than feels necessary, and chill the slab until it is genuinely firm.

Troubleshooting guide showing why homemade granola bars fall apart, including dry mixture, big chunks, loose slab, warm bars, and wet mixture fixes.
When homemade granola bars fall apart, do not guess blindly. Instead, check the texture: add binder if the mixture is dry, chop large chunks smaller, press harder, chill longer, or add oats and seeds if the mixture is too wet.

The Hand-Squeeze Test

Before pressing the mixture into the pan, squeeze a spoonful in your hand. A good mixture should hold together like a sticky cluster after a firm squeeze. When it falls apart immediately, add a little more nut butter, honey, date paste, or brown rice syrup. When it smears and feels wet, balance it with more oats, seeds, or ground flaxseed.

What to Adjust Before Pressing

Crumbly bars usually need more sticky binder, even when the homemade granola mixture looks well mixed. That is why the hand-squeeze test is so useful before everything goes into the pan. Once the mixture clumps in your hand, press it firmly into the pan instead of adding more dry mix-ins.

Clean Slicing Cues

Before slicing, press the center of the slab gently. A firm center means the bars are ready to cut. Deep dents mean they need more chilling time. Smearing on the knife usually means the bars are too warm or too wet, while sharp cracking can mean the mixture is too dry or too cold.

Quick Troubleshooting Guide

Problem Most Likely Cause Best Fix
Crumbles when sliced Not enough sticky binder Add 1 to 2 tablespoons more nut butter, honey, date paste, or brown rice syrup next time.
Breaks around nuts or fruit Mix-ins are too large Chop nuts and dried fruit smaller before mixing.
Falls apart after chilling Mixture was not pressed firmly enough Cover with parchment and press hard with a measuring cup before chilling.
Sticky and messy texture Too much wet binder or not enough dry structure Add more oats, seeds, shredded coconut, or ground flaxseed.
Too hard after setting Binder was cooked too long or too much syrup was used Warm only until smooth for chewy no-bake bars. Avoid over-boiling.
Softens in a lunchbox No-bake bars are warmer than ideal Pack with an ice pack, use brown rice syrup, or make the firmer cooked-binder version.
Chocolate melts into the mixture Binder was too hot when chips were added Cool the mixture for a few minutes, then add mini chocolate chips.
Slab cracks when cut Mixture is too dry or too cold Let it sit for 5 minutes before slicing, and add slightly more binder next time.
Knife smears through the bars Bars are too warm or too wet Chill longer, then slice with a sharp knife. Add more oats next time if needed.

Granola Bar Mixture: Too Dry, Too Wet, or Just Right

Texture guide showing granola bar mixture that is too dry, too wet, and just right, with the note that the mixture should clump when squeezed.
Before you ever press the mixture into the pan, texture tells you whether the bars are likely to work. The mixture should look cohesive and slightly sticky, and it should clump when squeezed instead of scattering or smearing.
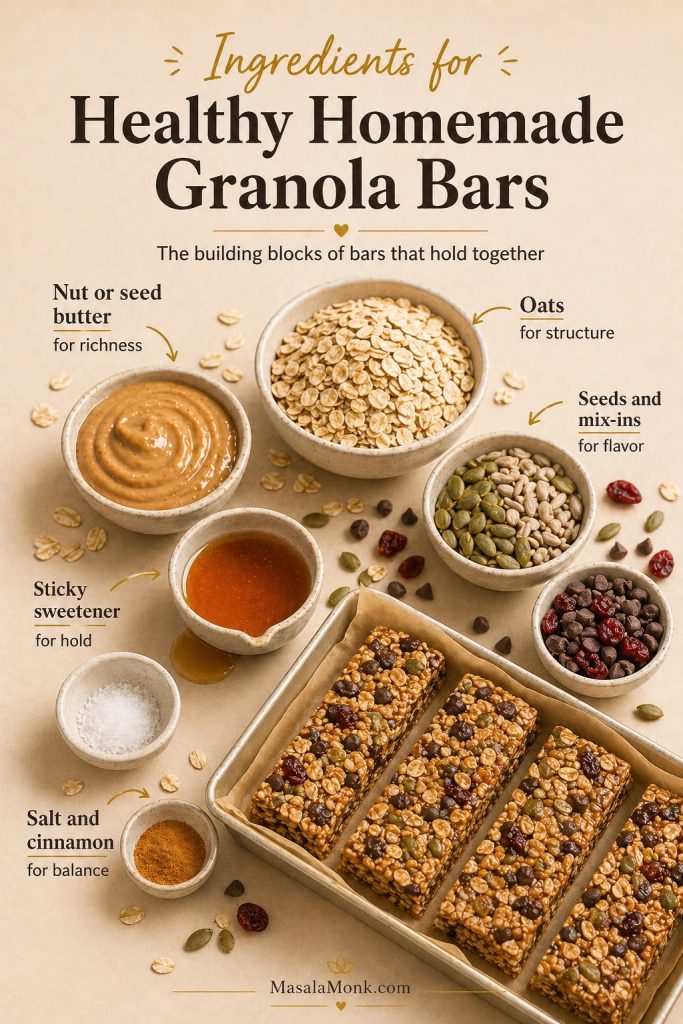
Chewy vs Crunchy vs Soft Granola Bars

This homemade recipe can make chewy, crunchy, or soft granola bars depending on how you handle the binder, oats, baking, and chilling.

Comparison image showing chewy, crunchy, and soft granola bars, with notes that chilling makes chewy bars, baking makes crunchy bars, and added moisture makes soft bars.
Texture changes the whole experience of a homemade granola bar. For example, chilling helps create a chewier bite, baking makes bars crisper, and a slightly moister mix gives you a softer, more tender bar.
Texture How to Get It Best For
Chewy no-bake bars Use nut butter + sticky sweetener, press firmly, and chill. Classic homemade granola bars, lunchbox snacks, freezer snacks.
Crunchy granola bars Toast the oats and nuts first, use slightly less wet binder, then bake briefly and cool fully. People who prefer crisp edges and toasted flavor.
Soft breakfast oat bars Add mashed banana, applesauce, yogurt, egg, or flax egg and bake like oatmeal bars. Breakfast, toddlers, softer snack bars, meal prep.
Firm travel bars Use brown rice syrup or a short cooked honey binder and keep mix-ins small. Road trips, office snacks, gym bags, warmer weather.

For Chewy Granola Bars

Use the main no-bake recipe. Keep the oats mostly whole, use creamy nut butter, choose a sticky sweetener, and chill fully. Chewy bars are the best first version because they are easy, flexible, and forgiving.

For Crunchy Granola Bars

For crunchy granola bars, toast the oats, nuts, and seeds at 325°F / 165°C until fragrant, then use slightly less wet binder than the chewy no-bake version. Press the mixture firmly into a parchment-lined pan and bake at 300°F / 150°C for 15 to 20 minutes, until the edges look lightly golden. Let the slab cool completely before slicing. If you cut while warm, the bars may bend or crumble instead of snapping cleanly.

Extra crispness comes from replacing 1/2 to 1 cup of the oats with puffed rice cereal, crisp rice cereal, or crisp oat cereal. Brown rice syrup gives a firmer bite than maple syrup because it is thicker and stickier.

For Soft Breakfast Oat Bars

Use more moisture and a baking method. Add mashed banana, applesauce, yogurt, or a flax egg to the oats. The result will be closer to oatmeal breakfast bars than classic granola bars. If you want a spoonable make-ahead breakfast instead of a sliced bar, MasalaMonk’s high protein overnight oats are a better fit.

Recipe Variations for Homemade Granola Bars

Once the basic healthy homemade granola bars recipe works, the variations become much easier. Keep the oat-binder balance in mind, and change one or two things at a time.

Guide showing six homemade granola bar variations: peanut butter, protein, low-sugar, vegan, nut-free, and cereal-style.
Once the base recipe works, it becomes much easier to branch out. From peanut butter and protein bars to lower-sugar, nut-free, and cereal-style versions, these variations help readers adapt homemade granola bars to different needs.

Peanut Butter Granola Bars

Peanut butter is the easiest flavor to start with because it binds well, tastes familiar, and makes the bars feel richer without extra steps. Use creamy peanut butter with honey, then add mini chocolate chips, chopped roasted peanuts, or a pinch of cinnamon. If your peanut butter is very thick, warm it gently before mixing so it coats the oats instead of clumping.

To make the peanut flavor stronger, use roasted peanut butter and add chopped peanuts as part of the mix-ins. A softer bar needs finely chopped peanuts and slightly more peanut butter. When the bars need to hold up better in a lunchbox, choose honey or brown rice syrup rather than maple syrup.

Chocolate Chip Granola Bars

Mini chocolate chips are better than large chips because they spread evenly through the bars and do not create big gaps. Let the oat mixture cool for a few minutes before adding them. If you add chocolate while the binder is very hot, the chips will melt into the mixture instead of staying visible.

For a more chocolate-forward bar, stir 1 tablespoon cocoa powder into the warm binder before adding the oats. For a less sweet version, use cacao nibs or chopped dark chocolate instead of regular chocolate chips.

Protein Granola Bars

Protein granola bars need a little more care because protein powder absorbs moisture. Start by replacing 1/4 cup oats with protein powder. Then, mix the bars and check the texture before pressing. If the mixture feels dry, add 1 to 2 tablespoons more nut butter or a small splash of milk.

Protein granola bars shown with oats, protein powder, nut butter, seeds, and stacked finished bars.
Protein granola bars usually work best when only part of the oats is replaced. In other words, add enough protein powder to boost nutrition, but keep enough binder so the bars stay chewy instead of dry and crumbly.

Whey protein usually blends more smoothly, while many plant protein powders make the mixture thicker and drier. Do not expect a homemade protein granola bar to feel exactly like a store-bought protein bar. The best homemade version should still taste like oats, nut butter, and real mix-ins, with extra protein added carefully.

For a simple protein version, use 2 cups oats, 1/4 cup protein powder, 3/4 cup peanut butter or almond butter, 1/2 cup honey or brown rice syrup, 1/3 cup seeds, and 1/3 cup mini chocolate chips. If the mixture feels stiff before pressing, add 1 tablespoon milk or extra nut butter at a time until it clumps when squeezed.

Low-Sugar Granola Bars

For lower-sugar granola bars, the goal is not to remove every sweet ingredient. Instead, keep the sticky binder measured, use fewer dried fruits and chocolate chips, and build more of the texture from oats, seeds, nuts, coconut, cacao nibs, or chopped dark chocolate.

Lower-sugar granola bars made with oats, seeds, measured sweetener, nut butter, and a date paste option.
Lower-sugar granola bars do not need to taste flat. Instead, leaning on seeds, oats, nut or seed butter, and carefully measured sweetener helps keep the bars satisfying while cutting back on overall sweetness.

For a lower-sugar batch, use more seeds and nuts, reduce dried fruit and chocolate, and keep the sticky binder measured. If you want a no-refined-sugar version, use date paste. For flavor without extra syrup, try cinnamon, vanilla, cocoa, orange zest, toasted coconut, or a small pinch of salt.

EatingWell’s dietitian guidance on granola bars recommends looking at added sugar, fiber, protein, whole grains, and recognizable whole-food ingredients when deciding whether a granola bar is a healthy choice. Read their granola bar health guide here.

Gluten-Free Granola Bars

For gluten-free granola bars, start with certified gluten-free oats and then check the smaller ingredients too, especially chocolate chips, protein powder, cereal-style mix-ins, and flavorings. As long as the oats and add-ins are gluten-free, the base recipe can be gluten-free too.

Gluten-Free and Vegan Granola Bar Swaps

Swap guide for gluten-free and vegan granola bars showing regular oats changed to certified gluten-free oats, honey to date paste or brown rice syrup, peanut butter to seed butter, and milk chocolate chips to dairy-free chips.
If you need gluten-free or vegan granola bars, the easiest approach is to swap one ingredient at a time. Certified gluten-free oats, plant-based binders, seed butter, and dairy-free chocolate chips usually get you close to the original texture without rebuilding the whole recipe.

Vegan Granola Bars

For vegan granola bars, choose brown rice syrup, date paste, or maple syrup instead of honey. Brown rice syrup gives the firmest result, while date paste adds softer caramel-like sweetness. Also check that your chocolate chips are dairy-free if needed.

Nut-Free Granola Bars

For nut-free granola bars, start with sunflower seed butter, pumpkin seed butter, or tahini instead of nut butter. Then, replace nuts with pumpkin seeds, sunflower seeds, sesame seeds, chia seeds, flaxseed, dried fruit, coconut, or chocolate chips. This can be useful for lunchboxes, depending on allergy rules where the bars will be eaten.

Nut-free granola bars made with seed butter, seeds, small mix-ins, and packed bars for storage or lunchboxes.
Nut-free granola bars can still be rich, sturdy, and flavorful. For best texture, use seed butter, keep the mix-ins fairly small, and check school or allergy rules if the bars are meant for lunchboxes or sharing.

Sunflower seed butter is one of the easiest nut-free binders, and sunflower seeds also work well as crunchy mix-ins. For the best texture, keep the seeds small, use a sticky binder, and press the mixture firmly before chilling.

Muesli-Style Granola Bars

For muesli-style bars, use oats, chopped almonds, pumpkin seeds, sunflower seeds, raisins, dried cranberries, chopped dates, and a little coconut. Because fruit-and-nut bars can become chunky, keep everything chopped small and press the mixture especially firmly.

Breakfast Granola Bars

For breakfast bars, keep the chocolate light and build the flavor around oats, seeds, nut butter, cinnamon, dried fruit, and maybe protein powder. If you want something softer and more filling, use the soft oat bar variation with mashed banana or applesauce.

Date Granola Bars

Blend soft dates with a splash of warm water to make a thick date paste, then use it as part or all of the sticky sweetener. Date paste gives the bars caramel-like sweetness and helps avoid refined sugar. Even so, dates are still sweet, so balance them with salt, seeds, and unsweetened nut butter.

No-Peanut-Butter Granola Bars

If you do not want peanut butter, use almond butter, cashew butter, sunflower seed butter, tahini, or pumpkin seed butter. Almond butter gives a mild flavor, cashew butter makes the bars softer and creamier, sunflower seed butter works well for nut-free bars, and tahini gives a slightly earthy flavor that pairs well with honey, sesame, dates, and dark chocolate.

Cereal Bar Variation

For a lighter, crispier cereal bar, replace 1 cup of the oats with puffed rice cereal, toasted oat cereal, or another crisp breakfast cereal. Keep the binder sticky, because cereal is lighter than oats and can fall apart if the mixture is too dry. For chocolate chip cereal bars, use mini chocolate chips and press the mixture especially firmly before chilling.

For a stronger cereal-bar texture, use half oats and half crisp cereal. However, if you want the bars to taste more like classic granola bars, keep more oats than cereal.

No-Bake Oat Bars

If you want softer no-bake oat bars instead of classic granola bars, use quick oats for part of the oats and add a softer ingredient such as mashed banana, applesauce, or date paste. The bars will be less crisp and less granola-like, but they will feel more like breakfast bars. This is a good direction for kids, softer snacks, and make-ahead breakfasts.

For a simple no-bake oatmeal bar, use 1 cup rolled oats, 1 cup quick oats, 3/4 cup peanut butter or sunflower seed butter, 1/2 cup date paste or honey, and 1/2 cup small mix-ins. Press firmly and chill before slicing.

Healthy Granola Flapjack Variation

If you know flapjacks as baked oat bars, this recipe can move in that direction too. Use the crunchy baked variation, press the mixture into a lined tin, and bake until the edges look lightly golden. Traditional flapjacks are usually richer and sweeter because they often use butter, sugar, and syrup. This version stays closer to a healthy granola bar because it uses oats, nut or seed butter, measured sweetener, seeds, and dried fruit.

For a more flapjack-like texture, use slightly more binder and bake the slab until it looks set at the edges but still a little soft in the center. Let it cool completely before slicing, because baked oat bars firm up as they rest.

Best Mix-Ins for Homemade Granola Bars

The best mix-ins depend on what you want from the bar. Crunchy batches work well with pumpkin seeds, sunflower seeds, sesame seeds, chopped almonds, cacao nibs, or toasted coconut. Chewier batches are better with raisins, chopped dates, dried cranberries, dried apricots, figs, or dried blueberries.

Guide image showing the best mix-ins for homemade granola bars, grouped by crunchy, chewy, protein, lower-sugar, and kid-friendly options, including pumpkin seeds, sunflower seeds, chopped almonds, cacao nibs, raisins, chopped dates, dried cranberries, apricots, hemp seeds, peanuts, protein powder, coconut, mini chocolate chips, and dried banana chips.
The best mix-ins do more than add flavor. They also shape the texture, sweetness, chew, and nutrition of your homemade granola bars, so choosing them with a purpose helps the bars taste better and hold together more reliably.

To add more protein, use hemp seeds, pumpkin seeds, peanuts, almonds, protein powder, or extra peanut butter. Meanwhile, kid-friendly bars work best when the flavor stays familiar, so try peanut butter, mini chocolate chips, cinnamon, vanilla, raisins, or dried banana chips. If you want a lower-sugar feel, lean on seeds, nuts, unsweetened coconut, cinnamon, cacao nibs, or chopped dark chocolate instead of large amounts of dried fruit.

Whatever you add, keep the pieces small. Although that sounds like a minor detail, small mix-ins make a huge difference. They help the slab compress tightly and slice cleanly.

How to Store and Freeze Homemade Granola Bars

No-bake homemade granola bars are firmest when stored cold. Once sliced, place parchment between layers so the bars do not stick together. Therefore, if your kitchen is warm, the fridge is the safest place for clean, chewy bars.

Storage guide for homemade granola bars showing fridge storage for up to 1 week, freezer storage for up to 2 months, and packing chilled bars for lunchboxes.
Homemade granola bars usually keep best when chilled and stored with a little separation between layers. Refrigeration helps preserve texture for the week, while freezing is the better option if you want to make a larger batch ahead.

For lunchboxes, this recipe makes homemade granola bars that slice more cleanly when chilled first. If the room is warm, pack them with an ice pack or use the firmer binder variation.

Fridge-firm vs lunchbox-firm: Most no-bake granola bars are best from the fridge. If you need bars that hold up longer at room temperature, use brown rice syrup or a short-cooked honey binder, keep mix-ins small, press very firmly, and chill before packing.

Make-Ahead Plan

For weekly meal prep, make the bars the night before you need them. Chill the whole slab overnight, then slice in the morning. After that, wrap individual bars in parchment and store them in an airtight container in the fridge or freezer. This gives the cleanest slices and the firmest texture.

Storage Method How Long Best For
Room temperature 1 to 2 days, only if firm enough Short-term snacking, cool kitchens, firmer cooked-binder bars.
Refrigerator Up to 1 week Best texture for chewy no-bake bars.
Freezer Up to 2 months Meal prep, lunchbox planning, batch cooking.
Lunchbox Same day Pack with parchment. Use an ice pack if the weather is warm.

To freeze, wrap bars individually or layer them with parchment in an airtight container. Thaw in the fridge or let a frozen bar sit at room temperature for a few minutes before eating. Frozen bars are especially useful in hot weather because they soften gradually instead of falling apart immediately.

As with any homemade snack, store the bars in a clean airtight container and discard them if they smell off, look moldy, or become unusually wet or sticky during storage.

How to Serve Homemade Granola Bars

Homemade granola bars are useful at several points in the day. For example, you can serve one with tea or coffee, pack one in a lunchbox, crumble one over yogurt, eat one before a workout, or keep a few in the freezer for rushed mornings.

Serving ideas for homemade granola bars, including breakfast with yogurt and fruit, lunchbox packing, yogurt topping, and freezer snack use.
Homemade granola bars are more versatile than just grab-and-go snacks. They can double as breakfast with yogurt and fruit, work well in lunchboxes, and even be broken up as a topping when you want a little crunch.

For a more complete breakfast, pair a bar with fruit, yogurt, eggs, cottage cheese, paneer, milk, or a smoothie. The bar gives you oats and energy; the extra protein or fruit makes the meal feel more complete.

FAQs About Healthy Homemade Granola Bars

Why do homemade granola bars fall apart?

Homemade granola bars usually fall apart because they do not have enough sticky binder, the mix-ins are too large, the mixture was not pressed firmly enough, or the bars were sliced before chilling. Use enough nut butter and sticky sweetener, chop large nuts and dried fruit, press hard, and chill fully.

What is the best binder for homemade granola bars?

A combination of creamy nut butter and honey is the easiest binder for chewy granola bars. Brown rice syrup is even stickier and works well for firm or vegan bars. Date paste is useful for no-refined-sugar bars. Maple syrup tastes good, but it is thinner and usually needs extra support from nut butter, flaxseed, or longer chilling.

Can I make granola bars without peanut butter?

Absolutely. Almond butter, cashew butter, sunflower seed butter, pumpkin seed butter, and tahini can all work. For a nut-free version, sunflower seed butter and tahini are usually the easiest swaps.
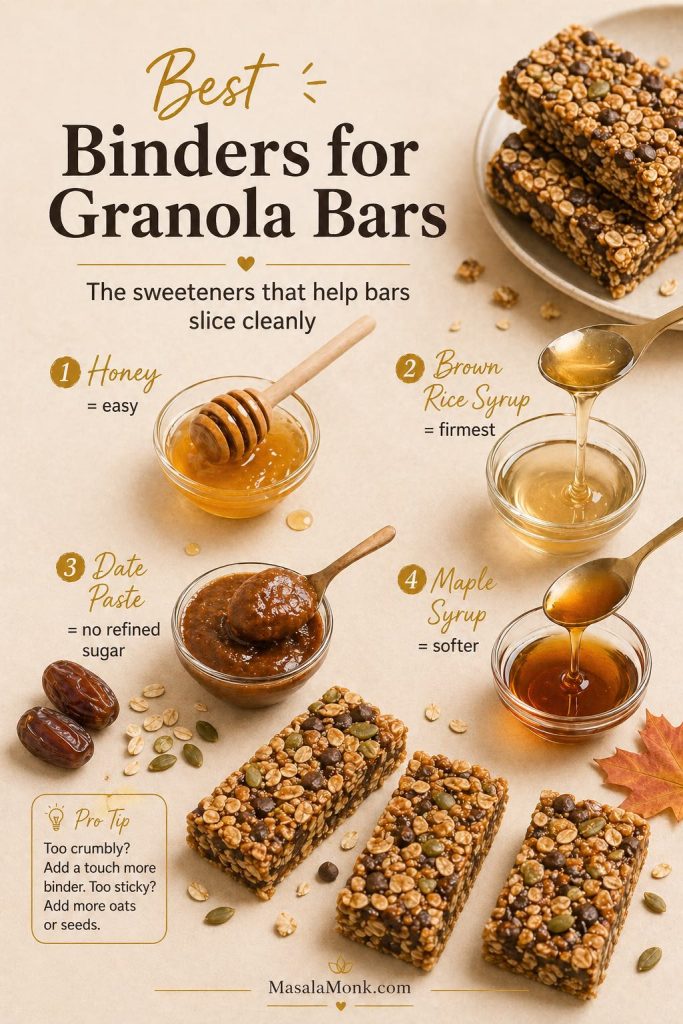
Can I use quick oats instead of rolled oats?

You can, although the texture will be softer and less defined. Rolled oats give a chewier, more classic granola bar texture, while quick oats make the bars more compact and softer for kids.

Can I use maple syrup instead of honey?

You can, but maple syrup is usually less sticky than honey or brown rice syrup. If you use maple syrup, add extra nut butter, ground flaxseed, or date paste to help the bars hold together. Chill the bars longer before slicing.

How do I make vegan granola bars?

For vegan granola bars, choose brown rice syrup, date paste, or maple syrup instead of honey. Brown rice syrup gives the firmest result, while date paste adds softer caramel-like sweetness. Also check that your chocolate chips are dairy-free if needed.

How do I make gluten-free granola bars?

Start with certified gluten-free oats, then check the labels on your chocolate chips, protein powder, cereal mix-ins, and flavorings. As long as the oats and add-ins are gluten-free, the base recipe can be gluten-free too.

How do I make nut-free granola bars?

Start with sunflower seed butter, pumpkin seed butter, or tahini instead of nut butter. Then, replace nuts with pumpkin seeds, sunflower seeds, sesame seeds, coconut, dried fruit, or chocolate chips. Depending on allergy rules where the bars will be eaten, this can be a useful lunchbox direction.

Can I add protein powder to granola bars?

Yes, but start small. Replace 1/4 cup oats with protein powder. If the mixture becomes dry or chalky, add more nut butter or a splash of milk. Plant protein powders usually absorb more moisture than whey protein.
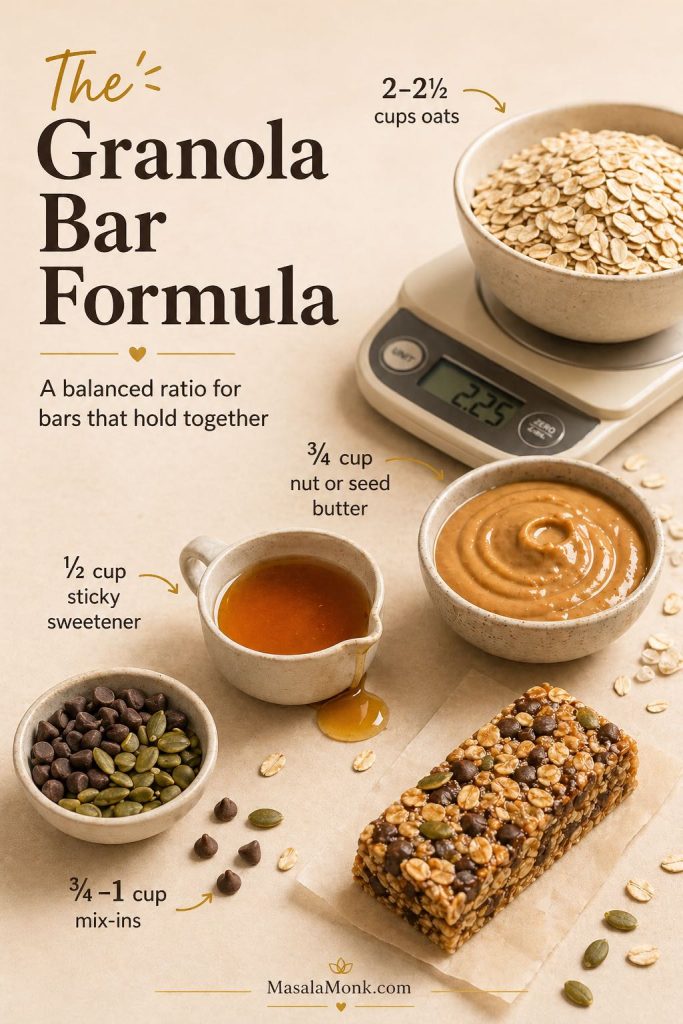
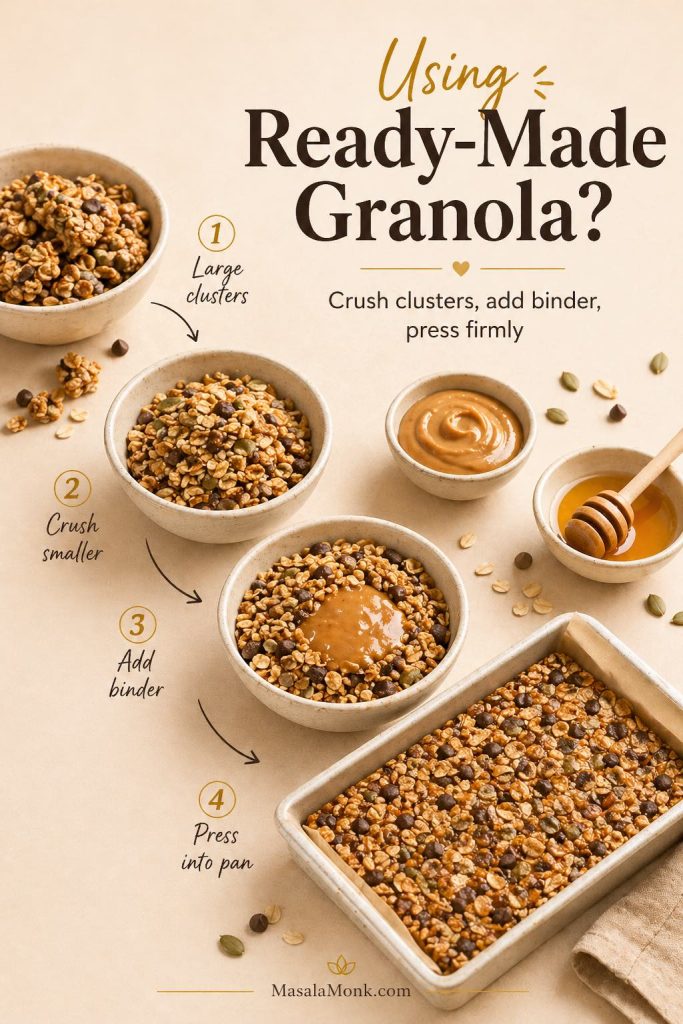
How do I make crunchy or crispy granola bars?

Toast the oats, nuts, and seeds first, then press the mixture into a pan and bake it briefly at a low temperature. Let the slab cool completely before slicing. For a lighter crisp texture, replace part of the oats with puffed rice cereal or crisp rice cereal.

How long do homemade granola bars last?

Chewy no-bake granola bars keep best in the fridge for about 1 week. They can be frozen for up to 2 months. At room temperature, they are best eaten within a day or two unless you make a firmer cooked-binder version.

Can I freeze homemade granola bars?

Freezing works well. First, wrap bars individually or layer them with parchment in an airtight container. After that, freeze them for up to 2 months. To serve, thaw in the fridge or let a frozen bar sit at room temperature for a few minutes before eating.

Are homemade granola bars good for breakfast?

They can be, especially if they include oats, nut or seed butter, seeds, and a moderate amount of sweetener. To make breakfast more complete, pair a granola bar with fruit, yogurt, milk, eggs, cottage cheese, paneer, or another protein source.

What is the difference between granola bars and oat bars?

Granola bars are usually chewy or crunchy snack bars made with oats, nuts, seeds, dried fruit, and a sticky binder. Oat bars can be softer and more breakfast-like, especially when made with banana, applesauce, yogurt, or a baked oatmeal-style base.

Can I make granola bars with dates instead of honey?

Yes. Blend soft dates with a small amount of warm water to make a thick paste, then use it as the sticky sweetener. Date paste gives the bars a caramel-like flavor and helps avoid refined sugar, but it still adds sweetness.

Can I make granola bars with ready-made granola?

Prepared granola can work well. As a starting point, use about 2 1/2 cups prepared granola, 1/2 cup creamy nut or seed butter, and 1/3 cup honey, brown rice syrup, or date paste. Since prepared granola is often already sweetened, start with less added sweetener than you would use for plain oats.

Are granola bars the same as flapjacks?

They overlap, especially in UK-style usage. A British flapjack is usually a baked oat bar made with oats, fat, sugar, and syrup, while granola bars are often made with oats, nuts, seeds, dried fruit, and a sticky binder. This recipe is closer to a healthy homemade granola bar, but the baked variation can work like a lighter flapjack-style oat bar.

Can I add crisp rice cereal or puffed rice to granola bars?

Yes. Replace 1/2 to 1 cup of the oats with crisp rice cereal, puffed rice, crisp oat cereal, or another light breakfast cereal. This makes the bars lighter and crispier. Because cereal is less dense than oats, keep the binder sticky and press the mixture firmly before chilling.

What is the best sweetener for granola bars that hold together?

Honey and brown rice syrup are the easiest sweeteners for granola bars that hold together. Brown rice syrup is especially sticky and works well for firm or vegan bars. Date paste is useful for no-refined-sugar bars. Maple syrup tastes good, but it is thinner and usually needs extra nut butter, flaxseed, or longer chilling.

If you try this healthy homemade granola bars recipe, leave a comment with the binder, sweetener, and mix-ins you used. That helps other readers choose their own chewy, crunchy, protein, nut-free, or low-sugar version.

Back to top

Posted on 3 Comments

Food for Constipation Relief & Gut Health : 6 High-Fiber Sandwiches

High-fiber sandwich on whole-grain bread with hummus, spinach, kiwi and carrot sticks; chia seeds and a water glass suggest hydration for digestion.

Constipation is exhausting, but lunch can actually help. These high-fiber sandwiches are built the way your gut prefers: sturdy whole-grain bread for gentle bulk, creamy legume spreads for steady fiber, seed “gel boosters” for softness, and juicy produce for moisture. Moreover, they’re practical—quick to assemble, easy to repeat, and sized to deliver meaningful fiber without feeling heavy.

Now, how much fiber do most adults need? A realistic daily target sits around 25–38 g. However, jumping there overnight can backfire. Instead, increase gradually—about 5 g extra per day each week—and pair each meal with fluids so fiber can actually hold water and move comfortably (see this concise intake overview and NIDDK hydration guidance). Meanwhile, short habits matter: drink a glass of water with your sandwich, then take a 10–15-minute walk. Little by little, those simple moves add up to relief.

Because details determine outcomes, every recipe below was designed with fiber grams, moisture, and texture in mind. In other words, the builds aren’t random—they’re engineered for comfort, regularity, and flavor you’ll actually crave tomorrow.

Also Read: Hemorrhoids High Fiber Diet: Best Foods, What to Avoid, and a 7-Day Plan


How much fiber these sandwiches deliver & of what kinds?

First, how much: each sandwich aims to contribute roughly 12–20 g of fiber toward your day. Which means, two thoughtfully built high-fiber sandwiches can cover most of what you need, leaving breakfast and snacks to top you up gently.

Second, which kinds: not all fibers behave the same, so the layers do different jobs.

  • Viscous, soluble fibers make a soft gel that holds water in the stool, which often makes passing easier. You’ll get these from oats and barley (thanks to β-glucans), plus chia and ground flax (rich in mucilage). we have used oat/barley-leaning breads, avocado-chia mixes, and flax-boosted hummus throughout. If you’re curious about the mechanics, here’s a clear look at β-glucans and stool-softening and a friendly explainer on chia’s mucilage-rich fiber.
  • Insoluble fibers—from bran, leafy greens, and vegetable skins—add gentle bulk and help speed transit. As a result, grated carrots, greens, and crunchy slaws live inside the sandwich, not just on the side, so every bite pulls its weight.
  • Moisture is the multiplier. Because fiber needs water to work, spreads are creamy, fillings are juicy, and sauces are built in rather than left out. Additionally, we suggest sipping water with the meal, since fluids help fiber function.

Finally, how the recipes are structured: each sandwich states its intent (relief or maintenance), lists realistic portions, and includes make-ahead notes, smart swaps, and small finishing touches. Therefore, you can choose what fits today—and repeat it tomorrow—without turning lunch into a project.

Also Read: Prune Juice & Prunes for Constipation: What Works, How Much, and When to Seek Help


Why High-Fiber Sandwiches help (and how to build them)

Put simply, sandwiches make fiber doable. They bundle the right textures (soft + crisp), the right moisture (creamy + juicy), and the right amounts (measured slices and scoops) into a meal you can repeat tomorrow. Moreover, the format nudges consistency—arguably the most important factor for regularity.

They’re effortless to measure—and easy to stick with

Whole-grain slices are pre-portioned, spreads are spoonable, and veg layers are visible. Making it easy for you to assemble, eat, and actually hit useful daily fiber targets with minimal guesswork. If you like to prep once and assemble fast, this MasalaMonk idea for lentil meal-prep (as a sandwich filling) shows how a single batch can anchor multiple sandwiches during the week.

Moisture is built in by design

Dry, dense meals can backfire. We have ensured, each of these high-fiber sandwiches are built in a way that anchors moisture inside the bread: creamy hummus or yogurt-tahini underlayers, avocado folded with seeds, and juicy produce (carrot, greens, citrus segments) on top. That layering keeps bites slick rather than pasty, which, in turn, supports comfortable stool texture. If you like dairy or dairy-free yogurt as a base, a quick example is this hung curd spinach sandwich—the same idea powers our “Green Goddess” stack.

Layer order actually helps transit

Then start with a creamy spread to “seal” the crumb; next, add your fiber engine (chickpeas, lentils, or black beans) so it clings; in the end, finish with watery produce for slip. Additionally, a squeeze of lemon or a spoon of salsa adds acidity and fluid without heaviness. Small choices like these often determine whether a sandwich just sits—or genuinely supports movement.

Seeds add gentle gel—without bulky portions

A teaspoon of chia or finely ground flax disappears into spreads yet changes texture meaningfully after a glass of water. In brief, chia’s soluble, mucilage-rich fiber is well-documented (concise overview, open-access review; see also a broader nutrient profile in this MDPI review of chia’s composition: open access). For flax specifics you can use in everyday cooking, here’s a MasalaMonk primer: flax seeds for strong digestion.

The hand-held format supports satiety and travel

Because each of these high-fiber sandwiches pairs intact grains with legumes and produce, you get slower digestion and steadier fullness; which means, you’re less likely to graze later. For a clear big-picture explainer on fiber’s roles (beyond “roughage”), Harvard’s Nutrition Source summarizes the two fiber types and their effects.

Gentle routines amplify the effect

Right after eating, your body’s gastrocolic reflex naturally increases colon motility—so a brief 10–15-minute walk can nudge momentum in the right direction. For a plain-language primer, see Cleveland Clinic’s overview of the gastrocolic reflex. Moreover, even light movement supports regularity; their constipation guide underscores that exercise can stimulate the intestines. If symptoms persist despite these habits, the NIDDK’s constipation page outlines when to speak with a clinician.

Build template (at a glance)

  • Bread (2 slices): 100% whole-grain or sprouted; look for ≥3–4 g fiber per slice.
  • Spread (2–4 tbsp): hummus, white-bean mash, or yogurt-tahini; optionally stir in 1 tsp chia or ground flax.
  • Engine (⅓–½ cup): chickpeas, lentils, or black beans; lightly mash so it anchors.
  • Produce (heaped): grated carrot + leafy greens + a juicy element (cucumber, tomato, or citrus).
  • Finish: lemon or vinegar splash; herbs; pepper. Additionally, sip water and, if possible, take a short walk afterward.

For background reading that ties food choices to gut comfort more broadly (in case you want to deepen the “why”), this MasalaMonk primer on gut inflammation and digestive health connects everyday plant foods with a calmer baseline—useful context for readers who like understanding the bigger picture.

Also Read: Teas for Digestion, Bloating, and Gut Health.


How to Use These High-Fiber Sandwiches

When constipation drags on, lunch is often the easiest place to add high fiber foods for constipation relief—without cooking an entire pot of anything. In practice, plant based foods high in fiber (beans, chickpeas, lentils, leafy greens) plus high fiber fruits and vegetables for constipation (kiwi, pear, apple, carrots) work together; as a result, you get both moisture and bulk. Along the way, foods rich in soluble fiber—like oats, barley, chia, and ground flax—form a gentle gel that supports softer stools and calmer bellies. Because you asked for a high fiber plant based diet approach, every sandwich below is fully plant-forward, practical for weekdays, and aligned with high fiber foods for gut health, colon health, and everyday digestive health. For hydration cues that make this even easier, see NIDDK’s diet & constipation guidance; for grain choices that add viscous fiber, here’s a friendly β-glucan overview.

Format you’ll see below: brief “why,” a clear ingredient list, step-by-step method, fiber-forward upgrades, and make-ahead tips—so these fiber rich foods for bowel movement become an easy habit, not homework.


1) Hummus–Kiwi–Greens “Softener” — flagship of High-Fiber Sandwiches (Relief)

Estimated fiber: ~17 g • Taste & texture: cool, fresh, silky
When to choose it: stools feel dry; you want gentle moisture without heaviness

Why it works (quickly yet gently)
This is a purpose-built combo of foods that are rich in soluble fiber and high fiber fruits for constipation. Specifically, creamy hummus (legumes = plant based foods high in fiber) and a teaspoon of ground flax (mucilage) create a moist base; then, thin-sliced kiwi and a mound of grated carrot supply juicy volume. Resulting in every bite that stays soft, which supports easier bowel movements and overall gut health. If you’d like a plain-English primer on adding flax safely, skim flax seeds for strong digestion; if you prefer the science on chia/flax-style gels, here’s a concise chia fiber review for later.

Infographic of a high-fiber hummus–kiwi–spinach sandwich for constipation relief, with step-by-step method, 17g fiber badge, hydration reminder, and MasalaMonk.com footer.
Moist hummus + ground flax soften; kiwi and grated carrot add fluid; whole-grain bread supplies gentle bulk. Aim for ~17 g fiber here and drink water with the meal for best effect.

Ingredients (serves 1)

  • 2 slices 100% whole-grain bread (≥3–4 g fiber/slice; oats or barley in the mix add foods rich in soluble fiber)
  • Hummus, 4 tbsp (legume base = high fiber foods for digestive health)
  • Ground flaxseed, 1 tsp (stirred into the spread)
  • Kiwi, 1 medium, thin-sliced (one of the most convenient high fiber fruits for constipation)
  • Baby spinach, big handful (leafy greens = fiber rich foods for gut health)
  • Carrot, finely grated, ½ cup (insoluble lift for bowel movement comfort)
  • Lemon juice, black pepper, tiny pinch of salt

Method

  1. In a small bowl, whisk lemon into the hummus; then stir in ground flax until creamy.
  2. Spread the mixture edge-to-edge on both slices; afterwards, pile on spinach, layer kiwi, and shower with grated carrot.
  3. Season with pepper and a pinch of salt; and then, close gently and press once with your palm.

Fiber-forward upgrades (choose 1–2, not all)

  • Add 2–3 tbsp chickpeas into the hummus; which will make you push the legume count higher for a plant based high fiber diet day.
  • Scatter 1 tsp chia over the carrot before closing; helping you nudge the soluble fiber profile without adding bulk.
  • Swap bread for a dense oat-bran or barley loaf to increase β-glucans (i.e., foods rich in soluble fiber)—see β-glucan basics.

Make-ahead & serving

  • Grate carrot the night before; store sealed so it stays juicy.
  • Assemble within 10 minutes of eating (kiwi looks and tastes brightest right away).
  • Serve with a full glass of water; thus, the high fiber foods to ease constipation you just ate can actually hold fluid as intended.
  • On very sensitive days, replace raw spinach with tender arugula for similar benefits and gentler texture.

Why it fits the brief
This sandwich champions high fiber foods for constipation relief without heaviness—because moisture, viscosity, and volume are layered on purpose. In turn, you’ll notice comfort during the afternoon rather than bloat

Also Read: Peppermint Tea for IBS and Bloating: Natural Relief Backed by Tradition


2) Lentil “Sloppy-Joe” Toastie — cozy High-Fiber Sandwich (Relief with staying power)

Estimated fiber: ~19–20 g • Taste & texture: warm, savory, cohesive
When to choose it: you need relief and long-lasting satiety

Why it works (comfort + momentum)
Here you combine two plant based foods high in fiber—a white-bean mash and saucy lentils—with a crunchy layer of broccoli slaw. Which helps you get soluble-leaning moisture from tomato-braised lentils and insoluble lift from brassica shreds. Because the filling is warm and glossy, this tastes indulgent; nevertheless, it is textbook high fiber foods for bowel movements, colon health, and all-day digestive health. Prefer batch cooking? This lentil meal-prep filling anchors several sandwiches across the week—convenient for a high fiber plant based diet.

Infographic of a Lentil ‘Sloppy-Joe’ Toastie high-fiber sandwich for constipation relief and satiety—white-bean mash base, tomato-braised lentils, broccoli slaw, step-by-step method, and 19–20 g fiber badge.
Warm, saucy lentils + creamy white-bean mash keep the filling moist, while broccoli slaw adds insoluble lift. Press 2–3 min/side for a cohesive, ~19–20 g fiber sandwich—drink water with the meal to help the soluble fibers gel.

Ingredients (serves 1)

  • 2 slices sprouted-grain bread (≥3–4 g fiber/slice; excellent high fiber foods for gut health)
  • White-bean mash, 3 tbsp (blend white beans + lemon + olive oil + pinch salt)
  • Cooked lentils, ½ cup (core legume in any plant based high fiber diet)
  • Broccoli slaw, ½ cup (insoluble crunch from stems + a little prebiotic fiber)
  • Tomato paste, onion, garlic, smoked paprika, olive oil, splash vinegar (for sauce)

Method

  1. Warm a small pan; sauté onion and garlic until tender; then add tomato paste and smoked paprika.
  2. Stir in lentils with 2–3 tbsp water and a splash of vinegar; simmer 3–4 minutes until thick, glossy, and spoonable.
  3. Spread white-bean mash on both bread slices; afterwards, pile on the lentils; then crown with broccoli slaw.
  4. Press in a grill pan or sandwich press 2–3 minutes per side until toasty outside and steamy inside.

Fiber-forward upgrades (pick what fits your day)

  • Fold 1 tsp ground flax into the bean mash; in practice, you add foods that are rich in soluble fiber without changing flavor.
  • Replace one slice with an oat-bran slice for extra β-glucans (again, high fiber foods for colon health).
  • Add 2 tbsp grated carrot to the slaw for more insoluble volume (i.e., fiber rich fruits and vegetables for constipation in practice).

Make-ahead & serving

  • Simmer a bigger batch of lentils on Sunday; cool quickly and refrigerate up to 4 days (or freeze flat in bags).
  • Keep slaw dry until assembly so it stays crisp; alternatively, dress slaw lightly with lemon just before toasting.
  • Serve with a sliced apple or pear (skin on): those are easy fiber rich fruits for constipation that travel well.
  • Hydrate alongside; that helps the sandwich’s foods rich in soluble fiber can do their gel-forming job.

Why it fits the brief
Because it layers legumes two ways, this toastie moves from “filling” to truly high fiber foods to ease constipation. Moreover, it stays moist, which many readers find is the missing piece in at-home “healthy” & high-fiber sandwiches.

Also read: The Ultimate Guide to Lentils: Types, Benefits, and Recipes


3) Barley–Chickpea “Salad” Sandwich — herby High-Fiber Sandwich (Maintenance)

Estimated fiber: ~17 g • Taste & texture: cool, herby, packable
When to choose it: you want balance, not “power relief,” especially on workdays

On days you want reliability rather than “power relief,” this build blends foods rich in soluble fiber (barley’s β-glucans) with legume bulk from chickpeas. Consequently, you get a gentle gel plus comfortable volume—exactly what high fiber foods for digestive health should deliver. If you’re curious about the science behind β-glucans and softness, here’s a clear overview.

Infographic of a Barley–Chickpea ‘Salad’ Sandwich for maintenance: mashed avocado–chia base with chickpeas, cooked barley, celery and dill on whole-grain bread; 3-step method, 17 g fiber badge, and hydration reminder.
Balanced, packable fiber: barley’s β-glucans for gentle softness, chickpeas for comfortable bulk, and an avocado–chia base to keep moisture. Spread thickly on rye/whole-grain (3–4 g fiber/slice) and sip water to help soluble fibers work.

Ingredients (serves 1)

  • 2 slices rye or 100% whole-grain bread (≥3–4 g fiber/slice; supports high fiber foods for gut health)
  • Avocado, ¼ fruit, mashed (creamy base for moisture)
  • Chia seeds, 1 tsp (disappears into the mash; classic foods rich in soluble fiber) — background: chia’s mucilage review
  • Cooked chickpeas, ⅓ cup (plant based foods high in fiber)
  • Cooked barley, ¼ cup (β-glucans for stool comfort)
  • Celery (finely diced), dill, lemon, pepper, small pinch salt

Method

  1. Mash avocado with lemon; then stir in chia and chopped dill until glossy.
  2. Fold in chickpeas, barley, and celery; afterwards, season to taste.
  3. Spread thickly; after that, close and press lightly for a tidy, travel-worthy sandwich.

Fiber-forward upgrades

  • Add 2 tbsp grated carrot for extra insoluble lift—useful among high fiber fruits and vegetables for constipation.
  • Swap one slice for an oat-bran slice to nudge β-glucans (again, foods rich in soluble fiber).
  • For herb lovers, a handful of parsley adds polyphenols without changing fiber math.

Make-ahead & serving

  • Mix the filling up to 48 hours ahead; which means, weekday assembly takes 2 minutes.
  • Serve with apple slices (skin on) for simple fiber rich fruits for constipation and satisfying crunch.
  • Sip water alongside; therefore, the sandwich’s soluble fibers can actually do their job.

Why it fits the brief
This is a dependable high fiber plant based diet lunch: creamy, not dry; hearty, not heavy; and quietly supportive for bowel movements, colon health, and long-term gut health.

Also Read: Chickpeas’ Instead of ‘Sardines’: 5 High Protein Plant-Based Meal Prep Ideas


4) Pear–Walnut “Green Goddess” Stack — bright High-Fiber Sandwich (Gentle maintenance)

Estimated fiber: ~12–13 g • Taste & texture: juicy, herb-bright, light
When to choose it: you want support without heaviness

Why it works (light yet helpful)
Some days you want a lift without intensity. Here, juicy pear (skin on) brings pectin, leafy greens add volume, and a yogurt-tahini herb sauce keeps everything moist. Ultimately you get high fiber foods for constipation relief that feel bright rather than dense—ideal for easy digestive health.

Infographic of a Pear–Walnut ‘Green Goddess’ high-fiber sandwich for gentle maintenance—yogurt-tahini herb sauce, thin-sliced pear (skin on), arugula, and walnuts; 3-step method with a 12–13 g fiber badge.
Light yet effective: pear pectin provides soft, juicy fiber; greens add comfortable volume; yogurt-tahini keeps moisture so bites stay bright—not heavy. Aim for ~12–13 g fiber here and sip water to help soluble fibers do their job.

Ingredients (serves 1)

  • 2 slices oat-bran or whole-grain bread (≥3–4 g fiber/slice)
  • Yogurt-tahini-herb sauce (yogurt + tahini + lemon + herbs)
  • ½ pear, thin-sliced, skin on (simple high fiber fruits for constipation)
  • Arugula or spinach, big handful (fiber rich foods for gut health)
  • Walnuts, 1 tbsp (pleasant crunch)
  • Lemon zest, black pepper

Method

  1. Whisk yogurt, tahini, herbs, and lemon until creamy; then spread generously.
  2. Layer pear, greens, and walnuts; afterwards, finish with zest and pepper.
  3. Close gently; press once to set the layers.

Fiber-forward upgrades

  • Add thin cucumber or tomato slices for extra juiciness (i.e., high fiber fruits and vegetables for constipation that also boost moisture).
  • Stir 1 tsp ground flax into the sauce to tilt toward foods rich in soluble fiber—basic primer: flax for digestion.
  • Prefer curd? The texture tactic mirrors this hung curd spinach sandwich.

Make-ahead & serving

  • The sauce keeps 3–4 days; making weekday builds stay fast.
  • Serve with a small bowl of berries for additional fiber rich fruits for constipation that don’t weigh you down.
  • Drink water; subsequently, the pectin and seed gels work more comfortably.

Why it fits the brief
Although gentle, the stack still qualifies as high fiber foods for bowel movements, and, importantly, it supports colon health without the heaviness that sometimes derails weekday lunches.

Also Read: Bananas for Constipation: Ripe vs Green, Timing & What Works


5) Black Bean–Avocado Salsa Melt — cozy High-Fiber Sandwich (Relief + comfort)

Estimated fiber: ~18.5–19 g • Taste & texture: warm, saucy, satisfying
When to choose it: you need soothing relief and an easy win at dinner

Why it works (warm, saucy, effective)
This is comfort food with a purpose. Black beans (core to any plant based high fiber diet) supply both soluble and insoluble fiber; avocado keeps things lush; and fresh salsa provides juicy acidity so the sandwich never feels dry. Meaning, you get high fiber foods to ease constipation that also satisfy.

Infographic of a Black Bean–Avocado Salsa Melt for constipation relief—sprouted-grain bread with mashed avocado, black beans, fresh salsa and optional cheese; 3-step method, 18.5–19 g fiber badge.
Warm, saucy relief: black beans deliver soluble + insoluble fiber, avocado keeps bites lush, and salsa adds juicy acidity so the sandwich never eats dry. Toast until just melty; aim for ~18.5–19 g fiber and sip water to help fiber work comfortably.

Ingredients (serves 1)

  • 2 slices sprouted-grain bread (≥3–4 g fiber/slice; great for high fiber foods for gut health)
  • Avocado, ¼ fruit, mashed
  • Black beans, ½ cup (lightly mashed so they cling)
  • Fresh tomato-onion salsa, ¼ cup (or tomato-lime if onion-sensitive)
  • Optional: thin slice cheddar or plant cheese
  • Lime, cumin, pinch salt

Method

  1. Mash avocado with lime and a pinch of cumin; spread from edge to edge.
  2. Spoon on black beans; then add salsa; top with cheese if using.
  3. Toast or grill until warmed through and a little melty.

Fiber-forward upgrades

  • Stir 1 tsp ground flax into the avocado to lean toward foods rich in soluble fiber.
  • Add 2 tbsp grated carrot for extra insoluble support (a staple among high fiber fruits and vegetables for constipation).
  • Swap one slice for oat-bran bread to increase β-glucans.

Make-ahead & serving

  • Beans keep 3–4 days; meanwhile, mash just before assembly for best texture.
  • Serve with orange segments or cucumber spears; which makes you add fluid and crunch that amplify results.
  • Hydrate; in turn, these fiber rich foods for bowel movement do their job more comfortably.

Why it fits the brief
It’s a weeknight win: cozy, fast, and firmly in the lane of high fiber foods for colon health and everyday digestive health.

Also Read: 10 Creative Chia Pudding Recipes for Every Taste


6) Tempeh–Kimchi Gut-Health Reuben — tangy High-Fiber Sandwich (Maintenance + microbiome)

Estimated fiber: ~14 g • Taste & texture: savory-tangy, deli-style
When to choose it: things are moving, and you want to keep the gut ecosystem happy

Why it works (tangy and sustaining)
Once things are moving, pairing plant based foods high in fiber with fermented vegetables is a smart way to maintain momentum. Tempeh offers satisfying protein and fiber; kimchi or sauerkraut adds acidity, moisture, and live cultures; as a result, you get high fiber foods for gut health in a deli-style package. For more combinations, browse Probiotic-Rich Sandwiches.

Infographic of a Tempeh–Kimchi Gut-Health Reuben: whole-grain rye with sautéed tempeh, kimchi (or sauerkraut), spinach, and yogurt-mustard; 3 simple steps, 14 g fiber badge, hydration cue.
Steady maintenance, deli-style: fiber-rich tempeh plus fermented kimchi/kraut bring moisture, acidity, and live cultures; rye adds whole-grain fiber. Grill lightly to meld. Tip—stir 1 tsp chia into the sauce or add tomato slices for extra softness and juiciness; sip water alongside.

Ingredients (serves 1)

  • 2 slices whole-grain rye (≥3–4 g fiber/slice)
  • Tempeh, ~100 g, sliced and sautéed
  • Kimchi or sauerkraut, ¼ cup
  • Spinach, big handful
  • Yogurt-mustard (or a dairy-free version)

Method

  1. Sear tempeh in a thin film of oil until browned; then set aside.
  2. Spread yogurt-mustard on bread; afterwards, layer tempeh → kimchi → spinach.
  3. Grill lightly to warm and meld the layers.

Fiber-forward upgrades

  • Add thin tomato slices for juicy slip (handy within high fiber fruits and vegetables for constipation).
  • Stir 1 tsp chia into the yogurt-mustard for a small soluble nudge (again, foods that are rich in soluble fiber).
  • Prefer milder ferments? Use kraut and a dab of pickle brine for acidity without heat.

Make-ahead & serving

  • Cook tempeh 2–3 days ahead; consequently, weekday assembly is trivial.
  • Serve with carrot sticks and apple wedges (skin on) for easy fiber rich fruits for constipation and crunch.
  • Water alongside, then a brief walk; helping the meal support predictable bowel movements.

Why it fits the brief
This one keeps the momentum you’ve built—supporting colon health and digestive health while staying firmly in the high fiber plant based diet lane.

Also Read: Optimize Digestion with These 5 Fruit Juice Recipes


Sidekicks that make High-Fiber Sandwiches even more effective

Kiwifruit (1–2/day)—slice one into Sandwich #1 and enjoy the second on the side. Trials show kiwi improves bowel movements and overall comfort (kiwi RCT overview; gold-kiwi RCT).

Prunes or prune juice—start with 4–6 prunes or ½–1 cup prune juice alongside lunch or dinner. Practical “how much/when” is covered here: prune juice & prunes for constipation. For clinical context, review the trial where prunes beat psyllium in mild–moderate cases.

Chia or ground flax add-ins—a teaspoon whisked into spreads boosts softness without heaviness. Chia’s mucilage is well documented (chia fiber review), and flax blends easily into hummus or avocado (see flax seeds for strong digestion).

Hydration reminder—fluids help fiber function; thus, pair every High-Fiber Sandwich with water or herbal tea (NIDDK guidance).

Also Read: Psyllium Husk (Isabgol/Ispaghula) Side Effects: Risks, Benefits & How to Take It Safely


A day that shows how High-Fiber Sandwiches fit together

Breakfast
Oat-bran toast with avocado + ground flax; sliced kiwi on the side. (Fluids help fiber work—keep a glass of water nearby: NIDDK guidance.)

Lunch
Hummus–Kiwi–Greens “Softener.”

Snack
Whole-grain pita with hummus and grated carrot; sip water.

Dinner
Black Bean–Avocado Salsa Melt.

After meals
A 10–15-minute walk—especially helpful after dinner.

Weekly rotation

  • Power relief days: Lentil Toastie (#2) + Hummus–Kiwi (#1).
  • Steady maintenance days: Barley–Chickpea (#3) + Pear–Walnut (#4).
  • Microbiome-minded days: Tempeh–Kimchi (#6) with a side of berries.

Because the builds repeat cleanly, you’ll hit helpful fiber totals consistently without chasing supplements.

Also Read: Hummus Veggie Sandwich: A Nutritious and Delicious Delight


Shopping once, eating well all week (repeatable High-Fiber Sandwiches)

These staples keep a high fiber plant-based diet effortless across the week.

Breads & grains

  • 100% whole-grain or sprouted sandwich bread (≥3–4 g fiber/slice)
  • Rye; oat-bran loaves
  • Barley (pearled or hulled)

Legumes & spreads

  • Hummus; canned or cooked chickpeas, lentils, black beans; white beans for mash

Seeds & flavor

  • Chia; ground flaxseed; tahini; plain yogurt (dairy or plant-based)
  • Lemons, dill, cumin, smoked paprika, black pepper, olive oil, vinegar

Produce

  • Kiwifruit, pears, apples, oranges, berries, prunes
  • Spinach/greens, carrots, broccoli slaw, cucumbers, tomatoes, onions
  • Kimchi or sauerkraut

Batch tips

  • Cook barley on Sunday; chill and portion for quick fold-ins.
  • Freeze cooked beans flat in bags; they thaw in minutes.
  • Keep a tiny “fiber station” (chia, ground flax) in reach so you never forget the add-ins.
  • Pre-shred carrots and wash greens to make assembly truly five minutes.

Also Read: The Best Greens for Gut Health and Digestive Wellness


Gentle ramp-up (comfort matters with High-Fiber Sandwiches)

If you’re coming from a low-fiber baseline, jumping to 30+ grams immediately can feel rough. Therefore, increase gradually—about 5 g per day each week—and keep fluids steady. On a day that feels gassy, reduce raw brassicas, emphasize oats, barley, chia/flax, and use ripe pears or kiwi for a softer profile; subsequently, bring the extra crunch back as comfort improves. For a neutral reference on intake ranges, most adults do well around 25–38 g/day (scale up gradually: concise intake overview).

Also Read: Top 10 Foods for Gut Health


Put it all together (and keep repeating)

Ultimately, relief comes from meals that are moist, fibrous, and easy to repeat. These six High-Fiber Sandwiches were engineered for exactly that: whole-grain bread for steady bulk, legume spreads for satisfying depth, chia or ground flax for gentle gel, and fruit-veg add-inskiwi, pear, apple, carrots, greens—for softness and volume. Add water, take a short walk, and give it a few consistent days. Consequently, your gut will notice; meanwhile, your schedule won’t suffer; and, importantly, your lunches will finally pull their weight.

For quick reference when you need an extra nudge, bookmark prune juice & prunes for constipation; for fermented add-ins that pair well with High-Fiber Sandwiches, explore probiotic-rich sandwiches.

FAQs

1) What makes these High-Fiber Sandwiches good for constipation relief?

Because they combine foods rich in soluble fiber (oats, barley, chia, ground flax) with insoluble sources (bran, leafy greens, vegetable skins), they add moisture and gentle bulk together. Consequently, stools hold water, bowel movements become easier, and overall digestive health feels steadier. Meanwhile, the format is practical—so you actually repeat it.

2) How many grams of fiber should I aim for with a high fiber plant based diet?

Most adults do well around 25–38 g per day. That said, increase gradually. For example, add about 5 g per day each week and space it across meals. In practice, two High-Fiber Sandwiches can provide a big share, while breakfast and snacks top up the rest.

3) Which ingredients are the best high fiber foods for constipation relief inside a sandwich?

Start with plant based foods high in fiber: chickpeas, lentils, and black beans. Then, add foods that are rich in soluble fiber—chia, ground flax, oats, and barley—for gel-forming softness. Finally, tuck in high fiber fruits and vegetables for constipation like kiwi, pear, apple (skin on), carrots, and leafy greens for comfortable volume.

4) Are there specific fiber rich fruits for constipation that work especially well between bread?

Yes—pears and apples (with the skin), berries, and kiwi slot neatly into layers. Moreover, citrus segments and grated carrot add juiciness without heaviness. In turn, those choices support bowel movements while keeping sandwiches fresh and bright.

5) What bread should I pick for high fiber foods for gut health?

Choose 100% whole-grain or sprouted loaves that list whole grain first and give at least 3–4 g fiber per slice. Better yet, rotate rye, oat-bran, and barley-forward breads to keep textures interesting and to boost foods rich in soluble fiber via β-glucans.

6) I feel gassy when I jump into a plant based high fiber diet. What should I tweak?

First, slow the ramp—add fiber gradually. Next, emphasize moist builds with foods that are rich in soluble fiber (chia, ground flax, oats, barley) and slightly reduce raw brassicas for a few days. Subsequently, bring crunch back as comfort improves. Hydration and a brief walk after meals often help.

7) How can I hydrate wisely so high fiber foods to ease constipation actually work?

Pair each sandwich with a full glass of water. Additionally, use juicy layers—tomato, cucumber, citrus segments—to keep bites moist. Consequently, soluble fibers can form the soft gel that supports smoother bowel movements.

8) What are smart add-ins for high fiber foods for colon health?

Sprinkle 1 teaspoon of chia or finely ground flax into spreads; fold beans into hummus; or add a spoon of barley or oat-bran to legume salads. Therefore, you raise soluble fiber without making the sandwich bulky or dry.

9) Can I keep these High-Fiber Sandwiches fully vegan?

Absolutely. In fact, a high fiber plant based diet is the default here. Use hummus, white-bean mash, avocado-chia spreads, and yogurt-style dairy-free sauces. Meanwhile, tempeh, kimchi, and sauerkraut bring plant-forward protein and tang that support gut health.

10) What are easy meal-prep moves so my high fiber foods for digestive health stick all week?

Batch-cook lentils and chickpeas; chill barley; pre-grate carrots; wash greens; and keep ground flax and chia within arm’s reach. Consequently, assembly takes five minutes, and you’ll actually repeat the habit.

11) How do I balance high fiber foods for bowel movements with a sensitive stomach?

Begin with softer, moist builds: creamy spreads, thin-sliced fruit, and tender greens. Moreover, keep portions moderate, chew thoroughly, and add a short post-meal walk. On balance, that trio supports comfort while still moving fiber intake upward.

12) Are raw veggies mandatory, or can I still get high fiber foods for constipation relief with gentler textures?

You can. Lightly sautéed onions/peppers, roasted carrots, or softened greens still count. In practice, you’ll retain fiber while improving tolerance. Therefore, choose textures your gut likes and keep moisture high.

13) Which spreads quietly raise foods rich in soluble fiber without changing flavor?

Hummus mixed with 1 tsp ground flax, avocado blended with 1 tsp chia, or yogurt-tahini whisked with oat-bran. Subsequently, you’ll notice creamier bites and better stool softness—without extra weight.

14) Do I need fruit at every meal to hit high fiber foods for gut health targets?

Not necessarily, but it helps. For instance, one high fiber fruits for constipation choice (pear, apple, berries, or kiwi) inside or beside a sandwich boosts totals and adds moisture. Meanwhile, legumes and whole-grain bread carry the rest.

15) What’s the simplest “starter” High-Fiber Sandwich if I’m brand-new to this?

Begin with whole-grain bread, hummus + 1 tsp ground flax, thin-sliced pear or apple, and a handful of spinach. Therefore, you’ll get foods rich in soluble fiber plus gentle bulk in a mild, friendly package.

16) How do I keep high fiber foods for colon health from feeling dry or dense?

Layer moisture at every step: creamy spread, juicy produce, and a quick acidity hit (lemon, vinegar, salsa). Consequently, the sandwich eats soft, not stodgy—and your bowel movements tend to follow suit.

17) Are there kid-friendly options that still count as plant based foods high in fiber?

Yes: mashed black beans with mild salsa and avocado on soft whole-grain bread; chickpea “salad” with finely diced cucumber; or thin pear slices with yogurt-tahini. Moreover, cutting sandwiches into small squares improves traction with picky eaters.

18) How can I vary flavors yet stay within high fiber foods for digestive health?

Rotate breads (rye, oat-bran, sprouted), spreads (hummus, white-bean, avocado-chia), and high fiber fruits and vegetables for constipation (pear, apple, kiwi, carrot, greens). In turn, you’ll keep taste buds happy while the fiber keeps working.

19) Do these ideas help if I’m focused on high fiber foods for gut health beyond constipation?

Generally, yes. While everyone’s different, a steady mix of soluble and insoluble fiber plus plant diversity often supports gut health and overall comfort. Nevertheless, adjust portions and textures to your tolerance.

20) What’s a quick checklist before I make any High-Fiber Sandwiches?

Whole-grain bread (3–4 g fiber/slice) ✅
Legume base (⅓–½ cup) ✅
Seed booster (1 tsp chia or ground flax) ✅
Juicy produce (heaped) ✅
Water alongside + brief walk ✅
Therefore, you’ve covered high fiber foods for constipation relief and set up a predictable, comfortable day.

Posted on 5 Comments

Quinoa vs Rice: Nutrition, Glycemic Index, and When to Choose Each

Hand scooping cooked quinoa beside a bowl of white rice; magazine-style cover comparing calories, carbs and glycemic index to choose the healthier base

We reach for rice or quinoa because both are comforting. They carry flavor, welcome vegetables and both of them make a plate feel complete. Yet, when you compare them closely, they behave differently in your body and in your kitchen. This guide unpacks quinoa vs rice with practical numbers, plain language, and easy cooking moves you can use tonight.

Although both are starches, they do not play the same role. Quinoa brings more protein and more fiber. Rice, especially white rice, brings a softer texture and a neutral base. As a result, each shines in different meals. In the sections below, you will see where quinoa wins. You will also see where rice still fits beautifully. Most importantly, you will learn how to choose the right base for your goals and your taste.

Before we dive in, remember one key fact. Quinoa is a seed. It cooks like a grain, but botanically it is not a cereal. This small detail explains some of its unique traits. It also explains why its protein and fiber numbers stand out.

Also Read: Glycemic Index (GI) VS Glycemic Load (GL)


Quinoa vs Rice: the short, honest take

Let’s set the stage with a clear summary. Then we will build details under it.

  • Quinoa offers more protein and fiber per cooked cup. Therefore, it usually keeps you full longer.
  • White rice is slightly lower in calories per cup. It tastes neutral. It lets sauces and curries take center stage.
  • For steadier energy, quinoa, brown rice, and basmati are generally better picks than standard white or jasmine.

If you want more context on varieties, skim our explainer on basmati rice and glycemic index. For a simple primer on blood sugar and carbs, read Harvard’s guide to carbohydrates and blood sugar. Both links will help you turn this article into action.


Quinoa vs Rice: nutrition, per cooked cup

Numbers make decisions easier. Let’s compare typical cooked portions you see in bowls and plates.

Two hands holding bowls of cooked quinoa vs white rice with text showing protein and fiber per cup.
Why quinoa keeps you fuller: more protein and fiber per cup compared with standard white rice.

Which has fewer calories per cup? White rice does, by a modest margin.
Which supports fullness better? Quinoa does, because of protein and fiber.
Is quinoa lower carb than rice? Per cup, quinoa has slightly fewer carbs than many white rices. The gap is small. The bigger win is quinoa’s fiber and protein.

Prefer metric? No problem. Per 100 g cooked, quinoa averages about 4.4 g protein and ~2.8 g fiber. White rice averages roughly 2.7 g protein and ~0.4–0.6 g fiber. Consequently, quinoa sticks a bit longer and often delivers better satiety. Rice, meanwhile, usually needs support from protein and vegetables to keep hunger steady and digests faster unless you add partners like beans, tofu, eggs, fish, or chicken.

Now step back. Nutrition is not only macros. Micronutrients matter. So do amino acids. Quinoa offers a broader amino acid profile and helpful minerals. Rice offers consistency, digestibility, and a clean flavor stage. Therefore, let your meal goal guide your choice. Are you building a lean, filling bowl for lunch? Quinoa might serve you well. Are you plating a rich curry that needs a soft base? White or basmati rice may be perfect.

Also Read: Glycemic Index and Secrets of Weight Loss


Overhead bowls of quinoa, white, brown, basmati and jasmine rice labeled with calories per cooked cup for quinoa vs rice types.
Quick glance: typical calories per cooked cup across quinoa and common rice varieties—use it to portion bowls fast.

Quinoa vs Rice: per cup and per 100 g at a glance

Per cup (cooked)

1 cup cookedCaloriesCarbsProteinFiber
Quinoa (~185 g)~222~39 g~8 g~5 g
White rice (~158 g)~205~45 g~4 g<1 g
Brown rice (~195 g)~216~45 g~5 g~3.5 g
Comparing Quinoa VS Rice Macros, based on Per Cup Serving.

Source the quinoa and white rice figures from USDA/MyFoodData for quinoa and USDA/MyFoodData for white rice. Values vary by brand and moisture, but the pattern remains stable.

Tip: Use the cup table for quick menu planning. Use the gram table below for macro tracking.

Per 100 g (cooked)

Food (100 g)CaloriesCarbsProteinFiber
Quinoa~120~21.3 g~4.4 g~2.8 g
White rice~130~28.3 g~2.7 g~0.4–0.6 g
Brown rice~123~25.6 g~2.7–2.9 g~1.6–1.8 g
Basmati (white)~121–130~25–28 g~2.7–3.0 g~0.4–0.8 g
Jasmine (white)~129–135~28–30 g~2.7–3.0 g~0.4–0.8 g
Comparing Quinoa VS Rice Macros, based on Per 100 gm Serving.

These tables helps in calories vs carbs vs protein comparison. They also support quick menu planning. If you build bowls by volume, the per-cup table helps. If you track macros by weight, the 100 g snapshot helps more. You can now place the base that matches your day.


Glycemic index in quinoa vs rice (and why it matters)

The glycemic index (GI) estimates how fast a carb-rich food raises blood sugar. As a rule of thumb, ≤55 is low, 56–69 is medium, and ≥70 is high. For clear definitions and practical examples, read Harvard’s overview on carbohydrates and blood sugar. If you want to look up specific foods or brands, use the University of Sydney GI database.

Five bowls of rice varieties labeled with approximate glycemic index values including basmati, jasmine, brown and white.
Variety matters: basmati tends to test lower on GI than many white rices, while jasmine often trends higher.

Here is the part that matters for your day.

  • Quinoa is generally low-GI, often reported around the low 50s. Its fiber and protein contribute to that steadier curve. That is why quinoa bowls often feel satisfying for longer.
  • Rice spans a wide range. Brown rice averages around the low-to-medium boundary. Standard white rice sits medium on average. Basmati often lands lower among white rices. Jasmine tends to land higher.

Here it is important to keep on mind cooking changes starch, GI can shift with methods. Cooling cooked rice and then reheating increases resistant starch. That change can soften the post-meal rise for some people. Pairings matter too. When you add protein, fiber, and healthy fats, digestion slows. Therefore, you can keep rice in rotation and still aim for steady energy.

Summarizing GI in quinoa vs rice

  • What is the GI of quinoa vs rice? Quinoa is generally low-GI (often ~53). Rice varies widely by type.
  • Which rice types run lower GI? Brown rice often averages ~55. Basmati is frequently lower among white rices.
  • Which rice types run higher GI? Jasmine tends to be higher. Many standard white rices fall in the medium range.

Is quinoa healthier than rice for blood sugar? Often yes, because quinoa starts low-GI and brings fiber and protein. However, brown rice and basmati can also be smart picks. Therefore, choose variety first, then use cooking methods that encourage steadier curves.

If you want practical levers, walk through our guide to reducing the glycemic impact of rice. You will see how cook → cool → reheat, slightly firmer texture, and protein-fiber pairings smooth the ride. For a neutral, health-organization perspective on using GI wisely, review Diabetes UK’s GI overview.


GI by rice variety (white, brown, basmati, jasmine)

Variety matters. So do cultivar and cooking. Here is a quick comparison you can trust.

  • White rice (general): medium GI on average. Soft and easy to over-serve.
  • Brown rice: low-to-medium GI. More fiber than standard white. Chewier bite and nutty notes.
  • Basmati (white): often lower GI among white rices. Higher amylose helps keep grains separate.
  • Jasmine (white): often higher GI. Plush texture and a perfumed aroma.

For a broader context on GI and health outcomes, skim Harvard’s overview of rice. For brand or product specifics, check entries in the University of Sydney GI database.


How cooking and pairing change GI (so rice stays in your life)

Small technique shifts change how grains behave.

Pot of cooked white rice and bowl of quinoa with text explaining the cook–cool–reheat method to lower GI.
Batch smart: chill cooked grains and reheat—resistant starch goes up, and meals feel steadier.
  1. Cook → cool → reheat. Cooling cooked rice forms resistant starch. That starch resists digestion and can blunt the spike.
  2. Keep grains slightly firm. Very soft grains digest faster. Slightly firmer grains slow things down.
  3. Pair smartly. Add protein, fiber, and healthy fats. Beans, tofu, eggs, fish, chicken, vegetables, nuts, and seeds all help.
  4. Mind portions. A modest scoop leaves room for vegetables and protein. You get the texture you love without losing balance.

For a clear walkthrough, open our practical guide on reducing rice’s GI. The methods are simple, repeatable, and budget-friendly.


Quinoa vs Rice for different goals

This section folds several “which is better” questions directly into the guidance. That way, you decide by goal, not by hype.

Quinoa vs Rice for fullness and everyday nutrition

Which is healthier, rice or quinoa, for satiety? Quinoa usually wins. If satiety is your priority, start with quinoa. It delivers more protein and more fiber per cup. Those two levers slow digestion. They also help curb snack cravings later. For the full panel, compare USDA/MyFoodData for quinoa with USDA/MyFoodData for white rice. For a friendly overview, read Harvard Nutrition Source on quinoa.

Even so, rice can still support fullness when you structure the plate. First, add bulk with non-starchy vegetables. Next, add protein. Then finish with a little fat for flavor and texture. Together, those pieces change how the whole meal feels.

What about brown rice vs quinoa? That contest is closer. Brown rice is a whole grain with moderate fiber and low-to-medium GI. However, quinoa still edges it on protein and often on fiber per cup. If you love the chew of brown rice, you can still get great meals. Just add beans or tofu to push protein higher.

Quinoa vs Rice for steady energy and blood sugar

If you want stable post-meal energy, lean on low- or medium-GI bases. Quinoa is a reliable choice. Brown rice and basmati are strong options too. Moreover, dial in technique. Use the cook-cool-reheat sequence. Keep grains a touch firm. Pair with protein, vegetables, and healthy fats. For a clean, balanced view from a health organization, read Diabetes UK on the GI.

Does quinoa have a lower GI than jasmine rice? Usually yes. Jasmine often trends higher. If you love jasmine for aroma, balance the plate. Add vegetables and protein. Keep the serving controlled.

Quinoa vs Rice for weight management

Is quinoa better than rice for weight loss? Sometimes. Weight management is about patterns, not single foods. Still, the base matters. White rice is slightly lower in calories per cup than quinoa. That small edge can help when you want a lighter base. However, quinoa’s higher protein and fiber can improve fullness. Consequently, the “better” choice depends on the rest of the plate.

Here are two simple frameworks:

  • Quinoa-forward bowl: quinoa base + beans or tofu + mixed vegetables + yogurt-tahini dressing + lemon.
  • Light rice bowl: modest scoop of white or basmati rice + vegetable-heavy stir-fry + lean chicken or shrimp + crunchy side salad.

Is quinoa more filling than rice? Often yes. The protein and fiber explain that feeling. But remember preference and texture. If rice helps you enjoy more vegetables and lean protein, that also supports the goal. If you want more structure, explore our guide on choosing the best rice for weight loss. It shows how to set portions and choose cooking methods that support a calorie plan.

Quinoa vs Rice for bodybuilding and training days

Training changes needs. Sometimes you want faster carb delivery. Other times you want meals that stick. Therefore, match the base to the session.

  • Around training: white or basmati rice digests a bit faster. That can help when you need quick refueling. Pair with lean protein and a small amount of fat.
  • Away from training: quinoa brings more protein and fiber. That helps fullness as you spread meals through the day. Add legumes, eggs, tofu, or fish for extra protein.

As always, test and notice. Your body will tell you which base supports your work.

Also Read: Quinoa for Weight Loss: Benefits, Nutrition, and How to Cook Ideas


Quinoa vs Rice by variety (white, brown, basmati, jasmine)

As the risk of repeating ourselves, however for sake of more clarity on topic, let’s now fold some comparisons directly into short, practical sub-sections. Each one answers “which is better” in the specific context.

Quinoa vs White Rice

White rice is plush and neutral. It absorbs sauces and lets other flavors lead. On average, it is medium GI and low in fiber. Therefore, watch portions. Pair it with vegetables and protein. In contrast, quinoa is typically lower GI and higher in protein and fiber. It brings a nutty note and a slight pop to each bite.

For facts while you cook, keep USDA/MyFoodData for white rice open in a tab. For quinoa context, browse Harvard Nutrition Source on quinoa. If you want a broad view of rice varieties, read Harvard Nutrition Source on rice.

When to choose which: use white rice when the dish is rich and saucy. Use quinoa when you want the base to contribute protein and fiber. Or mix them half-and-half for a balanced compromise.

Quinoa vs Brown Rice

Here the gap narrows. Brown rice is a whole grain. It keeps the bran and germ. As a result, it carries more fiber and micronutrients than standard white rice. Its GI usually sits in the low-to-medium band. If you enjoy the chewier bite and nutty flavor, it can anchor meals beautifully. Quinoa still edges brown rice on protein and fiber per cup. That edge can aid fullness when calories are tight.

For averages and a sensible overview, see Harvard’s rice page. For a narrative comparison of brown and white rice, skim Harvard Health’s head-to-head explainer.

When to choose which: pick brown rice when you want the rice experience with extra texture and a friendlier GI. Pick quinoa when you want more protein, more fiber, and quicker cooking.

Quinoa vs Basmati Rice

Among white rices, basmati is a standout. It often lands lower on the GI spectrum than many standard white rices. Higher amylose helps keep grains separate. The aroma is a bonus. If you want a white rice experience with a gentler curve, basmati is a smart choice. For deeper detail and cooking notes, open our basmati GI analysis. If you want brand-specific values, search the University of Sydney GI database.

When to choose which: pick basmati when you want long, separate, fragrant grains. Pick quinoa when you want more protein and fiber in the base. Or serve basmati with lentils or chickpeas to boost protein and fiber.

Also Read: ‘Quinoa’ Instead of ‘Chicken’: 5 High Protein Plant-Based Meal Prep Ideas

Quinoa vs Jasmine Rice

Jasmine rice is aromatic and soft. It is lovely with Thai curries and dishes that want a perfumed base. However, jasmine tends to sit higher on the GI than basmati and many brown rices. Therefore, if blood sugar steadiness is a priority, choose jasmine less often. For variety differences and a clear overview, read Harvard’s rice page.

When to choose which: pick jasmine for aroma and softness. Pick quinoa when you want steadier energy and extra protein.


Top-down view of a bowl split 50–50 with cooked quinoa and white rice, showing an easy transition strategy.
Start with a 50–50 base—quinoa for protein and fiber, rice for comfort—then shift to 60–40 as your taste adapts.

Other rice styles in brief (so you can branch out)

There are so many rice varieties, it’s hard to cover them all, however some of the more popular ones and which keep trending every now and then are covered below in comparison with Quinoa.

Wild rice vs quinoa

Wild rice is a grass seed, much like quinoa is a seed. It brings a chewy bite and an earthy, nutty flavor. It has more protein than many standard white rices. Choose wild rice when you want texture and a whole-grain feel. Choose quinoa when you want more protein per cup and a faster cook.

Red and black rice vs quinoa

Red and black rices keep their bran. They bring color, antioxidants, and a bit more fiber than standard white rice. They usually land in the medium-GI range. Choose them when you want a classic rice experience with extra character. Choose quinoa when you want more protein and a typically lower GI.

Parboiled rice vs quinoa

Parboiled rice is steamed in the husk before milling. That process helps retain some nutrients. It also tends to keep grains separate and can yield a lower GI than standard white rice. Use parboiled rice when you want distinct grains for pilaf. Use quinoa when you want higher protein and fiber in the base.

Cauliflower rice and shirataki rice vs quinoa

Cauliflower and shirataki “rice” are low-calorie substitutes, not grains. They drastically reduce carbs and calories. However, they change texture and flavor. Use them for low-carb meals or as volume extenders. Use quinoa or rice when you want true grain structure and lasting fullness.

Also Read: Healthy Oat Protein Bars – 5 Easy No Sugar Recipes for Snacks


Taste, texture, and kitchen behavior (so your swaps stick)

Food should satisfy. Numbers help, but flavor keeps habits alive. Therefore, pay attention to texture and taste.

Quinoa tastes nutty with a gentle chew. Rinse it well to remove saponins. For extra depth, toast the dry grains for a minute or two. Then add water. A 1:2 quinoa-to-water ratio works for many cooks. Simmer until you see tiny germ rings and the pot looks just dry. Cover and rest for five minutes. Finally, fluff and season. A drizzle of olive oil and a squeeze of lemon go a long way.

Spoon lifting cooked quinoa above a pot with tip to rinse before cooking to reduce bitterness.
Pro tip: rinsing removes saponins so quinoa tastes cleaner and pairs better with delicate sauces.

White rice is soft and neutral. It lets sauces sing and stews shine. Brown rice is chewier and slightly nutty. Basmati cooks fragrant and separate, which makes it ideal for pilafs. Jasmine is plush and perfumed, perfect for Thai and Southeast Asian flavors.

If you are not ready for a full swap, start gently. Mix half quinoa and half rice. The bowl will feel familiar yet more filling. Over time, you can push the ratio toward your goals without losing comfort.

Does quinoa taste like rice? Not exactly. It is nuttier and slightly chewy. However, with the right dressing or sauce, most eaters enjoy the swap quickly.


Real-world plates you can build tonight

Real life asks for simple moves, you do not need new recipes to start. You only need patterns that repeat well, here are patterns that work.

Protein-forward quinoa bowl
Base: quinoa. Add roasted chickpeas or grilled tofu. Pile on vegetables. Finish with a yogurt-tahini drizzle and lemon. Because quinoa brings protein and fiber, the bowl satisfies. For more ideas, see quinoa meal-prep ideas.

Light, saucy rice bowl
Base: a modest scoop of white or basmati rice. Top with a vegetable-heavy stir-fry. Add lean chicken or shrimp. Add a crunchy side salad. The plate stays light yet complete.

Basmati pilaf with legumes
Toast basmati with spices. Simmer until long and separate. Fold in cooked lentils and herbs. Serve with a bright cucumber salad. The dish tastes rich but lands gently.

Half-and-half “transition” bowl
Mix equal parts cooked quinoa and cooked brown rice. Add roasted vegetables, a protein, and a nutty dressing. You get rice comfort and quinoa’s staying power.

Cold grain salad for busy weeks
Toss cooked and cooled quinoa with chopped greens, beans, cucumbers, tomatoes, olives, and a lemon vinaigrette. Store for lunches. Because quinoa holds texture, the salad keeps well. For higher-protein patterns, explore high-protein quinoa strategies.


Quinoa vs Rice: cooking smarter for better curves

You can improve rice’s glycemic profile without abandoning it, which means you can keep rice and still aim for steady energy. Use these simple levers.

  • Cook → cool → reheat. Resistant starch goes up. The glycemic hit can soften.
  • Pair with protein, fiber, and healthy fats. Beans, eggs, tofu, fish, chicken, leafy greens, nuts, and seeds slow digestion.
  • Keep texture slightly firm. Very soft grains digest faster.
  • Scale portions down. A smaller scoop plus more vegetables often feels better.
  • Prefer lower-GI choices. Basmati and brown rice are friendlier than standard white or jasmine.

For step-by-step help, read reducing the glycemic impact of rice. For a neutral, health-org perspective on using GI well, see Diabetes UK’s GI overview.


Pantry, storage, and prep notes that make the habit easy

Logistics shape success. Set up your kitchen so good choices happen on autopilot.

  • Store uncooked grains in airtight jars away from heat and light.
  • Cool cooked grains quickly, then refrigerate within two hours.
  • Use cooked grains within three to four days, or freeze flat for later.
  • Reheat with a splash of water and cover to restore moisture.
  • Batch once; eat many times. Cook big on one night. Portion into containers. Rotate through bowl formulas all week.
  • Season simply. Try lemon zest, garlic, toasted cumin, turmeric, parsley, cilantro, sesame, or a spoon of pesto. Little touches amplify flavor.

When you cook a pot, cook a little extra. Future-you will thank present-you.


Pulling it together: how to choose with confidence

You now have the facts and the levers. Let’s convert them into confident choices.

  • Choose quinoa when you want more protein and fiber, generally lower GI, and a base that can stand on its own in bowls and salads. For numbers and context, revisit USDA quinoa and Harvard’s quinoa guide.
  • Choose brown or basmati rice when you want a classic rice experience with a gentler glycemic impact than standard white. For a balanced overview of varieties, see Harvard’s rice page.
  • Choose white rice when you need a lighter-calorie, neutral base that keeps the spotlight on the main dish. Then round out the plate with vegetables and protein so the meal satisfies and digests steadily. For exact cup-for-cup figures, compare white rice per cup with quinoa per cup.

If blood sugar steadiness is a priority, focus on technique. Cook, cool, and reheat. Keep grains slightly firm. Pair with protein and vegetables. Favor lower-GI varieties. For simple steps, use our guide to reducing rice’s GI. For a neutral, health-org stance on GI, read Diabetes UK’s overview.

Finally, keep cooking joyful. Food is fuel, but it is also comfort. Try one new method this week. Swap in a half-and-half mix. Add a bright pickle or a crunchy salad. Notice how the plate feels. Then iterate. With a little curiosity, quinoa vs rice stops being an argument. It becomes a flexible toolkit you can use with ease.

FAQs

1) What is the glycemic index of quinoa vs rice?

Generally, quinoa sits in the low-GI range, while rice varies widely by type. Consequently, brown and basmati rice tend to be friendlier than standard white or jasmine. Even so, cooking, cooling, and reheating can shift the numbers a bit.

2) Which is healthier overall: quinoa or rice?

It depends on your goal. Typically, quinoa wins on protein, fiber, and a steadier blood-sugar response. However, white rice is slightly lower in calories per cup and works well as a neutral base when portions and pairings are smart.

3) Is quinoa better than rice for weight loss?

Often, yes—because quinoa’s extra protein and fiber can improve fullness. Nevertheless, a modest serving of rice with plenty of vegetables and lean protein can also fit well.

4) Brown rice vs quinoa: which should I choose?

Both are solid. Brown rice offers a whole-grain experience with chew and moderate fiber. Meanwhile, quinoa usually brings more protein and fiber per cup. Therefore, choose by texture preference and how long you want the meal to keep you satisfied.

5) Basmati rice vs quinoa: which has the advantage?

Each brings different strengths. Basmati often lands lower on the GI spectrum among white rices and has a fragrant, separate grain. Conversely, quinoa adds more protein and fiber. As a result, you might even combine them.

6) Jasmine rice vs quinoa: which supports steadier energy?

Typically quinoa. Jasmine rice is delicious and plush, yet it often trends higher on the GI scale. Thus, if you choose jasmine, balance the plate with vegetables, protein, and mindful portions.

7) Does quinoa have fewer carbs than rice?

Per cooked cup, quinoa usually has slightly fewer carbs than many white rices. Still, the difference is small. Instead, quinoa’s bigger edge is its protein and fiber.

8) Quinoa vs white rice: which has fewer calories?

White rice, by a modest margin. Even so, quinoa often feels more filling thanks to its higher protein and fiber content.

9) Protein in quinoa vs rice: how do they compare?

Quinoa commonly provides about twice the protein per cup compared with white rice. Consequently, it can help when you want more protein from the base itself.

10) Fiber in quinoa vs brown rice: who wins?

Quinoa usually edges out brown rice on fiber per cup. Nevertheless, both beat standard white rice. Therefore, either can help you build more satisfying bowls.

11) What is the difference between quinoa and rice?

Botanically, quinoa is a seed that cooks like a grain, while rice is a cereal grain. Hence, quinoa tends to carry more protein and fiber, whereas rice delivers a softer, more neutral canvas.

12) Is quinoa better than rice for diabetics?

Often yes, due to lower GI and higher fiber. That said, brown rice and basmati can also be sensible choices. Furthermore, pairings, portions, and cooking methods matter just as much.

13) Which is better for bodybuilding or training days: quinoa or rice?

It depends on timing. Around workouts, white or basmati rice can digest a bit faster. Conversely, away from training, quinoa’s extra protein and fiber can help with satiety across the day.

14) Quinoa vs rice for weight loss: what portion strategies work?

First, keep the base modest. Next, pack in vegetables. Then, add lean protein and a little fat for flavor. Consequently, both quinoa bowls and rice bowls can fit your plan.

15) Wild, red, or black rice vs quinoa: how do these compare?

These colorful rices retain more of the grain and usually bring extra texture and character. Even so, quinoa still tends to offer more protein per cup. Thus, choose based on flavor and the role you want the base to play.

16) Parboiled rice vs quinoa: which should I use?

Parboiled rice often cooks into separate grains and can be gentler than some standard white rices. Nevertheless, quinoa remains stronger on protein and fiber. Therefore, pick parboiled for pilafs and quinoa for protein-forward bowls.

17) Cauliflower rice or shirataki rice vs quinoa: which is “lighter”?

Those substitutes are extremely low in calories and carbs. However, they change texture and flavor dramatically. Meanwhile, quinoa behaves like a true grain and offers staying power. Hence, use the alternatives for very low-carb plates and quinoa for fuller meals.

18) Does quinoa taste like rice?

Not exactly. Quinoa is nutty with a slight chew; rice is softer and more neutral. That said, with dressings, sauces, and herbs, the swap feels natural surprisingly quickly.

19) Can I mix quinoa and rice in one dish?

Absolutely. In fact, a half-and-half mix is an easy transition strategy. As a result, you get rice’s familiarity and quinoa’s extra protein and fiber in the same bowl.

20) Is quinoa more expensive than rice?

In many markets, yes, because quinoa is less widely grown and processed differently. Even so, mixing quinoa with rice or using quinoa for specific meals can manage cost while preserving benefits.

21) Quinoa vs rice calories per 100 g vs per cup: which view should I use?

Use the per 100 g view for precise macro tracking. Alternatively, use the per cup view for quick home cooking decisions. Either way, keep consistency in your method.

22) Which is healthier: brown rice or quinoa?

Often quinoa, thanks to protein and fiber. Nonetheless, brown rice remains a strong whole-grain option. Therefore, rotate both and pick based on texture, budget, and the rest of the plate.

23) Is quinoa or rice better for beginners who want steadier energy?

Start with quinoa or basmati, since both usually support a smoother glucose response than many standard white rices. Additionally, keep portions steady and add protein.

24) Why do cooking methods change the GI of rice?

Because heat, cooling, and reheating alter starch structure. Specifically, cooling increases resistant starch, which resists digestion. Consequently, the post-meal rise can be gentler.

25) How do I choose between quinoa and rice on busy weeks?

Plan for versatility. Batch-cook one pot of quinoa and one of rice. Then, alternate: quinoa bowls on high-satiety days; rice bowls when you want a lighter base or faster digestion.