Posted on Leave a comment

How to Cook Perfect Rice Every Time (Recipe)

How to cook perfect rice — uncooked white rice pours from a measuring cup into a steaming black pot, with warm spices around; fluffy, not gummy.

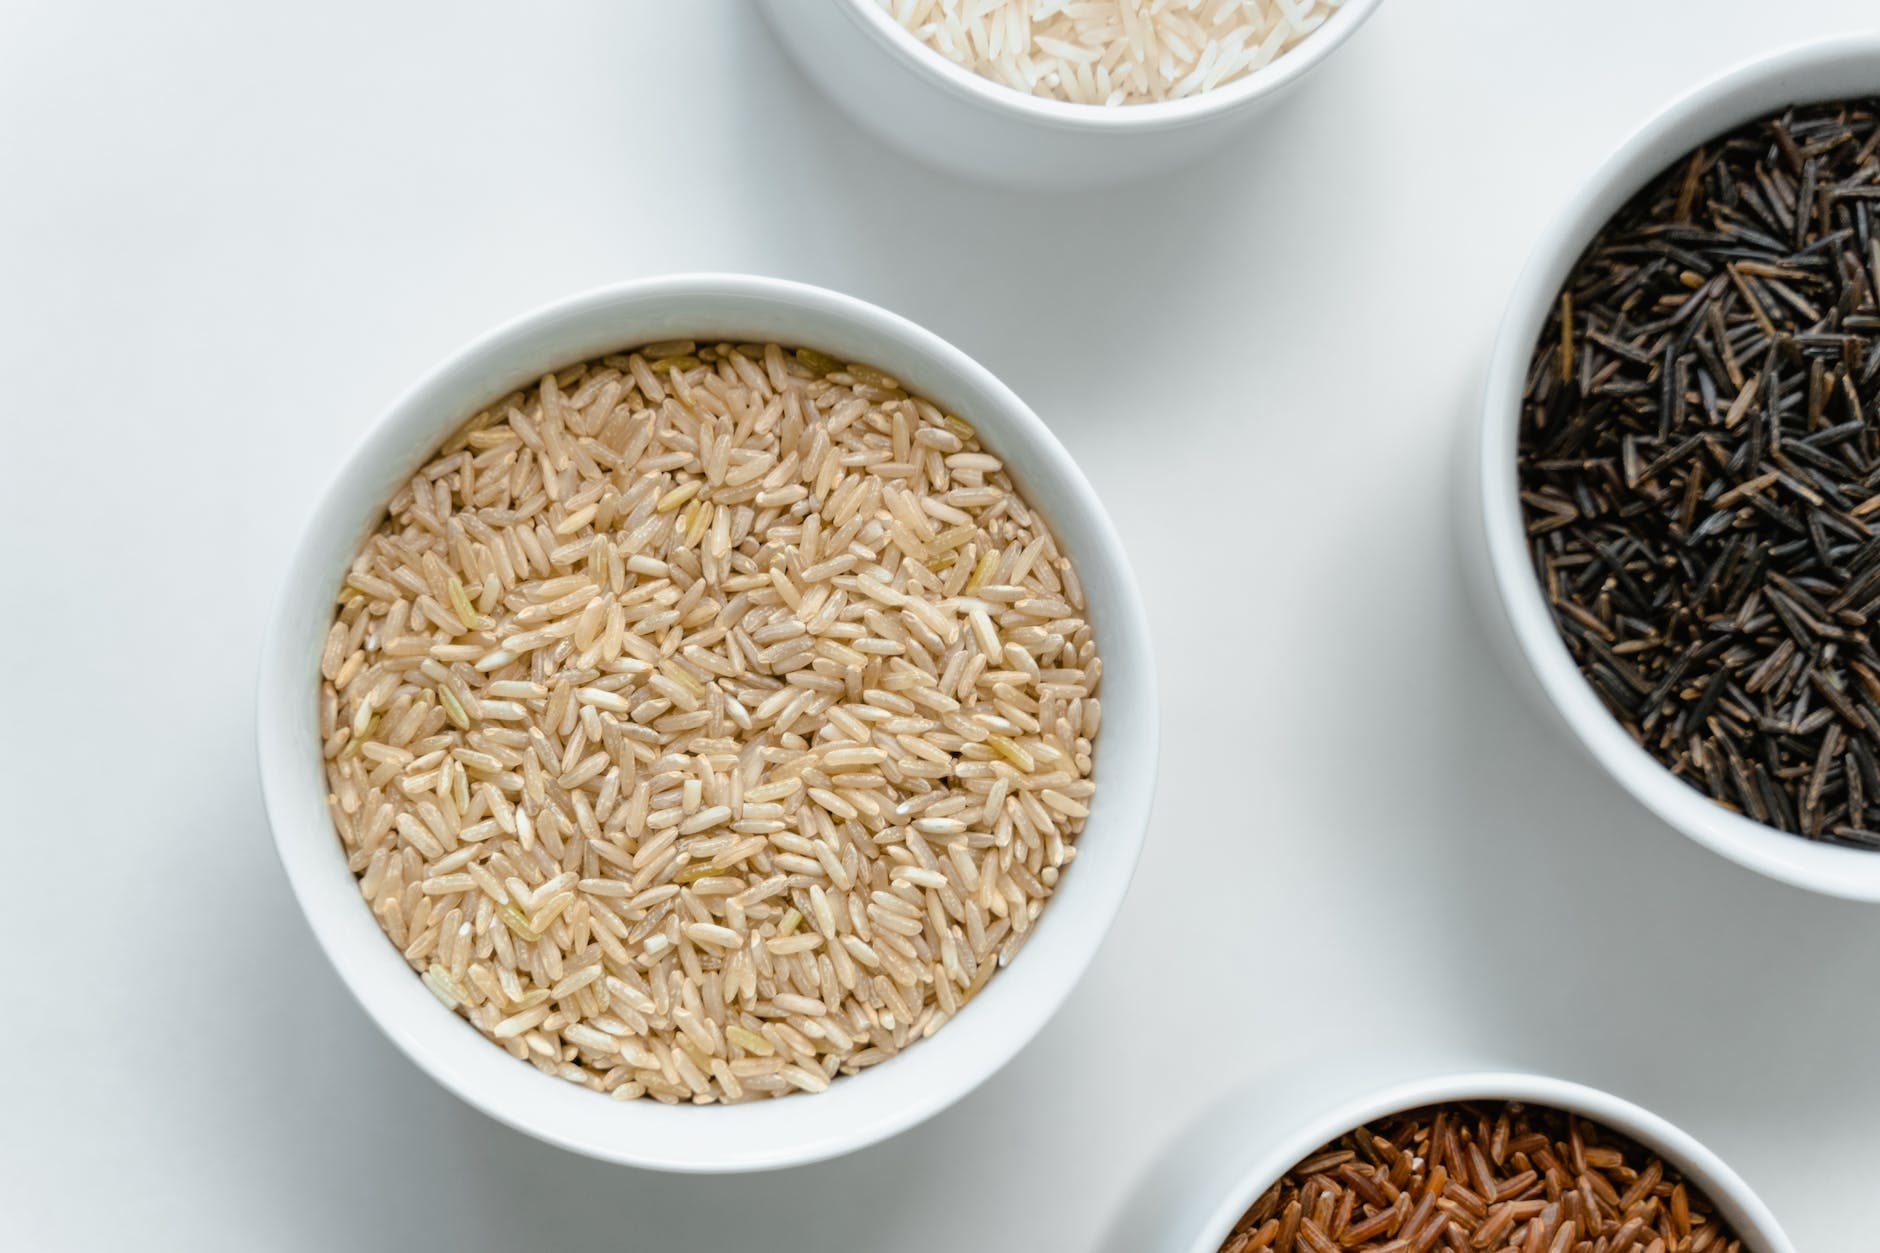
Rice ought to be effortless. Nevertheless, a little too much water or a quick peek under the lid can turn a pot of promise into clumpy frustration. This guide shows how to cook perfect rice across methods and varieties—with crystal-clear steps, practical ratios, and why the small moves matter. You’ll learn a base stovetop technique, then branch into basmati, jasmine, sushi, and brown rice; after that, we’ll cover rice cookers and Instant Pots, storing and reheating safely, and turning leftovers into fast, satisfying meals. Along the way, you’ll find carefully chosen links for follow-up reading and technique deep dives woven naturally into the text.

The Baseline: How to Cook Perfect Rice on the Stovetop

If you only remember one method, make it this one. It delivers fluffy, separate grains without gimmicks, and it adapts to most long-grain white rices.

You’ll need: 1 cup long-grain white rice, 1½ cups water, a pinch of salt, a heavy pot with a tight lid, and a fork.

  1. Rinse thoroughly. Place the rice in a fine-mesh strainer and rinse under cold water, swishing with your hand until the water runs mostly clear. This removes excess surface starch so grains don’t glue together later.
  2. Measure precisely. For long-grain white rice on the stovetop, use 1½ cups water per 1 cup rice. Add a pinch of salt if you like.
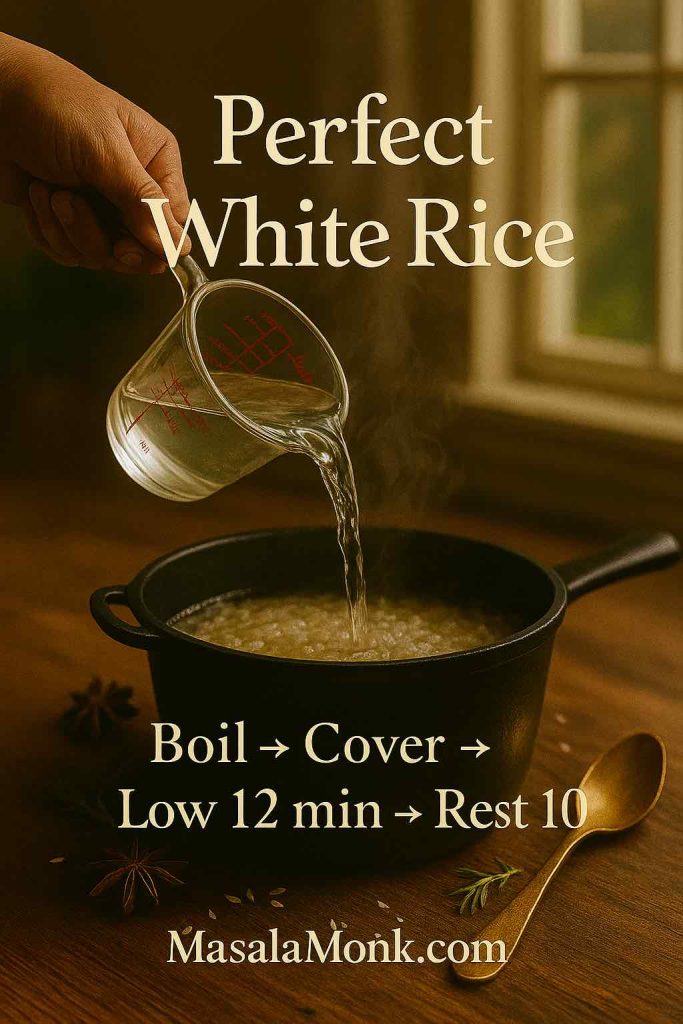
  3. Boil, then cover. Bring the water to a rolling boil, stir in the rice once to break up any clumps, clamp on the lid, and immediately reduce the heat to low.
  4. Simmer gently for 12 minutes. No peeking. Lifting the lid dumps steam and derails even cooking.
  5. Rest for 10 minutes, still covered. The residual heat finishes the centers without overcooking the outer layers.
  6. Fluff and vent. Off the heat, uncover and fluff with a fork. If you want extra-dry, restaurant-style grains, briefly vent another 2–3 minutes.

As an optional flourish, place a clean kitchen towel between the pot and the lid during the rest; it absorbs condensation and prevents drip-back, yielding lighter, drier rice. For a quick visual explanation of this trick, see the concise breakdown of the towel-under-lid rest.

Why this works

Rinsing reduces sticky surface starch; an immediate drop to low heat stabilizes simmering; the undisturbed rest lets steam equalize moisture from the outside in. Moreover, the ratios here are calibrated for typical long-grain white rice; once you navigate specialty varieties, you’ll tweak the numbers a bit, but the underlying logic stays consistent.

Also Read: Homemade Hot Chocolate with Cocoa Powder Recipe

At-a-Glance Cheatsheet for Cooking Perfect Rice

Standard Water Ratios (by volume) for Making Rice by various Methods

Rice typeRinse?Soak?Stovetop water : riceRice cookerInstant Pot (HP)Microwave rice cooker
Long-grain whiteYesNo1.5 : 11.1–1.2 : 1 (or to line)1 : 1, 3–4 min + 10 min NR1.5 : 1, 10–12 min, 5 min rest
JasmineYes10 min (optional)1.25–1.33 : 1~1.1–1.2 : 11 : 1, 3 min + 10 min NR1.5 : 1, 10–12 min
BasmatiRinse very well20–30 min1.5 : 11.2 : 11 : 1, 6 min + 10 min NR1.5 : 1, 12–14 min
Short-grain / SushiRinse until clear20–30 min1.1–1.2 : 1~1.1 : 11 : 1, 5 min + 10 min NR1.25–1.33 : 1, 10–12 min
Brown (long-grain)Rinse20 min (optional)2–2.25 : 11.4–1.5 : 11.25–1.33 : 1, 22–25 min + 10 min NR2 : 1, 20–22 min
Cheat Sheet for How to Cook different types of Rice at Home using various methods & devices.

NR = Natural Release (don’t vent; let pressure drop for the stated time).

Also Read: Peanut Butter Cookies (Classic Recipe & 3 Variations)

How to Cook Perfect Rice for Basmati

Basmati rewards gentle handling and a short soak. Its hallmark is long, elegant grains that stay separate, so our moves aim to protect structure rather than chase stickiness.

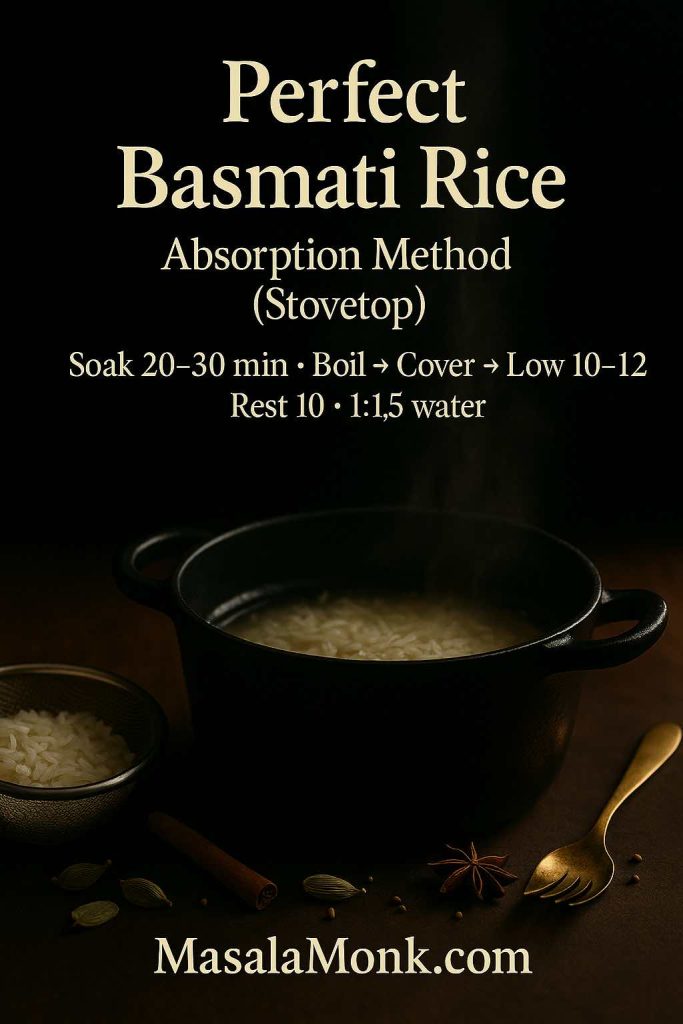
  1. Rinse very well until the water is almost clear—this usually takes 2–3 changes.
  2. Soak 20–30 minutes. Hydrating the core ensures the grains elongate without bursting. Drain thoroughly.
  3. Use 1½ cups water per cup of rice on the stovetop. Bring to a boil, cover, reduce to low, and simmer 10–12 minutes.
  4. Rest 10 minutes covered, then fluff. For even airier grains, spread the rice on a tray for 2–3 minutes to vent.

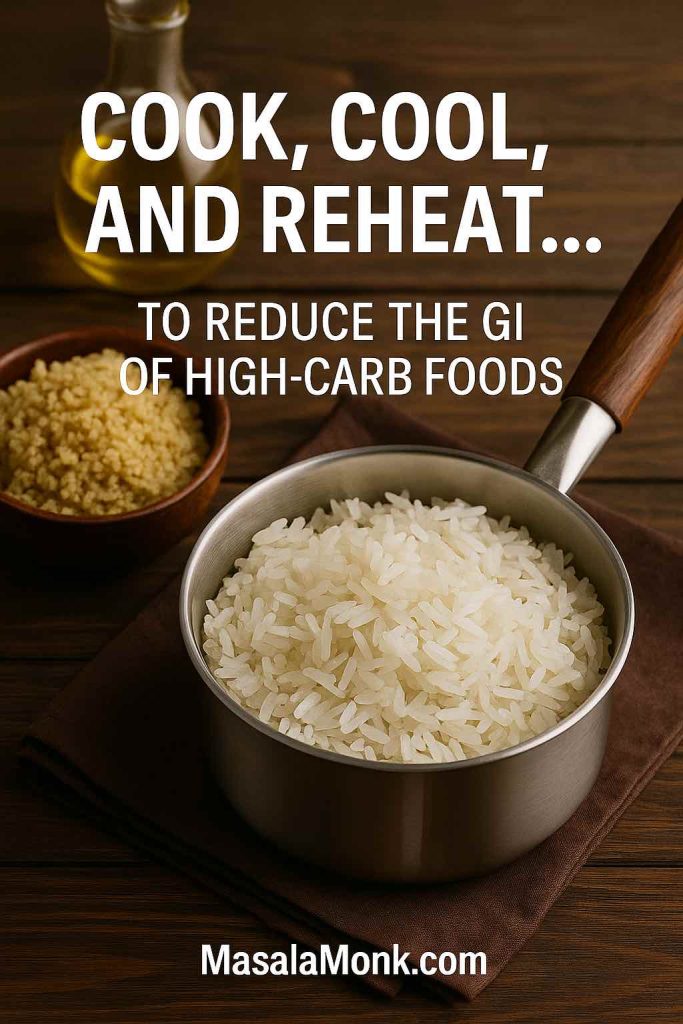
Beyond texture, many cooks pick basmati for its gentler impact on blood sugar compared with some other white rices. If that angle matters to you, explore a compact primer on basmati rice GI and nutrition and a broader look at GI vs GL across rice types. Because context helps, you might also skim a practical guide to reducing the glycemic impact of rice using cook-cool-reheat strategies you can fold into weekly meal prep.

How to Cook Perfect Rice for Jasmine

Jasmine sits between fluffy and plush. It wants slightly less water than standard long-grain; too much and it edges toward soft and clingy.

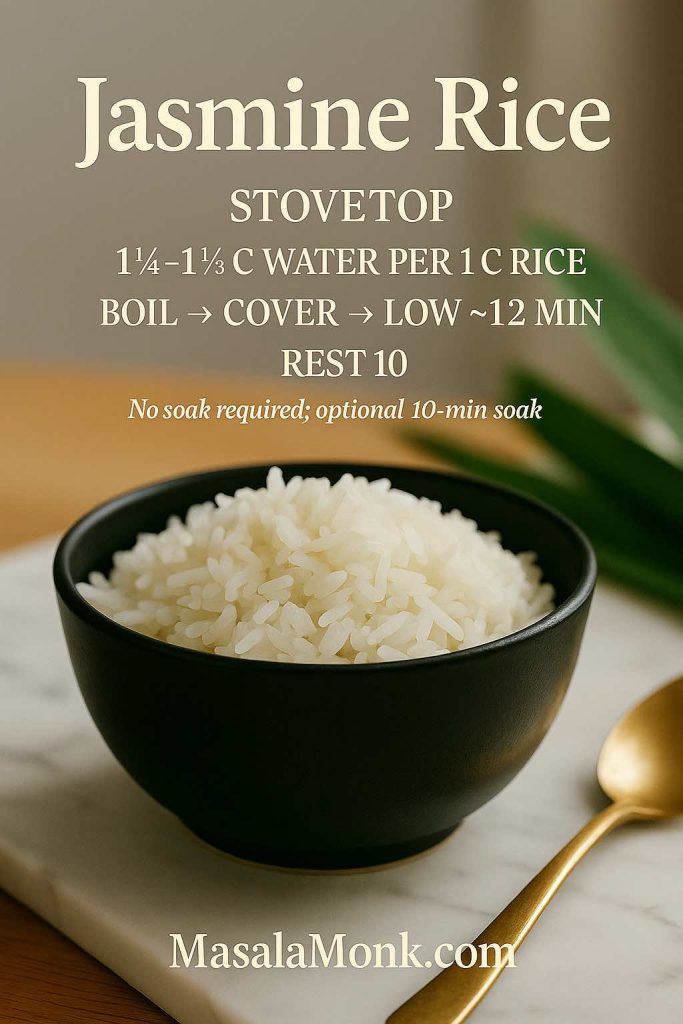
  • Rinse until the water mostly clears; an optional 10-minute soak can soften the core.
  • Measure 1¼–1⅓ cups water per cup of rice, depending on how dry or tender you prefer it.
  • Cook like the baseline: boil → cover → low simmer ~12 minutes10-minute rest.

For a ratio-first discussion that aligns with testing across brands, skim this practical stovetop jasmine/white rice method. It mirrors the idea that jasmine benefits from slightly less water than old “2:1” rules of thumb.

Also Read: Green Tea Shot with Jameson | Recipe & 10 Variations

How to Cook Perfect Rice for Sushi (Short-Grain)

Sushi rice is meant to cling. Nevertheless, the goal is glossy and supple—not mushy—so gentle handling and proper seasoning matter.

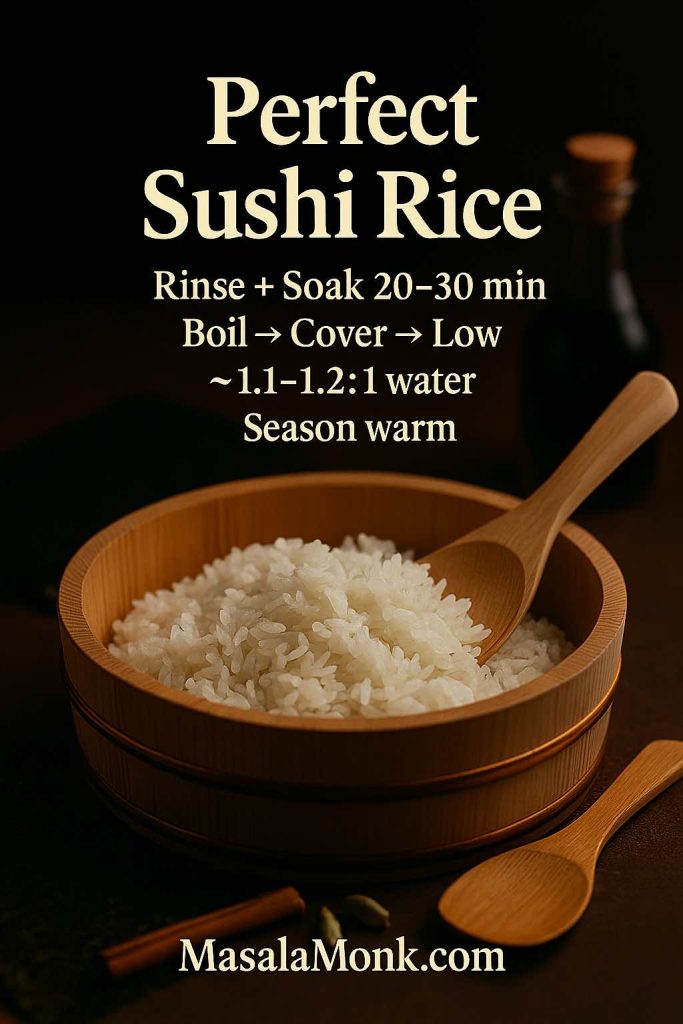
  1. Rinse until the water is nearly clear to remove powdery starch.
  2. Soak 20–30 minutes; drain. This gives the short grains an even, tender finish.
  3. Use ~1.1–1.2 : 1 water to rice on the stovetop or your cooker’s dedicated “sushi” line.
  4. Cook, rest 10 minutes, then season while warm with sushi vinegar (rice vinegar plus sugar and salt).
  5. Fold, don’t mash. Fan as you cut and turn the rice to keep grains intact and shiny.

For well-illustrated steps and classic proportions, follow a reliable reference like Just One Cookbook’s sushi rice method. And because short-grain techniques differ from long-grain instincts, returning to photos mid-process can be surprisingly helpful.

Also Read: Béchamel Sauce for Lasagna: Classic, Vegan & Ricotta Sauce Recipe

How to Cook Perfect Brown Rice (Tender Without the Chalk)

Brown rice asks for more water and time because the bran and germ slow hydration. Still, done right, it’s deeply satisfying—nutty, chewy, and never chalky.

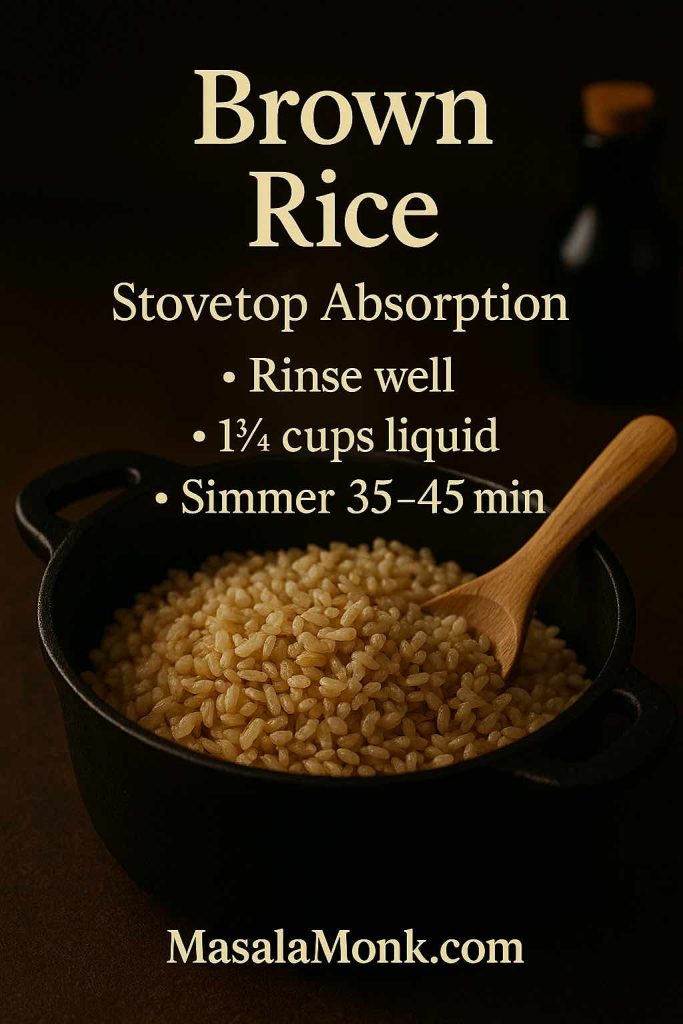
  • Stovetop: Use 2–2¼ : 1 water to rice. Bring to a boil, cover, and simmer 35–45 minutes until the water is absorbed; rest 10 minutes before fluffing.
  • Instant Pot: Measure 1.25–1.33 : 1 water to rice. Cook 22–25 minutes on high pressure, then let it naturally release for 10 minutes before venting.

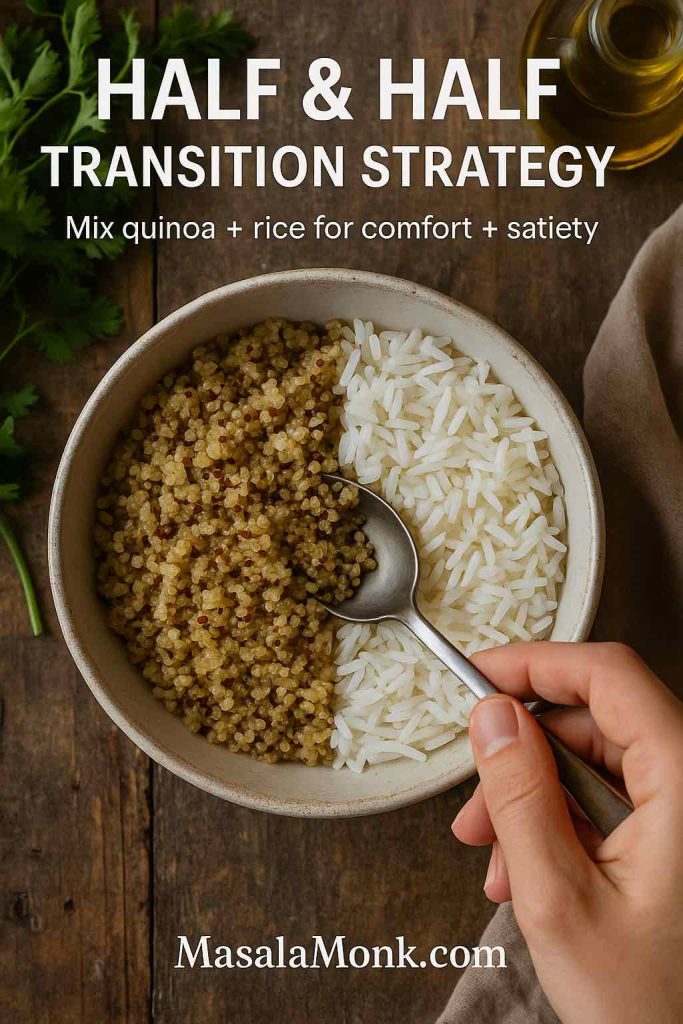
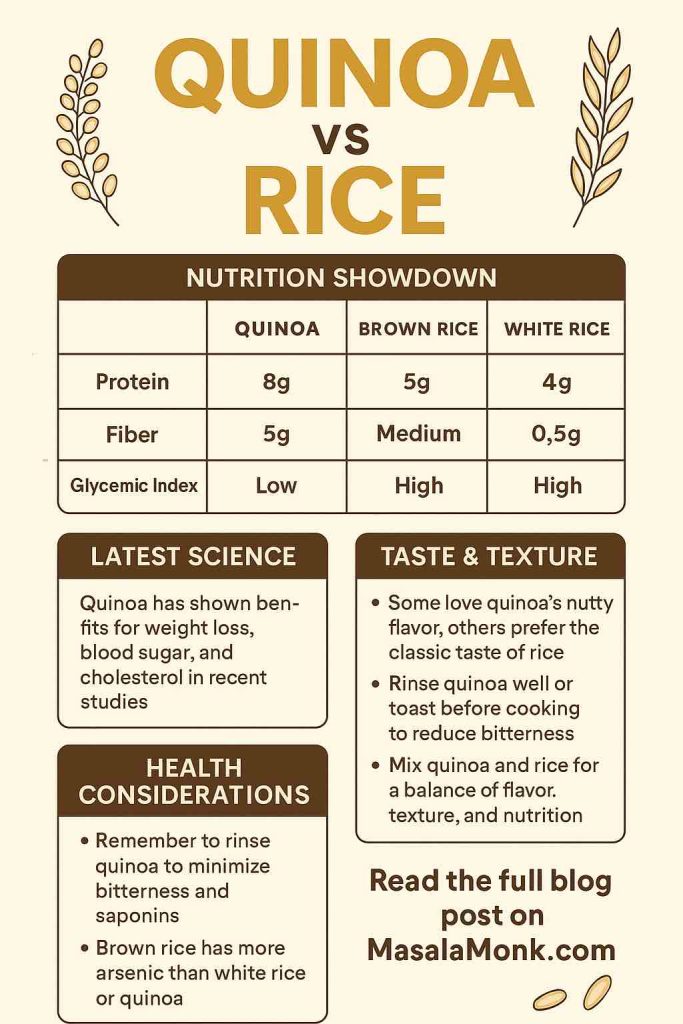
If nutrition is part of your decision tree, it’s worth reading the FDA’s consumer resources on arsenic in rice and rice products and the agency’s technical risk assessment overview. Among practical takeaways, an excess-water method (boil in plenty of water, then drain) can reduce inorganic arsenic—a trade-off to consider if that aligns with your health priorities. Meanwhile, if you’re comparing grains for weekly menus, this side-by-side look at quinoa vs rice is a handy complement.

Also Read: Crock Pot Lasagna Soup (Easy Base + Cozy Slow-Cooker Recipes)

Rice Cookers Demystified

A good rice cooker is like cruise control: set it and focus on something else. Still, understanding its logic helps you get the most out of it.

  • Trust the lines. Most cookers calibrate for specific varieties; fill to the marked lines instead of relying on generic kitchen ratios. If you want brand-specific guidance, browse Zojirushi’s concise white rice instructions or the broader manuals page.
  • Rinse and drain well. Excess water clinging to the grains can skew the cooker’s assumptions.
  • Let it rest. When the switch flips to “warm,” give the rice 10 minutes before opening; this small pause improves texture noticeably.
  • Fluff and vent briefly. Loosen the rice, then leave the lid ajar for a minute or two for drier, separate grains—especially useful when the next stop is a stir-fry.

Even in the cooker, basmati appreciates a 20–30-minute soak and jasmine benefits from slightly less water than standard long-grain. Sushi rice, on the other hand, thrives when you follow your model’s dedicated short-grain settings.

Also Read: Cottage Cheese Lasagna Recipe | Chicken, Spinach, & Ricotta

Instant Pot and Pressure Cooker Shortcuts

Pressure cookers shine when you want predictability. Because they operate in a sealed environment, small ratio changes matter; nevertheless, the results are consistent once dialed in.

  • White rice (long-grain or jasmine): 1:1 water to rice, 3–4 minutes on high pressure, 10-minute natural release.
  • Basmati: 1:1, 6 minutes on high, 10-minute natural release.
  • Short-grain for sushi: 1:1, 5 minutes on high, 10-minute natural release.
  • Brown: 1.25–1.33:1, 22–25 minutes on high, 10-minute natural release.

For model-specific variations, it’s wise to refer to the manufacturer’s documentation; start at the Instant Pot manuals hub and, if you want a baseline reference recipe, browse an official white rice example by Instant Pot. Because factors like altitude and personal texture preference play a role, adjust subsequent batches a tablespoon or two of water at a time rather than reinventing ratios from scratch.

Also Read: How to Make Churros (Authentic + Easy Recipe)

Texture Control: From Feather-Light to Just-Sticky-Enough

Understanding what affects texture allows you to steer the outcome. Consider these levers:

  • Rinse level. More rinsing = more separation. Minimal rinsing = more cling. Consequently, long-grain white benefits from thorough rinsing; sushi demands cleaning but then recruits seasoning to achieve stickiness.
  • Soaking. Basmati and sushi gain even doneness from soaking; jasmine may soften slightly with a short soak but doesn’t require it.
  • Agitation. Stir only once after adding rice to boiling water; further agitation releases starch, which binds grains.
  • Lid discipline. Steam is your friend; lifting the lid mid-cook vents heat, lengthens cooking, and risks uneven texture.
  • Rest time. A 10-minute rest evens moisture and turns “good” rice into “great” rice. Additionally, a towel-under-lid rest (during the off-heat phase) curbs condensation and keeps the top layer from turning soggy—see the towel trick for a quick demo.

Also Read: How to Cook Bacon in the Oven (Crispy, No-Mess, Crowd-Ready Recipe)

Scaling Up Without Guesswork

Perhaps you’re cooking for a crowd. Fortunately, the math scales cleanly as long as your pot is wide enough and the heat stays gentle.

  • 1 cup rice → 1½ cups water (stovetop long-grain white)
  • 3 cups rice → 4½ cups water
  • 4 cups rice → 6 cups water

For jasmine, aim for 1¼–1⅓ : 1; for basmati, 1½ : 1 with a soak; for brown, 2–2¼ : 1 on the stove or 1.25–1.33 : 1 under pressure. Rather than leap to big changes when scaling, adjust by 2–3 tablespoons of water per cup of rice after your first larger batch to match your stove, pot, and preference.

Also Read: French Toast Sticks (Air Fryer + Oven Recipe) — Crispy Outside, Custardy Inside

Storing, Cooling, and Reheating Safely

Rice is easy to make ahead, but it deserves the same diligence you’d give to chicken or soup. Cool it quickly, refrigerate promptly, and reheat thoroughly.

  • Cool fast. Spread hot rice on a sheet pan to release steam; once warmth dissipates, pack into shallow containers.
  • Refrigerate within 1–2 hours. The quicker you chill, the safer your leftovers.
  • Reheat to 165°F/74°C. In the microwave, sprinkle a tablespoon of water over each cup of rice, cover, and heat until piping hot; on the stovetop, add a spoonful of water and steam briefly. For authoritative guidance, bookmark the USDA’s page on leftovers and safe reheating.

If you’re exploring broader nutrition or contaminant questions around rice varieties and cooking methods, take a moment with the FDA’s resources on arsenic in rice and products. They’re balanced, practical, and help you decide when to use absorption versus excess-water techniques.

Also Read: 10 Best Chicken Sandwich Recipes (BBQ, Parm, Buffalo & More)

How to Cook Perfect Rice on Busy Weeknights

Life happens. Even so, you can still put excellent rice on the table without hovering over a pot.

  • Use the Instant Pot for white rice when you’re juggling multiple dishes. Measure 1:1, set 3 minutes on high, and walk away; dinner’s starch will be ready right as you need it.
  • Batch-cook basmati on Sunday. Soak, cook, fluff, cool quickly, and refrigerate. Basmati reheats beautifully and still eats light.
  • Lean on a rice cooker for hands-off consistency. Follow the model’s lines, then give it a 10-minute warm rest before fluffing. If you’re new to your machine, the brand’s manuals page is a shortcut to specifics.

Meanwhile, finishers make weeknight rice feel special: a pat of butter or ghee, a thread of olive oil, or a splash of toasted sesame oil right before serving. Even a few slices of ginger bloomed in oil at the start can transform a plain bowl.

Also Read: 10 Best Espresso Martini Recipe Variations (Bar-Tested)

Flavor Boosters and Simple Add-Ins

Before adding water, briefly warm 1 teaspoon oil or ghee in the pot and bloom aromatics—sliced garlic, crushed cardamom, or a bay leaf. During the rest, fold in chopped herbs (cilantro, scallions, or dill) or a handful of frozen peas for color. As you explore, keep a few ideas in your back pocket:

  • For an almost effortless rice bowl, toss hot grains with a splash of balsamic and olive oil, then crown with roasted vegetables. It’s a fast route to a satisfying dinner when time is scarce.
  • When a craving for dessert strikes, pivot to a silky Thai-style treat using coconut milk and ripe fruit—this approachable walkthrough on mango + coconut milk turns pantry items into a crowd-pleaser: creamy mango-coconut how-to. If you want a festival-worthy finish with sticky rice, try the kitchen’s fully detailed authentic mango sticky rice recipe.

Also Read: Macaroni & Cheese Recipe: Creamy Stovetop, Baked & Southern

Leftovers You’ll Look Forward To

Great rice rarely goes to waste, but planning for leftovers turns tomorrow’s meal into an easy win.

Same-Day Fried Rice (When You Just Cooked the Rice)

When fried rice is on tonight’s menu, lower the water for your white rice by 2 tablespoons per cup, then spread the cooked rice on a tray and chill it for 15–20 minutes. This brief drying step helps the grains sear rather than steam in the pan. For a crisp, minimal baseline, use a straightforward, wok-friendly technique like this classic egg fried rice walkthrough. If you prefer a vegetable-forward version loaded with texture, Kenji’s method-first approach shows how to balance heat, oil, and moisture for vivid results: easy vegetable fried rice.

Also Read: Vegan French Toast: 6 Easy Recipes (Pan, Air Fryer, GF & High-Protein)

Day-Old Transformations

Day-old rice is ideal for fried rice, obviously, yet it also shines in croquettes and stuffed vegetables. For a snack that feels special, use those leftovers to make crisp, melty arancini; the step-by-step guide to shaping, breading, and frying is here: turn leftover rice into arancini. Serve with a quick marinara or a garlicky yogurt dip and you’ve got a win either way.

How to Cook Perfect Rice for Meals that Fit Your Goals

If you’re mindful of post-meal energy or simply tracking macros, small technique choices can help. Cooling and reheating can modestly increase resistant starch, while your choice of variety matters too. For a practical, non-dogmatic overview that connects kitchen moves to outcomes, start with this field guide to reducing the glycemic impact of rice. For a zoomed-out look across varieties and contexts, the side-by-side on GI vs GL for common rices is useful; pair it with the FDA resources on arsenic in foods if you’re choosing methods with both texture and safety in mind.

Also Read: Homemade Electrolytes for Fasting: 7 Precise Recipes

Frequently Used Ratios and Timings, Explained in Plain Language

Because recipes scatter numbers everywhere, let’s unify the essentials so you can adjust confidently.

  • Long-grain white (stovetop): 1.5 : 1 water → 12-minute simmer, 10-minute rest. This yields about 3 cups cooked per cup raw.
  • Jasmine (stovetop): 1¼–1⅓ : 1 water → 12 minutes, 10-minute rest; tenderness sits between fluffy and plush. A thorough overview appears in this tested stovetop ratio piece.
  • Basmati (stovetop): 1.5 : 1 water after a 20–30-minute soak10–12 minutes, 10-minute rest; texture is light and separate. For health context, see the basmati GI briefing.
  • Sushi/short-grain: ~1.1–1.2 : 1 water after a 20–30-minute soakcook + 10-minute rest, then season gently; technique photos here: sushi rice guide.
  • Brown (Instant Pot): 1.25–1.33 : 1 water → 22–25 minutes high pressure, 10-minute natural release; for stovetop, plan 2–2¼ : 1 water and 35–45 minutes simmer time.
  • Rice cooker: Follow the unit’s water lines for your variety; it’s the design assumption. If you’re curious how manufacturers expect you to use those markings, peek at Zojirushi’s white rice instructions and their manuals page.

Also Read: Pumpkin Spice, Your Way: Master Blend, Variations & Real-World Recipes

Troubleshooting: Fix It Today, Improve It Tomorrow

Even experienced cooks occasionally miss by a little. Here’s how to correct in the moment and calibrate for next time.

  • Too wet or soft? You likely used too much water or lifted the lid. Spread the rice on a tray and let it vent for a few minutes; next time, reduce the water by 2–3 tablespoons per cup and resist peeking.
  • Undercooked in the center? Sprinkle over 2–4 tablespoons of hot water, cover, and cook on the lowest heat for 3–5 minutes; extend the rest before fluffing.
  • Starchy clumps? Rinse more thoroughly and avoid stirring after the initial boil. If you want extra separation, adopt the towel-under-lid rest technique—again, the quick explainer for that move is here: how the towel rest helps.
  • Scorched base? The heat was too high or the pot too thin. Use a heavier pan, lower the flame, and keep ratios consistent.
  • Basmati breaking? The soak ran too long or you stirred during the simmer. Keep the pre-cook soak to 20–30 minutes, then handle gently.

Because kitchens vary—burners, pots, even the mineral content of your water—log your favorite ratio the first time you nail it. From then on, you’re just repeating success.

Also Read: Homemade & DIY Coffee Creamer: 16 Flavor Recipes (French Vanilla, Pumpkin Spice & More)

How to Cook Perfect Rice, Then Make It Sing

Mastering the basics is liberating. Once you can produce perfect rice without thinking, it becomes a canvas for flavor.

  • Ghee and cumin (jeera rice). Warm a spoon of ghee, bloom cumin seeds until fragrant, then add cooked rice to coat.
  • Ginger-garlic steam. Start the pot with a few slices of ginger and a crushed clove of garlic before adding water; the aroma perfumes the whole batch.
  • Pandan or bay leaf. Add either to the pot and retrieve before fluffing for a subtle, sophisticated note.
  • Coconut finish. Fold a splash of coconut milk into hot rice for a plush side that loves grilled fish and veggies.
  • Curd rice twist. For cooling comfort, stir yogurt, mustard seeds, and a little tempering into leftover rice; if you want a vivid variation, the beet-brightened take is here: curd rice with beetroot.

Meanwhile, when you want a sweet ending, keep it simple: ripe mango, creamy coconut milk, and warm rice are an unbeatable trio; the pantry-friendly method is spelled out in this mango + coconut milk guide, and for a celebration-level classic, make the authentic mango sticky rice.

Also Read: Classic vs. Authentic Alfredo: 5 Essential Recipes

Putting It All Together

At this point, how to cook perfect rice should feel far less mysterious. Start with the baseline stovetop method—rinse, 1.5 : 1 water, 12-minute simmer, 10-minute rest—and you’ll win most nights. For basmati, soak briefly and keep the water at 1.5 : 1. If its jasmine, dial water down to 1¼–1⅓ : 1. For sushi, rinse thoroughly, soak, and season gently after cooking. And when cooking brown, commit to more time or use pressure for convenience. When using machines, trust rice cooker lines and lean on manufacturer documents like Zojirushi’s manuals or the Instant Pot manuals hub. For nuanced texture, adopt the towel-under-lid rest demonstrated in the towel trick explainer.

Finally, keep your leftovers safe and delicious: cool quickly, refrigerate promptly, and reheat to 165°F/74°C, following the USDA’s guidance on leftovers and safe reheating. Then have some fun—turn a bowl into egg fried rice with this reliable wok-side walkthrough, go veg-heavy with Kenji’s stir-fry method, or roll day-old grains into golden arancini.

When a staple tastes this good and works this reliably, dinner stops being a question mark. It becomes a rhythm: measure, simmer, rest, fluff—and enjoy.

Also Read: Lemon Drop Martini Recipe (Classic, 3-Ingredient, & More)

FAQs

1) How to cook perfect rice on the stove without it getting mushy?

Rinse until the water runs mostly clear, then use a precise water-to-rice ratio (typically 1.5:1 for long-grain white). Bring to a boil, cover, reduce to low, simmer about 12 minutes, and let it rest covered for 10 minutes before fluffing. Consequently, grains stay separate and tender.

2) What is the best water-to-rice ratio for white rice?

Generally, long-grain white rice thrives at about 1.5 cups water per 1 cup rice on the stovetop. For slightly drier rice, reduce the water by 2–3 tablespoons per cup; for softer results, add the same amount. Thus, you can fine-tune texture to taste.

3) How long does it take to cook rice?

For white or jasmine rice on the stove, expect roughly 12 minutes of gentle simmering plus a 10-minute rest. Brown rice usually needs 35–45 minutes on the stove. Meanwhile, pressure cooking shortens the timeline considerably.

4) How to cook perfect rice in a rice cooker?

Rinse, drain well, and fill water to your cooker’s variety line (or use the same ratios you’d use on the stove). Start the cycle, then allow a 10-minute warm rest before you open. Afterwards, fluff and briefly vent for drier, separate grains.

5) How to cook perfect rice in an Instant Pot or pressure cooker?

Use a 1:1 ratio for most white rices (3–4 minutes high pressure, 10 minutes natural release). For basmati, still 1:1 but about 6 minutes high; for brown, 1.25–1.33:1 and 22–25 minutes high. Importantly, let pressure drop naturally before venting for the best texture.

6) How much water for jasmine rice?

Jasmine prefers slightly less water than standard long-grain: about 1¼–1⅓ cups water per cup of rice on the stovetop. Moreover, an optional 10-minute soak softens the core without making it soggy.

7) How to make basmati rice fluffy and long?

Rinse thoroughly, soak 20–30 minutes, drain well, then cook at roughly 1.5:1 water to rice. Keep heat low and the lid tight; rest 10 minutes. Consequently, grains elongate beautifully without breaking.

8) Do I need to soak rice?

Not always. Basmati and sushi benefit from soaking (20–30 minutes) for even doneness. Conversely, most long-grain white and jasmine work fine without soaking, though a brief soak can soften edges slightly.

9) How to cook perfect rice for sushi (short-grain)?

Rinse until nearly clear, soak 20–30 minutes, drain, then use about 1.1–1.2:1 water. Cook gently, rest 10 minutes, and season warm rice with a vinegar mixture while folding—never mashing. Hence, you get glossy, clinging grains.

10) How to keep rice from sticking together?

Rinse thoroughly to remove surface starch, avoid stirring once it returns to a simmer, and let it rest before fluffing. Additionally, use a heavy pot and steady low heat so the bottom doesn’t scorch and glue the batch.

11) How to make fluffy rice every time?

Measure accurately, keep the simmer gentle, and give that 10-minute covered rest. Likewise, a quick post-cook vent (lid off 2–3 minutes) drives off excess steam for lighter, more separate grains.

12) How much water for 1 cup, 3 cups, or 4 cups of rice?

For long-grain white on the stove, start at 1.5:1. That’s 1.5 cups water for 1 cup rice; 4.5 cups water for 3 cups rice; 6 cups water for 4 cups rice. Notably, different varieties may require small adjustments.

13) How to cook perfect brown rice that isn’t chalky?

Use 2–2¼ cups water per cup on the stove (35–45 minutes simmering), or 1.25–1.33:1 in a pressure cooker (22–25 minutes high). Afterward, rest 10 minutes before fluffing to let moisture even out.

14) Can I make rice in the microwave?

Yes. In a microwave-safe bowl or microwave rice cooker, use about 1.5:1 for white rice. Cook on high 10–12 minutes for 1 cup (your microwave may vary), rest 5 minutes covered, then fluff. Remarkably convenient for small batches.

15) How to cook perfect rice for fried rice the same day?

Cook white rice with 2 tablespoons less water per cup, spread it on a tray, and chill 15–20 minutes to dry. Thereafter, stir-fry over high heat with minimal moisture so the grains sear rather than steam.

16) Why is my rice gummy or clumpy?

Usually, either insufficient rinsing, too much water, or stirring after boiling. Reduce water slightly, rinse more, and avoid agitation during the simmer. Ultimately, a calm pot yields cleaner texture.

17) Why is the bottom of my rice pot scorched?

Heat was too high, the pot too thin, or water too low. Next time, use a heavier pot, lower the flame, and follow proven ratios. Furthermore, never lift the lid during the cook, which can trigger uneven heating.

18) How to reheat rice so it tastes fresh?

Add a spoonful of water, cover, and steam until piping hot (microwave or stovetop). Break up clumps gently with a fork halfway through. Consequently, grains regain moisture without turning soggy.

19) How to boil rice vs. steam/absorption—what’s the difference?

Boiling in excess water and draining offers forgiving doneness but slightly less aroma retention; absorption (our standard method) locks flavor in the pot and produces fluffier texture. Nevertheless, both work—choose based on preference and variety.

20) How to cook perfect rice if my tap water is hard or soft?

Hard water can firm grains; soft water can push them toward mushy. Therefore, if your batches are consistently too firm, add a tablespoon or two of extra water per cup; if too soft, subtract the same amount.

21) How to make plain rice taste great without heavy sauces?

Bloom a teaspoon of ghee or oil with aromatics (garlic, ginger, cumin, bay, or pandan) before adding rice and water. Then, finish with butter or toasted sesame oil and a pinch of salt. Instantly more character, minimal effort.

22) Is “balsamic rice” the same as basmati rice?

Often it’s a typo or mishearing of “basmati.” However, if you literally want balsamic-glazed rice, toss hot cooked white rice with a little balsamic and olive oil, then season. Simple, bright, and surprisingly good.

23) How to cook perfect rice when doubling or tripling a recipe?

Scale water linearly (keep the same ratio) and use a wider pot so steam circulates evenly. Keep the simmer gentle and extend the rest by a couple of minutes. Consequently, larger batches finish evenly without soggy centers.

24) Should I salt the water for rice?

Yes—seasoning the water yields rice that tastes good on its own. Start with about ½ teaspoon fine salt per cup of raw rice. Alternatively, swap some water for light broth if you prefer layered flavor.

25) How to store cooked rice safely?

Cool quickly in shallow containers, refrigerate promptly, and eat within a few days. Reheat until steaming hot. As a result, you keep texture appealing while maintaining good food safety habits.

26) How to cook perfect rice when I want it extra dry?

After the 10-minute rest, fluff and leave the lid off for 2–3 minutes to vent steam. Alternatively, reduce water by 1–2 tablespoons per cup of rice next time. Subtle tweaks deliver a distinctly lighter bite.

27) What’s the difference between jasmine and basmati in cooking?

Jasmine leans softer and uses a touch less water; basmati prefers a soak and keeps a firmer, longer grain with a standard 1.5:1 ratio. Consequently, match your technique to the variety for best results.

28) How much rice per person should I cook?

As a side, plan ¼–⅓ cup raw rice per person (about ¾–1 cup cooked). For rice-centric meals or big appetites, move toward ½ cup raw per person. Naturally, leftovers are easy to repurpose.

29) How to cook perfect rice with oil or butter—before or after?

Either works. A teaspoon of fat before cooking blooms aromatics and improves mouthfeel; a small knob after cooking adds gloss and flavor. Nevertheless, keep amounts modest so grains don’t turn heavy.

30) Can I skip rinsing?

You can, but expect more stickiness, especially with long-grain white. For fluffy, non-sticky results, rinsing pays off. Even so, for sushi, you’ll still rinse—then you’ll deliberately add seasoning to achieve cling by design.

Posted on 2 Comments

Quinoa vs Rice: Nutrition, Glycemic Index, and When to Choose Each

Hand scooping cooked quinoa beside a bowl of white rice; magazine-style cover comparing calories, carbs and glycemic index to choose the healthier base

We reach for rice or quinoa because both are comforting. They carry flavor, welcome vegetables and both of them make a plate feel complete. Yet, when you compare them closely, they behave differently in your body and in your kitchen. This guide unpacks quinoa vs rice with practical numbers, plain language, and easy cooking moves you can use tonight.

Although both are starches, they do not play the same role. Quinoa brings more protein and more fiber. Rice, especially white rice, brings a softer texture and a neutral base. As a result, each shines in different meals. In the sections below, you will see where quinoa wins. You will also see where rice still fits beautifully. Most importantly, you will learn how to choose the right base for your goals and your taste.

Before we dive in, remember one key fact. Quinoa is a seed. It cooks like a grain, but botanically it is not a cereal. This small detail explains some of its unique traits. It also explains why its protein and fiber numbers stand out.

Also Read: Glycemic Index (GI) VS Glycemic Load (GL)


Quinoa vs Rice: the short, honest take

Let’s set the stage with a clear summary. Then we will build details under it.

  • Quinoa offers more protein and fiber per cooked cup. Therefore, it usually keeps you full longer.
  • White rice is slightly lower in calories per cup. It tastes neutral. It lets sauces and curries take center stage.
  • For steadier energy, quinoa, brown rice, and basmati are generally better picks than standard white or jasmine.

If you want more context on varieties, skim our explainer on basmati rice and glycemic index. For a simple primer on blood sugar and carbs, read Harvard’s guide to carbohydrates and blood sugar. Both links will help you turn this article into action.


Quinoa vs Rice: nutrition, per cooked cup

Numbers make decisions easier. Let’s compare typical cooked portions you see in bowls and plates.

Two hands holding bowls of cooked quinoa vs white rice with text showing protein and fiber per cup.
Why quinoa keeps you fuller: more protein and fiber per cup compared with standard white rice.

Which has fewer calories per cup? White rice does, by a modest margin.
Which supports fullness better? Quinoa does, because of protein and fiber.
Is quinoa lower carb than rice? Per cup, quinoa has slightly fewer carbs than many white rices. The gap is small. The bigger win is quinoa’s fiber and protein.

Prefer metric? No problem. Per 100 g cooked, quinoa averages about 4.4 g protein and ~2.8 g fiber. White rice averages roughly 2.7 g protein and ~0.4–0.6 g fiber. Consequently, quinoa sticks a bit longer and often delivers better satiety. Rice, meanwhile, usually needs support from protein and vegetables to keep hunger steady and digests faster unless you add partners like beans, tofu, eggs, fish, or chicken.

Now step back. Nutrition is not only macros. Micronutrients matter. So do amino acids. Quinoa offers a broader amino acid profile and helpful minerals. Rice offers consistency, digestibility, and a clean flavor stage. Therefore, let your meal goal guide your choice. Are you building a lean, filling bowl for lunch? Quinoa might serve you well. Are you plating a rich curry that needs a soft base? White or basmati rice may be perfect.

Also Read: Glycemic Index and Secrets of Weight Loss


Overhead bowls of quinoa, white, brown, basmati and jasmine rice labeled with calories per cooked cup for quinoa vs rice types.
Quick glance: typical calories per cooked cup across quinoa and common rice varieties—use it to portion bowls fast.

Quinoa vs Rice: per cup and per 100 g at a glance

Per cup (cooked)

1 cup cookedCaloriesCarbsProteinFiber
Quinoa (~185 g)~222~39 g~8 g~5 g
White rice (~158 g)~205~45 g~4 g<1 g
Brown rice (~195 g)~216~45 g~5 g~3.5 g
Comparing Quinoa VS Rice Macros, based on Per Cup Serving.

Source the quinoa and white rice figures from USDA/MyFoodData for quinoa and USDA/MyFoodData for white rice. Values vary by brand and moisture, but the pattern remains stable.

Tip: Use the cup table for quick menu planning. Use the gram table below for macro tracking.

Per 100 g (cooked)

Food (100 g)CaloriesCarbsProteinFiber
Quinoa~120~21.3 g~4.4 g~2.8 g
White rice~130~28.3 g~2.7 g~0.4–0.6 g
Brown rice~123~25.6 g~2.7–2.9 g~1.6–1.8 g
Basmati (white)~121–130~25–28 g~2.7–3.0 g~0.4–0.8 g
Jasmine (white)~129–135~28–30 g~2.7–3.0 g~0.4–0.8 g
Comparing Quinoa VS Rice Macros, based on Per 100 gm Serving.

These tables helps in calories vs carbs vs protein comparison. They also support quick menu planning. If you build bowls by volume, the per-cup table helps. If you track macros by weight, the 100 g snapshot helps more. You can now place the base that matches your day.


Glycemic index in quinoa vs rice (and why it matters)

The glycemic index (GI) estimates how fast a carb-rich food raises blood sugar. As a rule of thumb, ≤55 is low, 56–69 is medium, and ≥70 is high. For clear definitions and practical examples, read Harvard’s overview on carbohydrates and blood sugar. If you want to look up specific foods or brands, use the University of Sydney GI database.

Five bowls of rice varieties labeled with approximate glycemic index values including basmati, jasmine, brown and white.
Variety matters: basmati tends to test lower on GI than many white rices, while jasmine often trends higher.

Here is the part that matters for your day.

  • Quinoa is generally low-GI, often reported around the low 50s. Its fiber and protein contribute to that steadier curve. That is why quinoa bowls often feel satisfying for longer.
  • Rice spans a wide range. Brown rice averages around the low-to-medium boundary. Standard white rice sits medium on average. Basmati often lands lower among white rices. Jasmine tends to land higher.

Here it is important to keep on mind cooking changes starch, GI can shift with methods. Cooling cooked rice and then reheating increases resistant starch. That change can soften the post-meal rise for some people. Pairings matter too. When you add protein, fiber, and healthy fats, digestion slows. Therefore, you can keep rice in rotation and still aim for steady energy.

Summarizing GI in quinoa vs rice

  • What is the GI of quinoa vs rice? Quinoa is generally low-GI (often ~53). Rice varies widely by type.
  • Which rice types run lower GI? Brown rice often averages ~55. Basmati is frequently lower among white rices.
  • Which rice types run higher GI? Jasmine tends to be higher. Many standard white rices fall in the medium range.

Is quinoa healthier than rice for blood sugar? Often yes, because quinoa starts low-GI and brings fiber and protein. However, brown rice and basmati can also be smart picks. Therefore, choose variety first, then use cooking methods that encourage steadier curves.

If you want practical levers, walk through our guide to reducing the glycemic impact of rice. You will see how cook → cool → reheat, slightly firmer texture, and protein-fiber pairings smooth the ride. For a neutral, health-organization perspective on using GI wisely, review Diabetes UK’s GI overview.


GI by rice variety (white, brown, basmati, jasmine)

Variety matters. So do cultivar and cooking. Here is a quick comparison you can trust.

  • White rice (general): medium GI on average. Soft and easy to over-serve.
  • Brown rice: low-to-medium GI. More fiber than standard white. Chewier bite and nutty notes.
  • Basmati (white): often lower GI among white rices. Higher amylose helps keep grains separate.
  • Jasmine (white): often higher GI. Plush texture and a perfumed aroma.

For a broader context on GI and health outcomes, skim Harvard’s overview of rice. For brand or product specifics, check entries in the University of Sydney GI database.


How cooking and pairing change GI (so rice stays in your life)

Small technique shifts change how grains behave.

Pot of cooked white rice and bowl of quinoa with text explaining the cook–cool–reheat method to lower GI.
Batch smart: chill cooked grains and reheat—resistant starch goes up, and meals feel steadier.
  1. Cook → cool → reheat. Cooling cooked rice forms resistant starch. That starch resists digestion and can blunt the spike.
  2. Keep grains slightly firm. Very soft grains digest faster. Slightly firmer grains slow things down.
  3. Pair smartly. Add protein, fiber, and healthy fats. Beans, tofu, eggs, fish, chicken, vegetables, nuts, and seeds all help.
  4. Mind portions. A modest scoop leaves room for vegetables and protein. You get the texture you love without losing balance.

For a clear walkthrough, open our practical guide on reducing rice’s GI. The methods are simple, repeatable, and budget-friendly.


Quinoa vs Rice for different goals

This section folds several “which is better” questions directly into the guidance. That way, you decide by goal, not by hype.

Quinoa vs Rice for fullness and everyday nutrition

Which is healthier, rice or quinoa, for satiety? Quinoa usually wins. If satiety is your priority, start with quinoa. It delivers more protein and more fiber per cup. Those two levers slow digestion. They also help curb snack cravings later. For the full panel, compare USDA/MyFoodData for quinoa with USDA/MyFoodData for white rice. For a friendly overview, read Harvard Nutrition Source on quinoa.

Even so, rice can still support fullness when you structure the plate. First, add bulk with non-starchy vegetables. Next, add protein. Then finish with a little fat for flavor and texture. Together, those pieces change how the whole meal feels.

What about brown rice vs quinoa? That contest is closer. Brown rice is a whole grain with moderate fiber and low-to-medium GI. However, quinoa still edges it on protein and often on fiber per cup. If you love the chew of brown rice, you can still get great meals. Just add beans or tofu to push protein higher.

Quinoa vs Rice for steady energy and blood sugar

If you want stable post-meal energy, lean on low- or medium-GI bases. Quinoa is a reliable choice. Brown rice and basmati are strong options too. Moreover, dial in technique. Use the cook-cool-reheat sequence. Keep grains a touch firm. Pair with protein, vegetables, and healthy fats. For a clean, balanced view from a health organization, read Diabetes UK on the GI.

Does quinoa have a lower GI than jasmine rice? Usually yes. Jasmine often trends higher. If you love jasmine for aroma, balance the plate. Add vegetables and protein. Keep the serving controlled.

Quinoa vs Rice for weight management

Is quinoa better than rice for weight loss? Sometimes. Weight management is about patterns, not single foods. Still, the base matters. White rice is slightly lower in calories per cup than quinoa. That small edge can help when you want a lighter base. However, quinoa’s higher protein and fiber can improve fullness. Consequently, the “better” choice depends on the rest of the plate.

Here are two simple frameworks:

  • Quinoa-forward bowl: quinoa base + beans or tofu + mixed vegetables + yogurt-tahini dressing + lemon.
  • Light rice bowl: modest scoop of white or basmati rice + vegetable-heavy stir-fry + lean chicken or shrimp + crunchy side salad.

Is quinoa more filling than rice? Often yes. The protein and fiber explain that feeling. But remember preference and texture. If rice helps you enjoy more vegetables and lean protein, that also supports the goal. If you want more structure, explore our guide on choosing the best rice for weight loss. It shows how to set portions and choose cooking methods that support a calorie plan.

Quinoa vs Rice for bodybuilding and training days

Training changes needs. Sometimes you want faster carb delivery. Other times you want meals that stick. Therefore, match the base to the session.

  • Around training: white or basmati rice digests a bit faster. That can help when you need quick refueling. Pair with lean protein and a small amount of fat.
  • Away from training: quinoa brings more protein and fiber. That helps fullness as you spread meals through the day. Add legumes, eggs, tofu, or fish for extra protein.

As always, test and notice. Your body will tell you which base supports your work.

Also Read: Quinoa for Weight Loss: Benefits, Nutrition, and How to Cook Ideas


Quinoa vs Rice by variety (white, brown, basmati, jasmine)

As the risk of repeating ourselves, however for sake of more clarity on topic, let’s now fold some comparisons directly into short, practical sub-sections. Each one answers “which is better” in the specific context.

Quinoa vs White Rice

White rice is plush and neutral. It absorbs sauces and lets other flavors lead. On average, it is medium GI and low in fiber. Therefore, watch portions. Pair it with vegetables and protein. In contrast, quinoa is typically lower GI and higher in protein and fiber. It brings a nutty note and a slight pop to each bite.

For facts while you cook, keep USDA/MyFoodData for white rice open in a tab. For quinoa context, browse Harvard Nutrition Source on quinoa. If you want a broad view of rice varieties, read Harvard Nutrition Source on rice.

When to choose which: use white rice when the dish is rich and saucy. Use quinoa when you want the base to contribute protein and fiber. Or mix them half-and-half for a balanced compromise.

Quinoa vs Brown Rice

Here the gap narrows. Brown rice is a whole grain. It keeps the bran and germ. As a result, it carries more fiber and micronutrients than standard white rice. Its GI usually sits in the low-to-medium band. If you enjoy the chewier bite and nutty flavor, it can anchor meals beautifully. Quinoa still edges brown rice on protein and fiber per cup. That edge can aid fullness when calories are tight.

For averages and a sensible overview, see Harvard’s rice page. For a narrative comparison of brown and white rice, skim Harvard Health’s head-to-head explainer.

When to choose which: pick brown rice when you want the rice experience with extra texture and a friendlier GI. Pick quinoa when you want more protein, more fiber, and quicker cooking.

Quinoa vs Basmati Rice

Among white rices, basmati is a standout. It often lands lower on the GI spectrum than many standard white rices. Higher amylose helps keep grains separate. The aroma is a bonus. If you want a white rice experience with a gentler curve, basmati is a smart choice. For deeper detail and cooking notes, open our basmati GI analysis. If you want brand-specific values, search the University of Sydney GI database.

When to choose which: pick basmati when you want long, separate, fragrant grains. Pick quinoa when you want more protein and fiber in the base. Or serve basmati with lentils or chickpeas to boost protein and fiber.

Also Read: ‘Quinoa’ Instead of ‘Chicken’: 5 High Protein Plant-Based Meal Prep Ideas

Quinoa vs Jasmine Rice

Jasmine rice is aromatic and soft. It is lovely with Thai curries and dishes that want a perfumed base. However, jasmine tends to sit higher on the GI than basmati and many brown rices. Therefore, if blood sugar steadiness is a priority, choose jasmine less often. For variety differences and a clear overview, read Harvard’s rice page.

When to choose which: pick jasmine for aroma and softness. Pick quinoa when you want steadier energy and extra protein.


Top-down view of a bowl split 50–50 with cooked quinoa and white rice, showing an easy transition strategy.
Start with a 50–50 base—quinoa for protein and fiber, rice for comfort—then shift to 60–40 as your taste adapts.

Other rice styles in brief (so you can branch out)

There are so many rice varieties, it’s hard to cover them all, however some of the more popular ones and which keep trending every now and then are covered below in comparison with Quinoa.

Wild rice vs quinoa

Wild rice is a grass seed, much like quinoa is a seed. It brings a chewy bite and an earthy, nutty flavor. It has more protein than many standard white rices. Choose wild rice when you want texture and a whole-grain feel. Choose quinoa when you want more protein per cup and a faster cook.

Red and black rice vs quinoa

Red and black rices keep their bran. They bring color, antioxidants, and a bit more fiber than standard white rice. They usually land in the medium-GI range. Choose them when you want a classic rice experience with extra character. Choose quinoa when you want more protein and a typically lower GI.

Parboiled rice vs quinoa

Parboiled rice is steamed in the husk before milling. That process helps retain some nutrients. It also tends to keep grains separate and can yield a lower GI than standard white rice. Use parboiled rice when you want distinct grains for pilaf. Use quinoa when you want higher protein and fiber in the base.

Cauliflower rice and shirataki rice vs quinoa

Cauliflower and shirataki “rice” are low-calorie substitutes, not grains. They drastically reduce carbs and calories. However, they change texture and flavor. Use them for low-carb meals or as volume extenders. Use quinoa or rice when you want true grain structure and lasting fullness.

Also Read: Healthy Oat Protein Bars – 5 Easy No Sugar Recipes for Snacks


Taste, texture, and kitchen behavior (so your swaps stick)

Food should satisfy. Numbers help, but flavor keeps habits alive. Therefore, pay attention to texture and taste.

Quinoa tastes nutty with a gentle chew. Rinse it well to remove saponins. For extra depth, toast the dry grains for a minute or two. Then add water. A 1:2 quinoa-to-water ratio works for many cooks. Simmer until you see tiny germ rings and the pot looks just dry. Cover and rest for five minutes. Finally, fluff and season. A drizzle of olive oil and a squeeze of lemon go a long way.

Spoon lifting cooked quinoa above a pot with tip to rinse before cooking to reduce bitterness.
Pro tip: rinsing removes saponins so quinoa tastes cleaner and pairs better with delicate sauces.

White rice is soft and neutral. It lets sauces sing and stews shine. Brown rice is chewier and slightly nutty. Basmati cooks fragrant and separate, which makes it ideal for pilafs. Jasmine is plush and perfumed, perfect for Thai and Southeast Asian flavors.

If you are not ready for a full swap, start gently. Mix half quinoa and half rice. The bowl will feel familiar yet more filling. Over time, you can push the ratio toward your goals without losing comfort.

Does quinoa taste like rice? Not exactly. It is nuttier and slightly chewy. However, with the right dressing or sauce, most eaters enjoy the swap quickly.


Real-world plates you can build tonight

Real life asks for simple moves, you do not need new recipes to start. You only need patterns that repeat well, here are patterns that work.

Protein-forward quinoa bowl
Base: quinoa. Add roasted chickpeas or grilled tofu. Pile on vegetables. Finish with a yogurt-tahini drizzle and lemon. Because quinoa brings protein and fiber, the bowl satisfies. For more ideas, see quinoa meal-prep ideas.

Light, saucy rice bowl
Base: a modest scoop of white or basmati rice. Top with a vegetable-heavy stir-fry. Add lean chicken or shrimp. Add a crunchy side salad. The plate stays light yet complete.

Basmati pilaf with legumes
Toast basmati with spices. Simmer until long and separate. Fold in cooked lentils and herbs. Serve with a bright cucumber salad. The dish tastes rich but lands gently.

Half-and-half “transition” bowl
Mix equal parts cooked quinoa and cooked brown rice. Add roasted vegetables, a protein, and a nutty dressing. You get rice comfort and quinoa’s staying power.

Cold grain salad for busy weeks
Toss cooked and cooled quinoa with chopped greens, beans, cucumbers, tomatoes, olives, and a lemon vinaigrette. Store for lunches. Because quinoa holds texture, the salad keeps well. For higher-protein patterns, explore high-protein quinoa strategies.


Quinoa vs Rice: cooking smarter for better curves

You can improve rice’s glycemic profile without abandoning it, which means you can keep rice and still aim for steady energy. Use these simple levers.

  • Cook → cool → reheat. Resistant starch goes up. The glycemic hit can soften.
  • Pair with protein, fiber, and healthy fats. Beans, eggs, tofu, fish, chicken, leafy greens, nuts, and seeds slow digestion.
  • Keep texture slightly firm. Very soft grains digest faster.
  • Scale portions down. A smaller scoop plus more vegetables often feels better.
  • Prefer lower-GI choices. Basmati and brown rice are friendlier than standard white or jasmine.

For step-by-step help, read reducing the glycemic impact of rice. For a neutral, health-org perspective on using GI well, see Diabetes UK’s GI overview.


Pantry, storage, and prep notes that make the habit easy

Logistics shape success. Set up your kitchen so good choices happen on autopilot.

  • Store uncooked grains in airtight jars away from heat and light.
  • Cool cooked grains quickly, then refrigerate within two hours.
  • Use cooked grains within three to four days, or freeze flat for later.
  • Reheat with a splash of water and cover to restore moisture.
  • Batch once; eat many times. Cook big on one night. Portion into containers. Rotate through bowl formulas all week.
  • Season simply. Try lemon zest, garlic, toasted cumin, turmeric, parsley, cilantro, sesame, or a spoon of pesto. Little touches amplify flavor.

When you cook a pot, cook a little extra. Future-you will thank present-you.


Pulling it together: how to choose with confidence

You now have the facts and the levers. Let’s convert them into confident choices.

  • Choose quinoa when you want more protein and fiber, generally lower GI, and a base that can stand on its own in bowls and salads. For numbers and context, revisit USDA quinoa and Harvard’s quinoa guide.
  • Choose brown or basmati rice when you want a classic rice experience with a gentler glycemic impact than standard white. For a balanced overview of varieties, see Harvard’s rice page.
  • Choose white rice when you need a lighter-calorie, neutral base that keeps the spotlight on the main dish. Then round out the plate with vegetables and protein so the meal satisfies and digests steadily. For exact cup-for-cup figures, compare white rice per cup with quinoa per cup.

If blood sugar steadiness is a priority, focus on technique. Cook, cool, and reheat. Keep grains slightly firm. Pair with protein and vegetables. Favor lower-GI varieties. For simple steps, use our guide to reducing rice’s GI. For a neutral, health-org stance on GI, read Diabetes UK’s overview.

Finally, keep cooking joyful. Food is fuel, but it is also comfort. Try one new method this week. Swap in a half-and-half mix. Add a bright pickle or a crunchy salad. Notice how the plate feels. Then iterate. With a little curiosity, quinoa vs rice stops being an argument. It becomes a flexible toolkit you can use with ease.

FAQs

1) What is the glycemic index of quinoa vs rice?

Generally, quinoa sits in the low-GI range, while rice varies widely by type. Consequently, brown and basmati rice tend to be friendlier than standard white or jasmine. Even so, cooking, cooling, and reheating can shift the numbers a bit.

2) Which is healthier overall: quinoa or rice?

It depends on your goal. Typically, quinoa wins on protein, fiber, and a steadier blood-sugar response. However, white rice is slightly lower in calories per cup and works well as a neutral base when portions and pairings are smart.

3) Is quinoa better than rice for weight loss?

Often, yes—because quinoa’s extra protein and fiber can improve fullness. Nevertheless, a modest serving of rice with plenty of vegetables and lean protein can also fit well.

4) Brown rice vs quinoa: which should I choose?

Both are solid. Brown rice offers a whole-grain experience with chew and moderate fiber. Meanwhile, quinoa usually brings more protein and fiber per cup. Therefore, choose by texture preference and how long you want the meal to keep you satisfied.

5) Basmati rice vs quinoa: which has the advantage?

Each brings different strengths. Basmati often lands lower on the GI spectrum among white rices and has a fragrant, separate grain. Conversely, quinoa adds more protein and fiber. As a result, you might even combine them.

6) Jasmine rice vs quinoa: which supports steadier energy?

Typically quinoa. Jasmine rice is delicious and plush, yet it often trends higher on the GI scale. Thus, if you choose jasmine, balance the plate with vegetables, protein, and mindful portions.

7) Does quinoa have fewer carbs than rice?

Per cooked cup, quinoa usually has slightly fewer carbs than many white rices. Still, the difference is small. Instead, quinoa’s bigger edge is its protein and fiber.

8) Quinoa vs white rice: which has fewer calories?

White rice, by a modest margin. Even so, quinoa often feels more filling thanks to its higher protein and fiber content.

9) Protein in quinoa vs rice: how do they compare?

Quinoa commonly provides about twice the protein per cup compared with white rice. Consequently, it can help when you want more protein from the base itself.

10) Fiber in quinoa vs brown rice: who wins?

Quinoa usually edges out brown rice on fiber per cup. Nevertheless, both beat standard white rice. Therefore, either can help you build more satisfying bowls.

11) What is the difference between quinoa and rice?

Botanically, quinoa is a seed that cooks like a grain, while rice is a cereal grain. Hence, quinoa tends to carry more protein and fiber, whereas rice delivers a softer, more neutral canvas.

12) Is quinoa better than rice for diabetics?

Often yes, due to lower GI and higher fiber. That said, brown rice and basmati can also be sensible choices. Furthermore, pairings, portions, and cooking methods matter just as much.

13) Which is better for bodybuilding or training days: quinoa or rice?

It depends on timing. Around workouts, white or basmati rice can digest a bit faster. Conversely, away from training, quinoa’s extra protein and fiber can help with satiety across the day.

14) Quinoa vs rice for weight loss: what portion strategies work?

First, keep the base modest. Next, pack in vegetables. Then, add lean protein and a little fat for flavor. Consequently, both quinoa bowls and rice bowls can fit your plan.

15) Wild, red, or black rice vs quinoa: how do these compare?

These colorful rices retain more of the grain and usually bring extra texture and character. Even so, quinoa still tends to offer more protein per cup. Thus, choose based on flavor and the role you want the base to play.

16) Parboiled rice vs quinoa: which should I use?

Parboiled rice often cooks into separate grains and can be gentler than some standard white rices. Nevertheless, quinoa remains stronger on protein and fiber. Therefore, pick parboiled for pilafs and quinoa for protein-forward bowls.

17) Cauliflower rice or shirataki rice vs quinoa: which is “lighter”?

Those substitutes are extremely low in calories and carbs. However, they change texture and flavor dramatically. Meanwhile, quinoa behaves like a true grain and offers staying power. Hence, use the alternatives for very low-carb plates and quinoa for fuller meals.

18) Does quinoa taste like rice?

Not exactly. Quinoa is nutty with a slight chew; rice is softer and more neutral. That said, with dressings, sauces, and herbs, the swap feels natural surprisingly quickly.

19) Can I mix quinoa and rice in one dish?

Absolutely. In fact, a half-and-half mix is an easy transition strategy. As a result, you get rice’s familiarity and quinoa’s extra protein and fiber in the same bowl.

20) Is quinoa more expensive than rice?

In many markets, yes, because quinoa is less widely grown and processed differently. Even so, mixing quinoa with rice or using quinoa for specific meals can manage cost while preserving benefits.

21) Quinoa vs rice calories per 100 g vs per cup: which view should I use?

Use the per 100 g view for precise macro tracking. Alternatively, use the per cup view for quick home cooking decisions. Either way, keep consistency in your method.

22) Which is healthier: brown rice or quinoa?

Often quinoa, thanks to protein and fiber. Nonetheless, brown rice remains a strong whole-grain option. Therefore, rotate both and pick based on texture, budget, and the rest of the plate.

23) Is quinoa or rice better for beginners who want steadier energy?

Start with quinoa or basmati, since both usually support a smoother glucose response than many standard white rices. Additionally, keep portions steady and add protein.

24) Why do cooking methods change the GI of rice?

Because heat, cooling, and reheating alter starch structure. Specifically, cooling increases resistant starch, which resists digestion. Consequently, the post-meal rise can be gentler.

25) How do I choose between quinoa and rice on busy weeks?

Plan for versatility. Batch-cook one pot of quinoa and one of rice. Then, alternate: quinoa bowls on high-satiety days; rice bowls when you want a lighter base or faster digestion.

Posted on 1 Comment

Choosing the Best Rice for Weight Loss: A Comprehensive Guide to Nutritional Value, Cooking Methods, and Portion Control

white ceramic bowl with brown rice

Introduction 🚀

Rice is a versatile and widely consumed staple food that can be incorporated into a weight loss diet when chosen wisely. In this comprehensive guide, we will delve deeper into the nutritional value of different rice varieties, explore cooking methods that promote weight loss, discuss portion control strategies, and provide practical tips for incorporating rice into your weight loss journey.

Understanding the Nutritional Value of Rice Varieties 🌾

  1. Brown Rice: Brown rice is a whole grain rice that undergoes minimal processing, retaining the bran and germ layers. It is a nutrient-dense option, rich in fiber, vitamins, minerals, and antioxidants. The high fiber content aids digestion, promotes satiety, and regulates blood sugar levels, making it an excellent choice for weight management.
  2. White Rice: White rice is more refined compared to brown rice. During processing, the outer bran and germ layers are removed, leaving behind the starchy endosperm. While white rice is lower in fiber and certain nutrients compared to brown rice, it still provides energy and can be part of a balanced diet when consumed in moderation.
  3. Basmati Rice: Basmati rice is a fragrant long-grain rice variety known for its distinct aroma and flavor. It has a lower glycemic index compared to some other rice types, meaning it has a less significant impact on blood sugar levels. This makes basmati rice a favorable choice for weight management, as it helps maintain steady energy levels and reduces cravings.
  4. Wild Rice: Wild rice is not technically a rice but the seed of aquatic grass. It is high in fiber, protein, antioxidants, and various nutrients. The fiber content helps regulate digestion, promotes satiety, and supports weight loss efforts. Wild rice has a nutty flavor and a slightly chewy texture.
  5. Red Rice: Red rice retains its red bran layer, making it a nutrient-dense choice. It contains more fiber, antioxidants, and minerals compared to white rice. The fiber content contributes to better digestion, increased feelings of fullness, and improved weight management.

Cooking Methods for Weight Loss-Friendly Rice 🍚🔥

The cooking methods you choose can impact the overall healthiness of rice-based meals:

  1. Steaming: Steaming rice helps preserve its nutrients and natural flavors. This gentle cooking method ensures that the rice retains its texture and doesn’t become overly sticky. Use a rice cooker or steaming basket to cook rice to perfection.
  2. Boiling: Boiling rice in an appropriate amount of water until tender is a common cooking method. Be cautious not to overcook it to avoid a mushy texture. To enhance the nutritional profile, opt for brown rice or other whole grain varieties.
  3. Rice Pilaf: Rice pilaf involves lightly sautéing rice in oil or butter before adding liquid for cooking. This method adds flavor and texture to the rice and can be done with various rice types, including brown rice and wild rice. Choose healthier fats and add vegetables for added nutritional value.
  4. Stir-Frying: Stir-frying rice with vegetables, lean proteins, and a minimal amount of oil can create a flavorful and nutritious meal. Use pre-cooked and cooled rice to achieve the desired texture. This method is well-suited for basmati rice and other long-grain varieties.

Portion Control Strategies ⚖️🍽️

Portion control plays a crucial role in weight loss. Here are some strategies to help you manage your rice portions:

  1. Use Measuring Cups: Measure your rice portions using measuring cups or a kitchen scale to ensure accuracy. The recommended portion size for cooked rice is typically around 1/2 to 1 cup, depending on your individual needs and calorie goals.
  2. Balance Your Plate: Instead of filling your plate solely with rice, create a balanced meal by incorporating protein sources (such as lean meats, fish, tofu, or legumes), a variety of vegetables, and healthy fats. This ensures a more nutrient-rich and satisfying meal.
  3. Increase Vegetable Content: Include a generous amount of vegetables in your rice-based dishes to add volume, fiber, and nutrients while reducing the proportion of rice. This helps create a more filling and nutritious meal with fewer calories.
  4. Practice Mindful Eating: Pay attention to your hunger and fullness cues while eating rice. Eat slowly, savor each bite, and stop when you feel comfortably satisfied. This mindful approach to eating can prevent overconsumption and promote better portion control.

Practical Tips for Incorporating Rice into Your Weight Loss Journey 📝💡

  1. Choose Whole Grain Options: Opt for brown rice, wild rice, or other whole grain varieties to maximize nutritional value and fiber content.
  2. Meal Prep: Prepare rice in advance and portion it into individual containers for quick and convenient meals throughout the week. This helps control portion sizes and reduces the likelihood of overeating.
  3. Experiment with Rice Blends: Mix different rice varieties, such as brown rice and wild rice, for added texture, flavor, and nutritional diversity. Blends can offer a unique combination of taste and health benefits.
  4. Use Rice as a Side Dish: Instead of making rice the main component of your meal, use it as a side dish or part of a larger dish. This helps ensure a well-rounded meal with a balanced distribution of nutrients.
  5. Explore International Cuisines: Discover recipes from various cuisines that feature rice in healthier preparations, such as vegetable stir-fries, rice salads, or rice-based soups. This allows you to enjoy the flavors of different cultures while incorporating rice in a weight loss-friendly manner.

Conclusion 🏁

Choosing the best rice for weight loss involves considering the nutritional value, cooking methods, and portion control. Whole grain options like brown rice, wild rice, and basmati rice offer higher fiber content and additional nutrients compared to refined white rice. Pair rice with lean proteins, vegetables, and healthy fats to create well-balanced meals. Employ portion control strategies and practice mindful eating to manage rice portions effectively. With careful selection, preparation, and moderation, rice can be a satisfying and nutritious addition to your weight loss journey.

Disclaimer: This blog post is intended for informational purposes only and should not replace professional medical advice. Consult with a healthcare professional or registered dietitian for personalized dietary recommendations.