Posted on 8 Comments

Peanut Butter Fudge: Recipes & Guide (8 Methods + Easy Variations)

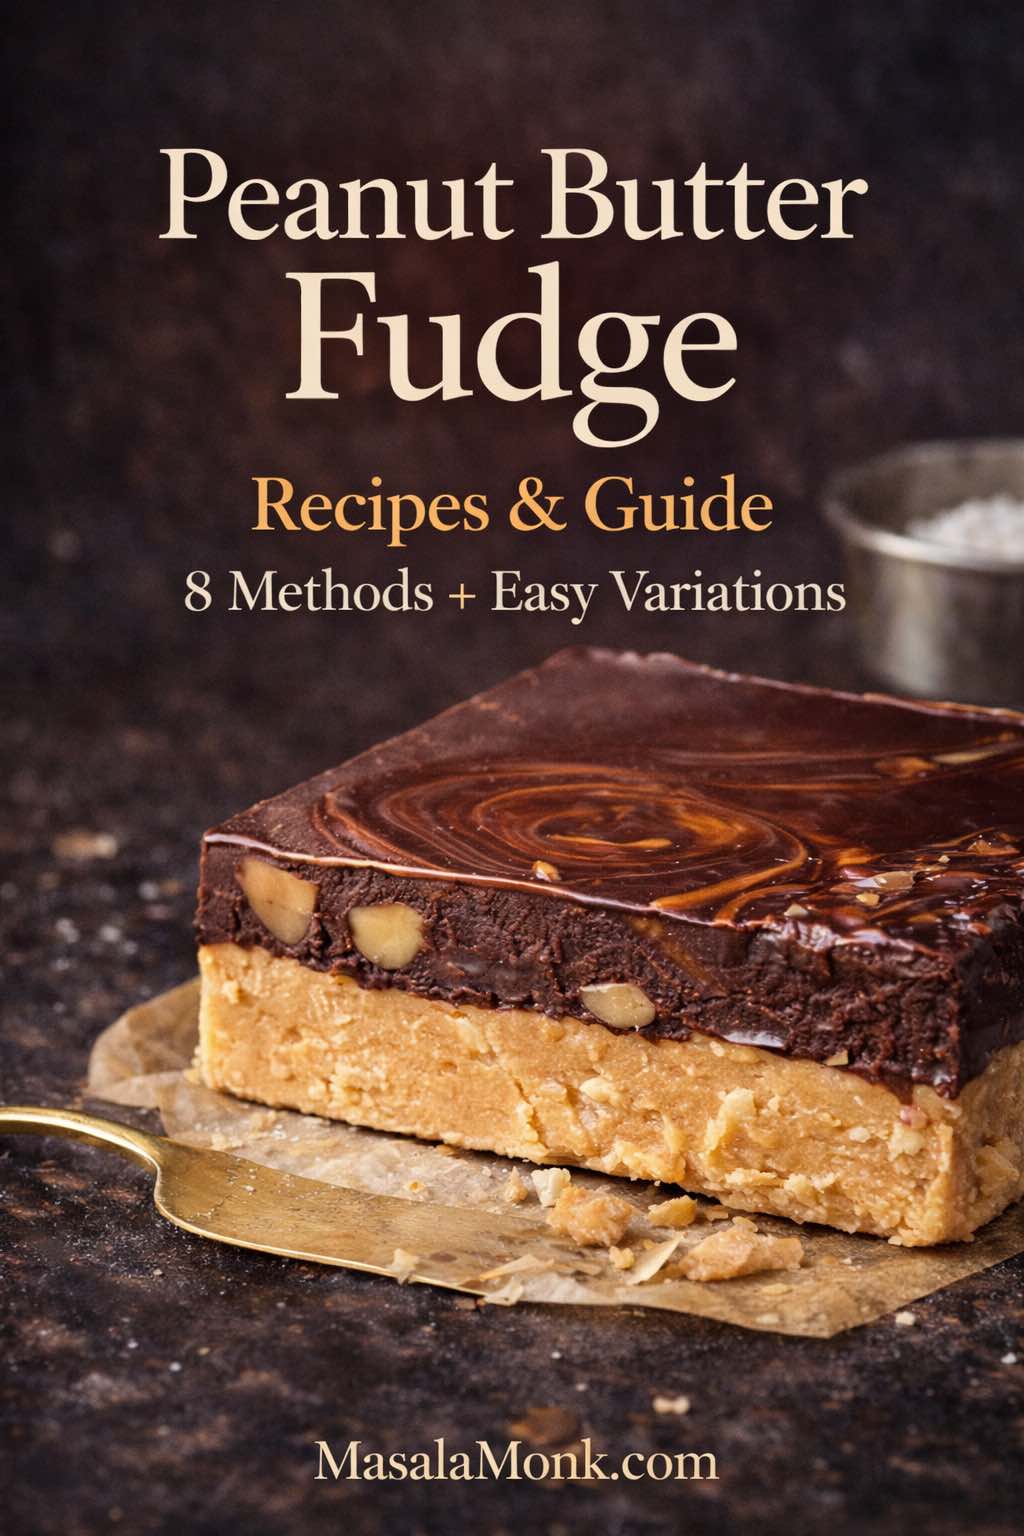
Peanut butter fudge cover image with a thick buckeye-style layered fudge square and text “Peanut Butter Fudge: Recipes & Guide – 8 Methods + Easy Variations.”

Some desserts feel like a project. This one, thankfully, doesn’t have to. A peanut butter fudge recipe can be a two-minute stir-and-chill treat, a creamy slice that tastes like it came from a candy counter, or an old-fashioned cooked confection with that unmistakable “holiday tray” vibe. Even better, it adapts: you can turn it into chocolate-and-peanut swirls, a buckeye-style slab with a glossy cap, a peanut-free version for allergy-friendly sharing, or a sugar-alternative batch that still scratches the same sweet itch.

Because there are so many ways to make it, the smartest approach is simple: pick the style that matches your mood, then follow the steps. Along the way, you’ll also learn how to troubleshoot grainy texture, fix a too-soft set, and store slices so they stay tender instead of drying out.

Choose your peanut butter fudge style

If you want the shortest path, start with the 2-ingredient version. If you prefer a creamier bite that rarely crumbles, go for the condensed milk method. Meanwhile, marshmallow creme delivers that plush, classic texture that many people associate with “fantasy” style fudge. On the other hand, if you’re craving a true candy-shop finish, the cooked soft-ball stage method is the one.
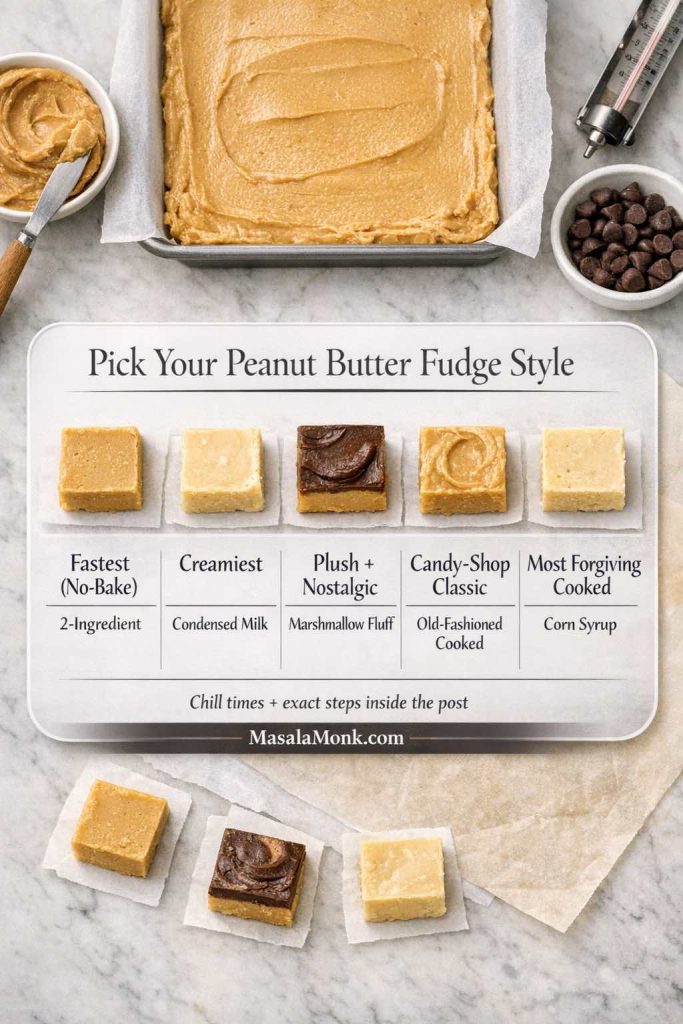
Quick chooser infographic for peanut butter fudge styles. Shows five options with fudge squares: 2-ingredient no-bake (fastest), condensed milk (creamiest), marshmallow fluff (plush nostalgic), old-fashioned cooked (candy-shop classic), and corn syrup method (most forgiving cooked). Includes MasalaMonk.com branding.
Not sure which peanut butter fudge recipe to make first? Use this quick chooser to match your mood to the right method—2-ingredient no-bake for speed, condensed milk for extra creaminess, marshmallow fluff for classic ‘fantasy’ texture, old-fashioned cooked for candy-shop flavor, or corn syrup for a smoother cooked set.
  • Fastest: 2-ingredient easy peanut butter fudge
  • Creamiest: peanut butter fudge with sweetened condensed milk
  • Plush/nostalgic: marshmallow fluff peanut butter fudge
  • Candy-shop: old fashioned peanut butter fudge (soft-ball stage)
  • Most forgiving cooked: peanut butter fudge with corn syrup
  • Shortcut: frosting and peanut butter fudge
  • Low-sugar: keto peanut butter fudge / sugar free peanut butter fudge
  • Allergy-friendly: peanut free fudge (seed butter swap)

No matter which route you take, great results begin with great peanut butter. If you like controlling the texture from the start—ultra smooth, slightly chunky, or deeply roasted—this guide on how to make peanut butter at home is a useful foundation.


Ingredients and tools that make everything easier

Before jumping into specific methods, it helps to set yourself up for a smooth run. Even when a recipe is “easy,” small choices can make the difference between creamy slices and a crumbly pan.

Pan size and lining

An 8-inch square pan is the sweet spot for thick, giftable squares. For thinner pieces (or if you want more servings), use a 9-inch square pan.

Line the pan with parchment paper, leaving overhang on two sides. That overhang becomes handles, so you can lift the slab out cleanly and slice without gouging the pan.

Peanut butter choice

You can use either stabilized peanut butter (the kind that doesn’t separate much) or natural peanut butter. However, natural versions vary a lot: some are oily and loose; others are stiff and dry.

  • If your peanut butter is very stiff, you’ll often need a touch more fat (butter or coconut oil) to keep the mixture from crumbling.
  • If it’s very runny, you may need a bit more structure (powdered sugar, a little extra chill time, or a firmer method like condensed milk).
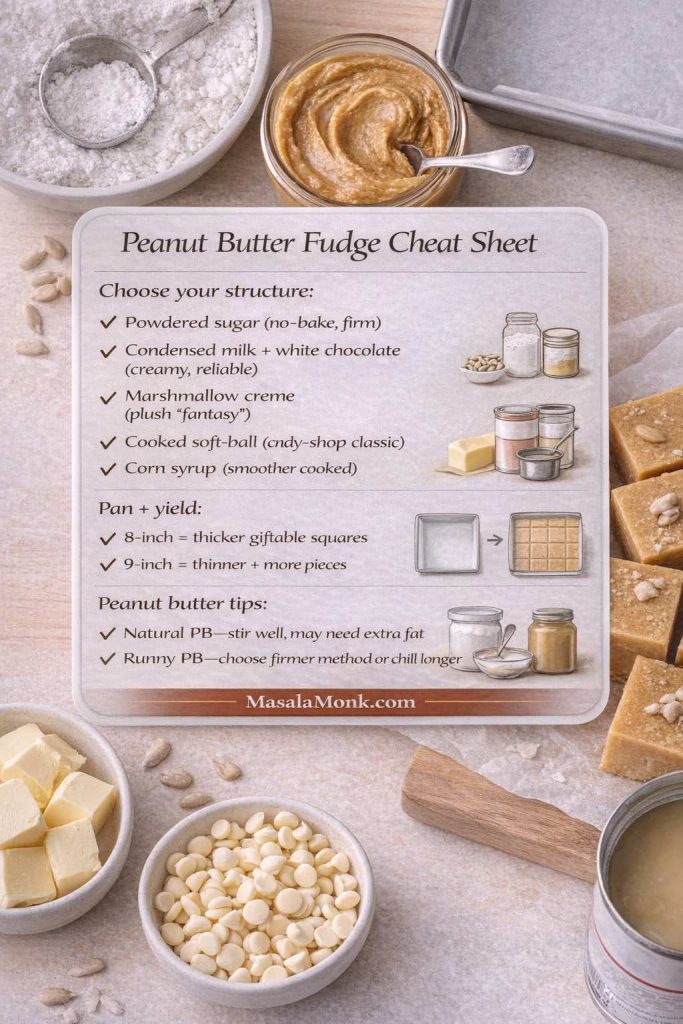
Photorealistic ‘Peanut Butter Fudge Cheat Sheet’ infographic. Lists how to choose a peanut butter fudge method: powdered sugar no-bake, condensed milk with white chocolate, marshmallow creme ‘fantasy’ style, cooked soft-ball, and corn syrup for smoother cooked fudge. Includes pan size guidance (8-inch thicker squares, 9-inch thinner more pieces) and peanut butter tips for natural vs runny peanut butter. MasalaMonk.com branding.
Save this peanut butter fudge cheat sheet to pick the right method fast—no-bake powdered sugar for speed, condensed milk + white chocolate for the creamiest reliable set, marshmallow creme for classic ‘fantasy’ texture, soft-ball cooked for candy-shop fudge, or corn syrup for a smoother cooked finish. It also shows the best pan size (8-inch vs 9-inch) and quick peanut butter tips so your batch sets the way you want.

Salt and vanilla in a peanut butter fudge recipe

Salt is the quiet hero here. Even salted peanut butter usually benefits from a pinch more. Vanilla is optional, yet it rounds the flavor and makes the final result taste more “finished.”

Optional tools

  • A sturdy silicone spatula (best for thick mixtures)
  • A heavy saucepan (for heated methods)
  • A candy thermometer (strongly recommended for cooked styles)

Storage and food safety

Fudge lasts well when protected from air. Still, many versions include dairy (butter, milk, condensed milk). For safe handling basics, the USDA’s guidance on leftovers and food safety is a solid reference.

Also Read: 10 Vegan Chocolate Cake Recipes (Easy, Moist, & Dairy-Free)


Method 1: Two ingredient easy peanut butter fudge (fast, firm, classic recipe)

This is the “I need something sweet right now” method. It’s also the simplest way to get that peanut-butter-candy vibe without turning on the stove.

What this style of fudge with peanut butter is like

The texture is firm and sliceable, with a sweetness that hits quickly and then fades into roasted peanut flavor. Because it sets through dry structure rather than cooking, the bite feels a bit like old-fashioned peanut butter candy—dense and satisfying.

Ingredients (8-inch pan)

  • 1 cup peanut butter (creamy works best)
  • 2 to 2½ cups powdered sugar
  • Optional: ½ teaspoon vanilla
  • Optional: pinch of salt
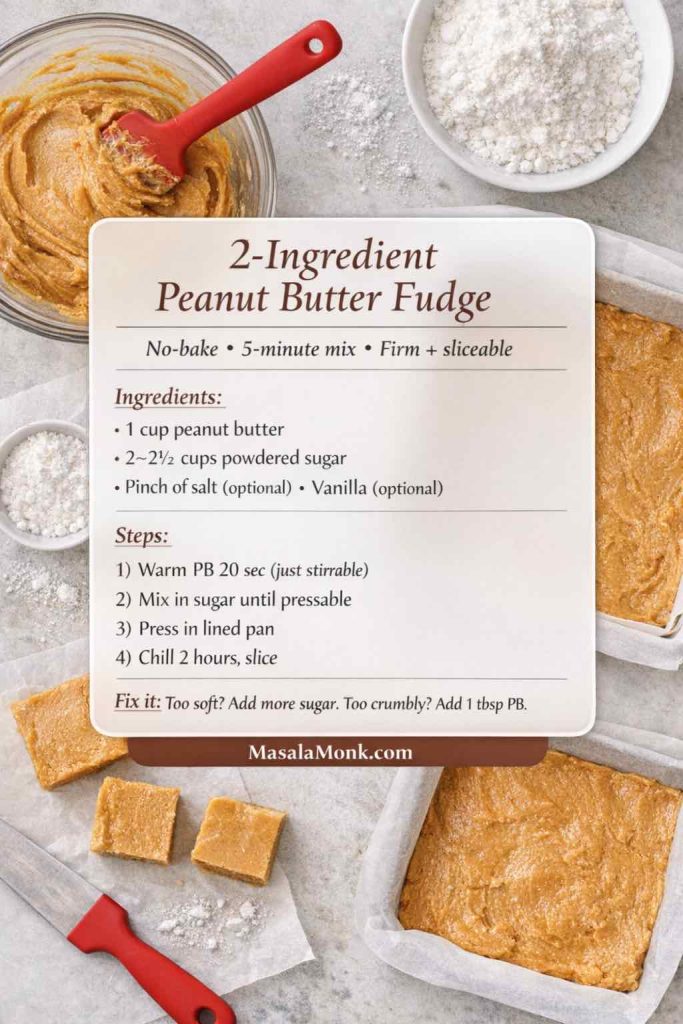
Photorealistic recipe card for 2-ingredient peanut butter fudge (no-bake). Shows ingredients (1 cup peanut butter, 2–2½ cups powdered sugar, optional salt and vanilla) and quick steps to mix, press into a lined pan, chill 2 hours, and slice. Includes tips to fix fudge that’s too soft or crumbly, with MasalaMonk.com branding.
This 2-ingredient peanut butter fudge is the fastest no-bake method: warm the peanut butter just until stirrable, mix in powdered sugar until pressable, then chill and slice. Save this card for those ‘need something sweet now’ moments—and use the quick fix tips if your batch turns out too soft or a little crumbly.

Step-by-step recipe

  1. Line the pan. Set it aside so it’s ready.
  2. Soften the peanut butter. Warm it gently—about 20 seconds in the microwave, or briefly in a small saucepan—just until it stirs easily. Avoid making it hot.
  3. Season it. Stir in vanilla and a pinch of salt if you’re using them.
  4. Add powdered sugar gradually. Start with 2 cups and stir until the mixture thickens into a soft dough.
    Next, add more powdered sugar a few tablespoons at a time until it holds together and feels pressable.
  5. Press into the pan. Use your spatula to compress it firmly. The tighter you press, the cleaner your slices will be.
  6. Chill until firm. Refrigerate at least 2 hours, then lift out and slice.

If it’s not perfect, fix it

  • Crumbly or dry: Warm 1–2 tablespoons of peanut butter and knead it into the mixture. Alternatively, add 1 tablespoon melted butter and mix again.
  • Too soft: Add a bit more powdered sugar and chill longer.

Also Read: Kahlua Drinks: 10 Easy Cocktail Recipes (Milk, Vodka, Coffee)


Method 2: Three ingredient peanut butter fudge (creamier and more forgiving)

This version keeps the no-bake ease, yet feels smoother and richer than the 2-ingredient batch. Because butter adds silkiness and helps binding, the texture often lands in that “creamy peanut butter fudge” zone.

Ingredients (8-inch pan)

  • 1 cup peanut butter
  • ¼ cup butter, melted
  • 2 to 2½ cups powdered sugar
  • Optional: ½ teaspoon vanilla
  • Optional: pinch of salt
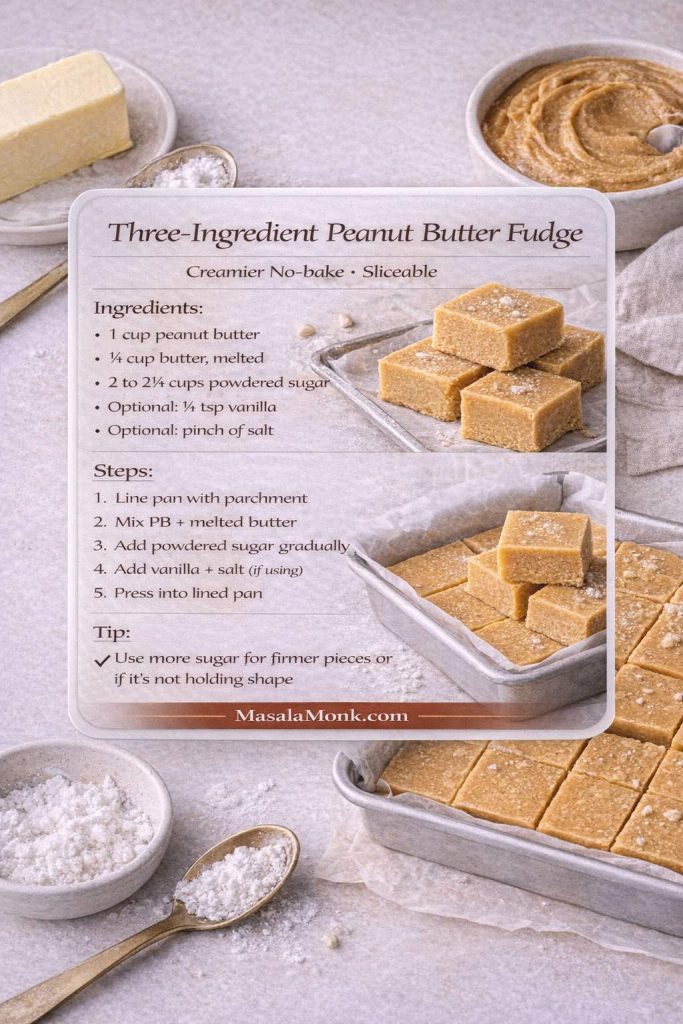
Photorealistic recipe card for three ingredient peanut butter fudge (no-bake). Shows ingredients: 1 cup peanut butter, ¼ cup melted butter, 2 to 2½ cups powdered sugar, optional vanilla, and a pinch of salt. Includes steps to line an 8-inch pan, mix peanut butter with melted butter, add powdered sugar gradually, press into the pan, and chill 2–3 hours until sliceable. MasalaMonk.com branding.
This 3-ingredient peanut butter fudge is the creamier, more forgiving upgrade from the 2-ingredient version—melted butter adds silkiness so the texture stays smooth and sliceable. Save this card for a quick no-bake fudge that sets reliably in the fridge and tastes extra peanut-forward with a bigger pinch of salt.

Step-by-step recipe

  1. Prepare your pan. Line it with parchment and set aside.
  2. Melt the butter. Let it cool for a minute so it’s warm, not scalding.
  3. Combine peanut butter and butter. Stir until glossy and unified.
  4. Add vanilla and salt if using.
  5. Stir in powdered sugar gradually. Begin with 2 cups, then adjust. The mixture should be thick but still spreadable.
  6. Press and smooth. Push it firmly into the pan and level the surface.
  7. Chill 2–3 hours until sliceable.

Flavor upgrades for 3 Ingredient peanut butter fudge

A slightly larger pinch of salt makes this taste more peanut-forward. Additionally, a spoonful of finely chopped roasted peanuts gives a satisfying crunch without making slicing difficult.

Also Read: Cranberry Moscow Mule Recipe: A Festive Holiday Cocktail With Easy Variations


Method 3: Four ingredient peanut butter fudge (balanced, “best-ever” flavor)

Four-ingredient versions are popular because that extra ingredient—often vanilla—makes the fudge taste more intentional. Moreover, the method is still just stir, press, chill.

Ingredients (8-inch pan)

  • 1 cup peanut butter
  • ¼ cup butter, melted
  • 2 cups powdered sugar (plus extra only if needed)
  • 1 teaspoon vanilla
  • Pinch of salt (highly recommended)
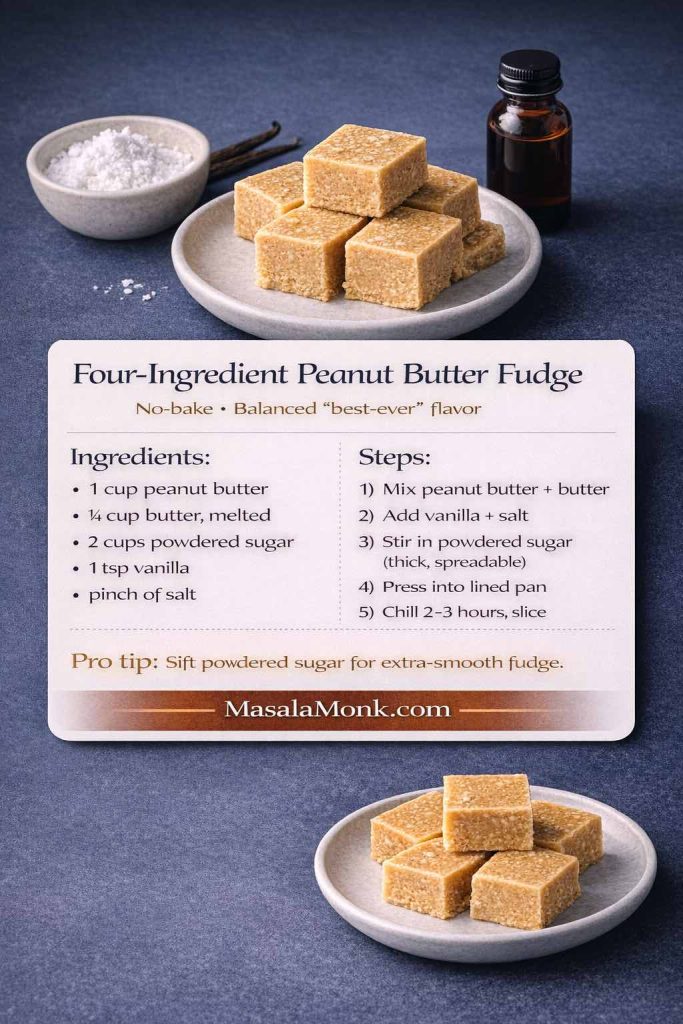
Photorealistic recipe card for four-ingredient peanut butter fudge (no-bake). Shows fudge squares on a plate with a navy background and an overlay listing ingredients (1 cup peanut butter, ¼ cup melted butter, 2 cups powdered sugar, 1 tsp vanilla, pinch of salt) and steps to mix, add vanilla and salt, stir in powdered sugar until thick, press into a lined pan, and chill 2–3 hours. Includes pro tip to sift powdered sugar for extra-smooth fudge. MasalaMonk.com branding.
Save this four-ingredient peanut butter fudge recipe card for a balanced, ‘best-ever’ no-bake batch that slices clean. The vanilla + salt make it taste more intentional, and the pro tip (sift the powdered sugar) helps keep the texture extra smooth instead of gritty.

Step-by-step

  1. Line the pan and set it nearby.
  2. Stir peanut butter and melted butter until smooth.
  3. Add vanilla and salt. Mix thoroughly.
  4. Add powdered sugar and stir until thick and spreadable.
  5. Press into the pan firmly; smooth the top.
  6. Chill 2–3 hours, then slice.

A simple cocoa twist in 4 Ingredient peanut butter fudge

If you want a quick chocolate-peanut vibe without adding a full layer, stir 1–2 tablespoons cocoa into half the mixture and swirl it through before chilling. For an easy drizzle at serving time, this quick homemade chocolate syrup works beautifully on top of a slice.

Also Read: Iced Coffee: 15 Drink Recipes—Latte, Cold Brew, Frappe & More


Method 4: Peanut Butter Fudge with Sweetened Condensed Milk (extra creamy, very reliable)

This is the candy-counter style: smooth, rich, and easy to slice. To guarantee a firm set, this condensed milk version uses white chocolate chips for structure. Without a setting ingredient, the classic “condensed milk + peanut butter” combo can stay too soft—especially in warmer kitchens.

Ingredients (for an 8-inch pan)

  • 1 can (14 oz / 396g) sweetened condensed milk
  • 2½ cups white chocolate chips
  • 1 cup peanut butter (creamy is easiest)
  • 1 teaspoon vanilla
  • Pinch of salt
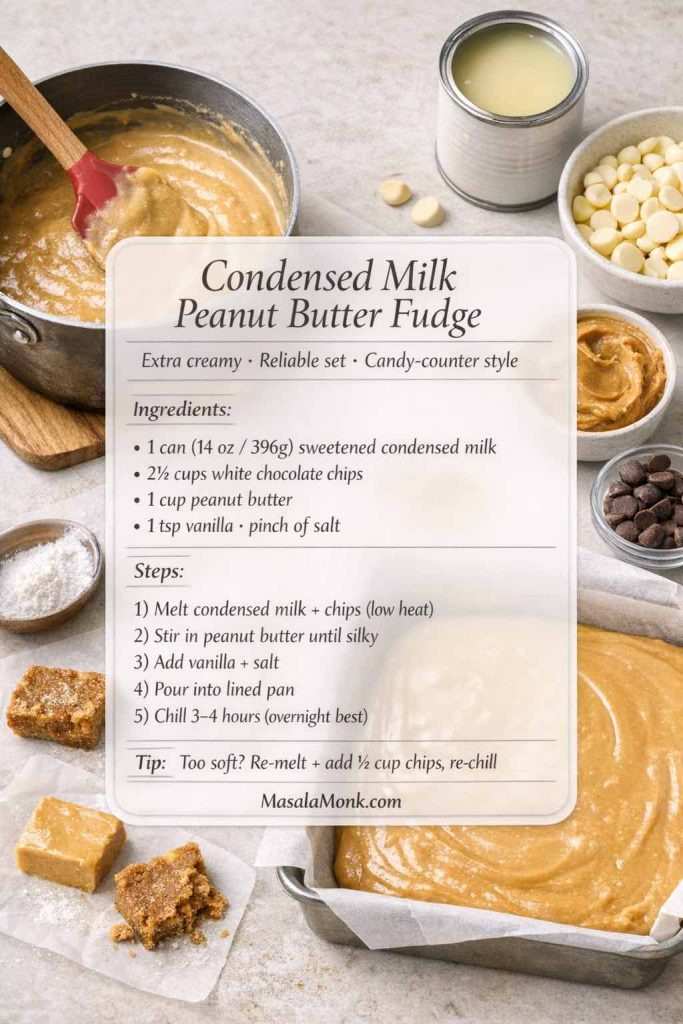
Photorealistic recipe card for condensed milk peanut butter fudge with a reliable set. Shows ingredients: 1 can (14 oz/396g) sweetened condensed milk, 2½ cups white chocolate chips, 1 cup peanut butter, vanilla, and salt. Includes steps to melt condensed milk with chips on low heat, stir in peanut butter, pour into a lined pan, and chill 3–4 hours (overnight best). Tip included for fixing fudge that’s too soft. MasalaMonk.com branding.
This condensed milk peanut butter fudge is the ‘candy-counter’ version—extra creamy, smooth, and reliably sliceable thanks to white chocolate chips for structure. Save this card if you want a gift-worthy batch with minimal effort: melt, stir, pour, chill, then cut clean squares.

Step-by-step

  1. Prep the pan: Line an 8-inch square pan with parchment paper, leaving overhang.
  2. Melt gently: In a heavy saucepan over low heat, warm the condensed milk and white chocolate chips, stirring constantly until smooth and glossy (about 3–6 minutes). Keep the heat low to avoid scorching.
  3. Add peanut butter: Stir in the peanut butter until fully unified and silky.
  4. Finish the flavor: Remove from heat and stir in vanilla and salt.
  5. Pour and smooth: Scrape into the pan, level the top, and tap the pan lightly to settle it.
  6. Chill to set: Refrigerate 3–4 hours (overnight is best for super-clean slices). Lift out and slice.

If it’s not perfect, fix it

  • Too soft: Chill longer first. If it still won’t set, re-melt gently and stir in ½ to 1 cup more white chocolate chips, then re-chill.
  • Too firm: Let slices sit at room temperature for 5–10 minutes before serving.

Condensed milk peanut butter fudge without white chocolate (works, but a different texture)

If you’d rather skip the chips, you can still use condensed milk—just add dry structure so it sets sliceable:

  • Warm 1 can condensed milk + 1 cup peanut butter over low heat until glossy.
  • Remove from heat and stir in 2 to 2½ cups powdered sugar until thick and spreadable.
  • Press into the pan and chill 3–4 hours.

This version is more “peanut butter candy” in texture than candy-shop fudge, but it’s still delicious and reliable when you want a no-chip option.

Also Read: Marinara Sauce Recipe: Classic Homemade Marinara


Method 5: Marshmallow Fluff Peanut Butter Fudge (plush, classic, nostalgic)

This is the classic “fantasy-style” approach: you cook the sugar base, then beat in marshmallow creme and peanut butter for that plush, sliceable, old-school texture. It’s much more reliable than simply mixing fluff and peanut butter and hoping it sets.

Ingredients (for an 8-inch pan)

  • 2 cups sugar
  • ½ cup evaporated milk (or whole milk)
  • ½ cup butter
  • 1 jar (7 oz / ~200g) marshmallow creme or marshmallow fluff
  • ¾ to 1 cup peanut butter
  • 1 teaspoon vanilla
  • Pinch of salt
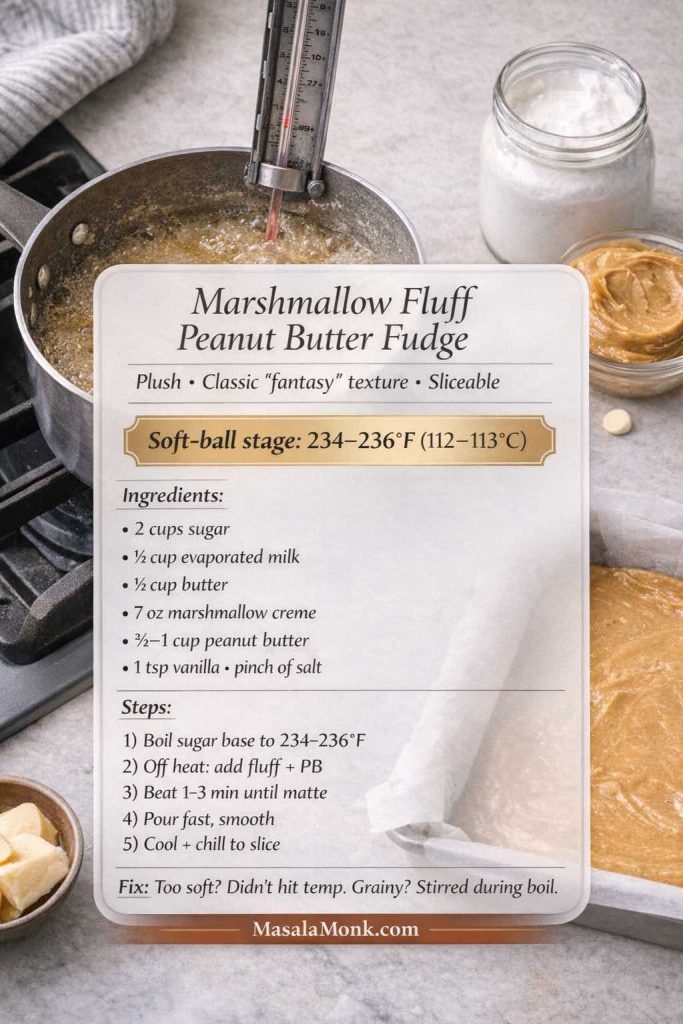
Photorealistic recipe card for marshmallow fluff peanut butter fudge (fantasy-style). Shows a bubbling sugar base in a saucepan with a candy thermometer and lists the soft-ball stage temperature (234–236°F / 112–113°C). Includes ingredients (sugar, evaporated milk, butter, marshmallow creme, peanut butter, vanilla, salt) and steps to boil to temp, add fluff and peanut butter off heat, beat until matte, pour, cool, and chill. MasalaMonk.com branding.
This marshmallow fluff peanut butter fudge is the classic ‘fantasy-style’ version—plush, nostalgic, and sliceable when you hit the soft-ball stage (234–236°F). Save this card if you want that old-school candy-shop texture, plus the quick fixes for batches that turn out too soft or grainy.

Step-by-step

  1. Line your pan with parchment and keep it close by. This mixture sets quickly once it’s beaten.
  2. Start the base: In a heavy saucepan, combine sugar, evaporated milk, and butter. Heat over medium, stirring until everything is dissolved and uniform.
  3. Boil to soft-ball stage: Bring to a steady boil and cook until the mixture reaches 234–236°F (112–113°C). Once it’s boiling, avoid stirring—if needed, gently swirl the pan instead.
  4. Finish off-heat: Remove from heat. Immediately add the marshmallow creme, peanut butter, vanilla, and salt.
  5. Beat until it turns matte: Stir vigorously (with a wooden spoon or a mixer on low) until the mixture thickens, loses some shine, and starts holding soft shape—usually 1–3 minutes.
  6. Pour and smooth fast: Transfer to the pan right away and smooth the top. Let it cool until set, then refrigerate for cleaner slices.

If Marshmallow Fluff Peanut Butter Fudge is not perfect, fix it

  • Grainy: Usually from sugar crystals or too much stirring while boiling. Next time, stop stirring once it boils and brush down the sides of the pan early with a little water.
  • Too soft: It likely didn’t reach soft-ball temperature. You can re-melt the batch gently, bring it back to 234–236°F, then beat again and reset.
  • Too firm/crumbly: It likely cooked a bit too hot or was beaten too long. Next time, stop beating as soon as it thickens and turns slightly matte.

Also Read: Hot Chocolate Coffee: 3 Easy Recipes (Cocoa, Mix, or Espresso)


Method 6: Frosting and peanut butter fudge (icing shortcut that actually works)

This method is almost unfairly easy. Because frosting already contains sugar and fat in a stable ratio, combining it with peanut butter creates a fudge-like base that sets in the fridge.

Ingredients (8-inch pan)

  • 1 cup peanut butter
  • 1 container frosting (about 16 oz / 450g), vanilla preferred
  • Pinch of salt
  • Optional: ½ teaspoon vanilla (if your frosting is bland)
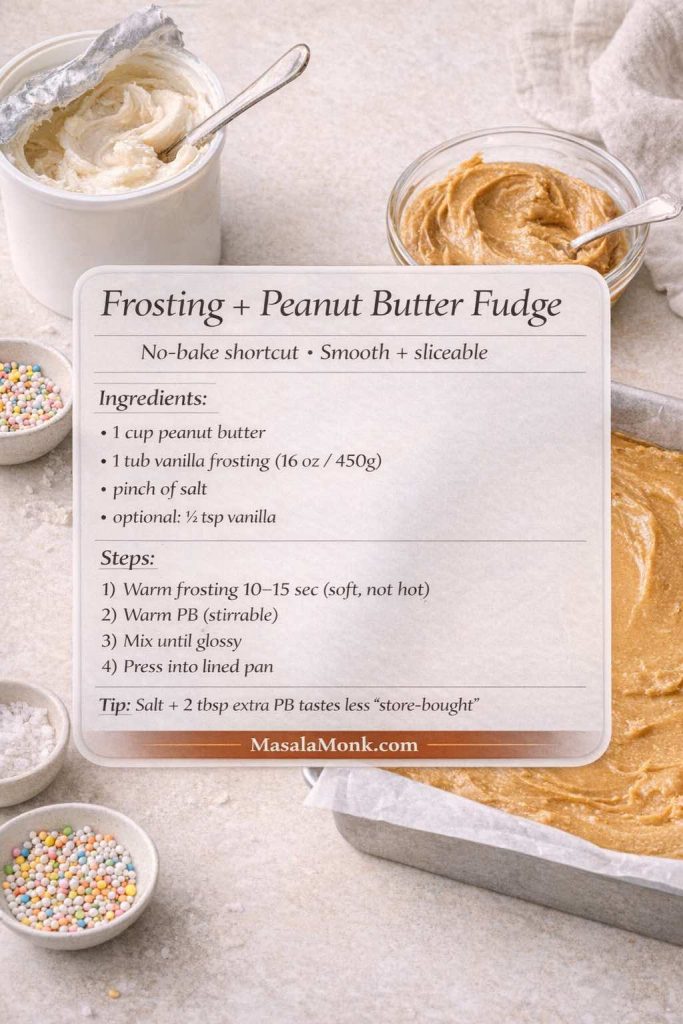
Photorealistic recipe card for frosting and peanut butter fudge (no-bake icing shortcut). Shows ingredients—peanut butter, vanilla frosting (16 oz/450g), pinch of salt, optional vanilla—and quick steps to warm frosting and peanut butter, mix until glossy, press into a lined pan, chill until set, and slice. Includes tip to add extra peanut butter and salt for better flavor. MasalaMonk.com branding.
This frosting and peanut butter fudge is the easiest no-bake shortcut—just warm, mix, press, and chill for smooth, sliceable squares. Save this card for last-minute dessert trays, and use the salt + extra peanut butter tip to make it taste less ‘store-bought.

Step-by-step

  1. Line your pan with parchment.
  2. Warm the frosting briefly. Microwave 10–15 seconds to soften it.
  3. Soften the peanut butter the same way—just enough to stir.
  4. Combine frosting and peanut butter until completely smooth.
    At first, it may resist; keep mixing and it will turn glossy.
  5. Season with salt (and vanilla if using).
  6. Spread into the pan and smooth the top.
  7. Chill 2–3 hours until set.

Make it taste less “store-bought”

Salt is essential here. Also, a little extra peanut butter (2–3 tablespoons) pushes the flavor forward and keeps it from tasting like frosting with peanuts.

Also Read: Strawberry Smoothie Recipes (12 Easy Blends + Bowls & Protein Shakes)


Method 7: Corn Syrup Peanut Butter Fudge (smoother cooked texture, less grainy)

Corn syrup is the quiet helper in cooked fudge. It makes the batch more forgiving by lowering the chances of that gritty, grainy texture that can sneak into candy. If you want old-fashioned flavor with a smoother finish and a little extra insurance, this is the cooked method to start with.

Ingredients (for an 8-inch pan)

  • 2 cups granulated sugar
  • ½ cup milk or evaporated milk
  • ½ cup light corn syrup
  • ¼ cup butter
  • 1 cup peanut butter (creamy is easiest)
  • 1 teaspoon vanilla
  • Pinch of salt
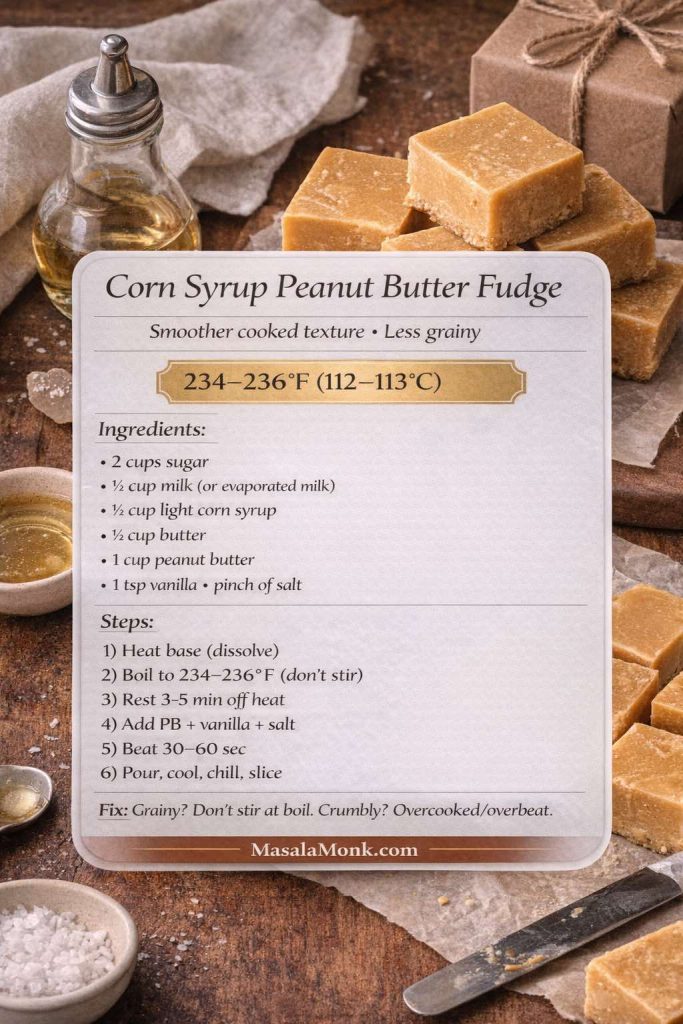
Photorealistic recipe card for corn syrup peanut butter fudge (Karo syrup style). Shows soft-ball stage temperature 234–236°F (112–113°C), ingredients (sugar, milk/evaporated milk, light corn syrup, butter, peanut butter, vanilla, salt) and steps to dissolve, boil without stirring, rest 3–5 minutes, stir in peanut butter, beat briefly, pour, cool, chill, and slice. MasalaMonk.com branding.
This corn syrup peanut butter fudge is the most forgiving cooked method—corn syrup helps reduce sugar crystallization so the texture stays smoother and less grainy. Save this card for the key cues: boil to 234–236°F, don’t stir at the boil, rest briefly off heat, then beat just until it turns slightly matte for clean slices.

Step-by-step

  1. Prep the pan first. Line an 8-inch square pan with parchment paper and leave overhang so you can lift the fudge out later.
  2. Start the base. In a heavy saucepan, combine sugar, milk, corn syrup, and butter. Heat over medium, stirring until the mixture is fully uniform and the sugar looks mostly dissolved.
  3. Boil without stirring. Bring it to a steady boil. Once it’s boiling, stop stirring (stirring encourages crystals). If needed, gently swirl the pan instead.
  4. Cook to soft-ball stage. Continue boiling until the mixture reaches 234–236°F (112–113°C) on a candy thermometer. (This range is where you get creamy fudge—not syrupy-soft and not crumbly.)
  5. Rest briefly. Remove from heat and let the pan sit undisturbed for 3–5 minutes.
  6. Add the peanut butter and flavorings. Stir in peanut butter, vanilla, and salt until completely smooth.
  7. Beat just until it thickens. Keep stirring for about 30–60 seconds, until it looks slightly thicker and loses some shine. Don’t keep going once it starts to resist—overbeating can make it crumbly.
  8. Pour and smooth fast. Scrape into the prepared pan immediately and smooth the top.
  9. Set and slice. Let it cool until firm at room temperature, then refrigerate for cleaner slices.

What makes this Corn Syrup Peanut Butter Fudge different

It’s still real cooked fudge, but the corn syrup helps keep the texture smoother and reduces the “grainy surprise” factor.

If it’s not perfect, fix it

  • Grainy: Next time, stop stirring once it boils, and brush down the sides of the pan early with a little water to remove sugar crystals.
  • Too soft: It likely didn’t reach temperature. You can gently reheat, bring back to 234–236°F, then finish again.
  • Crumbly: Usually cooked a touch too hot or beaten too long. Pull it off closer to 234°F next time and beat less.

Also Read: Sandwich for Breakfast: Breakfast Sandwich Recipe + 10 Variations
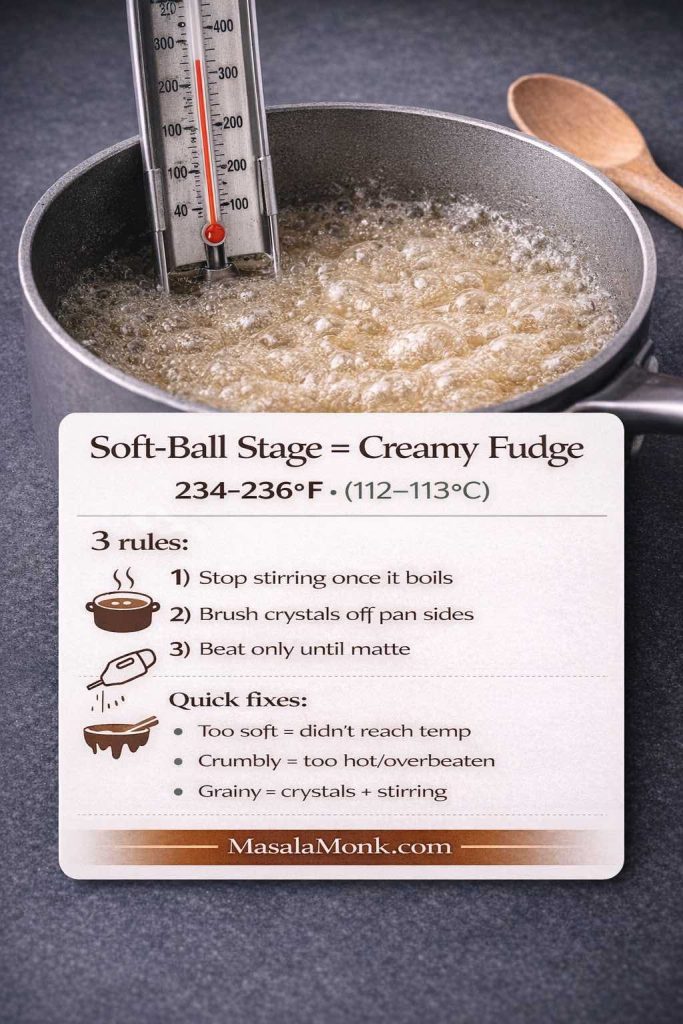

Photorealistic fudge-making cheat sheet showing soft-ball stage temperature for creamy fudge: 234–236°F (112–113°C). Background shows a saucepan of bubbling sugar syrup with a candy thermometer reading about 235°F and a wooden spoon nearby. Overlay lists three rules (stop stirring once it boils, brush crystals off pan sides, beat only until matte) and quick fixes for too soft, crumbly, or grainy fudge. MasalaMonk.com branding.
Save this soft-ball stage fudge temperature guide if you’re making old fashioned peanut butter fudge or any cooked fudge. Hitting 234–236°F (112–113°C) is the difference between creamy slices and a batch that’s too soft, crumbly, or grainy—and the quick rules here show exactly when to stop stirring and when to beat.

Method 8: Old-Fashioned Cooked Peanut Butter Fudge (classic soft-ball stage, candy-shop feel)

This is the true old-fashioned version—the one that smells like holidays and tastes like it came from a tiny candy shop. It’s a little more hands-on than the corn syrup method, but the payoff is big: a creamy, structured set and that classic “homemade fudge” character people remember.

Ingredients (for an 8-inch pan)

  • 2 cups granulated sugar
  • ½ cup milk or evaporated milk
  • ¼ cup butter
  • ¾ to 1 cup peanut butter (use 1 cup for bold peanut flavor)
  • 1 teaspoon vanilla
  • Pinch of salt
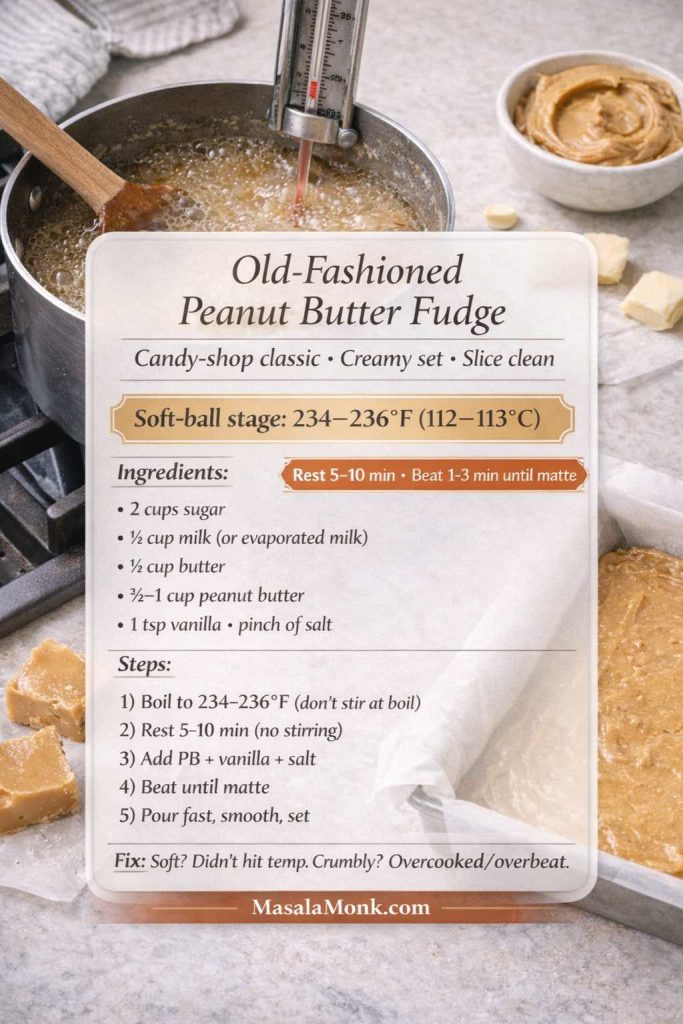
Photorealistic recipe card for old-fashioned peanut butter fudge. Includes soft-ball stage temperature (234–236°F / 112–113°C), timing cues to rest 5–10 minutes and beat 1–3 minutes until matte, plus ingredients and step-by-step instructions for a creamy candy-shop style set. MasalaMonk.com branding.
This old-fashioned peanut butter fudge is the classic candy-shop method: cook to the soft-ball stage (234–236°F), rest briefly, then beat until matte for that creamy, slice-clean set. Save this card if you want traditional holiday-tray fudge with the key timing cues that prevent grainy or crumbly batches.

Step-by-step

  1. Prep the pan. Line an 8-inch pan with parchment and set it right beside the stove. Timing matters later.
  2. Dissolve the sugar. In a heavy saucepan, combine sugar, milk, and butter. Heat over medium, stirring until the mixture is smooth and the sugar is dissolved.
  3. Boil hands-off. Bring to a steady boil. Once boiling, stop stirring. If you see sugar crystals on the sides early on, brush them down with a little water.
  4. Cook to soft-ball stage. Cook until the mixture reaches 234–236°F (112–113°C).
  5. Cool undisturbed. Remove from heat and let it sit 5–10 minutes without stirring. This short rest helps you land on creamy instead of gritty.
  6. Add peanut butter + finishers. Add peanut butter, vanilla, and salt. Stir until smooth.
  7. Beat until it turns matte. Stir vigorously until it thickens, loses gloss, lightens slightly, and starts holding its shape. This usually takes 1–3 minutes. Stop as soon as it reaches a thick, pourable stage—overbeating can make it crumble.
  8. Pour immediately. Scrape into the pan right away and smooth the top quickly.
  9. Set and slice. Let it set at room temperature, then refrigerate if you want extra clean edges when slicing.

Why this Cooked Peanut Butter Fudge is “classic”

The cooling pause and the beating step create tiny crystals that make fudge taste creamy and slice cleanly. The timing is the whole game.

If it’s not perfect, fix it

  • Too soft: It likely didn’t reach temperature. Reheat gently, bring back to 234–236°F, then finish again.
  • Grainy: Usually caused by stirring while boiling or crystals on the pan sides. Next time: hands off once boiling + brush down sides early.
  • Crumbly: Usually cooked too hot or beaten too long. Pull it off a touch earlier (closer to 234°F) and beat less.

Also Read: Paper Plane Cocktail Recipe + Best Amaro Substitutes & Tips


Chocolate peanut butter fudge and buckeye-style recipes

Chocolate turns a good batch into something that feels gift-worthy. Fortunately, you can add chocolate in several ways, depending on the mood.

If you want help choosing cocoa or chocolate types, MasalaMonk’s explainer on cacao vs chocolate vs dark chocolate is a handy read.
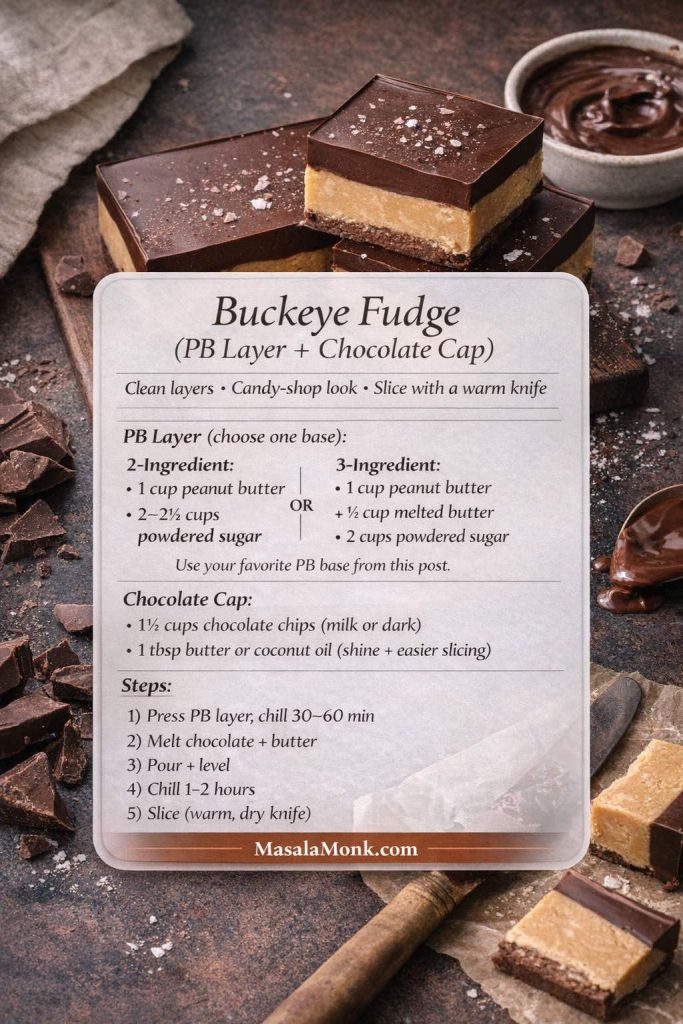
Photorealistic recipe card for buckeye fudge (chocolate peanut butter fudge with layers). Shows a peanut butter fudge base with a glossy chocolate cap and lists ingredients for the PB layer (2-ingredient or 3-ingredient base) plus chocolate topping (chocolate chips and butter/coconut oil). Includes steps to chill the PB layer, pour melted chocolate, chill again, and slice with a warm knife. MasalaMonk.com branding.
Buckeye fudge is the gift-worthy upgrade: a firm peanut butter fudge base topped with a smooth, glossy chocolate layer. Save this card for clean layers every time—chill the PB layer first, pour the melted chocolate cap, then slice with a warm, dry knife for sharp edges.

Variation A: Cocoa in the base (simple chocolate-peanut flavor)

Best for: a unified chocolate peanut fudge taste.

How to do it

  1. Make any base you like (no-bake, condensed milk, or marshmallow).
  2. Stir 2–4 tablespoons cocoa powder into the mixture.
    If it thickens too much, add 1–2 tablespoons warm peanut butter to loosen.
  3. Press, chill, slice.

Variation B: Buckeye fudge (peanut layer + chocolate cap)

Best for: clean layers and candy-shop vibes.

Chocolate cap ingredients

  • 1½ cups chocolate chips (milk or dark)
  • 1 tablespoon butter or coconut oil (for shine and easier slicing)

Step-by-step

  1. Make and set your peanut butter base fully.
  2. Melt chocolate chips with butter until smooth.
  3. Pour over the set layer and tilt the pan to spread evenly.
  4. Chill until firm, then slice with a warm knife.

Variation C: Swirl (marbled look with minimal effort)

Best for: an impressive finish without extra work.

Step-by-step

  1. Prepare your peanut layer, then spread it into the pan.
  2. Melt chocolate separately (or use a thick chocolate syrup).
  3. Spoon chocolate over the top and drag a knife through for swirls.
  4. Chill until set.

For a fast drizzle that looks elegant on a serving plate, this 3-minute chocolate syrup is an easy option.

Also Read: Katsu Curry Rice (Japanese Recipe, with Chicken Cutlet)


Keto peanut butter fudge (low-sugar direction, still rich)

Keto-style batches depend on the sweetener you choose. Because sugar alternatives vary, the texture can shift—sometimes firmer, sometimes softer. Still, a good base formula delivers a sliceable, satisfying result.

For a helpful overview of sweetener types, the American Diabetes Association’s PDF guide to sugar substitutes provides useful context. If you’re deciding on monk fruit specifically, Cleveland Clinic’s overview of monk fruit sweetener is a clear introduction.

Ingredients (8-inch pan)

  • 1 cup peanut butter (no added sugar)
  • ½ cup coconut oil or butter, melted
  • ¾ to 1 cup powdered-style keto sweetener blend
  • ½ teaspoon vanilla
  • Pinch of salt
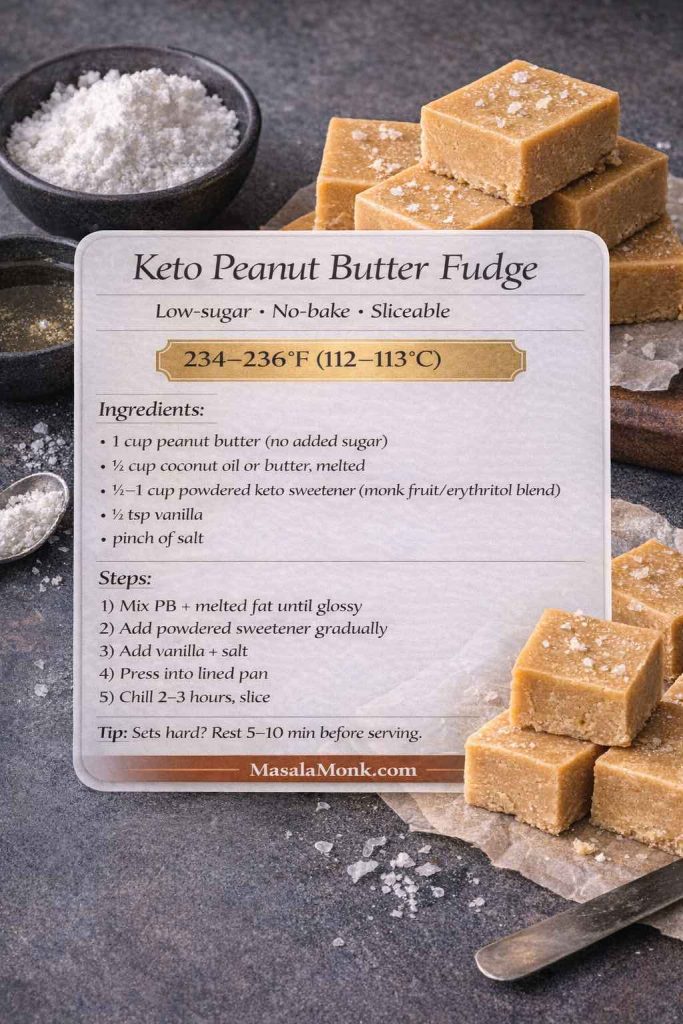
Photorealistic recipe card for keto peanut butter fudge (low-sugar, no-bake, sliceable). Shows ingredients: peanut butter with no added sugar, melted coconut oil or butter, powdered keto sweetener (monk fruit/erythritol blend), vanilla, and salt. Includes steps to mix until glossy, add sweetener, press into a lined pan, chill 2–3 hours, and slice, plus a tip to rest pieces 5–10 minutes if they set hard. MasalaMonk.com branding.
This keto peanut butter fudge is a simple no-bake, low-sugar method that still tastes rich and slices clean. Save this card if you’re making sugar-free peanut butter fudge with monk fruit/erythritol—use powdered sweetener for the smoothest texture, then chill until firm and let pieces rest briefly before serving if they set extra hard.

Step-by-step recipe

  1. Line your pan with parchment.
  2. Stir peanut butter and melted fat until glossy and smooth.
  3. Add sweetener gradually and mix until thickened.
    Taste as you go; sweetness builds quickly with some blends.
  4. Add vanilla and salt, mixing thoroughly.
  5. Press into the pan firmly and smooth the surface.
  6. Chill 2–3 hours until set.

Texture note for keto peanut butter fudge

If it sets very hard, let slices sit at room temperature for 5–10 minutes. Conversely, if it stays too soft, add a bit more powdered-style sweetener next time.

Also Read: Almond Flour Pancakes (Easy Recipes) Fluffy, High-Protein, Keto & More


Sugar-free peanut butter fudge and candy-style squares

Sugar-free versions often feel closer to “peanut butter candy” than traditional cooked fudge. That’s not a downside—rather, it’s a different texture expectation. The goal is a cohesive, sliceable slab with clean sweetness and strong peanut flavor.

For a grounded take on sweeteners, the NHS overview on whether sweeteners are safe is a practical read. If you prefer a research-focused summary, Harvard’s Nutrition Source page on low-calorie sweeteners adds nuance.

Ingredients (8-inch pan)

  • 1 cup peanut butter
  • ½ cup butter or coconut oil, melted
  • ¾ to 1 cup powdered sugar-free sweetener blend
  • ½ teaspoon vanilla
  • Pinch of salt
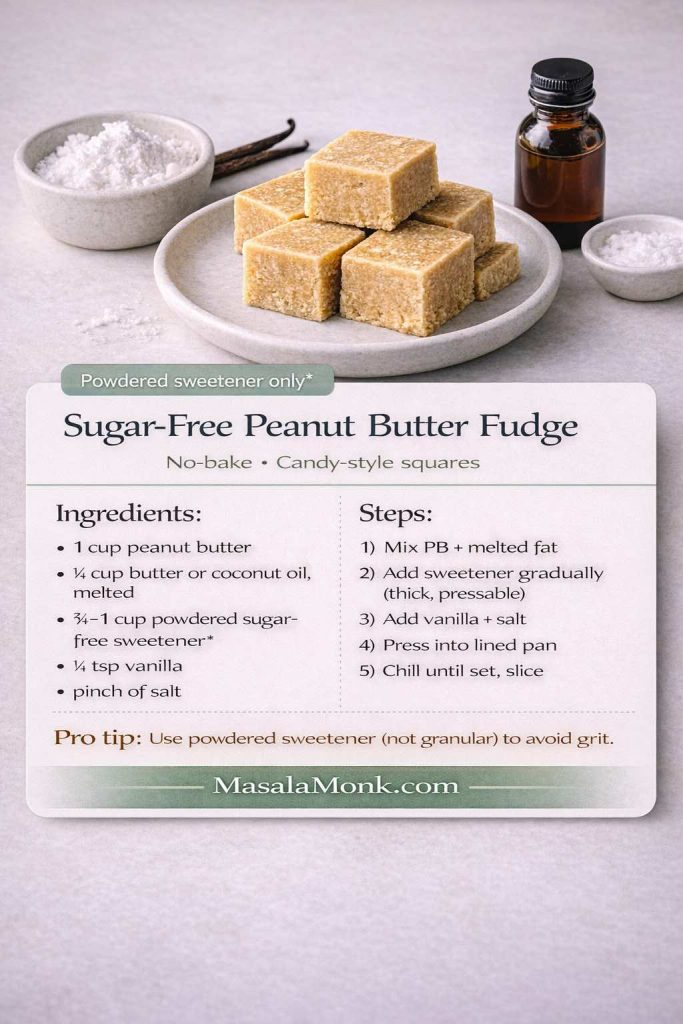
Recipe card image for sugar-free peanut butter fudge (no-bake, candy-style squares). Shows stacked peanut butter fudge squares on a plate with ingredients in the background (powdered sugar-free sweetener, melted butter or coconut oil, vanilla, and salt). Text overlay lists ingredients (1 cup peanut butter, ½ cup melted butter or coconut oil, ¾–1 cup powdered sugar-free sweetener, ½ tsp vanilla, pinch of salt) and steps to mix, add sweetener gradually, press into a lined pan, and chill until set. Pro tip: use powdered sweetener (not granular) to avoid grit. MasalaMonk.com footer.
Save this sugar-free peanut butter fudge recipe card for an easy no-bake, candy-style treat that still slices clean. The key to a smooth bite is using a powdered sugar-free sweetener (granular can taste gritty). Mix, press into a lined pan, chill, and you’ve got quick peanut butter fudge squares without the sugar.

Step-by-step

  1. Line the pan with parchment.
  2. Combine peanut butter and melted fat until smooth.
  3. Add sweetener gradually until the mixture becomes thick and pressable.
  4. Stir in vanilla and salt to finish.
  5. Press into the pan firmly.
  6. Chill until set and slice.

Avoiding grit

Powdered-style sweeteners generally work better than granular ones in no-bake candy squares. Additionally, mixing thoroughly helps eliminate pockets of sweetness that can feel sharp.

Also Read: How to Cook Tortellini (Fresh, Frozen, Dried) + Easy Dinner Ideas


Peanut-free fudge (allergy-friendly recipe, still sliceable)

Peanut-free fudge is completely doable when you swap the spread. The method stays the same; the flavor shifts. For substitution ideas, Food Allergy Research & Education has a helpful list of peanut butter alternatives, including sunflower seed butter and soy nut butter.

Ingredients (8-inch pan, no-bake style)

  • 1 cup sunflower seed butter (or another peanut-free alternative)
  • ¼ cup melted butter (or coconut oil)
  • 2 cups powdered sugar (or suitable alternative)
  • ½ teaspoon vanilla
  • Pinch of salt
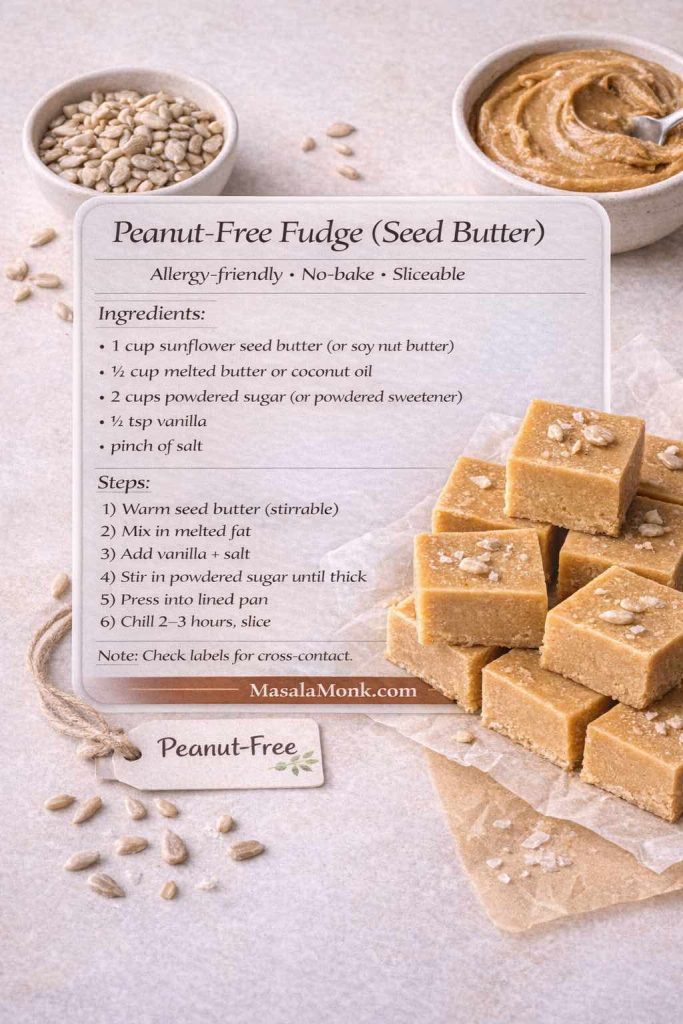
Photorealistic recipe card for peanut-free fudge made with seed butter. Shows sunflower seed butter (or soy nut butter) fudge squares and lists ingredients (seed butter, melted butter or coconut oil, powdered sugar or powdered sweetener, vanilla, salt) and steps to warm, mix, press into a lined pan, and chill 2–3 hours. Includes safety note to check labels for cross-contact. MasalaMonk.com branding.
This peanut-free fudge uses sunflower seed butter for an allergy-friendly, no-bake treat that still slices clean. Save this card for school events, parties, and potlucks—same easy method, different spread. Always check labels for cross-contact if you’re cooking for peanut allergies.

Step-by-step

  1. Line your pan with parchment.
  2. Warm the seed butter slightly so it stirs smoothly.
  3. Mix in melted butter until glossy.
  4. Add vanilla and salt.
  5. Stir in powdered sugar gradually until thick and spreadable.
  6. Press into the pan and chill until set.

Important reminder

Even when you use peanut-free ingredients, always check labels for cross-contact warnings if you’re cooking for someone with severe allergies.

Also Read: How to Cook Bacon in the Oven (Crispy, No-Mess, Crowd-Ready Recipe)


Troubleshooting: fix texture issues without panic

Even when you follow directions, fudge can surprise you. Fortunately, most problems have straightforward fixes.
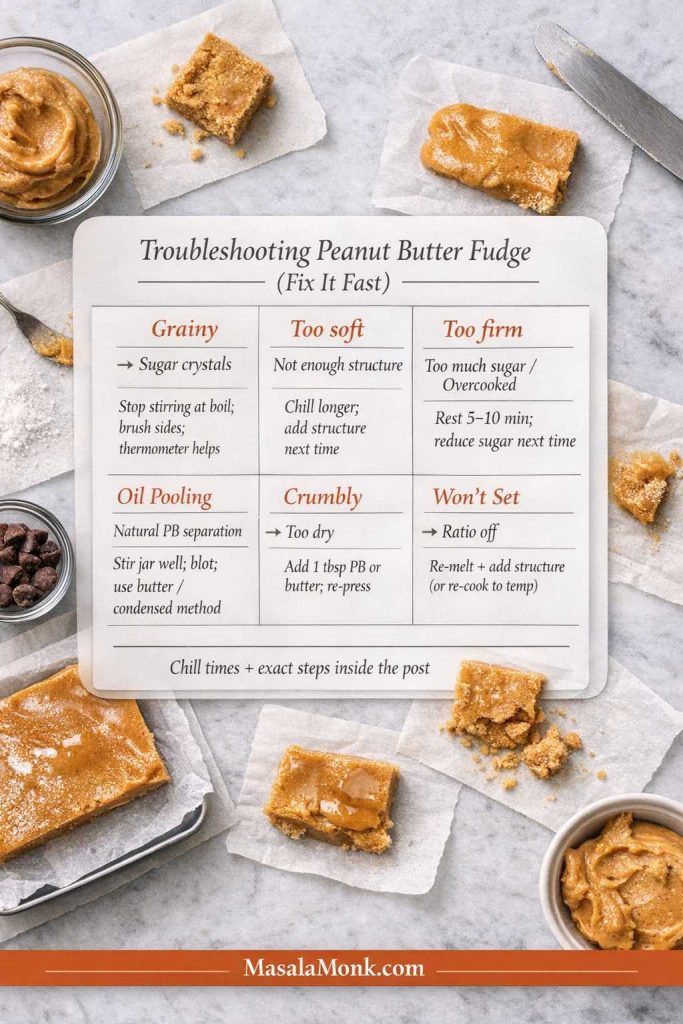
Troubleshooting infographic for peanut butter fudge with quick fixes for common problems: grainy texture (sugar crystals), fudge too soft, too firm, oil pooling from natural peanut butter separation, crumbly/dry fudge, and fudge that won’t set. Includes simple solutions like chilling longer, adjusting structure, stirring techniques for cooked fudge, and re-pressing, with MasalaMonk.com branding.
Fudge didn’t turn out the way you wanted? Save this quick troubleshooting guide for peanut butter fudge—fix grainy batches, rescue fudge that’s too soft or too firm, handle oil pooling (common with natural peanut butter), and recover crumbly or won’t-set slabs without starting over.

If it’s grainy

Graininess usually comes from sugar crystallization in cooked batches. To reduce the chance:

  • Avoid stirring while the mixture boils.
  • Use a clean pastry brush and water to wash sugar crystals from the sides early.
  • Consider the corn syrup method if you want extra insurance. King Arthur’s explanation of corn syrup’s role is helpful for understanding why it works.

Your Peanut butter fudge is too soft

  • Chill longer first; many slabs firm up with time.
  • For no-bake versions, add a bit more powdered sugar (or powdered sweetener) next time.
  • For condensed milk versions, slightly increase peanut butter or reduce condensed milk a touch.

If it’s too firm

  • Let it sit at room temperature for several minutes before serving.
  • In future batches, reduce powdered sugar slightly, or add a bit more fat (butter/coconut oil).

And If oil pools on top of your peanut butter fudge

This happens most often with natural peanut butter that separates easily.

  • Stir the peanut butter extremely well before measuring.
  • Chill the slab, then blot any surface oil gently with paper towel.
  • Next time, use the 3-ingredient method or a condensed milk base for a more stable set.

If it crumbles when slicing

Crumbly no-bake fudge usually needs more binding:

  • Add a spoonful of warmed peanut butter and mix again.
  • Alternatively, add a tablespoon of melted butter and re-press.

Also Read: Benefits of Nuts and Seeds – Protein-Packed Superfoods


Slicing, serving, and pairing ideas

Slicing goes best when the slab is cold and firm. Use a long knife, warm it under hot water, wipe dry, and slice in decisive downward cuts. Then, wipe the blade between slices for clean edges.
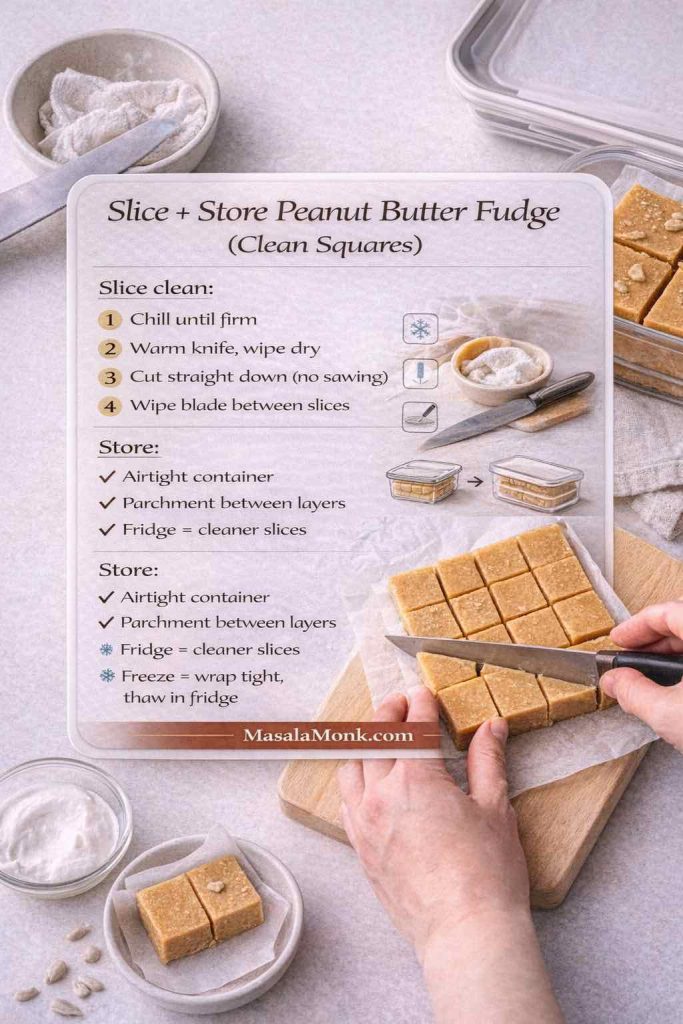
Step-by-step infographic showing how to slice and store peanut butter fudge for clean squares. Includes tips to chill until firm, warm and dry the knife, cut straight down (no sawing), and wipe the blade between slices. Storage guidance includes using an airtight container, parchment between layers, refrigerating for cleaner slices, and freezing by wrapping tightly and thawing in the fridge. MasalaMonk.com branding.
Want clean, sharp peanut butter fudge squares? Save this slicing + storage guide: chill the slab, warm and dry your knife, cut straight down, and wipe between slices. It also shows the best way to store peanut butter fudge (airtight + parchment layers) and how to freeze it without the surface getting messy when thawed.

For a peanut-butter-themed dessert plate, pairing squares with cookies makes everything feel intentional. MasalaMonk’s peanut butter cookies fit naturally alongside any of these methods. Meanwhile, if you want a lighter contrast, these healthy oat cookies balance rich fudge nicely. Finally, for something bright and fruity on the same spread, MasalaMonk’s mango dessert ideas bring a fresh counterpoint.


A closing thought (and a simple way to pick your winner)

If you’re short on time, start with the 2-ingredient batch. If you’re after creamy reliability, choose the condensed milk method. And if you want plush nostalgia, marshmallow creme is the move. When you want true candy-shop character, go cooked soft-ball stage. After that, chocolate turns any version into a showpiece—especially buckeye-style with a glossy cap.

Once you’ve made two or three styles, you’ll notice something: the “best” one changes depending on the day. Sometimes you want the easiest pan imaginable. Other times you want a softer melt, a deeper cooked flavor, or an allergy-friendly swap so everyone can share. Luckily, all of those are within reach—one method at a time.

Also Read: High Protein Overnight Oats | 5 Recipes (Low Calorie, Vegan, Bulking & More)


FAQs

1. What is the best peanut butter fudge recipe for beginners?

If you’re new to fudge, start with a no-bake peanut butter fudge that uses powdered sugar (the 2-, 3-, or 4-ingredient styles). It’s straightforward, doesn’t require a thermometer, and sets firmly in the fridge. After that, try the condensed milk or cooked soft-ball versions when you want a more candy-shop finish.

2. What are the ingredients in peanut butter fudge?

Peanut butter fudge usually needs peanut butter + a sweetener/structure. Depending on the method, that structure can be powdered sugar, sweetened condensed milk, marshmallow creme, or a cooked sugar base. In addition, many recipes include butter, vanilla, and salt to improve texture and flavor.

3. How do you make two ingredient peanut butter fudge?

Two-ingredient peanut butter fudge is typically peanut butter + powdered sugar. Warm the peanut butter just until stirrable, then mix in powdered sugar until the mixture becomes thick and pressable. Finally, press it into a lined pan and chill until firm.

4. How do you make three ingredient peanut butter fudge?

Three-ingredient versions usually add melted butter to peanut butter and powdered sugar. The butter makes the mixture creamier and easier to spread. Once combined, chill until sliceable.

5. What makes four ingredient peanut butter fudge taste “best ever”?

Four-ingredient peanut butter fudge often includes vanilla (plus peanut butter, butter, and powdered sugar). Vanilla and salt make the flavor taste more complete, while the butter keeps the bite smoother. As a result, it reads more like a finished candy than a quick mix.

6. Can I make peanut butter fudge with sweetened condensed milk?

Yes. For a reliable, creamy set, condensed milk versions usually need an additional “setting” ingredient (commonly white chocolate chips) or extra dry structure (like powdered sugar). Otherwise, condensed milk and peanut butter alone can stay too soft, especially in warmer kitchens.

7. What is marshmallow creme or fluff peanut butter fudge?

Marshmallow creme (or fluff) versions are often called fantasy-style peanut butter fudge. Typically, you cook a sugar base to the soft-ball stage, then beat in marshmallow creme and peanut butter. Consequently, the texture turns plush, cohesive, and sliceable for days.

8. How do you make old fashioned peanut butter fudge?

Old fashioned peanut butter fudge is a cooked method that usually requires reaching the soft-ball stage (about 234–236°F / 112–113°C). After cooking, you cool it briefly, then beat until it thickens and loses some shine before pouring into the pan. That timing is what creates the classic creamy bite.

9. What is corn syrup peanut butter fudge, and why use it?

Corn syrup versions are cooked fudge with an extra helper ingredient. Corn syrup helps reduce crystallization, which can lead to a smoother texture. In other words, it’s a more forgiving route when you want cooked fudge flavor without as much risk of graininess.

10. How do you make chocolate peanut butter fudge?

You can add chocolate in three easy ways: mix cocoa into the base, swirl melted chocolate through before chilling, or add a top layer for a buckeye-style finish. Meanwhile, using milk chocolate chips gives a softer, sweeter “candy bar” vibe, while dark chocolate makes the peanut flavor pop.

11. What is buckeye fudge?

Buckeye fudge is a peanut butter fudge base topped with a firm chocolate layer. Once the peanut butter layer is set, pour melted chocolate (often with a little butter or coconut oil for shine) over the top. Then chill again and slice with a warm knife for neat layers.

12. Can I make no bake peanut butter fudge?

Definitely. No-bake peanut butter fudge usually sets by using powdered sugar or a structured base like frosting. Because there’s no cooking stage, it’s faster and less fussy. Still, measuring and mixing thoroughly matters for a clean set.

13. Why is my peanut butter fudge grainy?

Graininess usually comes from sugar crystallization in cooked fudge, or from undissolved granules. To prevent it, avoid stirring once the mixture boils, keep crystals off the sides of the pan, and use a thermometer for accuracy. Conversely, if it’s a no-bake sweetener issue, switching to a powdered-style sweetener often helps.

14. Why is my peanut butter fudge too soft?

First, give it more chill time—many batches firm up as they cool fully. If it’s still soft, the mixture likely needs more structure: add a bit more powdered sugar (or powdered sweetener) next time. For cooked versions, it may not have reached soft-ball temperature, so a thermometer is the quickest fix.

15. Why is my peanut butter fudge crumbly or dry?

This usually means there’s too much dry structure or not enough fat. Add a spoonful of warmed peanut butter (or a little melted butter) and mix again, then press firmly into the pan. Next time, use slightly less powdered sugar or choose the condensed milk or marshmallow method for a creamier set.

16. Why did oil pool on top of my peanut butter fudge?

This happens most often with natural peanut butter that separates easily. Stir the jar extremely well before measuring, then chill and blot any surface oil if needed. Additionally, choosing a method with more stability (butter, condensed milk, or cooked fudge) can reduce pooling.

17. Can I make sugar free peanut butter fudge?

Yes, as long as you use a powdered-style sugar-free sweetener for the smoothest texture. Granular sweeteners can feel gritty in no-bake candy squares. Also, sweetness levels vary by brand, so taste as you go and adjust slowly.

18. Can I make keto peanut butter fudge?

Keto peanut butter fudge typically uses peanut butter with no added sugar, a fat like butter or coconut oil, and a powdered keto sweetener. If it sets very hard, let it sit at room temperature briefly before serving. On the other hand, if it stays too soft, add a little more powdered sweetener next time.

19. How do you make peanut free fudge?

To make peanut-free fudge, swap peanut butter for a safe alternative like sunflower seed butter or soy nut butter, then follow the same no-bake method. However, if you’re baking for allergies, always check labels and watch for cross-contact warnings.

20. How long does peanut butter fudge last and how should I store it?

For the best texture, store peanut butter fudge in an airtight container with parchment between layers. In a cool room, it can last several days; in the fridge, it lasts longer and slices cleaner. Furthermore, freezing works well—wrap tightly and thaw in the fridge so the surface doesn’t sweat.
Posted on 15 Comments

Tres Leches – Mexican 3 Milk Cake Recipe

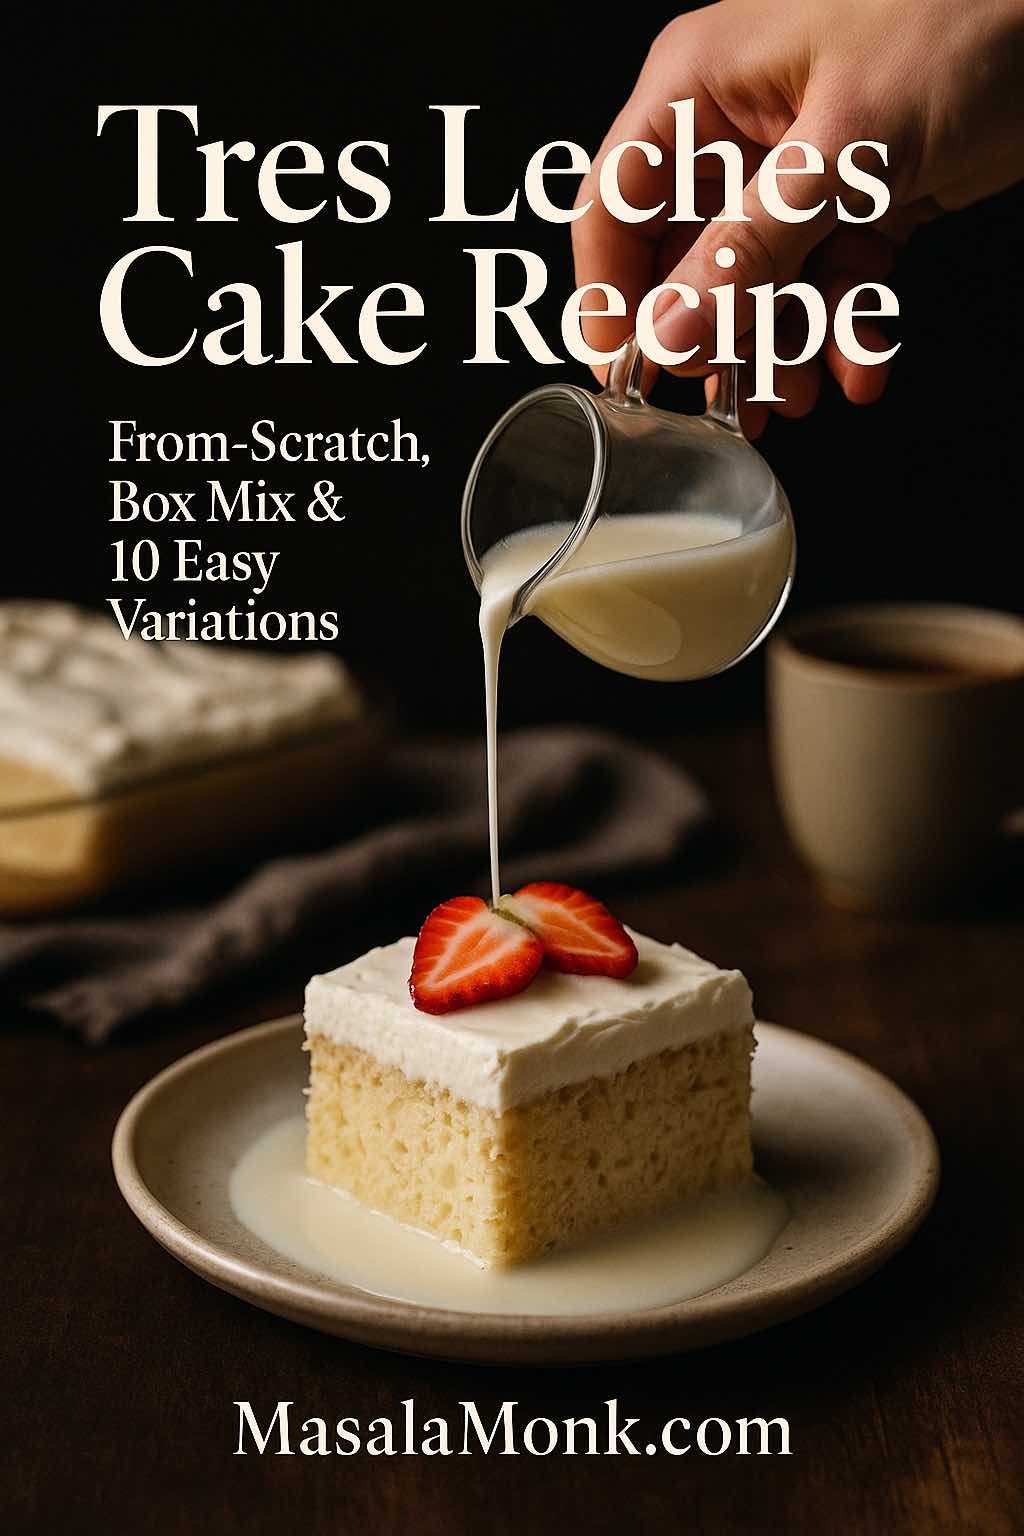
Hand pouring sweet milk over a slice of tres leches cake topped with fresh strawberries on a plate, with the text Tres Leches Cake Recipe – From-Scratch, Box Mix & 10 Easy Variations

If you’ve ever cut into a slice of tres leches cake and watched the fork slide through like it’s cutting clouds, you already know why this dessert has fans for life. It’s soft, cool, milky and somehow rich and light at the same time. This post walks you through a reliable tres leches cake recipe from scratch, then shows you how to turn the same base into an easy box-mix version, a party sheet cake, and a whole line-up of flavours like strawberry, chocolate, pistachio, Biscoff, cupcakes, cheesecake style, eggless and more.

No hunting around ten different posts. One base, many ways to play.


What Is Tres Leches Cake, Really?

At its heart, tres leches is a sponge cake soaked in three kinds of milk until it’s luxuriously moist, then finished with a blanket of whipped cream. Most versions use:

  • Sweetened condensed milk
  • Evaporated milk
  • Whole milk or heavy cream

Those three milks are where the name comes from: tres leches = three milks. The idea is simple, but the texture is unique: a cake that’s drenched yet not stodgy. The Simple English Wikipedia entry on tres leches cake describes it as a sponge cake soaked in evaporated milk, condensed milk and whole milk, and that’s exactly what you’re aiming for here.

Where it comes from is a little more tangled. Many Latin American countries claim it with pride. A piece in Food52, “The Long, Winding Origin Story of Tres Leches Cake”, traces how similar soaked cakes were made in Europe, then evolved through Latin America, with Nicaragua, Mexico and others all laying some claim to the modern version. However you slice the history, tres leches has settled into the “comfort dessert” category across the region and now far beyond it.

If you want another take on the basics, you can peek at the classic tres leches cake article, but you don’t need it to get baking. Let’s set you up with everything you need right here.


The Backbone of a Good Tres Leches Cake Recipe

Before diving into the step-by-step, it helps to understand what makes this cake work so well.

A good tres leches cake recipe has three pillars:

  1. A strong but airy sponge
    The cake needs a structure with enough air bubbles to drink in liquid without collapsing. Think of it a bit like the logic behind tiramisu or trifle.
  2. A balanced milk mixture
    Too much condensed milk and it’s cloying, too much plain milk and it’s bland. You want sweet, creamy and milky in harmony.
  3. Time to soak and chill
    Tres leches isn’t an impatient dessert. It tastes much better once the milks have had hours to seep into the crumb.

Other recipes – like Natasha’s Kitchen’s popular tres leches cake or this authentic version on Hola Jalapeño – follow a similar pattern: airy sponge, three-milk soak, whipped cream topping. You’ll be doing the same, just adapted to your kitchen.


Ingredients for the Classic Tres Leches Cake Recipe

You can make this in a 9×13 inch (23×33 cm) pan for a crowd-pleasing sheet cake or in a slightly smaller dish for a taller, more dramatic dessert.

For the sponge cake

  • All-purpose flour
  • Baking powder
  • Fine salt
  • Eggs, separated into whites and yolks
  • Granulated sugar
  • Vanilla extract
  • A splash of whole milk

This composition is similar to many sponge-style tres leches recipes, including the long-trusted tres leches (milk cake) recipe on Allrecipes, which keeps the batter light but sturdy enough to soak.

For the three-milk mixture

  • Sweetened condensed milk
  • Evaporated milk
  • Whole milk or heavy cream (or a mix of the two)

You can adjust the balance slightly according to how rich you like your cake, but this trio is non-negotiable if you want that classic flavour.

For the topping

  • Heavy whipping cream
  • Icing sugar or fine caster sugar
  • Vanilla extract
  • Ground cinnamon (optional)

Fresh fruit – strawberries, mango, berries, cherries – is optional but excellent.


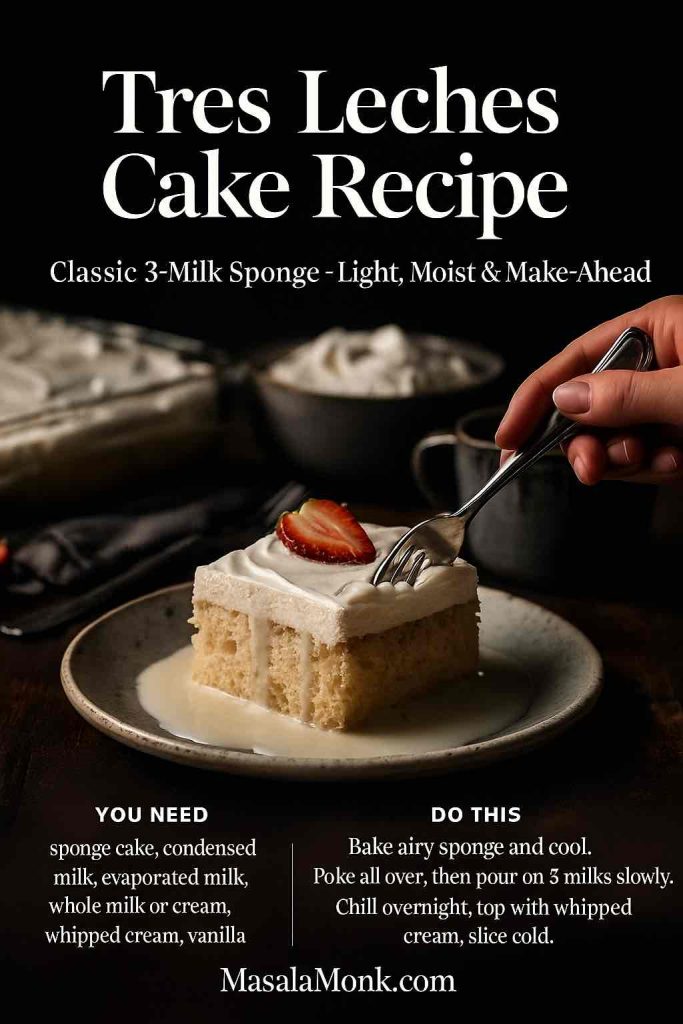
Recipe card showing a slice of classic tres leches cake topped with whipped cream and a strawberry, with a hand holding a fork and overlay text listing ingredients and simple steps for a light, moist 3-milk sponge
Classic Tres Leches Cake Recipe – a light, moist 3-milk sponge with whipped cream, shown here as a quick recipe card so you can see the ingredients and key steps at a glance on MasalaMonk.com.

Step-by-Step: Classic Tres Leches Cake Recipe From Scratch

Take it one stage at a time and the process feels very straightforward.

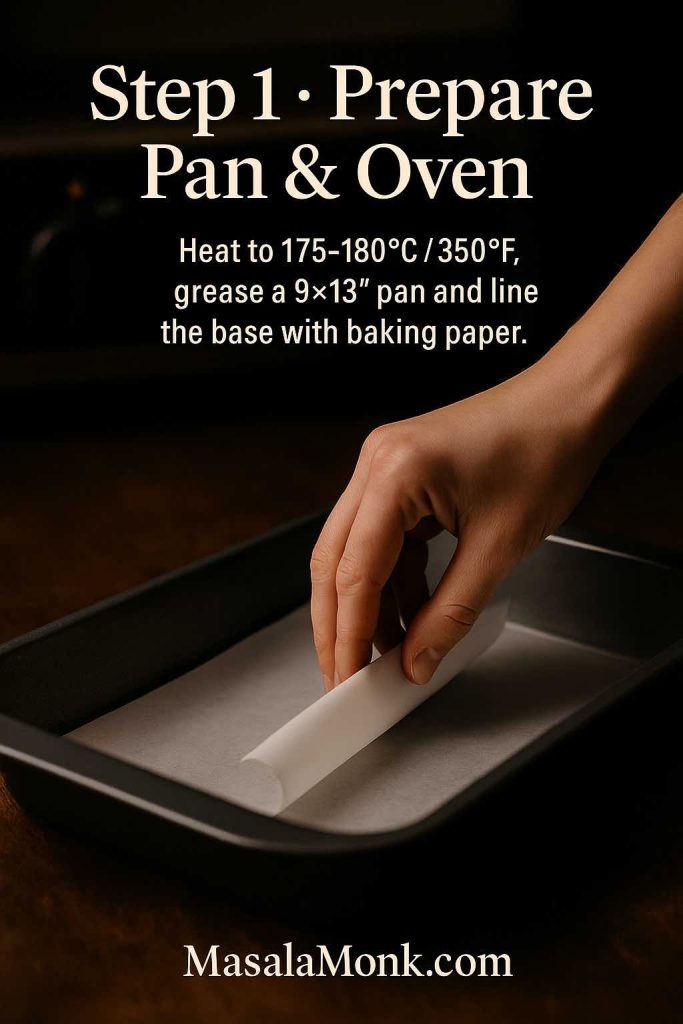
1. Prepare the pan and oven

First, heat your oven to the temperature your recipe specifies, usually around 175–180°C (350°F). Grease your 9×13 inch pan lightly and line the bottom with baking paper. That simple step makes the cake easier to slice neatly later, especially once it’s soaked.

Step 1 photo for a classic tres leches cake recipe showing a hand lining a greased 9x13 inch baking pan with parchment paper beside a preheated oven, with text overlay saying Prepare Pan & Oven
Step 1 – Prepare your pan and oven: lightly grease a 9×13 inch tin, line the base with baking paper and preheat the oven so your tres leches sponge bakes evenly and releases cleanly.

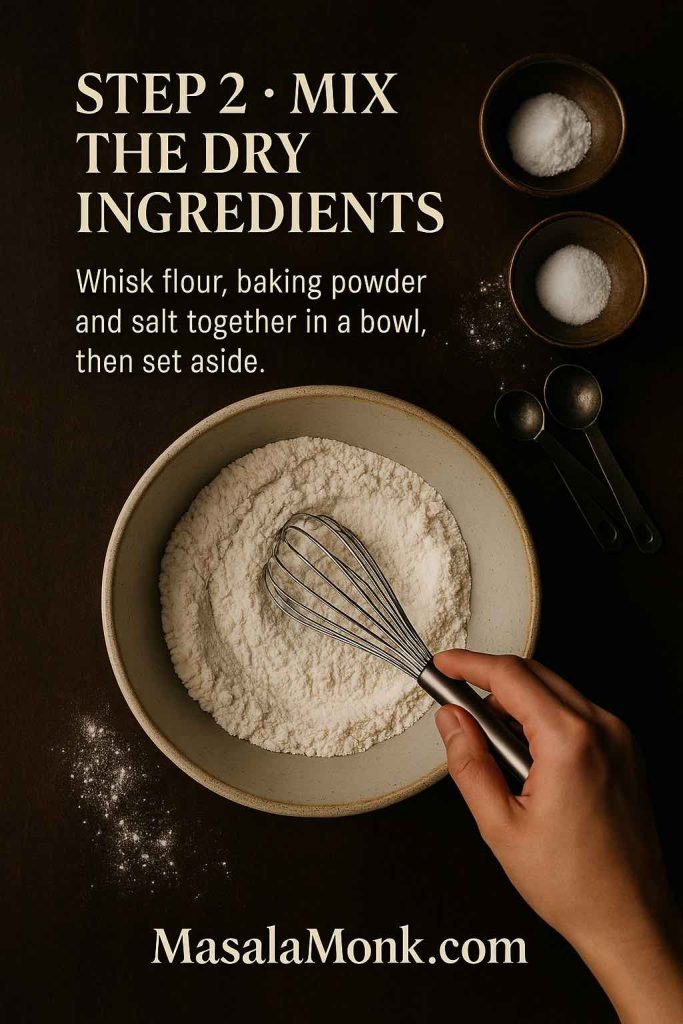
2. Mix the dry ingredients

In a medium bowl, whisk together:

  • Flour
  • Baking powder
  • Salt

Set this aside so it’s ready to fold into your egg mixture without over-mixing.

Step 2 photo for a tres leches cake recipe showing a hand whisking flour, baking powder and salt together in a ceramic bowl on a dark kitchen counter with small ingredient bowls and measuring spoons around it
Step 2 – Mix the dry ingredients: whisk flour, baking powder and salt together in a bowl and set aside so they’re ready to fold gently into your tres leches sponge batter.

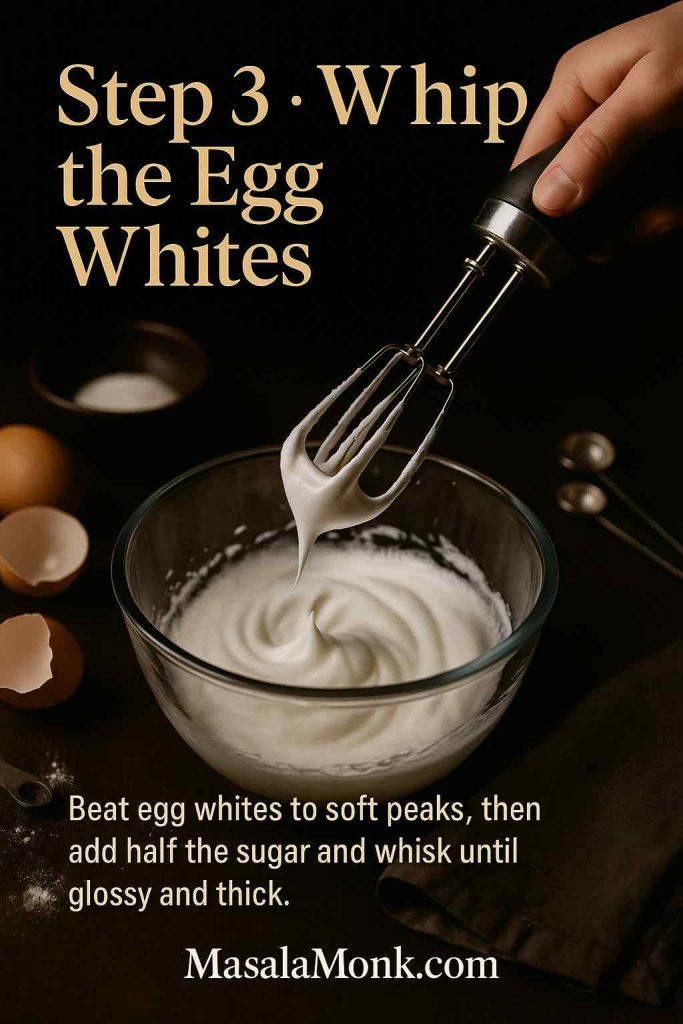
3. Whip the egg whites

In a clean, grease-free bowl, beat the egg whites until soft peaks form. Then, slowly add about half the sugar while continuing to whisk until glossy and thick. This meringue gives your tres leches sponge its lift and delicate crumb.

Once you get the hang of airy, moist cakes, you might enjoy experimenting with others that rely on good structure and moisture too – MasalaMonk’s orange olive oil cake is a great example of a simple cake that stays beautifully tender, using fat instead of milk soak for its softness.

Step 3 photo for a tres leches cake recipe showing a hand lifting a mixer whisk with soft peaks of whipped egg whites over a glass bowl, with eggshells, sugar and measuring spoons on a dark counter
Step 3 – Whip the egg whites: beat the whites to soft peaks, then add half the sugar and whisk until the meringue is glossy and thick so your tres leches sponge gets maximum lift.

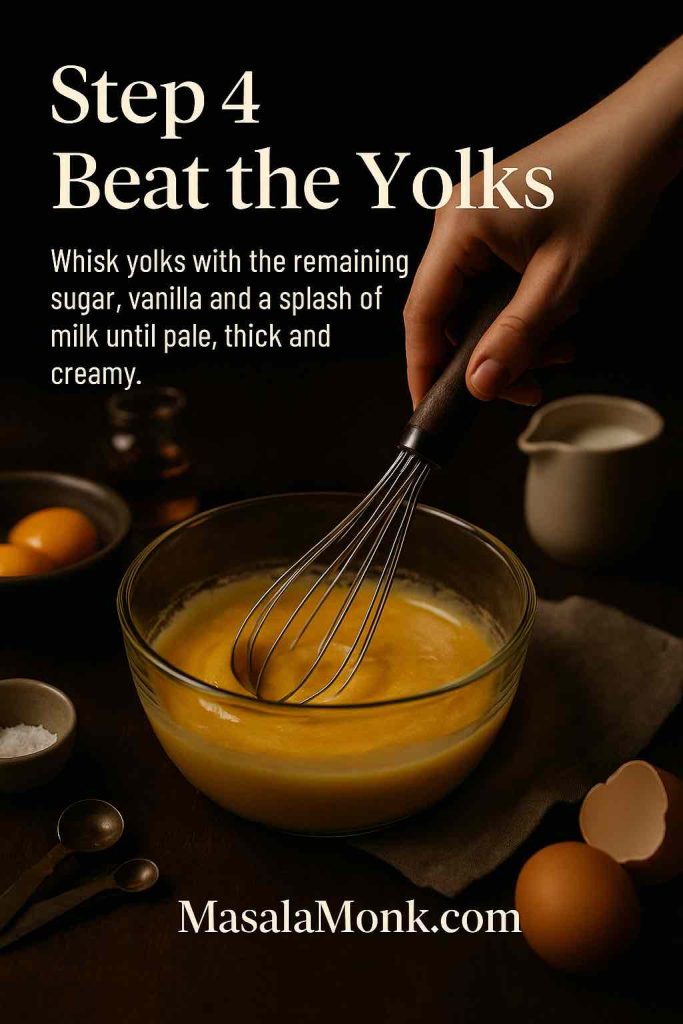
4. Beat the yolks

In another bowl, whisk the egg yolks with the remaining sugar until the mixture turns pale and thick. Add vanilla and a splash of milk. This forms a rich, flavourful base that will blend into your meringue.

Step 4 photo for a tres leches cake recipe showing a hand whisking egg yolks with sugar, vanilla and milk in a bowl on a dark counter, with text overlay explaining to beat until pale and thick
Step 4 – Beat the yolks: whisk the egg yolks with the remaining sugar, vanilla and a splash of milk until the mixture turns pale, thick and creamy, ready to be folded into the whipped whites for your tres leches sponge.

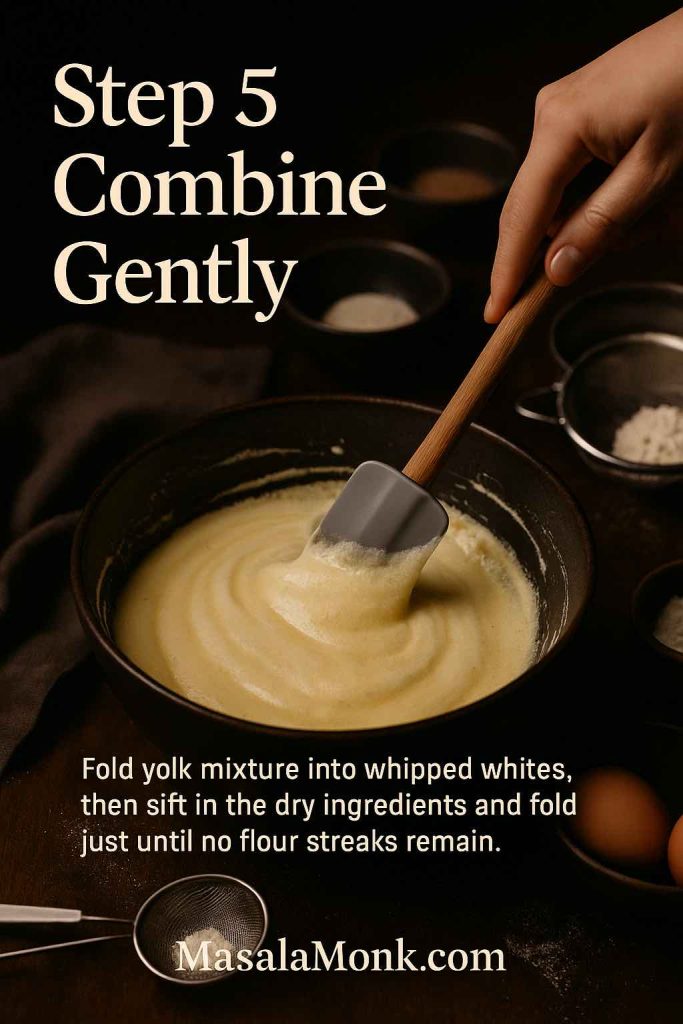
5. Combine gently

Now, pour the yolk mixture into the whipped whites and fold gently with a spatula. Try to keep as much air in the mixture as you can.

Once combined, sift the dry ingredients over the top in two or three additions, folding carefully after each one. Stop as soon as there are no visible streaks of flour; over-mixing here will deflate the batter.

Step 5 – Combine gently: fold the yolk mixture into the whipped whites, then sift in the dry ingredients and fold only until you no longer see flour streaks, keeping the batter light so your tres leches sponge bakes up tall and airy.

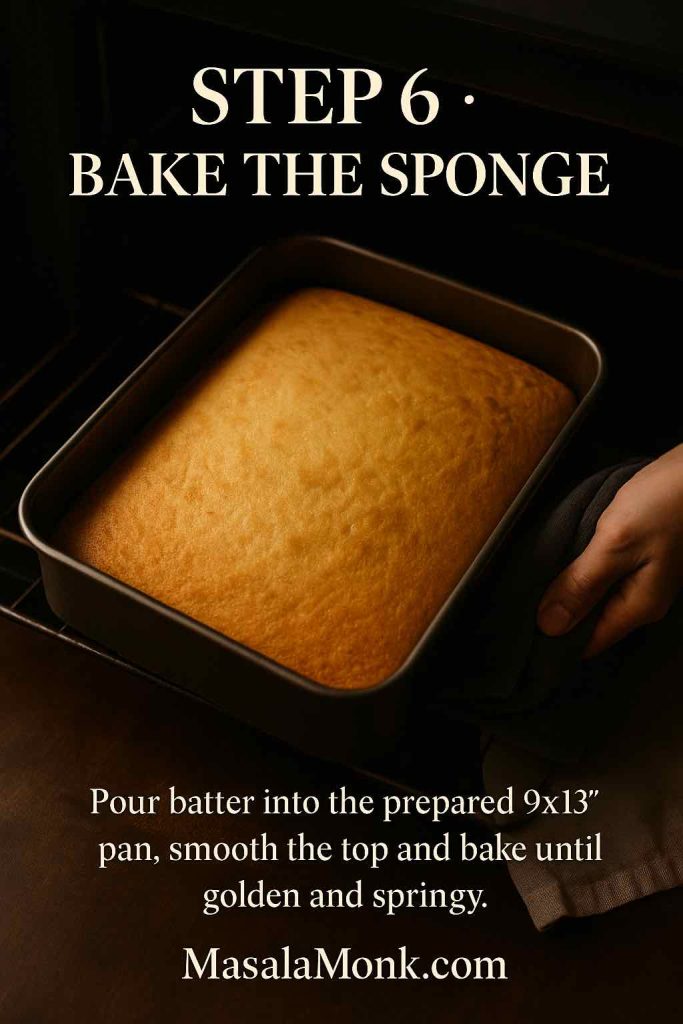
6. Bake the sponge

Pour the batter into your prepared pan and smooth the top lightly. Bake until the cake is golden and springs back when touched lightly in the centre, or a skewer inserted comes out clean.

As it bakes, your kitchen will start to smell like a promise: something simple now that will become something luxurious later.

Step 6 photo for a tres leches cake recipe showing a golden sponge cake in a 9x13 inch pan being pulled out of the oven with a cloth, with text overlay saying Bake the Sponge and instructions to bake until golden and springy
Step 6 – Bake the sponge: pour the batter into your prepared 9×13 inch pan, smooth the top and bake until the cake is risen, golden and springy to the touch so it’s ready to soak up the three milks.

Mixing the Three Milks for Tres Leches Cake Recipe

While the cake is cooling slightly, you’ll prepare the soaking mixture that turns it into tres leches.

In a jug or bowl with a spout, whisk together:

  • 1 part sweetened condensed milk
  • 1 part evaporated milk
  • 1 part whole milk or a mix of milk and cream
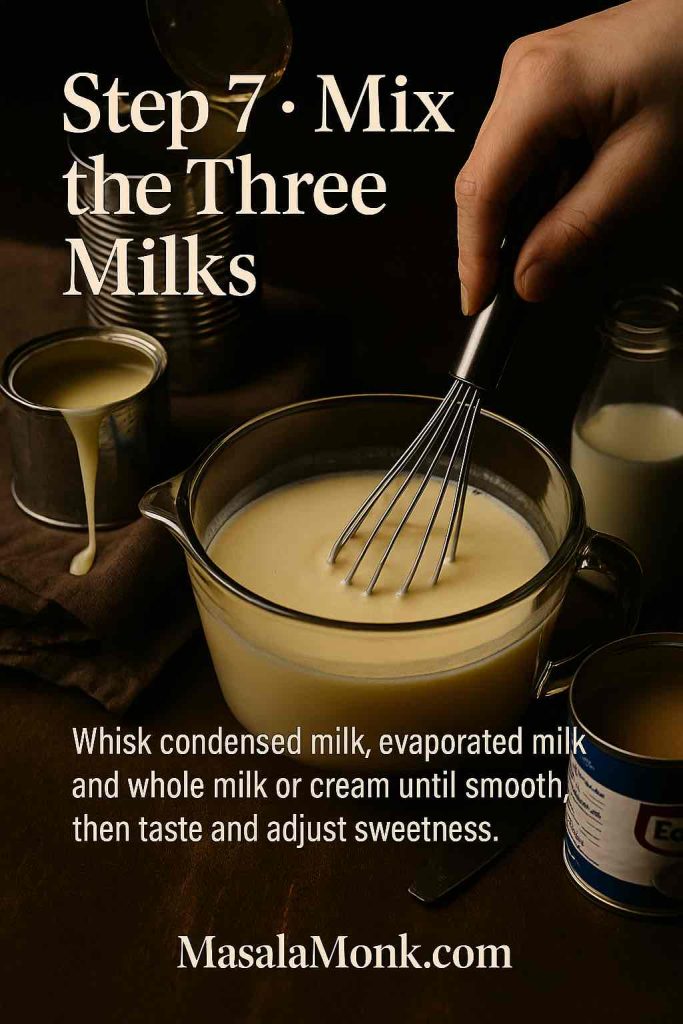
Step 7 photo for a tres leches cake recipe showing a hand whisking a mixture of condensed milk, evaporated milk and whole milk or cream in a glass jug, with open milk cans and a bottle on a dark counter and text saying Mix the Three Milks
Step 7 – Mix the three milks: whisk condensed milk, evaporated milk and whole milk or cream together until smooth, then taste and adjust the sweetness before you pour it over the warm sponge for your tres leches cake.

Different recipes tweak those ratios – the tres leches cake on A Cozy Kitchen and Natasha’s version are good examples – but the idea is the same: a sweet, pourable mixture that’s rich but not gluey.

Taste as you go. If it feels too sweet for your liking, thin it with a little extra whole milk. If it seems too thin, a splash more condensed milk usually does the trick.

This is also the moment to decide whether you’d like to bring in flavours later: strawberry, chocolate, pistachio, Biscoff and more. For now, though, keep it classic.


Soaking the Cake Without Turning It to Mush

The key to a successful tres leches cake recipe is soaking without shredding.

  1. Let the cake cool for 10–15 minutes once it comes out of the oven. It should be warm, not piping hot.
  2. Use a skewer or fork to poke holes all across the surface. Go right to the edges and corners so the milks can travel.
  3. Slowly pour the milk mixture evenly over the cake. Give the liquid time to sink in rather than flooding one spot.
  4. Tilt the pan gently if needed to help the milks travel into drier areas.
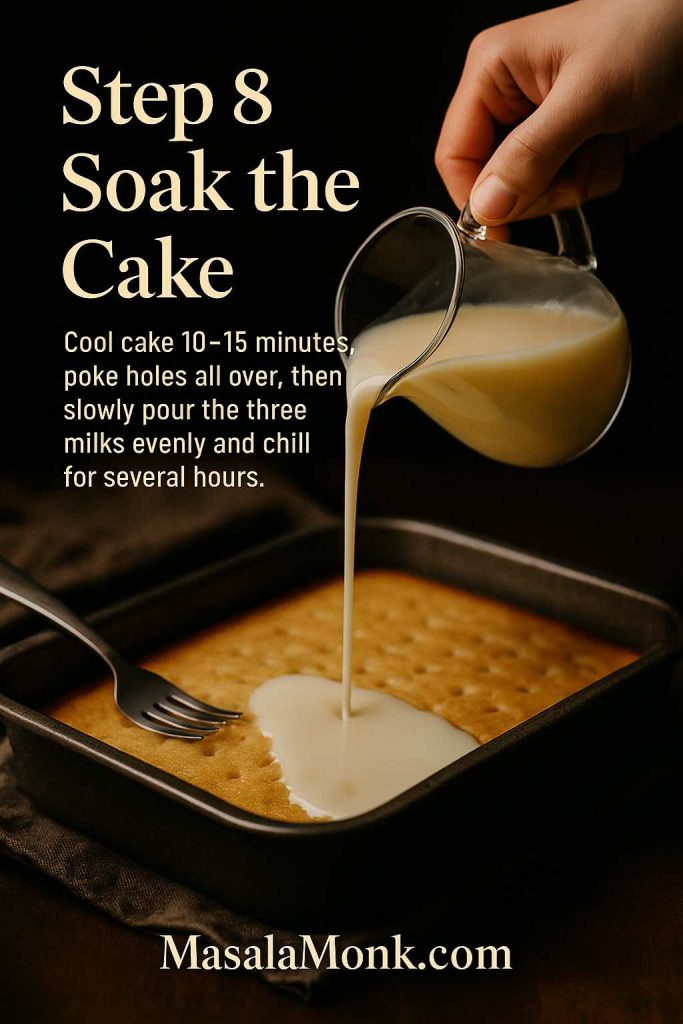
Step 8 photo for a tres leches cake recipe showing a hand pouring a creamy three-milk mixture from a glass jug over a fork-poked sponge cake in a metal pan, with text overlay explaining to cool, poke, pour and chill
Step 8 – Soak the cake: let the sponge cool for 10–15 minutes, poke holes all over, then slowly pour the three-milk mixture evenly across the surface and chill for several hours so every bite is moist but not mushy.

Some recipes, like The Pioneer Woman’s tres leches cake, use almost all the milk and hold back just a little if it starts to pool excessively. You can follow the same instinct: you want a well-soaked cake, not a cake floating in a pond.

Once you’re satisfied, cover the pan and slide it into the fridge for at least 4 hours. Overnight is even better; the milks mellow, the crumb relaxes, and the flavours get cozy.


Topping: The Soft Cloud on Top

When you’re close to serving time, it’s topping time.

  1. Pour chilled heavy cream into a bowl.
  2. Add sugar and vanilla.
  3. Beat until you get soft to medium peaks – you want the cream to hold its shape, but still look smooth and billowy.
Step 9 photo for a tres leches cake recipe showing a hand using an offset spatula to spread whipped cream over a chilled cake in a pan, with bowls of cream, sugar and cinnamon on a dark counter and text explaining to whip the cream and finish the cake
Step 9 – Whip the cream and finish: beat cold cream with sugar and vanilla to soft–medium peaks, spread it over the chilled tres leches cake in swoops and add a light dusting of cinnamon if you like before slicing and serving.

Spread the whipped cream over the chilled cake in swoops and swirls. If you like, dust with ground cinnamon for a gentle warmth.

At this point, you’ve nailed a classic tres leches cake. If that’s all you wanted, you can stop here, cut generous slices, and pour coffee or chai. A plate of this alongside a cup of masala chai for a rainy day is as comforting as dessert gets.

But the fun is only just starting.


Easy Tres Leches Cake Recipe with Box Mix

Maybe you love baking, but sometimes you just don’t have the energy to whip egg whites and fold flour. That’s when a box of cake mix becomes your best friend.

Plenty of bakers have proven that a tres leches cake recipe with cake mix can be just as satisfying. If you want to see how others do it, check out this easy tres leches cake with cake mix or this tres leches cake with a cake mix. The approach below follows a similar path, tailored to the same milk mixture and topping you already made.

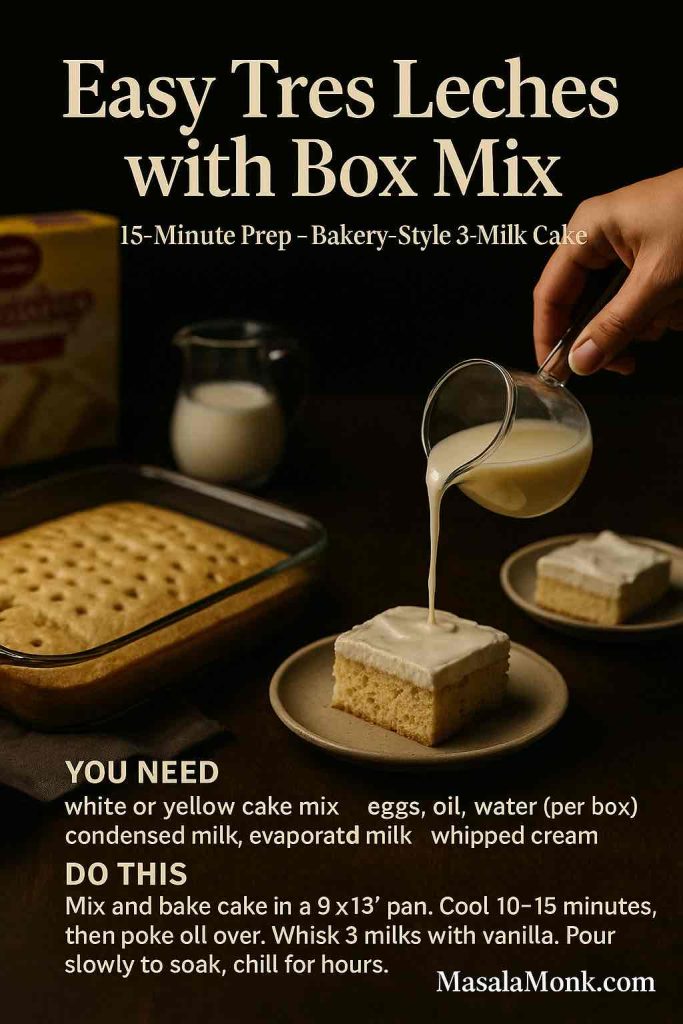
Recipe card for Easy Tres Leches Cake with Box Mix, showing a hand pouring three-milk mixture over a slice beside a poked sheet cake, with overlay text listing ingredients and simple step-by-step instructions
Easy Tres Leches with Box Mix – a quick 15-minute prep recipe where a simple boxed cake is soaked in a rich three-milk mixture, then chilled and topped with whipped cream for bakery-style results at home.

Step 1: Bake the box-mix base

Choose a white or yellow cake mix. Follow the package instructions to make the batter, using the eggs, oil and water it asks for. Bake it in the same 9×13 inch pan.

A couple of small adjustments help:

  • If the box gives a range of baking times, pull the cake out on the earlier side so it stays soft.
  • Avoid over-mixing the batter; just stir until combined.

Step 2: Soak like the classic Tres Leches Cake Recipe

Once the cake has cooled for 10–15 minutes:

  1. Poke all over with a fork or skewer.
  2. Pour your three-milk mixture slowly and evenly over the surface.
  3. Let the cake cool to room temperature, then cover and refrigerate for several hours.

Because box-mix cakes are often a little softer and sweeter, they actually take to the milk mixture beautifully. The result is a super easy tres leches cake recipe that tastes like you put in much more effort than you did.

Step 3: Finish with whipped cream

Top the chilled cake with whipped cream exactly as you would with the scratch version. Add fruit or sprinkles and you’re done.

This is the version to tuck away for weeknights, office potlucks, or days when you want dessert but your energy is on strike.


Strawberry Tres Leches Cake Recipe: Sweet, Fruity and Pretty

Once you’ve mastered the base tres leches cake recipe, strawberry is usually the first variation people ask for. It adds freshness, colour and a little tartness to balance all the cream.

There are many ways to bring strawberries in. One lovely approach is using strawberry milk in the soak, like in A Cozy Kitchen’s strawberry milk tres leches. You can borrow that idea and adapt it to your own cake.

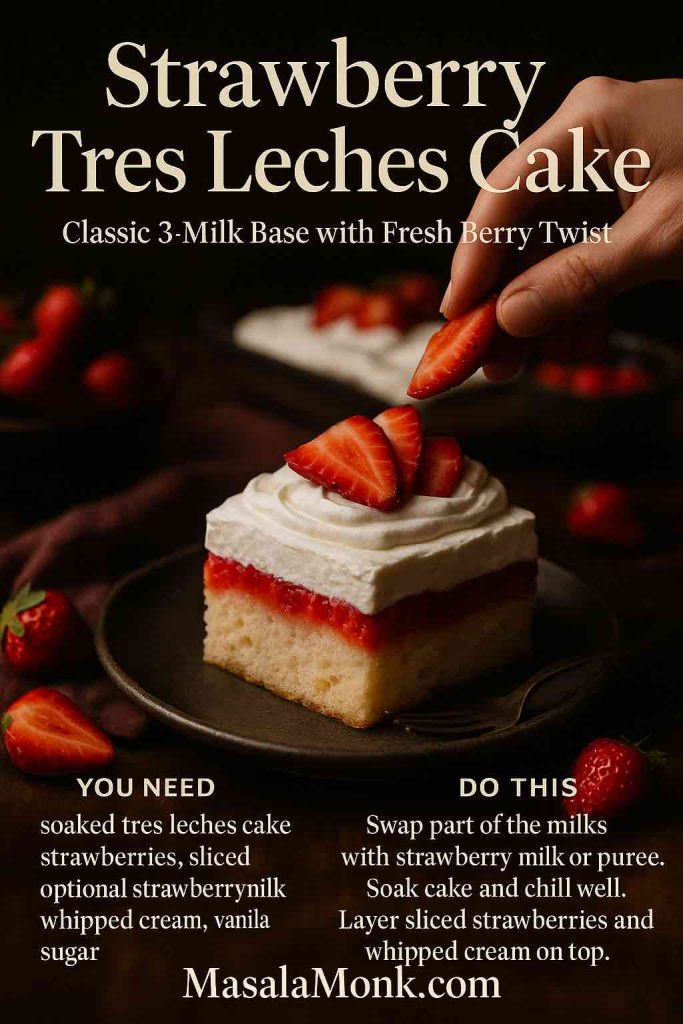
Dark and moody recipe card for Strawberry Tres Leches Cake, showing a slice of soaked three-milk sponge with a strawberry layer and whipped cream while a hand places fresh strawberry slices on top, with text listing key ingredients and simple instructions
Strawberry Tres Leches Cake – a classic three-milk sponge upgraded with a bright strawberry layer, fresh berries and whipped cream, shown here as a quick-reference recipe card from MasalaMonk.com.

Here are a few ways to strawberry-fy your tres leches:

  • In the milk mixture: Swap some of the whole milk for strawberry milk or blend fresh strawberries with milk, strain, and use that in the mix.
  • Between layers: Spread a thin layer of sliced strawberries over the soaked cake before adding whipped cream.
  • In the topping: Fold finely chopped strawberries or a spoonful of puree into the whipped cream for a pale pink cloud.

Finish with extra slices on top. It becomes the kind of dessert that looks like it belongs at a spring party without being fussy to make.

If you enjoy fruity desserts in general, you might later wander into the world of mango – MasalaMonk has an addictive mango cheese mousse cake and a fun round-up of mango dessert recipes that play with fruit and cream in different ways.


Chocolate Tres Leches Cake Recipe: For Cocoa Lovers

Chocolate fans don’t have to sit this one out. There are two simple routes to a chocolate tres leches:

  1. Cocoa in the sponge
    Replace a few tablespoons of flour with cocoa powder in your scratch batter, or use a chocolate box mix as your base.
  2. Chocolate in the topping and finish
    Keep the milk mixture classic, then:
    • Dust cocoa powder over the whipped cream,
    • Grate dark chocolate on top, or
    • Drizzle melted chocolate in thin lines.
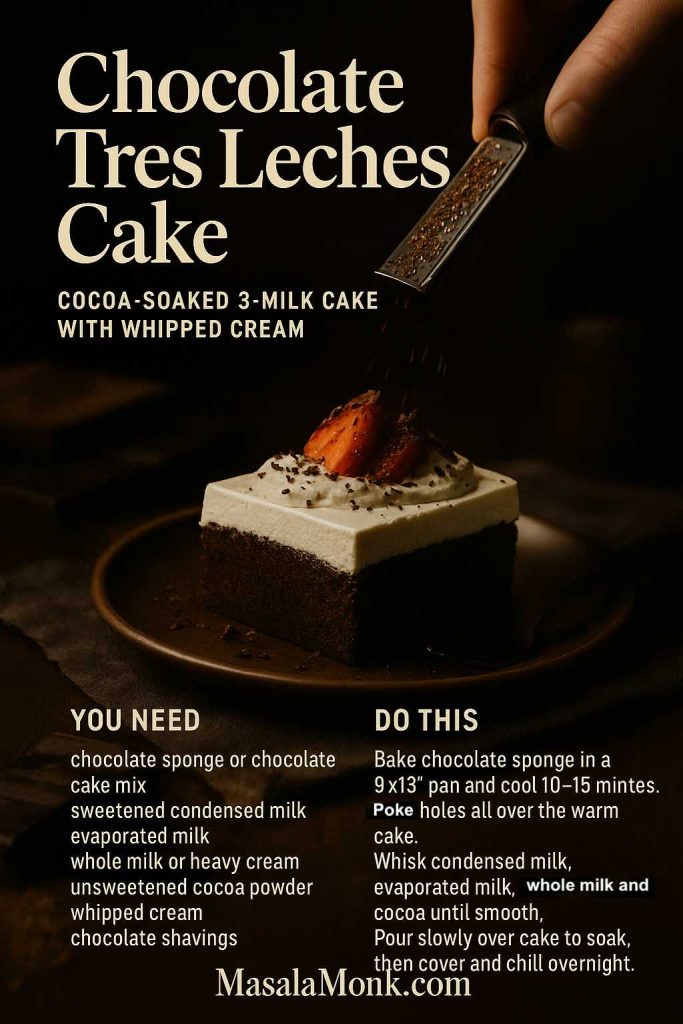
Recipe card for Chocolate Tres Leches Cake, showing a slice of cocoa-soaked three-milk sponge topped with whipped cream and strawberries while a hand grates chocolate over it, with ingredients and step-by-step instructions listed below
Chocolate Tres Leches Cake – a rich cocoa sponge soaked in three milks, chilled, then topped with whipped cream and grated chocolate, captured here as a quick-reference recipe card from MasalaMonk.com.

The result is something like a cross between a classic tres leches and a light chocolate mousse cake – rich, but not heavy. For another soaked-texture dessert with chocolate notes, you can look at MasalaMonk’s savoiardi chocolate vanilla pudding; it’s not tres leches, but it plays with similar comfort-dessert vibes.


Pistachio & Biscoff Tres Leches Cake Recipe: Crowd-Pleasers

Beyond strawberry and chocolate, pistachio and Biscoff (Lotus biscuit) variations have become internet favourites.

Pistachio tres leches cake recipe

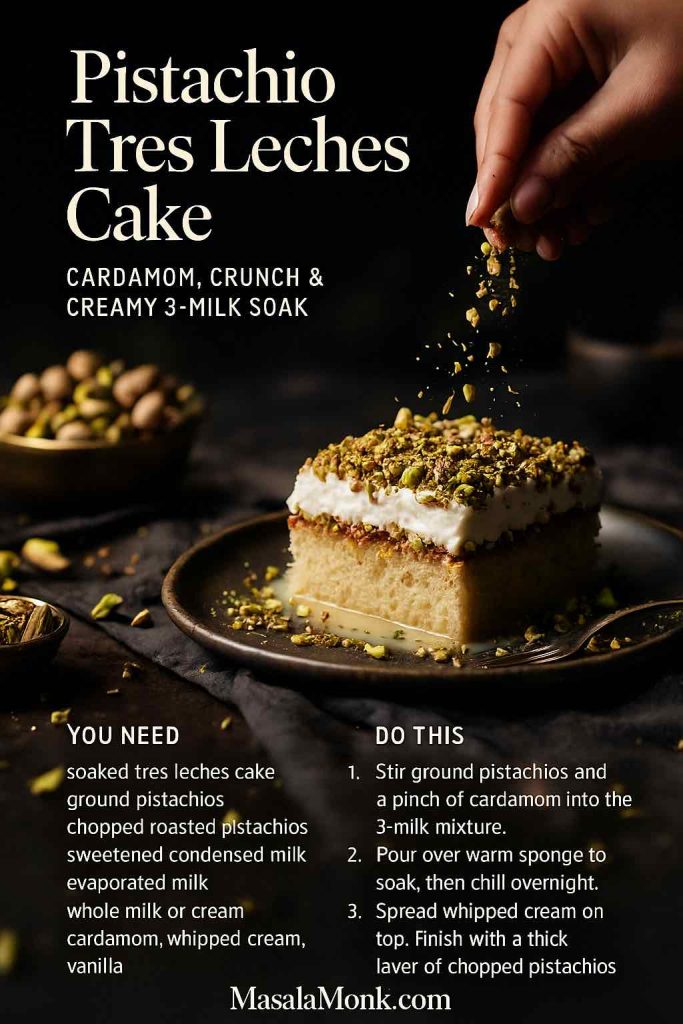
Recipe card for Pistachio Tres Leches Cake, showing a square slice of three-milk sponge topped with whipped cream and a thick layer of chopped pistachios while a hand sprinkles more nuts, with ingredients and simple instructions below
Pistachio Tres Leches Cake – a classic three-milk sponge infused with cardamom and finished with a generous pistachio crunch, presented as a quick-reference recipe card from MasalaMonk.com.

For a nutty, elegant twist:

  • Add a little ground pistachio to the sponge batter.
  • Stir a pinch of cardamom into the milk mixture.
  • Scatter chopped roasted pistachios generously over the whipped cream.

The pale green and white look beautiful on a table, and the flavour leans gently into Middle Eastern dessert territory without losing its tres leches soul.

Biscoff tres leches cake recipe

Recipe card for Biscoff Tres Leches Cake showing a slice of three-milk sponge topped with whipped cream while a spoon drizzles warm Biscoff spread over it, with crushed biscuits on the plate and ingredients and instructions written below
Biscoff Tres Leches Cake – a soft three-milk sponge soaked and chilled, then finished with whipped cream, warm Biscoff drizzle and crunchy biscuit crumbs, captured here as a quick-reference recipe card from MasalaMonk.com.

This one practically sells itself:

  • Warm a few spoonfuls of Biscoff spread until it’s pourable.
  • Swirl some into the milk mixture, keeping a portion back for drizzling.
  • After topping the cake with whipped cream, drizzle the remaining Biscoff on top and crumble Lotus biscuits over everything.

It’s sweet, nostalgic and guaranteed to disappear quickly.

Also Read: French Toast Sticks (Air Fryer + Oven Recipe) — Crispy Outside, Custardy Inside


Tres Leches Cupcakes, Jars and Mini Desserts

Sometimes you don’t want to deal with slicing a large cake, or you’re feeding a crowd who will be walking around with plates. That’s where mini formats come in.

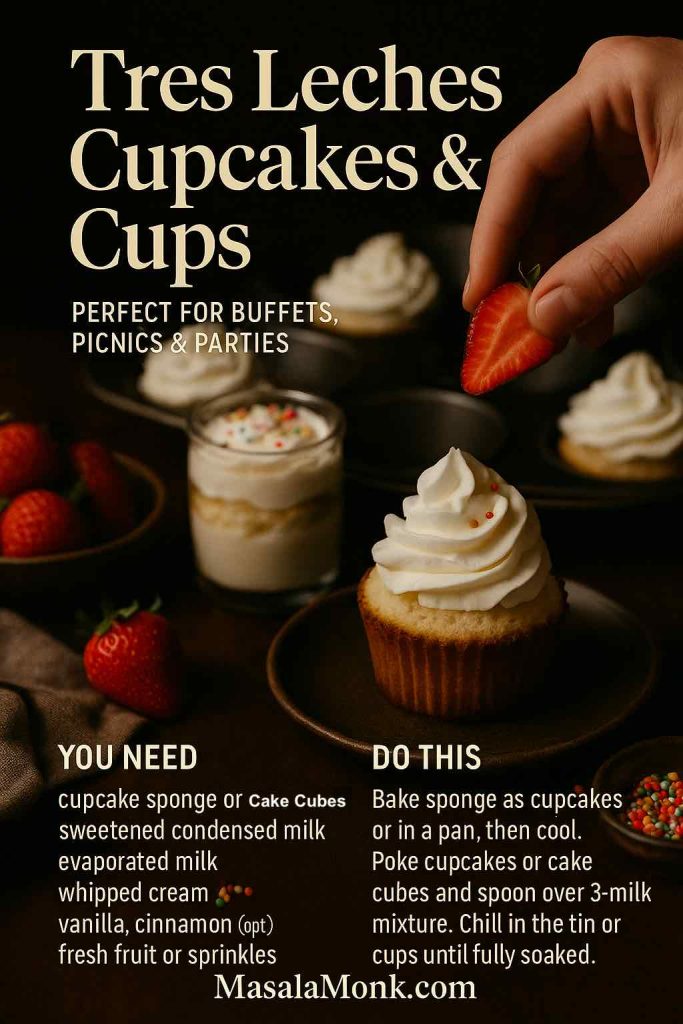
Recipe card for Tres Leches Cupcakes and Cups showing a cupcake topped with whipped cream and a strawberry, glass cups layered with soaked cake and cream, and text listing ingredients and simple party-friendly instructions
Tres Leches Cupcakes & Cups – bite-sized three-milk sponge desserts topped with whipped cream, strawberries and sprinkles, perfect for buffets, picnics and parties, presented here as a quick-reference recipe card from MasalaMonk.com.

Cupcakes

Use the same batter (scratch or box mix) but bake it in a lined muffin tin. Once cooled:

  • Poke each cupcake several times with a skewer.
  • Spoon the milk mixture over the top of each one until it’s nicely soaked.
  • Chill the cupcakes in the tin (to contain any escaping milk) and then top them individually with whipped cream.

They’re perfect for buffets, potlucks and birthdays where everyone wants their own little treat.

Dessert cups or jars

Alternatively, bake the cake in a pan, cut it into cubes and layer it in dessert glasses or jars:

  1. Cake cubes
  2. Spoonful of milk mixture
  3. Whipped cream
  4. Fruit, nuts or Biscoff crumbs

Repeat the layers. These can be sealed and transported easily, making them ideal for picnics or potluck dinners.

Also Read: Peanut Butter Cookies (Classic Recipe & 3 Variations)


Cheesecake-Style Tres Leches

If you love creamy, chilled desserts, consider a cheesecake-inspired tres leches.

Recipe card for Cheesecake-Style Tres Leches showing a slice with cookie crumb crust, soaked sponge layer and creamy topping drizzled with caramel, with ingredients and simple step-by-step instructions below
Cheesecake-Style Tres Leches – a layered dessert with biscuit crust, soaked sponge and a silky cream topping, drizzled with caramel and presented as a quick-reference recipe card from MasalaMonk.com.

One way to play it:

  • Press a simple biscuit or cookie crust into the bottom of your pan (like you would for a cheesecake).
  • Bake your sponge layer on top of this crust.
  • Soak the sponge layer only, then chill.
  • Finish with a slightly thicker topping, such as whipped cream with a little cream cheese folded in.

The cookie base adds a pleasant crunch, and the cream-cheese-boosted topping makes it feel closer to a mash-up between tres leches and cheesecake. If that idea excites you, you may enjoy MasalaMonk’s no-bake blueberry cheesecake, which uses similar chilled, creamy textures in a different direction.


Eggless and Gluten-Free Tres Leches Ideas

Tres leches is naturally adaptable for different diets because most of the magic lives in the milk mixture and topping.

Eggless variations

To go egg-free:

  • Use an eggless sponge cake recipe you already trust, or
  • Pick an eggless box mix as your base.
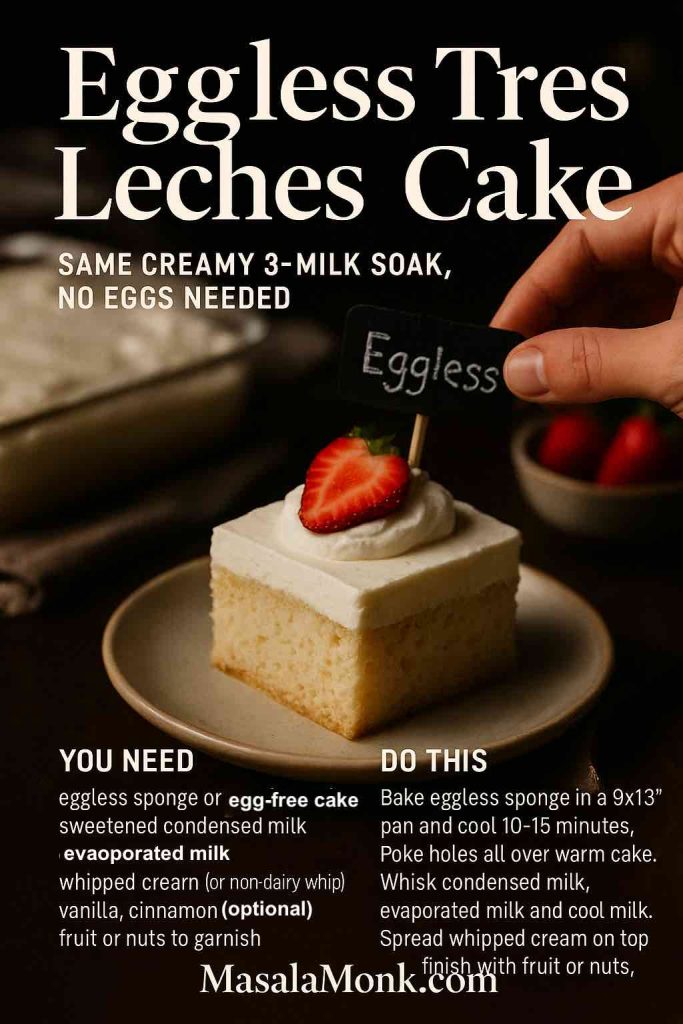
Recipe card for Eggless Tres Leches Cake showing a slice of three-milk sponge topped with whipped cream and a strawberry while a hand places an Eggless sign, with ingredients and simple step-by-step instructions below
Eggless Tres Leches Cake – a soft, three-milk soaked sponge made without eggs, topped with whipped cream and fresh fruit, presented as a quick-reference recipe card from MasalaMonk.com.

Once baked, you treat it exactly like the classic: poke holes, soak with the three milks, chill, top with whipped cream. Because eggs are responsible for much of the structure in traditional sponge, it’s important to choose an eggless base that doesn’t crumble easily.

Gluten-free versions

For gluten-free:

  • Swap the base for a gluten-free cake mix that you know bakes up well, or
  • Use a home-made gluten-free sponge recipe you like.
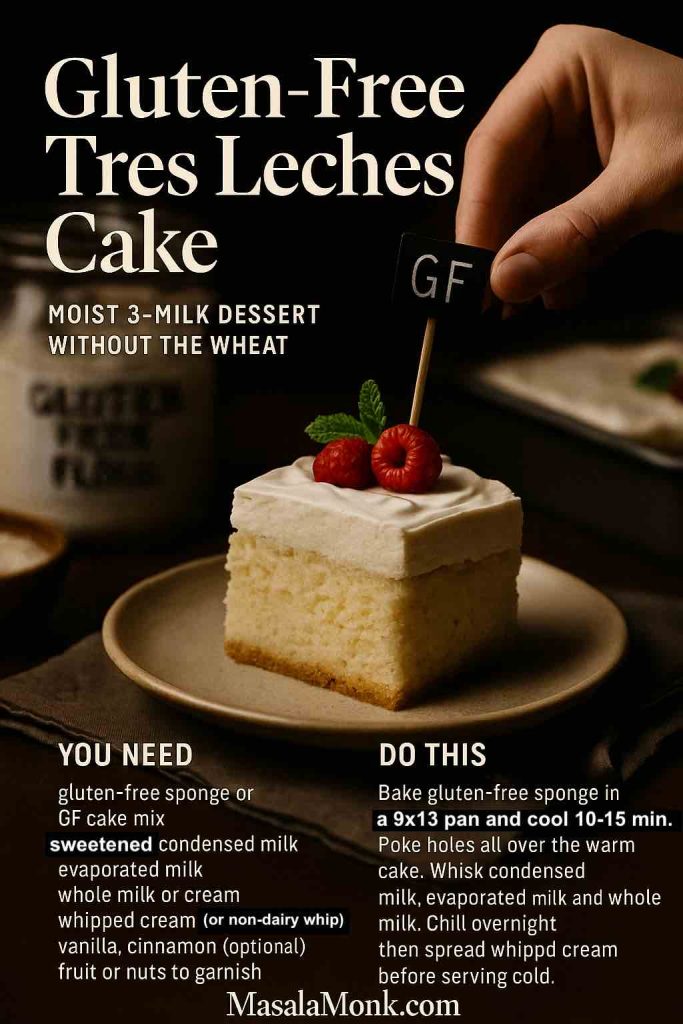
Recipe card for Gluten-Free Tres Leches Cake showing a slice of three-milk sponge topped with whipped cream, raspberries and a small GF flag, with ingredients and step-by-step gluten-free instructions written below
Gluten-Free Tres Leches Cake – a moist three-milk sponge made with a gluten-free base, chilled and finished with whipped cream and fresh berries, presented as a quick-reference recipe card from MasalaMonk.com.

Again, everything else stays the same: soak, chill, top. The milk mixture and cream are already wheat-free, so the main challenge is getting a cake that’s sturdy enough to handle the soak without falling apart.

Also Read: Vegan French Toast: 6 Easy Recipes (Pan, Air Fryer, GF & High-Protein)


Turning Tres Leches into a Birthday or Celebration Cake

A well-made tres leches cake is a brilliant birthday cake because it stays moist for days and feels like a treat without heavy frosting.

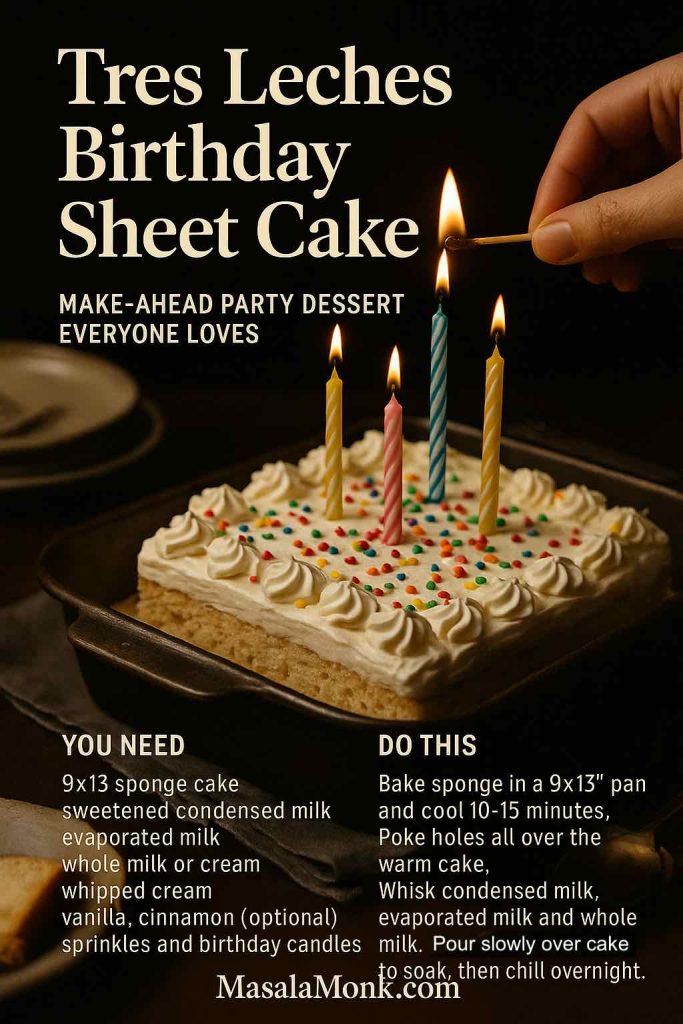
Recipe card for Tres Leches Birthday Sheet Cake showing a 9x13 three-milk cake topped with whipped cream, sprinkles and lit candles while a hand lights one candle, with ingredients and step-by-step instructions written below
Tres Leches Birthday Sheet Cake – a 9×13 three-milk sponge you can soak and chill the day before, then finish with whipped cream, sprinkles and candles for an easy make-ahead party dessert from MasalaMonk.com.

Here are some ways to lean into that:

  • Use a sheet pan: A 9×13 inch cake feeds a crowd comfortably and slices into neat squares.
  • Decorate with intention: Pipe whipped-cream rosettes around the edges, add sprinkles or edible flowers, and arrange fruit in patterns.
  • Write on it: Once the cake is fully chilled, you can pipe “Happy Birthday” or a message using melted chocolate or coloured whipped cream.

If you’re planning a full meal around it, you can keep the main course homely and satisfying. For instance, a hearty vegetable dish like kathal ki Bihari style sabzi with rice makes a lovely dinner that doesn’t overshadow dessert. And if rice tends to intimidate you, MasalaMonk’s guide on how to cook rice perfectly every time is a handy reference.

For an adult celebration, you can happily serve tres leches alongside a classic cocktail. A chilled slice next to a well-balanced whiskey sour with easy twists hits that sweet spot between indulgent and grown-up.


Serving, Storage and Leftovers

Tres leches is one of those desserts that rewards patience and planning.

Serving

  • Serve it chilled or just slightly cooler than room temperature. Warm tres leches tends to feel heavy; cold tres leches feels refreshing.
  • Cut with a sharp knife, wiping the blade between slices if you want picture-perfect edges.

Because it’s rich, smaller pieces often satisfy, especially after a filling meal. That said, people frequently go back for seconds.

Storage

  • Keep the cake covered in the fridge. It generally stays good for 2–3 days, sometimes longer if your kitchen is cool and everything was fresh to begin with.
  • If you’ve decorated with very juicy fruit, you may notice the fruit softening after a day or two, but the cake itself will still taste wonderful.

Leftovers

Leftover tres leches is a happy problem. You can:

  • Eat it as is, straight from the fridge – it tastes even better the next day.
  • Turn small squares into layered dessert cups with extra fruit.

While you’re thinking about using up bits and pieces, you might enjoy how cleverly savoury leftovers can be transformed too – the paneer sabji sandwich on MasalaMonk is a great example of giving yesterday’s curry a fresh life.

If you know a heavy dessert is coming after dinner, you can balance your day with lighter choices earlier on: something like high protein overnight oats with five flavour variations for breakfast or one of these high-calorie protein shakes and smoothies if you’re trying to gain weight in a more intentional way than just eating all the cake.


Bringing It All Together

A good tres leches cake recipe is less about fancy techniques and more about respecting a few simple rules:

  • Build a sponge that can hold its shape.
  • Mix milks that taste good even before they touch the cake.
  • Give everything time to soak and soften in the fridge.

Once you have that foundation, you can go in almost any direction:
from classic vanilla to strawberry-studded, chocolate-dusted, pistachio-sprinkled or Biscoff-swirled; from a tall birthday centrepiece to neat cupcakes and dessert jars; from scratch-baked weekends to weeknight box-mix shortcuts.

The next time you’re craving something creamy and celebratory, you’ll have a tres leches game plan ready – and all the tools to make it your own.

Also Read: Homemade Hot Chocolate with Cocoa Powder Recipe

FAQs

1. What exactly is tres leches cake and how is it different from regular milk cake?

Tres leches cake is a very light sponge that gets soaked in a mixture of three milks (usually evaporated milk, sweetened condensed milk and whole milk or cream). After soaking, it’s topped with whipped cream and often finished with fruit or cinnamon.

A regular “milk cake” or plain milk-based dessert might simply use milk in the batter or syrup, but a proper tres leches cake recipe is built around that deep soak in three milks. The texture should be moist all the way through, yet still sliceable, almost like a hybrid between cake and pudding.


2. What are the three milks in a traditional tres leches cake recipe?

In a classic tres leches cake recipe, the three milks are:

  1. Sweetened condensed milk
  2. Evaporated milk
  3. Whole milk or heavy cream

Together, they create a pourable mixture that’s sweet, creamy and rich without feeling heavy. Occasionally, people switch the whole milk for half-and-half or cream for extra indulgence, but the idea stays the same: one very sweet milk, one cooked-down milk, and one fresh milk to balance everything.


3. How do I make the milk mixture for tres leches cake?

To make the milk mixture for your tres leches cake recipe, whisk together equal parts condensed milk and evaporated milk, then add enough whole milk or cream until it’s pourable but still luxurious. Taste as you go.

If it’s too sweet, add a splash more regular milk. If it feels thin, trickle in a little extra condensed milk. The mixture should coat the back of a spoon and taste delicious on its own, because that flavour is what will soak into every crumb of your cake.


4. Is tres leches cake Mexican and what does “pastel de tres leches” mean?

Tres leches cake is loved across Latin America, and you’ll often see it in Mexican bakeries and restaurants. That’s why many people search for Mexican tres leches cake or authentic pastel de tres leches.

“Pastel de tres leches” simply means “three milks cake” in Spanish. Different countries have their own versions and small tweaks, but the foundation is the same: a sponge, three milks, and a creamy topping. Your tres leches cake recipe will feel right at home on a Mexican-inspired menu, yet it’s flexible enough to fit into almost any cuisine.


5. Can I make an easy tres leches cake recipe at home if I’m a beginner?

Absolutely. Even if you’re new to baking, you can make an easy tres leches cake recipe without stress. There are two straightforward paths:

  1. From-scratch sponge: You’ll whip eggs, fold in flour and bake a simple sponge, then soak it in the three milks.
  2. Box-mix shortcut: You bake a plain box cake (white or yellow), poke holes in it and pour the same milk mixture on top.

In both cases, the whipped cream topping is very forgiving, and the long chill in the fridge actually hides small mistakes. As long as the cake is baked through and the milk mixture tastes good, you’re already most of the way there.


6. Can I use a box cake mix for a tres leches cake recipe?

Yes, a box mix works beautifully and it’s one of the most searched-for shortcuts. To adapt a mix:

  1. Bake a white or yellow box cake in a 9×13 inch pan according to package directions.
  2. Let it cool slightly, then poke holes all over with a fork or skewer.
  3. Pour your three-milk mixture slowly over the top so it soaks in evenly.
  4. Chill for several hours and finish with whipped cream.

This method turns an ordinary box cake into a moist, impressive dessert, and it’s a great option for busy days, office parties or last-minute celebrations.


7. Can I make tres leches cake with yellow cake mix or other flavours?

You can use yellow cake mix, white cake mix or even chocolate cake mix as the base of a tres leches cake recipe. Each one brings a slightly different personality:

  1. Yellow cake mix: Richer flavour, slightly denser crumb, great for birthdays.
  2. White cake mix: Lighter and more neutral, ideal for fruit toppings like strawberries or mango.
  3. Chocolate cake mix: Perfect for a chocolate tres leches with cocoa, chocolate shavings or chocolate sauce on top.

The important thing is to bake the cake just until done, avoid drying it out, and then soak it patiently with the milk mixture.


8. How do I make a simple chocolate tres leches cake?

To turn your tres leches cake recipe into a chocolate version, you can:

  1. Replace a few tablespoons of flour with cocoa powder in your scratch batter, or start with a chocolate box mix.
  2. Keep the three-milk mixture the same or add a spoonful of cocoa for an extra chocolate hint.
  3. Dust cocoa powder over the whipped cream and add chocolate curls, chips or shavings on top.

This approach gives you a cake that tastes like a cross between chocolate sponge and creamy pudding, without changing the basic method too much.


9. How can I make a strawberry tres leches cake at home?

Strawberry tres leches is a favourite twist, and it’s easier than it looks. To start:

  1. Prepare your usual tres leches cake recipe and soak the sponge as normal.
  2. Layer sliced fresh strawberries over the soaked cake before adding whipped cream.
  3. Stir chopped strawberries or a little strawberry puree into the whipped cream for a soft pink tint.
  4. Decorate the top with extra strawberries.

For even more flavour, you can swap some of the plain milk in the soak for strawberry milk or a blend of milk and strawberry puree.


10. Can I make tres leches cake eggless?

Yes, you can make an eggless tres leches cake by switching the base cake rather than the milk mixture:

  1. Use a reliable eggless sponge cake recipe you already like, or
  2. Choose an eggless box cake mix from the store.

After baking, poke holes, soak with the same three-milk mixture, chill, and top with whipped cream. Because eggs provide structure in traditional sponges, it helps to pick an eggless base that doesn’t crumble easily and holds together when soaked.


11. Is there a gluten-free version of tres leches cake?

A gluten-free tres leches cake recipe is absolutely possible. The three milks and whipped cream are naturally gluten-free, so the only change you need is the base cake:

  1. Choose a gluten-free cake mix that bakes up light and sturdy, or
  2. Use a home-made gluten-free sponge cake recipe that you trust.

Once baked, soak it in the milk mixture exactly as you would with a regular cake. The key is avoiding a gluten-free cake that’s too crumbly or fragile, because it still needs to hold its shape after the soak.


12. How do I turn a tres leches cake recipe into a birthday cake?

Tres leches makes an excellent birthday cake because it’s moist, creamy and not overly sweet. To turn it into a celebration centrepiece:

  1. Bake the cake in a 9×13 inch pan or slightly larger if you’re feeding many people.
  2. Chill the soaked cake overnight so it’s firm enough to handle.
  3. Pipe whipped cream swirls around the edges and add sprinkles, fruit or chocolate decorations.
  4. Write your birthday message on top using a small piping bag filled with frosting, chocolate or coloured whipped cream.

Because the cake is served cold, it’s refreshing even after a big meal and holds up well on a buffet table.


13. How long should I soak tres leches cake and can I make it ahead of time?

To let the milks really work their magic, a tres leches cake recipe needs time in the fridge:

  1. After pouring the milk mixture over the cake, let it sit at room temperature until it cools down.
  2. Then, cover it and chill for at least 4 hours.
  3. For the best texture and flavour, aim for an overnight rest (8–12 hours).

Tres leches is a perfect make-ahead dessert; you can prepare it the day before an event and simply add the whipped cream topping a few hours before serving.


14. How long does tres leches cake keep in the fridge?

Generally, a tres leches cake keeps well for about 2–3 days in the refrigerator. The milk mixture continues to keep the crumb moist, and the flavour often improves by the next day.

To store it properly:

  1. Cover the cake tightly so it doesn’t absorb fridge smells.
  2. If you’ve added fresh fruit, expect the fruit to soften slightly over time, even though the cake itself will still taste lovely.

After three days, the texture may become too soft and the whipped cream can start to lose its shape, so it’s best enjoyed within that window.


15. Can I freeze a tres leches cake?

Freezing a fully-soaked tres leches cake isn’t ideal because the texture can change once it thaws. The milk mixture and whipped cream may separate slightly, and the crumb can become unevenly soggy.

Instead, if you need to plan far ahead:

  1. Bake the sponge cake and let it cool completely.
  2. Wrap the un-soaked sponge well and freeze it.
  3. On the day before serving, thaw the sponge, soak it with the three milks and let it chill in the fridge.
  4. Finally, add the whipped cream topping on the day you plan to serve.

This way, you get the convenience of advance prep without sacrificing the smooth, creamy texture that makes a tres leches cake recipe so special.