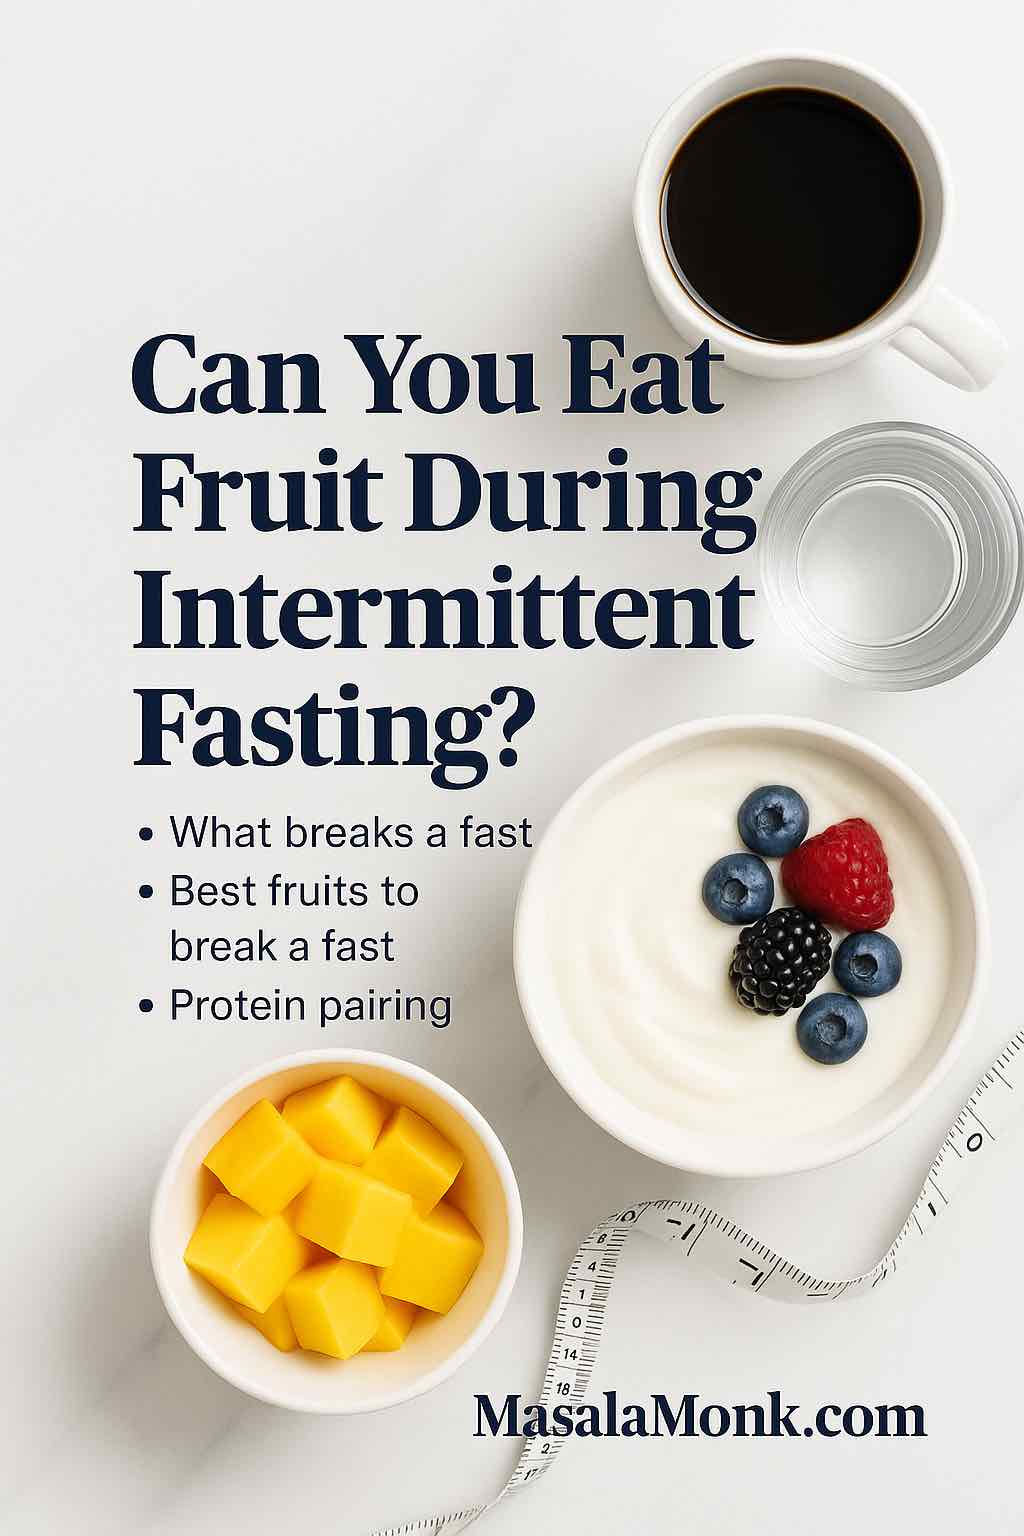
Can you eat fruit during intermittent fasting? If you’re talking about the fasting window, the straightforward answer is no—fruit contains calories and natural sugars, so it breaks a strict fast. During the eating window, though, fruit can absolutely help you feel hydrated, satisfied, and steady—especially when you mind timing, portion, and pairings. That’s the practical balance this guide focuses on: how to enjoy fruit without working against your fasting goals. For a clear science primer on why a true fast means zero energy intake (and how that triggers the metabolic “fuel switch” into ketones), see the NEJM review on intermittent fasting and the metabolic switch.
To learn more about IF or Intermittent fasting, explore our posts on Benefits of Intermittent Fasting as well as Intermittent Fasting and Blood Sugar Regulation.
Can you eat fruit during intermittent fasting in the fasting window?
Let’s answer the most common scenario first. Can you eat fruit during intermittent fasting in your fasting window? For a strict fast, no. Fruit, fruit juices, and smoothies carry calories and carbohydrates that end the fast. In contrast, water, plain tea, and black coffee are the classic “safe” choices—no calories, no problem. That zero-calorie gap is what allows your body to lean less on incoming glucose and more on stored fat and ketones, a metabolic state associated with many of the benefits people seek from fasting (appetite control, clearer energy, and, for many, easier fat loss). The NEJM review explains this “metabolic switch” in digestible, research-grounded language. For more context on staying within your limits, see our post Intermittent Fasting: Daily Discipline or Overdoing It?
What if you follow a more flexible style—sometimes called a “dirty fast”—where tiny calories are allowed? It’s your call. Just be honest about trade-offs: any calories are still calories. A few bites of mango at 10 a.m. won’t keep you fasted, even if it feels like “almost nothing.” If your goal is simply calorie control across the day, this may still fit your life. If your goal is the physiological fast, keep fruit for later.
Understand more on IF here: Foods to Eat During 16:8 Intermittent Fasting.
Can you eat fruit during intermittent fasting once your eating window opens?
Absolutely—this is where fruit shines. The goal is to use fruit, not fight it. See our post on Best Foods to Break a Fast for a friendly checklist. A few principles help almost everyone:
- Start gently. After longer fasts, your stomach may be sensitive. Begin with a small portion to “wake up” digestion without discomfort.
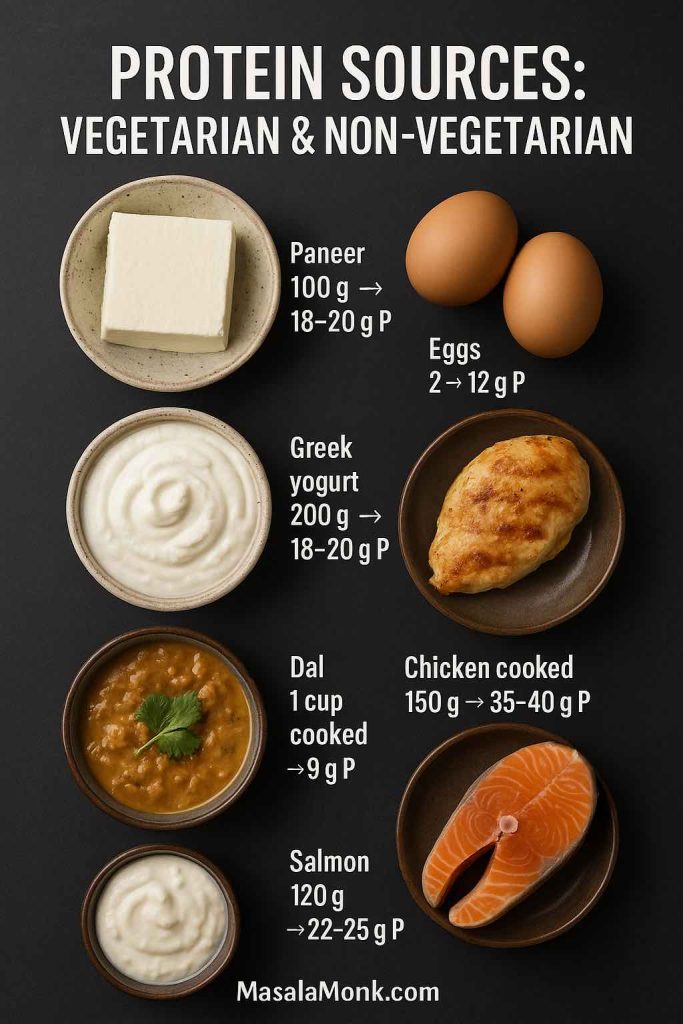
- Protein before (or with) fruit. A little protein before carbohydrates can noticeably flatten the post-meal glucose rise and help you feel steady rather than spiky. This isn’t just anecdotal: a randomized, controlled trial showed pre-meal whey protein lowered postprandial glucose and slowed gastric emptying—translate that as smoother energy and fewer cravings. You can skim the AJCN study or the PubMed summary and simply apply the idea with curd/yogurt, eggs, tofu, or paneer – and see our guide to protein: What is Protein? and How to Eat 100 Grams of Protein a Day.
- Right-size portions. It’s easy to over-pour fruit, especially cut fruit and grapes. Start with a small bowl (think “cupped hand” size). For exact calories, carbs, and fiber by fruit and variety, USDA FoodData Central is the easiest reliable lookup.
Best way to break your fast with fruit (and why sequence matters)
If you love beginning your eating window with fruit, choose light and hydrating first, then quickly build a balanced plate:
- Watermelon is gentle and refreshing. Per USDA, it’s about ~46 kcal per cup—a forgiving opener if you follow with protein within minutes. Deep dive: The Watermelon – Nutrition, Benefits, and 5 Practical Ways for Weight Loss and How to Choose the Sweetest, Juiciest Watermelon.
- Papaya and berries (strawberries, blueberries, raspberries) are also well-tolerated, with fiber to help fullness and a naturally “clean” taste.
- Dates (1–2 pieces) are a traditional way to “switch on” your window—sweet, simple, and easy to portion. Because they’re calorie-dense, roll straight into protein and veggies to steady appetite. Related reads: Dates During Pregnancy (nutrition/use‑cases) and Black Raisins (Munakka): A Tiny Superfood… for portion ideas on concentrated fruits.
A simple rhythm works wonders: open small → short pause → protein + veg + slow carbs. That order respects your appetite cues and reduces the “I opened my window and suddenly I’m ravenous” spiral. It also lines up with the protein-before-carb evidence mentioned earlier.
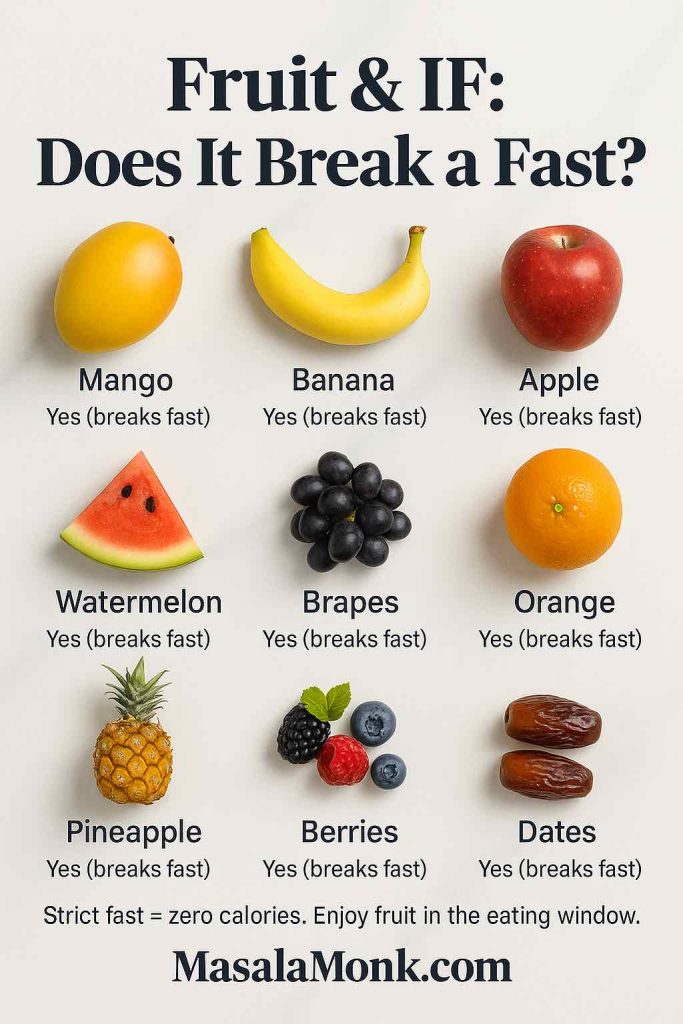
Can you eat fruit during intermittent fasting if it’s mango, banana, apple, or watermelon?
Search Console shows people phrase this question fruit-by-fruit, so let’s keep answers short, human, and useful—while still giving enough detail to act on.
Mango during intermittent fasting
Does mango break a fast? Yes. For strict fasting, mango ends the fast. Enjoy it in your eating window. Because it’s naturally sweeter, keep portions modest—around 100–150 g is sensible for most people—and pair with protein (curd/yogurt, paneer) or a few nuts. If precise numbers help you plan, verify your variety in USDA FoodData Central. Learn more: Calories in Mango and Vitamins in Mango. Treat idea: Mango with Coconut Milk.
Banana during intermittent fasting
Can you eat a banana while intermittent fasting? Not in the fasting window; yes during the window. A small banana can be a gentle first bite if you add protein (yogurt or eggs). Protein before or with banana often blunts a sugar spike—and that’s backed by the AJCN trial and its PubMed summary. One extra note: ripeness changes banana’s GI (more on GI/GL soon), which is why pairing helps. Handy nutrition explainer: How Much Potassium in a Banana?; tolerability note: Bananas & Acid Reflux—Good or Bad?.
Apple during intermittent fasting
Does an apple break a strict fast? Yes—any fruit with calories does. Inside the window, apple + peanut or seed butter delivers fiber + fat for longer fullness. If you like to “budget” carbs, FoodData Central has clear entries for grams of carbs, fiber, and calories for typical apple sizes; check USDA FoodData Central.
Watermelon during intermittent fasting
Can you eat watermelon while intermittent fasting? Only in your eating window. It’s high water, modest calories, and very refreshing—great as a first nibble before moving to protein. See USDA’s watermelon resource for per-cup calories and a seasonal overview. See: Watermelon – Nutrition & Weight‑Loss Tips.
Oranges, grapes, pineapple, pomegranate, guava, amla, berries
- Oranges: break a fast. In the window, some people find the acidity easier after a few neutral bites or with yogurt.
- Grapes: break a fast. They’re easy to snack mindlessly—pre-portion about a cup and add protein to smooth your response. Deep dive: Grapes and Weight Loss: A Comprehensive Guide.
- Pineapple: window-only. Slightly acidic for some; pairing with cottage cheese/curd feels great on the stomach.
- Pomegranate: breaks a fast; inside your window, sprinkle arils onto salads for texture and antioxidants.
- Guava: not for fasting, but excellent in the window. Guava’s fiber makes it a powerhouse for fullness—great for weight-management goals.
- Amla (raw/pickled/candied): still calories, so it breaks a fast. Save it for the window.
- Berries: yes, they break a fast too—but they’re lower in sugar per cup than many fruits and bring fiber. That makes berries a standout when your window opens. For GI orientation, the University of Sydney GI resources are useful. See also our post on Top 10 Fruits for Diabetics for GI/GL‑friendly choices.
Can you eat fruit during intermittent fasting and still manage blood sugar? (GI/GL explained simply)
Some readers worry fruit will wreck blood sugar control. The reality is more nuanced, and understanding GI and GL helps you use fruit wisely. To understand more about both these terms, read our post Glycemic Index (GI) VS Glycemic Load (GL).
- Glycemic Index (GI) measures how fast a standard amount of carbohydrate from a food raises blood sugar, compared to a reference.
- Glycemic Load (GL) adjusts GI for portion size. This matters in real life: a fruit can have a medium (or even high) GI but still a low GL at typical servings.
A few practical examples, kept intentionally simple:
- Bananas & ripeness. As bananas ripen, more starch converts to sugars, nudging GI upward. So a very ripe banana usually has a higher GI than a just-ripe one. The University of Sydney’s “Go Bananas” piece explains why two bananas can behave differently.
- Watermelon & GL. You might see older charts list watermelon as “high GI,” but typical servings come with a low GL because the carbohydrate per serving is small for all that water. The University of Sydney’s watermelon update clarifies this nicely.
- Government-level GI/GL explainer. If you want a public-health overview in plain English, this state health explainer is perfect—clear definitions, practical ranges, and reminders that mixed meals change responses.
Now, fold GI/GL into your day in a way that’s actually useful: portion + pairing beats chasing perfect numbers. A modest serving of fruit with or after protein typically produces a much steadier response than a large bowl of fruit alone on an empty stomach. That’s also exactly what the AJCN trial on protein preloads suggests mechanistically.
For a curated list of generally steadier options, see Top 10 Fruits for Diabetics.
Dry fruits and dates during intermittent fasting
Here’s the easy rule: dry fruits (raisins, apricots, figs) and dates are concentrated fruit. They’re fantastic inside your eating window, but they break a strict fast in the fasting window. If you like opening your window sweetly, 1–2 dates are a lovely ritual—just move quickly to protein and veggies so you don’t feel hungry again twenty minutes later. For planning your portions, check per-piece or per-gram numbers in USDA FoodData Central and keep them as accents rather than the whole snack.
Monk fruit and other low/no-calorie sweeteners in a strict fast
What if you crave a sweet taste during the fasting window but don’t want to consume calories? Many fasters use monk fruit extract or other low-/no-calorie sweeteners in black coffee or tea. The FDA’s consumer pages and additives overview explain that approved low/no-calorie sweeteners contribute few or no calories and generally do not raise blood sugar. Two practical tips:
- Read labels. Some “monk fruit” products are blends with erythritol or caloric carriers (like dextrose). If your aim is a strict zero-calorie fast, choose products without caloric fillers.
- Notice your own response. Sweet taste—even without calories—can increase cravings for some people. If it makes your fasting hours harder, save sweetness for your eating window.
Can you eat fruit during intermittent fasting and still lose weight?
Yes—if you use your window wisely. Remember, the biggest levers for fat loss are total energy balance, consistency, and how well your plan manages appetite. Fruit can be an ally because it’s satisfying and can replace ultra-processed snacks that creep calories up. Keep these four habits front-and-center:
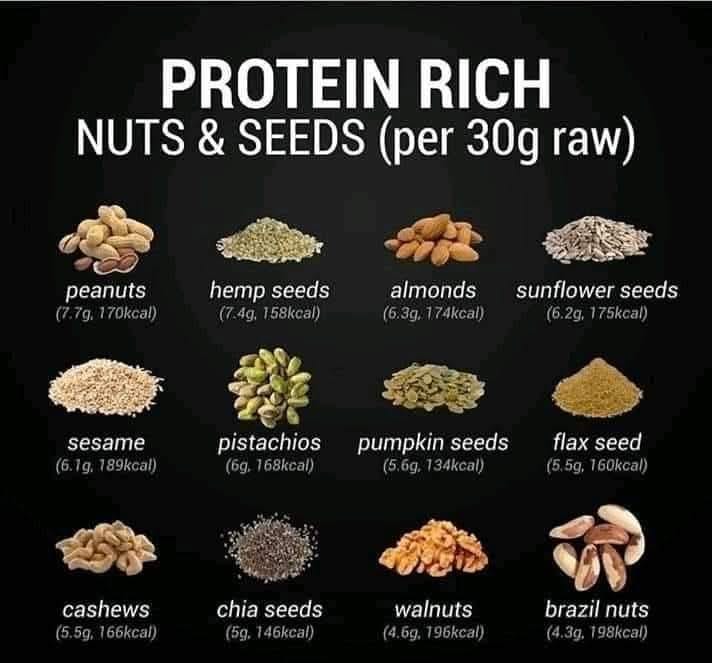
- Protein first (or early). A little protein before or with fruit can calm hunger and stabilize energy. The AJCN pre-meal protein trial is a great reference if you like the “why.” Pair with the options in Nuts & Seeds – Protein‑Packed Superfoods.
- Lower-sugar, higher-fiber fruits as default: berries, guava, apple, pear.
- Hydrating/easy fruits when you’re hot, tired, or post-workout: watermelon, muskmelon, papaya.
- Treat-tier fruits in portion-controlled amounts: mango, grapes, pineapple. These are wonderful—just be intentional.
If precision helps you feel calm, look up the exact fruit and form (fresh vs. dried, diced vs. whole) in FoodData Central and plan servings accordingly. But don’t get lost in decimals; your portion and pairing choices will drive 90% of the real-world outcome.
A simple day template you can make your own
- Morning / fasting hours: water, plain tea, black coffee. If desired, a truly non-caloric sweetener in coffee/tea (double-check the ingredient list). This keeps your fast strict and protects the metabolic benefits described in the NEJM review. For practical food ideas when your window opens, see Foods to Eat During 16:8 Intermittent Fasting and Best Foods to Break a Fast.
- Open your eating window: start with a small serving of fruit—watermelon or berries feel especially gentle—with or after protein (curd/yogurt, eggs, tofu/paneer). Protein first isn’t a fad; see the controlled trial for the physiology behind steadier post-meal glucose.
- Main meal: build a plate around protein, colorful veg, and slow carbs. If you want something sweet, enjoy a small portion of your favorite fruit at the end—you’ll often be satisfied with less once protein is “on board.”
- Later snack (if your window is longer): pick lower-sugar, higher-fiber fruits (berries, guava, apple, pear) or a protein-forward mini-meal. Keep portions modest and keep momentum.
This pattern meets you where real life happens. It respects the no-calorie fasting window (the physiological definition that supports ketone shift and appetite benefits) and uses timing + pairing inside the window to make fruit a helper rather than a hiccup.
Also Read: 5 Fasting DIY Homemade Electrolyte Drink Recipes.
Can you eat fruit during intermittent fasting and still protect blood sugar? (Yes—with these quick moves.)
Here are the five moves that matter most, distilled:
- During the fast: no calories → fruit breaks a strict fast. Stick to water, plain teaj, black coffee.
- At window open: take protein first (or with) fruit to keep your energy smooth—backed by a controlled trial.
- Portion beats perfection: start with a small bowl of fruit; scale by hunger, not habit.
- GI/GL are guides, not gospel: ripeness and variety shift numbers; mixed meals change them again. The University of Sydney GI resources and this GI/GL explainer are handy references.
- Labels matter for sweeteners: if you want sweetness during the fasting window, choose non-caloric products without caloric fillers. The FDA’s overview explains how these are regulated and why they generally don’t raise blood sugar.
Also Read: Can We Eat Almonds During Intermittent Fasting?
Bringing it all together
So, can you eat fruit during intermittent fasting? In the fasting window, no—fruit breaks a strict fast. In the eating window, fruit can be one of the most enjoyable, practical tools you have—as long as you sequence smartly (protein before or with fruit), portion sanely, and pick the right fruits for your goals (berries and guava when you want steady; mango and grapes when you want a treat).
The beauty of this approach is its simplicity: it mirrors how fasting is defined in research (a true pause from calories, per the NEJM review), and it leans on controlled evidence showing that a small protein preload can change how your body handles the rest of your meal. Combine those with common-sense portions and a little self-awareness, and you’ll keep the benefits of intermittent fasting without giving up the sweetness and color that fruit brings to your plate.
For more related reading on fasting mindset and recovery, see Intermittent Fasting: Daily Discipline or Overdoing It? and Fasting & Cortisol: Is Intermittent Fasting Stressing Your Hormones?.
Helpful references (linked above so readers can explore)
- Intermittent fasting & the “metabolic switch”: New England Journal of Medicine overview — read the review.
- Protein before carbs = steadier glucose: American Journal of Clinical Nutrition randomized trial — full text; PubMed summary.
- Low/no-calorie sweeteners (monk fruit context): FDA consumer update and FDA additives page.
- Nutrition facts for specific fruits: USDA FoodData Central (search by fruit & form).
- GI/GL basics and fruit examples: University of Sydney GI resources, “Go Bananas” (ripeness matters), Watermelon update, GI/GL explainer.
FAQs
) Can you eat fruit during intermittent fasting?
Short answer: during the fasting window, no—fruit has calories and will break a strict fast. However, once your eating window opens, fruit can fit beautifully when you keep portions sensible and pair it with protein for steadier energy.
2) Can you eat fruit during the fasting window?
No. Instead, stick to water, plain tea, or black coffee while fasting. Then, when your window begins, bring in fruit thoughtfully.
3) Does fruit break intermittent fasting?
Yes, it does. Because fruit contains calories and natural sugars, even small amounts end a strict fast. Nevertheless, that doesn’t make fruit “bad”—it just belongs in the window.
4) Can you eat mango during intermittent fasting?
Not while you’re fasting. That said, in the eating window, enjoy a modest portion of mango and, for smoother energy, pair it with something protein-rich like curd, paneer, eggs, or tofu.
5) Can you eat banana during intermittent fasting?
During the fast, no. But during the window, a small banana is a gentle first bite—especially when you add protein so you don’t spike and crash.
6) Can you eat apple during intermittent fasting?
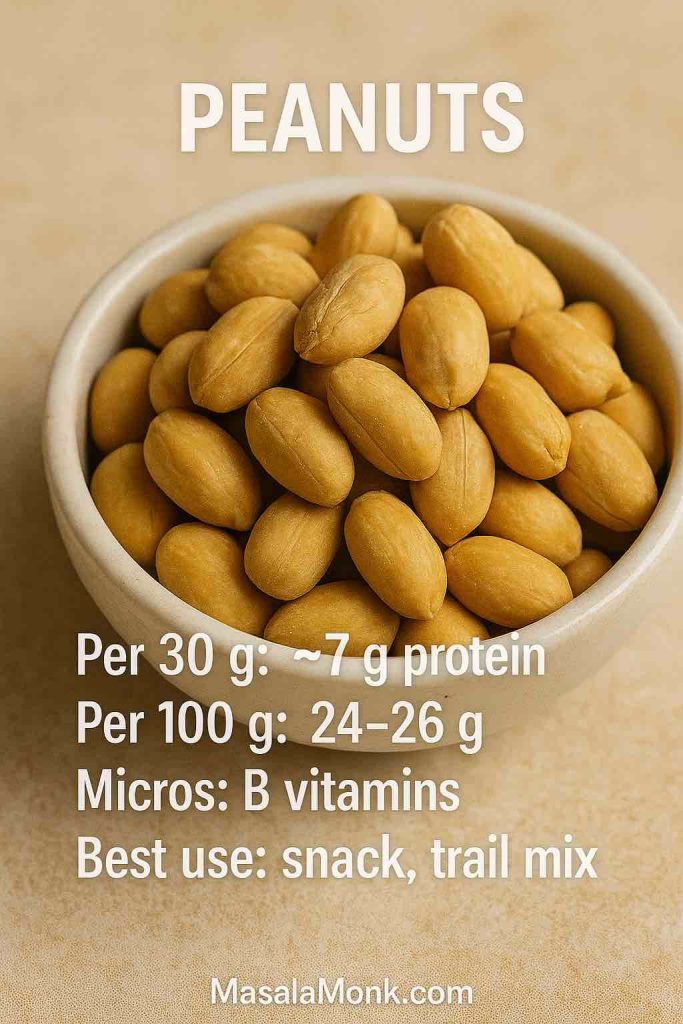
Apple breaks a fast. Still, inside the window, apple with a little nut or seed butter feels filling and pleasantly steady.
7) Can you eat watermelon during intermittent fasting?
Only in your eating window. Watermelon is light and hydrating, so it’s a friendly opener before you move to a balanced meal.
8) Can you eat oranges while intermittent fasting?
Oranges break a fast. However, in the window, many people enjoy them after a few neutral bites or alongside yogurt if acidity bothers an empty stomach.
9) Are dry fruits and dates allowed during intermittent fasting?
They’re concentrated and calorie-dense, so they break a fast. Inside the window, keep portions small—think 1–2 dates as a starter, then add protein and veggies.
10) What’s the best fruit to break a fast?
Start gently. Watermelon, papaya, or berries are kind to the stomach. Then, very soon, add protein so you feel satisfied and stable.
11) Can you eat fruit during intermittent fasting at night?
If you’re still within your eating window, yes—just keep portions modest and consider pairing fruit with protein. If your window has closed, wait until the next one opens.
12) Can you eat fruit during intermittent fasting on a 16-hour fast?
During those 16 fasting hours, no. During the 8-hour window, yes—use fruit intentionally: small portions first, then build a balanced plate.
13) Do grapes, pineapple, or pomegranate break intermittent fasting?
Yes. They all contain calories, so they end a strict fast. Yet, in the window, they’re perfectly fine when you pre-portion and, ideally, mix with protein.
14) What about guava and amla during intermittent fasting?
Both break a fast. Still, guava is wonderfully filling in the window, while amla—raw, pickled, or candied—belongs there too, not in the fasting hours.
15) Does monk fruit sweetener break a fast?
Pure, non-caloric monk fruit sweetener is generally used during fasting by people who want sweetness without calories. Even so, listen to your body—if sweet taste triggers cravings, keep it for the window.
16) Can you break intermittent fasting with fruit and still lose weight?
Yes—because weight loss depends on overall intake and consistency. So, once your window opens, lean on lower-sugar, higher-fiber fruits (berries, guava, apples, pears), keep portions calm, and add protein for better appetite control.
17) Is GI/GL important when eating fruit in intermittent fasting?
It helps as a guide, not a rule. In practice, portion size and protein pairing matter most. So, begin with a small serving of fruit, then follow with protein to feel even and satisfied.
18) Quick recap: how to use fruit without losing fasting benefits
Fast = no calories → fruit waits. Window = fruit is welcome → start small, pair with protein, and choose fruits that suit your goals. This way, you keep the structure of intermittent fasting intact while enjoying fruit in a way that genuinely supports you.

