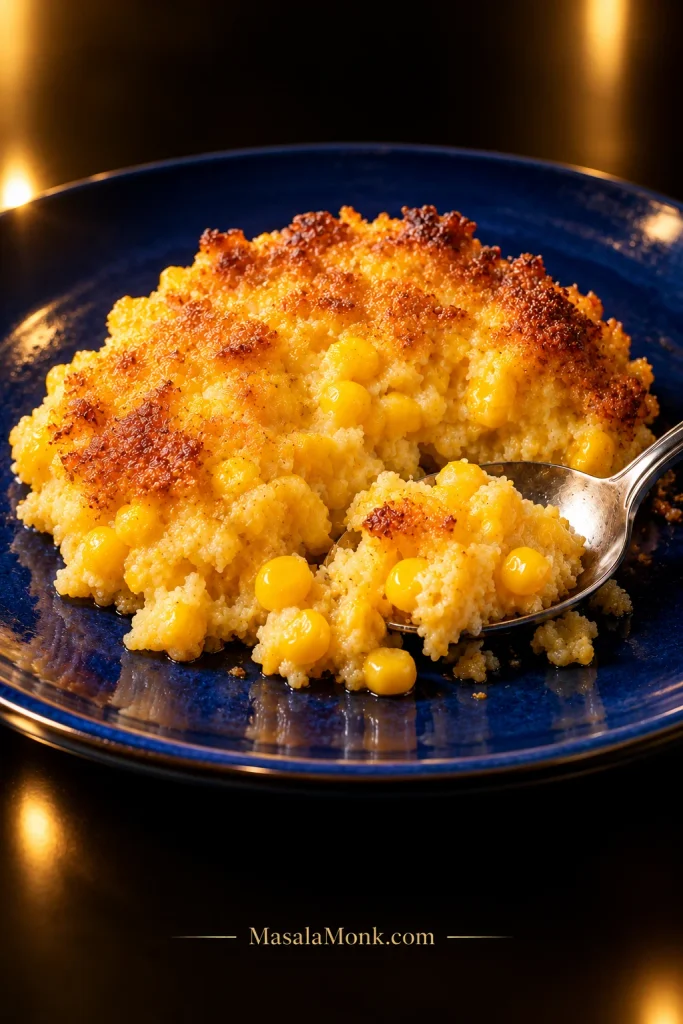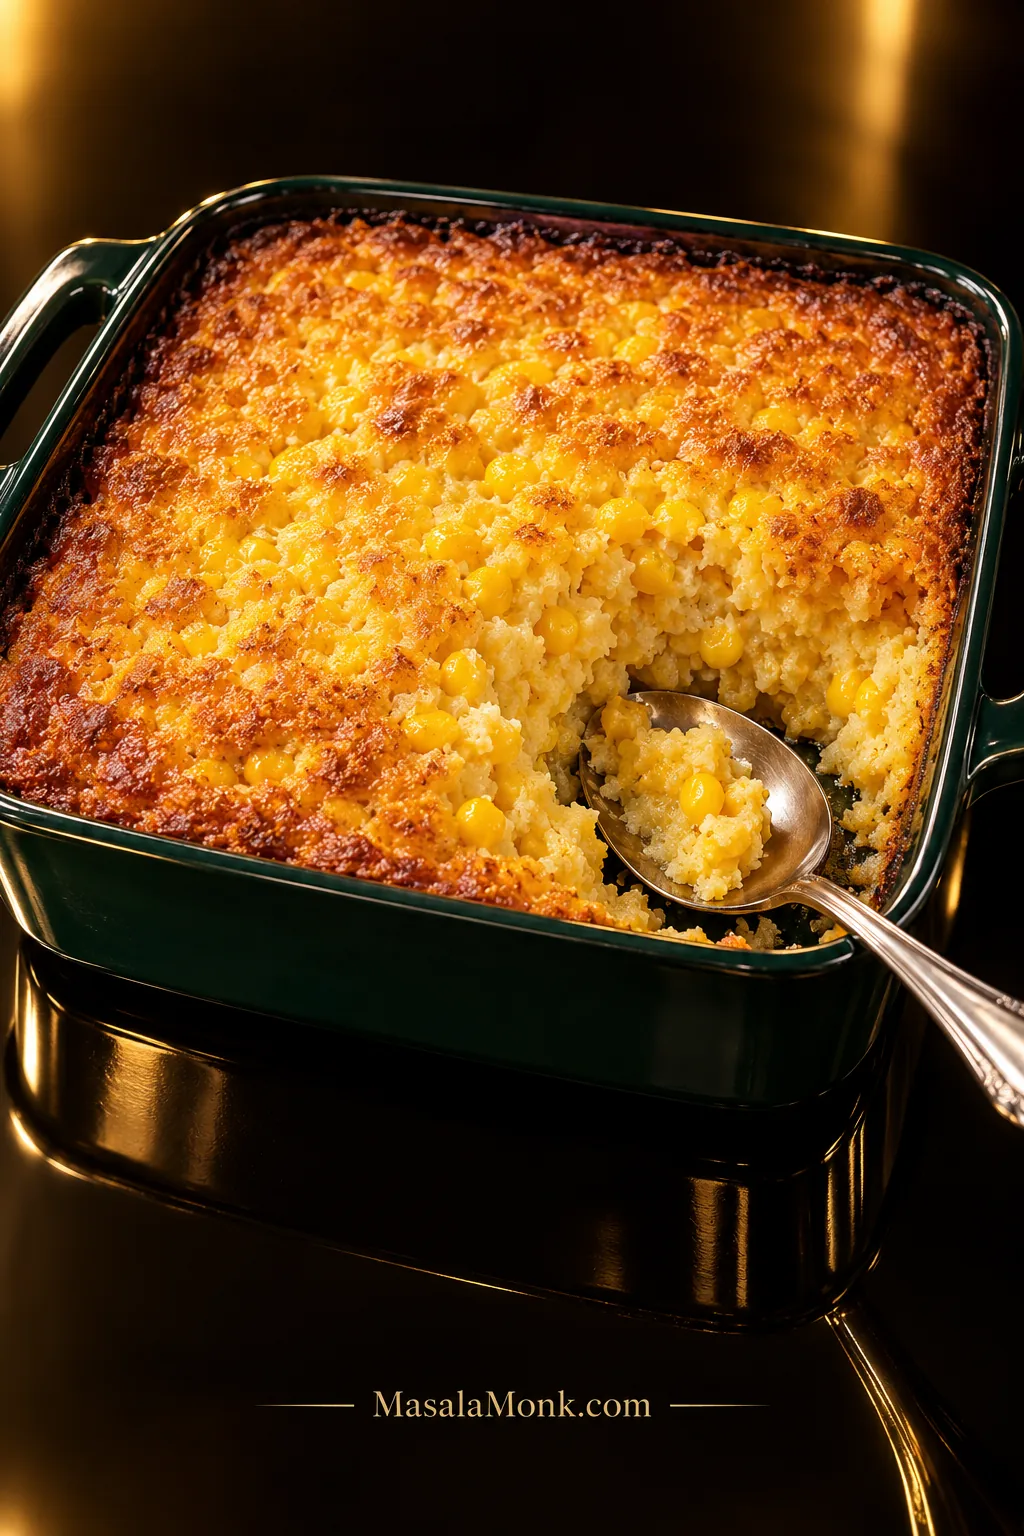
A good corn casserole has browned, buttery edges and a middle soft enough for a serving spoon to sink straight through. Sweet kernels pop through the creamy base, while the top tastes closer to tender cornbread.
The tricky part is knowing when that softness is actually done. Pull it too soon and you have wet batter; leave it until it looks like ordinary cornbread and the part that makes the casserole special has disappeared.
This corn casserole recipe lands between those two extremes. Everything comes together in one mixing bowl in about 10 minutes—no stovetop step, no mixer, and no need to prepare the corn muffin mix separately.
The classic Jiffy corn casserole uses one 8.5-oz / 240-g package of mix, added dry. A from-scratch version is included farther down if you do not have Jiffy or prefer to skip the box.
Corn Casserole in 30 Seconds
Corn casserole is a soft, spoonable baked corn side that usually combines corn with a creamy base and cornmeal or cornbread mix. For this corn casserole recipe, heat the oven to 350°F / 175°C. Combine an 8.5-oz / 240-g package of dry corn muffin mix with one drained can of whole-kernel corn, one full can of cream-style corn, 1 cup sour cream, ½ cup melted butter, and 2 eggs. Bake in a 9×9-inch (23×23-cm) dish and begin checking around 45 minutes. Rest for 10 minutes before serving.
The middle should stay soft, but it should no longer behave like liquid. Soft is right. Sloshy is not.
Make It Now
Classic Creamy Corn Casserole
This corn casserole recipe gives you sweet corn in every scoop, buttery browned edges, and enough egg to hold everything together without turning the casserole cakey.
Before You Mix
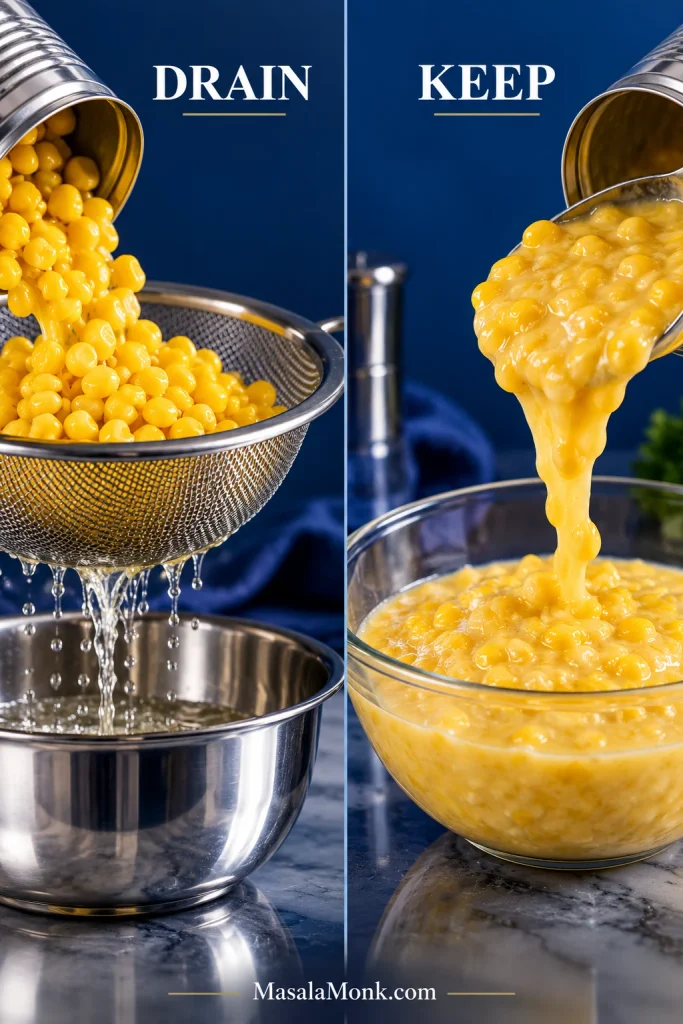
Drain the whole-kernel corn.
Keep the cream-style corn and its thick liquid.
Add the corn muffin mix dry. Do not prepare muffins according to the box directions first.
Ingredients
- 1 package corn muffin mix, 8.5 oz / 240 g
- 1 can whole-kernel corn, about 15 oz / 425 g before draining, well drained
- 1 can cream-style corn (often called creamed corn), 14.75–15 oz / 418–425 g, undrained
- 1 cup full-fat sour cream, about 8 oz / 227 g
- ½ cup unsalted butter, 4 oz / 113 g, melted and cooled slightly
- 2 large eggs
- ¼ teaspoon freshly ground black pepper, optional
- Up to 1 cup shredded cheddar, about 4 oz / 113 g, optional
If you’re using a larger package of the same corn muffin mix, weigh out 240 g rather than using the whole package. The muffin mix and canned corn are already seasoned, so the base recipe does not automatically need extra salt.
Vegetarian cooks should check the package before buying. The original JIFFY Corn Muffin Mix contains lard, while its Vegetarian Corn Muffin Mix uses vegetable shortening.
Method
- Heat the oven. Set a conventional oven to 350°F / 175°C. Lightly grease a 9×9-inch (23×23-cm) baking dish.
- Mix the wet ingredients. Whisk the eggs and sour cream together. Once the melted butter has cooled from very hot to warm, whisk it in.
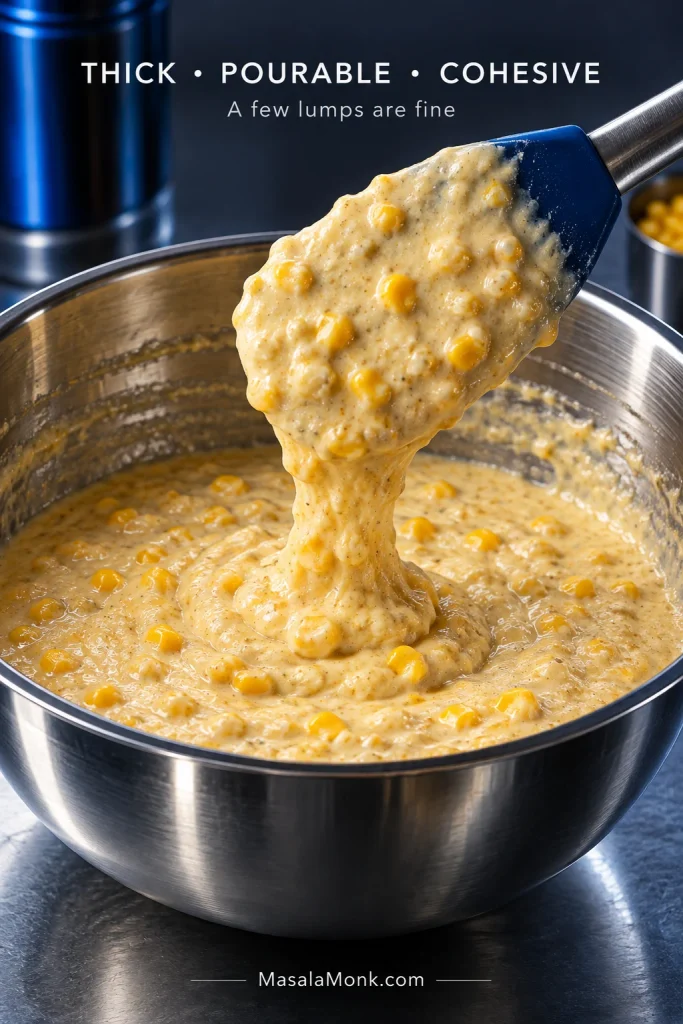
- Add the corn and muffin mix. Stir in the whole-kernel corn and cream-style corn. Fold in the dry muffin mix just until no obvious dry pockets remain. A few small lumps are fine; there is no need to keep stirring until the batter is perfectly smooth. Add cheddar now if you want cheese throughout.
Check the batter before baking: it should be thick but still pourable or easily spoonable. It should look cohesive, not watery, with no loose liquid pooling around the corn.
- Bake. Pour or spoon the batter into the dish and bake uncovered. Begin checking around 45 minutes. The edges should be lightly golden and the surface should have lost its raw, glossy look. For an egg casserole, USDA guidance gives 160°F / 71°C as the minimum center temperature. If you want cheddar on top, add it for roughly the final 8–10 minutes.
- Rest. Leave the casserole in the pan for 10 minutes before scooping.
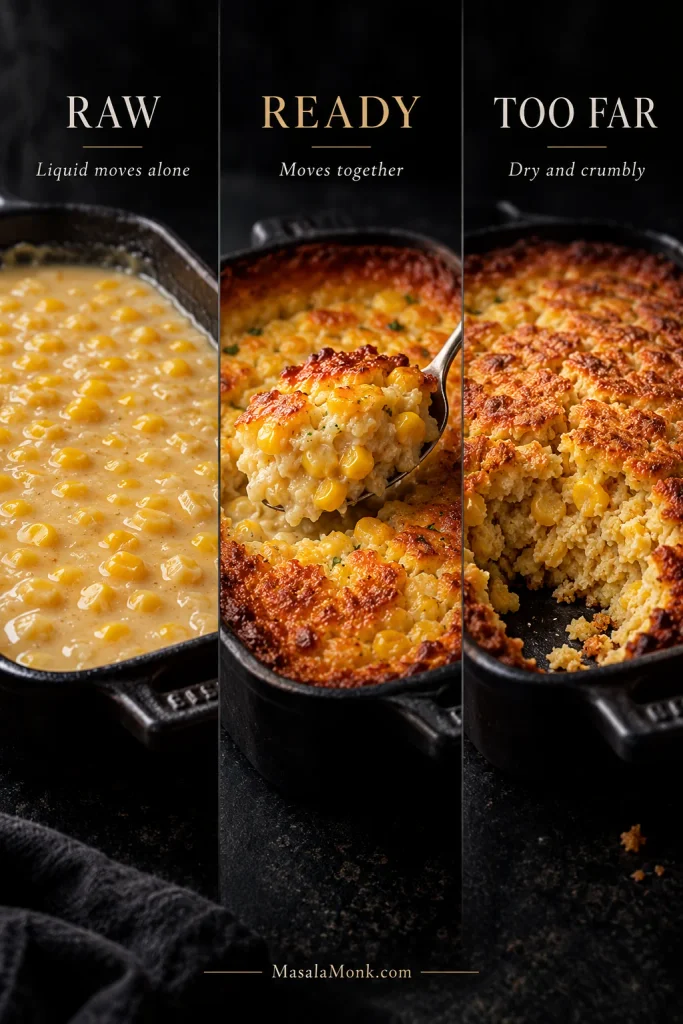
How to Tell When Corn Casserole Is Done
If you are staring through the oven door wondering whether the loose-looking middle is still raw, watch what happens when the pan moves. The top can brown before the inside is ready, so color alone is not enough.
Still Raw
The center looks glossy and loose. Nudge the dish and liquid ripples through the middle on its own. A tester comes out coated in wet batter.
Ready
The perimeter is set and beginning to brown. The middle can move gently, but it moves with the rest of the casserole instead of sloshing independently. Moist crumbs on a tester are fine.
You may also notice a toasted butter-and-corn aroma around the edge. After the rest, a serving spoon should lift a cohesive scoop rather than leave wet batter behind.
Gone Too Far
The middle has become bread-like, the perimeter feels hard, and spoonfuls crumble instead of yielding. It will still taste good, but you have lost the contrast between the browned edge and tender center.
Why Corn Casserole Recipes Disagree
Corn casserole recipes differ mainly because they aim for different textures, carry different amounts of moisture, and sit at different depths in the pan. That is why one recipe uses no eggs while another uses two, or why a broad shallow casserole can finish much sooner than a deeper one.
If dinner is already underway, the recipe above is enough.
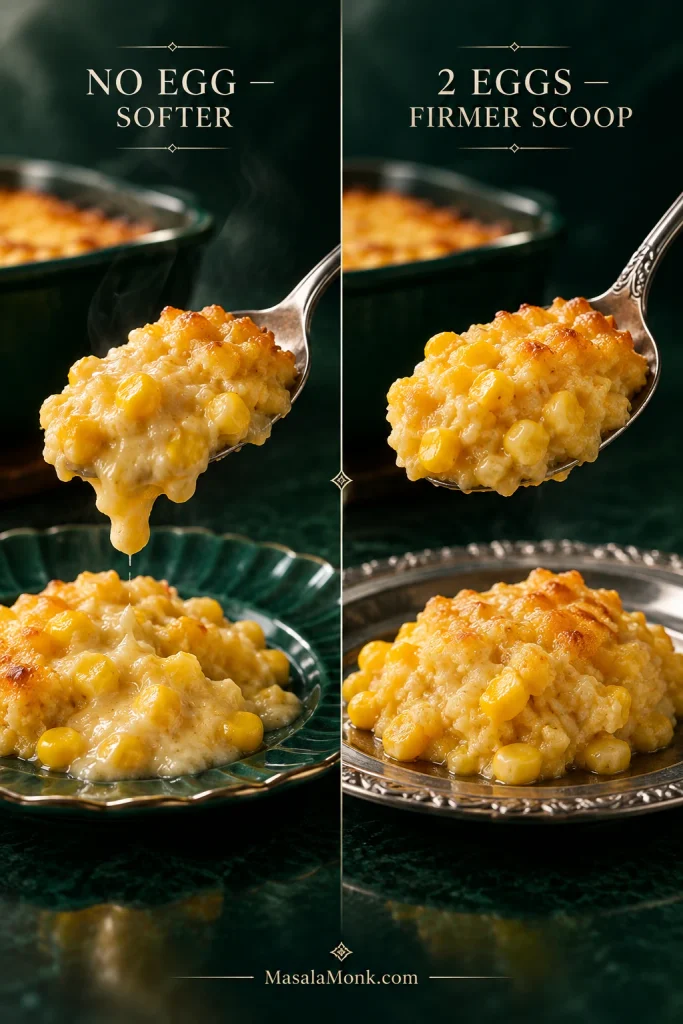
Softer or Firmer? Egg vs No Egg
Using no eggs gives you a softer, more pudding-like casserole; two eggs make it firmer and easier to scoop.
For this recipe—and especially for a holiday table—two eggs are the better default. The casserole holds together on the spoon and stays where you put it on the plate. Sour cream and cream-style corn keep it tender.
Leave the eggs out for the familiar 5-ingredient corn casserole: corn muffin mix, whole-kernel corn, cream-style corn, sour cream, and butter. It is intentionally looser and more pudding-like. One egg lands somewhere between those two styles.
Corn Casserole vs Corn Pudding: What’s the Difference?
Ask three families for corn casserole and you may get three noticeably different dishes. One is eggless and spoon-soft, another is firmer, and a third may be called corn pudding.
The names overlap, so texture is usually more useful than the label. Cornbread casserole is often another name for this same broad family of corn-and-cornbread-mix dishes. Spoonbread is another name you may encounter for this soft corn-casserole family.
Cornbread itself is firmer and sliceable. Corn pudding usually leans softer and more custard-like. A true corn soufflé is lighter and more egg-driven, often using whipped whites for lift. Scalloped corn overlaps too, although many versions use crackers or breadcrumbs and a different creamy base.
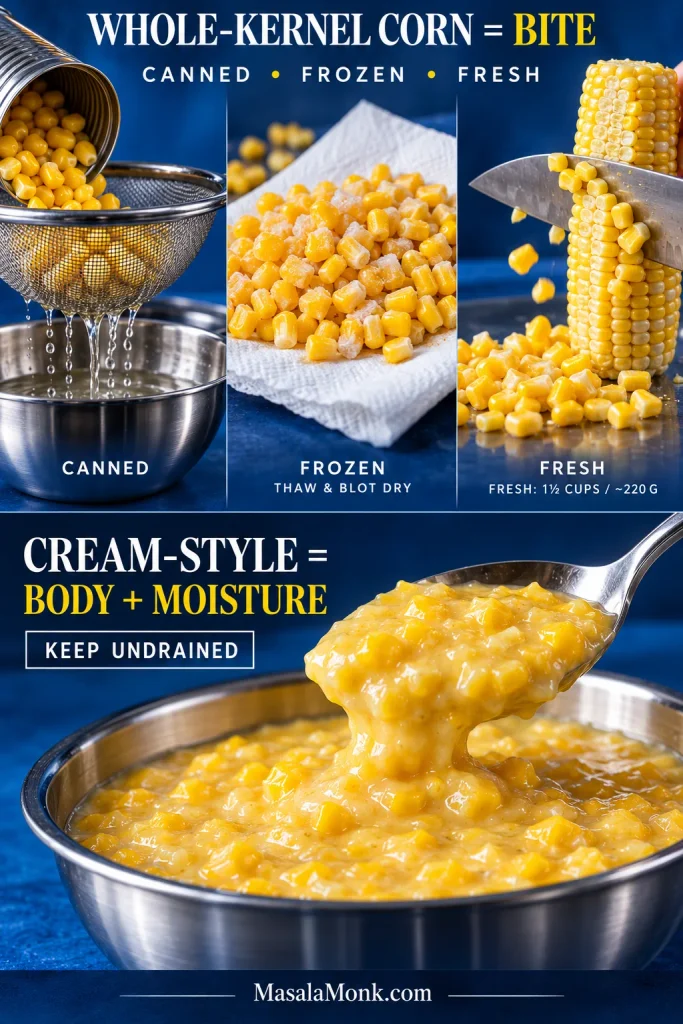
Canned, Frozen or Fresh Corn?
This recipe uses corn for two different jobs. One portion gives you whole kernels to bite into. The cream-style corn brings both corn solids and the thick liquid that keeps the casserole spoonable.
| Part of the Recipe | Choice | How to Use It | Result |
|---|---|---|---|
| Whole-kernel portion | Canned corn | Drain well | Classic texture and the most straightforward option |
| Whole-kernel portion | Frozen corn | Thaw, drain, blot if wet | Similar texture once the thawing water is removed |
| Whole-kernel portion | Fresh corn | Cut from the cob and measure | Brighter corn flavor and more distinct kernels |
| Creamy corn portion | Cream-style corn | Use the full can | Supplies the thick corn-rich base |
Fresh corn works at about 1½ cups / 220 g kernels in place of the drained canned whole corn. That is roughly 3 medium ears, though ear size varies enough that measuring the kernels is more dependable.
Frozen kernels work well too, but thaw them before they reach the bowl. Meltwater left clinging to the corn goes straight into the batter and can make an already-soft casserole noticeably wetter.
Why Cream-Style Corn Is Different
Another drained can of whole corn cannot replace cream-style corn by itself. You would be replacing the kernels but losing the thick corn liquid that helps produce the characteristic spoonable texture.
Corn Casserole Without Jiffy
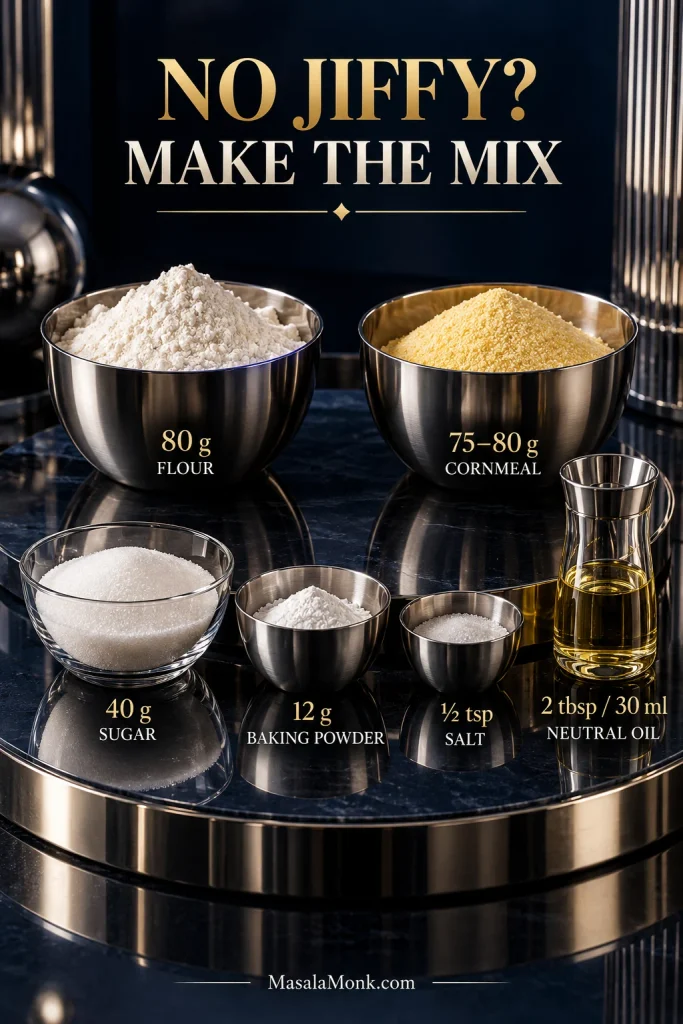
To make corn casserole without Jiffy, replace the 8.5-oz / 240-g boxed mix with flour, cornmeal, sugar, baking powder, salt, and a little neutral oil.
- 80 g all-purpose flour, about ⅔ cup
- 75–80 g yellow cornmeal, about ½ cup
- 40 g granulated sugar, about 3 tablespoons
- 12 g baking powder, about 1 tablespoon
- ½ teaspoon fine salt
Whisk those ingredients together and use them in place of the boxed mix. Add 2 tablespoons / 30 ml neutral oil with the melted butter. The boxed mix already contains added fat, so the oil replaces some of what disappears when you make the mix from scratch.
A more savory version needs only 20–25 g sugar. Cornmeal grind varies, so follow the same doneness cues as the main recipe rather than expecting the scratch version to finish at exactly the same minute.
If what you actually want is a firm slice with a bread-like crumb, use a dedicated Southern cornbread recipe instead.
Ingredient Changes That Work
| Change | What to Do | What to Expect |
|---|---|---|
| Full-fat Greek yogurt for sour cream | Use the same amount | Tangier flavor and a slightly firmer scoop |
| Frozen corn for canned whole corn | Thaw and remove the water first | Works well once excess moisture is gone |
| More or fewer eggs | Choose deliberately | Changes how firmly the casserole sets |
| Milk or half-and-half for sour cream | Avoid as a direct swap | Thins the batter much more than yogurt does |
| Different gluten-free cornbread mix | Use a recipe built for that mix | Different mixes absorb liquid differently |
Full-fat Greek yogurt is the cleanest sour-cream replacement; use 1 cup / about 225–230 g. It is thick enough to keep the batter from turning runny. Milk or half-and-half loosens it much more, which can leave the edges browned before the middle is ready.
If You Do Not Have Cream-Style Corn
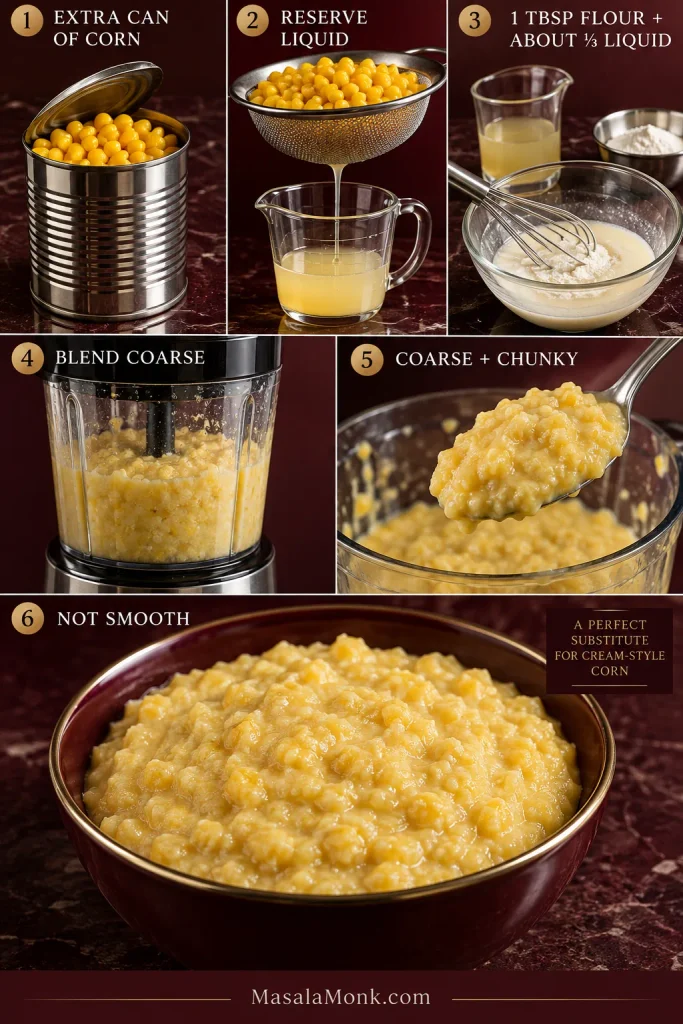
Use one additional 15-oz / 425-g can of whole-kernel corn, separate from the can used for the whole-kernel portion of the recipe. Reserve the liquid before draining it.
Blend all of those kernels with about one-third of the reserved canning liquid and 1 tablespoon all-purpose flour. Stop when no intact kernels remain but the mixture is still coarse and chunky, not smooth. If the blender needs help moving, add a little more of the reserved liquid. Use the entire mixture in place of the cream-style corn.
Changing either the baking mix or the dairy is manageable. Change both at once, though, and you are better off starting with a gluten-free or dairy-free corn casserole recipe built for those ingredients.
Cheddar, Jalapeño and Other Add-Ins
For a cheesy corn casserole, add up to 1 cup / 4 oz / 113 g shredded cheddar. Fold it into the batter for cheese throughout, or add it near the end for a browned, salty layer on top.
Finely chopped jalapeño, well-drained green chiles, scallions, chives, and black pepper all work without substantially changing the batter. A cheddar-jalapeño version is especially good beside smoky food such as slow cooker pulled pork.
Extra sugar is rarely necessary with a sweet corn muffin mix. Add 1–2 tablespoons only when you deliberately want a sweeter casserole. Tart cranberry sauce with orange juice is particularly good against that buttery sweetness.

Your Pan Is Part of the Recipe
Bake time is not just about the dimensions printed on the pan. What matters is how deeply the batter sits inside it. Spread the same amount across more surface area and it heats through faster. Stack twice as much into the same footprint and the center has much farther to go.
Same batter, deeper pan, longer bake.
| Setup | What Changes | When to Begin Checking |
|---|---|---|
| 1 batch in 9×9 | Baseline depth | About 45 min |
| 1 batch in 8×8 | Deeper than the baseline | Around 45 min; it may run toward the longer end of the range |
| 1 batch in 9×13 | Shallower, broader layer | Around 35 min; judge by the same doneness cues |
| 2 batches in one 9×13 | Much deeper | About 55–60 min, then judge the center |
| 2 batches in two standard pans | Depth stays close to the original | About 45 min |
Those are checkpoints, not guaranteed finish times. Pan material, starting temperature, and the behavior of your oven still matter.
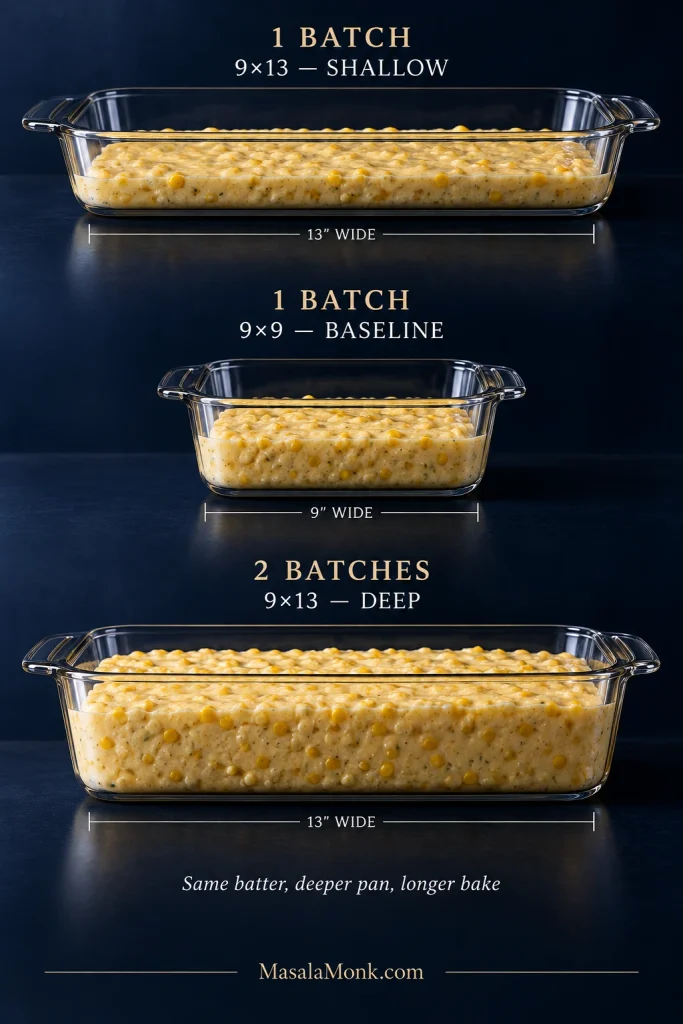
One Batch in a 9×13 Is Not the Same as Two
A single batch spread through a 9×13-inch (23×33-cm) pan is relatively shallow, so start looking at it around 35 minutes. Double the recipe in that same pan and you can end up staring at beautifully browned edges while a loose patch in the middle is still catching up.
That is why a statement such as “a 9×13 takes 30 minutes” tells you very little unless you also know how much batter was in it.
Doubling the Recipe
For a double batch, use two 9×9 pans if possible. One high-sided 9×13 works too; begin checking that deeper casserole around 55–60 minutes.
Keeping roughly the original batter depth makes the result easier to predict. With one deeper 9×13, leave some headroom above the batter. If the top and edges brown before the middle is ready, tent the dish loosely with foil and keep baking.
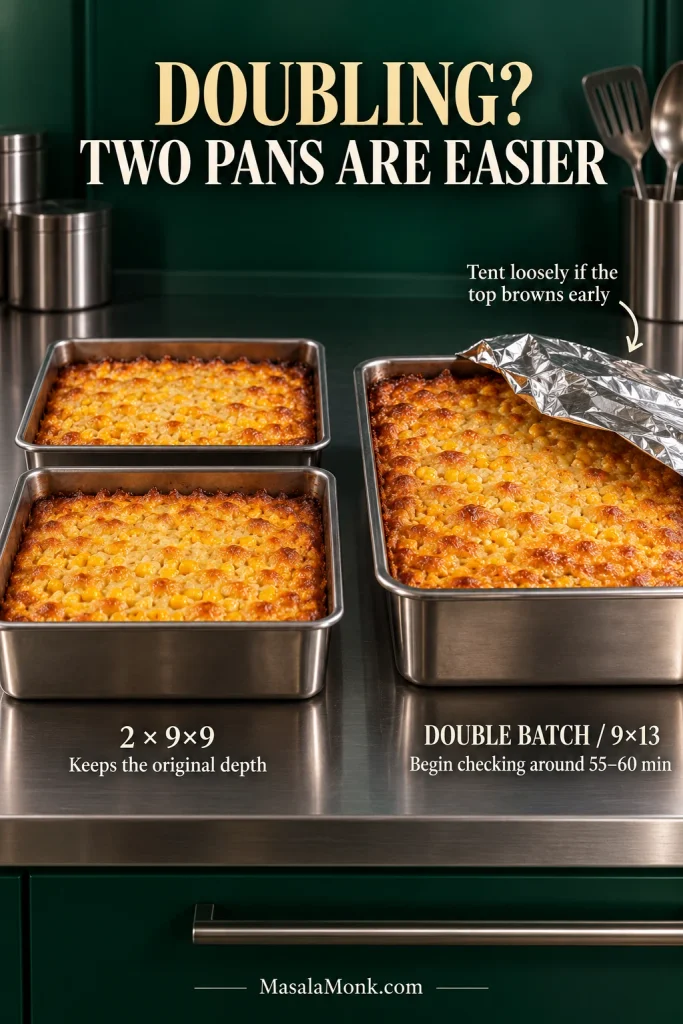
One batch makes about 8 side servings. At a meal with several other sides, a double batch generally covers around 14–16 people. Two moderate pans are also easier to work around another 350°F dish such as sweet potato casserole.
Metal pans can brown the edges sooner. Heavy ceramic and glass take longer to warm but hold heat well once hot. With a fan-assisted oven, use your oven’s normal temperature conversion and start watching a little earlier.
Making Corn Casserole for Thanksgiving When the Oven Is Full
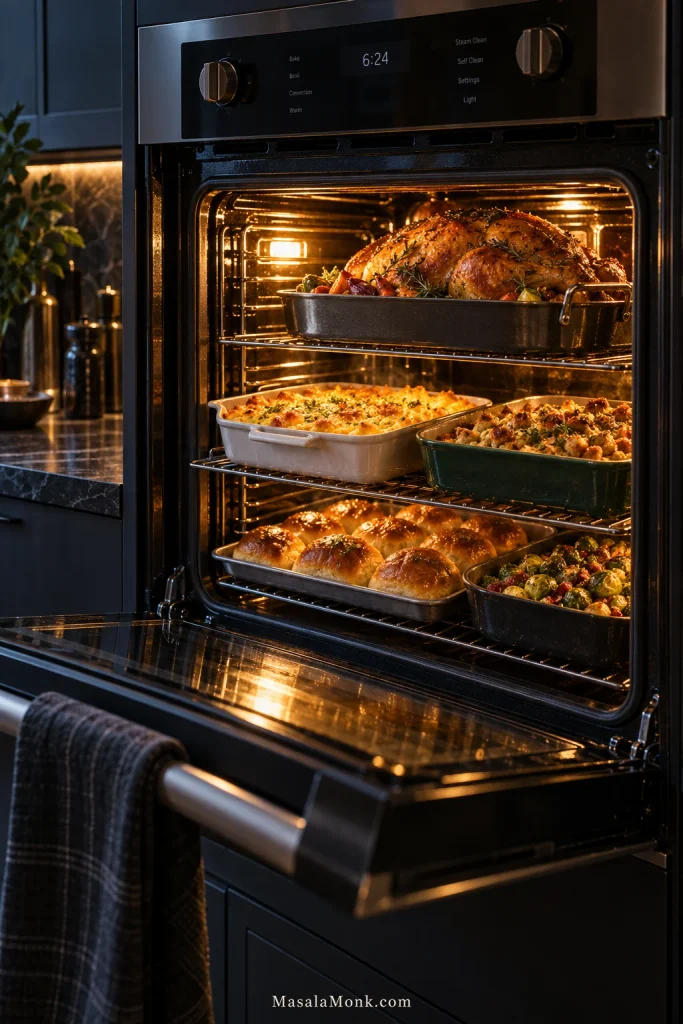
On a weeknight, the casserole can have the oven to itself. Thanksgiving is another story: the turkey is roasting, dressing needs a rack, rolls want a final blast of heat, and the door keeps opening.
The casserole does not know the recipe promised roughly 50 minutes. It only knows the oven keeps losing heat.
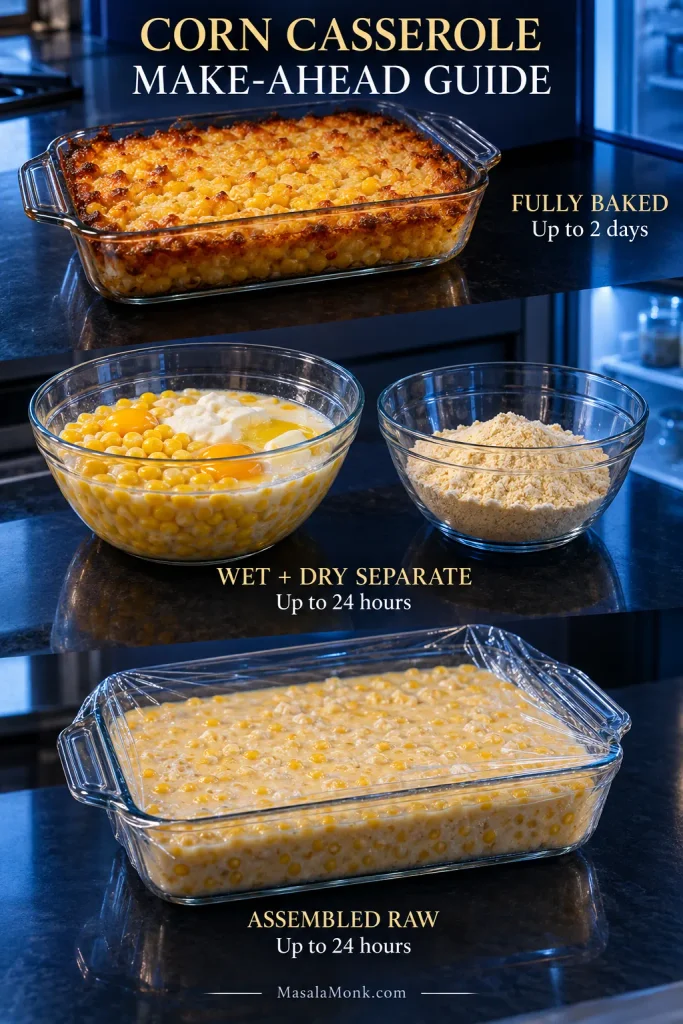
Bake It Ahead
Yes—corn casserole can be fully baked up to 2 days ahead. Cool it promptly, cover, and refrigerate, then reheat before serving. This is the simplest way to remove the casserole from the holiday oven traffic jam.
If Southern cornbread dressing is also on the menu, baking the corn casserole ahead leaves valuable oven space available for the dressing closer to dinner.
If You Want to Bake It Fresh
The best texture comes from keeping the muffin mix dry until close to baking. Up to 24 hours ahead, combine the eggs, sour cream, butter, and corn, then cover and refrigerate promptly. When you are ready to bake, stir the chilled mixture well before folding in the dry mix.
You can also assemble the whole casserole the night before if convenience matters most. Cover it, refrigerate promptly, and bake it within about 24 hours. Cold batter normally needs more oven time, and batter that has sat overnight may rise a little differently from one mixed immediately before baking.
When the Oven Gets Crowded
Leave a little breathing room around the dish when possible. Adding another refrigerator-cold casserole—such as green bean casserole—at the same time slows the oven’s recovery.
The casserole can wait through its 10-minute rest, so there is no benefit in forcing every side to finish at exactly the same moment. If oven space disappears completely, use a slow-cooker corn casserole recipe built for that moist cooking environment rather than moving this exact batter straight into a slow cooker.
When Something Goes Wrong
A problem that looks mysterious in the oven is usually easier to diagnose once you separate excess moisture from insufficient baking and excessive batter depth.
| What You See | Likely Cause | What to Do |
|---|---|---|
| Liquid center | Needs more baking, too much moisture, or unusually deep batter | Continue baking and review corn drainage or substitutions |
| Edges browned, center raw | Center is heating much more slowly than the perimeter | Tent loosely with foil and continue |
| Top browns too quickly | Strong top heat or a deep casserole | Cover loosely with foil while the inside finishes |
| Dry or cakey | Overbaked, too much dry mix, or too much egg | Check package weight and pull the next batch sooner |
| Frozen-corn version is watery | Thawing water went into the bowl | Thaw, drain, and blot before mixing |
| Dense or gummy | Dry-to-liquid ratio changed | Check the mix weight and any extra liquid or substitutions |
| Overflow | Pan is too small or too full | Divide the batter or use a larger, high-sided dish |
Storage and Reheating
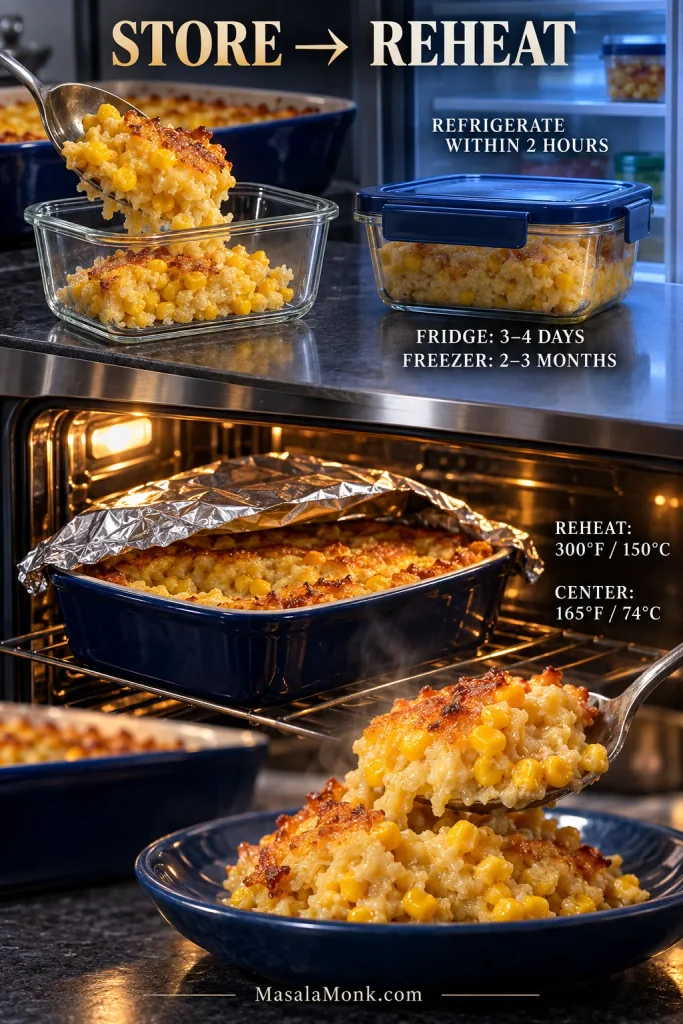
Cooked corn casserole keeps for 3–4 days in the refrigerator. Refrigerate leftovers within 2 hours of serving and keep them covered.
Reheat a larger portion covered at about 300°F / 150°C until hot through. A partially filled dish often warms in 15–20 minutes; a whole refrigerator-cold casserole takes longer. Uncover near the end if you want some color back on top. Reheated leftovers should reach 165°F / 74°C.
A single serving reheats well in short microwave bursts. The casserole will usually be a little softer after refrigeration and reheating than it was straight from the oven.
Freezing extends the useful storage window to about 2–3 months for best quality. Thaw overnight in the refrigerator before reheating.
What to Serve With Corn Casserole
The casserole is rich, buttery, and naturally sweet. Salty gravy and tart cranberry sauce both work beautifully with it, while crisp green vegetables keep the plate fresh. Smoke and char keep the sweetness from dominating the savory side of the meal.
At Thanksgiving, it fits naturally beside turkey, dressing, green beans, cranberry sauce, and a spoonful of turkey gravy made from pan drippings. With a honey-glazed spiral ham, keep the casserole itself on the less-sweet side so the whole plate does not lean sugary.
Outside the holidays, serve it with chili, ribs, grilled chicken, pulled pork, or other smoky barbecue. Jalapeño, green chiles, or cheddar move the casserole even more comfortably in that direction.
Give the casserole its 10-minute rest, then go for a browned corner and a generous scoop. It is at its best hot, when the sweet corn, butter, tender center, and lightly crisp edge all land in the same bite.