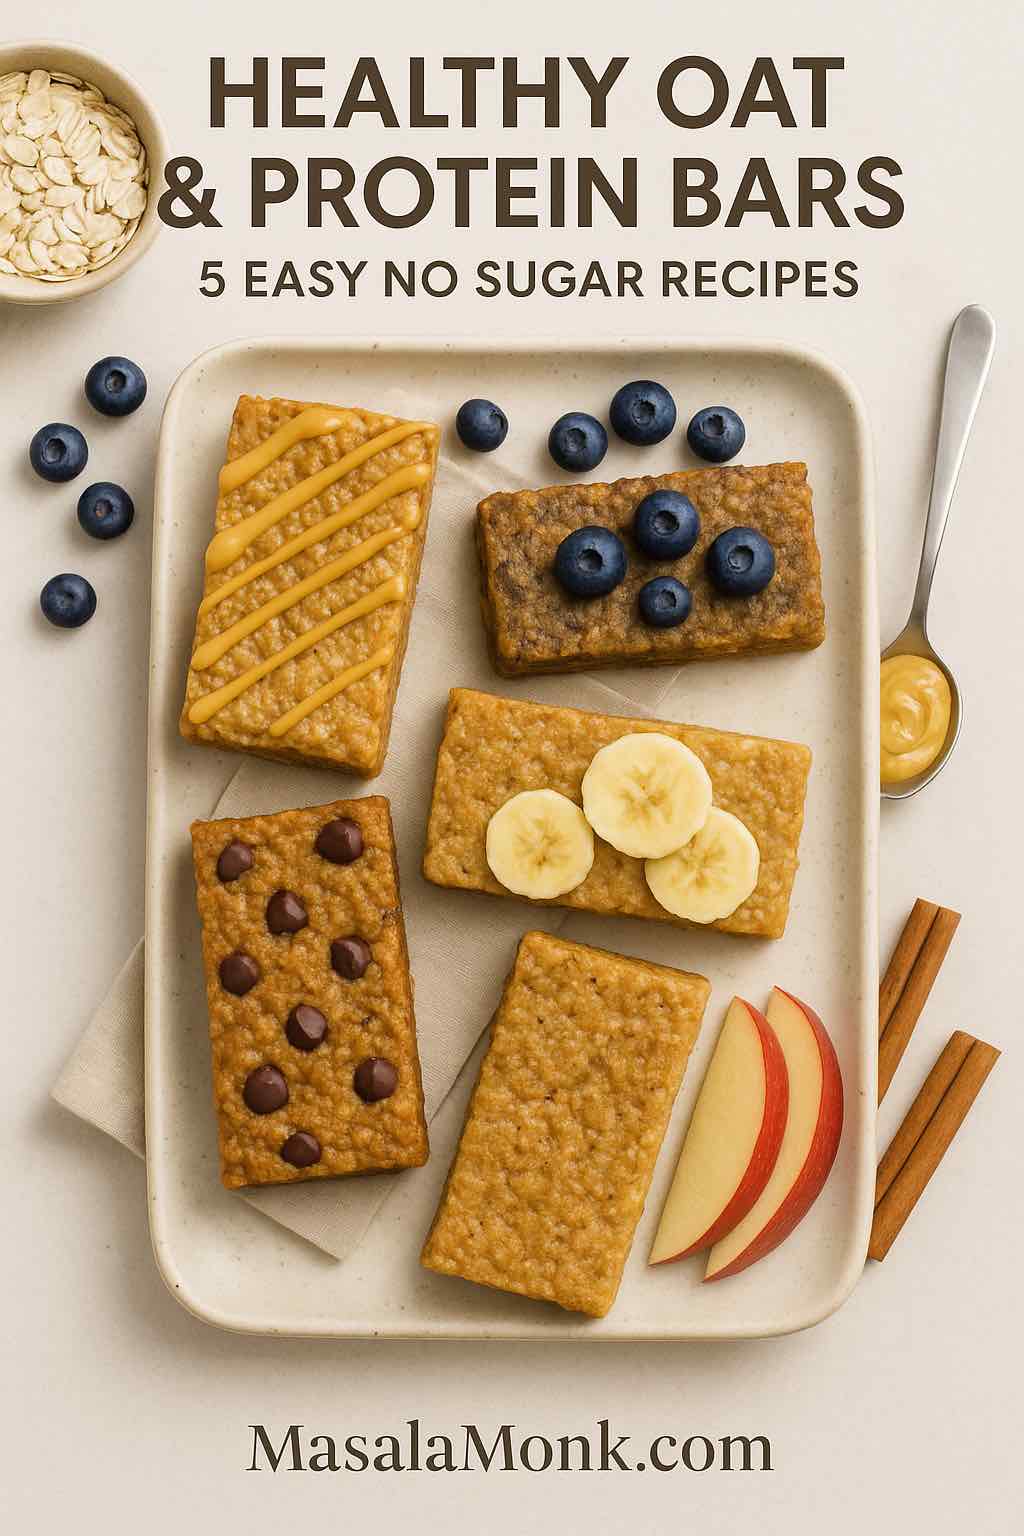
If you’ve ever grabbed a store-bought granola bar in a rush and later regretted it after reading the label, you’re not alone. Many so-called “healthy” bars are loaded with hidden sugars, syrups, and additives. They may look nutritious on the package, but in reality, they’re often closer to candy bars than real fuel. The good news is that you don’t need to rely on those packaged options. With just a few simple ingredients, you can create your own healthy oat protein bars at home — bars that are naturally sweetened, nourishing, and quick to prepare. They make the perfect grab-and-go snack, a light breakfast, or even post-workout recovery fuel.
And here’s the best part: oats and protein aren’t just tasty, they’re backed by science. Oats are rich in beta-glucan, a soluble fiber proven to lower total and LDL cholesterol by up to 10% in clinical studies (PubMed). In fact, Health Canada even allows oat-based products to carry a heart health claim based on this evidence (Health Canada). Beyond heart health, oats also provide slow-digesting carbs that help stabilize blood sugar and keep energy levels steady throughout the day (Health.com).
When you combine oats with protein from nut butters, seeds, or powders, you don’t just make a snack—you create a balanced mini-meal. Protein helps with satiety, supports muscle repair, and prevents energy crashes. Dietitians often recommend snacks with at least 7 grams of protein to keep you feeling full and focused (Real Simple). That’s exactly what these recipes deliver.
It’s tempting to toss a box of granola or protein bars into your cart. But once you understand the difference, you may never want to go back.
First, you control the ingredients. With homemade bars, there are no hidden sugars, syrups, or preservatives. A surprising number of commercial “protein bars” contain as much sugar as a candy bar (NY Post). By making your own, you decide whether to sweeten with bananas, dates, or honey—and you know exactly what’s going into your body.
Second, the nutrition is better. Oats are packed with fiber and help slow digestion, which means fewer spikes in blood sugar and better appetite control (Verywell Health). Add protein and healthy fats from nut butters, seeds, or yogurt, and you’ve got a truly balanced snack.
Third, they’re more satisfying. When you hit that 7–10 grams of protein mark, you’re not just curbing hunger—you’re setting yourself up for better focus, energy, and even fewer cravings later in the day. That’s something most sugary snack bars simply can’t deliver.
Finally, they’re cost-effective and customizable. A batch of homemade oat protein bars often costs less than a single box of store-bought ones, and you can change the flavors week to week: chocolate one week, fruit the next, apple-cinnamon when the weather turns crisp.
In other words, by making your own bars, you save money, gain control, and actually get a snack that fuels you the way it should.
These recipes all follow the same simple formula: oats + binder + protein source + flavor boost. But each one has its own personality. Some lean indulgent (hello, chocolate chip), others are light and fruity (blueberry, apple cinnamon), while peanut butter and banana offer a more classic, hearty vibe.
Each recipe makes about 8–10 bars. Nutrition is estimated per bar.
1. Peanut Butter Healthy Oat Protein Bars
Peanut butter lovers, this one’s for you. These bars are rich, creamy, and full of that nutty goodness we all crave. Unlike packaged peanut butter bars that often sneak in added sugars and oils, these are made with nothing but whole, real ingredients. They’re also naturally high in protein, making them ideal for a pre-workout energy boost or a post-gym recovery snack.
Stacked high with creamy peanut butter drizzle, these healthy oat protein bars show that wholesome can still feel indulgent. And because they’re packed with protein, they make the perfect grab-and-go breakfast or snack.
Ingredients:
2 cups rolled oats
½ cup natural peanut butter (no sugar added)
¼ cup honey or 1 mashed banana
1 scoop vanilla protein powder (optional)
2 tbsp chia seeds
Method:
Warm peanut butter and honey/banana until smooth.
Stir in oats, protein powder, and chia seeds.
Press mixture into a lined pan and refrigerate for at least 1 hour.
👉 Pro tip: Wrap each bar individually so you can toss it into your bag for a quick, protein-packed snack whenever you need it.
Also Read: What is Protein? – To understand more about this essential Macronutrient, how much and why you need it.
2. Chocolate Chip Oatmeal Protein Bars
These bars are proof that healthy doesn’t have to mean boring. By using dark chocolate (70–85% cacao), you get antioxidants and rich flavor without the sugar overload of milk chocolate. Think of these as a smarter version of a chocolate chip cookie—one you can enjoy any time of day without guilt.
Rich, chewy, and dotted with dark chocolate, these oatmeal protein bars prove that healthy snacks can taste like dessert while keeping you fueled.
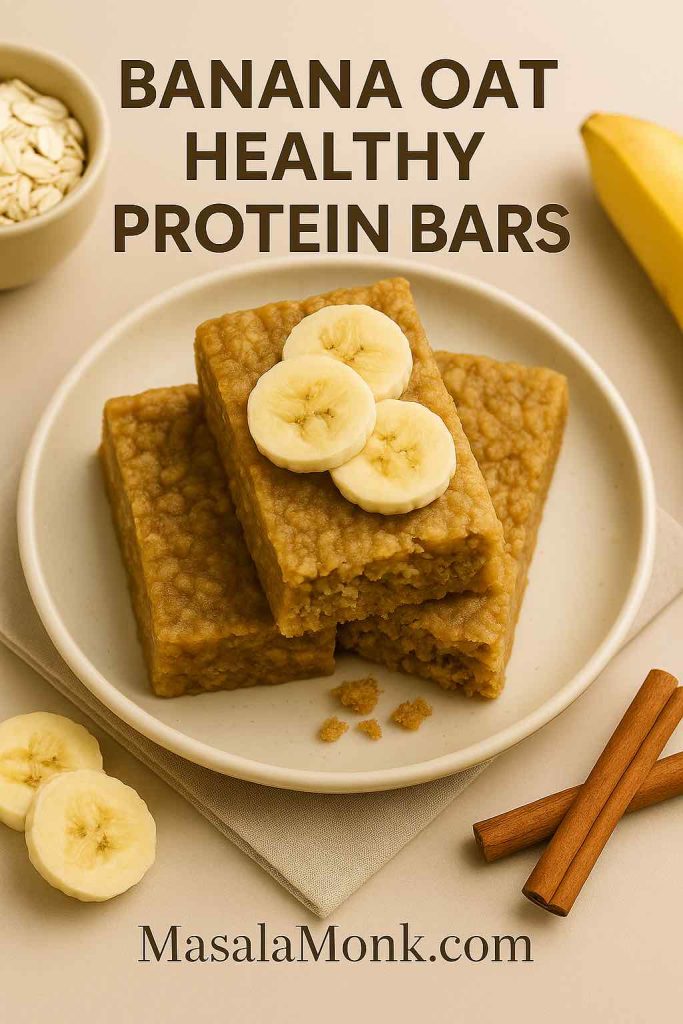
Bananas are one of the best natural sweeteners you can use in baking. They’re loaded with potassium and fiber, and they double as a binder, eliminating the need for eggs or refined sugar. These bars come out soft and chewy—like banana bread in snack form. They’re perfect for kids, or as a wholesome breakfast bar.
Soft, naturally sweet, and packed with fiber, these banana oat protein bars are like banana bread in snackable form.
Ingredients:
2 ripe bananas, mashed
2 cups oats
2 tbsp almond butter
½ tsp cinnamon
Optional: 1 scoop protein powder
Method:
Mash bananas until smooth, then stir in almond butter.
Add oats, cinnamon, and protein powder if using.
Bake at 350°F (175°C) for 20–25 minutes, or chill for a no-bake version.
👉 Pro tip: Add chopped walnuts or raisins for extra texture and flavor. This small change transforms them into a snack that feels almost like banana bread bars.
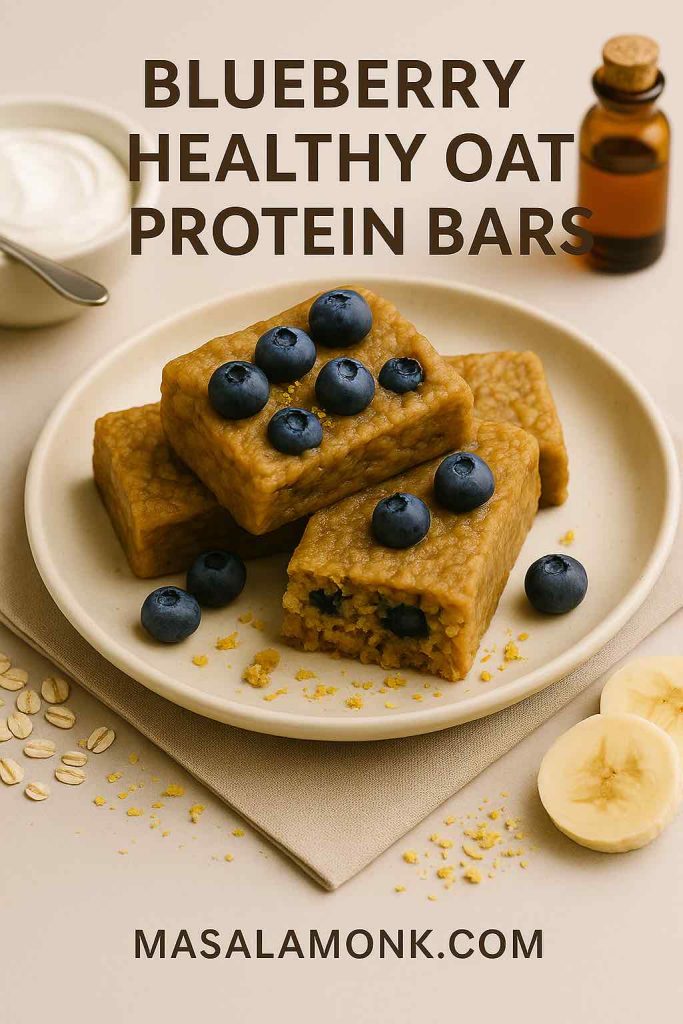
When you’re craving something fruity and refreshing, these bars are the answer. Blueberries are packed with antioxidants and natural sweetness, while Greek yogurt adds protein and creaminess. The result is a bar that feels indulgent yet energizing—a cross between a snack and a mini breakfast.
Juicy blueberries make these healthy oat protein bars a refreshing and antioxidant-rich twist on the classic oat snack.
Ingredients:
2 cups oats
½ cup Greek yogurt
½ cup fresh or frozen blueberries
2 tbsp honey or mashed banana
1 tsp vanilla extract
Method:
Mix oats, yogurt, honey/banana, and vanilla until smooth.
These bars are like autumn in snack form. The grated apple keeps them moist, while cinnamon adds that cozy, spiced flavor. Unlike many packaged “apple cinnamon” bars that rely on artificial flavors, these actually taste like real fruit and spice. They’re perfect with a cup of tea or coffee in the afternoon.
Spiced with cinnamon and sweetened with apples, these cozy bars are perfect with a warm cup of tea.
Ingredients:
1 apple, grated
2 cups oats
2 tbsp almond butter
½ tsp cinnamon
Optional: walnuts or raisins
Method:
Mix grated apple with almond butter.
Stir in oats, cinnamon, and extras.
Bake for 20 minutes at 350°F (175°C), or refrigerate overnight.
Boost the protein: Add whey or plant-based protein powders, hemp hearts, or pumpkin seeds. Hitting at least 7 grams of protein per bar ensures satiety (Real Simple).
Bind naturally: Dates and mashed bananas are excellent natural binders, holding the bars together without refined sugars.
Store smartly: Keep them in the fridge for up to 7 days, or freeze in batches for up to 2 months.
Get creative: Change up flavors to keep it exciting—add cranberries, coconut, or even drizzle with dark chocolate.
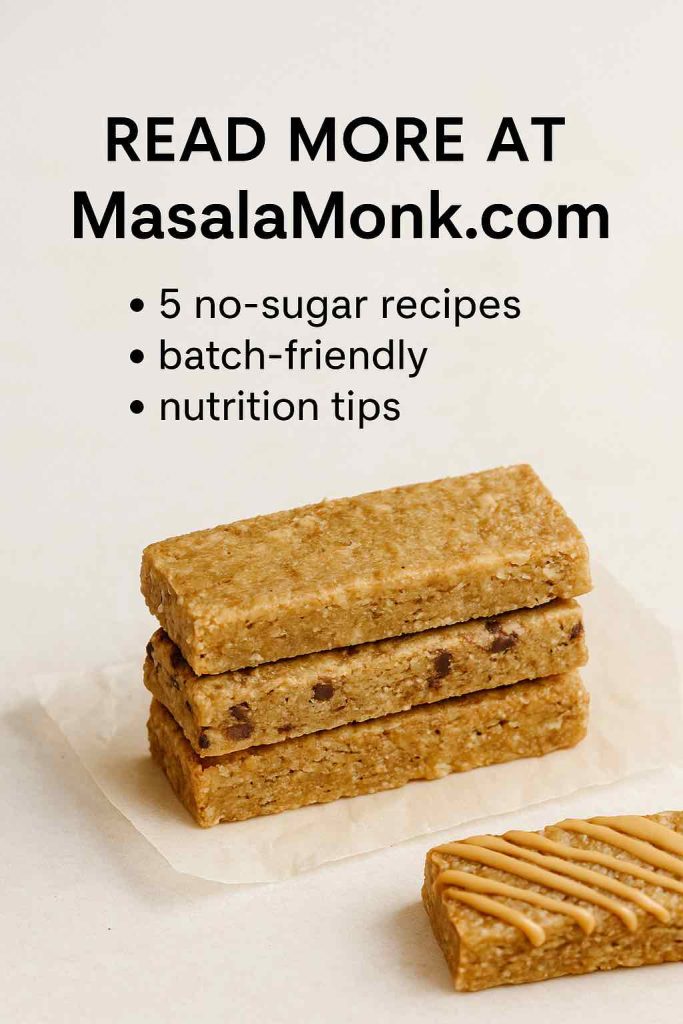
Want more? Discover all 5 no-sugar recipes for healthy oat protein bars at MasalaMonk.com and start snacking smarter.
Wrapping It Up
These healthy oat protein bars prove that eating well doesn’t mean sacrificing taste or convenience. They’re versatile, affordable, and backed by science. Oats improve heart health, cholesterol, and blood sugar stability (Verywell Health), while protein adds staying power, focus, and recovery support.
So instead of grabbing a sugar-laden bar off the shelf, imagine reaching into your own fridge for a bar you made yourself—with oats, protein, and flavors you love. The result? A snack that truly works with your body, not against it.
👉 Try one of these recipes this week and see the difference. Once you taste how simple and satisfying homemade oat protein bars can be, you may never go back to store-bought again.
Frequently Asked Questions About Healthy Oat Protein Bars
1. Are healthy oat protein bars actually good for you?
Yes, absolutely! Healthy oat protein bars combine the slow-digesting carbs and soluble fiber in oats with the satiating power of protein. As a result, they not only give you energy but also help keep you full for hours. Unlike store-bought bars—which can contain as much sugar as a candy bar—homemade oat bars allow you to control every ingredient and avoid artificial fillers. That makes them a smart choice for breakfast, snacks, or even post-workout recovery.
2. Can oatmeal protein bars help with weight loss?
They can definitely support weight management when used wisely. Oats are naturally rich in beta-glucan fiber, which has been shown to improve fullness and reduce cravings. When you combine oats with protein, you slow digestion and stabilize blood sugar, which helps prevent overeating later. Therefore, oatmeal protein bars make an excellent snack for anyone looking to manage appetite and maintain steady energy.
3. How much protein should homemade oat bars have?
Most dietitians recommend that snacks contain at least 7 grams of protein to be truly satisfying. That’s why many of the recipes here include nut butters, Greek yogurt, or protein powder. Consequently, each bar hits that target, making them not just tasty but also functional. Whether you’re eating them for breakfast, as a midday bite, or as a quick oat protein snack before the gym, that protein makes all the difference.
4. Do you need sugar to make oat protein bars taste good?
Not at all. In fact, one of the best things about homemade oat bars is that you can rely on natural sweeteners like ripe bananas, Medjool dates, or even a touch of honey. These add gentle sweetness without spiking your blood sugar the way refined sugar does. Moreover, when combined with cinnamon, vanilla, cocoa, or fruit, your bars taste amazing without needing extra sugar.
5. How long do healthy oat protein bars last?
Freshly made bars usually keep for 5–7 days in the fridge when stored in an airtight container. For longer storage, freeze them for up to 2 months. That means you can meal prep a whole batch of oatmeal protein bars on Sunday and enjoy healthy, ready-to-go snacks all week long. In addition, freezing makes it easy to keep a stash for busy days.
6. Are oat protein snacks good for kids?
Yes, and kids often love them! Since these bars are soft, slightly sweet, and customizable, they’re a much healthier alternative to packaged granola bars or sugary cereal bars. Of course, you can adjust ingredients—like skipping protein powder for younger children—and still provide a wholesome, naturally sweet snack. Therefore, oat protein snacks are family-friendly, portable, and easy to make in bulk.
For generations, people have called walnuts “brain food.” The nickname sticks partly because a walnut looks like a tiny brain. More importantly, walnuts are rich in nutrients that matter for the nervous system, and researchers have tested their effects on mood, memory, and day-to-day performance. The data doesn’t promise miracles, and we shouldn’t expect a single food to transform cognition. Even so, the evidence points to a simple, practical story: a small daily serving of walnuts is a smart, tasty habit that supports overall brain health, especially when paired with a balanced lifestyle.
In this guide, you’ll find what the best studies actually show, how walnuts might work in the body, who stands to benefit most, and how to build an easy walnut habit without overdoing calories. You’ll also get straightforward tips for storage, safety, and cooking—so the advice is not only sound, but usable.
One small handful (28–30 g ≈ 14 halves) delivers ~2.6 g ALA—the plant omega-3—plus antioxidants. Swap for lower-quality snacks to keep calories in check.
Walnut Benefits for Brain Health—Myth, Hype, or Science?
The “brain food” idea isn’t just folklore. Walnuts supply a mix of nutrients with plausible roles in brain function:
Alpha-linolenic acid (ALA), a plant-based omega-3 that helps maintain healthy cell membranes and inflammatory balance. A 28 g serving (about 14 halves) contains roughly 2.6 g of ALA, according to USDA-based data via MyFoodData. My Food Data
Polyphenols and other antioxidants that help counter oxidative stress—a driver of age-related decline.
Vitamin E and key minerals (magnesium, folate) that support nerve function and overall metabolism.
Melatonin and related phytochemicals naturally present in walnuts, which may influence sleep/circadian biology.
Together, that’s a nutrient profile you won’t quite find in other nuts. And while not every trial shows across-the-board improvements, several controlled studies and reviews suggest walnuts can nudge specific brain-related outcomes in the right direction.
What Research Really Says About Walnut Benefits for Brain?
Are Walnuts Good for Your Brain? Evidence at a Glance
In healthy young adults, the big picture is no sweeping boost across all cognitive tests. However, one domain—inferential verbal reasoning—has shown a meaningful improvement with regular walnut intake (details just below). PubMed
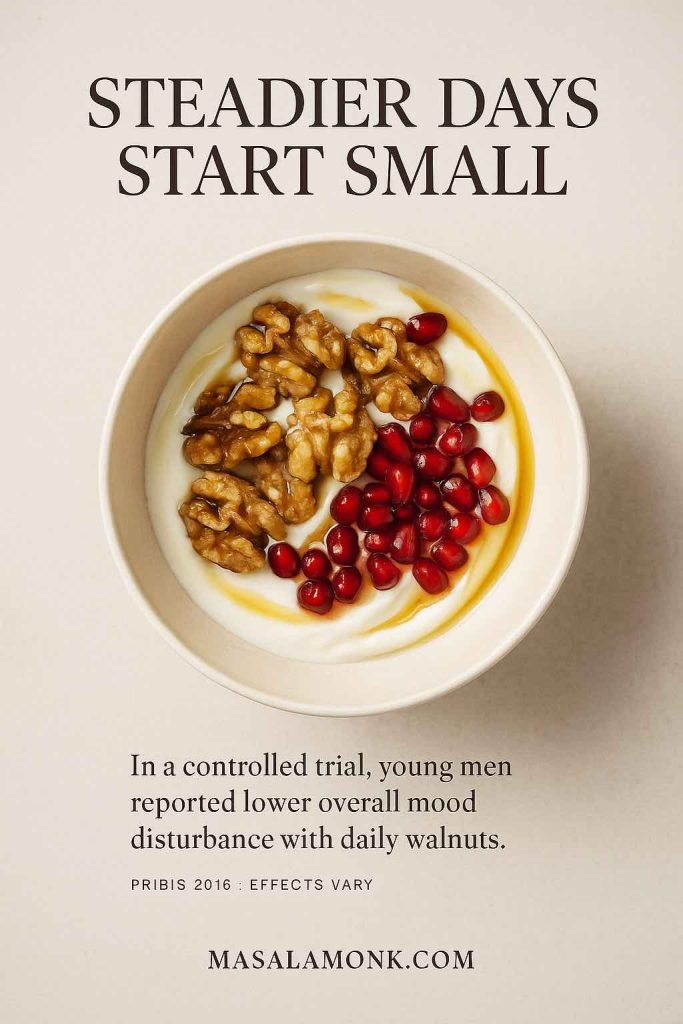
For mood, a well-designed trial found benefits in young men when walnuts were consumed daily as part of a normal diet. PubMed
Over the long term in healthy older adults, the best randomized trial to date found no overall change in global cognition, though exploratory analyses hinted at potential benefits in higher-risk subgroups. PubMed
In short: walnuts appear to provide small, realistic support for certain outcomes—mood steadiness in some people, subtle gains in specific cognitive subdomains, and potential protection in at-risk groups—especially as part of an overall healthy pattern.
A double-blind, randomized crossover trial in college students found that young men experienced a clear reduction in overall mood disturbance while eating walnuts daily compared with a matched control diet (PubMed). Women in the same study did not show the same effect, which raises interesting questions about sex-specific responses and points to the need for further research. The practical takeaway is simple: if you’re aiming for steadier energy and a calmer baseline, a small daily portion of walnuts is a low-risk experiment worth trying. PubMed
How to try it: Add a handful to breakfast or keep a small container at your desk. Give it two to eight weeks and note how you feel. If it helps, keep going; if not, you’ve still adopted a nutritious snack.
In a randomized crossover trial (Pribis 2016), young men reported lower overall mood disturbance during a walnut phase. Effects vary; best with a balanced diet.
Walnuts for Memory and Cognitive Performance: Where They Seem to Help
In a crossover study of healthy young adults, walnuts did not overhaul memory or non-verbal reasoning across the board. Even so, inferential verbal reasoning—the kind of thinking you use to connect ideas and draw conclusions—improved by about 11% during the walnut period compared with control (PubMed). Although that’s a single domain in a specific population, it’s a good example of where walnuts can matter: not as a cure-all, but as a small edge in tasks that require flexible thinking. PubMed
Where this is useful: Exam days, presentations, coding sprints—any situation where you need to stay sharp for a long block of time. For best results, combine walnuts with protein, fiber, and hydration.
Young adults showed ~11% improvement in inferential verbal reasoning during walnut intake in a crossover study (Pribis 2012). Domain-specific—not a cure-all.
Long-Term Walnut Benefits for Brain Health: The Big-Picture View
When researchers look beyond a single day or week, results become more nuanced. In the two-year WAHA trial following healthy elders, a walnut-supplemented diet did not improve global cognition overall. At the same time, brain imaging and post-hoc analyses hinted that walnuts might delay decline in subgroups at higher risk—interesting, but not definitive (PubMed). The right interpretation is neither hype nor dismissal: walnuts likely fit well inside broader dietary patterns that protect the brain, yet they do not transform test scores by themselves. PubMed
A broader review of human studies comes to a similar conclusion: walnuts contain nutrients that align with brain health, and associations are often positive, but the magnitude and consistency of benefits vary across trials and populations (Open-access review, 2021). This is how nutrition usually works—incremental gains that add up when you stack multiple good habits.
How Might Walnut Benefits for Brain Actually Work?
Healthy Fats that Feed the Nervous System
Walnuts are exceptional among nuts for ALA omega-3 content. Cell membranes in the brain rely on a balanced mix of fatty acids, and ALA helps maintain that balance while participating in anti-inflammatory signaling. Although the body converts ALA to longer-chain omega-3s (EPA/DHA) only modestly, ALA itself supports membrane fluidity and neuron function. Practically, that means walnuts help you hit daily omega-3 targets—especially helpful for those who eat little or no fish.
Antioxidants that Counter Everyday Wear and Tear
Free radicals and oxidative stress can damage neurons and accelerate age-related decline. Walnuts provide polyphenols, vitamin E, and melatonin—a trio that works together to neutralize oxidative stress and may nudge the body’s own antioxidant defenses. Over time, that can translate into better cellular resilience, particularly in tissues rich in delicate polyunsaturated fats like the brain.
Inflammation, Blood Flow, and the Brain–Heart Connection
Chronic, low-grade inflammation and impaired vascular health correlate with cognitive decline. Walnuts have been linked to improved endothelial function in some contexts, and European regulators acknowledge a related claim on vasodilation. That doesn’t prove a direct cognitive effect, but it does strengthen the case for walnuts inside a cardio- and neuro-friendly diet (see EFSA’s opinion on walnuts and endothelium-dependent vasodilation). European Food Safety AuthorityEFSA Journal
The Gut–Brain Pathway
Polyphenols in walnuts interact with the gut microbiome, producing metabolites that influence inflammation and neural signaling. This area is still evolving, yet it offers a plausible route for how a daily walnut habit might gently shape mood and cognition over weeks to months.
Growing brains demand quality fats, minerals, and antioxidants. While there aren’t definitive pediatric trials showing that walnuts alone boost grades, adding them to breakfast or snacks helps meet nutrient needs during intensive learning years. For households with allergies, safety comes first—see the notes below.
Easy wins: Stir crushed walnuts into porridge with banana, blitz a cocoa-banana-walnut smoothie, or tuck a homemade trail mix into lunchboxes (walnuts + roasted chana + a few raisins + dark chocolate shards).
Walnuts for Memory and Mental Clarity in Adults
Workdays stack meetings, deadlines, and context switching. Here’s where steady energy and attention matter. A simple bowl with oats, yogurt, berries, and walnuts delivers slow-release carbs, protein, fiber, and healthy fats—nutrients that support mental performance while keeping you satisfied. On long days, a walnut-inclusive breakfast or snack can help you sustain focus and avoid the mid-afternoon crash.
Practical ideas: Top Greek yogurt with walnuts and cinnamon; toss walnuts into a quinoa-vegetable bowl for lunch; carry a small container of lightly roasted walnuts to sidestep ultra-processed snacks.
Walnuts for Brain Health in Seniors
As we age, protecting vascular health, reducing inflammation, and maintaining nutrient sufficiency all matter. Even though the large WAHA trial didn’t show universal gains from walnuts alone, it sits comfortably within a larger pattern: Mediterranean-style eating—rich in plants, fish (if eaten), whole grains, and nuts—associates with slower decline. In that context, walnuts become a convenient way to hit omega-3 and antioxidant targets.
Practical ideas: Add walnuts to dal or sabzi for a soft crunch; blend into chutneys; combine with leafy greens and olive oil for a Mediterranean-style salad.
Walnuts Brain Food: Smart Ways to Work Them into Your Day
Breakfast (busy-morning friendly)
Oats + Walnut Crunch: Rolled oats simmered with milk or a plant alternative, finished with crushed walnuts, dates, and apple.
Creamy Smoothie: Banana, cocoa, yogurt, a spoon of soaked walnuts, and a splash of coffee if you like.
Savory Start: Eggs with spinach and cherry tomatoes; finish with toasted walnuts and a pinch of feta.
Midday & Snacks (focus without the crash)
Walnut Chutney Sandwich: Whole-grain bread with mint-walnut chutney, cucumber, and paneer.
Desk Bowl: Greek yogurt topped with walnuts, pomegranate arils, and a drizzle of honey.
Trail Mix That Works: Walnuts, roasted chana, a few raisins, dark chocolate shards.
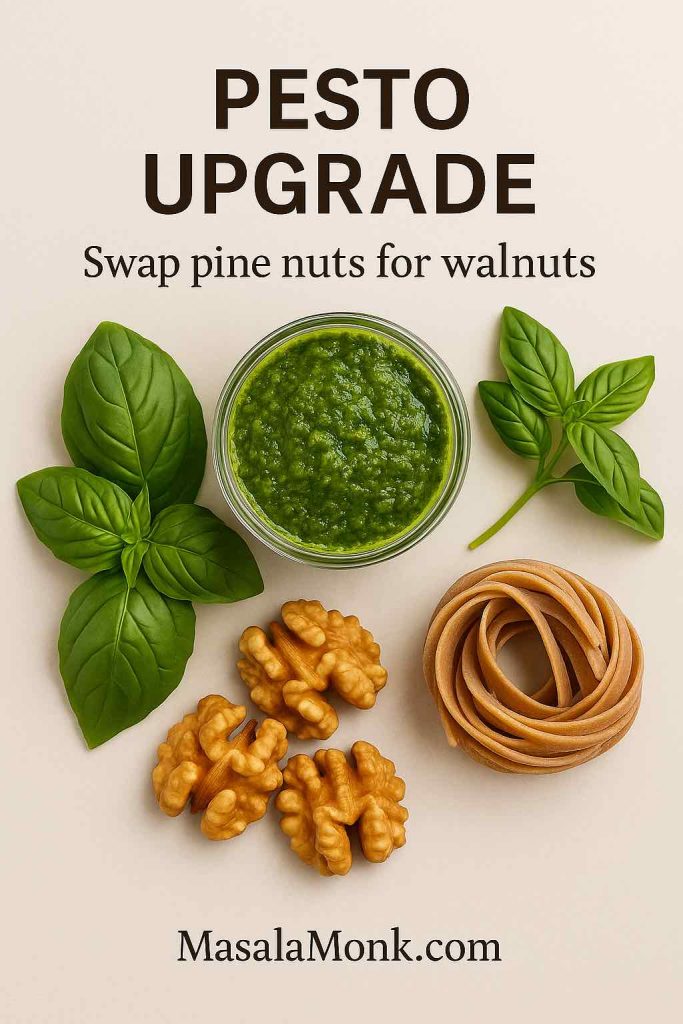
Toast walnuts and blitz with basil, garlic, olive oil, lemon zest, and Parmesan for a budget-friendly pesto that adds plant omega-3 (ALA) and a rich, earthy flavor. Freeze leftovers in ice-cube trays for easy weeknights.
Dinner & Entertaining (family-friendly)
Walnut-Paneer Tikka: Skewer paneer and peppers; brush with yogurt-spice marinade and finish with a walnut crumble.
Pesto Upgrade: Swap pine nuts for walnuts in basil pesto and toss with whole-wheat pasta or zucchini noodles.
Stir-Fry Crunch: Add walnuts at the end of a veggie stir-fry for texture and healthy fats.
Walnut for Brain Development: Pairings that Make a Difference
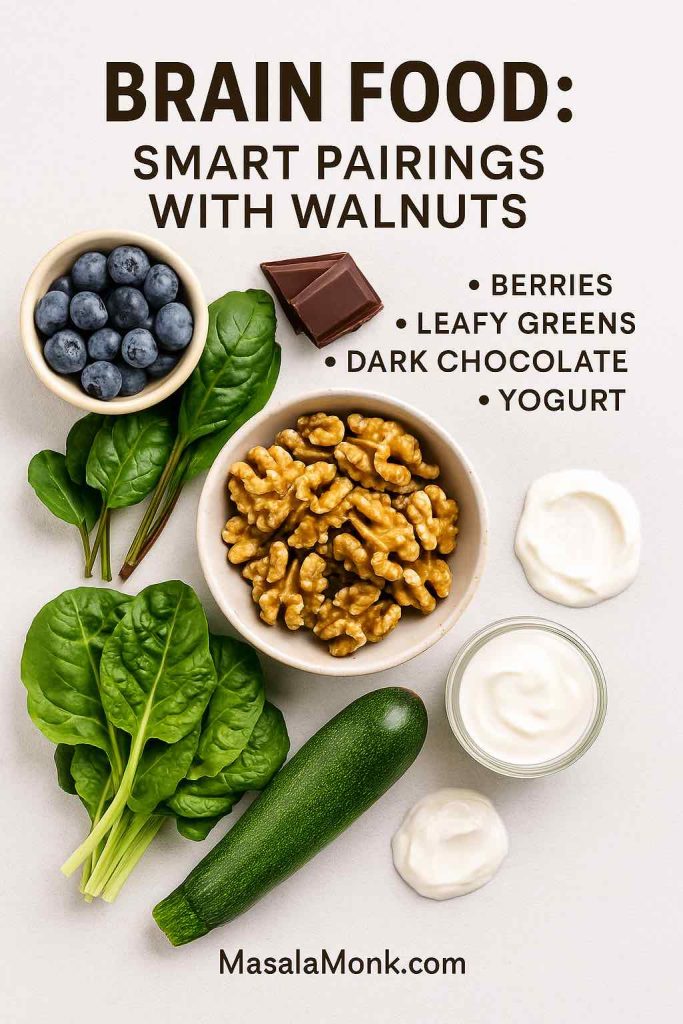
Synergy matters. Combine walnuts with:
Berries (anthocyanins) for antioxidant teamwork.
Leafy greens (folate, magnesium) for nerve support.
Dark chocolate (flavanols) for blood-flow benefits.
Fermented foods (yogurt, kefir, dosa batter) to support the gut–brain axis.
These pairings build meals that are satisfying, nutrient-dense, and naturally supportive of cognitive function.
Synergy matters: berries (anthocyanins), leafy greens (folate & magnesium), fermented dairy (gut–brain), and a little dark chocolate (flavanols).
How Much Walnuts to Eat for Possible Brain Benefits?
A practical daily target is about 28–30 g—roughly one small handful (≈14 halves). That serving supplies ~2.6 g of ALA plus fiber and antioxidants (USDA-based: MyFoodData). If you’re replacing less healthy snacks, keep total calories steady by trimming sweets or refined snacks elsewhere. If you’re very active, plant-forward, or trying to improve diet quality, going a little higher on training days is reasonable. My Food Data
Dial it in:
Start with one handful daily for two to eight weeks and see how you feel.
Mix walnuts with almonds or pistachios for variety, while keeping walnuts as the anchor for their omega-3 content.
If weight management is a priority, replace, don’t simply add—use walnuts instead of lower-quality snacks.
Safety, Allergies, and Storage: Read This Before You Stock Up
Allergies and Sensitivities
Tree-nut allergies can be serious. If you or a family member has a known tree-nut allergy—or you’re introducing nuts to a child—speak with a qualified clinician first. Cross-contamination with other nuts or peanuts is common in processing environments; always check labels and follow medical guidance. For an expert public overview, see the AAAAI’s page on tree-nut allergy (AAAAI).
Watch-outs can include itching, hives, swelling, wheezing, or stomach upset soon after eating. Any severe reaction requires immediate medical attention.
Medication Considerations
Walnuts don’t typically interact with common medicines. Still, if you’re on a restricted diet or anticoagulants, discuss big diet changes with your healthcare provider—especially if you plan to increase overall vitamin E intake.
How to Store Walnuts So They Stay Fresh
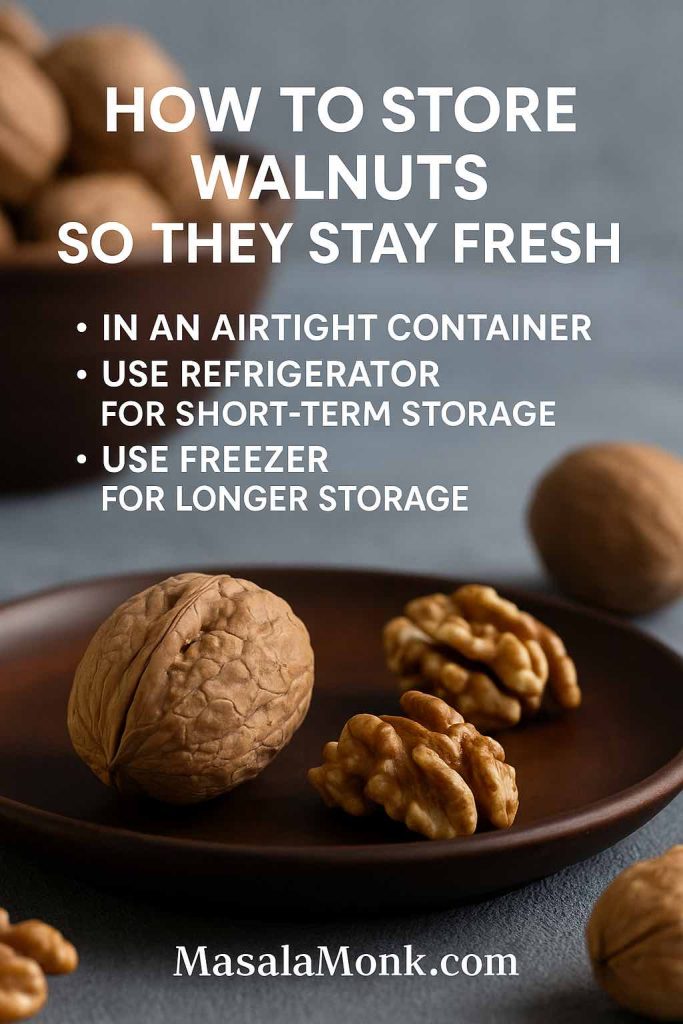
Walnuts are rich in delicate unsaturated fats that can turn rancid if stored poorly. Keep shelled or in-shell walnuts in an airtight container; use the refrigerator if you’ll finish them within a few weeks, or the freezer for longer storage. Simple, evidence-based guidance is available from UC Davis Postharvest (UC Davis). UC Postharvest Center
If your walnuts smell paint-like or taste bitter, they’re past their prime—don’t use them.
Keep delicate fats from going rancid: airtight container; refrigerate for weeks, freeze for months. Discard if smell is paint-like or taste is bitter.
The Deeper Science: How Walnut Benefits for Brain Could Accrue Over Time
From ALA to Signaling Molecules
ALA integrates into cell membranes and supports fluidity, which influences how receptors and ion channels behave. Although conversion of ALA to longer-chain omega-3s (EPA/DHA) is limited, the body also uses ALA directly in anti-inflammatory pathways. In parallel, omega-3s help with neurotransmission and synaptic plasticity—processes central to learning and memory.
Oxidative Stress, Polyphenols, and Neurons
Neurons are metabolic overachievers; they generate more reactive oxygen species than many other cells. Walnut polyphenols, vitamin E, and melatonin help scavenge those oxidants and may up-regulate the body’s own antioxidant enzymes. Over time, that can limit cumulative wear—especially in tissues rich in polyunsaturated fats like the brain.
Vascular Function and the Brain–Heart Link
The brain depends on precise blood flow. Walnuts have been tied to improved endothelial function—the ability of blood vessels to relax properly. Better endothelial function supports steadier delivery of oxygen and glucose to neurons, particularly under stress. The EFSA recognizes a health claim related to walnut intake and endothelium-dependent vasodilation, which adds regulatory context (see EFSA’s published opinion). European Food Safety AuthorityEFSA Journal
Microbiome Metabolites and the Gut–Brain Axis
Walnut polyphenols can be transformed by gut bacteria into metabolites with systemic effects. While this area is still evolving, it offers a plausible route for how a daily walnut habit could gently shape mood and cognition over weeks to months.
Buying, Preparing, and Cooking: A Mini-Guide
Raw vs. Roasted: Lightly roast at home (low oven, 8–10 minutes) to enhance flavor without burning sensitive fats.
Soaking: Soak to soften for smoothies or chutneys; drain and refrigerate, using within 1–2 days.
Quality checks: Prefer sealed packaging. If buying from bulk bins, choose high-turnover shops and store promptly at home.
Flavor pairings: Walnuts love cinnamon, cocoa, berries, dates, citrus zest, leafy greens, beetroot, mushrooms, and tangy cheeses.
Quick Start: A One-Week Walnut Plan
Day 1–2: Add one handful to breakfast. Note appetite, focus, and energy by mid-morning. Day 3–4: Swap an afternoon packaged snack for a yogurt-and-walnut bowl. Track mood and cravings toward evening. Day 5–6: Cook one dinner that uses walnuts for texture (pesto, stir-fry, sabzi). Notice satiety and sleep quality. Day 7: Reflect on what worked. Keep the breakfast habit if mornings felt clearer; keep the snack if afternoons felt steadier.
Are Walnuts Good for Your Brain? An Honest Bottom Line
Yes—with context. When you scan the full landscape of studies, walnuts emerge as a useful, nutrient-dense food that can support brain-adjacent outcomes like mood steadiness in some people and subtle improvements in specific cognitive tasks. Large, long-term trials in older adults haven’t confirmed broad gains on global cognitive batteries from walnuts alone; however, that’s not a let-down so much as a reminder that nutrition is cumulative. Walnuts fit beautifully inside a wider strategy that includes a plant-forward, Mediterranean-style diet, regular movement, good sleep, and stress management.
If you’re after a simple, realistic step that nudges brain health in the right direction, a daily handful of walnuts is about as easy—and as delicious—as it gets.
Yes—though without the hype. Walnuts deliver ALA omega-3s, polyphenols, vitamin E, and minerals that support brain-adjacent functions. In short, walnut benefits for brain health are real but modest, working best alongside an overall healthy lifestyle.
2) What’s the simplest daily amount for brain support?
Aim for about 28–30 g (≈14 halves). This serving provides roughly ~2.6 g ALA, plus antioxidants. Moreover, if you’re watching calories, replace a lower-quality snack rather than simply adding walnuts.
3) Do walnuts improve mood?
They can—especially for some people. In a randomized crossover study, young men reported lower overall mood disturbance during a walnut phase. Nevertheless, responses vary, so try a small daily portion for 2–8 weeks and notice how you feel.
4) Do walnuts boost memory or reasoning?
Not across every test, but there’s a signal. For example, inferential verbal reasoning improved in young adults during a walnut period. Consequently, walnut benefits for brain performance tend to be domain-specific rather than sweeping.
5) How long until I notice anything?
Be patient. Because nutrition works cumulatively, give your walnut habit 2–8 weeks before judging mood or focus changes. Meanwhile, support the effort with sleep, movement, hydration, and balanced meals.
6) Are soaked or roasted walnuts better for brain benefits?
Either can fit. Light roasting enhances flavor; soaking softens texture and may aid comfort for some. However, the core nutrients tied to walnut benefits for brain—ALA and polyphenols—remain in both when you avoid high heat or lengthy storage after soaking.
7) What should I pair walnuts with for extra payoff?
Go for berries, leafy greens, fermented dairy (yogurt/kefir), and a little dark chocolate. These pairings add anthocyanins, folate/magnesium, helpful microbes, and flavanols—therefore reinforcing blood-flow, gut–brain, and antioxidant pathways.
8) Can I eat walnuts if I already take fish oil (EPA/DHA)?
Absolutely. ALA from walnuts complements fish-derived omega-3s. Moreover, for people who rarely eat fish, walnuts are a practical way to raise total omega-3 intake and still enjoy broader walnut benefits for brain health.
Generally, yes for those without nut allergies. They add fiber, healthy fats, and micronutrients. That said, always follow your clinician’s guidance and standard prenatal dietary advice.
10) What about kids and teens—do walnuts help with studying?
They can help meet nutrient needs during growth and heavy learning periods. While grades won’t jump overnight, a walnut-inclusive breakfast or snack supports steady energy and, consequently, better attention habits.
11) How should I store walnuts so the healthy fats stay fresh?
Because their fats are delicate, keep walnuts airtight; refrigerate for weeks and freeze for months. If they smell paint-like or taste bitter, they’re rancid—therefore discard them and restock.
12) Are other nuts just as good for the brain?
Many nuts are great, yet walnuts are unique for their high ALA content. Consequently, when your focus is walnut benefits for brain health, keeping walnuts as the “anchor” nut (and mixing others for variety) is a sensible strategy.
13) What’s one easy recipe that fits the science and the schedule?
Try a walnut pesto (swap pine nuts for walnuts) or a yogurt bowl with walnuts, berries, and honey. Both combine healthy fats, protein, and polyphenols—therefore practical, tasty ways to make the habit stick.
14) Bottom line—should I start?
Yes—if you enjoy them. A daily handful of walnuts is an easy, delicious step that can support mood steadiness and certain thinking tasks while nourishing long-term health. Nevertheless, remember: food is a team sport, and walnuts shine brightest as part of a balanced routine.
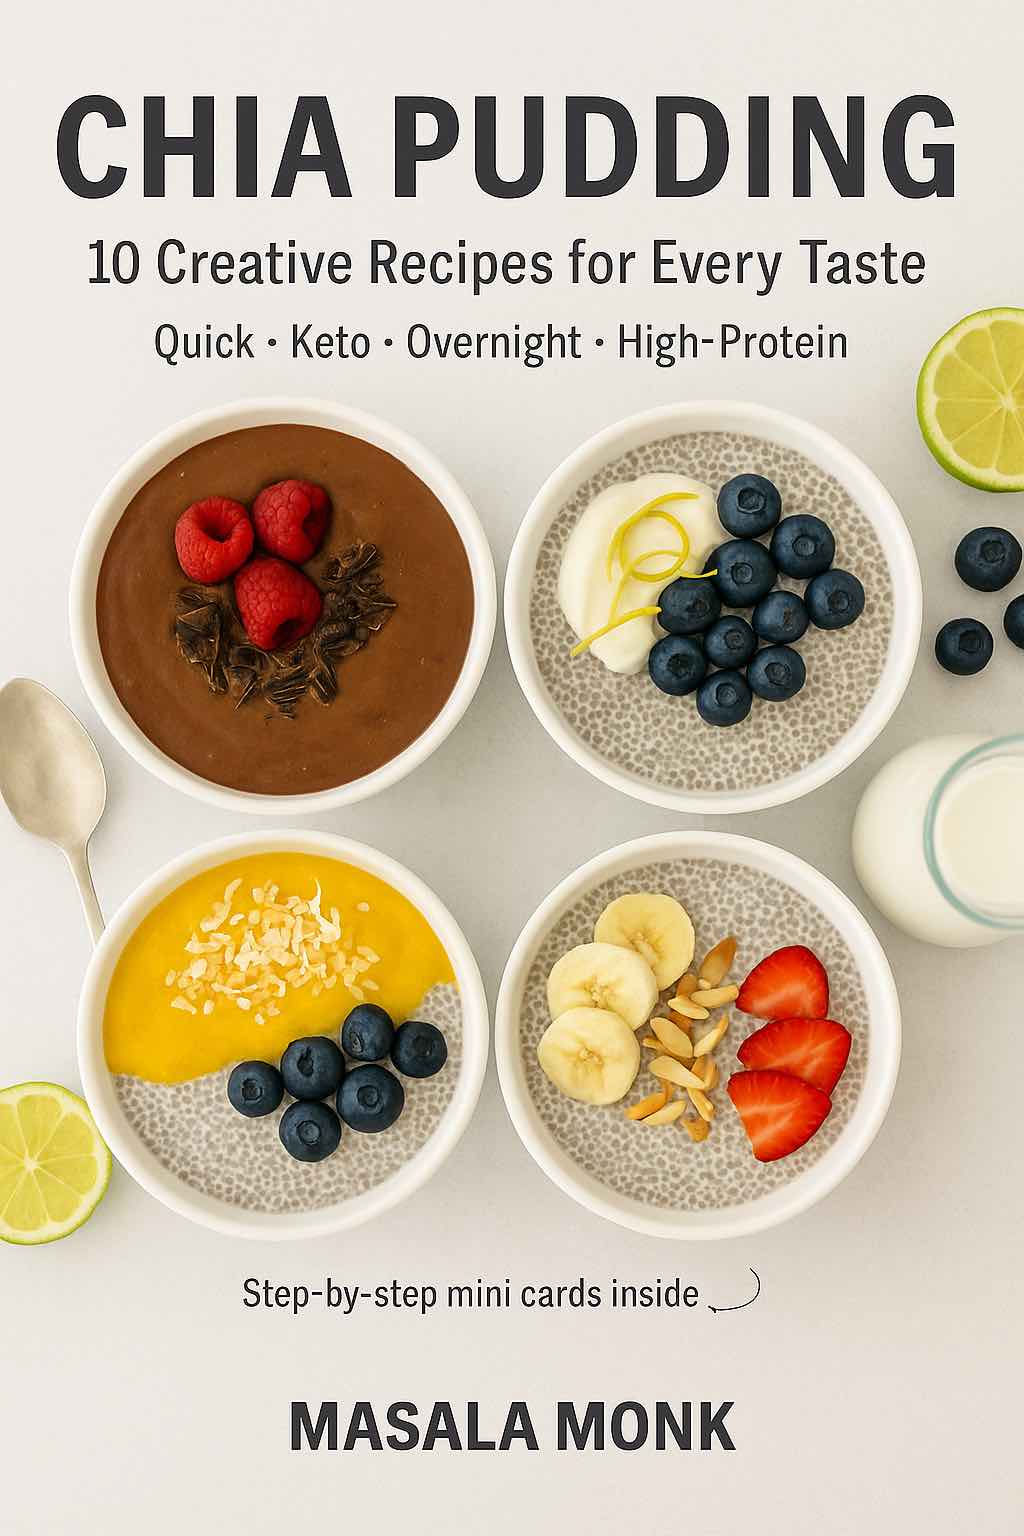
If you’ve ever wished that breakfast could be healthy, filling, and taste like dessert, then one of the chia pudding recipes might just be the answer. These tiny seeds have taken the world by storm — and for good reason. With just a handful of ingredients, you can create something that’s delicious, nutrient-packed, and ready in minutes.
What makes chia pudding so special is its versatility. With a basic recipe, you can make endless variations: a simple overnight chia pudding recipe for busy mornings, a chia pudding with yogurt for extra protein, or even a keto chia pudding for those cutting carbs. It’s one of those rare foods that works for practically every diet and every lifestyle.
In this post, we’ll start with the basic chia pudding recipe and then build it up into ten creative and tasty variations you’ll actually want to eat again and again.
Why Chia Seeds Deserve a Spot in Your Kitchen
Tiny but mighty, chia seeds are often called a superfood—and for good reason. They’re loaded with fiber, plant-based protein, omega-3 fatty acids, antioxidants, and essential minerals like calcium and magnesium. According to Harvard Health, chia seeds pack nutrients that support heart, gut, and bone health while being naturally gluten-free and vegan-friendly (Harvard Health).
Backed by Science
A review of 14 clinical trials found that chia consumption can improve cholesterol levels, reduce triglycerides, and lower blood pressure (Food & Wine).
Verywell Health reports chia seeds may reduce systolic blood pressure by up to 7 mmHg, making them especially heart-friendly (Verywell Health).
The Cleveland Clinic highlights their high fiber content, which promotes fullness, supports gut health, and helps with weight control (Cleveland Clinic).
👉 In short: Chia pudding isn’t just delicious—it’s functional food that nourishes you from the inside out.
Why Chia Pudding Is the Perfect Healthy Treat
So, why turn chia seeds into pudding? Because when these tiny seeds are soaked in liquid, they swell up and form a gel-like texture, creating a naturally creamy base.
Digestive Support: The soluble fiber in chia helps keep digestion smooth and supports a healthy gut microbiome (Times of India).
Energy & Satiety: Because they absorb up to 10x their weight in liquid, chia seeds expand in your stomach, helping you feel full longer (Real Simple).
Keto & Low-Carb Friendly: With minimal net carbs and loads of fiber, chia pudding makes a great addition to keto and low-carb diets (Healthline).
Versatility: You can blend, soak overnight, add yogurt for protein, or dress it up with fruits and nuts—the possibilities are endless.
💡 Think of chia pudding as a canvas—you can keep it simple or get creative with flavors like blueberry lemon, mango coconut, or even cheesecake-inspired indulgence.
The Basic Chia Pudding Recipe (Only 2 Ingredients!)
Before we dive into fancy flavors, let’s master the base. Every delicious version starts with this simple chia seed pudding recipe.
Ingredients (serves 1–2):
¼ cup chia seeds
1 cup liquid (your choice: milk, almond milk, coconut milk, oat milk, or kefir)
Instructions:
Add chia seeds to a jar or bowl.
Pour in your liquid of choice. Stir well.
Let the mixture rest for 5 minutes, then stir again to prevent clumps.
Refrigerate for at least 2 hours, or overnight for best results.
👉 The magic ratio? ¼ cup chia seeds to 1 cup liquid. This ensures your chia pudding is thick, creamy, and not watery.
Optional add-ins: vanilla extract, cinnamon, cocoa powder, sweeteners like honey or maple syrup, or keto-friendly options like stevia.
Once you’ve mastered this, you can build on it to make almost any variation you like.
Tips for Making the Best Chia Pudding
Making chia pudding is simple, but a few tricks make a huge difference:
Stir twice: Stir once when mixing and again after 5–10 minutes. This keeps the chia seeds from clumping.
Let it rest long enough: A quick soak of 2 hours works, but an overnight chia pudding recipe gives the best creamy texture.
Choose your milk wisely: Almond milk makes it light, coconut milk makes it rich, and yogurt or kefir adds protein and tang.
Sweeten to taste: Honey, maple syrup, jaggery, or stevia all work — just adjust based on your diet.
Experiment with toppings: Fresh fruit, nuts, granola, or even a spoonful of nut butter can completely transform your pudding.
Chia Pudding for Every Lifestyle
One of the reasons chia pudding recipes are so popular is how easily they adapt to different diets:
Keto chia pudding: Use unsweetened almond or coconut milk, and a low-carb sweetener.
Vegan chia pudding: Stick to plant-based milks like almond, oat, or soy.
High-protein chia pudding: Stir in Greek yogurt, protein powder, or kefir.
Family-friendly chia pudding: Add bananas, cocoa, or blended berries for a kid-approved treat.
No matter your preferences, there’s always a way to make chia pudding work for you.
🍨 10 Delicious Chia Pudding Recipes
1. Overnight Chia Pudding Recipe
If mornings are always rushed, this overnight chia pudding recipe is a lifesaver. With just 5 minutes of prep the night before, you can wake up to a ready-made, creamy, and satisfying breakfast. The chia seeds absorb the liquid overnight, creating a pudding-like texture without any effort.
Ingredients:
¼ cup chia seeds
1 cup almond milk (or coconut milk for richness)
1 tsp vanilla extract
1–2 tsp honey, maple syrup, or stevia (optional)
Instructions:
Combine chia seeds, almond milk, vanilla, and sweetener in a jar.
Stir well, wait 5 minutes, then stir again to prevent clumping.
Cover and refrigerate overnight.
Stir before serving and add toppings of choice.
The easiest overnight chia pudding recipe — soak chia seeds in milk for a creamy, ready-to-eat breakfast.
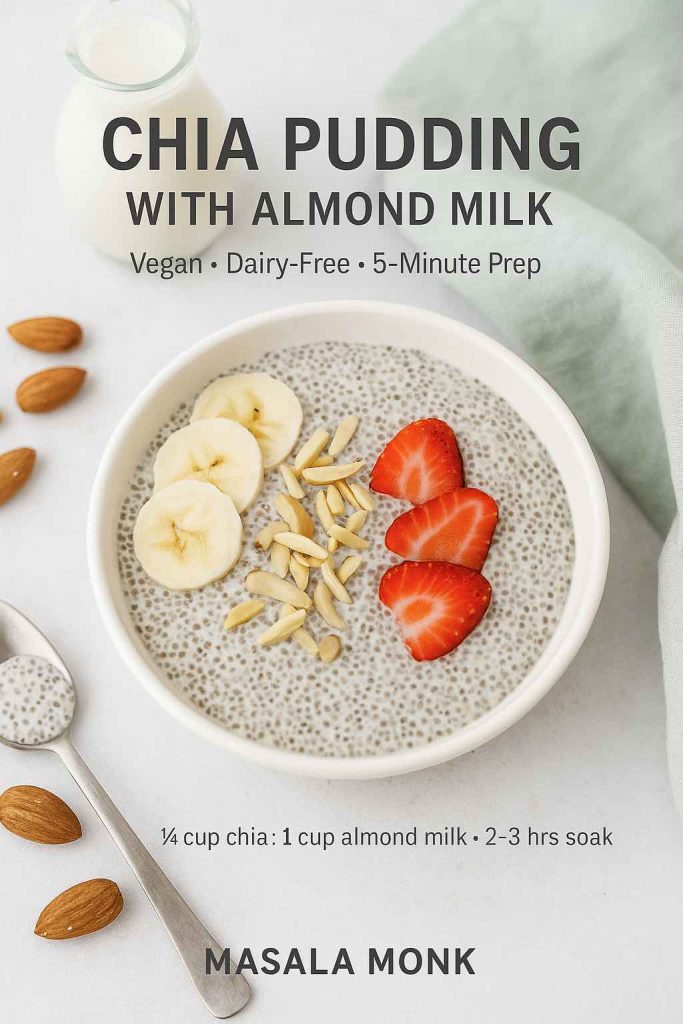
This chia pudding with almond milk is light, dairy-free, and endlessly versatile. Almond milk gives a subtle nutty flavor and pairs beautifully with fruit or nut butter. It’s the base recipe many vegans swear by.
Ingredients:
¼ cup chia seeds
1 cup unsweetened almond milk
1 tbsp almond butter (optional, for richness)
1 tsp vanilla extract
1–2 tsp maple syrup or agave
Instructions:
Mix chia seeds, almond milk, vanilla, and sweetener in a jar.
Stir well and refrigerate for at least 2 hours (overnight preferred).
Stir again before serving.
Add toppings for extra texture.
A light, dairy-free chia pudding made with almond milk, topped with fresh bananas, strawberries, and almonds.
Topping Ideas:
Sliced bananas + almond butter drizzle
Fresh strawberries or blueberries
Chopped almonds or walnuts
Dark chocolate shavings
Variations:
Add cocoa powder for a chocolate almond chia pudding.
Blend in a handful of frozen berries for a fruity version.
Use flavored almond milk (like vanilla) for a natural twist.
👉 Perfect for: vegans, dairy-free eaters, or anyone who enjoys a light yet filling breakfast.
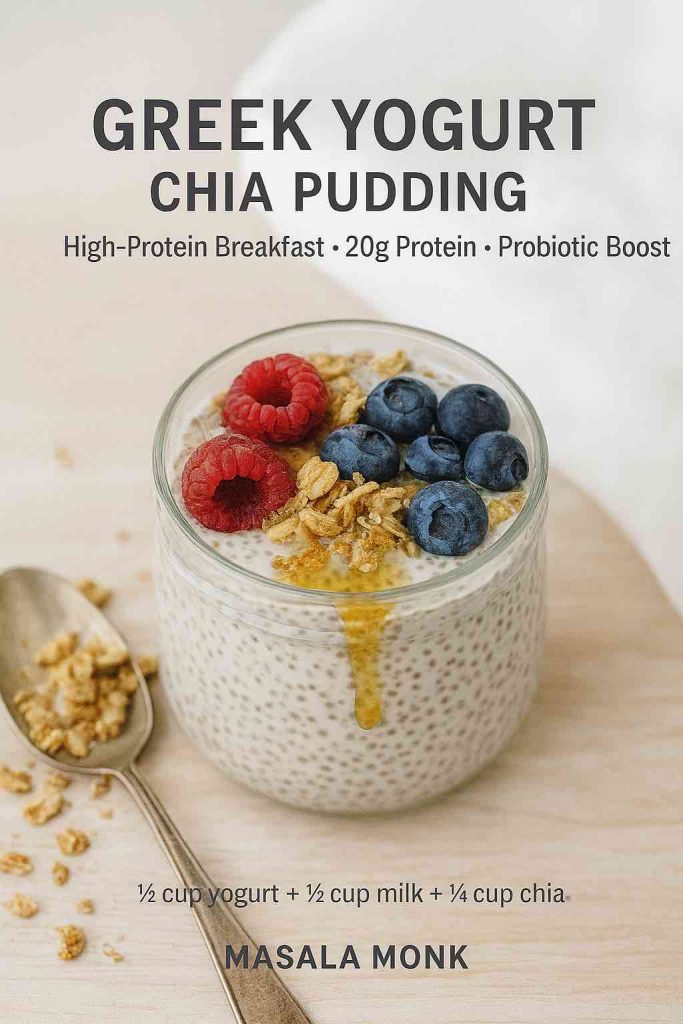
This Greek yogurt chia pudding recipe is creamy, tangy, and loaded with protein. The yogurt not only thickens the pudding but also adds probiotics for gut health. A drizzle of honey and some crunchy toppings turn it into a balanced breakfast or post-workout snack.
Ingredients:
¼ cup chia seeds
½ cup almond or dairy milk
½ cup Greek yogurt
1 tbsp honey or stevia
½ tsp vanilla extract
Instructions:
Mix chia seeds, milk, Greek yogurt, vanilla, and sweetener in a bowl.
Stir well until combined.
Refrigerate for at least 2 hours or overnight.
Stir again and add toppings before serving.
Creamy Greek yogurt chia pudding packed with protein, finished with berries, granola, and a drizzle of honey.
Topping Ideas:
Granola or muesli
Fresh berries
Walnuts or pecans
A drizzle of nut butter
Variations:
Add a scoop of protein powder for an extra high-protein chia pudding.
Use flavored Greek yogurt for a fun twist.
Add a spoonful of fruit compote for tangy sweetness.
👉 Perfect for: athletes, gym-goers, or anyone who needs a protein-packed start to the day.
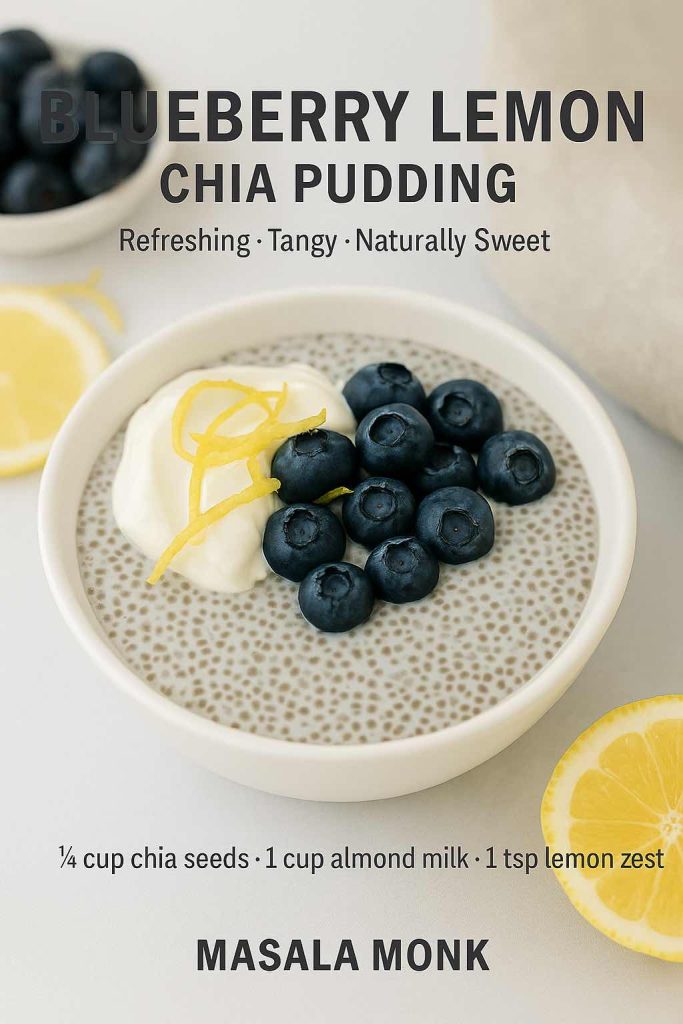
This blueberry chia pudding with a hint of lemon zest tastes like summer in a jar. It’s refreshing, tangy, and naturally sweet. Blueberries add antioxidants, while lemon gives a cheesecake-like brightness.
Ingredients:
¼ cup chia seeds
1 cup almond milk
1 tsp lemon zest
½ cup fresh or blended blueberries
1 tbsp honey or maple syrup
Instructions:
Mix chia seeds, almond milk, lemon zest, and sweetener in a jar.
Refrigerate for 2 hours or overnight.
Layer pudding with blueberries before serving.
Refreshing blueberry lemon chia pudding with a hint of zest and antioxidant-rich blueberries.
Topping Ideas:
Lemon zest curls
Blueberry compote
A dollop of Greek yogurt
Crushed graham crackers (for cheesecake vibes)
Variations:
Blend blueberries into the almond milk for a vibrant purple pudding.
Use kefir instead of almond milk for a probiotic-rich version.
Add vanilla protein powder for extra nutrition.
👉 Perfect for: hot summer mornings, fruit lovers, and antioxidant-rich breakfasts.
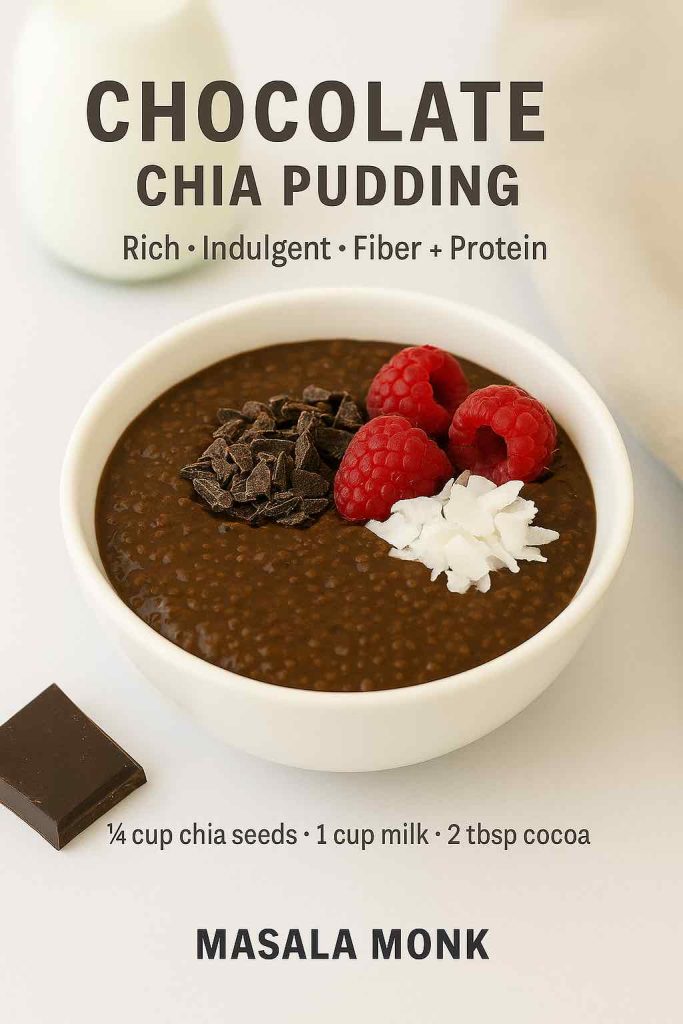
This chocolate chia pudding recipe is proof that dessert can be healthy. It’s rich, indulgent, and feels like a treat — but thanks to chia seeds, it’s also fiber- and protein-packed.
Ingredients:
¼ cup chia seeds
1 cup milk (almond, coconut, or dairy)
2 tbsp cocoa powder or cacao
1–2 tbsp maple syrup, honey, or stevia
½ tsp vanilla extract
Instructions:
Whisk cocoa into the milk until smooth.
Stir in chia seeds, vanilla, and sweetener.
Refrigerate at least 2 hours or overnight.
Stir well before serving.
Rich and indulgent chocolate chia pudding topped with raspberries, coconut flakes, and dark chocolate shavings.
Topping Ideas:
Dark chocolate shavings
Fresh raspberries or strawberries
Coconut flakes
Peanut butter drizzle
Variations:
Add chocolate protein powder for a post-workout chia pudding.
Use coconut cream instead of milk for a mousse-like texture.
Add espresso powder for a mocha chia pudding.
👉 Perfect for: chocoholics, kids, or anyone who wants dessert for breakfast.
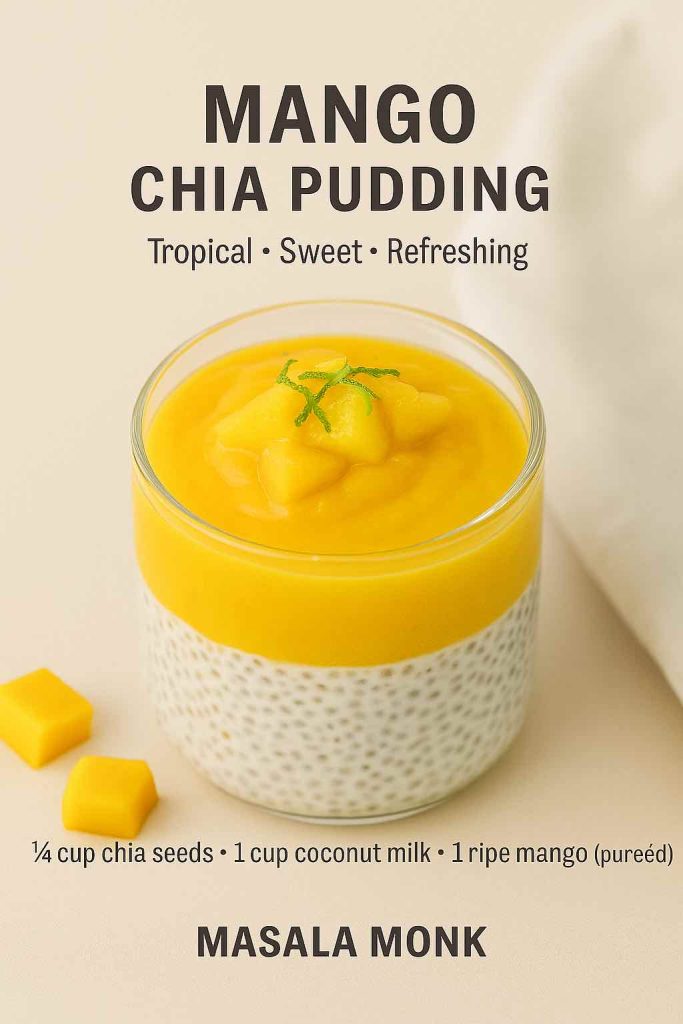
This mango chia pudding recipe brings tropical vibes to your table. Sweet mango puree layered with creamy chia pudding makes a dessert-like breakfast that’s both refreshing and filling.
Ingredients:
¼ cup chia seeds
1 cup coconut milk
1 ripe mango (pureed)
1 tsp lime juice (optional, for tang)
Instructions:
Mix chia seeds and coconut milk, then refrigerate overnight.
Puree mango and layer it over the chia pudding.
Garnish with extra mango or lime zest.
Tropical mango chia pudding layered with coconut milk and fresh mango purée.
Topping Ideas:
Fresh mango chunks
Shredded coconut
Pistachios
A squeeze of lime juice
Variations:
Blend mango puree into the base for a smooth, golden pudding.
Mix with passionfruit for a tropical combo.
Use dairy milk + yogurt for a creamy mango lassi-style pudding.
👉 Perfect for: summer breakfasts, fruity desserts, or anyone who loves tropical flavors.
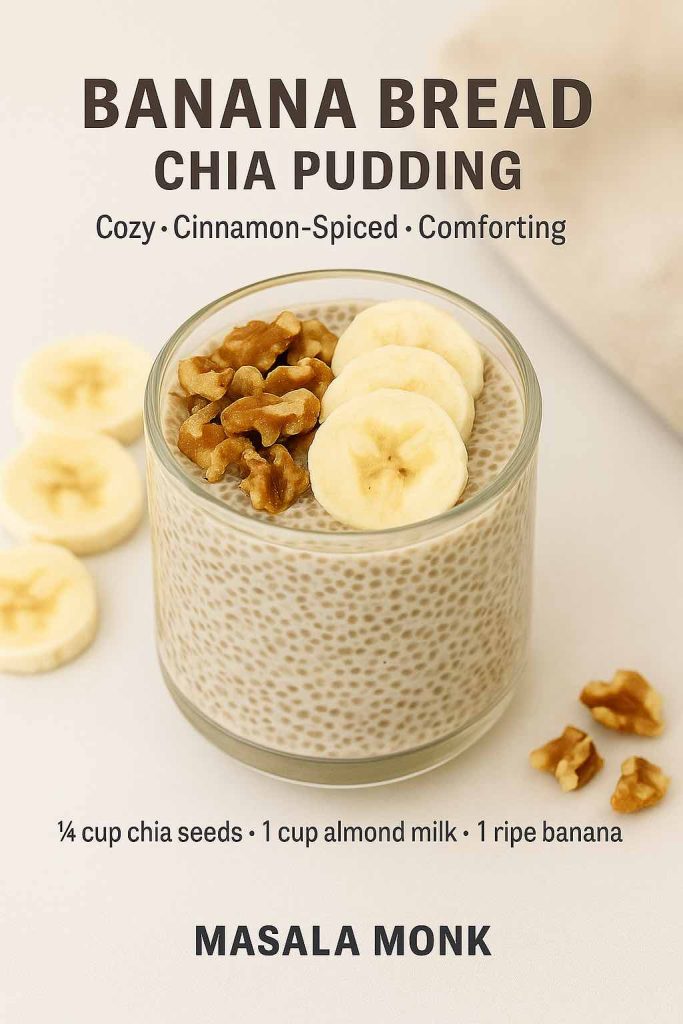
Think of this banana chia pudding as banana bread in a jar. Cinnamon, vanilla, and mashed banana create cozy flavors that feel like comfort food — but with way less sugar and no baking required.
Ingredients:
¼ cup chia seeds
1 cup almond or dairy milk
1 ripe banana (mashed)
½ tsp cinnamon
½ tsp vanilla extract
2 tbsp chopped walnuts (optional)
Cozy banana bread-inspired chia pudding with cinnamon, walnuts, and banana slices.
Instructions:
Mash banana and whisk with milk, cinnamon, and vanilla.
Stir in chia seeds.
Refrigerate overnight.
Add walnuts and extra banana slices before serving.
Topping Ideas:
Chopped walnuts or pecans
Raisins or dates
Banana slices
A dusting of cinnamon
Variations:
Add cocoa powder for a chocolate banana version.
Use Greek yogurt instead of milk for extra protein.
Stir in nut butter for a richer flavor.
👉 Perfect for: cozy fall mornings, comfort-food cravings, and banana bread lovers.
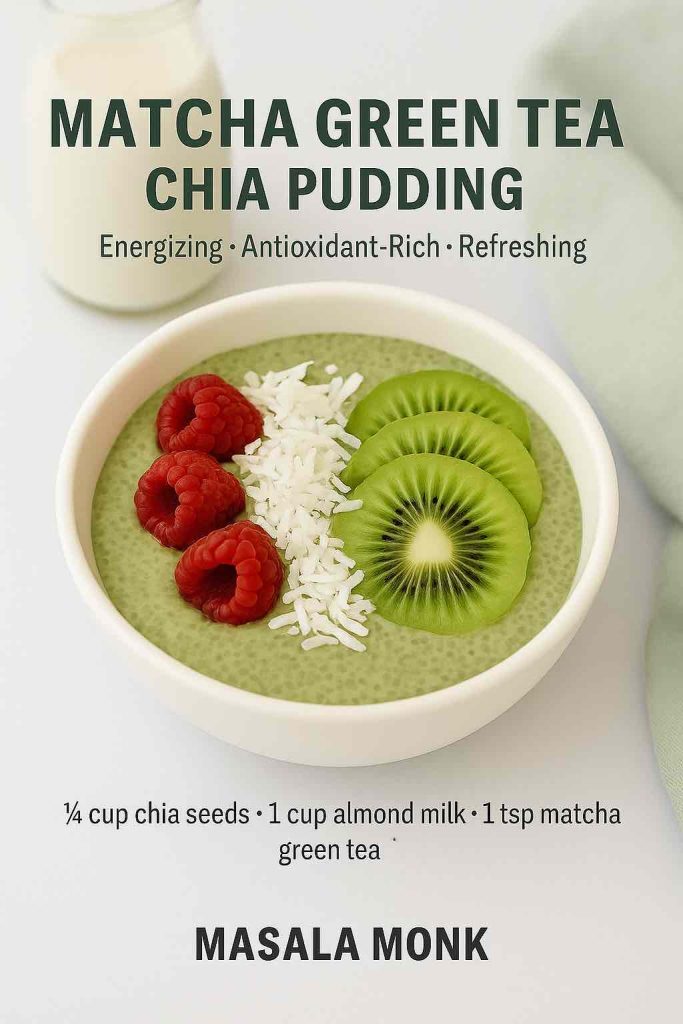
This matcha chia pudding recipe is energizing and antioxidant-rich. The subtle earthy flavor of matcha pairs beautifully with coconut or almond milk, creating a refreshing green breakfast or snack.
Ingredients:
¼ cup chia seeds
1 cup warm almond milk
1 tsp matcha green tea powder
1 tsp honey, maple syrup, or stevia
Energizing matcha chia pudding topped with kiwi, raspberries, and coconut flakes.
Instructions:
Whisk matcha into warm almond milk until no lumps remain.
Stir in chia seeds and sweetener.
Refrigerate overnight.
Stir before serving and add toppings.
Topping Ideas:
Fresh raspberries
Shredded coconut
Sliced kiwi
Granola clusters
Variations:
Blend banana into the base for natural sweetness.
Add vanilla protein powder for a high-protein matcha pudding.
Use coconut milk for a creamier, dessert-like version.
👉 Perfect for: matcha lovers, coffee alternatives, and afternoon energy boosts.
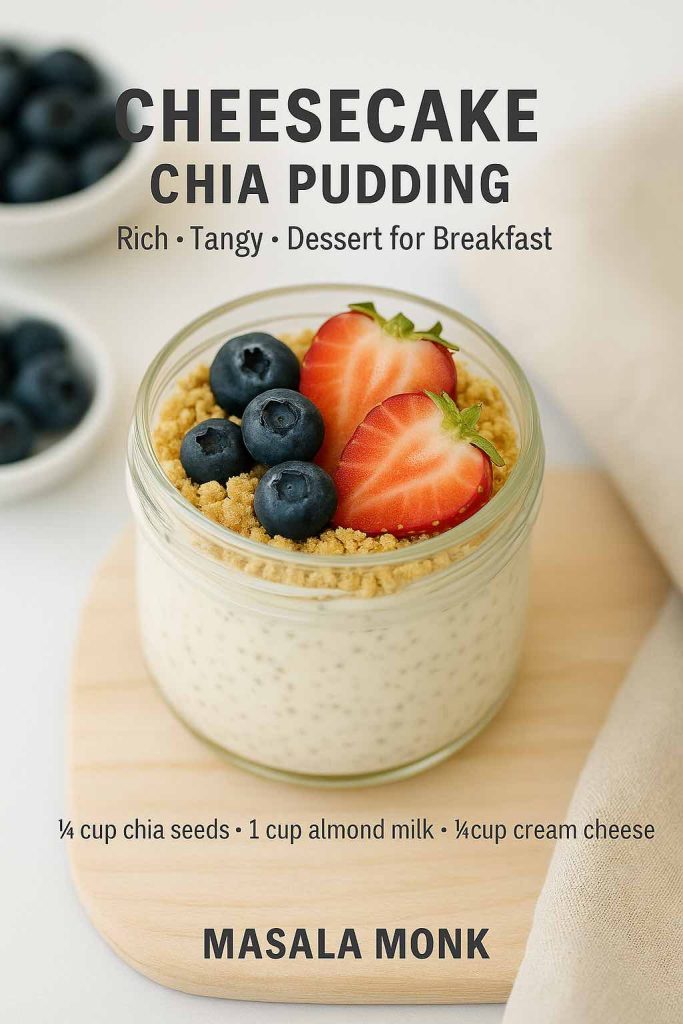
Yes, you can have cheesecake for breakfast — with this cheesecake chia pudding recipe. Cream cheese (or Greek yogurt for a lighter version) makes the base rich and tangy, while crushed biscuits and berries give it that dessert feel.
Ingredients:
¼ cup chia seeds
1 cup almond or dairy milk
¼ cup cream cheese (or Greek yogurt)
1 tbsp honey or maple syrup
½ tsp vanilla extract
2 tbsp crushed biscuits or granola (for topping)
Fresh berries
Instructions:
Blend milk, cream cheese, honey, and vanilla until smooth.
Stir in chia seeds.
Refrigerate overnight.
Top with crushed biscuits and fresh berries.
Guilt-free cheesecake chia pudding topped with graham crumbs, strawberries, and blueberries.
Topping Ideas:
Strawberries or blueberries
Graham cracker crumbs
Lemon zest
Berry coulis
Variations:
Use flavored yogurt for different cheesecake vibes.
Add cocoa powder for a chocolate cheesecake chia pudding.
Stir in lemon juice for a tangy New York-style cheesecake twist.
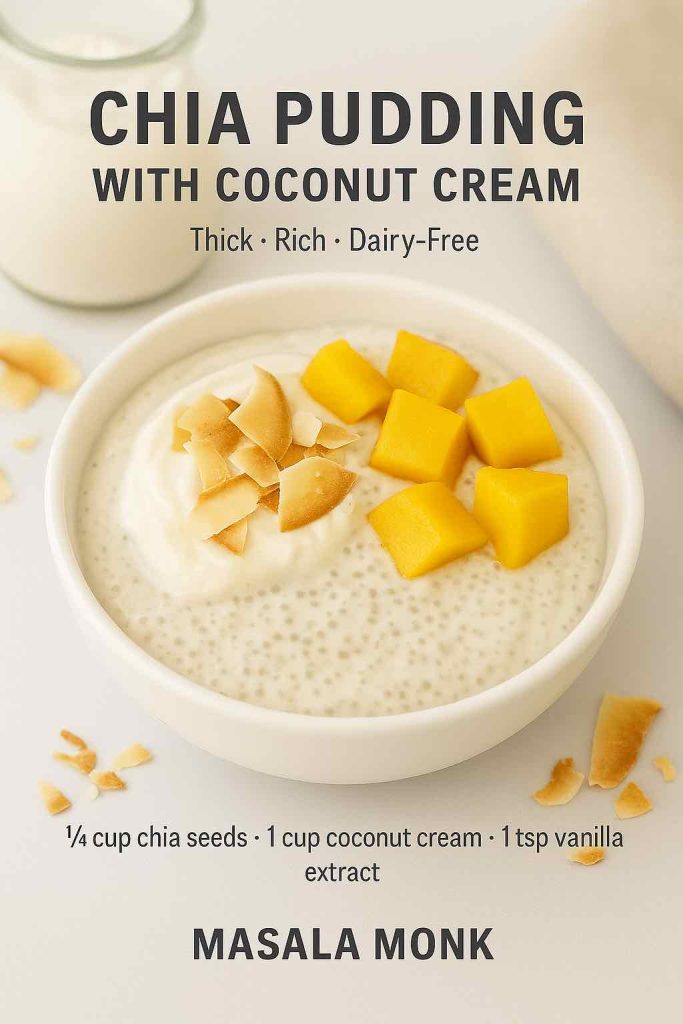
This chia pudding with coconut cream is thick, rich, and incredibly indulgent — almost like a mousse. It’s naturally dairy-free but tastes luxurious enough for dessert.
Ingredients:
¼ cup chia seeds
1 cup coconut cream
1 tbsp honey, maple syrup, or stevia
1 tsp vanilla extract
Instructions:
Mix coconut cream, chia seeds, vanilla, and sweetener.
Stir well, let sit for 5 minutes, then stir again.
Refrigerate overnight until thick.
Garnish before serving.
Thick and creamy chia pudding with coconut cream, topped with mango cubes and toasted coconut.
Topping Ideas:
Toasted coconut flakes
Mango chunks
Dark chocolate drizzle
Crushed nuts
Variations:
Blend in cocoa for a chocolate coconut chia pudding.
Add pineapple for a pina colada-inspired pudding.
Use spiced jaggery syrup for an Indian twist.
👉 Perfect for: tropical dessert fans, dairy-free eaters, and anyone who loves creamy indulgence.
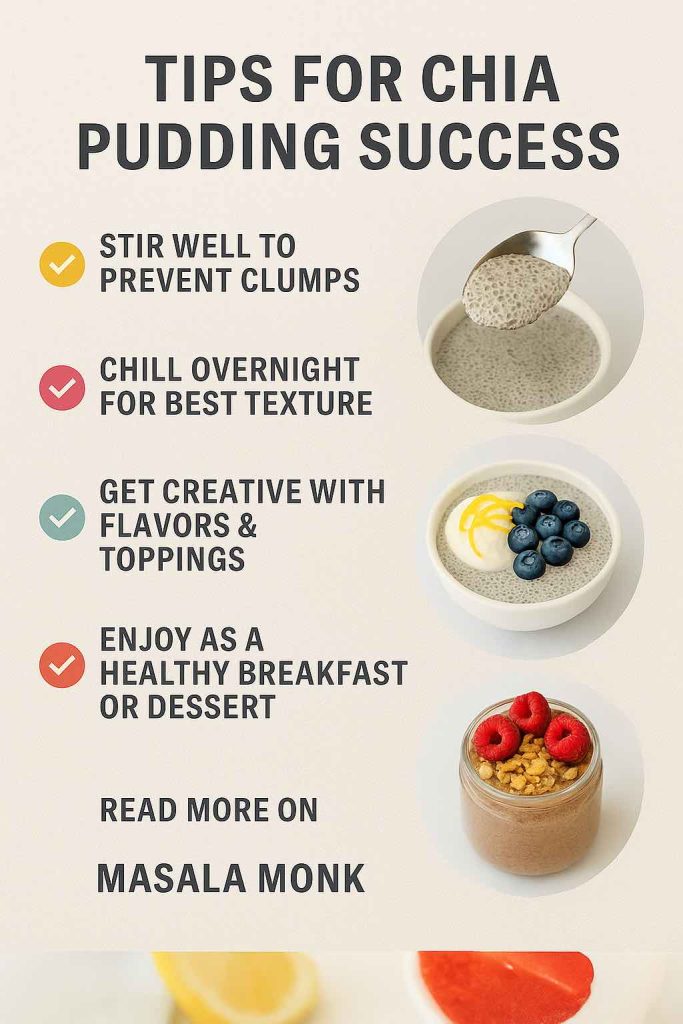
Making chia pudding is wonderfully simple, but a few insider tricks will take your pudding from “good” to “I can’t believe this is healthy.”
Tips for making chia pudding delicious plus an invitation to read more on MasalaMonk.
1. Stir Twice, Always
When you first mix chia seeds with liquid, they start to gel almost instantly. If you don’t stir them again after 5–10 minutes, you’ll get clumps. Always give your mixture a second stir before refrigerating — it makes a world of difference.
2. Let It Set Long Enough
Yes, chia pudding will thicken in as little as 2 hours. But if you want the best texture — smooth, creamy, and spoonable — an overnight chia pudding recipe is the way to go. The extra time lets the seeds fully absorb the liquid.
3. Master the Ratio
The golden formula is ¼ cup chia seeds to 1 cup liquid. Stick to this, and your pudding will be perfectly balanced: not too watery, not too thick.
4. Choose the Right Liquid
Almond milk → light and neutral, lets toppings shine.
Coconut milk or coconut cream → rich and indulgent, great for dessert-like chia pudding recipes.
Greek yogurt or kefir → creamy, tangy, and packed with protein.
Regular dairy milk → classic and kid-friendly.
5. Sweeten Smartly
Depending on your diet, choose your sweetener wisely:
Natural: honey, maple syrup, or jaggery.
Low-carb/keto: stevia, monk fruit, or erythritol.
Fruity: mashed bananas, mango puree, or blended berries.
6. Have Fun with Toppings
This is where chia pudding gets exciting. Fresh fruit, crunchy nuts, granola, toasted coconut, or even a drizzle of dark chocolate — toppings transform a simple base into something you’ll look forward to every morning.
🥗 Chia Pudding for Every Lifestyle
One of the reasons chia pudding recipes have become so popular is their ability to fit seamlessly into nearly every eating style. Here’s how you can tailor them:
Keto-Friendly Chia Pudding
Keep it low-carb by using unsweetened almond or coconut milk and a keto-friendly sweetener like stevia. Add cocoa powder or nut butter for richness.
Vegan Chia Pudding
Stick to plant-based milks (almond, soy, oat, or coconut) and sweeten with maple syrup or agave. Layer with fruits for natural flavor.
High-Protein Chia Pudding
Stir in Greek yogurt, protein powder, or kefir. Great after workouts or when you need lasting energy.
Family & Kid-Friendly Chia Pudding
Blend in bananas, cocoa, or berries to make a naturally sweet pudding. Kids love the dessert-like texture, and parents love the nutrition.
On-the-Go Chia Pudding
Portion your puddings into small jars or containers. They’ll last 4–5 days in the fridge, making them perfect for busy weeks.
🎉 Conclusion
Chia pudding isn’t just a passing health trend — it’s a true kitchen essential. With just two base ingredients and endless ways to customize, you can create breakfasts, snacks, or desserts that are:
Quick to make — 5 minutes of prep and the fridge does the rest.
Nutrient-dense — packed with fiber, protein, omega-3s, and minerals.
Diet-friendly — keto, vegan, high-protein, or family-approved.
Deliciously versatile — from classic overnight chia pudding recipes to indulgent chocolate or cheesecake-inspired variations.
So grab your chia seeds, pick a recipe from this list, and start experimenting. Once you realize how easy and satisfying these puddings are, they’ll become a regular part of your routine.
👉 Which chia pudding recipe are you most excited to try first — the refreshing blueberry lemon, the cozy banana bread chia pudding, or the indulgent coconut cream version? Share your favorite in the comments, and don’t forget to tag Masala Monk when you post your creations!
❓ Frequently Asked Questions About Chia Pudding
1. How much chia seeds do you need for pudding?
The standard ratio is ¼ cup chia seeds to 1 cup liquid. This gives you a creamy, pudding-like consistency. If you prefer it thicker, add a bit more chia; for a lighter texture, add extra liquid.
2. How long does chia pudding need to sit?
Chia seeds need at least 2 hours to absorb liquid and form that gel-like texture. However, for the best results, make an overnight chia pudding recipe. The longer resting time gives you a smoother, creamier pudding.
3. Is chia pudding good for keto?
Yes! A keto chia pudding recipe is one of the easiest low-carb breakfasts you can make. Just use unsweetened almond or coconut milk and a keto-friendly sweetener like stevia or monk fruit. Skip sugary fruits and add toppings like nuts, cocoa powder, or nut butter.
4. Can you add protein powder to chia pudding?
Absolutely. Adding protein powder turns your pudding into a high-protein chia pudding recipe. Simply stir a scoop into your milk before mixing with chia seeds. Popular combos include chocolate protein + cocoa powder, or vanilla protein + banana.
5. Can you make chia pudding with yogurt?
Yes! A chia pudding with yogurt (especially Greek yogurt) makes it extra thick, creamy, and higher in protein. Mix half yogurt and half milk with your chia seeds for the best balance.
6. How long does chia pudding last in the fridge?
Chia pudding keeps well for 4–5 days when stored in an airtight container. This makes it perfect for meal-prep chia pudding recipes. Just make a batch on Sunday night and enjoy ready-to-go breakfasts all week.
7. What’s the healthiest milk for chia pudding?
That depends on your diet:
Almond milk → light and low-calorie.
Coconut milk → rich, indulgent, and great for desserts.
Dairy milk → classic, with extra protein and calcium.
Kefir or yogurt → probiotic-rich and high-protein.
8. Can you eat chia pudding every day?
Yes — chia pudding can be eaten daily as part of a balanced diet. It’s high in fiber, protein, and omega-3s, which support digestion and satiety. Just vary your toppings and flavors to keep it exciting.
9. Can you blend chia pudding?
Definitely. If you prefer a smooth, mousse-like texture, simply blend your chia pudding after it has set. This is especially good for recipes like chocolate chia pudding or mango chia pudding.
10. Is chia pudding good for weight loss?
Yes, chia pudding can support weight management because it’s filling, low in calories, and high in fiber. Recipes like overnight chia pudding with almond milk are especially light but satisfying.
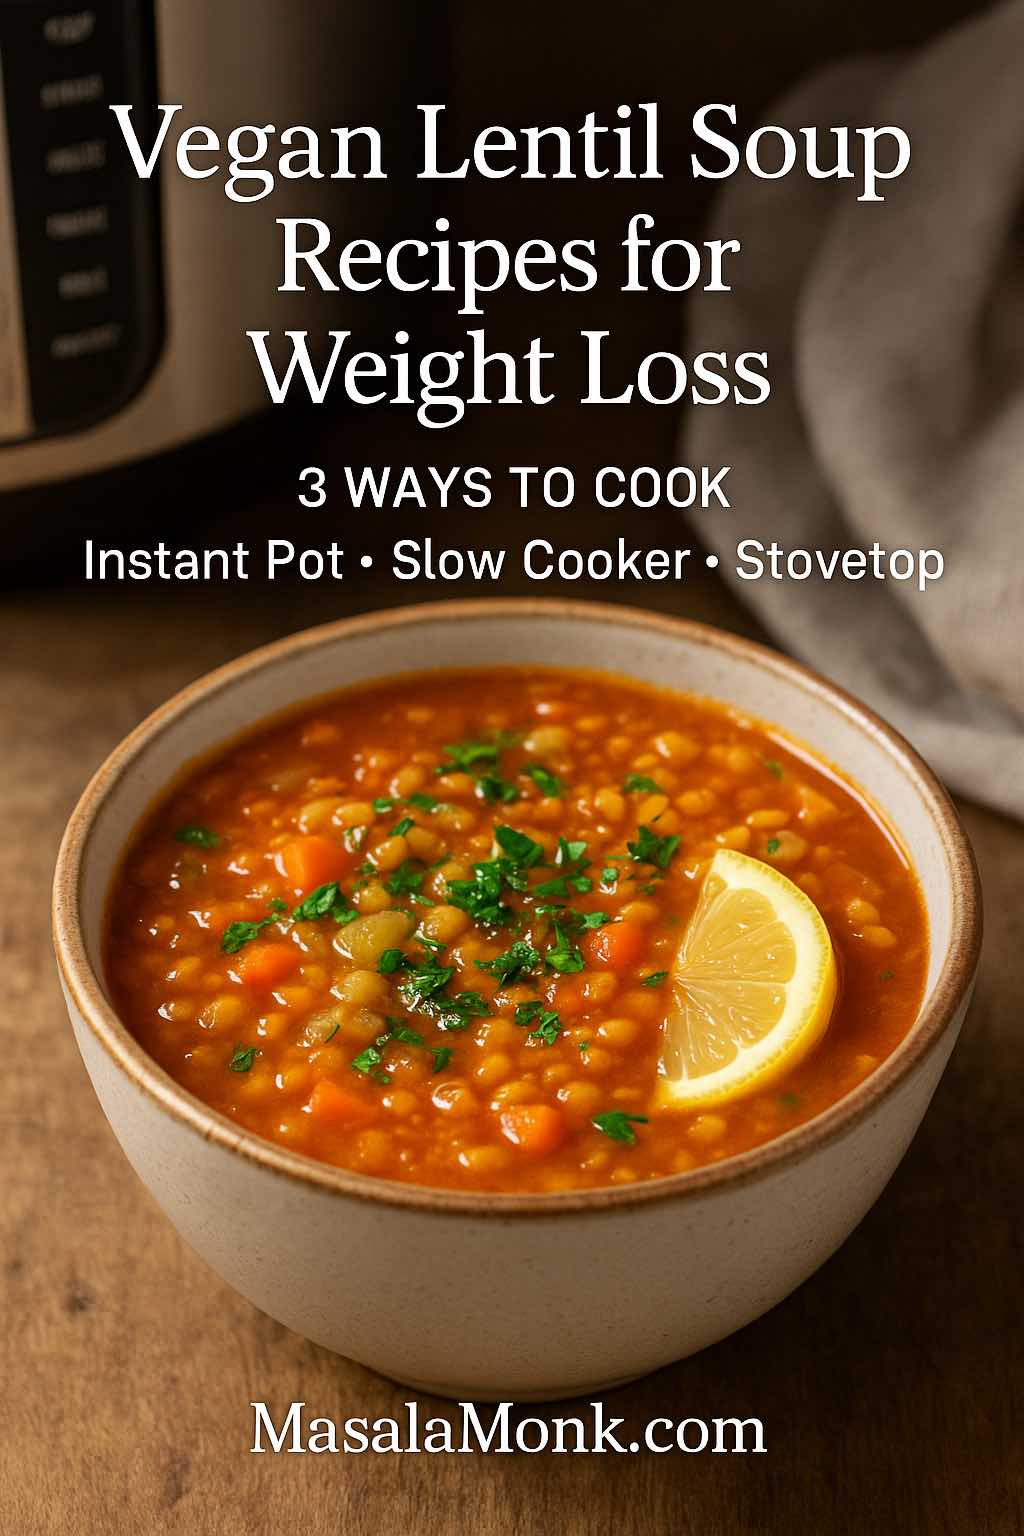
There’s something deeply comforting about a bowl of warm soup — especially when it’s both delicious and good for you. That’s why vegan lentil soup recipes for weight loss have become a favorite among health-conscious eaters, busy families, and anyone craving a wholesome, satisfying meal. For a quick primer on why lentil soup fits weight-loss goals, see this overview from Healthline on lentil soup and weight management: Lentil Soup for Weight Loss: Does It Help?. (Healthline)
Unlike many “diet foods” that leave you hungry an hour later, lentil soups are hearty, nourishing, and full of flavor. They give you the best of both worlds: comfort food that feels indulgent, and nutrition that supports your goals. Moreover, lentils are incredibly versatile — they pair beautifully with Mediterranean spices, creamy coconut curry flavors, or simple garden vegetables.
In the recipes below, you’ll find five variations designed to keep your meals exciting: from a quick Instant Pot red lentil detox soup to a slow-cooked coconut curry green lentil soup, and even a Mediterranean-style vegetable-packed version. Each one is completely plant-based, loaded with protein and fiber, and thoughtfully crafted to be filling yet light.
So, if you’re ready for meals that will warm your body, nourish your soul, and help you on your weight-loss journey, let’s dive into the wonderful world of lentils.
Why Vegan Lentil Soup Recipes for Weight Loss Really Work
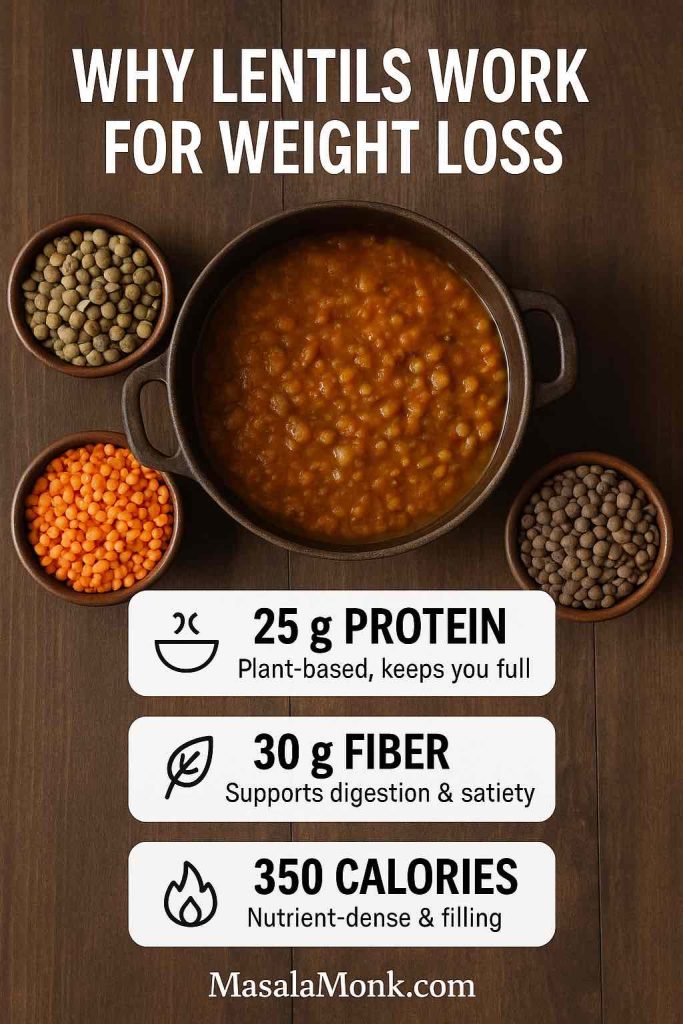
Lentils are often described as a “superfood,” and for good reason. One cup of cooked lentils provides roughly 18g protein and 15–16g fiber—a combo linked with fullness and steady energy. Source: University of Rochester Medical Center (nutrition table): Lentils, cooked, 1 cup. (University of Rochester Medical Center)
In addition, lentils are naturally low in fat and cholesterol-free, making them heart-friendly as well as waistline-friendly. The Cleveland Clinic notes that the soluble fiber in lentils can help lower LDL cholesterol, support blood-sugar control, and enhance satiety—key reasons they work so well in weight-management meals: Health Benefits of Lentils. (Cleveland Clinic)
Because lentils are packed with protein and fiber while staying low in calories, they naturally keep you full and energized. That’s why, when you’re building meals for weight loss, lentils transition beautifully into hearty soups that satisfy both body and soul.
Another reason vegan lentil soup recipes are ideal for weight loss is their adaptability. For example, if you want a light detox-friendly meal, red lentils with turmeric and ginger work beautifully – see our primer on red lentils for weight loss. If you prefer something more hearty, green or brown lentils hold their shape well and can turn a simple vegetable broth into a full meal.
Moreover, lentil soups are perfect for meal prep – for planning help, tap our post – plant-based high-protein meal-prep ideas using lentils. You can cook a big batch, store it in the fridge, and reheat portions throughout the week. This makes it easier to stay on track with healthy eating, because a nourishing option is always ready when hunger strikes. In short, lentil soup is one of the most practical, filling, and budget-friendly meals you can add to your weight-loss routine.
One of the best things about lentil soup is how forgiving and flexible it is. No matter your cooking style, you can make it work for you. Here are three easy methods to try:
Instant Pot Lentil Soup If you’re pressed for time, the Instant Pot is a lifesaver. It cooks lentils quickly and evenly, turning what would normally take 30–40 minutes on the stove into a hearty soup in under 15 minutes of pressure cooking. In addition, you don’t have to babysit the pot — just set it and let the pressure do the work. This method is ideal for busy weeknights or anyone who wants maximum flavor with minimal effort. For a pressure-cooker friendly template, see our curried lentil soup workflow inside this Lentils instead of chicken meal-prep post.
Slow Cooker Lentil Soup On the other hand, if you like coming home to a kitchen filled with the aroma of simmering spices, the slow cooker is your best friend. You simply toss in your lentils, veggies, and broth in the morning, and by evening you’ll have a deeply flavorful, ready-to-eat soup. The long cooking process allows the flavors to meld together beautifully. This method is perfect for weekends, meal prep, or when you just want the comfort of knowing dinner is waiting for you.
Stovetop Lentil Soup Of course, the classic stovetop method has its own charm. It gives you the most control — you can taste, adjust seasonings, and tweak as you go. Moreover, stovetop cooking is great for those times when you want to be hands-on in the kitchen and enjoy the process of creating something wholesome. With this method, you can easily experiment by adding more vegetables, spices, or finishing touches like a squeeze of lemon or a swirl of coconut milk. If Mediterranean flavors are your thing, this Guide to the Mediterranean Dietshows why lentil soups fit the pattern perfectly.
In short, whether you’re an Instant Pot enthusiast, a slow-cooker devotee, or someone who loves the simplicity of stovetop cooking, there’s a Vegan Lentil Soup Recipes for Weight Loss – that fits seamlessly into your routine.
🍵 5 Hearty Vegan Lentil Soup Recipes for Weight Loss
Now that we’ve explored why lentils are such a powerhouse for health and weight management, let’s get into the heart of this post: the recipes. These soups are more than just meals — they’re nourishing bowls of comfort designed to keep you full, energized, and satisfied.
Each recipe highlights a different cooking method, flavor profile, or health benefit. You’ll find everything from a quick Instant Pot detox soup to a slow-cooked coconut curry and even a Mediterranean-inspired vegetable mix. In addition, every recipe is vegan, high in protein, and naturally supportive of weight loss.
So, whether you’re cooking for busy weeknights, prepping for the week ahead, or simply craving something cozy, these five soups will give you plenty of variety without complicating your kitchen routine.
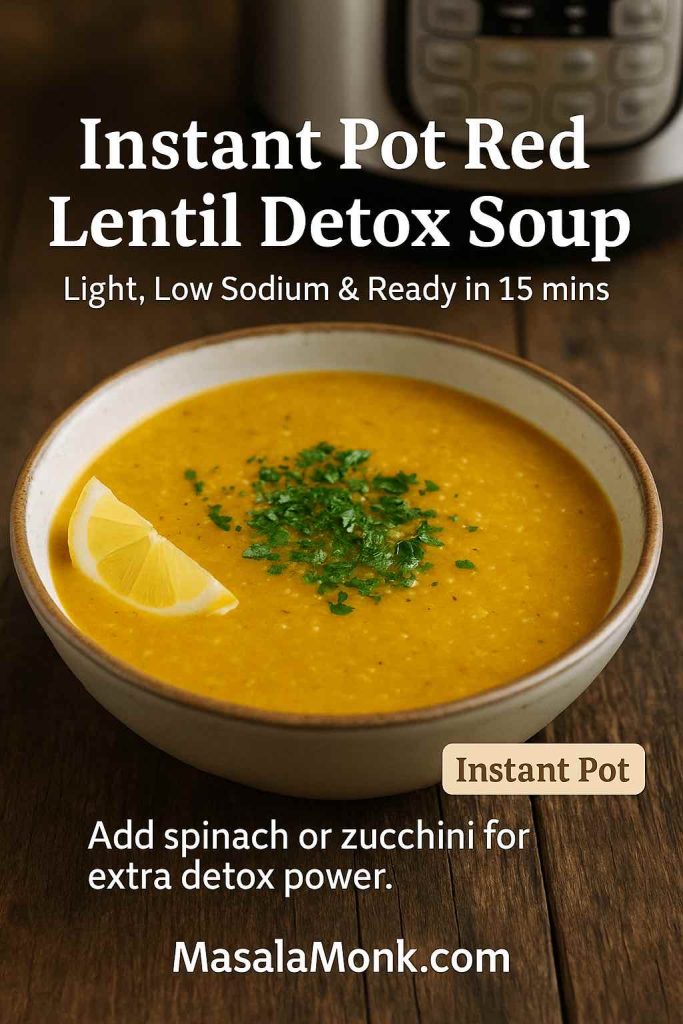
1. 🥣 Instant Pot Red Lentil Detox Soup (Vegan & Low Sodium)
There’s nothing quite as comforting — or as quick — as a bowl of red lentil soup made in the Instant Pot. This version is light yet hearty, packed with warming spices like turmeric and ginger, which not only give it a golden glow but also boost its detox benefits. For more on using masoor for weight management, see Red Lentil Recipes for Weight Loss.
For busy days when you still want something nourishing, this Instant Pot red lentil detox soup comes together in just 15 minutes. And since it’s light, low in sodium, and naturally creamy, it becomes the perfect transition into a week of clean eating.
Because it’s made with red lentils, this soup cooks down to a silky texture without the need for cream or thickeners. It’s also naturally vegan, low in sodium, and perfect for weight loss since it’s filling while staying low in calories.
🛒 Ingredients
1 cup red lentils, rinsed
1 medium carrot, diced
1 stalk celery, diced
1 small onion, chopped
3 garlic cloves, minced
1 tsp turmeric
1 tsp cumin
1 tsp grated fresh ginger
4 cups low-sodium vegetable broth
Juice of ½ lemon
Salt & pepper (to taste, optional)
Fresh parsley or cilantro for garnish
👩🍳 Instructions
Add the onion, carrot, celery, garlic, and spices (turmeric, cumin, ginger) into the Instant Pot with a splash of broth. Sauté for 2–3 minutes.
Stir in the rinsed lentils and the remaining broth.
Lock the lid and cook on High Pressure for 10 minutes.
Let the pressure release naturally for 5 minutes, then do a quick release.
Stir in the lemon juice, taste, and adjust seasoning.
Ladle into bowls, garnish with parsley or cilantro, and serve warm.
🌱 Options & Tweaks
For Detox: Add extra ginger and turmeric, or a pinch of cayenne for metabolism support.
For Extra Veggies: Toss in spinach, zucchini, or bell peppers just before serving.
For Meal Prep: Double the recipe and freeze in portions — it reheats beautifully.
For More Creaminess: Blend half the soup and stir it back in for a silky finish.
For Slow Cooker: Cook on low for 6–7 hours or high for 3–4 hours.
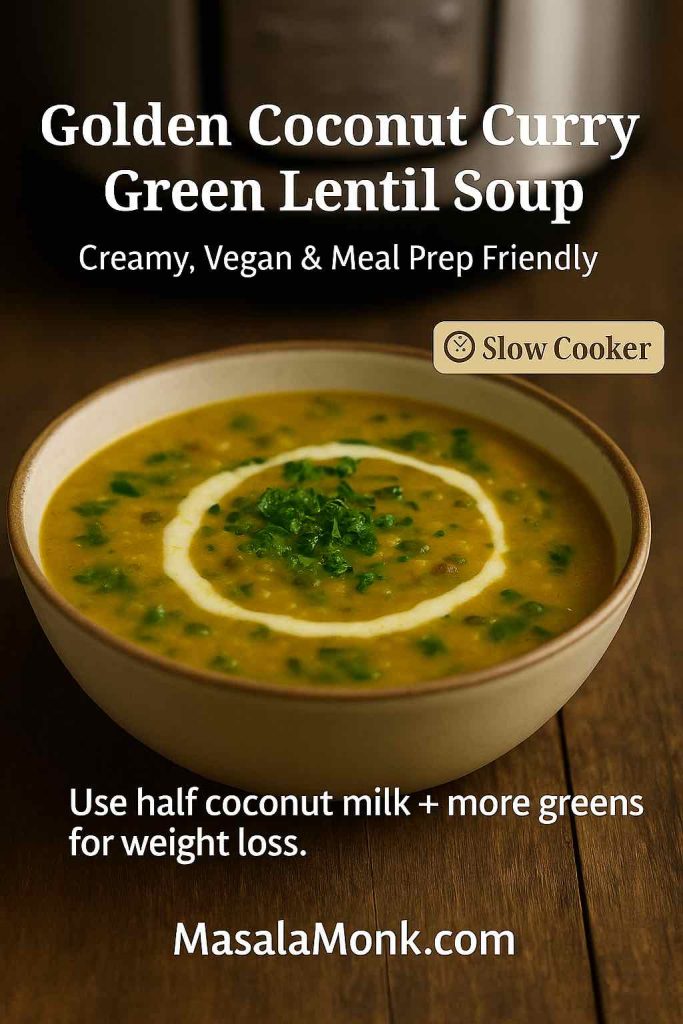
2. 🥥 Golden Coconut Curry Green Lentil Soup (Slow Cooker or Instant Pot)
If you love soups that feel creamy and indulgent yet remain completely plant-based, this coconut curry green lentil soup will quickly become a staple in your kitchen. The coconut milk gives it a luscious texture, while curry powder, turmeric, and garlic infuse it with warming spice.
Here’s proof that comfort food and healthy eating can go hand in hand: this golden coconut curry green lentil soup is creamy, vegan, and meal-prep friendly. Moreover, the gentle heat of curry spices and the richness of coconut milk turn your slow cooker into a wellness powerhouse.
Moreover, green lentils hold their shape beautifully, making this soup hearty enough for a main meal. It’s versatile too — cook it low and slow in the crock pot, or whip it up in the Instant Pot when you need dinner fast. Best of all, it’s naturally vegan, gluten-free, and weight-loss friendly when made with light coconut milk.
🛒 Ingredients
1 cup green lentils, rinsed
1 medium sweet potato, peeled & cubed
1 cup spinach or kale (add at the end)
1 small onion, diced
2 garlic cloves, minced
1 tbsp curry powder
1 tsp turmeric
1 can (400 ml) light coconut milk
3 cups vegetable broth (low sodium, if preferred)
1 tbsp olive oil
Fresh cilantro or parsley for garnish
Juice of ½ lime (optional, for brightness)
👩🍳 Instructions
Instant Pot Method:
Set the Instant Pot to sauté mode. Add olive oil, onion, garlic, curry powder, and turmeric. Cook for 2–3 minutes until fragrant.
Add green lentils, sweet potato, and vegetable broth. Stir to combine.
Seal lid and cook on High Pressure for 12 minutes. Allow natural release for 10 minutes.
Stir in coconut milk and greens. Cook on sauté mode for another 2–3 minutes.
Adjust seasoning, add lime juice if desired, garnish with cilantro, and serve.
Slow Cooker Method:
Add all ingredients (except coconut milk, greens, and lime) to the slow cooker.
Cook on Low for 7–8 hours or High for 4 hours.
Stir in coconut milk and greens just before serving. Garnish and enjoy.
🌱 Options & Tweaks
For Weight Loss: Use ½ can of light coconut milk and increase greens or zucchini.
For Extra Protein: Add chickpeas or quinoa.
For More Heat: Stir in chili flakes, cayenne, or harissa paste.
For Creamier Texture: Purée half the soup before serving.
Make Ahead: This soup thickens beautifully the next day, making it great for meal prep.
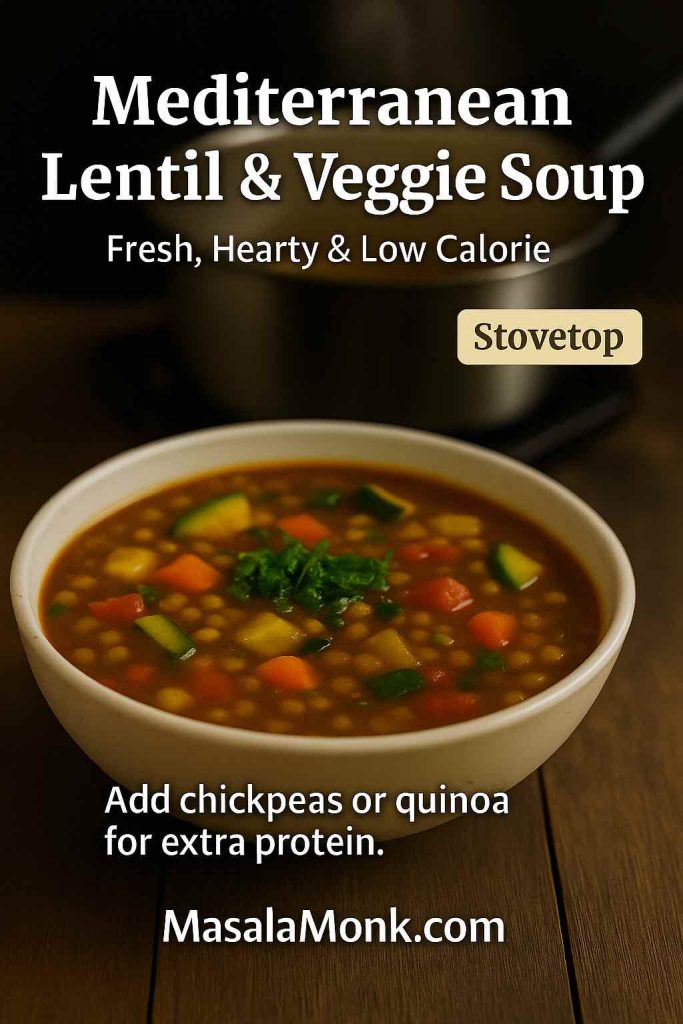
This Mediterranean-inspired lentil and vegetable soup is light, vibrant, and full of garden-fresh flavors. Think of it as sunshine in a bowl: olive oil, ripe tomatoes, zucchini, carrots, celery, and a sprinkle of herbs that make the broth fragrant and refreshing.
Brimming with zucchini, carrots, and tomatoes, this Mediterranean lentil and veggie soup feels like sunshine in a bowl. And because it’s light yet hearty, it creates the perfect balance — fresh enough for weight loss, yet satisfying enough for family dinners.
What makes this soup special is its balance — it’s hearty enough to be filling, yet light enough for those focusing on weight loss. Moreover, it’s a flexible recipe: you can make it on the stovetop for a classic feel or in a pressure cooker when you’re short on time. Either way, it’s a wholesome, vegan lentil and vegetable soup that fits perfectly into a healthy lifestyle.
🛒 Ingredients
1 cup brown or green lentils, rinsed
1 medium zucchini, diced
1 medium carrot, diced
1 stalk celery, diced
1 small onion, diced
3 garlic cloves, minced
1 can (400 g) diced tomatoes
2 tbsp olive oil
1 tsp smoked paprika
1 tsp oregano (or Italian herbs mix)
4 cups vegetable broth (low sodium preferred)
Salt & pepper, to taste
Fresh parsley or basil for garnish
Optional: juice of ½ lemon for brightness
👩🍳 Instructions
Stovetop Method:
Heat olive oil in a large pot. Add onion, carrot, celery, and garlic; sauté until softened.
Stir in smoked paprika, oregano, and lentils. Mix well.
Add diced tomatoes and broth. Bring to a boil, then reduce to simmer.
Cook for 30–35 minutes, until lentils are tender.
Stir in zucchini during the last 10 minutes of cooking.
Finish with lemon juice and garnish with parsley or basil before serving.
Pressure Cooker Method:
Sauté onion, garlic, carrot, and celery in olive oil.
Add spices, lentils, tomatoes, and broth.
Seal and cook on High Pressure for 15 minutes.
Quick release, then stir in zucchini and simmer on sauté mode for 5 minutes.
🌱 Options & Tweaks
For Low Sodium: Use fresh herbs and lemon juice instead of extra salt.
For More Protein: Stir in cooked chickpeas or quinoa.
For Extra Veggies: Add spinach, kale, or bell peppers at the end.
For a Creamier Soup: Blend half the mixture before serving.
Meal Prep Friendly: Stores well in the fridge for 4–5 days, flavors deepen with time.
4. 🥕 Classic Brown Lentil Soup (Homemade & Weight Loss Friendly)
Sometimes, the simplest recipes are the most satisfying. This classic brown lentil soup is a homemade staple that feels cozy and familiar, like something you’d want on a chilly evening. It’s rich in flavor thanks to onions, garlic, carrots, and celery, yet light enough to be part of a weight loss-friendly meal plan.
Sometimes the simplest meals are the most comforting. This classic brown lentil soup is cozy, affordable, and endlessly adaptable — blend half for creaminess or add barley for extra heartiness. Either way, it shows how small tweaks can transform a humble bowl into a nourishing delight.
What makes this recipe stand out is its versatility. You can keep it plain and rustic, or enhance it with lemon juice, fresh herbs, or even a touch of cumin for an earthy note. Moreover, it’s one of the most budget-friendly vegan lentil soups you can make — a pot of this soup stretches into several hearty servings that taste even better the next day.
🛒 Ingredients
1 cup brown lentils, rinsed
1 medium onion, diced
1 medium carrot, diced
2 stalks celery, diced
2 garlic cloves, minced
1 tsp ground cumin
½ tsp black pepper
4 cups low-sodium vegetable broth
2 tbsp lemon juice
1 tbsp olive oil
Salt, to taste
Fresh parsley for garnish
👩🍳 Instructions
Stovetop Method:
Heat olive oil in a pot. Add onion, carrot, celery, and garlic. Cook until softened.
Stir in cumin, pepper, and lentils. Mix well to coat.
Add broth and bring to a boil. Reduce heat and simmer for 35–40 minutes, until lentils are tender.
Stir in lemon juice before serving. Adjust seasoning and garnish with parsley.
Pressure Cooker Method:
Sauté onion, garlic, carrot, and celery in olive oil.
Add cumin, lentils, broth, and pepper. Stir well.
Seal and cook on High Pressure for 12 minutes.
Natural release for 5 minutes, then quick release. Stir in lemon juice and serve.
🌱 Options & Tweaks
For Weight Loss: Skip the olive oil and cook veggies in a splash of broth.
For More Protein: Add cooked quinoa or barley.
For Extra Veggies: Mix in spinach, kale, or diced tomatoes.
For a Creamy Version: Blend part of the soup for a thicker texture.
For Meal Prep: Stores well in the fridge for 4 days and freezes for up to 3 months.
5. 🌶 Moroccan Spiced Red Lentil Soup (Vegan & Detox-Friendly)
If you’re craving bold flavors with a nourishing base, this Moroccan-inspired red lentil soup is just the thing. Fragrant spices like cumin, coriander, cinnamon, and turmeric create a warm, slightly sweet depth of flavor that pairs beautifully with the creaminess of red lentils.
With warming spices like cumin, coriander, and turmeric, this Moroccan spiced red lentil soup proves healthy food can also be bold and exciting. And when you add ginger for an anti-inflammatory boost, every spoonful becomes both detox-friendly and deeply satisfying.
Because red lentils cook quickly and break down into a velvety texture, this recipe is ideal when you want a detox-friendly, vegan soup that feels indulgent yet is naturally light. Moreover, with its anti-inflammatory spices and plant-based protein, it’s a fantastic option for both weight loss and overall wellness.
🛒 Ingredients
1 cup red lentils, rinsed
1 medium carrot, diced
1 small onion, diced
3 garlic cloves, minced
1 tsp ground cumin
1 tsp ground coriander
1 tsp turmeric
½ tsp cinnamon
1 can (400 g) diced tomatoes
4 cups vegetable broth (low sodium preferred)
1 tbsp olive oil
Salt & pepper, to taste
Fresh cilantro or parsley, for garnish
Optional: juice of ½ lemon
👩🍳 Instructions
Stovetop Method:
Heat olive oil in a pot. Add onion, carrot, and garlic. Cook until softened.
Stir in cumin, coriander, turmeric, and cinnamon. Cook for 1 minute until fragrant.
Add red lentils, tomatoes, and broth. Bring to a boil.
Reduce heat and simmer for 20–25 minutes, until lentils are soft and soup thickens.
Stir in lemon juice, season to taste, and garnish with cilantro.
Pressure Cooker Method:
Sauté onion, garlic, and carrot in olive oil. Stir in spices.
Add lentils, tomatoes, and broth. Mix well.
Cook on High Pressure for 10 minutes.
Quick release, stir, and finish with lemon juice and herbs.
🌱 Options & Tweaks
For Extra Detox: Add grated ginger and extra turmeric.
For Creaminess: Blend part of the soup and stir it back in.
For More Heft: Add diced sweet potato or butternut squash.
For a Spicy Kick: Toss in cayenne or chili flakes.
For Freezer Meals: This soup freezes beautifully for make-ahead portions.
Serving Ideas for Vegan Lentil Soup Recipes for Weight Loss
By now, you’ve seen just how versatile lentil soups can be. However, a soup rarely has to stand alone. In fact, pairing these hearty bowls with the right sides can turn them into complete, balanced meals that are satisfying without being heavy.
For example, a slice of warm whole-grain bread or a piece of naan can soak up the broth and make the meal feel extra cozy. Alternatively, a crisp green salad with lemon vinaigrette adds freshness and crunch, creating a lovely balance against the warmth of the soup. If you want something heartier, roasted vegetables or even a small serving of brown rice or quinoa on the side will round out the dish while keeping everything plant-based. For a deeper dive into lentil nutrition (fiber, folate, polyphenols), Harvard’s Nutrition Source has an excellent explainer: Lentils – The Nutrition Source. (The Nutrition Source)
Moreover, these Vegan Lentil Soup Recipes for Weight Loss are wonderful for family dinners or gatherings because they’re naturally gluten-free, vegan, and adaptable. With just a few tweaks, you can please everyone at the table while staying aligned with your weight-loss goals.
One of the best things about vegan lentil soup recipes for weight loss is how meal-prep friendly they are. Unlike some soups that lose flavor over time, lentil soups actually taste better the next day as the spices and aromatics meld together.
If you plan to enjoy them throughout the week, simply let the soup cool completely, then store it in airtight containers in the fridge. For food-safe storage, USDA/FSIS guidelines state most cooked leftovers can be refrigerated 3–4 days and frozen 3–4 months. Practical tip: cool soups in shallow containers for faster chilling, then reheat gently with a splash of water/broth if thickened. Reference: Leftovers and Food Safety. (Food Safety and Inspection Service)
When reheating, you can warm the soup gently on the stovetop, stirring occasionally, or pop it into the microwave for a quick meal. If it thickens during storage (which is common with lentils), just add a splash of water or broth to bring it back to the perfect consistency.
Variations of Vegan Lentil Soup Recipes for Weight Loss
While we’ve shared five of our favorite recipes, the beauty of lentil soup lies in how endlessly customizable it is. In other words, you can adapt these soups to suit your taste buds, your pantry, and even the season. Prefer a firmer texture? Try Puy (French green) lentils. Craving pasta night without derailing macros? Our Lentil Pasta for Weight Loss guide keeps the vibe but ups the protein.
For extra bulk, try adding grains such as quinoa, barley, or brown rice. This not only stretches the soup further but also makes it even more filling — great for active days when you need sustained energy. If you prefer creamier soups, stir in a swirl of coconut milk, cashew cream, or blend a portion of the soup for a velvety finish.
Transforming your health doesn’t require complicated diets — sometimes, it begins with a single cozy bowl. A warm lentil soup is not just food; it’s comfort, nourishment, and a gentle reminder that healthy eating can be joyful.
Spices are another way to transform a simple pot of lentils into something extraordinary. For instance, Mediterranean herbs like oregano and basil create a light and fresh profile, while Moroccan spices such as cumin, coriander, and cinnamon add depth and warmth. Alternatively, if you love bold flavors, go for Indian-inspired seasonings like curry powder, garam masala, or turmeric.
Moreover, you can make your soups more veggie-packed by tossing in seasonal produce. Spinach, kale, zucchini, bell peppers, and even sweet potatoes can all find a home in these bowls. Not only does this keep things interesting, but it also boosts the nutritional value and variety of your meals.
🌱 Final Thoughts: Why Lentil Soups Deserve a Spot in Your Routine
At the end of the day, these vegan lentil soup recipes for weight loss are more than just dishes — they’re tools for building a healthier, more balanced lifestyle. They’re easy to make, budget-friendly, and incredibly forgiving in the kitchen. And yes, as far as lentils go – they’re backed by nutrition science on protein, fiber, and heart health (Ref: Cleveland Clinic and Harvard). (Cleveland Clinic, The Nutrition Source)
Unlike fad diets or complicated meal plans, soups like these make healthy eating sustainable. They allow you to nourish your body while still enjoying the comfort of a warm, hearty bowl. In short, they’re proof that wholesome food can also be deeply satisfying.
So, whether you’re on a weight-loss journey, looking to add more plant-based meals to your diet, or simply craving something cozy and flavorful, these lentil soups are here to support you. Try one, try them all, and don’t be afraid to make them your own.
👉 If you enjoyed this collection, share it with a friend, or let us know in the comments which recipe you’re trying first. After all, food is always better when it’s shared.
❓ Frequently Asked Questions About Vegan Lentil Soup
1. Is lentil soup good for weight loss?
Yes! Lentil soup is excellent for weight loss because it’s high in plant-based protein and fiber, both of which help keep you full for hours. Moreover, it’s naturally low in fat and calories, making it a nourishing, satisfying option without feeling heavy. Read more: Are Lentils Good for Weight Loss? Benefits, Recipes, and Science Explained
2. Which type of lentils is best for soup?
It depends on the texture you prefer. For example, red lentils cook quickly and create a creamy soup, while green or brown lentils hold their shape for chunkier, more rustic bowls. In short, all types of lentils can work — you just need to choose the style you enjoy most.
3. Can I make lentil soup in an Instant Pot?
Absolutely! In fact, lentil soup is one of the easiest Instant Pot meals. Simply add your ingredients, set it to high pressure, and let it cook for about 10–12 minutes. As a result, you’ll have a hearty, flavorful soup in less time than it takes on the stovetop.
4. How do I make lentil soup low sodium but still tasty?
Great question. Instead of relying on salt, focus on flavor boosters: garlic, onion, herbs, lemon juice, and warming spices like cumin or turmeric. In addition, cooking with low-sodium broth allows you to control seasoning without sacrificing taste.
5. Can I freeze vegan lentil soup?
Yes, and it freezes beautifully! First, let the soup cool completely, then portion it into freezer-safe containers. Moreover, frozen lentil soup will last up to 3 months. When you’re ready to enjoy it again, thaw overnight in the fridge or reheat gently on the stovetop.
6. How long does lentil soup last in the fridge?
Lentil soup will keep for 4–5 days in the refrigerator when stored in an airtight container. Furthermore, the flavors often deepen the next day, making it even more delicious as leftovers.
7. How can I make lentil soup creamier without dairy?
It’s simple! Blend a portion of the soup and stir it back in for natural creaminess. Alternatively, add a splash of coconut milk or cashew cream for a rich, velvety texture that stays 100% vegan.
8. Can I add extra protein to vegan lentil soup?
Of course. In addition to the protein already in lentils, you can stir in quinoa, barley, or chickpeas. As a result, your soup becomes even more filling and perfect for post-workout meals or active days.
9. What spices go well in lentil soup?
Lentil soup is a blank canvas for flavors. For instance, Mediterranean herbs like oregano and basil create a light, fresh taste, while Moroccan spices such as cumin, coriander, and cinnamon add warmth. Alternatively, curry powder and turmeric bring an Indian-inspired twist.
10. Can I use cooked lentils in soup?
Yes — if you already have cooked lentils, simply shorten the cooking time. In fact, just simmer them with vegetables, broth, and spices for 10–15 minutes. This method is a great way to use leftovers while still enjoying a hearty, homemade soup.
We’ve all been there — you wake up after a fun night out, your head is pounding, your mouth feels like sandpaper, and even the thought of getting out of bed seems impossible. That’s the dreaded hangover. And while there’s no magical cure, one of the most effective ways to bounce back is by turning to electrolyte drinks for hangovers.
Why electrolytes? Because alcohol doesn’t just dehydrate you — it also flushes essential minerals like sodium, potassium, and magnesium out of your system. These electrolytes are key for keeping your body’s fluid balance, energy levels, and even muscle function in check. Without them, you’re left feeling sluggish, foggy, and completely drained.
The good news is you don’t need to rely on expensive hydration powders or neon-colored sports drinks. With just a few simple ingredients from your kitchen, you can make powerful DIY electrolyte drinks that will help rehydrate your body, restore balance, and ease those brutal hangover symptoms. In this guide, we’ll walk through exactly why electrolytes matter, the key ingredients you’ll need, and finally share five easy homemade recipes to help you feel like yourself again.
💧 Why Electrolytes Are Important for Hangover Recovery
So, why do hangovers hit so hard — and how do electrolytes help? It all comes down to the way alcohol affects your body. When you drink, alcohol acts as a diuretic, which is just a fancy way of saying it makes you pee more often. Every bathroom trip isn’t just flushing out water, though — it’s also draining your body of vital electrolytes. Over time, this imbalance doesn’t just leave you dehydrated; it can even put added stress on your kidneys if recovery is neglected. Masala Monk’s piece on Alcohol & Kidney Health: The Hard Truth highlights just how serious that strain can be.
Headaches and dizziness – your brain is literally dehydrated.
Extreme fatigue – low potassium and magnesium mess with your energy.
Muscle cramps or weakness – your sodium levels are out of balance.
Nausea or stomach upset – dehydration and salt loss irritate digestion.
Replenishing electrolytes helps fix this imbalance. Sodium and potassium restore fluid balance, magnesium supports energy production, and natural sugars (like from honey or fruit) actually help your body absorb electrolytes more effectively. This combination allows your body to rehydrate faster than with plain water, giving you relief from headaches, fatigue, and nausea much more quickly.
Think of it this way: drinking water is like patching a hole in the bucket, while drinking an electrolyte drink for hangovers is like filling the bucket back up with the right mix of fluids and minerals. It’s the missing piece your body desperately needs after alcohol.
🥬 Key Ingredients in DIY Electrolyte Drinks for Hangovers
Now that we know why electrolytes matter, let’s talk about what goes into making them. The beauty of DIY electrolyte drinks is that you can craft them at home with everyday ingredients — no need for fancy powders or overpriced bottles. Here are the building blocks that make an electrolyte drink effective for hangover recovery:
Water – The foundation of hydration. Your body is mostly water, and it needs a lot of it after drinking.
Salt (sodium chloride) – A small pinch goes a long way in restoring sodium levels and keeping fluid balance in check.
Citrus juice (lemon, lime, orange) – Adds potassium for energy and vitamin C for immune support. Plus, the fresh flavor makes the drink more enjoyable.
Natural sweeteners (honey, maple syrup) – A touch of natural sugar helps your body absorb electrolytes faster while giving you an energy lift.
Coconut water – Nature’s electrolyte drink, packed with potassium and magnesium.
Ginger – Calms nausea and eases stomach discomfort, a common hangover symptom.
Apple cider vinegar – Provides trace minerals, supports digestion, and balances pH levels.
When you mix these simple ingredients in the right way, you create more than just a drink — you make a natural hangover recovery remedy that rehydrates your body and helps you feel human again. Just like when you’re battling dehydration from illness, replenishing sodium and potassium quickly restores fluid balance. Masala Monk’s guide on Electrolytes and Diarrhea explains how these minerals speed up hydration.
And the best part? You can mix and match depending on what you have at home. Whether it’s a quick lemon-honey blend, a coconut water mix, or a soothing ginger tea, these DIY options are versatile, effective, and way healthier than grabbing a sugar-packed sports drink.
🥤 DIY Electrolyte Drinks for Hangovers You Can Make at Home
Now that we’ve covered why electrolytes are so important — and the key ingredients that make them work — let’s get practical. You don’t need to stock up on pricey sports drinks or hydration powders; some of the best electrolyte drinks for hangovers can be made right in your own kitchen.
These five recipes are quick, natural, and use ingredients you probably already have at home. Each one has its own strengths — some are great for easing nausea, others are perfect for restoring energy — so you can choose whichever best fits how you’re feeling. In fact, many of the same soothing ingredients are recommended for sensitive situations like pregnancy — see Masala Monk’s post on Best Electrolyte Drinks for Pregnancy for ideas that overlap beautifully with hangover recovery.
🍋 Lemon & Honey Electrolyte Water for Hangovers
This simple recipe is a lifesaver the morning after drinking. The fresh lemon juice restores potassium, honey gives you quick energy, and a pinch of salt helps your body absorb fluids faster. It’s light, refreshing, and much easier on your stomach than plain water.
Lemon and honey electrolyte drink – a refreshing way to rehydrate after alcohol.
Ingredients (1 serving):
2 cups filtered water
1 tablespoon fresh lemon juice
1 tablespoon raw honey
¼ teaspoon sea salt
Optional: a pinch of baking soda for extra balance
Instructions:
Combine water, lemon juice, honey, and salt in a glass.
Stir until fully dissolved.
Chill in the fridge or add ice before drinking.
Why it works: This DIY electrolyte drink rehydrates quickly while being gentle on the stomach — perfect if you wake up groggy and dehydrated.
Sometimes a hangover comes with nausea, and the thought of chugging something sweet or cold isn’t appealing. That’s where this warm ginger tea comes in. Ginger has natural anti-nausea properties, while the salt and honey gently restore lost electrolytes.
Warm ginger and salt electrolyte tea – soothing hangover remedy for nausea and dehydration.
🍊 Orange Juice & Sea Salt Recovery Drink for Hangovers
If your hangover has left you tired and foggy, this bright and refreshing drink gives you a vitamin C and energy boost while replenishing electrolytes. Orange juice adds potassium and natural sugars, while sea salt improves hydration.
Orange juice with sea salt – a refreshing vitamin C and electrolyte boost for hangovers.
Ingredients (1 serving):
1 cup fresh orange juice
1 cup filtered water
¼ teaspoon sea salt
1 teaspoon honey (optional)
Instructions:
Mix orange juice, water, and salt in a glass.
Stir until combined and serve cold over ice.
Why it works: This is a quick rehydration drink after alcohol that helps fight fatigue while giving your immune system a boost.
🍎 Apple Cider Vinegar & Honey Hydration Drink for Hangovers
For those hangovers that come with bloating or digestive discomfort, apple cider vinegar can be surprisingly helpful. Paired with honey and salt, it creates a balanced electrolyte drink that supports digestion while hydrating your body.
Apple cider vinegar and honey electrolyte drink – supports digestion and hydration after drinking.
Ingredients (1 serving):
2 cups filtered water
1 tablespoon raw apple cider vinegar (with “the mother”)
1 tablespoon honey
¼ teaspoon sea salt
Optional: dash of cinnamon for flavor
Instructions:
Add apple cider vinegar, honey, and salt to water.
Stir until honey dissolves completely.
Drink chilled or at room temperature.
Why it works: Apple cider vinegar provides trace minerals and aids digestion, making this a smart hangover recovery drink when your stomach needs extra care.
These DIY electrolyte drinks for hangovers are quick, affordable, and made with real ingredients — no artificial colors, no heavy sugar, just natural rehydration. Whether you need something light and refreshing, soothing for nausea, or energizing for fatigue, there’s a recipe here to help you bounce back after a night of drinking.
Remember: the best strategy is prevention — alternating water or an electrolyte drink between alcoholic beverages and having one before bed can help reduce the severity of a hangover. But when those mornings hit hard, these homemade recipes can make all the difference.
🔎 Quick Guide: Best DIY Electrolyte Drinks for Hangovers
Not sure which recipe to try first? Here’s a simple breakdown so you can pick the drink that matches your hangover symptoms:
Recipe
Best For
Key Benefits
🍋 Lemon & Honey Electrolyte Water for Hangovers
Morning rehydration
Gentle on the stomach, restores sodium + potassium, quick hydration boost
🥥 Coconut Water Electrolyte Mix for Hangovers
Before bed or during drinking
High in potassium & magnesium, naturally sweet, prevents dehydration
🌿 Ginger & Salt Electrolyte Tea for Hangovers
Nausea & upset stomach
Soothes digestion, replaces lost electrolytes, hydrating without being heavy
🍊 Orange Juice & Sea Salt Recovery Drink for Hangovers
Midday recovery & fatigue
Vitamin C boost, natural sugar for energy, balances hydration
🍎 Apple Cider Vinegar & Honey Hydration Drink for Hangovers
Digestive discomfort & bloating
Aids gut health, provides trace minerals, rehydrates with balanced electrolytes
Comparison Chart for Natural Electrolyte Drinks for Hangovers
🛡️ Extra Tips to Prevent Hangovers with Electrolytes
Of course, the best cure is always prevention. While these homemade electrolyte drinks for hangovers work wonders the next morning, you can also use them before and during your night out to minimize symptoms. Here are a few tips:
Hydrate before drinking: Have a glass of water or an electrolyte drink before heading out.
Alternate drinks: A good rule of thumb is one glass of water or electrolytes for every alcoholic drink.
Refuel before bed: A quick DIY electrolyte mix before you sleep can lessen hangover severity.
Choose lighter drinks: Dark liquors like whiskey and rum contain more congeners (byproducts of fermentation) that worsen hangovers.
A little planning goes a long way — and your morning self will thank you.
Prevention is the smartest strategy. If you’re curious about speeding up recovery beyond hydration, check out Masala Monk’s practical guide on How to Get Alcohol Out of Your System Fast.
🌱 Why DIY Electrolyte Drinks Beat Store-Bought
You might be wondering: why not just grab a sports drink? While store-bought options like Gatorade or Pedialyte can help, they often come with excess sugar or additives. As per The Guardian, Electrolyte sachets may only provide minor support for hangovers, so if you want a cleaner, more natural approach, homemade drinks are usually the better option.
Less sugar: Many sports drinks are loaded with sugar, which can actually make nausea worse.
More natural: DIY recipes use real fruit juice, honey, and sea salt instead of artificial dyes and additives.
Customizable: You can adjust sweetness, saltiness, or flavor depending on what your body needs.
Budget-friendly: Ingredients like lemon, honey, and salt cost pennies compared to pricey hydration powders.
In short, homemade electrolyte drinks give you all the benefits without the unnecessary extras.
✅ Final Thoughts on Electrolyte Drinks for Hangovers
Hangovers may be a painful reminder of a fun night, but recovery doesn’t have to be miserable. By replenishing your body with fluids and minerals, you can bounce back faster, ease symptoms, and feel like yourself again.
These DIY electrolyte drinks for hangovers are simple, natural, and effective — whether you need quick rehydration, nausea relief, or digestive support. And remember, prevention is key: sip electrolytes before bed, alternate them during drinking, and you’ll likely wake up feeling much better.
So next time you find yourself dreading the morning after, skip the neon sports drink and try one of these homemade remedies instead. Your body (and your wallet) will thank you.
Try these DIY electrolyte drinks for hangovers – stay hydrated with MasalaMonk.com.
❓ Frequently Asked Questions About Electrolyte Drinks for Hangovers
Even after learning the recipes, you might still have questions about how electrolytes really help, when to drink them, and which options are best. To make this guide even more useful, here are answers to some of the most common questions about electrolyte drinks for hangovers.
1. What are the best electrolyte drinks for hangovers?
The best electrolyte drinks for hangovers are those that restore sodium, potassium, and magnesium while rehydrating your body. DIY options like lemon-honey water, coconut water mixes, or ginger tea work well. Store-bought choices like Pedialyte, Liquid I.V., or LMNT are also popular.
2. Do electrolytes really help a hangover?
Yes, as per EatingWell as well – electrolytes absolutely help with hangovers. Alcohol dehydrates you and depletes essential minerals. Replacing them helps your body absorb fluids faster, reduces headaches, boosts energy, and eases nausea.
3. Should I drink electrolytes before or after drinking alcohol?
Ideally, both. Having an electrolyte drink before and during drinking can prevent severe dehydration. Drinking electrolytes before bed and the next morning helps speed up recovery and reduce hangover symptoms.
4. Are homemade electrolyte drinks better than store-bought?
Homemade electrolyte drinks are often healthier because you control the ingredients. They usually have less sugar, no artificial dyes, and can be customized to your taste. Store-bought options like Gatorade or Pedialyte work too, but DIY recipes are more natural and budget-friendly.
5. Can coconut water cure a hangover?
Coconut water can’t “cure” a hangover, but it’s an excellent natural rehydration drink. It’s packed with potassium and magnesium, which help restore electrolyte balance and fight fatigue. Adding a pinch of salt makes it even more effective.
6. Is Gatorade good for hangovers?
Yes, Gatorade can help because it contains sodium and potassium. However, it’s higher in sugar and lower in electrolytes compared to medical-grade drinks like Pedialyte. If you don’t like the taste of DIY mixes, Gatorade is a convenient option.
7. How much electrolyte drink should I have for a hangover?
Start with one serving (about 2 cups / 500 ml) in the morning. If symptoms persist, you can sip another throughout the day. The key is to drink slowly and steadily so your body absorbs the fluids.
8. Can I drink electrolyte water while drinking alcohol?
Absolutely. Alternating alcohol with water or electrolyte drinks is one of the best ways to prevent hangovers. It slows down dehydration and keeps your mineral balance more stable.
9. Do electrolyte powders like Liquid I.V. or LMNT work for hangovers?
Yes, both Liquid I.V. and LMNT are popular for hangover recovery. Liquid I.V. contains glucose and sodium for fast absorption, while LMNT is sugar-free and high in sodium, great for those avoiding added sugars. Both are effective depending on your needs.
10. What’s the fastest way to rehydrate after drinking?
The fastest way is to combine water + electrolytes. Plain water alone won’t fully restore balance. A DIY electrolyte drink, coconut water with salt, or a packet like Pedialyte or DripDrop will help you recover more quickly and feel better faster.
🔑 Pro Tip:
There’s no one-size-fits-all hangover solution. Try different electrolyte drinks and see which one helps your body the most. The key is consistency — hydrate before, during, and after drinking for the best results.