In a world flooded with superfoods and weight-loss hacks, some of the most powerful tools for sustainable fat loss remain simple, natural, and often overlooked. Enter: Pumpkin Seeds — tiny green nutritional powerhouses packed with protein, healthy fats, essential minerals, and bioactive compounds that may offer surprising support in your weight-loss journey.
Recent scientific evidence — including a landmark 2023 clinical trial — is starting to validate what many health enthusiasts have suspected: pumpkin seeds don’t just taste great, they also work synergistically with your metabolism, appetite, and hormones to help optimize fat loss.
In this post, we’ll explore:
- The complete nutritional profile of pumpkin seeds
- How they promote weight loss (mechanisms)
- Recent research breakthroughs
- Practical tips for incorporating them into your daily routine
Let’s dive deep.
The Nutritional Power of Pumpkin Seeds
Pumpkin seeds, also known as pepitas, are harvested from pumpkins (Cucurbita pepo and Cucurbita maxima) and are naturally rich in an impressive array of nutrients.
| Nutrient | Per 28g (~1 oz or small handful) | Health Role |
|---|---|---|
| Calories | 151 kcal | Energy |
| Protein | 7g | Satiety, muscle maintenance |
| Fat | 13g (mainly unsaturated) | Healthy fats, hormonal balance |
| Carbohydrates | 5g | Low-carb friendly |
| Fiber | 1.7g | Gut health, appetite control |
| Magnesium | ~150mg (37% RDA) | Glucose control, insulin sensitivity |
| Zinc | ~2mg (14% RDA) | Thyroid & hormone regulation |
| Iron | ~4mg | Energy metabolism |
| Potassium | ~230mg | Electrolyte balance |
| Antioxidants | Vitamin E, phenolic acids | Anti-inflammatory |
How Pumpkin Seeds May Support Weight Loss: The Science-Backed Mechanisms
The weight-loss potential of pumpkin seeds isn’t about “burning fat” directly — instead, they work indirectly through multiple synergistic mechanisms:
1️⃣ Satiety: Keeping Hunger at Bay
- High Protein Content: With 7g of protein per ounce, pumpkin seeds help you feel full for longer, curbing snacking and overeating.
- Healthy Fats & Fiber: The unsaturated fats and fiber further slow digestion, regulate appetite hormones like PYY and GLP-1, and stabilize blood sugar.
- Studies consistently show that high-protein, high-fiber snacks improve satiety and reduce total daily calorie intake.
2️⃣ Blood Sugar & Insulin Control
- Pumpkin seeds are naturally rich in magnesium, a critical mineral for insulin function.
- Magnesium enhances insulin receptor sensitivity, improving glucose uptake and reducing insulin resistance — key for fat mobilization.
- A 2018 study showed that adding 65g of pumpkin seeds to a carb-heavy meal reduced post-meal blood sugar by 35%.
3️⃣ Reducing Inflammation
- Chronic low-grade inflammation is tightly linked to obesity and metabolic dysfunction.
- The antioxidants in pumpkin seeds — such as vitamin E, phenolic acids, and phytosterols — may help neutralize oxidative stress and improve lipid profiles.
4️⃣ Hormonal Balance (Especially for Women)
- Zinc is essential for thyroid function, leptin sensitivity, and reproductive hormones.
- This may be particularly helpful for women struggling with weight issues tied to PCOS or hormonal imbalances.
5️⃣ Lipid Regulation
- Pumpkin seed oil and flour have demonstrated triglyceride-lowering effects in both animal models and human studies.
- Better lipid profiles reduce cardiovascular risk and may improve metabolic flexibility — making weight loss more sustainable.
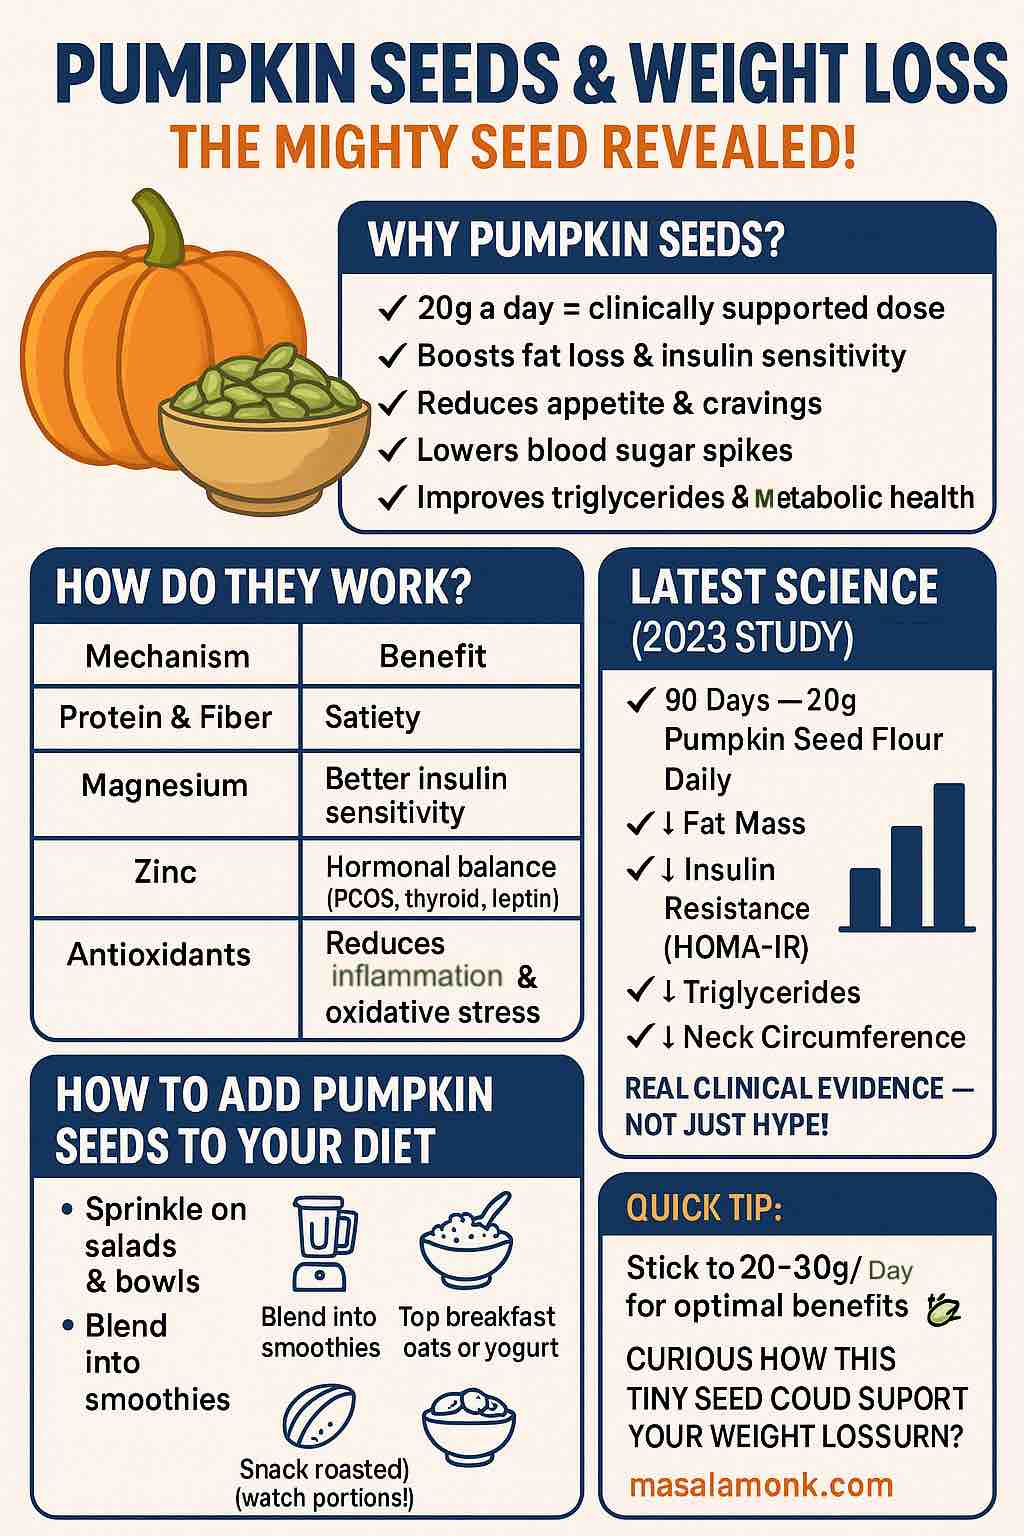
The Breakthrough 2023 Clinical Trial: Hard Evidence Emerges
Until recently, much of pumpkin seeds’ weight-loss reputation was built on indirect evidence. But a 2023 Brazilian clinical trial has added real-world credibility:
- ✅ 100 obese women (BMI > 30 kg/m²)
- ✅ Randomized, double-blind, placebo-controlled
- ✅ 90 days of a calorie-restricted diet + 20g/day pumpkin seed flour
- ✅ Compared to placebo
Key Results:
| Health Marker | Improvement (PSF group) |
|---|---|
| Fat Mass | Decreased |
| Neck Circumference | Decreased |
| Triglycerides | Decreased |
| Fasting Insulin | Decreased |
| HOMA-IR (Insulin Resistance) | Decreased |
In short: Pumpkin seed flour made calorie restriction even more effective, improving both fat loss and metabolic health.
Practical Ways to Use Pumpkin Seeds for Weight Loss
Here’s where research meets real life. How do you actually eat pumpkin seeds to take advantage of these benefits?
🥄 Recommended Daily Intake
- Whole seeds: ~20–30g/day (about 1–2 tablespoons)
- Pumpkin seed flour (as in the trial): 20g/day (~1–1.5 tablespoons)
Caution: They are calorie-dense (~150 kcal/oz), so portion control is important!
🍽 Easy & Tasty Ways to Incorporate Pumpkin Seeds
| Meal | Usage Idea |
|---|---|
| Breakfast | Sprinkle on oatmeal, yogurt, or smoothie bowls |
| Snacks | Eat as a roasted snack (unsalted preferably) |
| Lunch | Add to salads, soups, or Buddha bowls |
| Baking | Replace 10–20% of flour with pumpkin seed flour in breads, muffins, or pancakes |
| Smoothies | Blend pumpkin seed flour into protein shakes |
The Power of Synergy: Combine Pumpkin Seeds With…
Pumpkin seeds work even better when combined with other healthy foods that support blood sugar control and appetite regulation:
- 🥣 Chia or flaxseeds: for extra fiber and omega-3s.
- 🍇 Berries: for antioxidants and gut-friendly polyphenols.
- 🥬 Leafy greens: for additional magnesium, potassium, and fiber.
- 🍳 Lean proteins: to amplify satiety.
- 🍠 Complex carbs: when timed post-workout, for metabolic flexibility.
Possible Cautions (and How to Avoid Them)
While generally safe, pumpkin seeds aren’t magical or entirely free of downsides:
- Calorie Density: Overeating can offset any weight-loss benefit. Measure portions.
- Mild Allergies: Rare but possible.
- Phytates: May reduce mineral absorption if consumed in extremely high quantities (rare with normal intake).
- Digestive Issues: Start slow if you’re not used to higher fiber.
The Bottom Line: Are Pumpkin Seeds a Weight Loss Miracle?
No — pumpkin seeds aren’t a magic bullet.
But based on the latest clinical trial and strong mechanistic science, we can confidently say:
Pumpkin seeds — particularly in flour form — are a powerful, science-backed addition to a sustainable weight-loss program. They work by improving satiety, blood sugar control, insulin sensitivity, and lipid metabolism — all while providing your body with essential micronutrients that many dieters miss.
20 grams of pumpkin seed flour a day — combined with a calorie-controlled, nutrient-dense diet — can yield meaningful fat loss and metabolic improvements.
Quick Summary Table
| Benefit | Mechanism | Evidence |
|---|---|---|
| Satiety | Protein, fat, fiber | ✓ Human studies |
| Glycemic Control | Magnesium, fiber, fat | ✓ Acute human trials |
| Insulin Sensitivity | Magnesium, zinc | ✓ 2023 RCT |
| Lipid Improvement | Phytosterols, antioxidants | ✓ 2023 RCT, animal models |
| Anti-Inflammatory | Antioxidants | ✓ Mechanistic & animal data |
| Hormonal Balance | Zinc, magnesium | ✓ Observational & mechanistic |
Final Thought
The pumpkin seed isn’t just a garnish for your salad — it’s a functional food whose full potential we’re only beginning to unlock. If you’re serious about crafting a long-term, effective, and sustainable weight-loss strategy, this mighty seed deserves a permanent place in your pantry.
FAQs
1️⃣ How much pumpkin seed should I eat daily for weight loss?
The most evidence-backed amount is 20 grams of pumpkin seed flour daily, based on recent clinical studies. This equals about 1.5 tablespoons of flour or roughly 1 ounce (28 grams) of whole seeds. Always adjust portions based on your total calorie intake.
2️⃣ Is it better to consume whole pumpkin seeds or pumpkin seed flour?
Both forms are beneficial. However, the strongest clinical evidence supports pumpkin seed flour (20 g/day), which was shown to improve fat loss, insulin sensitivity, and triglyceride levels in obese women. Whole seeds still provide fiber, healthy fats, and micronutrients but can be easier to overeat.
3️⃣ Can pumpkin seeds help lower blood sugar?
Yes. Studies show that consuming pumpkin seeds with meals can lower post-meal blood sugar spikes by up to 35%. This effect comes from their fiber, protein, fat, and magnesium content, which slows carbohydrate digestion and improves insulin sensitivity.
4️⃣ Do pumpkin seeds support hormonal balance?
Yes, especially for women. Zinc in pumpkin seeds helps regulate thyroid hormones, supports reproductive hormones, and improves leptin sensitivity — important factors for weight management, especially in cases like PCOS.
5️⃣ Are there any side effects of eating pumpkin seeds?
Pumpkin seeds are generally safe. However:
- Overeating can lead to excessive calorie intake.
- Rare allergies exist.
- High amounts may cause mild digestive upset due to fiber.
- The phytic acid content may reduce mineral absorption if consumed in extremely large quantities.
6️⃣ Can men benefit from pumpkin seeds for weight loss?
Absolutely. While one study was on obese women, the metabolic benefits — improved insulin sensitivity, better lipid profile, reduced inflammation — are highly relevant to both men and women.
7️⃣ Do roasted pumpkin seeds have the same benefits as raw?
Roasted seeds still provide key nutrients, but high-heat roasting may slightly reduce some heat-sensitive antioxidants. Lightly roasted or raw pumpkin seeds are ideal for maximizing nutrient retention.
8️⃣ Can I lose weight just by adding pumpkin seeds without dieting?
Pumpkin seeds are not a magic fix. They work best as part of an overall calorie-controlled, nutrient-rich diet. Their main role is to support satiety, blood sugar control, and metabolic health — making it easier to stick to your weight loss plan.
9️⃣ What’s the best time of day to eat pumpkin seeds for weight loss?
Anytime works. Some people add them:
- At breakfast for satiety
- In snacks to curb afternoon cravings
- With carbohydrate meals to reduce post-meal glucose spikes
Consistency is more important than timing.
🔟 Are pumpkin seeds keto or low-carb friendly?
Yes. Pumpkin seeds are naturally low in net carbs and high in healthy fats, protein, and fiber — making them a keto-friendly, low-carb snack when consumed in moderation.