Posted on 4 Comments

How to make Almond Milk at Home

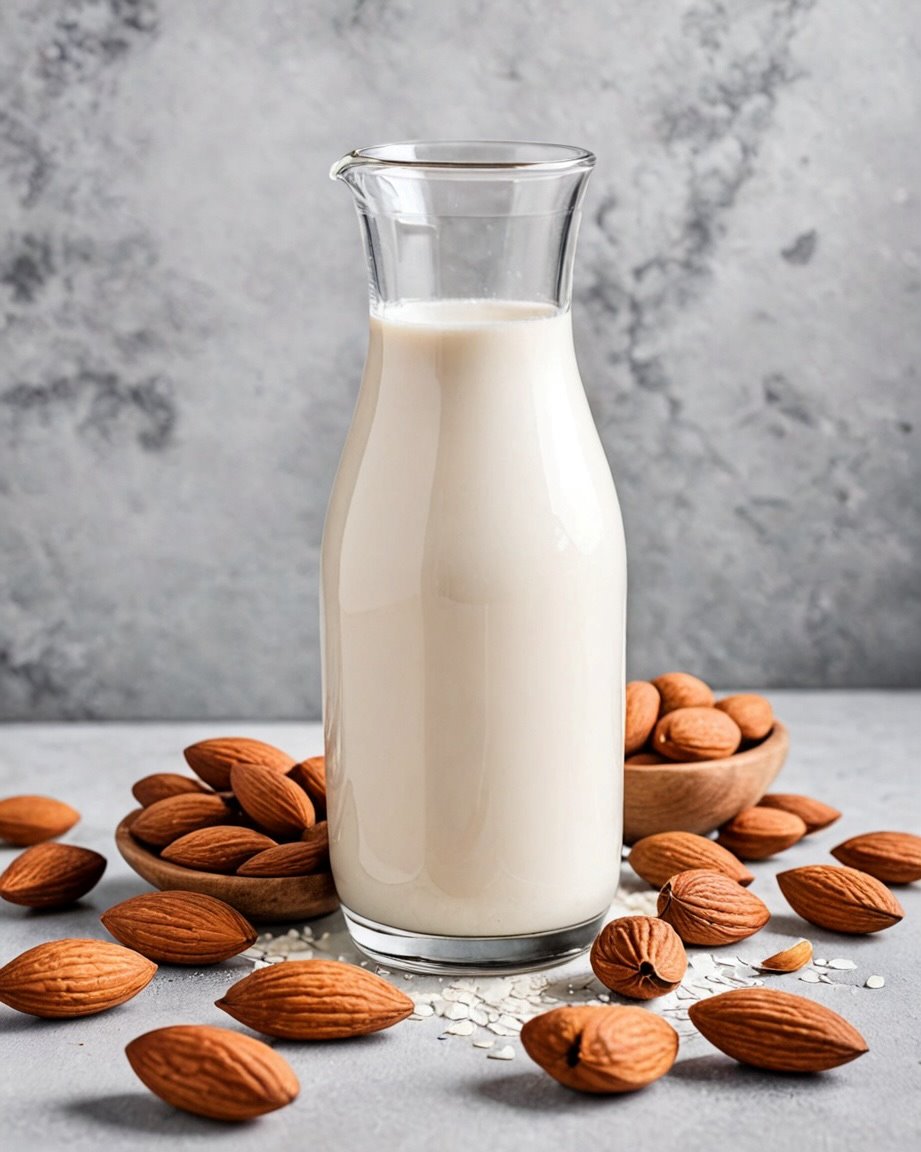
While I love the convenience of store-bought almond milk but once you get the taste of your homemade version, it’s hard to go back to store-bought milk. It’s creamier and nuttier than commercial almond milk and of course without thickeners, artificial flavors, stabilizers and no shelf life extending additives.

Almond milk is a nutritious, nut-based dairy alternative and has become popular over the years. It’s dairy and lactose free. Hence, making it a good option for those avoiding dairy or are lactose intolerant.

Including almond milk in an overall healthy and balanced diet certainly has its upsides. Almond is a fabulous source of vitamin E, a nutrient that has antioxidants properties. Since it is low in calories, it can also support your weight management goals. 1 cup of almond milk has only around 40 calories. It also contains heart-healthy poly- and monounsaturated fats and is also free from saturated fat, trans fats and dietary cholesterol.

While homemade almond milk is a great source of nutrients, it is not a good source of protein and calcium but don’t let it stop you. There are plenty of other plant base sources of calcium and protein which you can include in your diet.

Homemade almond milk allows you to control the amount of sweetness and infuse flavors as well as play around with the thickness. It’s amazingly simple- just soak, blend and strain and it is super versatile. You can use this milk for making coffee, add it to your cereals, blend it to smoothies, use it in your favorite baked goods. Once you have it in hands, there are million ways to use it.

How to make Almond Milk

Ingredients: makes 800 ml thick Almond milk

  • 1 cup raw Almond
  • 3 sticky Dates
  • 1/2 tsp Vanilla extract
  • 3 cups of filtered Water

Instructions

  • Soak almonds overnight or for at least 7-8 hours. Now most recipes call for soaking almonds in hot water for an hour or 2. But soaking it for long increases bioavailability of the nutrients and makes milk easy to digest. Also, it makes almond easier to blend resulting in creamier milk.
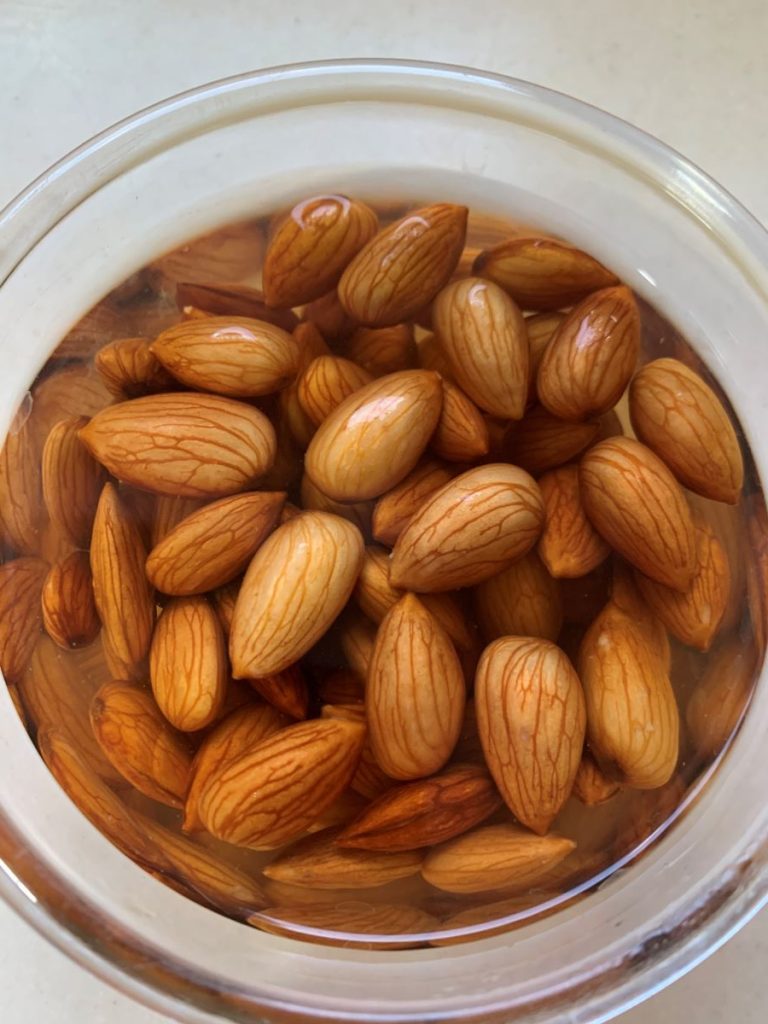
  • Drain the water. The almonds should be nice and plump. Add soaked almonds in a blender. (Do not peel the skin. Skin contains several antioxidants and prebiotics)
  • Also add de-seeded sticky dates and vanilla extract.
  • Add filtered water and then blend till it is smooth & creamy. Do it for 1 or 2 minutes. The timing will depend on how powerful your blender is.
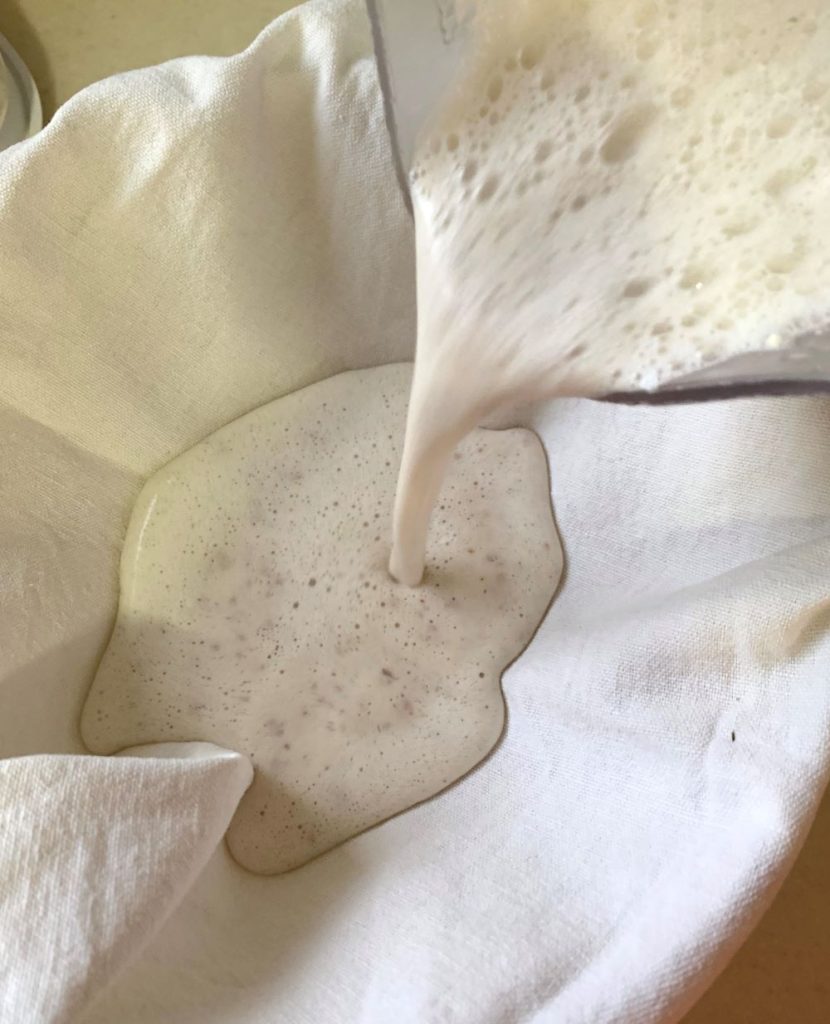
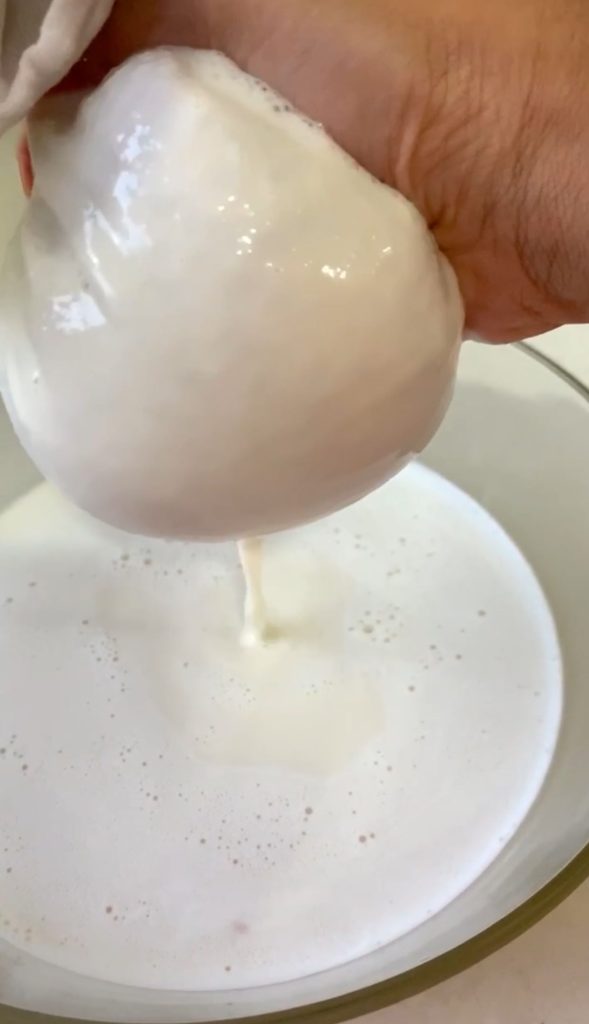
  • Take a clean muslin cloth and set it over a large bowl. Add almond milk. Use your hands to squeeze and press as much liquid out as possible. This is thick creamy milk.
  • If you want it thin, which I like, put the almond residue back in blender. Add 1.5 cups of water and strain again. This will be thin and less creamy.

Variations:

  1. You can choose sweetener of your choice as well. If you don’t want to use sticky dates, you can either go for maple syrup or honey to sweeten it.
  2. You can also simply go for unsweetened version of almond milk as well.
  3. Flavoring your almond milk is totally your choice. Either you can add vanilla extract like mentioned above or flavor it with cinnamon or raw cacao powder if you like chocolaty milk.
  4. You also try blending it with strawberries or blueberries if berry milk is your thing.

Notes:

  • You can use almond milk right away or refrigerate it in a clean airtight glass bottle for upto a week.
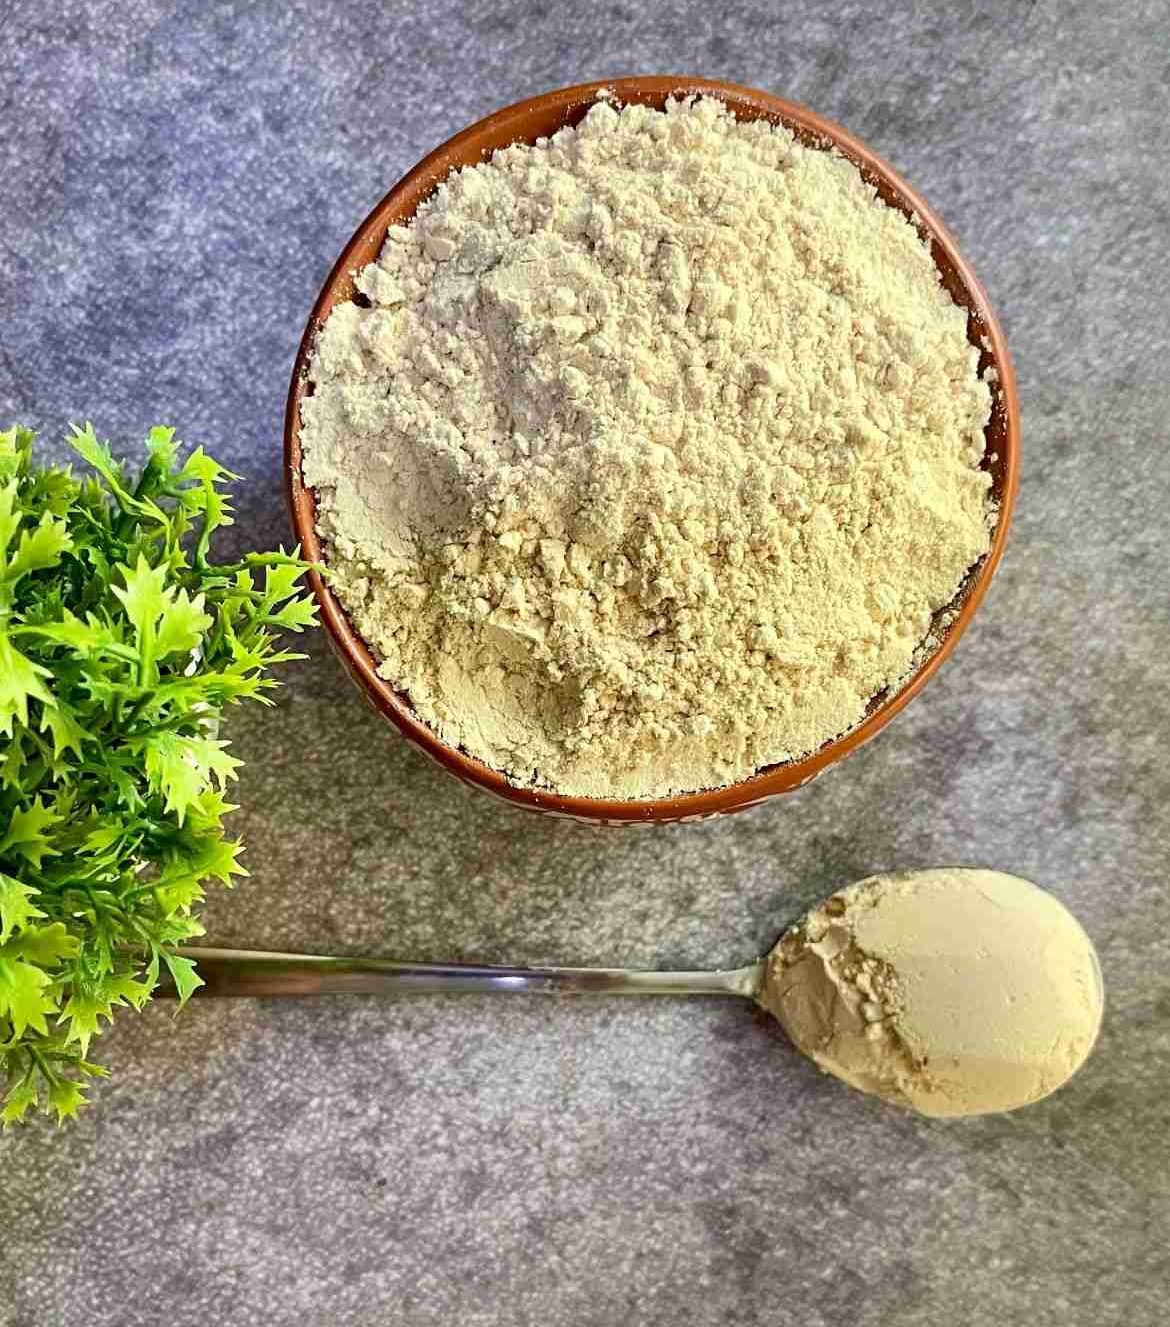
  • Do not throw away the almond residue. This can be added to cakes, cookies, smoothies, energy bites. You can also spread the almond residue on a baking tray and bake it in an oven at 180 C till moisture evaporates. Once cooled, grind it to a fine powder and you have your homemade almond meal ready.


Posted on Leave a comment

Spiced Plum and Dragon Fruit Compote with Jaggery

Welcome to my kitchen, where I am always experimenting with fresh and exciting flavors! Today, I’m thrilled to share a delightful recipe that combines the sweet and tangy taste of plums with the exotic flair of dragon fruit. Enhanced with the rich, caramel-like sweetness of jaggery and the warm spice of cinnamon, this compote is a versatile treat perfect for topping your favorite desserts, breakfast dishes, or simply enjoying by the spoonful. Whether you’re a seasoned cook or just love to dabble in the kitchen, this Spiced Plum and Dragon Fruit Compote with Jaggery is sure to become a new favorite. The best part? You can store this compote in a jar and keep it in the fridge for a few days, making it a convenient and delicious addition to your meals throughout the week. Let’s dive into this easy-to-make, yet irresistibly delicious recipe!

Ingredients:

3 ripe plums, pitted and chopped
1 dragon fruit, peeled and chopped
1/2 cup jaggery powder
1 cinnamon stick

Instructions:

Start by chopping the plums and dragon fruit into small, bite-sized pieces. This will ensure they cook evenly and blend well in the compote.

In a medium saucepan, combine the chopped plums, dragon fruit and cinnamon stick and cook for 2-3 minutes.

Now add the jaggery powder. Cook over medium heat, stirring occasionally, until the fruits begin to soften and the jaggery dissolves, about 5-7 minutes. You’ll notice the wonderful aroma of the fruits and jaggery blending together.

Continue to cook for another 10-15 minutes, until the mixture thickens to a compote-like consistency. Stir occasionally to prevent sticking and ensure even cooking.

Remove the saucepan from the heat and let the compote cool slightly. Once cooled, remove the cinnamon stick and transfer the compote to a clean jar. Seal the jar tightly and store it in the fridge. This compote will keep well for a few days, allowing you to enjoy it throughout the week.


Serve the compote warm or chilled. It’s a fantastic topping for yogurt, ice cream, pancakes, waffles, or toast.
You can also enjoy it on its own for a simple, satisfying treat.


Tips:
Adjust the sweetness by adding more or less jaggery powder to suit your taste. For an extra flavor boost, consider adding a splash of vanilla extract or a squeeze of lemon juice towards the end of cooking. This Spiced Plum and Dragon Fruit Compote with Jaggery is not only easy to make but also a wonderful way to incorporate unique flavors into your meals. I hope you enjoy making and eating it as much as I do! Happy cooking!

Posted on Leave a comment

Calamondin Orange Marmalade- Simple Quick Recipe

I have a plant of this gorgeous beauty in my garden. I planted calamondin oranges as a mere ornamental beauty. Little did I know that they are a remarkable member of the citrus family. Calamondins originated in China and the Philippines. But this fruit soon gained popularity across the world for its versatility. This fruit is a hybrid between a mandarin orange and a kumquat.

The fruits are sour and slightly sweet, resembling a tarter version of traditional oranges. The peel of this fruit tastes sweet and the inside is sour but very flavorful. Despite its sour taste, the calamondin orange is a culinary delight. It’s widely used in marmalades, jams, and as a flavor enhancer in beverages and desserts. In Southeast Asian cuisine, it’s a common condiment, adding zest to dishes.

This fruit yields fabulous marmalade. The distinct aroma and sweet taste of the peels makes this marmalade quite different from the regular orange marmalade you had. And dare I say tastes so much better! If you personally ask me, this is best citrus food marmalade I have ever made.

This vital little fruit is also known for it’s healthy benefits. One of the most common applications is in the treatment of respiratory ailments such as coughs and phlegm. The fruit’s juice, when consumed, can help in loosening and expelling phlegm, making it easier to clear congested airways.

The fruit’s acidity can aid in digestion and help alleviate gastrointestinal discomfort such as bloating and indigestion. Its mild laxative effect can also be beneficial in regulating bowel movements.

I think I have given you enough insight about this fruit. Now coming to the recipe. You only need 3 ingredients to make this marmalade. The entire recipe will take you no time since you don’t require much cooking unlike other citrus marmalades because the peels are very soft.

Recipe

Prep time: 15 minutes Cook time: 12 minutes 
Yields: 700 grams

Ingredients

  • 500 grams Calamondin Orange
  • 500 grams sugar
  • 1/2 tsp Salt
  • 1 tbsp Lemon juice
  • 1 tbsp minced Ginger (optional, but adds flavor)

Instructions

  • Before starting the recipe, put a plate in a freezer for later testing the marmalade.
  • Cut the calamondins into half and take out all the seeds. This might take you 10 to 12 minutes but as soon as you are done with this step, this recipe is a piece of cake.
  • Now blend all the calamondins in a blender. 500 grams of this fruit will roughly give you 2 cups pulp.
  • Bring a heavy bottom pan to a medium heat. Add the pulp and cook it for 3-4 minutes.
  • Now add sugar and cook the pulp for 7-8 minutes. After 7 minutes of cooking, do the plate test.
  • Pour a tsp of marmalade on a chilled plate and try to wriggle it using your fingers. If the liquid starts getting wrinkles and it resembles a set jelly, you know that your marmalade is ready.
  • Pour the marmalade in a sterilized glass jar. Now add a tbsp of lemon juice and mix well. It will last you months at room temperature. Refrigerate for longer shelf life.

Enjoy this delicious treat!!! 🙂

Notes:

  • Never try to cook this marmalade beyond 10-12 minutes. Do the plate test precisely after 7 minutes. The marmalade might appear loose but as it cools, it will become thick. If you are still unsure, then once the marmalade coats the back of your spoon, it is time to take it off heat. If you keep cooking it beyond that time, your marmalade on cooling will become like a solid mass.
  • Do not reduce the sugar. Since calamondin is a sour fruit, you will have to add equal amount of sugar to balance the tartness.
  • Always take the ripest calamondins for better flavor.
  • Always store the marmalade in a glass jar due to its acidic nature.
Posted on Leave a comment

The Indian Summer Superfood: Chana Sattu

This super food has existed in our country for decades. Sattu atta or Sattu maavu is familiarly mentioned as a quick breakfast option in many households across India. A staple in Bihar, Jharkhand, West Bengal, Uttar Pradesh, Rajasthan, and Madhya Pradesh, it is cherished and consumed by laborers and farmers.

Sattu, derived from roasted Bengal gram flour, is often hailed as the “poor man’s protein” for its affordability and rich nutritional profile which is now also gaining popularity in urban areas. What earlier belonged to a few states, is now a famous and exotic food ingredient that is easily available even in supermarkets.

Growing up, sattu was not just a food item for me; it was a cornerstone of my childhood memories and experiences. In the bustling kitchen of my Bihari household, sattu was omnipresent, woven into the fabric of our daily lives in countless ways. From savory dishes to refreshing drinks, sattu featured prominently on our dining table, each serving a testament to its versatility and significance.

Interesting History of Sattu

There have been many stories behind origin of sattu. However the most common one is that, Sattu originated in Tibet where it is known as ‘Tsampa’. It was a staple travel food of monks, who traveled long distances in search of enlightenment. It was durable, easy to eat and provided them with required nutrients and energy.

Infact, in the heroic case of the 1999 Kargil War in the Batalik Sector, not many know that the win initially was achieved, courtesy Ladakh Scouts. This unit was instrumental in ensuring that not only the little battalion posted up there got their ammunition and information supply, but food as well— especially Sattu.

Health benefits of Sattu:

  • Rich source of protein: Did you know 100 grams of sattu can give you 20 grams of pure protein? Sattu is made from roasted Bengal gram flour, making it a potent source of plant-based protein.
  • High fiber content: Sattu contains dietary fiber, which aids digestion, promotes bowel regularity, and helps maintain a healthy gut.
  • Low glycemic index: Sattu has a low glycemic index, meaning it causes a slower and steadier rise in blood sugar levels, making it suitable for individuals with diabetes.
  • Nutrient-dense: Sattu is packed with essential vitamins and minerals such as iron, calcium, magnesium, and potassium, which are vital for overall health and well-being.
  • Energy booster: Sattu provides a sustained release of energy due to its complex carbohydrates, making it an ideal pre- or post-workout snack.
  • Cooling properties: Sattu has natural cooling properties, making it a popular choice during hot summer months to beat the heat and stay hydrated.
  • Weight management: Sattu is low in calories and fat, making it a nutritious option for those looking to manage their weight while still feeling satisfied and full.
  • Supports heart health: The fiber, protein, and potassium content in sattu may help lower cholesterol levels, reduce blood pressure, and support cardiovascular health.
  • Boosts immunity: Sattu contains antioxidants and micronutrients that help strengthen the immune system and protect the body against infections and diseases.
  • Promotes bone health: Sattu is a good source of calcium and magnesium, which are essential for maintaining strong bones and teeth, reducing the risk of osteoporosis.

How to select Sattu Flour?

When an ingredient becomes more popular, brand race starts to put their stamp on the product which is in demand. In this race, selecting a good brand becomes challenging. Go for indigenous variety of channa that is stone ground to a fine powder. Indigenous pure variety is easy to digest while being a source of insoluble fibre. Traditional stone grinding process preserves the natural taste, aroma, and nutritional benefits of the chana, making it a more authentic and a wholesome choice. You can explore Masala Monk’s Sattu Mix which is made from pure channa and is stone ground sattu flour.

Ways to incorporate Sattu in your lifestyle 

  • Simple Sattu Drink: This one is effective, easy and you just need a few ingredients to make this recipe. It is an easy fussy free recipe which will keep you hydrated in summer heat. All you need to do is mix sattu, lemon juice and some spices in a glass of water. Stir it well and drink this nutritious drink. For the full recipe, click here
  • Sattu Parantha: A staple in Bihar, sattu parantha is delicious and so easy to make, and you can pair it with curd and pickle. Just make simple filling with sattu, onion, green chillies and spices. Then add the filling in the middle of your parantha dough and cook. Check out the full recipe here. 
  • Buttermilk Sattu: Sattu is a rich source of protein and when mixed with buttermilk it is a natural and a potent protein shake. This drink is a quick escape from the sweltering summer heat and a refreshing twist on a classic drink that’s both easy to make and high in protein. Click here for full recipe.
  • Sattu Cheela (Pancake): A good and nutritious breakfast recipe, sattu cheela is easy to make. For this, you need is a mix of besan, sattu, spices and vegetables of your choice. It is simple protein rich breakfast recipe. Know how you can make this iron rich too. Check the recipe here.
  • Sattu Porridge: Sattu Porridge is a wholesome and nutritious breakfast option that combines sattu with creamy milk and a touch of natural sweetness. This hearty porridge provides sustained energy and keeps you feeling full and satisfied throughout the morning. With its easy preparation and customizable toppings, it’s the perfect way to start your day on a healthy and delicious note! Click here for detailed recipe.
  • Sattu Chokha: It is a humble yet flavorsome dish. With no cooking involved and no intricate techniques required, it’s a true testament to the beauty of minimalism in cooking. Made primarily from sattu, this dish celebrates the natural flavors and nutritional benefits of its core ingredient. Mixed with an array of aromatic spices and fresh ingredients like onions, green chilies, and coriander leaves, Sattu Chokha is a delightful medley of textures and tastes. Click here for full recipe.

Posted on Leave a comment

Easy Festive Irish Rum Truffles- The Best Truffles

Irish Rum Truffles are a classic holiday treat. Chocolatey and rich. It is a French confectionery traditionally made with chocolate ganache centre and coated with cocoa powder, coconut or chopped nuts. It’s sweet, slightly bitter, fudgy and of course intensely boozy. These are my favourite indulgent sweets. I am absolutely certain that after trying this recipe, you will ditch the boxed truffles which doesn’t even come close to the homemade ones.

Irish Rum Truffles are quite easy to make. They are perfect when you are craving a treat but don’t want to turn on the oven. 

One of the qualities I find most important in food is the taste it leaves in my mouth. It should leave a memory on my taste buds that makes me want the next one. And, these truffles do exactly that.

My husband and I cut a small cake together at midnight on our anniversary each year. This is our moment together before we celebrate the day with our family and friends. 

So for our 5th anniversary I wanted to treat my husband with something different and not the usual midnight cake. That’s when I thought of making Irish rum truffles. I sat down and scrolled through many recipes, adding and omitting what I like and don’t like and finally came up with this recipe. I had my fingers crossed. 

When the clock struck midnight, I surprised him with these. He had a confused expression on his face because it was not the usual stuff. Skeptically, he took the first bite and the wide eyed expression said it all. 😄

They turned out to be so good. It has been 6 years now since I have been making this. I didn’t realise how good these were until one year I didn’t make them.

Not only are these holiday classics or a perfect gifting treats but you can make them whenever you like. It will lift your mood when you are sad. When you are happy, it will just make you happier. 😊

Although if rum or bailey’s isn’t your favourite liquor, you could try making them with bourbon, cointreau, cognac or kahlúa instead.

The taste will depend on the chocolate you are using. I used a total of 100 grams chocolate. 60 grams was Green & Black Dark Chocolate (70%) and 40 grams was a mix of Lindors and Lindt Milk chocolate. 

Pro Tips:

  • Do not use Chocolate chips or cheap bars because they will not melt in truffle consistency leaving you with grainy bits. Chocolate chips are great for recipes like cookies and tea cakes. 
  • Do not use half-and-half or any other liquid because the truffles won’t set properly.
  • Pure vanilla extract adds exceptional flavor to your chocolate truffles.
  • Coffee will accentuate the taste of the chocolate, so do not skip it. 

Truffles are too firm with less liquid. So stick to this recipe for truffle success!

Recipe: makes 12-13 truffles

Ingredients

Chocolate: 100 gms

Fresh cream: 60 ml (25% fat)

Coconut oil/Unsalted butter: 3 tbsps

Rum: 10 ml

Bailey’s Irish cream: 30 ml

Instant coffee: 1/2 tsp mixed in 1 tbsp water

Vanilla extract: 1/2th tsp

Sieved unsweetened Cocoa powder

Some coarsely crushed nuts. I went with Pistachios. 

Method:

  • Finely chop chocolate and keep aside in a big glass bowl. 
  • Heat cream. DO NOT BOIL IT. Remove from heat just when you see bubbles forming on the edges. Add coconut oil or butter. 
  • Pour the hot cream over the chocolate in batches, mixing well each time so that the chocolate doesn’t split. Use a wire whisk. If the chocolate splits, just add a splash of boiling water. 
  • Now, in goes the rum, bailey’s, instant coffee and vanilla extract.
  • Whisk it well for couple of minutes to incorporate some air and till everything mixes well.
  • Cover it with a cling and put it in the refrigerator for 3 hours to set. 
  • Once set, line a plate with butter paper. 
  • Take one tbsp scoop and scoop out to make small balls. You will have to shape really quickly because the heat from your hand might melt the chocolate. 
  • Keep the topping handy in a plate. 
  • Roll the truffle in the topping of your choice and place it one by one on the butter paper. 
  • Refrigerate for one hour or till it is set. It will last you about 2 weeks in a refrigerator. 

Troubleshooting

  • The chocolate is separating: This is one of the biggest concerns while making truffles. If your chocolate splits then your cream was too hot. So make sure you don’t boil it. 
  • The chocolate doesn’t melt: There can be two issues here, either your cream is too cold or you didn’t chop the chocolate into very small pieces. The finer the chocolate chunks, the quicker it will melt. If the chocolate doesn’t melt, craft a double boiler setting and heat the mixture in a heat proof bowl for a few seconds. 
  • Trying to scoop too-warm ganache: Once the cream and chocolate are whisked together, you will have a thick, smooth mixture known as ganache. You might think that it’s scoopable right out of the bowl, but you’ll need to cool it properly before scooping and rolling. Refrigerate it before scooping.