When people reach for fiber, psyllium is often first on the list. Yet before the scoop hits the glass, most of us wonder about psyllium husk side effects. Because psyllium (called isabgol in India and ispaghula in the UK) swells into a gel, it can be wonderfully helpful for constipation and stool regularity; however, it also brings predictable bumps—gas, bloating, and, if used incorrectly, more serious problems. In this guide, we put psyllium husk side effects front and center, then walk—step by step—through safer use, who should be cautious, and why many people still choose it. For brand timing specifics, you can also refer to our practical explainer on when to take Metamucil.
Educational information only — not medical advice. Please consult your clinician, especially if you’re pregnant, have GI disease, or take regular medicines.
What Psyllium Is (and Why It’s So Popular)
Psyllium is the husk from Plantago ovata seeds. Once mixed with enough water, it forms a soft gel that bulks and softens stool, helping it pass more comfortably. You’ll find it sold as plain husk/powder, in capsules, and in branded products such as Metamucil and Konsyl; in the UK, the same fiber appears as Fybogel (ispaghula). For a clear, consumer-facing overview of ispaghula products, see the NHS medicines page.
Although this article is detailed, it remains educational—it isn’t a diagnosis or prescription. Because your history and medicines matter, check in with your own clinician if you’re unsure how to start.
Also Read: Significance of Fiber in Diet: Understanding Its Health Benefits
Understanding Psyllium Husk Side Effects (At a Glance)
Most people tolerate psyllium well, especially when they start low and go slow. Nevertheless, certain psyllium husk side effects are common in the first week:
- Gas, bloating, and abdominal cramps. These often improve as your gut adapts. Practical consumer guidance appears on the NHS side-effects page and in the Cleveland Clinic drug overview.
- Looser stools or—paradoxically—temporary constipation if you overshoot the dose without enough fluid. Again, “start low, increase gradually” makes a real difference (see the same NHS and Cleveland Clinic pages).
- Less common effects include nausea, itching/rash, and allergy, including to inhaled powder dust; for symptom lists, see MedlinePlus.
- Serious (seek urgent care): rare choking or esophageal/intestinal obstruction if psyllium is taken with too little liquid or dry-swallowed. For the regulatory backdrop on older granular forms and choking risk, see the U.S. FDA’s Federal Register rule: FDA final rule.

To reduce these risks, hydration and timing are everything; we’ll cover both in depth below. Meanwhile, if you’re curious about brand routine (morning vs pre-meal), our hands-on breakdown—best time to take Metamucil—compares real-world options.
Also Read: Fiber in Food
Common Psyllium Side Effects and How to Ease Them
Gas, Bloating, and Cramps (the Usual Startup Hurdles)
Early psyllium side effects usually reflect your gut adjusting to more fermentable material and extra water. Fortunately, they commonly settle in 3–7 days. Therefore, begin with a small dose and increase gradually while drinking more water. Both the NHS and Cleveland Clinic emphasize those basics.
If you want brand-specific expectations (sweeteners, flavors, and fullness effects), we discuss them in our reader-friendly piece on Metamucil side effects. And because hydration magnifies comfort, if your tummy is touchy or you’re recovering from a bug, our practical guide on electrolytes for diarrhea explains simple ways to keep fluids up without going overboard.
Temporary Scale Weight Changes (Not Fat Gain)
Psyllium’s gel holds water and increases stool mass. Consequently, your scale can tick up even while body fat does not. Some people use psyllium 15–30 minutes before meals to boost fullness; others prefer it at a neutral time of day. We compare those approaches—and how to match them to your goals—in when to take Metamucil.
Skin Symptoms or Allergy (Less Common)
Although uncommon, itchy rash, wheeze, swelling, or throat tightness are not normal fiber effects. Stop immediately and seek care, especially if symptoms escalate. Plain-language lists are collected by MedlinePlus.
Serious Side Effects of Psyllium Husk (Read Carefully)
Choking or obstruction can occur if psyllium is swallowed “dry,” taken with only sips of water, or used right before lying down. The FDA flagged granular dosage forms decades ago for avoidable choking risk; modern consumer advice continues to stress proper mixing and generous fluid. For the policy record, see the FDA’s Federal Register decision: FDA final rule. If you prefer a clinical plain-English reminder—red-flag symptoms and “when to seek help”—the Cleveland Clinic and Drugs.com monograph are practical.
Because we all skim, here’s the essence: never dry-swallow psyllium powder or capsules, always mix a dose with at least 240 mL (8 oz) of water, and avoid bedtime dosing.
Isabgol Side Effects in Special Situations (Who Should Be Cautious)
Some situations deserve individualized advice. Therefore, check with a clinician first if you have:

- Swallowing difficulties (dysphagia) or known GI strictures/narrowing
- A history of bowel obstruction
- Children under 6 who might not hydrate reliably
- Pregnancy: bulk-forming laxatives like ispaghula/psyllium are generally considered safe if diet, fluids, and movement aren’t enough, but confirmation from your obstetric provider is sensible. See UKTIS and Mayo Clinic.
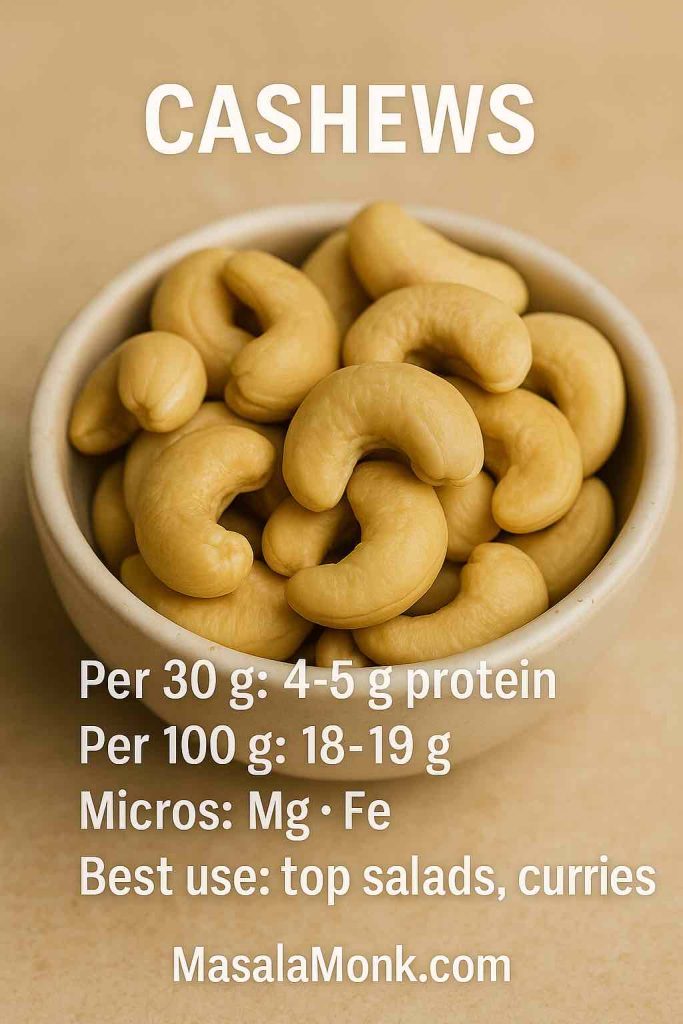
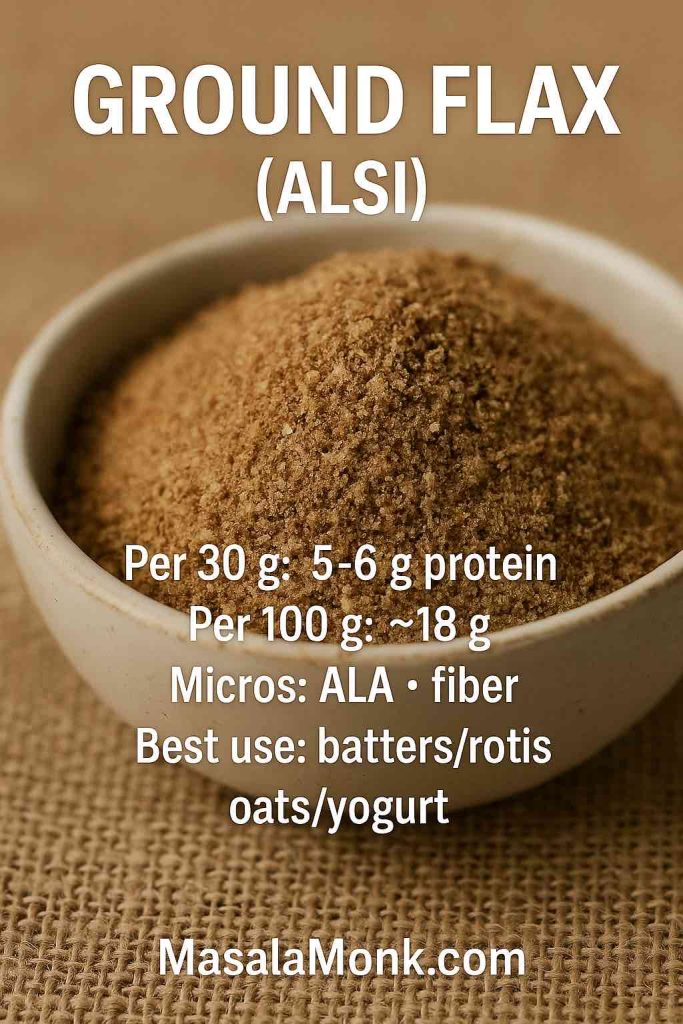
In parallel, you may prefer to try food-first strategies while you ramp fiber—our everyday guides on millet fiber & digestion and flax seeds for digestion can help you build a gentle baseline even before you optimize supplement timing.
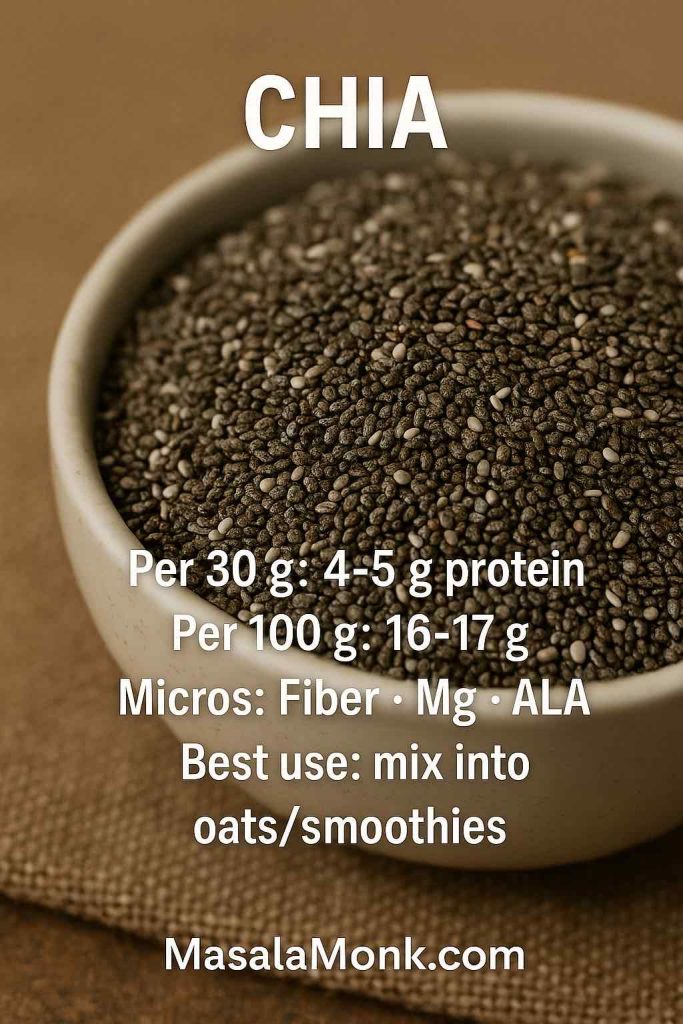
Also Read: Chia Seed Water: Benefits, Recipes & Best Time to Drink for Weight Loss
Medicine Timing, Interactions & Hydration (The Safety Core)
Because psyllium forms a water-loving gel, it can reduce the absorption of other medicines taken at the same time. The simplest rule is also the most effective: take other oral medicines at least 2 hours before or after your psyllium dose. Moreover, always mix each dose with a full glass of water and finish it promptly. Pharmacist-written consumer guidance is clear on both points: Drugs.com Food/Lifestyle.

If your medicines are time-critical—think thyroid tablets, certain diabetes medicines, or narrow-therapeutic-index drugs—ask your clinician or pharmacist to map the day so your psyllium husk side effects don’t include sub-par drug absorption.
Educational information only — not medical advice. Please consult your clinician, especially if you’re pregnant, have GI disease, or take regular medicines.
How to Take Psyllium Safely (Step by Step)
- Start low and titrate. Begin around 3–5 g once daily, then increase gradually toward the label dose (often 5–10 g, up to 3×/day) as tolerated. For OTC dosing ranges and definitions, see the U.S. order: FDA Administrative Order (2023).
- Add liquid first. Pour ≥240 mL (8 oz) water into a glass, sprinkle in psyllium, stir, and drink immediately. If it thickens, add more water and finish. Clear how-to notes: Cleveland Clinic.
- Separate from medicines. Keep the 2-hour buffer for every dose (before or after); see Drugs.com.
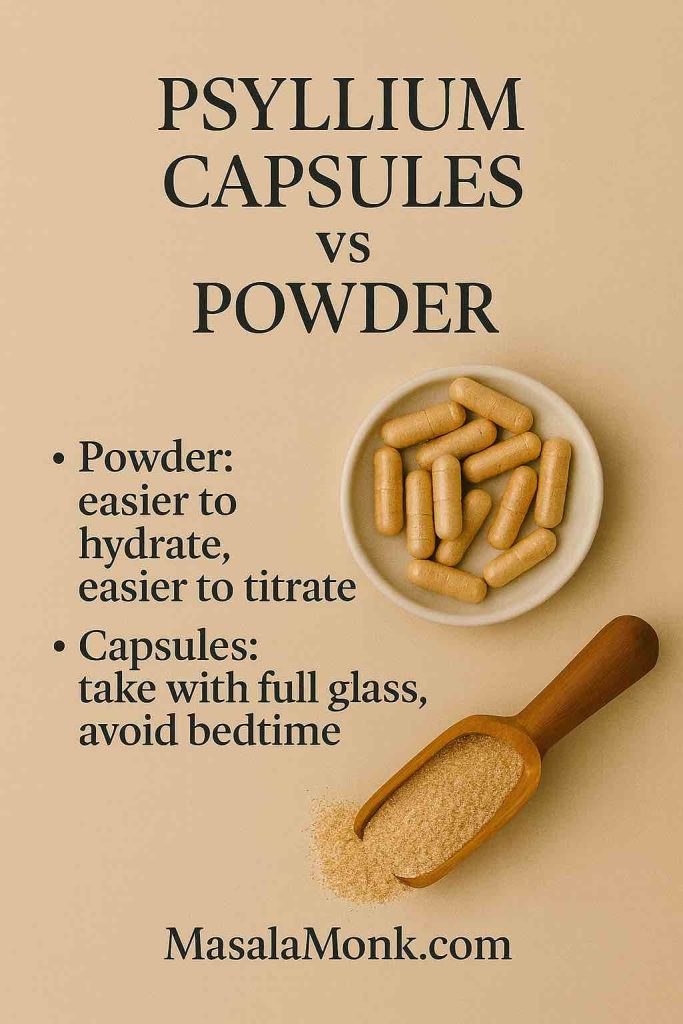
- Capsules aren’t an excuse to skimp on water. They can still swell and lodge if you sip, so take with a full glass and avoid bedtime. Capsule care reminders: Drugs.com capsule info.
- Popular mixes. If you combine isabgol with curd/yogurt, also drink a full glass of water separately so the gel doesn’t sit thick in your throat.

If you’d rather align psyllium with appetite control, we compare pre-meal vs neutral-time routines in best time to take Metamucil. And if you’re tackling constipation more holistically, readers often pair a gentle regimen with our food-based ideas, like high-fiber sandwich options or—cautiously—olive oil for constipation.
Why People Persist Despite Psyllium Fiber Side Effects (The Evidence)
Even though psyllium fiber side effects can be annoying early on, many people continue because benefits are well documented.
- Constipation (and sometimes diarrhea). As a bulk-forming, gel-forming fiber, psyllium helps normalize stool form and can ease IBS-C in many—though not all—people. Therefore, it’s wise to start low and titrate. Monash’s clinical team summarize how soluble fibers like psyllium behave in IBS: Monash FODMAP.
- Cholesterol. A meta-analysis of 28 randomized trials shows psyllium lowers LDL-C and improves non-HDL-C and apoB; thus, it’s a useful adjunct alongside diet and medication. Read the paper by Jovanovski et al. in the American Journal of Clinical Nutrition: AJCN access or PubMed.
- Glycemic control. Benefits scale with baseline dysglycemia—largest in type 2 diabetes, smaller in prediabetes, minimal in euglycemia. See the AJCN meta-analysis (Gibb et al.) and the 2024 update in BMC Endocrine Disorders: AJCN and BMC Endocrine Disorders.
- Blood pressure. Some syntheses suggest a small systolic BP reduction with supplementation; an open-access summary is available in Frontiers in Nutrition: systematic review/meta-analysis.
All of this is encouraging. Still, these benefits complement rather than replace prescribed therapy. Keep taking your regular medicines unless your clinician advises otherwise.
Metamucil vs Plain Psyllium: Side Effects, Taste, and Practical Differences
Because many readers buy a brand first and ask questions later, it’s worth comparing. Metamucil is psyllium with flavor systems; plain psyllium is typically neutral or slightly earthy. Side-effect profiles are similar because the active fiber is the same; however, sweeteners and flavors can change taste and fullness. If you’re undecided about routine or dose, you’ll find concrete pros and cons in our guide to the best time to take Metamucil. And if you’re concerned about ongoing gassiness with brand mixes specifically, see our walk-through on Metamucil side effects, which includes simple tweaks that readers say helped.

Dose, Duration, and “How Long Until It Works?”
With constipation, some people notice gentler stools within 24–48 hours, but a steady rhythm usually takes a few days of consistent dosing and hydration. For lipids and glycemic control, benefits accrue over weeks, since gel-forming fiber works cumulatively. From a regulatory standpoint, OTC dosing ranges are laid out in the U.S. order: FDA Administrative Order (2023). That said, follow your product’s label and your clinician’s plan.
Meanwhile, don’t overlook diet: pairing psyllium with everyday fiber makes the whole approach more comfortable. If you’re looking for easy wins, we collected gentle ideas here: high-fiber sandwich options, millet fiber & digestion, and flax seeds for digestion.
Everyday Mistakes That Make Psyllium Husk Side Effects Worse
- Dry swallowing or tiny sips. Psyllium swells; therefore, always use ≥240 mL liquid per dose. Consumer guidance: Drugs.com Food/Lifestyle.
- Jumping straight to a high dose. Rapid increases create more gas and cramps; instead, titrate. Practical “how to” reminders: Cleveland Clinic.
- Taking it alongside pills. Keep a 2-hour buffer to avoid reduced absorption; again, see Drugs.com.
- Hydrating poorly when you have diarrhea. If you’re recovering from a stomach bug and experimenting with fiber, oral rehydration comes first. Our explainer on electrolytes for diarrhea shows simple, effective options.
- Ignoring food-first wins. Supplements help, but they’re not your only tool. For gentle kitchen-cupboard tweaks, readers often try (carefully) a little olive oil for constipation, alongside fluids and fiber-rich meals.
Names, Forms, and Labels (So You Pick Wisely)
- Same fiber, different names: psyllium = isabgol (India) = ispaghula (UK).
- Powder vs capsules: powders are easier to hydrate and dose flexibly; capsules are convenient but must be taken with a full glass of water and not right before lying down. See Drugs.com guidance.
- Sweeteners and flavors: flavored products may contain sugar or non-nutritive sweeteners; adjust to your goals. For a consumer overview of fiber supplements in general, here’s a practical summary from the Cleveland Clinic.
The Short Version to Remember
Because psyllium husk side effects depend on how you use it and who you are, keep three rules close: mix with enough water, start low and titrate, and separate medicines by 2 hours. Everything else is fine-tuning. And just to repeat: this article is educational, not a substitute for medical advice.
Sources
NHS—Fybogel (ispaghula) • NHS—Side effects • Cleveland Clinic—Psyllium • MedlinePlus—Psyllium • Drugs.com—Food/Lifestyle • Drugs.com—Monograph • FDA—Federal Register (granular forms & choking risk) • FDA Administrative Order 2023 • UKTIS—Constipation in pregnancy • Mayo Clinic—Constipation in pregnancy • Monash FODMAP—Fibre supplements & IBS • AJCN 2018 (Jovanovski et al.) via AJCN and PubMed • AJCN 2015 (Gibb et al.) via AJCN • BMC Endocrine Disorders 2024 • Frontiers in Nutrition—BP review
Educational information only — not medical advice. Please consult your clinician, especially if you’re pregnant, have GI disease, or take regular medicines.
FAQs
1) What exactly are the most common psyllium husk side effects, and how long do they last?
Firstly, expect gas, bloating, and mild cramping during the first few days. Your gut is meeting a gel-forming fiber that suddenly holds water and changes stool texture, so it needs a moment to adapt. Usually, these effects settle within 3–7 days if you start low, increase gradually, and drink plenty of water. However, if you jump to a big dose without enough liquid, you can feel worse. Therefore, begin with a small serving, listen to your body, and step up slowly.
2) Are psyllium husk side effects a long-term problem?
Generally, no. When used as directed with sufficient fluids, psyllium is considered safe for ongoing use. Moreover, many people take it for months or years because it reliably supports regularity. Nevertheless, any persistent abdominal pain, bleeding, difficulty swallowing, or unexplained symptoms is a red flag—pause the supplement and speak to your clinician. Long-term comfort almost always comes down to the basics: steady hydration, a sensible dose, and consistency.
3) What serious risks should I know about, and how do I avoid them?
The big one is choking or obstruction, which is rare but serious. Consequently, never dry-swallow powder or capsules; always mix each dose with at least 240 mL (8 oz) water and finish it promptly. In addition, avoid taking psyllium right before lying down or going to sleep. Finally, if you ever feel chest pain, throat tightness, or can’t swallow, stop immediately and seek urgent care.
4) Do I really need to separate psyllium from my medicines?
Yes—because psyllium’s gel can delay or reduce absorption. Therefore, take other oral medicines at least 2 hours before or after your fiber. This is especially important for time-critical meds (e.g., thyroid tablets, some diabetes or heart medications). To make life easier, anchor psyllium to a predictable daily moment—breakfast, mid-afternoon, or before dinner—and keep your pills at a different, consistent time.
5) What are Metamucil psyllium side effects—are they different from plain husk?
Functionally, Metamucil = psyllium, so the side effects are the same: early gas/bloating, possible cramps, and—if under-hydrated—an avoidable choking risk. However, flavored versions can include sugars or sweeteners, which may affect taste, fullness, or tolerance for some people. If you’re sensitive, choose an unsweetened or lightly flavored option, or switch to plain husk and add your own flavor (for example, a squeeze of lemon).
6) Capsules vs powder: do psyllium husk capsules side effects differ?
The gut effects are similar, but capsules add a mechanical risk if you sip too little water. They can swell and feel “stuck.” Consequently, take capsules with a full glass and avoid bedtime dosing. Meanwhile, powder is easier to titrate by half-teaspoons and can be mixed to your preferred thickness. If you dislike texture, blend it into a thin smoothie—then drink another half-glass of water on the side.
7) What dose should I use for constipation, and how fast will it work?
Start around 3–5 g once daily for a few days, then step up toward the label dose (often 5–10 g, up to 3×/day) as tolerated. With constipation, some people notice a difference within 24–48 hours, but a steady rhythm generally arrives after several days of consistent use. Importantly, more is not always better; instead, aim for the lowest effective dose that keeps stool soft and easy to pass.
8) I’ve heard about “temporary weight gain.” Is that a real psyllium husk side effect?
Yes—but it’s usually water and stool mass, not body fat. Psyllium holds water and increases stool bulk, so the scale may tick up briefly. Meanwhile, many people find psyllium increases fullness and helps them eat a little less, especially when taken 15–30 minutes before larger meals. Therefore, don’t panic at a small, early scale shift; it typically stabilizes with a consistent routine.
9) Can psyllium help with diarrhea, or could it make things worse?
Interestingly, psyllium can normalize stool form in both directions. For some people with loose stools, the gel adds structure and reduces urgency. However, timing matters: during acute gastro bugs, rehydration comes first (oral fluids, electrolytes), and fiber is a “re-build” tool once you’re keeping liquids down. If stools are very watery, start with smaller doses and observe; increase later if needed.
10) Why do I feel stomach pain with psyllium, and what should I change?
Mild cramps early on usually relate to dose, speed of titration, or not enough water. Therefore, reduce your serving, slow down the increase, and add more liquid. Furthermore, consider when you take it: some people feel better using psyllium away from heavy meals, while others prefer pre-meal for fullness. However, if you develop severe pain, vomiting, or trouble swallowing, stop and get medical attention.
11) Is psyllium safe in pregnancy, and are side effects different?
Bulk-forming fibers like ispaghula/psyllium are commonly used in pregnancy because they’re not absorbed in the usual sense. Even so, it’s still wise to confirm with your obstetric provider, especially if you have nausea, reflux, or difficulty swallowing. As always, mix with plenty of water and titrate gently. If gas is bothersome, lower the dose, add a short walk after meals, and increase fluids.
12) I’m seeing “detox” claims. Are there psyllium husk detox side effects I should worry about?
Psyllium supports regularity, but it doesn’t “detox” your body in the dramatic way some marketing suggests. Consequently, if you leap into large “cleanse” doses, you may invite bloating, cramps, constipation, or even choking. A smarter approach is boring but effective: small dose, lots of water, steady routine, and ordinary whole foods alongside it. Your GI tract likes patience more than shock tactics.
13) What about psyllium side effects long term—like nutrient blocking or dehydration?
With sensible use, there’s no evidence that psyllium causes broad nutrient deficiency. Nevertheless, it can interfere with medication absorption if taken together; hence the 2-hour spacing rule. As for dehydration, the risk comes from insufficient fluids with the fiber—so keep a bottle nearby and make water a non-negotiable habit. Over the long haul, people do best when fiber plus hydration becomes automatic.
14) Does psyllium really affect cholesterol and blood sugar—and how does that relate to side effects?
Yes. Over weeks, regular psyllium can lower LDL cholesterol and smooth post-meal glucose spikes, particularly in people with higher baseline levels. However, because those benefits rely on consistent, daily intake, side-effect prevention is crucial: hydrate, titrate, and separate from meds. In other words, handle the little things well so you can stay consistent long enough to see the bigger wins.
15) Can psyllium influence blood pressure, and does that change how I should take it?
Some research suggests a small reduction in systolic blood pressure with ongoing use. Nevertheless, the fundamentals don’t change: choose a dose you tolerate, take it every day, and keep liquids up. If you’re already on BP medication, maintain the 2-hour spacing and avoid abrupt dose jumps that could upset your stomach and make you inconsistent.
16) Is isabgol with curd/yogurt a good idea, and what about side effects?
Culturally, that combo is popular and perfectly fine if you still drink a full glass of water separately. Otherwise, the mix can thicken in your mouth or throat and feel uncomfortable. To stay comfortable, stir the psyllium into the curd, eat it steadily, and then follow with water; or, alternatively, take the psyllium in water first and enjoy curd after.
17) What’s the best way to take psyllium for appetite control without extra side effects?
Take a small dose 15–30 minutes before the meal you usually overeat, and pair it with a full glass of water. Then, wait a few minutes; the gel thickens, and your fullness cues arrive sooner. Meanwhile, keep the 2-hour medicine gap and avoid stacking big doses across multiple meals until you know how your gut responds.
18) I’m sensitive—how do I reduce psyllium husk side effects from day one?
Go gentle:
- Dose: start at the low end and only increase every few days;
- Liquid: use ≥240 mL per dose and add extra sips afterward;
- Timing: pick the same time daily so spacing pills is effortless;
- Texture: if the mouthfeel puts you off, use colder water, a taller glass, or a quick blend;
- Lifestyle: support the fiber with light movement, regular meals, and everyday food fiber so your gut isn’t shocked.
19) Who should avoid psyllium or get medical advice first?
Anyone with swallowing difficulties (dysphagia), GI strictures/narrowing, a history of bowel obstruction, or a tendency to drink very little water should consult a clinician before starting. Likewise, children under six need individualized guidance. If in doubt, a quick conversation with your doctor or pharmacist will save you discomfort later.
20) Bottom line—what three habits prevent most psyllium husk side effects?
Finally, remember this simple trio: water (≥240 mL) with every dose, spacing (2 hours) from other oral medicines, and titration (start low, increase slowly). Nail those three, and the rest—comfort, rhythm, and long-term benefits—usually follows.

