Posted on Leave a comment

Garlic: Unveiling Its Extraordinary Properties for Heart Health

GARLIC EXTRACT AND HEART HEALTH

Heart disease remains the world’s leading cause of death, yet many people overlook simple, natural interventions that could complement conventional treatments. Among these, garlic stands out. Revered for centuries in both culinary and medicinal traditions, garlic (Allium sativum) is gaining attention in modern science for its potent effects on heart health. In this article, we delve deep into the mechanisms, clinical evidence, and practical ways to harness garlic’s extraordinary cardiovascular benefits.


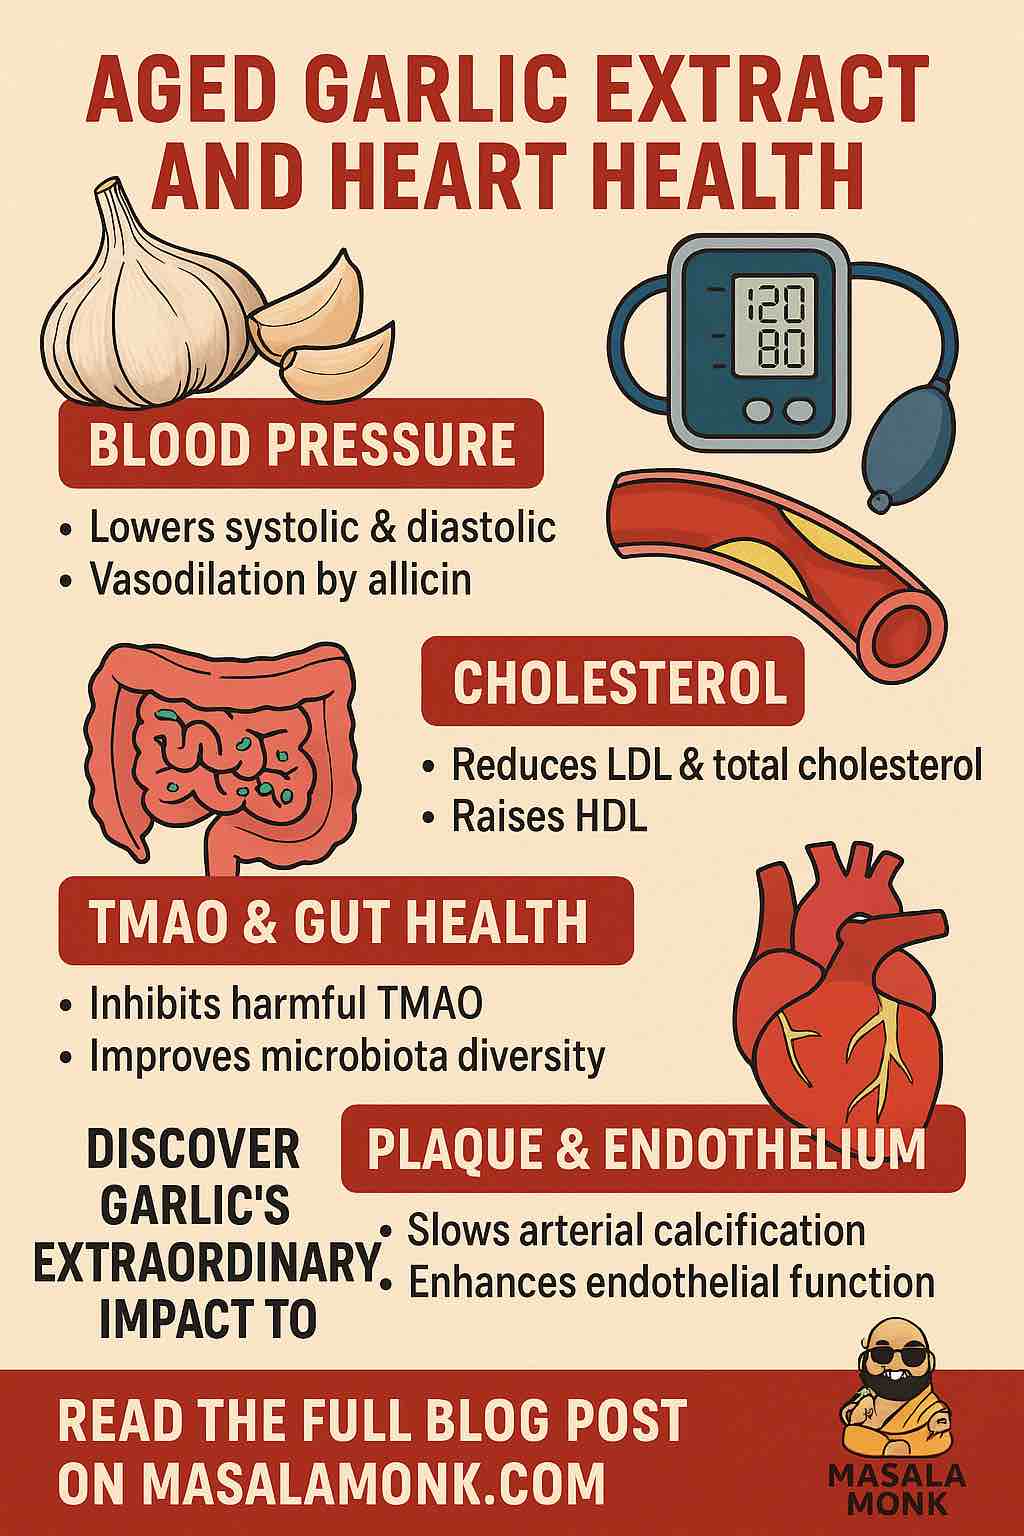
1. Blood Pressure: Nature’s ACE Inhibitor

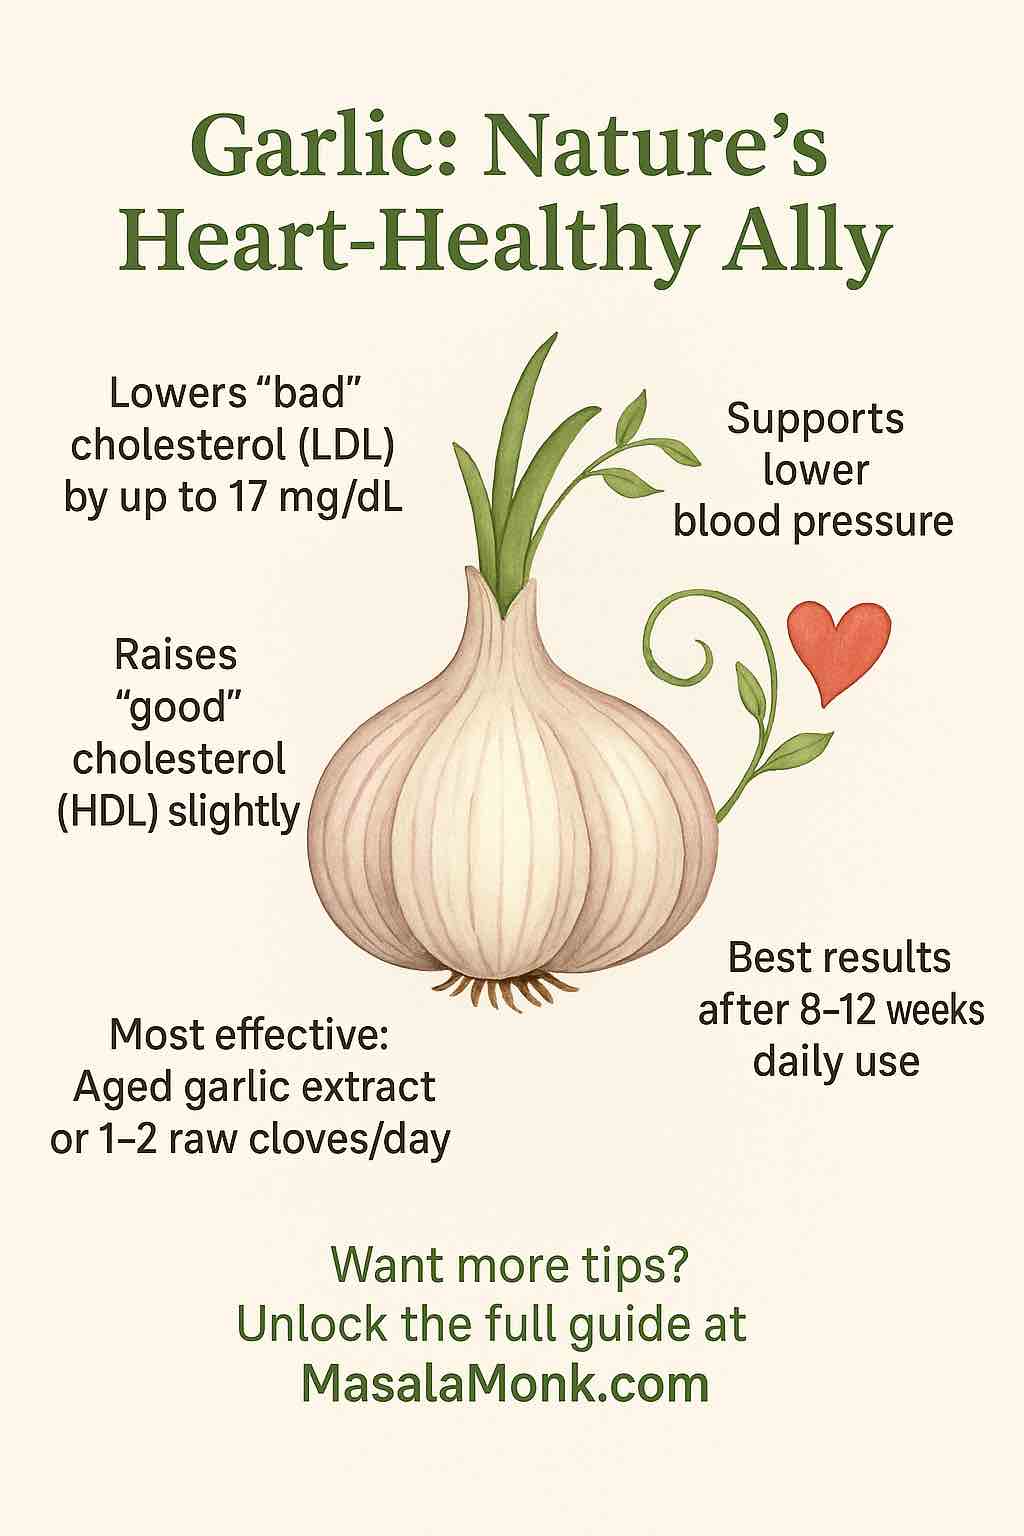
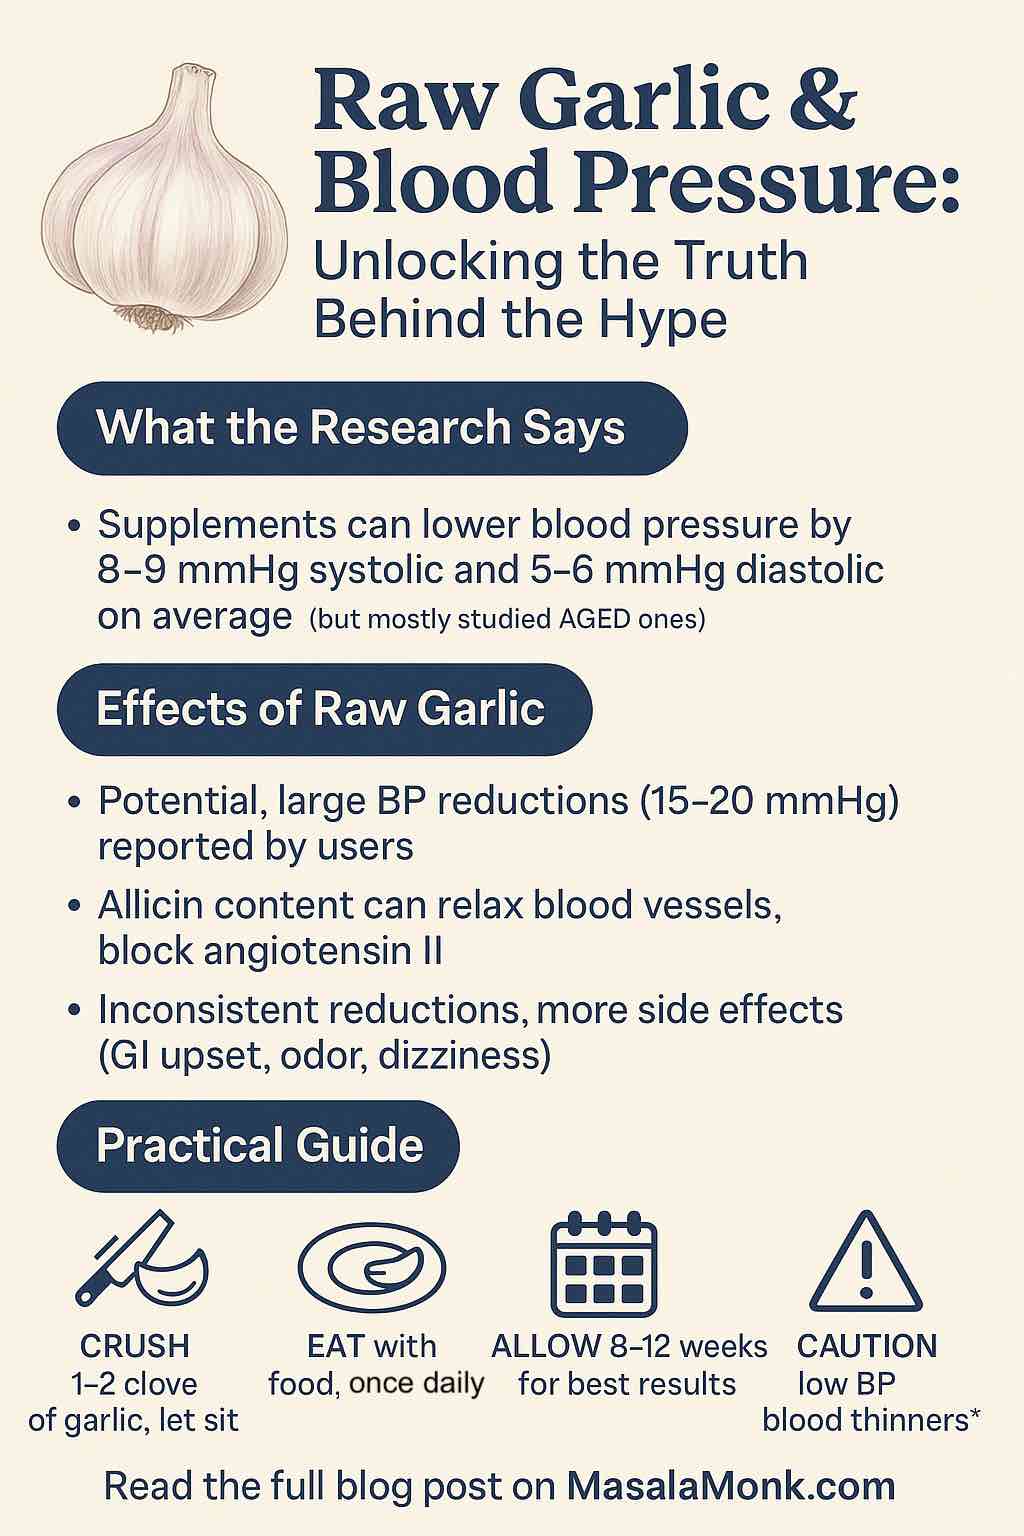
One of garlic’s most well-documented benefits is its ability to lower blood pressure. Numerous clinical trials and meta-analyses confirm that standardized garlic preparations can reduce both systolic and diastolic pressure, with effects rivaling low-dose prescription medications.

Mechanism: The key lies in allicin, a sulfur-containing compound formed when garlic is crushed. Allicin enhances nitric oxide production and inhibits angiotensin-converting enzyme (ACE), leading to vasodilation and reduced vascular resistance.

Practical Tip: Aged garlic extract (AGE) at doses of 1,000 to 2,400 mg per day has been shown to lower blood pressure in hypertensive patients. Choose supplements standardized for allicin or S-allylcysteine (SAC).


2. Cholesterol and Lipid Profile: Trimming the Bad, Supporting the Good

Garlic has demonstrated consistent benefits in improving lipid profiles. Multiple studies show reductions in total cholesterol, LDL (“bad”) cholesterol, and triglycerides, with a mild increase in HDL (“good”) cholesterol.

Mechanism: Garlic inhibits the enzyme HMG-CoA reductase (similar to how statins work), decreases lipid absorption in the intestines, and modulates inflammatory pathways that contribute to dyslipidemia.

Practical Tip: Use garlic powder supplements with at least 5 mg of allicin potential. Consider combining garlic with other lipid-lowering foods like oats and flaxseed for synergistic effects.


3. Antioxidant and Anti-inflammatory Powerhouse

Oxidative stress and chronic inflammation are foundational to cardiovascular disease. Garlic’s antioxidant compounds, including diallyl disulfide and ajoene, neutralize free radicals and reduce inflammatory cytokines.

Mechanism: These sulfur compounds block NF-κB and other inflammatory transcription factors, enhance glutathione activity, and reduce C-reactive protein (CRP) levels.

Practical Tip: Aged garlic extract is particularly rich in stable antioxidants. Incorporate it daily, and consider pairing it with turmeric or green tea for a broader anti-inflammatory spectrum.


4. Atherosclerosis and Plaque Stability: Slowing the Clock

Garlic doesn’t just work on numbers; it also improves arterial health. Several clinical studies using coronary calcium scoring and advanced imaging show that garlic can slow the progression of atherosclerosis.

Mechanism: Allicin and related compounds inhibit vascular calcification by downregulating BMP2 and RUNX2 expression. They also enhance endothelial function and reduce arterial stiffness.

Practical Tip: For measurable results, consistent use over 12+ months is essential. Combine garlic with regular exercise and a Mediterranean-style diet for optimal arterial support.


5. Gut Microbiota and TMAO Reduction: The New Frontier

Emerging science highlights the role of gut bacteria in heart health. Specifically, the metabolite TMAO (trimethylamine-N-oxide), produced by gut microbes from dietary carnitine and choline, is linked to plaque formation.

Mechanism: Garlic and its compounds inhibit the gut microbes responsible for TMA production, lowering circulating TMAO and reducing atherosclerotic risk.

Practical Tip: Raw garlic or high-allicin supplements can modulate the gut microbiome. Fermented garlic or garlic combined with prebiotics may further enhance microbiota diversity.


6. Safety and Supplementation Guidelines

Garlic is generally safe for most people, though high doses may cause gastrointestinal discomfort or interact with anticoagulant medications due to its blood-thinning properties.

Dosage: Clinical trials support doses of 600–2,400 mg/day of aged garlic extract or 5–10 mg/day of allicin potential.

Forms: Aged garlic extract (odorless), garlic oil capsules, garlic powder tablets, and raw garlic (1–2 cloves/day).

Interactions: Consult your healthcare provider if you are on blood thinners, planning surgery, or pregnant.


Conclusion: A Clove a Day Keeps the Cardiologist Away?

While garlic is not a miracle cure, the cumulative evidence suggests it plays a powerful, multi-pronged role in supporting cardiovascular health. From lowering blood pressure and cholesterol to enhancing vascular function and modulating gut microbiota, garlic offers a compelling case for inclusion in both preventive and adjunctive heart care.

For best results, use garlic as part of a comprehensive lifestyle approach that includes a heart-healthy diet, regular physical activity, and medical oversight.

Pro Tip: If you’re new to garlic supplementation, start low and monitor blood pressure or lipid panels after 4-6 weeks to assess response.


Further Reading and References


Share your experience: Have you tried garlic supplements for heart health? What results have you noticed? Let us know in the comments below!

Frequently Asked Questions (FAQs)

  1. Q: What’s the best form of garlic for heart health?
    A: Aged garlic extract (AGE) is the most studied form, offering consistent results in blood pressure and cholesterol management. It’s odorless, has stable compounds like S-allylcysteine, and is easier to tolerate than raw garlic.
  2. Q: How much garlic should I take daily for cardiovascular benefits?
    A: Clinical studies typically use 600–2,400 mg/day of AGE or 5–10 mg of allicin potential. If using fresh garlic, 1–2 cloves per day may offer mild benefit but is less standardized.
  3. Q: How long does it take to see results?
    A: Most users notice improvements in blood pressure or lipid profiles within 4–12 weeks, with plaque stabilization benefits seen over 6–12 months of continuous use.
  4. Q: Can garlic supplements replace statins or blood pressure meds?
    A: No. Garlic is best used as a complement, not a substitute. Always consult your healthcare provider before adjusting prescribed medications.
  5. Q: Are there side effects or risks with garlic supplementation?
    A: Garlic is generally safe, but high doses can cause digestive upset, bad breath, or increase bleeding risk—especially if you’re on anticoagulants or aspirin.
  6. Q: Can I cook garlic to get the same heart health benefits?
    A: Cooking garlic reduces allicin content. For health effects, use lightly crushed raw garlic or supplements. Let crushed garlic sit for 10 minutes before cooking to activate allicin.
  7. Q: What other nutrients or supplements pair well with garlic?
    A: Garlic pairs well with omega-3 fatty acids, turmeric, green tea, CoQ10, and magnesium, offering synergistic cardiovascular benefits.
  8. Q: Can garlic help with metabolic syndrome or diabetes?
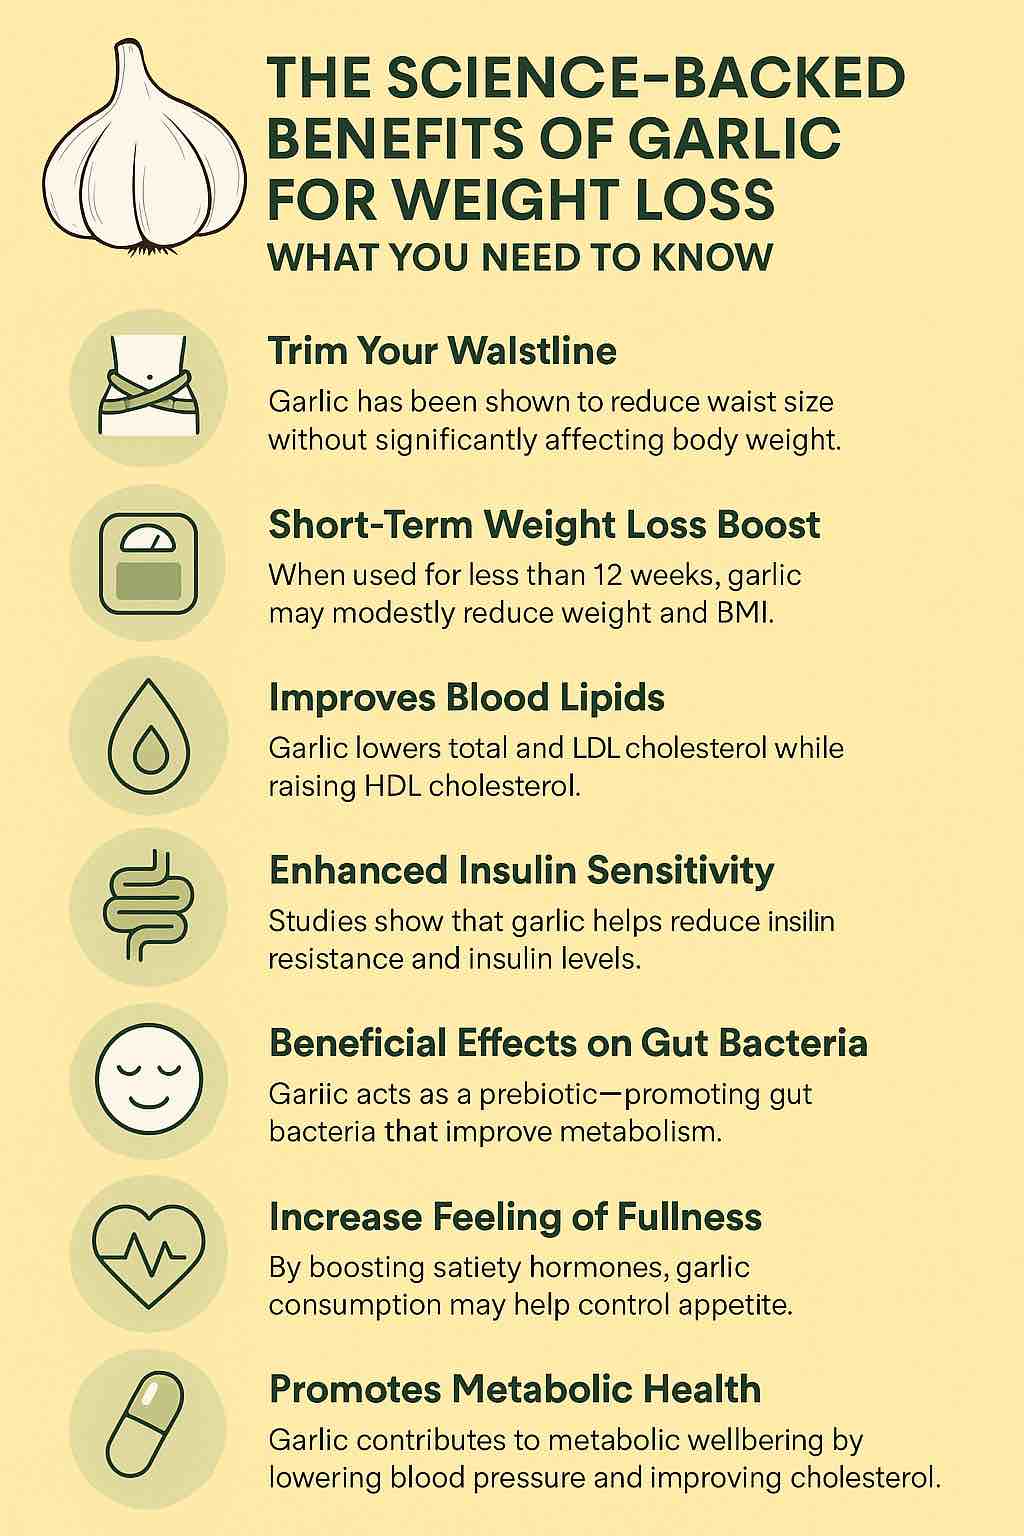
    A: Yes. Garlic has shown modest reductions in fasting blood glucose, insulin resistance, and even waist circumference in some studies.
  9. Q: Does garlic really impact gut microbiota and TMAO levels?
    A: Emerging research shows garlic can reduce TMAO, a harmful metabolite linked to heart disease, by altering gut bacteria involved in its formation.
  10. Q: What’s the difference between garlic oil, powder, and AGE?
    A:
    • Garlic oil: May cause GI irritation; limited standardization.
    • Garlic powder: Effective if standardized for allicin; less stable than AGE.
    • Aged Garlic Extract (AGE): Most clinically validated; odorless and safe.
Posted on Leave a comment

Spicy and Flavorful Vada Pav Dry Chutney Recipe

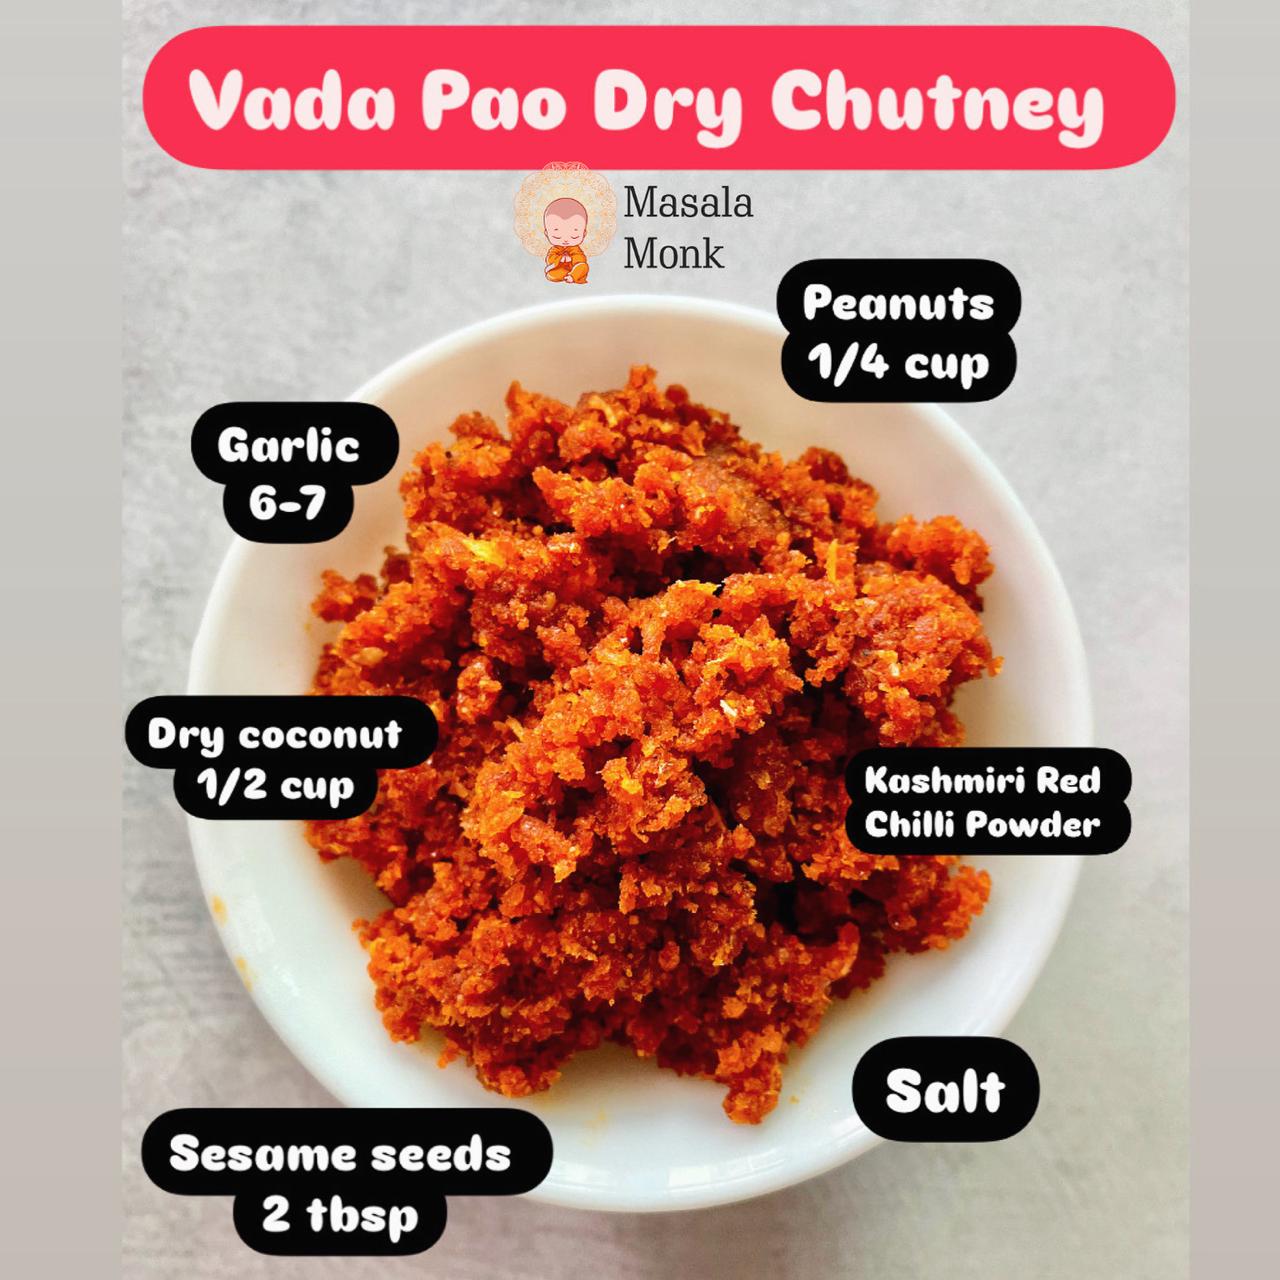
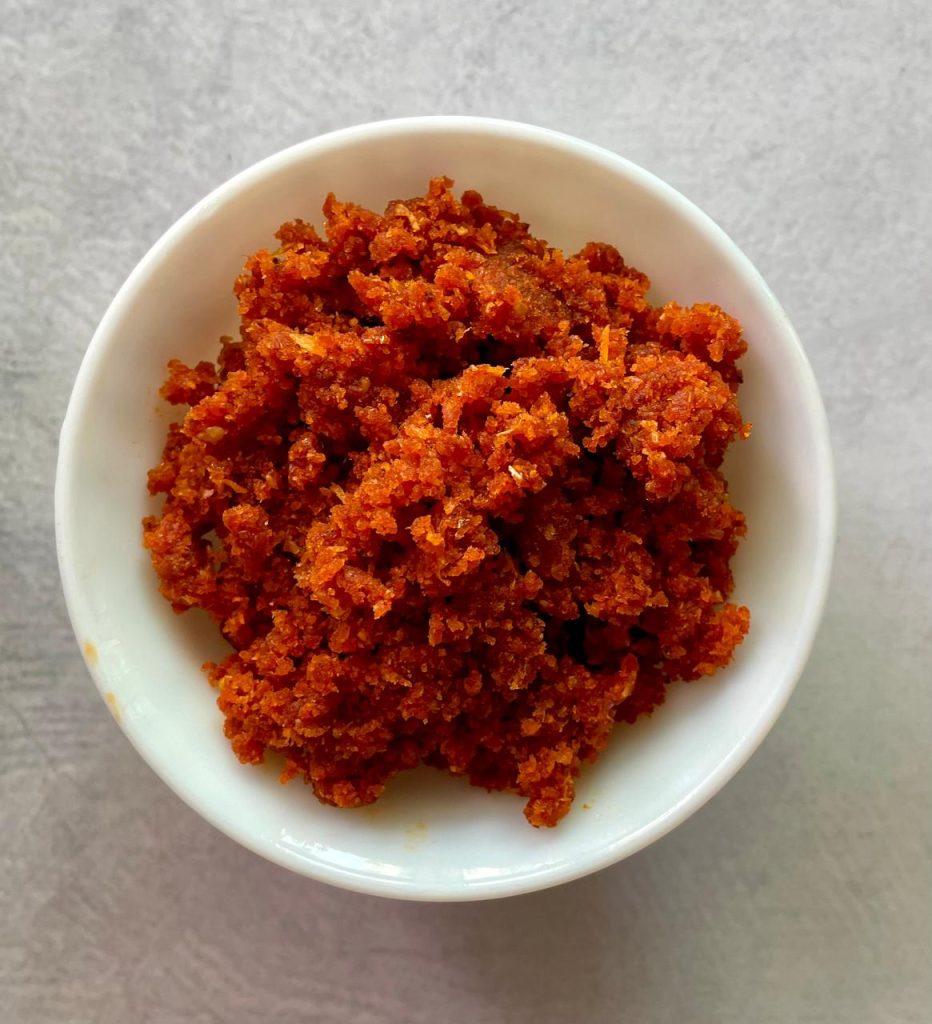
If you’re a fan of the classic Mumbai street food, Vada Pav, then you know that the dry chutney is what truly enhance this beloved snack to the next level. This dry chutney, made with roasted peanuts, dry coconut, garlic, and spices, adds a burst of flavor and heat to every bite. It’s the perfect accompaniment to Vada Pav, but it’s so tasty you might find yourself sprinkling it on everything. I make this dry chutney in big lot and keep in the refrigerate for a week and use like idli podi, sometimes in poha or just combine with ajwain paratha (here is the recipe for ajwain paratha) with garma garam chai.

Ingredients:

  1. Peanuts: 1/4 cup
  2. Dry Coconut: 1/2 cup, grated
  3. Garlic: 6-7 cloves
  4. Sesame Seeds: 2 tbsp
  5. Kashmiri Red Chilli Powder: 1-2 tbsp, adjust to taste
  6. Salt: to taste

Method:

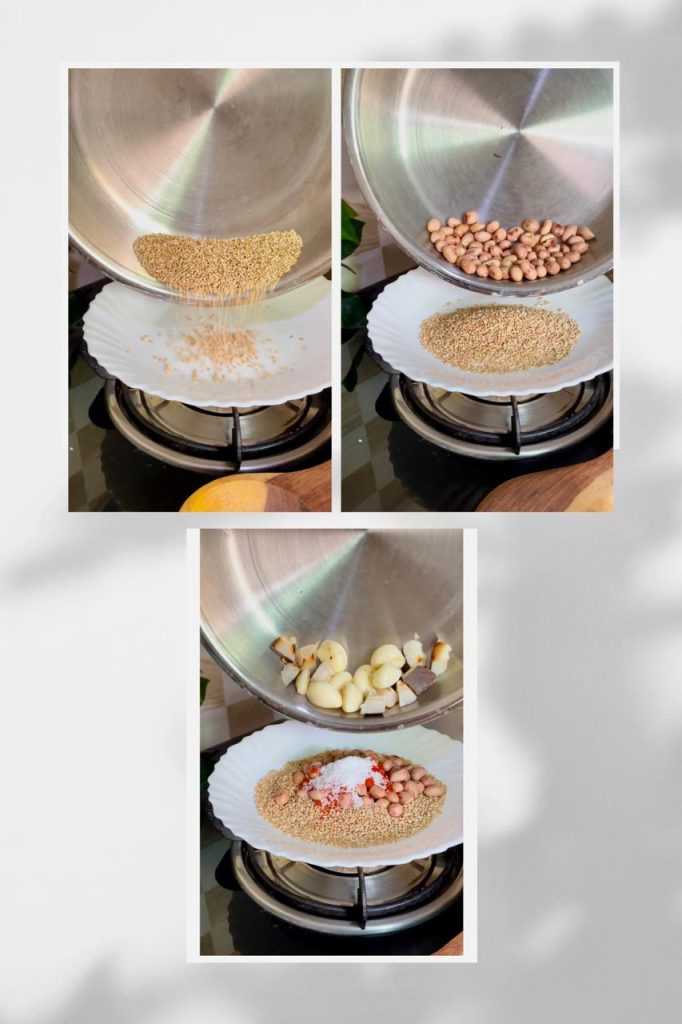
Start by dry roasting the peanuts in a pan over medium heat until they turn golden brown and begin to release their aroma. Once roasted, allow them to cool. In the same pan, dry roast the sesame seeds until they start to pop and turn light golden. Set them aside to cool dry roast the grated dry coconut until it turns a light golden brown. Set it aside to cool. Roast the garlic cloves and dry coconut in the same pan until they turn slightly golden.

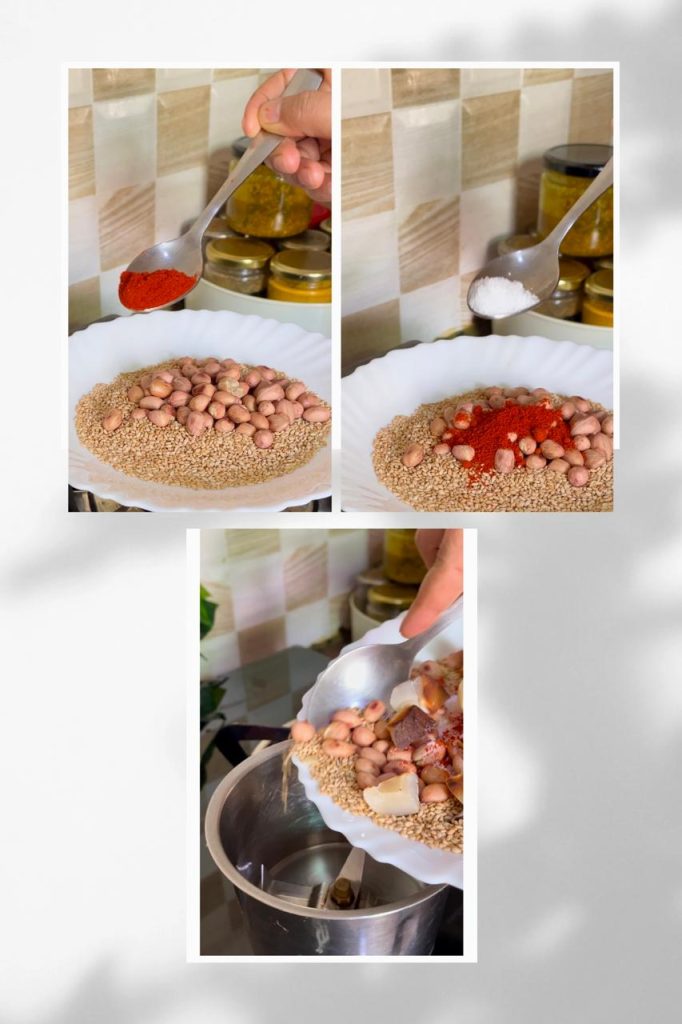
Once all the ingredients are roasted and cooled, combine them in a blender or food processor. Add the Kashmiri red chili powder and salt to taste. Grind everything together into a coarse powder. Be careful not to over-grind; the chutney should have a slightly coarse texture for the best flavor.

Transfer the ground chutney to an airtight container. It can be stored at room temperature for a few weeks or in the refrigerator for longer shelf life.

How to Use:

This dry chutney is traditionally sprinkled inside the Vada Pav, but it can also be used in a variety of ways:

Sprinkle on Dosas or Idlis: Add a spicy kick to your South Indian breakfast. Explore here perfect batter recipe for Idly and Doda

Serve with Snacks: It pairs wonderfully with bhajis, samosas, or pakoras and parathas

Use as a Topping: Sprinkle over salads, roasted vegetables, or even popcorn for an extra burst of flavor.

This Vada Pav dry chutney is a must-have in any spice lover’s pantry. Its rich, nutty flavor combined with the heat from the red chili powder and the boldness of garlic makes it irresistible.

Try making it at home and bring a taste of Mumbai’s street food culture to your kitchen. If you try this recipe, do give us a shout out. Just click a picture and tag us on @masala.monk or use the hashtag #MasalaMonkRecipe and share on Instagram and Facebook. We would love to hear from you. 🙂Happy cooking!

Posted on 1 Comment

Homemade Garlic Bread Loaf from Scratch- Easy Recipe

Baking gives me so much joy. I don’t consider myself as an exceptionally good baker but whenever I chance upon a good baking recipe, I would often bookmark it and bake it at home. So, when I saw this amazing recipe on Pinterest, I immediately bookmarked it. 

My interest in bread baking started during Covid time. It was when there was a lockdown in my city and procuring everyday things became such a hassle. I think that was the time when many people tried baking recipes at home. Before bread baking, I was used to making a lot of tea cakes and cookies at home but 2020 was the first time I tried my hands in bread baking. After a couple of trials, I started baking decent bread at home. Taking confidence from that, I started baking buns, dinner rolls, focaccia and many more kind of breads at home. Now 3 years down the line, I can say I am pretty good at it. You can try my Braided Coconut Banana Bread which is mildly sweet and delicious.

I absolutely love garlic bread- that buttery aromatic garlicky flavoured bread that I can just munch away. This recipe is exactly that. I don’t like making those dishes that involve too many ingredients and have too many complicated steps. I often go for recipes which are fuss free, has easy to follow steps and tastes absolutely delicious. The moment I saw this recipe, I was excited to bake it. The next day I gathered all the ingredients and spend some time in the kitchen baking this wonderful garlic bread. The recipe is adapted from a blog Magic from Indian Rasoi. 

This an easy recipe and if you are a beginner you can definitely try this. Let’s see how you can make this

Recipe: Bakes 2 loaves

Ingredients: cup measurement 250 ml

  • All Purpose Flour: 2.5 cups
  • Sugar: 1 tbsp
  • Extra Virgin Olive oil: 3 tbsp
  • Instant Dry Yeast: 1.25 tsp tsp
  • Salt: 1.5 tsp
  • Lukewarm Milk: 1/2 cup
  • Milk Powder: 2 tbsps
  • Minced Garlic: 2 tbsp
  • Melted Salted Butter: 2 tbsps, for brushing
  • Mixed Italian Herbs for garnish (optional)

Instructions 

  • In a bowl add minced garlic, mixed Italian herbs and melted salted butter. Keep aside.
  • In another bowl add yeast, sugar & lukewarm water & milk. Mix it. Keep aside for 7-10 minutes for yeast to proof. You know the yeast has proofed if it becomes foamy. You can use instant yeast directly, but I like to proof it just to be sure. 
  • In another large bowl, add flour, milk powder & salt. After proofing, mix the mixture to form a soft & sticky dough. The dough will be very sticky at this point, and you will get tempted to add more flour but strictly avoid it.
  • Sprinkle very little flour on the kitchen counter or your work surface. Take the dough out on kitchen counter and add olive oil. Knead in forward and backward motion for 10 minutes or till the dough becomes smooth and non-sticky. I kneaded it for 15 minutes. 
  • To be sure if you have kneaded enough, poke the dough. If it bounces back, it’s done. If not and the indentation remains, knead for some more time. 
  • Grease a big bowl with oil. Place the dough in it, apply oil on top and even out the dough with your hands.
  • Cover with a cling wrap or a kitchen towel to avoid dough from drying and proof it at a warm place for 1 to 1.5 hours or till the dough doubles in size. It might take more time depending on the temperature in your area. 
  • After the dough has doubled, punch it down and knead again for 1-2 mins.
  • Divide the dough into two equal portions (approx. 260 gm each). 
  • Using a rolling pin, roll each portion into a rectangle and generously apply garlic butter on the inside covering all the corners with a brush.
  • Now tightly roll the rectangle into a log shape and place both the loafs on two different 6 by 3-inch loaf pans.
  • Cover the pans loosely with a cloth and keep it in dark place for second proofing. It’ll take 35-40 minutes. Just gently poke on the side. If the indentation remains, your bread has proofed and is ready to bake.
  • In the meantime, pre-heat the oven at 180C/350F for 10-12 mins. 
  • After the second proof, apply remaining garlic oil on the top of the loaf & sprinkle some mixed herbs. 
  • Place the pans on a baking tray at the centre rack (both rods on) & bake at 180C for 30 mins or until a golden crust form on top. Once done, tap the bread, if it makes a hollow sound, it’s done. 
  • Once baked, remove the Garlic Bread Loaves from the oven & brush it generously with melted butter.
  • Transfer the bread to a cooling rack & allow it to cool completely for 1-2 hours before slicing it.

Notes: 

  • How do you know the first rise is done: This can take one to three hours, depending on the temperature and moisture in the dough. Check your dough. If it has doubled in size, it’s good for second proofing. Generally speaking, a warm, humid environment is best for rising bread.
  • How do you know your bread is ready for baking? To check that your dough has risen to its full capacity, gently press a fingertip into the surface – if the dough springs back, it means the gluten hasn’t developed fully, so you can leave it for a little longer. If the indentation left by your finger remain, it means the gluten has stretched as much as it can, and the dough is ready to bake. Don’t leave it any longer or the air bubbles will start to collapse, and your bread will be dense.
  • Dough will feel sticky at the starting but do not add more flour to it. It will become smooth after kneading for 10 mins. 
  • While rolling the dough into a log, make sure you tuck in all the edges. Leave no gaps. 

You can half the recipe if you want to make only 1 loaf. You can also keep the dough in the refrigerator after putting it in the loaf tin after the first proofing and bake it the next day. The dough will proof slowly in the refrigerator. In fact, it will develop more flavour.

I hope you enjoyed reading this recipe. Do give this recipe a shot. I am sure this recipe will bring you a lot of joy. If you try this recipe, do give us a shout out. Just click a picture and tag us on @masala.monk or use the hashtag #MasalaMonkRecipe and share on Instagram and Facebook. We would love to hear from you. Happy Baking! 🙂

Posted on Leave a comment

Mastering the Perfect Mashed Potatoes: Gordon Ramsay’s Signature Recipe

potatoes beside stainless steel cooking pot

When it comes to mashed potatoes, few chefs have mastered the art quite like the renowned Gordon Ramsay. Known for his culinary expertise and exceptional flavor combinations, Ramsay’s mashed potatoes are a true delight. In this tantalizing blog post, we’ll guide you through the steps to recreate Gordon Ramsay’s signature mashed potatoes, ensuring you achieve creamy, fluffy, and flavorful results that will elevate your dining experience. Get ready to impress your family and friends with this show-stopping side dish straight from the culinary genius himself! 🥔🍽️

🍟 Ingredients for Gordon Ramsay’s Mashed Potatoes To recreate Gordon Ramsay’s iconic mashed potatoes, you’ll need the following ingredients:

  • 2 pounds (900 grams) of Yukon Gold or Russet potatoes, peeled and cut into chunks
  • 1 cup (240 ml) of heavy cream
  • 1/2 cup (115 grams) of unsalted butter
  • 4 cloves of garlic, minced
  • Salt and freshly ground black pepper, to taste
  • Chopped fresh chives, for garnish (optional)

🍟 Step-by-Step Instructions Follow these steps to create Gordon Ramsay’s exquisite mashed potatoes:

1️⃣ Boil the Potatoes: Place the peeled and cut potatoes in a large pot of salted water. Bring the water to a boil and cook the potatoes until tender, about 15-20 minutes. Test for doneness by inserting a fork into the potatoes; they should be easily pierced.

2️⃣ Heat the Cream: While the potatoes are cooking, in a separate saucepan, heat the cream over low heat until warm. This will ensure that the cream incorporates smoothly into the mashed potatoes.

3️⃣ Prepare the Garlic Butter: In a small saucepan, melt the butter over low heat. Add the minced garlic and cook for a minute or two until fragrant. Be careful not to brown the garlic, as it can turn bitter.

4️⃣ Drain and Mash the Potatoes: Once the potatoes are cooked, drain them well and return them to the pot. Using a potato masher or a ricer, mash the potatoes until they are smooth and free of lumps. Take care not to over-mash, as this can result in a gluey texture.

5️⃣ Incorporate the Cream and Garlic Butter: Gradually pour the warm cream into the mashed potatoes, stirring gently with a wooden spoon or spatula. Continue adding the cream until the desired consistency is achieved. Next, pour the garlic butter into the mashed potatoes and mix well to distribute the flavors evenly.

6️⃣ Season to Perfection: Season the mashed potatoes with salt and freshly ground black pepper to taste. Give them a final stir to incorporate the seasoning throughout the dish. Taste and adjust the seasoning as needed.

7️⃣ Serve and Garnish: Transfer the mashed potatoes to a serving dish. For an extra touch of freshness and visual appeal, sprinkle chopped fresh chives over the top as a garnish.

See the YouTube video by Chef Gordon Ramsay’s Guide to Potatoes.

🍟 Join Our Foodie Community! We invite you to join our vibrant community of food lovers on our Facebook group. Share your creations, get inspired by others, and exchange ideas to take your culinary skills to new heights. There’s no better way to elevate your cooking game than by connecting with fellow foodies who share the same passion.

🥔💡 Now that you’ve learned the secrets behind Gordon Ramsay’s exquisite mashed potatoes, it’s time to put your skills to the test. Follow these steps, savor the creamy and flavorful results, and delight your taste buds with this culinary masterpiece. Remember, great mashed potatoes require patience, attention to detail, and quality ingredients. So gather your tools and ingredients, and let’s embark on a mashed potato adventure that would make Gordon Ramsay proud! 🍽️🥔

Posted on 1 Comment

5 Benefits of Garlic for Weight Loss

Garlic is a Proven Weight Loss Accelerator.

Garlic, a common ingredient found in almost every kitchen, is often recognized for its health benefits. But did you know that this pungent-smelling herb could also aid in weight loss? Let’s delve into the world of garlic and its potential role in weight management.

Garlic and Weight Loss: The Connection 🤔

Garlic has been used for centuries in various cultures to treat numerous health ailments. Its medicinal properties are even mentioned in ancient texts like the Bible, Talmud, Chinese and Egyptian Medicine, and Ayurveda. But the question remains, how does garlic contribute to weight loss?

Research suggests that garlic, specifically aged garlic extract, may lead to weight loss, particularly in postmenopausal women. A 2012 study published in Nutrition Research and Practice found that postmenopausal women who took aged garlic extract daily for three months lost more weight (measured in body fat percentage and BMI) than those who did not1.

The secret behind garlic’s weight loss properties lies in an organic sulfur compound called allicin. This compound is responsible for garlic’s pungent smell and is believed to contribute to its health-boosting properties2.

How to Use Garlic for Weight Loss 🍽️

One of the most common ways to use garlic for weight loss is to consume it raw with water first thing in the morning. You can also add lemon juice and garlic to warm water and drink the concoction3. Here’s a simple recipe to kickstart your day:

  1. Take 2-3 cloves of raw garlic and crush them.
  2. Add the crushed garlic to a glass of warm water.
  3. Squeeze the juice of half a lemon into the water.
  4. Mix well and drink it on an empty stomach.

Remember, consistency is key when it comes to seeing results. Make this a part of your daily routine and you might just start noticing a difference.

Garlic and Honey: A Powerful Combo? 🍯

There’s been some buzz around the combination of garlic and honey for weight loss. While both garlic and honey are packed with health-promoting compounds, there’s little evidence to show they help people lose weight4. However, incorporating them into a balanced diet can certainly contribute to overall health.

The Bottom Line 🎯

While garlic can potentially aid in weight loss, it’s not a magic bullet. Weight loss involves a combination of a balanced diet, regular exercise, and a healthy lifestyle. Garlic can be a part of this balanced diet, contributing not just to weight loss, but also offering other health benefits.

So, the next time you’re cooking, don’t forget to add a clove or two of garlic. Not only will it enhance the flavor of your dish, but it might also help you in your weight loss journey.

FAQs ❓

Q: Can garlic help you lose weight?
A: Research suggests that garlic, specifically aged garlic extract, may aid in weight loss. However, it’s not a standalone solution and should be part of a balanced diet and healthy lifestyle.

Q: How to use garlic for weight loss?
A: One common way is to consume raw garlic with water first thing in the morning. You can also add lemon juice and garlic to warm water and drink it.

Q: Is the combination of garlic and honey good for weight loss?
A: While both garlic and honey have health-promoting compounds, there’s little evidence to show they directly contribute to weight loss.

Q: Is garlic good for your health?
A: Yes, garlic offers multiple health benefits. It’s known for its antibacterial, antiviral, and antifungal properties. It’s also rich in vitamins C and B6, manganese, selenium, and fiber.

Q: What is allicin?
A: Allicin is an organic sulfur compound found in garlic. It’s responsible for garlic’s pungent smell and is believed to contribute to its health-boosting properties.

Q: Can I consume garlic at night for weight loss?
A: Yes, consuming garlic at night can also aid in weight loss. However, it’s best to consult with a healthcare professional or a dietitian to understand the best time to consume garlic for your specific needs.

Q: Can I eat garlic on an empty stomach for weight loss?
A: Yes, consuming garlic on an empty stomach can potentially enhance its weight loss benefits. However, if you have a sensitive stomach, it’s best to consume it with other foods or consult with a healthcare professional.

Blog Tags

Garlic, Weight Loss, Healthy Diet, Nutrition, Allicin, Garlic and Weight Loss, Garlic Benefits, Health, Wellness, Diet, Weight Management, Garlic and Honey, Aged Garlic Extract, Natural Remedies, Health Tips

Footnotes

  1. Verywell Fit
  2. Cleveland Clinic
  3. NDTV
  4. Healthline

—————————————- Also Check Out ————————————-

To know how Garlic can be used and to see some examples of food products that are made using it, Click here


For videos related to Health and Wellness, Subscribe to our YouTube Channel:
Masala Monk – The Gourmet Store