Some soups do their job and move along. However, this one lingers—in the best way. Creamy Cauliflower Soup has a quiet kind of confidence: a short ingredient list, a steady method, and that velvety finish that makes a bowl feel like a small kindness. Moreover, it’s an easy weeknight recipe you can cook on a Tuesday and still be proud to serve on a Sunday. The base method is simple and reliable; then, with just a few tweaks, you can nudge it cheesy, roast-forward, leek-fragrant, broccoli-green, slow-cooker mellow, minimalist, or gently spicy.
Meanwhile, we’ll keep the tone warm and the directions practical. You’ll see clear steps, small tips that make a big difference, and smooth transitions so the post reads like a conversation in your kitchen. Most importantly, you’ll get a flexible, delicious Creamy Cauliflower Soup blueprint that adapts to keto, vegetarian, and vegan tables without losing its creamy heart.
If you are curious to know more about Cauliflower in Keto, and what other ways you can use it, do read our post : Incorporating Cauliflower into Your Keto Diet: A Guide to Low-Carb Deliciousness. For a quick nutrition snapshot, see cauliflower nutrition facts (USDA).
Why Creamy Cauliflower Soup Works (and When)
First, cauliflower is a naturally mild vegetable that welcomes flavor—from onions and leeks to herbs, spices, and good stock. Second, blending transforms humble florets into something silky and soothing. Third, the method is forgiving: even if you skip the cream, Creamy Cauliflower Soup still tastes luxurious if you blend thoroughly and season with intention. Consequently, it’s a recipe that fits early fall cozy nights, deep winter meal prep, and even quick spring dinners when you want comfort without heaviness. For the technique behind that silkiness, here’s how to make creamy soups without flour.
Additionally, this soup scales beautifully. You can double it for gatherings, halve it for a solo supper, or batch it for lunch all week. Finally, it holds up to different eating styles with minimal changes—so the whole table can eat happily together.
Ingredients for Cauliflower Soup
Here are the ingredients for cauliflower soup most home kitchens already have:
- 2 tablespoons olive oil or butter
- 1 medium onion, diced (or 2 leeks, white and light green parts only)
- 3 garlic cloves, minced
- 1 medium head cauliflower (about 700–800 g), cut into florets
- 3 cups unsalted vegetable or chicken stock (plus a splash to thin)
- ½ to ¾ cup heavy cream or coconut milk (optional, for extra silk)
- ½ teaspoon freshly ground black pepper, and salt to taste
- 1 lemon wedge, to finish
In addition, if you prefer a vegetarian bowl, choose vegetable stock. Alternatively, if you’re making a fully plant-based version, use olive oil and coconut milk (or cashew cream) instead of dairy for a vegan Creamy Cauliflower Soup. For low-carb readers, this naturally leans toward a keto approach—if you’re curious to learn more about keto, so browse our post Keto Diet: Most Frequently Asked Questions.
The Base: Easy, Creamy Cauliflower Soup
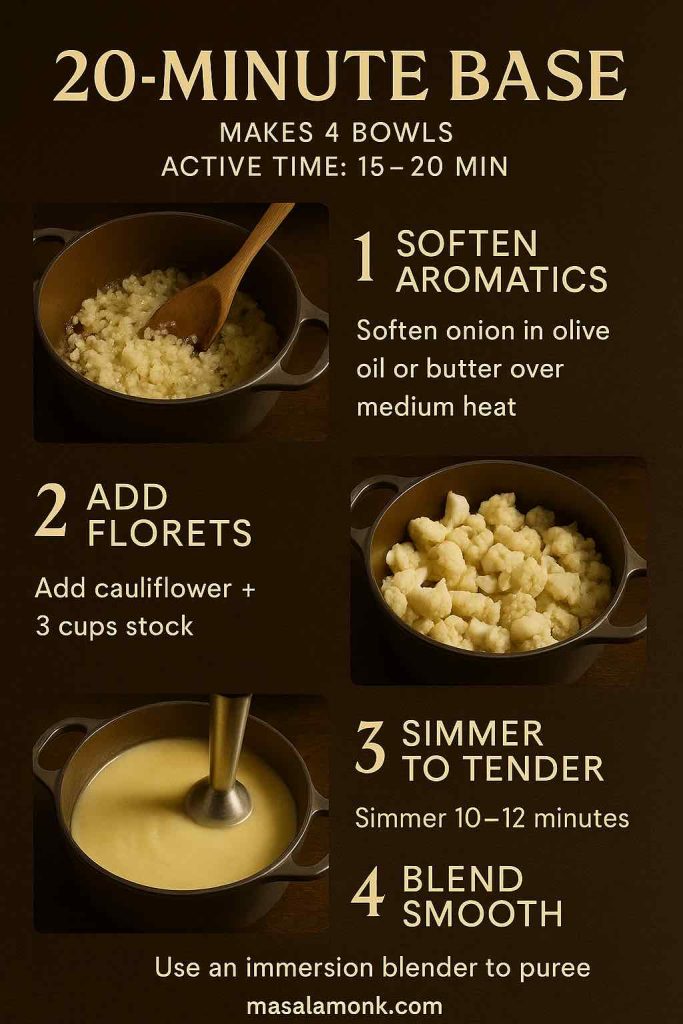
Serves: 4 bowls
Active Time: 15–20 minutes
Total Time: 20–30 minutes
- Soften the Aromatics. Warm olive oil or butter over medium heat. Next, add the onion with a pinch of salt and cook, stirring now and then, until translucent and sweet, 3–4 minutes. Add the garlic and cook just 30 seconds—enough to wake it up.
- Simmer the Cauliflower. Add the florets and stock. Bring to a boil, then lower to a lively simmer. Cook until a knife slides through the stems easily, about 10–12 minutes.
- Blend to Silk. Turn off the heat. Use an immersion blender to puree until completely smooth. (If using a stand blender, vent the lid and blend in batches.)
- Enrich and Balance. Stir in cream or coconut milk if you’re using it. Afterward, taste and season with salt and plenty of black pepper. Finish with a squeeze of lemon to brighten. Thin with a splash of stock to your perfect consistency.
Texture Tip: For that restaurant-smooth Creamy Cauliflower Soup, blend a full minute longer than you think, then pass the soup through a fine mesh sieve. Admittedly, it’s optional; nevertheless, the result is luxurious.
Basic Cauliflower Soup Shortcut: If you’re in a minimalist mood, skip the cream and keep the texture slightly rustic. Even so, once blended, it still reads as a simple cream of cauliflower soup—light yet satisfying.
Flavor Fundamentals (So Small Moves Taste Big)
To begin with, sweat aromatics gently; browned onions or leeks can turn bitter in a delicate puree. Furthermore, season in layers: a pinch early to draw out sweetness, another check after blending, and a final brightening with lemon. Similarly, blend longer than you think you need—texture carries aroma to your palate. Finally, garnish for contrast: something crisp (nuts or seeds), something green (herbs), and a little shine (olive oil or chili oil). Altogether, these moves make every bowl of Creamy Cauliflower Soup feel complete.
Roasted Cauliflower Soup
When you want deeper, toastier notes, roast the florets first. Toss with olive oil, salt, and pepper; spread on a sheet pan and roast at 220°C / 425°F for 25–30 minutes, until the edges are well browned. Meanwhile, make the base as written. Then, blend the roasted florets into the stock, onion, and garlic. The color leans golden-beige, the flavor turns nutty, and the whole bowl feels weekend-special. For a primer on browning and tray spacing, see how to roast vegetables well.
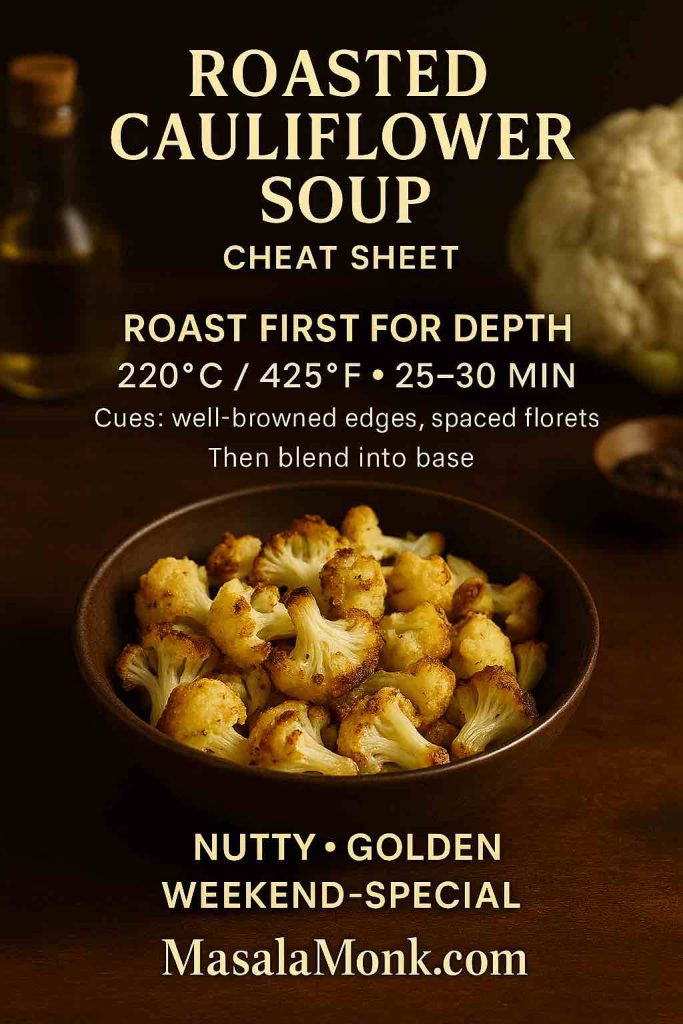
Finishing Move: Drizzle each serving with a teaspoon of rosemary-infused olive oil (warm oil with a sprig, cool, then strain) and add a pinch of flaky salt. Additionally, hold back a few roasted florets as garnish so every spoonful gets silky base plus a little texture.
Cauliflower & Cheese Soup
Cheese brings nostalgic comfort. Therefore, once your base is blended and back over low heat, stir in 1 to 1½ cups grated sharp cheddar until fully melted and smooth. For depth, add 2 tablespoons finely grated Parmesan. Importantly, keep the heat gentle and avoid a simmer so the cheese stays glossy.

Make It Extra: A handful of chives, a twist of pepper, and a few shards of crisped Parmesan on top. For a lower-carb crunch, toasted almonds or seed crackers work beautifully. If you’re tracking carbs in dairy, this quick guide can help you choose wisely: Carbs in Cheese (Keto Perspective).
Cauliflower & Leek Soup
Leeks have a soft perfume that suits creamy soups. Accordingly, swap onion for 2 leeks, sliced thin and rinsed well. Cook them slowly in olive oil with a pinch of salt until tender but pale; browning makes leeks a bit assertive for this style. After that, proceed with the base method. The result is a pale, elegant Cauliflower & Leek Soup—or, as some home cooks say, a comforting cauli and leek soup.
Optional Finish: A spoon of crème fraîche (or coconut cream) right before serving, plus dill or chives. Alternatively, a little lemon zest brightens beautifully.
Broccoli & Cauliflower Soup
For a heartier green bowl, use about half broccoli, half cauliflower. To keep the color bright, add the broccoli a couple of minutes after the cauliflower. Then, blend smooth for a familiar Broccoli & Cauliflower Soup that eats like a sweater-weather staple. If you’d like extra body, add a small peeled potato to the simmer (skip if you’re keeping it very low-carb).

Serving Idea: Lemon zest and shaved Parmesan lift the green notes without getting in the way. Alternatively, swirl in a spoon of pesto for a leafy accent.
Read more about: <strong>The Broccoli – Nutrition, Benefits, and 5 Practical Ways for Weight Loss.
Slow Cooker Cauliflower Soup (Crockpot)
Some days, dinner needs to take care of itself. In that case, add everything except the cream to the slow cooker and cook on LOW for 4–6 hours or HIGH for 2–3 hours, until the florets are soft. Blend right in the crock if your stick blender fits; otherwise, carefully transfer to a blender and puree in batches. Afterward, stir in cream or coconut milk, season, and finish with lemon. This slow cooker cauliflower soup—also known as cauliflower soup crockpot in some kitchens—tastes like you worked all afternoon, even if you didn’t. If you are looking to amp up your plant based protein game while meal prepping, have a look at 10 Delicious Plant-Based Protein Sources for High-Protein Meal Prep.

20-Minute, 3-Ingredient, and 5-Ingredient Options
20-Minute Cauliflower Soup: Cut florets small, keep the simmer lively, and blend hot with an immersion blender. Additionally, warm your bowls with hot water beforehand; that small step makes weeknight Creamy Cauliflower Soup feel special.
3-Ingredient Cauliflower Soup: Cauliflower + good stock + olive oil. That’s it. Even with so little, blend very smooth, season assertively, and finish with lemon. This minimalist path yields a lovely healthy cauliflower soup that still tastes complete.
5-Ingredient Cauliflower Soup: The minimalist version plus onion for sweetness and cream (or coconut milk) for silk. Consequently, it reads simple, but the mouthfeel feels restaurant-worthy.
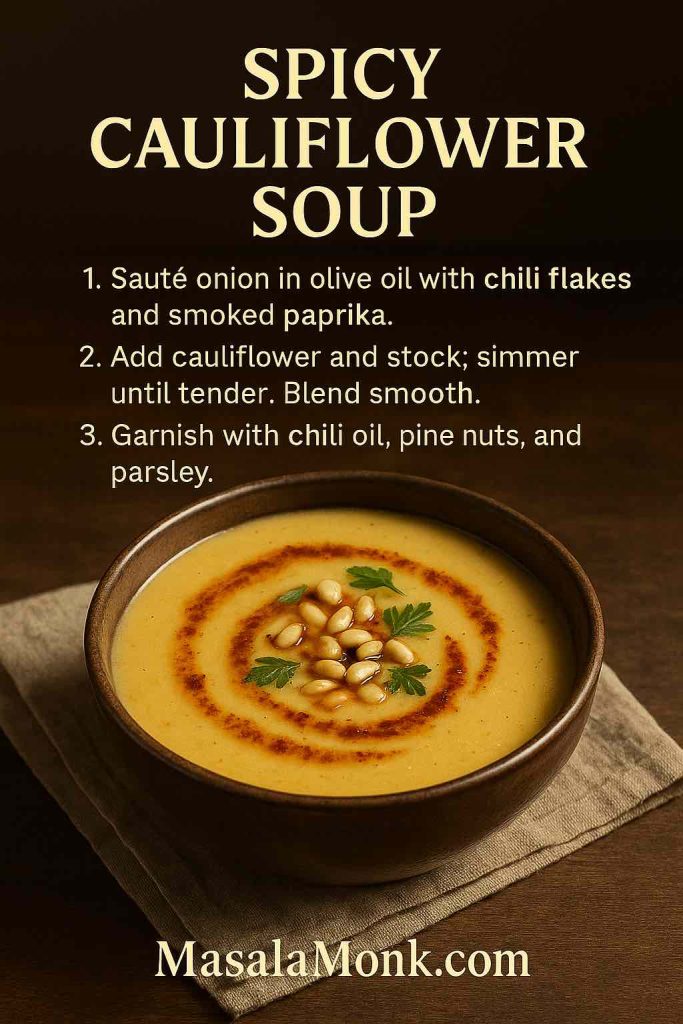
Spicy Cauliflower Soup
For gentle heat, bloom ½ to 1 teaspoon chili flakes and ½ teaspoon smoked paprika in the oil before you add the onion. Then, proceed with the base. After blending, taste and add a tiny splash of apple cider vinegar to bring the flavors forward. Finally, finish each bowl with a light swirl of chili oil. If the spice edges sharper than you planned, simply round it out with a tablespoon of cream or coconut milk. Either way, the result is a lively interpretation of Creamy Cauliflower Soup that still comforts.
Carrot & Cauliflower Soup (Optional)
Add 2 cups chopped carrots with the florets and proceed with the base. As a result, you’ll get a sunny, orange-gold bowl with quiet sweetness. A spoon of crème fraîche or coconut milk ties it together; a little cumin warms it without turning the soup into something entirely different.
Cauliflower Bisque (Optional)
If you like a classic cauliflower bisque, enrich the blended soup with a splash of cream and the gentlest whisper of dry sherry. Keep it subtle; the bisque should still taste like cauliflower first. To finish, try chives and a touch of white pepper. Altogether, it feels like a dinner-party first course that’s secretly easy.
Eating Styles: Keto, Vegetarian, and Vegan
Keto Cauliflower Soup: Start with butter or olive oil, then enrich with heavy cream. Keep stock unsweetened, skip flour or starch, and finish with a little cheddar or Parmesan if cheese fits your plan. Additionally, if cheese is your topping of choice, this helpful reference on dairy macros can guide your picks: Carbs in Cheese (Keto Perspective).

Vegetarian Cauliflower Soup: Use vegetable stock and finish with cream, milk, or a swirl of olive oil. That way, it stays silky and satisfying without chicken stock.
Vegan Cauliflower Soup: Use olive oil. Replace cream with coconut milk or cashew cream (blend soaked cashews with hot water until perfectly smooth). Notably, nutritional yeast can add a gentle “cheesy” note; lemon and herbs brighten beautifully. And if you’re in a plant-based groove, these soup ideas are a great next stop: Vegan Lentil Soup Recipes.
Serving Ideas and Toppings
Little finishes make a puree feel complete. Therefore, mix and match:
- Herb Oils: Rosemary or thyme gently infused into olive oil, then drizzled over each bowl.
- Crisp and Crunchy: Toasted almonds, hazelnuts, pine nuts, or seed crackers.
- Cheese Shower: Parmesan or Pecorino for savoriness; cheddar shards for comfort.
- Green Notes: Snipped chives, parsley, dill, or a handful of baby spinach blended in for color.
- Hold-Back Roasted Florets: If you made the roasted version, save a few for garnish—soft base, crisp top.
- Bright Finishes: Lemon juice and zest lift every version, especially vegan bowls.
Side Ideas: For low-carb nights, consider a cucumber–dill salad or roasted mushrooms with thyme. Alternatively, if your table isn’t strictly low-carb, a warm loaf or garlic croutons makes dunking irresistible. Moreover, if celery comes up as a crunchy add-in or side, this friendly overview answers the usual questions: Celery on Keto.
Ingredient Swaps and Pantry Notes
- Onion vs. Leek: Onion gives sturdy sweetness; leek brings delicate perfume. Either way, both are right—choose your mood.
- Stock Choices: Vegetable stock keeps things vegetarian/vegan; chicken stock tilts toward Sunday-supper richness. For control, low-sodium helps you stay in charge of seasoning.
- Creamy Elements: Heavy cream is plush, coconut milk adds gentle sweetness, and cashew cream is a vegan power move.
- Cheese Options: Cheddar melts smoothly; Parmesan adds umami; Gruyère feels a little fancy.
- Aromatics: A stick of celery, a bay leaf, or a sprig of thyme can join the simmer and hop out before blending.
- Add-Ins: A spoon of pesto, a dusting of smoked paprika, or a few sweet peas (skip peas if you’re very low-carb). For thickness on the fly, adding riced cauliflower to soup works beautifully. Plus, if you’re bulking soups while keeping carbs in check, see these smart ideas: Keto Beans: 5 Varieties That Won’t Ruin Your Diet.
Make-Ahead, Storage, and Freezing
- Chill: Cool, then refrigerate in a sealed container for up to 4 days.
- Freeze: For the smoothest thaw, freeze without dairy, then stir in cream or coconut milk after reheating. Additionally, freeze up to 2 months in flat, labeled bags—they stack neatly and thaw faster. Here’s how to freeze soup flat for easy storage.
- Reheat: Warm gently on the stovetop. If the soup thickens, loosen with a splash of stock or water and re-season with salt and pepper.
For authoritative guidance, see USDA: Freezing and Food Safety and the Cold Food Storage Chart.
Meanwhile, if you’re batch-cooking for variety, pair this with something hearty and plant-based from our Red Lentil Soup Collection. That way, the week feels diverse without complicating your shopping list.
Troubleshooting and Tiny Adjustments
- Too Thin? Simmer 3–5 minutes to reduce, or add a small handful of grated cheddar if you’re steering cheesy.
- Too Thick? Add hot stock a splash at a time and blend back to silky.
- Needs “Something”? It’s usually acid and salt. Therefore, try lemon, then a pinch of salt, then a grind of pepper.
- Cheese Split? Take the pot off heat and whisk in a spoon of cream or coconut milk. Generally, gentle heat keeps cheese emulsified.
- Want Extra Body Without Cream? Blend in a few cauliflower florets reserved from the pot or a spoon of cashew cream; both boost creaminess while keeping flavors clean.
A Gentle Cooking Plan That Actually Happens
Monday: Pick up a cauliflower, an onion or leeks, garlic, and stock.
Tuesday: Make the base—20 minutes, tops—and portion half for lunch.
Wednesday: Rewarm part of the base and whisk in cheddar for Cauliflower & Cheese Soup.
Weekend: Roast a fresh batch of florets and turn the rest into Roasted Cauliflower Soup with an herby oil drizzle. In short, one pot, two moods, very little effort.
More Cauliflower You’ll Love
When people fall for Creamy Cauliflower Soup, they often want another classic. Accordingly, you can browse these:
- Easy Aloo Gobi (Indian Cauliflower & Potato) — a pantry-friendly favorite that wears weeknights well.
- Cauliflower Instead of “Steak” — 5 Plant-Based Ideas — if someone needs a second cauliflower main, this collection delivers.
Printable Core Recipe (Reader-Friendly Summary)
Creamy Cauliflower Soup (Keto, Vegetarian, and Vegan Options)
- 2 tbsp olive oil or butter
- 1 onion (or 2 leeks), 3 garlic cloves
- 1 medium cauliflower (700–800 g), florets
- 3 cups unsalted vegetable or chicken stock
- ½–¾ cup cream or coconut milk (optional)
- Salt & black pepper, lemon to finish
Method:
- Soften onion in oil, 3–4 min; add garlic 30 sec.
- Add cauliflower + stock; simmer 10–12 min until very tender.
- Blend completely smooth.
- Stir in cream or coconut milk (if using). Season and finish with lemon.
Variations:
- Roasted Cauliflower Soup: Roast florets 25–30 min at 220°C/425°F, then proceed.
- Cauliflower & Cheese Soup: Stir in 1–1½ cups grated cheddar + 2 tbsp Parmesan off heat.
- Cauliflower & Leek Soup: Swap onion for 2 leeks; sweat gently without browning.
- Broccoli & Cauliflower Soup: Use half broccoli; add a couple of minutes after cauliflower.
- Slow Cooker Cauliflower Soup: Everything except dairy, LOW 4–6 h or HIGH 2–3 h; blend; add dairy.
- Spicy Cauliflower Soup: Bloom chili flakes + smoked paprika; finish with chili oil.
- 3-Ingredient: Cauliflower + stock + olive oil; blend and season.
- 5-Ingredient: Add onion + cream (or coconut milk).
Closing Notes (and a Gentle Nudge)
Ultimately, the secret to Creamy Cauliflower Soup isn’t a long ingredient list; instead, it’s attention in the right places: softly sweated aromatics, patient blending, layered seasoning, and a bright finish. Because of that, even a minimalist bowl feels generous. So, keep riced cauliflower in the freezer, stash a carton of good stock in the pantry, and give yourself permission to cook simply. Before long, you’ll have a dependable, cozy staple that adapts to every season and every table.
FAQs
1) What makes Creamy Cauliflower Soup so silky without flour?
Because cauliflower blends beautifully, the puree turns naturally velvety. Moreover, when you sweat the onions or leeks gently, blend a bit longer than you think, and finish with a splash of cream or coconut milk, the result is a luxurious Creamy Cauliflower Soup—no flour or starch required.
2) Can I make Creamy Cauliflower Soup dairy-free or vegan?
Absolutely. Simply use olive oil instead of butter and, additionally, swap cream for coconut milk or cashew cream. As a result, you’ll keep the same cozy texture while the soup stays fully plant-based.
3) How do I keep it keto-friendly without losing the creamy vibe?
It’s already low in carbs, so you’re close. Then, for extra richness, finish with heavy cream and a sprinkle of cheese if you like. Meanwhile, avoid flour or potatoes, and taste for salt and lemon so the flavors stay bright.
4) What are the essential ingredients for cauliflower soup?
You’ll need olive oil or butter, onion or leeks, garlic, cauliflower, stock, pepper, salt, and a lemon wedge. Additionally, cream or coconut milk is optional; however, it does add that signature silk to Creamy Cauliflower Soup.
5) How can I make it in 20 minutes on a busy weeknight?
First, cut florets small. Next, bring the pot to a lively simmer and cook until the stems are easily pierced. Finally, blend right in the pot with an immersion blender. Consequently, you’ll have Creamy Cauliflower Soup on the table fast.
6) What’s the difference between the basic soup and a true “cream of cauliflower” version?
The basic version is blended and naturally creamy; however, the cream of cauliflower soup includes an enriching step with cream or coconut milk. In short, both are silky—one is simply richer.
7) How do I make Roasted Cauliflower Soup for deeper flavor?
Toss florets with oil, salt, and pepper; then roast at 220°C / 425°F until golden at the edges. Meanwhile, build the base with onion and garlic, and finally blend in the roasted florets. As a result, you’ll get a nutty, weekend-special bowl.
8) What’s the best way to make Cauliflower & Cheese Soup without it splitting?
Keep the pot over low heat and add grated cheese after blending. Additionally, avoid boiling once the cheese goes in. This gentle approach keeps the soup glossy, smooth, and wonderfully cheesy.
9) Can I use leeks instead of onions?
Yes, and they’re lovely. Leeks bring a softer aroma; therefore, sweat them slowly without browning. After that, proceed as usual and you’ll get an elegant Cauliflower & Leek Soup with a calm, café-style vibe.
10) How do I make Broccoli & Cauliflower Soup that stays bright green?
Add broccoli two to three minutes after the cauliflower so it doesn’t overcook. Then, blend promptly and finish with lemon zest. Consequently, the color stays vivid and the flavor remains fresh.
11) Is there a slow-cooker (crockpot) method that still tastes rich?
Definitely. Place everything except dairy in the slow cooker and cook on LOW 4–6 hours or HIGH 2–3 hours. Then blend, stir in cream or coconut milk, and, finally, brighten with lemon. Meanwhile, the hands-off approach makes meal prep effortless.
12) What are easy minimalist options—3-ingredient or 5-ingredient?
For 3-ingredient, use cauliflower, good stock, and olive oil; blend and season assertively. For 5-ingredient, simply add onion and cream (or coconut milk). Even so, both taste pleasantly complete.
13) How can I adjust the spice without overpowering the soup?
Bloom chili flakes and smoked paprika in the oil at the start. After blending, taste and, if needed, balance with a tiny splash of apple cider vinegar. Alternatively, soften heat with a tablespoon of cream or coconut milk.
14) What’s the easiest way to fix texture—too thick or too thin?
If it’s too thick, add hot stock a splash at a time and blend again. Conversely, if it’s too thin, simmer briefly to reduce or melt in a small handful of cheese (for a cheesy path). Either way, season again at the end.
15) Can I freeze Creamy Cauliflower Soup?
Yes. For best results, freeze it without dairy, and then stir in cream or coconut milk after reheating. Additionally, cool completely first and freeze flat in labeled bags; this method stacks neatly and thaws quickly.
16) How long does it keep in the fridge, and how should I reheat it?
It keeps up to 4 days chilled. When reheating, warm gently over medium-low heat. Moreover, if the soup has thickened, loosen it with a splash of stock or water; then taste and adjust salt and lemon.
17) Which garnishes make Creamy Cauliflower Soup feel restaurant-worthy?
Think contrast. For instance, add herb oil, toasted nuts or seeds, a cheese shower, and fresh herbs. Additionally, holding back a few roasted florets for the top gives every spoonful a little texture.
18) How do I boost protein without changing the flavor too much?
Stir in shredded rotisserie chicken after blending, or, alternatively, top each bowl with a soft-boiled egg. Meanwhile, keep the seasoning balanced so the soup still tastes like cauliflower first.
19) Can I make a lighter bisque-style version?
Certainly. Enrich the blended soup with a modest splash of cream and, optionally, a whisper of dry sherry. Consequently, you’ll get a classic cauliflower bisque that feels dinner-party elegant yet remains simple.
20) What’s the single most important step for the best flavor?
Blend thoroughly and finish bright. In other words, pureeing until silky and adding lemon at the end—plus a pinch of salt—turns a good Creamy Cauliflower Soup into a truly memorable one.