
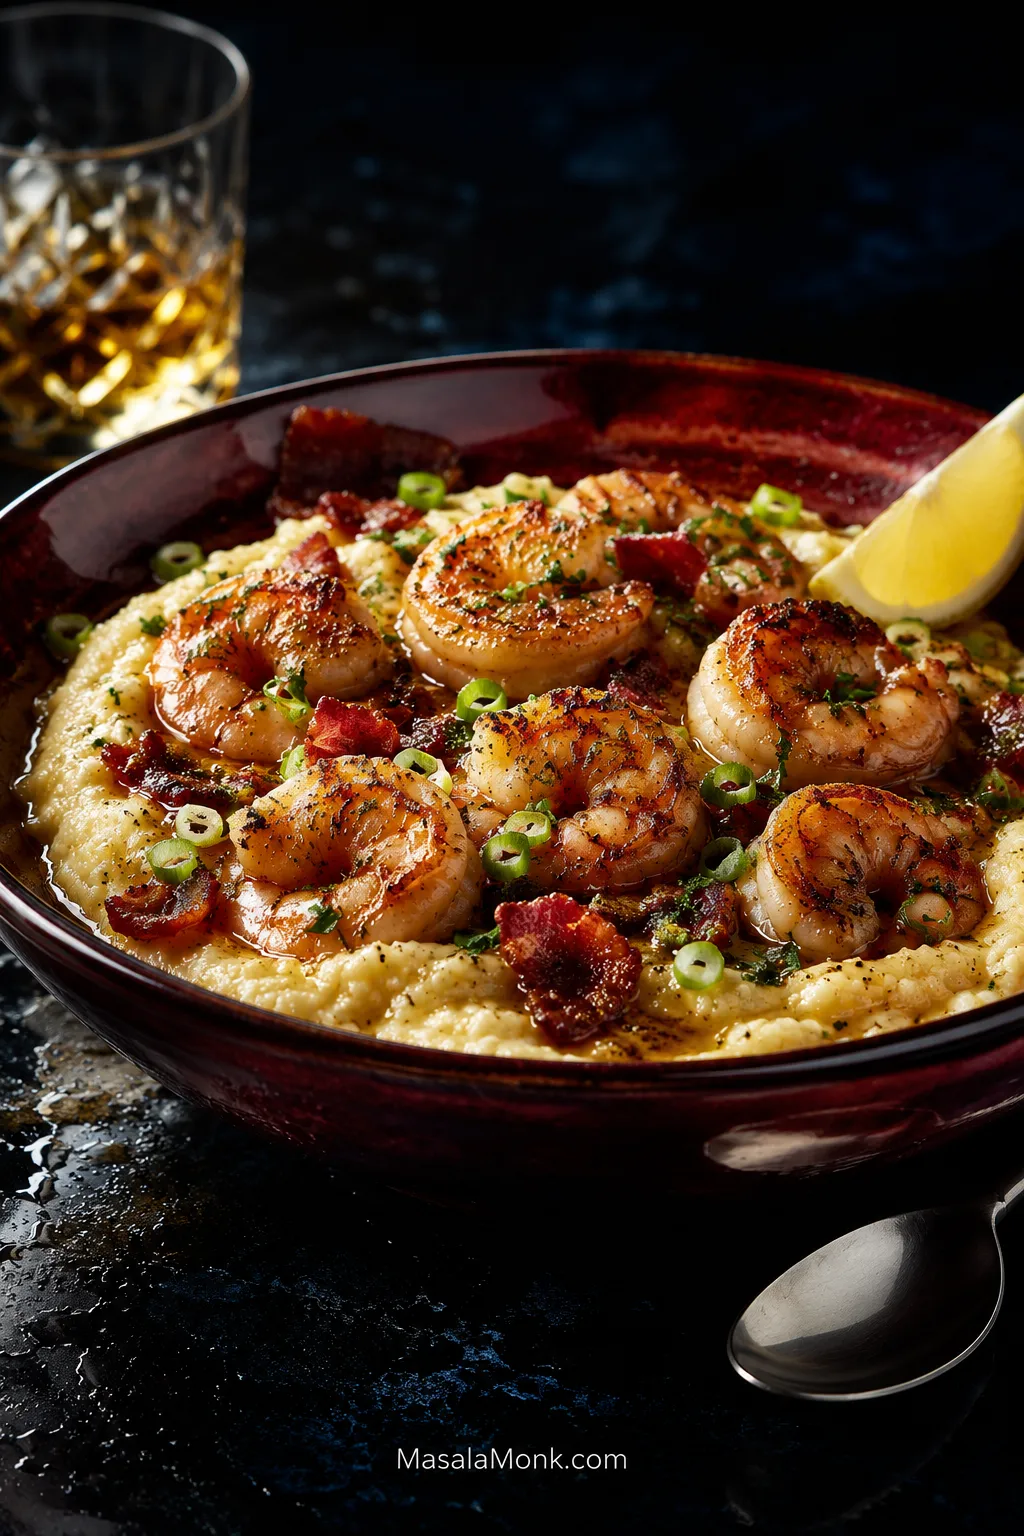
A really good bowl of shrimp and grits comes together on the spoon: creamy grits with clear corn flavor, a plump shrimp, glossy gravy slipping into the surface and, every few bites, crisp bacon. Fresh lemon cuts through the butter and cheese just enough to make you want another bite.
The trick is that grits and shrimp run on opposite clocks. Grits need patience, liquid and time. Shrimp need a hot skillet and a quick exit. The gravy happens in between, picking up the browned, smoky flavor left in the pan and carrying it into the grits.
This recipe leans into the richer modern Southern style—sharp cheddar, bacon and a light bacon-garlic gravy—but none of those additions gets to bury the foundation. The grits should still taste distinctly of corn. The shrimp should still taste like shrimp.
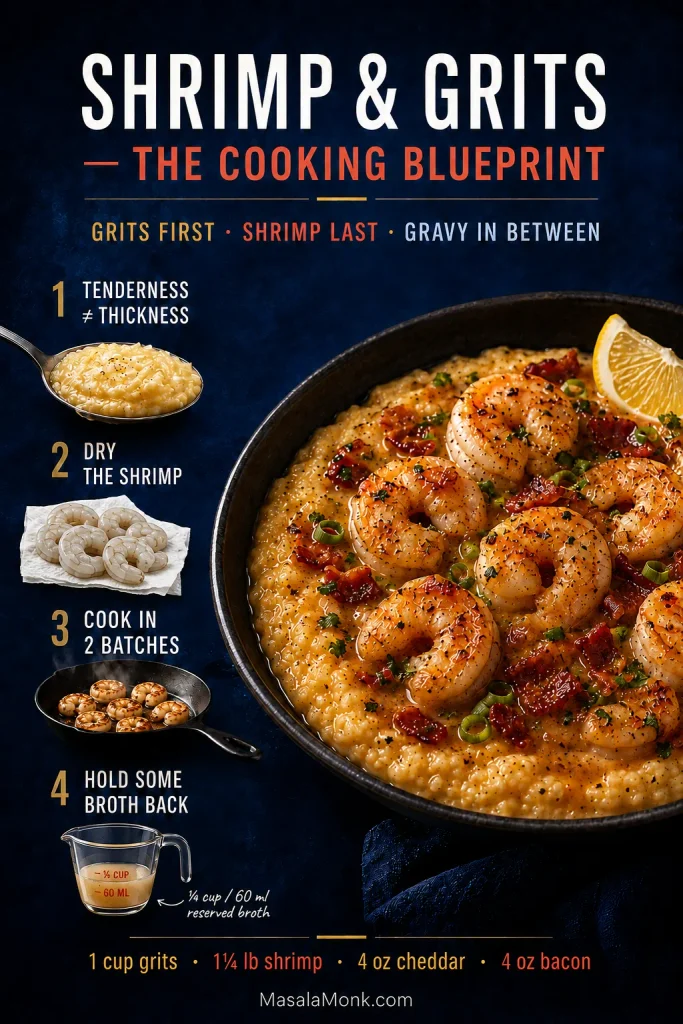
Grits First. Shrimp Last. Gravy in Between.
Serve the grits loose enough to spread gently rather than sit in a stiff mound. Keep the shrimp plump, and let the gravy lightly coat them and streak into the grits instead of pooling around the bowl.
Need the faster route? Use quick grits according to their package liquid ratio and timing, then finish them with the same butter, cream and cheddar. The shrimp and gravy stay the same, bringing dinner closer to about 30–35 minutes.
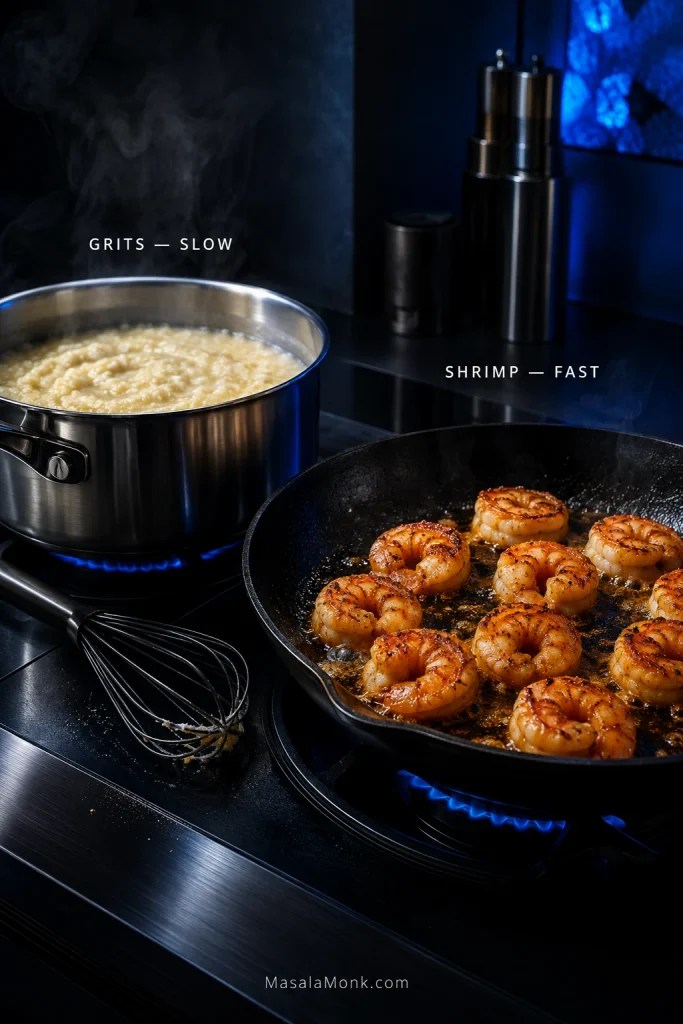
The Two-Pan Plan
| In the grits pot | In the skillet |
|---|---|
| Start the grits | Prep the shrimp, bacon, garlic, scallions and gravy ingredients |
| Grits gently simmer | Crisp the bacon |
| Grits approach tenderness | Sear the shrimp in two batches and remove them |
| Grits finish cooking | Make the pan gravy |
| Add butter, cream and cheddar | Return the shrimp for only 30–60 seconds |
| Loosen the grits one last time | Add lemon and herbs, then serve |
Shrimp and Grits Recipe
Creamy sharp-cheddar grits topped with seasoned shrimp, crisp bacon and a light Southern-style pan gravy with garlic, lemon and scallions.
Prep: 15 minutes Cook: about 40 minutes Total: about 55 minutes Serves: 4 generously
Heat level: warmly seasoned rather than fiery. Choose a mild Cajun or Creole blend if you prefer less heat; extra hot sauce can stay at the table.
You’ll need: a medium heavy-bottomed saucepan, a 12-inch / 30 cm skillet and a whisk.
Before you start: read through Steps 3–7 once. The grits give you some breathing room at the beginning; once the bacon and shrimp hit the skillet, dinner moves quickly.
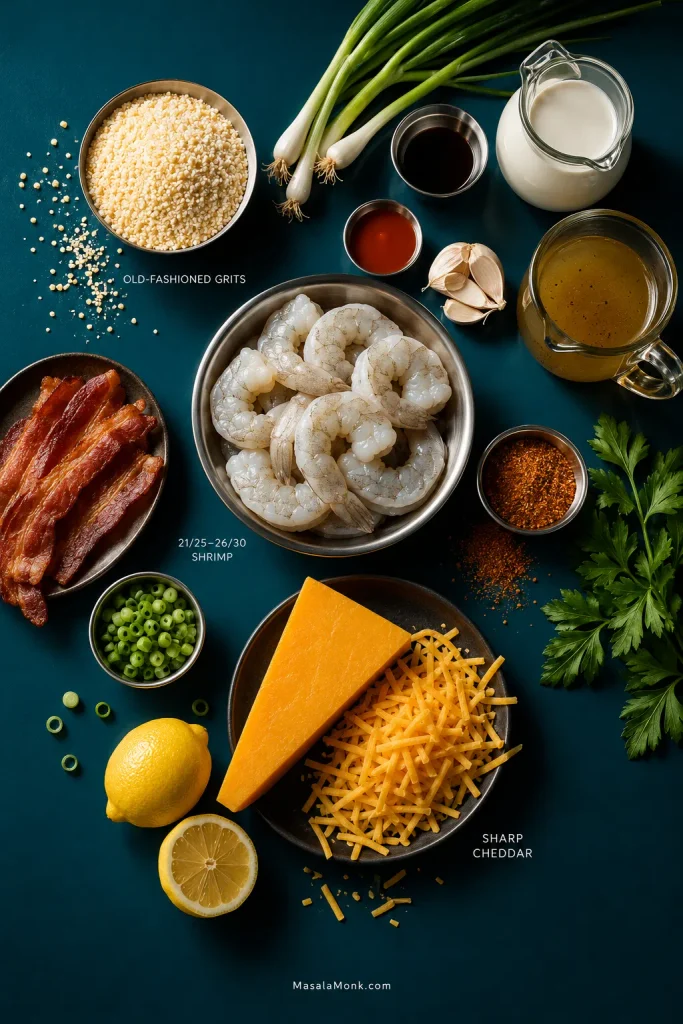
For the Creamy Cheddar Grits
- 1 cup old-fashioned grits — about 165 g; not quick or instant
- 3 cups water — 720 ml
- 1 cup low-sodium chicken broth — 240 ml
- About 1.5 g salt — roughly ½ teaspoon Diamond Crystal kosher, a scant ⅓ teaspoon Morton coarse kosher, or ¼ teaspoon fine/table salt, plus more to taste
- 2 tablespoons unsalted butter — 28 g
- ⅓ cup heavy cream — 80 ml
- 4 oz sharp cheddar, freshly grated — 113 g
- Freshly ground black pepper, to taste
- Up to 1 cup additional hot water or chicken broth — 240 ml, only as needed
For the Shrimp and Pan Gravy
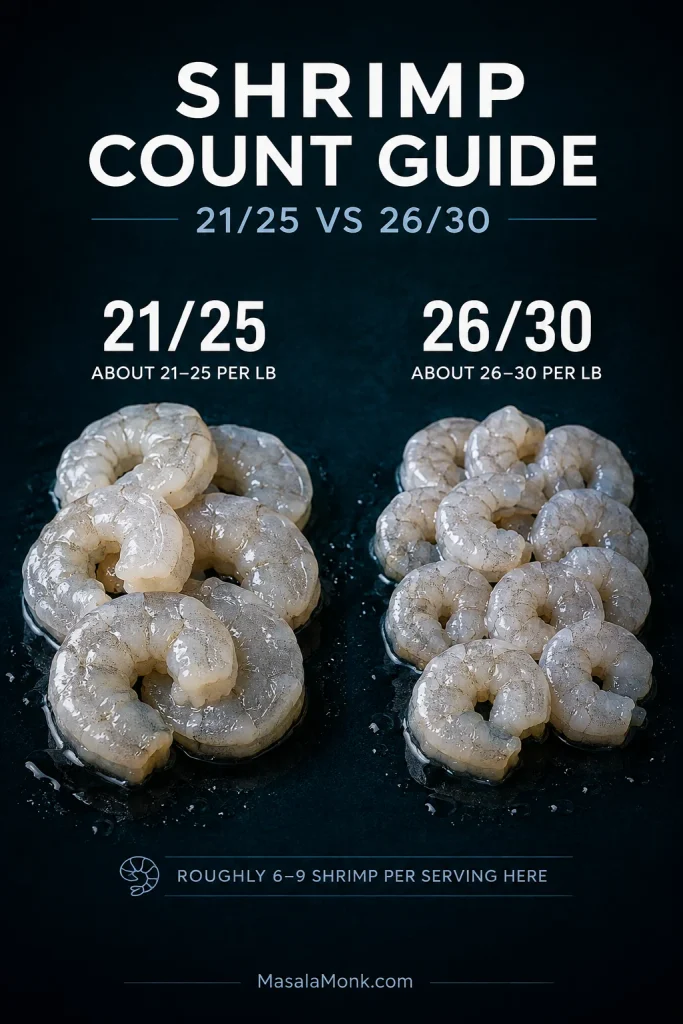
- 1¼ lb raw shrimp — about 570 g, preferably 21/25 or 26/30 count, peeled, deveined and tails removed
- 1½ teaspoons Cajun or Creole seasoning, preferably a lower-salt blend
- Freshly ground black pepper, to taste
- 4 oz bacon — 113 g, chopped
- 1–2 teaspoons olive oil, only if needed for the skillet
- 4 scallions, sliced, white/pale-green and dark-green parts separated
- 3 garlic cloves, finely minced
- 1 tablespoon all-purpose flour — about 8 g
- ¾ cup low-sodium chicken broth — 180 ml
- ¼ cup additional low-sodium chicken broth — 60 ml, held back for adjusting the gravy
- 2 teaspoons Worcestershire sauce — 10 ml
- 1 teaspoon hot sauce — 5 ml, plus up to 1 teaspoon more to taste and extra for serving
- 1 tablespoon fresh lemon juice — 15 ml
- 2 tablespoons chopped flat-leaf parsley
- Lemon wedges, for serving
1. Start the Grits
Bring the water, chicken broth and salt to a boil in the saucepan.
Pour in the grits in a slow, steady stream while whisking. Lower the heat to a gentle simmer once they are incorporated.
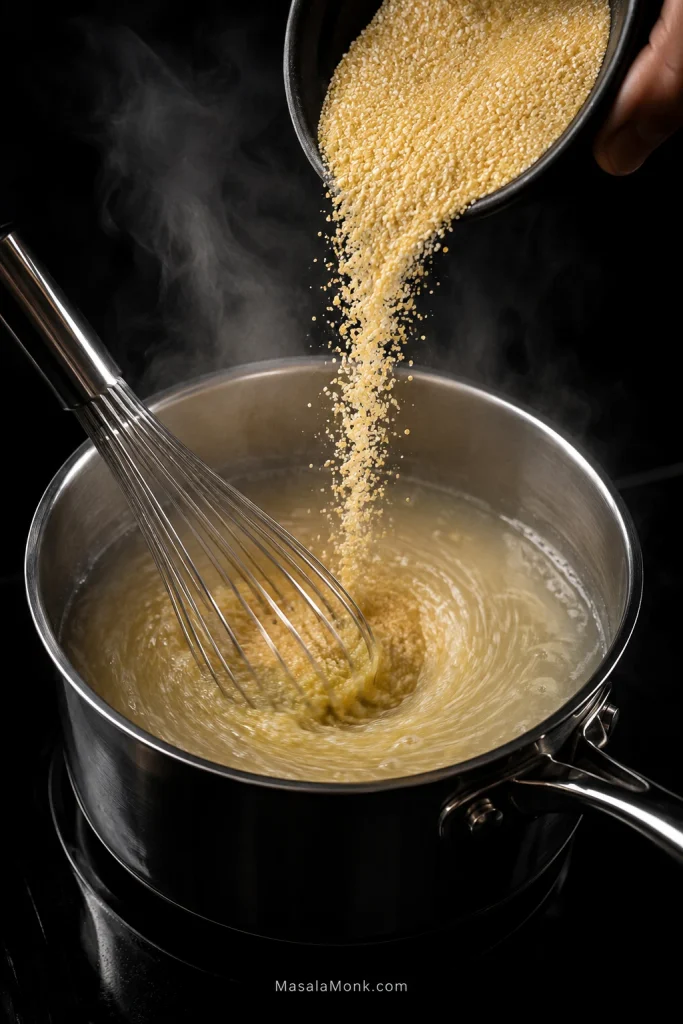
Cook, stirring regularly and scraping the bottom and sides, until the grains are tender. Package timing is a sensible place to start; many old-fashioned grits fall somewhere around 15–25 minutes, but brands and grinds vary. If yours need another ten minutes, give them another ten minutes.
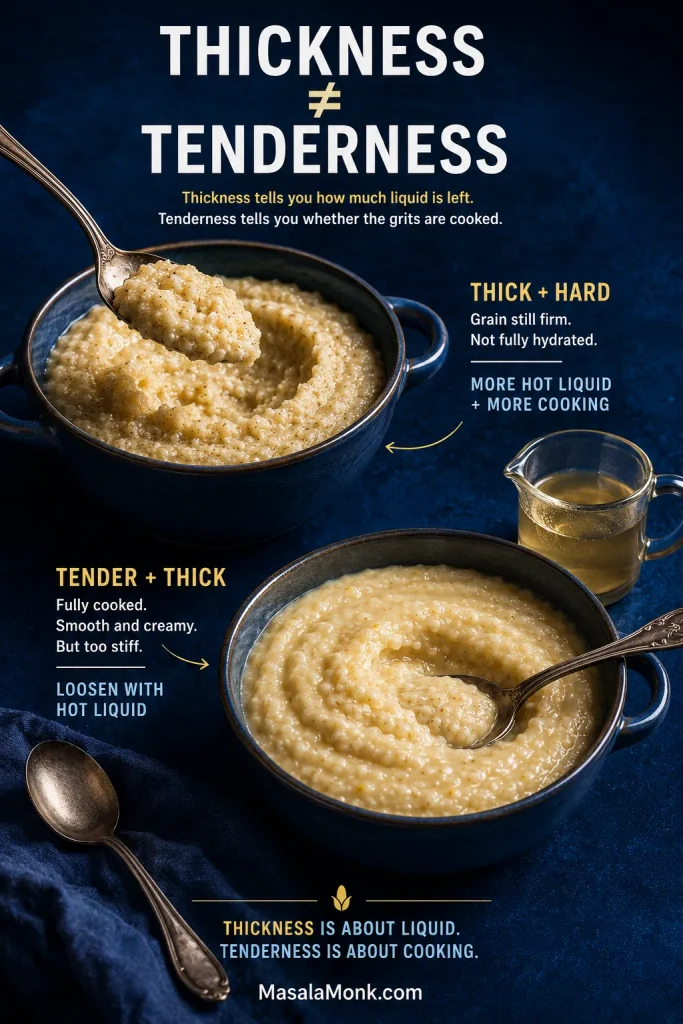
Taste a grain. It can have some corn texture, but there should be no dry, hard or sandy center. A pot may look thick before the corn is ready. Add more hot water or broth ¼ cup / 60 ml at a time and keep cooking.
Thickness tells you how much liquid is left. Tenderness tells you whether the grits are cooked. If that distinction still feels fuzzy, see how to tell when grits are done.
2. Prep While the Grits Cook
Pat the shrimp very dry. Slice the scallions, mince the garlic, chop the bacon, measure the flour and broth, and juice the lemon. Put the Worcestershire and hot sauce beside the stove.
Shrimp have no interest in waiting around while you look for the Worcestershire.
3. Crisp the Bacon
Cook the bacon over medium heat until its fat has rendered and the pieces are deeply browned at the edges. They should be crisp enough to hold their own against the soft grits later.
Transfer the bacon to a plate with a slotted spoon. Spoon off excess fat, leaving about 2 tablespoons in the skillet for the shrimp; if your bacon rendered less, add a little olive oil to make up the difference.
The bacon has done its job in the pan. Keep the pieces out of the gravy and save them for the bowls.
4. Sear the Shrimp in Two Batches
Toss the dry shrimp with the Cajun or Creole seasoning and black pepper. Check the seasoning label before adding extra salt; many blends already contain plenty.
Raise the skillet to medium-high. Divide the shrimp roughly in half and cook them in two batches so the pan stays hot enough to brown them.
For each batch, cook about 1–2 minutes on the first side, then roughly 1 minute on the second. The surface should turn pink and mostly opaque while the thickest centers can remain just shy of finished. Add a teaspoon of olive oil before the second batch only if the skillet has become dry.
Move each batch to a plate as soon as it is ready. The shrimp will get their final few seconds in the gravy.
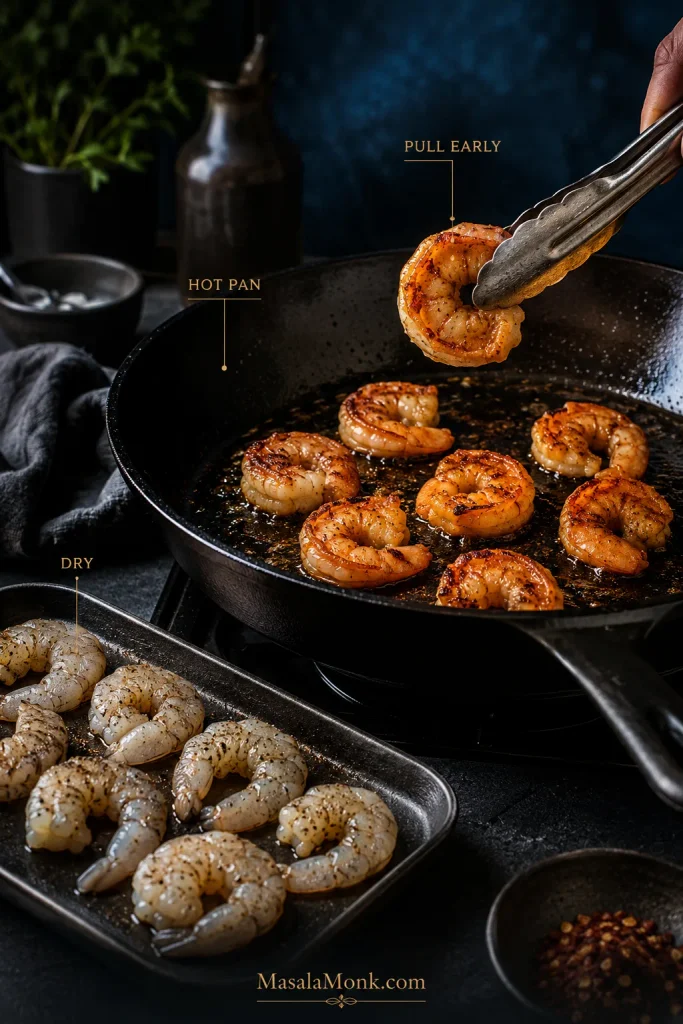
Current federal food-safety guidance for shrimp uses a visual doneness cue: cook until the flesh is pearly or white and opaque. The brief return to the gravy will take the centers there.
5. Make the Pan Gravy
Look at the fat left in the skillet after the shrimp come out. You want roughly 1 tablespoon. Spoon off obvious excess; add a little olive oil if the pan is nearly dry. Reduce the heat to medium, add the white and pale-green scallion pieces and cook for 30–60 seconds. Add the garlic, then stir in the flour about 20–30 seconds later.
Cook the flour for about 1 minute, then gradually whisk in ¾ cup / 180 ml chicken broth, scraping up the browned bacon-and-shrimp bits. This is when the skillet starts smelling like the dish you came here to make. Stir in the Worcestershire and 1 teaspoon hot sauce.
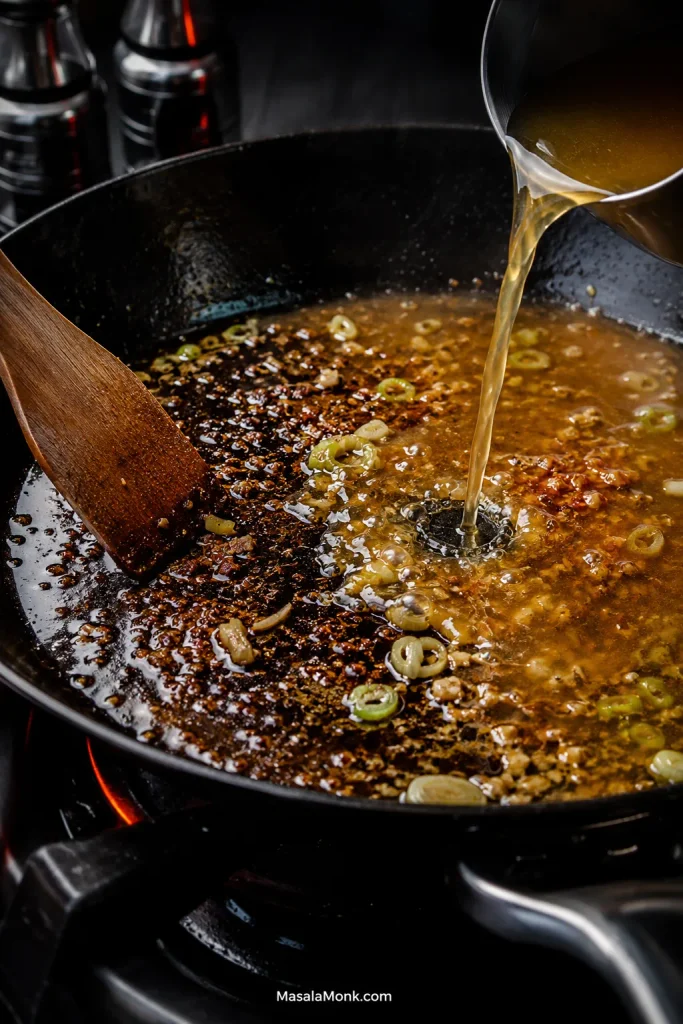
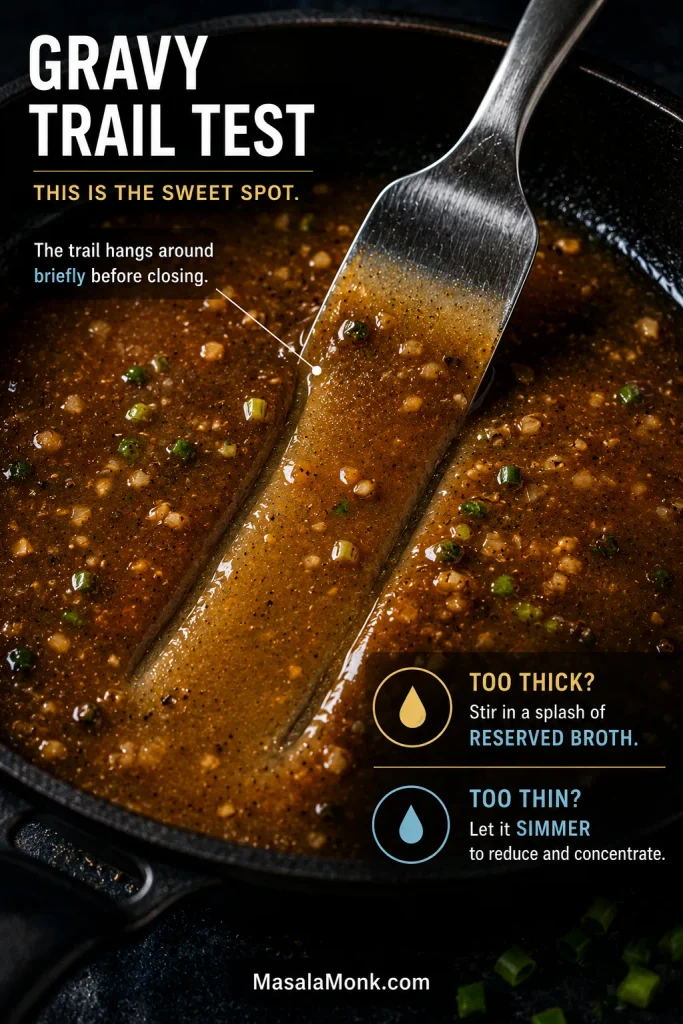
Simmer until the gravy turns glossy and lightly coats a spoon. Drag a spatula through the skillet; the trail should hang around briefly before closing. Add reserved broth a tablespoon or two at a time if the sauce gets too thick. If it is loose, leave the shrimp out and simmer a little longer. If the consistency is still off, see the gravy troubleshooting guide.
6. Finish the Cheddar Grits
Once the corn itself is tender, turn the heat very low or take the pot off the burner. Stir in the butter and cream, then the cheddar.
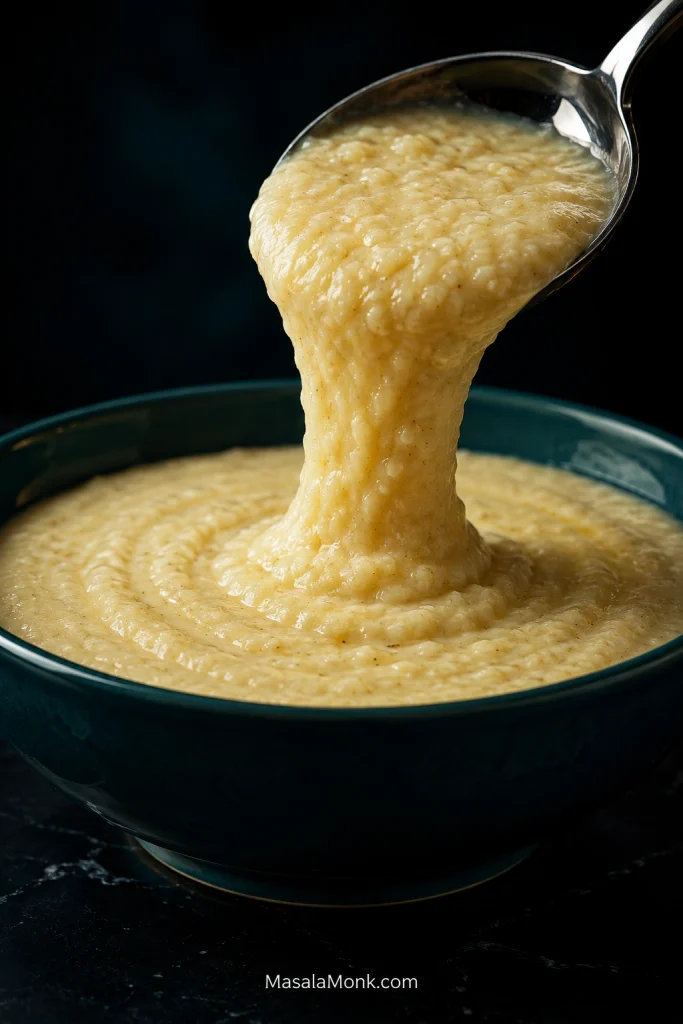
Give everything 30–60 seconds to melt together before deciding the pot is too thick. The butter and cream loosen the grits first; the cheese then gives them a little more body.
Scoop up some grits. They should fall slowly and spread after they land. Add hot water or broth a splash at a time if they have become too stiff.
Taste now, then add salt and black pepper only if the pot needs them.
7. Finish the Shrimp
Return the shrimp and any juices from their plate to the skillet. Toss for only 30–60 seconds, until the centers are opaque and the shrimp are hot.
Turn off the heat. Add the lemon juice, most of the parsley and most of the dark-green scallion tops.
Taste the gravy. Salt, Worcestershire, lemon and hot sauce do different jobs. If everything tastes rich but dull, try lemon first.
8. Build the Bowls
Spoon the grits into warm shallow bowls. Add the shrimp and enough gravy to coat them and run lightly into the grits. Scatter over the bacon, remaining scallion greens and parsley.
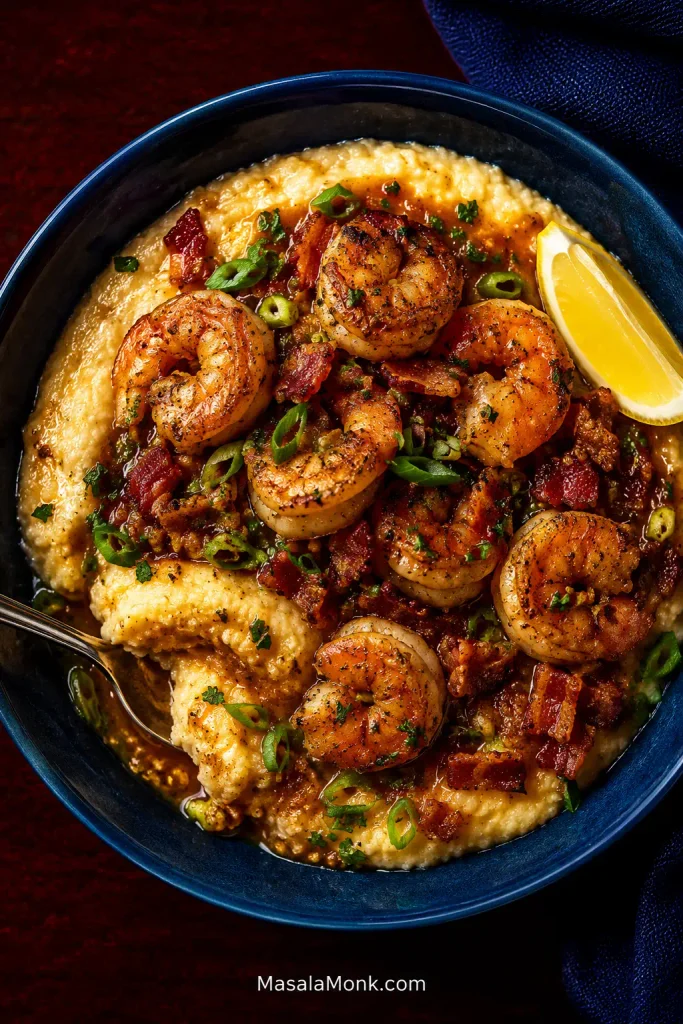
Put lemon wedges and hot sauce on the table and serve immediately.
Recipe Notes
- Frozen or precooked shrimp: raw frozen shrimp work well once completely thawed and dried. Already-cooked shrimp should skip the sear and go into the finished gravy only long enough to heat through.
- Different grits: quick grits use their package ratio and timing, then get the same butter, cream and cheddar finish. Stone-ground grits vary much more by mill; follow the producer’s directions and keep extra hot liquid nearby. See Choosing the Right Grits for the differences.
- No bacon: start the skillet with 1 tablespoon butter plus 1 tablespoon olive oil.
- Salt: bacon, cheese, seasoning, broth, Worcestershire and hot sauce all contribute sodium, so begin conservatively and adjust at the end.
- Gravy: the extra ¼ cup broth is there in case the sauce needs loosening. Plenty of skillets will not need all of it. For the reasoning behind the sauce, see How the Shrimp and Grits Gravy Works.
Before the deeper guide: this blueprint condenses the whole recipe into the checkpoints worth remembering.
Choosing the Right Grits for Shrimp and Grits
Grits are ground corn cooked with liquid until soft enough to spoon. Grind changes texture and cooking time; the corn itself, freshness and milling method have a great deal to do with flavor.
For the deepest corn flavor, good stone-ground grits are hard to beat. Old-fashioned grits are the default here because they still taste distinctly of corn while being easier to find and much easier to fit into a weeknight dinner.
| Type | What to expect | Best fit |
|---|---|---|
| Stone-ground | Pronounced corn character, more texture, longest and most variable cook | When corn flavor is the priority |
| Old-fashioned | Good corn flavor, creamy texture, manageable timing | Main recipe |
| Quick | Finer and softer, with a much shorter cook | Fastest good shortcut |
| Instant | Very soft texture and mild corn flavor | Convenience first |
| Polenta | A close relative with its own grind and cooking directions | Can work in a pinch |
| Fine cornmeal | Much finer than grits | Not a direct substitute |
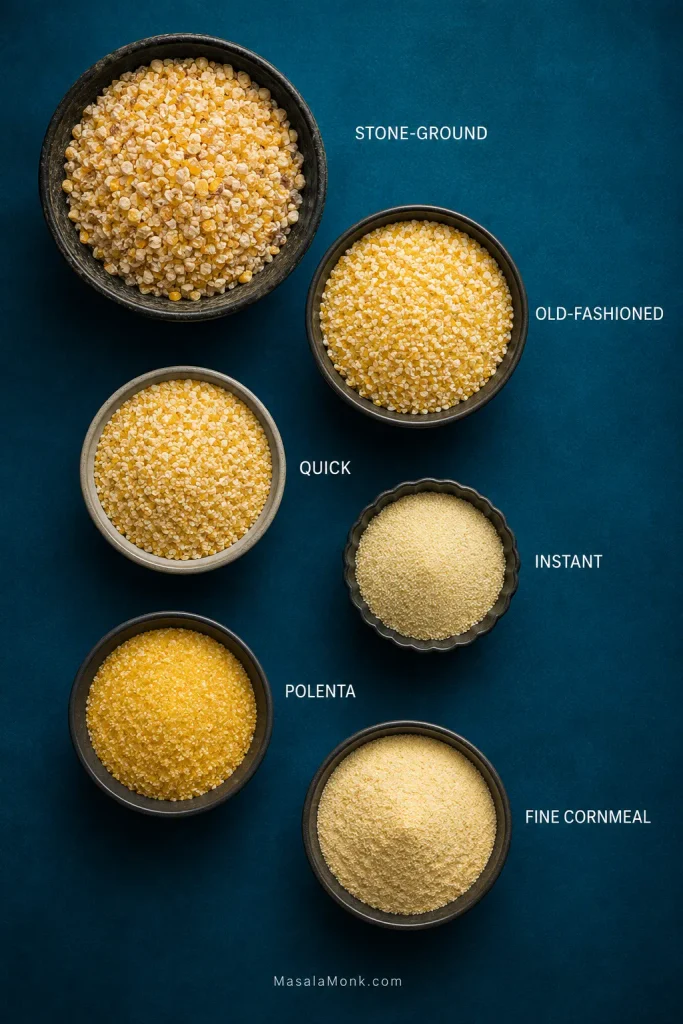
White or yellow? Either works. A fresh, flavorful bag of grits is a more important choice than the color of the corn.
If the bag in your cupboard is fine cornmeal, give it another job—something like Southern cornbread—instead of expecting it to cook like grits.
Stone-Ground Grits Follow the Mill
Stone-ground products vary dramatically. Some mills use a straightforward simmer; others recommend longer cooking, soaking, rinsing or skimming away floating chaff first. Follow the directions on the bag you are actually using and keep hot water nearby.
Some stone-ground grits soften fairly quickly. Others settle in for the better part of an hour. Let them.
Extra cheese can make undercooked grits richer. It cannot finish cooking the corn.
How to Tell When Grits Are Done
Taste first. Properly cooked grits can still have character; the grain should yield instead of crunching around a dry center.
Once the grains are tender, consistency is easy to change. Add hot liquid until the grits fall slowly and spread after serving.
← Back to the recipe · ↑ Back to top
Choosing Shrimp and Cheese
Raw fresh and raw frozen shrimp both work. Frozen shrimp simply need to be fully thawed and thoroughly dried before they see the skillet.
Ignore supermarket adjectives and look for the count. 21/25 or 26/30 gives you substantial shrimp that brown nicely but still show up repeatedly as you eat the bowl. With 1¼ pounds for four people, expect roughly 6–9 shrimp per serving.
A bowl of grits should be spoon food from first bite to last, so tails-off is the default. The same dry-shrimp, hot-pan, short-cook approach works beautifully in shrimp scampi.
Sharp cheddar works especially well because its tang survives the cream, bacon and gravy without wiping out the corn underneath. White cheddar behaves similarly. Gouda makes the flavor rounder; smoked Gouda shifts the bowl much further toward smoke.
How the Shrimp and Grits Gravy Works
There is no single gravy that defines every bowl of shrimp and grits. Some versions rely on bacon drippings, shrimp juices, butter and lemon. Others bring in flour, tomatoes, cream, sausage, tasso or a substantial roux.
This recipe uses a lighter bacon-garlic pan gravy. Flour gives the broth enough body to cling to the shrimp, Worcestershire reinforces the browned flavor from the skillet, and lemon sharpens the finish.
Start with ¾ cup broth and keep the final ¼ cup beside the stove. Skillet size, heat and evaporation decide how much you actually need.
For a visual check, drag a spatula through the gravy: a trail that lingers briefly before closing means the sauce is ready to coat.
Using shell-on shrimp? Simmer the shells for about 10 minutes in the 1 cup / 240 ml chicken broth intended for the gravy, then strain. Top the infused broth back up to 1 cup / 240 ml with water or additional broth to replace what evaporated. Measure ¾ cup for the skillet and keep the final ¼ cup in reserve.
Shrimp and Grits Troubleshooting
Similar-looking failures can need very different fixes. Diagnose first.
My Grits Are Wrong
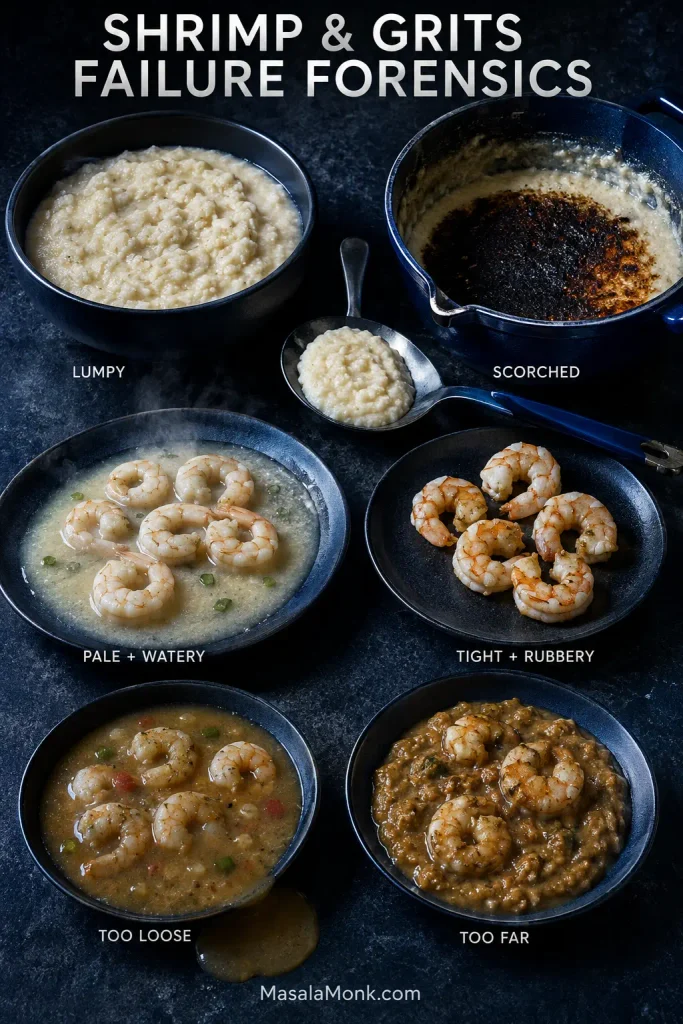
Thick but still hard: The corn is undercooked. Add hot liquid and keep cooking.
Tender but too thick: Cooking is finished. Loosen with hot water or broth.
Too loose: Simmer uncovered for a few minutes. They will also thicken slightly as they sit.
Lumpy: Whisk while the grits are still loose; stubborn set lumps may not disappear completely. Next time, pour the grits in gradually while whisking.
Scorched: Transfer the good portion to a clean saucepan and leave the burnt layer behind. Do not scrape it up.
Oily or stringy after cheese: The pot was probably too hot when the cheese went in.
My Shrimp Are Wrong
Pale and watery: Usually too much surface moisture, too little heat or too many shrimp in the pan.
Rubbery or tightly curled: They overcooked. Once shrimp are tough, you cannot uncook them. Get them off the heat sooner next time.
My Gravy Is Wrong
Too thin: Keep the shrimp out and reduce the sauce first.
Too thick: Add reserved broth slowly.
Lumpy: Whisk well; strain if stubborn lumps remain.
Flat: Taste for salt, savory depth and brightness before reaching for more seasoning blend.
Heavy: Try lemon before more cream or cheese.
Too salty: Stop adding salty ingredients and dilute with unsalted liquid if the sauce can tolerate it.
← Back to the recipe · ↑ Back to top
A Few Ways to Change the Bowl
- Andouille: replace the bacon with 4–6 oz / 113–170 g sliced andouille. Brown it first, remove it, and return it near the end. Add a little butter or olive oil if the sausage leaves too little fat for the shrimp.
- No cheese: fully cooked grits are still delicious finished with butter and a little cream or milk.
- A little lighter: reduce the bacon, use whole milk instead of cream and pull back the cheddar.
- Gluten-free: check the packaged ingredients and replace the all-purpose flour with the same amount of a 1:1 gluten-free all-purpose flour blend.
Lowcountry Roots, Modern Southern Shrimp and Grits
Shrimp and grits is most strongly associated with South Carolina’s Lowcountry, especially Charleston, although there is no single documented moment when the dish began. Smithsonian reporting describes shrimp and grits as an amalgamation of West African and Indigenous American ingredients and methods, a framing that fits the broader Gullah Geechee foodways of the Lowcountry.
One of the most memorable early records appears in the 1930 cookbook Two Hundred Years of Charleston Cooking. The Local Palate identifies the cook credited with “Shrimps and Hominy” as William Deas, the cookbook author’s African American butler. He was said to be 78 and to have eaten the dish every morning during shrimp season for as long as he could remember.
The old recipe was startlingly spare: hot grits, shrimp, butter and salt. Cheese, bacon, sausage, tomatoes, cream and elaborate gravies all came later.
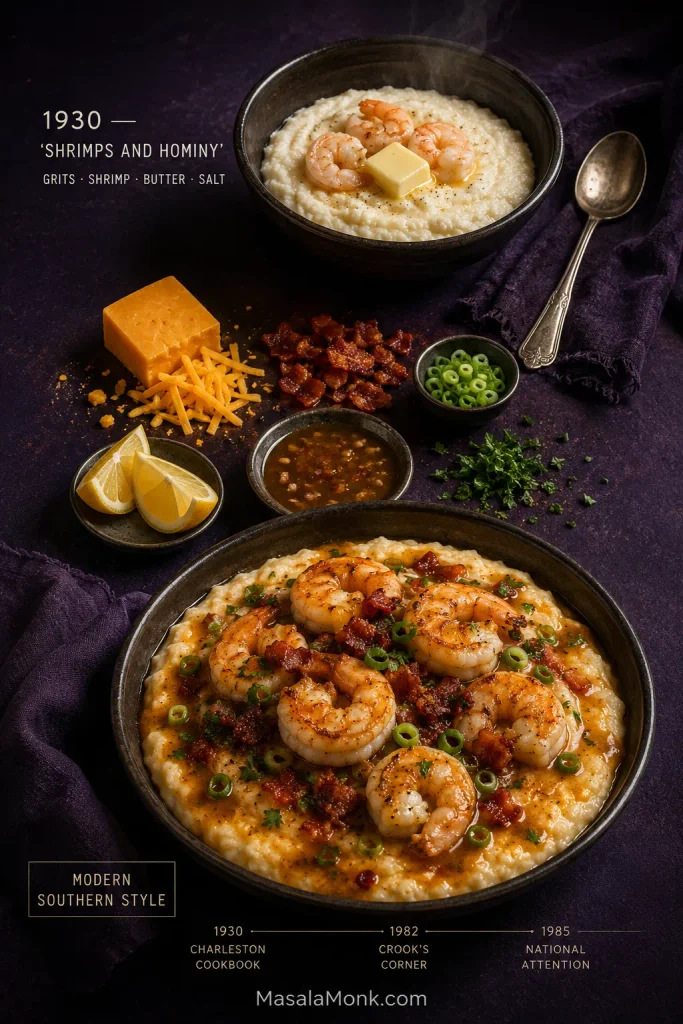
Bill Neal and Gene Hamer opened Crook’s Corner in Chapel Hill in 1982 and began serving shrimp and grits for dinner. Craig Claiborne’s 1985 New York Times article helped carry the dish far beyond its regional breakfast associations.
Here, the modern additions are cheddar grits, bacon and pan gravy, with Cajun or Creole seasoning bringing warmth. For a Louisiana dish where roux and regional seasoning move much closer to the center, Cajun étouffée makes a useful contrast.
Make-Ahead, Storage and Reheating
Peel the shrimp, chop the bacon and aromatics, grate the cheddar and measure the broth ahead if that makes dinner easier. Cook the shrimp close to serving.
Storing Leftovers
When possible, refrigerate the grits separately from the shrimp and gravy in airtight containers. Use the leftovers within about 3 days.
Reheating the Grits
Cold grits become firm. Warm them over low heat with a splash of water, broth or milk, stirring until creamy again.
Reheating the Shrimp and Gravy
Use gentle heat so the shrimp spend as little extra time cooking as possible, but reheat leftovers thoroughly. Current federal guidance calls for leftovers to reach 165°F / 74°C.
What to Serve With Shrimp and Grits
A rich bowl likes contrast around it. You do not need a long menu.
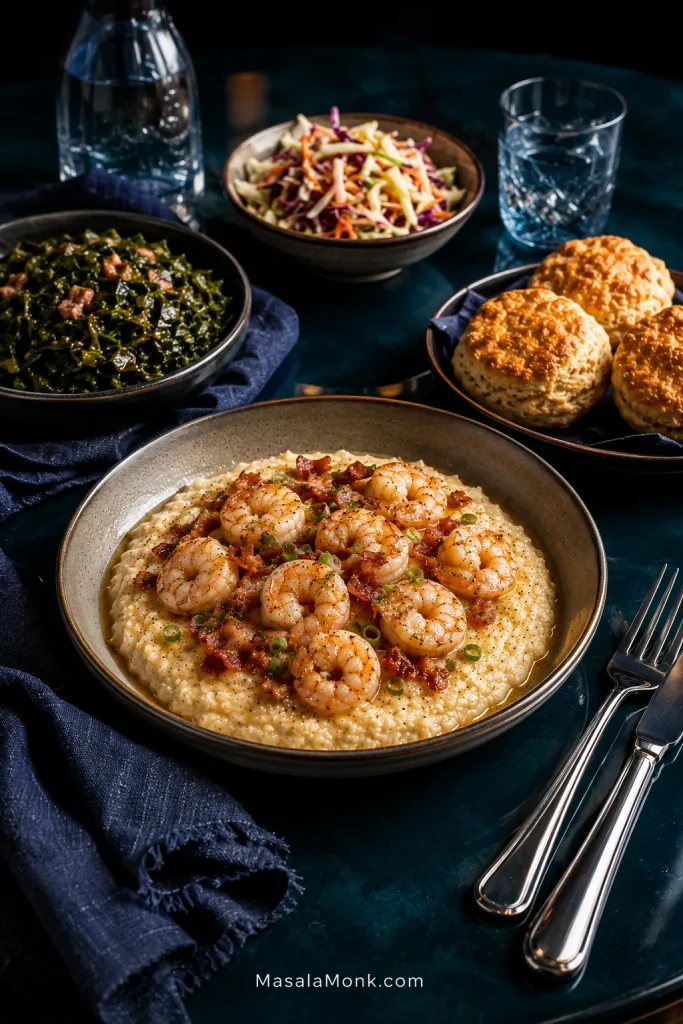
- Fresh contrast: crunchy coleslaw, ripe tomatoes or a green salad with a sharp vinaigrette.
- Green and savory: collard greens, green beans or roasted asparagus.
- For the gravy: warm Southern buttermilk biscuits.
This version works naturally for brunch or dinner. For an appetizer, use a small cup of grits and one or two shrimp per person.
If you make it, tell us which grits you used—old-fashioned, stone-ground or quick—and whether your gravy needed any of the reserved broth. Those two details vary quite a bit from one kitchen to another.
Then eat it hot. The spoonful worth chasing has corn, a plump shrimp, a little pan gravy and a piece of crisp bacon all at once.








