Posted on 2 Comments

Apple Cider Vinegar & Lemon Juice for Weight Loss

Woman stirring a glass of diluted apple cider vinegar and lemon water in a sunlit kitchen; overlaid text shows the safe recipe and enamel-care tips.

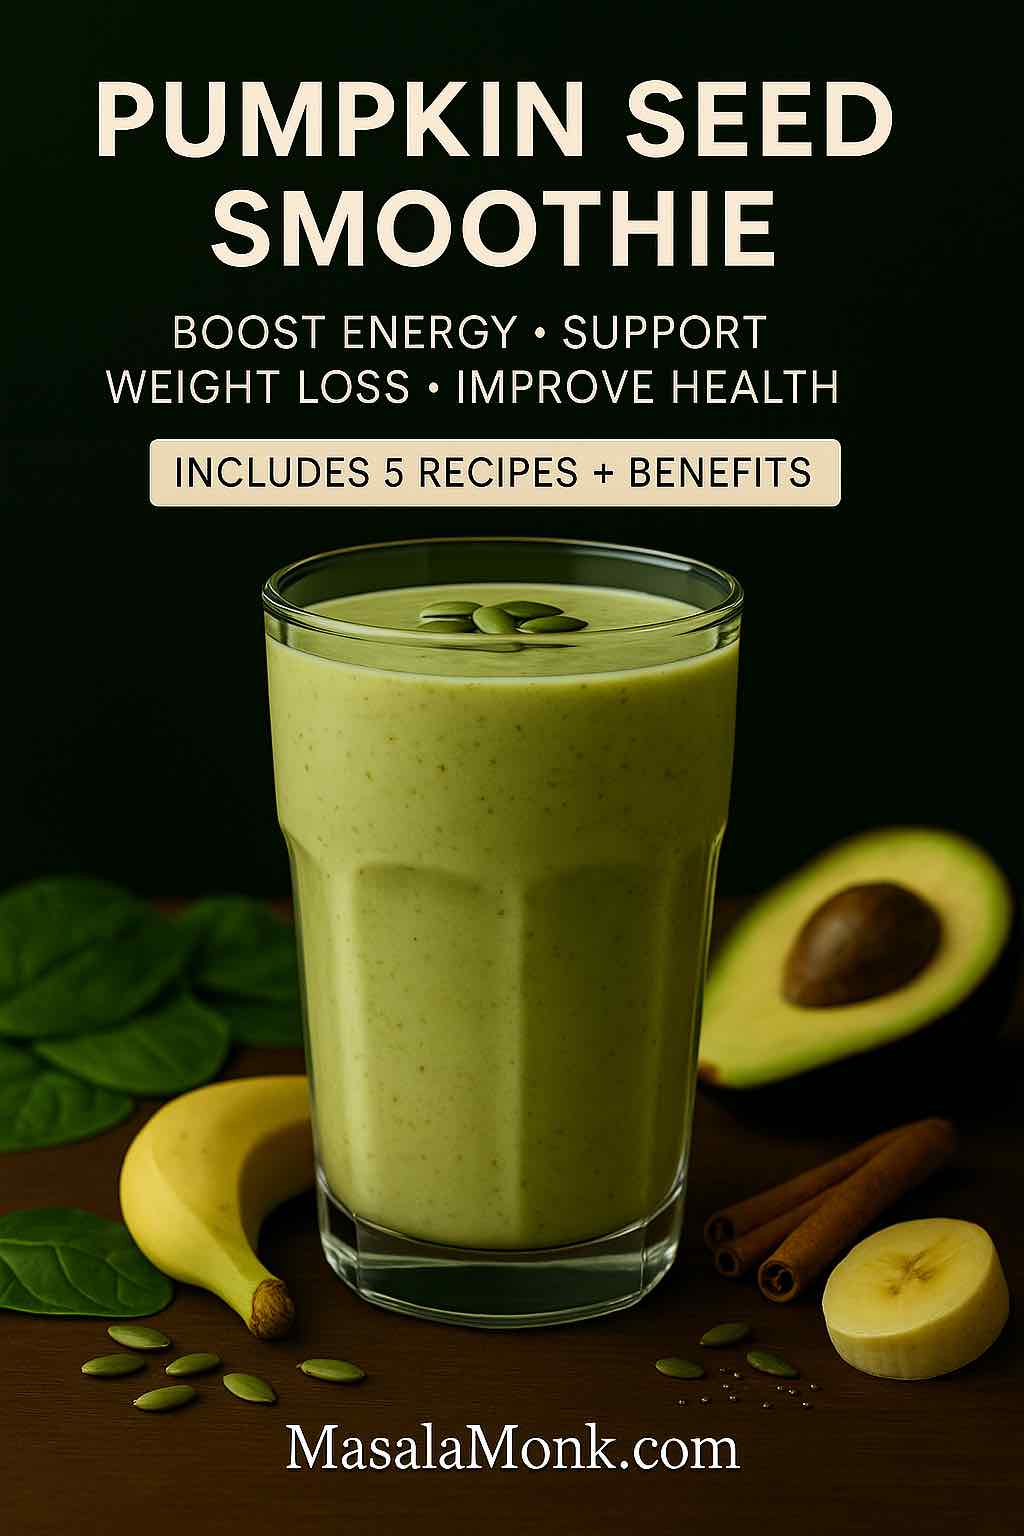
People love simple rituals. A tall glass of water. A splash of vinegar. A squeeze of lemon. The routine feels clean and doable, which is part of its charm. Still, it helps to be honest. Apple cider vinegar and lemon juice for weight loss can support better choices for some people, mostly because it makes water more appealing and may help a few folks feel fuller. Even so, it’s not a switch you flip to change your body overnight. Progress still leans on ordinary decisions repeated often: meals anchored by protein and plants, everyday movement, and decent sleep.

Rather than pitching another miracle, let’s slow down and explore the drink in a realistic way—what research actually says, how lemon genuinely helps, what safety looks like in real life, and the gentlest way to try the ritual if you’re curious. Along the way, you’ll find straightforward resources from trusted health publishers and several MasalaMonk reads to make the journey tastier and easier to keep.

Also Read: Lentil Pasta for Weight Loss: Nutrition, Best Brands & 5 Healthy Recipes.


What apple cider vinegar and lemon juice for weight loss can and can’t do

To begin with, expectations matter. The Mayo Clinic puts it plainly: vinegar alone is unlikely to drive significant weight loss, and the evidence just isn’t strong enough to promise big results. Their concise guidance on apple cider vinegar is a useful reset if you’re sorting through bold claims you’ve seen online (Mayo Clinic’s guidance on ACV for weight loss).

That said, there are reasons the habit keeps getting attention. Some small studies and reviews report that vinegar can blunt post-meal blood-sugar rises and slow gastric emptying. In plain language, digestion may take a touch longer, and energy swings may feel steadier. For some, that translates into modest appetite control. However—and this is important—the effect tends to be small, short-term, and heavily dependent on your overall pattern. For a measured, readable overview that balances interest with caution, Harvard Health’s discussion of the “ACV diet” is worth a skim (Harvard Health’s overview). Likewise, Health.com has a recent explainer that lands in the same place: there might be a small nudge when ACV is used alongside a calorie deficit, but robust proof is limited (Health.com’s explainer).

Stepping back, the pattern is consistent: apple cider vinegar and lemon juice for weight loss might be a possible nudge, not a cure-all. If you enjoy the taste and you use the drink to replace a sweetened beverage, it may tilt the day in your favor. If you dislike it or it bothers your stomach, you can safely skip it—plenty of people reach their goals without ever sipping vinegar.

Also Read: Chia Seed Water: Benefits, Recipes & Best Time to Drink for Weight Loss


Where lemon genuinely helps—and where it doesn’t

Lemon earns its place here for reasons that are refreshingly down-to-earth. It brightens water, adds a familiar aroma, and turns hydration into a habit you might actually look forward to. That alone can change a day. A squeeze of juice offers a little vitamin C and makes the ritual feel fresh. However, honest evidence that lemon juice directly drives fat loss in humans is thin. Consider it flavor and hydration support, not a fat-burning trigger.

If citrus rituals appeal to you, two simple MasalaMonk companions can help you fine-tune the vibe you enjoy: the cozy routine of warm lemon water in the morning and the crisp refreshment of cold lemon water. Pick the version you’ll actually repeat.


Safety first: protect teeth, throat, and stomach

Because vinegar is acidic, the biggest long-term concerns with sloppy use aren’t your waistline—they’re your teeth and comfort. Enamel erosion creeps up slowly; throat irritation can turn a once-pleasant ritual into something you avoid. In addition, vinegar slows stomach emptying. Some people like the lingering fullness; others, especially those with reflux or delayed gastric emptying, find it uncomfortable. For a clear consumer-level rundown of common pitfalls—enamel wear, low potassium with heavy long-term intakes, and potential interactions with medications—see Verywell Health’s side-effects summary (Verywell Health on ACV side effects). Harvard also underscores two evergreen rules: dilute thoroughly and prefer food-first uses over “shots” (Harvard Health’s overview).

Practical steps you can trust:

  • Always dilute ACV in plenty of water.
  • Sip through a straw, then rinse your mouth with plain water.
  • Give enamel ~30 minutes before brushing.
  • Pair the drink with food if you’re prone to heartburn or queasiness.
  • Check with your clinician first if you live with diabetes and gastroparesis, significant reflux/ulcer symptoms, kidney disease, or if you take insulin, digoxin, or certain diuretics.

These guardrails keep a small habit from becoming a big problem.

Also Read: Apple Cider Vinegar for Arthritis & Joint Pain: Myths vs Facts


How to make apple cider vinegar and lemon juice for weight loss (gentle method)

Let’s keep the method simple, the taste pleasant, and the dose sensible.

One-glass method (1 serving):

  • Apple cider vinegar: start with 1–2 teaspoons; only increase if you feel fine. Most people don’t need more than 1 tablespoon per serving.
  • Water: 250–300 ml (room temperature or warm).
  • Lemon juice: 1–2 teaspoons (optional).
  • Optional flavor: a slice of fresh ginger, or ½ teaspoon honey (remember honey adds calories).

How to:
Stir the vinegar into the water, add lemon, sip through a straw, then rinse with plain water.

When to drink:
With a meal or just before your most carbohydrate-heavy meal. There’s no proven “best time,” so choose a moment you’ll remember. The Mayo guidance emphasizes dilution and moderation above timing or brand (Mayo Clinic on ACV basics).

Daily ceiling:
Without medical advice, keep total intake around 15–30 ml (1–2 tablespoons) per day, always well diluted.

Brand note:
Choose a pasteurized vinegar you like and can find easily. There’s nothing magical about a label; dilution and habits matter more than logos.

Also Read: Best Nuts and Seeds for Weight Loss (Chia, Flax, Almonds & More)


Prefer not to sip? Put vinegar in food and smile

You do not have to drink acid to get the flavor benefits. In fact, using vinegar in meals may be the smarter path for your teeth and your tastebuds. A simple vinaigrette over crisp greens gives you the same acetic-acid experience while bundling it with fiber, protein, and healthy fats. If you’d like enamel-friendlier ideas that still feel indulgent, browse MasalaMonk’s safe apple cider vinegar salad dressing and a set of ACV dressing recipes. Use those approaches broadly—not only during pregnancy.

As you experiment, lean into texture and contrast: peppery greens, toasted seeds, juicy tomatoes, and a vinaigrette that makes you crave the next bite. When a salad becomes the part of lunch you anticipate, you’ve shifted the whole day in your favor without feeling deprived.


Morning or empty stomach: is it necessary?

Plenty of people adore a morning ritual; it feels like a reset. Nevertheless, there isn’t convincing evidence that sunrise timing or an empty stomach makes vinegar more effective for fat loss. If an empty stomach leaves you queasy, place the drink with breakfast. If you prefer an even gentler start, consider warm lemon water on its own and then use ACV later in the day inside food. For tuning your routine to your taste, the MasalaMonk guide to warm lemon water in the morning is a friendly read.


Variations of apple cider vinegar and lemon juice for weight loss

Because taste keeps habits alive, it’s worth exploring small tweaks.

  • Honey: A drizzle rounds off sharp edges and makes the ritual feel softer. Just remember that sweetness brings energy; a half teaspoon adds roughly 20–25 calories. That’s easy to fit into your day when you plan for it.
  • Ginger: Grated ginger adds warmth without much energy cost and can make the drink feel cozier. For more zesty, hydrating ideas, MasalaMonk’s cucumber, lemon, and ginger water has crisp combinations you can borrow.
  • Spices: A pinch of black pepper brings a gentle kick. If you enjoy playful seasonings that don’t sneak in calories, lemon and black pepper offers easy variations.

Finally, some readers ask whether one famous ACV brand matters. It doesn’t, assuming you choose a pasteurized product and keep the dose modest. The basics—dilution, consistency, and an overall balanced plate—do the heavy lifting.


Tiny habit upgrades that compound over time

Instead of asking, “Will this drink make me lose weight?”, consider, “How can this ritual help me show up for myself the rest of the day?” A single glass won’t change your life. A small cascade of better choices might.

  • Pair it with protein. Aiming for ~25–35 g of protein at meals steadies appetite and protects lean mass as you lose fat.
  • Swap, don’t stack. Let the drink replace a sweetened beverage rather than adding on top of your usual routine.
  • Front-load plants. Start lunch or dinner with a generous salad dressed in a light ACV vinaigrette.
  • Walk after meals. Even a short stroll can steady post-meal blood sugar and clear your head.
  • Guard your bedtime. Hunger and cravings improve when sleep is consistent.

If you like myth-free fundamentals, the Mayo Clinic’s weight-loss basics is calm and useful (weight-loss basics). And for perspective from dietitians who see the ACV trend often, EatingWell recently summarized their take: interesting, but far from magical (dietitians’ view at EatingWell).

Also Read: How Does a High Protein, High Fiber Diet Support Weight Loss?


A seven-day starter plan using apple cider vinegar and lemon juice for weight loss

Trying something new is easier with a script. Use this as a soft landing and adjust freely.

Days 1–2
Stir 1 teaspoon ACV into 300 ml water. Add a little lemon. Drink with lunch. Rinse your mouth after.

Days 3–4
Increase to 2 teaspoons if you feel fine. Keep the same dilution. Stay with meals so your stomach has company.

Days 5–7
Try 1 tablespoon once per day, or split across two smaller servings. Keep your daily total within 1–2 tablespoons. If you notice throat irritation, reflux, or tooth sensitivity, switch to food-first uses and reassess later.

Alongside the drink, build a plate you enjoy: a protein you actually like, plenty of vegetables, and a starch that suits the day. If you need citrus refreshers between meals, cold lemon water is a bright companion to keep you sipping without added sugar (cold lemon water ideas).


What results feel like with apple cider vinegar and lemon juice for weight loss

Outcomes vary—and that’s completely normal. One person feels fewer afternoon cravings. Another feels no change. Someone else decides the drink isn’t for them and keeps vinegar strictly in dressings. None of these experiences are wrong; they simply reflect biology and preference.

If you enjoy the ritual and it helps you replace a sugary beverage, you may notice slow, steady benefits. If you dislike it, you won’t miss anything by skipping. A bright salad often delivers the same nudge with fewer dental worries. For a realistic, dietitian-led take, EatingWell sums it up neatly: evidence is limited; any help is likely small; food-first habits do the heavy lifting (dietitians’ view). Meanwhile, Health.com’s recent explainer lands in the same place, with a simple reminder to dilute and keep expectations modest (Health.com explainer).

Also Read: Guide to Body Fat Percentage


A kind closing thought on apple cider vinegar and lemon juice for weight loss

Choose the version of this habit that fits your life. If you enjoy the taste, keep it well diluted and pair it with meals. If you prefer food-first, whisk a quick vinaigrette and enjoy a generous salad. Both paths can support a calmer appetite and better choices—the quiet way real change happens. If questions about safety linger, the Verywell Health side-effects overview is clear and practical, and the Harvard Health pieces add helpful context without sensationalism (Verywell Health side-effects; Harvard Health overview).

Finally, a quick note to keep you safe: because vinegar can interact with certain conditions and medications, and because tolerance varies, it’s wise to speak with your clinician if you have diabetes (especially with gastroparesis), kidney disease, or chronic reflux, or if you take insulin, digoxin, or particular diuretics. A short conversation now is worth more than a long detour later.

FAQs

1. Can I mix lemon juice with apple cider vinegar?

First, yes—you can mix them. Apple cider vinegar and lemon juice for weight loss is mostly about taste and a simple ritual; the combo can make water more appealing while you aim for balanced meals and steady movement.

2. Does apple cider vinegar and lemon juice in the morning work better?

Next, timing isn’t magic. Morning feels motivating for many, yet the gentle benefits are similar whether you drink it with breakfast, lunch, or another meal you’ll remember.

3. Should I drink it on an empty stomach?

Also, not everyone tolerates acid well on an empty stomach. Pairing the drink with food often feels easier on the throat and may reduce reflux or queasiness.

4. How much should I drink daily?

Meanwhile, start small—1–2 teaspoons of apple cider vinegar in 250–300 ml water—with a squeeze of lemon if you like; if it sits well, you can work up to 1 tablespoon per serving and keep your daily total near 1–2 tablespoons.

5. Is apple cider vinegar and lemon juice good for weight loss?

Still, consider expectations. Apple cider vinegar and lemon juice for weight loss may help you feel a little fuller and swap out sugary drinks, yet the real progress comes from your overall eating pattern, steps, and sleep.

6. What are the benefits and risks?

That said, potential upsides include a more satisfying beverage habit and, for some, steadier appetite; possible downsides include enamel wear, throat irritation, delayed stomach emptying, and interactions if you have certain conditions or take specific medications.

7. Is there a simple recipe I can follow?

However, keep it basic: 1–2 teaspoons ACV + 250–300 ml water + 1–2 teaspoons lemon juice; sip through a straw and rinse your mouth with plain water afterward; adjust tartness to taste.

8. Can I add honey or ginger?

Moreover, tiny tweaks help adherence—½ teaspoon honey softens sharpness (remember the calories), while a slice of fresh ginger adds warmth without much energy.

9. Is warm water better than cold?

Additionally, temperature is personal. Warm water can feel soothing, cold water can feel refreshing; choose whichever helps you repeat the habit comfortably.

10. Is apple cider vinegar better than lemon juice alone?

On balance, vinegar has the stronger tradition of modest effects; lemon mainly brightens flavor and supports hydration, which can indirectly help you stick to your plan.

11. How long before I notice changes?

Practically speaking, give any routine a few weeks while you also stack fundamentals—protein-forward meals, vegetables, walking—so any small nudge from the drink has room to matter.

12. Who should avoid this drink?

Generally, skip or speak with your clinician first if you have diabetes with gastroparesis, chronic reflux or ulcers, kidney issues, low potassium history, or if you take insulin, digoxin, or certain diuretics.

13. Can I use apple cider vinegar and lemon juice for weight loss at night?

Typically, evenings are fine if you tolerate acid well; if nighttime triggers reflux, place the drink earlier in the day or use vinegar in a salad dressing instead.

14. Does it target belly fat?

Ultimately, no single drink targets fat from one area. Apple cider vinegar and lemon juice for weight loss may support better choices, but body fat reduces overall when your daily pattern creates a gentle calorie deficit.

Posted on 2 Comments

Benefits of Drinking Warm Lemon Water Every Morning

Infographic on warm lemon water in the morning—benefits, safe recipe, enamel tips, myth vs facts—MasalaMonk.com footer.

Before messages and meetings, before the day picks up speed, there’s a small decision that can soften the edges: a warm mug, a squeeze of lemon, and a quiet minute that belongs only to you. Warm lemon water in the morning won’t transform life in a single sip—and thankfully it doesn’t pretend to. What it offers is gentler: an easy way to hydrate first, a clean citrus lift, and a calmer shape to your morning. That little bit of steadiness is often what sets the tone for better choices through the next twelve hours.

This isn’t a sales pitch for miracles. It’s a simple ritual explained plainly: what helps, what doesn’t, how to protect your teeth, when to adjust for your body, and how to make it a habit that lasts.

Why warm lemon water in the morning helps

You actually drink it

Most people wake slightly dehydrated. A warm, lightly flavored drink is simply easier to finish than a tall glass of cold water; that first 200–250 ml goes down without much effort, and as a result the morning feels less jagged. If this mug nudges you to skip a sweetened beverage, that’s a quiet win for energy and long-term health. If you like receipts, the public-health team at Harvard has a clear, readable overview of sugary drinks and risk that explains why replacing sugar-sweetened drinks is one of the most useful everyday changes.

Of course, routines shift with seasons. On hot afternoons, a cooler glass may feel more inviting. When the weather turns that way, it’s easy to slide toward your own take on cold citrus hydration—our deep dive on benefits of cold lemon water compares the experiences without the hype.

A modest vitamin C nudge

Half a lemon won’t replace a bowl of fruit, yet it still adds a small but useful vitamin C top-up—especially on coffee-and-toast mornings. If you’re the kind of reader who enjoys the details, you can check citrus values in USDA FoodData Central and skim the NIH vitamin C fact sheet for sensible ranges. If you’d rather stay in our kitchen, stroll through lemon varieties around the world and their health benefits to see how flavor and nutrition dance across different cultivars.

For some, a citrate assist

If you’ve dealt with certain calcium kidney stones, citrus citrate can help—when overall hydration is on point. It’s not a cure; it’s an assist. The National Kidney Foundation notes that lemon juice diluted in water can raise urinary citrate (be mindful of sugar if you’re turning it into lemonade). Prefer to compare citrus side by side? Our guide to lemon vs. lime water offers a simple, practical look.

What the ritual doesn’t do (and what does)

Let’s be honest. Lemon water doesn’t detox your liver, alkalize your blood, or burn belly fat. Your body handles detox, your blood’s pH isn’t pushed around by a wedge of fruit, and fat loss comes from overall balance—not a single ingredient. Still, warm lemon water in the morning can influence the day in a way that matters: hydrate early, and breakfast tends to calm down; skip one sugary drink, and the afternoon is steadier. If you’re exploring weight topics with nuance, lemon and black pepper for weight loss frames lemon as a helpful nudge rather than a magic trick.

Warm vs. hot vs. cold Lemon Water in the Morning

Warm usually wins at sunrise: soothing, easy on an empty stomach, and inviting enough that you finish the mug. Very hot water doesn’t add benefits and can irritate. Cold is lovely later in the day—especially after a walk or when the weather leans tropical. None of this needs to become a doctrine. The best temperature is the one you’ll actually drink, consistently.

When to drink it

Morning works because it stacks neatly with things you already do—open the curtains, put on the kettle, squeeze lemon, sip. If evenings are gentler in your world, shift the ritual there and keep everything else the same. The effect comes from showing up for the habit, not from the clock.

Protecting your teeth while you sip

Lemon is acidic. You don’t have to avoid it; you just have to be kind to enamel.

  • Use warm, not boiling water—comfortable to sip.
  • Sip rather than swish; if you like to linger over your mug, a straw helps limit contact.
  • Rinse with plain water right after.
  • Wait 30–60 minutes before brushing so saliva can rebalance and the enamel surface can re-harden. Mayo Clinic explains the timing clearly; for a friendly recap, Verywell Health’s explainer says the same in gentler language.

Prefer the reminder in our own voice? The pros-and-cons note in lemon water in morning: 5 benefits and drawbacks keeps the guidance practical without the scare tactics.

The recipe (and variations that respect the ritual)

The simple version (two minutes)

  1. Warm 200–250 ml water until it’s comfortable to sip.
  2. Squeeze ½ fresh lemon (or 1–2 tablespoons bottled juice).
  3. Stir, sip, and rinse with plain water afterward.

That’s enough. The ritual works because it’s simple and repeatable. But on days when you want a little more character, small additions help without turning your kitchen into a lab.

Small upgrades, still simple

  • Ginger: a thin slice brings subtle heat and clears the morning cobwebs.
  • Cinnamon: a pinch softens the edges and suits cooler weather.
  • Mint: a few leaves brighten the cup without adding acidity.
  • Cucumber: when afternoons run hot, keep the hydration theme rolling with cucumber, lemon, and ginger water or dip into cooling cucumber electrolyte quenchers to make “drink more water” feel like pleasure instead of duty.

Honey, used thoughtfully

If a touch of sweetness keeps the habit alive, add ½–1 teaspoon honey. It softens the citrus, which, in turn, makes the ritual easier to keep. It does add calories and the drink is still acidic, so keep the enamel tips. Curious about choosing better honey—raw or filtered, floral varietals and all the rest? Wander through Raw Honey: The Sweet Superfood, or pair the conversation with a measured look at ginger and honey for weight.

Making the habit of Warm Lemon Water in the Morning stick

Habits don’t survive on motivation; they survive on logistics. Reduce friction until the ritual is almost automatic.

  • Pair it with something you already do: kettle on → squeeze lemon → two easy stretches → coffee.
  • Keep a small “lemon station”—knife, board, mug—in one dependable spot.
  • If mornings are chaotic, pre-cut wedges at night.
  • Use the kettle’s timer if it has one and let the machine do the reminding.
  • Track a short two-week streak; once it feels natural, drop the tracker and trust the routine.

The next steps matter too. After warm lemon water in the morning, breakfast tends to tilt toward balance: yogurt and fruit instead of a hurried pastry; an omelet instead of a sugar crash. For practical ideas you can use tomorrow, our quick hydration-forward breakfasts live neatly alongside health benefits of cucumber and lemon water and refreshing lemon cucumber water—ignore the word “detox”; keep the parts that make drinking water easier.

When to soften, switch, or skip

Sensitive stomachs and reflux

Citrus can aggravate symptoms for some people with GERD. That doesn’t automatically rule out the ritual. Try less lemon in more water, sip after a small bite of food, or keep the habit with warm plain water in the morning and enjoy citrus later in the day. The Cleveland Clinic’s GERD diet guide is a straightforward, no-drama reference if you need it.

Also Read: 21 Remedies for Acid Reflux, Heartburn, and GERD: Natural and Ayurvedic Solutions.

Enamel concerns

If enamel is already compromised, keep the practical steps—warm water, brief contact, a rinse after, and a pause before brushing—and keep regular dental check-ins. The short Mayo Clinic piece above is the cleanest summary if anyone in your house likes to know “why” before they change a routine.

Travel days

Rituals wobble when you’re away from your kitchen. A tiny bottle of lemon juice in your bag is a quick fix; if that’s not your style, switch to warm plain water while traveling and return to lemon at home. No guilt necessary; the habit’s shape matters more than its exact ingredients for a week or two.

Small science, plain English

  • Hydration is the clearest benefit. Flavors you enjoy increase intake; better intake supports digestion, cognition, and energy. For context on why swapping out sugary beverages matters, the Harvard sugary-drinks pages make a crisp case without sensationalism.
  • Vitamin C: lemons help, modestly; bigger wins come from the overall pattern—daily fruit and vegetables, not a single mug. Exact values and reasonable limits live in USDA FoodData Central and the NIH fact sheet.
  • Citrate & stones: relevant for a subset of people; hydration is the main lever and lemon can assist. The National Kidney Foundation lays out practical steps without hype.
  • Weight: there’s no fat-burning shortcut in a cup. The value is in replacing a sugary drink and building a low-friction morning that keeps you steady. When you want a grounded follow-up, lemon and black pepper for weight loss keeps expectations realistic.

Putting it together

Begin with warm lemon water in the morning because it’s easy and kind. Protect your teeth with simple steps. Adjust the lemon or the timing if your body asks for it. Keep the ritual because it helps you drink water—and because it says something about how you want the day to feel: less noise, more intention. The benefits aren’t flashy; they accrue in the background while you get on with living.

FAQs about Warm Lemon Water in the Morning

1) What are the benefits of warm lemon water in the morning?

It’s a gentle way to hydrate first thing, which often steadies energy and digestion. Plus, you’ll get a small vitamin C nudge from the lemon. While it won’t “detox” or melt fat, it can help you replace sugary morning drinks—and that shift matters over time.

2) Is warm lemon water better than hot lemon water in the morning?

Yes—generally. Warm is kinder on the throat and teeth, and, importantly, you’re more likely to sip it comfortably and consistently. Meanwhile, very hot water doesn’t increase benefits and can feel harsh.

3) What’s the difference between warm lemon water and hot lemon water benefits?

Practically speaking, the benefits are similar—hydration plus a little vitamin C. However, warm wins for comfort and tooth-friendliness, so it’s usually the better everyday choice.

4) Does adding honey change the benefits of warm lemon water?

Not much nutritionally—honey adds flavor (and a few calories). However, if a touch of honey helps you stick to the habit, that consistency is the real win. Just keep the same enamel-care tips in mind.

5) Can warm lemon water help with weight loss?

Indirectly, yes. Although it doesn’t burn fat, it can replace higher-calorie beverages and set a steadier tone for breakfast choices. Over weeks, that routine can support a healthier overall pattern.

6) Is it good to drink warm lemon water on an empty stomach in the morning?

Usually, yes. Starting the day with a warm, mild drink is comfortable for many people. That said, if you have a sensitive stomach, try less lemon in more water—or sip after a small bite of food.

7) How much lemon should I use for morning warm water with lemon?

A simple, sustainable ratio is ½ fresh lemon (or 1–2 tablespoons juice) in 200–250 ml of warm water. It’s enough for flavor without overwhelming acidity.

8) How hot should the water be—warm, hot, or lukewarm?

Aim for pleasantly warm—comfortable to sip, not steaming. In other words, think “cozy tea” rather than “fresh-off-the-boil.”

9) Are there benefits of drinking warm water and lemon in the morning with honey?

Mainly taste and habit-keeping. Honey can make the flavor softer, which, in turn, makes the routine easier to repeat. nutritionally, the core benefits still come from hydration and the lemon’s citrus notes.

10) What are the early morning lemon water benefits vs. drinking it later?

The main benefits don’t depend on the clock; consistency does. Even so, many people find morning easiest because it stacks neatly with existing routines—and that makes the habit stick.

11) Is warm lemon water safe to drink every day?

For most people, yes. Just be enamel-smart: sip (don’t swish), rinse with plain water afterward, and wait a bit before brushing. If citrus bothers your stomach, dilute it more—or drink it later in the day.

12) Can warm lemon water affect teeth or enamel?

Lemon is acidic, so a little care helps. Therefore, use warm (not hot) water, minimize mouth contact (a straw can help), rinse after, and wait 30–60 minutes before brushing. With those steps, most people do fine.

13) Is there a difference between benefits of warm water with lemon in morning and at night?

Not really; timing is personal. Morning encourages routine and replaces sugary a.m. drinks, while night can be calming. Choose the moment that helps you keep the habit comfortably.

14) Does warm lemon water help with digestion or bloating?

It can, gently. Warm fluids tend to feel soothing, and beginning hydrated often makes the rest of breakfast sit better. However, if you have persistent digestive issues, it’s wise to notice patterns and adjust.

15) What about GERD or acid reflux—should I avoid lemon water in the morning?

Because citrus can trigger symptoms for some, start mild: less juice, more water, and slow sips. Alternatively, keep the ritual with warm plain water and save lemon for later if mornings are sensitive.

16) Are there benefits of hot lemon water in the morning specifically?

Beyond comfort, not especially—“hot” isn’t more effective. In fact, very hot water can feel irritating. Warm remains the sweet spot.

17) Does lukewarm water with lemon in morning work as well?

Absolutely. Lukewarm sits in the same comfort zone as warm—easy to drink, easy to keep. And consistency, again, is the real advantage.

18) Should I drink warm lemon water before or after breakfast?

Either is fine. Before breakfast is popular because it creates a clean, calm start and helps you hydrate early. Still, if after-breakfast feels better for you, stick with that.

19) Can I add ginger, cinnamon, or mint to morning lemon water?

Yes—small add-ins can make the ritual more enjoyable without complicating it. A thin slice of ginger, a pinch of cinnamon, or a few mint leaves keeps the flavor interesting while you keep the habit.

20) How many times should I drink warm lemon water in a day?

Once daily is a simple, sustainable baseline. If you enjoy a second cup later—perhaps without lemon or with a milder squeeze—that’s fine too. As always, let comfort and enamel care guide you.

21) Is there any benefit to warm lemon water with honey at night instead of morning?

It’s mostly about preference. Night can feel soothing and can help you wind down; morning anchors your day. Choose the moment that you’ll actually keep—because the habit you enjoy is the one that lasts.

22) Can warm lemon water help with skin or immunity?

Indirectly. Better hydration and a modest vitamin C bump support overall wellness, which can reflect in skin and seasonal resilience. But, to be clear, the mug is a helper—not a cure-all.

23) Are there benefits of drinking warm lemon water with honey for weight loss?

Only indirectly through habit change and beverage swaps. Honey adds calories, so keep it light; the goal is a routine that nudges you toward steadier choices throughout the day.

24) Any quick tips to make the morning habit stick?

Yes—pair it with something you already do (kettle on, lemon squeezed, two easy stretches, then coffee), keep a small “lemon station” ready, and prep wedges if mornings are rushed. Small frictions removed; habit secured.

Posted on 3 Comments

Guide to Oil Pulling for Dental Health

Smiling South Asian woman in a warm, minimal setting holding two small jars labeled coconut oil and sesame oil; elegant headline “Guide to Oil Pulling for Dental Health” with MasalaMonk.com footer.

Oil pulling is disarmingly simple: swish a spoonful of edible oil around your mouth, then spit and brush. Even so, once you decide to try it, a practical question immediately rises to the top—what’s the best oil for oil pulling? Because this habit touches both Ayurveda and modern dentistry, the most helpful answer balances taste and texture, everyday comfort, and what the current (still modest) evidence actually shows. Consequently, this guide begins with a quick answer you can act on today; then, step by step, it walks through the research, the oils, the routine, and the safety boundaries that keep the practice sensible.


The quick answer (so you can choose and get going)

If you want the best oil for oil pulling, start with coconut oil or sesame (gingelly) oil. These two are most commonly used and the most studied. For a plain-English clinical stance, the American Dental Association sets clear guardrails in ADA MouthHealthy: Oil Pulling—they frame pulling as a possible adjunct, not a replacement for brushing with fluoride, interdental cleaning, and routine dental care. In a similar vein, the Cleveland Clinic’s oil pulling explainer offers a balanced hospital voice: helpful as an add-on, but not a cure-all.

Prefer something ultra-light that never solidifies in winter? In that case, MCT oil can be more comfortable, although direct trial data are sparse. Alternatively, if minimalism matters, olive oil is perfectly edible and easy to swish; however, modern clinical work still leans toward coconut and sesame. We’ll compare all of them in detail shortly; first, a quick look at what the literature actually measured—and what it didn’t—keeps the rest of this discussion honest.


What the research actually measured (in plain English)

Before we compare oils, context matters. Most oil-pulling studies are short-term (days to a few weeks) and small (dozens of participants). Nevertheless, there’s enough to sketch a realistic picture. A practical entry point is the open-access 2022 systematic review and meta-analysis, which pooled available trials and reported beneficial effects on oral bacterial counts and short-term plaque/gingival outcomes compared with controls, while emphasizing that higher-quality, longer studies are still needed.

If you prefer to see a single trial up close, a 2015 preliminary study on coconut oil for plaque-related gingivitis observed reductions in plaque and gingival indices across a few weeks when coconut oil pulling was added to normal hygiene. For perspective against a medical-grade mouthrinse, an experimental comparison with chlorhexidine (abstract) suggested oil pulling may improve short-term gingival metrics, yet chlorhexidine remained stronger for plaque in that model. In short, oil pulling is a gentle complement, not a therapeutic rinse.

With those guardrails in mind—and with the ADA overview and Cleveland Clinic explainer as your reality checks—we can choose an oil that you’ll actually use most mornings.


Oil pulling in Ayurveda (what kavala and gandusha mean)

In classical Ayurveda, oil use in the mouth appears as kavala (swishing) and gandusha (filling the mouth and holding). If you’d like a concise primer that situates oil pulling within that framework without overselling modern medical effects, scan this short review on kavala and gandusha. Today, most people adapt those ideas into a short, morning-friendly ritual that’s easy to keep. If you enjoy traditional approaches, you may also like this roundup of natural spices for dental health for everyday oral wellness context.


Choosing the best oil for oil pulling: comfort first, then evidence

Because oil pulling takes five to fifteen minutes, comfort isn’t a luxury—it’s everything. Consequently, the best oil for oil pulling is the one you’ll actually swish consistently. Here’s how the main options compare—by feel, flavor, and facts.

Coconut oil — mild, familiar, beginner-friendly

Why people choose it. Coconut oil tastes mild, melts quickly in the mouth, and leaves a clean finish. Moreover, if you’re new to oil pulling, its cream-to-liquid transition feels reassuringly smooth.

What studies suggest. The 2015 trial above reported short-term reductions in plaque and gingival indices as an add-on; pooled analyses point in the same direction: modest improvements over short windows when pulling complements brushing and interdental cleaning.

Practical notes. Coconut oil solidifies below ~24 °C. Therefore, on cooler mornings, warm your spoon or the jar briefly so the first minute of swishing feels comfortable. If you also cook with it and want a kitchen-side refresher, skim cooking with coconut oil FAQs for everyday use tips.

Sesame (gingelly) oil — classic, light, and always liquid

Why people choose it. Sesame is the traditional Ayurvedic choice for kavala/gandusha. Because it stays liquid even when your kitchen is chilly, it often feels “thinner” and easier to keep moving—especially in winter.

What the evidence suggests. Sesame appears across datasets summarized in the 2022 meta-analysis. Furthermore, a small but informative clinical paper found sesame performed similarly to chlorhexidine for short-term malodor control; see this 2014 trial on oral malodor for design details. In practice, many people who dislike coconut’s thickness settle on sesame and never look back.

Practical tip. Choose regular (untoasted) sesame. Toasted is culinary—too aromatic for swishing. For nutrition background that explains sesame’s popularity beyond oral care, see sesame seeds: health benefits and usage; if men’s health is on your radar, this quick read on top benefits of sesame seeds is a useful overview.

Sunflower oil — neutral and pantry-friendly

Why people choose it. It’s already on the shelf and tastes neutral. Consequently, sunflower is a reasonable fallback if coconut or sesame don’t appeal.

What the evidence suggests. Sunflower appears in older Indian clinical discussions and in newer comparative work that included multiple oils. For example, a triple-blind trial reported that coconut, sesame, and sunflower all improved gingival health, with coconut slightly ahead overall; you can read the design and outcomes in this 2024 randomized clinical trial (PubMed record also available). Sunflower therefore sits in the “edible and acceptable” column—less studied recently than coconut/sesame, but still reasonable if it keeps you consistent. If you’re browsing options, this guide to popular edible oils in India is a handy primer.

MCT oil — feather-light, never solidifies

Why people choose it. MCT oil feels feather-light and never turns solid, which can be the difference between “I tried once” and “I’ve been doing this for months.” If you gag with thicker oils, MCT often solves the problem.

What the evidence suggests. Direct randomized trials on MCT-only pulling are scarce. Even so, adherence often drives outcomes more than theoretical advantages; therefore, if MCT is the only oil you’ll actually use, it wins on practicality. For broader context on pooled oil-pulling data, revisit the 2022 meta-analysis.

Olive oil — accessible, pleasantly fruity for some

Why people choose it. It’s edible, familiar, and already in your kitchen. If you enjoy the flavor, you’ll likely swish longer and more happily.

What the evidence suggests. Modern pulling trials focus less on olive oil than on coconut and sesame. For a discussion that touches gingival contexts while acknowledging limited pulling-specific data, see this 2023 article on extra-virgin olive oil and gingivitis. Consequently, olive sits in the “personal preference” bucket rather than the “best-studied” one.

Bottom line. If you want a practical answer to which oil is best for oil pulling, choose coconut or sesame first for the strongest (still modest) research signal; then switch to MCT or olive if comfort or taste gets in the way. As the ADA overview and the Cleveland Clinic page both stress, oil pulling is an add-on, not a standalone strategy.

For a broader culinary context while you’re in the pantry, see this comparison of coconut oil vs ghee in Indian cooking; it won’t change your pulling choice, but it helps with stocking an oil you’ll actually use.


Clear answers to common questions (the things people actually search)

Can you use “vegetable oil” for oil pulling?

If “vegetable oil” means an edible oil like sunflower, sesame, or olive, then yes—you can swish with it. That said, modern research skews toward coconut and sesame; therefore, if you’re seeking the best oil for oil pulling with a little evidence at its back, choose one of those two. Nevertheless, if pantry convenience is what keeps you consistent, a neutral sunflower or olive oil is perfectly acceptable.

Oil pulling with sunflower oil

Sunflower oil is neutral and pantry-friendly. Although it’s less prominent in recent trials than coconut or sesame, it appears in comparative work (see the 2024 triple-blind RCT), and many people quietly prefer it because it’s bland and comfortable.

Is MCT oil good for oil pulling?

Yes—for comfort and adherence. MCT stays liquid even in winter and feels feather-light, which is exactly what some people need to avoid gagging. However, direct randomized clinical data on MCT for pulling are scarce. In practice, that’s fine: choose MCT if it keeps you consistent, then keep the fundamentals (fluoride brushing and interdental cleaning) intact.

What about olive oil for dental pulling?

Olive oil is edible and, for some, pleasantly fruity. Because comfort drives consistency, olive oil can be a sensible choice. However, as discussed in the 2023 olive-oil article, pulling-specific trials are limited; most controlled work focuses on coconut/sesame. If olive keeps you swishing without dread, it’s a reasonable fit.

Castor oil for oil pulling (and “how to oil pull with castor oil”)

Short answer: skip castor oil. It has a strong, lingering taste and is a stimulant laxative if swallowed. More importantly, there’s virtually no comparative clinical evidence supporting castor oil for pulling versus coconut or sesame. If someone insists, steer them gently toward edible, better-tolerated options—ideally coconut or sesame. Consistency matters far more than novelty here.

If you’re curious about castor in other contexts, here’s a primer on castor oil uses (beyond the mouth)—but for pulling, stick to edible pantry oils.

Tea tree oil for oil pulling (and other essential oils): safe to add?

Kind but firm: tea tree oil should not be used for oil pulling. It isn’t an edible oil; swallowing tea tree oil can be hazardous. For a clear, consumer-facing safety explainer, read U.S. Poison Control: Tea Tree Oil—Remedy and Poison; for a broader research-oriented overview, see NCCIH: Tea Tree Oil—Usefulness and Safety.

Referring to Posion.org here –  Tea tree oil should not be taken by mouth for any reason, even though some traditional uses include tea tree oil as a mouthwash, treatment for bad breath, and treatment of toothache and mouth ulcers. If you want a minty finish after you spit and rinse, read our post on peppermint oil and dental health—as part of brushing and tongue cleaning, not for pulling.

Toasted vs. regular sesame for oil pulling

Skip toasted sesame oil. It’s intended for culinary flavoring and can contain aroma compounds you don’t want to swish. If you like sesame’s mouthfeel, choose regular (untoasted) sesame/gingelly oil.

Turmeric in the oil for pulling?

You’ll see social posts about turmeric-infused oil or “golden oil.” Realistically, this sits outside what’s been studied for pulling. Turmeric can stain surfaces and has a strong taste; moreover, powdered additives change mouthfeel and can increase gag potential. If you love turmeric, keep it in your cooking; for oil pulling, stick with plain edible oils—ideally coconut or sesame.


What oil pulling can do—and what it can’t

Oil pulling can make your mouth feel cleaner. In short-term studies, it has nudged plaque and gingival scores in a good direction when layered onto brushing and interdental cleaning. However, it cannot replace the basics, and it does not treat infections, cavities, or deep dental problems. If you have pain, swelling, fever, or sensitivity that lingers, book a dental exam rather than swishing harder. The ADA overview is very clear on this, and the Cleveland Clinic piece echoes the point.


Toothache and cavities: quick, honest guidance

If a tooth hurts, oil pulling won’t fix the cause. Toothache usually signals inflammation inside the tooth or around the root; that needs professional care. Pulling can be part of feeling fresher while you wait for your appointment, but please don’t use it to delay treatment. Likewise, oil pulling doesn’t “heal” a cavity. The reliable path to fewer cavities remains the boring one: fluoride toothpaste, interdental cleaning, and regular professional visits (with dietary tweaks if recommended). For short-term comfort ideas while you arrange care, try these home remedies for toothache.


Receding gums and gum disease: clear expectations

Recession means the gum has pulled away and exposed more of the tooth. Oil pulling cannot reverse that. At best, it fits alongside your routine, helping limit soft plaque before you brush. Periodontal disease, by contrast, happens below the gumline, where hardened tartar (calculus) builds up; only professional care removes it. If your gums bleed or feel puffy, pair gentle pulling with fluoride brushing, interdental cleaning, and a periodontal evaluation—then reassess after your cleaning plan.


Bad breath (halitosis): will oil pulling help?

Morning breath is common—your mouth dries overnight and bacteria flourish. Swishing first thing can loosen that film so brushing finishes the job. Small clinical work has suggested short-term improvements in malodor with sesame oil in a limited comparison model. In everyday life, pulling plus tongue cleaning, hydration, and consistent brushing can help noticeably. Additionally, for a simple food-based tip after meals, a pinch of fennel seeds for freshness supports breath while you keep the basics consistent. If halitosis persists, a dentist (and sometimes an ENT) can check for sinus issues, reflux, or other causes.


Oil pulling during pregnancy

If you choose to oil pull during pregnancy, keep it delightfully boring: use edible oils only (coconut or sesame), keep sessions short, and maintain brushing and flossing as usual. Because essential oils are not meant to be swallowed, avoid tea tree oil in the mouth entirely (Poison Control and NCCIH are unequivocal on this). Meanwhile, pregnancy gingivitis deserves professional guidance—if bleeding or tenderness continues despite careful hygiene, book an exam.


How to do oil pulling (a routine you’ll actually keep)

You don’t need a 20-minute marathon. In fact, starting smaller improves your odds of sticking with it. Consequently, treat this like a brief, repeatable ritual—not a chore.

  1. Measure 1 teaspoon to 1 tablespoon of an edible oil—coconut or sesame are great starters.
  2. Swish softly for 3–5 minutes at first, pulling the oil between your teeth. Keep your jaw relaxed and your breathing easy.
  3. Work up to 10–15 minutes if it feels comfortable. There’s no strong evidence that going longer adds meaningful benefit.
  4. Spit in a bin (not the sink—oil can clog pipes), then rinse with water.
  5. Brush with fluoride toothpaste and do your regular routine.

Because habits thrive on convenience, pair oil pulling with something you already do—while the kettle boils, while you check your calendar, or while you tidy the kitchen. In other words, attach the new habit to an existing anchor so there’s less internal debate every morning.


Morning or evening?

Morning feels fresher for many because it tackles the overnight film before breakfast. Even so, evening can be useful—especially if you snack late. Ultimately, the “best” time is the one you’ll keep. Try mornings for a week; then try evenings and go with whichever felt easier.


How much oil? How long?

Start with 1 teaspoon. If that feels comfortable, move toward 1 tablespoon. For duration, begin at 3–5 minutes and climb to 10–15 minutes only if it still feels easy. Consistency beats heroics.


Plumbing and disposal

Spit into tissue or a bin, not the sink. Oils can solidify in pipes and create slow drains. If you do use the sink by mistake, flush with plenty of hot water.


A realistic plan you can keep (and adjust season by season)

Because habits depend on friction, make the first week as easy as possible. First, pick the oil that sounds friendliest today. Next, commit to just three minutes while the kettle boils. Then, if that’s smooth, step up gradually; if it isn’t, step down without guilt. In short, aim for momentum, not perfection.

  • Pick your starter oil. If you like a mild taste and don’t mind melting, choose coconut. If you prefer a light, always-liquid feel, choose sesame. If texture is your sticking point, choose MCT.
  • Begin tiny. Swish 3–5 minutes while you make tea or prep breakfast. Stop there. Consistency beats enthusiasm.
  • Scale gently. If you feel good after a week, nudge toward 10–15 minutes. Conversely, if a longer session makes you want to quit, drop back down.
  • Stack it. Swish while you shower, while you pack a bag, or while you skim emails. Pairing it with an existing routine keeps your brain from negotiating.
  • Keep the fundamentals. Brush with fluoride twice a day, clean between teeth, and book regular checkups. If bleeding or tenderness persists, you need professional care—pulling can’t reach below the gums to remove tartar.

As the Cleveland Clinic explainer frames it, consider oil pulling a small, pleasant add-on—not the star of the show.

And as a small adjunct for freshness between pulls, some readers also like clove for oral health; used thoughtfully, it complements the basics without replacing them.


Myths, hopes, and what to skip (whitening, “detox,” and heroic sessions)

Because social media sometimes promises the moon, a brief reality check helps. Oil pulling may reduce short-term plaque and gingival scores when added to brushing and flossing; it does not whiten enamel the way peroxide-based treatments do, and it does not “detox” your body—your liver and kidneys already handle that job. Meanwhile, heroic 20-minute sessions aren’t necessary. As the research summaries suggest, benefit—when seen—shows up over short windows, and your consistency matters more than your stopwatch.

If you want food-based reading on appearance, this look at strawberries for a whiter smile sets expectations realistically.


Coconut vs sesame vs others: Oil Pulling rundown for Teeth

Coconut oil — Pleasant taste, melts in seconds, and—crucially—sits at the center of modern pulling trials. As the 2015 coconut study shows, you may see improvements in plaque and gingival indices over a few weeks when you add it to regular care.

Sesame (gingelly) oil — Classic Ayurveda pick, always liquid, and widely preferred by people who dislike coconut’s thickness. As summarized in the 2022 meta-analysis, sesame features across the literature and, in practice, keeps many users consistent during cooler months. A 2014 trial also found sesame comparable to chlorhexidine for short-term malodor control.

Sunflower oil — Neutral flavor and very pantry-friendly. While it’s less prominent in recent clinical work, a 2024 triple-blind trial that included it alongside coconut and sesame reported gingival improvements across all three—so sunflower remains a reasonable, comfortable option.

MCT oil — Feather-light and never solidifies. Evidence is thinner than coconut/sesame; however, if MCT oil is the only way you’ll maintain the routine, it wins on adherence alone.

Olive oil — Fruity, familiar, and already in your kitchen. Modern pulling trials are fewer here; treat olive as a comfort-based choice rather than the best-studied one.

Not recommended: Tea tree oil (and, broadly, essential oils) for oil pulling—not edible. As Poison Control explains, accidental ingestion can be dangerous; NCCIH echoes the warning. If you crave “freshness,” finish your routine with brushing and tongue cleaning instead.

For plant-based breath help, see cardamom for oral hygiene as a traditional after-meal tip.


Bringing it all together

If you enjoy the ritual and the way your mouth feels afterward, oil pulling can be a pleasant, low-cost add-on to your oral-care routine. For most people, the best oil for oil pulling balances taste, texture, and the ease of keeping the habit—coconut or sesame align with what’s most studied, while MCT and olive are perfectly reasonable if comfort or flavor keeps you consistent. Keep sessions short, spit responsibly, and always follow with the fundamentals: fluoride toothpaste, interdental cleaning, and regular checkups.

For deeper reading, start with the 2022 open-access meta-analysis (what pooled trials measured), the 2015 coconut trial (a clear example of an adjunct routine), and the chlorhexidine comparison (abstract) (why pulling is a gentle complement rather than a medical-grade rinse). To learn traditional context, skim the kavala/gandusha primer, and for guardrails, keep the ADA overview and the Cleveland Clinic explainer handy.


Reference links (Sources used above in above post)

FAQs

1. What’s the best oil for oil pulling?

For most people, the best oil for oil pulling is coconut oil or sesame (gingelly) oil. Coconut is mild and melts quickly; sesame stays liquid and feels lighter. If texture or taste still gets in the way, MCT or olive oil are reasonable backups—because, ultimately, the best oil is the one you’ll actually use consistently.

2. Can I use vegetable oil for oil pulling?

Yes—if by “vegetable oil” you mean edible oils like sunflower, sesame, or olive. While coconut and sesame are the most studied, a neutral pantry oil can help you build the habit. Even so, start with coconut or sesame if you want the simplest, evidence-leaning choice.

3. Is castor oil good for oil pulling?

Not really. Castor oil has a strong aftertaste and, if swallowed, can act as a stimulant laxative. More importantly, there’s little comparative human data for castor oil versus coconut or sesame. Consequently, if you’re curious, try sesame for a lighter mouthfeel or coconut for familiarity instead. If you’re curious about castor more broadly, here’s castor oil in the belly button—but don’t use castor oil for pulling.

4. Can I add tea tree oil or other essential oils?

No. Essential oils (including tea tree) aren’t meant for swishing or swallowing. Instead, keep the routine simple: use edible oils only, swish gently, spit, rinse, and then brush. If you want a “fresh” finish, let your toothpaste and tongue cleaning handle it. If you want a “fresh” finish, lean on toothpaste and tongue cleaning—or read up on peppermint oil & dental health as a post-brushing note.

5. Olive oil vs MCT oil vs sunflower oil—how do I choose?

Start with comfort. Olive oil tastes familiar and is easy to swish; MCT oil stays liquid and feels feather-light; sunflower oil is neutral and pantry-friendly. However, if you also want the most studied options, coconut and sesame still come first. Therefore, pick based on both comfort and how likely you are to stick with it.

6. How long should I oil pull—and how much oil should I use?

Begin with 1 teaspoon for 3–5 minutes. If that still feels easy after a week, work up to 1 tablespoon for 10–15 minutes. However, longer isn’t necessarily better, and pushing duration makes many people quit. Consistency beats heroics every time.

7. Morning or evening—what’s the best time for oil pulling?

Morning is popular because it loosens the overnight film before brushing. Even so, evenings can work—especially if you snack late. Try mornings for a week, then evenings for a week, and choose the slot that felt easiest to keep. In short, the “best” time is the one you’ll repeat.

8. Will oil pulling help with toothache or cavities?

Oil pulling can make your mouth feel fresher; nevertheless, it doesn’t treat infections, deep decay, or active pain. If you have a toothache, swelling, fever, or lingering sensitivity, you need a dental exam. Meanwhile, to reduce cavity risk long-term, rely on fluoride toothpaste, interdental cleaning, and regular checkups.

9. Can oil pulling fix receding gums or gum disease?

No. Recession means the gum has already pulled back; oil pulling won’t reverse it. Likewise, gum disease involves tartar below the gumline that only professional care can remove. Still, oil pulling may sit comfortably alongside your daily routine to help manage soft plaque before brushing.

10. Does oil pulling whiten teeth?

It may help lift surface film a little, which can make teeth look cleaner; however, it doesn’t bleach enamel like peroxide-based whitening. For visible shade changes, you’ll need whitening methods designed for that purpose. Even then, keep pulling as a gentle add-on if you enjoy it. If you’re curious about foods and appearance, see strawberries for a whiter smile for realistic expectations.

11. Is oil pulling good for bad breath (halitosis)?

Often, yes—especially first thing in the morning. Swishing can reduce that stale, overnight mouthfeel. For the best results, pair pulling with tongue cleaning, hydration, and consistent brushing; after meals, a pinch of fennel seeds for freshness also helps. If breath issues persist despite good hygiene, consider a dental or medical check for sinus, reflux, or other causes.

12. Can I oil pull during pregnancy?

Yes—so long as you keep it simple and safe. Use edible oils only (coconut or sesame), keep sessions short, and then brush and floss as usual. Because essential oils aren’t for swallowing, avoid them. And if your gums bleed or stay tender, schedule a dental evaluation.

13. Should I use toasted sesame oil or regular?

Choose regular (untoasted) sesame. Toasted sesame oil is made for flavoring food and can be overly aromatic in the mouth. Regular sesame (often labeled “gingelly”) is the better option for a light, fluid swish.

14. Can I mix turmeric into the oil?

You can, but it’s not ideal. Turmeric can stain and it changes mouthfeel, which may increase gagging and reduce consistency. Therefore, if you want a routine you’ll actually keep, stick to plain edible oil and keep the rest of your oral care simple.

15. What’s the simplest method to start oil pulling today?

Measure 1 teaspoon of coconut or sesame oil. Swish gently for 3–5 minutes while you make tea or prep breakfast. Spit into tissue (not the sink), rinse with water, and then brush with fluoride. If it felt easy, repeat tomorrow; if it didn’t, try a lighter oil like MCT.

16. How often should I oil pull?

Aim for most days, but don’t chase perfection. Even 3–4 sessions per week can help you build the habit. Later, if it feels effortless, nudge toward daily. Meanwhile, keep the fundamentals—brushing and interdental cleaning—non-negotiable.

17. What about “before and after” photos I see online?

They can be motivating, yet they’re not the whole story. Improvements you can photograph typically come from professional cleaning, consistent plaque control, or whitening protocols. Oil pulling can support freshness, but it shouldn’t be your only strategy.

18. How do I dispose of the oil safely?

Spit into tissue or a bin—not the sink—because oil can clog pipes. If you slip up, flush with plenty of hot water. And, of course, never swallow the used oil.

19. I gag easily—what’s my best oil for oil pulling?

Choose the lightest option you’ll tolerate. MCT oil feels feather-light and never solidifies, while sesame is naturally fluid and less thick than coconut. Start with 1 teaspoon and short sessions; then, if it’s easy, build gradually.

20. How do I keep this habit going long term?

Use a step-ladder plan:

  • Week 1: 1 teaspoon, 3 minutes, three days/week.
  • Week 2: 2 teaspoons, 5–7 minutes, four days/week.
  • Week 3+: 1 tablespoon, 10–15 minutes, most days—only if it still feels effortless.
    If it ever feels like a chore, step down in time or switch oils. Consistency, not intensity, is what pays off.

Posted on 3 Comments

Pumpkin Seed Smoothie for Weight Loss | 5 Healthy Recipes & Benefits

Tall glass of pumpkin seed smoothie surrounded by avocado, banana, spinach, and cinnamon on a rustic table.

There’s something comforting about starting your day with a smoothie. It’s quick, nourishing, and gives you that little “reset” button we often crave in the morning. Now, imagine making that smoothie even more powerful by adding a simple ingredient you probably already have in your kitchen — pumpkin seeds. A pumpkin seed smoothie isn’t just creamy and delicious, it’s also a smart way to sneak in nutrients that support energy, satiety, and even weight loss. Think of it as a small daily ritual that helps keep your cravings in check, your digestion on track, and your body fueled with lasting energy.

Read More: The Benefits of Pumpkin Seeds for Weight Loss and Blood Sugar Control

But don’t just take our word for it — science has a lot to say about these tiny green seeds.


🔬 The Science Behind Pumpkin Seed Smoothies

Pumpkin seeds may be small, but research shows they’re packed with benefits that make them the perfect smoothie booster:

  • Keeps you fuller for longer. Pumpkin seeds are rich in protein, fiber, and healthy fats — the trifecta for curbing cravings and avoiding those mid-morning snack crashes. Studies consistently show that diets high in fiber support long-term weight management by keeping you satisfied without excess calories (Healthline).
  • Balances blood sugar and supports heart health. Thanks to their high magnesium content, pumpkin seeds may help regulate blood sugar and lower blood pressure. In fact, a clinical trial found that adding pumpkin seeds to meals reduced post-meal blood sugar spikes, making them especially useful when blended into a breakfast smoothie (Journal of Nutrition & Food Science, PDF).
  • Packed with micronutrients that support mood and metabolism. Pumpkin seeds deliver magnesium, zinc, antioxidants, and even tryptophan — an amino acid linked to better sleep and mood. That’s why experts often call them a super-seed for whole-body health (Cleveland Clinic, NY Post).
  • Simple but mighty. Even eating just a spoonful of pumpkin seeds daily can improve digestion, immunity, and skin health — according to recent insights on everyday consumption habits (Times of India).

Also Read: Benefits of Nuts and Seeds – Protein-Packed Superfoods


✨ Why This Matters for Your Smoothie

When you blend pumpkin seeds into your smoothie, you’re not just creating a tasty drink — you’re giving your body a nutrient-dense upgrade. The protein and fiber help with weight control, the magnesium supports energy and calm, and the antioxidants keep your health in balance.

So, whether you’re reaching for a smoothie to kickstart your morning, refuel after a workout, or simply curb cravings in a healthy way, the humble pumpkin seed smoothie is a practical, research-backed choice that’s easy to stick with.

5 Easy Pumpkin Seed Smoothie Recipes

Whether you’re new to smoothies or already blending them daily, it’s easy to feel lost in the sea of recipes online. That’s why instead of giving you five random ideas, we’ve carefully selected these recipes to match both what’s trending and what actually helps you in your health journey.

Each smoothie below is designed with a unique purpose — whether it’s detoxing, fueling your workouts, managing sugar, or simply keeping things quick and simple. Here’s why these five recipes made the cut:

  • Green Pumpkin Seed Detox Smoothie → Perfect for mornings when you want something light, fresh, and digestion-friendly. A trending category thanks to “detox” and “green smoothies” being perennial favorites.
  • Pumpkin Spice Protein Smoothie → Because pumpkin spice never goes out of style. This one combines comfort with protein power, making healthy eating feel indulgent.
  • Low-Carb Pumpkin Seed Shake → Tailored for keto and low-carb seekers who often skip smoothies due to high fruit sugar. Creamy, filling, and blood-sugar-friendly.
  • Post-Workout Recovery Smoothie → Designed for fitness lovers. High in protein, potassium, and magnesium to refuel muscles and aid recovery.
  • Minimalist 3-Ingredient Pumpkin Seed Smoothie → Sometimes less is more. This one proves you can make a nourishing smoothie in under 2 minutes with just three simple ingredients.

Together, these recipes cover different lifestyles and goals: weight loss, fitness, energy, comfort, and convenience. Think of this as your “smoothie toolkit” — pick the one that fits your mood or goal each day.

Green Pumpkin Seed Detox Smoothie

If your mornings feel heavy or sluggish, this smoothie is like a reset button in a glass. Fresh cucumber, spinach, and banana meet protein-rich pumpkin seeds for a blend that supports digestion, boosts hydration, and keeps your energy steady without weighing you down.

Ingredients:

  • 2 tbsp pumpkin seeds (soaked overnight for smoother texture & better digestion)
  • 1 cup spinach or kale (fresh or frozen)
  • ½ cucumber, chopped
  • 1 small frozen banana (adds creaminess + sweetness)
  • 1 cup unsweetened almond milk (or other plant milk)
  • 1 tsp honey or maple syrup (optional)
  • Ice cubes as needed
Glass jar of green detox smoothie with spinach, cucumber slices, banana, and pumpkin seeds on a rustic table.
A refreshing green detox smoothie made with spinach, cucumber, banana, pumpkin seeds, and almond milk — packed with fiber and antioxidants to refresh, hydrate, and energize.

Instructions:

  1. Blend soaked pumpkin seeds with almond milk until silky.
  2. Add spinach, cucumber, and banana. Blend until bright green and smooth.
  3. Taste and add honey or maple syrup if you prefer it sweeter.
  4. Adjust thickness with ice cubes or a splash of extra milk.
  5. Pour into a tall glass, top with extra pumpkin seeds, and enjoy fresh.

Nutrition (approx.):
220 kcal | 8g protein | 6g fiber | Rich in magnesium & antioxidants

Pro Tips:

  • Swap spinach for kale if you want a stronger, earthier flavor.
  • Add 1 tbsp fresh lemon juice for extra detox and brightness.
  • Replace banana with frozen mango if you want less sugar and a tangier taste.

👉 For more refreshing blends that cleanse and energize, check out these Turmeric and Moringa Detox Smoothies.


Pumpkin Spice Protein Smoothie

Who says pumpkin spice is only for fall? This smoothie delivers cozy café vibes year-round — with cinnamon, nutmeg, and pumpkin purée — but unlike a latte, it actually keeps you full. With protein powder or Greek yogurt, it’s perfect for weight management while still tasting indulgent.

Ingredients:

  • 2 tbsp pumpkin seeds
  • ½ cup pumpkin purée (unsweetened)
  • 1 frozen banana
  • 1 scoop vanilla protein powder (or ½ cup Greek yogurt)
  • 1 cup oat milk (or milk of choice)
  • ½ tsp cinnamon
  • Pinch of nutmeg & ginger
Creamy pumpkin spice protein smoothie in a mug with cinnamon sticks, banana, and pumpkin seeds beside it.
A comforting pumpkin spice protein smoothie featuring pumpkin purée, banana, cinnamon, protein powder, and pumpkin seeds — 18g protein for flavor and satiety.

Instructions:

  1. Add all ingredients to your blender.
  2. Blend until thick, creamy, and well combined.
  3. Pour into a mug, sprinkle cinnamon on top, and enjoy your “healthy pumpkin spice latte in a glass.”

Nutrition (approx.):
280 kcal | 18g protein | 7g fiber | Antioxidant-rich

Pro Tips:

  • No pumpkin purée? Use steamed sweet potato for a similar taste.
  • Want more protein? Double the seeds or use Greek yogurt and powder.
  • For a dessert-like touch, add ½ tsp vanilla extract.

👉 If cozy, protein-rich flavors are your thing, you’ll also love these Almond & Chia Protein Smoothies, which strike the same balance of indulgence and nourishment.


Low-Carb Pumpkin Seed Shake

If you love smoothies but hate the sugar spike, this shake is your best friend. It’s creamy, filling, and designed with low-carb eaters in mind. Avocado brings healthy fats, chia seeds add fiber, and pumpkin seeds tie it all together with protein.

Ingredients:

  • 3 tbsp pumpkin seeds
  • ½ ripe avocado
  • 1 cup unsweetened almond milk
  • 1 handful spinach (optional, extra greens)
  • 1 tbsp chia seeds
  • Stevia or monk fruit (optional, to taste)
Tall glass of low-carb avocado and chia seed shake topped with pumpkin seeds, with avocado and spinach on the side.
A keto-friendly low-carb shake made with avocado, almond milk, pumpkin seeds, and chia seeds — creamy, filling, and high in fiber.

Instructions:

  1. Blend pumpkin seeds with almond milk until smooth.
  2. Add avocado, spinach, chia, and sweetener.
  3. Blend until thick and creamy.
  4. Adjust sweetness or texture as needed.

Nutrition (approx.):
250 kcal | 10g protein | 8g fiber | Low carb, high healthy fats

Pro Tips:

  • Want it thicker? Add 2–3 ice cubes or use frozen avocado chunks.
  • For a boost, add unsweetened cocoa powder — think “keto chocolate shake.”
  • If you’re not strict keto, a few frozen berries add antioxidants without much sugar.

👉 Looking for more low-carb inspiration? These Macadamia & Flax Keto Smoothies deliver fiber, protein, and creaminess without the sugar crash.


Post-Workout Recovery Smoothie with Pumpkin Seeds

After exercise, your muscles need a mix of protein, carbs, and minerals to recover. This smoothie checks every box: banana restores glycogen, pumpkin seeds deliver protein and magnesium, and cocoa adds antioxidants. It tastes like a chocolate milkshake but works like a recovery drink.

Ingredients:

  • 2 tbsp pumpkin seeds
  • 1 frozen banana
  • 1 scoop whey or plant-based protein powder
  • 1 cup soy milk (or high-protein milk alternative)
  • 1 tsp unsweetened cocoa powder
  • Ice cubes as needed
Shaker glass filled with chocolate protein smoothie on a rustic table with banana, cocoa, and pumpkin seeds.
A post-workout recovery smoothie blended with protein powder, cocoa, banana, and pumpkin seeds — 22g protein to help muscles recover and rebuild.

Instructions:

  1. Combine all ingredients in a blender.
  2. Blend until creamy and lump-free.
  3. Pour into a tall glass, sprinkle cocoa on top, and refuel.

Nutrition (approx.):
320 kcal | 22g protein | 8g fiber | Excellent for muscle repair

Pro Tips:

  • Swap banana for frozen pineapple if you prefer a tropical post-workout vibe.
  • Use chocolate protein powder instead of vanilla for double cocoa goodness.
  • Add a pinch of sea salt to replenish electrolytes naturally.

👉 For more recovery-friendly snack options with a protein edge, explore these Healthy Oat Protein Bars – 5 Easy No Sugar Recipes for Snacks.


Minimalist 3-Ingredient Smoothie with Pumpkin Seeds

Sometimes, less is more. This smoothie is proof that you don’t need a long ingredient list for something tasty and nourishing. With just three ingredients, it’s quick enough for busy mornings or a mid-day snack that doesn’t derail your goals.

Ingredients:

  • 3 tbsp pumpkin seeds
  • 1 cup almond milk
  • 1 frozen banana
Minimalist banana and almond milk smoothie in a tall glass with a banana and almond milk jug beside it.
A simple 3-ingredient smoothie with banana, almond milk, and pumpkin seeds — quick, nourishing, and easy to prepare at home.

Instructions:

  1. Toss all ingredients into your blender.
  2. Blend until smooth and creamy.
  3. Pour, sip, and enjoy — ready in under 2 minutes.

Nutrition (approx.):
210 kcal | 7g protein | 4g fiber | Simple, quick, satisfying

Pro Tips:

  • Out of banana? Use ½ cup frozen mango for a tangier flavor.
  • Add 1 tsp honey or dates if you like it sweeter.
  • For extra creaminess, toss in 1 tbsp peanut or almond butter.

👉 When you want simple but nourishing, these 10 Creative Chia Pudding Recipes for Every Taste prove that less can indeed be more.

FAQs About Pumpkin Seed Smoothies

Here are the most common questions people ask about pumpkin seeds in smoothies. Each one is answered with practical tips, so you know exactly how to make the most of this nutrient-dense ingredient.


1. Can you put pumpkin seeds in a smoothie?

Yes, absolutely! Pumpkin seeds blend well and add creaminess, protein, and healthy fats. For a smoother texture, soak them overnight before blending.


2. Should I soak pumpkin seeds before making a smoothie?

Soaking is optional but recommended. It softens the seeds, makes blending easier, and can improve digestibility by reducing natural compounds called phytates.


3. How many pumpkin seeds should I add to a smoothie?

A good serving is 2–3 tablespoons. This provides about 7–9 grams of protein, healthy fats, and key minerals like magnesium and zinc — without making the smoothie too calorie-heavy.


4. Are pumpkin seed smoothies good for weight loss?

Yes! The protein and fiber in pumpkin seeds help you feel full longer, which curbs cravings. They also contain healthy fats that support metabolism and balanced blood sugar — both important for weight management.


5. What can I mix with pumpkin seeds in a smoothie?

Pumpkin seeds pair well with bananas, spinach, cucumber, pumpkin purée, avocado, oats, protein powder, and even cocoa. For flavor, try cinnamon, nutmeg, or vanilla.


6. Can I use pumpkin seed butter instead of whole seeds?

Definitely. Pumpkin seed butter gives a creamier texture and blends instantly. Just keep in mind it’s more calorie-dense, so use about 1–2 tablespoons per smoothie.


7. Are pumpkin seed smoothies keto-friendly?

They can be. Skip high-sugar fruits like bananas and use avocado, spinach, almond milk, and a low-carb sweetener instead. Our Low-Carb Pumpkin Seed Shake is a perfect example.


8. Do pumpkin seeds make smoothies taste bitter?

Not if balanced well. Raw seeds can have a slightly earthy flavor, but blending them with fruit, spices, or cocoa masks bitterness. Toasted seeds add a nuttier, richer taste.


9. When is the best time to drink a pumpkin seed smoothie?

  • Morning: for steady energy and satiety.
  • Post-workout: for muscle recovery (add protein powder).
  • Evening snack: to curb cravings with healthy fats and tryptophan (which supports better sleep).

10. Can I drink a pumpkin seed smoothie every day?

Yes! A daily smoothie with 2–3 tablespoons of pumpkin seeds is safe and healthy for most people. Just be mindful of overall calories, especially if your goal is weight loss.


11. Do pumpkin seeds help with digestion?

Yes. They’re high in dietary fiber, which supports gut health and regularity. Pairing them with leafy greens or cucumber in smoothies boosts this effect.


12. Can I use store-bought roasted pumpkin seeds?

Yes, but choose unsalted and unflavored ones. Salted or spiced seeds may alter the taste and nutrition. For the best texture, use raw or soaked seeds.

Final Thoughts

Pumpkin seeds may be small, but when you blend them into a smoothie, they deliver big benefits. From protein and fiber to healthy fats and essential minerals, each sip works to keep you full, energized, and balanced.

What makes them even better is their versatility. With recipes that cover detox mornings, cozy pumpkin spice cravings, low-carb lifestyles, post-workout recovery, and even quick grab-and-go blends, there’s a smoothie for every mood and goal.

At the end of the day, a pumpkin seed smoothie isn’t just about nutrition — it’s about building a simple ritual of self-care. One glass can set the tone for your day, help you stay on track with your goals, and remind you that healthy choices can be both delicious and satisfying.

So grab your blender, try one of these recipes, and see how a handful of pumpkin seeds can transform your smoothie — and maybe even your routine. Cheers to better health, one sip at a time 🥤✨

Posted on 1 Comment

Citrus Zing: 5 Turmeric-Orange Drinks for a Tangy Morning Kick

Turmeric-Orange Drinks

Do you ever wish your morning could start with more energy, clarity, and a touch of sunshine—even before you step out the door? If you’re tired of the same old cup of tea or coffee, you’re in for a treat! We’re sharing five vibrant, nourishing turmeric-orange drinks that will bring a tangy, golden “zing” to your morning routine. Each recipe is loaded with the natural goodness of oranges, the ancient healing of turmeric, and a little Masala Monk magic.


Why Turmeric and Orange? (And Why Now?)

There’s a reason why both turmeric and orange are trending superfoods. Let’s break it down:

  • Turmeric: This golden spice is a staple in Indian kitchens and Ayurvedic medicine. Modern research confirms what our ancestors knew—turmeric’s active ingredient, curcumin, is a powerhouse for fighting inflammation, easing joint pain, and boosting immunity. But curcumin is even more effective when paired with black pepper or a healthy fat (like coconut milk).
    (Looking for more healthy drinks? Dive into our 8 Anti-Inflammatory Drinks for Health & Wellness for a full rundown.)
  • Oranges: Sweet, juicy, and loaded with vitamin C, oranges are nature’s immune booster. They bring brightness, hydration, and a lovely tartness that balances turmeric’s earthiness.

Together, turmeric and orange are more than the sum of their parts. When you start your day with these two, you get a drink that’s refreshing, gently energizing, and truly good for you.


The Real Science: More Than Just Hype

Let’s get real: a lot of health claims online are exaggerated. Here’s what research (and experience) actually supports:

  • Curcumin (in turmeric) has been studied in clinical settings for its anti-inflammatory, joint-soothing, and antioxidant effects. However, absorption is low unless paired with black pepper or healthy fats.
  • Vitamin C (in orange) not only boosts immunity but may help your body use iron, recover faster, and fight oxidative stress.
  • Gut support: Both turmeric and ginger (a common addition) can help ease digestion and reduce bloating—a win for busy mornings!

5 Turmeric-Orange Drinks for Your Morning Kick

1. Sunshine Turmeric-Orange Juice

Ingredients:

  • 1 cup fresh orange juice (about 2 oranges)
  • ½ tsp freshly grated turmeric (or ¼ tsp ground turmeric)
  • ½ tsp freshly grated ginger (optional)
  • Pinch of black pepper
  • 1 tsp honey or agave (optional)

How to Make:

  1. In a glass, combine orange juice, turmeric, ginger, and black pepper.
  2. Stir vigorously. Add honey to balance tartness, if desired.
  3. Serve chilled with a slice of orange.

Tip: If you prefer pulp-free, strain before serving.


2. Golden Citrus Smoothie Bowl

Ingredients:

  • 1 cup orange segments (peeled and de-seeded)
  • 1 banana (frozen for creaminess)
  • ½ cup frozen mango or pineapple chunks
  • ¼ tsp ground turmeric
  • ½ cup coconut water or almond milk
  • Toppings: chia seeds, shredded coconut, berries

How to Make:

  1. Blend fruit, turmeric, and coconut water until thick and smooth.
  2. Pour into a bowl; decorate with toppings.
  3. Enjoy with a spoon as a refreshing breakfast.

Tip: Add a scoop of protein powder or nut butter for a more filling option.


3. Turmeric-Orange Iced Latte

Ingredients:

  • ½ cup fresh orange juice
  • 1 cup cold brew coffee or black tea
  • ¼ tsp ground turmeric
  • ½ cup almond or oat milk
  • 1 drop vanilla extract
  • Pinch of black pepper

How to Make:

  1. Mix orange juice, cold brew, turmeric, and vanilla in a shaker or jar.
  2. Add almond milk and black pepper; shake with ice.
  3. Pour into a tall glass and sip slowly.

Tip: Use coconut milk for a richer, creamier twist.

Love spicy teas? See how we pair turmeric with ginger and cinnamon in our Turmeric Ginger Cinnamon Tea for Weight Loss and Well-Being.


4. Spiced Turmeric-Orange Morning Tea

Ingredients:

  • 1 cup water
  • 1 orange (zest and juice)
  • 1 black or green tea bag
  • ¼ tsp ground turmeric
  • 1 cinnamon stick
  • Honey, to taste

How to Make:

  1. Bring water, orange zest, turmeric, and cinnamon to a gentle simmer.
  2. Add the tea bag and steep for 2–3 minutes.
  3. Strain, stir in orange juice and honey, and serve warm.

Tip: Swap in rooibos for a caffeine-free, antioxidant-rich version.

Bonus: Want more on turmeric-powered breakfasts? Our 5 Health-Boosting Turmeric and Moringa Tea Recipes are the perfect next stop!


5. Turmeric-Orange Detox Water

Ingredients:

  • 1 large pitcher water
  • 1 orange, sliced
  • 1 lemon, sliced
  • ½ inch fresh turmeric, sliced (or ½ tsp ground)
  • ½ inch fresh ginger, sliced (optional)
  • Fresh mint leaves

How to Make:

  1. Add all ingredients to a pitcher.
  2. Let infuse in the fridge for at least 2 hours (overnight is best).
  3. Pour over ice for a hydrating, anti-inflammatory sip all day long.

Tip: Great for meal prep—just refill with water as you go!

If you’re all about functional beverages, don’t miss our Cinnamon and Turmeric Twist: DIY Electrolyte Drinks for post-workout hydration!


Practical Tips for Turmeric-Orange Perfection

  • Always add black pepper: Even just a pinch helps your body absorb curcumin from turmeric.
  • Fresh root vs. powder: Fresh turmeric root gives a brighter, slightly floral flavor, while powder is earthier and convenient. Both work.
  • Mind the stains: Turmeric stains easily—use a glass container and wipe up spills promptly.
  • Balance flavors: If the turmeric is too strong, increase citrus or add a splash more honey.

The Real Benefits: What Does the Science Say?

  • Digestive and gut support: Both turmeric and ginger are noted for easing digestion and soothing minor discomforts.
  • Joint and muscle wellness: Regular turmeric intake is associated with reduced inflammation and milder joint pain, especially when combined with black pepper.
  • Immune system boost: Vitamin C, antioxidants, and the synergy of these ingredients help your body fend off illness.
  • Mood and energy: Anecdotally, people report increased morning alertness and lighter moods with these zesty drinks.

Note: While the health benefits of curcumin are well documented in supplement form, the amounts found in daily drinks are modest but can add up over time as part of a balanced diet.


What’s Trending: Market Insights & New Innovations

  • Turmeric-orange blends are now available as ready-to-drink (RTD) beverages in stores, sometimes mixed with ginger, mint, or other functional botanicals.
  • Turmeric coffee (“golden latte”) and wellness shots are trending, often fortified with enhanced curcumin for better absorption.
  • Consumers are moving towards low-sugar, vegan, and preservative-free options—you can easily tailor these recipes at home for your needs.
  • In Asia-Pacific and India, turmeric-based beverage sales are rapidly growing, reflecting a shift towards holistic health.

📝 Loved this post? Here are more Masala Monk guides you’ll love:

Final Thoughts: Start Your Day with Citrus Zing!

Whether you’re looking to boost your immunity, support joint health, or just want a zesty, refreshing way to begin your morning, turmeric-orange drinks deliver flavor and functional benefits in every sip.

Try one (or all) of these recipes, experiment with your own twists, and share your favorite blends with friends and family. Remember, a little golden goodness goes a long way—especially when it tastes this good.

Ready to turn your mornings into a ritual of wellness and zing? Give these turmeric-orange drinks a try, and let the sunshine in!


Do you have a favorite variation or a tip for making turmeric-orange drinks even better? Drop a comment below, or share your recipe on social with the hashtag #CitrusZing!


FAQs: Citrus Zing – Turmeric-Orange Drinks

1. Is it safe to drink turmeric-orange juice every day?
Yes, most people can safely enjoy turmeric-orange drinks daily in moderate amounts. Stick to about ¼–½ teaspoon of turmeric per serving, and consult your doctor if you have health conditions or take medications that interact with turmeric (such as blood thinners).

2. Why do I need to add black pepper to turmeric drinks?
Black pepper contains piperine, which dramatically increases your body’s absorption of curcumin (the active compound in turmeric). Even a small pinch makes a big difference!

3. Can I use ground turmeric instead of fresh root?
Absolutely! Both forms are healthy. Fresh root gives a more vibrant, floral flavor, while ground turmeric is more convenient and easy to store. Adjust the quantity to taste.

4. Will turmeric stain my blender or pitcher?
Turmeric can stain plastic and some countertops. Use glass or stainless steel containers when possible, and wash items soon after use with warm, soapy water.

5. Can I make these drinks in advance and store them?
Yes, most turmeric-orange drinks will keep well in the fridge for 1–2 days. For the freshest taste, stir or shake before serving as the spices may settle.

6. Can I skip the sweetener or make these drinks sugar-free?
Definitely! Most recipes can be made with no sweetener, or you can use stevia, monk fruit, or simply let the orange’s natural sweetness shine.

7. Are turmeric-orange drinks safe for children?
In small amounts, yes. Children over the age of 1 can generally enjoy these drinks, but keep turmeric amounts low (⅛ teaspoon per serving) and skip the black pepper for very young kids.

8. Do these drinks help with weight loss?
Turmeric and citrus can support digestion and metabolism, but there’s no magic bullet. Pair these drinks with a balanced diet and active lifestyle for best results.

9. Can I add other spices or ingredients?
Absolutely! Try ginger, cinnamon, mint, or lime for variety. Coconut water or almond milk also make great bases for smoothies or lattes.

10. What if I don’t have a juicer or blender?
No problem—simply use store-bought pure orange juice, and mix the turmeric and other spices directly in a glass. Use a whisk or shaker for best results.