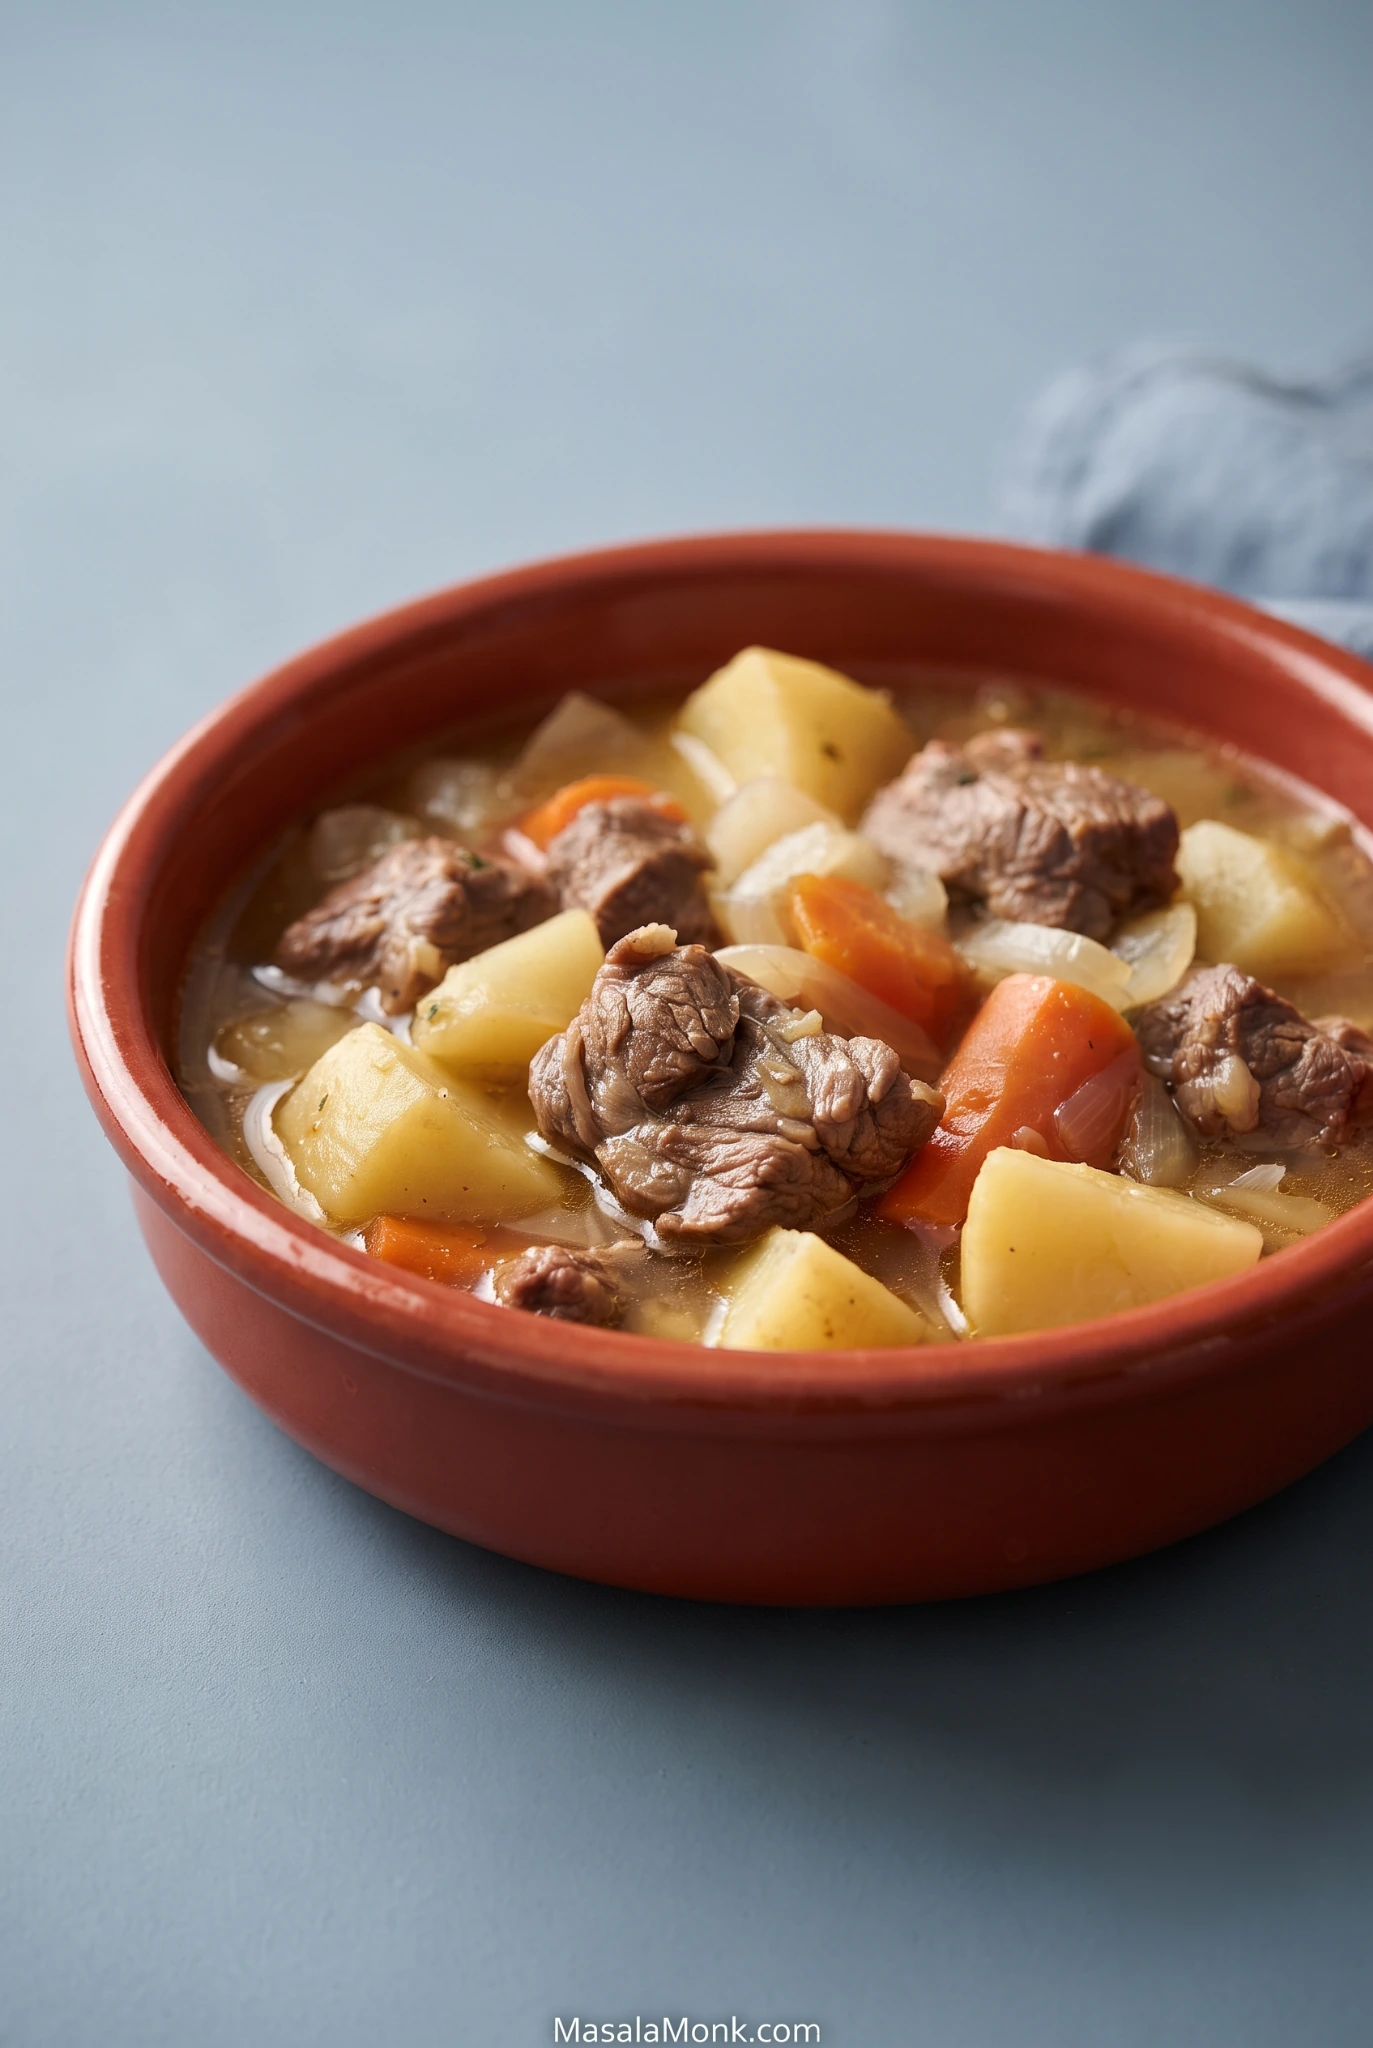
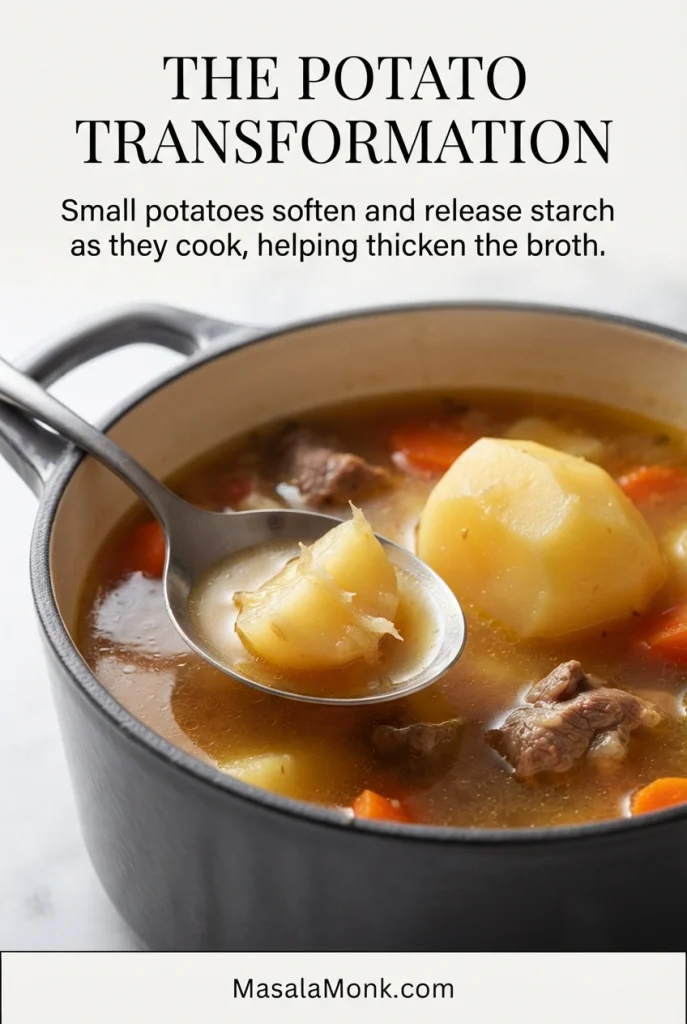
Tender lamb, potatoes that partly melt into the broth, and larger chunks that stay intact are what make a good Irish stew so satisfying. As the pot simmers, the onions soften, the lamb yields and the broth gains body from the potatoes.
This Irish stew recipe follows the familiar lamb-or-mutton, potato-and-onion foundation, with carrots and a little thyme. The key is to let the lamb become tender while giving the vegetables the cooking time they need—not to assume everything will be ready at once. If you’re looking for beef simmered with stout into a darker gravy, our Guinness Beef Stew Recipe takes a different route.
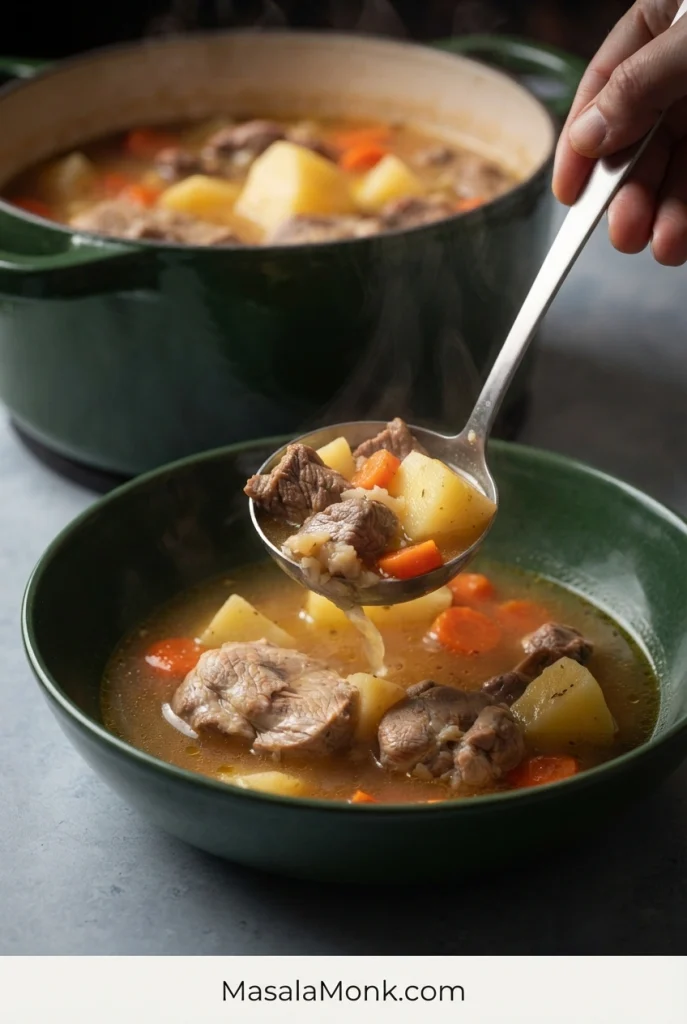
Tender lamb shoulder, soft potatoes and carrots in a savory broth, naturally thickened as some of the potatoes soften into it.
Serves 6
Prep About 25 minutes
Cook About 1¾–2¼ hours
Rest About 10 minutes
Total About 2 hours 20 minutes–2 hours 50 minutes
Method Stovetop
Equipment
A heavy 6-quart / 5.7-liter lidded pot or Dutch oven
Sharp knife and cutting board
Liquid measuring cup or jug
Slotted spoon or tongs
Ingredients
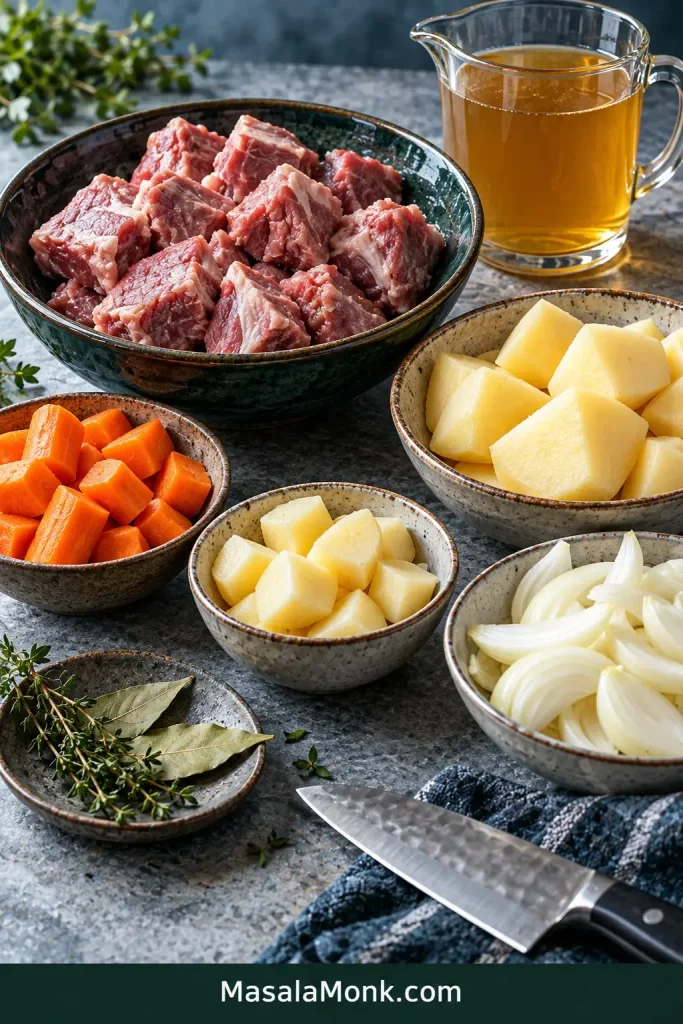
2 lb / 900 g boneless lamb shoulder, trimmed of large, hard pieces of exterior fat and cut into roughly 1½-inch / 4-cm chunks
2.2 lb / 1 kg potatoes, weighed before peeling, preferably floury or starchy potatoes such as Russets; cut into smaller and larger pieces as directed
2 large yellow onions, about 350 g after peeling, thickly sliced
3 medium carrots, about 250 g after trimming, cut into roughly 1-inch / 2.5-cm pieces
2 cups plus 2 tablespoons / 500 ml unsalted or low-sodium chicken or lamb stock
1½ cups / 350 ml water, plus a little hot water if needed
2 bay leaves
1 teaspoon dried thyme or 4–5 fresh thyme sprigs
1 teaspoon fine salt, about 5 g, divided, plus more to taste
Freshly ground black pepper, ½ teaspoon, plus more to taste
Chopped flat-leaf parsley, optional, for serving
Because this Irish stew uses a short ingredient list, the choices matter: lamb shoulder handles the long simmer, while starchy potatoes help shape the broth as they cook.
Instructions
Build the Stew
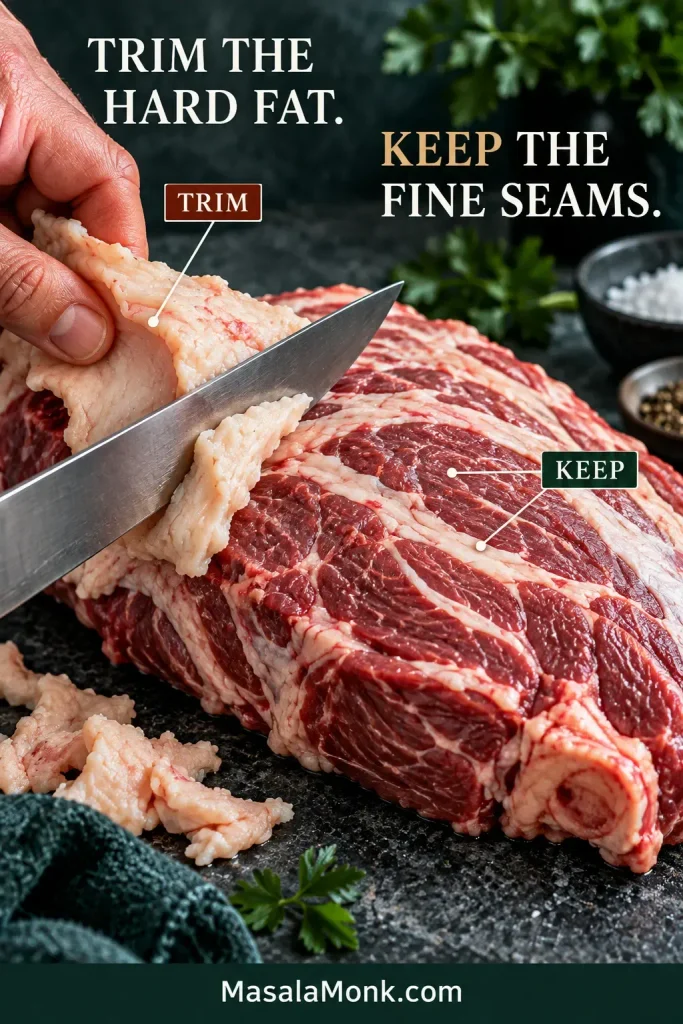
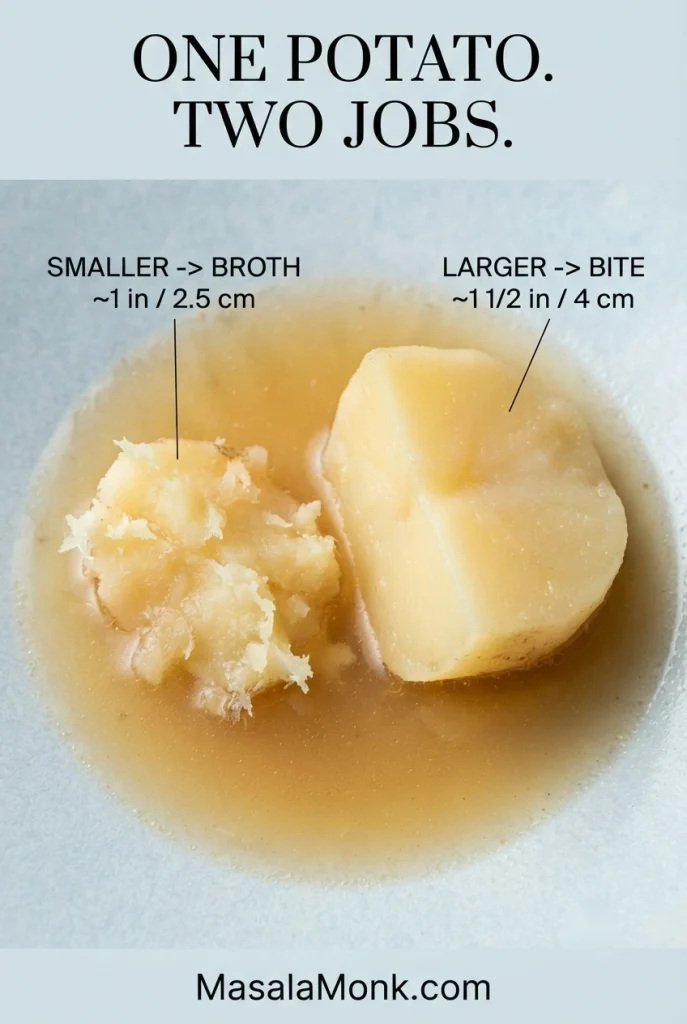
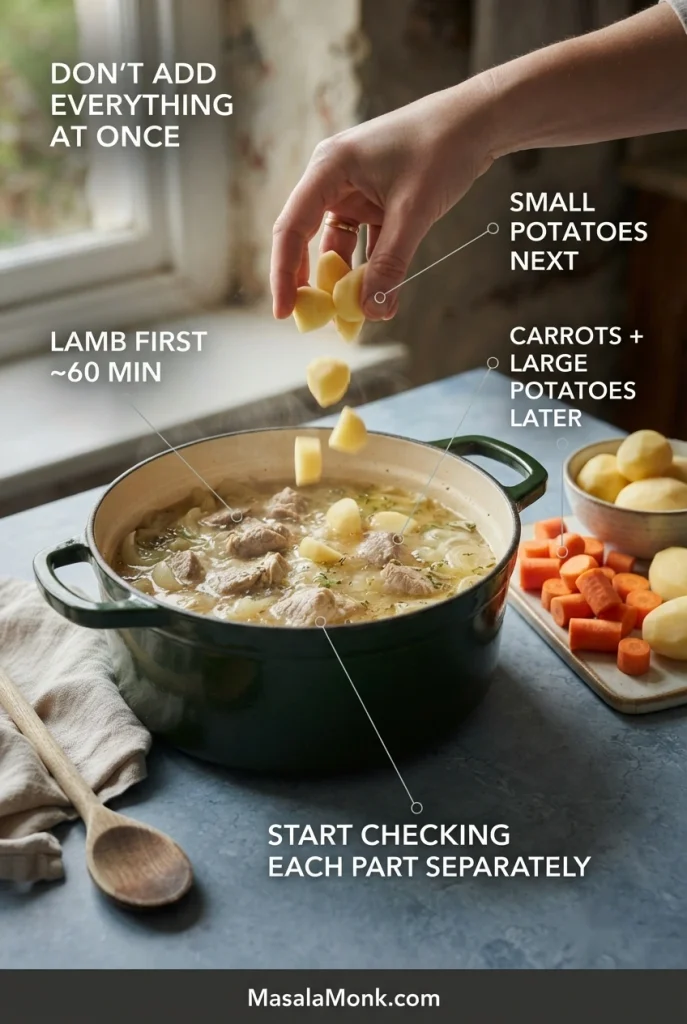
Prepare the lamb and potatoes. Trim away large, hard pieces of exterior fat, leaving the finer seams running through the shoulder. Cut the lamb into roughly 1½-inch / 4-cm chunks and season with ½ teaspoon of the measured salt and all the black pepper. Peel the potatoes. Cut roughly one-quarter into 1-inch / 2.5-cm pieces and the rest into larger 1½-inch / 4-cm chunks.
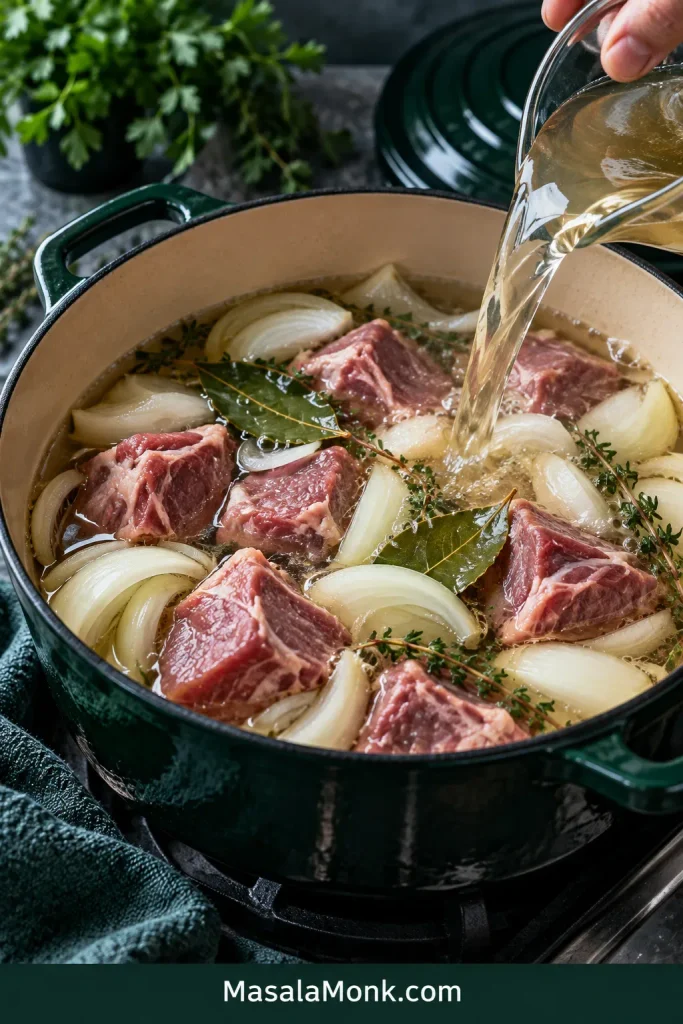
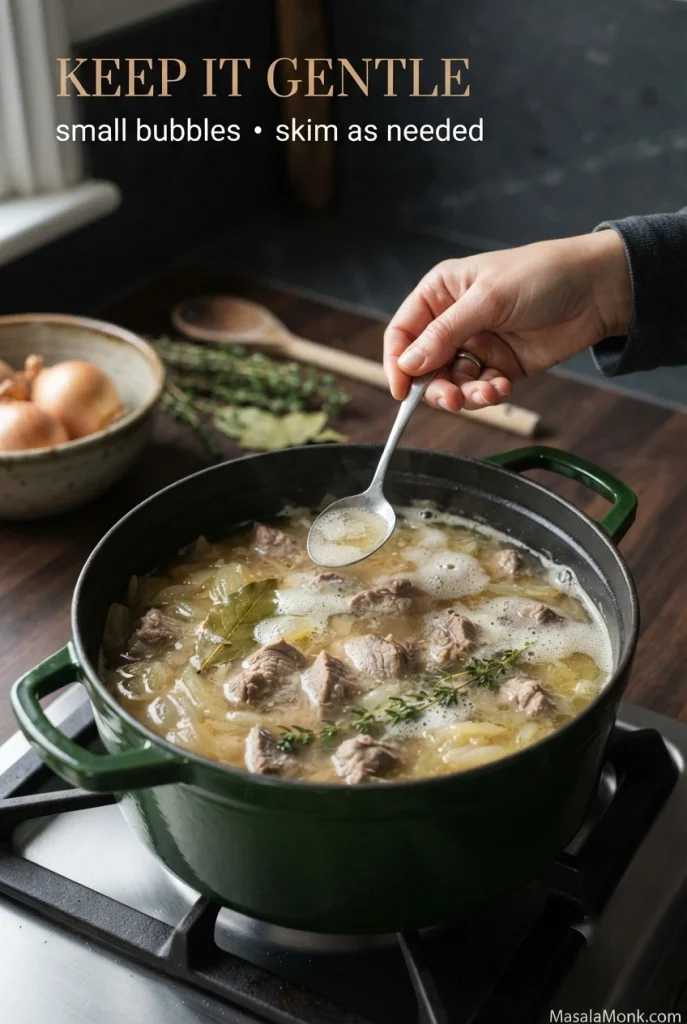
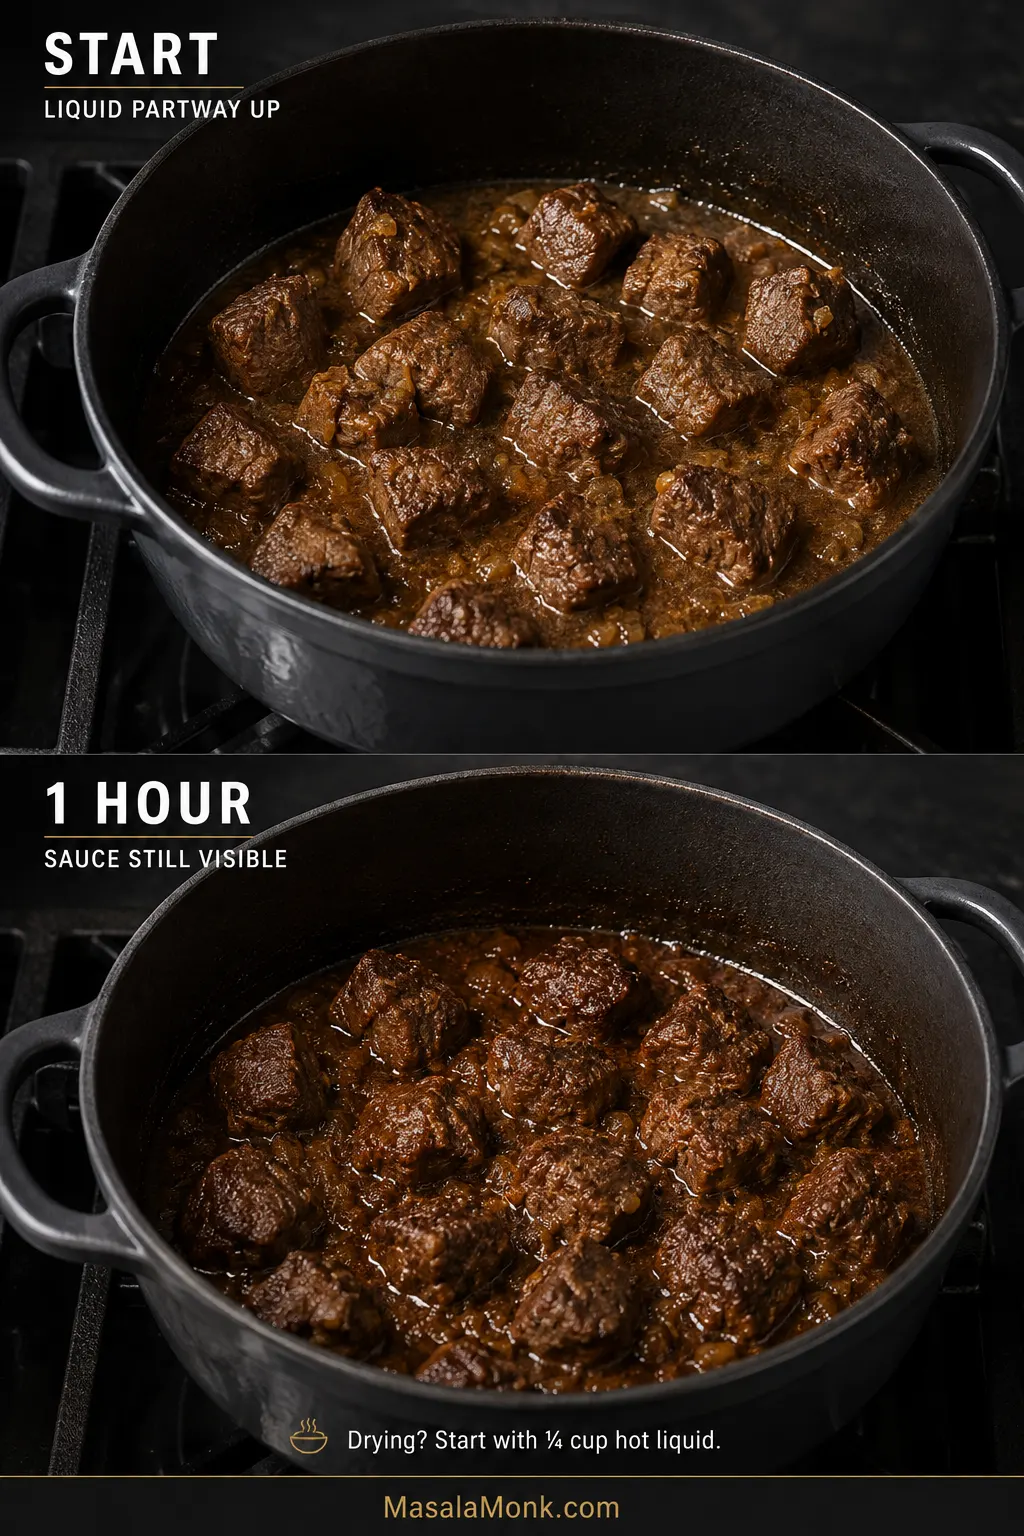
Start the stew. Put the lamb, onions, stock, water, bay leaves, thyme and remaining ½ teaspoon of salt into the pot. The onions go in from the start so they have time to soften into the stew. Bring just to a boil, then lower the heat until only small bubbles break the surface. Partially cover the pot.
This early pot is supposed to look loose. The smaller potatoes have not yet released their starch, so the broth will gain more body later in the cooking.
Give the lamb a head start. Simmer gently for about 60 minutes, skimming away any heavy foam or large pools of fat as they rise to the surface. Don’t worry if the lamb is still firm; it has more cooking ahead.
Add the smaller potatoes. Stir them in and simmer for 15–20 minutes. These pieces are meant to become very soft, and some may begin breaking apart into the broth.
Finish and Check the Stew
Add the carrots and remaining potatoes. Stir them in gently and simmer, partially covered, for about 25 minutes, then begin checking. Give them another 5–15 minutes as needed. If the liquid drops too far while the lamb is still firm, add a little hot water.
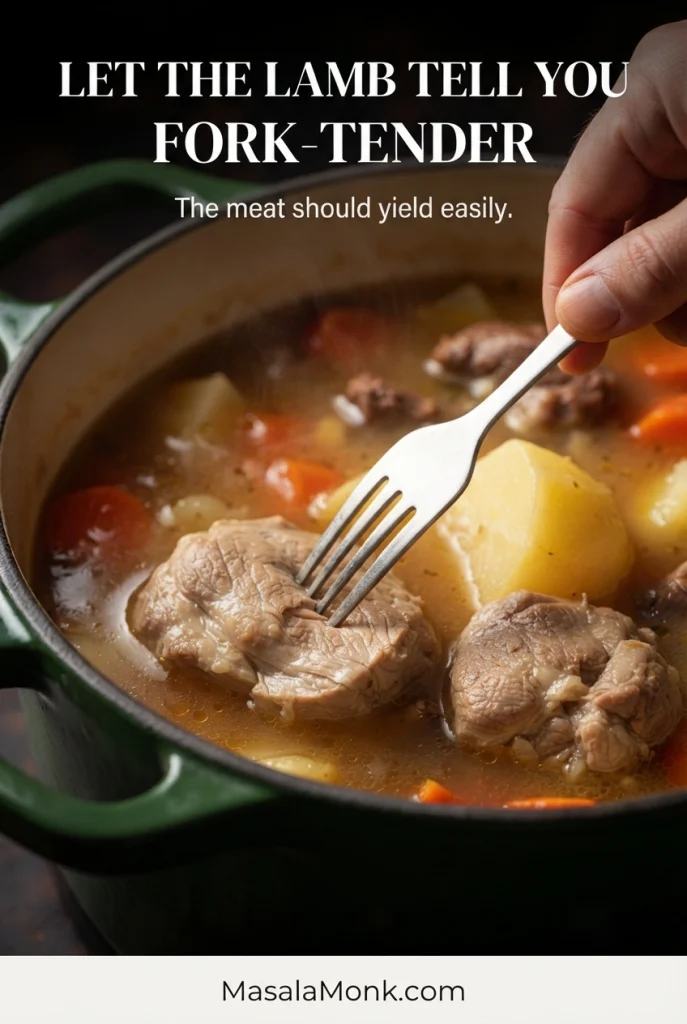
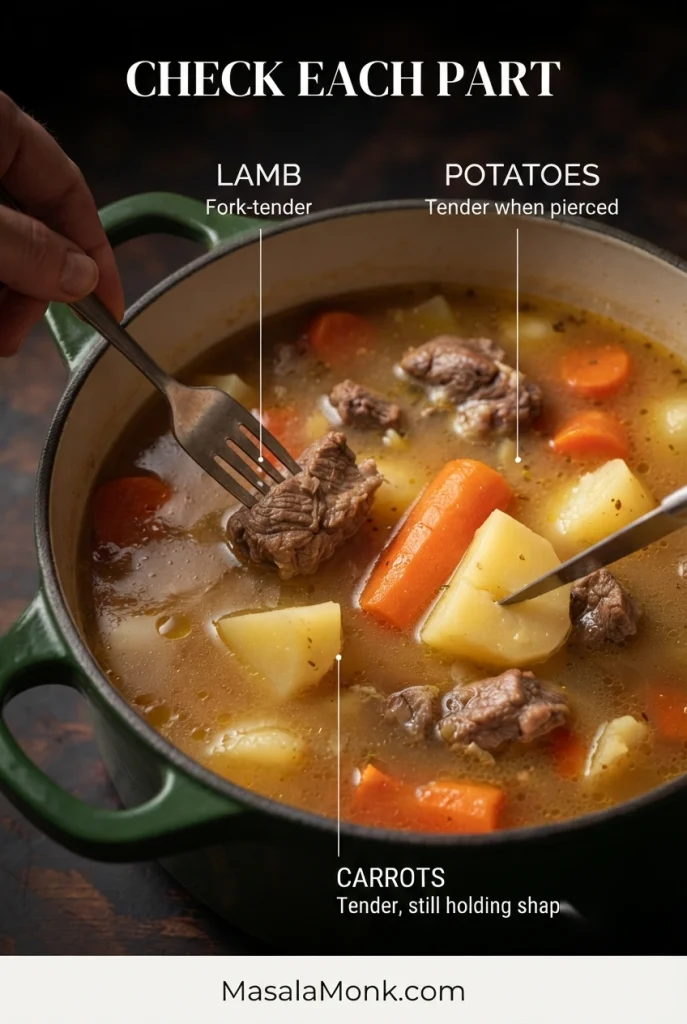
Check everything separately. A knife should slide through the center of a large potato without finding a hard core. The carrots should be tender but still hold together. Press a piece of lamb with a fork; it should yield easily and begin to pull apart with gentle pressure. If the lamb is still chewy, lift out any vegetables that are already done and keep simmering the meat, checking every 15–20 minutes.
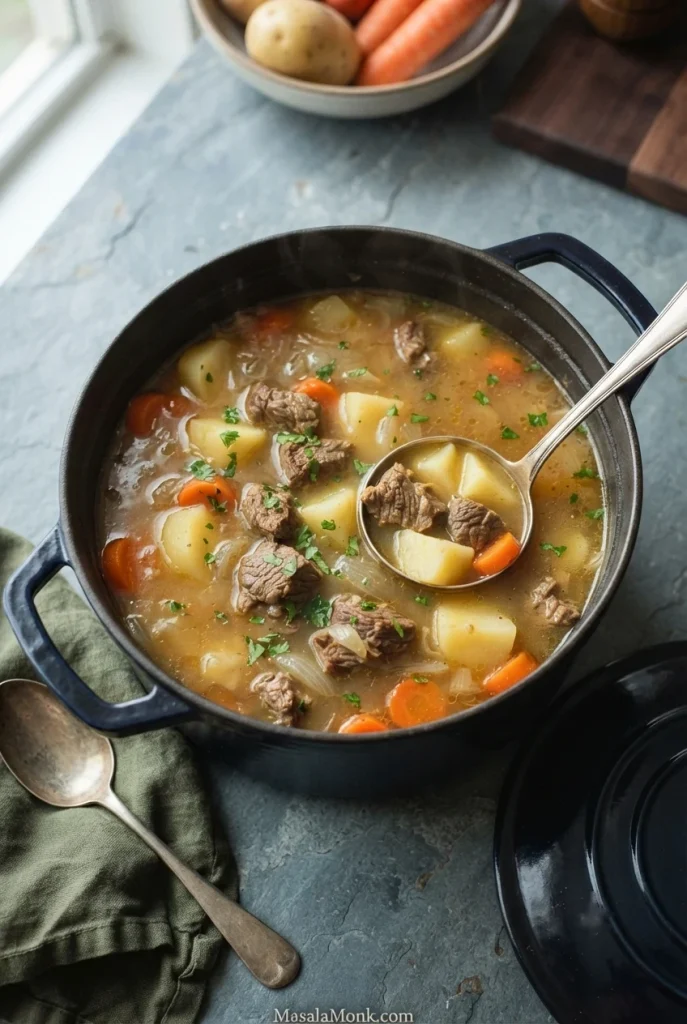
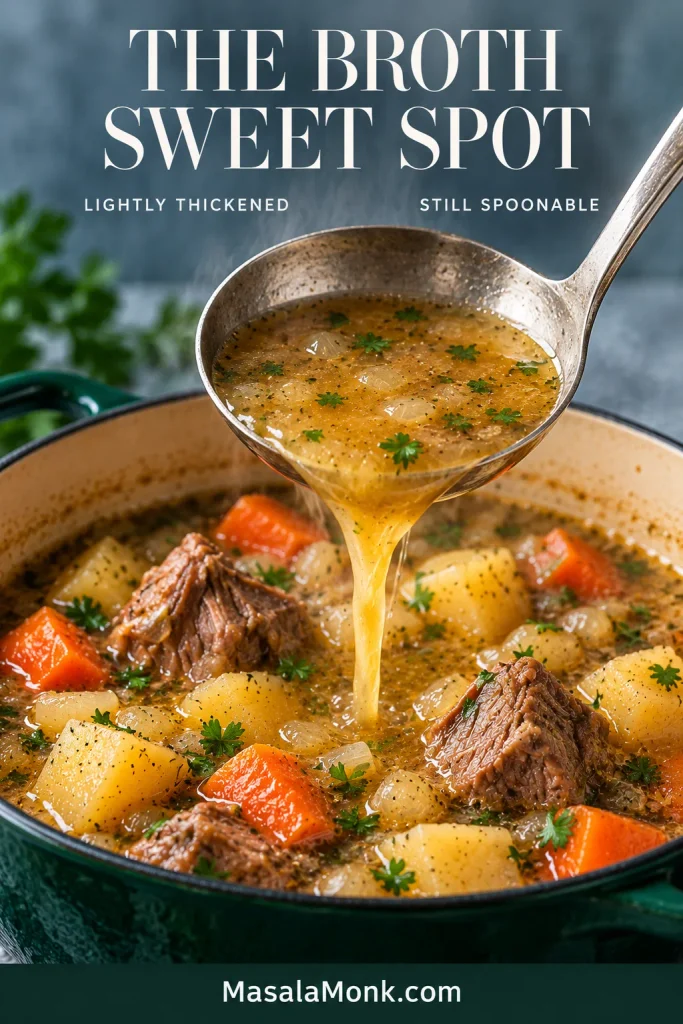
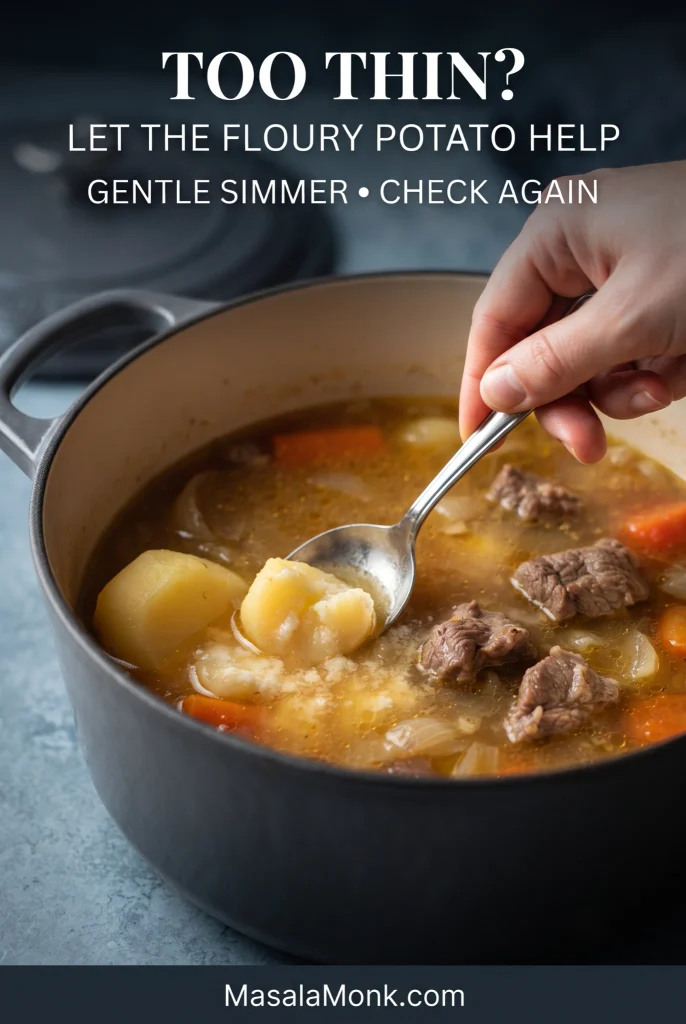
Finish the broth. It should be lightly thickened but still loose enough to spoon around the lamb and vegetables. A little cloudiness from potato starch is normal. If the broth is watery once the solids are cooked, lift them out and reduce the liquid uncovered for a few minutes, or mash two or three very soft potato pieces into it.
Taste and serve. Remove the bay leaves and any thyme stems. Skim off a heavy slick of surface fat. Taste the broth and adjust the salt and pepper. Return anything you removed, rest the stew for about 10 minutes, and ladle it into warm bowls. Finish with chopped parsley, if using.
At the finish, you should still see broth pooling between the lamb and vegetables. If the liquid sits heavily like sauce, the stew has gone too thick.
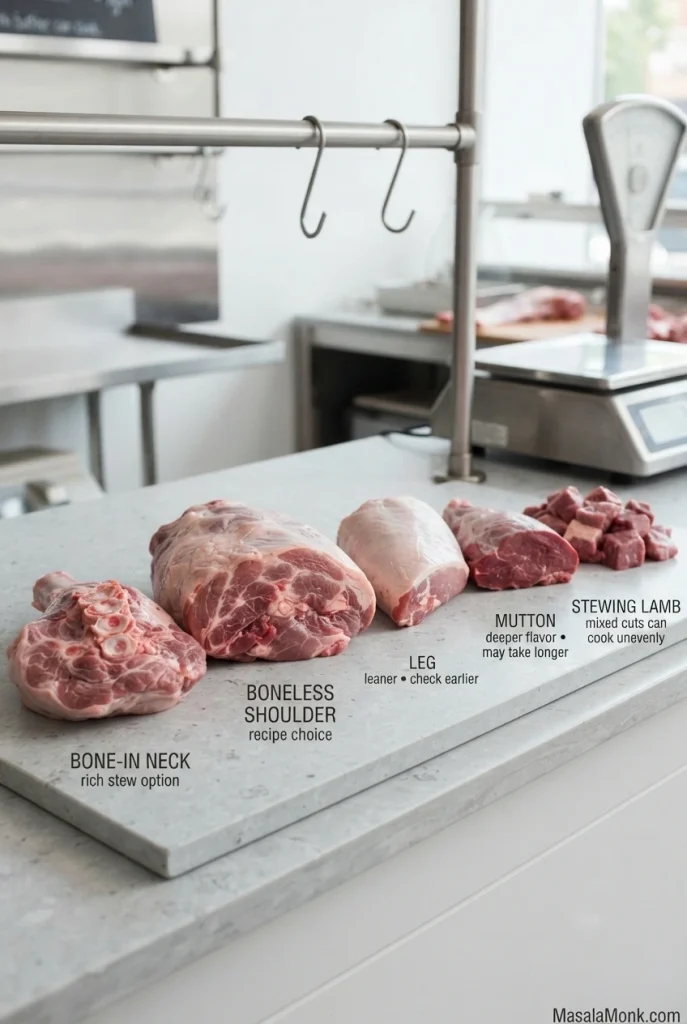
Lamb shoulder is our first choice for this recipe. It handles a long, gentle simmer well, becoming tender while giving the broth plenty of flavor.
Cut
What to expect
Boneless shoulder
The cut this recipe is written for: flavorful, convenient and well suited to slow cooking.
Bone-in neck
Excellent for stew, with bones and connective tissue contributing to the broth. Because the edible yield differs, don’t treat the same weight as a direct swap for boneless shoulder.
Lamb leg
It can work in a pinch, but this recipe’s timing is written for shoulder. Leg is generally leaner, so start checking it earlier.
Mutton
Deeper and more mature in flavor than lamb, and it may need longer before becoming tender.
Stewing lamb
Convenient, but mixed cuts can finish unevenly, so check the larger pieces for tenderness.
If you change the lamb cut, change the clock—not the tenderness test. Shoulder is the baseline here, while neck, leg and mutton can reach tenderness at different rates.
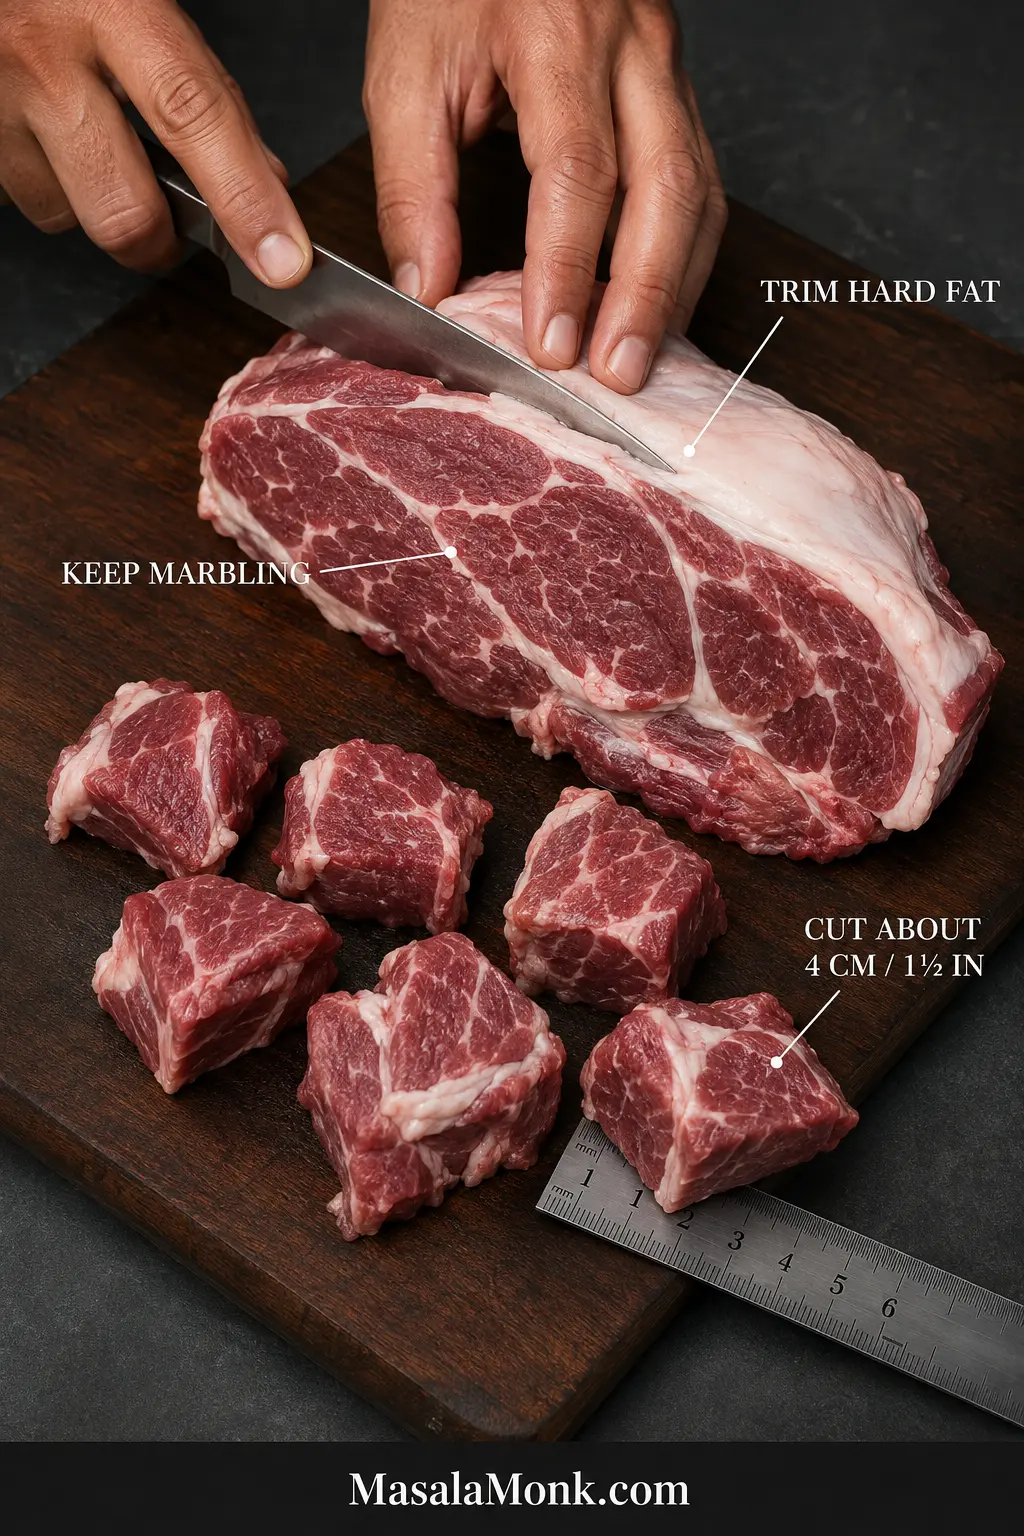
Don’t over-trim the shoulder. The fine seams running through the meat can stay; concentrate on removing the thick exterior deposits of fat. That keeps the broth from becoming unnecessarily greasy without stripping the meat of all its internal fat.
Use thickness as the visual cue: the dense outer strip is the fat to trim away, while the narrow white seams running through the shoulder can stay.
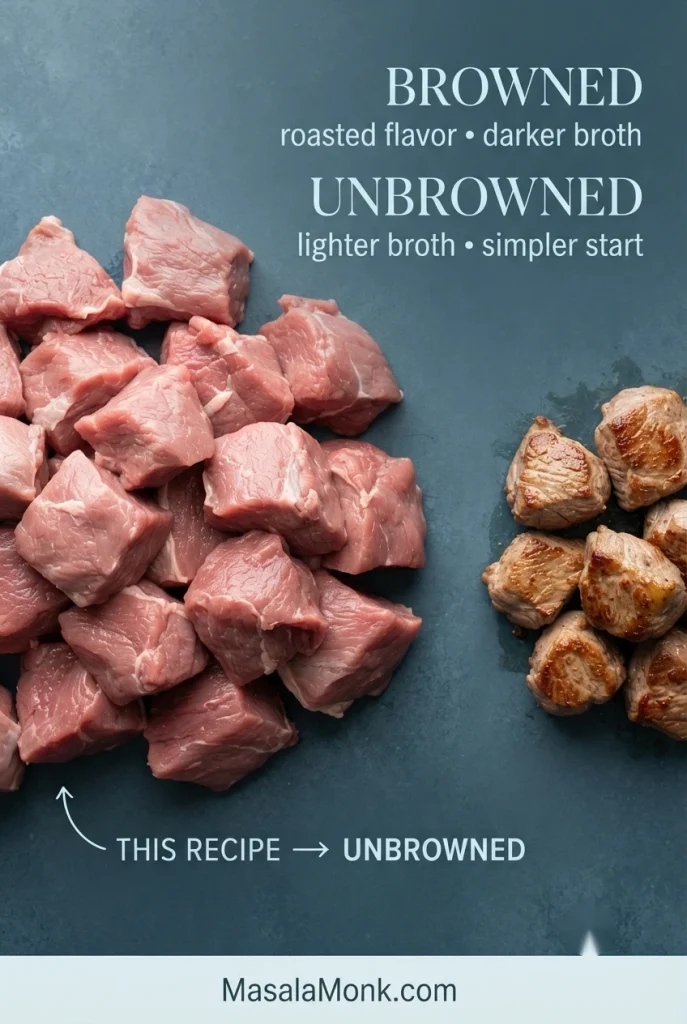
Should You Brown the Lamb First?
You don’t have to. Browning gives lamb a roasted flavor and makes the broth darker; putting the meat straight into the liquid keeps preparation simpler and the broth lighter. This recipe skips browning.
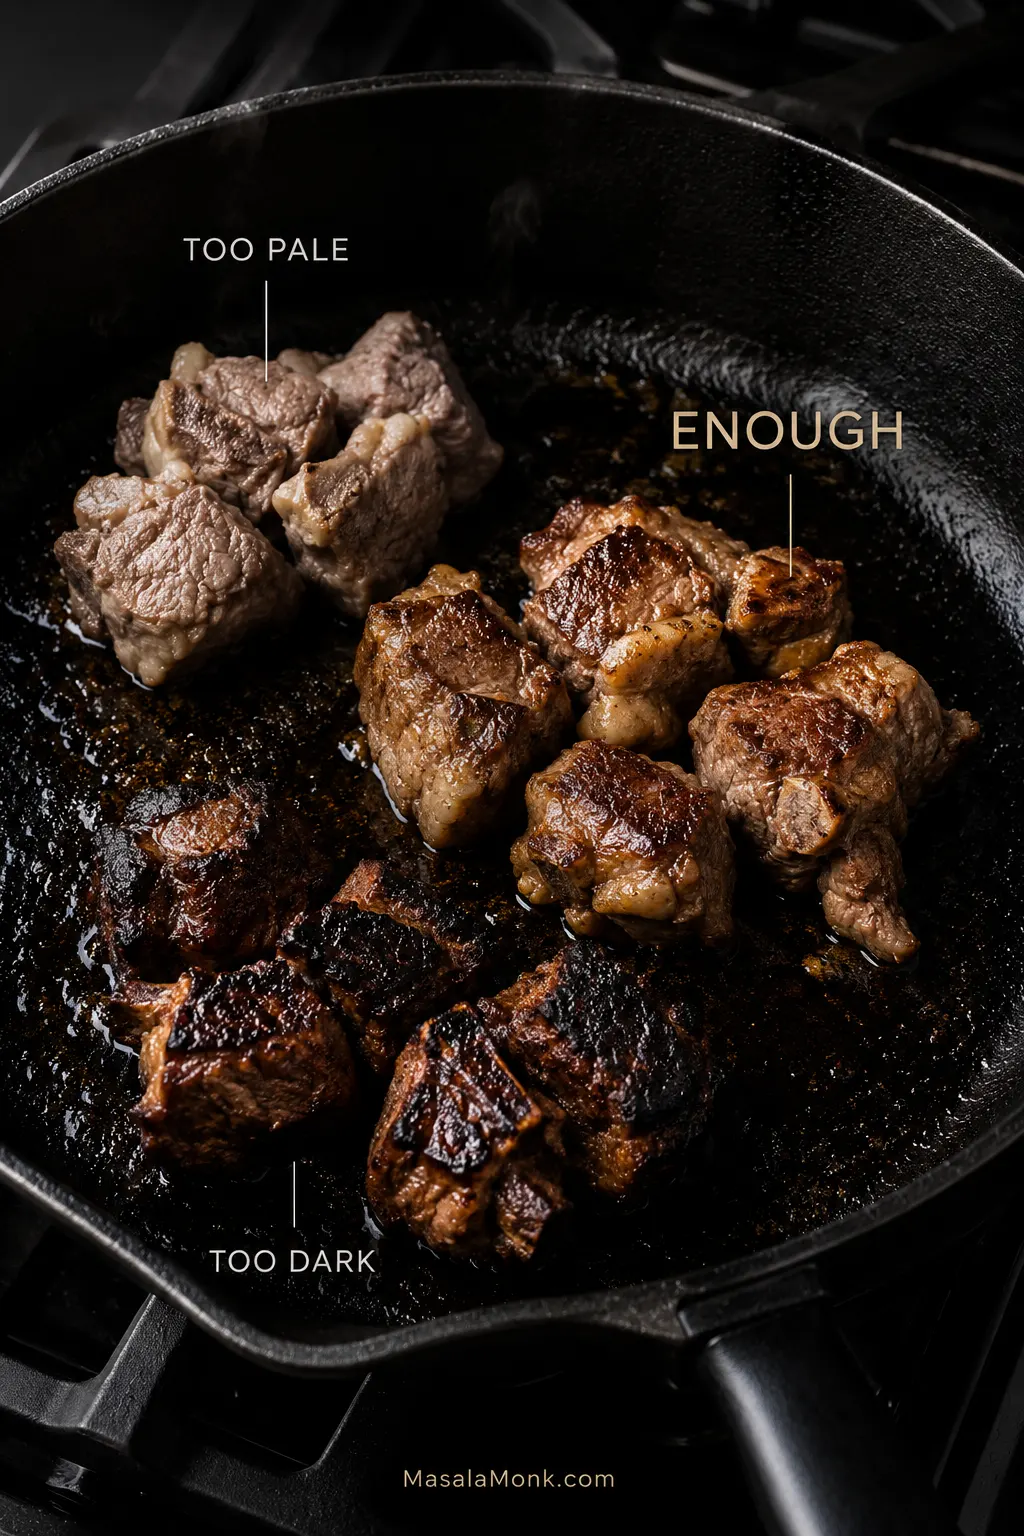
The color difference is the useful cue here: seared lamb develops a deep browned crust, while the pale, unseared pieces show the starting point used for this lighter-broth version.
Which Potatoes Work Best for Irish Stew?
Floury or starchy potatoes such as Russets work especially well in Irish stew because their edges soften readily and help thicken the broth. If Yukon Golds are what you have, use them—they’ll simply hold their shape more firmly and thicken the broth less. Very waxy potatoes are better at keeping neat edges than breaking down into the liquid.
This two-size technique works best with floury or starchy potatoes. If you use Yukon Golds, expect the pieces to hold together more firmly and contribute less natural thickening.
That’s why this recipe cuts one batch of potatoes smaller and adds it first. Those are the pieces you can afford to lose into the broth. The larger chunks arrive later and stay substantial enough for the spoon. If your potatoes hold their shape especially well, mash a couple of cooked pieces into the broth at the end if it still seems thin. For another quick option, see the watery-broth fix.
Fraying potato edges are the useful stage: they show starch moving into the broth. Once the larger chunks start disappearing too, stir less and protect what is still intact.
If you have Russets left over, our Potato Soup Recipe turns them into a creamier, more substantial soup.
How Much Liquid Does Irish Stew Need?
For 900 g / 2 lb boneless lamb shoulder, start with 500 ml stock and 350 ml water. Unsalted or low-sodium stock adds flavor without making the stew too salty before it reduces. Water alone is also a reasonable choice if you want the lamb itself to provide most of the broth’s flavor.
A wide Dutch oven loses liquid faster than a narrower pot because more surface is exposed. Keep the lid partly on and the simmer gentle. If the liquid drops too far before the lamb is tender, add a small splash of hot water instead of turning up the heat.
Look for small, intermittent bubbles rather than a rolling boil. Meanwhile, skim only substantial foam or obvious pools of rendered fat instead of disturbing the surface constantly.
Bone-in lamb can add extra richness to the cooking liquid, while mutton brings a deeper meat flavor. With either, water may be enough instead of stock. Whatever liquid you choose, wait until the stew has finished cooking before making the final salt adjustment. Before serving, judge the broth while it is hot: it should have some body but still pour easily from a spoon.
Remember that potato starch and lamb gelatin keep firming the broth as the stew cools, so stop thickening while the hot broth is still a little looser than you want it in the bowl.
What Belongs in Traditional Irish Stew?
Traditional Irish stew is built around lamb or mutton, potatoes and onions, but there isn’t one fixed ingredient list. Carrots, leeks, turnips, rutabaga (swede), cabbage and herbs appear in different versions.
For an Irish reference point, Bord Bia’s Irish stew uses lamb neck or shoulder with onions, carrots, leek, turnip, potatoes and cabbage. Other versions keep the ingredient list closer to meat, potatoes and onions.
Some versions include pearl barley, which adds chew and absorbs some of the broth. We leave it out here to keep the focus on lamb and potatoes.
How Do You Know Irish Stew Is Done?
Don’t make the clock decide dinner. Press one of the larger pieces of lamb with a fork: it should yield easily rather than spring back or fight you. Push a knife through one of the largest potatoes; there should be no firm center. Taste the broth, too. It should be savory and cohesive, but loose enough to spoon generously around the meat and vegetables.
Look at the fibers as well as the fork: tender lamb shoulder begins to loosen at the edges and yields under gentle pressure instead of springing firmly back.
If the lamb is still chewy, it needs more cooking even if the timer says otherwise. If the potatoes are already perfect, lift them out first. The pot doesn’t care whether everything finishes at exactly the same minute. If the timing gets awkward, use Fix My Irish Stew below.
Treat the sequence as a safety net, not a rigid timer: if the vegetables become tender before the lamb, lift them out rather than sacrificing their texture.
Fix My Irish Stew
Does something look wrong? Find the closest match below before you keep cooking.
Test the difficult samples, not the easy ones: check the largest potato chunk and judge the lamb separately. One tender carrot or small potato does not prove the whole pot is ready.
Quick Troubleshooting Guide
What happened?
What to do
The lamb is chewy but the vegetables are ready.
Lift out the tender vegetables and keep cooking the lamb at a gentle simmer. Check it again every 15–20 minutes.
The lamb is ready but the potatoes are hard.
Lift out the lamb and continue cooking the potatoes until a knife slides through the centers easily.
The potatoes are falling apart.
Stop unnecessary stirring. A little breakdown is useful here. If most pieces are disappearing, lift out the ones still intact and return them when the stew is ready.
The broth looks watery.
Once the solids are cooked, lift them out and reduce the broth uncovered for a few minutes, or mash a couple of very soft potato pieces into it.
The broth is too thick.
Stir in hot water a little at a time until it loosens to the consistency you want.
The broth is cloudy.
That is often simply potato starch and isn’t a problem by itself. Judge the broth by its flavor and consistency.
There is a greasy layer on top.
Skim it with a shallow spoon or ladle. Reducing the broth won’t remove excess fat; it will only concentrate what is there.
The stew tastes flat.
Check the salt first. If the seasoning is right but the broth still tastes weak, remove the solids and reduce the liquid briefly, then taste again.
The stew is too salty.
Stop reducing it. Add unsalted hot water gradually until the flavor comes back into balance.
If the Broth Is Watery
Choose reduction if the broth tastes weak as well as thin. If the flavor is already where you want it and only the body needs help, mash in one or two very soft potato pieces instead.
Reduction concentrates seasoning along with the liquid, so hold back on extra salt until the broth has reached the consistency you want.
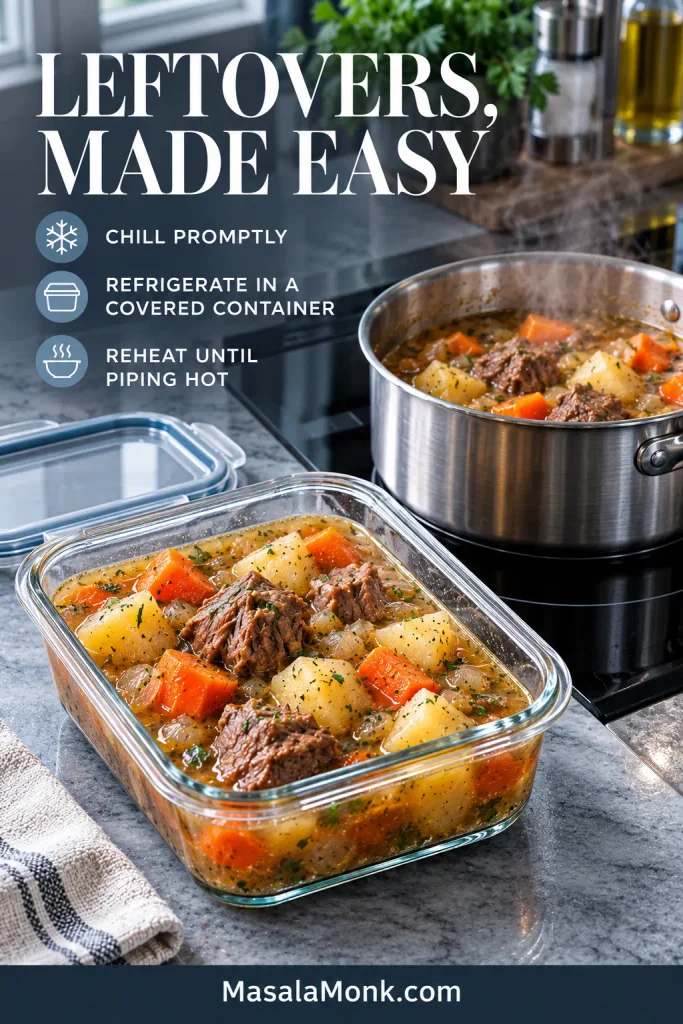
Irish stew works particularly well as a make-ahead dinner, and chilling brings one practical bonus: the rendered lamb fat firms on the surface, where it’s easy to lift away.
Don’t be alarmed if the refrigerated broth looks considerably thicker. Potato starch thickens the liquid, and gelatin released from the lamb can make it set further. Warm the stew gently before deciding whether it needs extra water.
For leftovers, shallow containers help a large batch cool more efficiently; when reheating, stir only as much as needed so the softened potatoes stay in recognizable pieces.
Refrigerating Leftovers
Cool leftovers promptly. For a large batch, divide the stew among smaller, shallow containers and refrigerate within two hours—or within one hour if the surrounding temperature is above 90°F / 32°C. Cover and use within 3–4 days. See the USDA guidance on leftovers for food-safety details.
Reheating
Reheat the stew gently on the stovetop, stirring only as much as needed so the potatoes don’t break apart. Add a splash of water if the broth remains too thick once hot. Reheat leftovers thoroughly to 165°F / 74°C.
Freezing
The lamb and broth freeze well, but potatoes can become softer or slightly grainy after thawing. If that texture bothers you, add freshly cooked potatoes when reheating.
What to Serve with Irish Stew
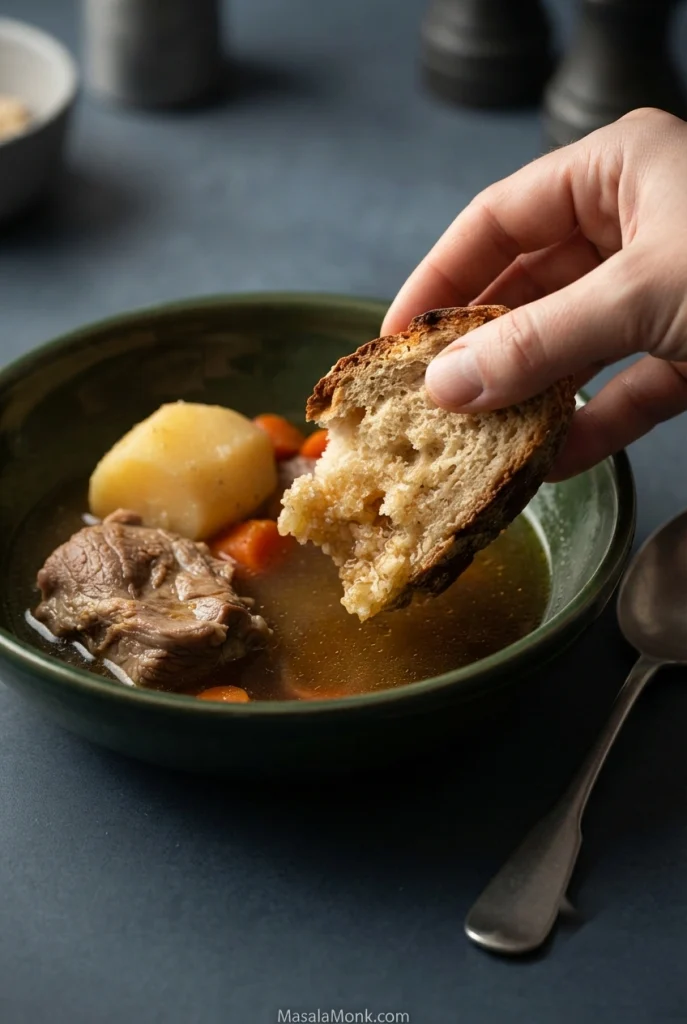
Irish stew doesn’t need much beside it. A thick piece of Irish Soda Bread is hard to beat: hold onto the crust and let the soft crumb catch the broth left at the bottom of the bowl.
A torn piece works better than a thin slice for dipping: the crust gives you something to hold while the open crumb picks up broth without falling apart immediately.
Steamed cabbage or another simply cooked green vegetable works well if you want something fresh alongside. Otherwise, a little chopped parsley and bread on the table are plenty.
After the short rest, ladle rather than repeatedly stir. That keeps the larger potato pieces recognizable while still giving each serving plenty of lamb, vegetables and broth.
Save the last spoonful of lamb-and-potato broth for the final piece of soda bread.
A good lamb tagine announces itself before anyone takes a bite. Lift the lid and you get spice, lamb and fruit; press a fork into the meat and it gives without collapsing; spoon through the pot and the sauce clings instead of running like broth.
This Moroccan lamb tagine gets there with shoulder, onions, fragrant spices and a deliberately modest amount of braising liquid. The dried apricots wait until the lamb is almost tender, so they can soften in the sauce without spending hours dissolving into it.
Sweetness stays in the background. Most comes from the apricots, while lemon sharpens the sauce at the end. Honey is optional, and worth adding only after you taste the pot.
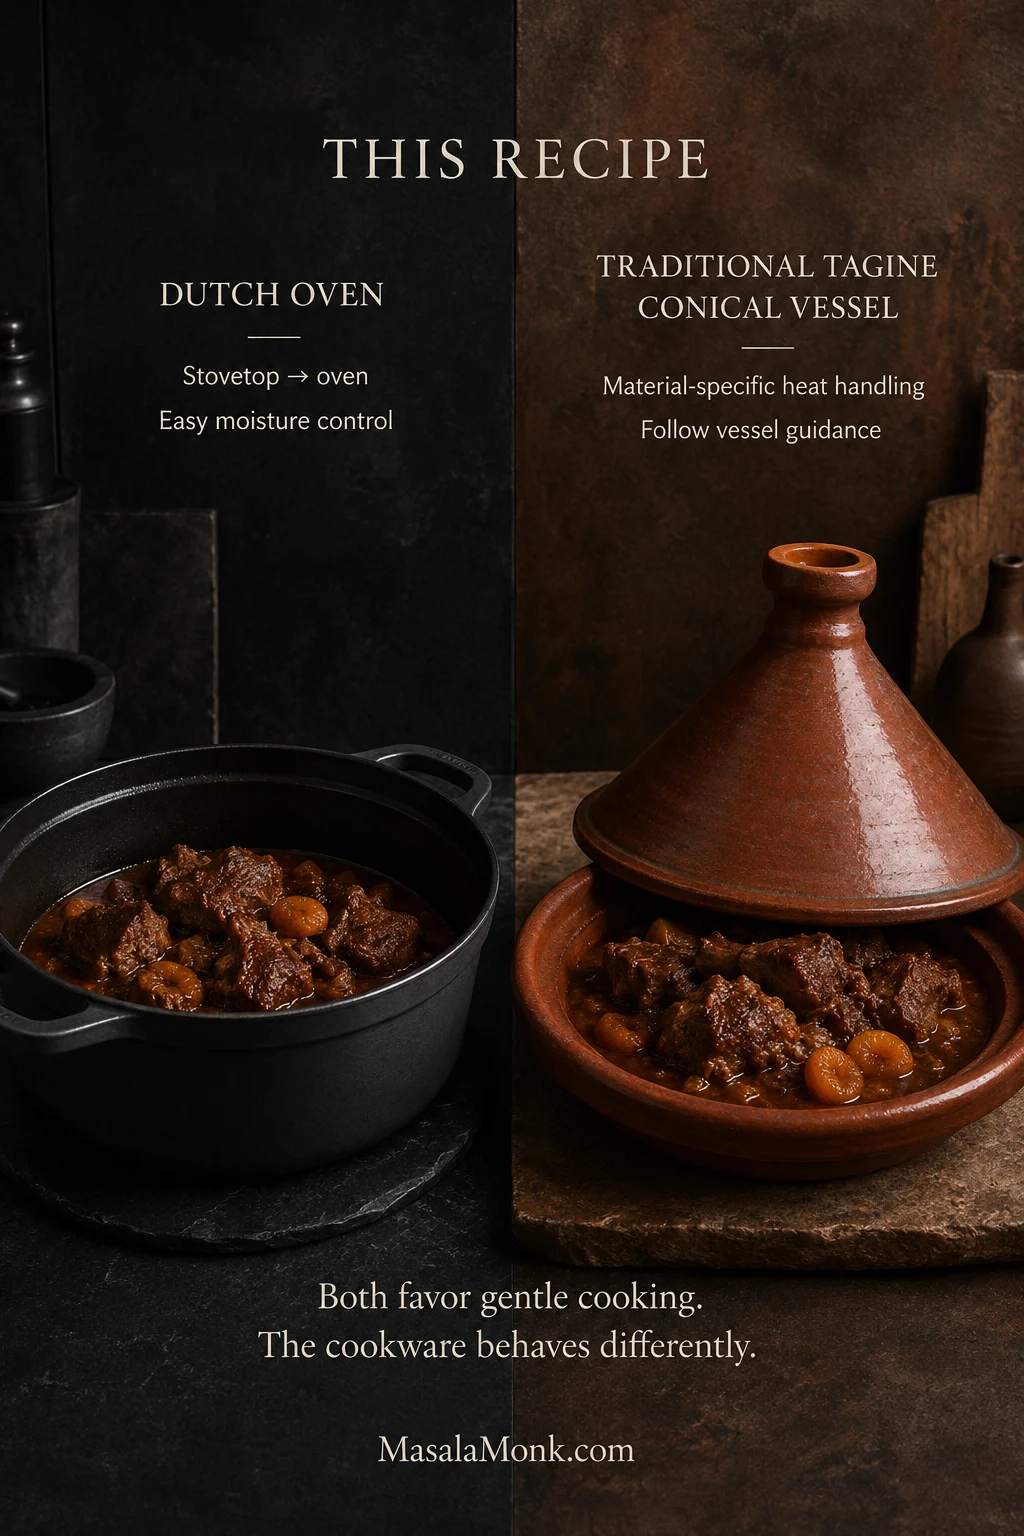
You don’t need a traditional tagine pot, either. A heavy Dutch oven or covered casserole handles the long braise beautifully, and the method leaves room for the reality that one shoulder, lid or oven rarely behaves exactly like another.
Brown 1 kg / 2.2 lb lamb shoulder, soften the onions and briefly cook the spices. Add 350 ml / about 1½ cups stock or water and braise covered at 180°C / 160°C fan / 350°F until nearly tender. Add the dried apricots for about 25 minutes. Once the lamb is tender, reduce the sauce only if it needs it, then finish with lemon, toasted almonds and fresh cilantro.
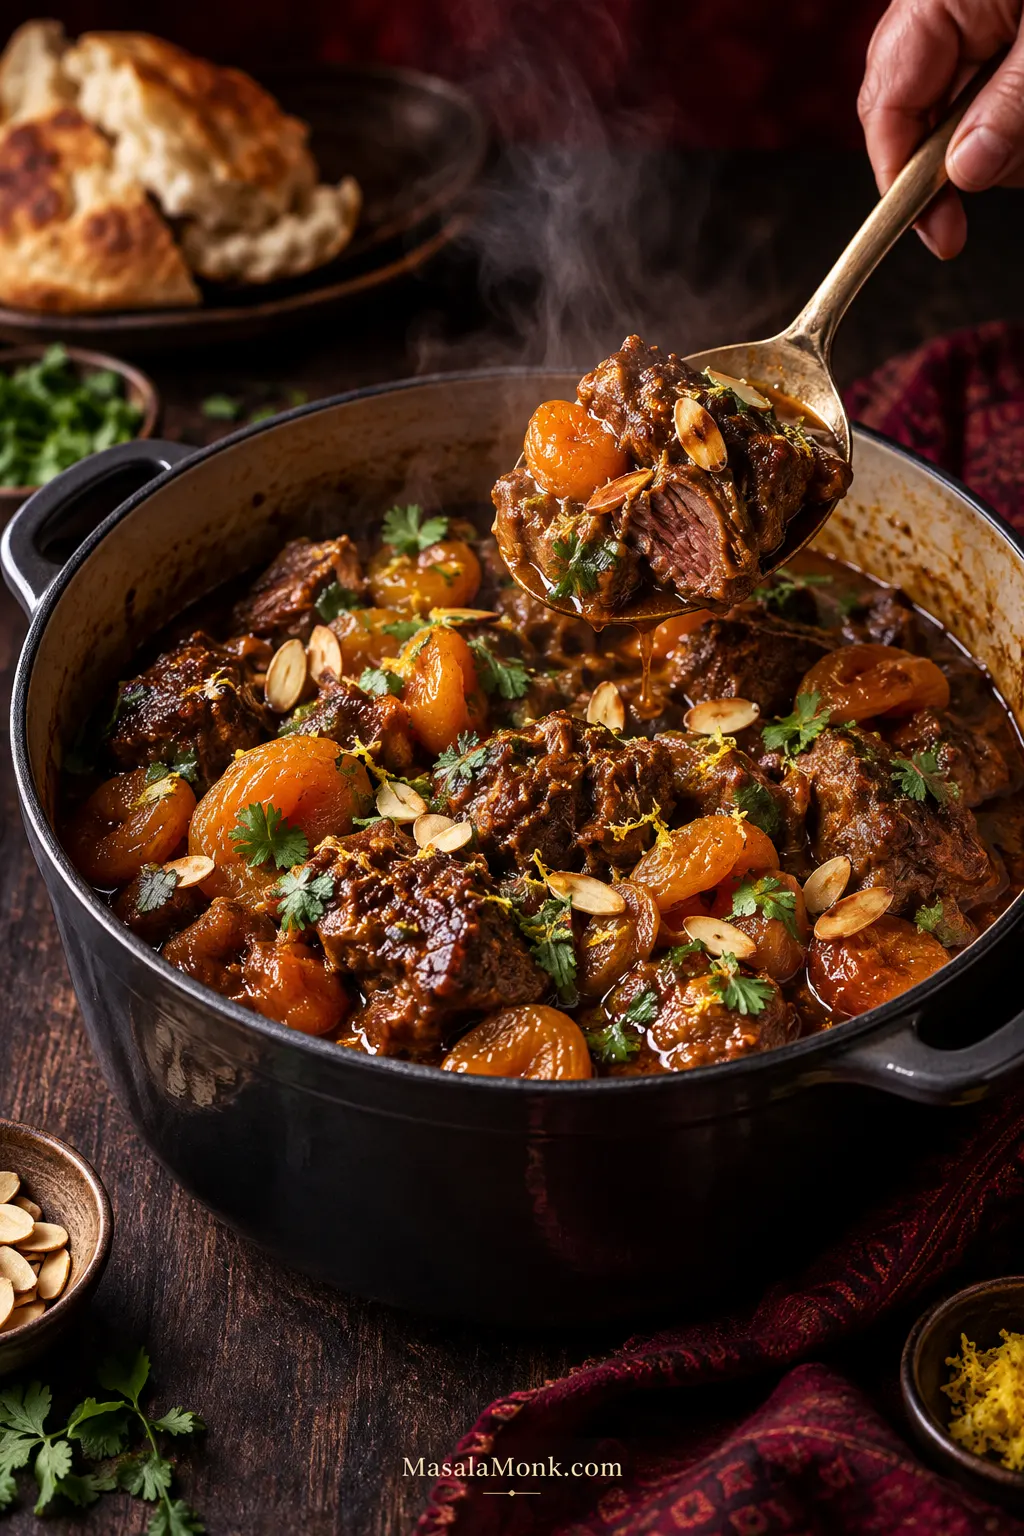
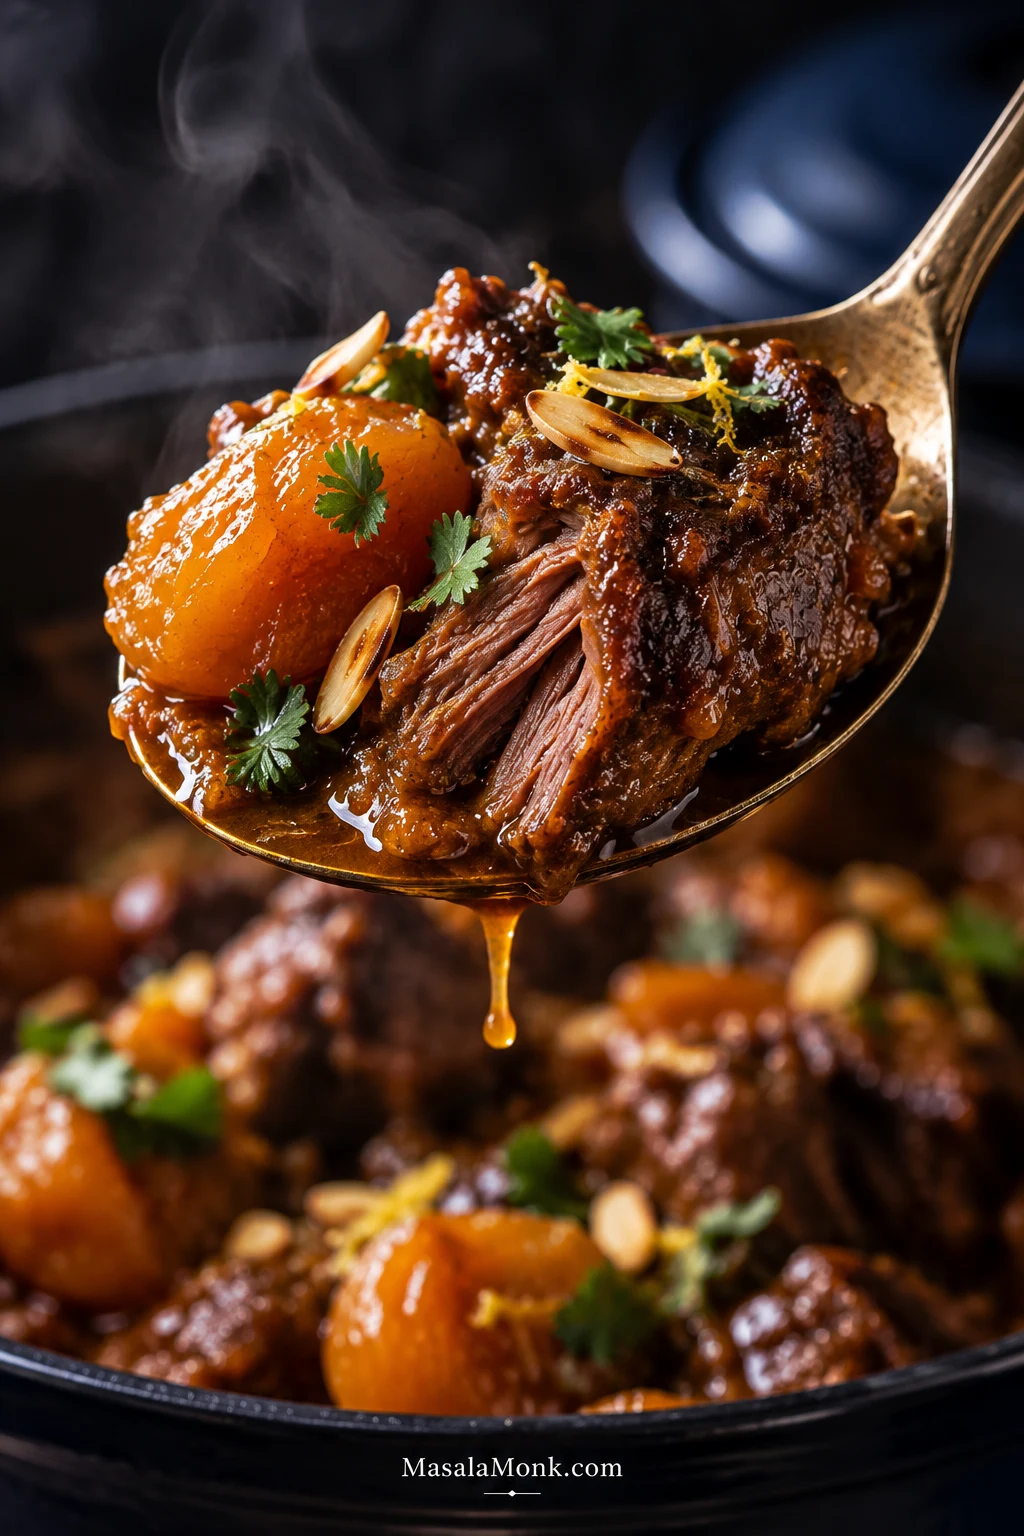
A finished bite should bring the lamb, apricot and sauce together at once: tender meat, soft fruit, a glossy coating and a little almond crunch. That is the texture and balance the recipe is working toward.
Moroccan Lamb Tagine Recipe With Apricots
Tender lamb shoulder braised with warm spices and dried apricots, brightened with lemon and finished with toasted almonds and fresh cilantro.
5 servings; up to 6 with generous bread, grain and sides
Prep time
25 minutes
Cook time
Usually 2½–3¼ hours; particularly firm shoulder may take longer
Total time
About 3–3¾ hours, with extra time possible for firmer lamb
Oven
180°C / 160°C fan / 350°F
Best pot
Heavy 24–26 cm / about 9½–10¼-inch Dutch oven or similar covered casserole
Doneness
A fork enters the lamb easily and the meat yields while remaining in chunks
This is a patient recipe, not a complicated one. Most of the active work happens while you brown the lamb and build the onion-and-spice base; the oven handles the long middle. Keep a little extra hot water or stock nearby in case your pot loses moisture quickly.
No marinating is required. Seasoning before browning and the long braise give the lamb plenty of time with the spice base, so you can start this recipe the day you plan to eat it.
Ingredients
For the Lamb and Braise
1 kg / 2.2 lb trimmed boneless lamb shoulder, cut into roughly 4 cm / 1½-inch pieces
8 g fine salt (about 1¼ teaspoons; weighing is more reliable), plus more to taste
2 tablespoons / 30 ml olive oil or neutral cooking oil
350 g / 12 oz onions, thinly sliced
5 garlic cloves, finely chopped
25 g / about 1½ tablespoons tomato paste
350 ml / about 1½ cups low-sodium chicken stock or water, plus more only if needed
Spices
2 teaspoons ground cumin
2 teaspoons ground coriander
1 teaspoon ground ginger
1 teaspoon ground turmeric
½ teaspoon freshly ground black pepper
1 teaspoon sweet paprika
⅛–¼ teaspoon cayenne pepper, optional
1 medium cinnamon stick
Small pinch saffron threads, optional; bloom for 10 minutes in 30 ml / 2 tablespoons taken from the measured stock or water
Apricots and Finishing Ingredients
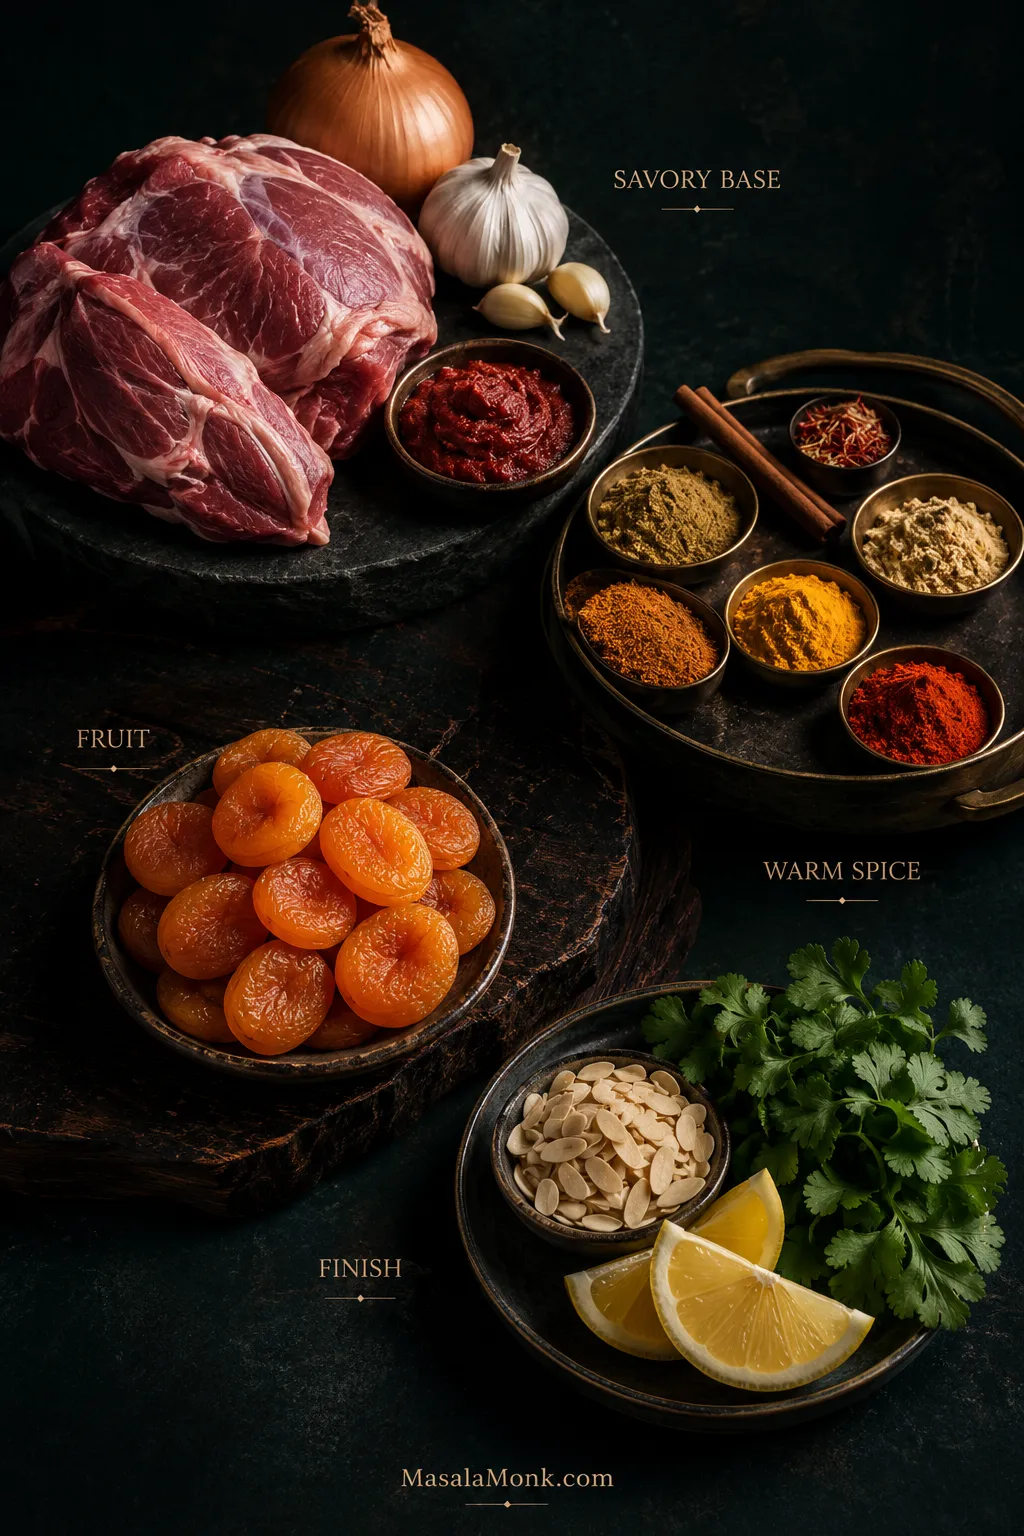
180 g / about 6¼ oz dried apricots; halve very large ones
1 lemon, finely grated zest plus 1–2 tablespoons juice, to taste
1–2 teaspoons honey, optional
50 g / about 1¾ oz sliced or slivered almonds
Small handful fresh cilantro (coriander leaves), roughly chopped
Ingredient Notes
Water or stock: water works beautifully here. The lamb, onions and spices build plenty of flavor as they braise, so stock is optional rather than something you need to buy specially. With well-seasoned stock, reduce the initial salt to about 5–6 g and adjust near the end.
Ras el hanout: use about 1½–2 tablespoons in place of the cumin, coriander, ground ginger, turmeric, paprika, black pepper and cayenne. Begin at the lower end with a potent blend. Omit the cinnamon stick if the blend is already cinnamon-heavy, and account for any added salt.
Instead of treating lamb tagine spices as one long list, think about what each layer contributes. The onion base creates savory depth, warm spices fill the aroma, dried fruit changes the middle of the bite, and the final lemon, herbs and almonds provide contrast. Complexity comes from those layers working in sequence, not from simply adding more spice.
Instructions
Prepare and Brown the Lamb
Heat the oven. Heat to 180°C / 160°C fan / 350°F.
Prepare the lamb. Trim away large hard deposits and seams of exterior fat, leaving the marbling within the shoulder. Cut into roughly 4 cm / 1½-inch pieces, pat dry and season with the measured salt.
With lamb shoulder for tagine, the biggest cubes effectively set the cooking clock. Keep the main pieces in roughly the same size family so one of the larger ones becomes a trustworthy tenderness benchmark later. Smaller scraps soften sooner and can make the pot appear ready before the substantial pieces have finished braising.
Brown in batches. Heat the oil in the Dutch oven over medium-high heat. Brown the lamb in about three batches, roughly 3–4 minutes per batch. Give the pieces room to make good contact with the pot and turn them only once or twice. A few deep brown patches are enough; every surface does not need to be perfect. Transfer the lamb to a plate.
When browning lamb for tagine, watch the bottom of the pot as well as the meat. Brown fond will loosen into the onions and eventually deepen the sauce; blackened residue brings bitterness instead. Between batches, meanwhile, give the pot a moment to recover its heat so the next pieces brown rather than release enough moisture to steam.
Build the Flavor Base
Soften the onions. Reduce the heat to medium. Add the onions and cook for 7–8 minutes, scraping up the browned bits, until soft and beginning to turn golden. Deep caramelization isn’t necessary.
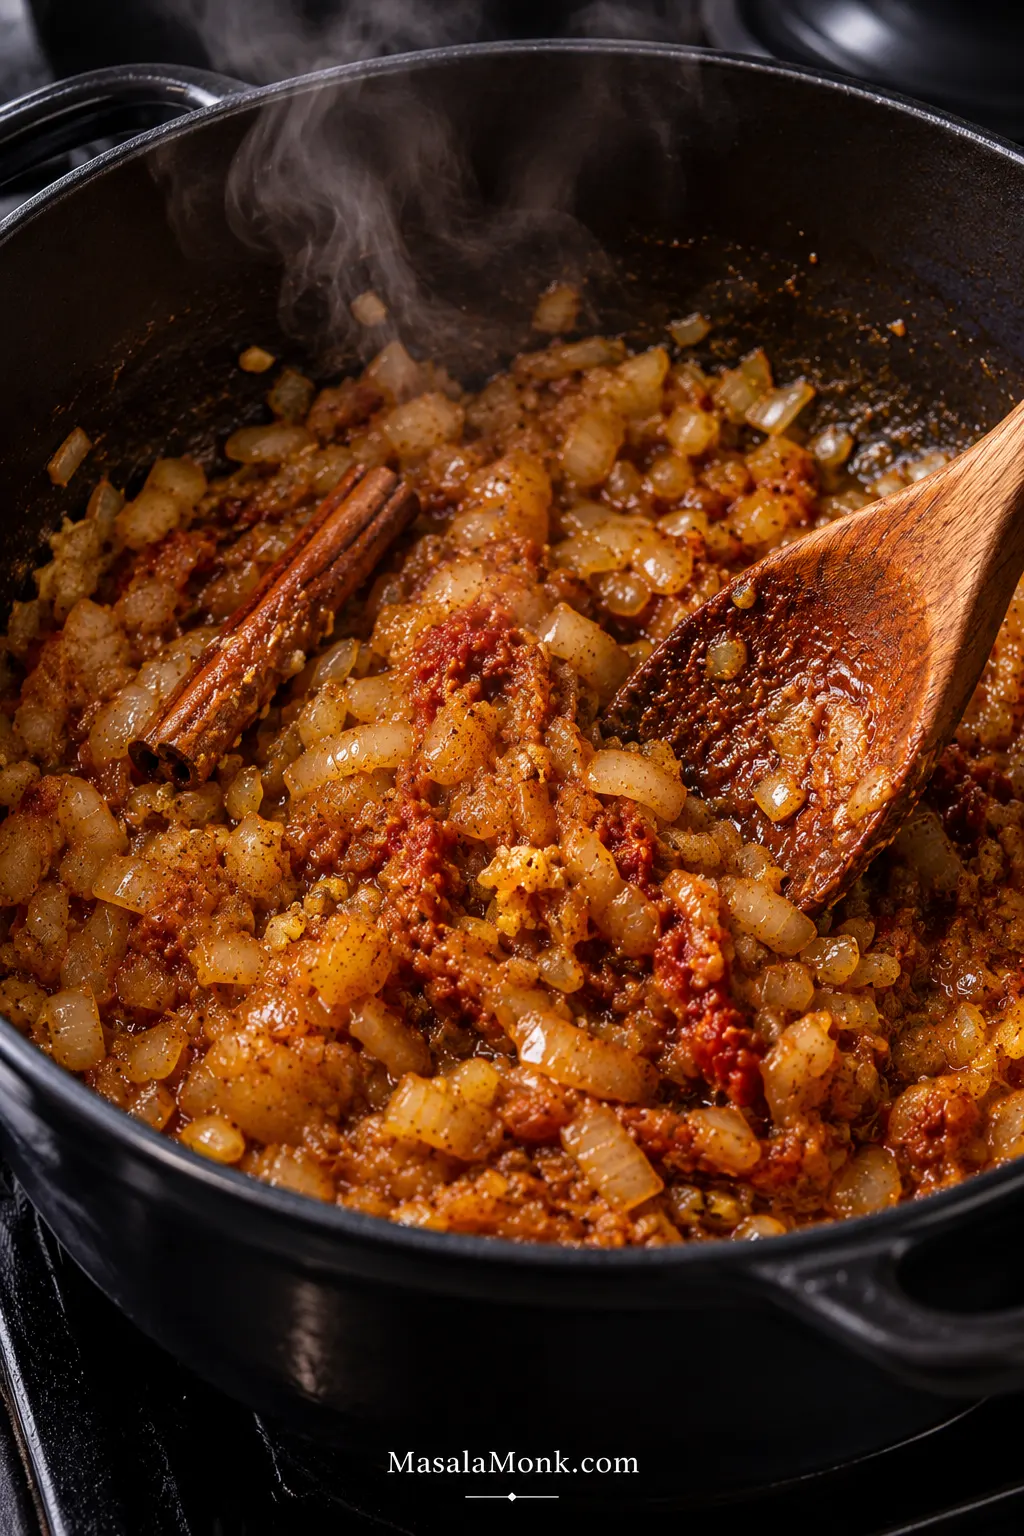
Build the spice base. Add the garlic and cook for about 30 seconds. Stir in the cumin, coriander, ground ginger, turmeric, paprika, black pepper and cayenne, if using. Cook for 30–45 seconds, just until fragrant. Move on before the spices darken rapidly or smell acrid. Add the cinnamon stick and tomato paste and cook for another minute.
A useful cue for the lamb tagine spice base is when it stops looking like separate ingredients. The ground spices lose their dusty appearance, the tomato paste blends into the onions, and the whole mixture becomes cohesive and glossy. Once that happens, add the liquid rather than extending the frying simply because the clock says you can.
Start the Braise
Add the lamb and liquid. Return the lamb and any juices to the pot. Pour in the measured stock or water, including the saffron infusion if using, and bring to a gentle simmer. The liquid should sit around the meat and reach only partway up the pieces.
Cover and braise for 60 minutes. Transfer the covered pot to the oven. The sauce will look loose at this stage. Leave it alone for now.
Look at the moisture. Lift the lid after an hour. There should be sauce around the lamb and no dry, frying patches around the bottom edge. If the bottom is drying, add 60 ml / ¼ cup hot water or stock. Add up to another 60 ml / ¼ cup only if the pot still looks genuinely dry. Cover and cook for another 30 minutes.
For lamb tagine braising liquid, use the bottom edge of the pot as your warning zone. The upper surfaces of the meat can remain exposed; what matters is that the base stays moist rather than dry and frying. A broad casserole will reach that point faster than a snug Dutch oven, so pot geometry matters as much as the starting quantity.
Test Tenderness and Add the Apricots
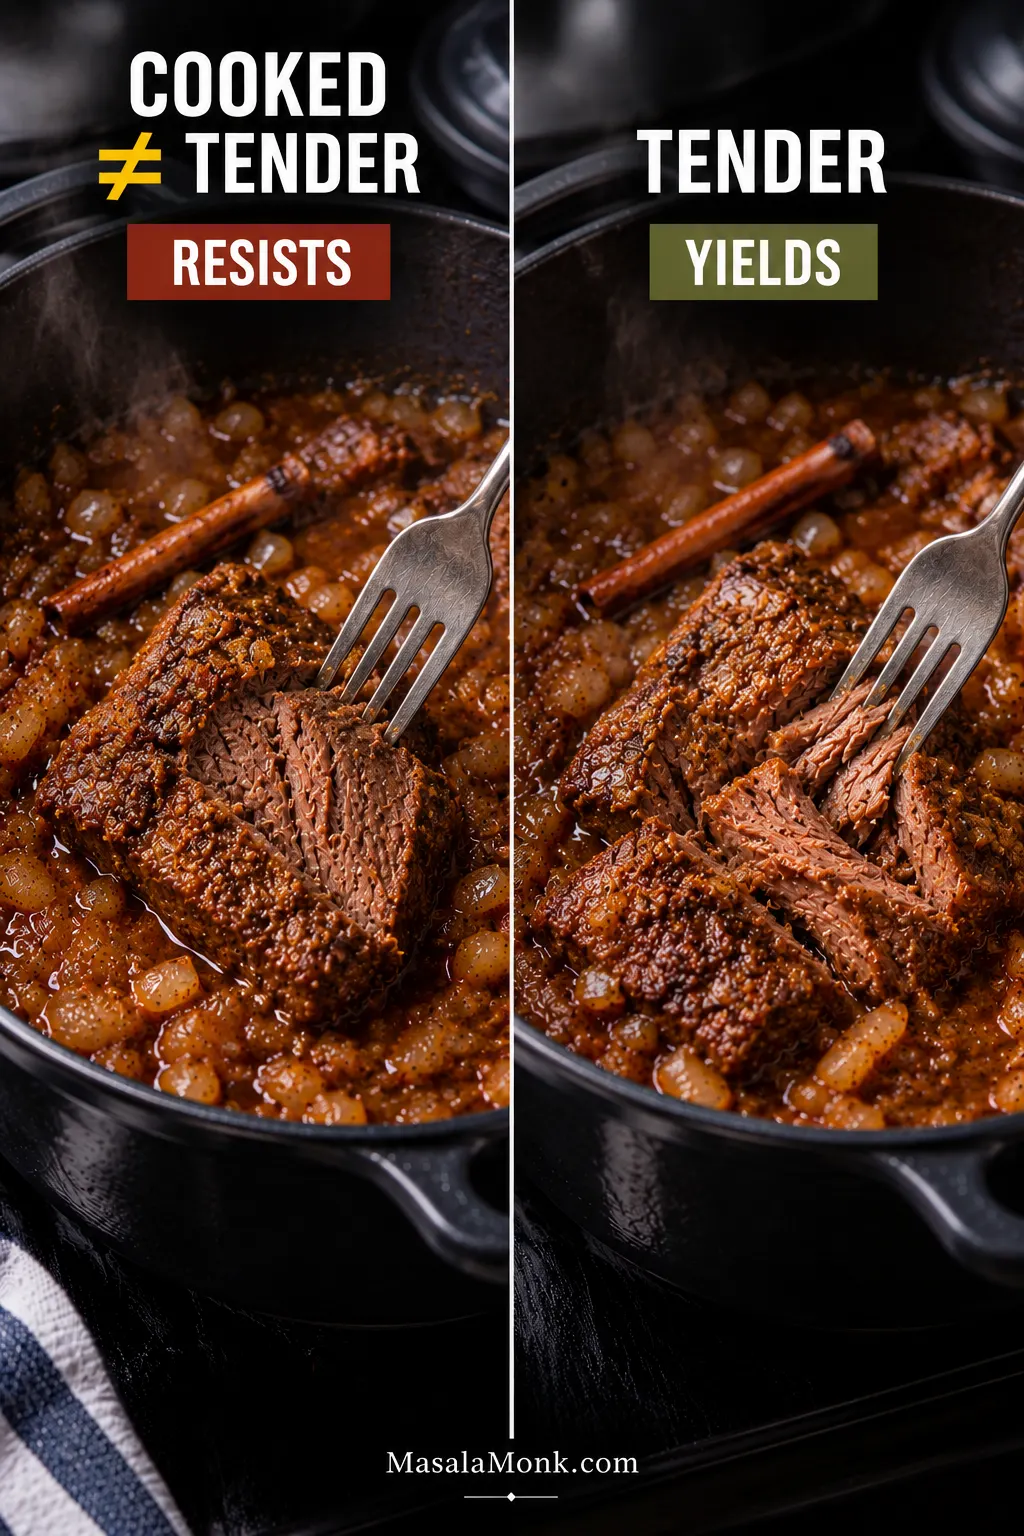
Test the lamb. Push a fork into one of the largest pieces. Clear resistance means more covered cooking. Continue in 15-minute intervals until the fork enters fairly easily and the meat keeps its shape.
The target for braised lamb tenderness sits between two obvious extremes: no stubborn resistance, but no shredding on contact either. A fork should enter with little effort while the chunk keeps enough structure to reach the plate intact. Falling-apart meat can be delicious, but it is already beyond the texture this particular lamb tagine is aiming for.
Check the Finished Texture
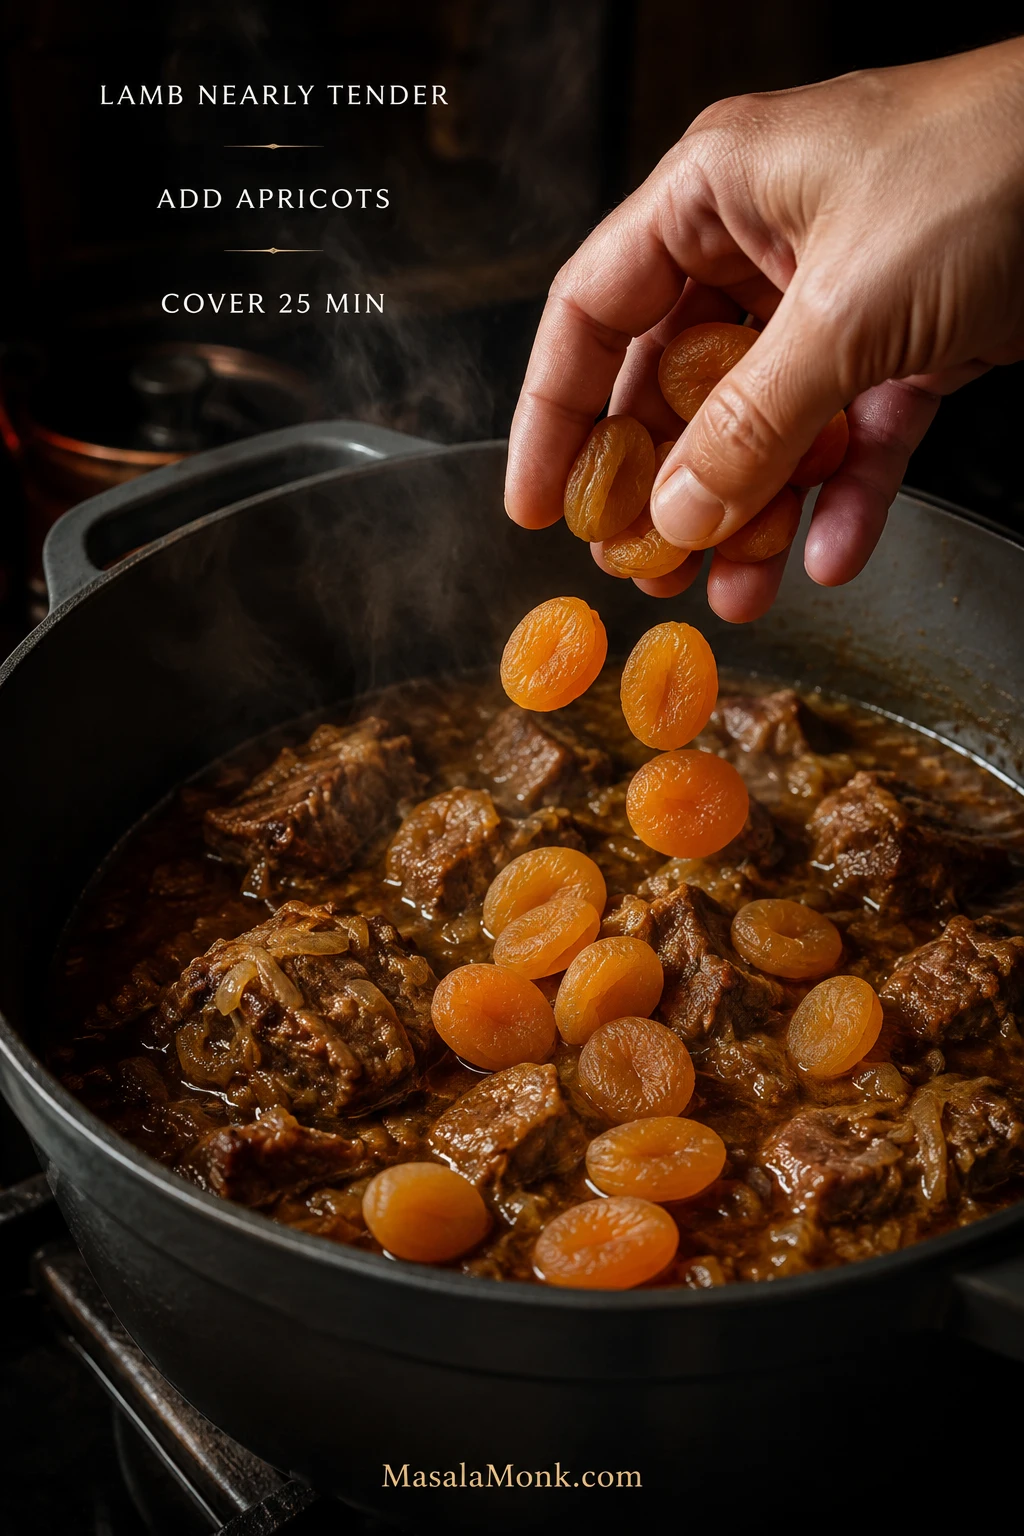
Add the apricots. Stir in the dried apricots, cover and cook for 25 minutes. While they cook, toast the almonds in a dry frying pan over medium heat for 2–4 minutes, tossing often, until lightly golden and fragrant. Tip them onto a plate immediately.
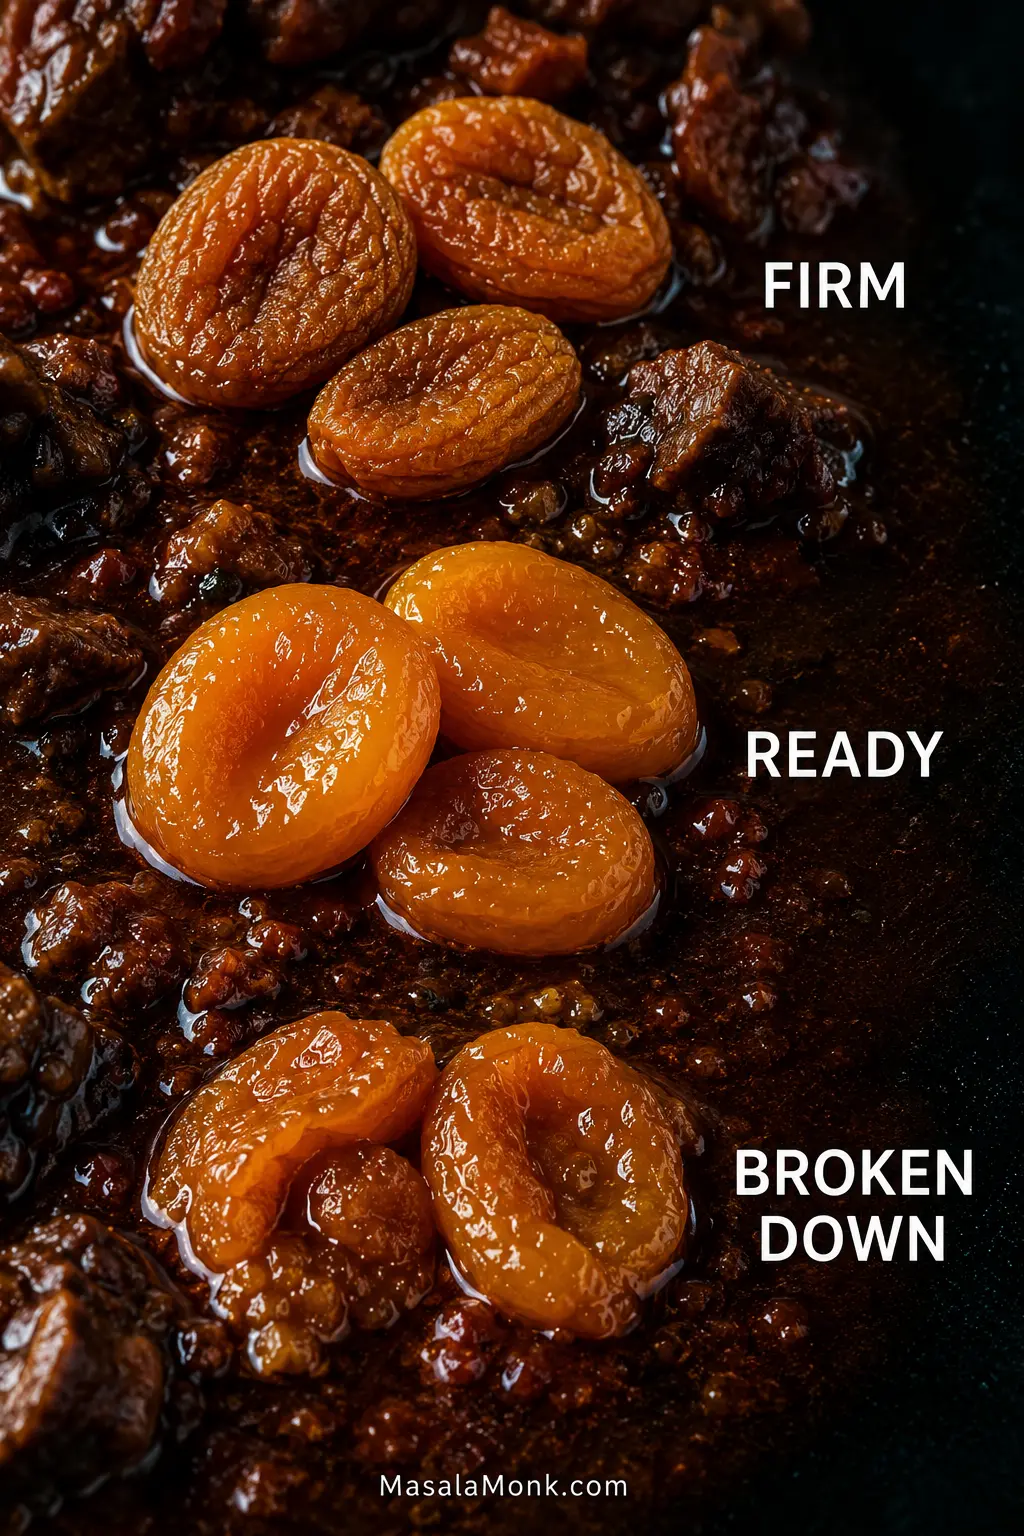
Once dried apricots are softening in lamb tagine, handling becomes as important as timing. Stir only as much as necessary and move the fruit gently through the sauce; plumped apricots break much more easily than dry ones. Keeping them intact preserves little pockets of fruit rather than distributing all their sweetness through the entire pot.
Know when to stop. Test one of the largest pieces of lamb and an apricot. The lamb should yield easily without collapsing; the apricots should be soft and full. If the lamb still resists, cover and continue in 10–15-minute intervals. If the apricots reach the texture you want before the lamb does, lift them onto a plate and return them later.
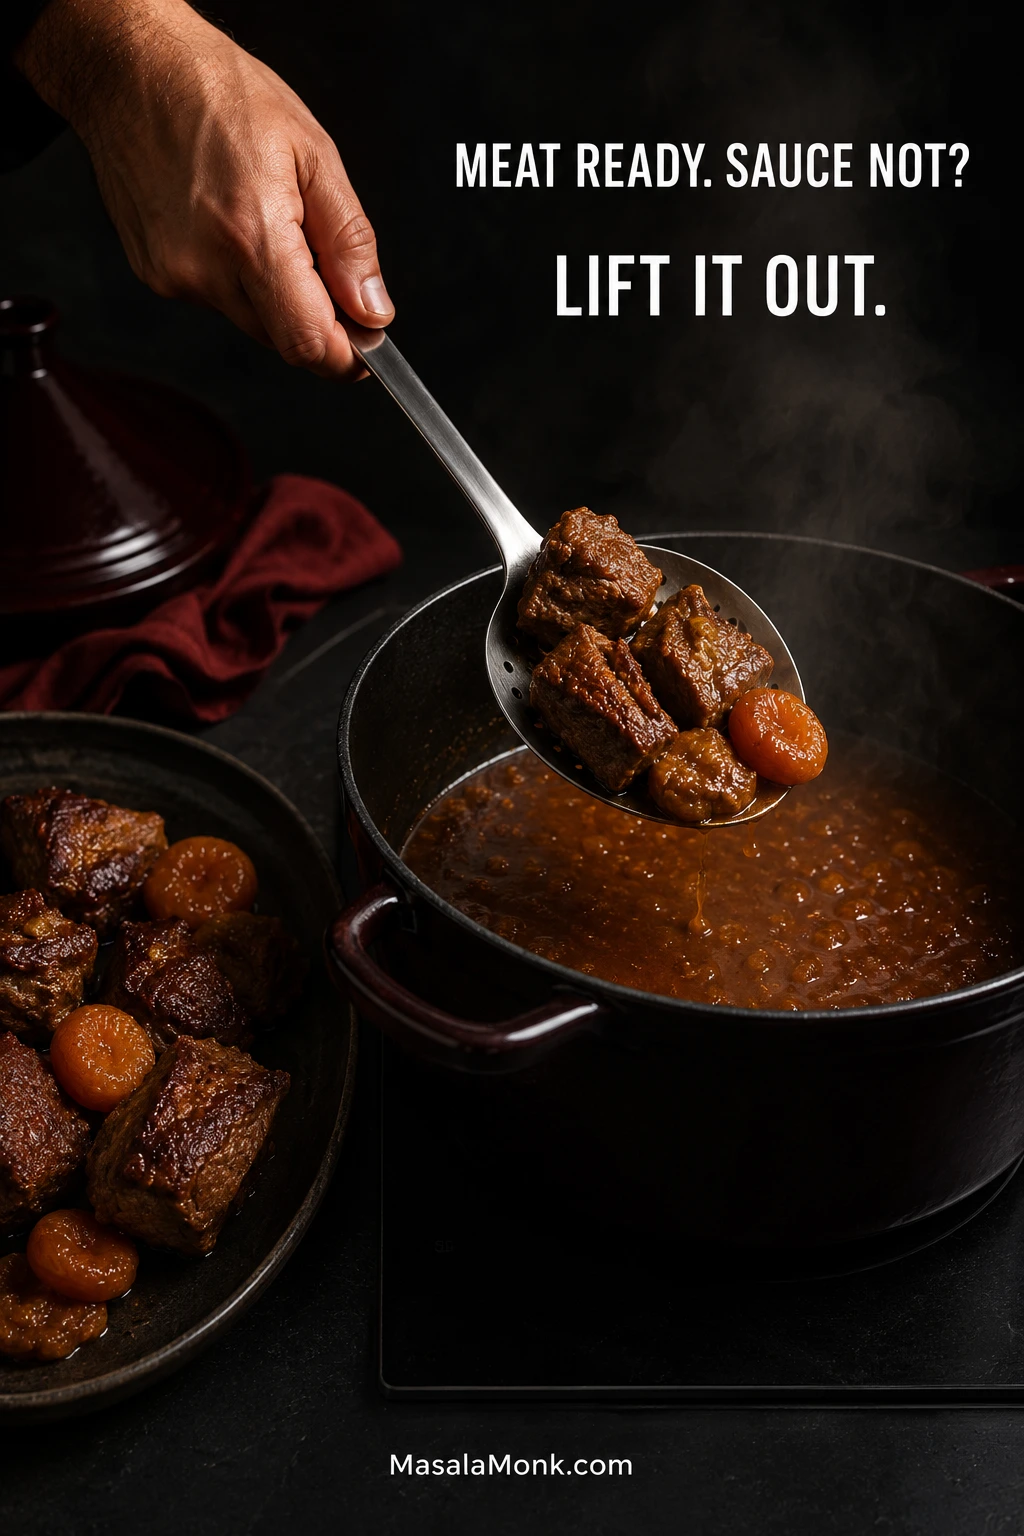
Finish the sauce. If the lamb and apricots are ready and the sauce already lightly coats them, leave it alone. For a very brothy pot, lift the lamb and apricots onto a warm plate and reduce the sauce uncovered for 5–15 minutes, then return everything briefly to coat and heat through. Loosen an over-reduced sauce with hot water or stock, 30–60 ml / 2–4 tablespoons at a time. Mash two or three apricots into the sauce if you want it slightly thicker and fruitier.
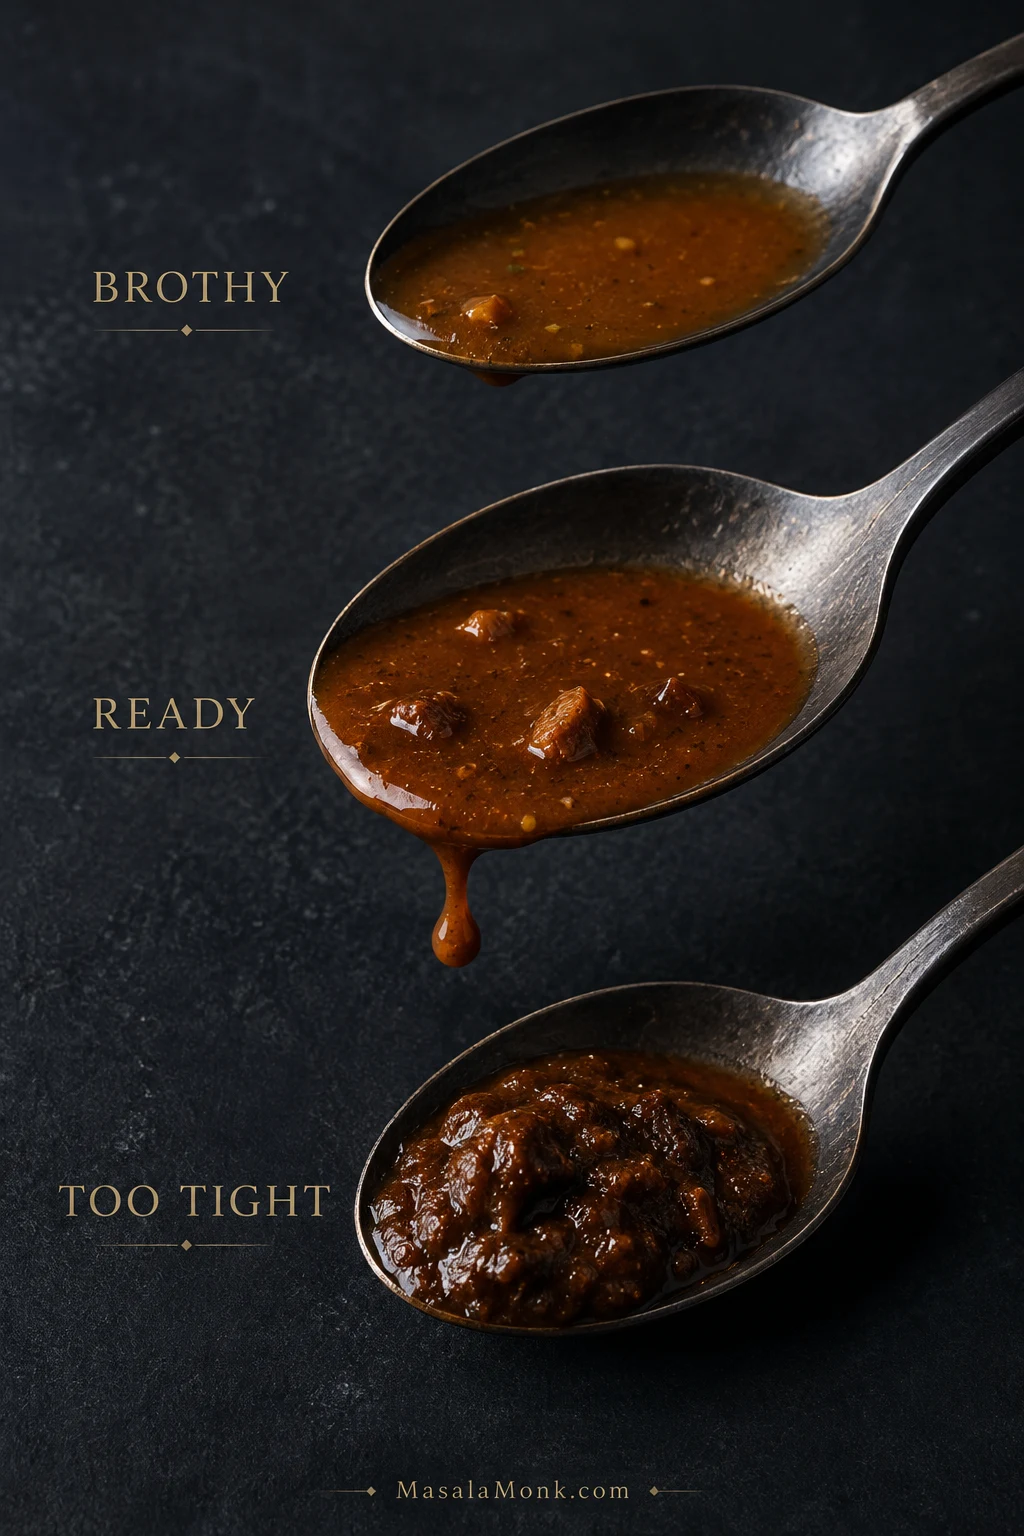
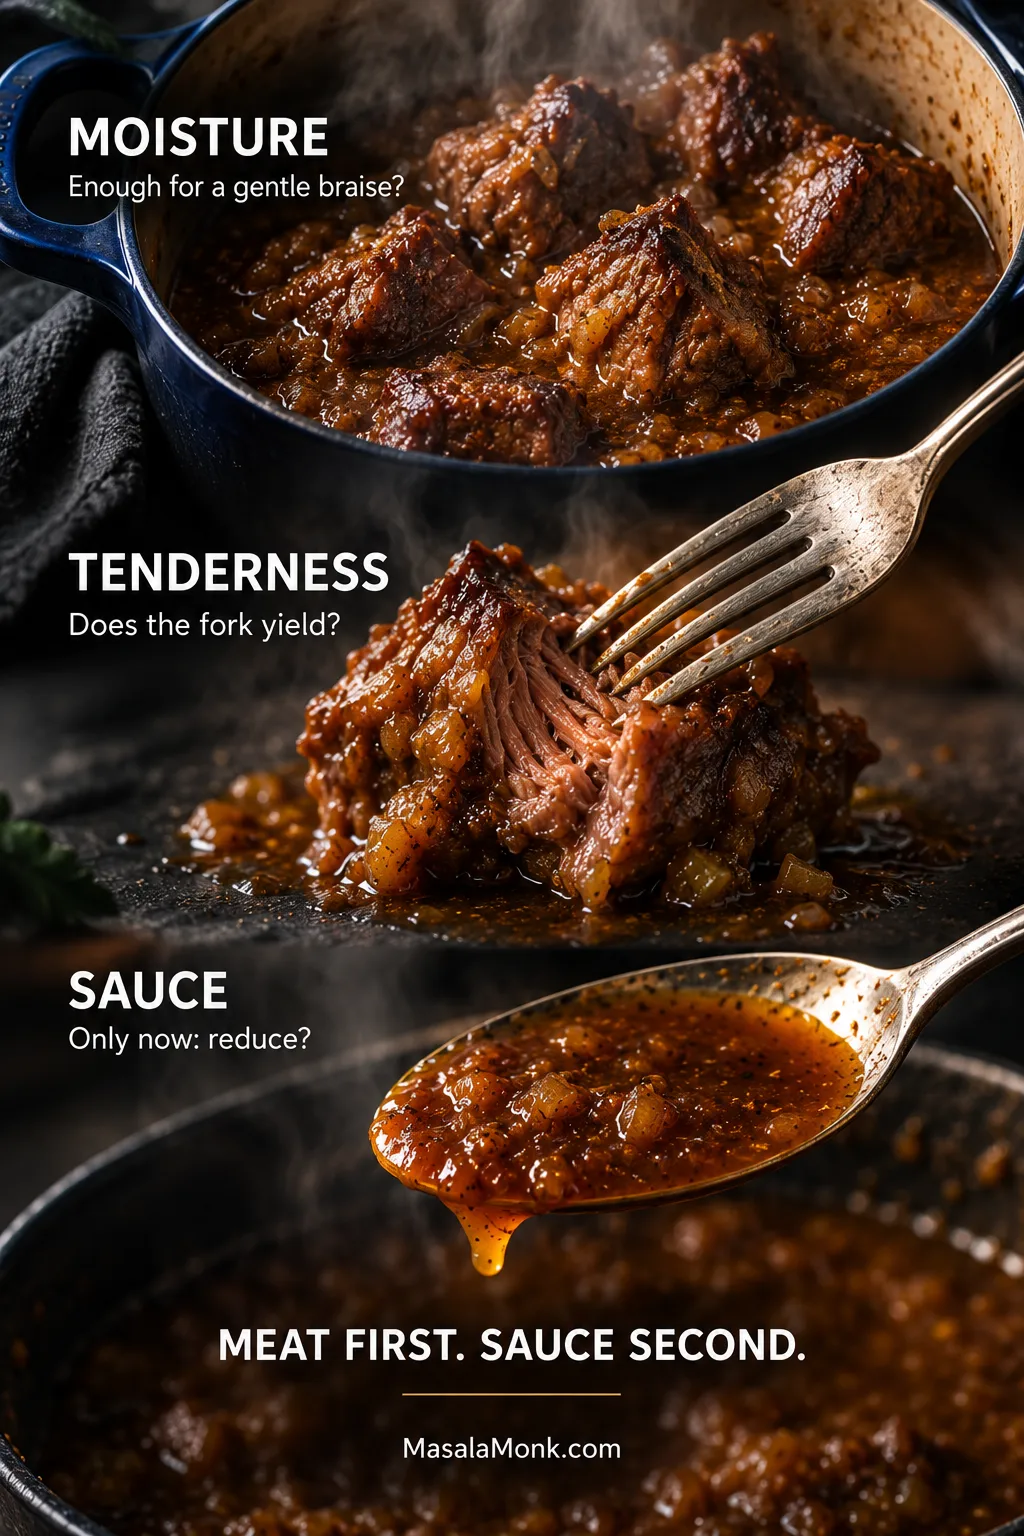
The spoon gives a clearer lamb tagine sauce test than the busy surface of the pot. Brothy sauce runs off almost immediately; ready sauce leaves a thin glossy film before sliding away; over-reduced sauce sits heavily and starts to mound. That movement tells you more about concentration than color alone.
Season and Serve
Season. Remove the cinnamon stick and skim excess surface fat. Check the salt first, then add lemon juice to taste. Taste before reaching for honey; the apricots may already have given you enough sweetness. Start with 1 teaspoon if you want more.
Serve. Add the lemon zest, fresh cilantro and toasted almonds. Stir gently and serve hot.
Scaling up: use a larger pot as well as more ingredients. Let the liquid level around the lamb guide the extra stock or water; braising liquid rarely scales neatly with the meat.
How to Read the Pot as It Cooks
The recipe gives you the timetable. The pot tells you when that timetable needs changing.
Think of moisture, tenderness and sauce as three separate dials on the same braise. A dry bottom is a moisture problem; a resistant fork is a tenderness problem; a spoon that will not hold a light coating is a sauce problem. Diagnose the right dial first, because fixing one automatically can make another worse.
The measured liquid is only a starting point. A broad casserole loses water faster than a snug Dutch oven with a heavy lid, while the lamb and onions contribute moisture of their own. Two cooks can start with the same amount and see very different pots an hour later.
The first hour is mostly about leaving the lamb alone. Keep enough moisture in the pot for a gentle braise while the shoulder is firm. A drying bottom is your cue for a splash of hot liquid. Starting with too much stock creates the opposite problem: plenty of water that eventually has to cook away.
Moisture buys the shoulder time. Eventually the useful question changes: has that time actually made the meat tender?
Lamb can be cooked through and still feel chewy because its connective tissue has not softened enough. Test one of the larger pieces. The fork should enter easily and gentle pressure should make the meat yield without collapsing.
If the fork still has to argue with the lamb, dinner needs more time.
Once the Lamb Is Tender, Judge the Sauce
Tender meat changes the job. A brothy pot can now spend some time uncovered; sauce that already coats the lamb lightly is close to where you want it.
Perfect lamb and apricots in a pot with too much liquid is an easy fix. Lift the solids onto a warm plate, reduce the sauce on its own, then return everything briefly to coat and heat through.
Once the finished lamb and apricots are out of the pot, the sauce can reduce more actively without pushing either solid further. Return them only briefly when the liquid has reached the consistency you want, so the final coating stays concentrated without sacrificing tenderness.
At the table, aim for enough sauce to collect around the lamb and soak into bread or a spoonful of grain.
Fix My Lamb Tagine
Lamb Problems
Problem
What to do
Lamb is still tough
Cover and cook for another 15 minutes, then test one of the largest pieces again.
Lamb is dry and still chewy
Keep it in the moist braise while a fork meets resistance. Very lean cuts and small pieces have less room for error.
Lamb is tender but dry
Stop cooking it and serve with plenty of sauce. Next time use shoulder or neck and keep the pieces larger.
Lamb is falling apart
Stir as little as possible and serve gently. Begin the tenderness checks earlier next time.
Sauce and Seasoning Problems
Problem
What to do
Sauce is watery
Once the lamb is nearly tender, leave the lid off and let some water evaporate.
Lamb is ready but sauce is very watery
Lift the lamb and apricots onto a warm plate, reduce the sauce separately, then return them briefly to coat and heat through.
Sauce is disappearing
Add hot water or stock 30–60 ml / 2–4 tablespoons at a time.
Tagine tastes too sweet
Check the salt first, then add lemon juice a little at a time. Leave out the honey.
Tagine tastes flat
Correct the salt, then add lemon before reaching for more ground spice.
Sauce tastes bitter or burnt
Transfer the unburnt upper portion to a clean pot without scraping the bottom, then reassess the seasoning.
Surface looks greasy
Skim the excess fat now, or chill the tagine and lift away the hardened fat before reheating.
Bottom is catching
Lower the heat, add a small amount of hot liquid and leave the scorched material stuck to the pot.
Apricot Problems
Problem
What to do
Apricots have broken down
They’ve become part of the sauce. Add them later next time for more distinct pieces.
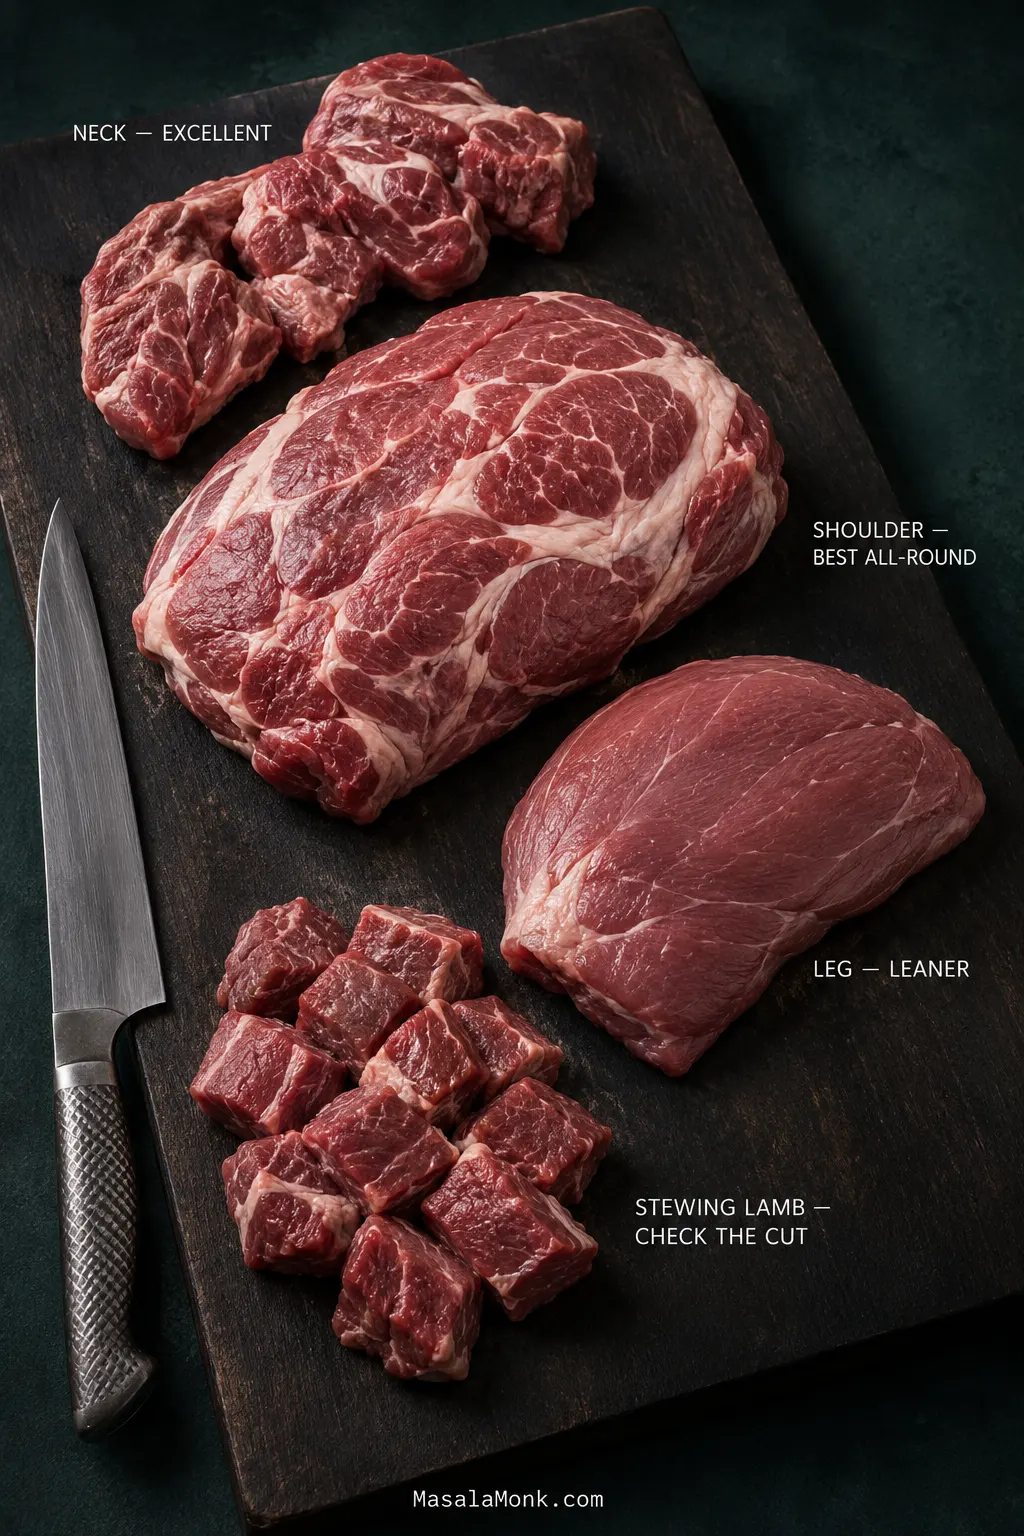
Lamb shoulder gives you the widest margin for error. It stays succulent through a long braise, while its collagen gives the sauce natural body as the shoulder softens. That also gives you some breathing room when the meat and sauce don’t reach their ideal point at exactly the same moment.
Cut
How it behaves
Shoulder
Juicy, well suited to a long braise and the best all-round choice.
Neck
Deeply flavorful with plenty of connective tissue; allow extra time if necessary.
Leg
Leaner and more prone to drying during prolonged cooking.
Diced/stewing lamb
Convenient when the underlying cut is suitable for braising and the pieces are not too small.
At the butcher counter, the meat itself can tell you something the label cannot. Shoulder tends to look irregular and marbled; leg is cleaner and leaner; neck carries more compact connective tissue. Most importantly, “stewing lamb” describes how the meat has been cut, not which lamb cut it came from, so it is worth asking what is actually in the pack.
Already bought a whole leg and want to keep it intact? Our roast leg of lamb is built for browned edges, a juicy center and carving into slices.
Buying and Preparing Lamb Shoulder
The 1 kg / 2.2 lb in this recipe means shoulder after trimming. A heavy exterior fat cap means buying a little extra. Bone-in shoulder works too; allow extra purchase weight for the bone, then judge the cooking by tenderness rather than trying to match the boneless weight exactly.
Remove thick deposits and hard seams of exterior fat while keeping the marbling within the meat. Leave the chunks generous—around 4 cm / 1½ inches. Small pieces dry out more easily over a long braise.
Shanks need their own bone-in timing, while minced lamb belongs in a kefta-style tagine rather than this recipe.
Mutton and goat also suit these spices, although older meat may take longer to soften. For a completely different use of mutton—drier, darker and built around a reduced masala—see our Punjabi mutton bhuna.
Apricots, Spices and the Sweet-Savory Balance
Dried apricots soften in the sauce and pick up some of the lamb and spice around them. Their tart edge matters: the fruit tastes sweet, but the next forkful still tastes unmistakably like lamb.
For 1 kg / 2.2 lb lamb, 180 g / about 6¼ oz dried apricots gives the fruit a clear presence without dominating every bite. Adding them once the shoulder is nearly tender protects their texture if the meat takes longer than expected.
This recipe is formulated for dried apricots. Fresh apricots contain much more water and soften quickly, so add them only near the end and cook just until tender instead of making a direct gram-for-gram substitution. Drain canned apricots particularly well if they’re packed in syrup.
When judging dried apricot texture in tagine, look at shape as well as gloss. Firm fruit stays wrinkled and compact; ready fruit swells and rounds out while keeping clean edges; farther along, those edges begin feathering into the sauce. That last stage is not ruined fruit—it simply shifts more apricot flavor from distinct pieces into the braising liquid.
The Spice Blend
Cumin and coriander carry most of the earthy flavor, with ginger and black pepper adding warmth. Turmeric and paprika deepen the sauce. Cinnamon should remain a background note rather than make the lamb taste candied.
The blend is aromatic but mild rather than chile-hot. Cayenne controls the heat here, so you can leave it out for a gentler lamb tagine or increase it carefully if you prefer more warmth.
Ras el hanout can replace most of the individual ground spices, but blends vary enormously. Start around 1½ tablespoons and use up to 2 tablespoons with a milder blend, accounting for any salt, chili or cinnamon already present.
Saffron is optional. A small pinch adds a subtle floral note, but the tagine doesn’t depend on it. If that little jar rarely leaves the cupboard, our guide to saffron and how to use it explains where its flavor earns a place.
Salt and acidity become more pronounced as the sauce reduces, so make the important adjustments near the end. Check the salt first, then add lemon. Taste before reaching for honey; the apricots may already have given you enough sweetness.
What Is a Tagine—and Is There One Authentic Version?
The word tagine refers both to the distinctive lidded cooking vessel and to the family of dishes associated with it. In other words, “tagine” describes both the pot and a style of slow, gently cooked dishes. Moroccan tagine isn’t one fixed recipe: lamb may appear with prunes or apricots, while other versions feature preserved lemon and olives, vegetables, fish or kefta. For a wider look at the food tradition, the Moroccan National Tourist Office has a useful overview of tajine and other emblematic dishes.
This version is designed around a Dutch oven in a conventional home oven, with browned shoulder as its base. Those are deliberate choices for this recipe, not claims about how every Moroccan cook prepares tagine.
Do You Need a Tagine Pot?
No. A heavy Dutch oven you already own can make an excellent tagine. It holds the steady, covered heat the shoulder needs and moves easily from stovetop to oven.
For a tagine pot vs Dutch oven comparison, carry over the flavor idea rather than automatically carrying over the same liquid and timing. Heavy cast iron and clay manage stored heat, direct heat and evaporation differently. Therefore, the vessel is part of the cooking method—not merely a different-looking container for exactly the same instructions.
This recipe also browns the lamb first. Some tagine methods skip that step; here, the dark patches on the shoulder and the fond left in the pot create a deeper roasted base.
Cooking in an actual tagine? Make sure the vessel is intended for cooking. Glazed ceramic, unglazed clay, flameproof ceramic and cast-iron versions behave differently, so follow the manufacturer’s instructions for seasoning, direct heat and thermal shock. Some clay vessels benefit from a heat diffuser over a concentrated gas flame.
For stovetop cooking in a heavy covered pot, maintain the gentlest simmer you can. Look at the bottom and liquid a little more often than you would in the oven because concentrated sauce can catch over direct heat. Let tenderness, not the clock, decide when the lamb is ready.
Slow cooker or pressure cooker: both retain far more moisture than this Dutch-oven method, so do not carry the 350 ml / about 1½ cups liquid quantity across unchanged. For a reliable conversion, use an appliance-specific lamb-tagine formula and add the dried apricots late enough to keep their shape rather than treating this recipe as a line-by-line conversion.
Prunes, Dates, Preserved Lemon and Other Variations
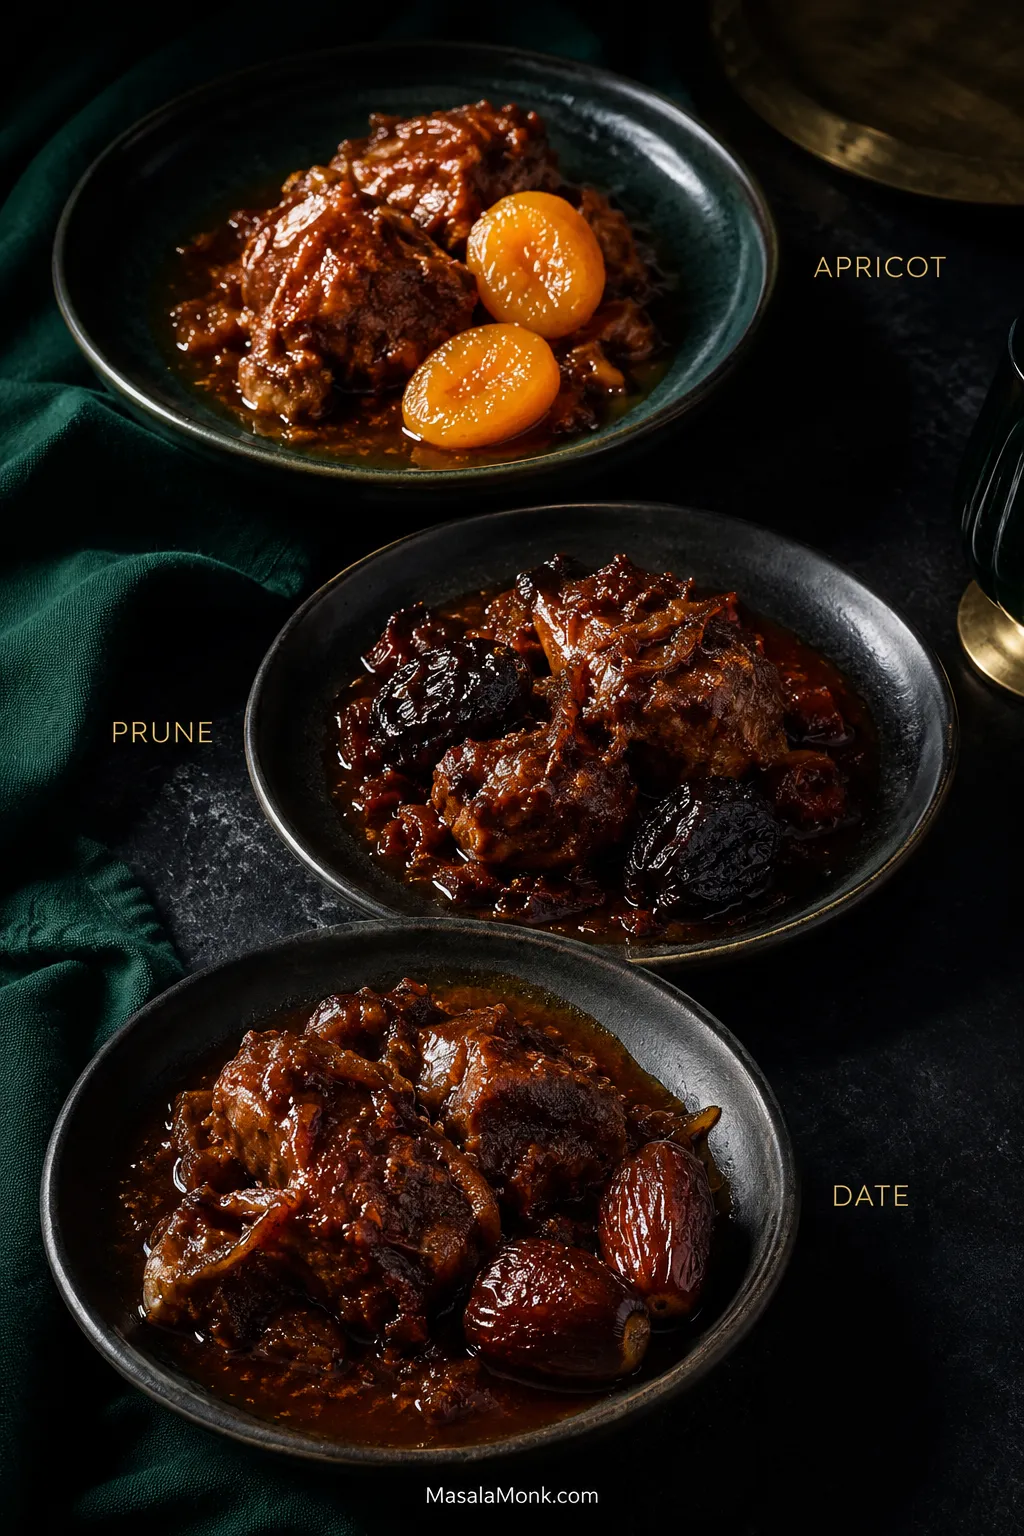
Prunes produce a darker, more jammy sauce and pair particularly well with almonds. They usually bring enough sweetness without much help from honey.
Dates are sweeter still, with more caramel depth. Use them more sparingly than apricots and keep enough lemon in the sauce to give the lamb some contrast.
Switching dried fruit changes the finishing decisions as well as the flavor. Apricot keeps the sauce brighter, prune pushes it darker and jammier, and date brings deeper caramel sweetness. After changing the fruit, taste again before copying the apricot version’s honey or lemon adjustments, because the balance at the end may need to move with the substitution.
Preserved lemon and olives take the dish somewhere saltier and more intensely citrusy. Both bring seasoning of their own, so begin with less salt and use water or low-sodium stock.
Cooked chickpeas can stretch the pot; add them during the last 20–30 minutes. Carrots, squash and sweet potato in generous bite-size pieces need roughly 30–45 minutes and will absorb some of the braising liquid.
Mrouzia is a different preparation altogether, traditionally associated with lamb, honey, raisins and almonds. It deserves its own recipe.
What to Serve With Lamb Tagine
The tagine is soft, fragrant and deeply flavored, so its best partners are simple: something to catch the sauce and something fresh enough to sharpen the plate.
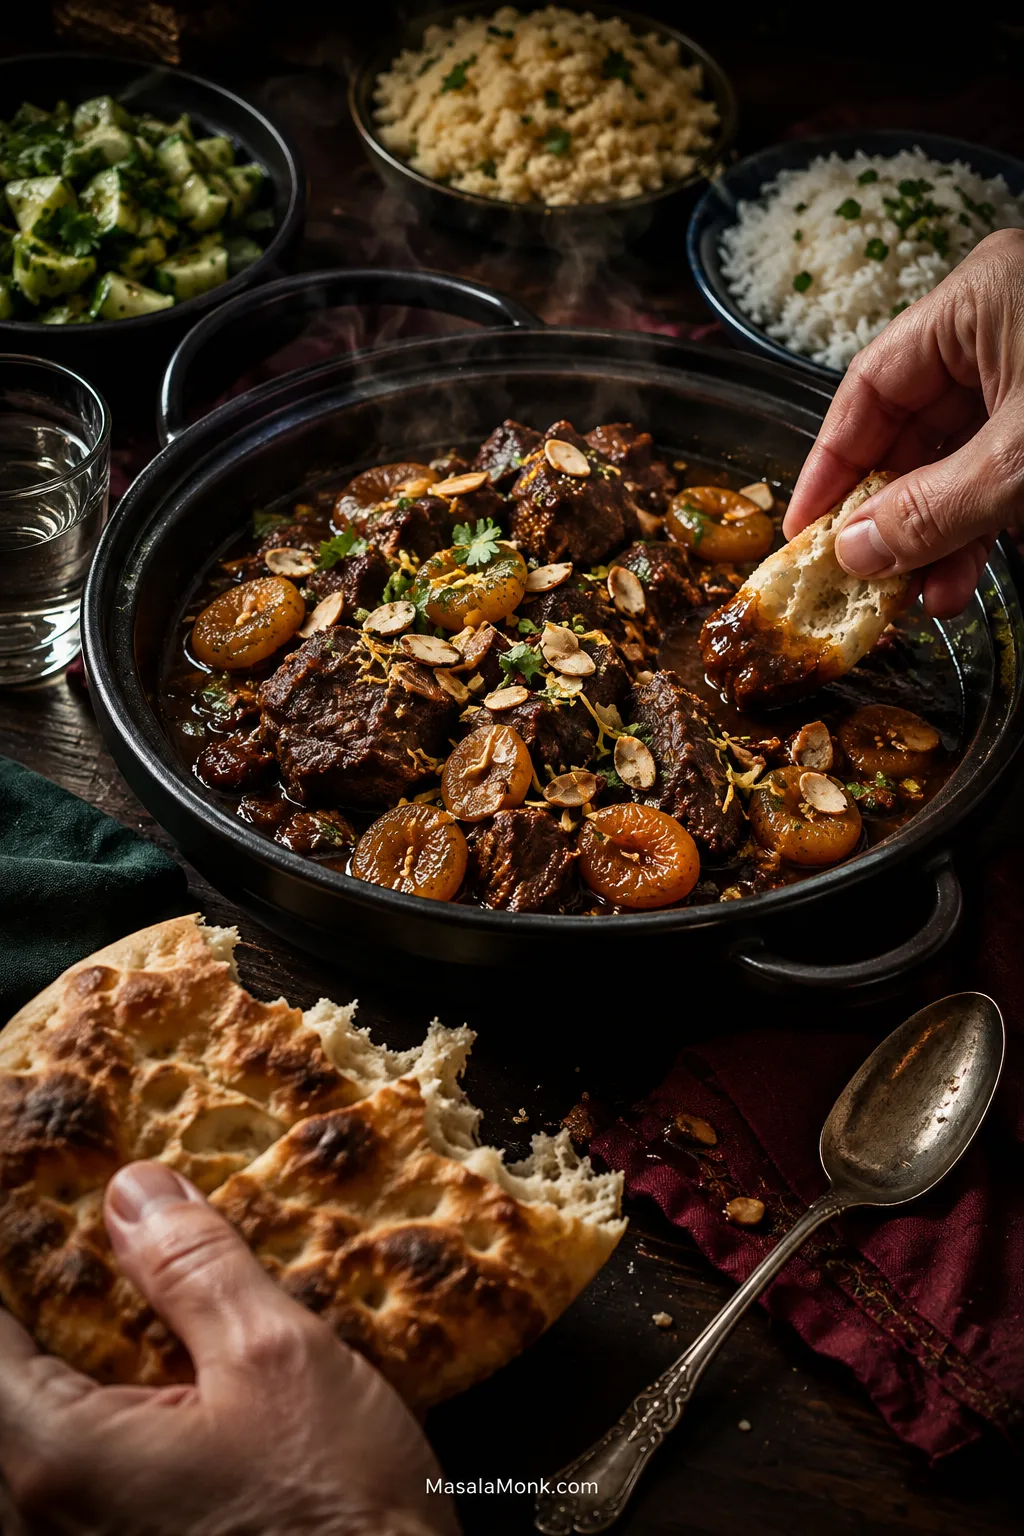
When deciding what to serve with lamb tagine, organize the table around contrast. Keep bread closest for sweeping through the sauce, serve couscous or rice separately when you want a more substantial plate, and put something cool and crisp alongside. That arrangement lets each bite move between rich, absorbent and fresh instead of becoming uniformly soft.
Moroccan bread is the classic table partner. Tear it and use it to scoop the lamb and sweep through the sauce. If khobz isn’t available, homemade pita is a practical stand-in.
For a plated meal, couscous is light and excellent at absorbing the braising juices. For a gluten-free plate, choose rice; standard couscous is wheat-based. Our rice cooking guide will help if you want loose, separate grains.
A lemony salad, fresh herbs or cucumber gives the plate a cooler, sharper side. Our crisp cucumber salad works especially well against the warm lamb and fruit.
Make Ahead, Store, Freeze and Reheat
If people are coming over, this is the kind of make-ahead recipe that genuinely changes the evening. The lamb can already be tender, excess fat can be removed cleanly once chilled, and all that’s left is warming the sauce and adding the fresh garnish.
Cook the tagine completely, cool it promptly and refrigerate it. The USDA’s leftovers guidance recommends refrigerating cooked food within 2 hours and generally using refrigerated leftovers within 3–4 days.
How to Reheat and Freeze Lamb Tagine
Remove any hardened excess fat while the tagine is cold, then reheat gently with the lid on. Wait until it is hot before deciding whether the sauce needs loosening; add small splashes of water or low-sodium stock only if necessary.
Reheat until thoroughly hot throughout; if checking with a thermometer, leftovers should reach 74°C / 165°F. Add fresh cilantro, lemon zest and toasted almonds after reheating.
For freezing, cool the tagine and pack it into airtight meal-sized portions. Freeze for up to 3 months for best quality, thaw overnight in the refrigerator when possible, and reheat thoroughly.
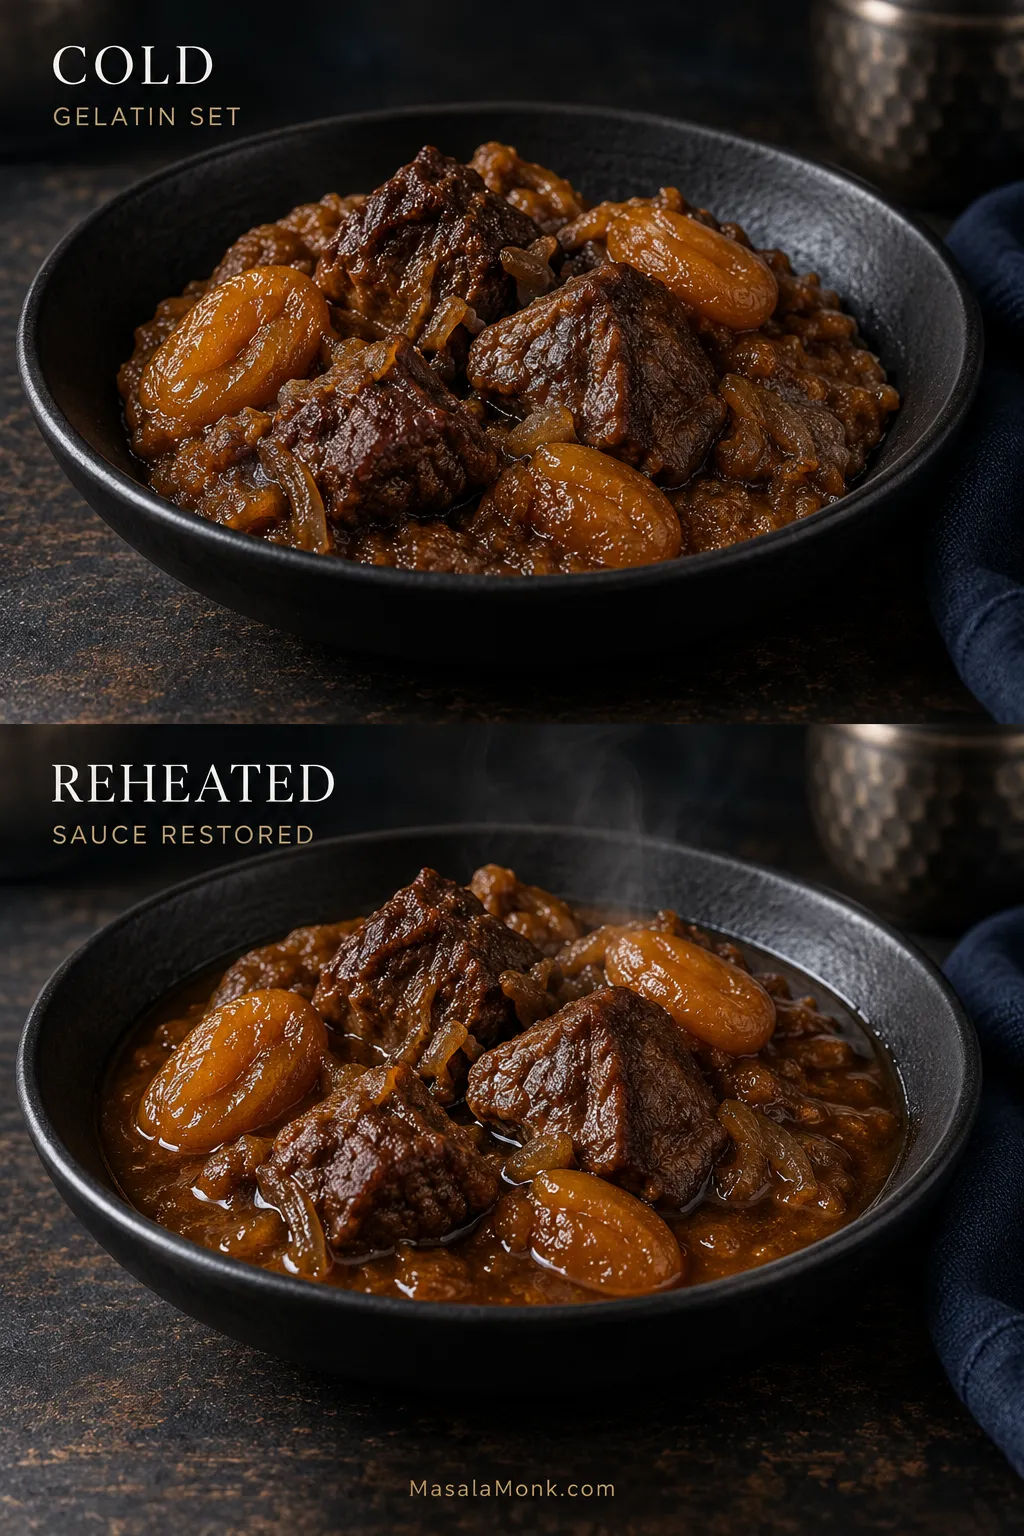
One last thing: a refrigerated tagine can look almost dry because lamb gelatin has set and the fruit is holding moisture. Give it heat before you give it stock. Much of the sauce returns as it warms.
When reheating lamb tagine, judge the sauce by movement rather than shine. Cold gelatin can still catch the light and look moist even though it will not flow; once thoroughly hot, the sauce should move freely around the lamb again. Only after seeing that hot state can you tell whether refrigeration or reheating actually cost enough moisture to require extra liquid.
The useful moment to remember is not when the timer beeps. It is when you lift the lid, press a fork into one of the larger pieces and feel the lamb finally give. Lemon lifts the darker sauce, while the toasted almonds add a little crackle against all that softness.
Scatter over the cilantro, put bread within reach, and leave the serving spoon near the pot. The sauce at the bottom is worth going back for.