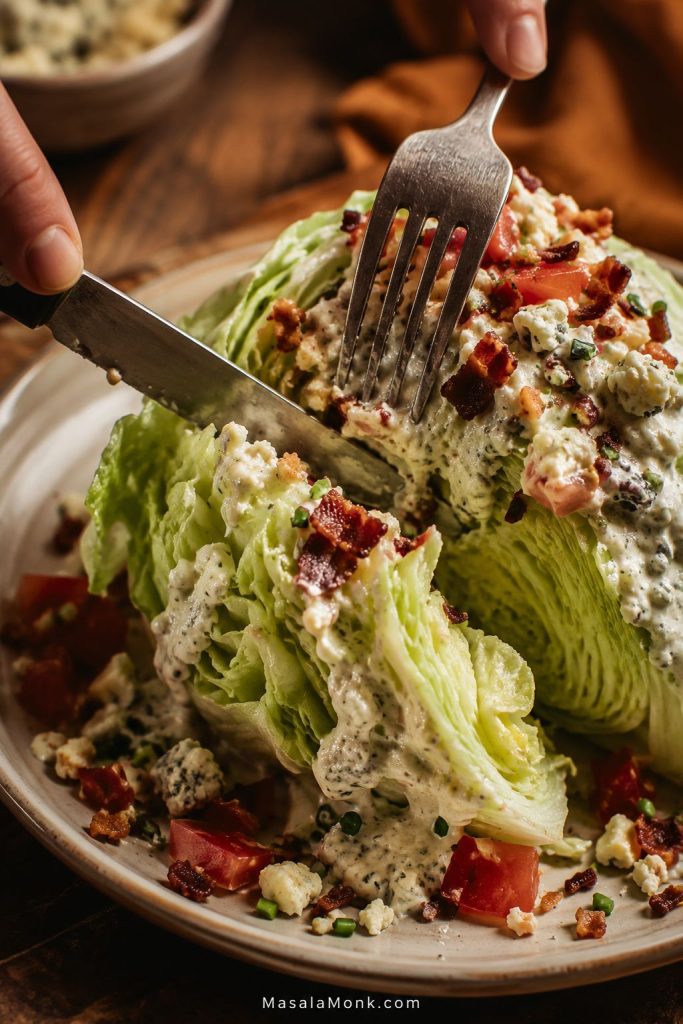
A wedge salad is funny because it looks almost too simple: a quarter of iceberg lettuce, a spoonful of dressing, and a few toppings. Then you cut into it and remember why steakhouses never let it disappear.
The lettuce snaps cold under the knife, the dressing settles into the layers, the bacon hits salty and crisp, and suddenly the plainest lettuce in the fridge feels like the best side on the table.
A wedge salad is not a tossed salad. It is a cold, knife-and-fork salad where the details matter: dry lettuce, thick dressing, crisp bacon, and toppings small enough to stay put. The trick is not doing more; it is doing those simple things properly.
What Makes a Good Wedge Salad?
Most disappointing wedge salads fail for the same reason: wet lettuce, thin dressing, warm bacon, and toppings that slide off. This version fixes those small things first, so the salad stays crunchy, creamy, and easy to eat.
This is the kind of recipe to keep in your back pocket for nights when you want a salad that feels special without making the meal harder. Start with the blue cheese wedge salad, then use the ranch, Outback-style, chopped, grilled, keto, vegetarian, no-bacon, and no-blue-cheese options whenever you want a slightly different version.
It also looks more impressive than the work it takes, which is exactly why it is such a good starter for guests, burger nights, steak dinners, and summer meals from the grill.
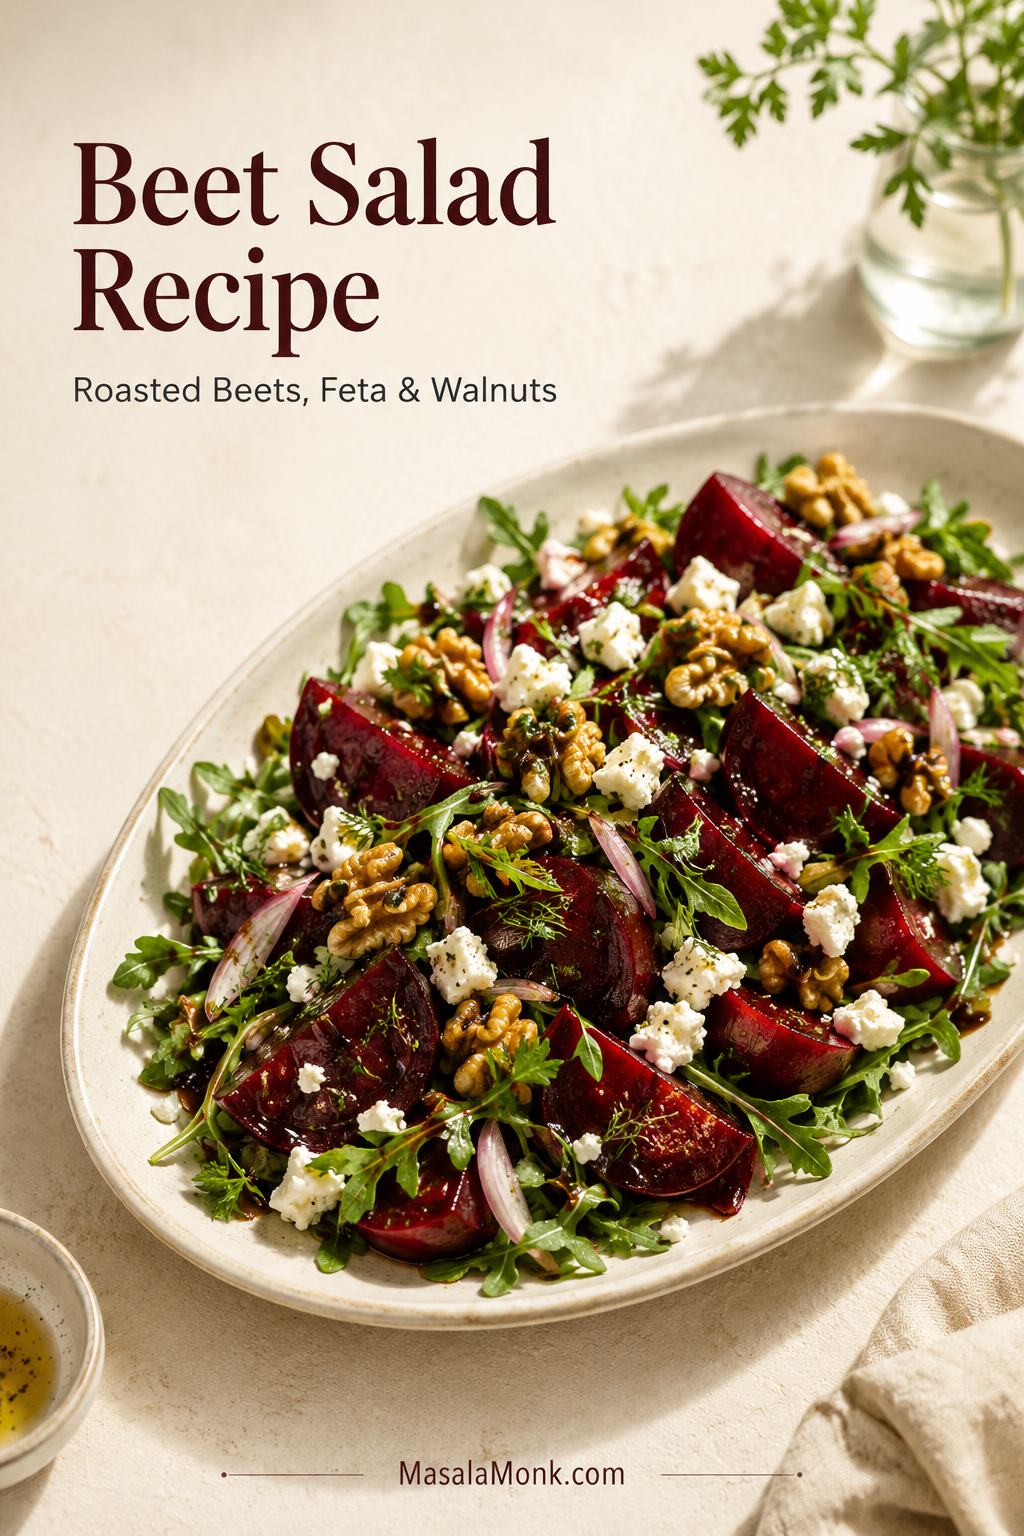
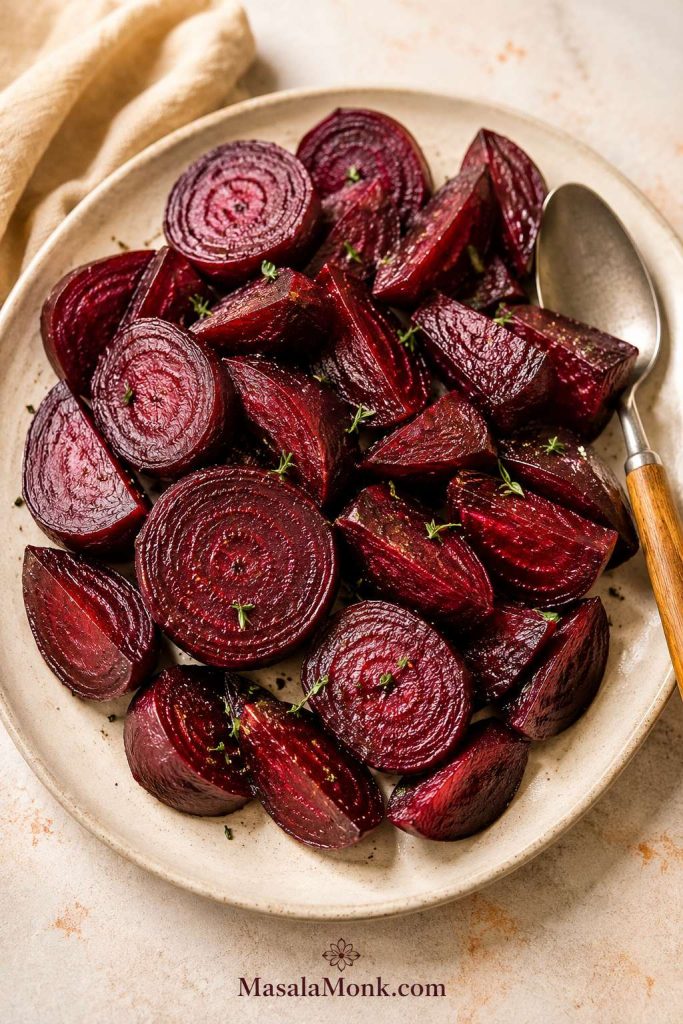
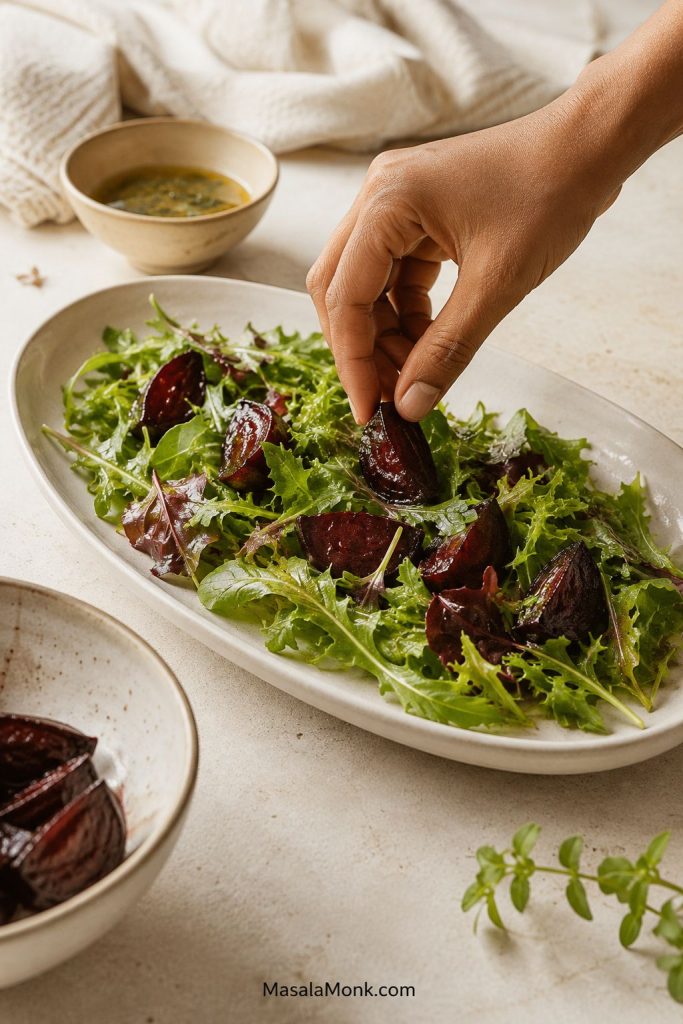
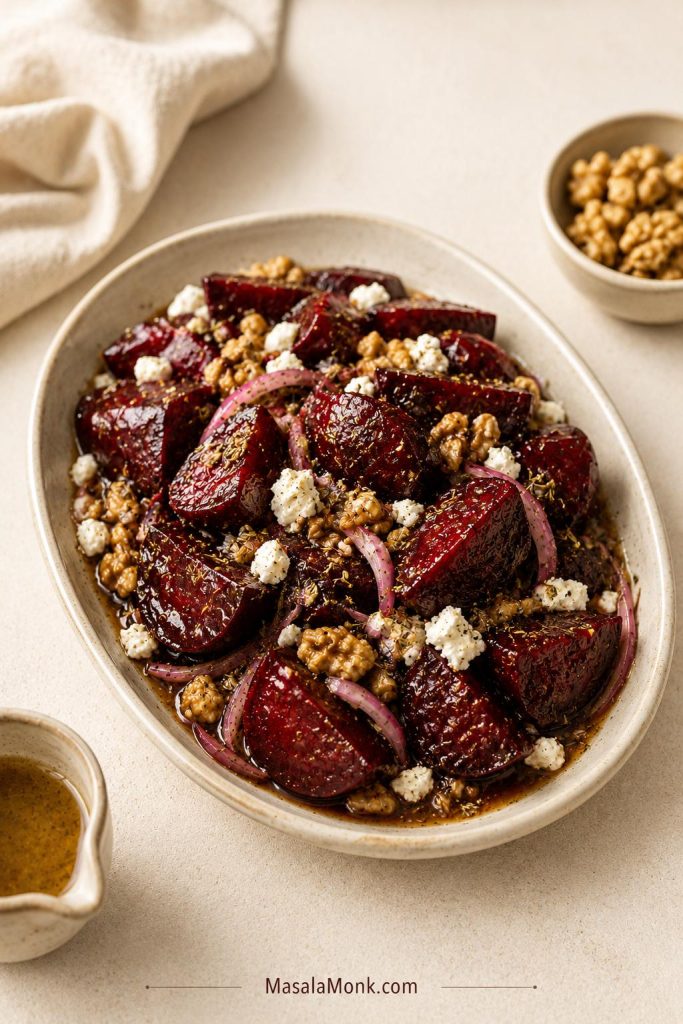
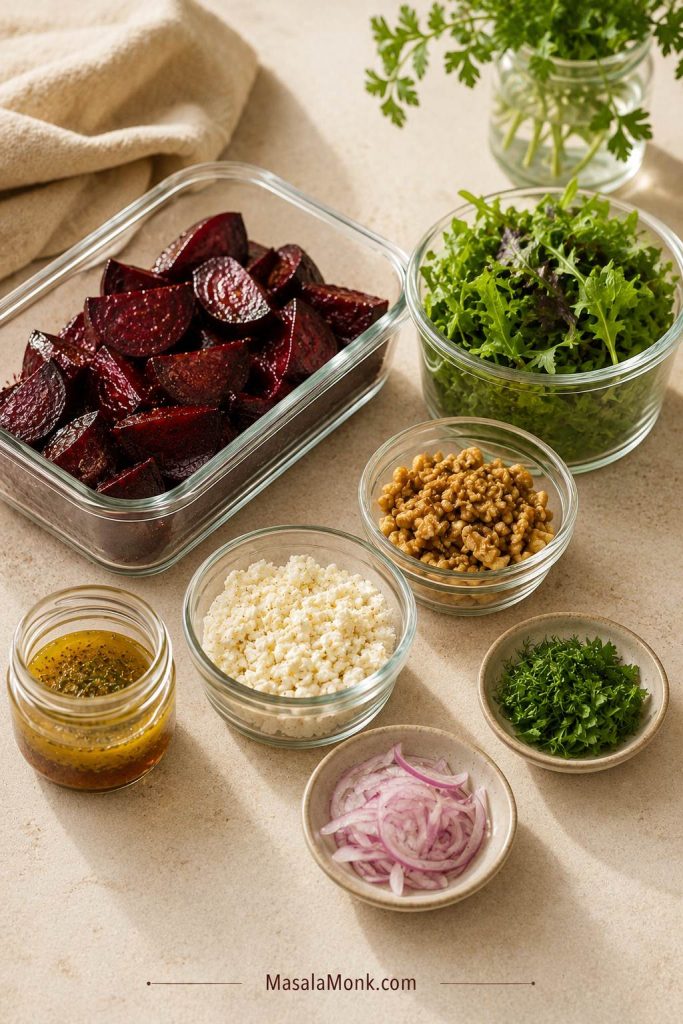
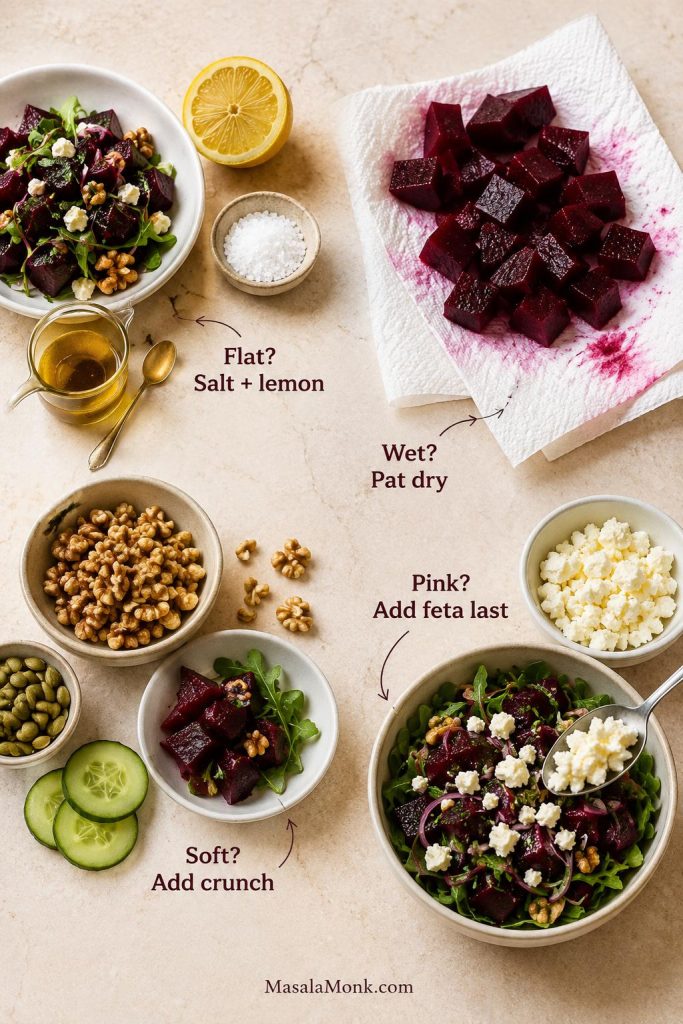
If you are building a fresh salad spread, this sits nicely next to a crisp cucumber salad or a colorful beet salad.
Quick Answer: What Is a Wedge Salad?
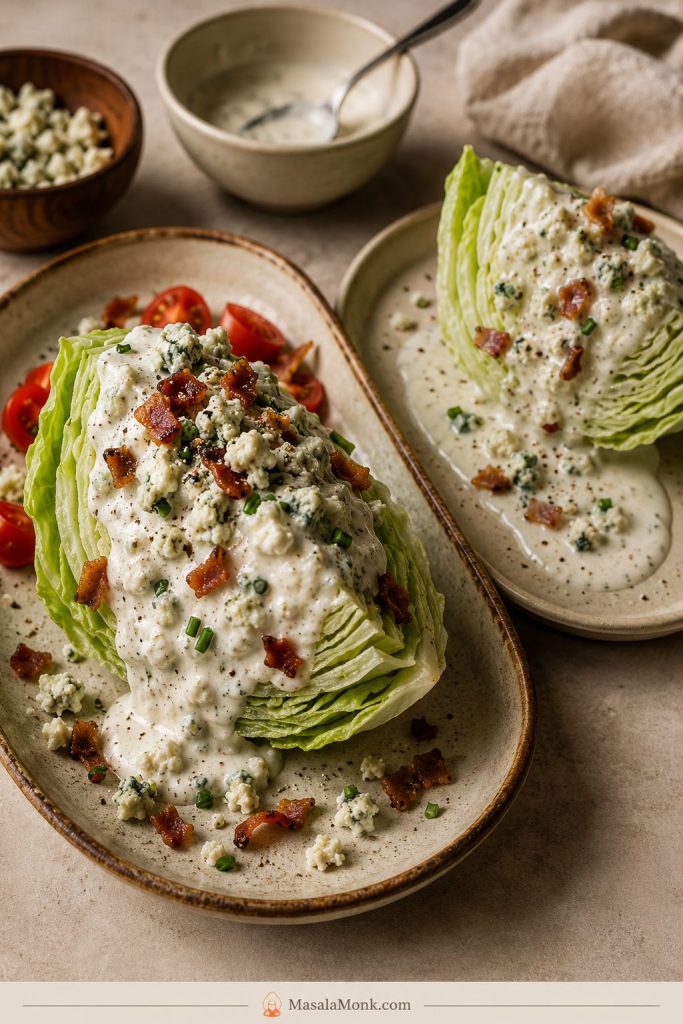
A wedge salad is a cold quarter of iceberg lettuce topped with creamy dressing, crisp bacon, tomatoes, onion or chives, blue cheese crumbles, and black pepper. It is usually served as a knife-and-fork salad, which is part of its old-school charm.
Blue cheese dressing is traditional, while ranch is the easiest milder swap. Iceberg works because it stays crunchy and sturdy under creamy dressing and toppings.
Why This Recipe Works
The salad works because the textures stay in balance: crisp iceberg, creamy dressing, salty bacon, juicy tomatoes, and a sharp little finish from onion and blue cheese.
That is why a good wedge salad never feels like a sad side salad. It is fresh enough to reset the plate and rich enough to belong beside burgers, steak, grilled chicken, or a baked potato.
- Iceberg brings the snap. Its tight layers hold the wedge shape and stand up to a rich dressing.
- The dressing grips the layers. It should fall from a spoon in thick ribbons, not pour like milk.
- Crisp bacon gives salty crunch. Soft bacon disappears, but crisp bits make every bite better.
- The toppings are small on purpose. Think confetti, not chunks.
- Everything comes together at the end. Last-minute assembly keeps the wedge fresh instead of soggy.
What Makes It Taste Like the One You’d Order Out?
A great wedge salad is cold, neat, generous, and balanced. The lettuce is chilled, the dressing is thick enough to coat, the bacon is crisp but not hot, and the toppings stay where they belong.
- Use cold plates if you can. They help the iceberg stay crisp longer.
- Dress the cut sides, not just the top. A little dressing in the layers makes better bites.
- Add toppings after the dressing. The dressing helps hold bacon, tomatoes, onion, and crumbles in place.
- Finish with black pepper. It cuts through the creamy dressing and sharpens the whole salad.
Wedge Salad Ingredients
The ingredient list is short, so each part has to earn its place.

Iceberg Lettuce
Iceberg is the heart of the recipe. It is crisp, mild, refreshing, and sturdy enough to cut into wedges. One medium head gives you 4 large wedges or 6 smaller starter wedges.
Look for a head that feels heavy for its size, with tight leaves and no slimy or brown patches.
Bacon
Thick-cut bacon gives the strongest salty crunch. Cook it until crisp, drain it well, and chop it small so the bits catch in the dressing instead of sliding off the plate.
You can also cook the bacon in the oven. Arrange it on a lined sheet pan and bake at 400°F / 200°C until crisp, usually 15–20 minutes depending on thickness.
Let the bacon cool before adding it. Warm bacon fat can soften the lettuce and loosen the dressing.
Tomatoes
Cherry or grape tomatoes are the easiest win here: sweet, tidy, easy to halve, and less likely to flood the plate than large chopped tomatoes.
If they are very juicy, sprinkle them lightly with salt and let them drain for 5–10 minutes before adding them to the salad. This keeps the finished plate fresher and cleaner.
Red Onion, Chives, or Scallions
Red onion gives a sharp bite, but it can be strong. Dice it finely, or soak it briefly in cold water for a milder flavor.
Chives are the gentlest option. Scallions are fresh and easy, with a little more bite than chives but less intensity than red onion.
Blue Cheese Dressing
Blue cheese, sometimes written as bleu cheese on steakhouse menus, is the classic flavor for a wedge. For the best version, the dressing should sit on the lettuce, not run away from it.
Blue Cheese Crumbles
Extra crumbles make the salad feel richer and more old-school. Use a creamy, tangy blue cheese if you like a smoother bite, or a sharper blue cheese if you want more punch. Either way, use it lightly so the flavor stays balanced.
Black Pepper
Freshly cracked black pepper cuts through the creamy dressing and gives the finished salad a little bite.
Optional Toppings
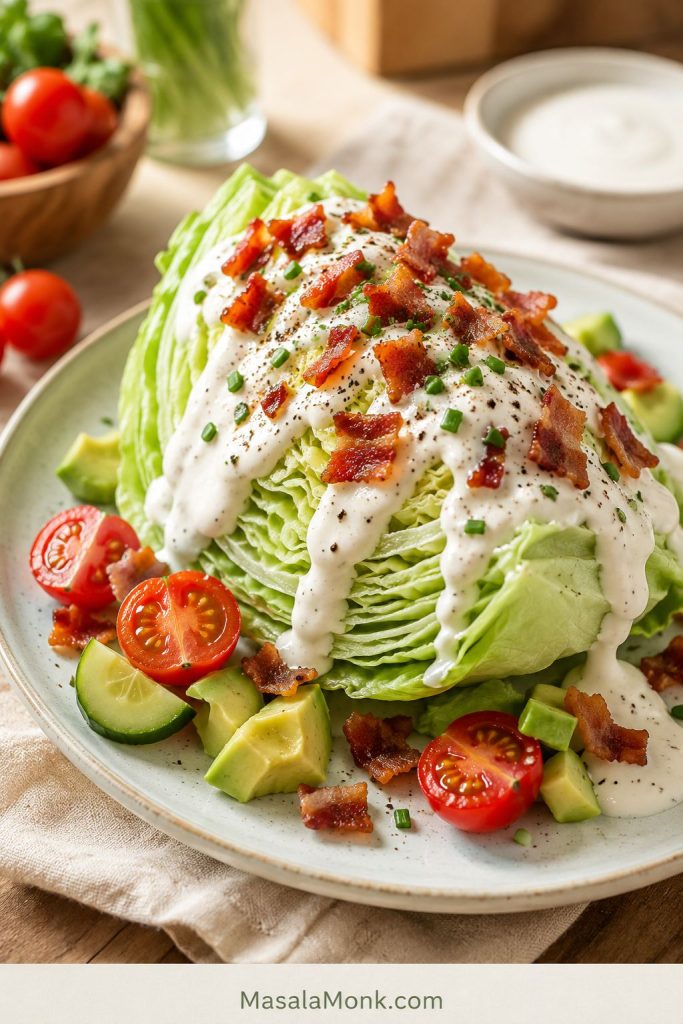
Balsamic glaze, avocado, hard-boiled egg, cucumber, crispy breadcrumbs, fried shallots, grilled chicken, steak strips, shrimp, croutons, roasted chickpeas, and toasted nuts all work well.
The Best Lettuce to Use
Iceberg is the classic choice because it has tight layers, clean crunch, and enough structure to hold dressing and toppings. Softer greens can taste good, but they collapse faster.
- Iceberg lettuce: the most reliable choice because it is crisp, sturdy, and tightly layered.
- Romaine hearts: good for grilled wedge salads or Caesar-style wedges.
- Little gem lettuce: useful for mini wedges or appetizer-style servings.
- Butter lettuce or green leaf lettuce: better for tossed salads than wedge salads because they are softer.
For the main version, iceberg is still the one to buy. Romaine can work if you want a grilled or Caesar-style variation, but iceberg gives the true chilled crunch.
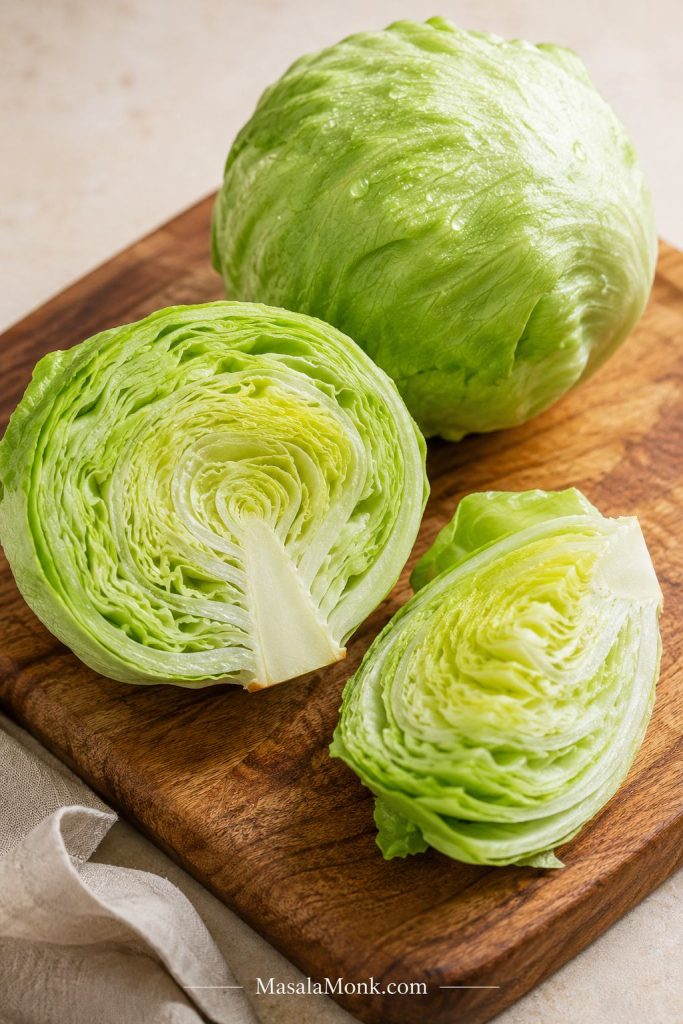
How to Wash and Cut Iceberg Lettuce for Wedge Salad
The wedge holds together because you cut through the core, not around it. Remove the core too early and the leaves can fall apart before they ever reach the plate.

- Remove damaged or wilted outer leaves.
- Rinse the outside of the iceberg head under cold water.
- Pat the outside dry with a clean towel.
- Trim only the brown end of the stem if needed.
- Place the lettuce on a cutting board with the core facing down.
- Cut the head in half through the core.
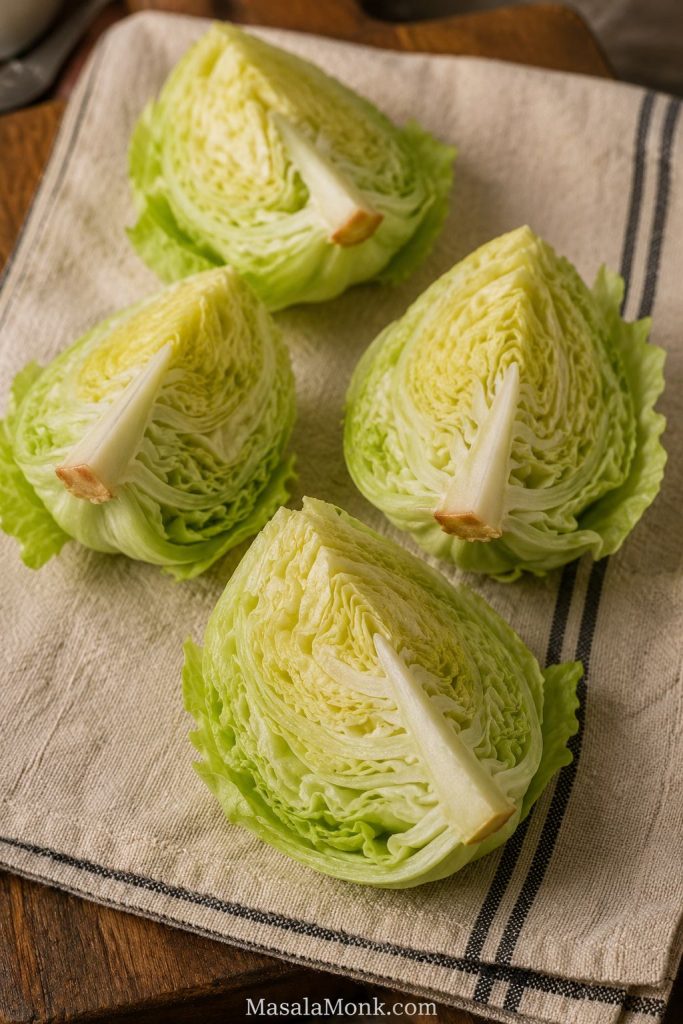
- Cut each half through the core again to make 4 wedges.
- Keep a small part of the core attached so each wedge holds together.
- Gently rinse between the layers only if needed.
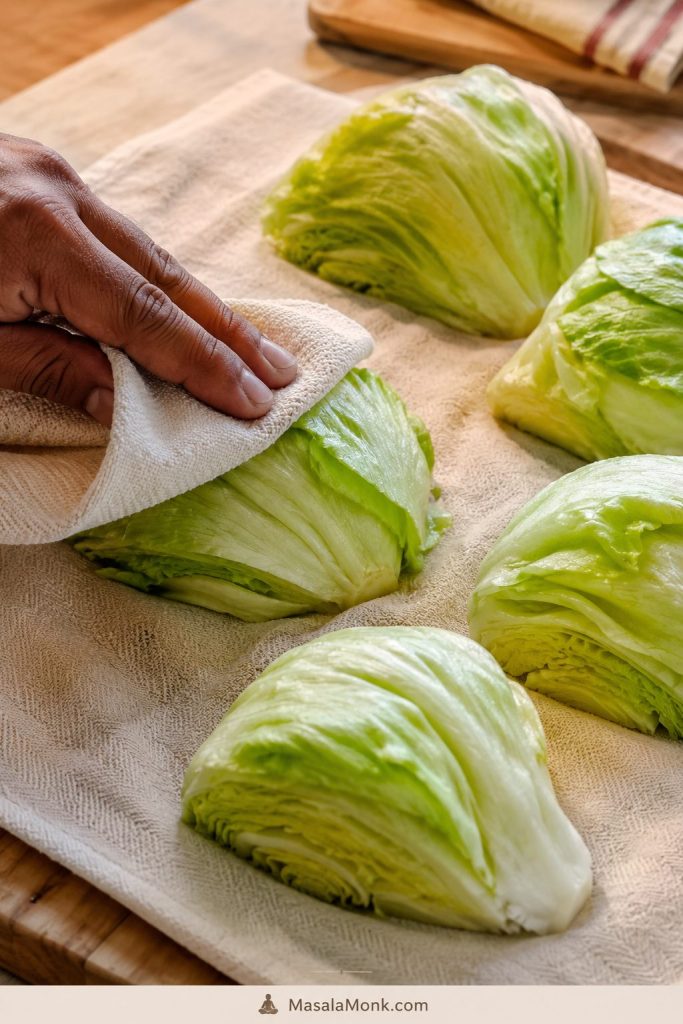
- Drain the wedges cut-side down.
- Pat very dry with paper towels or a clean kitchen towel.
- Chill until you are ready to assemble.
Core Attached Cue
Use this visual check after cutting: each iceberg wedge should still have enough core to hold the layers together, but not so much that the hard center dominates the bite.
If the lettuce already looks clean inside, avoid forcing water deep between every layer. Rinse what needs rinsing, dry it well, and keep the wedges cold.
Quick produce note: rinse lettuce under plain running water. The FDA also advises skipping soap or produce wash for fruits and vegetables.
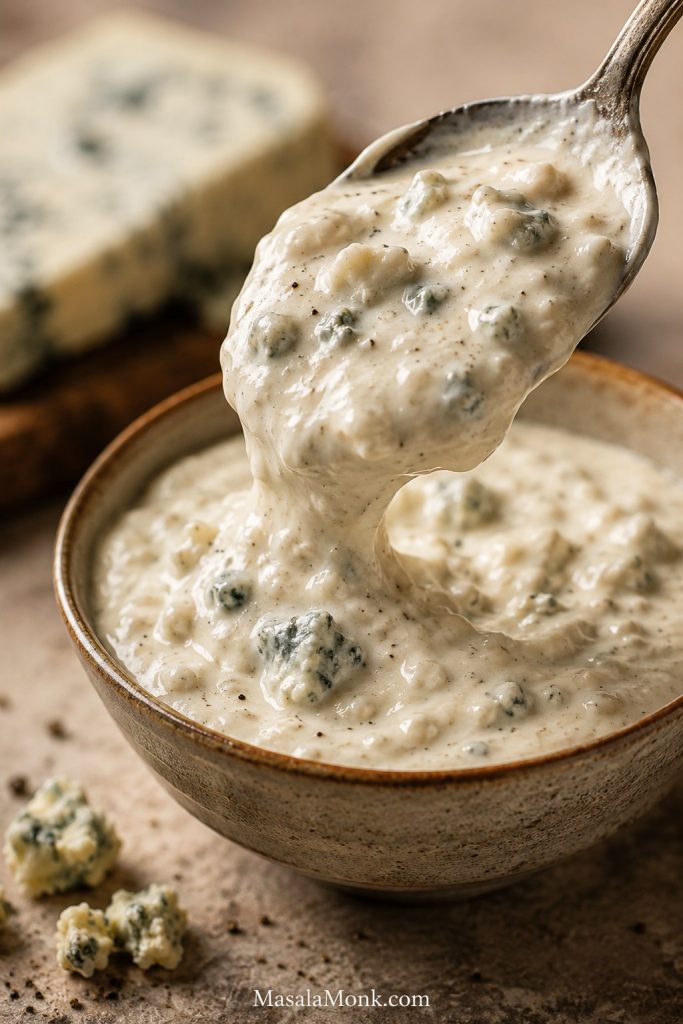
The Dressing Should Be Thick, Not Runny
Blue cheese dressing gives this version its creamy, tangy steakhouse flavor. Texture matters as much as taste here.
Think creamy dressing, not pourable dressing. It should fall from a spoon in thick ribbons. Add milk or buttermilk one tablespoon at a time, because it is much easier to thin a thick dressing than rescue a watery one.
Blue Cheese Dressing Ingredients
| Ingredient | US Measure | Metric |
|---|---|---|
| Sour cream | ½ cup | 120 g |
| Mayonnaise | ¼ cup | 55 g |
| Buttermilk or milk | 2–3 tbsp | 30–45 ml |
| Lemon juice or red wine vinegar | 1½–2 tsp | 7–10 ml |
| Worcestershire sauce | ½ tsp | 2–3 ml |
| Garlic powder | ¼ tsp | About 1 g |
| Freshly cracked black pepper | ¼–½ tsp | 1–2 g |
| Blue cheese, crumbled | 2 oz | 56 g |
| Salt | To taste, optional | To taste |
How to Make the Dressing
Whisk together the sour cream, mayonnaise, buttermilk or milk, lemon juice or vinegar, Worcestershire sauce, garlic powder, and black pepper. Stir in the crumbled blue cheese.
For a smoother dressing, mash some of the cheese into the mixture with the back of a spoon. For a chunkier version, fold the crumbles in gently at the end.
Chill the dressing for 20–30 minutes before serving. If it becomes too thick in the fridge, loosen it with a small splash of buttermilk or milk.
To soften a sharp dressing, add a spoonful more sour cream. For a flat dressing, add a little more lemon juice or black pepper. Taste before adding salt, because blue cheese varies a lot; add only a small pinch if needed.
This makes about 1 to 1¼ cups dressing. Start with ¾ cup for the salad and serve extra on the side if needed.
If you use store-bought dressing, choose a thick one, preferably refrigerated. To make it taste fresher, stir in black pepper, a squeeze of lemon, and a spoonful of blue cheese crumbles. Thin bottled dressing is better served on the side; a wedge needs dressing with some body.
How to Make Wedge Salad
Once the lettuce, dressing, bacon, and toppings are ready, assembly takes only a few minutes.
1. Make the Dressing
Whisk together the blue cheese dressing ingredients and chill the dressing for 20–30 minutes. This gives it better flavor and a colder, creamier texture.
2. Cook the Bacon
Cook the bacon in a skillet over medium heat until crisp, about 8–10 minutes. Transfer it to paper towels to drain, then chop or crumble it. Let it cool before it touches the lettuce.
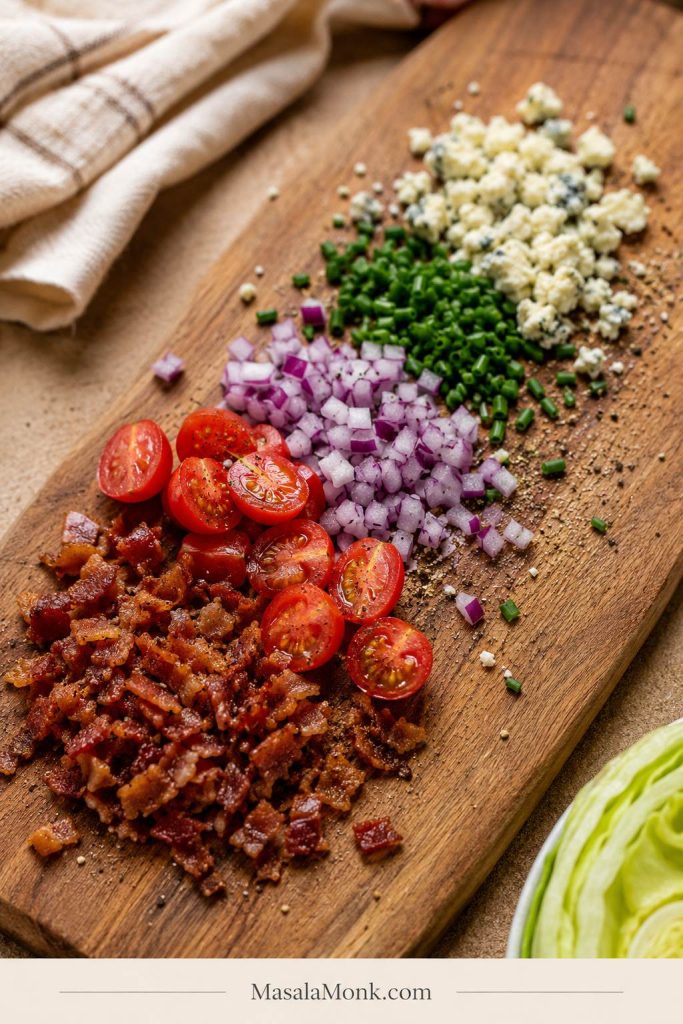
3. Prepare the Toppings
Halve the tomatoes, finely dice the onion, chop the chives, and crumble the blue cheese. If the tomatoes are juicy, salt and drain them for a few minutes.
4. Wash, Dry, and Cut the Lettuce
Cut the iceberg through the core into wedges. Rinse only as needed, drain well, pat dry, and keep the wedges chilled until serving.
5. Plate the Wedges
Place one cold wedge on each plate. Trim the hard core if needed, but keep the wedge intact.
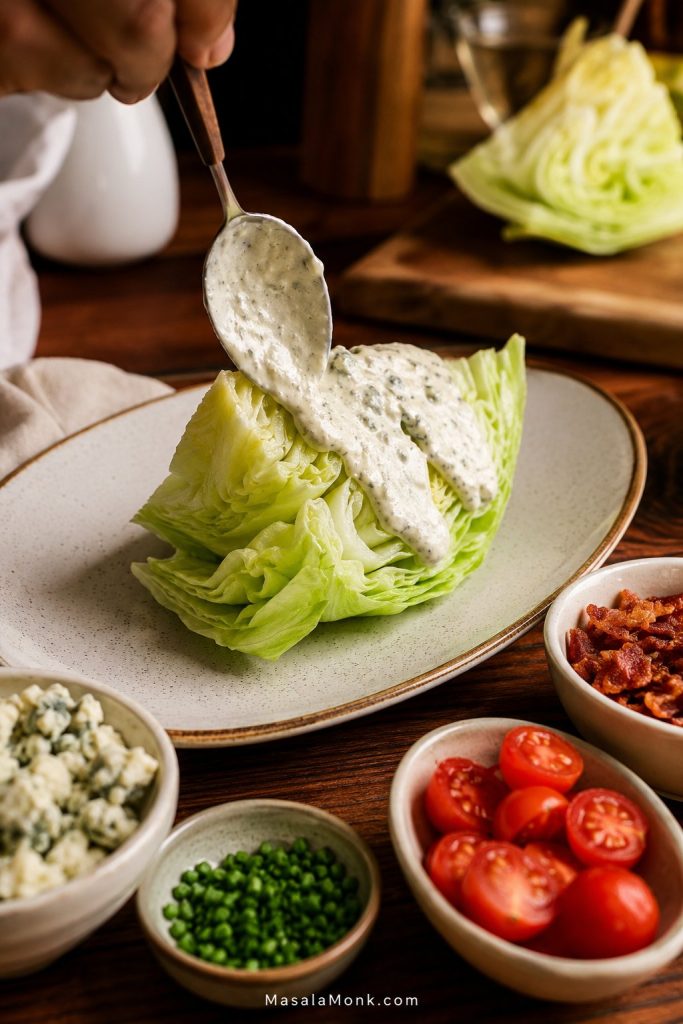
6. Add Dressing and Toppings
Spoon the dressing over each wedge. Add bacon, tomatoes, red onion or chives, blue cheese crumbles, and black pepper.
7. Serve Immediately
Serve as soon as it is dressed, before the lettuce starts to soften.
How to Plate It So It Looks Good
Place each wedge with one cut side facing up. Spoon dressing over the top and into the layers, then add toppings while the dressing is still sitting on the lettuce. Finish with pepper and chives.
Recipe Card: Wedge Salad Recipe
Wedge Salad with Iceberg Lettuce, Bacon & Blue Cheese Dressing
A crisp steakhouse-style wedge salad with cold iceberg lettuce, thick blue cheese dressing, smoky bacon, juicy tomatoes, chives, and extra crumbles — simple enough for weeknights, polished enough for steak night.
Equipment
- Chef’s knife
- Cutting board
- Mixing bowl
- Whisk
- Skillet or sheet pan for bacon
- Paper towels or clean kitchen towel
- Serving plates
- Optional: small saucepan for balsamic glaze
Ingredients for the Salad
| Ingredient | US Measure | Metric |
|---|---|---|
| Iceberg lettuce | 1 medium head | About 500–700 g |
| Thick-cut bacon | 4–6 strips | About 115–170 g raw |
| Cherry or grape tomatoes, halved | 1–1½ cups | 150–225 g |
| Red onion, finely diced | ¼ cup | 35–40 g |
| Chives or scallions, chopped | 2 tbsp | About 6 g |
| Blue cheese crumbles | 1–2 oz | 28–56 g |
| Blue cheese dressing, recipe below | ¾–1 cup | 180–240 ml |
| Freshly cracked black pepper | To taste | To taste |
Ingredients for the Blue Cheese Dressing
| Ingredient | US Measure | Metric |
|---|---|---|
| Sour cream | ½ cup | 120 g |
| Mayonnaise | ¼ cup | 55 g |
| Buttermilk or milk | 2–3 tbsp | 30–45 ml |
| Lemon juice or red wine vinegar | 1½–2 tsp | 7–10 ml |
| Worcestershire sauce | ½ tsp | 2–3 ml |
| Garlic powder | ¼ tsp | About 1 g |
| Freshly cracked black pepper | ¼–½ tsp | 1–2 g |
| Blue cheese, crumbled | 2 oz | 56 g |
| Salt | To taste, optional | To taste |
Instructions
- Make the dressing. In a bowl, whisk together sour cream, mayonnaise, buttermilk or milk, lemon juice or vinegar, Worcestershire sauce, garlic powder, and black pepper. Stir in the crumbled blue cheese.
- Chill the dressing. Refrigerate for 20–30 minutes. If it becomes too thick, loosen it with a small splash of buttermilk or milk. Taste before adding salt.
- Cook the bacon. Cook bacon in a skillet over medium heat until crisp, about 8–10 minutes, or bake at 400°F / 200°C until crisp, about 15–20 minutes. Drain, crumble, and let it cool.
- Prep the toppings. Halve the tomatoes, finely dice the onion, chop the chives, and crumble extra blue cheese. If the tomatoes are very juicy, salt and drain them for 5–10 minutes.
- Prepare the lettuce. Remove damaged outer leaves from the iceberg. Rinse, dry, and cut through the core into 4 wedges. Keep a little core attached so each wedge holds together.
- Plate the wedges. Place one cold lettuce wedge on each plate. Trim the hard core if needed.
- Add dressing. Spoon blue cheese dressing over each wedge and into the layers.
- Add toppings. Sprinkle with bacon, tomatoes, onion or chives, blue cheese crumbles, and black pepper.
- Serve immediately. Serve while the lettuce is still cold and crisp.
Recipe Notes
- Use thick ranch instead of blue cheese dressing for a milder version.
- Add a light drizzle of balsamic glaze for the Outback-style finish.
- Chop the iceberg for bowls, potlucks, or easier eating.
- Briefly grill the wedges for a smoky summer side.
- For keto, skip sweet glaze or use only a tiny drizzle.
- For vegetarian, replace bacon with crispy chickpeas, fried onions, smoked almonds, or toasted breadcrumbs.
How to Keep the Salad from Getting Watery
The fastest way to make a wedge salad disappointing is to let water sneak in. Wet lettuce, juicy tomatoes, and thin dressing all work against that cold crunch.
| Problem | Likely Cause | Fix |
|---|---|---|
| Dressing slides off | Lettuce is wet | Pat the wedges dry and chill them before serving. |
| Salad tastes watery | Tomatoes are too juicy | Salt and drain tomatoes for 5–10 minutes. |
| Wedge falls apart | Core was removed too early | Cut through the core and trim only after plating if needed. |
| Toppings roll off | Pieces are too large | Chop bacon, onion, and tomatoes smaller. |
| Bacon softens | Salad was assembled too early or bacon was added warm | Cool the bacon and add it right before serving. |
| Dressing pools on the plate | Dressing is too thin | Use less milk or buttermilk, or stir in more sour cream. |
Thick vs Thin Dressing Test
Use this cue before serving: thick dressing should sit on the iceberg wedge, while thin dressing will run down the layers and collect on the plate.
Get those details right and the salad stays crisp instead of sliding apart on the plate.
Toppings That Actually Stay Put
This is where the wedge becomes fun. Keep it old-school with bacon and blue cheese, make it fresher with cucumber and avocado, or turn it into lunch with chicken, shrimp, egg, or crispy chickpeas.
Choose one direction first: steakhouse, fresh, crunchy, meal-worthy, lighter, or spicy. That keeps the salad balanced instead of overloaded.
| Style | Topping Ideas |
|---|---|
| Classic | Bacon, tomatoes, red onion, chives, blue cheese crumbles |
| Steakhouse | Balsamic glaze, cracked pepper, fried shallots, extra blue cheese |
| Crunchy | Croutons, toasted breadcrumbs, fried onions, smoked almonds |
| Make it a meal | Grilled chicken, steak strips, shrimp, hard-boiled egg |
| Fresh | Cucumber, avocado, radish, herbs, scallions |
| Vegetarian | Crispy chickpeas, toasted nuts, avocado, roasted corn |
| Lighter | Greek yogurt dressing, turkey bacon, extra tomatoes, cucumber |
| Spicy | Jalapeños, spicy ranch, chili crisp, hot honey drizzle |
The goal is not to pile on everything. The goal is to make each bite feel complete: creamy, crunchy, juicy, salty, and fresh.
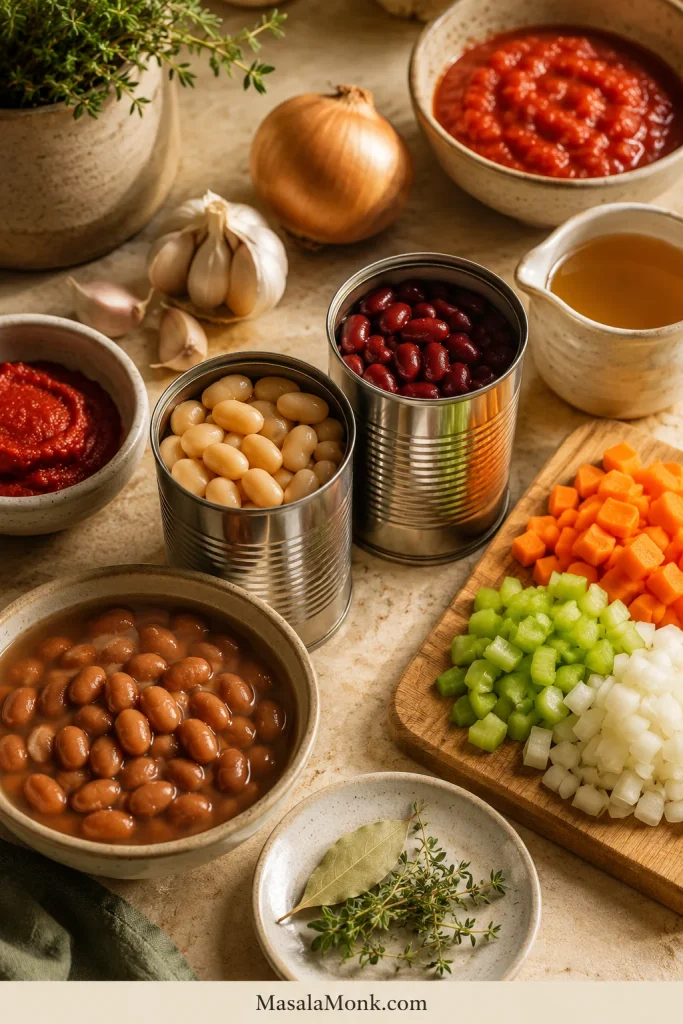
If you want the salad to eat more like lunch, chickpeas are an easy add-in. For that direction, this chickpea salad recipe is a useful companion.
Wedge Salad Variations
The main version is the one to learn first. After that, the variations are just swaps: change the dressing, add glaze, chop the lettuce, grill the cut sides, or build everything on a platter.
Ranch Wedge Salad
Ranch is the easiest alternative if you do not like blue cheese. Start with a thicker ranch base and loosen it slowly; thin ranch slips off before you get a good bite.
| Quick Ranch Ingredient | US Measure | Metric |
|---|---|---|
| Sour cream | ½ cup | 120 g |
| Mayonnaise | ¼ cup | 55 g |
| Buttermilk | ¼ cup, plus more as needed | 60 ml, plus more as needed |
| Lemon juice | 2 tsp | 10 ml |
| Garlic powder | 1 tsp | 3 g |
| Dried dill | 1–1½ tsp | 1–2 g |
| Chives | 2 tbsp | About 6 g |
| Salt | ½ tsp | 3 g |
| Black pepper | To taste | To taste |
Whisk everything together and chill before using. Add more buttermilk one tablespoon at a time until the ranch is spoonable. For a fresh ranch version, top the iceberg with bacon, tomatoes, chives, cucumber, black pepper, and optional avocado.
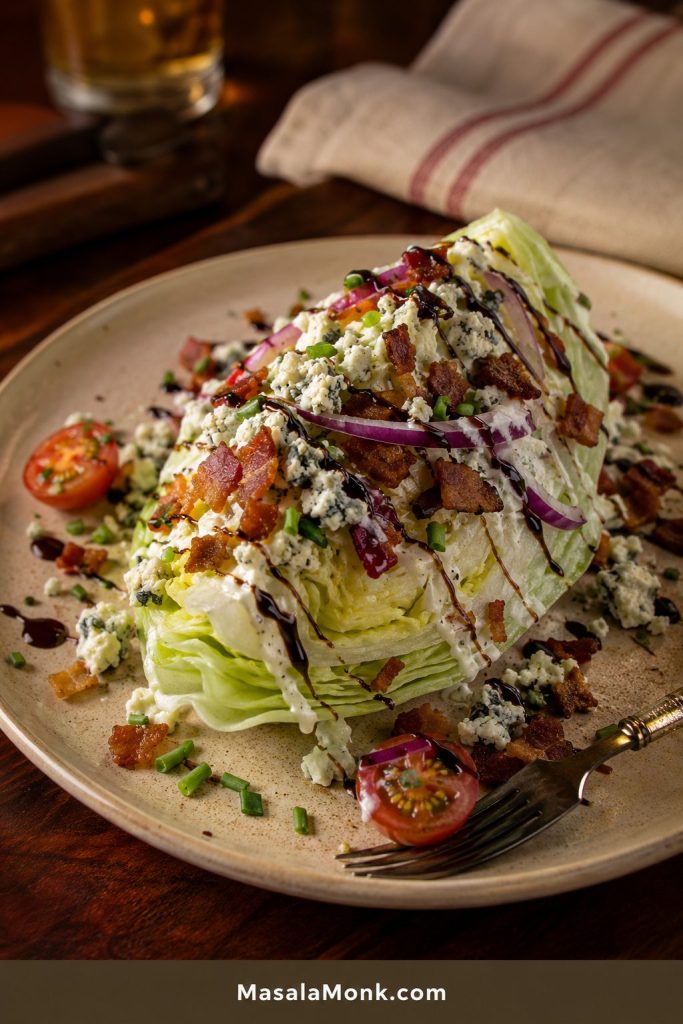
Outback-Style Blue Cheese Wedge Salad with Balsamic Glaze
This is not the official restaurant recipe. It is a home-style version built around the same steakhouse idea: iceberg lettuce, blue cheese dressing, bacon, tomatoes, red onion, crumbles, and a light balsamic glaze drizzle.
| Balsamic Glaze Ingredient | US Measure | Metric |
|---|---|---|
| Balsamic vinegar | ½ cup | 120 ml |
| Brown sugar or honey | 2 tbsp | 25 g brown sugar or 30 ml honey |
| Salt | Pinch | Pinch |
Simmer the balsamic vinegar, sugar or honey, and salt over medium-low heat for 5–8 minutes, until it lightly coats the back of a spoon. Let it cool for a few minutes, then drizzle lightly over the finished salad.
This makes more glaze than you need for 4 wedges. Drizzle it last in thin lines, not a heavy pour. Balsamic glaze is a drizzle, not a sauce; too much makes the salad sweet, sticky, and heavy.
Chopped Wedge Salad
A chopped version uses the same ingredients but cuts the iceberg into bite-size pieces. It is easier to eat, easier to pack into bowls, and often the better choice if a full wedge feels awkward.
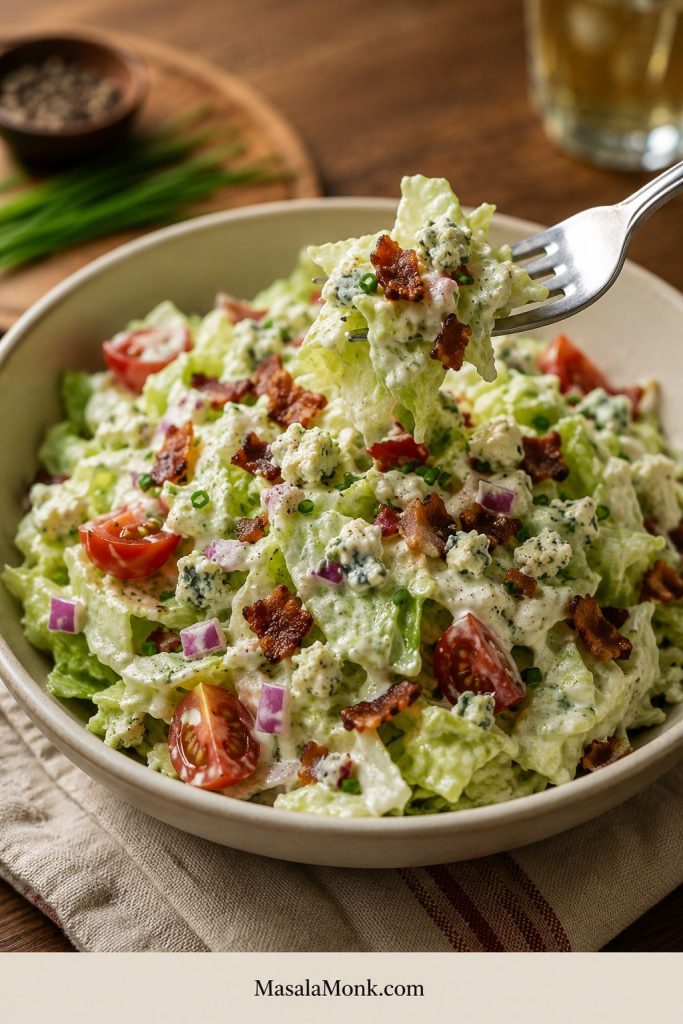
Chop the lettuce into large pieces, then add bacon, tomatoes, red onion, chives, blue cheese crumbles, and dressing. Toss lightly or drizzle the dressing over the top. Add hard-boiled egg, grilled chicken, avocado, cucumber, or crispy breadcrumbs if you want it to feel more like a meal.
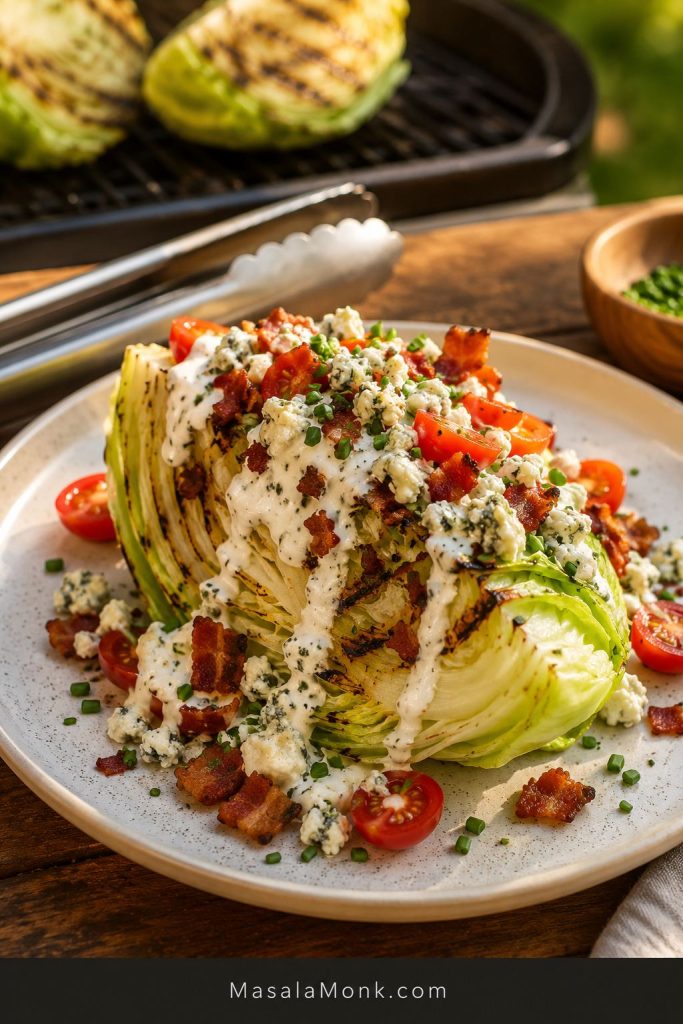
Grilled Wedge Salad
A grilled version gives the lettuce a smoky edge. Romaine hearts are easiest to grill, but iceberg can work if you keep the core attached and dry the wedges well.
- Cut the lettuce into wedges through the core.
- Dry the cut sides very well.
- Brush the cut sides lightly with oil.
- Place the wedges cut-side down on the grill.
- Grill just until the edges pick up color.
- Serve immediately with blue cheese dressing, ranch, or spicy ranch.
Grill only the cut sides. Leave the rounded outside mostly untouched so the wedge keeps some cool crunch. If your grill is very hot, start with 30–45 seconds per cut side. If it is medium-hot, 1–2 minutes may be enough. The wedges should pick up color at the edges, not wilt all the way through. Grill them last, after the rest of the meal is ready.
Loaded Wedge Salad for a Crowd
For parties, cut the iceberg into 6 smaller wedges and arrange them on a chilled platter. Put dressing in a bowl and toppings in small piles or bowls so guests can build their own plates without the lettuce wilting.
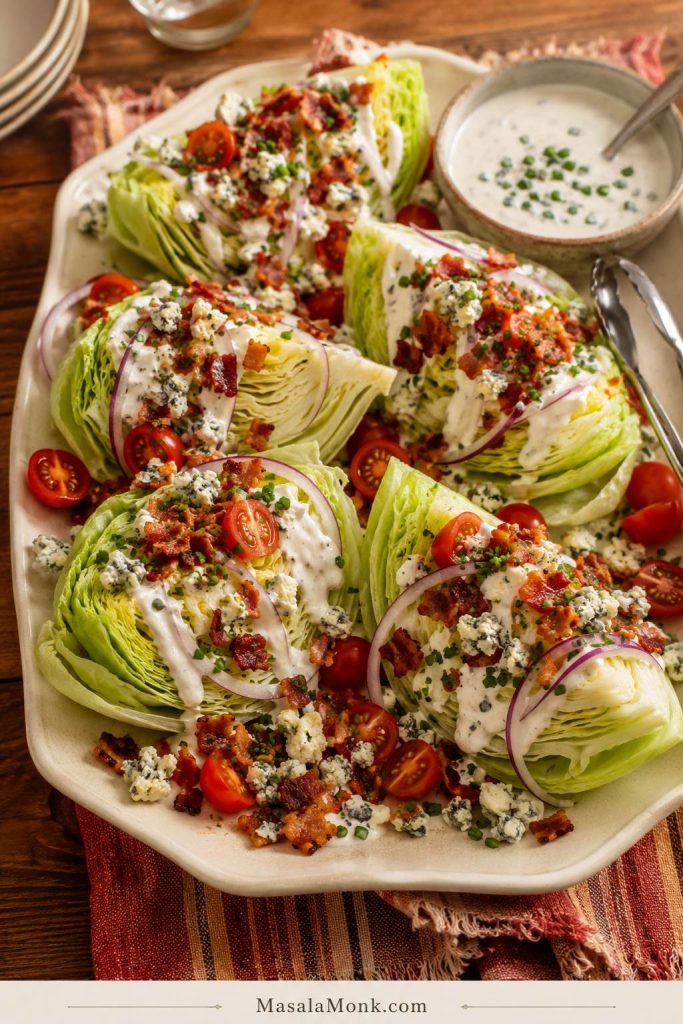
Good loaded toppings include bacon, cherry tomatoes, red onion, chives, blue cheese crumbles, hard-boiled egg, avocado, cucumber, crispy breadcrumbs, fried onions, grilled chicken, steak strips, shrimp, ranch, blue cheese dressing, and balsamic glaze.
Lighter, Keto, Vegetarian, and No-Blue-Cheese Options
The blue cheese version is rich, but it is easy to adjust without losing the point of the salad: cold crunch, dressing that grips the layers, and toppings with texture.
Lighter Wedge Salad
For a lighter-feeling wedge salad, use a Greek yogurt-based dressing, reduce the bacon, and add more fresh toppings like tomatoes, cucumber, radish, herbs, or grilled chicken. Keep the dressing creamy enough that the salad still feels satisfying.
For a simple protein to turn it into a fuller plate, slice in some juicy baked chicken breast.
Keto Wedge Salad
The main version can be keto-friendly with iceberg lettuce, full-fat blue cheese dressing, bacon, blue cheese, and low-carb toppings. Skip sweet balsamic glaze or use only a tiny drizzle.
Check bottled dressing labels if you are strict keto, and keep tomatoes, onions, and any balsamic glaze modest.
For a fuller low-carb meal, serve it with bunless burgers or burger bowls from these keto burger ideas.
Vegetarian Wedge Salad
Skip the bacon and add crunch with crispy chickpeas, smoked almonds, toasted walnuts, fried onions, roasted corn, or crispy breadcrumbs. Avocado adds richness if you are also skipping blue cheese.
For a strict vegetarian version, use vegetarian Worcestershire or skip it, and choose a vegetarian-friendly blue cheese if needed.
Wedge Salad Without Blue Cheese
Go with ranch, creamy garlic dressing, green goddess, buttermilk herb dressing, Caesar dressing, or a vinaigrette. Ranch is the closest creamy substitute.
Wedge Salad Without Bacon
Replace bacon with crispy chickpeas, croutons, toasted breadcrumbs, fried shallots, toasted nuts, roasted seeds, or smoked almonds for crunch.
Dairy-Free Wedge Salad
Choose a dairy-free ranch or a vinaigrette-style dressing. Skip the blue cheese crumbles and add avocado, crispy chickpeas, or nuts for richness.
What to Serve with Wedge Salad
This is the salad to make when dinner is already rich and hot, but you still want something cold, crisp, and a little showy on the plate.
It is especially good beside a burger, steak, baked potato, roast chicken, or anything smoky from the grill.
- Steakhouse-style dinners: steak, grilled shrimp, mashed potatoes, and anything finished with a rich creamy mushroom sauce.
- Casual meals: burger patties, air fryer burgers, and barbecue meals.
- Comfort dinners: roast chicken, pork chops, casseroles, baked potatoes, and slow-cooked mains.
- Lighter plates: baked chicken, roasted vegetables, soups, or simple pasta dinners.
For lunch, a cold wedge also works well beside sandwiches, especially when you want something fresher than chips.
Make-Ahead and Storage Tips
The finished salad is best assembled right before serving, but the parts can be prepared ahead.
| Component | Make Ahead? | Notes |
|---|---|---|
| Blue cheese dressing | Yes, 2–3 days | Keep refrigerated and stir before using. |
| Ranch dressing | Yes, 2–3 days | Keep cold and thin slightly if needed before serving. |
| Bacon | Yes, 1–2 days | Store chilled and re-crisp briefly if needed. |
| Lettuce wedges | Same day ideal | Wash, dry, wrap, and chill. |
| Tomatoes and onion | Same day ideal | Store separately so they do not water down the lettuce. |
| Fully assembled salad | No | Dress right before serving. |
A simple prep schedule works best: make the dressing and cook the bacon earlier in the day, wash and dry the wedges about an hour before serving, then assemble the plates just before serving.
Once dressed, the lettuce wilts, the bacon softens, and the dressing becomes watery.
This make-ahead style works well when the main dish is already taking care of itself, like a slow cooker pork loin.
For broader cold-storage guidance beyond this salad, FoodSafety.gov has a helpful cold food storage chart.
Common Mistakes
Most wedge salad problems come from water, weak texture, or assembling too early. Use this as a final checklist.
- Wet lettuce: dressing slides off instead of sitting on the wedge.
- Core removed too early: the wedge falls apart.
- Thin dressing: it pools on the plate.
- Warm bacon: it softens the lettuce and loosens the dressing.
- Large toppings: they roll off instead of sticking to the wedge.
- Early assembly: the salad turns watery before serving.
- Too much balsamic glaze: the plate becomes sweet and sticky.
How to Eat a Wedge Salad
This is a knife-and-fork salad, so do not fight it. Cut down through the wedge so each bite has lettuce, dressing, bacon, tomato, onion, and blue cheese.
If the large wedge feels awkward, make the chopped version instead. It has the same flavor but is easier to eat from a bowl.
FAQs
These quick answers cover dressing swaps, cutting iceberg, make-ahead timing, toppings, and ways to keep the salad crisp.
What is a wedge salad?
It is a cold quarter of iceberg lettuce topped with creamy dressing, bacon, tomatoes, onion or chives, blue cheese, and black pepper. It is usually served as a knife-and-fork side salad or starter.
Why is it called a wedge salad?
It is called a wedge salad because the lettuce is served as a wedge, usually a quarter of a head of iceberg, instead of being chopped or tossed.
How many wedge salads does one head of iceberg make?
One medium head of iceberg makes 4 large wedges or 6 smaller starter wedges.
What lettuce is best for wedge salad?
Iceberg is the classic choice because it is crisp, sturdy, and tightly layered. It holds its shape under dressing better than softer greens.
Why is iceberg lettuce used?
Iceberg has a mild flavor, high crunch, and compact structure, which is why it holds up so well as a wedge.
How do you cut iceberg lettuce for wedge salad?
Remove damaged outer leaves, rinse and dry the head, then cut it in half through the core. Cut each half through the core again to make 4 wedges.
Why does my wedge salad fall apart?
It usually falls apart because the core was removed too early or the lettuce was cut across the head. Cut through the core, keep a small piece attached, and trim the hard part only after plating.
Do you wash iceberg lettuce before making this salad?
Yes. Rinse the head or wedges under cold water, drain well, and pat very dry. Wet lettuce makes the dressing slide off.
What dressing goes on wedge salad?
Blue cheese dressing is traditional. Ranch is the easiest milder swap. Creamy garlic, buttermilk herb, green goddess, Caesar, or vinaigrette can also work.
Can I use store-bought blue cheese dressing?
Yes. Choose a thick dressing, preferably refrigerated. To improve it, stir in extra black pepper, lemon juice, and a spoonful of blue cheese crumbles.
What can I use instead of buttermilk?
Use regular milk with a small squeeze of lemon juice, or use milk alone and adjust the tang with lemon juice or vinegar.
Is wedge salad better with blue cheese or ranch?
Blue cheese gives the traditional steakhouse flavor: tangy, rich, and sharp. Ranch is milder and easier for a crowd. Serve both if you are not sure.
Can I make it with ranch?
Yes. Ranch works well if you want a milder dressing. Choose a thick ranch so it stays on the lettuce.
What toppings go on wedge salad?
Classic toppings include bacon, tomatoes, red onion, chives, blue cheese crumbles, and black pepper. Avocado, egg, cucumber, fried onions, crispy breadcrumbs, chicken, steak, shrimp, and balsamic glaze also work.
Can I cook the bacon in the oven?
Yes. Bake bacon on a lined sheet pan at 400°F / 200°C until crisp, usually 15–20 minutes depending on thickness.
What is in an Outback-style wedge salad?
An Outback-style version usually includes iceberg lettuce, blue cheese dressing, bacon, grape or cherry tomatoes, red onion, blue cheese crumbles, and balsamic glaze.
Is this an Outback copycat wedge salad?
No. It is not an official restaurant recipe, but the Outback-style variation uses the same general idea: iceberg, blue cheese dressing, bacon, tomatoes, red onion, crumbles, and a light balsamic glaze drizzle.
Can I make it without blue cheese?
Yes. Use ranch, creamy garlic dressing, buttermilk herb dressing, green goddess, Caesar, or vinaigrette. Skip the crumbles or add avocado for richness.
Can I make it without bacon?
Yes. Use crispy chickpeas, toasted breadcrumbs, fried shallots, smoked almonds, croutons, roasted seeds, or toasted nuts for crunch.
Is wedge salad keto?
It can be keto-friendly with iceberg lettuce, full-fat blue cheese dressing, bacon, blue cheese, and low-carb toppings. Check bottled dressing labels and keep tomatoes, onions, and balsamic glaze modest if you are strict keto.
Is wedge salad healthy?
It can be lighter or richer depending on the dressing and toppings. For a fresher version, use less bacon, choose a lighter dressing, and add cucumber, tomatoes, herbs, or grilled chicken.
Can I make it ahead of time?
You can make the dressing, cook the bacon, and prep toppings ahead. Wash, dry, and chill the lettuce the same day, then assemble just before serving.
How long does wedge salad last after dressing?
It is best served immediately. Once dressed, the lettuce softens, the bacon loses crunch, and the plate can become watery.
How do I keep it from getting watery?
Dry the lettuce well, use thick dressing, drain juicy tomatoes, and dress the wedges right before serving.
How do you eat a wedge salad?
Use a knife and fork. Cut the wedge into bite-size pieces on the plate so each bite gets lettuce, dressing, bacon, tomatoes, onion, and cheese.
What do you serve with it?
Serve it with steak, burgers, grilled chicken, roast chicken, barbecue meals, baked potatoes, pasta, sandwiches, soups, or grilled shrimp.
Once the lettuce is cold and dry, the dressing has body, and the toppings are crisp and small, wedge salad becomes what steakhouses know it can be: simple, dramatic, refreshing, and far more satisfying than a quarter of iceberg has any right to be.