Posted on Leave a comment

How to Make Banana Pudding? 5 Healthy Breakfast Twists

banana fruit on wood crate

Hello, health-conscious foodies! 🍽️💕 Today, we’re exploring the world of healthy breakfast options with a twist on a classic dessert: Banana Pudding. This isn’t your typical banana pudding, though. We’re going to show you how to make a healthier version of this beloved dessert and give you five unique ways to enjoy it for breakfast. Let’s dive in!

🍌 The Magic of Banana Pudding 🥚

Banana Pudding is a dessert that’s loved by many for its creamy texture and sweet, fruity flavor. But did you know that with a few tweaks, you can turn this dessert into a nutritious and delicious breakfast? By using healthier ingredients and adding some extra nutrients, you can start your day with a bowl of Banana Pudding that’s both satisfying and good for you.

🍽️ The Basic Recipe: How to Make Healthy Banana Pudding 🍌

The basic recipe for Healthy Banana Pudding is similar to the traditional one, but with a few healthier swaps. Instead of using sugar, we’ll use a natural sweetener like honey or maple syrup. We’ll also replace regular milk with a plant-based alternative like almond milk or oat milk. And instead of eggs, we’ll use chia seeds, which not only add a boost of nutrients but also help to thicken the pudding.

Here’s the basic recipe:

  1. Blend two ripe bananas until smooth.
  2. In a bowl, mix the banana puree with 2 cups of plant-based milk, 2 tablespoons of chia seeds, and 2 tablespoons of your chosen natural sweetener.
  3. Let the mixture sit in the fridge overnight to thicken.
  4. In the morning, give the pudding a good stir and it’s ready to enjoy!

🍌 5 Healthy Breakfast Twists on Banana Pudding 🥚

Now that you know how to make the basic Healthy Banana Pudding, let’s explore five ways to enjoy it for breakfast:

  1. Banana Pudding with Berries: Top your banana pudding with a handful of fresh berries for a fruity twist. Berries are packed with antioxidants and add a lovely burst of flavor. You can use any berries you like, such as strawberries, blueberries, or raspberries. The tartness of the berries complements the sweetness of the banana pudding perfectly.
  2. Banana Pudding with Nuts and Seeds: Add some crunch to your banana pudding with a sprinkle of nuts and seeds. They’ll add some healthy fats and protein to your breakfast. Try using almonds, walnuts, or chia seeds for a nutrient-packed start to your day.
  3. Banana Pudding with Granola: For a heartier breakfast, top your banana pudding with some granola. Choose a granola that’s low in sugar and high in fiber for the best health benefits. The crunchy texture of the granola pairs well with the creamy banana pudding.
  4. Banana Pudding with Yogurt: For a creamier texture, mix your banana pudding with some Greek yogurt. It’ll add some extra protein and make your pudding even more satisfying. Plus, the tanginess of the yogurt balances out the sweetness of the banana.
  5. Banana Pudding Smoothie Bowl: Blend your banana pudding until smooth, then pour it into a bowl and top with your favorite smoothie bowl toppings. It’s a fun and delicious way to enjoy banana pudding for breakfast! You could add fresh fruits, nuts, seeds, or even a drizzle of honey.

🎉 Join the Foodie Community! 🍽️

If you try these recipes or have other delicious recipes to share, join the vibrant and engaging food lovers community on Facebook. It’s a place where you can share your culinary experiments, discover new recipes, and connect with fellow food enthusiasts.

Posted on Leave a comment

4 Simple and Delicious Toast Recipes!

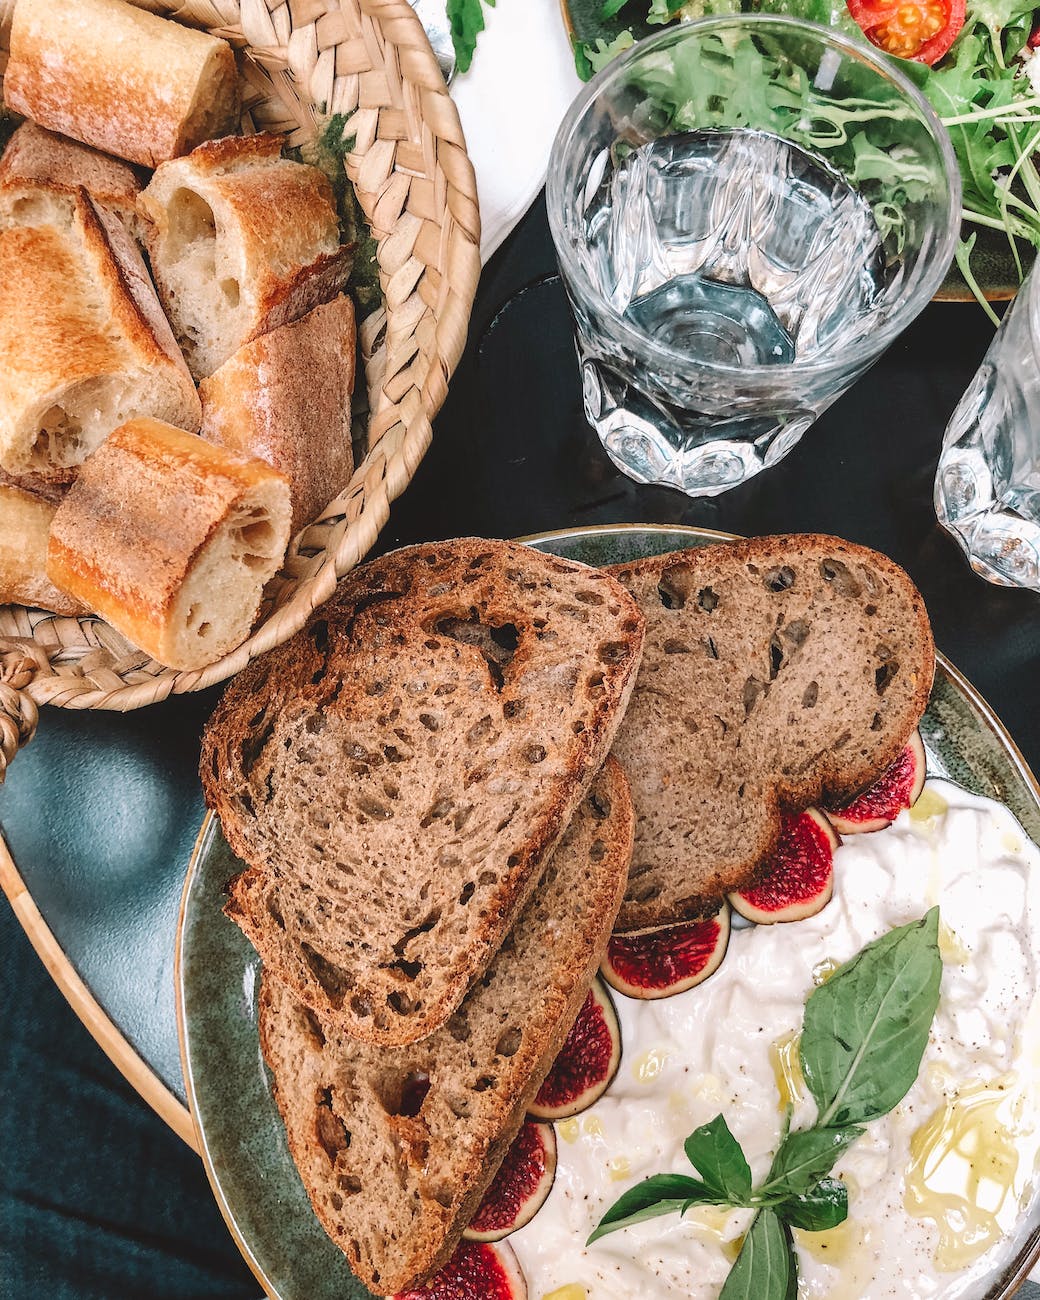
bread on plate beside glas

Hello, food lovers! 🍽️💕 Today, we’re diving into the world of quick and easy breakfast recipes with a focus on a staple food item: toast. But this isn’t just any toast. We’re talking about four unique and delicious toast recipes that will revolutionize your breakfast routine. These recipes come from the YouTube channel Cooking Everyday, a fantastic resource for anyone looking for simple yet tasty meal ideas.

🍞 The Magic of Toast 🍳

Toast is a breakfast staple in many households. It’s quick, easy, and can be customized in countless ways. But if you’re tired of the same old butter and jam, these four toast recipes are sure to shake things up. From egg-filled bread to honey toast, these recipes take toast to a whole new level.

🍽️ The Recipes: How to Make Delicious Toast 🍞

Recipe 1: Egg in a Hole Toast 🍳

This recipe starts with a slice of bread and a glass. The glass is used to cut a hole in the middle of the bread. The bread is then fried in butter on medium heat. An egg is cracked into the hole, seasoned with salt and black pepper, and topped with green onions and cheddar cheese. The inside of the bread is placed on top, and the whole thing is flipped over and fried until golden brown.

Recipe 2: Scrambled Egg Toast 🍳

This recipe begins with three eggs, which are seasoned with salt, black pepper, and paprika, and mixed well. Parsley, green onions, and mozzarella cheese are added to the egg mixture. The bread is dipped in the egg mix and fried in butter for 2-3 minutes on each side.

Recipe 3: Stuffed Egg Toast 🍳

This recipe involves one egg, chopped green onion, chopped bell pepper, salt, and black pepper. The mixture is poured inside a hole cut in a slice of bread, topped with cheddar cheese, and fried for 3-5 minutes on each side.

Recipe 4: Tomato and Cheese Toast 🍞

This recipe uses stale bread, eggs, salt, black pepper, tomato sauce, mozzarella cheese, grape tomatoes, parsley, and olive oil. The bread is cut into pieces, dipped in the egg mixture, and fried. Tomato sauce and cheese are added on top, along with grape tomatoes and parsley. The toast is fried for an additional 3-5 minutes.

🍴 Enjoying Your Delicious Toast: Tips and Suggestions 🍽️

When enjoying these toast recipes, here are a few tips and suggestions:

  • Feel free to adjust the ingredients to suit your taste. If you prefer a different type of cheese or want to add more vegetables, go for it!
  • These toast recipes are best enjoyed hot from the pan. They make a great breakfast or snack, and are sure to impress your family and friends.
  • Don’t be afraid to get creative with your toast. These recipes are just a starting point. The possibilities are endless!

🎉 Join the Foodie Community! 🍽️

If you try these recipes or have other delicious recipes to share, join the vibrant and engaging food lovers community on Facebook. It’s a place where you can share your culinary experiments, discover new recipes, and connect with fellow food enthusiasts

So, are you ready to bring a taste of these delicious toast recipes into your kitchen? With these recipes, you can enjoy a delicious and unique breakfast right at home. Happy cooking! 🍽️🎉

Remember to check out more amazing recipes on Cooking Everyday‘s YouTube channel. Enjoy the delicious day! 🌞🍡🌭

Posted on Leave a comment

How to make No-Bake Blueberry Cheesecake?

Greetings, dessert enthusiasts! 🍽️💕 Today, we’re embarking on a culinary journey into the realm of no-bake desserts, with a spotlight on a delightful and refreshing treat – the No-Bake Blueberry Cheesecake. Our guide for this journey is none other than the talented baker behind the YouTube channel 조꽁드Joconde’s Baking. Known for its vast repertoire of baking recipes and easy-to-follow instructions, 조꽁드Joconde’s Baking has become a go-to resource for dessert lovers. Today, we’re delving into their popular video titled “No-Bake Blueberry Cheesecake”.🍰🍇

If you’re a food enthusiast who loves experimenting with new recipes and sharing your culinary creations, consider joining our Vibrant and Engaging Food Lovers community on Facebook. It’s a place where food lovers from around the world can share their favorite recipes, cooking tips, and foodie adventures. We can’t wait to see what delicious dishes you’ll create next!

🌟 The Magic of No-Bake Desserts 🌟

No-bake desserts are a culinary marvel. They offer the sweet satisfaction of a baked dessert, without the need for an oven. This makes them an excellent choice for those hot summer days when turning on the oven feels like a chore. They’re also a great option for those who are new to baking or simply want a quick and easy dessert option. The No-Bake Blueberry Cheesecake from 조꽁드Joconde’s Baking perfectly embodies the charm of no-bake desserts. It’s a simple yet elegant dessert that boasts a delightful blend of creamy cheesecake and the tangy sweetness of blueberries.

🍇 The Star Ingredient: Blueberries 🍇

Blueberries take center stage in this cheesecake, lending their sweet and tangy flavor to the creamy cheesecake base. But blueberries aren’t just about taste; they’re also packed with antioxidants, making this dessert a healthy treat. In this recipe, blueberries are used in two ways: they’re pureed and mixed into the cheesecake filling, and they’re also used to create a jelly layer that adds a beautiful visual element to the finished dessert. This dual use of blueberries ensures that every bite of the cheesecake is bursting with their refreshing flavor.

🍰 The Cheesecake Base 🍰

The base of this cheesecake is a creamy, tangy mixture of cream cheese, sugar, plain yogurt, fresh cream, lemon juice, and lemon zest. This combination creates a rich and flavorful cheesecake filling that pairs wonderfully with the sweet blueberry layers. The addition of gelatin helps to set the cheesecake, giving it a firm yet creamy texture that’s simply irresistible.

🍪 The Oreo Crust 🍪

The crust of this cheesecake is made from Oreo cookies and melted butter. This combination creates a crunchy, chocolatey base that adds a delightful contrast to the creamy cheesecake and fruity blueberry layers. The crust is easy to make and sets in the fridge, making it a perfect base for this no-bake dessert.

🎂 Assembling the Cheesecake 🎂

Assembling this cheesecake is like creating a work of art. It involves carefully layering the different components in a round mousse ring. The process starts with pressing the Oreo crust into the bottom of the ring. Then, a layer of the blueberry cream cheese filling is added, followed by a layer of blueberry jelly. Finally, the remaining cream cheese filling is spread on top. The cheesecake is then refrigerated for several hours to allow it to set. The result is a visually stunning and delicious dessertthat’s sure to impress.

🍽️ Enjoying the No-Bake Blueberry Cheesecake 🍽️

Once the cheesecake is set, it’s ready to be enjoyed! The combination of the creamy cheesecake, sweet blueberry layers, and crunchy Oreo crust creates a symphony of flavors and textures in every bite. This dessert is perfect for any occasion, whether it’s a special celebration or a simple weeknight treat. It’s a dessert that’s sure to delight your taste buds and leave you craving for more.

📝 Recipe Notes 📝

The creator of this recipe, 조꽁드Joconde’s Baking, recommends adjusting the amount of gelatin based on the weather or the condition of your fridge. In hotter weather, you might need to use more gelatin to ensure the cheesecake sets properly. Also, it’s important to strain the blueberry puree to remove any seeds or skin that could affect the texture of the cheesecake. These little tips can make a big difference in the final result, ensuring that your No-Bake Blueberry Cheesecake turns out perfect every time.

🎉 Join the Food Lovers Community 🎉

If you’re a food enthusiast who loves experimenting with new recipes and sharing your culinary creations, consider joining our Vibrant and Engaging Food Lovers community on Facebook. It’s a place where food lovers from around the world can share their favorite recipes, cooking tips, and foodie adventures. We can’t wait to see what delicious dishes you’ll create next!

🙏 Credits 🙏

A big thank you to 조꽁드Joconde’s Baking for sharing this delightful No-Bake Blueberry Cheesecake recipe. Be sure to check out their YouTube channel for more delicious baking recipes and tips.

Posted on Leave a comment

Microgreens Magic: Top 5 Microgreens You Must Grow at Home

a couple with microgreens

Welcome to a journey of health and wellness brought to you by the informative and engaging YouTube channel, Daisy Creek Farms with Jag Singh. Hosted by Jag Singh, a passionate gardener, and farmer, the channel is a wealth of knowledge for those seeking to lead a healthier lifestyle through homegrown food. Today, we delve into one of their enlightening videos titled “Top 5 Microgreens You Must Grow”.

Microgreens, the young vegetable greens harvested just after the cotyledon leaves have developed, are a must-have in your diet. They are packed with nutrients and are incredibly easy to grow at home. In this video, Jag Singh introduces us to the world of microgreens, their benefits, and the simple process of growing them at home.

🌿 The Importance of Microgreens

Microgreens are the germinated seeds of vegetables and herbs. They are rich in vitamins, minerals, and enzymes that aid digestion. Microgreens are also known for their high fiber content, which aids in digestion and promotes a feeling of fullness.

Eating microgreens is like consuming a complete vegetable in itself. For instance, just a handful of broccoli microgreens can provide as much nutrition as a full-sized broccoli head. Microgreens are also a great source of plant-based protein, making them an excellent choice for vegetarians and vegans.

5 Mircrogreens You Can Easily Grow at Home

Let’s dive into the process of growing microgreens at home, as demonstrated by Jag Singh in the video. We will be focusing on five types of microgreens: Sunflower, Pea, Radish, Broccoli, and Cress.

5. Cress Microgreens 🌱

Cress microgreens are easy to grow and have a unique peppery flavor. They are rich in antioxidants, vitamins, and minerals. Cress microgreens can be used in salads, sandwiches, and soups to add a peppery flavor and a nutritional boost. To grow them, soak the cress seeds for 24 hours. The seeds will develop a gel-like medium, similar to chia seeds. Transfer the seeds, including any gel or water, to a container. There’s no need to cover the seeds with soil or blackout the seeds. After two days, the cress seeds will develop shoots. Keep watering every other day with a spray bottle. After another four days, the shoots are about two inches tall and ready to harvest.

4. Broccoli Microgreens 🥦

Broccoli microgreens are packed with nutrients and are easy to grow. They are known for their cancer-fighting properties and are a great source of vitamins A, C, and E. Broccoli microgreens can be added to salads, smoothies, and sandwiches for a nutritional punch. Unlike other seeds, broccoli seeds do not need to be soaked. Add the seeds on top of the growing medium and cover them with another container to blackout the seeds. After three days, uncover the container and the broccoli seeds will have developed shoots. Keep watering every other day with a spray bottle. After another five days, the shoots are about three inches tall and ready to harvest.

3. Radish Microgreens 🌶️

Radish microgreens are the fastest-growing microgreens of all. They have a spicy flavor and are packed with nutrients. They are a great source of vitamins A, B, C, E, and K, and also contain essential amino acids and antioxidants. Radish microgreens can be used in salads, sandwiches, and soups to add a spicy kick and a nutritional boost. To grow them, sprinkle the radish seeds in the container and spread the seeds well, leaving some gaps in the cluster of seeds. Cover the seeds with a growing medium and water the container. After two days, the radish seeds will sprout and begin to grow. After another four days, the radish microgreens are about three inches tall and ready to harvest.

2. Pea Shoot Microgreens 🌾

Pea shoot microgreens are the second most popular microgreens right after sunflower microgreens and they are by far the easiest microgreens to grow. They are high in vitamins A, C, and folic acid and are known for their sweet, fresh flavor. Pea shoot microgreens can be used in salads, stir-fries, and smoothies. To grow them, soak the pea seeds for 24 hours. Then, add the seeds on top of the growing medium and cover them with another container to blackout the seeds. After two days, the pea seeds will start to develop shoots. Keep watering every other day with a spray bottle. After another five days, the shoots are about five to six inches tall and ready to harvest.

1. Sunflower Microgreens 🌻

Sunflower microgreens are the most popular microgreens in the market. They are known for their nutty flavor and crunchy texture. Sunflower microgreens are a great source of healthy fats, fiber, vitamins, and minerals. They can be used in salads, sandwiches, and wraps. To grow them, soak the sunflower seeds for 24 hours. Then, add the seeds on top of the growing medium and cover them with another container to blackout the seeds. After two days, the sunflower seeds will develop shoots. Keep watering every other day with a spray bottle. After another five days, the shoots are about four inches tall and ready to harvest.

Growing your own food is the healthiest way to live a lifestyle. With mass-production of produce these days, we don’t even know what we are consuming. There are so many chemical fertilizers and pesticides being sprayed on our produce. Let’s take matters into our own hands, let’s grow our own organic produce, our own fruits and vegetables, and herbs, and live a healthy lifestyle.

If you’re interested in joining a community of curious people, who share their experiments and results, consider joining the Vibrant and Engaging community of Food Lovers Facebook group. It’s a great place to share your microgreen growing experiences and learn from others.

Remember, the journey to a healthier lifestyle starts with a single step. Start growing your microgreens today! 🌱🌱🌱

Posted on Leave a comment

4 Super Healthy Sprouts You can Grow at Home

happy asian women cooking oriental noodles in kitchen

Welcome to a journey of health and wellness brought to you by the vibrant and inspiring YouTube channel, Splash of Goodness. Hosted by Eva, a passionate health coach, the channel is a treasure trove of information and inspiration for those seeking to lead a healthier lifestyle. Today, we delve into one of their enlightening videos titled “How To Grow Sprouts at Home | 4 Super Healthy Sprouts”.

Sprouts, the tiny powerhouses of nutrition, are a must-have in your diet. They are packed with essential nutrients and are incredibly easy to grow at home. In this video, Eva introduces us to the world of sprouts, their benefits, and the simple process of growing them at home.

🌿 The Importance of Sprouts

Sprouts are the germinated seeds of legumes or grains, and they are a powerhouse of nutrition. They are rich in vitamins, minerals, proteins, and enzymes that aid digestion. Sprouts are also known for their high fiber content, which aids in digestion and promotes a feeling of fullness.

Eating sprouts is like consuming a complete vegetable in itself. For instance, just three tablespoons of broccoli seeds can grow into a volume of sprouts that is equivalent to eating a large amount of fully grown vegetables. Sprouts are also a great source of plant-based protein, making them an excellent choice for vegetarians and vegans.

🌱 The Countdown of Homegrown Goodness

Let’s dive into the process of growing sprouts at home, as demonstrated by Eva in the video. We will be focusing on four types of sprouts: Alfalfa, Radish, Lentils, and Broccoli.

4. Broccoli Sprouts 🥦

Broccoli sprouts are packed with nutrients and are easy to grow. Unlike other seeds, broccoli seeds do not need to be soaked overnight. They only need to be soaked for two to four hours during the day. After soaking, rinse them twice and let them drain.

3. Lentil Sprouts 🌾

Lentil sprouts are a rich source of protein and fiber. To grow them, soak a quarter cup of lentils in a jar overnight. The next morning, drain the water and rinse them twice. Lentil sprouts grow faster and are usually ready in three days.

2. Alfalfa Sprouts 🌱

Alfalfa sprouts are known for their rich flavor and crunchy texture. To grow them, add two tablespoons of alfalfa seeds to a jar and soak them overnight. Rinely rinse and drain them the next morning.

1. Radish Sprouts 🌶️

Radish sprouts are the star of the show. They have a spicy flavor and are packed with nutrients. To grow them, add two tablespoons of radish seeds to a jar and soak them overnight. Rinely rinse and drain them the next morning.

After the initial soaking and rinsing process, continue to rinse the sprouts twice daily for the next four to five days. Once the sprouts are fully grown, rinse them one final time, let them dry, and store them in an airtight container in the refrigerator.

Growing your own sprouts is not only a fun and educational project, but it also allows you to have fresh, nutritious food right at your fingertips.

This blog post is based on the video “How To Grow Sprouts at Home | 4 Super Healthy Sprouts” by Splash of Goodness. All credit for the information and instructions goes to the host, Eva, and her wonderful channel. You can watch the full video here.

We invite you to join our Facebook group, Vibrant and Engaging Community of Food Lovers, where you can share your sprouting experiments and results with a community of like-minded individuals. Remember, your health is in your hands. Start sprouting today!