Posted on Leave a comment

Garlic Mashed Potatoes Recipe

Creamy garlic mashed potatoes in a ceramic bowl with melted butter, chives, and a spoon pulling through soft swirls.

These garlic mashed potatoes are the kind you want under a spoonful of gravy: soft buttery ridges, mellow garlic in every bite, and enough body to hold melted butter without turning stiff, sticky, or gluey.

The secret is simple. Start with good potatoes, cook them until they are truly tender, let the extra steam escape after draining, then fold in warm garlic butter and milk while the potatoes are still hot. That gives you creamy spoonfuls, fluffy edges, and garlic flavor that runs through the whole bowl instead of sitting in sharp little pockets.

The goal is not restaurant-perfect smoothness at any cost. Instead, it is a warm, spoonable bowl that tastes buttery, garlicky, and comforting from the first bite to the last — the kind of mashed potatoes that make gravy, roast chicken, steak, or mushrooms feel like a complete meal.

Serve them with roast chicken, steak, meatloaf, mushrooms, turkey, gravy, or a holiday table. They are especially good beside a slow cooker roast chicken because the soft potatoes catch all those garlic-herb juices.

Make the classic version first, then use the variations below for roasted garlic mashed potatoes, garlic parmesan mashed potatoes, red skin mashed potatoes, no-milk mashed potatoes, dairy-free mashed potatoes, or a richer sour cream and cream cheese version.

In This Garlic Mashed Potatoes Recipe

Start with the classic creamy method, then adjust the potato, garlic, dairy, batch size, and make-ahead details to fit your meal.

Quick Answer: How to Make Garlic Mashed Potatoes

To make creamy garlic mashed potatoes, boil 2½ lb / 1.1 kg Yukon Gold potatoes in salted water until very tender. Drain them well, return them to the warm pot for a minute so excess moisture can steam off, then mash gently with warm garlic butter and milk.

For the garlic butter mixture, warm 6 smashed garlic cloves with 6 tbsp / 85 g butter and ¾ cup / 180 ml whole milk or half-and-half. Strain the garlic out for a smooth, rounded flavor, or mash the softened cloves into the potatoes if you want a deeper garlic taste. Finish with salt, pepper, and optional sour cream.

The full recipe takes about 35 minutes. For the best texture, use hot potatoes, warm dairy, enough salt, and a masher or ricer instead of a blender or food processor.

Best basic formula: 2½ lb Yukon Gold potatoes + 6 garlic cloves + 6 tbsp butter + ¾ cup warm milk or half-and-half + salt + optional ¼ cup sour cream.
Close-up of garlic mashed potatoes with a spoon drag, melted butter in the ridges, and small chive flecks.
Look for soft ridges that hold butter without looking stiff or pasty. That is the visual cue for creamy mashed potatoes that are spoonable, not gluey.

Garlic Mashed Potatoes at a Glance

  • Best potato: Yukon Gold for creamy and buttery, russet for lighter and fluffier, red potatoes only for rustic skin-on mash.
  • Best garlic method: Warm smashed garlic in butter and milk for smooth everyday flavor.
  • Best texture rule: Drain well, steam-dry briefly, use warm dairy, and stop mixing once creamy.
  • Best tool: Potato masher for homestyle texture, ricer for smoother potatoes.
  • Make-ahead: Best within 2 days, with leftovers refrigerated for 3–4 days.

Which Version Should You Make?

The classic recipe is the best place to start, but different meals call for different mashed potatoes. Use this quick guide if you already know the flavor or texture you want.

Four small bowls of mashed potatoes showing classic, roasted garlic, parmesan, and red skin versions.
Choose the version by the meal: classic for gravy, roasted garlic for deeper flavor, parmesan for savory richness, and red skin mashed potatoes for rustic texture.
If You Want… Make This Version Best For
Classic creamy mashed potatoes Main recipe Weeknights, holidays, gravy
Sweeter, softer garlic flavor Roasted garlic version Turkey, roast beef, dinner parties
Bigger garlic flavor Mash in the softened garlic cloves, add roasted garlic, or finish with a little garlic powder Garlic lovers, steak dinners, bold savory sides
Steakhouse-style flavor Garlic parmesan version Steak, chicken, mushrooms
No peeling Red skin version Rustic weeknight dinners
Tangier, richer potatoes Sour cream or cream cheese version Make-ahead meals, holiday sides
No milk or dairy-free Broth, olive oil, or dairy-free butter version Dairy-free guests, lighter sides
A smaller dinner batch Small batch version Steak night, dinner for two or three
A bigger holiday bowl Double batch Thanksgiving, Christmas, Easter, potlucks

Why This Garlic Mashed Potatoes Recipe Works

Good mashed potatoes should feel generous before you even add gravy. They should be warm, soft, buttery, and seasoned all the way through. In this recipe, each step protects that texture.

The method works because it avoids the three things that ruin mashed potatoes: raw garlic, wet potatoes, and overmixing. The garlic is warmed so it tastes smooth instead of sharp. After draining, the potatoes are dried briefly so they do not water down the butter. Everything is folded together gently, so the mash stays silky instead of tightening into paste.

Cooking the potatoes until completely tender also matters. If the potatoes are still firm in the center, you will have to keep mashing to chase out lumps, and that extra work can make the potatoes heavy. When they are cooked properly, they mash easily and absorb the warm dairy without a fight.

A potato masher gives you a cozy homemade texture, while a ricer gives you a smoother, fluffier bowl. Either way, the goal is the same: stop once the potatoes are spoonable, soft, and able to hold gentle swirls.

Ingredients for Garlic Mashed Potatoes

You do not need many ingredients, but small choices make a big difference. Warm dairy blends better than cold milk, enough butter carries the garlic flavor, and the right potato keeps the mash creamy instead of pasty.

Yukon Gold potatoes, garlic, butter, milk, sour cream, salt, pepper, chives, and a potato masher arranged on a counter.
Even a simple garlic mashed potatoes recipe depends on balance: starchy potatoes for structure, butter for richness, and warm dairy so everything folds together smoothly.

Potatoes

Yukon Gold potatoes are the best default. They have a naturally creamy texture and a buttery flavor, so they make the recipe taste rich without needing a huge amount of cream.

Russets make a lighter, fluffier mash. Red potatoes work well when you want a rustic, skin-on version, but they should be mashed gently because they are waxier.

Garlic

Use 6 garlic cloves for the main batch. Smashed cloves warmed in butter and milk give the potatoes a mellow garlic flavor. If you love a stronger garlic note, mash the softened cloves into the potatoes instead of straining them out.

Butter

Use 6 tbsp / 85 g unsalted butter. Butter gives the potatoes richness and helps carry the garlic into every bite. If you use salted butter, season carefully at the end.

Milk or Half-and-Half

Use ¾ cup / 180 ml whole milk or half-and-half. Whole milk keeps the potatoes lighter. Half-and-half makes them richer and more holiday-worthy. Warm it before adding it to the potatoes.

Sour Cream

Sour cream is optional, but it adds a gentle tang and a fuller texture. Use ¼ cup / 60 g for balance, or up to ½ cup / 120 g if you want a tangier, richer mash.

Salt, Pepper, and Herbs

Salt the cooking water, then season again after mashing. Potatoes need salt in layers; otherwise, they can taste flat. Black pepper, white pepper, chives, parsley, and a little melted butter are all good finishing touches.

Salt reality: If the potatoes taste creamy but flat, they usually need more salt before they need more garlic. Add salt in small pinches, stir gently, and taste again.

Best Potatoes for Garlic Mashed Potatoes

Because texture is the goal, the best potato depends on whether you want creamy, fluffy, or rustic mashed potatoes. Yukon Gold is the easiest choice for a smooth, buttery bowl. Russet is better for a lighter texture. Red potatoes are best when you want skins and a little more bite.

Yukon Gold, russet, and red potatoes shown with different mashed potato textures.
Before choosing a potato, choose the texture. Yukon Gold leans creamy, russet leans fluffy, and red potatoes are best when you want a skin-on rustic mash.
Potato Best For Texture How to Use It
Yukon Gold Classic creamy mashed potatoes Buttery, smooth, rich Use as the default for this recipe.
Russet Fluffy mashed potatoes Light, airy, absorbent Use alone or mix with Yukon Gold.
Yukon + Russet Balanced texture Creamy with fluffy edges Use half and half for a very reliable batch.
Red Potatoes Red skin mashed potatoes Rustic, slightly chunky, skin-on Mash gently and avoid electric mixing.

Think of the potato choice as a texture choice, not a strict rule. Yukon Gold gives the creamiest, most buttery everyday mash. Russet gives you a lighter, fluffier bowl that absorbs butter and milk easily. Red potatoes work when you want skins and a rustic texture, but they are not the best choice for perfectly smooth garlic mashed potatoes.

Yukon Gold vs Russet: Creamy or Fluffy?

If you are choosing between Yukon Gold and russet potatoes, pick by texture first. Yukon Gold gives a creamier bowl, while russets make the mash lighter and more absorbent.

Side-by-side comparison of Yukon Gold mashed potatoes and russet mashed potatoes with cut potatoes nearby.
Yukon Gold gives a buttery, creamy mash, while russets absorb butter and milk more easily for a lighter, fluffier bowl.

For potato choice, higher-starch potatoes such as russets and Yukon Golds are usually better for a smooth, fluffy mash, while waxier red potatoes are better kept rustic. Better Homes & Gardens explains why chefs often prefer russets and Yukon Golds for creamy mashed potatoes.

Fresh Garlic vs Roasted Garlic vs Garlic Powder

Garlic can taste sweet, sharp, mellow, or bold depending on how it is added. That is why one garlic mashed potatoes recipe can taste completely different from another.

Fresh garlic warming in butter and milk beside roasted garlic being squeezed, with mashed potatoes between them.
For a weeknight bowl, fresh garlic in warm butter keeps the flavor rounded. For a deeper holiday-style side, roasted garlic adds sweetness and depth.
Garlic Method Flavor Best Use How Much to Use
Garlic warmed in butter and milk Smooth, rounded, balanced Best everyday method 6 cloves for 2½ lb potatoes
Garlic boiled with potatoes Soft and simple Quick shortcut 5–6 cloves
Roasted garlic Sweet, deep, mellow Holiday or special version 1 whole head garlic
Garlic powder Bold, familiar garlic flavor Flavor boost or backup ¼–½ tsp
Raw minced garlic Sharp and harsh Usually best avoided Sauté first if using

The main method uses garlic warmed in butter and milk because it gives the best balance of speed and flavor. Roasted garlic is deeper and sweeter, but it adds extra time. Garlic powder is useful when the finished potatoes taste good but need a little more punch.

How to Build More Garlic Flavor Without Raw Bite

If you want the garlic to stand out more, layer it instead of only adding more raw garlic. Warm smashed cloves in the butter and milk, mash in the softened cloves, and add a tiny pinch of garlic powder only if the finished potatoes still taste too mild. That gives you deeper garlic flavor without the harsh bite of raw minced garlic.

Garlic-infused butter, softened garlic cloves, garlic powder, and mashed potatoes arranged as a flavor-layering setup.
If the potatoes need more garlic, layer the flavor gradually instead of adding raw garlic. Infused butter, softened cloves, and a tiny pinch of garlic powder add depth without harshness.

Avoid stirring raw minced garlic straight into mashed potatoes. It can taste hot and harsh, especially if the potatoes are mild. If you want to use minced garlic, cook it gently in the butter first.

How to Make Garlic Mashed Potatoes

This method keeps the potatoes creamy and the garlic smooth. The steps are simple, but the little details make the bowl taste much better.

Step-by-step process showing cut potatoes, simmering, garlic butter, steam-drying, and gentle mashing.
The sequence matters because texture is built in stages: tender potatoes first, dry potatoes next, then warm garlic butter and gentle mashing.

Step 1: Cut the potatoes evenly

Peel the potatoes and cut them into 1 to 1½-inch chunks. Even pieces cook at the same pace, which helps you avoid hard centers and lumpy mashed potatoes.

Step 2: Start in cold salted water

Put the potatoes in a large pot and cover them with cold water by about 1 inch. Add a generous spoonful of salt. Starting cold helps the potatoes cook evenly from edge to center.

Step 3: Simmer until very tender

Bring the water to a boil, then reduce to a steady simmer. Cook for 15–20 minutes, or until a knife slides through the potatoes with no resistance. If the potatoes are undercooked, the mash will stay lumpy no matter how much you stir.

A fork testing a tender cooked potato chunk over a pot or colander.
A fork should slide through easily before you drain the pot; otherwise, firm centers can force extra mashing and make the texture heavier.

Step 4: Warm the garlic, butter, and milk

While the potatoes cook, add the butter, milk or half-and-half, and smashed garlic cloves to a small saucepan. Warm over low heat until the butter melts and the garlic smells mellow. Keep the mixture warm and fragrant, but do not let it boil hard or scorch.

Smashed garlic cloves warming gently in butter and milk in a small saucepan.
Keep the pan gentle here. Low heat lets the garlic perfume the butter and milk without turning sharp, bitter, or scorched.

Step 5: Drain and steam-dry

Drain the potatoes well, then return them to the warm empty pot for about 1 minute. Gently shake the pot or stir once so extra moisture can evaporate. This keeps the finished potatoes from tasting loose or watery.

Drained Yukon Gold potato chunks steaming in a warm pot before mashing.
Once drained, let the potatoes steam-dry briefly in the warm pot so the final mash tastes rich instead of watery.

Step 6: Mash gently

Mash the hot potatoes with a potato masher, or pass them through a ricer. Add the infused butter-milk mixture gradually, then strain out the garlic for a smoother background flavor or mash the softened cloves in for a deeper garlic taste.

Warm garlic butter being folded into hot potatoes with a masher or spoon.
Add the warm garlic butter gradually, then stop once the potatoes are creamy. Too much mixing can turn a soft mash tight and gluey.

Step 7: Finish and serve

Fold in sour cream if using, then season with salt and pepper. Taste before serving. The finished potatoes should hold soft swirls but still spoon easily. Transfer them to a warm bowl and finish with melted butter, chives, parsley, or extra pepper.

Common Garlic Mashed Potato Mistakes

Often, mashed potato problems happen before the bowl reaches the table. Avoid these mistakes and the final texture will be much easier to control.

Small scenes showing raw garlic, cold dairy, wet potatoes, undercooked potatoes, and overmixing.
Most mashed potato problems start early, so avoid raw garlic, cold dairy, wet potatoes, firm centers, and aggressive mixing before they ruin the texture.
  • Using raw garlic: It can taste sharp and harsh. Warm it gently in butter or roast it first.
  • Undercooking the potatoes: Firm centers lead to lumps and extra mashing.
  • Adding cold dairy: Cold milk or cream cools the potatoes and makes blending harder.
  • Skipping the steam-dry step: Wet potatoes can taste watery and loose.
  • Overmixing: Too much stirring, blending, or whipping can make potatoes gluey.

How to Make Them Creamy, Not Gluey

Because gluey mashed potatoes usually come from overmixing, aggressive blending, or wet potatoes, a silky bowl needs a gentler touch.

Three mashed potato textures compared: too tight, too loose, and just right.
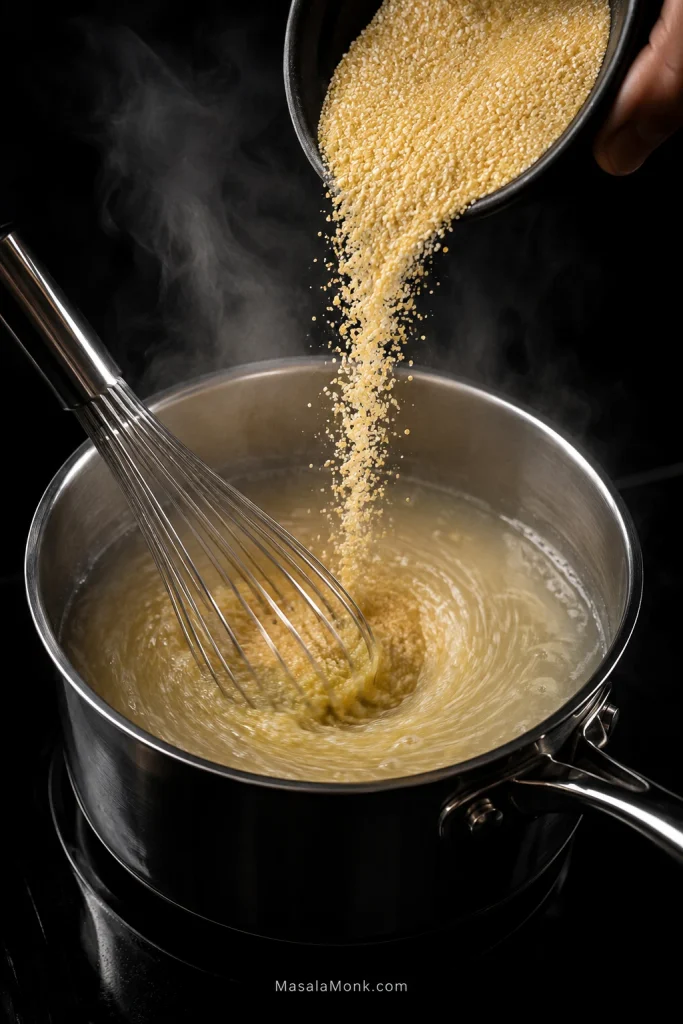
The best texture sits between loose and tight: soft enough to spoon, thick enough to hold swirls, and never worked into paste.

Cook them all the way through

Potatoes should be tender enough to mash easily. If they are still firm in the center, you will have to work them too much, and that extra mixing can make the texture heavy.

Let extra moisture escape

After draining, return the potatoes to the warm pot for a minute. This tiny step makes the mash taste more concentrated and helps the butter and milk blend in properly.

Use warm dairy

Warm milk, cream, or half-and-half folds into hot potatoes more smoothly than cold dairy. It also keeps the potatoes from cooling too quickly while you mash.

Choose the right tool

A potato masher gives a cozy homemade texture. A ricer makes the smoothest, fluffiest potatoes. A blender or food processor can turn potatoes sticky, so leave those tools for soups and sauces.

Potato masher and ricer shown with homestyle mashed potatoes and smoother riced potatoes.
Use a masher for homestyle garlic mashed potatoes, or use a ricer when you want a smoother, fluffier texture.

Stop once they look right

When the potatoes are creamy and the dairy has disappeared into the mash, stop stirring. Extra mixing rarely makes mashed potatoes better; it usually makes them tighter.

Garlic Parmesan Mashed Potatoes

Garlic parmesan mashed potatoes are savory, salty, and a little more steakhouse-style. Make the main recipe, then fold in ½ to ¾ cup finely grated parmesan while the potatoes are still hot.

Garlic parmesan mashed potatoes with grated parmesan, black pepper, melted butter, and chives.
Parmesan adds salt, nuttiness, and a savory edge, so garlic parmesan mashed potatoes pair especially well with steak, mushrooms, roast chicken, or pan sauce.

Add the cheese after mashing so it melts smoothly into the potatoes. Since parmesan brings salt, season lightly at first and adjust after the cheese is fully mixed in. For a bolder garlic-parmesan flavor, add ¼ tsp garlic powder with the warm butter and milk.

This version is especially good with steak, roast chicken, meatballs, mushrooms, or a simple pan sauce. It gives the potatoes a deeper savory finish without making them feel like a completely different dish.

Roasted Garlic Mashed Potatoes

Roasted garlic mashed potatoes taste deeper, sweeter, and more holiday-worthy than the classic version. The garlic loses its sharp edge in the oven, turns soft and golden, then melts into the potatoes like a savory spread.

Roasted garlic being squeezed into hot mashed potatoes with a creamy finished bowl nearby.
Roast the garlic until the cloves turn soft and golden, then mash them in while the potatoes are hot so the flavor spreads evenly.

To make roasted garlic mashed potatoes, slice the top off 1 whole head of garlic, drizzle with a little olive oil, wrap in foil, and roast at 400°F / 200°C for 40–45 minutes, until the cloves are soft and golden. Squeeze the roasted cloves into the hot potatoes and mash them in with the warm butter and milk.

One whole head of roasted garlic sounds like a lot, but roasted garlic is much softer than fresh garlic. It melts into the potatoes and gives them a round, almost sweet savory flavor.

How Much Roasted Garlic Should You Use?

Use one roasted garlic head for a balanced batch. Go down to half a head for a gentler family-style bowl, or use two heads only when you want roasted garlic to be the main flavor.

Roasted Garlic Amount Flavor Level Best For
½ head Gentle and mellow Family dinners or lighter garlic flavor
1 whole head Balanced roasted garlic flavor Classic roasted garlic mashed potatoes
2 heads Deep garlic-lover flavor People who want roasted garlic to be the main flavor
Roasted garlic guide showing half a head, one head, and two heads for mashed potatoes.
Start with one roasted garlic head for balance. Use less for a gentle background flavor, or use more when you want roasted garlic to lead.

For the best flavor, mash the roasted cloves while the potatoes are still hot, then taste before adding garlic powder. Roasted garlic brings sweetness and depth, while garlic powder brings sharper garlic punch. Used together carefully, they make the potatoes taste fuller without turning harsh.

Red Skin Garlic Mashed Potatoes

Red skin garlic mashed potatoes are more rustic than the classic Yukon Gold version. They are slightly chunky, a little more textured, and lovely when you want a no-peel side dish.

Red potatoes are not wrong for mashed potatoes; they are just a different style. Use them when you want a skin-on, homestyle bowl, not when you want the smoothest, fluffiest mash.

Rustic red skin mashed potatoes with visible potato skins, melted butter, chives, and a hand masher nearby.
Red potatoes work best when the mash stays a little chunky and rustic because that texture makes the skins feel intentional instead of tough.

Use 2 lb / 900 g red potatoes, scrubbed well. Leave the skins on if they are thin and tender. Mash with 5–7 garlic cloves, 6 tbsp / 85 g butter, ½ cup / 120 ml milk or half-and-half, and optional ¼ cup / 60 g sour cream.

Keep this version gently mashed rather than perfectly smooth. Red potatoes can get sticky if they are overworked, so use a hand masher and stop while there is still a little texture.

Sour Cream, Cream Cheese, and Heavy Cream Versions

These add-ins change the mood of the bowl: sour cream makes it tangier, cream cheese makes it thicker and richer, and heavy cream gives it more of a holiday-table feel. Add them after the potatoes have been mashed with the warm garlic butter and milk.

Choose sour cream when you want brightness, cream cheese when you want a thicker make-ahead mash, and heavy cream when you want a richer holiday bowl. For everyday garlic mashed potatoes, half-and-half is usually the easiest middle ground.

Garlic mashed potatoes with sour cream, cream cheese, and heavy cream in small bowls around the main bowl.
Use sour cream when the mash needs brightness, cream cheese when it needs body, and heavy cream when you want a richer holiday-style bowl.
Add-In Amount for 2½ lb Potatoes What It Does
Sour Cream ¼–½ cup / 60–120 g Adds tang and creaminess
Cream Cheese 4 oz / 115 g, softened Makes the mash thicker and richer
Heavy Cream Use instead of milk Creates a denser holiday-style texture
Half-and-Half Use instead of milk Gives a balanced creamy finish
Garlic Herb Cheese 3–5 oz / 85–140 g Adds rich, herby flavor

If you are making the potatoes ahead, cream cheese is especially useful because it helps the mash reheat with a thicker, smoother body. If you want a lighter everyday version, stick with milk or half-and-half and use sour cream only as a small finishing touch.

Garlic Mashed Potatoes Without Milk

You can make garlic mashed potatoes without milk. They will not taste exactly the same, but they can still be rich, smooth, and flavorful if you use warm liquid and enough fat.

The important thing is not milk itself; it is moisture plus fat. Broth or potato water loosens the mash, while butter, olive oil, or dairy-free butter keeps it from tasting dry.

Garlic mashed potatoes with broth or potato water, butter or olive oil, and garlic for a no-milk version.
Without milk, the same rule still applies: add moisture to loosen the mash and fat to keep it rich.
No-Milk Option Use This Result
Butter + potato water 6 tbsp butter + ½ cup reserved cooking water Simple, rich, potato-forward
Broth + olive oil ½ cup warm broth + 3–4 tbsp olive oil Savory and lighter
Dairy-free butter + plant milk Dairy-free butter + unsweetened oat or almond milk Creamier vegan-style mash

For the best no-milk flavor, warm the garlic in butter, olive oil, or dairy-free butter before adding it to the potatoes. If you are using broth, add it gradually. You can always loosen thick potatoes, but it is harder to fix a watery bowl.

Dairy-Free or Vegan Garlic Mashed Potatoes

For a dairy-free version, use Yukon Gold potatoes, roasted or sautéed garlic, olive oil or dairy-free butter, warm vegetable broth, and optional unsweetened plant milk. Oat milk works well when it is plain and unsweetened. Almond milk can also work, but avoid anything sweetened or vanilla-flavored.

A good dairy-free formula for 2½ lb potatoes is 5–6 garlic cloves, 4 tbsp olive oil or dairy-free butter, and ½ to ¾ cup warm vegetable broth or unsweetened plant milk. Add the liquid slowly and stop when the potatoes are spoonable.

Dairy-free mashed potatoes with roasted garlic, olive oil, vegetable broth, plant milk, and herbs.
Roasted garlic and olive oil help dairy-free garlic mashed potatoes taste full and rounded, even without cream or butter.

Roasted garlic is especially good here because it adds sweetness and depth without needing cream. Finish with chives, parsley, black pepper, and a small drizzle of olive oil.

If you are looking for a lower-carb mash instead of a potato-based dairy-free version, you may also like MasalaMonk’s keto cauliflower mashed potatoes.

Small Batch and Holiday Scaling

The main recipe makes 6 servings, which works well for a family dinner or a modest holiday side. For a smaller dinner or a bigger table, scale the recipe with the same basic ratio and adjust the warm liquid at the end.

Small Batch Garlic Mashed Potatoes

For 2–3 servings, make a half batch. This is the right size for steak night, roast chicken for two, or a smaller dinner where you do not want a refrigerator full of leftovers.

Ingredient Small Batch Amount
Yukon Gold potatoes 1¼ lb / 565 g
Garlic cloves 3 cloves
Butter 3 tbsp / 42 g
Milk or half-and-half ⅓ cup / 80 ml, plus more if needed
Sour cream 2 tbsp, optional
Salt and pepper To taste

How to Scale for a Holiday Table

For 10–12 servings, double the main recipe: use 5 lb / 2.25 kg potatoes, 12 garlic cloves, 12 tbsp / 170 g butter, and 1½ cups / 360 ml milk or half-and-half. Start with slightly less liquid, then add more after mashing until the potatoes are soft enough to spoon but still hold gentle swirls.

Holiday mashed potato scaling guide with a large bowl and ingredients for 10 to 12 servings.
For a holiday batch, scale the ingredients carefully and make the potatoes slightly softer than usual so they stay spoonable as they sit.

When scaling up, use a large enough pot so the potato pieces cook evenly. If the pot is crowded, the potatoes may cook unevenly and the bottom pieces can soften before the top pieces are ready.

For a fuller holiday plate, these potatoes pair naturally with a creamy green vegetable side like MasalaMonk’s green bean casserole.

Make-Ahead Garlic Mashed Potatoes

Garlic mashed potatoes can be made ahead, which is helpful for holidays, dinner parties, and busy evenings. Since mashed potatoes firm up as they cool, make them slightly softer than you want them at serving time.

Garlic mashed potatoes stored in an airtight container with butter and milk nearby for reheating.
Make-ahead garlic mashed potatoes work best when you plan for reheating, so keep butter and warm dairy nearby to refresh the texture before serving.

How far ahead can you make them?

For the best texture, make them up to 2 days ahead. They can be refrigerated for 3–4 days, but they are creamiest when reheated within the first couple of days. For general leftover safety, the USDA recommends refrigerating leftovers for 3–4 days and reheating them to 165°F.

How to store them

Let the potatoes cool, then transfer them to an airtight container. If you want to reduce drying, press a piece of parchment or plastic wrap against the surface before covering.

How to reheat them

Reheat gently with extra butter and a splash of warm milk, cream, broth, or half-and-half. Stir slowly and avoid whipping. For oven reheating, place the potatoes in a covered baking dish and warm at 325°F / 160°C, stirring once or twice and adding more liquid as needed.

Garlic mashed potatoes being reheated gently with warm milk or cream and butter in a pot.
Reheat slowly and add moisture back gradually. Warm milk, cream, broth, or butter helps cold mashed potatoes become creamy again.

The gentlest way to revive cold mashed potatoes is to warm a little milk, cream, or broth first, then fold the chilled potatoes into it slowly. This loosens the mash without forcing you to whip it, which helps protect the texture.

How to keep them warm

For a holiday meal, transfer hot mashed potatoes to a buttered slow cooker and hold on the warm setting. Stir occasionally and add a splash of warm milk or broth if they thicken too much. Avoid holding them on high heat, because the edges can dry out.

Can you freeze garlic mashed potatoes?

You can freeze them, although the texture may change after thawing. Mashed potatoes with enough butter, cream, sour cream, or cream cheese freeze better than lean versions. Reheat slowly and stir in extra warm dairy or broth to bring back creaminess.

If you end up with extra mashed potatoes, turn them into something crisp the next day. MasalaMonk’s croquettes recipe includes a potato croquette method that works beautifully with leftover mash.

Slow Cooker and Instant Pot Garlic Mashed Potatoes

The stovetop method gives the most control, while slow cooker and Instant Pot notes are useful when the stove is full or you are cooking for a crowd.

Method Best Use Texture
Stovetop, then hold warm Best overall method for holidays and company Creamiest and easiest to control
Cook fully in slow cooker When the stove is full Useful, but usually denser
Instant Pot Fast cooking Soft and convenient, but less controlled than stovetop

Slow Cooker Method

The slow cooker is most useful for keeping finished mashed potatoes warm. For the best texture, make the potatoes on the stovetop first, then hold them warm in a buttered slow cooker.

Garlic mashed potatoes held warm in a slow cooker with butter, chives, and soft spoon marks.
Once the potatoes are finished, a buttered slow cooker keeps them warm without taking up burner space during a crowded meal.

Add the hot mash to the buttered insert, cover, and keep on warm. Stir gently before serving and add a splash of warm milk, cream, or broth if the potatoes thicken while they sit.

If you want to cook the potatoes fully in the slow cooker, use peeled potato chunks, garlic, salt, butter, and a small amount of broth or water. Cook until the potatoes are fully tender, then mash with warm dairy. The texture is usually denser than stovetop mashed potatoes, but the method is useful when the stove is full.

If the slow cooker is already out for dinner, these potatoes are a natural side for a saucy main like MasalaMonk’s slow cooker pork loin. Make the potatoes on the stovetop, then hold them warm while the rest of the meal finishes.

Instant Pot Method

For Instant Pot garlic mashed potatoes, use about 2 lb / 900 g potatoes, 5–6 garlic cloves, 1 cup water or broth, and salt. Cook on high pressure for about 8 minutes, then quick release. Drain if needed, or mash in the remaining liquid if only a small amount is left. Add butter and warm milk or half-and-half after cooking.

Cooked potato chunks and garlic in a pressure cooker insert with butter and warm milk nearby.
Pressure cooking saves time, but tenderness still matters; check the potatoes before mashing so you do not chase lumps later.

Pressure cooker timing can vary depending on potato size, so cut the potatoes evenly and check that they are fully tender before mashing.

Troubleshooting Garlic Mashed Potatoes

If the bowl is not perfect, do not panic and do not keep whipping. Most mashed potato problems get worse with more mixing. Instead, first decide what is wrong: texture, moisture, seasoning, or garlic strength. Then fix that one thing gently.

Check the Texture Before You Add More

Before adding anything, taste and check the texture separately. A bowl can be bland but perfectly creamy, or well-seasoned but too thick, so fix only the problem you actually have.

Troubleshooting guide for mashed potatoes with fixes for thick, thin, bland, and too-garlicky potatoes.
Start with texture before you change the flavor. A splash of warm dairy, extra potato, salt, or garlic should fix the specific problem you see.

Texture and Moisture Fixes

Problem Likely Cause How to Fix It
Gluey Overmixed, blended, or processed too hard Stop mixing. Then fold in warm butter or cream and serve as a rustic mash.
Lumpy Potatoes were undercooked Next time, cook until a knife slides through easily. For small lumps, a ricer can help.
Too thick Not enough warm liquid Add warm milk, cream, or broth 1–2 tbsp at a time. After each addition, stir gently and check again.
Too thin Too much liquid or potatoes were not dried Warm gently uncovered to evaporate moisture. If available, add more mashed potato to bring back body.
Watery Potatoes were not drained or steam-dried well Warm gently in the pot and stir carefully. Next time, steam-dry after draining.

Flavor and Garlic Fixes

Problem Likely Cause How to Fix It
Bland Not enough salt, butter, or garlic Add salt gradually first. Then add more butter, parmesan, garlic butter, or herbs if needed.
Too garlicky Garlic was raw or harsh Add more potato, butter, cream, sour cream, or parmesan to soften the flavor.
Not garlicky enough Garlic was too soft or strained out Add garlic powder, roasted garlic, or extra garlic butter in small amounts. However, taste after each addition because garlic powder gets strong quickly.
Bitter or harsh garlic Garlic scorched, was old, or was added raw Use fresh cloves, warm them gently over low heat, or switch to roasted garlic next time.

Once mashed potatoes turn gluey, there is no perfect way to reverse the texture. At that point, stop mixing, add flavor, and serve them as a thicker homestyle mash. Leftovers can also become potato cakes, mashed potato pancakes, or a casserole topping.

What to Serve with Garlic Mashed Potatoes

A bowl of garlic mashed potatoes can carry a simple dinner, so you do not need much else on the plate. They are soft enough for gravy, rich enough for steak, and comforting enough to sit beside roast chicken, mushrooms, or green beans.

They are especially good with anything rich enough to drag through the potatoes: roast chicken drippings, mushroom pan sauce, turkey gravy, steak juices, garlicky butter, or extra melted butter settling into the ridges.

Weeknight dinners

Holiday mains

  • Roast turkey
  • Roast beef
  • Baked ham
  • Turkey gravy
  • Green bean casserole
  • Roasted carrots or Brussels sprouts

Steakhouse-style dinner

  • Steak with pan sauce or chimichurri
  • Garlic butter mushrooms
  • Roasted asparagus
  • Creamed spinach
  • Red wine gravy

For a cozy everyday plate, serve them with roast chicken, a spoonful of pan juices, and something green. For a richer dinner, add steak, mushrooms, or gravy, then let the soft swirls catch the butter, sauce, and juices. That is where these garlic mashed potatoes do their best work.

Garlic mashed potatoes served with roast chicken, gravy or pan juices, green beans, and mushrooms.
The best pairings give the potatoes something rich to catch, whether that is gravy, roast chicken juices, mushroom sauce, or melted butter.

Garlic Mashed Potatoes Recipe

Creamy, buttery garlic mashed potatoes made with Yukon Gold potatoes, warm garlic butter, milk or half-and-half, and optional sour cream. The method keeps the potatoes smooth, flavorful, and not gluey.

Prep Time15 minutes
Cook Time20 minutes
Total Time35 minutes
Yield6 servings
CourseSide Dish
CuisineAmerican
MethodStovetop
Best ToolMasher or ricer

Equipment

  • Large pot or Dutch oven
  • Colander
  • Small saucepan
  • Potato masher or potato ricer
  • Spatula or wooden spoon

Ingredients

  • 2½ lb / 1.1 kg Yukon Gold potatoes, peeled and cut into 1 to 1½-inch chunks
  • 6 garlic cloves, smashed and peeled
  • 6 tbsp / 85 g unsalted butter
  • ¾ cup / 180 ml whole milk or half-and-half
  • ¼ cup / 60 g sour cream, optional
  • 1½–2 tsp fine salt, plus more for the cooking water
  • ¼ tsp black pepper or white pepper
  • Chives or parsley, optional
  • Extra melted butter, optional for serving

Instructions

  1. Cook the potatoes. Add the potato chunks to a large pot and cover with cold water by about 1 inch. Salt the water generously. Bring to a boil, then reduce to a steady simmer and cook for 15–20 minutes, until the potatoes are very tender. The potatoes are ready when a knife slides through the center with no resistance.
  2. Warm the garlic butter and milk. While the potatoes cook, combine the butter, milk or half-and-half, and smashed garlic cloves in a small saucepan. Warm over low heat until the butter melts and the garlic smells mellow. The mixture should smell fragrant and garlicky, not scorched or boiled.
  3. Drain and dry. Drain the potatoes well. Return them to the warm empty pot for about 1 minute so excess moisture can steam off.
  4. Mash. Mash the hot potatoes with a potato masher, or pass them through a ricer. Add the warm garlic butter and milk gradually. For a softer garlic flavor, strain out the garlic. For stronger flavor, mash the softened garlic into the potatoes.
  5. Finish. Fold in sour cream if using. Season with salt and pepper. Taste and adjust until the potatoes are creamy, buttery, and well seasoned. The finished potatoes should hold soft swirls but still spoon easily.
  6. Serve. Spoon into a warm bowl and finish with melted butter, chives, parsley, or extra black pepper.

Notes

  • Use Yukon Gold potatoes for the creamiest texture.
  • Use a ricer for smoother, fluffier mashed potatoes.
  • Avoid a blender, food processor, or aggressive electric mixing.
  • For garlic parmesan mashed potatoes, fold in ½–¾ cup finely grated parmesan after mashing.
  • For roasted garlic mashed potatoes, use 1 whole head roasted garlic for balanced flavor, or 2 heads only if you want roasted garlic to be the main flavor.
  • For red skin mashed potatoes, use red potatoes, leave the skins on, and keep the texture rustic rather than perfectly smooth.
  • Serve hot. Mashed potatoes thicken as they sit, so loosen with a splash of warm milk or broth before serving if needed.
  • For the most inviting bowl, make shallow swirls on top and let melted butter settle into the ridges before serving.
  • Store leftovers in an airtight container in the refrigerator for 3–4 days.
  • Reheat gently with extra butter and a splash of warm milk, cream, or broth.
  • Freezing is possible, but the texture may change after thawing.

FAQs About Garlic Mashed Potatoes

What is the best potato for garlic mashed potatoes?

Yukon Gold potatoes are the best default because they are creamy, buttery, and forgiving. Russets make a fluffier mash, while red potatoes are better for rustic red skin mashed potatoes.

Fresh garlic or roasted garlic: which tastes better?

Fresh garlic warmed in butter and milk gives a balanced everyday flavor. Roasted garlic tastes sweeter, deeper, and more mellow. Use fresh garlic when you want speed, and roasted garlic when you want a richer holiday-style side dish.

How much garlic should I use?

Use 6 garlic cloves for 2½ lb / 1.1 kg potatoes. If using roasted garlic, use 1 whole head because the flavor is softer. If the finished potatoes need more punch, add ¼–½ tsp garlic powder.

Are garlic mashed potatoes and garlic whipped potatoes the same?

People often use the names loosely, but garlic whipped potatoes are usually smoother and lighter. For a whipped-style texture, use a ricer or mash very well by hand, then fold in warm dairy. If you use a hand mixer, keep it on low and stop quickly so the potatoes do not become gummy.

Why did my mashed potatoes turn gluey?

They were probably overmixed or blended too aggressively. Potatoes release starch when worked too much. Use a masher or ricer, add warm dairy gradually, and stop once the potatoes are creamy.

How do you make garlic mashed potatoes creamier?

Use Yukon Gold potatoes, warm milk or half-and-half, enough butter, and optional sour cream. Also make sure the potatoes are fully cooked and steam-dried before mashing.

Do garlic mashed potatoes need sour cream?

Not necessarily. Butter and warm milk or half-and-half are enough for a creamy batch. Sour cream adds tang and body, so use it when you want a richer flavor.

Can I make garlic mashed potatoes with cream cheese?

For a thicker, richer batch, add 4 oz / 115 g softened cream cheese after mashing. It is especially useful for make-ahead garlic mashed potatoes because it helps the texture reheat with more body.

Can I boil garlic with the potatoes?

Boiling garlic with the potatoes gives a soft, simple garlic flavor. For a smoother and more rounded taste, warm smashed garlic in butter and milk. For a sweeter holiday-style version, use roasted garlic.

What should I do if my mashed potatoes are not garlicky enough?

Add garlic flavor gradually. Mash in the softened garlic cloves if you strained them out, add a little roasted garlic, or stir in ¼ tsp garlic powder. Taste before adding more because garlic powder gets strong quickly.

What can I use instead of milk?

You can use half-and-half, heavy cream, warm broth, reserved potato cooking water, unsweetened plant milk, or a mix of broth and olive oil. Add any liquid gradually so the potatoes do not become too loose.

Are red potatoes good for this recipe?

Red potatoes are good for rustic, skin-on mashed potatoes. They are not the best choice for an ultra-smooth mash because they are waxier. Mash them gently and avoid electric mixing.

How far ahead can I make them?

For the best texture, make them up to 2 days ahead. Store in an airtight container in the refrigerator, then reheat gently with extra butter and a splash of warm milk, cream, or broth.

How do I reheat garlic mashed potatoes without drying them out?

Reheat slowly and add moisture back in. Use a splash of warm milk, cream, broth, or half-and-half, plus a little butter. Stir gently and avoid whipping them aggressively.

Back to top
Posted on 1 Comment

Homemade Hamburger Helper Recipe

Deep skillet of homemade Hamburger Helper with elbow macaroni, ground beef, and glossy cheddar sauce lifted on a spoon.

This homemade Hamburger Helper recipe is for the night when you want the comfort of the box, but not the box itself. You want browned beef, tender macaroni, a creamy cheddar sauce, and that familiar cheeseburger-macaroni flavor — only fresher, saucier, and made with ingredients you can actually adjust.

It is still the kind of dinner you make when everyone is hungry and you do not want three pans in the sink. The beef browns in one deep skillet, the pasta cooks right in the sauce, and the cheese melts in at the end. No packet, no separate pasta pot, no fussy sauce.

A Cozy One-Pan Dinner With More Control

The secret is not making it fancy. Instead, it is getting the little things right: enough liquid for the pasta, enough tomato and mustard for that nostalgic tang, enough cheese for comfort, and gentle heat so the sauce stays creamy instead of grainy.

That is why this version is built around control, not reinvention. You still get the childhood boxed-dinner feeling: beefy noodles, creamy sauce, orange cheddar comfort, and that little tomato-mustard tang in the background. Now you can make it saucier, sharper, milder, tangier, lighter, or closer to the version you remember depending on the night.

Once the ratio clicks, this homemade Hamburger Helper recipe stops feeling like a boxed-dinner workaround and starts feeling like a back-pocket dinner: the kind you can make when the day ran long, the fridge is ordinary, and everyone still needs something warm, cheesy, and reliable.

The short version: For a reliable homemade Hamburger Helper recipe, use 1 pound ground beef, 8 ounces short pasta, 2 cups beef broth, 1 cup milk, 2 tablespoons tomato paste, and 1 1/2 to 2 cups freshly grated cheddar. Simmer the pasta gently in the sauce, then turn off the heat before adding cheese. That gives you creamy cheeseburger macaroni instead of dry, grainy beef pasta.

Quick Answer: How Do You Make Homemade Hamburger Helper?

To make this homemade Hamburger Helper recipe, brown 1 pound ground beef in a large deep skillet, add onion, garlic, tomato paste, Worcestershire sauce, mustard, paprika, broth, milk, and dry macaroni, then simmer until the pasta is tender. After that, take the pan off the heat and stir in freshly grated cheddar until the sauce turns creamy.

For the best balance, use 1 pound ground beef, 8 ounces dry short pasta, 2 cups beef broth, 1 cup milk, and 1 1/2 to 2 cups shredded cheddar. As a result, you get a saucy, one-pot cheeseburger macaroni that thickens as it rests.

The goal is not to make this taste expensive or restaurant-style. The goal is to make it taste like the comfort you remember, only creamier, fresher, and easier to adjust when your pan, pasta, cheese, or family preference changes.

One-pan homemade Hamburger Helper in progress with ground beef, pasta, liquid, and cheddar for a quick skillet dinner.
Everything starts in one pan, so the beef, pasta, liquid, and cheese work together instead of turning into a separate sauce-and-noodle project.

Already know you want the classic version? Jump to the full recipe card, or keep reading for the sauce ratio and texture cues that help prevent dry or grainy results.

Homemade Hamburger Helper Recipe at a Glance

Total Time
30 minutes

Servings
4 to 6

Main Pan
Deep skillet or Dutch oven

Best Pasta
Elbows or small shells

Best Starting Version

Best starting version: Use 85/15 ground beef, elbow macaroni, beef broth, whole milk, sharp orange cheddar, tomato paste, Worcestershire sauce, mustard, and the optional ketchup. That combination gives the recipe a strong creamy, beefy, cheesy, and nostalgic direction.

Best starting version ingredients for homemade Hamburger Helper with ground beef, elbow macaroni, broth, milk, cheddar, tomato paste, mustard, Worcestershire sauce, and ketchup.
Start here when you want the most classic flavor lane: beefy, creamy, cheesy, slightly tangy, and close to the skillet dinner people remember.

Before you cook, check the full skillet ratio so the pasta has enough liquid to soften without turning the sauce soupy.

What Is Homemade Hamburger Helper?

A homemade Hamburger Helper recipe is a from-scratch version of the classic skillet-dinner idea: ground beef, pasta, seasonings, liquid, and a creamy sauce cooked together in one pan. Instead of relying on a prepared sauce mix, this version builds the flavor with tomato paste, garlic, onion, paprika, Worcestershire sauce, mustard, broth, milk, and real cheese.

Think of it as homemade cheeseburger macaroni. The goal is a cozy, weeknight ground beef dinner that tastes nostalgic, cheesy, savory, and satisfying without tasting flat or overly processed. If you want the same idea with an even stronger burger-style angle, this homemade cheeseburger macaroni recipe goes deeper into that version.

That is the charm of this dinner. It is the skillet you make when the day ran long, the pantry is doing most of the work, and everyone still wants something warm, cheesy, and familiar.

Hamburger Helper, the commercial boxed product, is a pasta meal where you add ingredients like ground beef, water, and milk. The official Hamburger Helper Cheeseburger Macaroni product page shows that basic dinner format. This homemade version keeps the same easy skillet spirit but gives you more control over the flavor, cheese, salt, and sauce texture.

Why This Homemade Hamburger Helper Recipe Works

The biggest mistake with a homemade Hamburger Helper recipe is treating it like ordinary mac and cheese with beef. It needs a little more savory depth. The flavor people remember is not just cheese; it is beefy, salty, slightly tangy, gently tomatoey, and deeply comforting.

This recipe works because tomato paste gives the sauce body, Worcestershire sauce adds beefy depth, mustard gives a subtle cheeseburger note, and paprika brings warm, familiar flavor. Meanwhile, the pasta cooks directly in broth and milk, so the starch helps thicken the sauce naturally. Then the pan comes off the heat before the cheddar goes in, which keeps the sauce smoother and less grainy.

The result is creamy but not soupy, cheesy but not gluey, and familiar without needing a packet. You still get the easy skillet-dinner feeling, while keeping control over the salt, cheese, sauce thickness, pasta shape, and add-ins.

Why This Method Helps Prevent Dry, Grainy, or Bland Results

The most important safeguards in this homemade Hamburger Helper recipe are the liquid ratio, the flavor base, and when the cheese goes in. Too little liquid can leave the pasta firm before the sauce is ready. A sauce that leans too heavily on milk can taste softer and less beefy. Cheese added while the pan is still bubbling is also more likely to turn grainy.

That is why this method relies on broth for beefy depth, milk for creaminess, tomato paste for body, mustard and Worcestershire sauce for cheeseburger-style tang, and cheese added off heat. Elbows keep the result classic, while small shells make the bowl feel extra saucy.

Key technique: Do not boil hard after adding the milk, and let the pan calm down before adding the cheese. A gentle simmer cooks the pasta; off-heat cheese gives the sauce a smoother finish.

What This Homemade Hamburger Helper Should Taste Like

The finished skillet should taste beefy, cheesy, lightly tomatoey, and just a little tangy. It should not taste like plain macaroni with ground beef, and it should not taste like tomato pasta with cheese thrown in. Instead, the best version lands right in the middle: cozy cheeseburger macaroni with a creamy sauce that clings to every bite.

Texture matters just as much. The pasta should be tender but not mushy, the sauce should look glossy and spoonable, and the cheese should melt into the sauce instead of sitting in oily strings. The skillet should look slightly loose before resting because the pasta will keep drinking in sauce for a few minutes after the heat is off.

Before You Start: 5 Things That Make or Break This Recipe

Homemade Hamburger Helper is easy, but one-pot pasta gives you less room to ignore the pan. These five details matter more than they might seem.

  • Use a wide, deep pan. A 12-inch deep skillet or Dutch oven lets the pasta cook evenly instead of clumping.
  • Brown the beef well. The browned bits give the sauce more flavor than the seasonings alone.
  • Simmer gently after adding milk. A hard boil can make the sauce look separated.
  • Stir often. Pasta cooked in sauce can stick to the bottom if ignored.
  • Add cheese off heat. This is the easiest way to avoid a grainy cheddar sauce.

A few small choices early on make the final skillet creamier, smoother, and easier to adjust.

Ingredients You Need

The ingredient list for this homemade Hamburger Helper recipe is simple on purpose. This is the kind of dinner that should work with the beef in the freezer, the pasta in the pantry, and the cheese already in the fridge. The difference between “fine” and “really good” is balance: enough beefy flavor, enough liquid for the pasta, and enough cheese added at the right moment.

Ingredients for homemade Hamburger Helper including ground beef, elbow macaroni, beef broth, milk, cheddar, onion, garlic, tomato paste, mustard, Worcestershire sauce, and paprika.
The ingredient list is short, but the balance matters: savory beef, starchy pasta, creamy liquid, tangy flavor builders, and cheddar at the end.

Choosing a pasta shape first? Jump to the best pasta guide before you start, especially if you are using shells, rotini, cavatappi, or gluten-free pasta.

Ground Beef

Use 1 pound / 450 g ground beef. An 85/15 blend gives the richest comfort-food flavor, while 90/10 or 93/7 keeps the dish lighter. If the beef releases a lot of fat, drain most of it after browning, but leave a little behind for flavor.

Very lean beef works too, but it may need a tablespoon of oil at the start and a little more seasoning at the end. Ground turkey or ground chicken can also work, although the flavor will be milder and less like the classic beefy skillet dinner.

Short Pasta

Elbow macaroni is the most classic choice. Small shells are excellent too because they catch the sauce. Rotini, cavatappi, and small penne also work, but they may need an extra splash of liquid and a few more minutes.

Broth and Milk

Beef broth gives the sauce a deeper flavor than water. Milk makes it creamy. The best starting point is 2 cups broth plus 1 cup milk for 8 ounces dry pasta. Keep another splash of broth or water nearby in case your pasta needs more liquid before it softens.

Cheese

Freshly grated sharp cheddar gives the strongest flavor and the smoothest melt. Pre-shredded cheese can work, but its anti-caking starches may make the sauce less silky. For a meltier, more nostalgic finish, blend cheddar with Monterey Jack, Colby Jack, or a little American cheese. Before you stir cheddar into the pan, see the off-heat cheese step so the sauce has a better chance of staying smooth. This macaroni and cheese recipe is useful if you want a more classic pasta-and-cheese direction with stovetop, baked, and Southern-style versions.

Flavor Builders

Tomato paste, Worcestershire sauce, mustard, garlic, onion, paprika, and a little chili powder create the flavor that makes this taste like a true homemade replacement instead of plain beefy mac and cheese. A spoonful of ketchup is optional, but it helps if you want a sweeter, tangier, more nostalgic cheeseburger macaroni flavor.

Best Pasta for Homemade Hamburger Helper

The best pasta is a short, sturdy shape that can simmer in sauce without falling apart. Because the pasta cooks directly in the pan, delicate noodles can go soft before the sauce is right.
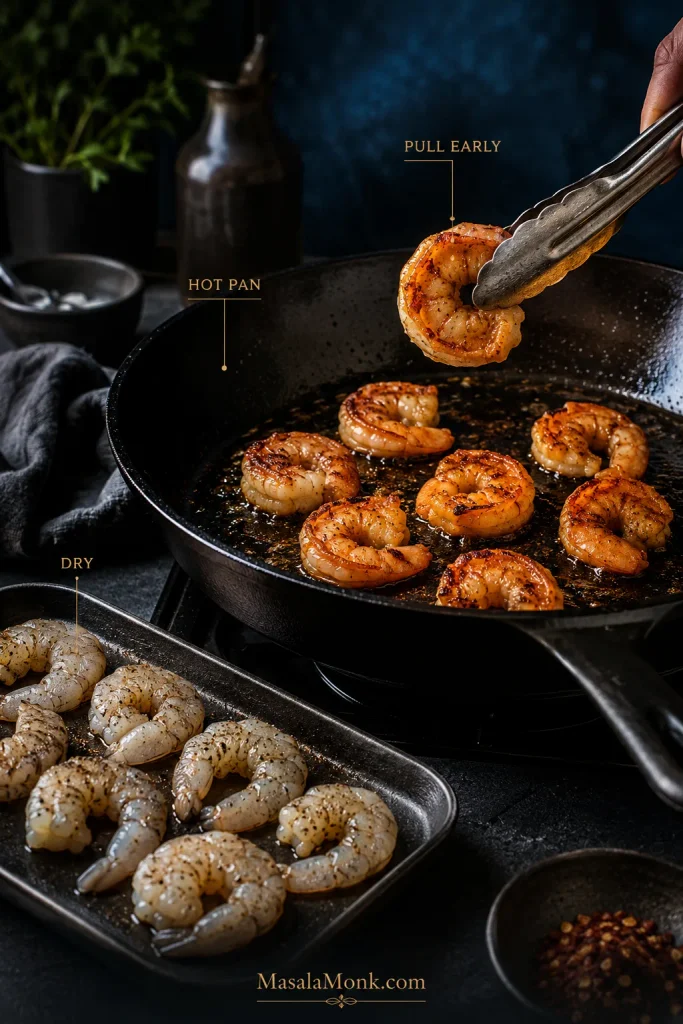
Best pasta shapes for homemade Hamburger Helper including elbow macaroni, small shells, rotini, cavatappi, and small penne.
Short pasta works best because it cooks evenly in the skillet and catches the cheddar sauce; thicker shapes may need extra liquid and time.
Pasta ShapeHow It WorksBest Use
Elbow macaroniClassic, reliable, cooks evenlyBest first choice
Small shellsHolds sauce well and feels extra creamyBest saucy version
RotiniGood texture but may need extra liquidGood pantry swap
CavatappiChewy and fun, slightly longer cook timeHeartier version
Small penneWorks, but the center can take longer to softenAdd liquid as needed
Gluten-free short pastaWorks, but can soften quicklyCheck early and stir gently
Egg noodlesToo delicate for this cheeseburger macaroni styleBetter for stroganoff
Spaghetti or long pastaWrong texture and harder to simmer evenlyNot recommended here

If you use a larger or thicker pasta shape, do not panic if it needs more liquid. Instead, add 2 to 4 tablespoons of broth or water at a time, stir, and keep simmering gently until the pasta is tender.

The Homemade Hamburger Helper Ratio: Saucy, Not Soupy

The ratio is the difference between a creamy homemade Hamburger Helper recipe and a skillet of dry beefy noodles. Because the pasta cooks directly in the pan, it needs enough liquid to soften, but not so much that the final dish turns soupy.

The most reliable starting point is 1 pound beef, 8 ounces dry short pasta, 2 cups broth, 1 cup milk, and 1 1/2 to 2 cups cheese. That gives the pasta room to cook while leaving enough starchy liquid for the cheddar to turn into a creamy sauce.

Homemade Hamburger Helper ratio guide showing 1 pound ground beef, 8 ounces pasta, 2 cups broth, 1 cup milk, and 1 1/2 to 2 cups cheese.
This creamy skillet ratio gives the pasta enough liquid to cook while keeping the finished cheeseburger macaroni thick, glossy, and scoopable.
  • 1 pound / 450 g ground beef
  • 8 ounces / 225 g dry short pasta
  • 2 cups / 480 ml beef broth
  • 1 cup / 240 ml milk
  • 1 1/2 to 2 cups / 170 to 225 g shredded cheese

This ratio is intentionally saucy at first because the pasta keeps absorbing liquid while it rests. As a result, the skillet should look slightly looser than the final texture when you turn off the heat. If the pasta is still firm and the pan looks dry, add liquid. If the pasta is tender and the sauce looks loose, simmer uncovered for a minute or two, then rest before judging.

Saucy, Not Soupy Texture Guide

Use this texture cue before serving: the sauce should still move and coat the pasta, not sit dry in clumps or pool thinly around the edges.

Texture guide for homemade Hamburger Helper showing too dry, just right, and too loose sauce consistency.
Aim for saucy, not soupy: the skillet should look slightly loose before resting because the macaroni keeps soaking up sauce.

If the sauce still turns too thick, too loose, or grainy, jump to the troubleshooting table for quick fixes.

How to Make Homemade Hamburger Helper

This homemade Hamburger Helper recipe is one-pot, but the order still matters. First, browning the beef builds flavor. Then, blooming the tomato paste and spices keeps the sauce from tasting raw. Finally, turning off the heat before adding cheese keeps the finish creamy. The same one-pot logic works in other creamy pasta dinners too, like this one-pot chicken bacon ranch pasta, where the pasta simmers directly in the sauce.

1. Brown the Beef

Heat a large deep skillet or Dutch oven over medium-high heat. Add the ground beef and cook until browned, breaking it up as it cooks. Then add the onion and cook until softened. If there is a lot of grease in the pan, drain most of it.

Do not stop as soon as the beef turns gray. Let some of the pieces brown against the pan, because those browned bits help the sauce taste deeper and less like boiled beef.

Ground beef browning with onions in a skillet for homemade Hamburger Helper, with browned bits visible on the pan.
Browning the beef instead of just graying it builds the savory base, so the sauce has depth before the cheese ever goes in.

Ground beef should be cooked to a safe minimum internal temperature of 160°F / 71°C. A food thermometer is the most reliable way to check. USDA safe minimum temperature chart

2. Build the Flavor Base

Add the garlic, tomato paste, Worcestershire sauce, mustard, paprika, chili powder, salt, and pepper. Stir for about 1 minute. The tomato paste should darken slightly and coat the beef. This quick step makes the sauce taste deeper and less flat.

After about a minute, the tomato paste should look darker and smell savory instead of raw. If it still smells sharp and tinny, give it another 30 seconds before adding the liquid.

Tomato paste, mustard, Worcestershire sauce, garlic, paprika, and browned beef being stirred together in a skillet.
Tomato paste, mustard, Worcestershire, and paprika move the pan toward cheeseburger-style flavor instead of plain beef macaroni.

3. Add the Liquid and Pasta

Pour in the beef broth and milk, then stir in the dry pasta. Bring the mixture to a gentle simmer. At this point, avoid a harsh boil, especially after the milk is in the pan.

Dry elbow macaroni being added to a skillet with ground beef, broth, and milk for one-pot homemade Hamburger Helper.
Dry pasta cooks directly in the skillet, so the starch helps thicken the sauce while saving you a separate pasta pot.

4. Simmer Until the Pasta Is Tender

Cook uncovered or partially covered, stirring often, until the pasta is tender and the sauce has reduced. This usually takes 10 to 14 minutes, depending on the pasta shape. If the pan gets too dry before the pasta is done, add a splash of broth, milk, or water.

The sauce should bubble gently, not aggressively. Stir across the bottom of the pan so the pasta does not stick, and start checking early if you are using small shells or gluten-free pasta.

Homemade Hamburger Helper simmering gently in a skillet with macaroni, ground beef, milk, and broth.
A gentle simmer gives the macaroni time to soften while keeping the milk-based sauce smooth, steady, and controlled.

Should You Cover the Pan?

You can cook it uncovered or partially covered. Uncovered gives you more control because you can watch the sauce reduce. Partially covered helps if the pasta is still firm but the liquid is reducing too fast. Avoid fully covering the pan for the whole cook time unless you are checking often, because the sauce can stay too loose while the pasta softens.

5. Stir in the Cheese Off Heat

Turn off the heat. Add the shredded cheese a handful at a time, stirring until melted. Then let the skillet sit for 2 to 3 minutes before serving so the sauce can settle and thicken.

Wait until the bubbling calms before adding the cheese. The sauce should look hot and glossy, but not actively boiling. That pause is what keeps the cheddar creamy instead of grainy.

Fresh cheddar being added to homemade Hamburger Helper after the pan has been taken off the heat.
Cheddar melts more smoothly when the pan is calm, so this finishing step is about temperature control as much as cheese.

Cook’s check: Before adding the cheese, the pasta should be tender and the pan should still have a small amount of glossy liquid. If it looks completely dry, add a splash of milk or broth. If it looks watery, simmer for another minute. Then turn off the heat and add the cheese.

The Spoon Test for the Right Sauce Texture

Before serving, drag a spoon through the skillet. The sauce should coat the pasta, leave a glossy trail, and still move enough to feel creamy.

Spoon test showing glossy homemade Hamburger Helper sauce coating macaroni and ground beef in a skillet.
This is the texture to look for: sauce that clings to the spoon, coats the macaroni, and still has enough movement to stay creamy.

Common Mistakes That Make the Sauce Dry, Grainy, or Bland

Most problems come from the same few places: the pan gets too dry before the pasta softens, the cheese goes in while the sauce is still bubbling, or the beef-and-pasta base is not seasoned before the cheddar is added. Fix those three things and the skillet becomes much easier to control.

Need the compact cooking version now? Jump to the recipe card. If dinner is already going sideways, use the troubleshooting table.

Homemade Hamburger Helper Recipe

A creamy, one-pot homemade Hamburger Helper recipe with browned ground beef, tender macaroni, real cheddar, and a savory cheeseburger-style sauce. It has the comfort of the boxed classic, but a fresher flavor and a sauce you can actually control.

Saveable homemade Hamburger Helper recipe card with ground beef, macaroni, cheddar sauce, and the one-pot method.
Save the core method: brown the beef, simmer the pasta in broth and milk, then add cheddar off heat for a creamy one-pan dinner.

Prep Time
10 minutes

Cook Time
20 minutes

Total Time
30 minutes

Servings
4 to 6

Equipment

  • Large deep 12-inch skillet, sauté pan, or Dutch oven
  • Wooden spoon or spatula
  • Measuring cups and spoons
  • Box grater, if shredding cheese fresh

Ingredients

  • 1 tablespoon olive oil or neutral oil, only if using very lean beef
  • 1 pound / 450 g ground beef
  • 1/2 medium yellow onion, finely chopped, about 1/2 cup / 75 g
  • 2 to 3 garlic cloves, minced
  • 2 tablespoons / 30 g tomato paste
  • 1 tablespoon ketchup, optional for a sweeter nostalgic flavor
  • 1 to 2 teaspoons Worcestershire sauce
  • 1 teaspoon Dijon mustard or 1/2 teaspoon mustard powder
  • 1 teaspoon paprika or smoked paprika
  • 1/2 teaspoon chili powder
  • 1/2 teaspoon garlic powder
  • 1/2 teaspoon onion powder
  • 3/4 teaspoon fine salt, plus more to taste
  • 1/4 teaspoon black pepper
  • 2 cups / 480 ml beef broth
  • 1 cup / 240 ml milk
  • 8 ounces / 225 g elbow macaroni or small shells
  • 1 1/2 to 2 cups / 170 to 225 g freshly grated sharp cheddar cheese
  • Optional: chopped parsley, chives, or extra black pepper for serving

Instructions

  1. Brown the beef. Set a large deep skillet or Dutch oven over medium-high heat. Add the beef and cook, breaking it into small pieces, until browned and cooked through. Add the onion and cook for 2 to 3 minutes, until softened. Drain excess fat if needed.
  2. Add the flavor base. Stir in the garlic, tomato paste, ketchup if using, Worcestershire sauce, mustard, paprika, chili powder, garlic powder, onion powder, salt, and black pepper. Cook for about 1 minute, stirring constantly, until the tomato paste darkens slightly and coats the beef.
  3. Add liquid and pasta. Pour in the beef broth and milk. Stir well, scraping the bottom of the pan. Add the dry pasta and stir again.
  4. Simmer gently. Bring to a gentle simmer, then reduce the heat to medium or medium-low. Cook for 10 to 14 minutes, stirring often, until the pasta is tender and the sauce has reduced. Add a splash of broth, milk, or water if the pan looks dry before the pasta is done.
  5. Finish with cheese. Turn off the heat. Stir in the cheese a handful at a time until melted and creamy.
  6. Rest and serve. Let the skillet sit for 2 to 3 minutes. Taste and adjust salt, pepper, or Worcestershire sauce if needed. Serve warm.

Notes

  • For the smoothest sauce, grate the cheese yourself, add it off heat, and see the grainy cheese prevention tip.
  • Small penne, rotini, or cavatappi may need an extra splash of liquid and 2 to 4 more minutes.
  • Too thick after resting? Stir in a splash of warm milk or broth, or see the dry sauce fix.
  • For stronger cheeseburger-macaroni flavor, keep the ketchup and mustard in the recipe.

Choose Your Hamburger Helper Style

This is where the recipe becomes yours. Some readers want the closest possible version of the childhood box. Others want a sharper, more homemade skillet pasta with real cheddar and extra garlic. Some need it lighter, higher-protein, or easier for kids. The base ratio stays the same; the flavor direction changes.

Five homemade Hamburger Helper style bowls showing classic, creamy, grown-up, lighter, and spicy cheeseburger macaroni variations.
The base ratio stays the same, but the final bowl can lean classic, extra creamy, lighter, sharper, or spicy depending on what your table likes.

Want to compare the actual versions? Jump to variations for the lighter, high-protein, no-milk, gluten-free, spicy, and vegetable options.

StyleUse ThisFlavor Result
Closest to the childhood boxKetchup, mustard, orange cheddar, a little paprikaSweet-tangy cheeseburger macaroni
Creamiest family-style versionFresh cheddar plus Monterey Jack or American cheeseSmoother, meltier, more kid-friendly
More grown-up skillet pastaExtra garlic, sharp cheddar, black pepper, herbsLess packet-style, more savory and homemade
Lighter but still cozyLean beef or turkey, vegetables, whole wheat pastaComforting without feeling as heavy
Spicy cheeseburger macHot sauce, jalapeño, cayenne, Pepper JackCheesy with a warm kick

This is usually where every household has an opinion. Some people want it sweeter and closer to the box, some want it sharper with real cheddar, some want it extra creamy for kids, and some want enough hot sauce to make it feel more grown-up. If your table is split, start with the classic version, then let people add hot sauce, extra cheddar, pickles, black pepper, or herbs at the end.

How to Get That Nostalgic Cheeseburger Macaroni Flavor

For the most nostalgic version, think savory, cheesy, slightly sweet, slightly tangy, and beefy. Tomato paste gives the sauce body. Ketchup adds the familiar sweet-acidic note. Mustard makes it taste more like cheeseburger macaroni. Worcestershire sauce keeps the beef flavor from tasting flat.

How to Build the Boxed-Dinner Flavor Without the Packet

This is the part many homemade versions miss. The familiar flavor does not come from cheese alone; it comes from beefy depth, a little tomato tang, a subtle mustard edge, warm color, and a sauce that feels creamy without turning gluey.

Boxed-dinner flavor map for homemade Hamburger Helper showing beefy depth, tomato tang, mustard edge, warm color, and creamy sauce.
Think of the boxed-dinner flavor as layers: beefy, tangy, warm, and creamy working together rather than one big hit of cheese.

Want the most nostalgic version? Jump to the closest boxed-dinner style variation.

What You RememberHow to Build It Here
Beefy, savory baseBrowned beef, beef broth, Worcestershire sauce
Light tomato tangTomato paste plus optional ketchup
Cheeseburger-style edgeMustard, cheddar, optional pickles or bacon
Warm orange colorPaprika and orange cheddar
Smooth, family-style sauceFresh cheddar plus a little American cheese, Monterey Jack, or Colby Jack

That is why this recipe uses small amounts of several flavor builders instead of relying only on cheese. Cheese gives comfort, but tomato paste, mustard, Worcestershire sauce, paprika, and ketchup are what make the skillet taste like cheeseburger macaroni instead of plain beef mac.

  • Sweeter tang: add 1 tablespoon ketchup.
  • Cheeseburger flavor: use Dijon or mustard powder.
  • Deeper savory flavor: use Worcestershire sauce and beef broth.
  • Smoother melt: use part cheddar and part American cheese or Colby Jack.
  • Stronger color: use paprika and sharp orange cheddar.

Make-Ahead Homemade Hamburger Helper Seasoning Mix

If the boxed version appealed because it was easy, this is the part to save. Mix the dry seasonings ahead of time and keep them in a small jar. Then a busy-night dinner starts with browning beef, not measuring five spices while everyone is hungry.

Homemade Hamburger Helper seasoning mix with paprika, chili powder, garlic powder, onion powder, salt, and black pepper in a jar.
A make-ahead seasoning mix keeps the homemade version convenient, while tomato paste, mustard, Worcestershire, and cheese still build the sauce fresh during cooking.
  • 1 teaspoon paprika or smoked paprika
  • 1/2 teaspoon chili powder
  • 1/2 teaspoon garlic powder
  • 1/2 teaspoon onion powder
  • 3/4 teaspoon fine salt
  • 1/4 teaspoon black pepper
  • Optional: 1 teaspoon cornstarch for a slightly thicker sauce

Label the jar “Homemade Hamburger Helper mix.” When you cook, still add the tomato paste, Worcestershire sauce, mustard, and cheese fresh. Those ingredients are what keep the sauce from tasting flat.

How to Make It Taste More Homemade

If you want less boxed nostalgia and more homemade skillet-pasta flavor, skip the ketchup, use sharp cheddar, add an extra clove of garlic, and finish with black pepper, chives, parsley, or a little hot sauce. You can also add sautéed mushrooms or bell pepper with the onion for a more grown-up version.

Variations

Cheeseburger Macaroni Hamburger Helper Style

For the most cheeseburger-like version, use elbow macaroni, keep the ketchup and mustard, and use a mix of sharp cheddar and American cheese. You can also top each bowl with chopped pickles, diced tomatoes, or a little crumbled cooked bacon.

Closest-to-the-box homemade Hamburger Helper style with elbow macaroni, orange cheddar sauce, ground beef, ketchup, and mustard cues.
For a more nostalgic cheeseburger macaroni flavor, keep the ketchup and mustard, use elbow macaroni, and lean into orange cheddar.

Healthy Homemade Hamburger Helper

For a lighter version, use 90/10 or 93/7 ground beef, ground turkey, or ground chicken. Add finely chopped bell pepper, grated carrot, zucchini, spinach, peas, or mushrooms. Whole wheat pasta also works, although it may need a little extra liquid and a few more minutes.

Healthy homemade Hamburger Helper variation with creamy macaroni, ground beef or turkey, vegetables, and cheddar sauce.
A lighter skillet should still feel comforting, so use leaner meat and vegetables while keeping enough sauce to coat the pasta well.

For extra creaminess with a lighter finish, stir in a spoonful or two of plain Greek yogurt after turning off the heat. Do not boil it. The flavor becomes a little tangier and less classic, but the sauce stays creamy if the heat is gentle.

High-Protein Homemade Hamburger Helper

For a higher-protein version, use lean ground beef or ground turkey, high-protein short pasta, beef bone broth, and a little plain Greek yogurt stirred in off heat. Keep the cheddar for flavor, but do not boil the yogurt or the sauce can separate. Because high-protein pastas vary in cooking time and starch release, start checking early and keep extra broth nearby. This version tastes less like the childhood box, but it works well when you want the same comfort-food idea with more protein.

High-protein homemade Hamburger Helper with lean beef, high-protein pasta, bone broth, Greek yogurt, and cheddar cheese.
High-protein pasta and Greek yogurt can make the dish more filling, but they need gentle heat and extra broth nearby so the sauce stays creamy.

No-Milk Homemade Hamburger Helper

You can make this without milk. Replace the milk with extra beef broth, then make the sauce creamier with cheese at the end. The result is a little less creamy but still very good. For more body, stir 1 teaspoon cornstarch into 2 tablespoons cold broth, then add it near the end and simmer briefly before adding cheese.

No-milk homemade Hamburger Helper made with extra broth, cheddar cheese, elbow macaroni, and ground beef in a creamy skillet sauce.
Milk gives the sauce softness, but broth can still cook the pasta while cheddar brings creaminess at the end.

Gluten-Free Homemade Hamburger Helper

Use a sturdy gluten-free short pasta and check it early. Gluten-free pasta can go from firm to soft quickly, and it often releases more starch. Stir gently, add liquid only as needed, and serve right away for the best texture.

Gluten-free homemade Hamburger Helper with short gluten-free pasta, ground beef, creamy cheddar sauce, and a spoon checking texture.
Gluten-free pasta can soften quickly, so check early, stir gently, and keep extra liquid nearby if the sauce tightens before the pasta is done.

Spicy Hamburger Helper

Add cayenne, hot sauce, diced jalapeño, or crushed red pepper. Pepper Jack cheese also works well if you want heat without changing the one-pot method.

Spicy homemade Hamburger Helper with jalapeño slices, hot sauce, Pepper Jack, cheddar, macaroni, and ground beef.
Spicy cheeseburger mac is easy to adjust at the end with jalapeños, hot sauce, crushed red pepper, or Pepper Jack.

Hamburger Helper with Vegetables

For vegetables that blend into the sauce, add grated carrot or zucchini with the onion. For vegetables that keep their shape, stir in peas, corn, or spinach near the end. Avoid adding too many watery vegetables unless you are ready to simmer the sauce a little longer.

Homemade Hamburger Helper with vegetables including peas, spinach, carrot, and zucchini mixed into creamy macaroni and ground beef.
Vegetables work best when folded into the sauce, not piled on top, so the skillet stays creamy while gaining color, texture, and balance.

If your comfort-food memory leans more creamy casserole than skillet pasta, this tuna noodle casserole recipe follows the old-school pantry-dinner route with noodles, creamy sauce, and a golden topping.

Is This for Boxed Hamburger Helper or Homemade?

This recipe is the homemade version. It does not use a box, sauce packet, or seasoning packet. It is meant for readers who want the same cozy skillet-dinner idea — beef, pasta, creamy sauce, cheese — made from scratch.

Neutral packet-style idea next to a from-scratch skillet of homemade Hamburger Helper with pasta, ground beef, cheese, milk, and seasonings.
This recipe keeps the cozy skillet-dinner idea, but the sauce comes from real ingredients like broth, milk, cheddar, tomato paste, mustard, and Worcestershire.

If you already have a box in the pantry, you can still borrow the flavor ideas here. Sauté onion and garlic with the beef, add a little tomato paste for depth, use milk or broth for a richer sauce, and finish with extra cheese or a spoonful of sour cream. That is a different recipe path, but the flavor logic is the same.

Troubleshooting Homemade Hamburger Helper

One-pot pasta is easy, but the sauce can change quickly because the pasta keeps absorbing liquid. Fortunately, most problems are fixable if you catch them before serving.

Troubleshooting guide for homemade Hamburger Helper showing fixes for sauce that is too thick, too thin, grainy, or bland.
Most sauce problems come down to liquid, heat, cheese timing, or seasoning, and each one can usually be fixed before serving.
ProblemWhy It HappenedHow to Fix It
Sauce is too thickThe pasta absorbed more liquid than expectedStir in warm milk, broth, or water a splash at a time
Sauce is too thinToo much liquid or pasta not starchy enoughSimmer uncovered for a few minutes, then rest before serving
Pasta is still firmThe liquid reduced before the pasta cookedAdd 1/4 cup liquid, cover briefly, and simmer gently
Cheese sauce is grainyCheese was added over high heat or pre-shredded cheese was usedRemove from heat before adding cheese and use freshly grated cheese
Dish tastes blandNot enough salt, acid, or savory depthAdd salt, Worcestershire sauce, mustard, black pepper, or a small spoon of ketchup
Dish tastes greasyBeef released too much fatDrain excess fat after browning; use leaner beef next time
Milk looks separatedThe sauce boiled too hardLower the heat, stir gently, and finish with cheese off heat
Pasta is stickingThe heat is too high or the pan is too dryLower the heat, stir more often, and add a splash of liquid

How to Fix Dry or Too-Thick Hamburger Helper

If the skillet tightens up, do not add a large pour of liquid at once. Start with a small splash of warm milk, broth, or water, stir, and let the sauce loosen evenly.

Warm milk or broth being poured into thick homemade Hamburger Helper to loosen the sauce in a skillet.
A thick skillet usually needs only a small rescue: warm liquid, a few stirs, and a minute for the sauce to loosen evenly.

How to Prevent Grainy Cheese Sauce

For a smoother cheddar finish, make sure the sauce is hot but no longer bubbling hard before the cheese goes in.

Cheddar being added off heat to homemade Hamburger Helper in a skillet on a trivet for a smoother cheese sauce.
The smoother the sauce looks before the cheese goes in, the easier it is for cheddar to melt in gently instead of breaking.

If cheese sauces are where dinner usually goes wrong, this easy cheese sauce recipe explains the smooth-cheddar method in more detail.

Storage, Reheating, and Freezing

This homemade Hamburger Helper recipe is best right after cooking, when the sauce is creamy and the pasta still has a little bite. However, leftovers are still useful for lunch or an easy next-day dinner.

Leftover homemade Hamburger Helper in a storage container and a skillet being reheated with a splash of milk.
Leftovers thicken in the fridge, so reheat gently with a splash of milk, broth, or water to bring the sauce back.

How to Store It

Let leftovers cool, then store them in an airtight container in the refrigerator for up to 3 to 4 days. The pasta will continue absorbing sauce as it sits, so the leftovers will be thicker than the fresh skillet.

How to Reheat It

Reheat gently on the stovetop or in the microwave with a splash of milk, broth, or water. Then stir, warm slowly, and add more liquid if needed. Do not blast it with high heat for too long, because the sauce can turn oily.

Can You Freeze Homemade Hamburger Helper?

You can freeze it, but the pasta will soften after thawing. For best texture, refrigerate leftovers and eat them within a few days. If you do freeze it, use an airtight container, thaw overnight in the refrigerator, and reheat gently with extra liquid.

What to Serve With Homemade Hamburger Helper

This is already a complete comfort-food dinner, so the best sides are simple and fresh. A crisp salad, roasted broccoli, green beans, peas, cucumber salad, or steamed vegetables help balance the richness. Garlic bread works too if you want the meal to feel extra cozy.

Homemade Hamburger Helper served with salad, broccoli, peas, garlic bread, and vegetables for a family-style dinner.
Since the skillet is rich and creamy, fresh sides like salad, broccoli, peas, green beans, or cucumber salad help balance the meal.

To keep the plate lighter, serve smaller bowls with a big salad or steamed vegetables. If you are feeding everyone family-style, set the skillet in the center of the table and let people add black pepper, herbs, hot sauce, or extra cheese.

Another cozy ground-beef dinner in the same family-comfort lane is this tater tot casserole recipe, especially if you want a baked, cheesy version of the same pantry-dinner feeling.

FAQs

Is homemade Hamburger Helper the same as cheeseburger macaroni?

It is very close. Cheeseburger macaroni is the best way to describe this homemade Hamburger Helper recipe because it has ground beef, macaroni, cheddar cheese, and a savory cheeseburger-style sauce.

What Hamburger Helper flavor is this closest to?

This recipe is closest to Cheeseburger Macaroni Hamburger Helper. It has ground beef, short pasta, cheddar cheese, tomato paste, mustard, and a little paprika for that familiar cheesy, savory, slightly tangy flavor.

Do I need to boil the pasta separately?

No. The pasta cooks directly in the skillet with the beef, broth, milk, and seasonings. This saves time and helps the sauce thicken because the pasta releases starch as it cooks.

What kind of cheese melts best?

Freshly grated sharp cheddar gives the best flavor. For a smoother, more nostalgic melt, use a blend of cheddar and American cheese, Monterey Jack, or Colby Jack.

Can I make homemade Hamburger Helper without milk?

Milk gives the sauce a softer, creamier finish, but it is not mandatory. Replace it with extra broth, then let the cheese do more of the creamy work at the end. For a thicker sauce, stir 1 teaspoon cornstarch into 2 tablespoons cold broth and add it before the cheese.

Can I use water instead of beef broth?

Water works in a pinch, but beef broth gives the sauce more depth. If water is all you have, add a little more Worcestershire sauce, tomato paste, paprika, salt, and pepper so the dish does not taste flat.

Can I use ground turkey instead of beef?

Ground turkey works well for a lighter skillet, especially with a little extra seasoning. Because turkey is milder than beef, add more Worcestershire sauce, paprika, mustard, or cheese to bring back some of the savory depth.

Why did my sauce get dry?

The pasta absorbed more liquid than expected, or the heat was too high. Stir in warm milk, broth, or water a splash at a time until the sauce loosens, or see the dry sauce fix above.

Why did my cheese turn grainy?

Cheddar can turn grainy when it is boiled or added while the pan is too hot. Turn off the heat, let the bubbling calm, then add freshly grated cheese gradually, or see the smooth cheese tip.

How do I make it more flavorful?

Start with salt, then add savory depth with Worcestershire sauce, mustard, smoked paprika, and tomato paste. For a sweeter boxed-style flavor, keep the optional ketchup.

Can I double the recipe?

A double batch works best in a Dutch oven or very large deep pan. If the pan is crowded, the pasta cooks unevenly and the sauce can reduce before the pasta softens. Stir often and add liquid as needed.

Is this recipe affiliated with Hamburger Helper?

No. This is a homemade, from-scratch recipe inspired by the style of the boxed skillet dinner. It does not use the boxed mix or seasoning packet.

Final Thoughts

The best homemade Hamburger Helper recipe is not trying to turn a boxed dinner into something fancy. It is trying to keep the part people actually loved: the warm skillet, the creamy beef-and-macaroni sauce, the orange cheddar comfort, and the relief of dinner being done.

Start with the classic cheeseburger macaroni version, then bend it toward your own memory. Make it tangier with mustard and ketchup, richer with extra cheddar, lighter with lean beef and vegetables, or saucier with a splash of broth at the end. Once the ratio clicks, this becomes one of those back-pocket dinners you can make without staring at a recipe every time.

What was the boxed dinner flavor in your house: cheeseburger macaroni, stroganoff, lasagna, chili mac, or something else? And if you make it from scratch now, do you want it closer to the childhood version, sharper and more grown-up, or extra creamy for family dinner?

Back to top

Posted on Leave a comment

Slow Cooker French Onion Chicken

Slow cooker French onion chicken with melted cheese, soft onions, and onion gravy served over creamy mashed potatoes.

Slow Cooker French Onion Chicken is what you make when you want the comfort of French onion soup but need it to feel like dinner: tender chicken, soft onions, savory gravy, and melted cheese spooned over mashed potatoes, rice, egg noodles, or toasted bread.

The base version is a true shortcut dinner: chicken, sliced onion, condensed French onion soup, dry onion soup mix, a little broth, and cheese at the end. It is simple enough for a busy day, but a few small choices keep the chicken tender and the onion gravy balanced instead of watery, harsh, or too salty.

When you lift the lid, you want soft onions, a savory gravy smell, chicken that still tastes juicy, and cheese that melts over the top instead of disappearing into the sauce. That is why this guide covers cook times, chicken breasts vs thighs, onion soup mix balance, gravy thickening, and the best way to finish the cheese.

The main recipe uses condensed French onion soup and dry onion soup mix, but you can also make it creamy, use thighs instead of breasts, broil the cheese, add mushrooms, or use the no-canned-soup version when you want a more homemade onion sauce.

Before the timing details, this is the result to aim for: a full dinner plate with tender chicken, softened onions, glossy onion gravy, and something underneath to catch the sauce.

Finished slow cooker French onion chicken served over egg noodles with melted cheese, onion gravy, and toasted bread nearby.
Because the onion gravy needs something to catch it, noodles, potatoes, rice, or toast help turn the chicken into a complete comfort-food dinner.

Quick Answer: How Long to Cook Slow Cooker French Onion Chicken

Cook slow cooker French onion chicken on low for 4–6 hours or on high for 3–4 hours, depending on the thickness of the chicken and whether you want sliceable or shreddable meat. Thin chicken breasts may be ready closer to 3–4 hours on low. Boneless thighs can usually handle a little longer and stay juicier.

The chicken is done when the thickest piece reaches 165°F / 74°C on an instant-read thermometer. Add the cheese only after the chicken is cooked through, then cover the slow cooker until the cheese melts, or transfer the chicken to a broiler-safe dish for a browned, bubbling top.

Quick answer guide for slow cooker French onion chicken with low and high cook times, 165°F doneness, and cheese finish note.
Start with the cook time, but trust the thermometer: the thickest piece of chicken should reach 165°F / 74°C before the cheese goes on.

For food safety, use thawed chicken rather than frozen chicken in the slow cooker. FoodSafety.gov lists 165°F / 74°C as the safe minimum internal temperature for poultry, and USDA slow-cooker guidance recommends thawing meat or poultry before adding it to a slow cooker. FoodSafety.gov’s temperature chart and USDA/FSIS slow-cooker guidance are useful references if you want the safety details.

For more detail by chicken cut and thickness, use the low vs high cook-time guide below.

Slow Cooker French Onion Chicken at a Glance

Best slow cooker size 5- to 6-quart slow cooker for about 2 lb / 900 g chicken
Best chicken Boneless skinless breasts for a leaner, sliceable dinner; boneless thighs for juicier, more forgiving meat
Cook time Low 4–6 hours or high 3–4 hours, checking to 165°F / 74°C
Flavor base Condensed French onion soup, dry onion soup mix, sliced onions, low-sodium beef broth, Worcestershire, thyme, and cheese
Best cheese Gruyère for classic French onion flavor, Swiss for budget-friendly comfort, provolone for smooth melting
Best serving ideas Mashed potatoes, rice, egg noodles, pasta, toasted bread, roasted vegetables, or sandwich rolls
At-a-glance guide for slow cooker French onion chicken showing slow cooker size, chicken amount, onion soup mix, and cheese options.
A 5- to 6-quart slow cooker keeps the chicken mostly in one layer, helping the onions, broth, soup mix, and cheese cook more evenly around it.

Use the table as your baseline, then choose the texture you want: sliceable chicken for plates, shredded chicken for bowls and sandwiches, or a creamier sauce for noodles and rice.

Choose Your Result: Sliceable, Shredded, Creamy, or Extra Cheesy

The best version depends on how you want to serve it. For a plated dinner, keep the chicken sliceable. For rice, noodles, mashed potatoes, or sandwiches, let it go softer and shred it into the onion gravy.

Slow cooker French onion chicken result guide with sliceable, shredded, creamy, and broiled cheese finish options.
Choose the result before you cook: sliceable chicken for plates, shredded chicken for bowls, creamy sauce for noodles, or broiled cheese for a deeper finish.
What you want Use Best method
Sliceable chicken Thin or evenly pounded chicken breasts Check early, around 3–4 hours on low
Shredded chicken and gravy Breasts or thighs Cook longer, then shred into the onion sauce
Juiciest version Boneless chicken thighs Cook low and slow; thighs are more forgiving
Creamy version Sour cream, Greek yogurt, cream cheese, or heavy cream Stir in at the end, after cooking
French onion soup-style finish Swiss, Gruyère, or provolone Broil the cheese for 2–5 minutes after slow cooking

Slow Cooker French Onion Chicken Recipe

This slow cooker French onion chicken cooks tender chicken in a savory onion gravy, then finishes with melted Swiss, provolone, or Gruyère cheese. Keep it simple with condensed French onion soup and onion soup mix, or use the notes below for thicker gravy, a broiled cheese finish, chicken thighs, creamy sauce, or a no-canned-soup version.

Prep Time10 minutes
Cook Time3–4 hours high or 4–6 hours low
Total TimeAbout 3 hr 10 min–6 hr 10 min
Servings4–6

Equipment

  • 5- to 6-quart slow cooker
  • Instant-read thermometer
  • Medium mixing bowl
  • Tongs
  • Optional broiler-safe dish for browning the cheese

Ingredients

  • 2 lb / 900 g boneless skinless chicken breasts or thighs
  • 1 large yellow or sweet onion, thinly sliced, about 200–250 g
  • 1 can condensed French onion soup, 10.5 oz / about 298 g, undiluted
  • 1 packet dry onion soup mix, 1 oz / 28 g
  • ½ cup / 120 ml low-sodium beef broth, plus more if needed
  • 1 tbsp / 15 ml Worcestershire sauce
  • 1 tsp Dijon mustard or 2 tsp balsamic vinegar, optional
  • ½ tsp black pepper
  • ½ tsp dried thyme or 2–3 fresh thyme sprigs
  • 4–6 slices Swiss, provolone, or Gruyère, or 1 cup / 100–115 g shredded cheese
  • Optional for thickening: 1 tbsp cornstarch + 1 tbsp cold water

Instructions

  1. Add the sliced onions to the bottom of a 5- to 6-quart slow cooker.
  2. Place the chicken over the onions in a mostly even layer.
  3. In a bowl, stir together the undiluted condensed French onion soup, dry onion soup mix, beef broth, Worcestershire sauce, Dijon or balsamic if using, black pepper, and thyme.
  4. Pour the sauce mixture over the chicken.
  5. Cover and cook on high for 3–4 hours or on low for 4–6 hours, until the thickest piece of chicken reaches 165°F / 74°C.
  6. If you want thicker gravy, remove the chicken to a plate. Stir together cornstarch and cold water, then stir the slurry into the slow-cooker sauce. Cover and cook on high for 10–15 minutes, until slightly thickened.
  7. Return the chicken to the sauce. Top with cheese, cover, and cook 10–30 minutes until melted.
  8. For a browned cheese finish, transfer the cooked chicken and some sauce to a broiler-safe dish, top with cheese, and broil for 2–5 minutes, watching closely.
  9. Serve over mashed potatoes, rice, egg noodles, pasta, toasted bread, or vegetables.

Notes

  • Use low-sodium broth because condensed soup, onion soup mix, and cheese already season the gravy.
  • If you prefer a milder onion gravy, start with ½ packet onion soup mix and add more only after tasting.
  • For sliceable chicken breasts, check early and avoid cooking much past 165°F / 74°C.
  • For shredded chicken, cook until very tender, shred into the sauce, then add cheese.
  • For a creamier sauce, stir in sour cream, Greek yogurt, cream cheese, or heavy cream at the end, once the slow cooker is on warm or the sauce is no longer bubbling hard.
Saveable slow cooker French onion chicken recipe card with servings, cook time, main ingredients, method, and 165°F doneness cue.
Keep the basic build simple, then use the extra notes when you want thicker gravy, a browned cheese top, or a no-canned-soup version.

Why This Recipe Works

This recipe works because the onion flavor comes from three places: sliced onions for sweetness, condensed French onion soup for body, and dry onion soup mix for shortcut seasoning. Low-sodium broth loosens the sauce without diluting it, while Worcestershire, thyme, and a little Dijon or balsamic keep the flavor from tasting flat.

The cheese waits until the end because it has a job: it should sit on top like a French onion soup finish. Melt it in the slow cooker for the easiest version, or broil it for browned edges and a deeper, toastier flavor.

What the Finished Chicken Should Be Like

When this dish is right, the chicken should be tender enough to cut with a fork but not dry around the edges. The onions should be soft and tucked into the gravy, not sitting on top as sharp raw slices. You want a sauce that drapes over potatoes or noodles, not one that runs straight to the edge of the plate.

At the finish, the cheese should stay visible and melty instead of blending into the gravy. If you broil it, look for browned spots, bubbling edges, and that French onion soup feeling when the cheese pulls slightly as you serve it.

French onion chicken texture guide showing tender chicken, soft onions, melted cheese, and gravy draping over the food.
The best onion gravy should drape instead of run, so it coats potatoes, noodles, or rice without turning watery or paste-thick.

Ingredients You Need

The ingredient list is short, but each part has a job: onions for sweetness, soup mix for shortcut flavor, broth for a spoonable base, and cheese for the French onion finish. Amounts are written in both US and metric measurements where useful.

Ingredients for slow cooker French onion chicken including chicken, sliced onions, onion soup mix, broth, thyme, cheese, and cornstarch slurry.
Although the ingredient list is short, the balance matters: soup mix seasons, broth loosens, onions sweeten, and cheese gives the French onion finish.

Chicken

The chicken is the only part of this recipe that can really punish you if it overcooks. Use 2 lb / 900 g boneless skinless chicken breasts or thighs. Breasts give you a leaner, more sliceable dinner, while thighs stay juicier and are more forgiving if you want shredded chicken in the sauce.

Chicken Breast Thickness and Doneness

If your chicken breasts are very thick, slice them horizontally or pound them to a more even thickness. This helps them cook evenly and reduces the chance of dry edges before the center is done. For exact timing by cut, use the cook-time table.

Chicken breast doneness guide with thick chicken breast, thinner chicken pieces, and a 165°F target temperature.
Even thickness helps chicken breasts cook predictably. Slice or pound thick pieces, and start checking thin pieces early.

If you want more slow-cooker ideas built around lean chicken, these crock pot chicken breast recipes are helpful for keeping chicken breast tender instead of dry.

For a different dinner built around a whole bird instead of boneless pieces, this whole chicken in crock pot guide is the better match.

Onions

Use 1 large yellow or sweet onion, thinly sliced. This is usually about 200–250 g, or roughly 2 cups sliced onion. Yellow onions give classic savory-sweet flavor. Sweet onions make the sauce softer and slightly sweeter.

For a more onion-heavy, French onion soup-style sauce, add a second onion. On busy nights, 1 large onion is still enough because the soup base and onion soup mix bring plenty of onion flavor too.

Condensed French Onion Soup

The shortcut base is 1 can condensed French onion soup, usually 10.5 oz / about 298 g. Use it straight from the can; do not prepare it with water first. The condensed soup brings savory onion flavor, body, and seasoning.

Dry Onion Soup Mix

Use 1 packet dry onion soup mix, usually 1 oz / 28 g. Any standard dry onion soup mix works. Because the mix already seasons the sauce, the rest of the recipe uses low-sodium broth and waits until the end for final adjustments.

For a better-balanced gravy: use low-sodium broth and wait to add extra salt until the end. Condensed soup, onion soup mix, and cheese already season the sauce, so you may not need much more.

Beef Broth or Beef Consommé

Use ½ cup / 120 ml low-sodium beef broth for a saucier version. Beef consommé can also work when you want a deeper, more concentrated flavor, but it is often richer and saltier than broth. Taste the sauce before adjusting the seasoning.

Worcestershire, Dijon, Balsamic, and Thyme

Worcestershire gives the sauce a deeper savory edge, while Dijon or balsamic keeps the onion sweetness from feeling flat. Thyme brings it closer to the flavor of French onion soup.

Use 1 tbsp / 15 ml Worcestershire sauce, plus either 1 tsp Dijon mustard or 2 tsp balsamic vinegar. Add ½ tsp dried thyme or a few fresh thyme sprigs.

Cheese

Use 4–6 slices Swiss, provolone, or Gruyère, or about 1 cup / 100–115 g shredded cheese. Gruyère gives the most classic French onion soup flavor. Swiss is easy to find and budget-friendly. Provolone melts smoothly and is mild enough for kids or picky eaters.

Best cheese for French onion chicken guide showing Gruyère, Swiss, and provolone melted over chicken.
Gruyère gives the most classic French onion flavor, Swiss keeps it easy and budget-friendly, and provolone melts into a smooth, mild topping.

Slow Cooker French Onion Chicken with Onion Soup Mix

Dry onion soup mix is what gives this crock pot French onion chicken its easiest shortcut flavor. One standard packet, usually 1 oz / 28 g, is enough for the main recipe because the condensed French onion soup and cheese also season the gravy.

Onion Soup Mix Balance

If you prefer a milder gravy, start with half the packet, use low-sodium beef broth, and taste the sauce before adding any extra seasoning. Two packets can work in some creamy onion soup mix chicken recipes, but for this French onion chicken, one packet usually gives a better balance.

French onion chicken soup mix balance guide with condensed soup, dry onion soup mix, broth, onions, and slow cooker chicken.
Condensed French onion soup gives body, dry onion soup mix adds seasoning, and low-sodium broth helps keep the gravy savory instead of harsh.

For a creamier onion soup mix chicken variation, use the main recipe as written, then stir in sour cream, Greek yogurt, cream cheese, or heavy cream after the chicken has finished cooking. Keep the creamy ingredient out of the slow cooker during the long cook so the sauce stays smoother.

If you want the same comfort-food idea without condensed soup or dry soup mix, jump to the no-canned-soup French onion chicken version.

Best shortcut balance: use 1 can condensed French onion soup, 1 packet dry onion soup mix, ½ cup / 120 ml low-sodium beef broth, and cheese at the end. That gives you a rich onion gravy without making the sauce harsh.

Chicken Breasts vs Thighs

Both work, but they give different results. If you want tidy, sliceable pieces, use chicken breasts and check them early. If you want juicy, pull-apart chicken in onion gravy, use thighs.

Chicken breasts versus thighs comparison for French onion chicken showing sliced chicken breast and saucier thigh-style chicken.
Breasts work best for cleaner slices, while thighs stay juicier and more forgiving if you want pull-apart French onion chicken in gravy.
Chicken cut Best for What to watch
Boneless skinless breasts Lean, sliceable French onion chicken Can dry out if cooked too long; check early
Thin-sliced breasts Faster, more even cooking May be done closer to 3–4 hours on low
Boneless skinless thighs Juicier, richer, more forgiving chicken Best if you like shredded or very tender meat
Bone-in thighs Deeper flavor Less convenient to serve; check around the bone

If you are making this for the first time, boneless thighs are the most forgiving. If you prefer chicken breasts, keep the pieces even and start checking before the longest listed cook time.

Best Crock Pot Size for French Onion Chicken

A 5- to 6-quart slow cooker is the best size for about 2 lb / 900 g chicken. It gives the chicken enough room to sit in a mostly even layer while still keeping the onions and sauce close around it.

Best crock pot size guide showing chicken pieces arranged in one layer in a slow cooker with onions and sauce.
Keeping the chicken mostly in one layer helps it cook evenly while the onions stay close enough to soften into the slow-cooker sauce.

A very large slow cooker can let the sauce spread thin and cook down faster. A small one may stack thick chicken breasts and cook them unevenly. Whenever possible, keep the chicken in one layer.

How to Make Crock Pot French Onion Chicken

The method is simple, but the order matters: onions underneath, chicken in an even layer, sauce over the top, and cheese only once the chicken is cooked.

Do not let the extra notes make the recipe feel complicated. The basic version is still simple: layer the onions, add the chicken, pour over the sauce, cook until done, then finish with cheese. For more detail, use the cook-time guide or the gravy-thickening section.

Step-by-step board for slow cooker French onion chicken showing onions, chicken, sauce, slow cooking, thickening, and cheese finish.
Once the onions and chicken are layered, the slow cooker does most of the work; the final texture depends on doneness, gravy thickness, and cheese timing.

1. Layer the onions

Add the sliced onions to the bottom of a 5- to 6-quart slow cooker. Spreading the onions underneath the chicken helps them soften into the sauce instead of sitting raw on top.

Hand placing chicken pieces over sliced onions in a slow cooker for French onion chicken.
Layer the onions underneath the chicken so they soften into the sauce rather than sitting on top with a sharp, raw bite.

2. Add the chicken

Place the chicken in a single layer over the onions. A little overlap is fine, but try not to stack thick chicken breasts directly on top of one another.

3. Mix the sauce

In a bowl, stir together the undiluted condensed French onion soup, dry onion soup mix, low-sodium beef broth, Worcestershire sauce, Dijon or balsamic if using, black pepper, and thyme. Pour this mixture over the chicken.

4. Slow cook until done

Cook on low for 4–6 hours or on high for 3–4 hours, until the thickest piece of chicken reaches 165°F / 74°C.

5. Thicken the gravy if needed

If the sauce is thinner than you like, remove the chicken to a plate. Stir together 1 tbsp cornstarch and 1 tbsp cold water, then stir the slurry into the sauce. Cover and cook on high for 10–15 minutes, until the sauce thickens slightly.

6. Add cheese

Place the chicken back into the sauce, top with cheese, and cover until melted. For a browned French onion finish, transfer the chicken and some sauce to a broiler-safe dish, add cheese, and broil for 2–5 minutes, watching closely.

Cooking Time: Low vs High

Slow cookers vary, and chicken thickness matters. Use the times below as a guide, then trust the thermometer.

French onion chicken cook time guide showing thin breasts, regular breasts, thighs, and 165°F doneness.
Cook time changes with cut and thickness, so check thin breasts early and use 165°F as the final doneness cue.
Chicken style Low setting High setting Best result
Thin or lightly pounded chicken breasts 3–4 hours 2–3 hours Sliceable, tender chicken
Regular boneless chicken breasts 4–6 hours 3–4 hours Tender chicken that can be sliced or lightly shredded
Boneless chicken thighs 5–7 hours 3–4 hours Juicy, saucy, more forgiving meat
Shredded French onion chicken 5–6 hours 3–4 hours Pull-apart chicken mixed into the gravy
Frozen chicken Not recommended Not recommended Thaw first before slow cooking
Chicken breast tip: if your slow cooker runs hot or your chicken breasts are thin, start checking around 3 hours on low. The goal is tender chicken at 165°F / 74°C, not chicken that stays in the pot until the longest possible time.

The same “check by temperature, not just time” idea matters with other lean slow-cooker meats too. This slow cooker pork loin recipe uses that same approach to keep lean pork sliceable and juicy.

How to Make the Onion Gravy Spoonable, Not Watery

The sauce should thicken enough to coat chicken, potatoes, or noodles. If your slow cooker releases a lot of liquid from the chicken and onions, thicken the sauce at the end instead of adding more soup mix.

For a simple thickener, stir together 1 tbsp cornstarch with 1 tbsp cold water. Remove the chicken, stir the slurry into the sauce, cover, and cook on high for 10–15 minutes. Add the chicken back once the sauce has thickened.

Cornstarch slurry being poured into French onion chicken gravy in a slow cooker.
When the slow-cooker liquid looks thin, a cornstarch slurry helps turn it into onion gravy that coats the chicken instead of pooling underneath.

When the sauce tastes strong rather than thin, use the troubleshooting table instead of adding more soup mix.

For another slow-cooker dinner with a proper spoonable sauce, this slow cooker sausage casserole recipe has the same cozy, gravy-friendly feel.

For a thicker gravy from the start, use only ½ cup / 120 ml broth. And for more sauce to spoon over rice, noodles, or mashed potatoes, use up to 1 cup / 240 ml broth and thicken at the end.

French Onion Chicken Gravy Thickness Guide

The goal is not a stiff gravy or a watery sauce. You want the middle texture: glossy, spoonable, and thick enough to cling to whatever you serve underneath.

French onion chicken gravy guide showing too thin, just right, and too thick gravy textures.
Aim for the middle texture: glossy enough to flow, yet thick enough to coat a spoon and cling to potatoes, noodles, or rice.

Melt the Cheese in the Slow Cooker or Broil It Until Bubbly

You have two good options for the cheese. The easiest is to melt it right in the slow cooker. The most French onion soup-like finish is to broil it briefly.

If you are still choosing the topping, see the best cheese options before deciding between a slow-cooker melt and a broiled finish.

French onion chicken cheese finish comparison showing slow cooker melted cheese and browned broiled cheese.
The slow-cooker melt keeps dinner easy; the broiled finish adds browned, bubbling cheese for a more French onion soup-style result.
Finish How to do it Best for
Slow cooker melt Top the cooked chicken with cheese, cover, and cook 10–30 minutes until melted Easy weeknight dinners, no extra dishes
Broiled cheese finish Transfer chicken and sauce to a broiler-safe dish, add cheese, and broil 2–5 minutes Browned, bubbling, French onion soup-style cheese

The slow cooker melt is easiest. The broiled finish is best if you want this dish to feel closer to French onion soup. Transfer the cooked chicken and onion gravy to a broiler-safe dish, add Swiss, Gruyère, or provolone, and broil until the cheese is bubbling and browned in spots.

Watch closely under the broiler; the cheese can move from beautifully browned to burnt quickly.

Optional 5-Minute Upgrade for Deeper Onion Gravy

The easy version works well as written. But if you have five extra minutes, this is where the dish starts to taste less like a shortcut and more like slow-cooked French onion gravy.

Five-minute flavor upgrades for French onion chicken with sautéed onions, broth, seasonings, and browned cheese finish.
Small upgrades can make a big difference: sautéed onions, garlic, deeper broth, and a browned cheese finish all build more layered French onion flavor.
  • Sauté the onions first: cook them in butter for 5–8 minutes before adding them to the crock pot.
  • Add garlic: one or two minced cloves make the gravy taste less flat.
  • Use beef consommé: it gives a richer flavor than regular broth, but taste before adjusting the seasoning.
  • Add Worcestershire and Dijon or balsamic: this balances the sweetness of the onions.
  • Broil the cheese: the browned top gives the dish a more classic French onion soup finish.

Variations

Once you have made the basic version, the recipe is easy to bend toward what you have: thighs instead of breasts, mushrooms in the sauce, a creamy finish, or a broth-based gravy when you do not want canned soup.

This is also where the recipe becomes more personal: some people want it creamy, some want it onion-heavy, and some just want the easiest version with the cheese browned on top.

French onion chicken variations board showing creamy, no-canned-soup, mushroom, potato, and dip-style versions.
Once the base recipe works, you can make it creamier, more homemade, mushroom-rich, potato-friendly, or thicker and dip-style for toast.

Creamy French Onion Chicken

For a creamy version, stir in ¼–½ cup sour cream, Greek yogurt, cream cheese, or heavy cream at the end. This makes the gravy softer and richer, especially if you are serving the chicken over rice, mashed potatoes, or noodles.

Add the creamy ingredient after the chicken is cooked and the slow cooker is on warm or no longer bubbling hard. This keeps the sauce smoother and reduces the chance of splitting.

No Canned Soup French Onion Chicken

For a no-canned-soup version, use a broth-based onion gravy instead of condensed soup and dry onion soup mix. It tastes less salty and more homemade, but it needs either sautéed onions or a slurry at the end for body.

No-canned-soup French onion chicken ingredients with onions, broth, garlic, herbs, slurry, chicken, and cheese.
Instead of canned soup, this version builds flavor from onions, broth, garlic, herbs, and a simple slurry for a more homemade French onion chicken.

Choose this version when you want the dish to taste more like slow-cooked onions and broth than a pantry shortcut. It takes a little more effort, but the flavor is softer, deeper, and easier to adjust.

If you make the no-canned-soup version, the biggest choice is how onion-forward you want it. Two onions keep it balanced; three onions push it closer to French onion soup.

Use the same 2 lb / 900 g chicken and the same cheese finish from the main recipe; only the soup base changes.

  • 2–3 yellow or sweet onions, thinly sliced
  • 1 tbsp butter or oil for sautéing the onions, optional but helpful
  • 1½ cups / 360 ml low-sodium beef broth
  • 2 cloves garlic, minced
  • 1 tbsp / 15 ml Worcestershire sauce
  • 1 tbsp balsamic vinegar or 1 tsp Dijon mustard
  • ½ tsp dried thyme or 2–3 fresh thyme sprigs
  • 1 bay leaf, optional
  • 1 tbsp cornstarch + 1 tbsp cold water, added at the end

No-Canned-Soup Method

For best flavor, sauté the onions in butter for 8–10 minutes before adding them to the slow cooker. Cook the chicken in the broth mixture, then thicken the sauce at the end and finish with Swiss, Gruyère, or provolone.

No-canned-soup French onion chicken method board showing sautéed onions, broth base, slow cooking, thickening, and cheese finish.
Sautéing the onions first gives the no-canned-soup version a deeper base before the broth, chicken, thickener, and cheese finish come together.

Chicken Thighs and Potatoes

For a one-pot comfort dinner, use boneless chicken thighs and add halved baby potatoes under or around the chicken. Potatoes need enough time to soften, so keep them in small pieces and cook on low until both the potatoes are tender and the chicken reaches 165°F / 74°C.

French Onion Chicken with Mushrooms

Add 8 oz / 225 g sliced mushrooms with the onions. Mushrooms make the sauce deeper and more savory, especially if you are serving the chicken over egg noodles or mashed potatoes.

French Onion Dip-Style Chicken

For a richer dip-style version, reduce the added broth, then stir in sour cream or cream cheese at the end. This variation is thicker, creamier, and especially good served with toasted bread, rice, or roasted potatoes.

What to Serve with Slow Cooker French Onion Chicken

Spoon it over mashed potatoes for the coziest plate, pile it onto egg noodles for a weeknight dinner, or shred the leftovers into sandwich rolls with extra cheese.

This is not a recipe that wants to sit alone on a plate. It wants something soft underneath it — potatoes, noodles, rice, or toasted bread — so the onion gravy and melted cheese become part of the whole dinner.

Serving ideas for slow cooker French onion chicken with mashed potatoes, noodles, rice, toast, and sandwich rolls.
Mashed potatoes, noodles, rice, toast, and rolls all give the onion gravy somewhere to go, so the dish feels like a full dinner.
  • Mashed potatoes: the best comfort-food pairing.
  • Egg noodles: easy, cozy, and great for shredded chicken.
  • Rice: simple and practical for weeknights.
  • Toasted bread: gives the dish a French onion soup feel.
  • Pasta: works well if you keep the sauce loose enough.
  • Roasted vegetables: a good lighter side with the rich sauce.
  • Sandwich rolls: shred the chicken, spoon it into rolls, add cheese, and broil.

Leftover French Onion Chicken Melt

If you are making this for a family dinner, mashed potatoes or egg noodles make it feel the coziest. For leftovers, shred the chicken into the onion gravy, tuck it into sandwich rolls, add extra cheese, and broil until the top looks like a French onion melt.

Leftover French onion chicken sandwich melt with shredded chicken, onion gravy, rolls, and melted browned cheese.
For leftovers, the gravy does the work: shredded chicken, rolls, and melted cheese turn yesterday’s slow-cooker dinner into a French onion melt.

Because the chicken is rich, salty-savory, and cheesy, a crisp side helps. This cucumber salad recipe gives you a fresh, tangy contrast without adding much work.

Make-Ahead and Freezer Meal Tips

You can slice the onions and mix the sauce ingredients a day ahead, then keep them covered in the refrigerator until you are ready to cook. Keep the raw chicken separate until it goes into the slow cooker.

For a freezer meal, combine the chicken, sliced onions, undiluted condensed soup, onion soup mix, broth, Worcestershire, thyme, and pepper in a freezer-safe bag. Freeze without the cheese. Thaw overnight in the refrigerator before cooking, then add the cheese at the end.

Storage, Freezing, and Reheating

Store leftovers in an airtight container in the refrigerator for up to 3–4 days. Reheat gently on the stove, in the microwave, or in the slow cooker on low until hot. Add a splash of broth if the sauce has thickened too much.

You can freeze the cooked chicken and sauce for up to 2–3 months. For best texture, freeze the chicken and gravy without the cheese, then add fresh cheese when reheating and serving.

Small Mistakes That Can Change the Result

  • Adding cheese too early: it can melt into the sauce and disappear instead of giving you that French onion-style finish.
  • Salting before tasting: condensed soup, soup mix, broth, and cheese may already season the gravy enough.
  • Cooking thin chicken breasts all day: check early if you want sliceable chicken instead of shredded chicken.
  • Adding regular pasta at the beginning: it can turn mushy in the slow cooker, so serve the chicken over cooked pasta instead.

Troubleshooting Slow Cooker French Onion Chicken

Most issues are easy to fix at the end. The chicken can be shredded back into the sauce, thin gravy can be thickened, and a strong sauce can be softened with broth, cream, or a plain side.

If your main issue is thin sauce, start with the gravy-thickening method. If the problem is dry chicken, strong sauce, sharp onions, or disappearing cheese, use the fixes below.

Troubleshooting board for slow cooker French onion chicken with fixes for dry chicken, thin gravy, strong sauce, flat flavor, sharp onions, and disappeared cheese.
Most fixes are simple: add moisture to dry chicken, thicken thin gravy with slurry, and soften a strong sauce with broth or cream.
Problem Why it happened How to fix it
Chicken is dry Breasts cooked too long or pieces were too thin Shred the chicken into the sauce and add a splash of broth or cream
Sauce is too thin Chicken and onions released more liquid than expected Use a cornstarch slurry and cook on high for 10–15 minutes
Sauce is too strong Condensed soup, soup mix, broth, and cheese all season the gravy Add unsalted broth, cream, sour cream, or Greek yogurt; serve over potatoes, rice, or noodles
Sauce is too thick Not enough broth or too much thickener Add ¼ cup / 60 ml broth at a time until spoonable
Flavor tastes flat Needs acidity or savory depth Add Worcestershire, Dijon, balsamic, black pepper, or thyme
Cheese disappeared into the sauce Cheese was added too early Add cheese only after the chicken is cooked, or broil it separately
Onions are still sharp Onions were too thick or did not cook long enough Slice thinly next time; for this batch, cook a little longer if the chicken can handle it, or remove chicken while sauce continues cooking

FAQs

Frozen chicken in the slow cooker: safe or not?

Use thawed chicken for this recipe. USDA slow-cooker guidance recommends thawing meat or poultry before adding it to a slow cooker. Frozen chicken may take too long to heat evenly in the slow cooker.

Chicken breasts or thighs: which is better?

For sliceable pieces, chicken breasts are leaner and cleaner on the plate. Thighs are juicier, more forgiving, and better when you want shreddable chicken in a rich onion gravy.

Best cheese for French onion chicken

Gruyère is the most classic choice because it echoes French onion soup. Swiss is easier to find and usually cheaper. Provolone melts smoothly and gives a milder finish.

How to make French onion chicken without canned soup

Use extra sliced onions, low-sodium beef broth, Worcestershire sauce, Dijon or balsamic, garlic, thyme, and a cornstarch slurry at the end. Sautéing the onions first gives the best flavor, but you can still make a simpler no-canned-soup slow-cooker version.

Can I use French onion dip instead of condensed soup?

You can use French onion dip for a creamier, thicker version, but it will taste different from classic French onion soup-style chicken. Use less added broth, cook the chicken until done, then stir the dip in near the end so the sauce stays smoother.

How to balance a strong onion gravy

If the sauce tastes stronger than you like, it is usually from stacked seasoning in the condensed soup, dry onion soup mix, broth, and cheese. Use low-sodium broth next time, taste before adding salt, and soften the current batch with a splash of unsalted broth, cream, sour cream, Greek yogurt, or a plain side like mashed potatoes, rice, or noodles.

How to make the French onion gravy thicker

Remove the chicken, stir 1 tbsp cornstarch with 1 tbsp cold water, then stir that slurry into the sauce. Cover and cook on high for 10–15 minutes until the sauce thickens.

Rice or pasta in the crock pot: what works?

For this recipe, it is better to serve the chicken over cooked rice, noodles, or pasta instead of adding them at the beginning. Regular pasta can turn mushy in the slow cooker, and rice needs a recipe built specifically around rice timing and liquid ratios. If you want a chicken-and-pasta dinner instead, this Cajun chicken pasta guide uses a better method: cook the pasta separately, then fold it into the sauce.

How to make creamy French onion chicken without splitting the sauce

Stir in sour cream, Greek yogurt, cream cheese, or heavy cream at the end, after the chicken is cooked. Add it gently and avoid boiling the sauce hard after the dairy goes in.

Best sides for slow cooker French onion chicken

Mashed potatoes, rice, egg noodles, pasta, toasted bread, roasted vegetables, or sandwich rolls all work well. Anything that catches the onion gravy will make the dish feel more complete.

If you try this with thighs, mushrooms, or the broiled cheese finish, that is the kind of variation other readers will want to know about too.

Final Thoughts

Slow Cooker French Onion Chicken is at its best when it stays easy without tasting careless. Keep the chicken from overcooking, let the onions soften into the sauce, and finish it in a way that feels generous. Then serve it over potatoes, noodles, rice, or toasted bread — the kind of simple dinner that feels bigger than the effort it took.

Back to top

Posted on Leave a comment

Creamy Salmon Pasta Recipe

Creamy salmon pasta in a shallow bowl with salmon flakes, spinach, capers, lemon zest, Parmesan, herbs, and a fork lifting pasta.

This creamy salmon pasta recipe is the kind of 35-minute dinner that makes an ordinary night feel handled: tender salmon, silky lemon garlic cream sauce, pasta that actually holds the sauce, Parmesan, spinach, and little pops of capers. It feels restaurant-style without being fussy — rich enough to feel special, but fresh enough for another bite.

The trick is not more cream. It is control: cook the salmon separately, keep the sauce slightly looser than you think, and fold the fish in at the end so you get large, soft flakes instead of dry crumbs scattered through the pan.

The best bite has a little of everything: a ribbon of sauce-coated pasta, a soft piece of salmon, a bit of spinach, a salty caper, and enough lemon to make you want the next forkful. That is the difference between a cream pasta that feels heavy halfway through and one that stays alive to the last bite.

Forkful of creamy salmon pasta with pasta, salmon, spinach, capers, lemon zest, and Parmesan
A balanced forkful has pasta, salmon, spinach, caper, Parmesan, and lemon working together, so the richness stays lively.

Quick Answer: How Do You Make Creamy Salmon Pasta?

To make creamy salmon pasta, roast or pan-sear salmon until tender, boil pasta until just shy of al dente, and reserve some starchy pasta water before draining. Then, in a wide skillet, make a lemon garlic cream sauce with butter, shallot, garlic, white wine or broth, heavy cream, Parmesan, and a splash of pasta water.

Toss the pasta in the sauce first, wilt in spinach, and gently fold in large flakes of salmon at the end. Finally, finish with lemon zest, lemon juice, herbs, black pepper, and capers so the final bite tastes creamy, lifted by lemon, and savory. For the texture cue, see how to keep the sauce smooth.

Bowl of creamy salmon pasta served with lemon, Parmesan, herbs, and a 35-minute dinner cue
Because the salmon cooks separately and the pan sauce comes together quickly, this dinner feels special without becoming a project.

Creamy Salmon Pasta Recipe at a Glance

Best salmon Fresh salmon fillet, cooked separately and folded in at the end
Best pasta Fettuccine, linguine, penne, rigatoni, or spaghetti
Sauce style Lemon garlic cream sauce with Parmesan and pasta water
Total time About 35 minutes
Safe salmon temperature 145°F / 63°C, or opaque and easy to flake
Best add-in Baby spinach
Best fix for thick sauce Reserved pasta water, added 1–2 tablespoons at a time
Best finish Lemon zest, herbs, capers, Parmesan, and black pepper
Choose your version: use fettuccine or linguine for a smoother date-night feel, penne or rigatoni for a chunkier family dinner, extra lemon and capers for a sharper finish, or a little more Parmesan when the sauce needs more depth.
What it tastes like: creamy first, then lemony, garlicky, and savory, with tender salmon flakes, soft spinach, Parmesan depth, and little salty pops from capers. It should feel rich without turning stodgy.
Creamy salmon pasta overview with salmon, pasta, cream sauce, lemon, capers, spinach, Parmesan, and pasta water
The whole recipe is built around three moves: cook salmon separately, keep the sauce flexible, and fold the fish in last.

Ready to cook? Go straight to the step-by-step method, or use the recipe card if you already know the sauce cues.

Why This Creamy Salmon Pasta Recipe Works

A good salmon pasta has to solve two problems at once: the fish should stay soft and juicy, and the sauce should coat the noodles without clumping or pooling. Because this version handles both, the final bowl tastes rounded by cream, lifted by lemon, and balanced by herbs and capers.

This is especially helpful if salmon pasta has disappointed you before — dry fish, sauce that tightens too fast, or a bowl that tastes rich for three bites and then starts to feel flat. The method is built to avoid those problems before they happen.

  • The salmon cooks separately. You can season it properly, cook it gently, and fold it into the pasta in large, moist flakes.
  • Pasta water keeps the sauce silky. Starchy water helps the cream and Parmesan cling to the noodles instead of turning thick and clumpy.
  • Lemon balances the richness. Lemon zest and juice keep the cream sauce clean on the finish.
  • Spinach makes it feel complete. It adds color, freshness, and a little vegetable comfort without another pan.
  • Capers and herbs wake up the salmon. Their salty, fresh finish keeps the dish from tasting flat.

Creamy weeknight pasta fans may also enjoy this Cajun chicken pasta, which uses a bolder smoky-spicy sauce but follows the same idea: the sauce should coat the pasta, not drown it.

Ingredients for Creamy Salmon Pasta

The best version of this dish does not come from a long ingredient list. Instead, it comes from balance: rich salmon, enough lemon to wake up the cream, Parmesan for body, and a splash of pasta water so the sauce coats the noodles instead of weighing them down.

Ingredients for creamy salmon pasta including salmon, pasta, cream, Parmesan, spinach, lemon, capers, garlic, shallot, Dijon, and wine or broth
Each ingredient has a job: salmon brings richness, lemon sharpens the finish, Parmesan adds body, and pasta water helps everything cling.

Not sure which type of salmon to use? The salmon guide below covers fresh, smoked, canned, frozen, and leftover salmon.

Salmon

Fresh salmon fillet is the best choice for this recipe. Use about 1 lb / 450 g for 4 servings. Skin-on or skinless both work; after roasting or pan-searing, the salmon should break into large, moist flakes that still feel soft in the finished pasta.

Pasta

Use 12 oz / 340 g dried pasta. Fettuccine and linguine feel elegant with cream sauce, while penne or rigatoni are easier to toss with chunky salmon pieces. Spaghetti is also a perfectly good pantry option.

Cream Sauce

The sauce starts with butter, shallot, garlic, dry white wine or low-sodium broth, heavy cream, Parmesan, and reserved pasta water. Low-sodium broth is the easiest wine-free swap; then, if the sauce needs brightness, add a little extra lemon at the end. A small spoon of Dijon mustard is optional, but useful. It does not make the sauce taste mustardy; instead, it adds a quiet savory sharpness that balances the cream.

Lemon garlic cream sauce ingredients with butter, shallot, garlic, cream, Parmesan, pasta water, lemon, Dijon, and wine or broth
Instead of letting cream do all the work, garlic, Parmesan, Dijon, lemon, and starchy pasta water give the sauce more balance.

If cream sauces usually make you nervous, the sauce section explains how to keep this one smooth before the salmon goes in.

That pasta-water trick is also what makes dishes like bacon carbonara turn glossy and cohesive without needing a heavy pool of sauce.

The Fresh Finish

Lemon zest, lemon juice, herbs, and capers keep the finished pasta lively. Add lemon juice near the end, when the sauce is warm but not boiling hard, so the cream stays smooth and the lemon tastes fresh rather than sharp.

Hand adding lemon zest, herbs, capers, and black pepper to creamy salmon pasta
Add lemon, herbs, capers, and pepper near the end so the pasta tastes layered rather than one-note creamy.

Optional Vegetable Add-Ins

Baby spinach is the easiest add-in because it wilts directly into the sauce. Peas, asparagus, broccoli, cherry tomatoes, and mushrooms also work. However, firmer vegetables should be cooked first so they do not water down the sauce.

Best Salmon for Creamy Salmon Pasta

Fresh salmon gives the cleanest flavor and the best texture for this dinner-style pasta. The goal is soft flakes that stay visible in the sauce, not dry shreds that disappear into the pan.

If salmon has ever turned dry on you, this is the section that matters most. The goal is not just cooked fish; it is soft flakes that still feel generous once they hit the pasta.

Fresh salmon, smoked salmon, canned salmon, and leftover cooked salmon options for creamy salmon pasta
Fresh salmon gives the cleanest texture, although smoked, canned, and leftover salmon can still work when handled gently.

Fresh Salmon Fillet

This is the most reliable option. Use one large fillet or a few smaller pieces. Pat the fish dry before seasoning so it roasts or sears cleanly instead of steaming on the surface. When buying salmon, choose fish that smells fresh and mild, not sour, fishy, or ammonia-like; the FDA seafood safety guide is a useful reference for fresh and frozen seafood handling.

Fresh salmon fillet on parchment with olive oil, salt, pepper, lemon, and a paper towel for drying
Patting salmon dry before cooking helps it roast or sear cleanly instead of steaming on the surface.

Skin-On Salmon

Skin-on salmon works well. Roast it skin-side down, then lift the salmon away from the skin after cooking. The skin does not need to go into the pasta.

Skinless Salmon

Skinless salmon is the easiest option because there is nothing to remove after cooking. Still, watch thinner pieces closely because they cook faster.

Frozen Salmon

Frozen salmon is fine as long as it is fully thawed and patted dry before cooking. After thawing, dry the surface well before seasoning. Frozen salmon should not go straight into the cream sauce because it releases moisture and makes the sauce harder to control.

Leftover Cooked Salmon

Leftover salmon can make this dinner even faster. Add it at the end and warm it gently in the sauce. Since it is already cooked, too much stirring will break it into small pieces. For a lighter rice-based meal, extra cooked salmon also works beautifully in a salmon bowl with rice, vegetables, avocado, and sauce.

Smoked Salmon

Hot-smoked salmon flakes nicely and can be used as a quick swap. Cold-smoked salmon is saltier and more delicate, so add it off heat and reduce the salt in the sauce. After that, a little extra lemon, dill, capers, or black pepper helps smoked salmon taste fresh instead of heavy.

Canned Salmon

Canned salmon gives a softer, more pantry-style version. Drain it well, remove any large bones or skin if preferred, and fold it in gently so it does not disappear into the sauce. For a crisp canned-salmon dinner instead, try these salmon croquettes.

Best Pasta Shapes for This Creamy Salmon Pasta Recipe

The best pasta shape depends on the bite you want. Long noodles give you a silky fork twirl, while short shapes make more room for salmon chunks, spinach, and capers.

Pasta shape Best for Notes
Fettuccine Classic creamy salmon pasta Wide enough to hold a silky lemon garlic cream sauce.
Linguine A slightly lighter twirl Elegant with salmon, lemon, herbs, and capers.
Spaghetti Pantry-friendly version Works well when the salmon is flaked into slightly smaller pieces.
Penne or rigatoni Chunky salmon pieces Easy to toss with spinach and larger flakes of fish.
Orzo or gnocchi Softer comfort-food versions Both absorb sauce differently, so keep the sauce looser.

For a slightly more filling pasta base, lentil pasta can work too. Cook it carefully so it stays tender rather than mushy, and use the same sauce rule from this lentil pasta guide: keep lemon, garlic, and pasta water balanced so the sauce still clings.

How to Make This Creamy Salmon Pasta Recipe

This is the part where the recipe becomes easier than it looks. You are not juggling everything at once; the salmon cooks first, the pasta water waits nearby, and the sauce comes together calmly in one skillet.

1. Cook the Salmon

First, heat the oven to 400°F / 200°C. Place the salmon on a parchment-lined baking sheet, rub it with a little olive oil, and season with salt and black pepper. Roast for 10–12 minutes for an average fillet, or until the fish is opaque and flakes easily.

Thin fillets may need only 8–10 minutes, while thicker pieces may need 12–14 minutes. For food safety, fish should reach an internal temperature of 145°F / 63°C, or be opaque and separate easily with a fork, according to FoodSafety.gov’s safe minimum internal temperature chart.

Salmon roasting on parchment with lemon and herbs for creamy salmon pasta
Roasting the salmon separately gives you better control over doneness before the flakes meet the cream sauce.

Optional: Pan-Sear the Salmon Instead

Prefer a stovetop version? Pat the salmon dry, season it, and sear it in a lightly oiled skillet over medium heat for 3–4 minutes per side, depending on thickness. Let it rest for 5 minutes, then flake it into large pieces. Keep the heat moderate so the outside browns without drying the center.

Salmon fillet searing in a skillet with a lightly browned surface for creamy salmon pasta
Pan-searing is a good stovetop option; however, moderate heat lets the surface brown before the center dries out.

After roasting or searing, let the salmon rest for 5 minutes before flaking. Resting helps the juices settle, and larger flakes look and taste better in the finished pasta.

Cooked salmon being separated with a fork into large moist flakes
Large, moist flakes make salmon pasta feel generous, while tiny dry pieces disappear into the sauce.

2. Boil the Pasta

Meanwhile, bring a large pot of water to a boil and salt it well. Add the pasta and cook it about 1 minute shy of al dente. Before draining, scoop out 1 cup / 240 ml of pasta water.

Cloudy pasta water being scooped into a measuring cup beside a pot of pasta
Reserve pasta water before draining because its starch helps the lemon garlic cream sauce hold onto the noodles.

Do not rinse the pasta after draining. The starch on the surface helps the sauce cling, and that little bit of cling is what makes the finished dish feel glossy instead of watery.

Drained pasta in a colander with a small Do not rinse label beside the pasta
Do not rinse the pasta after draining; that surface starch is what helps the sauce coat instead of slide off.

You may not use all the pasta water. Still, having extra gives you control because creamy pasta sauce tightens as it sits, and pasta water is the easiest way to loosen it without making it thin. For a visual cue on when to add more, jump to the 1-minute sauce control trick.

3. Build the Lemon Garlic Cream Sauce

Next, in a large high-sided skillet, melt the butter with a little olive oil. Add the shallot and cook until softened. Then stir in the garlic and cook just until fragrant, about 30 seconds. Add white wine or broth and simmer briefly so the sharp edge cooks off.

At this stage, the pan should smell like garlic, butter, and lemon waiting to happen — not raw onion, scorched garlic, or plain cream.

Shallot and garlic cooking in butter while wine or broth is poured into a skillet
Let the shallot and garlic soften gently before adding cream, so the sauce tastes rounded instead of harsh.

Lower the heat before adding the cream. Stir in Dijon if using, then add finely grated Parmesan a little at a time. After that, add a splash of pasta water and stir until the sauce looks creamy, loose, and glossy. It should move easily in the pan before the pasta goes in. If the sauce already looks thick before the pasta is added, loosen it now; the noodles will only make it tighter.

Parmesan and pasta water being stirred into cream sauce in a skillet
Add Parmesan gradually, then loosen with pasta water as needed, so the sauce stays smooth enough to toss.

4. Toss the Pasta, Wilt the Spinach, and Fold in the Salmon

Add the drained pasta to the skillet and toss until coated. At this point, the sauce should cling to the noodles but still look fluid.

Pasta being tossed in lemon garlic cream sauce while cooked salmon rests nearby
Toss the pasta before adding salmon, because coated noodles need less stirring once the delicate fish goes in.

Add spinach and let it wilt briefly, just until bright green and soft.

Baby spinach being tossed into creamy pasta while cooked salmon waits on a plate nearby
Wilt the spinach before folding in the salmon; this keeps the greens bright and protects the fish from extra stirring.

Finally, turn the heat low and fold in the salmon in large flakes with only a few gentle turns. The less you stir at this point, the prettier and softer the salmon stays. Add lemon zest, a little lemon juice, herbs, capers, and black pepper. Taste before serving: when the sauce feels too rich, add more lemon or herbs; when it feels too thick, loosen it with pasta water. For more depth, finish with a little extra Parmesan or black pepper.

Large salmon flakes being folded into creamy pasta with spinach and sauce
Fold the salmon in last with only a few turns, so the pieces stay large, soft, and visible.

If the sauce tightens, splits, or the salmon starts breaking apart, check the troubleshooting table before adding more cream.

How to Keep Creamy Salmon Pasta Sauce Smooth

The sauce should coat the pasta in a thin creamy layer rather than sitting at the bottom of the pan. Because cream sauces tighten quickly, these small details are what make the dish feel restaurant-style instead of rushed.

Cream sauces can feel intimidating at first. However, this one is mostly about patience: keep the heat gentle, add the cheese gradually, and let the pasta water do the smoothing.

The 1-Minute Sauce Control Trick

Keep the sauce slightly looser than you want before the pasta goes in. The noodles will keep absorbing liquid, so a sauce that looks perfect in the pan can turn tight on the plate. A few spoonfuls of pasta water at the end are not a rescue move — they are the finishing move.

  • Before pasta goes in: the sauce should move easily when you tilt the pan.
  • After pasta goes in: toss first, then loosen with pasta water only as needed.
  • Before salmon goes in: fix the sauce texture now, because heavy stirring later can break the fish.
Three-stage sauce control guide with labels for before pasta, after pasta, and before salmon
Fix the sauce texture before the salmon goes in; after that, gentle folding works better than heavy stirring.
Best texture cue: when you drag tongs through the pasta, the sauce should coat the noodles and leave a light creamy trail in the pan. If it clumps, add pasta water. If it pools like soup, simmer gently for another minute before adding the salmon.
Tongs pulling creamy pasta through sauce and leaving a light trail in the pan
The sauce is ready when it coats the noodles and leaves a light trail in the pan, not when it clumps or pools.

Keep the Heat Gentle Once Cream and Cheese Go In

  • Use gentle heat after adding cream. Cream and cheese do not need aggressive boiling.
  • Finely grate the Parmesan. Fine cheese melts more smoothly than large shreds.
  • Add Parmesan gradually. Stir in small handfuls instead of dumping it all in at once.
  • Add lemon juice near the end. Lemon is essential, but hard boiling can make cream less stable.
  • Fold salmon in last. This keeps the fish tender and prevents it from shredding into dry flakes.

The same gentle-heat rule also helps in creamy macaroni and cheese, where rushing the cheese can make the sauce grainy.

Taste and Adjust Before Serving

The final forkful should taste creamy first, then lemony and savory. If it tastes rich but flat, reach for lemon, capers, herbs, or black pepper before adding more cream.

Before you serve: taste one forkful with salmon, pasta, and sauce together. A heavy finish needs lemon, a thin sauce needs Parmesan, and a flat bite usually needs capers, herbs, or black pepper. The final adjustment is where this pasta becomes yours.
Forkful of creamy salmon pasta with lemon, capers, herbs, Parmesan, and black pepper nearby
Taste before serving, then choose the fix: lemon for sharpness, capers for salt, herbs for freshness, Parmesan for depth.

Creamy Salmon Pasta Recipe

Creamy Salmon Pasta Recipe

This creamy salmon pasta recipe brings together tender salmon, pasta, spinach, capers, and a silky lemon garlic cream sauce in about 35 minutes. The sauce should coat the pasta without clumping, the salmon should stay in soft flakes, and the lemon should lift the cream instead of fighting it.

Yield 4 servings
Prep Time 15 minutes
Cook Time 20 minutes
Total Time 35 minutes

Equipment

  • Large pot or Dutch oven
  • Rimmed baking sheet or large skillet for the salmon
  • Parchment paper, if roasting
  • Large high-sided skillet for the sauce
  • Tongs
  • Measuring cup for pasta water
  • Instant-read thermometer, optional but helpful

Ingredients

For the salmon

  • 1 lb / 450 g salmon fillet, skin-on or skinless
  • 1 tsp olive oil
  • ½ tsp kosher salt
  • ¼ tsp black pepper

For the pasta and sauce

  • 12 oz / 340 g dried fettuccine, linguine, spaghetti, penne, or rigatoni
  • 2 tsp olive oil
  • 2 tbsp / 28 g butter
  • 1 medium shallot or small onion, finely chopped, about 40–60 g
  • 3–4 garlic cloves, minced, about 10–15 g
  • ½ cup / 120 ml dry white wine or low-sodium broth
  • 1 tsp Dijon mustard, optional
  • 1 cup / 240 ml heavy cream
  • ½ cup / 45–55 g finely grated Parmesan, plus more for serving
  • 1 cup / 240 ml reserved pasta water, use ¼–½ cup as needed
  • 4–5 oz / 115–140 g baby spinach
  • Zest of 1 lemon
  • 1–2 tbsp / 15–30 ml fresh lemon juice, to taste
  • 1–2 tbsp capers, drained, optional
  • 2 tbsp chopped fresh dill, parsley, or chives
  • ¼–½ tsp kosher salt for the sauce, plus more to taste
  • Additional black pepper, to taste

Instructions

  1. Cook the salmon. Heat the oven to 400°F / 200°C. Place the salmon on a parchment-lined baking sheet. Rub with 1 tsp olive oil and season with ½ tsp salt and ¼ tsp black pepper. Roast for 10–12 minutes, depending on thickness, or until the salmon is opaque and flakes easily. Rest for 5 minutes, then flake into large pieces. Stovetop option: sear the seasoned salmon in a lightly oiled skillet over medium heat for 3–4 minutes per side, then rest and flake.
  2. Cook the pasta. Bring a large pot of salted water to a boil. Cook the pasta 1 minute shy of al dente. Reserve 1 cup / 240 ml pasta water, then drain. Do not rinse the pasta.
  3. Start the sauce. In a large high-sided skillet, warm 2 tsp olive oil and melt the butter over medium heat. Add the shallot and cook for 2–3 minutes, until softened. Add the garlic and cook for 30 seconds.
  4. Deglaze. Add the white wine or broth and simmer for 1–2 minutes, scraping up any flavorful bits from the pan.
  5. Add cream and Parmesan. Lower the heat to medium-low. Stir in Dijon if using, then add the cream. Add Parmesan in small handfuls, stirring until smooth. Add ¼ cup / 60 ml reserved pasta water to loosen the sauce.
  6. Toss the pasta. Add the drained pasta to the skillet and toss until coated. Add more pasta water, 1–2 tbsp at a time, until the sauce moves easily and coats the noodles.
  7. Wilt the spinach and fold in the salmon. Toss in the spinach just until it softens, then gently fold in the salmon flakes with only a few turns.
  8. Finish with lemon, herbs, and capers. Add lemon zest, 1 tbsp lemon juice, capers if using, herbs, and black pepper. Taste, then add more lemon, salt, pepper, Parmesan, or pasta water as needed.
  9. Serve immediately. This pasta is best while the sauce is freshly tossed and the salmon is still warm and soft.

Notes

  • For the smoothest sauce, avoid boiling hard after the cream and Parmesan are added.
  • The sauce should look slightly loose before serving because pasta keeps absorbing liquid as it sits.
  • Do not rush the final fold. Once the salmon is in, a few gentle turns are enough.
  • Warm bowls help the sauce stay loose a little longer at the table.
  • Leftover cooked salmon: skip the roasting step and fold the salmon in at the end just to warm through.
  • Smoked salmon: reduce added salt and add the smoked salmon off heat.
  • Sauce getting thick? Loosen it with a splash of reserved pasta water before serving.
Saveable creamy salmon pasta recipe card with a bowl of salmon pasta, 35-minute time, 4 servings, and core method tips
Remember the method, not just the ingredients: cook salmon separately, keep the sauce slightly loose, and fold fish in last.

Creamy Salmon Pasta Recipe Variations

Once the base sauce makes sense, the variations are easy. Use the main recipe card as the starting point, then change the salmon or sauce direction without changing the rhythm: keep the pasta coated, warm the fish gently, and finish with something sharp, fresh, or salty enough to balance the cream.

Make It for Two

For two servings, use 8 oz / 225 g salmon, 6 oz / 170 g pasta, ½ cup / 120 ml cream, ¼ cup / 25 g Parmesan, and about ½ cup / 120 ml reserved pasta water. Keep the lemon, capers, and herbs flexible, then taste at the end.

Two bowls of creamy salmon pasta with salmon, spinach, capers, lemon, Parmesan, and forks on a warm table
For two servings, scale down the pasta and salmon, then adjust lemon, herbs, and capers at the end.

Smoked Salmon Pasta

Hot-smoked salmon gives you firmer flakes, while cold-smoked salmon melts more softly into the sauce and brings a saltier, silkier finish. Add either one off heat, then lean on dill, lemon, capers, or a little cream cheese to keep the flavor fresh.

Smoked salmon pasta with creamy sauce, dill, lemon, capers, and thin salmon pieces
Smoked salmon is saltier and more delicate than roasted salmon, so add it off heat and finish with lemon and dill.

Canned Salmon Pasta

Canned salmon makes the pasta softer and more pantry-friendly. Drain it well, fold it in gently near the end, and use lemon, parsley, capers, and black pepper to keep the flavor clean and bright.
Canned salmon pasta with penne, creamy sauce, parsley, lemon, capers, and an open salmon can in the background
Canned salmon makes a practical pantry version, while lemon, parsley, capers, and pepper keep the flavor clean.

Salmon Pasta Without Cream

A lighter creamy texture can come from crème fraîche, Greek yogurt, cream cheese, or a sauce built mostly from Parmesan and pasta water. Yogurt and crème fraîche are happiest off heat or over very low heat, where they can loosen into the sauce without curdling.

Salmon pasta without heavy cream using Parmesan, lemon, herbs, and a light sauce on spaghetti
A no-cream salmon pasta can still feel satisfying when Parmesan, pasta water, lemon, and herbs carry the sauce.

Salmon Alfredo Pasta

An Alfredo-style version leans more heavily on Parmesan and cream, with softer lemon and plenty of black pepper. For another rich pasta dinner, this chicken Alfredo pasta guide has useful sauce ideas.

Salmon Pasta Bake

A baked version needs a looser sauce from the start because the pasta keeps drinking it in the oven. Undercook the pasta by about 2 minutes, top with Parmesan or a little panko, and bake until bubbling.

Salmon pasta bake in a cream-colored baking dish with golden Parmesan topping, herbs, and a spoonful lifted out
For a salmon pasta bake, start with a looser sauce because the pasta keeps absorbing liquid in the oven.

Salmon Pesto Pasta

Basil pesto gives salmon pasta a greener, more herbal direction. Use pesto, lemon, pasta water, and salmon flakes, then decide whether the sauce needs cream or feels bright enough without it. For homemade pesto, this pesto recipe guide has classic basil pesto plus useful variations.

Salmon Orzo

Orzo absorbs liquid quickly, so use a looser sauce and stir gently. The same lemon, garlic, cream, Parmesan, and salmon flavors work well, but the texture will be softer and more risotto-like.

Salmon Gnocchi

Gnocchi makes the dish softer and more comfort-food heavy. Keep the sauce loose, use enough lemon to balance the richness, and fold the salmon in gently so both the gnocchi and fish stay intact.

Salmon Pasta Salad

A cold salmon pasta salad needs a different base: cooked cooled pasta, flaked salmon, lemon dressing, herbs, cucumber, peas, capers, or a little yogurt-based dressing. Skip the hot cream sauce and focus on freshness.

What to Serve With Creamy Salmon Pasta

This is already a full dinner, so the best sides should make the plate feel brighter, not heavier. Think crisp salad, lemony greens, roasted vegetables, or garlic bread for the extra sauce left in the bowl.

  • Simple green salad: arugula, cucumber, lemon dressing, or a sharp vinaigrette.
  • Roasted asparagus or broccoli: both work well with lemon and Parmesan.
  • Garlic bread: cozy, useful, and great for catching extra sauce. For a homemade option, this garlic bread loaf works well beside creamy pasta.
  • Roasted cherry tomatoes: bright and juicy against the cream sauce.
  • Steamed peas: easy, sweet, and very good with salmon.
  • Lemon wedges: helpful at the table for anyone who wants a brighter plate.

Storing and Reheating Creamy Salmon Pasta

This dish is best right after tossing, while the sauce still coats the pasta easily and the salmon is warm and soft. However, leftovers can still be good if you reheat them gently so the cream stays smooth and the salmon does not dry out.

Creamy salmon pasta reheating in a skillet with a splash of liquid and leftovers in a glass storage container nearby
Reheat leftovers gently with a splash of liquid so the sauce loosens again and the salmon stays soft.

How Long Does It Keep?

Store leftovers in an airtight container in the refrigerator and use within 2 days for the best texture.

How to Reheat It

Reheat in a skillet over low heat with a splash of water, milk, cream, or broth. Stir gently until the sauce loosens. Avoid high heat, which can make the cream separate and the salmon dry.

If reheated sauce looks too thick or separated, use the same fixes in the troubleshooting section.

Microwave Method

Use short bursts at lower power and add a splash of liquid first. Stir gently between bursts. The microwave is convenient, but it can overcook salmon quickly.

Freezing

Freezing is not recommended. Cream sauces can split, pasta can soften, and salmon can become dry once thawed and reheated.

Creamy Salmon Pasta Troubleshooting: Sauce, Salmon, and Texture Fixes

If something feels off, do not panic and do not add more cream first. A thick sauce, broken sauce, dry salmon, or watery spinach does not mean dinner is ruined; it usually means one small adjustment is needed.

Creamy salmon pasta troubleshooting board with fixes for thick sauce, split sauce, dry salmon, and watery spinach
Most salmon pasta problems are fixable: loosen thick sauce with pasta water, lower the heat if it splits, and fold salmon in last.
Problem Why it happened Fix
Sauce is too thick The pasta absorbed more liquid than expected. Add reserved pasta water 1–2 tbsp at a time and toss until glossy.
Sauce split The heat was too high, or lemon was added while the cream was boiling hard. Lower the heat, add a splash of cream or pasta water, and stir gently. Next time, add lemon near the end.
Salmon is dry It was overcooked or stirred too much in the sauce. Cook salmon separately, rest it, and fold it in last in large pieces.
Pasta tastes bland The pasta water or sauce was under-seasoned. Salt the pasta water well and finish with Parmesan, lemon, herbs, and black pepper.
Sauce tastes too heavy Too much cream, not enough acid or herbs. Add lemon zest, lemon juice, capers, herbs, or a splash of pasta water.
Pasta tastes fishy The salmon may be old, overcooked, or not balanced with enough brightness. Use fresh salmon, avoid overcooking, and finish with lemon, herbs, capers, and black pepper.
Spinach made it watery Too much spinach was added too early, or it cooked too long. Add spinach at the end and wilt it briefly. If needed, simmer the sauce for a minute before adding salmon.

FAQs

What is the best pasta for this creamy salmon pasta recipe?

Fettuccine and linguine are best for a glossy, twirlable cream sauce. Penne and rigatoni are better for larger salmon chunks and an easier forkful.

Should salmon be cooked before adding it to pasta?

Cook the salmon first, then fold it into the pasta at the end. That gives you better control over doneness and keeps the pieces tender.

Can I pan-sear the salmon instead of roasting it?

Yes. Pat the salmon dry, season it, and sear it in a lightly oiled skillet over medium heat for 3–4 minutes per side, depending on thickness. Rest it for 5 minutes before flaking so the pieces stay moist in the pasta.

Fresh salmon or smoked salmon — which is better?

Fresh salmon is better for this creamy dinner-style pasta. Smoked salmon is better for a faster, saltier version. Add smoked salmon off heat so it stays delicate.

How do you stop cream sauce from splitting?

Use gentle heat once the cream is added, stir Parmesan in gradually, and add lemon juice near the end instead of boiling it hard with the cream. Reserved pasta water also helps smooth the sauce.

Why did my salmon pasta turn dry?

The salmon may have been overcooked, the pasta may have absorbed too much sauce, or the dish may have sat too long before serving. Fold salmon in last and keep extra pasta water nearby to loosen the sauce.

What temperature should salmon be cooked to?

For food safety, fish should reach 145°F / 63°C, or be opaque and separate easily with a fork. A thermometer is the most reliable way to check.

How much pasta water should I save?

Save 1 cup / 240 ml. You may only need ¼–½ cup, but it is better to have extra because the sauce thickens as the pasta sits.

What vegetables go well with salmon pasta?

Spinach is the easiest. Peas, asparagus, broccoli, cherry tomatoes, mushrooms, and zucchini also work. Add quick-cooking vegetables near the end and pre-cook firmer vegetables so they do not water down the sauce.

Is crème fraîche better than heavy cream?

Crème fraîche gives a tangier, slightly lighter sauce. Heavy cream is easier to find and gives the most classic creamy texture. Both work.

What is the best way to reheat leftovers?

Reheat leftovers gently in a skillet over low heat with a splash of water, milk, cream, or broth. Stir slowly until the sauce loosens. Avoid high heat because it can dry out the salmon and split the sauce.

Does this creamy salmon pasta recipe freeze well?

Not really. The cream sauce can split, the pasta can become soft, and the salmon can dry out after thawing. Refrigerating leftovers for a day or two is a better choice.

How do I make this creamy salmon pasta recipe without wine?

Use low-sodium chicken broth, vegetable broth, seafood stock, or even a splash of pasta water instead. Then add a little extra lemon at the end if the sauce needs brightness.

Once you understand the rhythm — cook the salmon gently, save pasta water, keep the cream sauce calm, and fold the fish in last — this creamy salmon pasta recipe becomes the kind of dinner you can adjust without stress. Fresh salmon makes it feel cozy and polished, smoked salmon makes it faster, and extra lemon or herbs can pull the whole bowl in a brighter direction.

That is the real win here: not just a rich pasta, but a plate that still tastes cared for at the last forkful.

Did you make it with fresh salmon, smoked salmon, canned salmon, or leftovers? Tell us which version you tried — and what you adjusted at the end. Extra lemon, more capers, dill, spinach, Parmesan, or black pepper all change the personality of the bowl.

Back to top

Posted on 2 Comments

Slow Cooker Pork Loin Recipe (Juicy Crock Pot Pork Loin)

Sliced slow cooker pork loin served with onion garlic gravy, mashed potatoes, carrots, and potatoes on a warm dinner plate.

Slow Cooker Pork Loin Recipe sounds like the easiest dinner in the world until the pork comes out dry, pale, or sitting in a puddle of watery juices. Pork loin is leaner than pork shoulder, so it does best with gentle heat, an early temperature check, a short rest, and a simple sauce or gravy made from the slow-cooker juices.

This version is built for the roast most people hope for when they set up the crock pot: clean, tender slices, a savory onion-garlic sauce, and warm gravy that keeps the lean meat moist on the plate. Serve it with mashed potatoes, rice, egg noodles, roasted vegetables, or the potatoes and carrots variation below.

By the time it is ready, you want the kitchen to smell like garlic, onion, herbs, and gravy — not like plain meat that sat too long in the pot.

This recipe starts with the result pork loin does best: tender, sliceable meat with enough sauce to keep every serving moist. If you want a softer, saucier version, you will find that option below too.

If you bought pork tenderloin instead of pork loin, use that recipe instead. Tenderloin is smaller, narrower, and cooks faster, so the timing is different.

Quick Answer: How to Make Slow Cooker Pork Loin

For juicy slow cooker pork loin, use a 2–4 lb boneless roast, season it well, place it over sliced onion or sturdy vegetables, add about ½ cup broth or sauce, and cook on LOW until the thickest center reaches 145°F / 63°C. Rest before slicing. Because slow cookers vary, begin checking early; lean pork can overcook faster than you expect.

Quick answer guide showing a 3 lb pork loin roast, 1/2 cup broth, LOW setting, 2 1/2 to 3 hour check time, and 145°F finish.
Start with this baseline for juicy crock pot pork loin: modest broth, LOW heat, an early temperature check, and a 145°F finish before resting.

For smaller or larger roasts, use the cook-time chart as your first check-in guide.

Best first version: Use a 3 lb / 1.35 kg boneless pork loin roast in a 6-quart slow cooker. Cook on LOW, start checking around 2½–3 hours, and pull the pork when the center reaches 145°F / 63°C for tender slices.

Choose Your Slow Cooker Pork Loin Result

Choose your result: For neat dinner slices, cook pork loin to 145°F / 63°C and rest before slicing. For softer saucy pork, use extra sauce and cook longer. For true fall-apart pulled pork, pork shoulder or pork butt is the better cut.
Comparison guide showing sliceable pork loin, softer saucy pork loin, and pulled pork shoulder as different slow cooker results.
Choose the result before you cook, because sliceable pork loin, softer saucy pork, and true pulled pork all need different timing expectations.

For a fuller texture breakdown, see sliceable vs shreddable slow cooker pork loin.

What Juicy Slow Cooker Pork Loin Should Look Like

Done right, this is the kind of slow cooker pork loin that still feels like a roast dinner: clean slices, savory onion-garlic gravy, and enough moisture on the plate that the lean pork tastes intentional instead of tired.

Close-up of sliced slow cooker pork loin with glossy onion garlic gravy and a fork lifting one moist slice.
Even when the pork slices cleanly, the gravy matters; it adds moisture, flavor, and a more finished roast-dinner feel.

Slow Cooker Pork Loin at a Glance

The base recipe is written for a 3 lb / 1.35 kg boneless roast, but the timing chart below will help you adjust for smaller or larger pieces.

Best cut Boneless pork loin roast, not pork tenderloin
Default size 3 lb / 1.35 kg
Slow cooker size 6-quart slow cooker
Best setting LOW for the most even, controlled result
Cook time Start checking at 2½–3 hours; many 3 lb roasts take closer to 3½–4½ hours
Internal temperature 145°F / 63°C in the thickest center, then rest
Liquid ½ cup / 120 ml broth for the base recipe; up to 1 cup / 240 ml with vegetables
Yield 6–8 servings
At-a-glance setup for slow cooker pork loin with a 3 lb roast, 6-quart slow cooker, 1/2 cup broth, LOW setting, and 145°F finish.
Before the lid goes on, check the pork cut, slow cooker size, liquid amount, heat setting, and final temperature target.

If you are unsure about liquid or timing, the liquid guide and cook-time chart explain those two decisions in more detail.

The goal is not to hover over the slow cooker all afternoon. It is to set yourself a smart checking window, then let the thermometer tell you when dinner is ready. That one check is what keeps pork loin from turning into the dry roast people remember for the wrong reasons.

Why This Crock Pot Pork Loin Works

Because pork loin is a lean roast, it needs a slightly different strategy from pork shoulder. Shoulder can handle long, slow cooking because it has more fat and connective tissue. Pork loin can still be wonderful in the slow cooker, but it is at its best when you cook it to the right endpoint instead of blindly leaving it in all day.

A good crock pot pork loin needs both flavor and control: enough seasoning to carry the lean meat, enough moisture to make a sauce, and enough restraint to stop before the slices turn dry.

It also gives you a different kind of slow-cooker meal. Instead of shredded pork or a heavy stew, you get a sliceable roast with enough sauce for mashed potatoes, noodles, or rice — easy enough for a weeknight, but polished enough for Sunday dinner.

  • It cooks by temperature, not guesswork. Time gives you a window, but the thermometer tells you when the pork is actually done.
  • It keeps the liquid controlled. Slow cookers trap moisture, so too much broth can make the sauce thin and dull.
  • It gives you two endpoints. Tender sliced pork and softer, saucier pork need different handling.
  • It protects the vegetables. Potatoes and carrots can cook slower than pork, so the method keeps the meat from drying out while you wait for them.

Pork Loin vs Pork Tenderloin vs Pork Shoulder

This is the part that saves a lot of dinners. Pork loin and pork tenderloin sound almost identical at the store, but they behave very differently once the lid goes on.

Pork loin, pork tenderloin, and pork shoulder are not the same cut, which is why slow cooker pork recipes can get confusing. They can all go into a slow cooker, but they need different timing, moisture, and texture expectations.

Raw pork loin roast, pork tenderloin, and pork shoulder arranged on butcher paper to compare their shapes and sizes.
This cut comparison matters because pork loin, pork tenderloin, and pork shoulder all need different timing and give different textures in the slow cooker.
Cut What it looks like Slow cooker behavior Best use
Pork loin Wide roast, often 2–5 lb Lean, sliceable when cooked to temperature; can dry out if overcooked This recipe
Pork tenderloin Long, narrow, usually 1–1.5 lb each Cooks faster; dries if treated like a large roast Use the slow cooker pork tenderloin recipe
Pork shoulder / pork butt Large, fattier roast Best for classic pulled pork because it has more fat and connective tissue Use for true fall-apart pulled pork

For this recipe, use a boneless pork loin roast. If the package says pork tenderloin, follow the tenderloin timing instead. If the package says pork shoulder or pork butt, you can cook it longer for classic pulled pork, but that is a different recipe with a different texture goal.

A pork sirloin roast can usually be cooked with the same general method, but it may be shaped differently from a center-cut pork loin. Use the thermometer in the thickest part and treat the chart as a guide, not a guarantee.

Check the Pork Roast Label Before Timing

At the store, “pork roast” may refer to pork loin, pork shoulder, pork butt, pork sirloin roast, or another cut. Check the package label and shape before you follow a slow cooker timing chart.

Generic pork roast labels for pork loin roast, pork sirloin roast, and pork shoulder roast with a pointer showing label and shape.
Since “pork roast” can mean several cuts, the package label and the shape matter before you follow any slow cooker timing.

Once you know it is pork loin, use the slow cooker pork loin timing chart for your roast size.

If you would rather roast that smaller cut, this pork tenderloin in oven guide gives the oven timing instead.

Ingredients for Slow Cooker Pork Loin

To keep the flavor balanced, the ingredient list is built around a garlic-herb pork loin with a small amount of savory sauce. The Dijon and vinegar keep the sauce from tasting flat, while a little honey or brown sugar rounds out the edges without turning the whole dish into a sweet roast.

Ingredients for slow cooker pork loin including raw pork loin roast, onions, garlic, broth, Dijon, vinegar, herbs, paprika, butter, and cornstarch slurry.
The flavor starts with a seasoned pork loin roast, a small onion-garlic broth base, and a simple thickener for turning juices into gravy.

If the sauce is the part you care about most, the gravy guide shows how to turn the slow-cooker juices into a spoonable finish.

The Pork and Seasoning

Start with a boneless pork loin roast, then season it well on every side. Salt, pepper, garlic powder, onion powder, paprika, and thyme give the lean meat enough flavor before it ever touches the slow cooker.

The Sauce Base

Next, keep the liquid controlled. The roast needs moisture, but it does not need to be submerged. A small amount of broth becomes more flavorful once it mixes with onion, garlic, seasoning, mustard, vinegar, and pork juices.

The Optional Gravy Finish

Finally, cornstarch and cold water turn the slow-cooker juices into a light gravy. Butter is optional, but it gives the sauce a rounder finish if you want a richer dinner-style result.

Ingredient Amount Metric Why it matters
Boneless pork loin roast 3 lb 1.35 kg Main cut; wide roast, not tenderloin
Fine sea salt 1½ tsp About 9 g Seasons the lean pork deeply
Black pepper 1 tsp 2–3 g Adds basic savory heat
Garlic powder 1 tsp About 3 g Gives even garlic flavor on the meat
Onion powder 1 tsp 2–3 g Rounds out the seasoning
Paprika 1 tsp 2–3 g Adds color and gentle warmth
Dried thyme or Italian seasoning 1 tsp About 1 g Classic roast-style flavor
Oil, optional sear 1 tbsp 15 ml Helps brown the pork before slow cooking
Large onion, sliced 1 180–220 g Creates a flavor base under the pork
Garlic, minced 4 cloves About 12 g Flavors the juices and gravy
Low-sodium chicken broth ½ cup 120 ml Enough liquid for sauce without drowning the roast
Dijon mustard 1 tbsp 15 g Adds savory sharpness
Apple cider vinegar or balsamic vinegar 2 tbsp 30 ml Balances the rich pork and gravy
Honey or brown sugar 1–2 tbsp 20–40 g honey / 12–25 g sugar Optional sweetness for a rounder sauce
Unsalted butter, optional 2 tbsp 28 g Finishes the sauce or gravy
Cornstarch 1 tbsp 8 g For thickening the juices
Cold water 2 tbsp 30 ml Mixes with cornstarch for a smooth slurry

Best Pork Loin Size for the Slow Cooker

A 3 lb / 1.35 kg boneless pork loin is the best first size for this recipe because it fits comfortably in a 6-quart slow cooker and usually serves 6–8 people. Smaller 1–2 lb roasts cook faster, so they need earlier checking. Larger 4–5 lb roasts need more time and should not be packed tightly against the lid or walls of the slow cooker.

If you are adding potatoes and carrots, make sure the slow cooker is not overfilled. The pork should sit above or beside the vegetables with enough space for heat to circulate. Otherwise, a crowded slow cooker can cook unevenly and leave you with pork that is done before the vegetables are tender.

Equipment You Need

You do not need much equipment, but a thermometer matters more than almost anything else here. Slow cooker times are always estimates because every appliance runs a little differently.

  • 6-quart slow cooker: the best general size for a 2–4 lb pork loin, especially with vegetables.
  • Instant-read thermometer: the most important tool for avoiding dry pork loin.
  • Large skillet: optional, for searing before slow cooking.
  • Tongs: for moving the pork without tearing it.
  • Cutting board and foil: for resting before slicing.
  • Small saucepan or skillet: for reducing or thickening the slow-cooker juices.
  • Whisk: for a smooth cornstarch slurry.

How Much Liquid Do You Need for Pork Loin in the Crock Pot?

More liquid feels safer, especially with lean pork, but the slow cooker does not reduce sauce the way an open pot does. A little restraint here makes the difference between savory gravy and a thin, watered-down finish.

A 3 lb pork loin only needs about ½ cup / 120 ml broth or sauce base to start. That is enough to create steam, flavor the onions, and give you juices for gravy without making the pork taste boiled. Use ¾–1 cup / 180–240 ml only if you are adding potatoes and carrots or want extra gravy.

Pork loin sitting over onions in a slow cooker with a shallow 1/2 cup broth base instead of being covered with liquid.
Pork loin needs a flavorful base, not a deep bath, because the slow cooker releases more juices as the roast cooks.

The pork does not need to be submerged. Slow cookers trap moisture, and the liquid level usually rises as the pork and onions release juices. If the sauce looks thin at the end, reduce it in a saucepan or thicken it with a cornstarch slurry.

This same liquid-control issue comes up in saucy crock pot dinners too, like this slow cooker sausage casserole, where the sauce needs enough moisture to cook but not so much that it turns thin.

How to Make the Slow Cooker Juices Taste Like Real Gravy

The slow cooker gives you juices, but gravy usually needs one extra step. First, pour the juices into a small saucepan and simmer them for a few minutes so the flavor concentrates. If there is a lot of fat on top, skim off what you can before thickening.

Next, whisk cornstarch with cold water until smooth, then add the slurry to the simmering juices. Once the gravy lightly thickens, taste it before serving. A small spoonful of Dijon, a splash of vinegar, a pinch of salt, or a little butter can make the sauce taste more finished.

Slow cooker pork loin juices being simmered, thickened with cornstarch slurry, tasted, and finished into glossy gravy.
After the pork is done, simmering and thickening the cooking juices turns them into gravy that clings to the slices.

How to Make Slow Cooker Pork Loin

This method gives you tender sliced pork with enough sauce to spoon over the meat at the end. Searing is optional; the thermometer is what makes the result reliable.

Step-by-step guide showing pork loin being seasoned, placed over an onion base, cooked on LOW, checked at 145°F, rested, and served with gravy.
The method stays simple when the order is clear: season, build the base, cook gently, check the center, rest, then make gravy.

1. Pat the pork dry and season it well

Pat the pork loin dry with paper towels. Mix the salt, pepper, garlic powder, onion powder, paprika, and thyme or Italian seasoning, then rub the mixture all over the pork. Season every side because the roast is thick and mild on its own.

Hands rubbing garlic herb seasoning onto every side of a raw pork loin roast before slow cooking.
Season every side, not only the top, so the thick pork loin roast has flavor around the edges before slow cooking begins.

2. Sear the pork loin, or skip it for a dump-and-go version

For deeper flavor, heat oil in a large skillet and sear the pork for 2–3 minutes per side, just until browned. Searing adds color and a more roasted flavor, especially if you plan to make gravy from the juices. It does not “seal in” moisture, so you can skip this step when you need a true dump-and-go crock pot dinner.

Can You Make This Without Searing?

Yes. Searing gives the roast better color and deeper flavor, but the recipe still works without it. If you skip the skillet, season the pork well, place it over the onion and sauce base, and be especially sure to finish with the reduced juices or gravy. That final sauce step helps the dump-and-go version taste complete.

Comparison of a seared pork loin in a skillet and an unseared seasoned pork loin going into a slow cooker.
Searing adds deeper color and roasted flavor; meanwhile, a no-sear pork loin can still work when the juices are finished into gravy.

The gravy step is especially helpful when you skip searing because it gives the finished pork more roasted-dinner flavor.

3. Build the slow cooker base

Add the sliced onion to the bottom of a 6-quart slow cooker. Stir in the garlic, broth, Dijon mustard, vinegar, and honey or brown sugar if using. This gives the pork something flavorful to sit on and creates the base for the sauce later.

Start with ½ cup / 120 ml broth for a 3 lb roast. Use up to 1 cup / 240 ml only if you are adding a lot of vegetables or want extra gravy. The pork should sit in a flavorful base, not a deep bath.

4. Cook on LOW until the center reaches 145°F / 63°C

Place the roast in the slow cooker, fat side up if it has a fat cap. Cover and cook on LOW until the thickest center reaches 145°F / 63°C. For a 3 lb pork loin, begin testing around 2½–3 hours. It may need closer to 4 or 4½ hours depending on thickness, how full the slow cooker is, and how hot your appliance runs.

Use HIGH only when you need a faster dinner and can check early. LOW is the better default for pork loin because the ideal window is easier to catch.

Instant-read thermometer showing 145°F and 63°C in a cooked slow cooker pork loin roast.
A thermometer makes slow cooker pork loin more reliable, since roast shape and appliance heat can shift the exact finish time.

For smaller or larger roasts, use the cook-time chart below.

5. Rest before slicing

Transfer the pork to a cutting board and tent it loosely with foil. Rest for 5–10 minutes before slicing. Then cut across the grain into slices. Resting helps the pork stay moister on the plate instead of losing everything the moment you cut into it.

6. Turn the juices into gravy or sauce

Pour the slow-cooker juices into a small saucepan. Simmer for a few minutes to concentrate the flavor. Whisk the cornstarch with cold water, then whisk the slurry into the simmering juices. Cook until lightly thickened. If you want a richer finish, whisk in the butter at the end.

Spoon the gravy over the sliced pork just before serving, especially if you are plating it with mashed potatoes, rice, or noodles. That glossy onion-garlic sauce is what turns lean pork loin from cooked meat into a real slow-cooker dinner.

How Long to Cook Pork Loin in a Slow Cooker

With pork loin, the clock gets you close, but the thermometer protects the dinner. Use the time range to know when to look, then let the center temperature make the final call.

If you only take one thing from this section, let it be this: check the center before the longest listed time.

Use the Cook-Time Chart as a Checking Window

Slow cooker pork loin timing still depends on the size and thickness of the roast, how hot your slow cooker runs, whether vegetables are packed around it, and whether you want tender slices or softer, shreddable pork. Use the chart as your checking window, not a finish line.

Pork loin size LOW estimate for sliceable pork HIGH estimate Start checking
1–1.5 lb / 450–680 g 1.5–3 hours 1–1.5 hours 1.5 hours on LOW
2 lb / 900 g 2–3.5 hours 1.5–2.5 hours 2 hours on LOW
3 lb / 1.35 kg 2.5–4.5 hours 2–3.25 hours 2.5–3 hours on LOW
4 lb / 1.8 kg 3.5–5.5 hours 2.75–4 hours 3.5 hours on LOW
5 lb / 2.25 kg 4.5–6 hours 3.5–4.5 hours 4.25 hours on LOW
Cook time chart for slow cooker pork loin showing roast sizes, start-checking times, and a 145°F finish temperature.
Use the cook time chart to know when to start checking; then let the center temperature decide when the pork is ready.

Small roasts can move quickly. Once you are near the early end of the range, check every 15–20 minutes so you do not miss the best slicing window.

Important: The earlier end of the range is for hotter slow cookers, smaller or thinner roasts, and pork cooked without many vegetables. The later end is for thicker roasts, fuller slow cookers, or a softer result. Always check the thickest center with a thermometer.

For tender, sliceable pork loin, pull the roast when the thickest center reaches 145°F / 63°C, then rest before slicing. FoodSafety.gov lists pork roasts, steaks, and chops at 145°F / 63°C with a 3-minute rest. You can check the official chart here: FoodSafety.gov safe minimum internal temperatures.

Why do some recipes say 2 hours while others say 8 hours?

Because they are not always cooking the same thing to the same result. A small pork loin cooked for neat slices may be done much earlier than a larger roast cooked until very soft. Some recipes also use the words pork loin, pork roast, pork tenderloin, and pork shoulder too loosely, which makes the timing look more confusing than it needs to be.

Here, the main goal is sliceable pork loin. If you want a softer, saucier roast for sandwiches or rice bowls, you can cook it longer with extra sauce, but the texture will still be leaner than classic pork shoulder pulled pork.

Educational guide explaining that pork loin timing varies by roast shape, thickness, vegetables, slow cooker heat, and texture goal.
Two pork loin roasts can weigh the same but cook differently when shape, thickness, vegetables, or texture goal changes.

Sliceable vs Shreddable Slow Cooker Pork Loin

Before you start cooking, decide what kind of pork loin you want. A pork loin cooked for slices and a pork loin cooked until softer and more shreddable are both useful, but they are not the same dinner.

Plate comparing sliceable pork loin, softer saucy pork loin, and pulled pork shoulder as different textures.
Pork loin can become softer and saucier, although classic fall-apart pulled pork still works better with pork shoulder.
Result wanted Best approach Best use
Tender slices Cook to 145°F / 63°C, rest, slice across the grain Dinner plates, gravy, potatoes, vegetables
Softer saucy pork loin Cook longer on LOW with extra sauce or broth Rice bowls, sandwiches, saucy leftovers
Classic pulled pork texture Use pork shoulder for best results, or use pork loin as a leaner BBQ-style option BBQ sandwiches, sliders, meal prep

For true fall-apart pulled pork, pork shoulder is the better cut. For a leaner BBQ-style pork loin, use more sauce and expect a firmer, less fatty texture.

Slow Cooker Pork Loin with Potatoes and Carrots

To make this a full crock pot dinner, add potatoes and carrots under and around the pork. The important detail is size. If the vegetables are cut too small, they can break down. If they are cut too large, the pork may finish before the vegetables are tender.

Pork loin roast in a slow cooker with potatoes, carrots, and onions arranged underneath and around the meat.
Place potatoes and carrots under and around the pork so they get more heat and liquid while the roast cooks above them.

Vegetables also cook more slowly than meat in a slow cooker, so give them the best position: the bottom and sides of the crock, where they sit closer to the heat and liquid.

Add-in Amount for this recipe How to cut it Where it goes
Baby potatoes or potato chunks 1 lb / 450 g Whole baby potatoes or 1½-inch chunks Under and around pork
Carrots 3–4 medium / 300–400 g Thick 1-inch chunks Under and around pork
Onion 1 large / 180–220 g Thick slices or wedges Bottom of slow cooker

What if the vegetables are not done yet?

If the pork reaches 145°F / 63°C before the potatoes and carrots are tender, remove the roast, tent it loosely, and let the vegetables continue cooking. Let the pork come out when it is ready; the vegetables can keep cooking after the roast rests.

Cooked pork loin resting under foil on a cutting board while potatoes and carrots continue cooking in a slow cooker behind it.
When the pork reaches temperature first, resting the roast while the vegetables finish keeps the meat from overcooking.

If you add the full amount of vegetables, increase the broth to ¾–1 cup / 180–240 ml so there is enough liquid to help the vegetables cook and enough juice left for sauce.

Easy Slow Cooker Pork Loin Variations

Once you understand the basic method, you can take this slow cooker pork loin in several directions. Keep the same timing logic: cook by temperature for slices, and use extra sauce if you want a softer, saucier result.

Slow cooker pork loin variation board with garlic herb, honey balsamic, BBQ, apple mustard, sauerkraut, and cranberry orange flavors.
Once the timing logic is clear, the same pork loin method can turn classic with garlic-herb gravy, sweet-tangy with balsamic, casual with BBQ, or festive with apple, sauerkraut, or cranberry-orange.

Garlic Herb Pork Loin

Choose this version for the most classic roast-dinner flavor. Thyme, rosemary, Italian seasoning, garlic, onion, broth, and a butter-finished gravy make it especially good with mashed potatoes or egg noodles.

Honey Balsamic Pork Loin

Choose this version when you want the pork to feel a little more dinner-party than weeknight. Use balsamic vinegar instead of apple cider vinegar and increase the honey to 2 tablespoons, then reduce the juices until glossy and tangy-sweet.
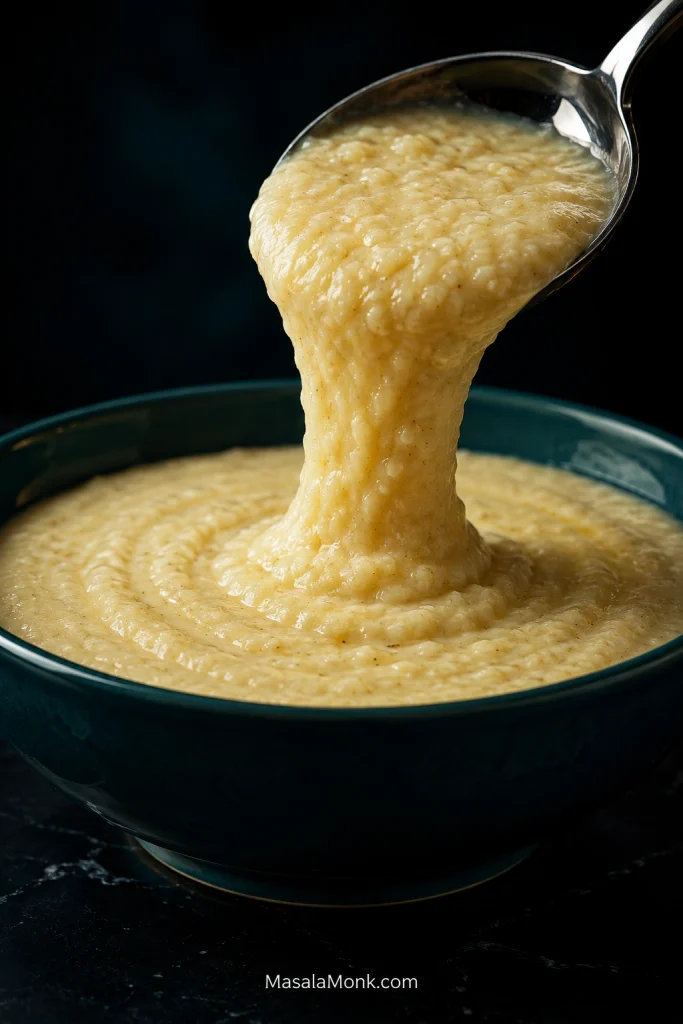

BBQ Pork Loin

For sandwiches, sliders, or rice bowls, replace the Dijon-vinegar base with your favorite barbecue sauce plus a splash of broth. Cook to 145°F / 63°C for saucy slices, or cook longer if you want a leaner shredded pork loin. For classic juicy pulled pork, pork shoulder is still the better cut.
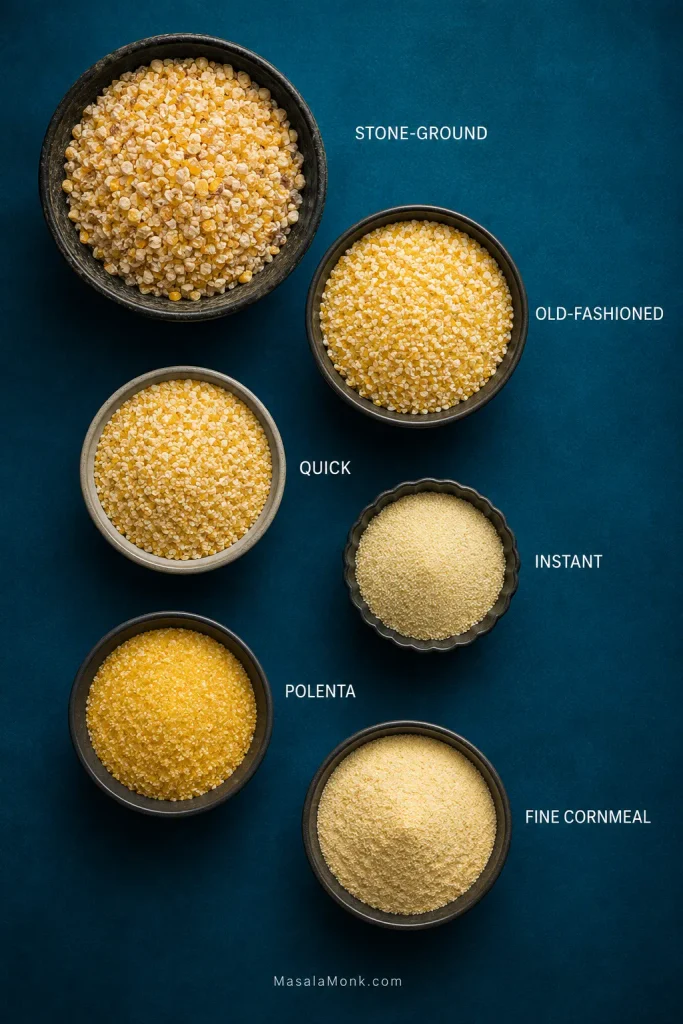
Pork Loin and Sauerkraut

Add sauerkraut, onion, mustard, and a sliced apple if you like a sweet-sour balance. Keep some broth in the base so the sauerkraut does not dry out. If you are using chops instead of a roast, use this crock pot pork chops and sauerkraut guide instead.

Pork Loin with Apples

Apples, onion, mustard, thyme, and a small splash of vinegar work beautifully with pork loin. For softer apples, add them at the beginning. For apples that hold more shape, add thicker wedges during the later part of cooking.

Cranberry Orange Pork Loin

For a holiday-style version, use cranberry sauce, orange zest, a little orange juice, onion, mustard, and broth. This is a good direction for Thanksgiving, Christmas, or any dinner where you want the pork to feel more festive.

Cream of Mushroom or Onion Soup Mix Pork Loin

For an old-school comfort version, use cream of mushroom soup or onion soup mix with broth. These versions can be salty, so use low-sodium broth and reduce or skip the added salt in the seasoning rub. The sauce will be thicker and more casserole-like than the garlic-herb gravy.

What to Serve with Crock Pot Pork Loin

This is the moment to build the plate around the sauce. Mashed potatoes, noodles, rice, rolls, and roasted potatoes all catch the warm gravy well, while BBQ or apple-style versions can go more casual with sandwiches, rice bowls, or simple vegetables.

Crock pot pork loin with gravy served with mashed potatoes, egg noodles, rolls, green beans, rice, and applesauce.
Build the plate around the gravy: mashed potatoes, noodles, rice, rolls, and simple vegetables all make sliced pork loin feel complete.
  • Mashed potatoes or buttered egg noodles for the gravy
  • Rice, roasted potatoes, simple dinner rolls, or a cozy hashbrown casserole when you want a richer comfort-food side
  • Green beans, peas, broccoli, carrots, or a crisp salad
  • Roasted apples, applesauce, sauerkraut, or a simple potato salad for a classic pork pairing
  • Sandwiches with sliced pork, extra sauce, and pickles
  • Leftover rice bowls with pork, vegetables, and warm gravy

How to Store and Reheat Leftovers

After dinner, cool leftover pork loin and refrigerate it within 2 hours. Store slices in an airtight container with some gravy, broth, or slow-cooker juices so they do not dry out. Use refrigerated leftovers within 3–4 days.

To freeze leftovers, pack sliced pork loin with some sauce or cooking juices. It is best within 2–3 months for quality. Thaw overnight in the refrigerator before reheating.

Sliced pork loin stored in containers with gravy and reheated gently in a pan with cooking juices.
Store leftover pork loin slices with gravy or juices, so gentle reheating keeps the lean meat from tasting dry the next day.
Reheating tip: Pork loin is lean, so reheat slices with a spoonful of broth, gravy, or slow-cooker juices. Dry heat makes leftovers taste tougher than they really are.

If the slices already seem dry, use the troubleshooting tips before reheating.

If you use the slow cooker for weekly protein prep, these crock pot chicken breast recipes are another easy batch-cooking option.

Troubleshooting: Dry, Tough, Watery, or Bland Pork Loin

If you have ever lifted the lid and wondered whether dinner just went dry, this section is for you. Pork loin is less forgiving than pork shoulder, but most slow cooker problems are fixable with warm juices, a quick gravy, or a better slicing strategy.

If the pork is not perfect, do not panic. Lean pork loin is easy to overcook, but thin slicing, warm juices, and a quick gravy can rescue more than you might think.

Thin slices of pork loin being covered with warm gravy as a rescue method for dry slow cooker pork.
If the pork loin went a little too far, thin slices and warm reduced juices can make the serving much more forgiving.
Problem Likely cause Best fix
Pork loin is dry Cooked too long, cooked too hot, or sliced without enough sauce Slice thin and serve with gravy or warm juices; next time begin testing earlier
Pork tastes tough Not rested, sliced too thick, or cut with the grain Rest before slicing and cut across the grain into thinner slices
Sauce is watery Too much liquid or no reduction after slow cooking Simmer juices separately and thicken with cornstarch slurry
Pork is cooked but not flavorful Seasoning stayed on the surface or sauce was too diluted Slice the pork, warm it in reduced juices, and finish with a little salt, mustard, or vinegar
Potatoes are still firm Chunks too large or slow cooker packed too full Remove pork when done and keep cooking vegetables until tender
Pork finished too early Smaller roast or hot slow cooker Hold sliced pork in warm juices, not uncovered on a board

FAQs About Slow Cooker Pork Loin

How long does pork loin take in the slow cooker?

A 3 lb / 1.35 kg pork loin usually takes about 3½–4½ hours on LOW for clean, moist slices, but the exact time depends on thickness and your slow cooker. Begin checking around 2½–3 hours and pull the pork when the thickest center reaches 145°F / 63°C. For size-by-size guidance, see the cook-time chart.

Is it better to cook pork loin on LOW or HIGH?

LOW is better for pork loin because it gives you more control and makes it less likely that the lean meat will overshoot the ideal temperature. HIGH can work when you need a faster dinner, but test the center early and do not let the clock make the final call.

What temperature should slow cooker pork loin be?

For tender, sliceable pork loin, cook the thickest center to 145°F / 63°C, then rest before slicing. Longer cooking is for a softer, saucier result, not because 145°F is unsafe for fresh pork roasts when properly rested.

Do you need liquid for pork loin in the crock pot?

Yes, but not a lot. For a 3 lb pork loin, ½ cup / 120 ml broth or sauce base is usually enough. Use more only if you are adding lots of potatoes and carrots or want extra gravy. The liquid guide explains why too much broth can leave the sauce watery.

Should pork loin be fat side up or down in the slow cooker?

If your pork loin has a fat cap, place it fat side up. As it cooks, some of the fat can baste the top of the roast. If the fat cap is very thick, trim it slightly before cooking so the sauce does not become greasy.

Can I use bone-in pork loin in the slow cooker?

Yes, but use the thermometer rather than the clock. Bone-in pork loin may cook a little differently depending on shape and thickness. Cook until the thickest part of the meat, away from the bone, reaches 145°F / 63°C, then rest before slicing.

Can I use pork tenderloin instead?

Not with the same timing. Pork tenderloin is smaller and cooks faster than pork loin. Use this slow cooker pork tenderloin recipe instead, or compare the cuts in the cut guide above.

Can I leave pork loin in the slow cooker for 8 hours?

For clean slices, 8 hours is usually too long for pork loin. It is tempting to treat it like an all-day roast, but lean pork loin can dry out when it sits in the slow cooker for that long. If you need an 8-hour cook, use extra sauce and expect a softer texture, or choose pork shoulder for a more forgiving pulled-pork result.

Can you overcook pork loin in a slow cooker?

Yes. Pork loin can overcook in a slow cooker because it is much leaner than pork shoulder. For clean slices, begin checking before the longest listed time and pull the roast when the thickest center reaches 145°F / 63°C. If it has already gone too far, slice it thin and serve it with warm gravy or reduced juices.

Should pork loin be covered with liquid in the slow cooker?

No. Pork loin does not need to be covered with liquid in the slow cooker. For a 3 lb roast, about ½ cup broth or sauce base is enough to create moisture and juices for gravy. Too much liquid can make the pork taste boiled and leave the sauce thin.

Is pork roast the same as pork loin?

Not always. “Pork roast” is a general store label, while pork loin is a specific lean roast. Check the package and shape: pork loin is usually wide and fairly lean; pork tenderloin is long and narrow; pork shoulder or pork butt is fattier and better for true pulled pork.

What if my pork loin is done before dinner?

Remove it from the slow cooker, rest it, slice it, and hold the slices in warm gravy or cooking juices. Avoid keeping a finished pork loin cooking just because the vegetables need more time. The vegetables-done-late section shows the safer order.

Can you put frozen pork loin in the slow cooker?

No. Thaw pork loin before putting it in the slow cooker. It is a frustrating answer when you forgot to thaw dinner, but a frozen roast can spend too long warming through before the center reaches a safe temperature. USDA/FSIS slow-cooker guidance says to thaw meat or poultry first. For more detail, see the USDA/FSIS slow cooker food safety guide.

If you forgot to thaw it overnight, use a safe thawing method such as cold-water thawing or microwave thawing, then cook the pork immediately. Do not thaw pork loin on the counter.

Why is my slow cooker pork loin dry?

Pork loin usually turns dry when it cooks too long, cooks too hot, or is served without enough sauce. For this batch, slice it thin, warm the slices in reduced juices, and spoon gravy over the top. For the next batch, use the cook-time chart as a checking window and pull the roast at 145°F / 63°C.

Can I make pulled pork from pork loin?

Yes, pork loin can make a leaner BBQ-style pulled pork, but it needs extra sauce and will not be as rich or moist as pork shoulder. For classic fall-apart pulled pork, pork shoulder or pork butt is usually the better cut.

Why does this recipe use temperature instead of one fixed cook time?

Pork loin can be short and thick, long and narrow, small, large, tightly packed with vegetables, or cooked in a slow cooker that runs hot. A fixed time can get you close, but it cannot see the center of the roast. The thermometer gives you the answer that matters: whether the pork is ready to rest and slice.

Once you understand the timing, this becomes a very repeatable dinner: season the pork, let the slow cooker do the quiet work, check the center, and finish with enough sauce to make every slice feel intentional.

Slow Cooker Pork Loin Recipe

Slow cooker pork loin made with garlic, onion, herbs, broth, Dijon, and a simple gravy from the crock pot juices. Cook it to temperature for clean, tender slices, then rest before serving.

Prep Time
15 minutes
Cook Time
Start checking at 2½–3 hours; usually 3½–4½ hours
Total Time
About 4–5 hours
Yield
6–8 servings

Ingredients

  • 3 lb / 1.35 kg boneless pork loin roast
  • 1½ tsp fine sea salt
  • 1 tsp black pepper
  • 1 tsp garlic powder
  • 1 tsp onion powder
  • 1 tsp paprika
  • 1 tsp dried thyme or Italian seasoning
  • 1 tbsp / 15 ml oil, optional for searing
  • 1 large onion, sliced
  • 4 garlic cloves, minced
  • ½ cup / 120 ml low-sodium chicken broth
  • 1 tbsp / 15 g Dijon mustard
  • 2 tbsp / 30 ml apple cider vinegar or balsamic vinegar
  • 1–2 tbsp honey or brown sugar, optional
  • 2 tbsp / 28 g unsalted butter, optional for sauce
  • 1 tbsp / 8 g cornstarch
  • 2 tbsp / 30 ml cold water

Optional Potatoes and Carrots

  • 1 lb / 450 g baby potatoes or large potato chunks
  • 3–4 medium carrots / 300–400 g, cut into thick chunks

Instructions

  1. Pat the pork loin dry. Mix salt, pepper, garlic powder, onion powder, paprika, and thyme. Rub the seasoning all over the pork.
  2. Optional: Heat oil in a large skillet and sear the pork for 2–3 minutes per side until browned.
  3. Add sliced onion to the bottom of a 6-quart slow cooker. Add garlic, broth, Dijon, vinegar, and honey or brown sugar if using.
  4. Place pork loin in the slow cooker, fat side up if it has a fat cap. Add potatoes and carrots around the pork if using.
  5. Cover and cook on LOW. Begin checking around 2½–3 hours, especially if your slow cooker runs hot. Many 3 lb roasts take closer to 3½–4½ hours. Pull the pork when the thickest center reaches 145°F / 63°C.
  6. Transfer pork to a cutting board, tent loosely, and rest for 5–10 minutes.
  7. Pour the slow-cooker juices into a small saucepan. Simmer. Whisk cornstarch with cold water, then add to the simmering juices. Cook until lightly thickened. Whisk in butter if using.
  8. Slice pork across the grain and serve with the gravy or sauce.

Notes

  • LOW gives better control than HIGH for lean pork loin.
  • Use the time range as a checking window; an instant-read thermometer gives the final answer for tender slices.
  • Do not cook frozen pork loin directly in the slow cooker. Thaw first.
  • If vegetables are not tender when the pork is done, remove and rest the pork while the vegetables continue cooking.
  • For a softer, shreddable result, cook longer with extra sauce, but expect a leaner texture than pork shoulder.
Saveable slow cooker pork loin recipe card with 3 lb pork loin, 1/2 cup broth, LOW heat, 2 1/2 to 3 hour check time, 145°F finish, rest, slice, and gravy.
Save the baseline method for repeat dinners: 3 lb pork loin, modest broth, LOW heat, a 145°F finish, a short rest, and gravy.

If you try it, note your pork loin size and cook time the first time. Once you know how your slow cooker handles this cut, the recipe becomes easy to repeat: tender slices, warm gravy, and a dinner that feels much more finished than the effort it took.

Back to top