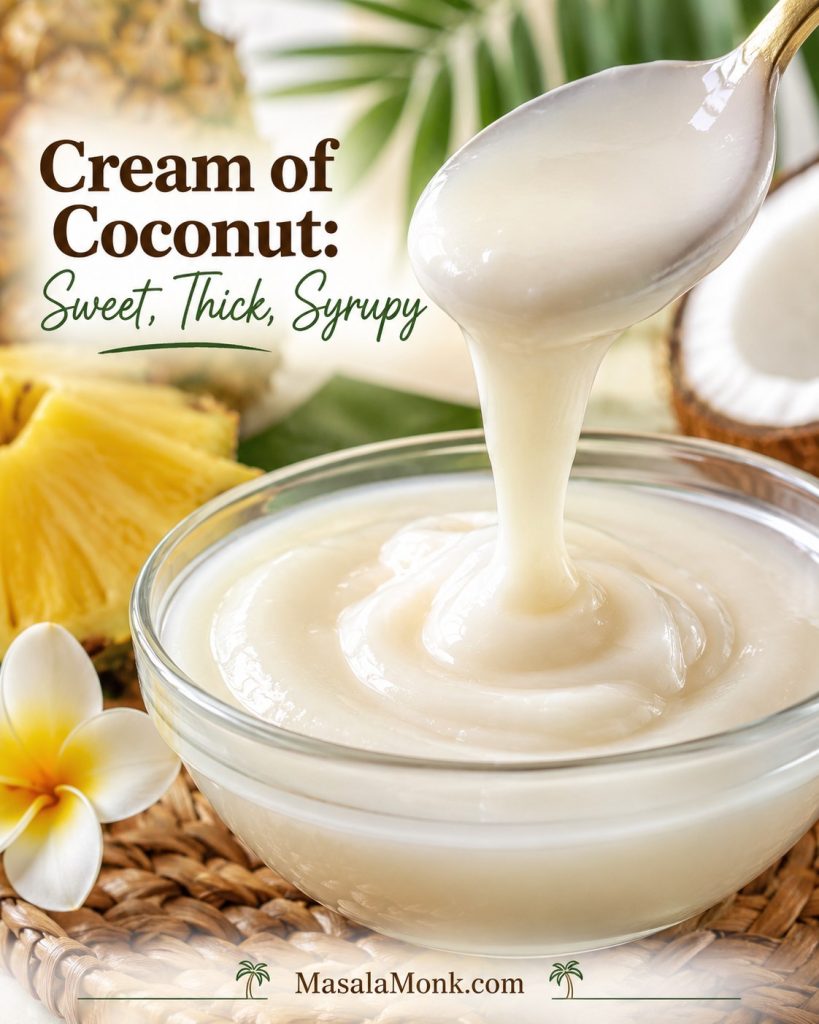
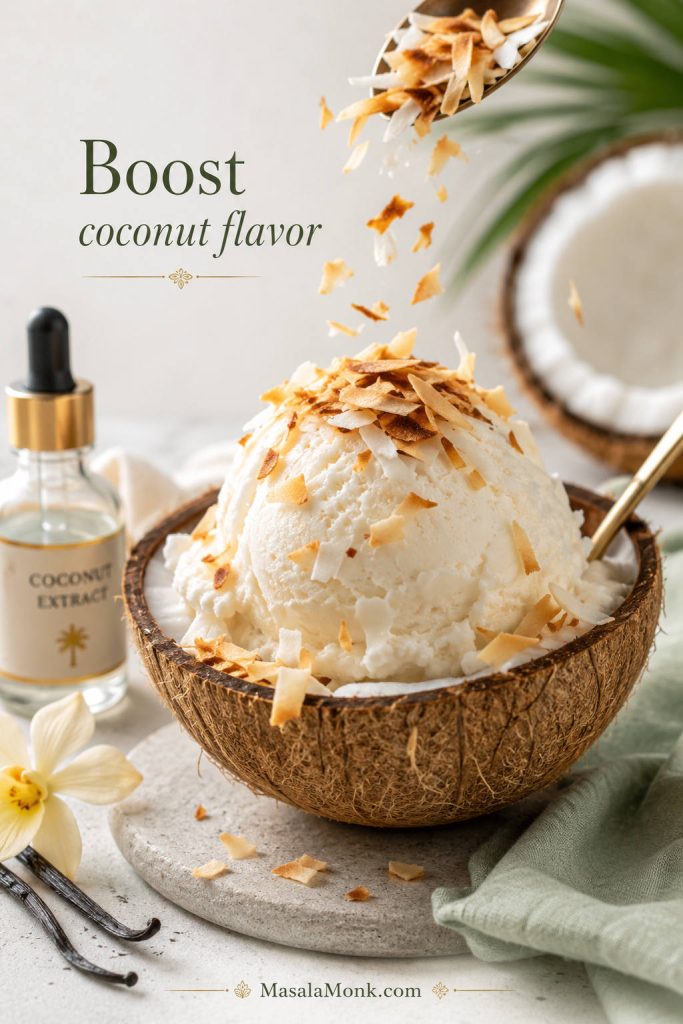
A good coconut shake recipe should give you a drink that tastes like opening a fresh tender coconut on a hot day, then turning that freshness into something colder, creamier, and more satisfying. The glass should taste clearly of coconut, feel lightly sweet, sip smoothly, and have enough thickness to feel like a real milkshake without becoming heavy or icy.
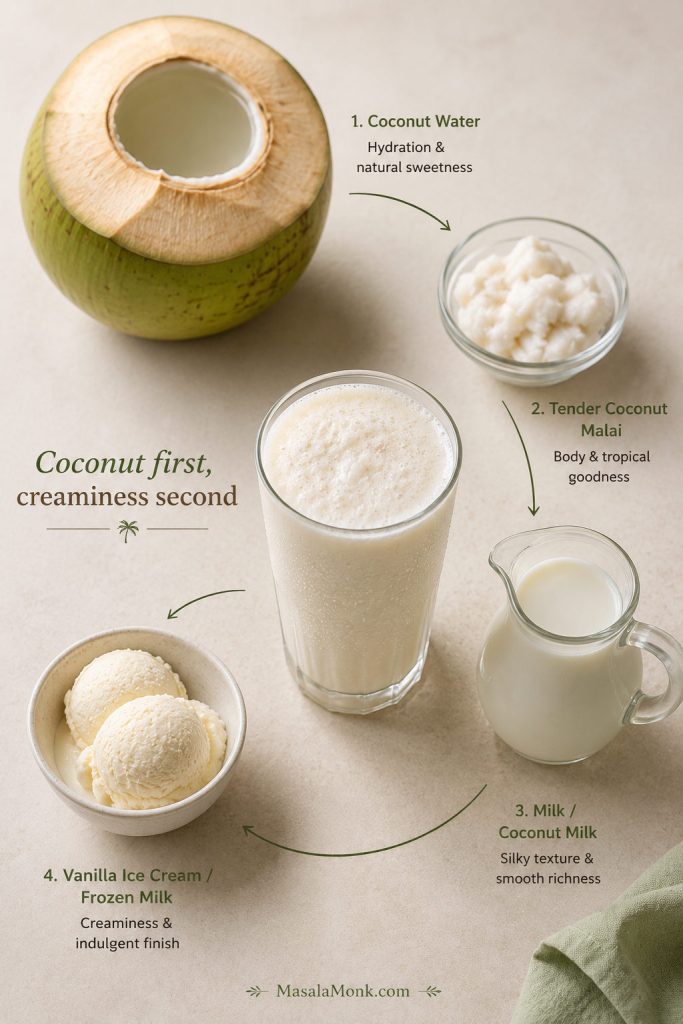
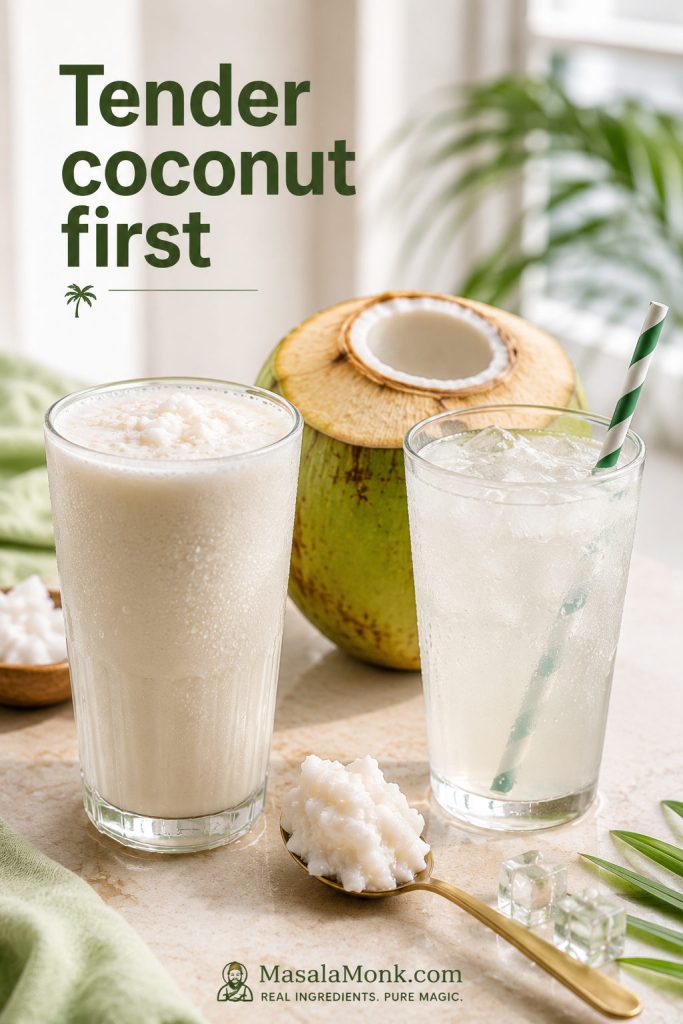
This coconut shake recipe starts with the best part of a tender coconut: the soft malai and the naturally sweet coconut water inside. From there, you can keep it light and fresh, make it creamy with chilled milk, or turn it into a dessert-style tender coconut milkshake with vanilla ice cream.
The problem with many coconut shakes is not the idea; it is the balance. Add too much ice and the drink turns watery. Pour in too much milk and the coconut disappears. Extra sugar can make the flavor taste flat instead of clean, while mature coconut can turn the whole glass grainy if it is not blended properly.
Start with the creamy tender coconut milkshake, then use the same base to make it lighter, dairy-free, no-ice-cream, or café-style without losing the fresh coconut taste. You will also find cup, ml, oz, and gram guidance for small 250 ml glasses, tall 16 oz café cups, and 500 ml bottles.
What You’ll Find in This Guide
Quick Answer: Best Ratio for 2 Tall Glasses
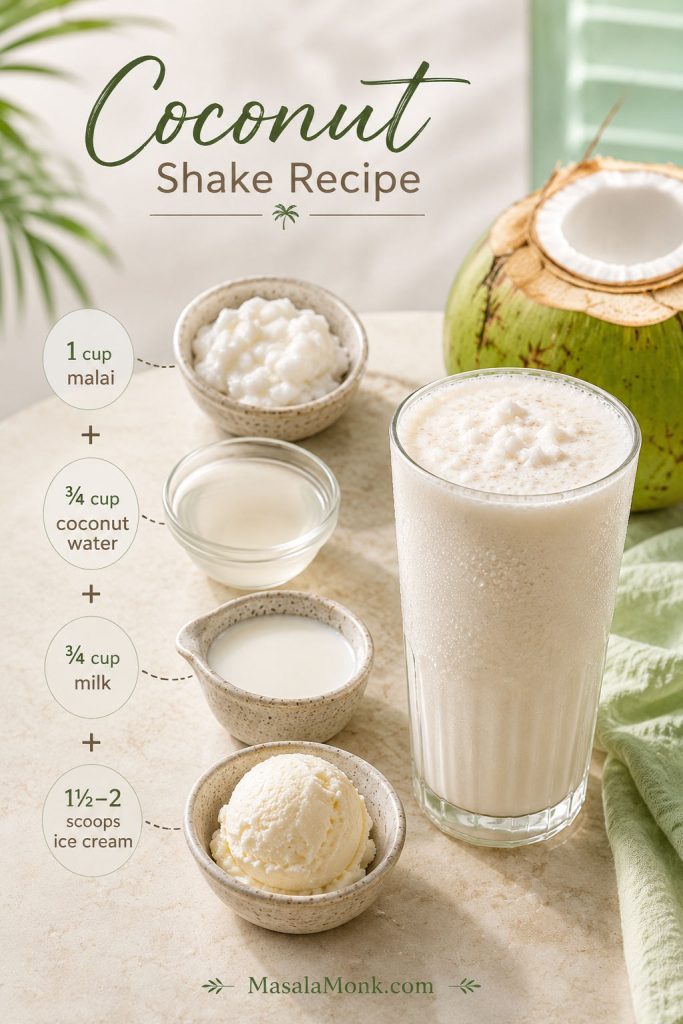
Best ratio for 2 tall glasses: 1 cup tender coconut malai + ¾ cup coconut water + ¾ cup chilled milk + 1½–2 scoops vanilla ice cream.
For the creamiest result in this coconut shake recipe, blend the tender coconut flesh with coconut water first, then add chilled milk, ice cream, and sweetener only after tasting. For a lighter homemade glass, jump to the no-ice-cream version; for dairy-free, go to the vegan coconut shake.
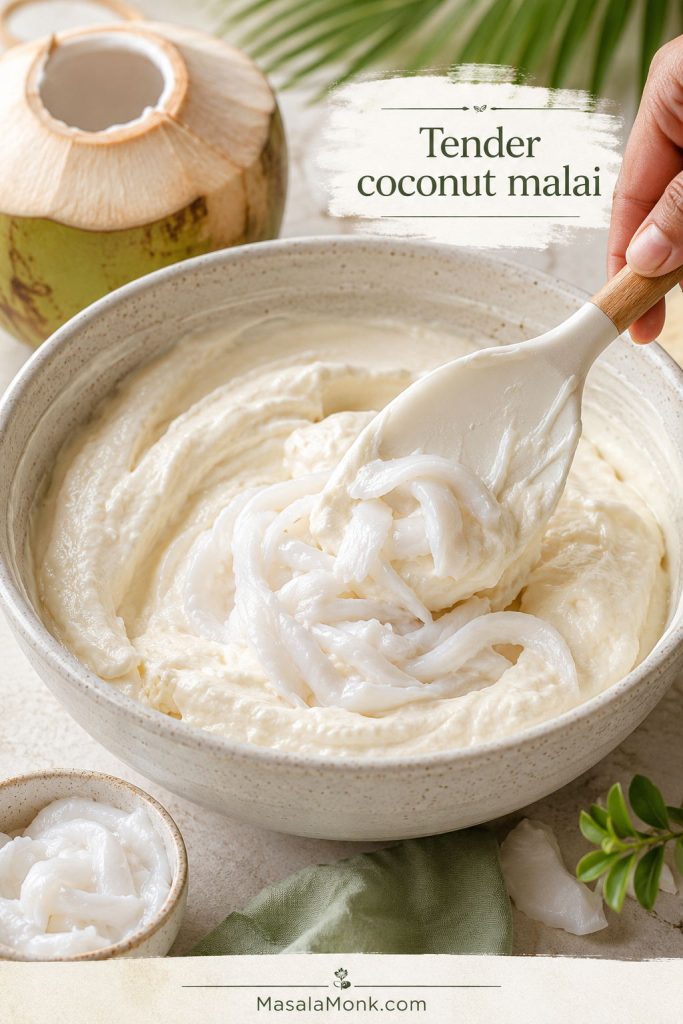
This is also a handy recipe when you have already drunk the coconut water and have soft malai left behind. Instead of letting it sit in the fridge until it loses that fresh coconut aroma, blend it into a cold shake while it still tastes delicate and sweet.
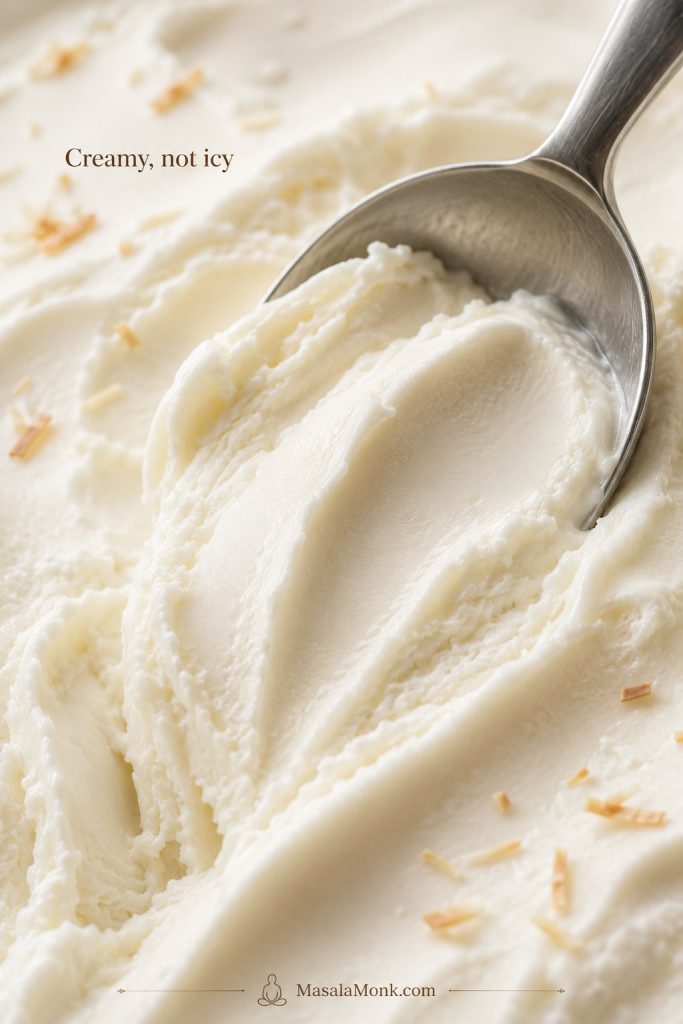
The best glass should feel cold from the first sip, but not icy and hollow. It should taste like tender coconut first, then creaminess.
| Best coconut | Tender coconut malai/flesh |
| Main liquid | Coconut water + chilled milk |
| Creamy version | Add 1½–2 scoops vanilla ice cream |
| No-ice-cream version | Use frozen milk cubes or extra malai |
| Vegan version | Use chilled coconut milk |
| Prep time | 10 minutes |
| Cook time | 0 minutes |
| Yield | 2 tall glasses or 3 small glasses, about 600–750 ml / 20–25 fl oz |
What Is Coconut Shake?
Coconut shake is a cold blended drink made with coconut flesh and a chilled liquid such as coconut water, milk, or coconut milk. In many Indian and South Asian kitchens, it usually means a tender coconut milkshake: soft coconut malai blended with tender coconut water, chilled milk, and sometimes ice cream.
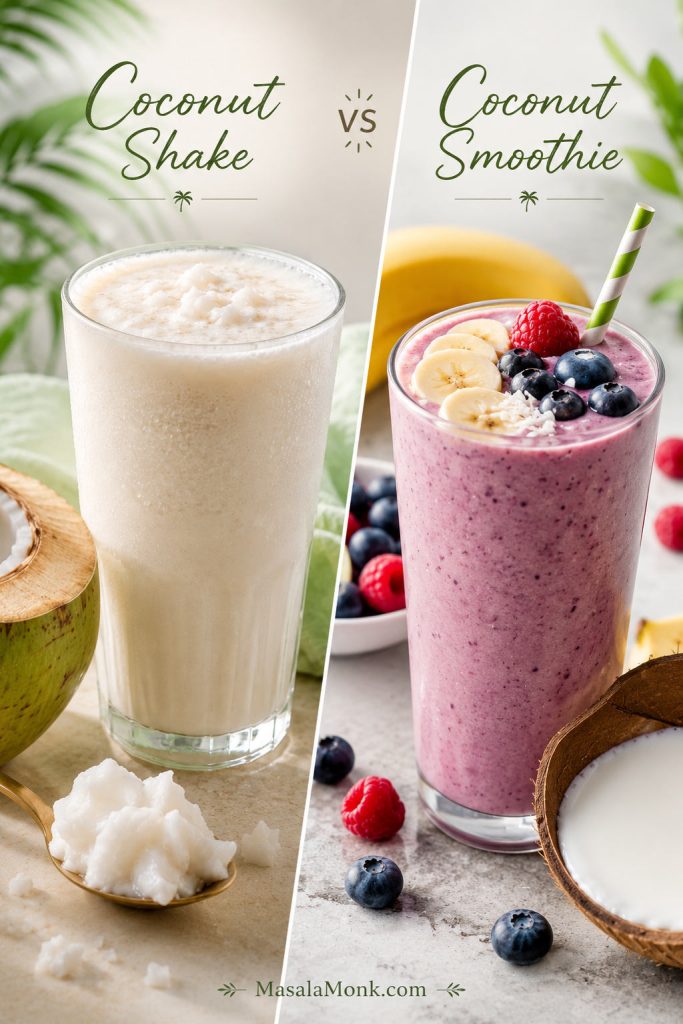
When coconut is the star, call it a shake. Once coconut milk becomes mostly the base for banana, berries, yogurt, protein powder, or greens, the drink starts behaving more like a smoothie. For fruitier coconut drinks, the flavor variations section covers banana, mango, pineapple, protein, and cardamom ideas.
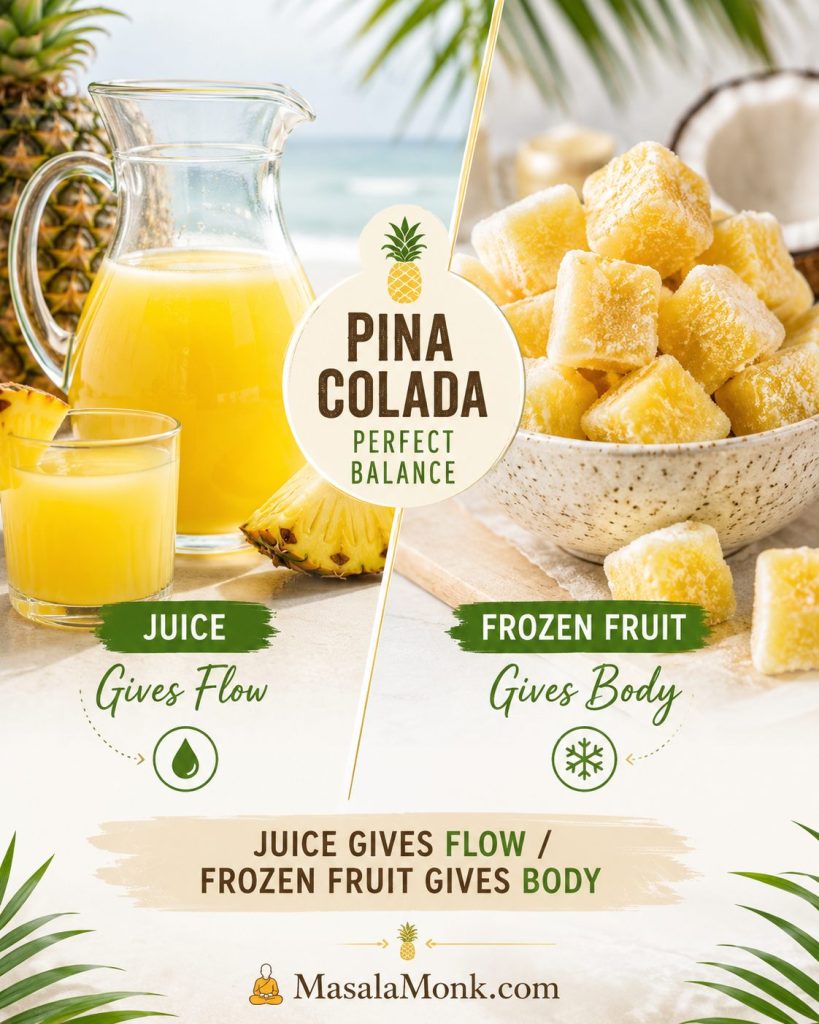
Coconut water and coconut milk are very different ingredients: coconut water is the clear liquid inside young coconuts, while coconut milk is made from coconut flesh and water. For more on using coconut water in drinks, read our guide to coconut water.
If plain coconut water feels too light and a full ice-cream milkshake feels too heavy, coconut shake sits right in the middle: fresh first, creamy second.
Why This Recipe Works
This is not just a matter of blending coconut and milk. Order, temperature, and balance all matter. The method below keeps coconut in front and creaminess in the background, so the shake tastes full without losing its fresh tender-coconut character.
- Blending the malai with coconut water first helps the coconut break down before milk and ice cream make the jar heavier.
- Chilled liquids reduce the need for ice, so the shake stays creamy instead of diluted.
- Sweetening after tasting keeps the drink balanced when the coconut water is already naturally sweet.
- Ice cream or frozen milk thickens without hollowing out the flavor, while plain ice mostly adds coldness and dilution. To get that thickness without ice cream, use the no-ice-cream formula instead of adding more plain ice.
- A short final blend protects the chill, because overblending warms the shake and loosens the texture.
The core idea: Keep coconut water and malai in charge, then add only enough milk, coconut milk, ice cream, or frozen milk to match the glass you want.
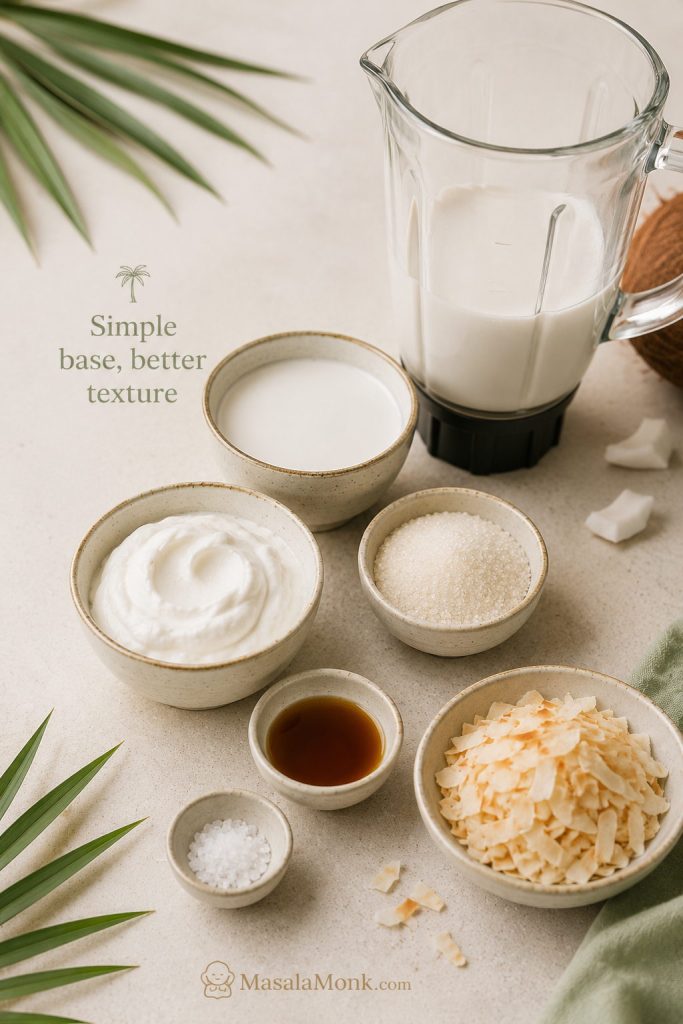
Ingredients That Matter
The ingredient list is short, but the balance matters. Start with fresh malai and coconut water, then decide how rich you want the glass to be. Milk, ice cream, coconut milk, frozen milk, and sweetener are all adjustable; the coconut should stay in charge.
| Ingredient | Amount for 2 tall glasses | Why it matters |
|---|---|---|
| Tender coconut flesh / malai | 1 cup / about 80–120 g | Creates the soft, pulpy coconut base. |
| Tender coconut water | ¾–1 cup / 180–240 ml / 6–8 fl oz | Keeps the shake light and unmistakably tender-coconut flavored. |
| Chilled milk | ¾–1 cup / 180–240 ml / 6–8 fl oz | Rounds the texture into milkshake territory. |
| Vanilla ice cream | 1½–2 scoops / about 90–130 g | Optional, but gives dessert-style thickness and sweetness. |
| Sugar, honey, or dates | 1–2 tbsp, or to taste | Use only if the coconut water is not sweet enough. |
| Cardamom or vanilla | ⅛ tsp cardamom or ½ tsp vanilla | Adds aroma without hiding the coconut. |
| Ice cubes | 2–4, only if needed | Chills the shake; use more only for a café-style icy version. |
| Chopped pistachios, almonds, or coconut bits | 1–2 tbsp, optional | Adds small bites that make the glass feel freshly blended. |
Ingredient Measurement Notes
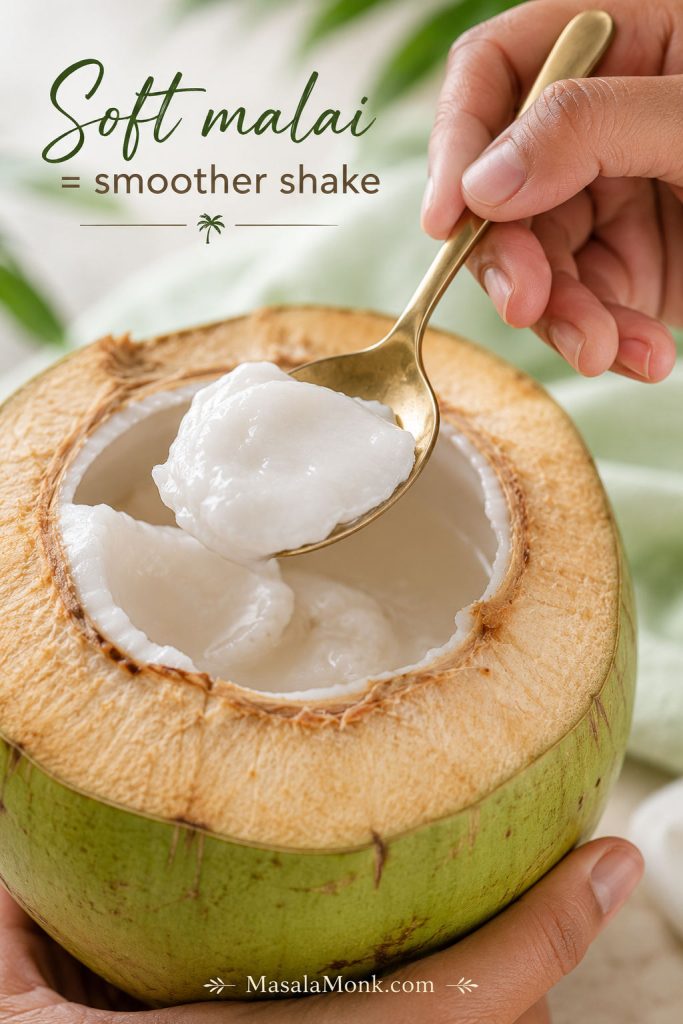
Measurement note: Tender coconut malai is not as predictable as flour, sugar, or mature grated coconut. Very soft malai can be watery and delicate, while firmer tender coconut flesh weighs more per cup. That is why this recipe gives a practical range of 80–120 g per cup instead of pretending every tender coconut measures the same.
Quick coconut note: Tender coconut is best here because the soft malai blends smoothly and the coconut water gives fresh aroma. If you are using mature coconut or only coconut milk, see which coconut works best so the drink does not turn grainy or too heavy.
Coconut Shake Recipe: Creamy Tender Coconut Milkshake
Classic texture cue: Make the creamy tender coconut milkshake first so you know the target balance before changing the recipe for no-ice-cream, vegan, or lighter versions.
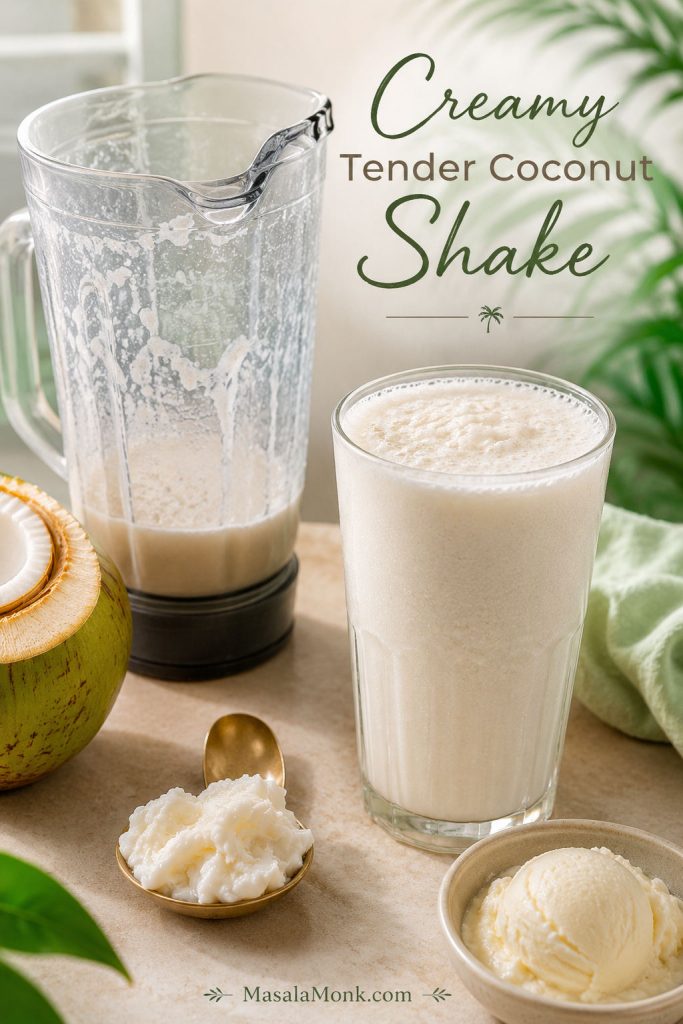
Creamy Tender Coconut Shake
This is the coconut shake recipe to make first: soft malai, coconut water, chilled milk, and optional vanilla ice cream blended into a cold, drinkable tender coconut milkshake. It makes about 600–750 ml, depending on the amount of malai and ice cream, which is enough for 2 tall glasses or 3 smaller home glasses.
Total quantity: About 600–750 ml / 20–25 fl oz, depending on the amount of malai and ice cream
Equipment: Blender, mixer-grinder, or high-speed blender; measuring cup; tablespoon; chilled serving glasses.
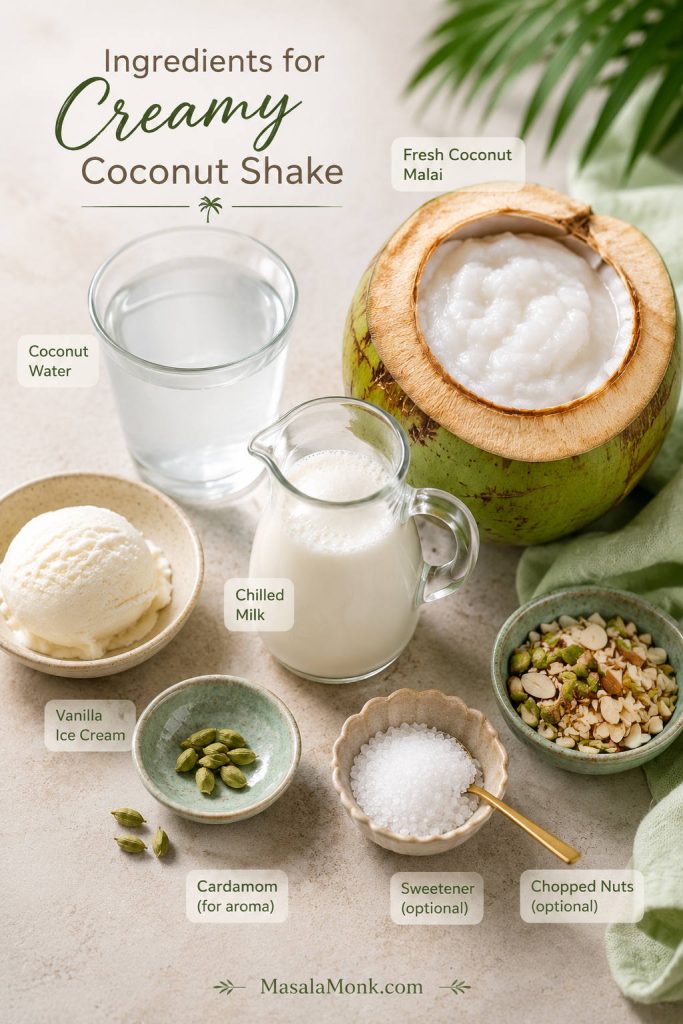
Ingredients
- 1 cup tender coconut flesh/malai, about 80–120 g
- ¾ cup tender coconut water, 180 ml / 6 fl oz, plus more if needed
- ¾ cup chilled milk, 180 ml / 6 fl oz
- 1½–2 scoops vanilla ice cream, about 90–130 g, optional but recommended for the creamy version
- 1 tbsp sugar, honey, or date syrup, optional
- ⅛ tsp cardamom powder or ½ tsp vanilla extract
- 2–4 ice cubes, only if the ingredients are not already very cold; use more only for a café-style icy shake
- 1 tbsp chopped pistachios, almonds, or tender coconut bits, optional
Method
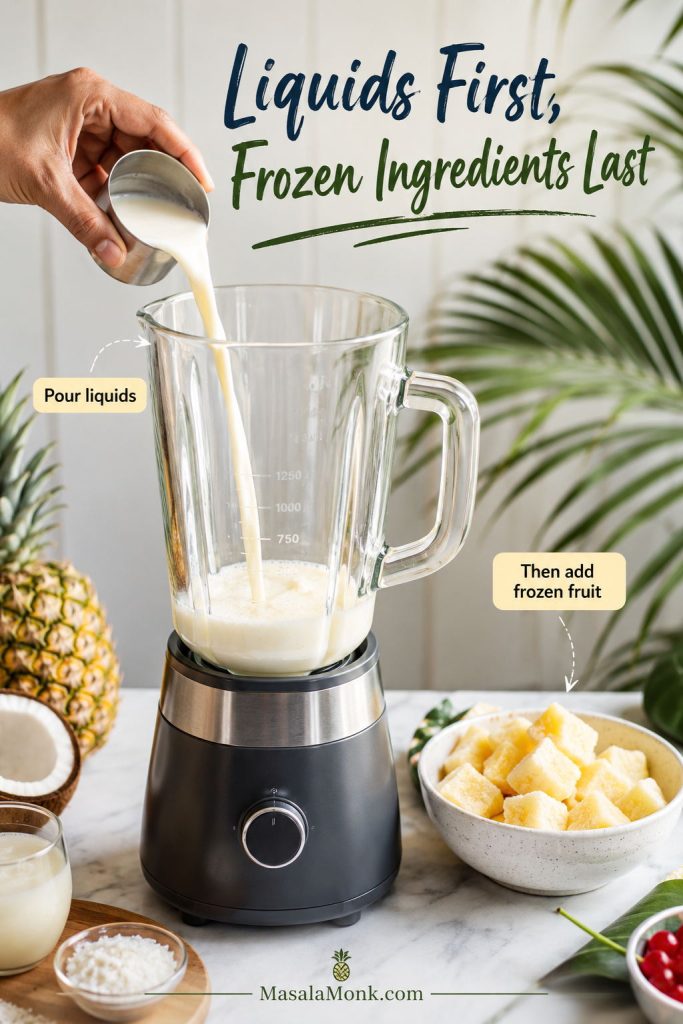
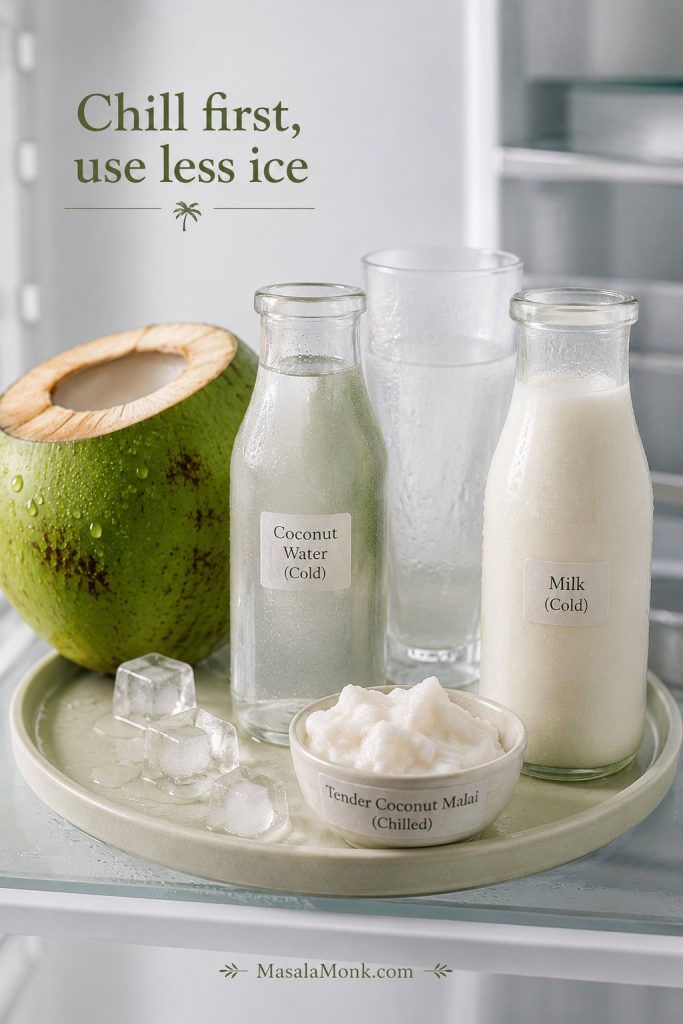
- Chill the ingredients. Cold coconut water, cold milk, and chilled glasses give a better shake than a blender full of ice.
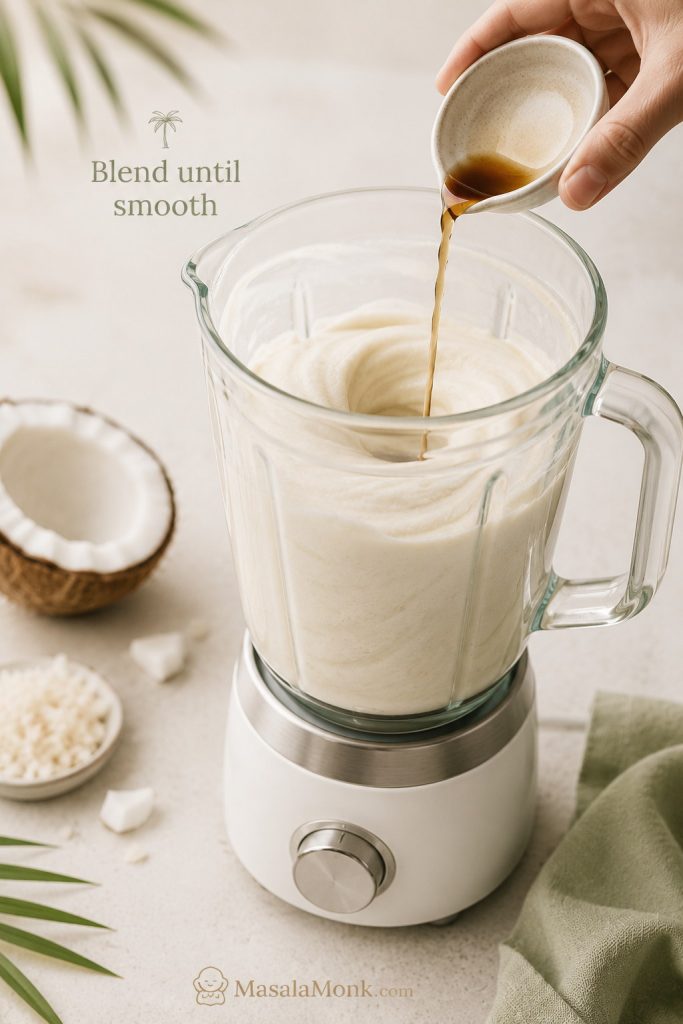
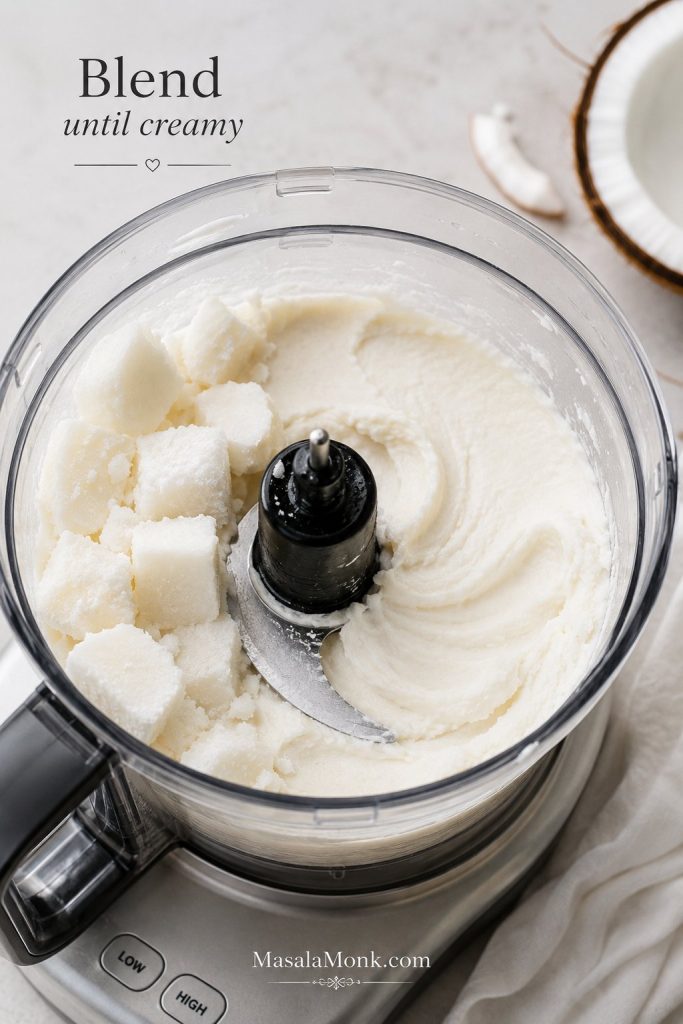
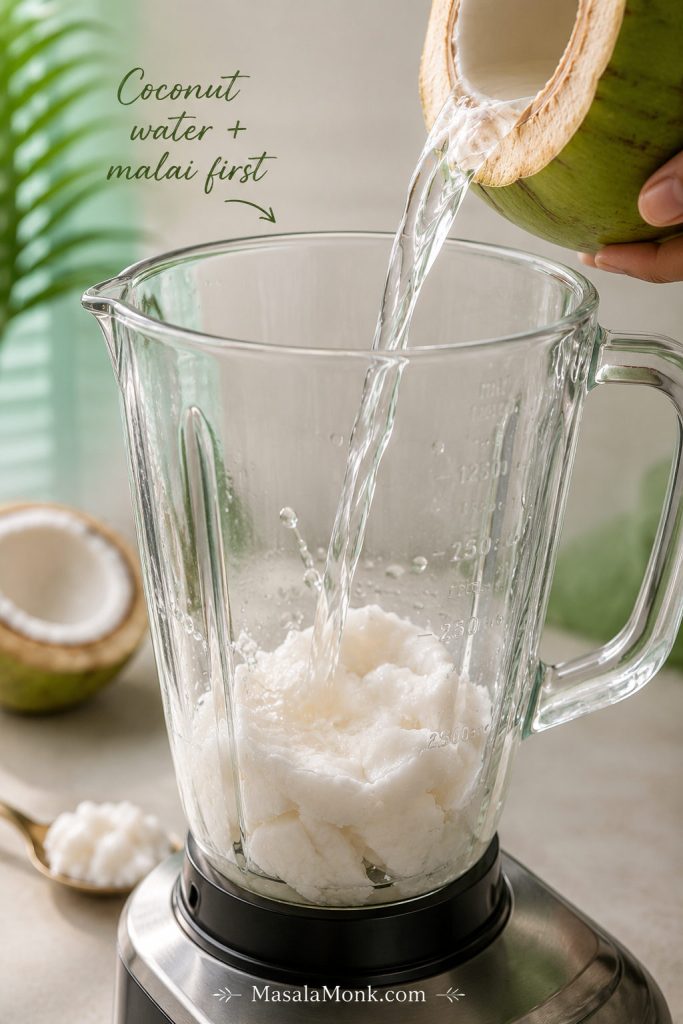
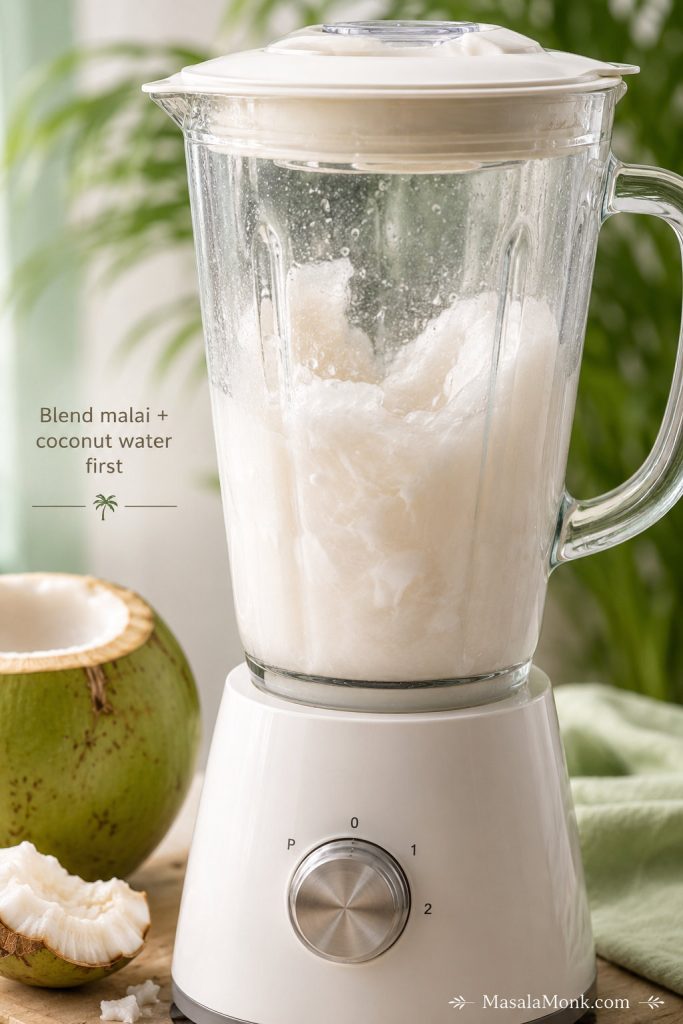
- Blend the coconut first. Add tender coconut flesh and coconut water to the blender. Blend for 20–30 seconds, until the malai breaks down and the mixture looks slightly cloudy and pulpy.
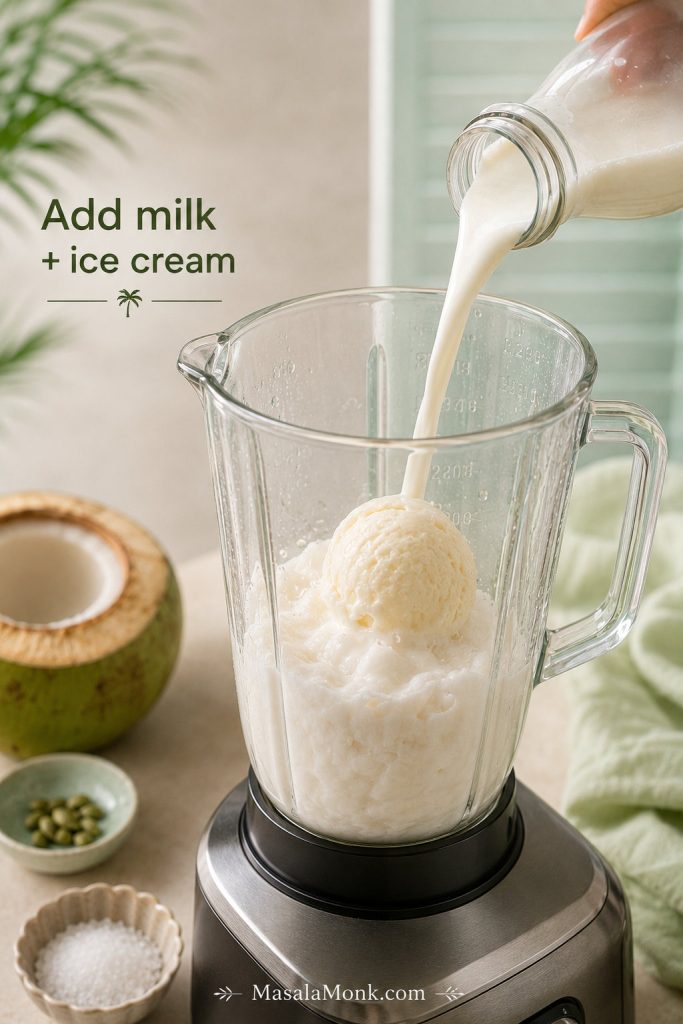
- Add the creamy ingredients. Add chilled milk, vanilla ice cream, cardamom or vanilla, and only a little sweetener.
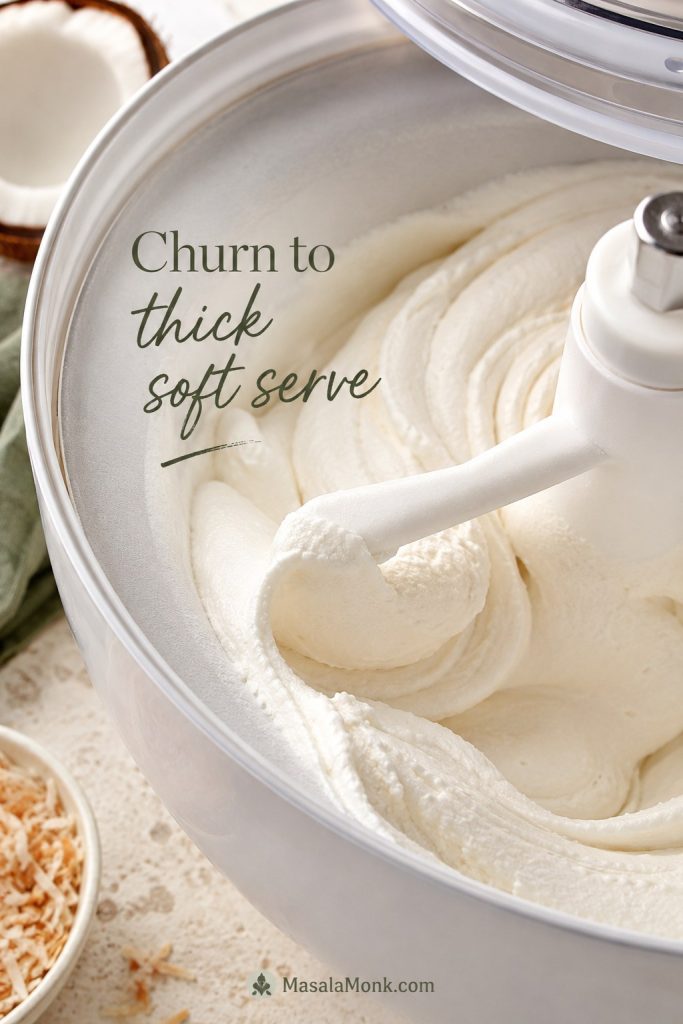
- Blend briefly. Blend for 15–20 seconds, just until the shake looks creamy and moves as one smooth liquid in the blender. Do not overblend after adding ice cream.
- Taste and adjust. Add a little more sugar, honey, or date syrup only if the shake needs sweetness. If it is too thick, add coconut water 1–2 tbsp at a time.
- Add ice only if needed. Add a few ice cubes and pulse briefly if the shake is not cold enough. Use more ice only when you want a café-style icy shake.
- Pour and finish. Pour while the top is still cold and lightly frothy. Garnish with chopped nuts or a few tiny tender coconut bits if you like a little texture.
Recipe Notes
- Best texture cue: The shake should pour easily but coat the glass lightly.
- Sweetness cue: Taste before adding sugar because fresh coconut water can already be sweet.
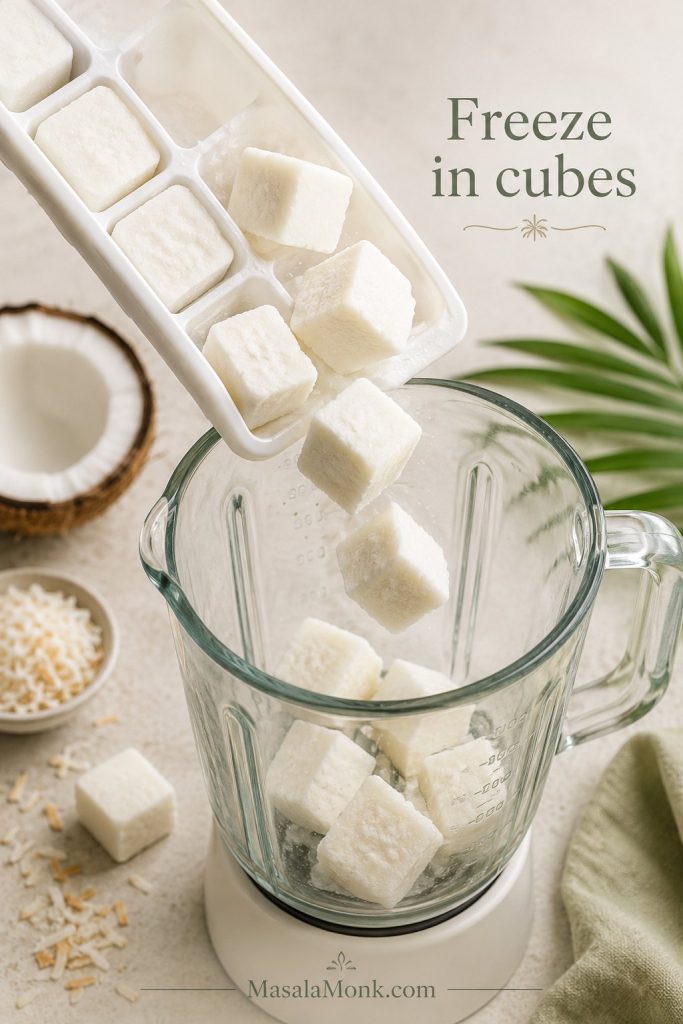
- No-ice-cream cue: Replace ice cream with ½ cup frozen milk cubes for a lighter but still creamy version.
- Blending cue: After adding ice cream or frozen milk, blend only until creamy so the shake stays cold and thick.
Visual Method Cues
Chill cue: Cold ingredients protect the texture before the blender even starts.
Blending cue: The coconut water and malai should move together before the heavier ingredients go in.
Creamy ingredient cue: Milk and ice cream work best after the coconut base is already loose and blended.
Pouring cue: The best time to serve is when the shake still looks cold, smooth, and lightly frothy.

If your shake turns watery, grainy, too sweet, or too thick, use the troubleshooting table before changing the whole recipe.
You will know this coconut shake is right when it pours smoothly, smells like fresh coconut water, and tastes creamy without losing that tender coconut freshness.
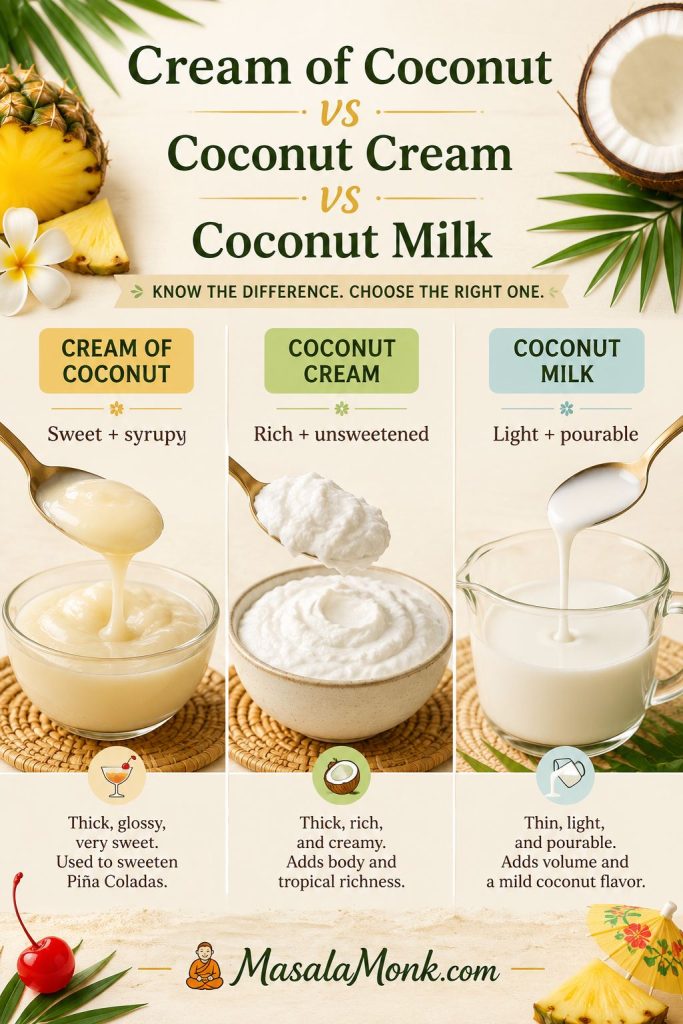
Tender Coconut, Mature Coconut, or Coconut Milk: What Works Best?
Tender coconut gives the best flavor and texture, but the recipe can still work if you only have mature coconut, coconut milk, or coconut cream. The key is knowing what each option changes.
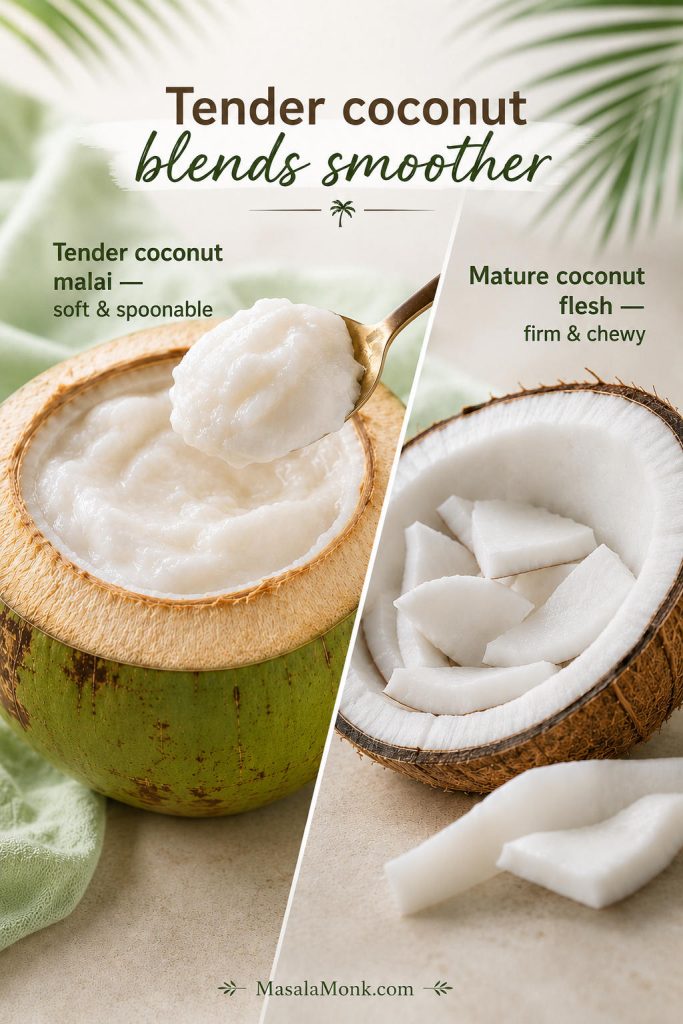
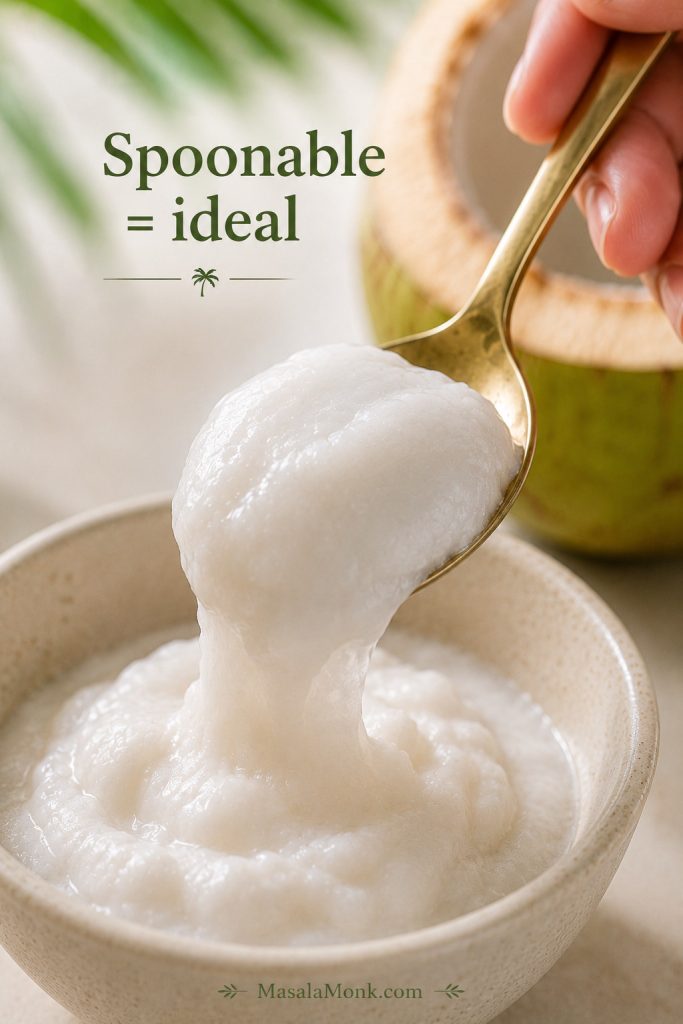
The best malai for this shake should be soft enough to scoop with a spoon. Very soft malai bends, tears, or slips easily, which helps it blend into a smoother drink. Chewy coconut can still work, but chop it small and expect a more pulpy finish.
For an outside ingredient comparison, this coconut milk vs coconut water guide explains why coconut water keeps drinks light while coconut milk adds body.
- Tender coconut / young coconut is the best choice because the malai blends soft and the water adds fresh coconut aroma.
- Mature fresh coconut is usable in a pinch, but it is firmer and more likely to turn grainy. Grate it finely, blend it longer with coconut water, and strain if needed.
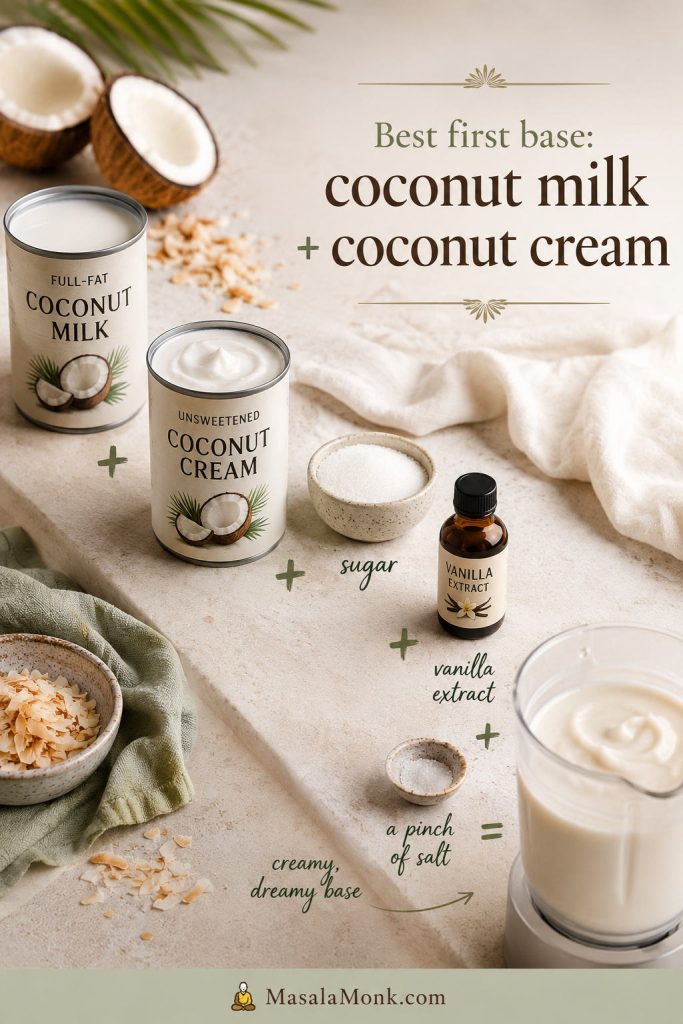
- Coconut milk is the easiest dairy-free route, but it should support the tender coconut rather than replace it completely when fresh malai is available.
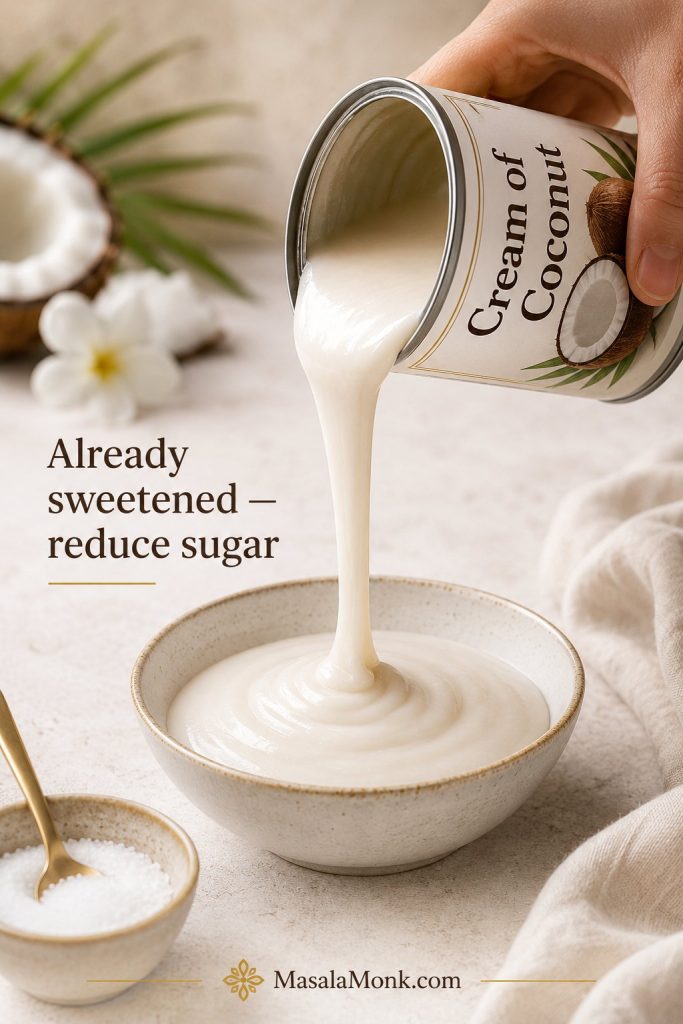
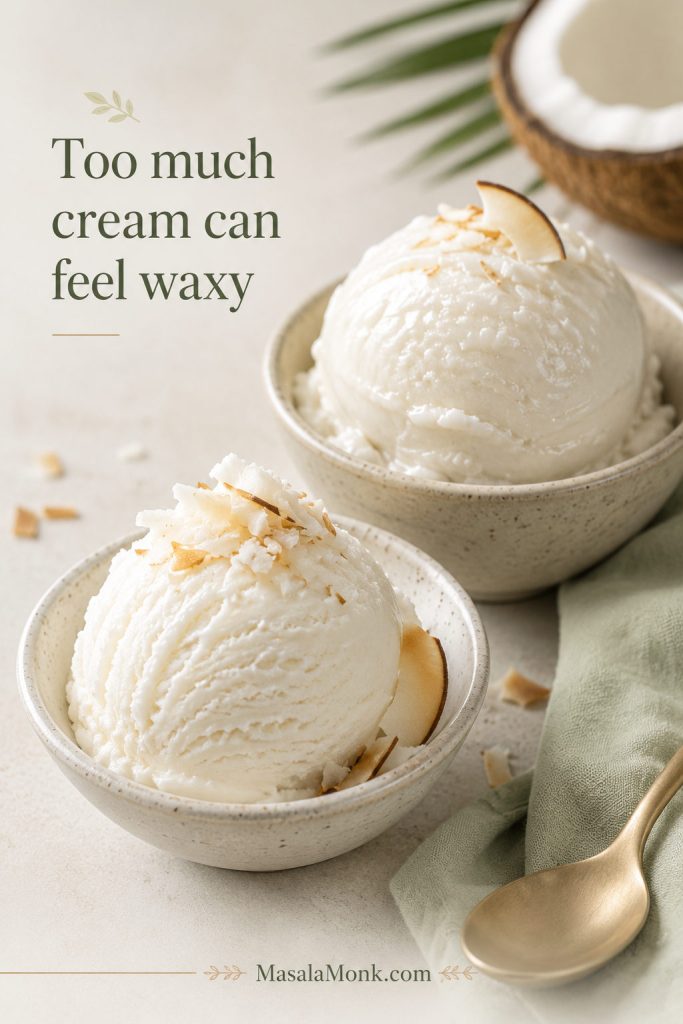
- Coconut cream makes the shake very thick and rich, so a little goes a long way. Use it when you want a dessert-style vegan shake.
What Should Coconut Shake Taste Like?
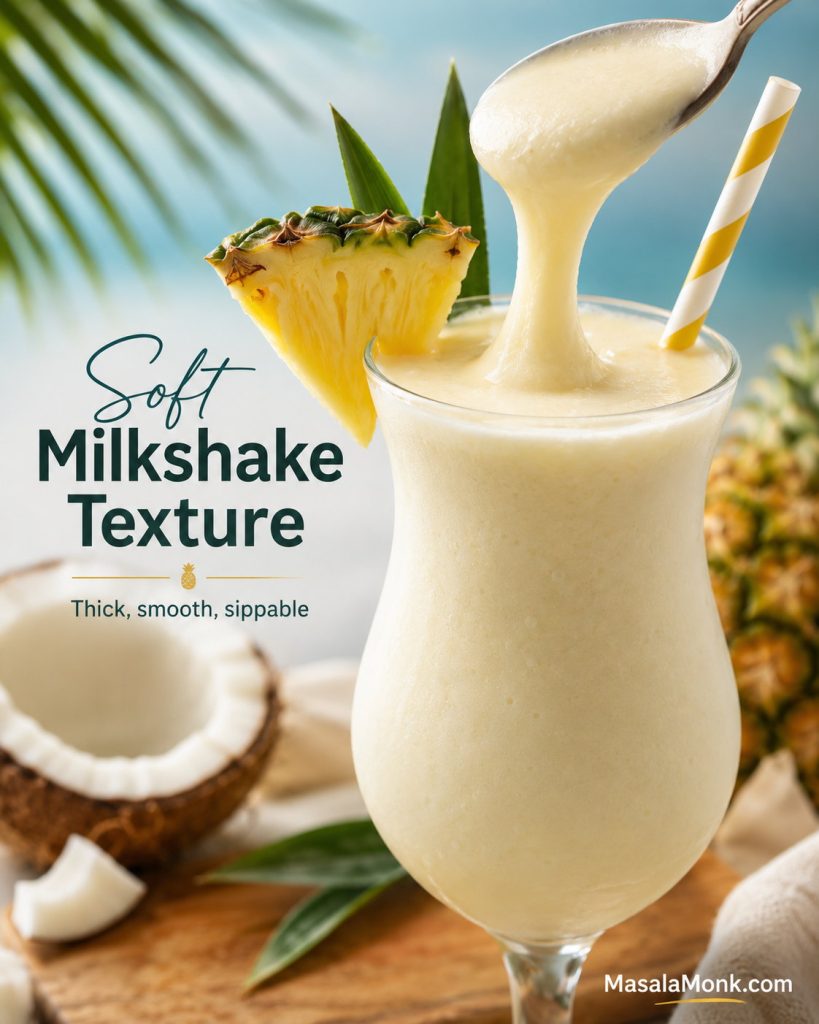
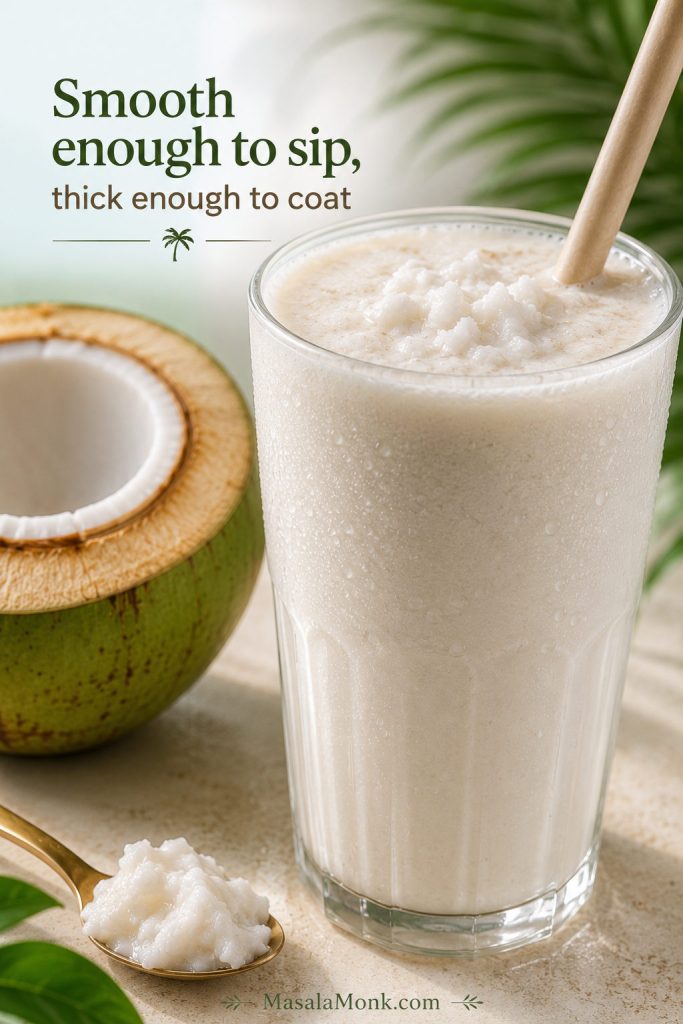
A well-made coconut shake should taste cold before it tastes sweet, and like coconut before it tastes like milk. It should sip smoothly through a straw, with just enough thickness to coat the glass lightly. A few tiny malai bits are welcome; grit is not.
A glass that tastes like melted vanilla ice cream with coconut hiding in the background needs less dairy next time. When the first sip tastes mostly like milk, the coconut ratio is too low. A cold but empty-tasting shake usually has too much ice. For flat flavor, use fresher coconut water, a pinch of cardamom or vanilla, and just a tiny pinch of salt.
Choose Your Style Before You Blend
The easiest way to avoid a disappointing shake is to choose the style before you blend. A café-style shake, a no-ice-cream homemade shake, and a fresh coconut-water shake use similar ingredients, but they should not taste the same.
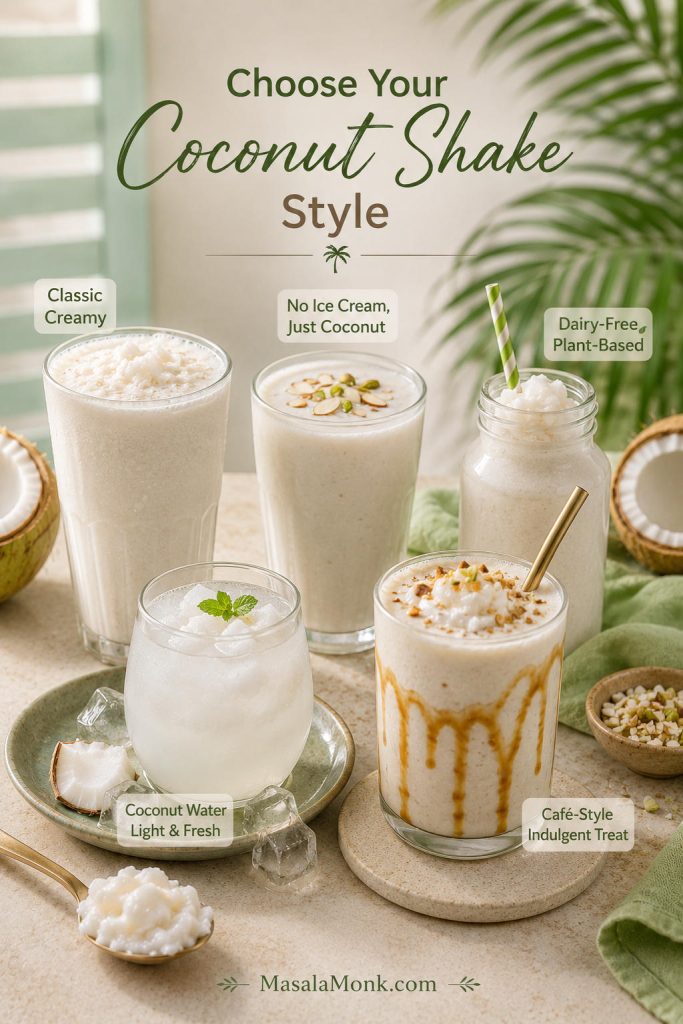
| You want… | Make this version | Use this base |
|---|---|---|
| A creamy café-style shake | Main recipe with ice cream | Tender coconut + coconut water + milk + ice cream |
| A homemade shake without ice cream | Frozen milk version | Tender coconut + coconut water + milk + frozen milk cubes |
| A dairy-free coconut shake | Vegan coconut shake | Tender coconut + coconut water + coconut milk |
| No milk and no added sugar | Fresh coconut water shake | Coconut water + malai + optional dates |
| A lighter summer drink | Coconut water shake | Coconut water + tender coconut + optional yoghurt or coconut milk |
| A 500 ml bottle | Scaled bottle version | Use the measurement table and leave headspace |
| A thicker smoothie-like drink | Banana or extra-malai variation | Add frozen banana or more tender coconut flesh |
Without Ice Cream
No ice cream does not mean thin or boring. The trick is to replace the cold thickness ice cream gives, not just its sweetness. Frozen milk cubes, extra malai, soaked cashews, coconut cream, or frozen banana can all make the shake feel full instead of thin.
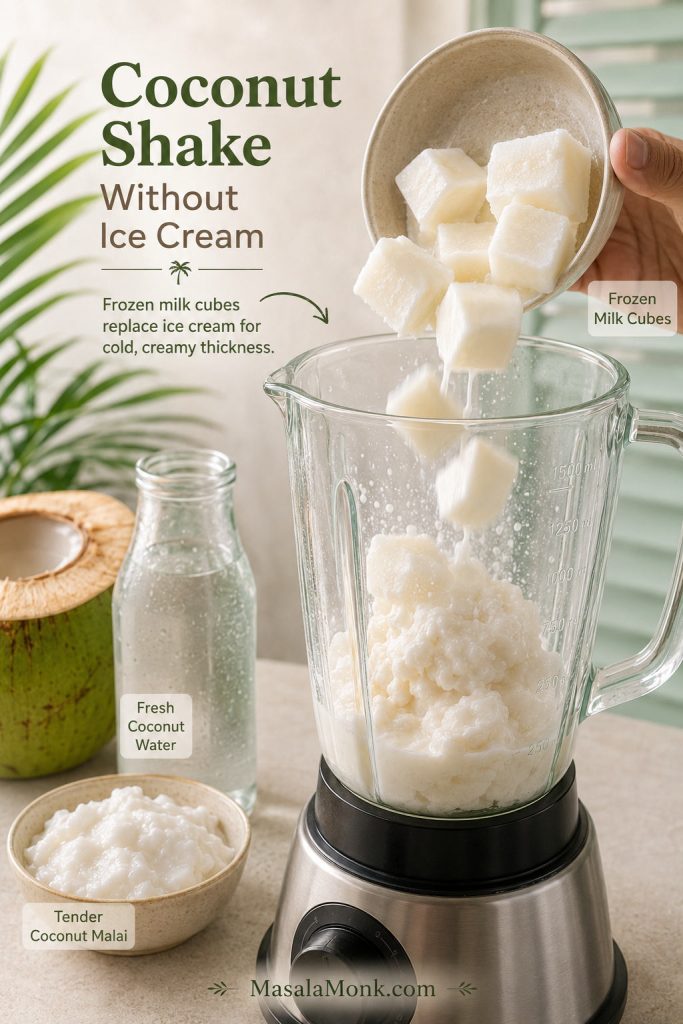
This version is for the days when you want homemade creaminess, not dessert. It feels lighter than the ice-cream shake but still has enough richness to taste deliberate.
No-Ice-Cream Formula
- 1 cup tender coconut flesh/malai, about 80–120 g
- ¾ cup tender coconut water, 180 ml
- ½ cup chilled milk, 120 ml
- ½ cup frozen milk cubes
- 1–2 tbsp sugar, honey, date syrup, or 1–2 soft dates
- Pinch of cardamom or ½ tsp vanilla
Blend the tender coconut and coconut water first. Add chilled milk, frozen milk cubes, sweetener, and cardamom. Blend briefly until creamy and serve immediately.
Texture cue: When you skip ice cream, the thickener matters more than extra ice because it decides whether the drink feels creamy, rich, or smoothie-like.
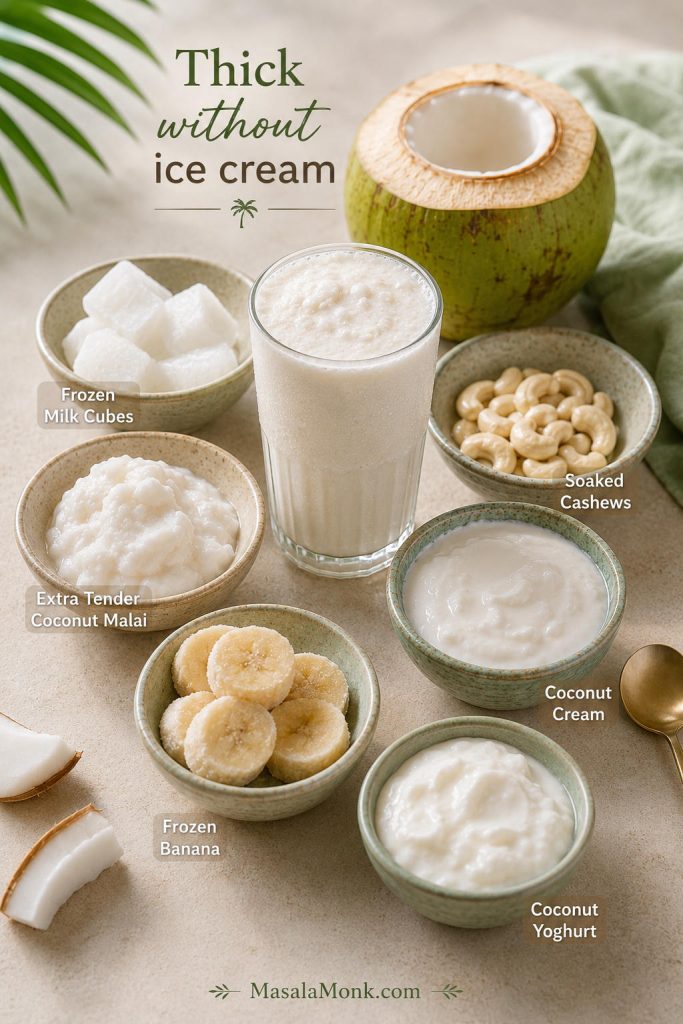
| Thickener | Best for | Amount for 2 tall glasses |
|---|---|---|
| Frozen milk cubes | Classic no-ice-cream shake | ½ cup |
| Extra tender coconut malai | More coconut flavor | ¼ cup extra |
| Soaked cashews | Rich Indian café texture | 1–2 tbsp |
| Coconut cream | Thick vegan shake | 2–4 tbsp |
| Frozen banana | Dairy-free body | ½ banana |
| Coconut yoghurt | Light tangy version | 2–3 tbsp |
For a lighter drink, use fewer frozen milk cubes and more coconut water. To make it richer, add soaked cashews or a spoon of cream. Cold ingredients matter more here than extra ice, because frozen milk gives body while plain ice mostly dilutes.
Without Milk or Added Sugar
This is the cleanest version, but also the least forgiving. Because there is no milk, ice cream, or sugar to cover anything, the coconut itself has to taste good. When the coconut water is sweet and the malai is soft, the result is light, cold, and beautifully fresh.
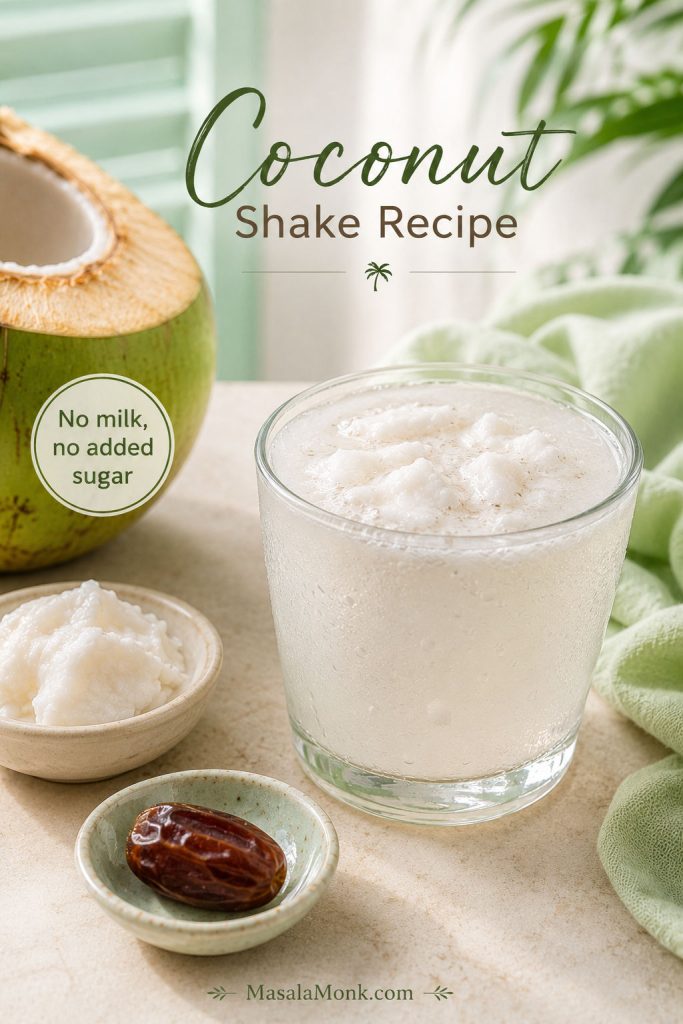
- 1 cup tender coconut water, 240 ml / 8 fl oz
- ¾–1 cup tender coconut flesh, about 80–120 g
- 4–5 ice cubes, or use chilled coconut water instead
- 1–2 soft dates, optional
- Pinch of cardamom, optional
Blend the coconut water and tender coconut flesh until smooth. Add ice only if needed and pulse briefly. If the shake tastes flat, add one soft date or a tiny pinch of salt. Do not add sugar automatically; taste the coconut water first.
This version depends on the coconut more than any other. If the coconut water is sweet and the malai is soft, it tastes fresh and delicate. If the coconut is bland, add one date, a spoon of coconut cream, or a few frozen coconut-water cubes to give it more body without turning it into the rich ice-cream version.
Dairy-Free Version with Coconut Milk
For a vegan coconut shake, replace dairy milk with chilled coconut milk while keeping tender coconut at the center. Carton coconut milk keeps the drink lighter, canned coconut milk gives it more milkshake body, and coconut cream is the richest option, so treat it like a thickener rather than the main liquid.
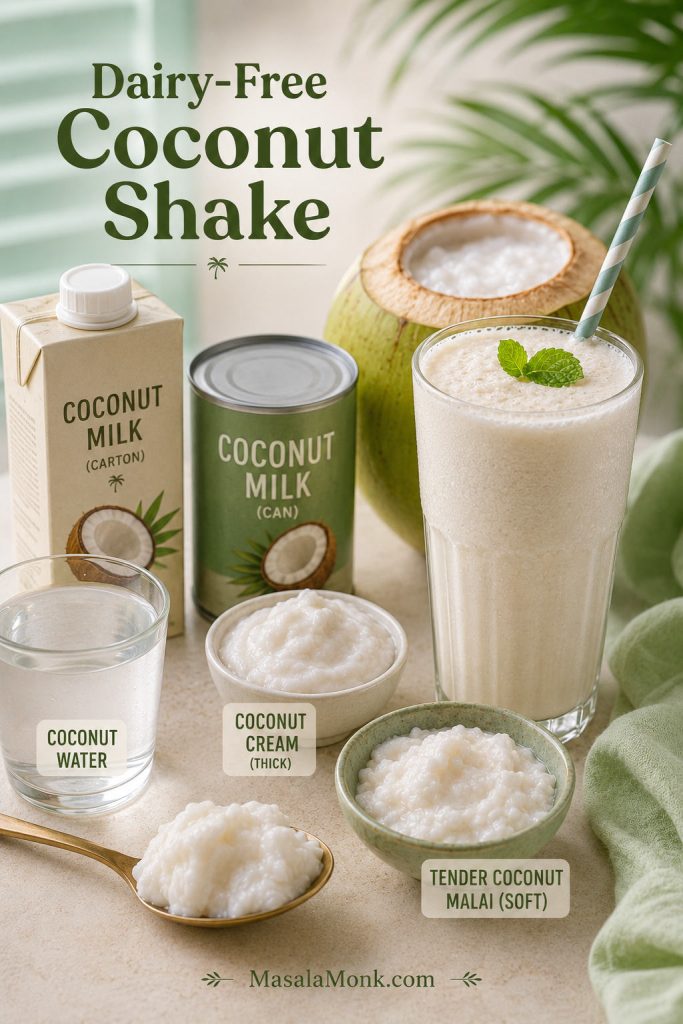
- 1 cup tender coconut flesh/malai
- ¾ cup tender coconut water
- ¾ cup chilled coconut milk
- 1–2 dates or 1 tbsp maple syrup, optional
- ½ frozen banana or 2 tbsp coconut cream, optional for thickness
- Pinch of cardamom or ½ tsp vanilla
Start with a smaller amount if you use canned coconut milk, then thin the shake with coconut water. Carton coconut milk may need frozen banana, extra malai, or a little coconut cream to get a thicker result. Keep tasting as you adjust; the drink should still feel fresh and coconut-forward, not like a heavy smoothie that has lost the tender coconut flavor.
The Lighter Coconut Water Version
A coconut water shake is lighter than a coconut milkshake, but it is not the lesser version. Make it when the coconut water is sweet, the malai is soft, and you want the drink to stay refreshing instead of rich.
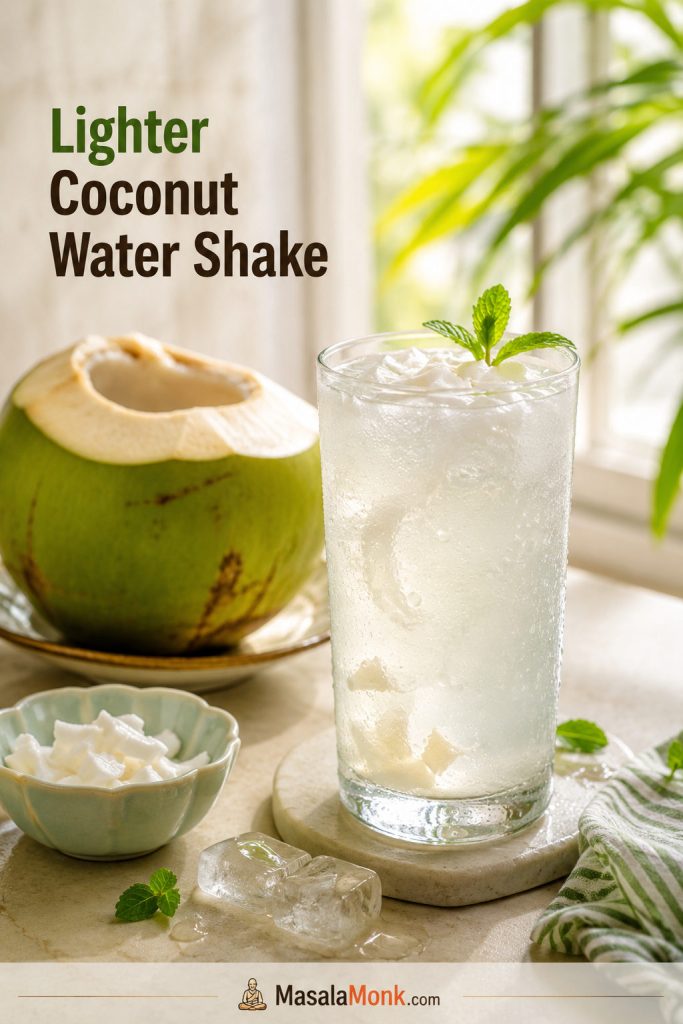
- 1 cup coconut water, 240 ml / 8 fl oz
- ½–¾ cup tender coconut flesh
- 1 tbsp cream, milk, coconut milk, or yoghurt, optional for body
- 1 tsp sugar, honey, or date syrup, optional
- Ice only if needed
Blend the coconut flesh with coconut water until smooth. Add the optional creamy ingredient only if you want more body. This lighter version also works well with mango, pineapple, berries, or banana when you want a fruitier coconut-water drink. For more ideas in that direction, see our coconut water smoothie and health drink ideas.
Once you have chosen the version you want, the next question is usually quantity. This coconut shake recipe is flexible because a small glass needs a different balance from a 500 ml bottle, especially when ice cream or frozen milk is involved.
Measurements: 250 ml, 16 oz, and 500 ml
Most coconut shake recipes give only “1 glass” or “2 servings,” but glass size changes everything. A small Indian glass, a tall café cup, and a 500 ml bottle do not need the same amount of coconut water, milk, or thickener. The numbers below are approximate blends for the final serving size.
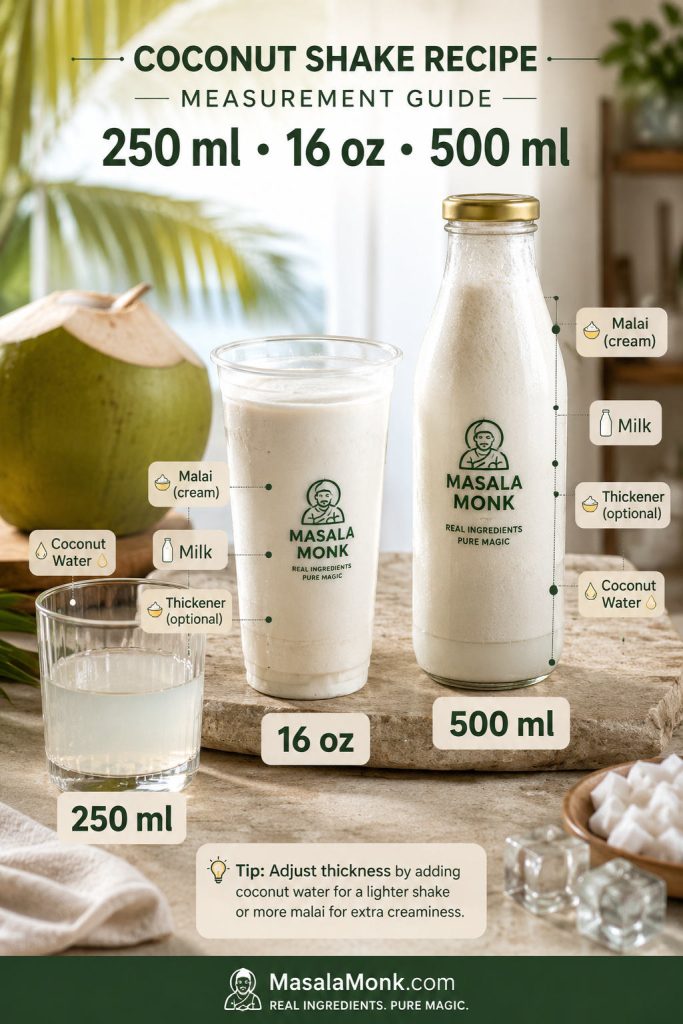
If you are using ice cream, start with the lower end of the coconut water and milk range so the glass does not overflow.
| Target serving | Coconut water | Tender coconut flesh | Milk or coconut milk | Ice cream or thickener |
|---|---|---|---|---|
| 250 ml glass | 70–90 ml | 35–50 g | 60–80 ml | ½ scoop ice cream or 2–3 tbsp frozen milk |
| 16 oz / 475 ml cup | 140–180 ml | 70–90 g | 120–140 ml | 1–1½ scoops or ⅓–½ cup frozen milk |
| 500 ml bottle | 160–200 ml | 80–100 g | 120–150 ml | 1½ scoops or ½ cup frozen milk |
| 2 tall glasses / 600–750 ml | 180–240 ml | 80–120 g | 180–240 ml | 1½–2 scoops or ½ cup frozen milk |
How to Adjust the Ratios
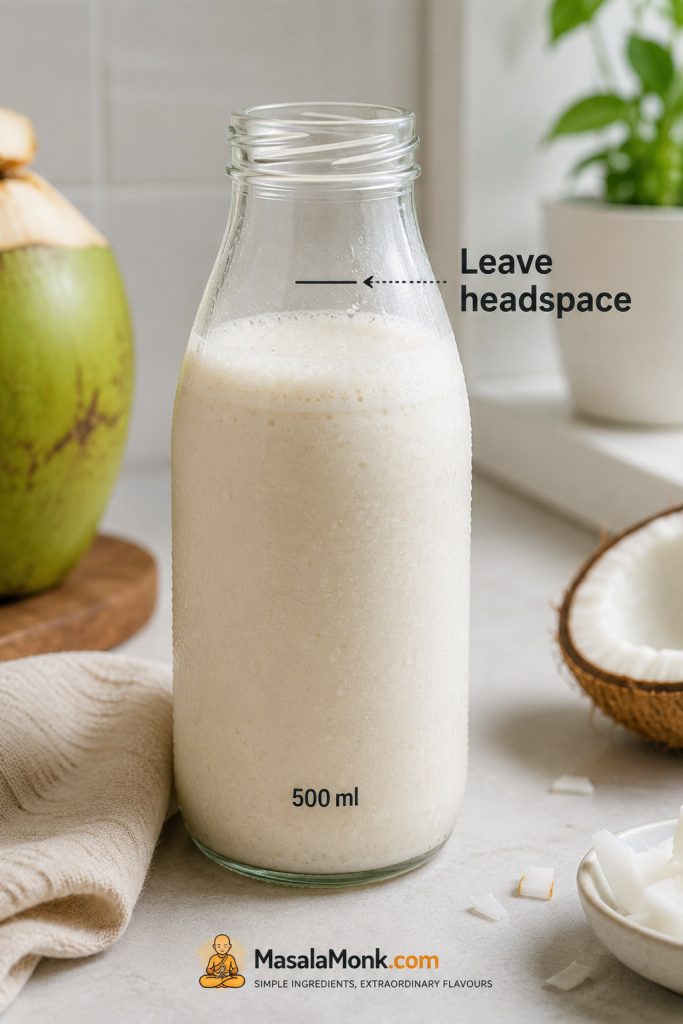
For a 500 ml bottle: Leave a little headspace if using ice cream or frozen milk. The shake can foam slightly after blending and may thicken as it sits. Shake the bottle before drinking.
Do not worry if your coconut does not match the table perfectly. Tender coconuts are not standardized ingredients; some give lots of water, some give thick malai, and some barely give enough flesh for one small glass. Blended drinks do not measure like water either: malai, ice cream, frozen milk, and foam can all change the final volume.
Treat these as starting ratios, then adjust by texture: malai or frozen milk for thickness, coconut water for loosening.
Once you know your serving size, the next thing that affects texture is the blender itself. A powerful blender can make even firmer coconut smoother, while a small portable blender needs softer malai, smaller pieces, and more liquid to move properly. After scaling, check the texture ladder so the larger bottle does not turn watery or too heavy.
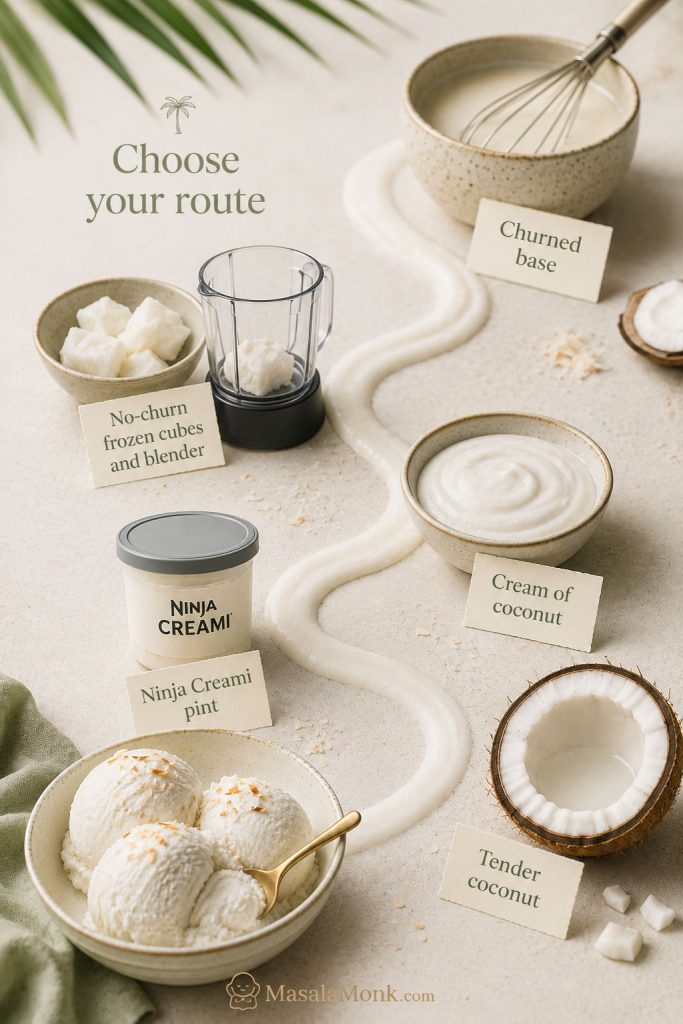
Equipment: Blender, Mixer-Grinder, or Portable Blender
You do not need special equipment, but the blender does affect texture. A small blender can still make a good coconut shake, but it needs a little kindness: smaller malai pieces, liquid first, and no overpacking.
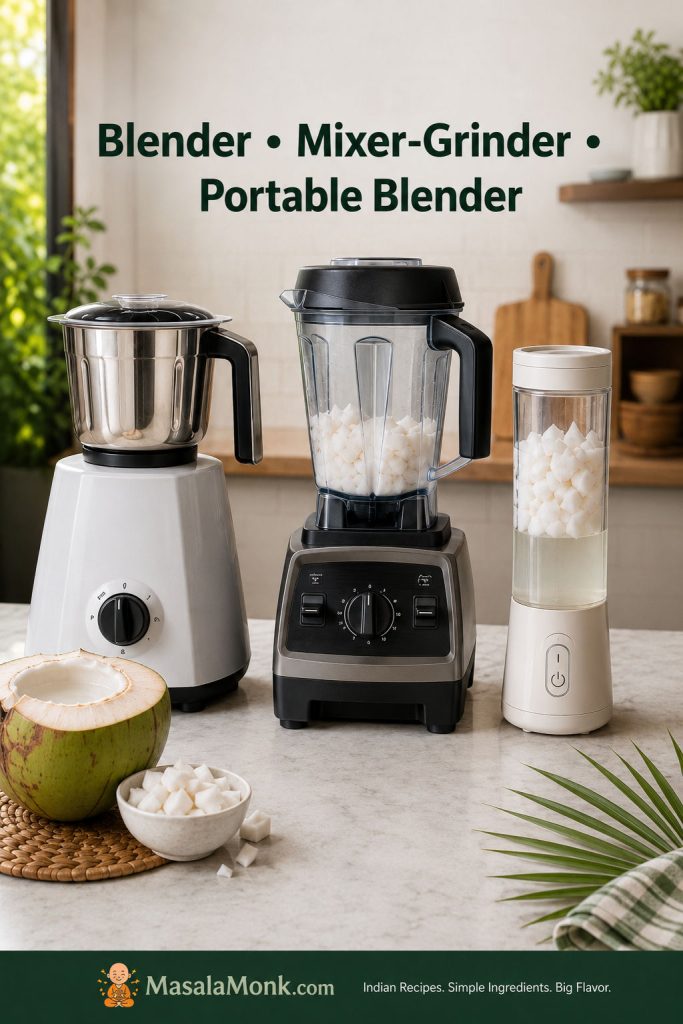
- Indian mixer-grinder: good for the everyday home version. Chop the malai first and blend it with coconut water before adding milk.
- High-speed blender: gives the smoothest texture, especially if the coconut is slightly firmer or the shake is thick.
- Portable blender: works for a small 300–500 ml shake if you add liquid first, then chopped malai, then ice or frozen milk. Do not pack the jar tightly.
- Fine strainer: useful only if mature coconut makes the drink gritty. If you are using soft tender coconut, a little pulp is usually pleasant.
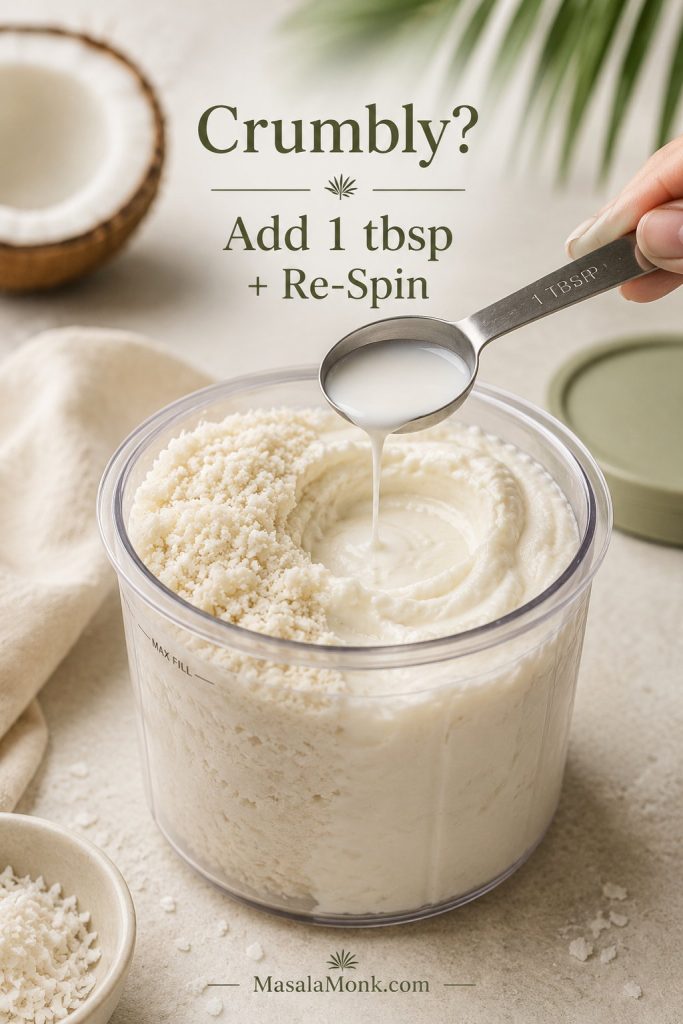
If the blades spin but the malai is not moving, the jar needs more liquid, not more blending time. Stop, shake the jar gently, add a splash more coconut water, and blend again. If your blender is small, make the shake in two short blends instead of forcing everything into one jar.
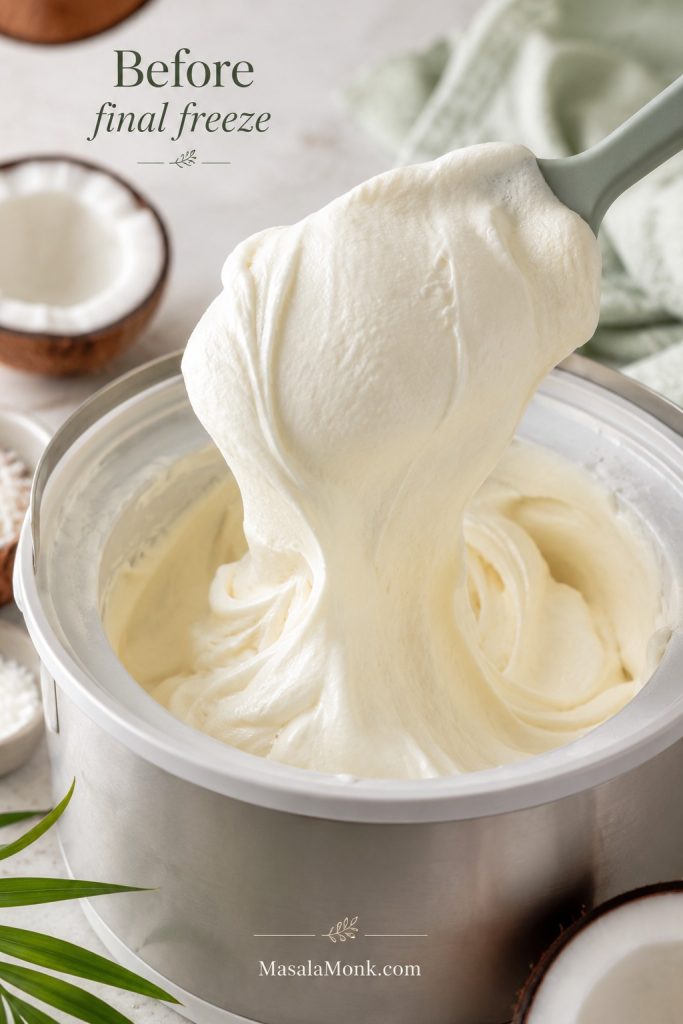
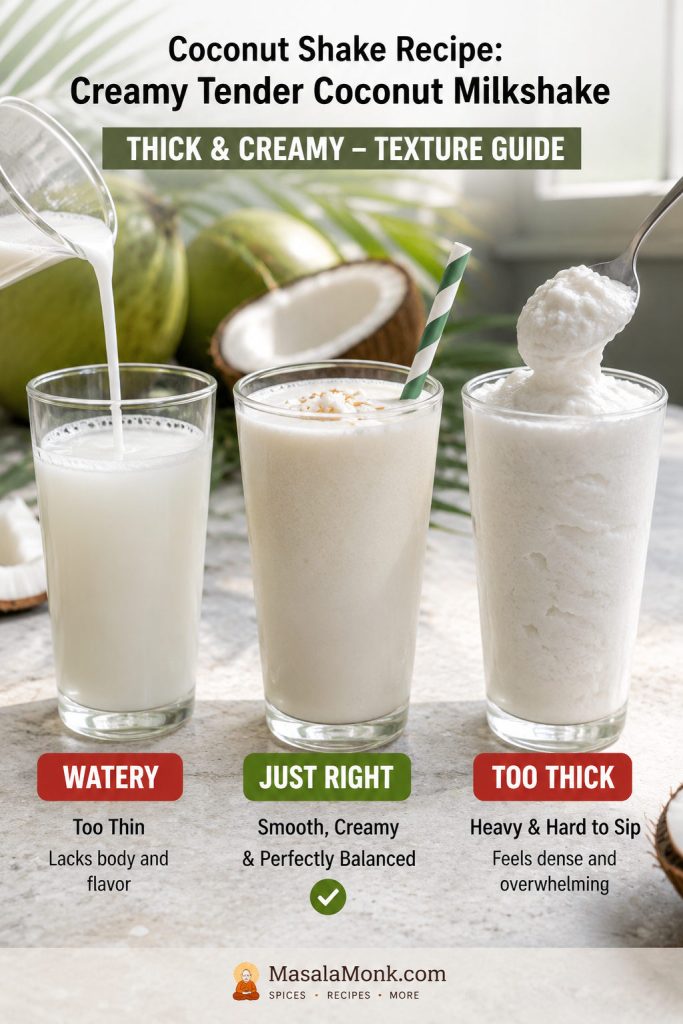
How to Make Coconut Shake Thick and Creamy
Thickness should come from coconut, milk, frozen milk, or ice cream — not from a blender full of plain ice. Use this as a texture ladder and stop when the shake matches the glass you want.

| Texture wanted | Best base | What it tastes like |
|---|---|---|
| Light and fresh | Coconut water + soft malai | Clean, cold, coconut-first |
| Creamy homemade | Milk + malai | Smooth and gentle, not too rich |
| Thick without ice cream | Frozen milk cubes | Cold and full without dessert sweetness |
| Dessert-style | Vanilla ice cream | Richer, sweeter, café-like |
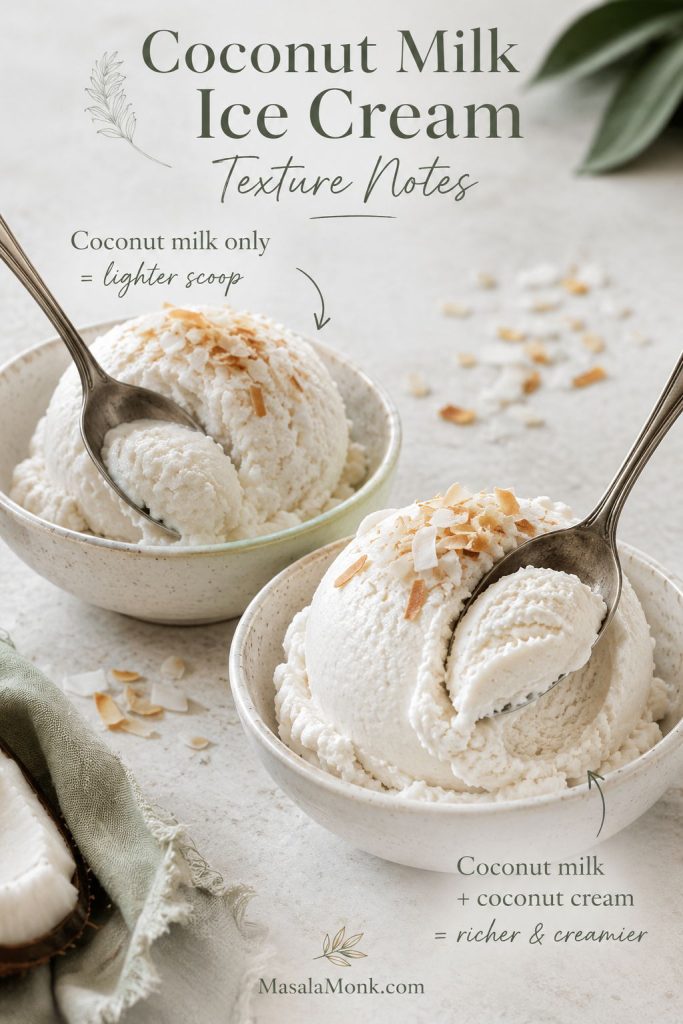
| Vegan thick | Canned coconut milk or a spoon of coconut cream | Creamy and dairy-free |
| Smoothie-like | Frozen banana or extra malai | Thicker, softer, more filling |
Texture check: before serving, compare the shake with what you wanted: light, creamy, thick, or dessert-style.
If your homemade shake never tastes like the one from a juice shop, the answer is usually not more sugar. The shop-style glass is colder, slightly thicker, and a little pulpy. Chill the liquids, keep a spoonful of tiny malai bits for the end, and avoid blending the final shake until it turns warm.
After you make the plain coconut version once, variations become much easier. You will know how thick the base should feel, so fruit, protein powder, or extra flavorings become adjustments rather than guesses.
Flavor Variations
Once you understand the base, variations stop feeling random. Keep the coconut in charge, then add only enough fruit, spice, protein, or extra creaminess to change the mood of the glass.
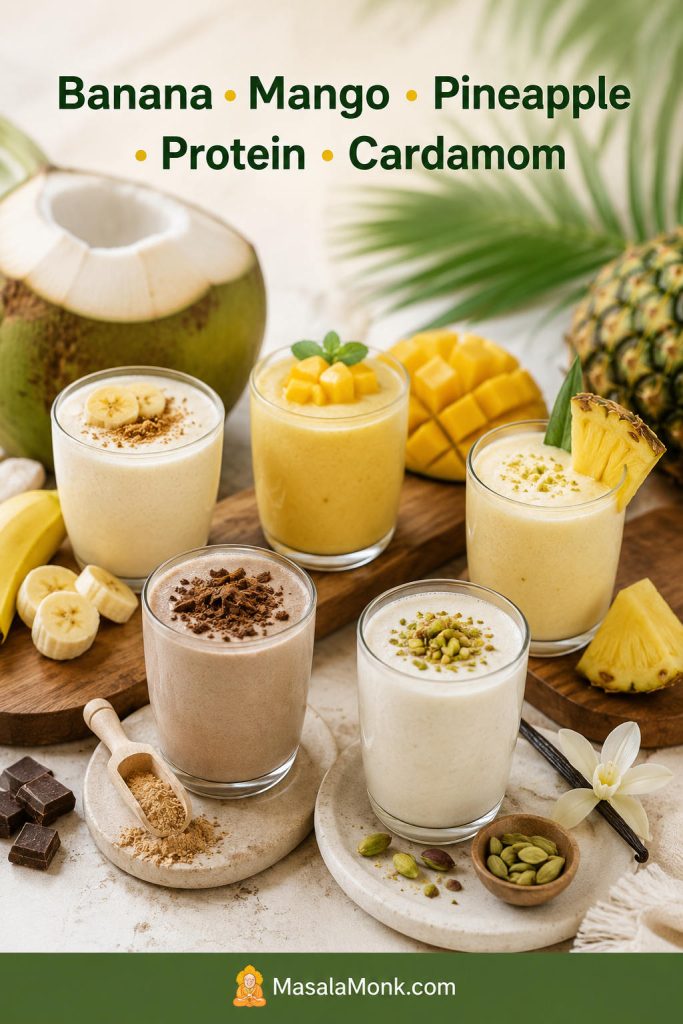
Banana Coconut Shake
For a thicker banana version, blend in ½ frozen banana. It adds natural sweetness and a soft smoothie-like texture, so start with little or no added sugar. This works especially well in no-ice-cream and vegan coconut shakes.
Mango Coconut Shake
Mango makes the shake sweeter, thicker, and more seasonal. Use ½ cup mango pulp or chopped ripe mango, then taste before adding sugar. If you want a classic Indian mango drink without the coconut angle, see our mango shake recipe.
Pineapple Coconut Shake
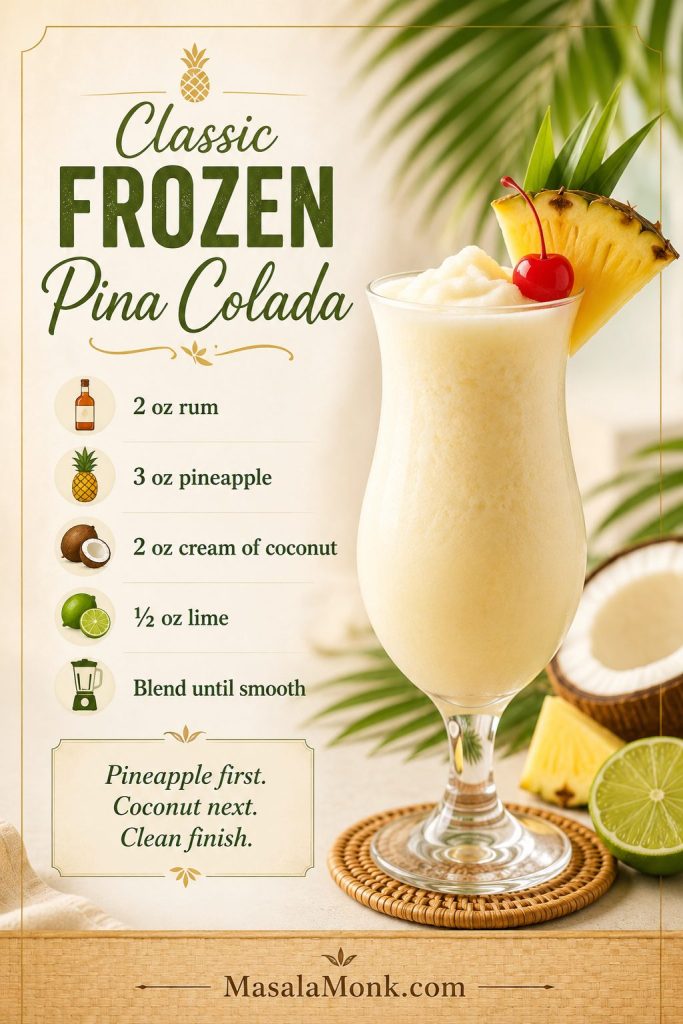
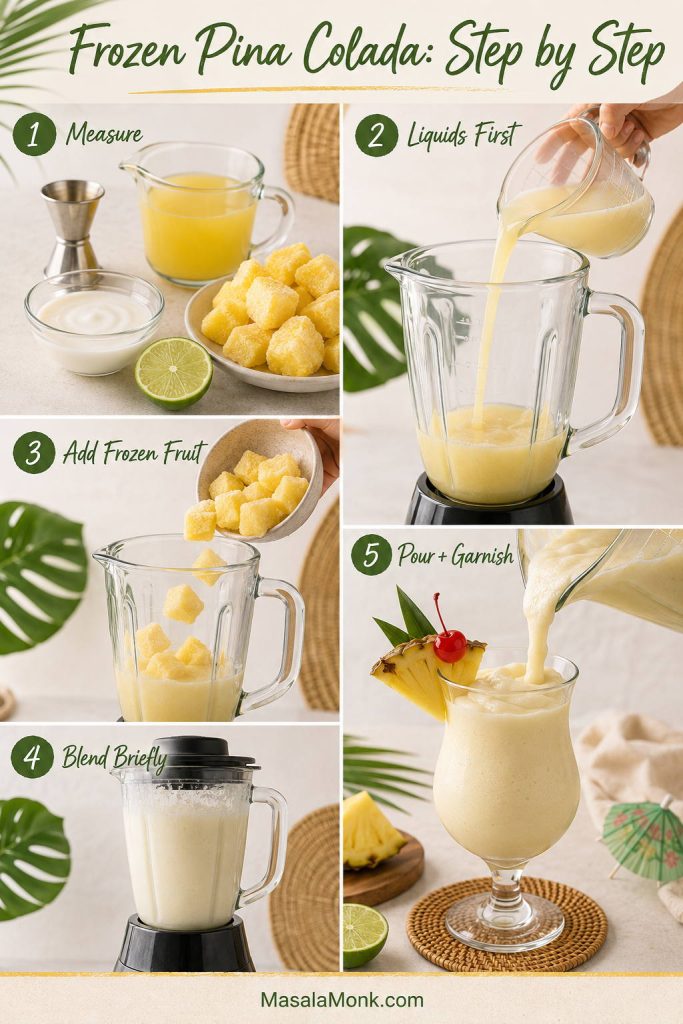
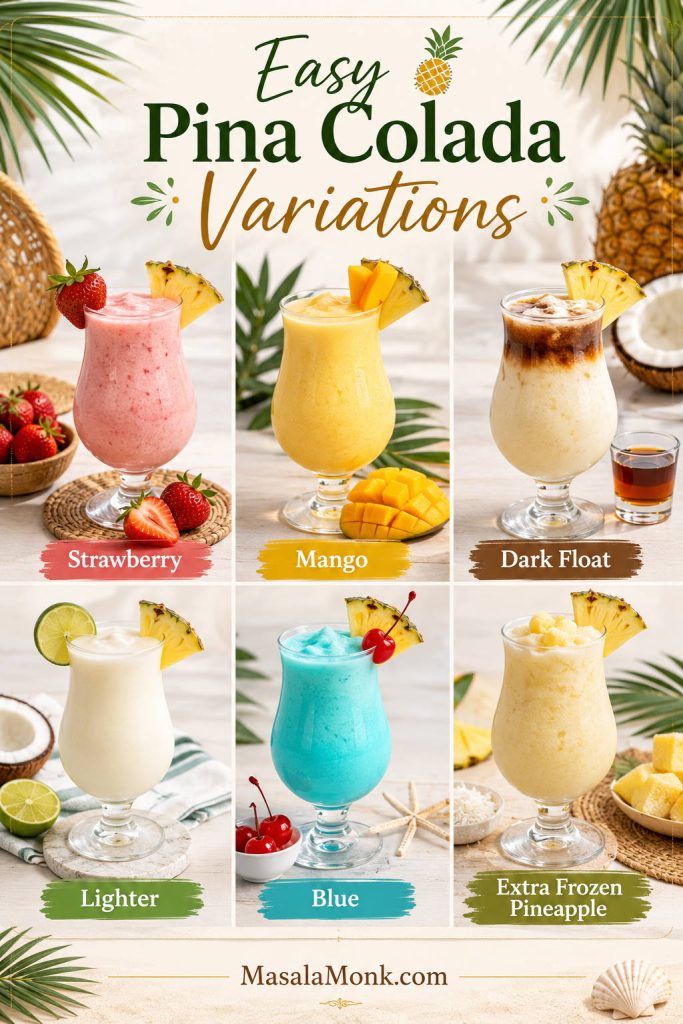
Pineapple changes the mood completely. Blend in ½ cup frozen pineapple for a colder, brighter, tropical version, especially if you are using coconut milk instead of dairy milk. For more pineapple-coconut inspiration, our piña colada drinks guide has classic, frozen, and virgin-style ideas.
Protein Coconut Shake
For a higher-protein version, blend in 1 scoop vanilla protein powder and add 2–4 tbsp extra coconut water or milk if the shake becomes too thick. Keep the flavor simple; chocolate or heavily flavored powders can easily overpower the tender coconut.
Cardamom, Vanilla, and Flavor Notes
Cardamom gives coconut shake a soft Indian milkshake flavor, especially with pistachios or almonds. Vanilla makes the drink taste more café-style, especially when you use vanilla ice cream. Use either lightly; the coconut should still be the first thing you notice.
Café-Style or Mr Coconut-Inspired Coconut Shake
For a café-style or Mr Coconut-inspired coconut shake, do not make it perfectly smooth or overly milky. The charm is cold coconut water, soft malai, a little vanilla richness, and tiny coconut bits that remind you it came from a real tender coconut.
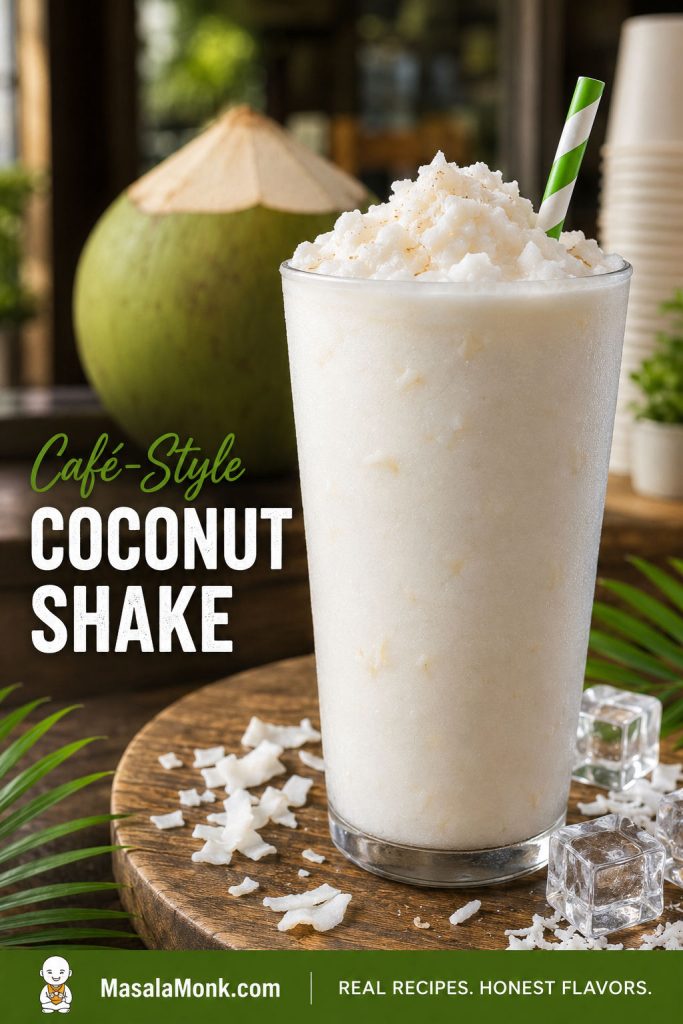
If you are chasing the shop-style version, do not make it too polite. It should be colder, a little sweeter, and slightly pulpy, with more emphasis on cold refreshment than dairy creaminess.
To make one café-style glass, blend ¾ cup coconut water, ½ cup tender coconut malai, 1–1½ scoops vanilla ice cream, and 4–5 ice cubes. Blend until mostly smooth, then stir in 1 tablespoon tiny coconut bits for texture. The trick is not to make it perfectly smooth; those little coconut bits make each sip taste fresh instead of flat.
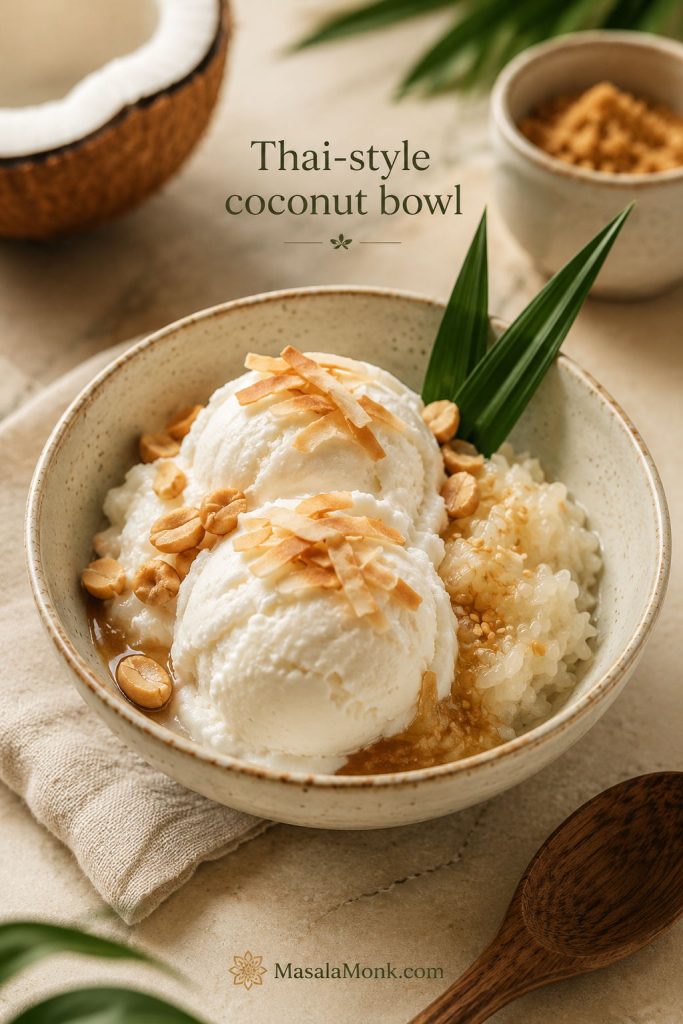
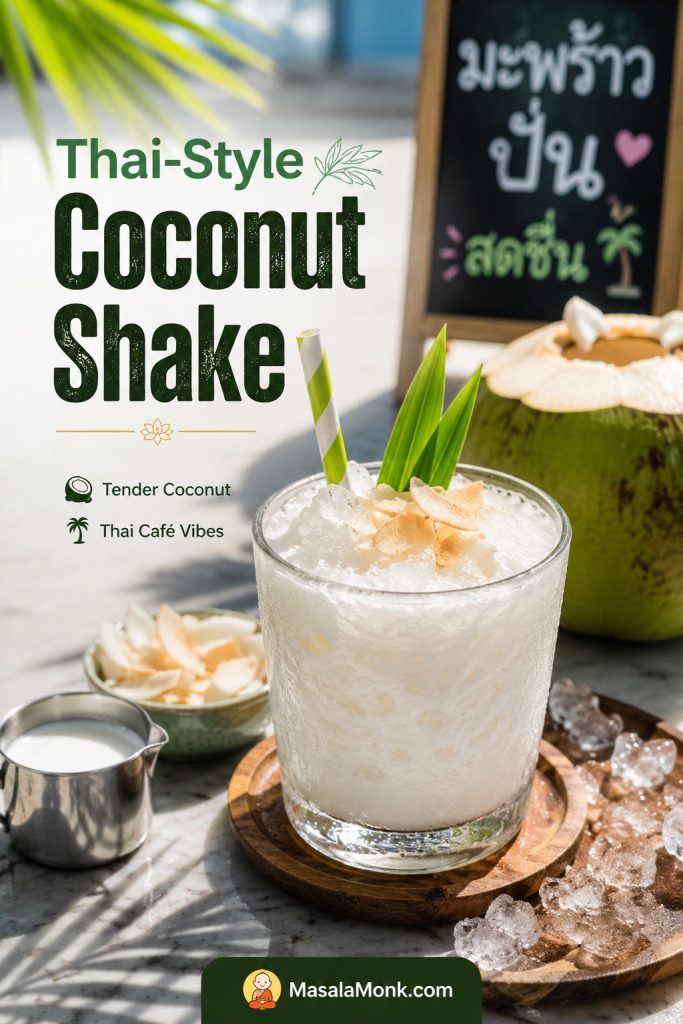
Thai-Style Coconut Shake
A Thai-style coconut shake is usually icier and sweeter than the classic tender coconut milkshake. Use coconut water, coconut milk, ice, sugar syrup, and a spoon of coconut cream if you want it richer. Serve it very cold so it stays refreshing rather than heavy.
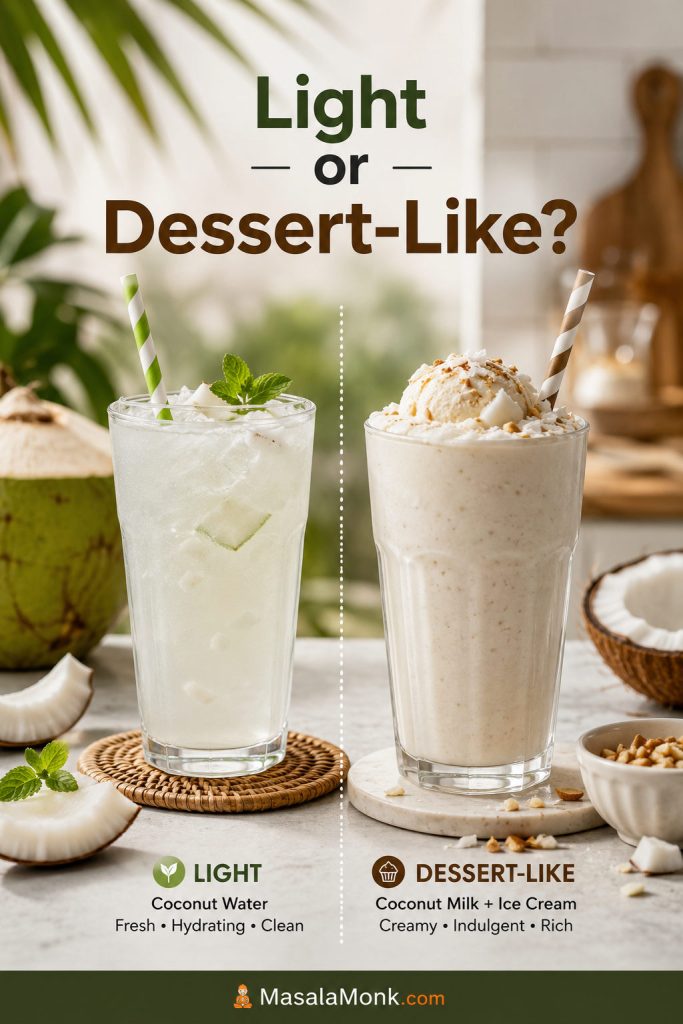
Is Coconut Shake Light or Dessert-Like?
The lighter version is not the punishment version. On a very hot day, coconut water and soft malai can taste better than a heavy ice-cream shake because the coconut stays clean, cold, and easy to finish. If the coconut itself is sweet and fragrant, the lighter glass may taste more coconut-forward than the rich one.
For dessert-style richness, add milk, ice cream, cream, condensed milk, or nuts. For a lighter summer glass, stay closer to coconut water, malai, and just enough milk or coconut milk to round the texture.
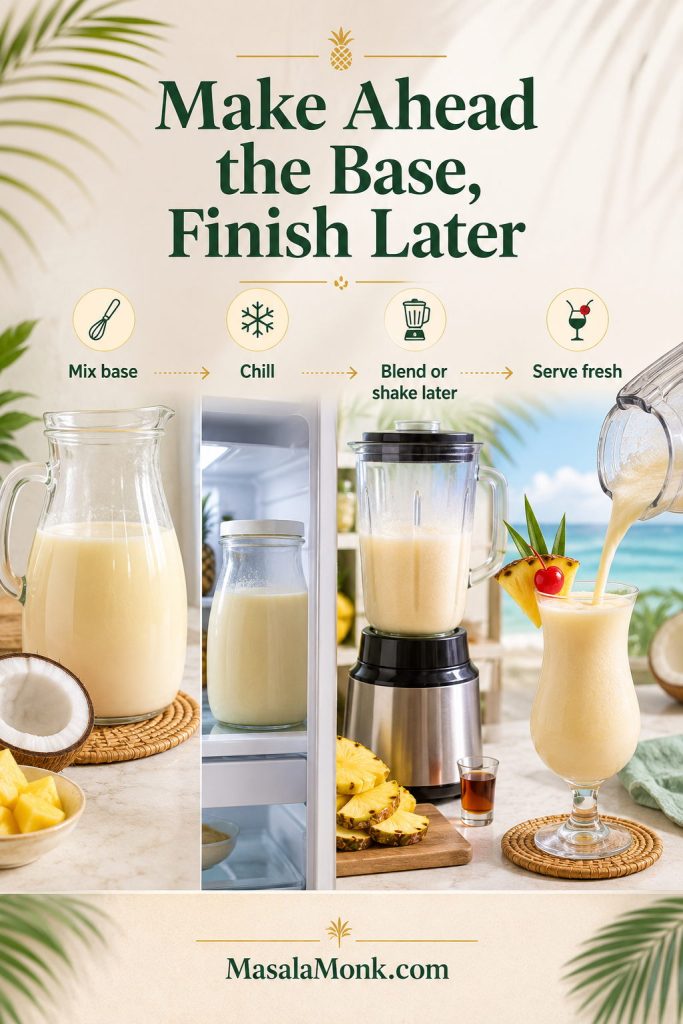
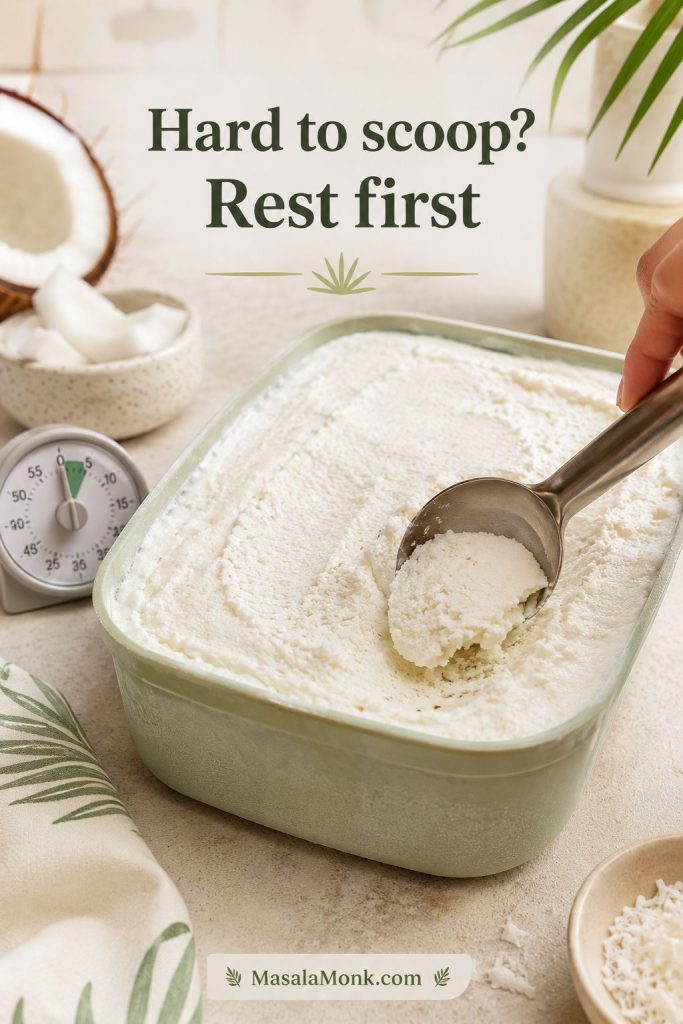
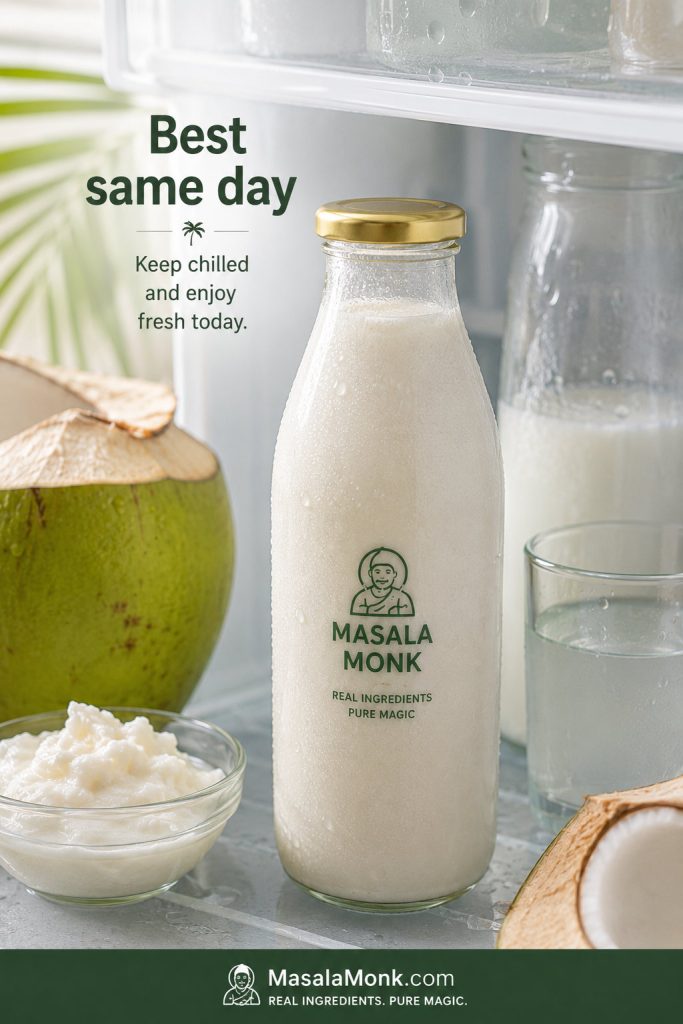
How to Store Coconut Shake Without Losing the Fresh Taste
This is not a make-ahead milkshake. It rewards you for blending it right before serving, when it is still cold, creamy, and fragrant. Fresh tender coconut drinks lose their clean flavor quickly, and milkshake-style versions can separate as they sit. When you must hold it, keep it covered in the fridge and drink it the same day.
Discard the shake if it smells sour, stale, or fermented instead of trying to fix it with sugar or flavoring.
- Keep the blended shake covered and cold until serving.
- Refrigerate it briefly in a covered bottle or jar if needed.
- Shake or blend again before serving if it separates.
- Avoid leaving milk, ice cream, or coconut milk versions out at room temperature.
- Freeze milk cubes or coconut water cubes instead of freezing the finished shake.
For prep-ahead ease, chill the coconut water, milk, and glasses. You can also freeze milk cubes ahead of time for the no-ice-cream version. Save the actual blending for the moment you want the shake to taste fresh.
Troubleshooting
Most problems come from warm ingredients, too much ice, mature coconut, or sweetness added too early. Use the table below to fix the glass you already made and improve the next batch.
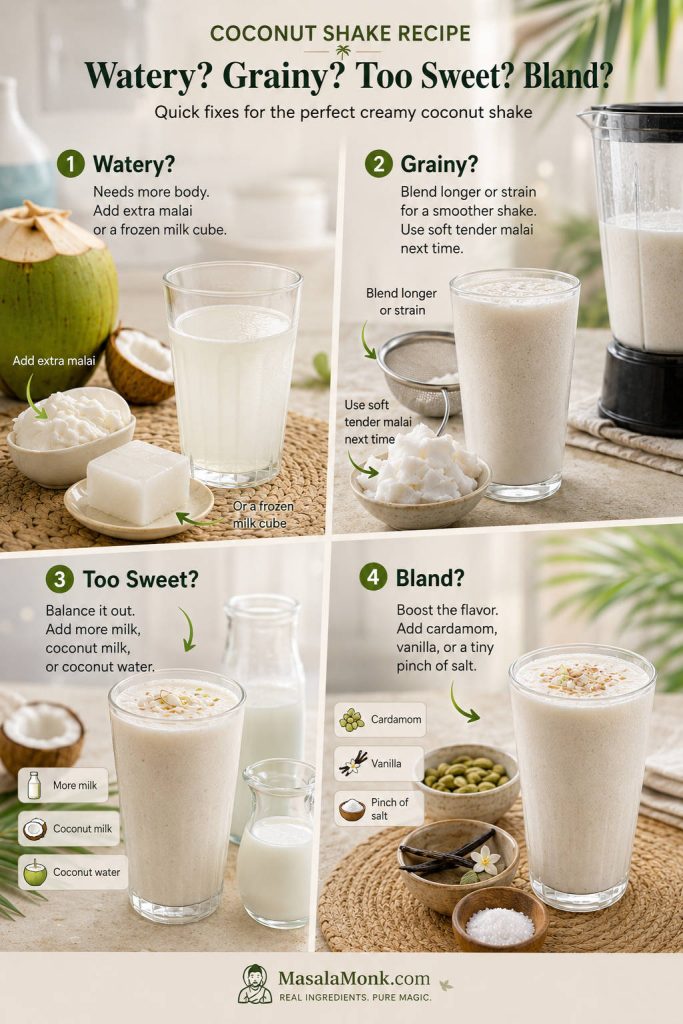
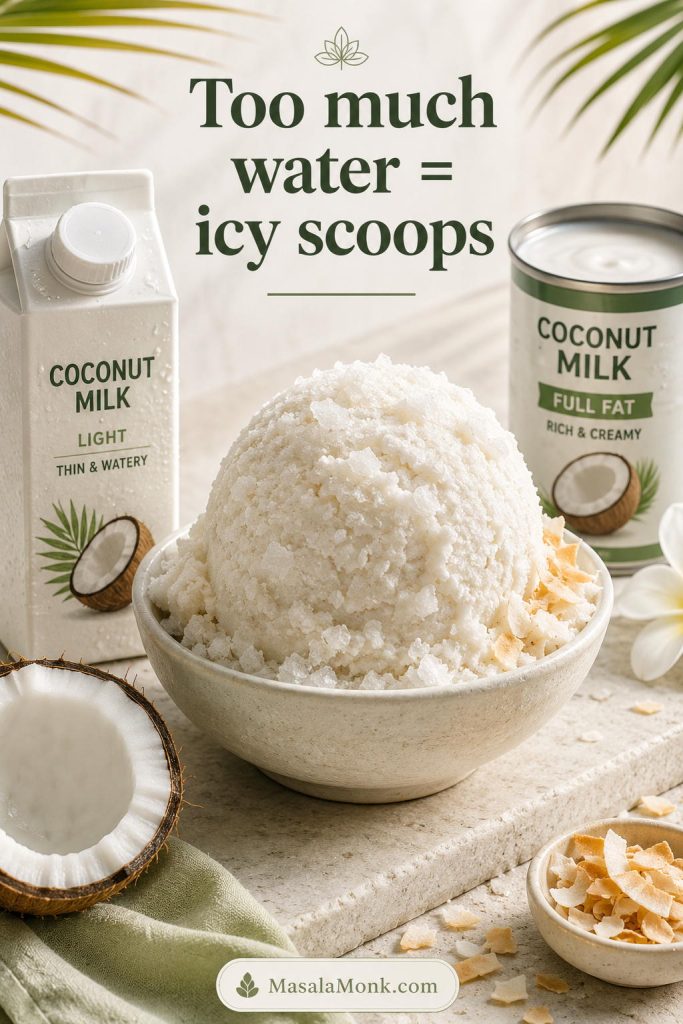
A coconut shake that tastes like sweet milk usually has too much milk or ice cream for the amount of malai. Thin texture, even after adding ice, means the problem is not coldness; the drink needs body from malai, frozen milk, ice cream, banana, or coconut cream. For dull flavor, a tiny pinch of salt can wake up the coconut without making the shake taste salty.
| Problem | Why it happened | Fix now | Fix next time |
|---|---|---|---|
| Watery shake | Too much coconut water or ice | Add ice cream, frozen milk, banana, or extra malai | Chill ingredients and use less ice |
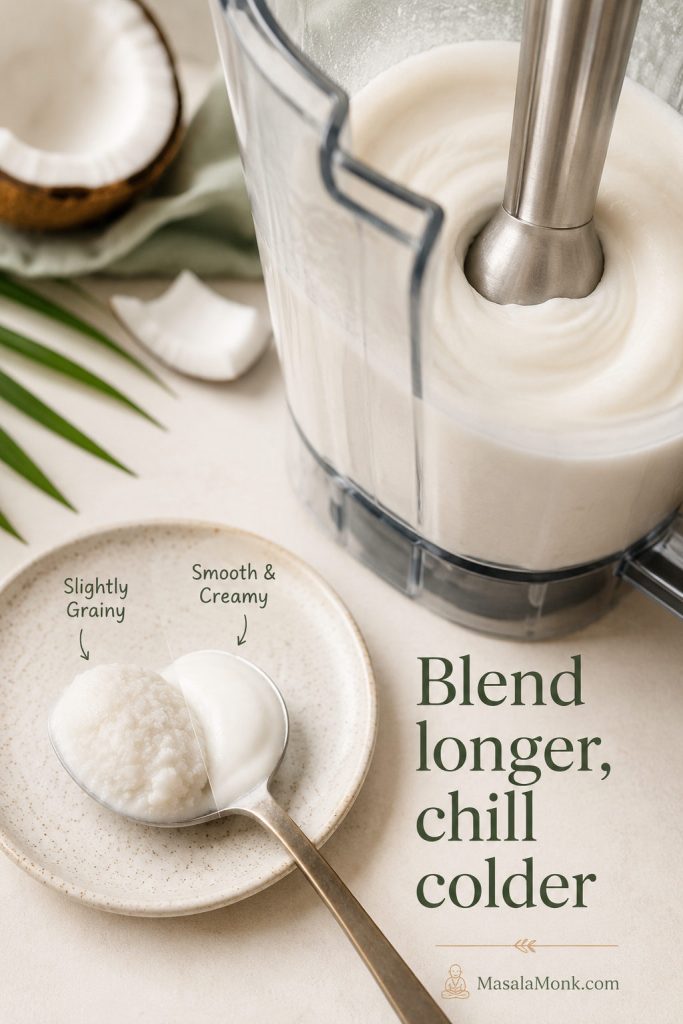
| Grainy shake | Mature coconut or under-blending | Blend longer or strain | Use soft tender coconut malai |
| Too sweet | Ice cream + sugar + sweet coconut water | Add milk or coconut milk | Taste before adding sugar |
| Bland | Weak coconut, too much milk, no aroma | Add cardamom, vanilla, or a tiny pinch of salt | Use fresh coconut water and less milk |
| Too thick | Too much ice cream or frozen milk | Add coconut water 1–2 tbsp at a time | Use less thickener |
| Separated | Coconut fat and liquid separating | Reblend briefly | Serve soon after blending |
| Warm or thin | Overblending or warm ingredients | Add a frozen milk cube and pulse | Chill everything first |
Once you start adjusting the shake to your coconut, blender, and glass size, these are the questions that usually come up.
FAQs
What is the difference between coconut shake and coconut smoothie?
If the drink is built around tender coconut malai and coconut water, think of it as a coconut shake. The coconut should be the main flavor, not just the liquid in the blender. If coconut is mainly the base for banana, berries, mango, protein powder, or greens, the drink is closer to a coconut smoothie.
Which coconut is best for coconut shake?
A tender coconut with soft, spoonable malai and sweet coconut water is best. If the flesh is firm and chewy, the shake can still work, but you may need to chop it small, blend longer, and strain if the texture turns gritty.
Do I need ice cream for coconut shake?
No. Ice cream gives the fastest café-style thickness, but frozen milk cubes are the closest homemade substitute. They make the shake cold and creamy without watering it down or making it taste too much like dessert.
How do I make coconut shake without milk?
Use coconut water as the main liquid and tender coconut flesh for body. If you still want creaminess, add chilled coconut milk or a small spoon of coconut cream. If the coconut water is not naturally sweet, one soft date is usually enough.
Why did my coconut shake become watery?
The usual reason is too much ice or too much coconut water for the amount of malai. To fix the glass you already made, add more tender coconut flesh, frozen milk, a scoop of ice cream, coconut cream, or half a frozen banana.
Should coconut shake be strained?
Usually, no. Soft tender coconut malai blends into a pleasant, slightly pulpy drink. Strain only if you used mature coconut or the shake feels gritty. If you like café-style texture, keep a spoonful of tiny malai bits aside and stir them in after blending.
How much coconut shake does one tender coconut make?
It depends on the size of the coconut and how much soft malai it has. A coconut with plenty of malai can usually make 1 large glass or 2 smaller glasses when blended with its coconut water and some milk. If it has mostly water and very little malai, the shake will be lighter unless you add frozen milk, ice cream, banana, or coconut milk.
What can I do with leftover tender coconut malai?
Coconut shake is one of the easiest ways to use leftover tender coconut malai. Blend it with chilled coconut water, milk or coconut milk, and a little sweetener only if needed. If you also have extra coconut water, these creative coconut water recipes are useful for using it beyond a shake. If the malai still smells fresh and sweet, this shake is usually the fastest and best use for it.
How soon should I drink coconut shake after blending?
As soon as you can. The first 10–15 minutes are when the shake tastes coldest, freshest, and creamiest. After that, it can separate or lose some of the tender coconut aroma. If you need to hold it, keep it covered in the fridge and shake or reblend before serving.
Final Tips for the Best Coconut Shake
In this coconut shake recipe, tender coconut should lead the flavor. Blend the coconut flesh with coconut water first, then add the creamy ingredients. Ice should only finish the chill, not carry the whole texture.
Make it once with the classic balance, then adjust from there. More coconut water makes it lighter, frozen milk makes it thicker without ice cream, coconut milk makes it dairy-free, and ice cream makes it dessert-like. Still, the real test never changes: the best coconut shake is not the thickest one or the sweetest one. It is the glass that still tastes like tender coconut after you add everything else.