Posted on — Leave a comment

Best Nuts for Weight Loss: Harnessing Nature’s Bounty to Shed Pounds Effectively

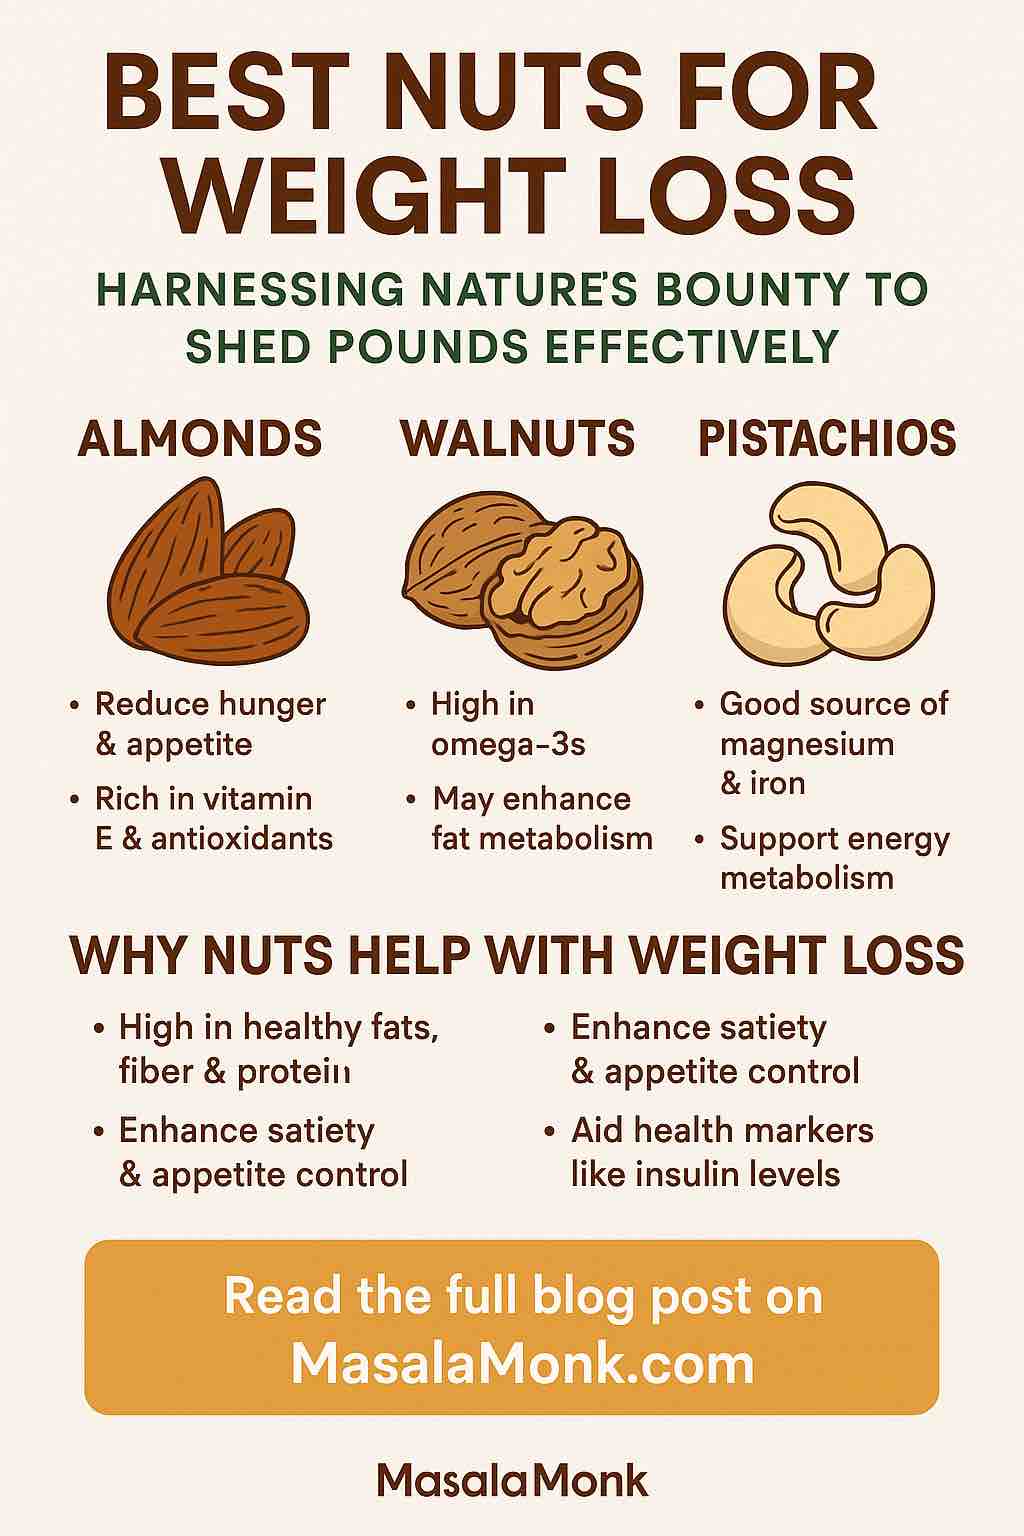
BEST NUTS FOR WEIGHT LOSS

When most people think of nuts, the first thing that comes to mind is calories. It’s true: nuts are calorie-dense. A small handful can pack in 150–200 calories, which may seem counterintuitive if you’re trying to lose weight. But here’s the surprise — research consistently shows that people who include nuts in their diets often have lower body weight, smaller waistlines, and better metabolic health compared to those who avoid them.

So, what makes nuts special? Their unique balance of protein, healthy fats, and fiber works together to curb hunger, stabilize blood sugar, and keep cravings at bay. Instead of reaching for processed snacks that leave you hungrier, nuts can help you feel satisfied for longer.

👉 Quick answer if you’re in a hurry:
The best nuts for weight loss are almonds, walnuts, pistachios, and peanuts. These are high in protein and fiber, support fat metabolism, and fit easily into a balanced diet.

Also Read: Best Nuts and Seeds for Weight Loss (Chia, Flax, Almonds & More)

But the real magic lies in the details — and that’s what we’ll explore next.


Why Nuts Can Help With Weight Loss

Nuts aren’t a “miracle food,” but they offer a combination of qualities that make them perfect for anyone looking to shed extra pounds:
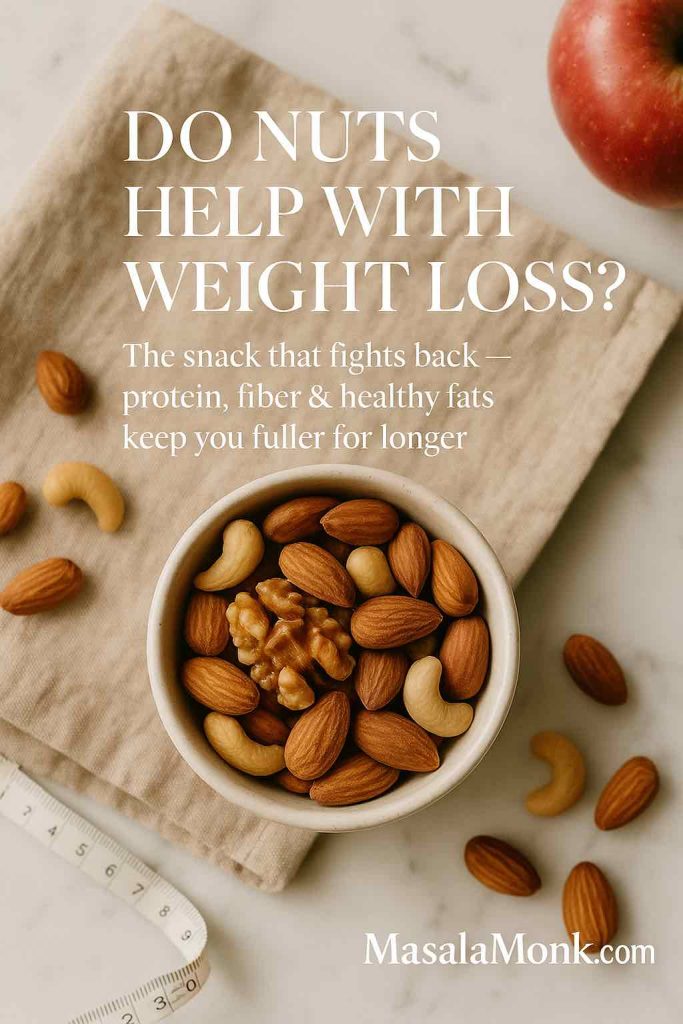
Top-down bowl of mixed nuts on beige linen with text “Do nuts help with weight loss?” and MasalaMonk.com footer.
Nuts are calorie-dense, but their protein + fiber + healthy fats increase satiety and can support smaller waists when portions are measured.
  • Protein power: Protein boosts satiety and helps preserve lean muscle while you’re losing fat.
  • Fiber for fullness: The fiber in nuts slows digestion, which means you stay fuller for longer and snack less.
  • Healthy fats: Monounsaturated and polyunsaturated fats keep blood sugar levels stable, preventing the crash-and-crave cycle.
  • Thermogenic effect: Studies suggest that nuts slightly increase calorie burn during digestion, meaning your body uses more energy to process them.
  • Portion control friendly: Unlike chips or cookies, a small handful of nuts is often enough to satisfy hunger — provided you stick to a modest portion.

Now that we know why nuts can help, let’s dive into the specifics. Each nut has its own unique set of nutrients and benefits, and some are more powerful for weight loss than others.

Do Read: How to Eat 100 Grams of Protein a Day

Best Nuts for Weight Loss (Ranked and Explained)

If you’ve ever wondered why so many weight-loss experts recommend nuts, the answer is simple: they’re a snack that fights back. While chips, cookies, or candy bars give you a quick hit of sugar or salt followed by a crash, nuts provide steady energy, hunger control, and real nutrition.

Still, not every nut is equal when it comes to losing weight. Some are better at curbing appetite, others support fat metabolism, and a few are best eaten in moderation. The goal isn’t to eat them by the bucket, but to use the right nut, in the right portion, at the right time.

Let’s go nut by nut—starting with almonds and walnuts, two heavyweights in the weight-loss world—so you’ll know exactly why to include them in your diet and how to do it without sabotaging progress.


Almonds for Weight Loss

Almonds are the superstar of weight-loss nuts, and for good reason. They’re rich in protein, fiber, and healthy fats—all nutrients that slow digestion and keep you feeling satisfied. Ever notice how a handful of almonds leaves you full far longer than a handful of crackers? That’s the almond advantage.
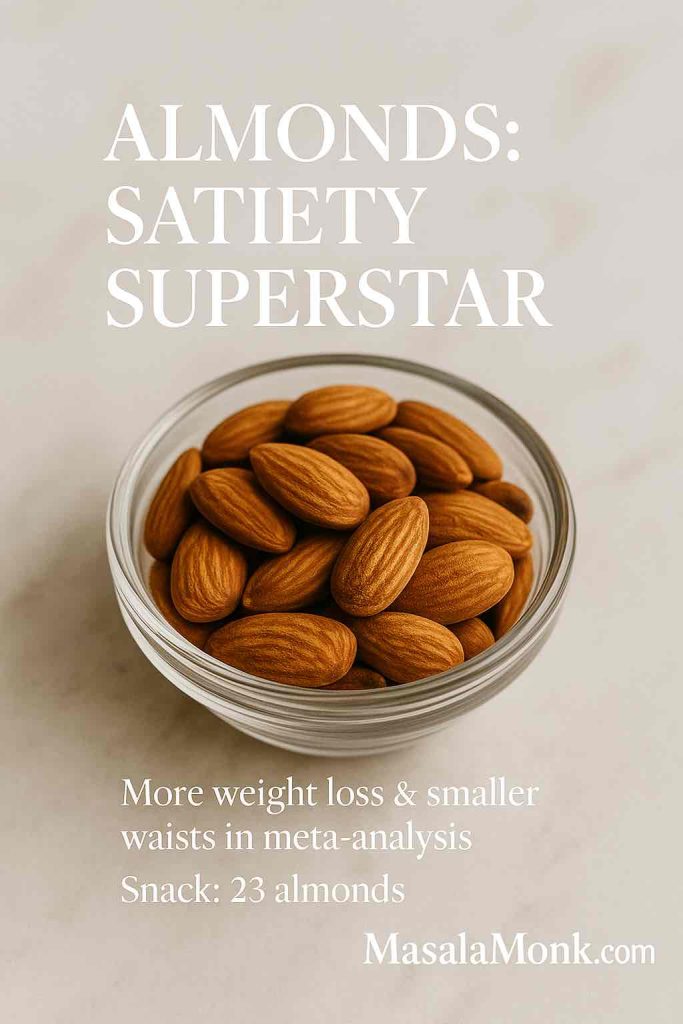
Clear glass bowl filled with whole almonds on white marble; overlay “Almonds: Satiety Superstar; Snack: 23 almonds - best nuts for weight loss.
A 23-almond (~1 oz) portion delivers crunch, protein, and fiber—ideal as a swap for chips or crackers.

But it’s not just a feeling—research backs it up. A meta-analysis of 62 clinical trials found that people who included almonds in their diet lost more weight, had lower BMI, and trimmed their waistlines compared to those who didn’t. The waist reduction was especially significant—around 2.4 cm on average (NIH study). Another study from Oregon State University showed that swapping a daily muffin or cracker snack for almonds led to smaller waists, better cholesterol levels, and even healthier gut bacteria (Oregon State News).

💡 How to add almonds to your weight-loss diet:

  • As a snack: Carry a small handful (about 23 almonds). The crunch satisfies the need to chew, and the portion is just enough to tide you over without excess calories.
  • At breakfast: Sprinkle slivered almonds on oatmeal, chia pudding, or Greek yogurt.
  • In meals: Toss roasted almonds into salads for crunch instead of croutons, or blend them into smoothies.
  • With fruit: Pair almond butter (unsweetened) with apple or banana slices for a filling, fiber-rich snack.

⚠️ Watch out for: Honey-roasted or salted almonds. They may taste good but often add extra sugars and sodium, undoing the weight-loss benefits.

Also Read: Almonds Nutrition Facts 100g & Glycemic Index Impact


Walnuts for Weight Loss

Walnuts are a little different. They may not lead to dramatic weight loss on their own, but they play an essential supporting role. Packed with omega-3 fatty acids, they’re fantastic for heart health and may help regulate appetite.
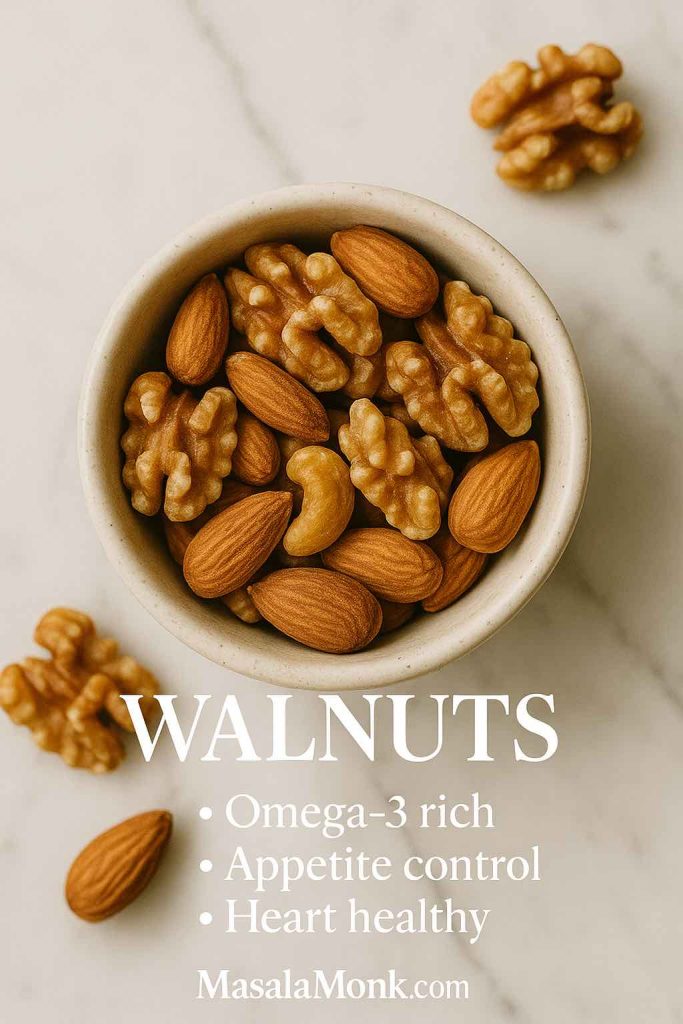
Ceramic bowl of walnut halves (and a few almonds) on marble; overlay bullets “Omega-3 rich • Appetite control • Heart healthy - best nuts for weight loss.
Walnuts bring plant omega-3s and may help regulate appetite—sprinkle into oats or salads.

A randomized controlled trial published in Nutrition Journal showed that people following a reduced-calorie diet including walnuts lost just as much weight as those on a standard low-calorie plan—but with added bonuses. The walnut group had better improvements in blood pressure and cholesterol, which means walnuts can help you slim down while protecting long-term health (Nutrition Journal).

What’s even more fascinating is how walnuts may influence the brain. Researchers at Beth Israel Deaconess Medical Center used brain imaging to show that eating walnuts activated regions linked to appetite control, helping participants feel fuller and resist unhealthy food cravings (Beth Israel Study).

💡 How to add walnuts to your weight-loss diet:

  • In breakfast bowls: Stir chopped walnuts into overnight oats, porridge, or smoothie bowls.
  • As a salad topper: Use walnuts instead of fried croutons or cheese.
  • In cooking: Add crushed walnuts to roasted veggies or grain bowls for texture and healthy fats.
  • Snack idea: Mix a few walnuts with a couple of dark chocolate chips for a satisfying treat that curbs sweet cravings without going overboard.

⚠️ Watch out for: Glazed walnuts or candied walnut mixes. They’re loaded with sugar and calories that cancel out the benefits.

Do Read: Walnuts and Weight Loss: Nurturing Health with Nature’s Powerhouse


Pistachios for Weight Loss

Pistachios are often dubbed the “mindful nut” — simply because eating them in-shell makes you slow down and tune into your hunger. That small pause can curb overeating and help you manage portions more naturally.

In fact, pistachios clock in at around 160 calories per ounce (roughly 49 nuts), making them one of the lower-calorie options with good bulk for satisfaction.
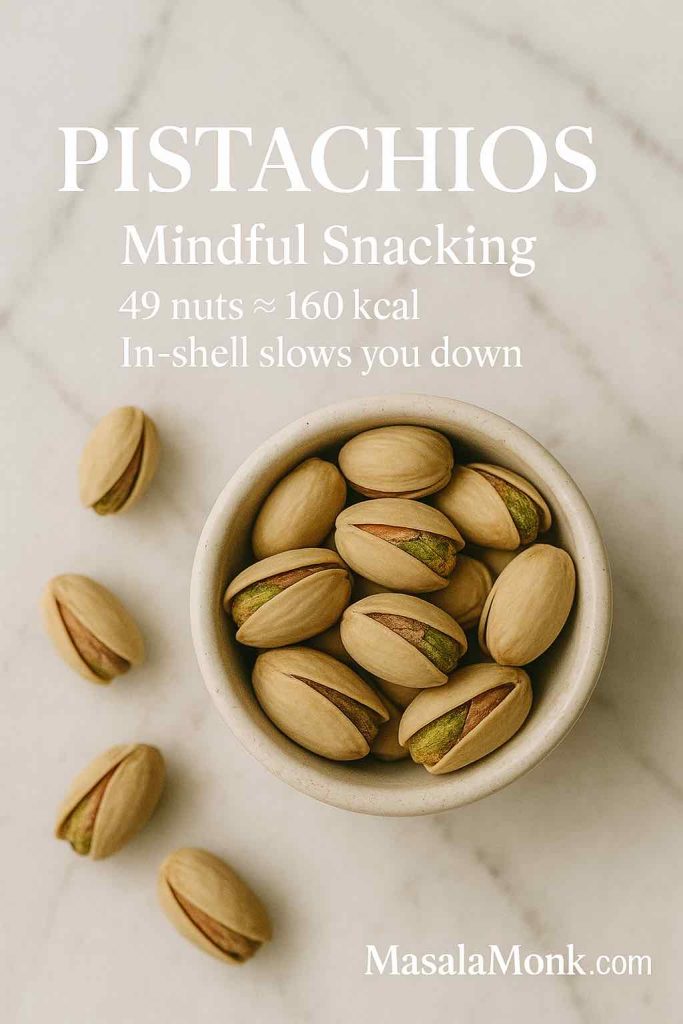
In-shell pistachios in a small bowl on marble with text “49 nuts ≈ 160 kcal; in-shell slows you down - best nuts for weight loss.
In-shell pistachios build in a pause so you naturally eat slower—and less.

Research backs up their role in weight management: one four-month randomized trial showed that folks adding pistachios daily to their weight-loss efforts lost a similar amount of weight and trimmed their waistlines, plus saw meaningful drops in blood pressure and better nutrient intake (PubMed RCT). A meta-analysis of randomised trials also confirmed that pistachio-rich diets led to small but significant reductions in BMI when compared to controls (PubMed Meta-analysis).

How to add pistachios to your weight-loss diet:

  • As a snack: Keep a pre-portioned ounce of in-shell pistachios handy to replace chips.
  • Meal topping: Toss shelled pistachios into salads, roasted veggies, or grain bowls for extra bite.
  • Sauce boost: Swap pine nuts in homemade pesto with pistachios for a lighter, nutrient-dense twist.

⚠ Watch out for: Salted or flavored pistachios—they can sneak in sodium or sugar that counteracts the benefits. Best to stick with unsalted, in-shell versions.

Suggested Read: Pistachios and Weight Loss: The Green Powerhouse for a Healthy You


Peanuts for Weight Loss

Though technically legumes, peanuts earn their spot on this list. Affordable, protein-rich, and satisfying, they’re a snack-friendly option with real weight-loss benefits.
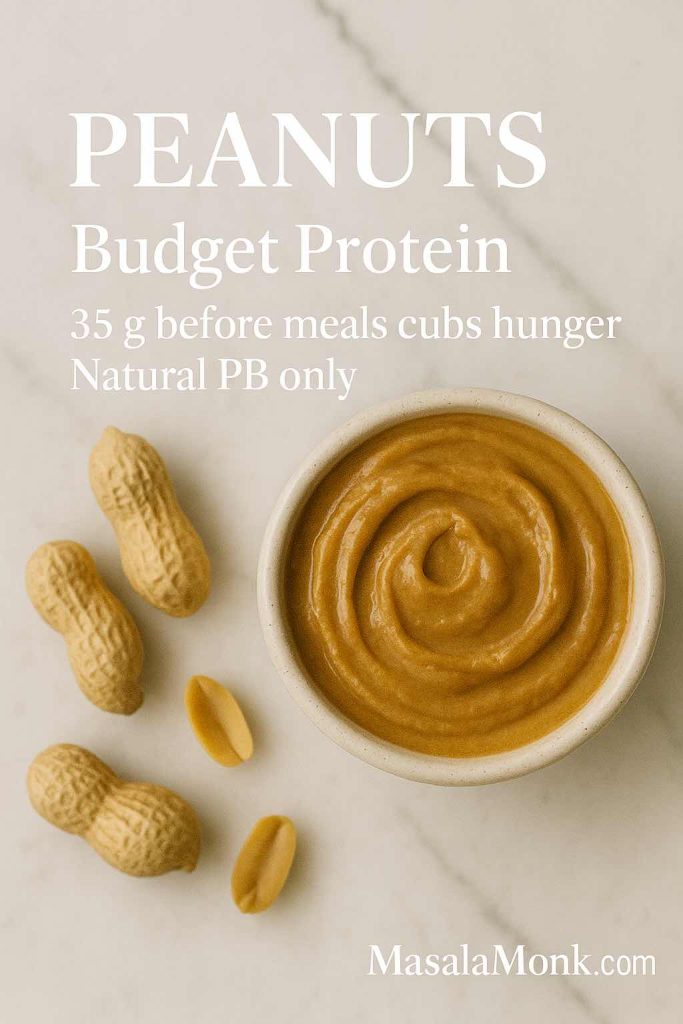
Swirl of natural peanut butter beside unshelled peanuts; overlay “Budget Protein; 35 g before meals curbs hunger; natural PB only.
A measured spoon of natural PB (or 35 g peanuts) before meals can temper hunger and improve adherence.

One 6-month randomized controlled trial found that eating 35 g of peanuts before two main meals daily resulted in weight loss comparable to a traditional low-fat diet—but with better reductions in systolic blood pressure (Nutrients RCT). Another study highlighted similar findings, showing minor drops in weight and waist size and improved intake of healthy nutrients when peanuts were part of a structured diet (PubMed ADA-Plan Study).

How to add peanuts to your weight-loss diet:

  • Pre-meal snack: Eat a 35 g handful of unsalted, dry-roasted peanuts before a meal to curb hunger.
  • Add crunch: Sprinkle crushed peanuts over salads, stir-fries, or noodles for texture and protein.
  • Peanut butter hack: Spread natural peanut butter (just peanuts, no added sugar) on fruit or whole-grain toast—but keep it measured.

⚠ Watch out for: Honey-roasted or salted peanuts—they load on sodium and sugar. Peanuts are easy to overconsume, so watch your portion.

Do Read: Peanuts and Weight Loss: Separating Fact from Fiction


Cashews for Weight Loss

Cashews, with their creamy texture, are easy to overlook — yet they can fit into a smart weight-loss strategy when eaten in moderation. A one-ounce serving (about 18 cashews) delivers roughly 155 calories, healthy monounsaturated fats, and essential micronutrients like magnesium and zinc, which support energy and satiety.

Research shows cashews don’t contribute to weight gain when included in a balanced diet. A clinical trial demonstrated that adding 15 g of Brazil nuts and 30 g of cashews to an energy-restricted diet improved body composition — specifically, reducing body fat percentage and improving lean mass — without negatively affecting weight loss progress (Br J Nutr RCT).

Another recent 8-week randomized controlled trial found that individuals consuming cashews experienced similar weight loss compared to controls, but also gained heart and liver health benefits — including reductions in markers like ApoB and improved liver enzymes — when included in a calorie-controlled diet (Front Nutr RCT).

💡 How to add cashews to your weight-loss diet:

  • Snack wisely: Stick to around 18 raw or dry-roasted cashews per serving.
  • Cooking: Use cashews in curries or stir-fries as a creamy substitute for heavy dairy.
  • Nut butter: Opt for natural cashew butter without added sugars or oils.

⚠️ Watch out for: Salted or candied cashews — these can undo the benefits with excess sugar and sodium.

Also Read: Cashews and Weight Loss: Unveiling the Nutritional Gems


Brazil Nuts for Weight Loss

Brazil nuts are standout for their selenium content — just one or two nuts a day generally meet your recommended intake. Selenium is vital for thyroid function, which in turn regulates metabolism and energy levels.

A recent trial in overweight women found that daily consumption of 8 g (~2 Brazil nuts) as part of an energy-restricted diet significantly reduced inflammation markers (like CRP and IL-8) and improved intestinal permeability, compared to a nut-free diet, even though both groups lost similar amounts of weight (J Nutr Controlled Trial). Another study showed that Brazil nut + cashew intake in a restricted diet improved overall body composition (reducing body fat percentage) and selenium status in women at cardiometabolic risk (Br J Nutr RCT).

💡 How to add Brazil nuts to your weight-loss diet:

  • Daily dose: Keep it to just 1–2 Brazil nuts per day for selenium support.
  • Snack mix: Add one to homemade trail mix for variety and immunity perks.
  • Smoothie addition: Blend a single nut in for creaminess and operational nutrition.

⚠️ Watch out for: Overconsumption — Brazil nuts are so rich in selenium that eating more than 4–5 per day regularly can lead to toxicity. Stick to the safe 1–2 nut guideline.

Do Read: Brazil Nuts for Selenium Boost: 5 Morning Smoothies for Balanced Health


Hazelnuts for Weight Loss

Hazelnuts are quietly powerful: fiber + healthy fats + vitamin E make them naturally satisfying, so a small handful can keep you full without feeling heavy. One ounce (about 21 nuts) has ~178 calories and ~4g protein—great for a mid-afternoon tide-you-over snack.

What does the research say? A systematic review and Bayesian meta-analysis found that hazelnut-enriched diets lowered LDL and total cholesterol while BMI remained unchanged—exactly what you want when weight control is the goal (Nutrients meta-analysis) (Perna et al., 2016). A 12-week randomized trial adding 30–60 g/day of hazelnuts improved diet quality and did not adversely affect body composition in overweight adults (PubMed RCT) (Tey et al., 2013).

How to add hazelnuts to your weight-loss diet:

  • Snack swap: ~20 raw hazelnuts with coffee/tea instead of biscuits.
  • Breakfast crunch: Chop over oatmeal, Greek yogurt, or chia pudding.
  • Savory boost: Toast lightly and toss onto roasted veggies or salads.

⚠ Watch out for: Chocolate-coated hazelnuts and sweet spreads (e.g., Nutella) — sugar flips the script.

Do Read: Hazelnuts in Your Diet: 5 Keto Smoothie Ideas for Efficient Weight Loss


Macadamia Nuts for Weight Loss

Buttery macadamias feel “indulgent,” yet in controlled portions they’re weight-neutral and very satiating. One ounce (10–12 nuts) is ~200 calories, mostly heart-healthy monounsaturated fat (think olive-oil vibes), with minimal carbs.

In an 8-week randomized crossover trial in adults with abdominal obesity, adding macadamias (~15% of calories) did not change weight, BMI, body fat, or waist; lipids trended modestly down (J Nutr Sci RCT) (Jones et al., 2023). A companion 8-week study reported no significant changes in weight, BMI, waist, or % body fat when macadamias were included daily (Current Developments in Nutrition) (Jones et al., 2020).

How to add macadamias to your weight-loss diet:

  • Portion plan: Cap at ~10 nuts; chew slowly.
  • Meal upgrade: Chop into salads or grain bowls for creamy crunch.
  • Yogurt topper: 1–2 tbsp chopped with berries for a satisfying finish.

⚠ Watch out for: Easy to over-eat (calorie-dense). Pre-portion; avoid honey-roasted mixes.

Do Read: Vegan Keto Smoothie Kick-Start: 5 Macadamia Nut Recipes for Nutrient-Packed Mornings


Pecans for Weight Loss

Pecans are naturally sweet and buttery, with fiber + polyphenols that play nice with cardiometabolic health. A small handful (19 halves) is ~196 calories—so the trick is portion plus substitution.

A 12-week randomized controlled trial (138 adults at cardiometabolic risk) showed that replacing usual snacks with ~57 g/day pecans significantly reduced LDL, non-HDL, total cholesterol and triglycerides, and improved overall diet quality; weight change was small and non-significant (+0.7 kg vs control), underscoring the need for portion control (AJCN RCT) (Hart et al., 2025). Earlier RCT work also found 8-week pecan diets lowered LDL, TG and ApoB vs control (J Nutrition RCT) (Guarneiri et al., 2021).

How to add pecans to your weight-loss diet:

  • Snack swap: 10–12 halves instead of cookies/chips.
  • Breakfast: Stir into oatmeal/yogurt; pair with cinnamon + apple.
  • Savory: Toast lightly and toss over roasted squash or salads.

⚠ Watch out for: Candied or praline pecans = sugar bombs. Keep portions tight to avoid creeping calories.

Do Read: Nuts for Heart Health: Harnessing the Nutritional Powerhouse for a Healthy Cardiovascular System


Pine Nuts for Weight Loss

Tiny but mighty, pine nuts bring buttery flavor and help you slow down and savor food. The interesting angle here is satiety signaling: a unique fatty acid (pinolenic acid) may boost fullness hormones.

In a placebo-controlled human trial, Korean pine nut oil increased satiety hormones (CCK, GLP-1) and reduced prospective food intake shortly after consumption (Lipids in Health & Disease RCT) (Pasman et al., 2008). More recently, delayed-release pine-nut-oil free fatty acids delivered to the small intestine reduced appetite via GLP-1 in an acute study (Clinical Nutrition) (Sørensen et al., 2021). These are short-term appetite studies, not long-term weight-loss trials—use pine nuts as a tool for fullness, not a magic bullet.

How to add pine nuts to your weight-loss diet:

  • Salad finisher: 1–2 tbsp toasted goes a long way.
  • Pesto play: Blend with basil + lemon; use thinly to flavor big bowls.
  • Grain bowls: Sprinkle over quinoa/veg to boost satisfaction.

⚠ Watch out for: Calorie density (measure, don’t pour) and rare “pine mouth” aftertaste. Buy fresh; store chilled.

Suggested Read: Pine Nuts and Weight Loss: A Natural Aid for Shedding Extra Pounds?


🥜 Best Nut Butters for Weight Loss

Nut butters are a creamy comfort food — and yes, they can actually help with weight loss when used wisely. The secret lies in sticking to natural, unsweetened versions (just nuts, maybe salt) and keeping your portions under control. A spoonful here and there can boost satiety, help you avoid junk snacks, and deliver healthy fats and protein that keep you energized.
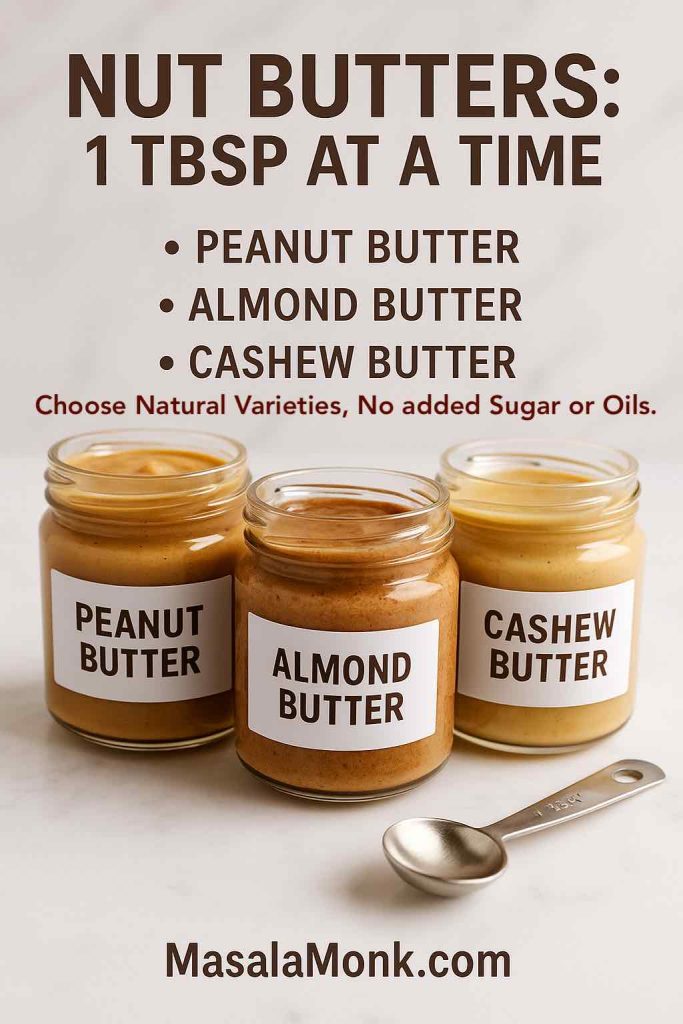
Three glass jars—peanut, almond and cashew butter—on marble with a 1-tbsp measuring spoon and portion headline - showing best Nut Butters for weight loss.
Measure 1 tbsp and pair with fruit or whole-grain toast. Peanut = budget protein, almond = vitamin E & magnesium, cashew = creamy swap. Scan labels: ingredients should read “peanuts/almonds/cashews, salt”—nothing else.

Let’s break it down by type.


🥜 Peanut Butter for Weight Loss

Peanut butter is the classic choice. It’s affordable, protein-packed, and one of the most studied when it comes to appetite control. Two tablespoons give you ~190 calories, 7g protein, 2g fiber, and a dose of heart-healthy fats.

Research backs it up: a 6-month randomized controlled trial found that people who ate 35 g of peanuts before two main meals daily lost as much weight as those on a traditional low-fat diet — but also had greater improvements in blood pressure (Petersen et al., 2022). Another crossover study showed that peanut or peanut butter snacks increased satiety and reduced blood sugar spikes compared to a grain-bar snack (Johnston et al., 2013).

💡 How to add peanut butter to your diet:

  • Use 1 tbsp on apple or banana slices to tide you over.
  • Stir into oatmeal or smoothies for protein and creaminess.
  • Try it as a pre-meal snack (1–2 tbsp) to help prevent overeating.

⚠️ Watch out for: Skippy, Jif, or other supermarket brands often add sugar, palm oil, or hydrogenated fats. Look for jars labeled “just peanuts.”


🌰 Almond Butter for Weight Loss

Almond butter feels a little more gourmet — and it comes with extra benefits. Two tablespoons provide ~190 calories, 7g protein, 3g fiber, and lots of vitamin E and magnesium.

While research on almond butter itself is limited, studies on whole almonds show why this spread can be a smart choice. A controlled satiety trial found that people who ate almonds as a snack compensated naturally at later meals, so total daily calorie intake didn’t increase despite the snack’s calories (Hull et al., 2015). Long-term studies also show that people who regularly eat nuts or peanut butter don’t gain more weight — in fact, they often have smaller waistlines over time (Bes-Rastrollo et al., 2009).

💡 How to add almond butter to your diet:

  • Spread thinly on whole-grain toast or crispbread.
  • Use as a dip for celery, carrots, or apple slices.
  • Mix into Greek yogurt or chia pudding for extra richness.

⚠️ Watch out for: Even natural almond butter is calorie-dense. Stick to 1–2 tbsp at a time.


🌰 Cashew Butter for Weight Loss

Cashew butter is smooth, slightly sweet, and often used as a dairy substitute in sauces. Two tablespoons provide ~180 calories, 6g protein, and valuable minerals like magnesium and zinc.

Clinical studies on cashews show real promise: a calorie-restricted RCT found that diets including cashews (and Brazil nuts) improved body composition — reducing fat percentage and preserving lean mass — without slowing weight loss (Cardoso et al., 2022). Another 8-week trial reported improved cholesterol and liver enzyme levels in people eating cashews, even though both groups lost the same amount of weight (Xiao et al., 2023).

💡 How to add cashew butter to your diet:

  • Spread on whole-grain crackers instead of cheese.
  • Stir into stir-fries or curries for a creamy base.
  • Blend into smoothies for natural sweetness.

⚠️ Watch out for: Many store-bought cashew butters contain added sugar or oils. Always check the label.


✅ Bottom line: Peanut, almond, and cashew butter can all fit into a weight-loss plan when natural, unsweetened, and portioned. Peanut butter shines for satiety and pre-meal appetite control, almond butter offers extra nutrients and satiety balance, and cashew butter brings creaminess with metabolic perks.


🥜 Trail Mix & Mixed Nuts for Weight Loss

Trail mix can be a double-edged sword. Done right, it’s portable, filling, and nutrient-dense. Done wrong (with sugar, candy, or salty coatings), it’s basically dessert in disguise.

The beauty of homemade trail mix is that you’re in control. You pick the nuts, the extras, and the portions — turning it into a snack that supports your weight-loss goals rather than sabotaging them.
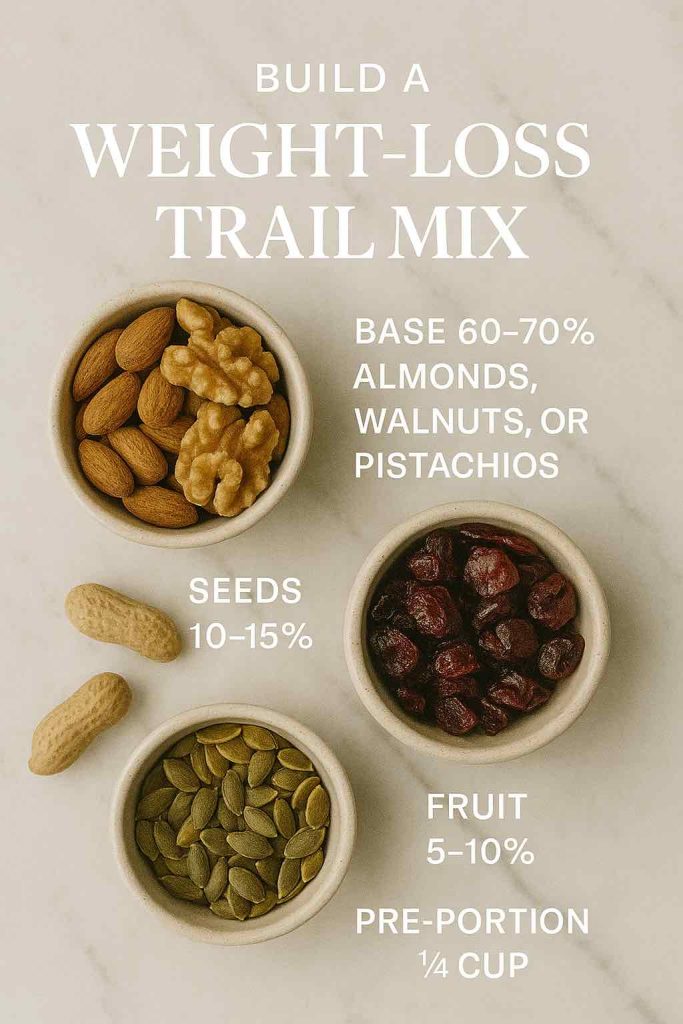
Small bowls—almonds/walnuts, dried cranberries, pumpkin seeds—arranged with overlay instructions and Pre-portion ¼ cup.
DIY trail mix: 60–70% almonds/walnuts/pistachios + 10–15% seeds + 5–10% unsweetened fruit; store in ¼-cup packs.

🌰 Why Homemade Trail Mix Helps

  • Balanced nutrition: A mix of nuts, seeds, and a touch of fruit delivers protein, fiber, and healthy fats.
  • Craving control: The variety of textures — crunch, chew, sweetness — satisfies snack cravings without overeating.
  • Portable fuel: Easy to keep in a bag, desk drawer, or glove compartment for hunger emergencies.

💡 How to Build It

  1. Base nuts (60–70%)
    • Almonds, walnuts, pistachios, or peanuts. These are the most filling and protein-rich.
  2. Secondary nuts (15–20%)
    • Cashews, pecans, hazelnuts, or Brazil nuts. Adds flavor variety and micronutrients.
  3. Seeds (10–15%)
    • Pumpkin or sunflower seeds for extra protein, minerals, and crunch.
  4. Fruit (5–10%)
    • Unsweetened raisins, cranberries, cherries, or apricots. Adds natural sweetness without candy.
  5. Optional extras (tiny sprinkle)
    • Dark chocolate chips (70%+) or shredded coconut if you want a touch of indulgence.

✅ Smart Portion Tips

  • Pre-portion into ¼ cup servings (about a small handful). That’s ~150–200 calories.
  • Store in small jars or zip bags so you don’t overdo it.
  • Use it as a snack between meals — not a free-for-all snack bowl.

⚠️ What to Skip

  • Sugary add-ins: Yogurt-covered raisins, M&Ms, or candy pieces.
  • Over-salted nuts: Sodium-heavy mixes can undo the health benefits.
  • Store-bought “deluxe” blends: Usually loaded with sugar, oils, or fried fruit.

👉 Bottom line: Homemade trail mix is a customizable, portion-controlled snack that works with weight loss, not against it. Stick to raw or dry-roasted nuts, unsweetened fruit, and just a pinch of extras to keep it satisfying and guilt-free.


🚫 Worst Nuts for Weight Loss

Not all nuts are created equal. While all provide healthy fats, protein, and nutrients, some varieties are harder to fit into a calorie-conscious plan. The problem isn’t the nut itself — it’s usually the calorie density or the way it’s processed (salted, candied, or honey-roasted).
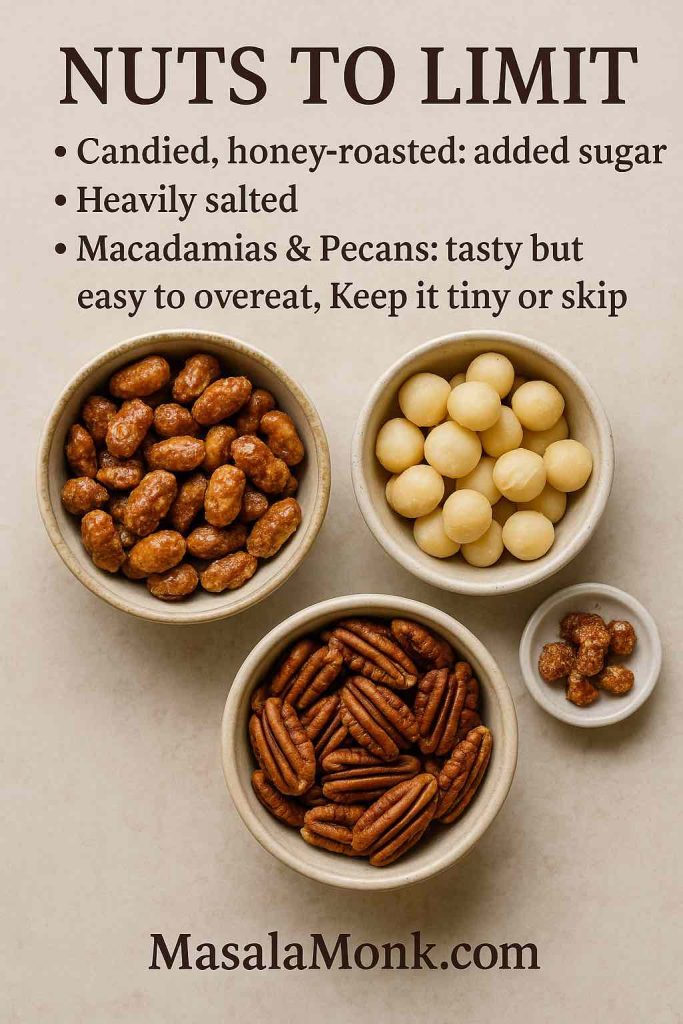
Bowls of candied nuts, macadamias and pecans with overlay warnings about added sugar, salt and overeating risk. Part of post on best nuts for weight loss.
Choose raw or dry-roasted. If you love macadamias/pecans, keep it tiny (5–6 pieces)—candied or heavily salted nuts derail progress.

Here are the main ones to watch out for if your goal is losing weight:


Macadamia Nuts

Even though they are featured in featured in Weight Loss freindly list as well, however they are super easy to go overboard.

  • Calories per ounce: ~200 (just 10–12 nuts).
  • Buttery and delicious, macadamias are mostly fat with little protein or fiber to keep you full. That makes them easy to overeat without much satiety payoff.
  • They’re fine in small amounts, but not the best choice if you’re trying to manage hunger.

Pecans

Again Pecans are so delicious that is super easy to go overboard with these and mess up your goals.

  • Calories per ounce: ~196 (about 19 halves).
  • Naturally sweet and tasty, pecans pack more calories than many other nuts, with lower protein content.
  • A small handful can easily turn into two, pushing you over your calorie limit fast.

Candied, Honey-Roasted, or Flavored Nuts

  • The biggest trap isn’t a specific nut but how it’s prepared.
  • Honey-roasted almonds, maple pecans, or BBQ cashews often come coated in sugar, oils, or flavorings — turning a healthy snack into a dessert-level calorie bomb.
  • These versions can also spike cravings instead of controlling them.

Salted & Processed Nut Mixes

  • Heavily salted peanuts or bar nuts can sneak in massive amounts of sodium, leading to bloating and making you thirstier (which sometimes gets mistaken for hunger).
  • Pre-made mixes often include fried corn bits, pretzels, or candy — all of which derail the weight-loss benefits of the nuts themselves.

⚖️ Bottom Line

If you love macadamias or pecans, you don’t have to give them up completely — just keep the portions tiny (think 5–6 nuts, not a handful). But if weight loss is your goal, you’ll get more satiety for fewer calories by focusing on almonds, walnuts, pistachios, and peanuts instead.


🥜 Practical Tips for Eating Nuts for Weight Loss

Nuts can absolutely support your weight-loss journey — but like any calorie-dense food, how you eat them makes all the difference. Here are some tips to keep them working in your favor:
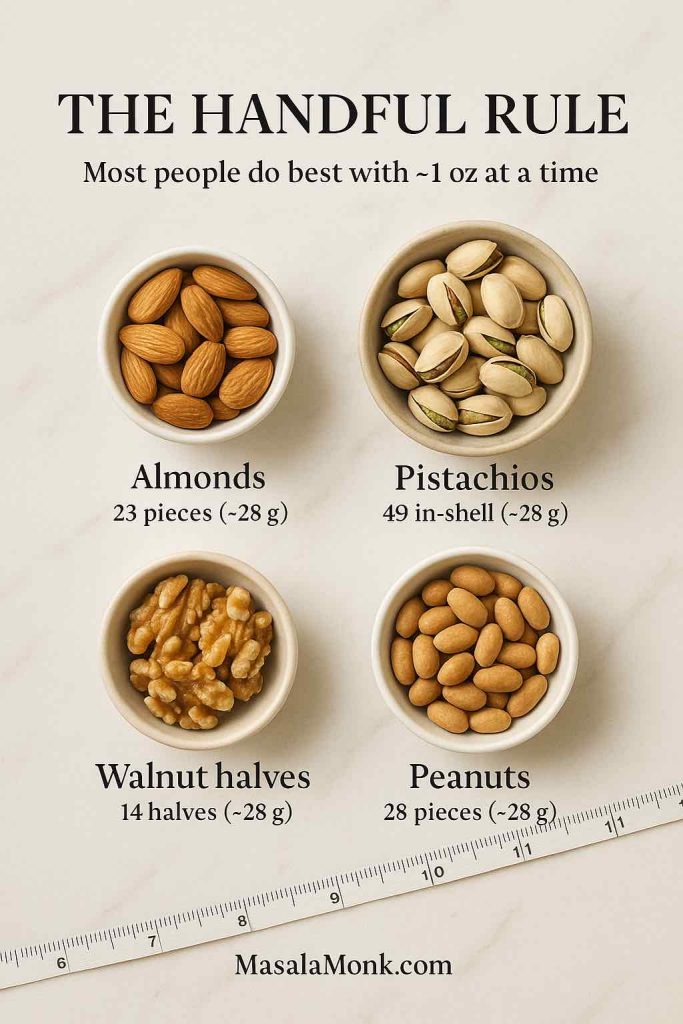
Four labeled bowls—23 almonds, 49 in-shell pistachios, 14 walnut halves, 28 peanuts—under headline “The Handful Rule” for best nuts for weight loss.
Portion first, then snack. ~1 oz keeps calories in check while delivering protein and fiber for lasting fullness.
  • Stick to the “handful rule”: About 1 ounce (a small handful, ~23 almonds or 49 pistachios). Pre-portion them into small containers or bags so you don’t go overboard.
  • Use nuts as a swap, not an add-on: Replace chips, cookies, or muffins with nuts. Don’t just add nuts on top of your regular snacks.
  • Snack smarter with timing: Nuts before meals can help reduce hunger and lead to smaller portions at mealtime.
  • Go for raw or dry-roasted: Skip oils, coatings, and added flavors. Natural versions have the same crunch without unnecessary calories.
  • Pair with protein or produce: Nuts plus fruit, Greek yogurt, or veggies make a more balanced, filling snack.
  • Watch flavored varieties: Honey-roasted, candied, or BBQ-coated nuts can undo the benefits.
  • Nut butters count too: Just stick to natural jars (only nuts, maybe salt) and measure 1–2 tbsp at a time.
  • Mix it up: Rotate between almonds, walnuts, pistachios, and peanuts to cover a wider nutrient spectrum.

🌟 Conclusion: Nuts That Work With Your Goals

Nuts aren’t the enemy of weight loss — in fact, they can be one of your greatest allies. Their protein, fiber, and healthy fats help you feel full, satisfied, and less likely to reach for junk food.

The key is moderation and mindfulness:

  • A handful of almonds, walnuts, pistachios, or peanuts a day can keep hunger in check.
  • Nut butters and trail mix can work beautifully — if you keep them natural and portioned.
  • Avoid candied, honey-roasted, or overly salted varieties.

👉 Action step for tomorrow: Instead of grabbing chips or cookies, try a small handful of almonds with fruit, or a spoon of peanut butter with apple slices. Tiny swaps like this can add up to big results for your waistline and health.

❓ Frequently Asked Questions About Nuts and Weight Loss

1. Which nut is best for weight loss?

While all nuts can be part of a healthy diet, almonds, walnuts, pistachios, and peanuts stand out for weight loss. This is because they combine protein, fiber, and healthy fats that promote satiety and help prevent overeating. For example, almonds are especially filling, walnuts support appetite regulation through omega-3s, pistachios offer bulk for fewer calories, and peanuts are affordable yet protein-rich. Therefore, if you’re trying to slim down, focusing on these four nuts gives you the most “fullness per calorie.”


2. How many nuts should I eat per day to lose weight?

The sweet spot is usually 1 ounce per day — roughly a small handful. To give you perspective, that’s about 23 almonds, 14 walnut halves, 49 pistachios, or 28 peanuts. This amount delivers enough protein and fiber to keep you full without tipping your calorie balance in the wrong direction. Eating significantly more can add up quickly since nuts are calorie-dense, but sticking to a measured portion makes them a smart, sustainable daily habit.


3. Are roasted nuts good for weight loss?

Yes, roasted nuts can absolutely be part of a weight-loss diet, but there’s a key detail to watch: how they’re roasted. Dry-roasted nuts, which are heated without extra oil or sugar, keep their nutrient profile intact. However, many packaged roasted nuts are fried in added oils, heavily salted, or coated in flavors like honey or barbecue. Those versions add unnecessary calories and sodium, which can work against your weight goals. So, roasted is fine — just make sure the label says “dry-roasted” and nothing more.


4. Can nuts help with belly fat specifically?

Nuts don’t directly burn belly fat — no food can target fat loss in one body area. However, nuts can help reduce overall calorie intake and improve metabolic health, which indirectly supports belly fat reduction. For instance, their healthy fats and fiber stabilize blood sugar and prevent the crash-and-crave cycle that often leads to overeating. Over time, consistent nut consumption as part of a calorie-controlled diet may lead to a smaller waistline, even if the fat loss isn’t “spot targeted.”


5. What is the lowest-calorie nut for weight loss?

Pistachios are often considered the lowest-calorie option. An ounce of pistachios (about 49 nuts) provides ~160 calories, making them lighter than walnuts, pecans, or macadamias. Cashews also rank fairly low at about 155 calories per ounce. Because pistachios come in shells, they also slow down your eating, giving your body more time to register fullness. This makes them both calorie-efficient and portion-control-friendly — a rare win-win.


6. Are peanuts good for weight loss even though they’re legumes?

Yes — in fact, peanuts and peanut butter have some of the strongest evidence for weight management. Despite technically being legumes, peanuts provide a nutrient profile similar to tree nuts: protein, fiber, and healthy fats. Several clinical studies show that peanuts can increase satiety and help people maintain or lose weight when included in a structured diet. So don’t let their “legume status” fool you; peanuts are just as effective as traditional nuts for weight loss.


7. Is peanut butter fattening, or can it help with weight loss?

Peanut butter has a bad reputation because it’s calorie-dense — about 190 calories per 2 tablespoons. However, when eaten in moderation, it can actually support weight loss. The protein and fat in peanut butter keep you full, and research shows that peanut preloads (eating peanuts or peanut butter before a meal) reduce hunger and total calorie intake later. The key is choosing natural peanut butter (just peanuts and maybe salt) and measuring your serving size carefully — usually 1 to 2 tablespoons.


8. Can I eat nuts at night if I’m trying to lose weight?

Yes, you can eat nuts in the evening, and in some cases, it may even help. Late-night cravings often lead people toward chips, cookies, or other processed snacks. Swapping those for a small handful of nuts provides lasting satiety and prevents you from waking up hungrier the next morning. The key is portion size: stick to a small handful, and avoid sugar-coated or salted varieties. In other words, nuts at night are fine as long as they replace less healthy options, not add extra calories.


9. Should I eat nuts raw, soaked, or roasted?

Raw and dry-roasted nuts are equally good choices for weight loss. Some people soak nuts to improve digestibility, which is fine if it helps you, but it doesn’t make them more effective for weight loss. The real difference comes down to additives: raw or dry-roasted nuts keep things simple, while oil-roasted, salted, or flavored nuts can sneak in calories, sodium, or sugar. So the best choice depends on your taste preference, but for weight management, plain raw or dry-roasted is ideal.


10. What are the worst nuts for weight loss?

Macadamia nuts and pecans aren’t “bad” for you, but they’re very calorie-dense and lower in protein than other nuts, so they don’t provide the same satiety bang for your calorie buck. The real danger, though, comes from flavored nuts — think candied pecans, honey-roasted peanuts, or chocolate-covered almonds. These can easily double or triple the calories and sugar, turning a healthy snack into a dessert. For weight loss, stick with natural, unflavored nuts, and keep the indulgent versions for rare occasions.


11. Can mixed nuts help me lose weight?

Yes, but the way you put the mix together matters. A homemade mix of almonds, walnuts, pistachios, and a sprinkle of seeds can be an excellent weight-loss snack. However, most store-bought “deluxe nut mixes” are loaded with salted nuts, fried corn, pretzels, and sugary fruit or chocolate. These add-ins increase calories without much nutrition. So mixed nuts can absolutely help with weight management — but the safest way is to make your own blend at home.


12. How should I store nuts to keep them fresh?

Nuts are high in natural oils, which means they can go rancid if stored improperly. To keep them fresh and tasty, store nuts in airtight containers in a cool, dark place. For long-term storage, refrigerate or even freeze them — this can extend freshness for months without affecting texture. Fresh-tasting nuts are not only healthier but also more satisfying, helping you stick to your weight-loss goals without reaching for processed snacks.
Posted on — 4 Comments

Pineapple Chia Pudding Recipe: Creamy & Spoonable Every Time

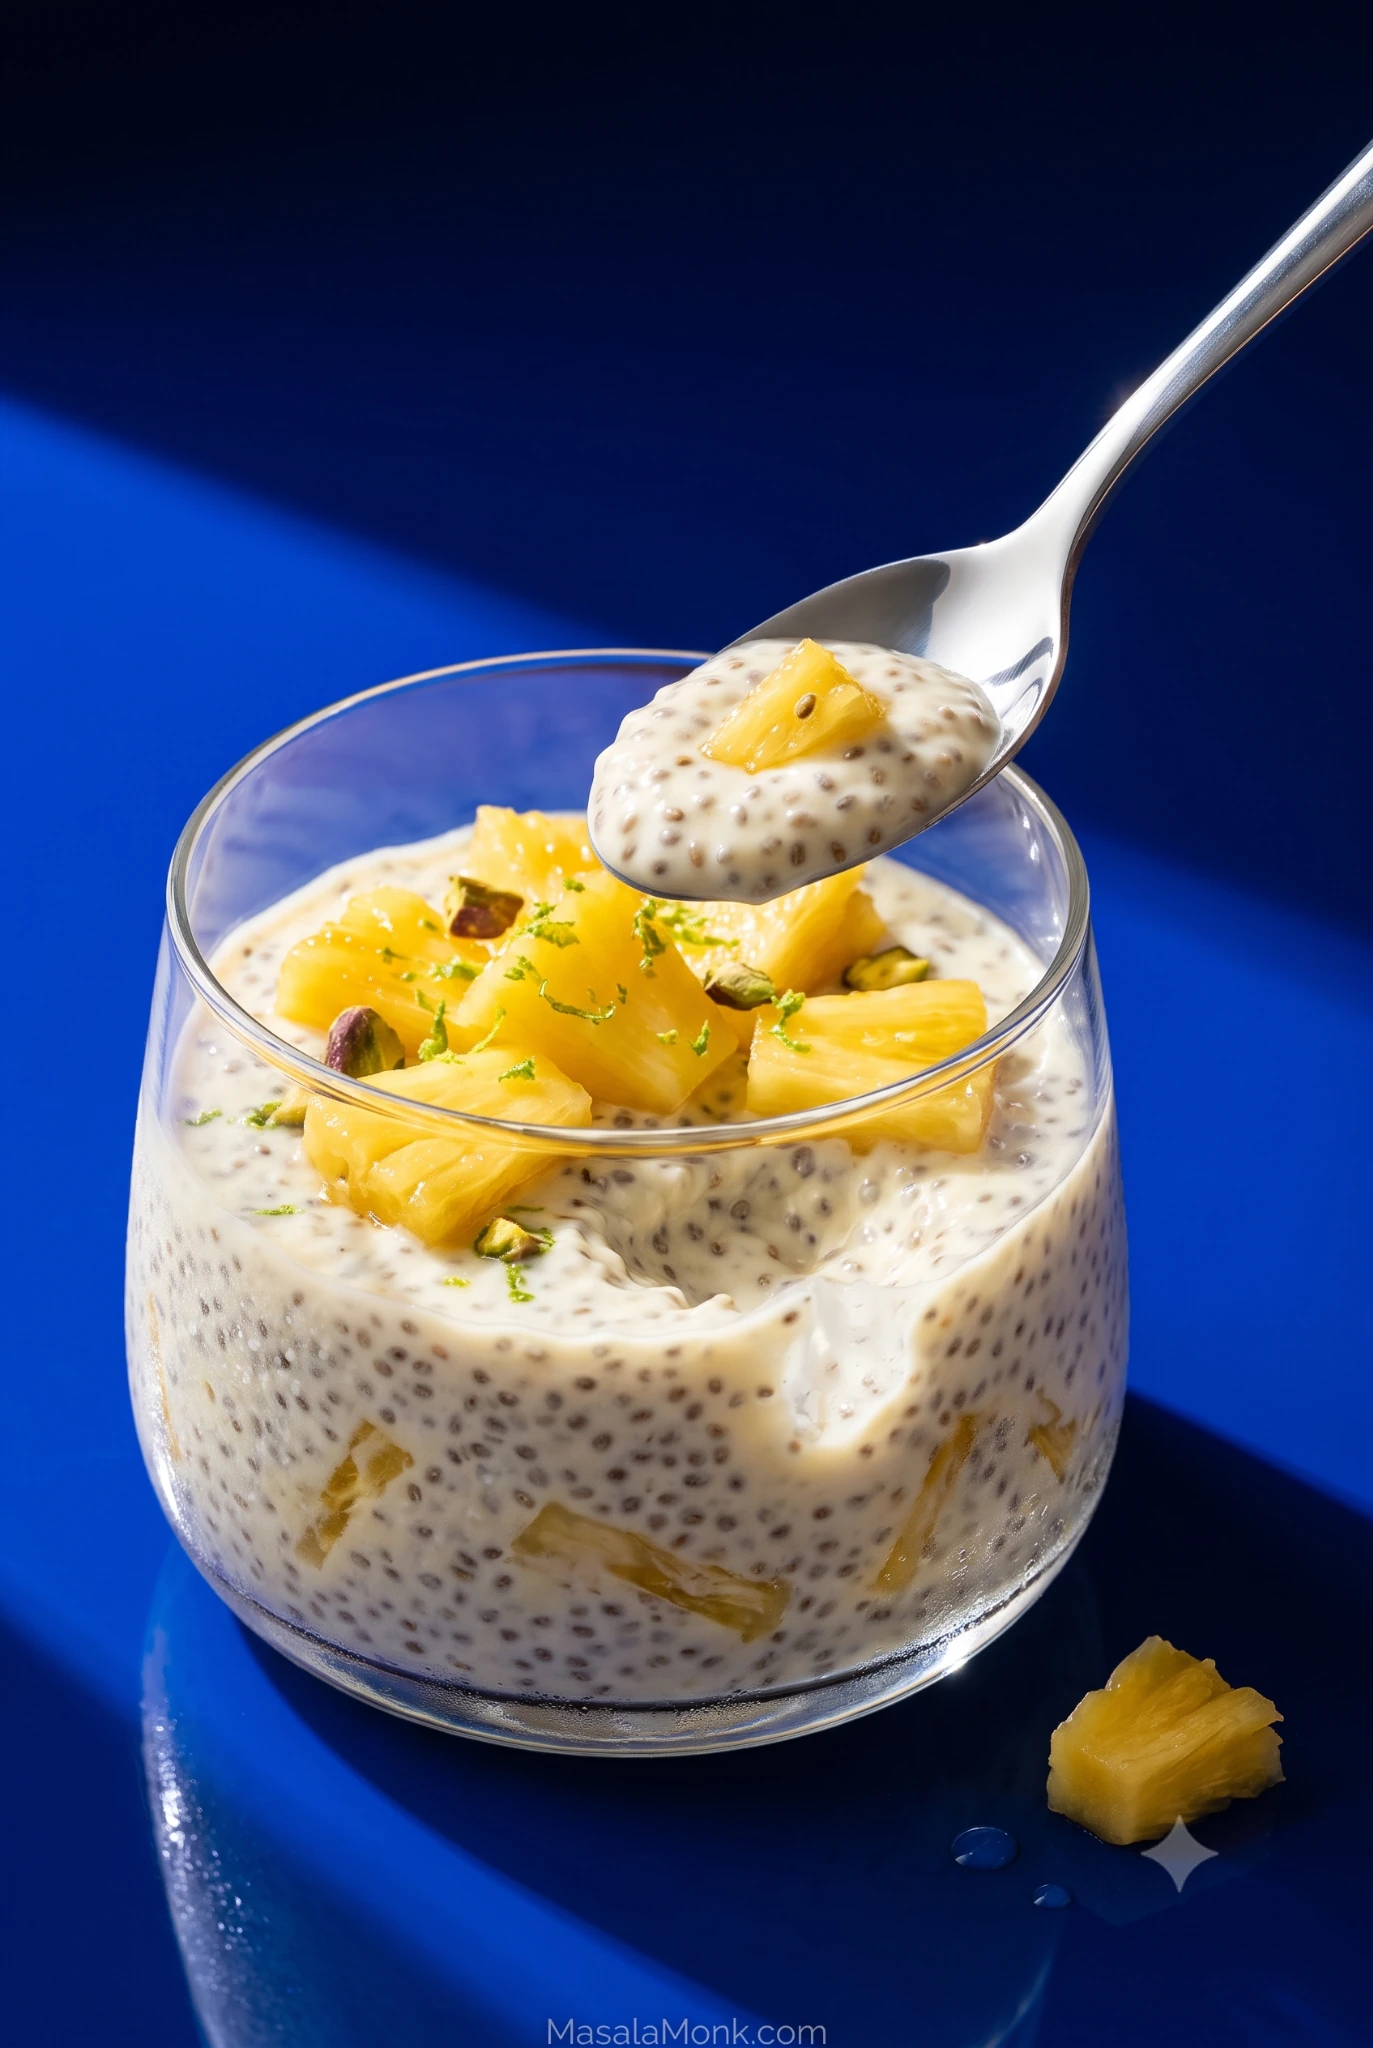
Pineapple chia pudding in a clear glass, topped with juicy pineapple, lime zest and pistachio, with a spoon lifting a soft chia-filled bite.

This post was last updated on:

Pineapple chia pudding should be cold, creamy and bright with fruit. It should not have milk floating above a chia slab or be so thick you can stand a spoon in it.

Juicy pineapple, fresh lime and just enough vanilla make it taste like something you would actually look forward to finding in the fridge. Mixing it takes minutes. Getting that soft, spoonable texture is where most jars go sideways.

This pineapple chia seed pudding uses a slightly firmer base so there is room for the fruit’s moisture. Give it a second stir before it goes into the fridge, and by morning the work is done: stir, add cold pineapple and eat.

Quick Answer

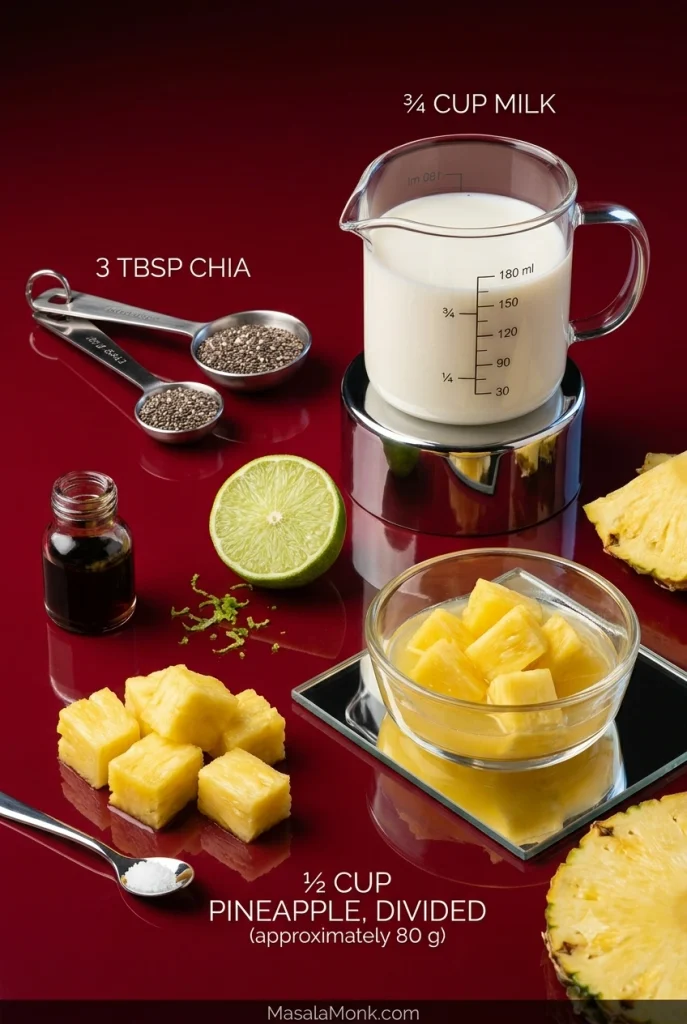
For one breakfast jar, use 3 tablespoons / about 35 g chia seeds + ¾ cup / 180 ml / 6 fl oz milk + ½ cup / about 80 g pineapple, divided. Stir well, wait 5–10 minutes, stir again, fold in about half the fruit, then chill for at least 2 hours. Four hours or overnight gives the most dependable texture; save the remaining pineapple for serving.

It is ready when the chia holds softly on a spoon and there is no loose milk pooling around it.

Pineapple Chia Pudding Recipe

Start with plenty of pineapple, a creamy but not heavy base, and enough lime and vanilla to keep the fruit tasting fresh and lively.

  • Makes: 1 breakfast jar or 2 small snack portions
  • Prep: about 5 minutes
  • Second stir: after the brief initial rest
  • Minimum chill: about 2 hours
  • Best texture: about 4 hours to overnight
  • Cook time: none

A 16 oz / 475 ml jar leaves plenty of room to stir and add toppings. A 12 oz / 350 ml jar works if you mix in a bowl first.

Equipment: a bowl or wide jar, a whisk or spoon, measuring spoons and a lidded container. A small blender is optional for the smooth version.

Ingredients

  • Whole chia seeds: 3 tablespoons, about 35 g / 1.2 oz
  • Unsweetened almond or coconut drinking milk: ¾ cup / 180 ml / 6 fl oz; soy or dairy milk also works
  • Finely diced pineapple: ½ cup / about 80 g / 2.8 oz, divided
  • Vanilla extract: ½ teaspoon
  • Finely grated lime zest: ½ teaspoon
  • Fresh lime juice: ½–1 teaspoon / 2.5–5 ml
  • Fine salt: a small pinch
  • Sweetener: up to 1 teaspoon, if needed

Chia tablespoon weights vary slightly between brands and measuring styles, so the tablespoon measure is the main functional measurement here.

Store-bought unsweetened almond milk keeps things easy, but homemade almond milk works too. Homemade batches vary in richness, so you may need a little more or less milk at the end.

Using dairy milk? The recipe still works. When the jar will sit overnight, keep raw fresh or frozen pineapple separate and add it at serving; the reason is explained below.

Optional toppings: choose one or two so the pineapple still gets to be the point.

  • Toasted unsweetened coconut
  • Chopped pistachios
  • Plain Greek or plant-based yogurt
  • Granola
  • Extra lime zest or fresh mint
Measured chia seeds, three-quarter cup of milk and half a cup of pineapple divided into two portions, with lime, vanilla and salt.
The firmer base leaves room for pineapple’s juice. The goal is still a soft, spoonable pudding once the fruit is folded in.

Method

  1. Mix the base. Add the milk, vanilla, lime zest, lime juice, salt and any sweetener to a bowl or wide jar. With the whisk moving, sprinkle in the chia gradually and whisk for about 20–30 seconds. Scrape the bottom and corners so no dry pockets remain.
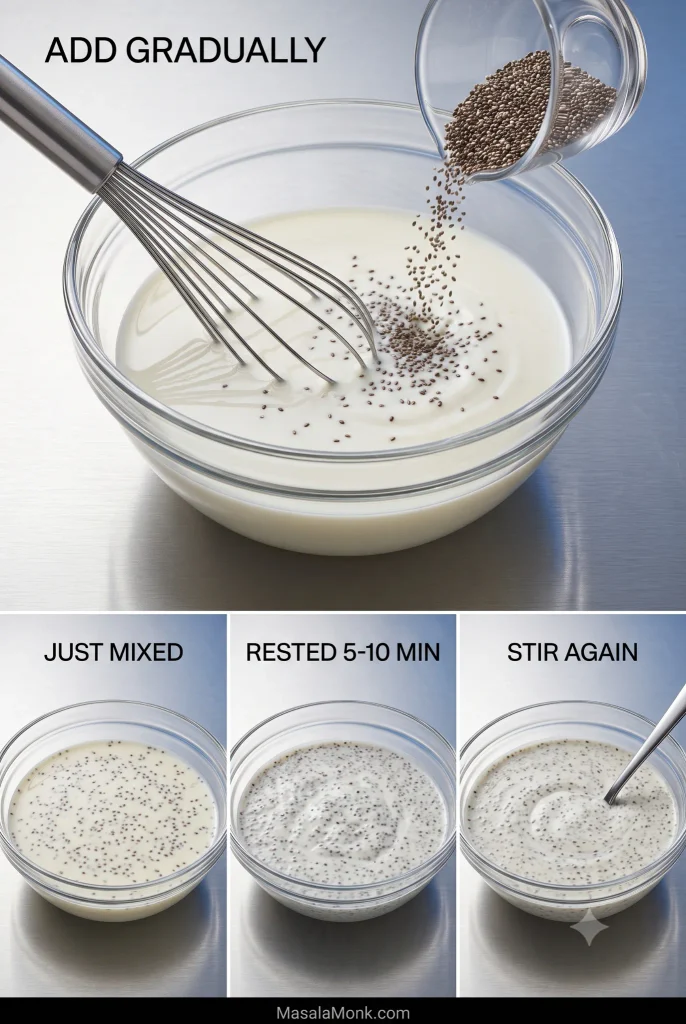
  2. Wait, then stir again. Leave it for 5–10 minutes, then scrape the bottom and sides and break apart any clusters. This is what prevents milk on top and a dense chia layer underneath.
  3. Add half the pineapple. Fold in about ¼ cup / 40 g well-drained diced pineapple. Very juicy fruit—and fruit going into jars for several days—is better kept separate until serving.
  4. Cover and chill. Refrigerate for at least 2 hours. Four hours gives a more dependable set; overnight is easiest. Still seeing the seeds settle—or making a large batch? Give it one more stir 30–60 minutes later. Most single jars will not need it.
  5. Check the texture. Give the pudding a good stir. The seeds should be evenly hydrated and the mixture should hold softly on a spoon without loose milk around it.
  6. Adjust only if needed. Too thick? Add milk 1 tablespoon / 15 ml at a time. Still clearly too thin after several hours? Add 1 teaspoon chia and wait another 15–30 minutes.
  7. Finish and eat. Add the remaining pineapple and any crunchy toppings. Taste it cold: if the pineapple seems muted, add a little extra lime zest; if the fruit is tart, add a touch more sweetener.

Why the Second Stir Matters

Four-step chia pudding process showing chia sprinkled into milk while whisking, then the mixture just mixed, rested for 5 to 10 minutes, and stirred again until evenly distributed.
The useful moment for the second stir is after hydration has started but before settling has fully taken hold. By then the seeds are tackier, so redistributing them now is more effective than trying to break up a compact layer later.

If your jar is already in the fridge, stop here—you have done everything you need. The rest is for choosing different pineapple or milk, making several breakfasts at once, or rescuing a jar that did not behave as expected.

Choose What You Need

The Chia-to-Liquid Ratio for Pineapple Pudding

Three tablespoons of chia per cup of liquid gives a softer pudding; four gives a noticeably firmer one. Pineapple adds its own moisture, so the main recipe starts toward the thicker end.

Chia seedsLiquidResult
3 tbsp1 cup / 240 mlSofter, looser pudding
4 tbsp1 cup / 240 mlFirmer, spoonable pudding
3 tbsp¾ cup / 180 mlThicker base with room for juicy fruit

A very ripe fresh pineapple can be surprisingly juicy, thawed fruit leaks water, and crushed pineapple carries more liquid than neat chunks. The main recipe’s 3 tablespoons chia to ¾ cup / 180 ml milk leaves room for that extra moisture.

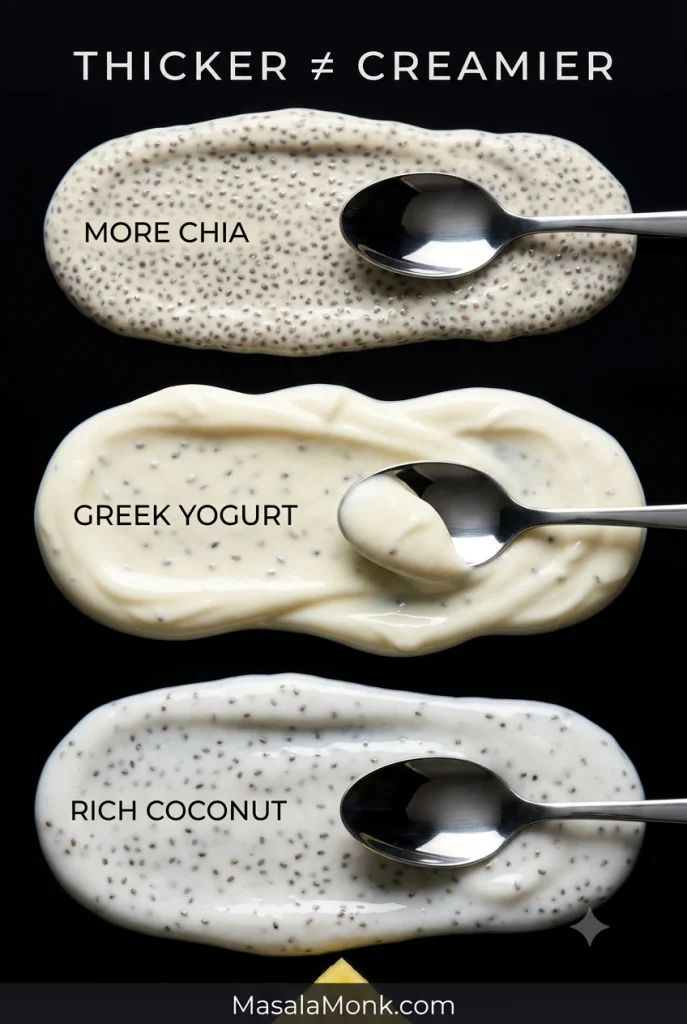
More chia makes the pudding thicker. Yogurt or richer coconut milk makes it feel creamier. That distinction matters when you are chasing a lush café-style spoonful rather than simply trying to make the pudding stand up on the spoon.

The same basic method works with plenty of other flavors in our chia pudding guide.

What Should Properly Set Chia Pudding Look Like?

Whole-seed chia pudding is never quite as smooth as custard. Each seed develops a soft gel coating while the seed remains perceptible. The finished pudding lands somewhere between tiny tapioca and a soft seeded gel.

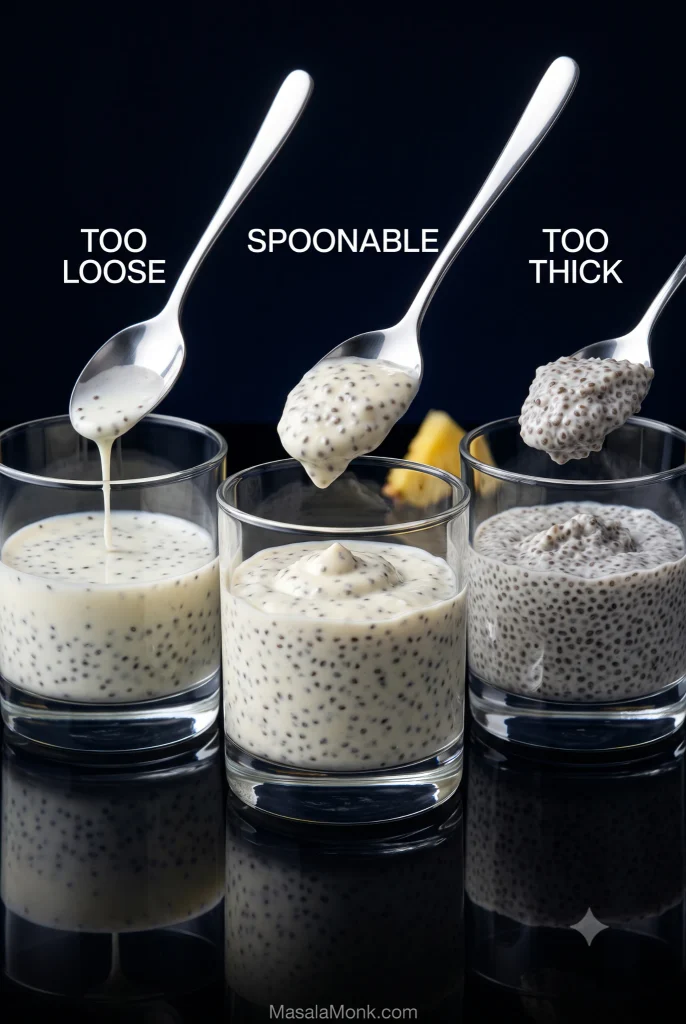
  • It should hold a soft mound on a spoon.
  • The seeds should look evenly hydrated.
  • There should be no pool of milk floating around it.
  • There should be no dense seed slab stuck underneath.
  • The overall texture should feel creamy rather than rubbery.

A little seed texture is normal. Dry, hard pockets are not.

Three glasses compare chia pudding textures: runny pudding dripping from a spoon, properly spoonable pudding holding a soft mound, and very thick pudding forming a dense stiff scoop.
After one good stir, watch what the spoon track does. A loose mixture flows closed, a ready pudding relaxes slowly around a soft scoop, and an over-thick jar leaves ridges that stay sharply defined.

Sometimes the pudding is exactly right and you still dislike the texture. That is allowed. Try the blended version. If that still does not appeal, there are plenty of good breakfasts in the world and no reason to force yourself into a chia habit.

Does your jar look different? Jump to Troubleshooting.

Fresh, Frozen or Canned Pineapple?

PineappleBest forWatch for
FreshBright flavor, topping, juicy piecesVariable juice
FrozenBlending into the baseThaw liquid
Canned in juiceEasy meal prepDrain well
CrushedFruit in every spoonfulExtra liquid
JuiceStronger pineapple flavorCounts as liquid

Fresh pineapple gives the brightest bite. For the sweetest jar, look for a clean sweet aroma at the base and a little give, then dice it fairly small.

Frozen pineapple is best when you want fruit through the base. Blend about ¼ cup / 40 g with the measured milk and keep the rest for serving. Drain thawed fruit before folding it into an already-set pudding.

Canned pineapple is easy for meal prep; choose fruit packed in juice and drain it well. Crushed pineapple spreads fruit through every spoonful but brings more liquid, so drain it or keep it as a separate layer.

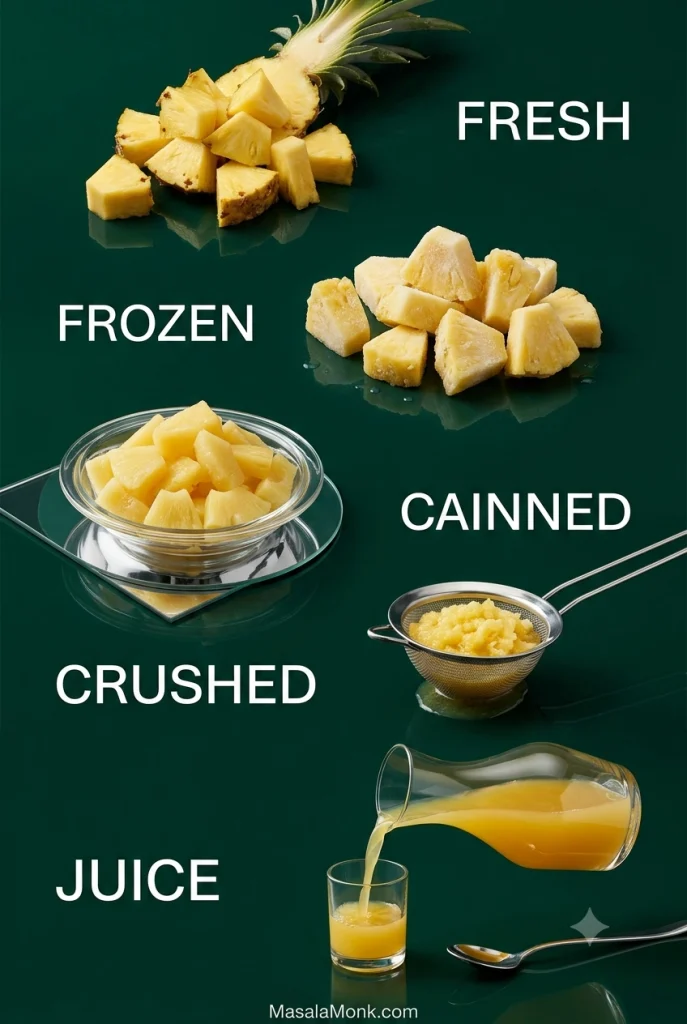
Five pineapple forms labeled fresh, frozen, canned, crushed and juice, showing fresh pieces, frozen chunks, drained canned fruit, crushed pineapple in a strainer and pineapple juice.
A useful rule is to watch what escapes the fruit. If thawed, crushed or canned pineapple leaves noticeable liquid behind, drain it. Once that moisture starts pouring rather than clinging to the fruit, treat it as part of the liquid budget.

Pineapple Juice Changes the Ratio

Chia hydrates perfectly well in pineapple juice, but the juice has to come out of the liquid somewhere else. Add ¼ cup / 60 ml pineapple juice and reduce the milk by about the same amount.

Juice makes the pudding fruitier and sweeter; milk, coconut or yogurt supplies more of the creamy body. Diced fruit gives bite, purée makes a fruit layer, and fully blended pineapple behaves more like liquid. Once the fruit pours like juice, treat it like juice.

Using Yogurt? One Pineapple Quirk Matters

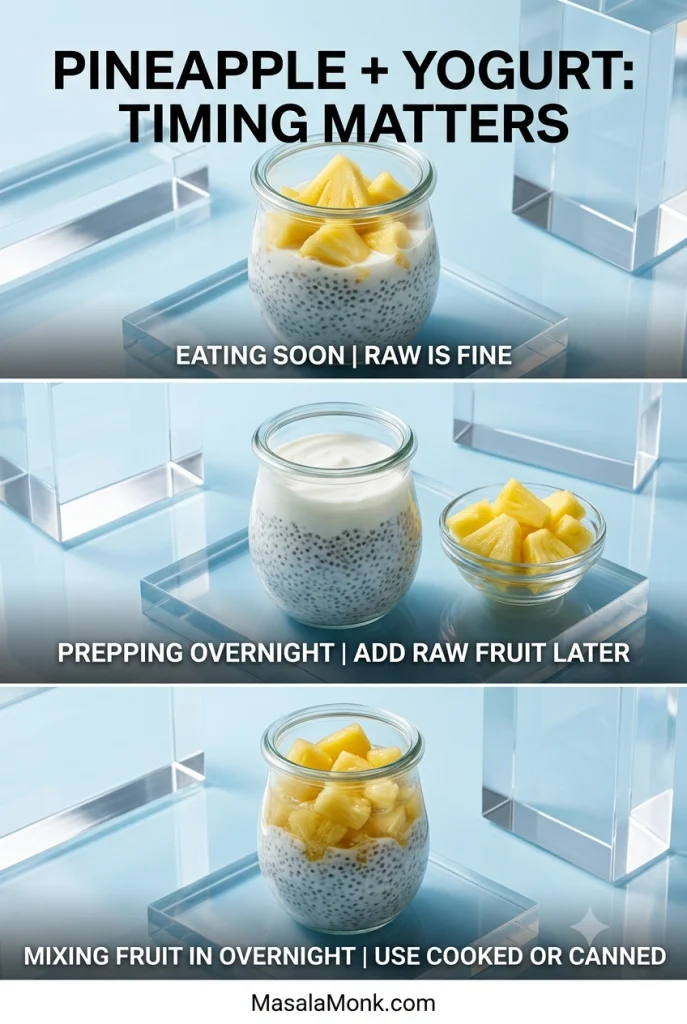
Fresh pineapple contains bromelain, an enzyme that breaks down milk proteins, and freezing raw pineapple does not reliably switch that enzyme off. Pineapple and yogurt are still perfectly normal foods to eat together. Odd bitterness or texture can show up when raw fresh or frozen pineapple sits in yogurt or skyr for hours.

For an overnight dairy-based jar, use canned or cooked pineapple, or add raw fresh or frozen fruit in the morning. With protein-rich soy yogurt, keeping raw pineapple separate until serving is a simple precaution when prepping well ahead.

Three pineapple and yogurt chia pudding examples: raw pineapple mixed in for eating soon, raw pineapple kept separate for overnight prep, and cooked or canned pineapple mixed into an overnight jar.
Keeping raw pineapple separate for an overnight yogurt jar has a sensory payoff too. Besides avoiding hours of enzyme contact, you preserve more of the fruit’s fresh aroma, brighter acidity and firmer bite for breakfast.

Using ordinary almond or coconut drinking milk and fresh pineapple? Follow the main recipe and move on.

Using yogurt for the base? Jump to the high-protein Greek yogurt version.

How to Make Pineapple Chia Pudding Creamier

Almond milk keeps the jar light, Greek yogurt makes it silkier, and coconut brings richness.

BaseResultBest move
Almond milkLight, cleanUse main ratio
Soy milkMore body, more proteinUse main ratio
Dairy milkRounder, creamierFresh pineapple at serving for overnight prep
Coconut drinkLight, tropicalUse main ratio
Canned coconut milkRich, denseDilute with lighter milk
Greek yogurt or skyrSilky, tangy, protein-richUse yogurt ratio below
Three close-up chia pudding textures compare a dense mixture with more chia, silky Greek yogurt chia pudding and glossy rich coconut chia pudding.
Look at the spoon tracks rather than the color. Extra chia creates tighter, more rigid grooves; Greek yogurt gives rounded silky folds; richer coconut shows more gloss and a fuller cold-set body.

Carton coconut drink, light canned coconut milk and full-fat canned coconut milk behave very differently once cold. Our guide to coconut milk types and nutrition goes deeper into those differences.

If you are happy with almond or coconut drinking milk and the main recipe, you do not need to change a thing. For a more café-style spoonful, Greek yogurt or skyr gives the base more body and a silkier feel. Let the pineapple do most of the flavor work, then add vanilla, lime and something crisp—perhaps toasted coconut, pistachios or a little granola.

Full-fat canned coconut milk can become surprisingly firm when it gets cold. A mixture that looked creamy at night may feel almost waxy by breakfast. Whisk a separated can smooth before measuring it, and combine rich canned coconut milk with a thinner drink rather than using it alone.

Pineapple Coconut Chia Pudding

Here the coconut softens pineapple’s sharper edges without burying the fruit.

Pineapple coconut chia pudding in a clear coupe with a pineapple layer, fresh pineapple, toasted coconut and lime zest.
The coconut blend is really a cold-texture decision. Lighter coconut drink provides most of the hydration. A smaller amount of canned coconut milk adds richness without letting chilled coconut fat dominate the finished pudding.
  • Chia seeds: 3 tbsp, about 35 g
  • Coconut drinking milk: ⅔ cup / 160 ml
  • Well-mixed canned coconut milk: ¼ cup / 60 ml
  • Pineapple: ½ cup / about 80 g, divided
  • Vanilla: ½ tsp
  • Lime zest: ½ tsp
  • Lime juice: ½–1 tsp
  • Salt: a pinch
  • Sweetener: only if needed

Use the same two-stir method as the main recipe. Fold about half the pineapple through and keep the rest for the top.

For a piña colada-style jar, pulse some of the pineapple into a thick purée. Layer it with the coconut chia so each spoonful gets a clearer hit of fruit.

That same pineapple-coconut-lime combination runs through our piña colada guide.

High-Protein Pineapple Chia Pudding with Greek Yogurt

Greek yogurt or skyr is the simplest way to add substantial protein while making the chia base silkier at the same time.

  • ½ cup plain Greek yogurt or skyr, about 120 g
  • ⅓ cup milk, about 80 ml
  • 2 tbsp chia seeds, about 24 g
  • ½ tsp vanilla
  • Lime zest to taste
  • Pinch of salt
  • Sweetener, if needed
  • ½ cup pineapple, about 80 g
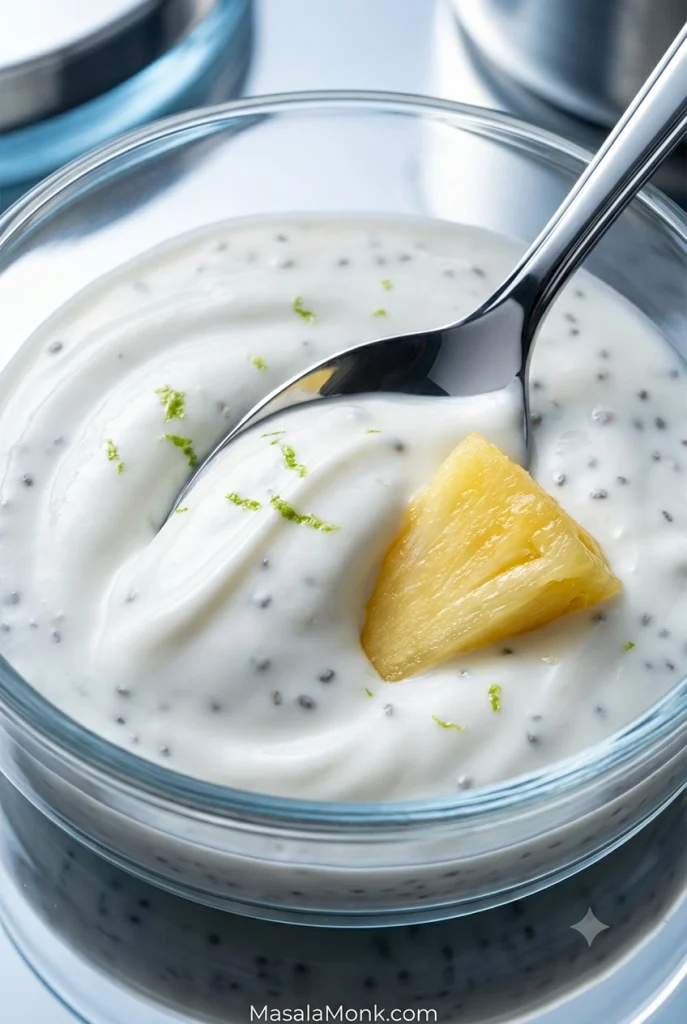
Close-up of thick pineapple chia pudding made with Greek yogurt, with a spoon drawn through the creamy chia mixture and a piece of pineapple in the pudding.
The lower chia amount here is deliberate. Greek yogurt already supplies substantial body. Using 2 tablespoons instead of the master recipe’s 3 helps the high-protein pineapple chia pudding stay silky rather than crowded with seeds.

Whisk the yogurt, milk, vanilla, lime zest and salt first, then add the chia and follow the same two-stir method. Very thick Greek yogurt may need another tablespoon or two of milk so the chilled pudding stays silky rather than pasty.

For an overnight jar, heat-treated or canned pineapple can go straight into the pudding. Raw fruit, whether fresh or frozen, is better added in the morning.

For a plant-based version, use soy milk with a thick soy yogurt. Using protein powder? Start with about 1 tablespoon. Depending on the powder, you may need another 1–3 tablespoons / 15–45 ml milk to keep the pudding creamy rather than pasty.

Prefer It Smooth? Blend It After Chilling

Whole chia always keeps a tiny-seed texture. For something closer to mousse, let the pudding hydrate fully first and then blend it with the pineapple until creamy.

Smooth blended pineapple chia pudding in a glass coupe with fine chia flecks, a pineapple purée swirl and lime zest.
Blend this version to change mouthfeel, not to rescue a runny pudding. Fully hydrated chia becomes smoother and mousse-like after blending, but an under-set ratio still needs time or adjustment before the blender comes out.

Blending after the set usually gives a smoother result than grinding dry chia at the beginning. Ground chia can feel finer, but it can also turn gummy. Hydrating whole seeds first and blending later smooths out most of the seed texture, although chia’s natural gel-like feel will still be there.

Ready to make it? Back to the main recipe.

Lower-Carb Pineapple Chia Pudding

For a lower-carb jar, use a smaller amount of pineapple and let lime zest, vanilla and a pinch of salt make that fruit go further. The easiest way to lower the carb load is simply to use less pineapple.

  • 3 tbsp chia seeds, about 35 g
  • ¾ cup unsweetened almond milk, 180 ml
  • 2–4 tbsp finely diced pineapple, about 20–40 g
  • ½ tsp vanilla
  • Plenty of fresh lime zest
  • Pinch of salt
  • Optional monk fruit, stevia or another preferred non-sugar sweetener

With less pineapple in the jar, lime zest matters more. Start toward the upper end of the fruit range if flavor matters more than shaving off every possible gram of carbohydrate. There is little point making a pineapple pudding with two apologetic cubes of pineapple.

Watching added sugar? Ripe pineapple may be sweet enough on its own. Honey, maple syrup and agave still count as added sugars even when they are described as “natural” sweeteners.

For a stricter base, use our keto chia pudding with almond milk.

Meal Prep & Storage

Making four breakfasts at once? Do not stand there stirring four tiny jars separately. Mix one big batch, give it the second stir, then divide it up.

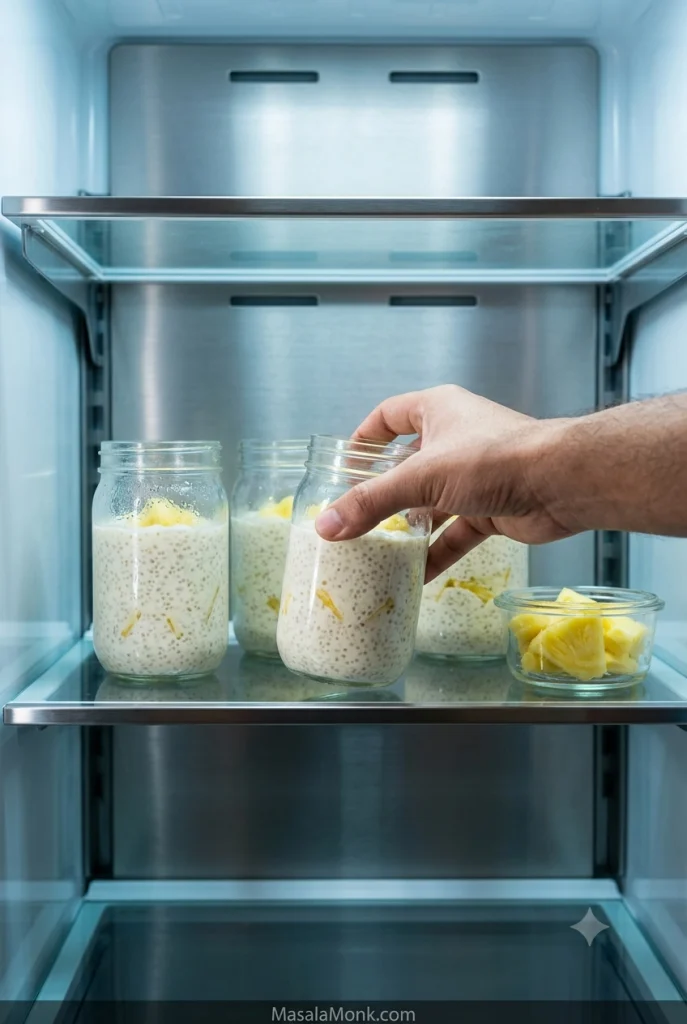
Four jars of pineapple chia pudding on a refrigerator shelf, with a hand reaching for one jar and a small container of pineapple nearby.
Before portioning a batch, give the bowl one last thorough stir so the first and last jars receive the same seed-to-liquid balance. Then divide promptly rather than letting the chia begin settling again while you fill containers.

Scaling the recipe is straightforward:

MakeChiaMilkPineapple
1 jar3 tbsp / ~35 g¾ cup / 180 ml½ cup / ~80 g
2 jars6 tbsp / ~70 g1½ cups / 360 ml1 cup / ~160 g
4 jars¾ cup / ~140 g3 cups / 720 ml2 cups / ~320 g

Mix all of the milk and chia in one large bowl, wait 5–10 minutes, and stir thoroughly again. If a large batch is still settling, keep it in the bowl for one more stir 30–60 minutes later; then divide it between containers. Use roughly half the pineapple in or alongside the jars and save the rest for serving. Keeping all of the fruit separate gives the most consistent texture over several days.

Keeping Meal-Prep Jars at Their Best

Crunchy toppings belong at the last minute. Granola, nuts, seeds and toasted coconut are much more enjoyable crisp than after three nights sitting in chia gel.

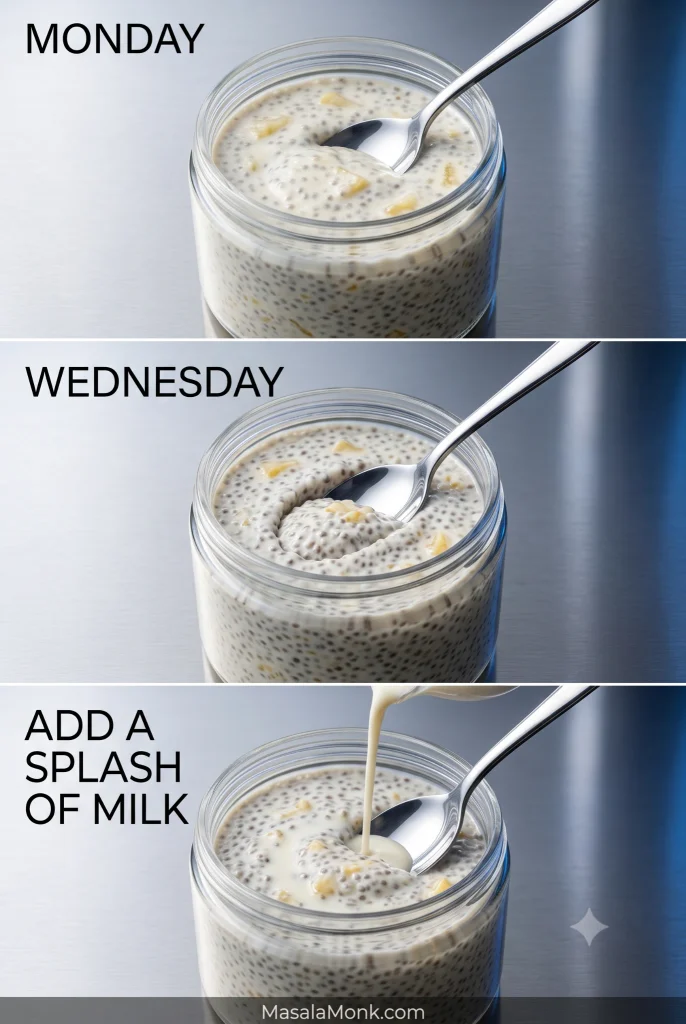
A jar that is just right on Monday can be noticeably thicker on Wednesday. Stir in 1–2 tablespoons / 15–30 ml milk and it usually comes straight back.

Three stages of stored chia pudding labeled Monday, Wednesday and add a splash of milk, showing a soft pudding, a firmer pudding two days later and milk being poured into the thicker jar.
Loosen the jar you are eating, not the entire batch in advance. Because stored chia keeps changing, adjusting each serving with a little milk preserves more control over tomorrow’s texture.

For the best fruit and texture quality, aim to eat prepared pineapple chia pudding within about 3–4 days. Keep it covered and refrigerated at 40°F / 4°C or below.

If you enjoy opening the fridge to find breakfast already handled, overnight oats work on much the same evening-prep rhythm with a completely different texture.

↑ Back to Recipe · ↑ Back to Top

Pineapple Chia Pudding Troubleshooting

Before fixing anything, check how long the pudding has actually been chilling. A jar that looks loose after 45–60 minutes may simply need more time.

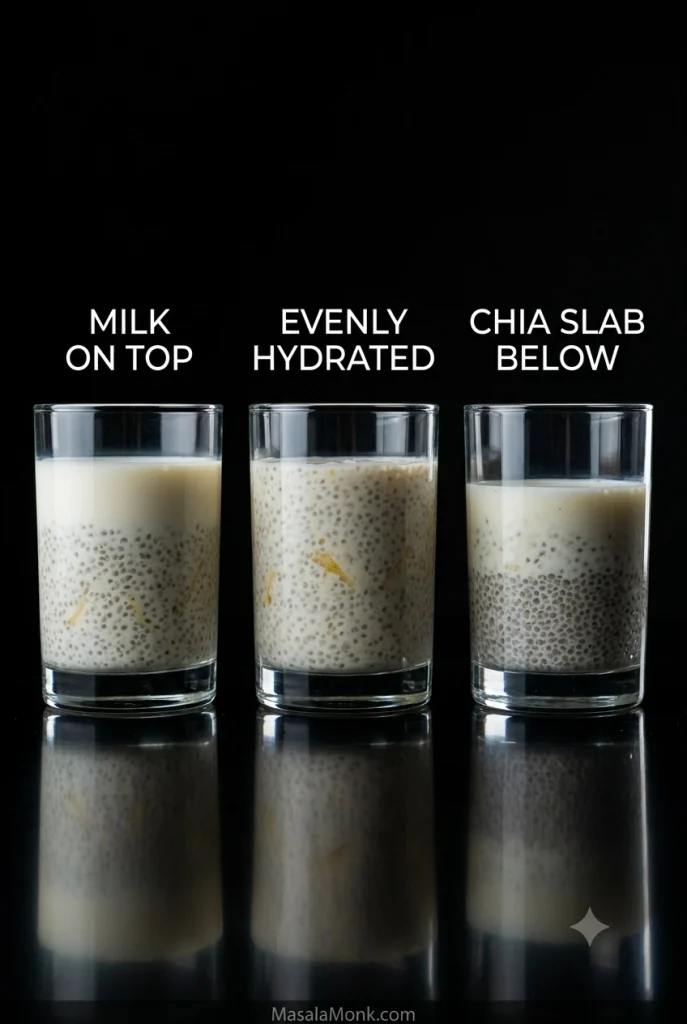
Three clear glasses compare separated chia pudding with milk on top, evenly hydrated chia pudding, and a dense chia layer settled at the bottom beneath thinner liquid.
Treat separation as a distribution problem before treating it as a ratio problem. If milk is sitting above compacted chia, first break up and redistribute the seeds already there. Adding more chia immediately can make the bottom even heavier.

Setting and Texture Problems

My chia pudding is still watery. What now?

After several hours, excess liquid usually means the ratio was too loose or the pineapple brought more juice than expected. Stir first. If it is still clearly too thin, add 1 teaspoon chia, wait 15–30 minutes, then check again. Next time, drain the fruit more thoroughly or keep it as a topping.

Why is there milk on top and a solid chia layer underneath?

The seeds settled before they had hydrated enough to stay suspended. Break the layer apart vigorously if you still can. Next time, stir once when you mix the pudding and again 5–10 minutes later.

My pudding is much too thick.

Stir in milk 1 tablespoon / 15 ml at a time until the spoon moves through it comfortably again. Very thick yogurt, extra chia and rich coconut milk can all push a jar past creamy into dense.

Why are there dry or crunchy chia pockets?

The seeds clumped before enough liquid could reach them. Break up any pockets you can find. Next time, sprinkle the chia in while whisking and do not skip the second stir.

Pineapple, Coconut and Yogurt Problems

The pineapple made my pudding watery.

Very ripe, thawed, crushed or poorly drained pineapple can contribute much more liquid than neat fresh pieces. A teaspoon of extra chia can rescue a clearly loose batch. Draining the fruit or keeping it as a separate layer prevents the problem next time.

Why did the coconut version become firm or waxy?

Coconut fat firms when chilled. Loosen the pudding with a little thinner milk and stir well. Next time, combine rich canned coconut milk with coconut drink or another lighter milk instead of using only full-fat canned coconut.

Why did my pineapple-yogurt pudding turn bitter?

Uncooked pineapple—fresh or frozen—can still contain active bromelain, which breaks down milk proteins during a long rest. For overnight yogurt or skyr pudding, use canned or cooked fruit, or add the raw pineapple in the morning.

It set properly, but I still hate the texture.

You may dislike whole chia pudding. Try blending the fully hydrated pudding. If that still does not help, the texture simply is not for you.

If the Chia Barely Gels at All

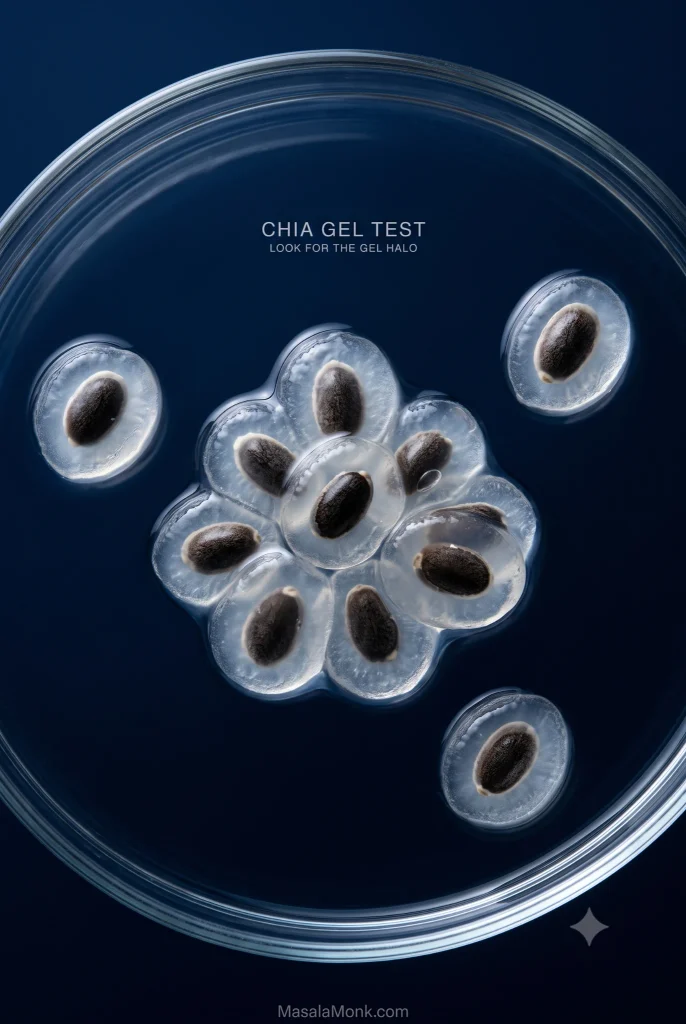
Brands and batches can thicken at different speeds, so give a correctly measured pudding several hours—or overnight—before blaming the seeds. If a familiar recipe suddenly stops setting, mix 1 teaspoon chia with 2 tablespoons water. After about 10–15 minutes, you would normally expect a clear gel halo. Very little gel is a good reason to try fresher chia rather than adding more and more seeds.

Macro view of hydrated chia seeds in water, each surrounded by a translucent gel halo, with several gelled seeds overlapping in a small cluster.
Judge the gel test across several seeds rather than looking for one perfect specimen. Visible translucent mucilage around multiple chia seeds is the useful sign that hydration is happening, even when individual halos vary in size and shape.

↑ Back to Recipe · ↑ Back to Top

A Few Flavor Ideas

Pineapple, cardamom & pistachio: stir a scant ⅛ teaspoon ground green cardamom into the milk, then finish with pineapple and chopped pistachios.

Pineapple, ginger & lime: add about ¼ teaspoon finely grated fresh ginger to the base and finish with extra lime zest. Start small; ginger gets loud quickly.

For a softer, sweeter fruit direction, try mango chia pudding.

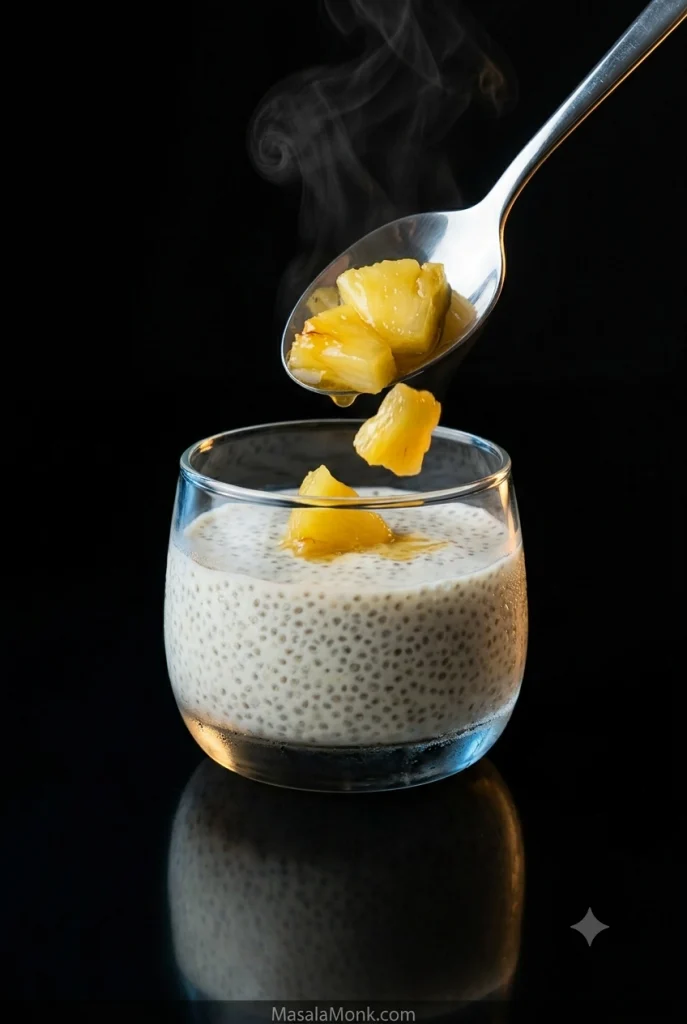
Warm pineapple over cold chia: cook diced pineapple over medium heat for about 5 minutes, until hot, glossy and softened. Add cardamom, ginger or cinnamon, then spoon it over the cold pudding.

Warm glossy pineapple being spooned onto cold chia pudding in a clear glass, with steam rising from the fruit and condensation visible on the chilled glass.
Add the warm pineapple only when you are ready to eat. The fruit stays glossy and aromatic, the chia stays properly cold, and the temperature contrast survives long enough to reach the first spoonful.

A Quick Nutrition Note

Chia contributes dietary fiber, plant protein, unsaturated fats and ALA omega-3 fatty acids. Harvard’s Nutrition Source has a fuller evidence-based overview. The rest of the jar matters too—Greek yogurt, coconut milk, sweeteners, granola and nuts can change the nutritional picture substantially.

Frequently Asked Questions

Can I make pineapple chia pudding overnight?

It works well overnight. Do the second stir, cover and refrigerate; the extra time gives the seeds plenty of time to hydrate.

Can I use pineapple juice instead of milk?

You can. Count pineapple juice as part of the measured liquid: add ¼ cup / 60 ml juice and reduce the milk by about the same amount.

Can I use fresh pineapple with Greek yogurt?

Fresh pineapple is fine for immediate serving. For an overnight yogurt jar, use canned or cooked pineapple, or add uncooked fruit in the morning.

Can I use ground chia seeds?

Yes, but ground chia can turn gummy. For a smoother result, hydrate whole chia first and blend the chilled pudding.

Why didn’t my chia pudding thicken?

Usually it needs more time, extra fruit liquid is involved, or the seeds clumped early. Check the troubleshooting section before adding more chia.

How long does pineapple chia pudding last?

Aim for 3–4 days refrigerated at 40°F / 4°C or below. Keep it covered and add crunchy toppings at serving.

When You’re Ready to Eat

Give the chilled pudding one good stir. Loosen it with a splash of milk if it needs it, then pile on the remaining pineapple, a little lime zest and something crunchy.

The best spoonful has soft, creamy chia, a juicy piece of pineapple and a little lime in the same bite. Cold, bright and ready when you open the fridge—not bad for five minutes the night before.

Did your jar behave differently? Tell us which milk and pineapple you used and how long it chilled; those details usually reveal what happened.

↑ Back to Recipe · ↑ Back to Top

Posted on — Leave a comment

The Bell Pepper – Nutrition, Benefits, and 5 Practical Ways for Weight Loss

Bell Pepper - Nutrition, Benefits

When it comes to weight loss, we often search for exotic superfoods or expensive supplements. But what if a humble, colorful, and delicious vegetable in your local produce aisle could help you trim fat, reduce inflammation, and supercharge your metabolism? Enter the bell pepper.

What Are Bell Peppers?

Bell peppers (Capsicum annuum), also known as sweet peppers, are non-spicy, thick-walled fruits that come in vibrant shades of red, green, yellow, and orange. Unlike their fiery relatives in the Capsicum family, bell peppers are mild, sweet, and exceptionally nutrient-dense.

Nutritional Powerhouse

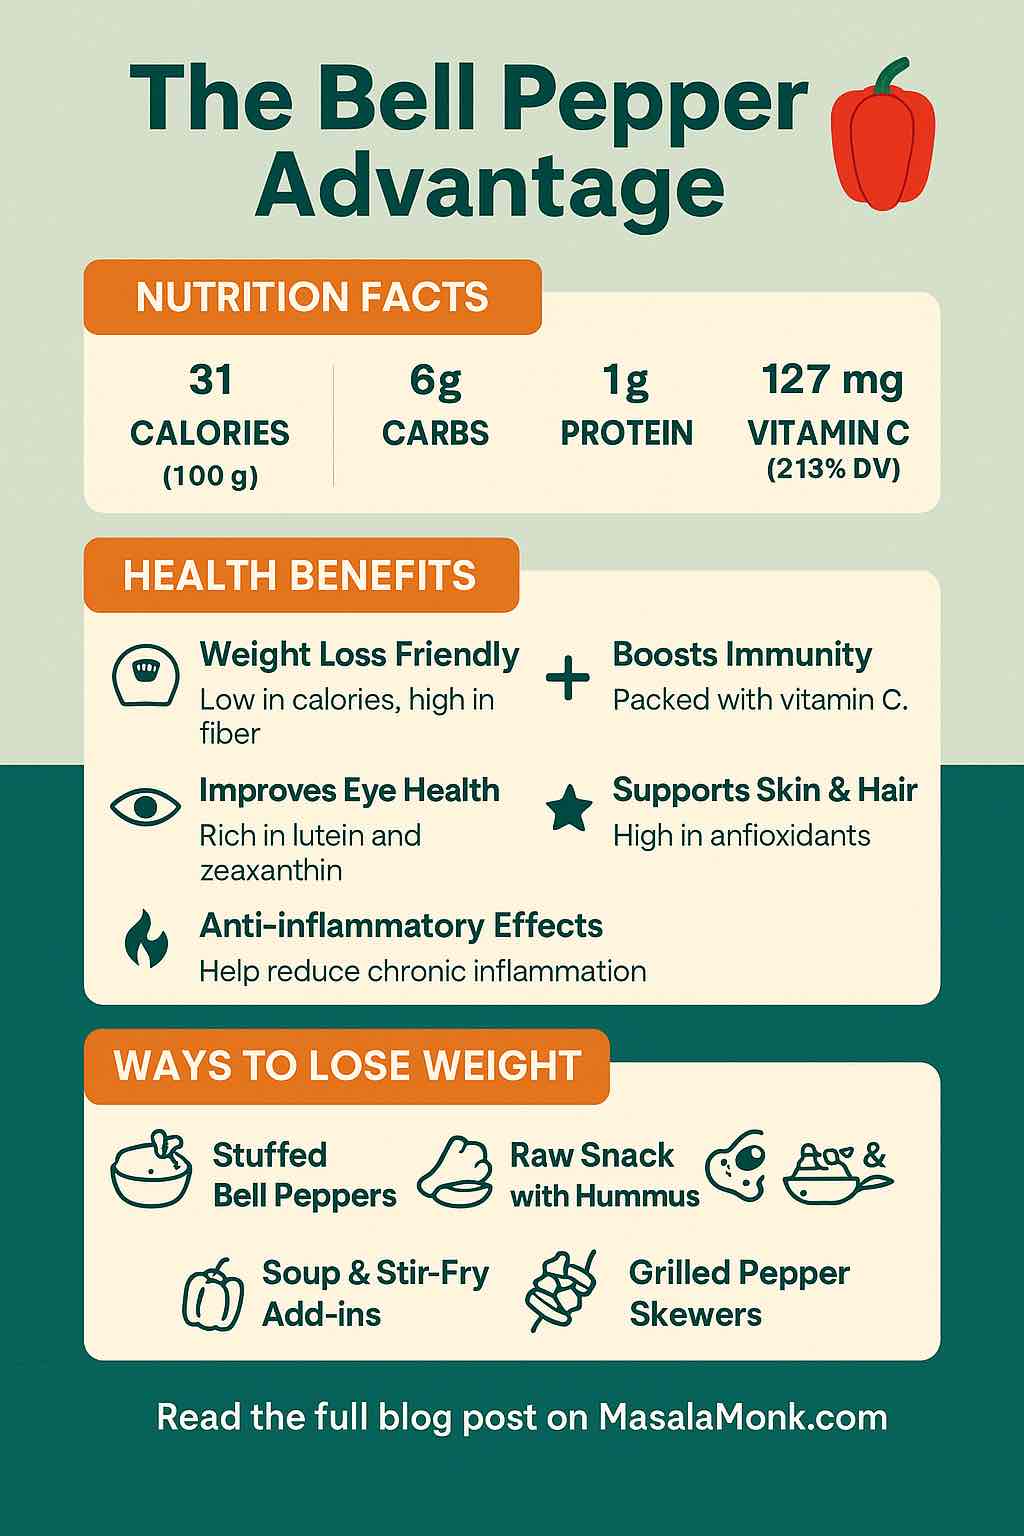
Here’s what you get in just one cup (about 100g) of raw red bell pepper:

  • Calories: 31
  • Water: ~92%
  • Carbohydrates: 6g (of which 4g are natural sugars)
  • Fiber: 2.1g
  • Protein: 1g
  • Fat: 0.3g
  • Vitamin C: 127mg (213% DV)
  • Vitamin A: 157mcg (19% DV)
  • Potassium: 211mg
  • Folate, Vitamin B6, Lutein, Zeaxanthin, Capsanthin, and Beta-carotene

Red bell peppers, which are fully ripened, have the highest levels of nutrients and antioxidants.

Science-Backed Health Benefits

1. Boosts Immunity and Skin Health

Vitamin C is essential for collagen production, wound healing, and immune function. Bell peppers contain more vitamin C than oranges, making them a powerful ally against seasonal illness and aging skin.

2. Enhances Metabolism and Fat Burning

Bell peppers contain capsiate, a non-spicy cousin of capsaicin, found in chili peppers. Capsiate has been shown in human and animal studies to modestly increase energy expenditure and fat oxidation without the burning sensation of capsaicin.

3. Fights Inflammation and Oxidative Stress

Antioxidants like beta-carotene, lutein, and zeaxanthin help neutralize free radicals. Capsanthin, unique to red bell peppers, has powerful anti-inflammatory and anti-obesity effects.

4. Improves Eye Health

Lutein and zeaxanthin accumulate in the retina and protect against macular degeneration and cataracts. Orange and yellow bell peppers are particularly rich in these carotenoids.

5. Promotes Fullness with Fewer Calories

High water content, dietary fiber, and low calorie density make bell peppers ideal for adding bulk to meals without increasing caloric load.

5 Practical Ways to Use Bell Peppers for Weight Loss

1. Stuffed Bell Peppers

Slice off the tops, remove seeds, and stuff with lean protein like turkey or lentils, brown rice, and herbs. Bake until soft. It’s a complete meal that’s filling, low-calorie, and fiber-rich.

2. Pepper & Hummus Snack Packs

Chop raw bell peppers into sticks and pair with 2 tablespoons of hummus. This crunchy, protein-rich snack keeps you full and curbs junk food cravings.

3. Egg & Pepper Breakfast Scramble

Saute diced bell peppers with onions and spinach. Add whisked eggs or tofu and scramble for a colorful, protein-packed breakfast that keeps you satisfied for hours.

4. Low-Cal Stir Fry Base

Bell peppers add volume, texture, and nutrition to stir fries. Use them with lean meats, tofu, or legumes in a light soy or garlic sauce over cauliflower rice for a low-carb dinner.

5. Grilled or Roasted as a Side Dish

Roast or grill peppers with a drizzle of olive oil and your favorite spices. Serve as a fiber-rich, antioxidant-loaded side dish that enhances any meal.

Cooking Tips to Maximize Benefits

  • Eat some raw to preserve vitamin C.
  • Cook lightly to boost carotenoid absorption.
  • Pair with healthy fats like olive oil or avocado to enhance nutrient uptake.
  • Mix colors to get a spectrum of nutrients and flavors.

Final Thoughts

Bell peppers aren’t just a colorful garnish. They’re a scientifically supported, budget-friendly powerhouse for weight loss and overall health. With their unique mix of fiber, water, antioxidants, and metabolism-boosting compounds, incorporating bell peppers into your daily meals is a simple yet effective way to support a leaner, healthier you.

So next time you shop, grab a rainbow of bell peppers and start reaping their delicious and transformative benefits.


📌 FAQs

1. Are bell peppers good for weight loss?
Yes. Bell peppers are low in calories, high in fiber and water, and contain metabolism-boosting compounds like capsiate, which can help support fat loss.

2. Which bell pepper is healthiest?
Red bell peppers are the most nutrient-dense. They’re fully ripened and contain the highest levels of vitamin C, beta-carotene, and capsanthin.

3. Can I eat bell peppers every day?
Absolutely. Eating bell peppers daily can support digestion, immunity, eye health, and weight management. Just vary the colors to maximize nutrient intake.

4. Do bell peppers burn belly fat?
While no food targets belly fat specifically, bell peppers contain compounds like capsiate and fiber that may help reduce overall fat and support metabolism.

5. How do I store bell peppers for freshness?
Keep unwashed bell peppers in the fridge’s crisper drawer. Use within 5–7 days for optimal freshness, or freeze sliced peppers for longer use.

6. Should I eat bell peppers raw or cooked?
Both are beneficial. Raw peppers preserve vitamin C, while cooking helps absorb carotenoids. A mix of both is ideal.

7. Can I eat bell peppers at night?
Yes. They are easy to digest and low in calories, making them a great late-night snack when paired with protein like hummus or cottage cheese.

8. Are green bell peppers less nutritious?
Green peppers are less sweet and contain fewer antioxidants than red or orange ones but still provide fiber, vitamin C, and B6.

9. Can bell peppers cause bloating or gas?
Some people with sensitive stomachs may experience mild bloating. Start with smaller amounts and cook them to reduce potential discomfort.

10. Are bell peppers keto-friendly?
Yes. Bell peppers are relatively low in carbs (~6g per 100g), making them suitable for most low-carb and ketogenic diets in moderation.

Posted on — Leave a comment

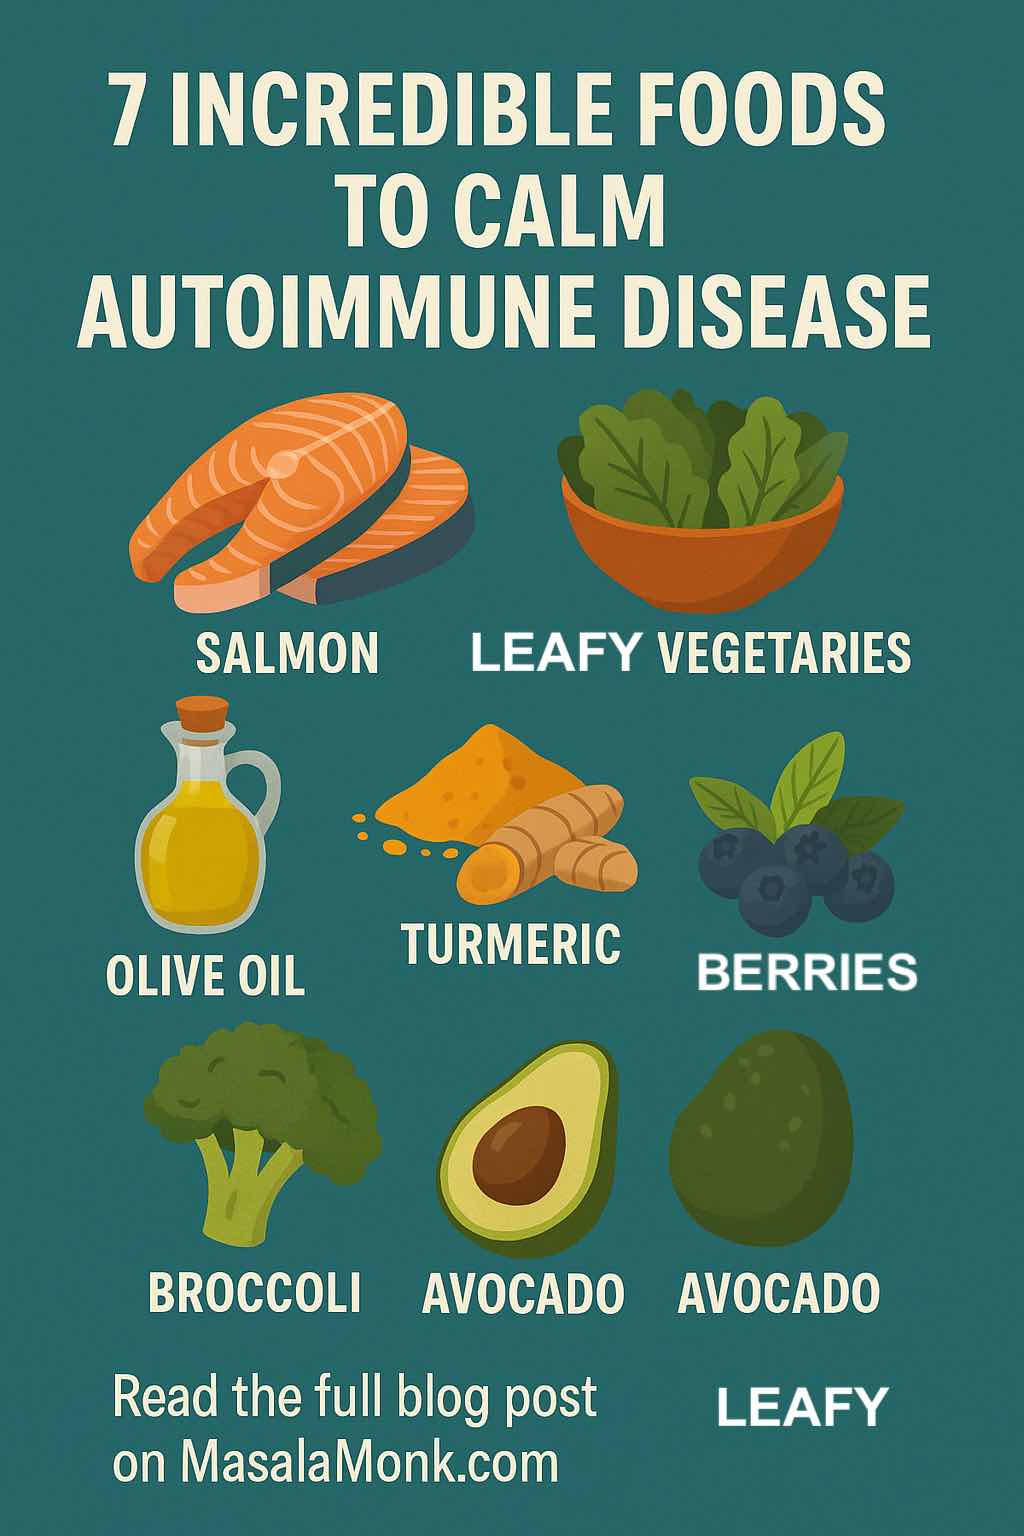
7 Incredible Foods to Calm Autoimmune Disease

FOODS TO CALM AUTOIMMUNE DISEASE

Autoimmune diseases are complex, unpredictable, and often exhausting. While there’s no magic food that can “cure” conditions like rheumatoid arthritis, lupus, Hashimoto’s, or multiple sclerosis, mounting research shows that what you put on your plate can make a huge difference in how you feel day to day. If you’re seeking more energy, fewer flares, and a chance to regain control, start by adding these science-backed, anti-inflammatory foods to your daily routine.

Let’s break down the most powerful foods for taming inflammation—with real-life tips for making them a delicious, effortless part of your lifestyle.


1. Fatty Fish (Salmon, Mackerel, Sardines)

Why they work: Fatty fish are rich in omega-3 fatty acids (EPA and DHA), which act like fire extinguishers for chronic inflammation. These fats not only lower inflammatory cytokines, but they also directly benefit joint pain and stiffness—especially in rheumatoid arthritis.

How to use them:

  • Grill salmon fillets with lemon and herbs for a 20-minute dinner.
  • Add tinned sardines or mackerel to salads or avocado toast for a protein boost.

Tip: If fish isn’t your thing, high-quality fish oil supplements are a proven alternative.


2. Extra Virgin Olive Oil

Why it works: The backbone of the Mediterranean diet, extra virgin olive oil contains polyphenols and oleocanthal, which have anti-inflammatory effects similar to ibuprofen, but without the side effects.

How to use it:

  • Drizzle over roasted veggies or use as a salad base.
  • Dip crusty whole-grain bread into olive oil, seasoned with fresh herbs and cracked pepper.

Tip: Use “cold-pressed” extra virgin olive oil for maximum benefits.


3. Leafy Greens (Spinach, Kale, Swiss Chard)

Why they work: These are nutritional powerhouses—rich in magnesium, vitamin C, and fiber. They help reduce oxidative stress, support detoxification, and provide essential nutrients that many autoimmune patients lack.

How to use them:

  • Add spinach to morning smoothies (you won’t even taste it!).
  • Sauté kale with garlic as a side dish for any meal.
  • Try a big mixed green salad every day at lunch.

4. Berries (Blueberries, Strawberries, Raspberries, Blackberries)

Why they work: Berries are packed with anthocyanins and flavonoids—compounds shown to lower markers like CRP and help regulate immune responses.

How to use them:

  • Sprinkle fresh or frozen berries on oatmeal, yogurt, or chia pudding.
  • Blend into smoothies for a quick, nutrient-rich snack.

5. Fermented Foods (Yogurt, Kefir, Sauerkraut, Kimchi)

Why they work: Your gut is the command center for your immune system. Fermented foods provide probiotics that help restore gut balance and can “retrain” the immune system—especially helpful for conditions like IBD and Hashimoto’s.

How to use them:

  • Add a spoonful of sauerkraut or kimchi to grain bowls or salads.
  • Choose plain, unsweetened yogurt as a base for fruit parfaits or savory dips.

6. Turmeric (with Black Pepper!)

Why it works: Curcumin, the active compound in turmeric, powerfully reduces inflammation and is shown in trials to lower symptoms in RA, psoriasis, and even MS.

How to use it:

  • Whisk turmeric and black pepper into soups, curries, or scrambled eggs.
  • Try a “golden milk” latte (turmeric, ginger, black pepper, milk of choice) before bed.

Tip: Always pair turmeric with black pepper to boost absorption by up to 2000%.


7. Nuts & Seeds (Walnuts, Almonds, Flax, Chia)

Why they work: Packed with healthy fats, fiber, magnesium, and zinc—nutrients that lower inflammation and support immune balance.

How to use them:

  • Snack on a handful of mixed nuts every afternoon.
  • Sprinkle chia or flax seeds into smoothies or over oatmeal.
  • Make your own trail mix with nuts, seeds, and a few dried berries.

8. Cruciferous Vegetables (Broccoli, Brussels Sprouts, Cauliflower)

Why they work: These veggies are rich in sulforaphane and indoles—natural compounds that help regulate detoxification and balance immune responses.

How to use them:

  • Roast broccoli or Brussels sprouts with olive oil and garlic for a crispy side.
  • Add finely chopped cauliflower to stir-fries or grain bowls.

9. Ginger

Why it works: Like turmeric, ginger blocks inflammatory pathways and soothes gut inflammation. Research supports its use in reducing pain and joint stiffness.

How to use it:

  • Steep fresh ginger slices in hot water for a calming tea.
  • Add grated ginger to smoothies, stir-fries, or salad dressings.

10. Avocado

Why it works: Loaded with monounsaturated fats and antioxidants, avocado helps lower inflammation and supports healthy cholesterol levels.

How to use it:

  • Smash on toast, top with seeds and a squeeze of lemon.
  • Dice into salads or blend into creamy smoothies.

11. Whole Grains (Quinoa, Oats, Buckwheat, Brown Rice)

Why they work: Whole grains deliver fiber, magnesium, and phytonutrients that help feed good gut bacteria and modulate immune function.

How to use them:

  • Cook a batch of steel-cut oats or quinoa for breakfast.
  • Use buckwheat or brown rice as a base for grain bowls.

Practical Tips for Success

  1. Aim for Color & Variety: The more diverse your diet, the wider the range of anti-inflammatory nutrients you’ll get.
  2. Watch for Triggers: Not every “healthy” food works for every person with autoimmune disease—track your meals and symptoms to spot personal sensitivities (e.g., gluten, nightshades, dairy).
  3. Prioritize Whole Foods: Limit processed foods, added sugars, and excessive salt. They can all drive inflammation and flare-ups.
  4. Stay Consistent: Benefits are cumulative—focus on building sustainable habits, not quick fixes.

Sample Day: Anti-Inflammatory Eating

Breakfast: Overnight oats with chia seeds, blueberries, walnuts, and a drizzle of honey
Lunch: Kale salad with roasted salmon, avocado, quinoa, and sauerkraut
Snack: Greek yogurt with raspberries and pumpkin seeds
Dinner: Stir-fried broccoli and ginger over brown rice, topped with tofu or chicken
Drink: Turmeric-ginger “golden milk” latte


Frequently Asked Questions

What about supplements?

Food comes first! But omega-3, vitamin D, high-quality probiotics, and curcumin can help—ask your doctor about appropriate dosing.

How long until I notice a difference?

Many people feel improvement in energy, pain, or gut symptoms within weeks of consistent changes, but individual results vary.

Is there a “best” diet for autoimmune disease?

Most research supports Mediterranean-style or autoimmune protocol (AIP) diets, focusing on unprocessed, anti-inflammatory foods and eliminating common triggers.


Final Thoughts

If you’re battling an autoimmune disease, know that you have real tools at your disposal. Every anti-inflammatory meal you eat is a message to your body: “Let’s work together to heal.” Focus on progress, not perfection. And remember, small changes add up—start with a new berry smoothie, an extra spoonful of sauerkraut, or a golden milk latte, and see how you feel.

Your journey is unique. Listen to your body, stay curious, and never underestimate the power of food as medicine.

10 FAQs & Answers

1. What are the most common autoimmune diseases that benefit from an anti-inflammatory diet?
Most autoimmune diseases—including rheumatoid arthritis, lupus, Hashimoto’s thyroiditis, multiple sclerosis, inflammatory bowel disease (IBD), psoriasis, and type 1 diabetes—may benefit from anti-inflammatory dietary patterns. Scientific studies consistently show improvement in symptoms and lower inflammation markers across these conditions.


2. Can diet alone cure autoimmune disease?
No, diet cannot cure autoimmune disease. However, the right foods can reduce flare frequency, lessen symptom severity, and improve overall well-being. Diet is best used alongside medications and medical guidance.


3. How quickly will I notice improvements after changing my diet?
Some people notice increased energy, reduced pain, and better digestion within 2–4 weeks. For others, improvements may take longer. Consistency is key—results often build gradually.


4. Are there foods I should avoid with autoimmune disease?
Yes, common triggers include ultra-processed foods, added sugars, excessive alcohol, and trans fats. For some people, gluten, dairy, soy, or nightshades (tomato, eggplant, peppers) can worsen symptoms. It’s best to track your own triggers with a food diary.


5. Can I follow a vegetarian or vegan diet if I have an autoimmune disease?
Absolutely. Focus on plant-based sources of anti-inflammatory nutrients—legumes, nuts, seeds, leafy greens, berries, whole grains, and healthy oils. Consider supplementing with vitamin B12, vitamin D, and possibly omega-3s (from algae oil) to avoid deficiencies.


6. Should I take supplements like fish oil or curcumin?
Supplements can help if you’re not getting enough from food. Fish oil (for omega-3s), curcumin (turmeric extract), vitamin D, and probiotics have research support. Always consult your healthcare provider before starting new supplements, especially if you take medications.


7. How important is gut health for autoimmune conditions?
Extremely important! Over 70% of your immune system resides in the gut. Eating plenty of fiber, fermented foods, and a diverse range of fruits and vegetables supports healthy gut bacteria and immune balance.


8. Are all fermented foods helpful?
Most are, but look for “raw” or “live culture” products (e.g., unpasteurized sauerkraut, kimchi, kefir, yogurt with live cultures). Processed or pasteurized versions may not provide probiotic benefits.


9. How do I manage food sensitivities or allergies alongside autoimmune disease?
Elimination diets (like AIP or low FODMAP) can help identify food triggers. Work with a registered dietitian or healthcare provider to avoid nutritional gaps when restricting foods.


10. What’s a simple way to start eating anti-inflammatory?
Begin by adding one or two anti-inflammatory foods (like berries or leafy greens) to your daily routine. Replace processed snacks with nuts or seeds. Cook more meals at home using olive oil and a variety of colorful vegetables.

Posted on — Leave a comment

Unwaxing the Truth: How to Clean Your Fruits

How to Clean Your Fruits

Have you ever noticed how apples at the store seem to glisten? Or how oranges sometimes feel a little slippery, even after a rinse? That’s fruit wax—a perfectly legal, food-safe coating used to keep produce looking fresh and to slow down spoilage. But is it something you want to eat? And, more importantly, are you really getting rid of wax, dirt, and pesticides when you wash your fruit?

Let’s get into the practical steps and science behind cleaning your fruit—no hype, just what works.


What’s On Your Fruit?

  • Wax is added after harvest to help fruit last longer and look appealing. It forms a thin layer over the skin.
  • Pesticide residues can be found on (and sometimes inside) both conventional and organic produce.
  • Dirt and germs from handling and transport are also present—even on organic or homegrown fruit.

Key insight: Most of the time, wax and surface pesticides can be removed with a smart cleaning routine. But for some deep-penetrating chemicals, only peeling fully removes them.


The Smart Routine: Clean Fruit, Less Fuss

Here’s how you can actually get rid of most wax, dirt, and pesticides at home, with everyday ingredients.

1. Don’t skip the rinse

Before anything else, rinse your fruit under cold, running water. Use your hands to gently rub the surface. This alone removes a lot of dirt and some microbes.

2. Make a cleaning solution (optional, but very effective)

For an extra-clean feeling, especially with apples, pears, cucumbers, or anything with a waxy finish:

  • Corn Starch Soak:
    Mix 2 teaspoons of corn starch in 1 cup of water. Soak your fruit for about 10 minutes.
  • Baking Soda Soak:
    Afterwards, mix 2 teaspoons of baking soda in 1 cup of water. Soak for another 10 minutes.
  • For quick results, you can also just scrub with a little baking soda paste (baking soda + a splash of water) on a damp cloth.

3. Scrub if you can

Firm fruits (apples, cucumbers, citrus) benefit from a gentle scrub with a clean brush. This helps lift wax and dirt. For softer fruit (plums, peaches), rub gently with your hands.

4. Rinse again

Always rinse fruit thoroughly under running water after any soak or scrub, to wash away loosened wax and residue.

5. Dry with a clean towel

This step removes even more wax and helps keep your fruit from spoiling too fast. If you’re prepping fruit for storage, skip washing until you’re ready to eat.

6. Peel if needed

If you’re serving fruit to young kids, pregnant women, or anyone with a weakened immune system—and you’re worried about possible pesticide residues—peeling is the ultimate way to remove what’s left. Just remember, you lose some fiber and nutrients in the skin.


For Specific Fruits

  • Berries and grapes:
    Don’t use scrubs or soaks. Just rinse thoroughly in a colander right before eating. Too much soaking causes them to break down.
  • Leafy produce (like apples, cucumbers, citrus):
    The corn starch and baking soda method works best.
  • Stone fruit (peaches, nectarines):
    Gentle rubbing and a quick baking soda soak help if the skin feels slick or sticky.

Pro Cleaning Habits

  • Wash fruit right before you eat it. Washing and storing adds moisture and speeds up spoilage.
  • Don’t use soap or dish detergent. These aren’t meant for eating and can leave behind their own residues.
  • Even organic fruit needs a rinse. “Organic” doesn’t mean “clean.”

Final Word

You don’t need fancy produce washes or special gadgets. Cold water and a little time are the best start; baking soda or corn starch solutions are your next-level upgrades for waxy or heavily handled fruits. If you want total peace of mind, peel—otherwise, just rinse, scrub, and enjoy. Every bite is better when it’s clean!


Try this routine next time you prep fruit and see the difference. If you notice a residue come off, or the fruit’s shine dull, you’re actually seeing the wax and dirt go down the drain—right where they belong.

Frequently Asked Questions (FAQs)

1. Do I really need to wash fruit if I’m going to peel it anyway?
Yes. Washing removes dirt, bacteria, and pesticides from the surface. If you peel unwashed fruit, your knife can transfer residues from the skin to the flesh.


2. Can I use dish soap or hand soap to clean fruit?
No. Soaps can leave behind residues that aren’t safe to eat and aren’t approved for use on foods.


3. Does vinegar actually remove pesticides?
Vinegar can help reduce some surface bacteria and wax, but baking soda or the corn starch method are more effective for removing pesticides.


4. Is it safe to eat the wax on store-bought fruit?
Yes, most commercial waxes are food-grade and considered safe. However, washing can remove dirt and any trapped residues under the wax.


5. How do I clean delicate fruits like berries or grapes?
Rinse gently under cold, running water right before eating. Avoid soaking for long periods, as this can make them mushy.


6. Does organic fruit need to be washed too?
Yes. Organic fruits can still have dirt, bacteria, and natural residues, so always wash them before eating.


7. What’s the best way to wash leafy greens or herbs?
Swish them in a bowl of cold water, let dirt settle, lift out, and rinse under running water. Repeat if necessary.


8. Can I use commercial fruit and veggie washes?
Most health experts say they aren’t necessary—plain water or homemade solutions (like baking soda) work just as well and are safer.


9. Why should I avoid washing fruit before storing it?
Moisture left on fruit encourages mold and spoilage. Always wash fruit just before eating or using it.


10. What’s the fastest way to remove wax from apples and cucumbers?
A quick scrub with a baking soda paste (baking soda + a little water) and a brush, followed by a thorough rinse, removes most wax quickly.