
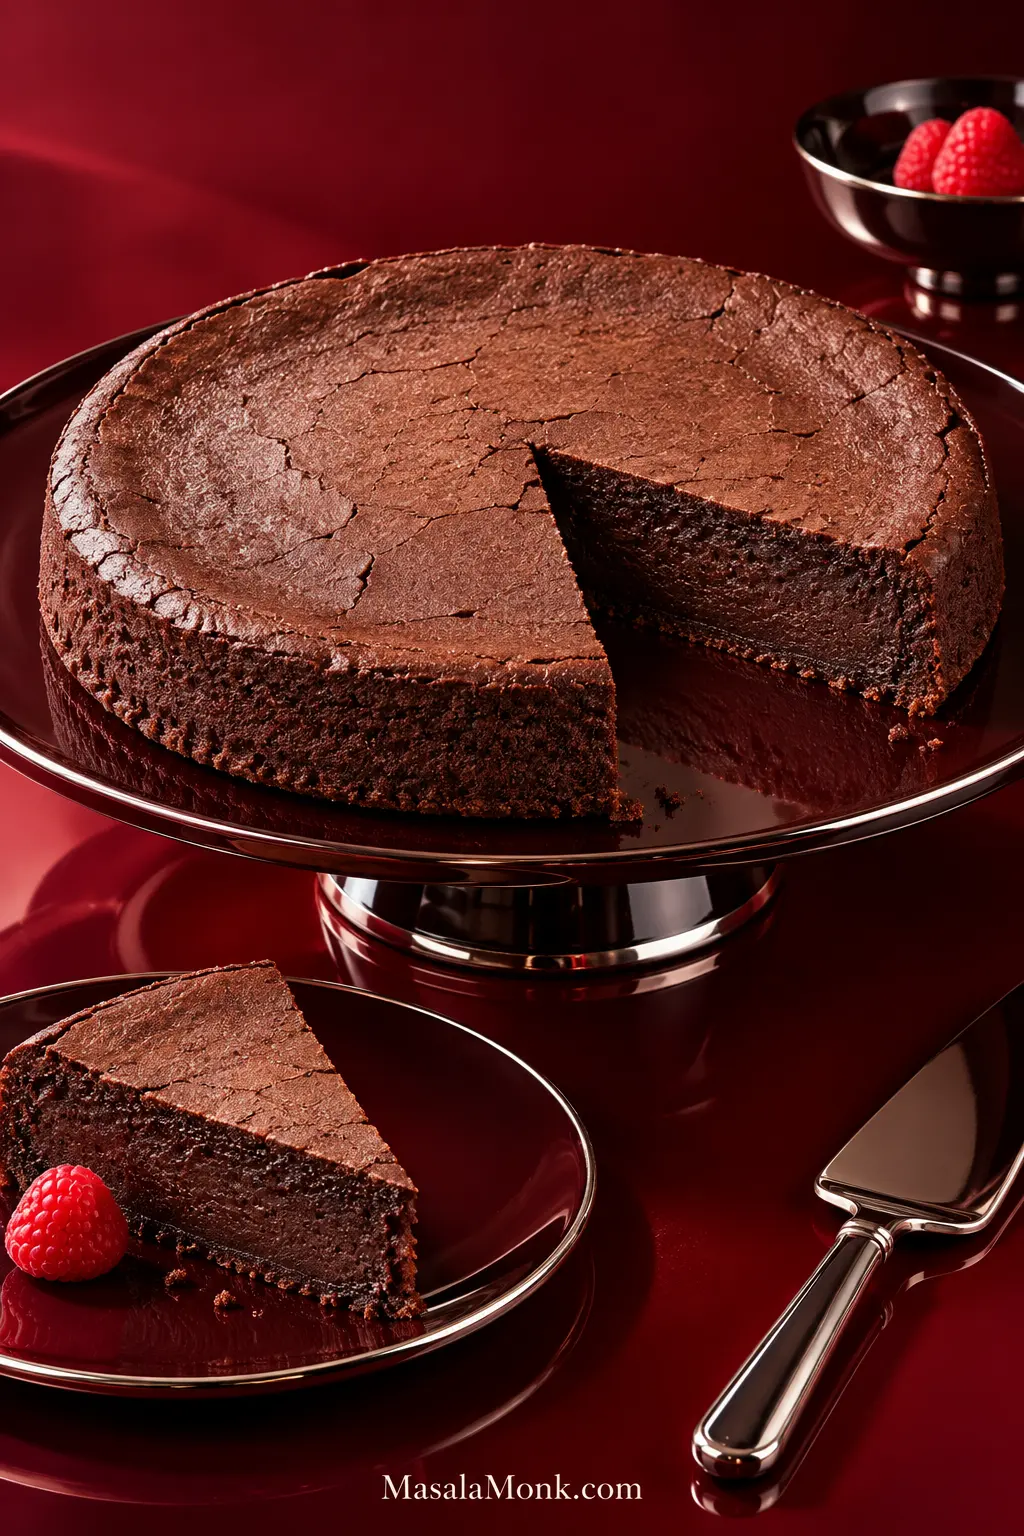
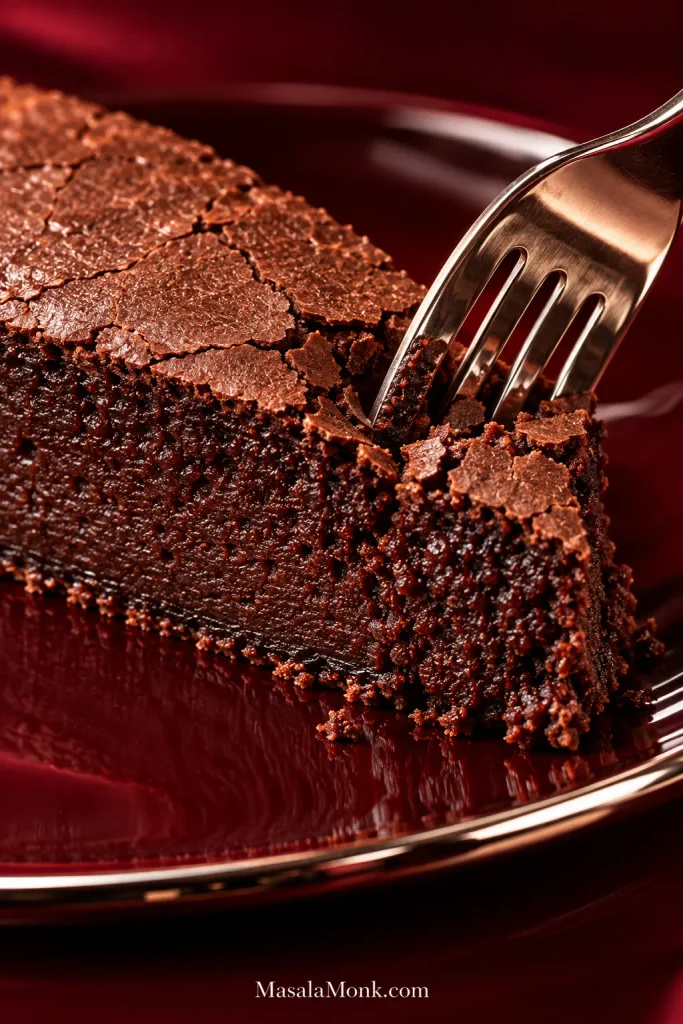
Cut into a good flourless chocolate cake and the fork breaks through a thin, delicate crust before reaching a dark center that is dense, soft and deeply chocolatey. Once cool, it holds a proper dessert wedge while the middle stays far fudgier than an ordinary chocolate cake.
This flourless chocolate cake recipe gets that texture from melted chocolate, cocoa, butter and eggs. There is no wheat flour, almond flour or specialty gluten-free flour blend. The method itself is straightforward: melt, whisk, bake, cool.
This is the low, fudgy style of flourless chocolate cake. Whole eggs give it a dense, silky slice; versions built around whipped egg whites bake lighter and more soufflé-like.
The bake is the part worth watching. Thick batter is normal. The middle comes out softer than the edge, and a little puffing, cracking and settling can all happen on the way to the finished cake. Once you know what those stages look like, most of the uncertainty disappears.
The result you’re looking for:
Top: thin chocolate crust; a few fine cracks are fine.
Edge: set and slightly puffed.
Center: soft but set, never liquid.
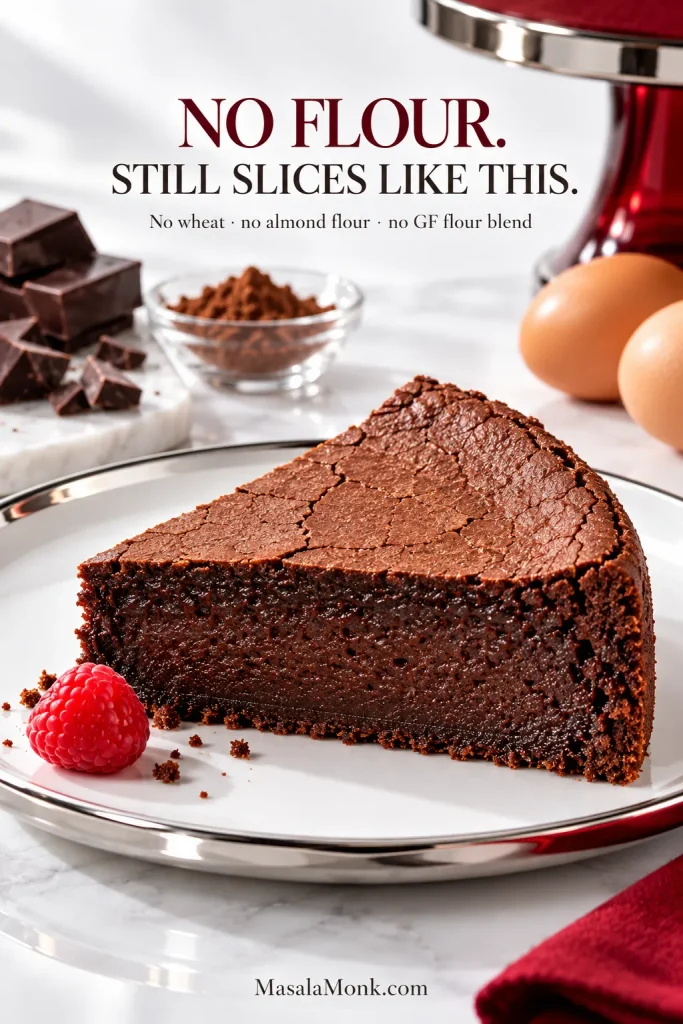
Slice: dense, fudgy and cleanly cut once cool.
Flourless Chocolate Cake Recipe
A rich flourless chocolate cake with a delicate crust and fudgy center, made with melted chocolate and cocoa. Whole eggs and an ordinary round cake pan keep the method simple, with no almond flour, mixer or water bath required.
Equipment
- 8-inch / 20-cm round metal cake pan, ideally about 2 inches / 5 cm deep, plus parchment paper
- Large heatproof mixing bowl, microwave-safe if using the microwave
- Balloon whisk and flexible spatula
- Small saucepan, only if melting the chocolate over simmering water
- Digital kitchen scale, recommended
- Fine-mesh sieve, optional if the cocoa is lumpy
Ingredients
- 5 oz / 142 g semisweet or bittersweet baking chocolate, about 60–70% cacao, finely chopped
- ½ cup / 4 oz / 113 g unsalted butter, cut into pieces
- ¾ cup / 150 g granulated sugar
- 1 teaspoon / 5 ml vanilla extract
- ¼ teaspoon fine salt
- ½ teaspoon instant espresso powder, optional
- 4 large eggs, about 200 g without shells, at room temperature
- 32 g unsweetened cocoa powder, about 6 tablespoons, natural or Dutch-process
Instructions
1. Prepare the oven and pan
Heat a conventional oven to 350°F / 175°C. Grease an 8-inch / 20-cm round metal cake pan, line the bottom with a parchment round, then lightly grease the parchment.
Do not skip the parchment. The cake is tender while warm, and a lined base makes release much easier.
2. Melt the chocolate and butter
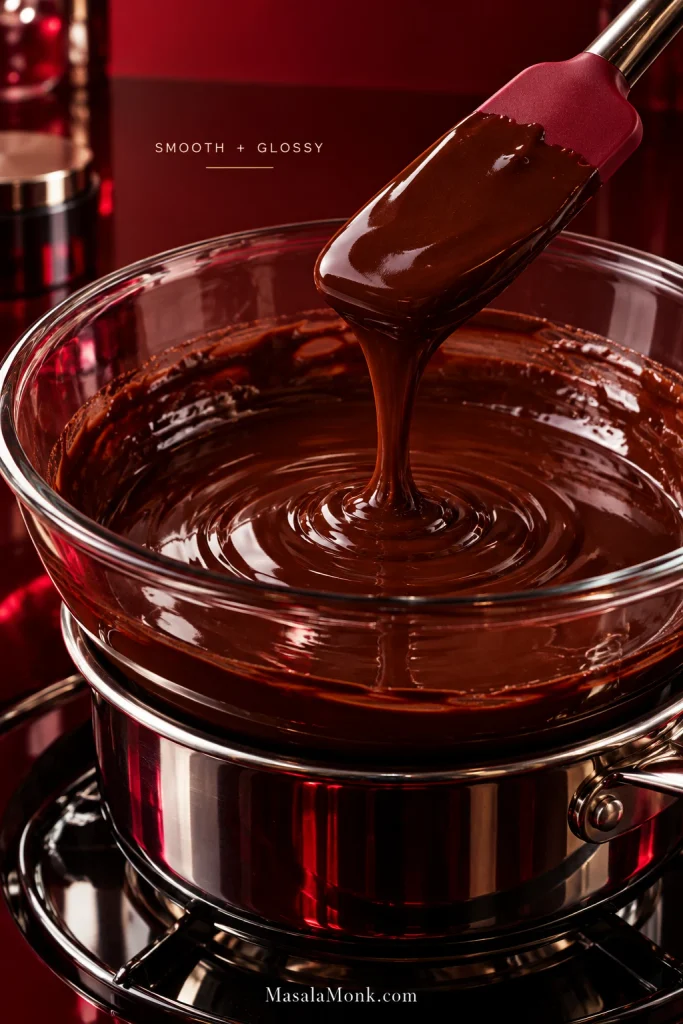
Put the chopped chocolate and butter in the heatproof mixing bowl. Either set the bowl over a small saucepan of barely simmering water, making sure the bottom does not touch the water, or microwave in short intervals, stirring often.
Stop heating as soon as the mixture is smooth and glossy. Let it stand for about 5 minutes, until warm rather than hot.
3. Add the sugar and flavorings
Whisk in the sugar, vanilla, salt and optional espresso powder. A little graininess from the sugar is fine at this stage.
4. Add the eggs
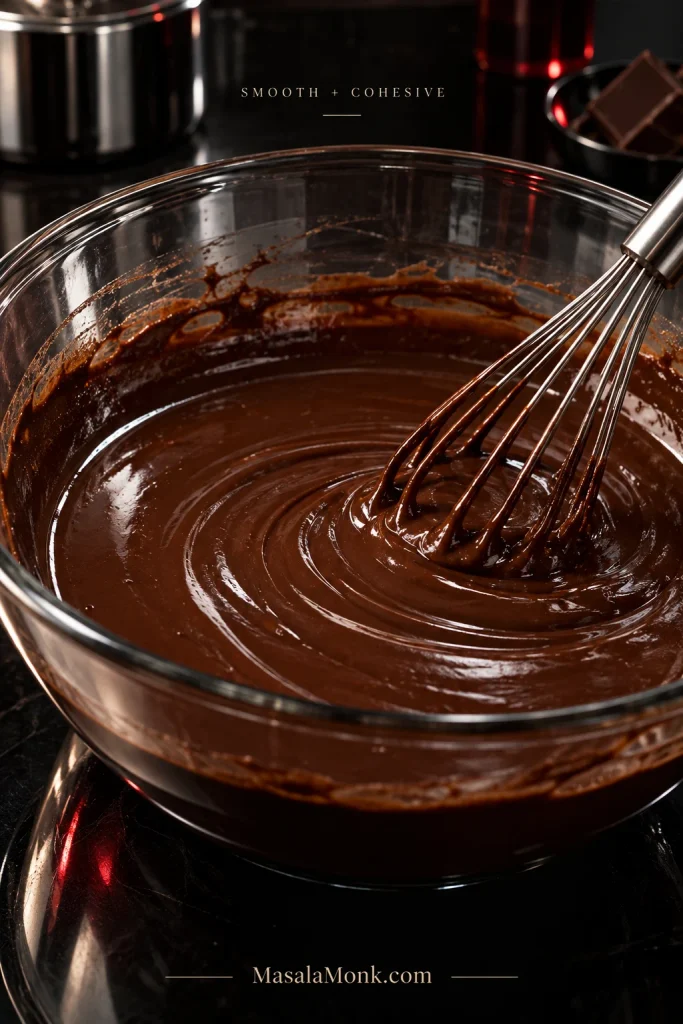
Add the room-temperature eggs one at a time, whisking just until each disappears into the chocolate mixture before adding the next.
By the fourth egg, the mixture looks smoother and more cohesive; it does not need to become pale or foamy.
If little cooked streaks of egg appear, the chocolate mixture was still too hot. Give the melted chocolate and butter more time to cool next time.
5. Add the cocoa and check the batter
Add the cocoa powder, sifting it first if it looks lumpy. Fold or whisk gently until the batter is evenly dark and no dry pockets remain, scraping the bottom and sides of the bowl.
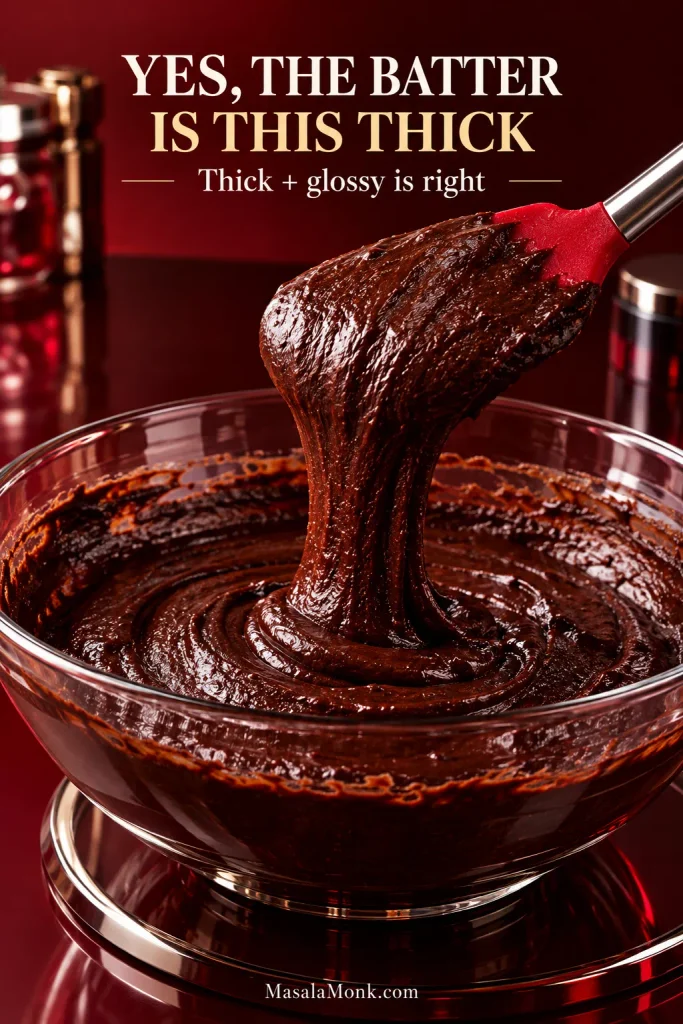
The batter is supposed to be thick. Look for a smooth, glossy mixture closer to brownie batter than loose layer-cake batter. Do not thin it with milk or water.
Scrape the batter into the prepared pan, smooth the top and give the pan one or two light taps on the counter to release any unusually large trapped air pockets.
6. Bake until the center is just set
Bake on the center rack. Begin checking at about 23–24 minutes. In the specified pan, expect roughly 24–30 minutes, but use the cake itself to decide when it is ready.
The perimeter looks set and slightly puffed, with a thin crust across the top. Meanwhile, the middle remains softer than the edge but no longer flows or sloshes when the pan is moved gently.
A tester near the center brings up moist chocolate crumbs or a light fudgy smear. Raw batter needs more time; a completely dry tester is farther than you need to go.
7. Let cooling finish the texture
Set the pan on a rack for about 10–15 minutes, until the cake is still warm but feels firm enough to handle. Expect a little puffing, fine cracking and settling.
Run a thin knife around the edge if needed. Carefully invert the cake onto a plate or rack and peel away the parchment. Place a second plate or rack over the cake, then turn it right-side up.
Leave it until completely cool before slicing; total cooling will usually take about 1½–2 hours. If it still feels fragile, leave it alone for a little longer. It becomes much sturdier as the chocolate and butter cool.
Recipe Notes
- Chocolate: 60–70% cacao gives the intended balance of chocolate intensity and sweetness.
- Cocoa: Dutch-process gives a darker, rounder chocolate flavor; natural cocoa is slightly brighter. Either works here.
- 9-inch / 23-cm pan: the cake will be thinner and usually finishes sooner. Start checking several minutes early.
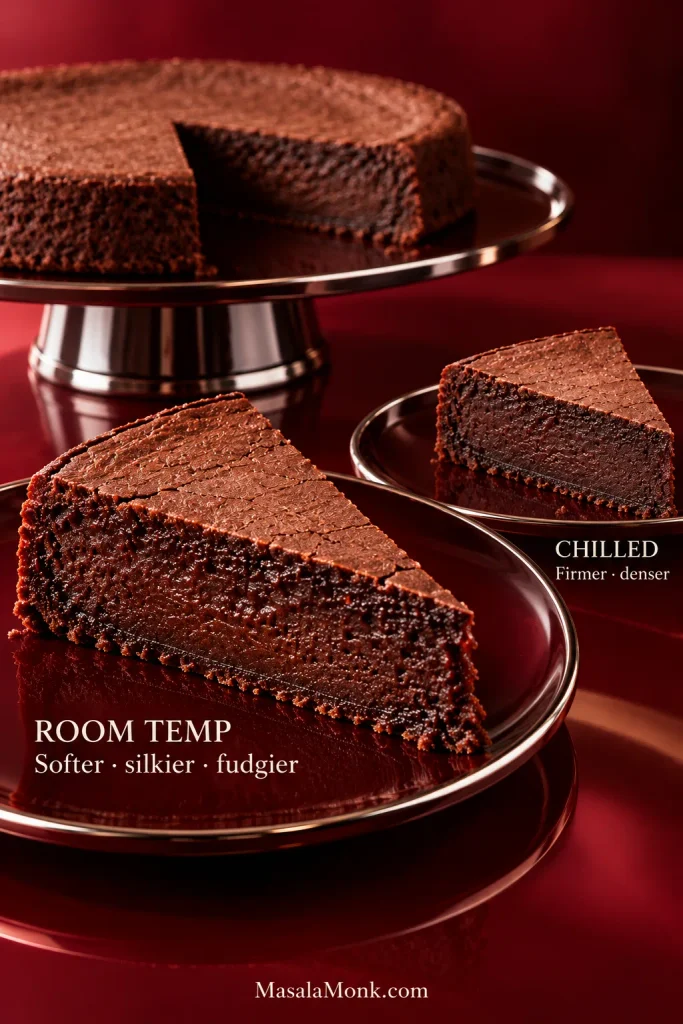
- Serving temperature: nearer room temperature, the cake is softer and silkier; refrigeration makes it firmer and more truffle-like.
- Gluten-free needs: for strict gluten avoidance, check labels on the chocolate, cocoa and other packaged ingredients and prevent cross-contact.
Flourless Chocolate Cake Guide
The method is simple; the guide below covers the ingredient choices, baking cues and questions that matter most with this style of flourless cake.
Before Baking
Baking & Cooling
Questions & Serving
Choosing the Right Chocolate
Chocolate does much of the flavor work here, so its character comes through clearly in the finished cake.
Use a semisweet or bittersweet baking bar around 60–70% cacao. That range keeps the chocolate dark and full-flavored without making the finished cake aggressively bitter.
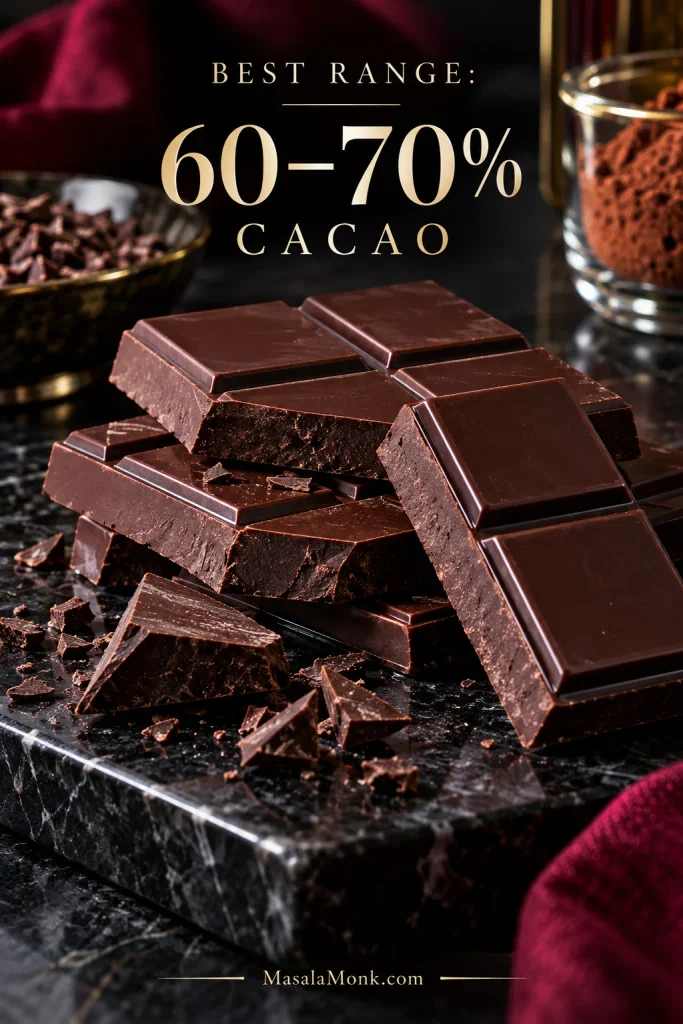
Chopped bar chocolate is the easiest choice because it melts smoothly. Good baking chips can work too, although results vary by brand. Skip candy melts and coating wafers; they are made for a different job.
Milk chocolate brings much more sugar and milk solids, so it needs a recipe balanced around that sweeter profile.
Why Use Chocolate and Cocoa Together?
Melted chocolate gives the cake richness and body, while cocoa adds concentrated chocolate flavor without another large dose of fat or sugar. Eggs help the cake set.
Dutch-process cocoa tastes darker and rounder; natural cocoa is a little brighter.
The Pan Changes the Cake
The same batter can behave quite differently in a different pan. Diameter and material both affect how quickly the edge sets compared with the softer middle.
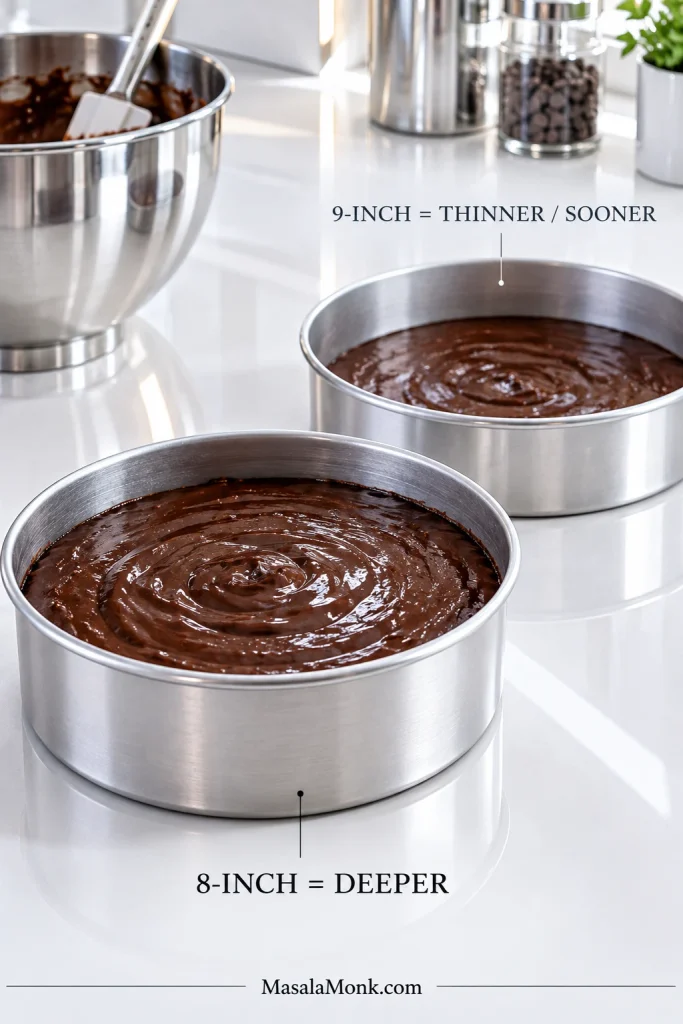
| Pan choice | What to expect |
|---|---|
| 8-inch / 20-cm metal | The specified pan; it gives the intended batter depth and timing range. |
| 9-inch / 23-cm metal | Spreads the batter into a shallower layer, so the center reaches the same doneness cues sooner. |
| Dark metal | The perimeter can set and darken faster. |
| Glass or ceramic | The timing here assumes metal. Those materials heat differently, so use the doneness cues rather than expecting the same clock time. |
The instructions assume a conventional oven. With fan or convection heat, use the adjustment recommended for your oven and rely on the same visual cues.
You do not need a springform for this; a regular round metal pan lined with parchment works neatly.
Using a different pan? See the doneness cues →
What the Batter Should Look Like
If the batter looks unusually thick, judge how it behaves rather than comparing it with ordinary cake batter. Lift the spatula: it should fall heavily, leaving soft trails before settling back into itself.
Room-temperature eggs make it easier for the butter and chocolate to stay smoothly blended. If the batter is glossy and cohesive, do not loosen it with milk or water just to make it pour.
Thickness by itself is not the warning sign. Smooth, glossy and cohesive is what you want; a thin, watery or visibly separated batter deserves another look.
Need the mixing steps again? Back to the recipe ↑
How to Know When It’s Done
Flourless chocolate cake is done when the edges are set and slightly puffed, a thin crust has formed on top, and the center is soft but no longer flows or sloshes. A tester near the middle should show moist crumbs or a light fudgy smear, not liquid batter.
Unlike this cake, a chocolate lava cake is meant to run when cut. Here, the center should stay soft and fudgy while still holding its shape.
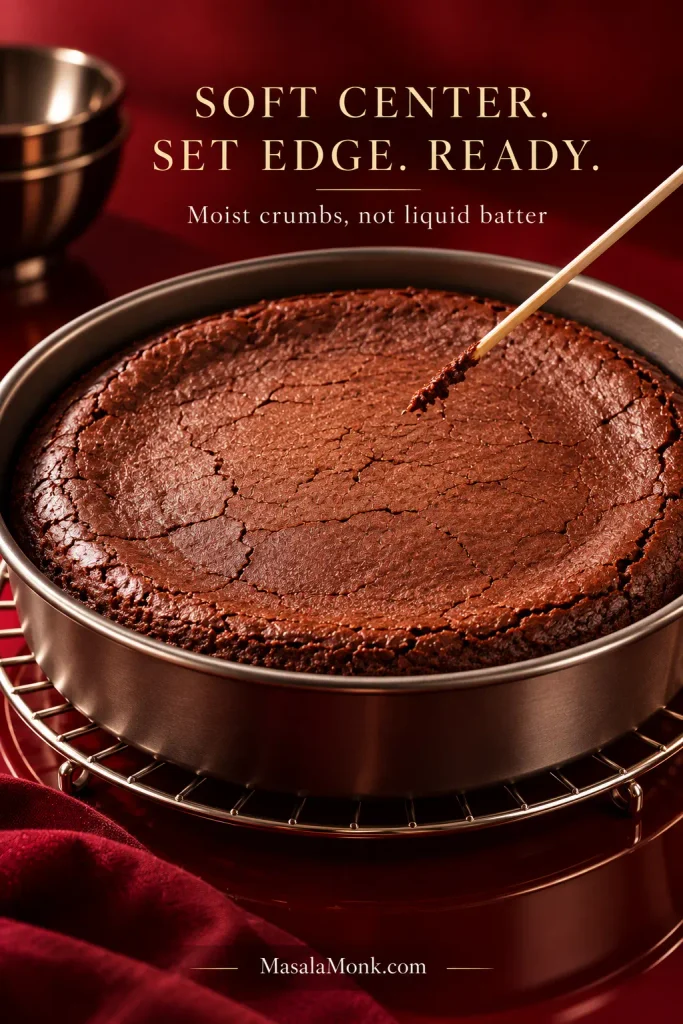
| Stage | What it looks like |
|---|---|
| Too early | The center flows or sloshes, and the tester carries raw liquid batter. |
| Ready | The edge is set, the top has a thin crust, and the middle is just set with moist crumbs or a fudgy smear. |
| Too far | The middle already feels firm while hot and the tester comes out completely dry. |
Soft is not the same as raw. The right middle has enough structure to stay in the cake, then turns dense and silky as it cools.
What the Cooled Center Should Look Like
That cooled slice is the payoff: dark, smooth and deeply chocolatey, with enough structure to hold on the fork and a center that still gives easily.
Why the Cake Cracks, Puffs and Sinks
A little puffing, cracking and settling is normal. Without a flour-based crumb structure, the cake does not hold all of its oven expansion as it cools.
As the cake heats, trapped air and steam expand while the eggs begin to set the structure. The top forms a thin crust; later, as the cake cools and contracts, the middle settles and that delicate crust may crack.
A flourless cake can therefore look most suspicious while it is behaving normally.
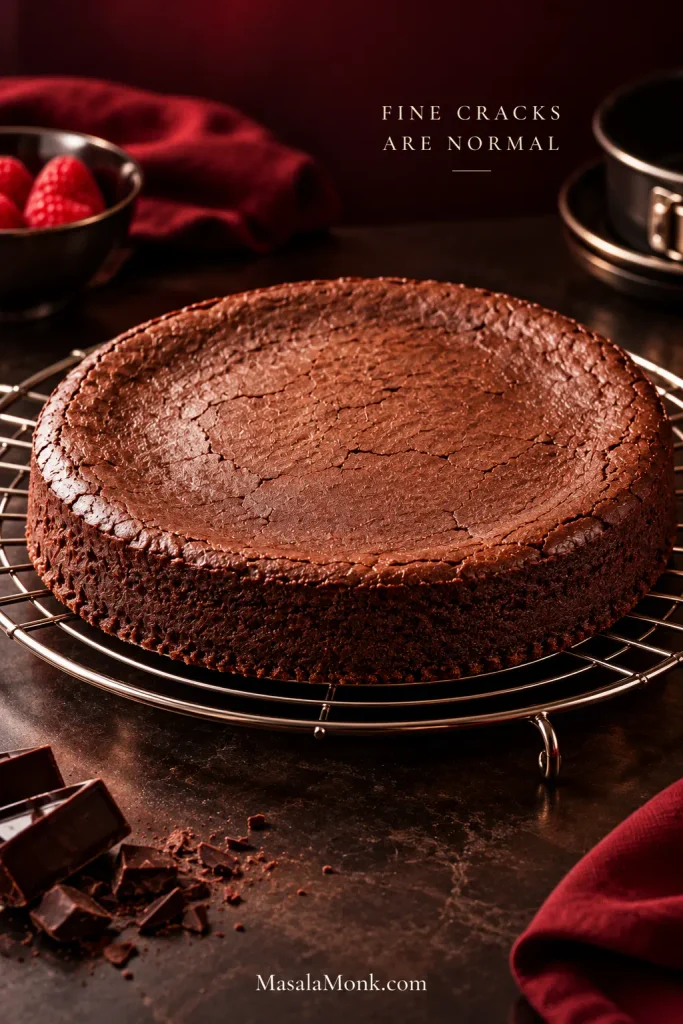
- Fine cracks on top: normal movement in the delicate crust.
- Puffing followed by settling: normal oven expansion followed by cooling.
- Large bubble or lopsided puff: usually a larger trapped air pocket expanding in the egg-rich batter. Gentle whisking and a light tap of the filled pan help reduce it.
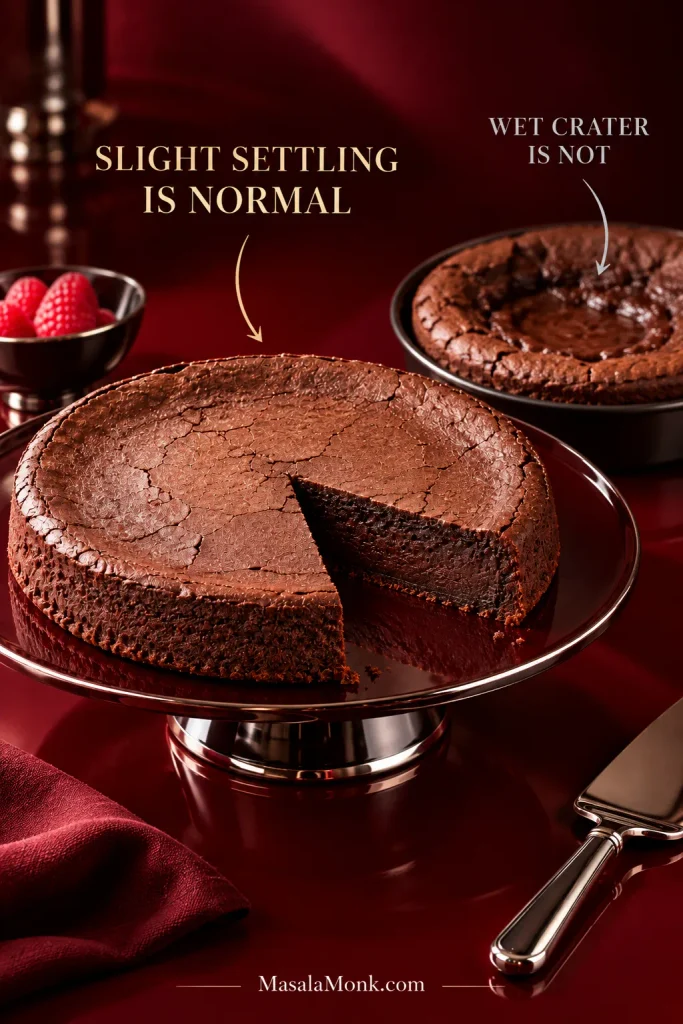
- Slightly lower center: normal if the middle has set.
- Deep crater + liquid center: not normal; use the troubleshooting guide below.
If Something Actually Went Wrong
Once ordinary cracking, puffing and settling are off the worry list, the real problems are easier to spot.
Troubleshooting by Symptom
| What you see | What to do |
|---|---|
| Liquid center while hot | Return the cake to the oven for a few minutes, then check again. The middle needs to become soft but set. |
| Liquid center after cooling | The cake was underbaked. An oven running cool, very large eggs or deeper batter can all contribute. Once completely cool, rebaking will not recreate the intended texture. |
| Deep crater + wet middle | Underbaking is the first suspect. Excess air can exaggerate the rise and collapse, so whisk the eggs only until incorporated and make sure the center has actually set before removing the cake. |
| Dry or crumbly center | The cake went too far. Start checking earlier next time and pull it while the tester still shows moist crumbs. |
| Dark edges + soft center | Check the pan, convection setting and oven heat. With dark pans or aggressive circulating heat, the perimeter can pull ahead of the center. |
| Greasy or split batter | The chocolate may have overheated, cold eggs may have chilled and thickened the chocolate-butter mixture, or a substitution may have thrown the mixture out of balance. Melt gently and use room-temperature eggs. |
| Cooked egg streaks | The chocolate and butter were still too hot. Let the melted mixture cool longer before adding the eggs. |
| Sticking to the pan | Give a very warm cake more time, loosen the edge gently and use grease plus parchment from the start. |
| Breaking or crumbling | It may simply be too warm. Let it cool further before moving or cutting it. |
Back to the recipe ↑ · Back to top ↑
What “Flourless” Means Here
This is a true chocolate cake without flour: no wheat flour, almond flour or gluten-free flour blend is standing in for regular flour. Eggs help hold the cake together, while chocolate and cocoa give it its dense body.
If ground almonds are what you had in mind, almond cake is a different style altogether, with almond flour supplying the main dry structure.
Is flourless chocolate cake gluten-free?
The recipe uses no wheat flour or other gluten-containing flour. If you are baking for someone with celiac disease or another reason for strict gluten avoidance, packaged ingredients and the kitchen environment still matter. Check the chocolate, cocoa and other packaged ingredients carefully, and prevent cross-contact from equipment and work surfaces.
The FDA’s gluten-free labeling guidance is useful when you are baking for someone who needs strict gluten avoidance.
Is this the same as a flourless chocolate torte?
In practice, “torte” and “cake” overlap heavily here. Torte is often used for low, rich cakes with dense centers, so plenty of flourless chocolate tortes sit in essentially the same dessert family.
This cake still holds a clean wedge once cool, but the middle stays far denser and richer than a conventional chocolate sponge. It is also different from a fudgy brownie, which has its own balance of flour, fat, sugar and eggs and is built to cut as bars.
What about Passover?
Flourless chocolate cake is popular for Passover because it can be made without wheat flour. If you are preparing it specifically for Passover, choose chocolate, cocoa, vanilla and other packaged ingredients appropriate to your own observance and certification requirements.
What You Can Change
The espresso powder is optional; leave it out without replacing it.
Bigger substitutions can change how the cake sets. Egg replacements, major sugar reductions, bulk alternative sweeteners, replacing all the butter with oil, or using a very different chocolate percentage are better handled with a recipe written for that change.
Dairy-free versions are possible too, but plant fats and dairy-free chocolate vary enough by brand that they deserve their own recipe.
Serve It, Make It Ahead and Store It
The first full cooling lets the cake firm into its final sliceable texture; after that, serving temperature is simply a texture choice.
Room temperature or chilled?
Closer to room temperature, the butter and cocoa butter soften and the interior feels silkier and more obviously fudgy. Straight from the refrigerator, the same cake is firmer, denser and more truffle-like.
For the softer texture intended here, let a refrigerated cake stand for about 20–30 minutes before serving.
How to cut clean slices
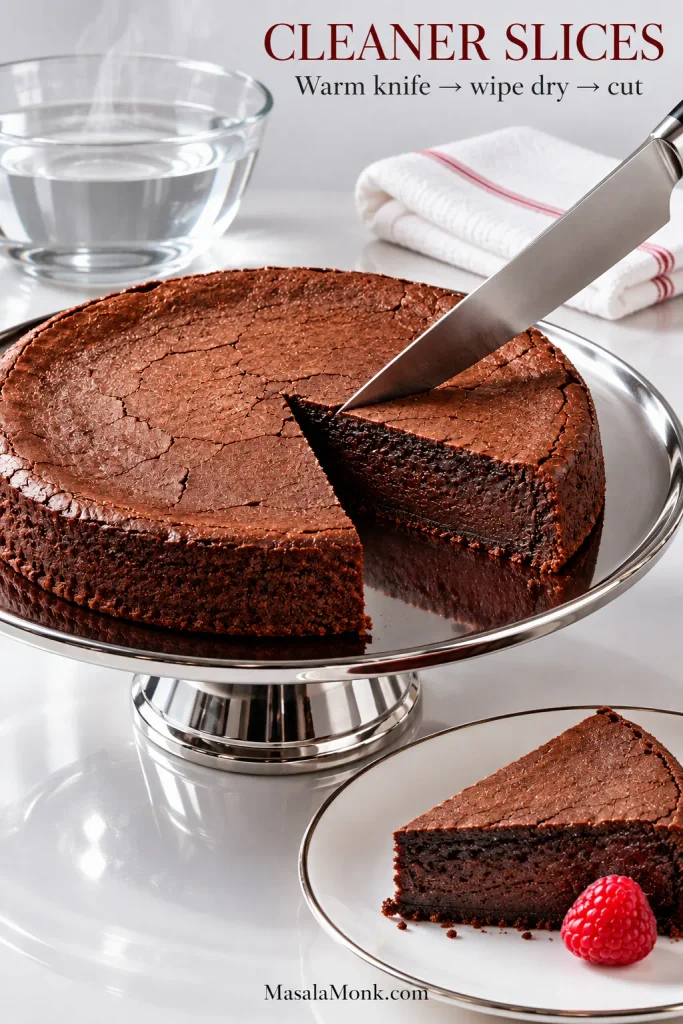
Use a thin, sharp knife. Dip the blade in hot water, wipe it completely dry, make one cut, then clean and warm it again before the next.
A slightly chilled cake is especially easy to portion neatly. Let the slices soften a little before serving and you get the best contrast: delicate top, dense silky middle, enough structure to hold against the fork.
What to serve with flourless chocolate cake
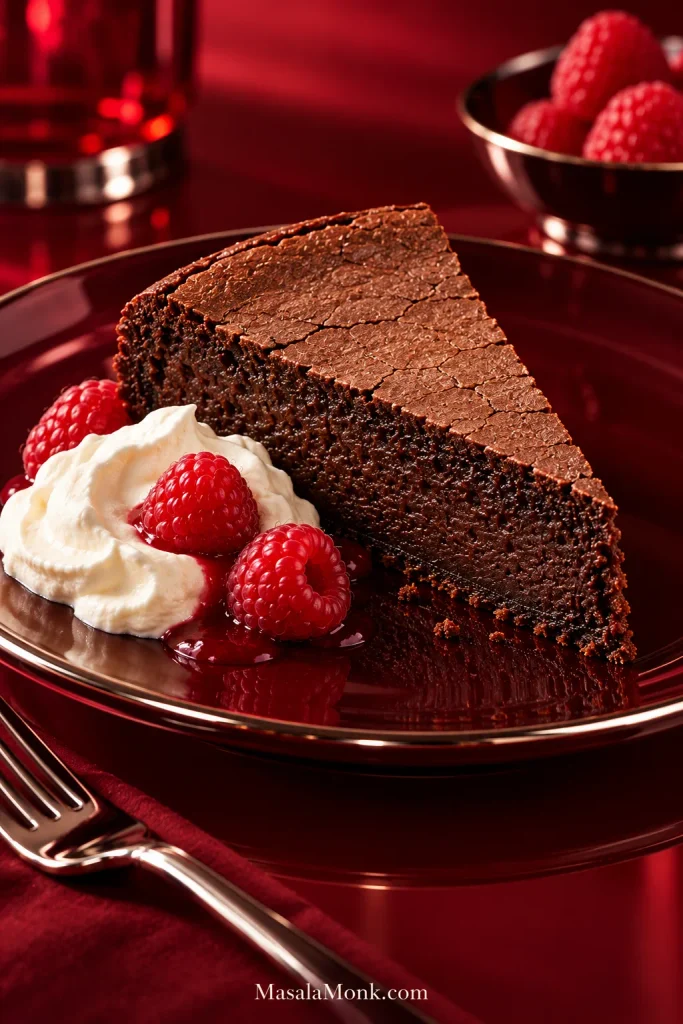
Tart raspberries and cool whipped cream are hard to beat here. The fruit cuts through the richness while the cream softens the dark chocolate without burying it.
- Best balance: fresh raspberries or raspberry sauce with softly whipped cream. The whipped cream recipe is useful if you want a soft, spoonable texture instead of stiff peaks.
- Simplest: a light dusting of powdered sugar or cocoa
- Richest: a thin layer of chocolate ganache
Make it a day ahead
For a day-ahead cake, let it cool completely, cover it well and refrigerate. Bring it out before serving and let it soften slightly.
Whipped cream, fresh berries and raspberry sauce are best added close to serving.
Refrigerator
Keep the cooled cake covered in the refrigerator for about 4–5 days for best quality.
Freezer
Freeze the completely cooled cake whole or in individual wedges. Wrap it tightly, then place it in an airtight freezer container or freezer bag. For best texture, use it within about 2 months.
Thaw it overnight in the refrigerator while still wrapped, then let it soften at room temperature before serving.








