
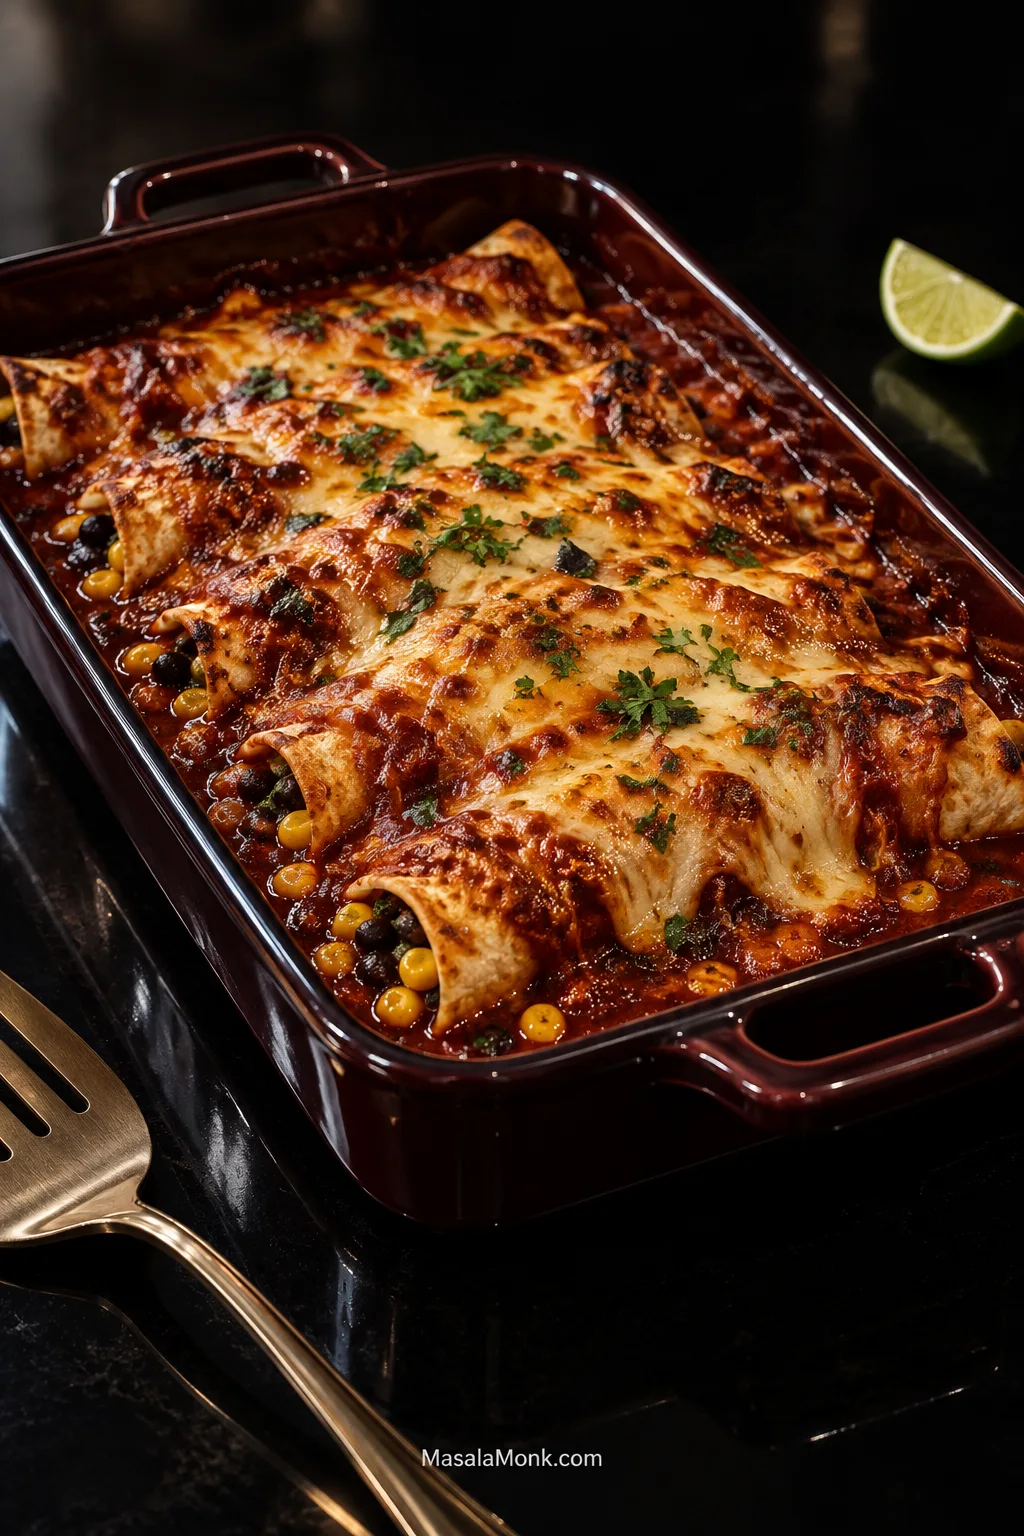
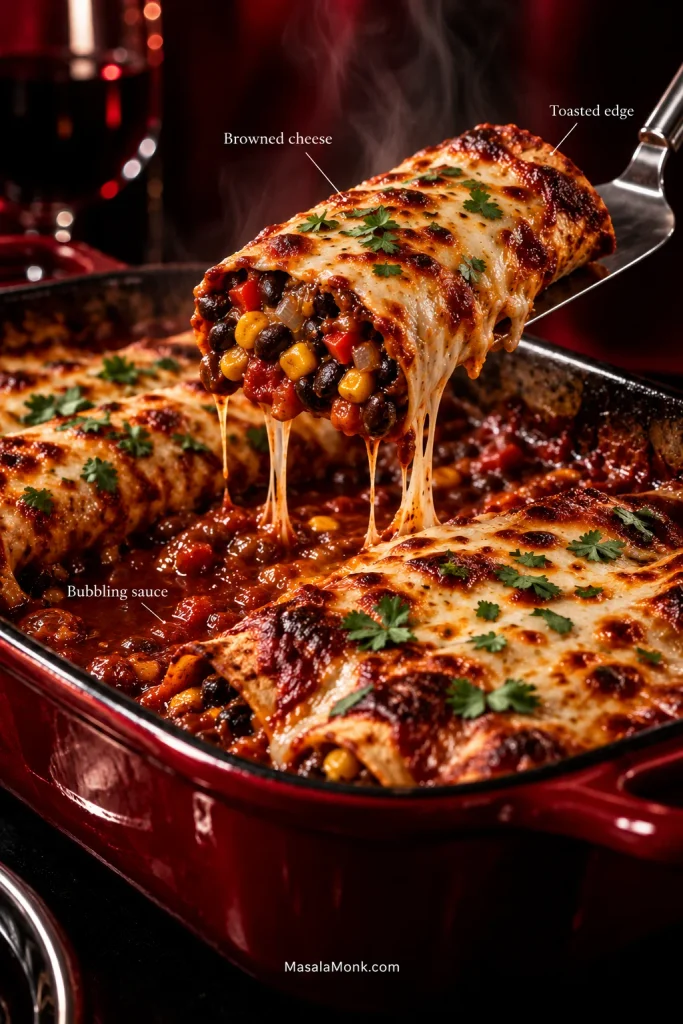
A good pan of vegetarian enchiladas comes to the table still bubbling: red sauce in the seams, browned patches of cheese, sweet corn, toasty cumin and lime underneath. The tortillas stay soft through the middle, while a few exposed edges catch enough oven heat to toast.
Keep the easy parts easy. The filling cooks in one skillet, store-bought enchilada sauce works perfectly well, and there is no need to dip every tortilla individually before rolling. What matters more is how wet the filling is, whether the tortillas bend cleanly and how long they sit in sauce.
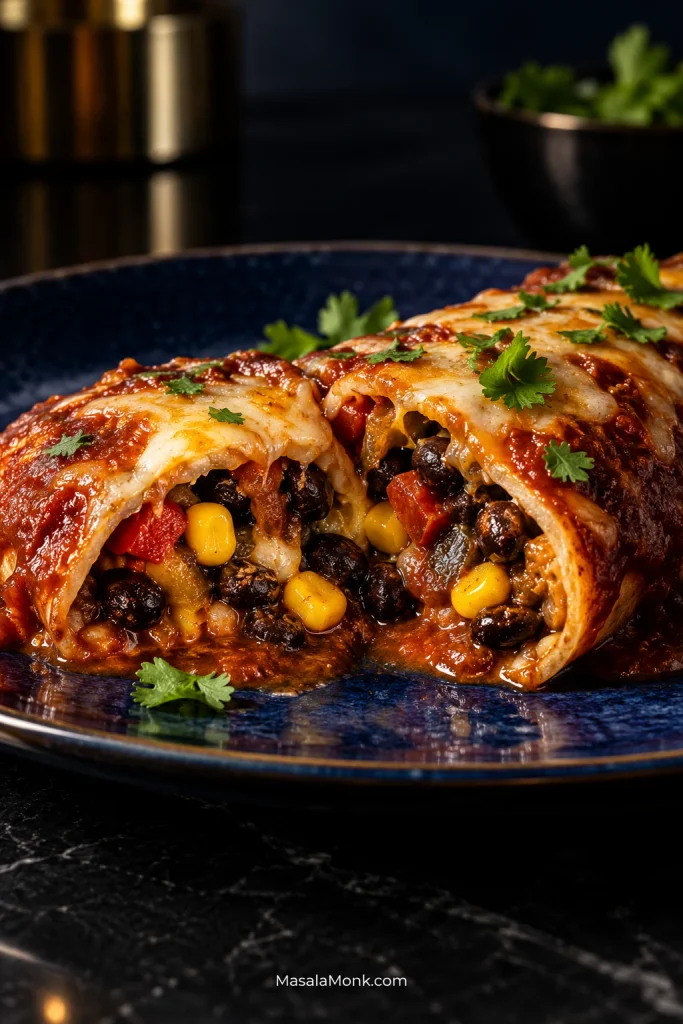
Black beans, corn, bell pepper, onion and garlic make up the filling. A few of the beans get crushed against the skillet so everything holds together inside the tortilla; the rest stay whole, giving you a hearty center without turning the filling into bean paste.
Saucy, not soggy is the aim. The recipe itself is straightforward; the extra guidance farther down is there for the few places enchiladas tend to get awkward.
Quick answer: To make vegetarian enchiladas, sauté onion, bell pepper and corn until tender and no loose water remains. Add black beans, lightly crush some of them, then season with cumin, chile, lime and a little red enchilada sauce. Taste before rolling. Fill 8 medium flour tortillas or 10–12 small corn tortillas, arrange them in a lightly sauced 9 × 13-inch / 23 × 33-cm dish, top with the remaining sauce and cheese, and bake at 400°F / 200°C for 18–22 minutes.
Jump to: the recipe · corn or flour · prevent sogginess · make ahead & freeze · troubleshooting · what to serve
Black Bean & Veggie Enchiladas
If you have never rolled enchiladas before, don’t let that make the recipe look fussy. Once the tortillas are flexible and you know how much filling they comfortably hold, the rest of the pan goes quickly.
Recipe at a Glance
| Yield | 8 medium flour-tortilla enchiladas or about 10–12 smaller corn-tortilla enchiladas; about 4 servings |
|---|---|
| Total time | About 50–60 minutes, including resting |
| Active time | About 30 minutes |
| Pan | 9 × 13 inches / 23 × 33 cm |
| Bake | 400°F / 200°C for 18–22 minutes |
Ingredients
- 1 tablespoon / 15 ml olive oil or neutral cooking oil
- ½ medium onion, finely diced, about 80 g. Red, yellow or white all work.
- 1 medium red bell pepper, diced, about 150 g. A small dice makes enchiladas easier to roll and eat.
- 1 cup corn, about 160 g. Fresh, frozen or well-drained canned corn all work.
- 3 garlic cloves, minced
- 1½ teaspoons ground cumin
- 1 teaspoon American-style chili powder. Use the relatively mild seasoning blend sold as “chili powder” in the US, not pure cayenne or another very hot ground chile.
- ½ teaspoon smoked or sweet paprika
- ½ teaspoon dried oregano
- 1 (15-ounce / 425-g) can black beans, rinsed and thoroughly drained, about 240–260 g drained
- 2 cups / 475 ml red enchilada sauce, divided. One 19-ounce can usually gives enough. Packaged sauce keeps this easy; this red enchilada sauce recipe makes about the right amount.
- 1 tablespoon / 15 ml fresh lime juice, plus wedges for serving
- Fine salt, as needed after tasting
- 8 ounces / 225 g / about 2 cups shredded melting cheese, divided roughly in half. Monterey Jack is an easy choice; Jack with sharp cheddar adds bite; Oaxaca works well too. Any mild cheese or blend that melts smoothly can stand in.
- 8 flour tortillas, about 8 inches / 20 cm each
- Or 10–12 corn tortillas, about 6 inches / 15 cm each. Expect closer to 12 at roughly ⅓ cup filling each; capacity varies with size and thickness.
- Neutral oil as needed, optional, for corn tortillas that remain fragile after warming
Cooking for vegetarians? Check enchilada sauce for meat stock and choose cheese made with vegetarian or microbial rennet if that matters to you. Canned refried beans may contain lard too, so check the label if using them as a swap.
Before You Start
- Taste the sauce. A salty or very spicy sauce means the filling needs more cautious seasoning.
- Bend one corn tortilla. A cracked edge tells you the batch needs warming before you start filling.
- Drain the beans and canned corn well. Water carried into the filling eventually reaches the tortilla.
1. Sauce the Baking Dish
Heat the oven to 400°F / 200°C.
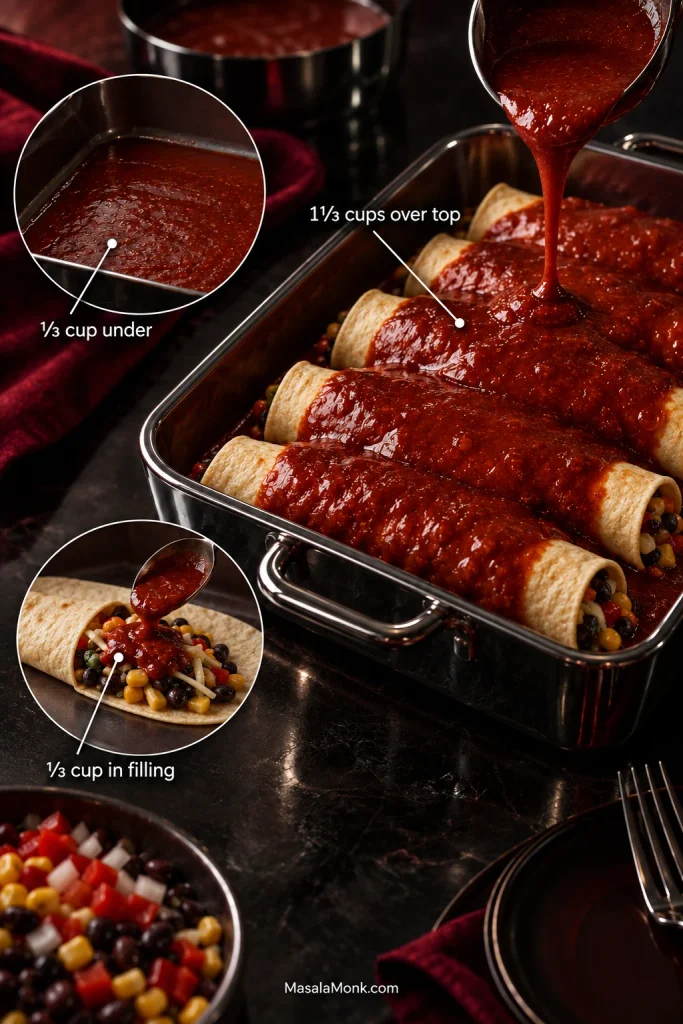
Spread about ⅓ cup / 80 ml enchilada sauce across the bottom of the baking dish. A thin coating is enough to flavor the underside and prevent sticking.
2. Cook the Vegetables Until the Pan Looks Dry
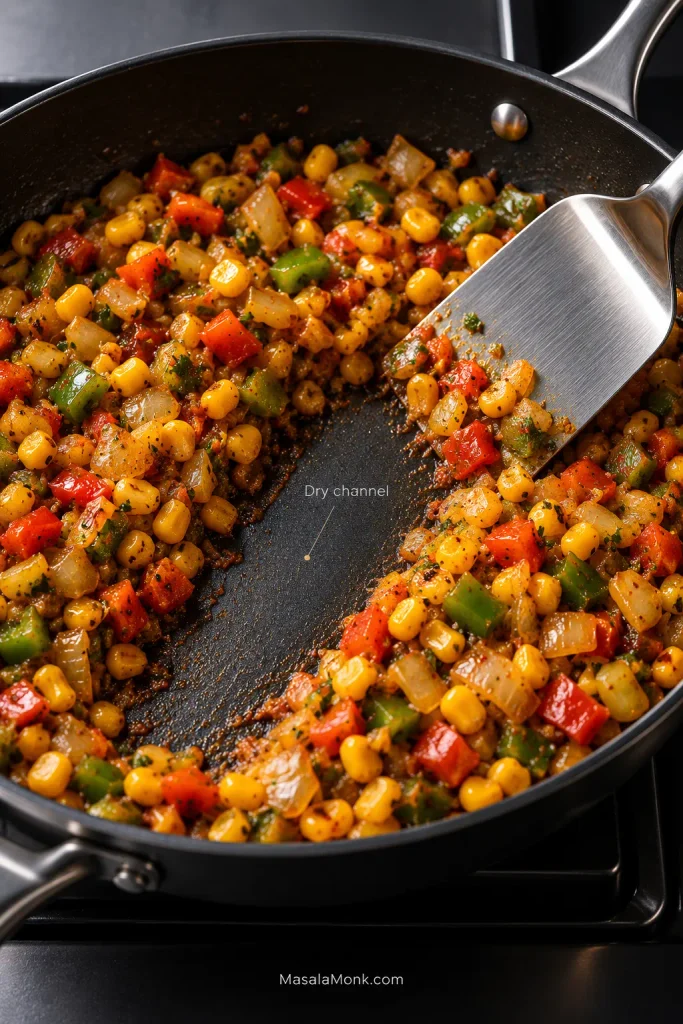
Heat the oil in a large skillet over medium to medium-high heat. Add the onion and bell pepper and cook for 5–7 minutes, stirring occasionally, until tender and beginning to color.
Add the corn and cook for another 2–3 minutes.
Lower the heat to medium and stir in the garlic, cumin, chili powder, paprika and oregano. Within about 30 seconds the pan should smell warmer and toastier, with the cumin and chile coming through before anything has a chance to scorch.
Drag the spatula through the vegetables. Water should not immediately flood back into the cleared path. You want glossy, juicy vegetables with a fairly dry skillet underneath them.
3. Add the Black Beans and Finish the Filling
Add the drained black beans. Lightly crush about one-third against the skillet with the back of your spoon; leave the rest whole.
Stir in another ⅓ cup / 80 ml enchilada sauce and the lime juice. Scoop up a spoonful. It should stay together as you carry it to a tortilla, with no watery liquid left behind in the skillet.
If the filling loosens after the sauce goes in, cook it for another minute or two until the excess liquid has reduced and the spoonful holds together again.
Keep the sauce split simple: ⅓ cup under the rolls, ⅓ cup in the filling and about 1⅓ cups over the top.
4. Taste Before You Roll
Taste the filling now. Beans soften seasoning, and both the sauce and cheese will add salt later.
Add salt if it needs it. A little more lime can wake up a heavy filling; another small pinch of cumin or chili powder can deepen one that tastes flat. Adjust it now, before the filling disappears inside the tortillas.
5. Warm the Tortillas
Flour tortillas: soft and flexible straight from the packet? Use them. There is no prize for adding an unnecessary warming step.
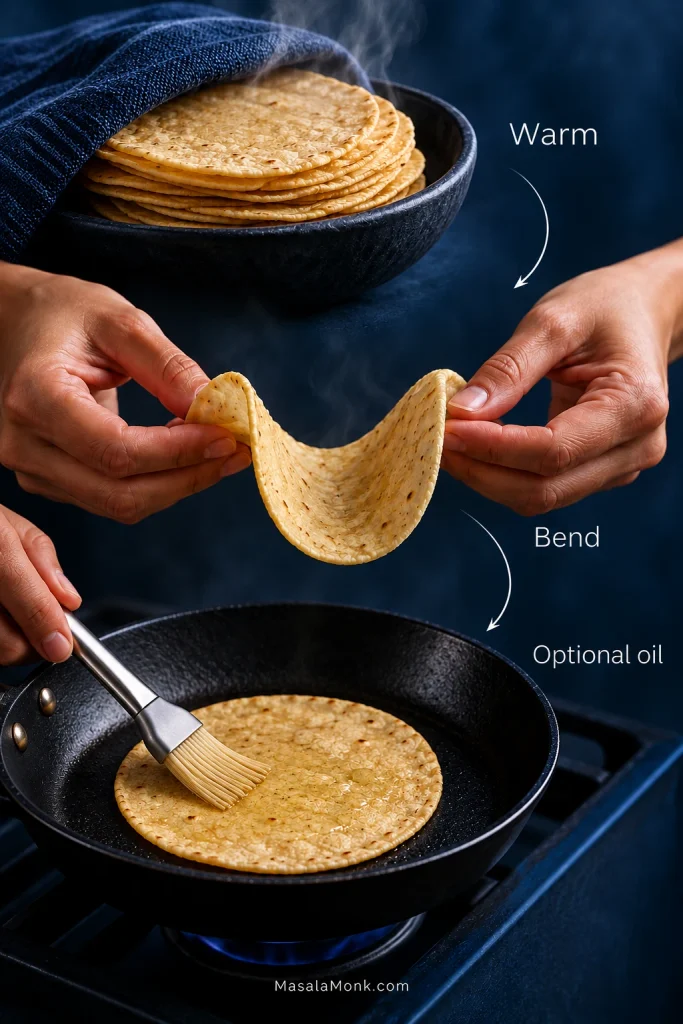
Corn tortillas: wrap the stack in a slightly damp kitchen towel or paper towel and microwave for about 20–30 seconds. Bend one. A batch that still cracks usually needs another 10 seconds. You can also use a hot skillet for about 10–20 seconds per side. Keep the warmed stack covered while you work.
Particularly brittle tortillas may benefit from a very light brush of neutral oil and another few seconds in the skillet. Pull them while they still bend easily.
6. Fill and Roll
The first tortilla is your test enchilada. A crack means the remaining tortillas need more warmth; filling bulging heavily from both ends means the next one needs a smaller scoop.
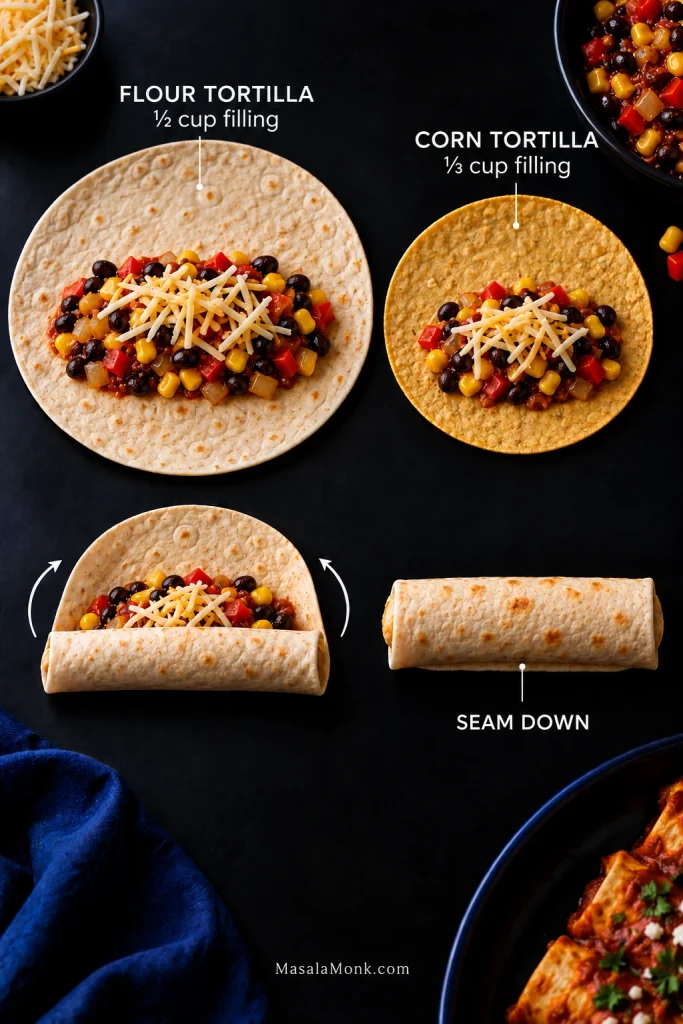
Use about ½ cup / 120 ml filling for each 8-inch / 20-cm flour tortilla or about ⅓ cup / 80 ml for each 6-inch / 15-cm corn tortilla.
Divide about half of the shredded cheese among the tortillas, roughly 1 cup in total.
Roll and place seam-side down in the dish. Don’t chase perfectly tight cylinders. Once the rolls are tucked beside one another, the baking dish does most of the holding. A small split is not a crisis; turn that side down and carry on.
By the third or fourth tortilla, the amount usually starts to feel obvious. From there, the pan fills quickly.
7. Add Sauce and Cheese
Sauce the centers and leave a little tortilla exposed at the ends. Spoon over the remaining sauce, about 1⅓ cups / 315 ml, then scatter the remaining half of the cheese over the top.
8. Bake Until Bubbling, Then Rest
Bake uncovered for 18–22 minutes. Look for red sauce bubbling between the rolls, melted cheese with a few golden patches and tortilla tips beginning to toast.
A hot pan with a pale top only needs a minute or two under the broiler/grill. Leaving the whole dish in the oven longer will only dry the filling and exposed tortilla edges.
Rest for 5–10 minutes. While the pan settles, cut the lime and get any toppings ready. The enchiladas will lift more cleanly when you come back to them.
If the pan is already in the oven, dinner is handled. Everything below is optional. Use it when you want to change the tortillas or filling, make the pan ahead, or work out why an earlier batch behaved differently.
Corn or Flour Tortillas for Enchiladas?
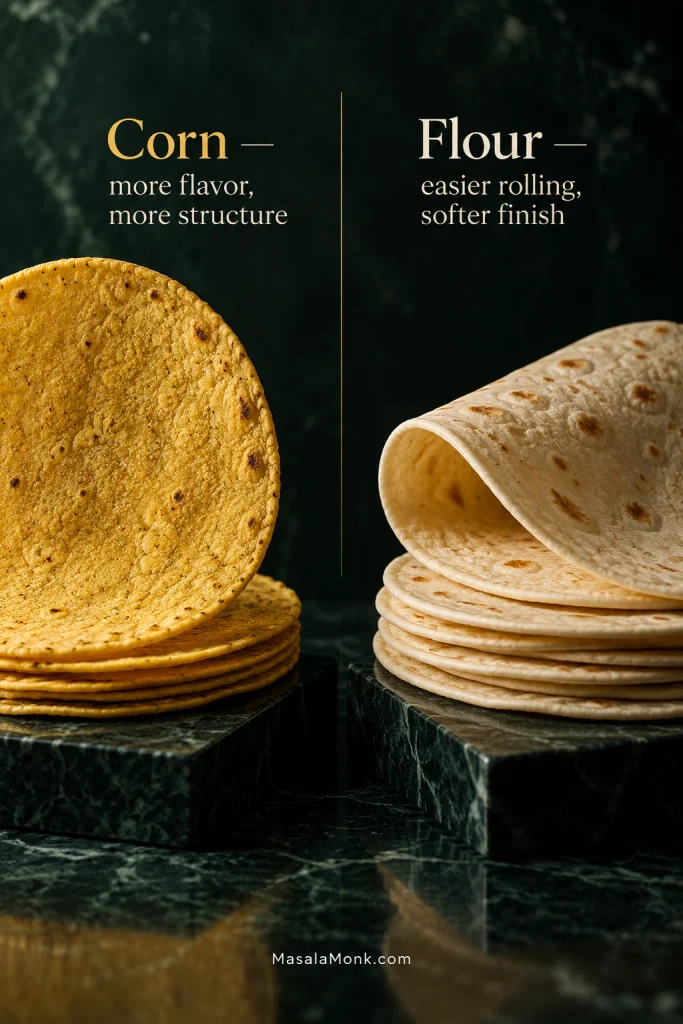
Corn tortillas are the traditional Mexican starting point for enchiladas. For this baked home-style version, flour tortillas are also useful when easy rolling matters more than pronounced corn flavor.
| If you want… | Choose | What changes |
|---|---|---|
| More corn flavor | Corn | You still taste the corn tortilla underneath the sauce. |
| Firmer tortilla texture under sauce | Corn | Properly warmed corn tortillas keep more of their own texture as they bake. |
| The easiest rolling | Flour | They are soft and forgiving. |
| A very soft finished enchilada | Flour | Flour tortillas soak up sauce faster as they bake and sit. |
Do Corn Tortillas Have to Be Fried?
Not for this baked version. A quick oil pass makes corn tortillas easier to roll and gives them a little more protection from the sauce. If yours already bend cleanly after warming, you can skip it.
Freshness, thickness and brand all matter. If you’ve got masa harina and want to make the tortillas too, this homemade corn tortilla recipe explains what properly hydrated, flexible dough should feel like.
For especially fragile tortillas, Bon Appétit also describes a brief oil treatment for sturdier enchiladas. Whatever method you use, the tortilla should still bend easily when it reaches the filling.
Whichever tortilla you choose, moisture eventually matters more than the label on the packet.
Saucy, Not Soggy: How to Keep Enchiladas From Falling Apart
Soggy enchiladas usually come down to moisture and time: a wet filling, sauce pooling underneath, or tortillas sitting in sauce for hours before they bake.
Soft is not the enemy here. A good enchilada should be tender where tortilla meets sauce. The trouble starts when the tortilla becomes watery, gummy or so fragile that it cannot make the trip from baking dish to plate.
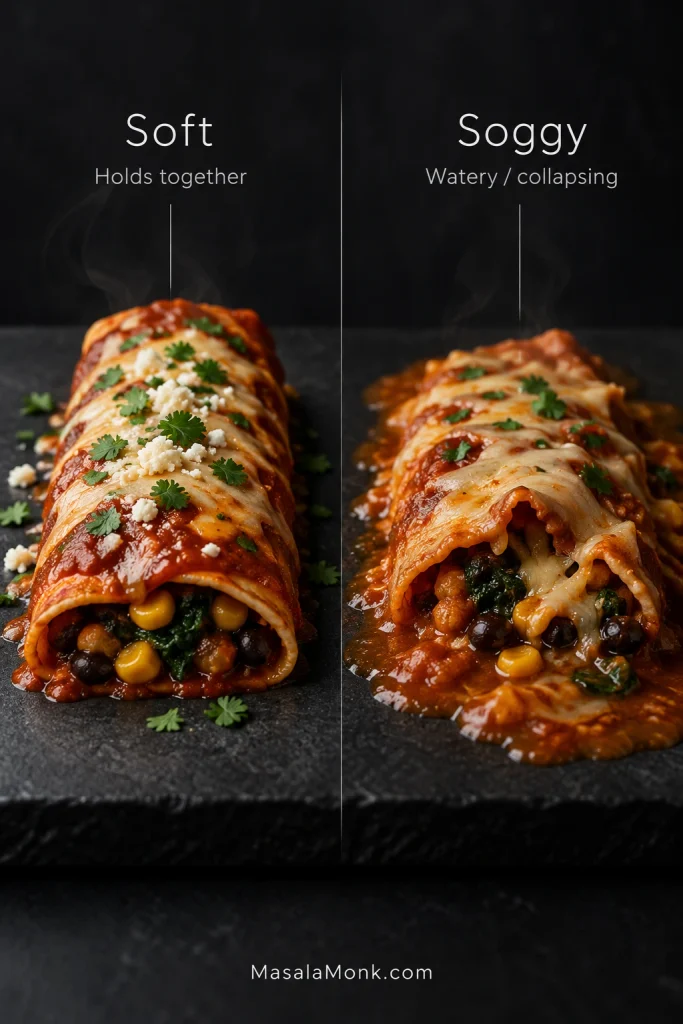
Most of the solution happens before the pan reaches the oven. Corn and peppers are fairly forgiving. Zucchini, mushrooms and spinach release much more water, so give those vegetables enough time in the skillet for that moisture to cook away.
Corn tortillas have the opposite problem at first: too dry and they crack. Warm them until they bend cleanly. Flour tortillas need almost no persuasion to roll, though they soften more quickly once they spend hours in sauce.
With the sauce, restraint underneath matters more than restraint on top. Give the bottom of the dish a thin coating, put a little sauce in the filling, then let most of it sit over the rolls. For a saucier serving, warm extra sauce separately and spoon it on at the table.
Sauce contact matters too. A pan rolled and baked now behaves differently from one that sits sauced for hours before it reaches the oven. If you are assembling ahead, the make-ahead method keeps that exposure under control.
Changing the Vegetarian Enchilada Filling
Poblano is the easiest place to start if you want to change the base without changing its character too much. It brings more chile flavor without adding much extra moisture. Extra corn makes the filling sweeter.
The important thing is volume: replace rather than endlessly add. A cup of something new should take the place of roughly the same amount of the original filling. Otherwise a flexible recipe quietly becomes enough for a second baking dish.
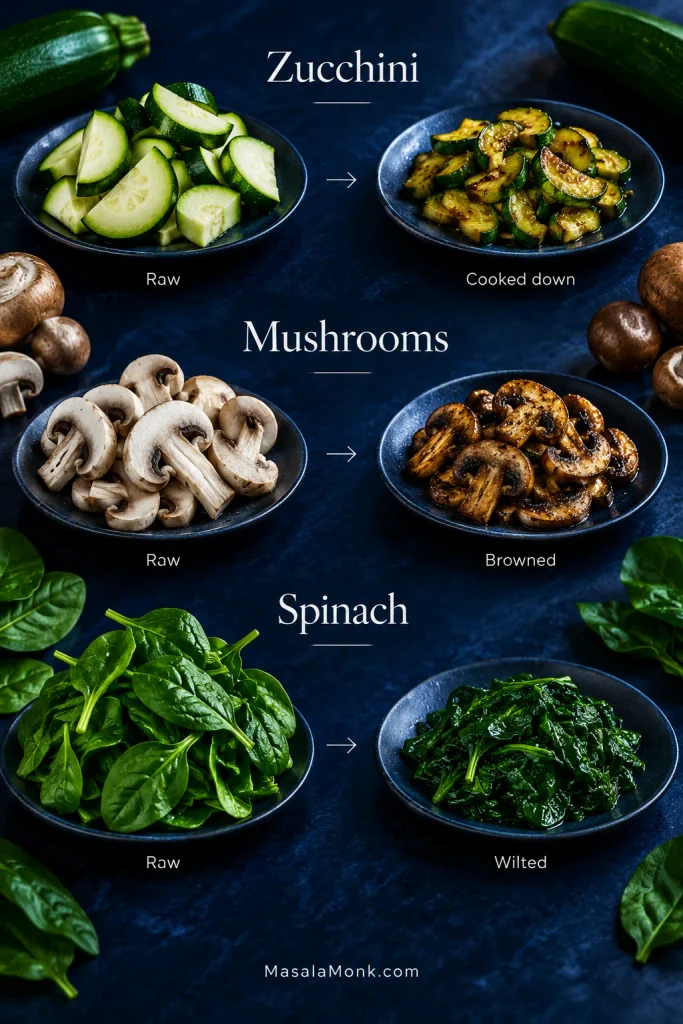
Vegetables That Need More Cooking
Wetter vegetables need a little more care before they go inside a tortilla.
- Zucchini: dice it small and cook until the water it releases has evaporated.
- Mushrooms: let them move past the wet, steaming stage and give them time to brown. Once browned, they make the filling much more savory.
- Spinach: wilt thoroughly. Drain or squeeze frozen spinach before it reaches the filling.
Sweet potato and butternut squash need a head start too. Cook them until tender before assembly; the short oven bake here is enough to heat the filling and melt the cheese, not enough to soften raw chunks of squash.
Black, Pinto or Refried Beans?
Black beans work especially well here because they hold their shape but crush easily enough to help bind the filling. Pinto beans are softer and milder and can replace them 1:1.
Refried beans give you a denser, creamier center. Check canned versions for lard if you are cooking for vegetarians. If you’d rather keep them on the side, this refried beans recipe from a can is a quick option.
Leaving beans out entirely calls for more cooked vegetables to take their place. Browned mushrooms with roasted cauliflower are one option. The tortillas should still feel properly filled when you roll them.
Red or Green Enchilada Sauce?
Red is the natural fit for the base recipe. Cumin, black beans and browned cheese sit especially well with its deeper chile flavor.
Green sauce changes what you notice. Lime, sweet corn, cilantro and the fresh toppings come forward, giving the same filling a brighter finish.
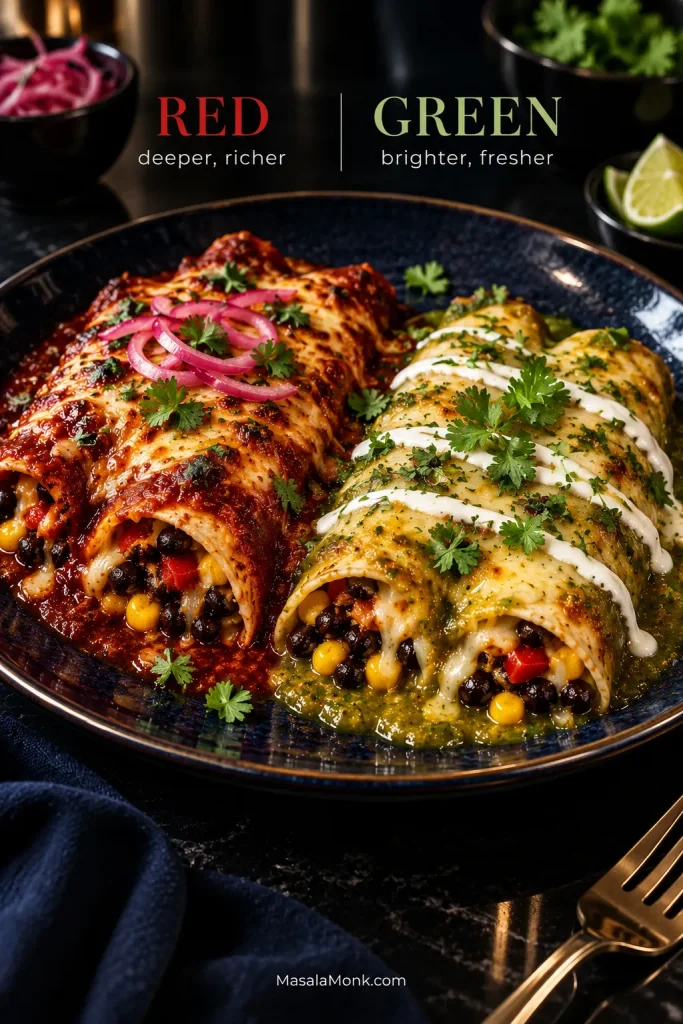
Swap green sauce for red roughly 1:1. A pourable bottled green enchilada sauce can go straight in. If you’re using a thicker salsa verde, loosen it with a little water, vegetable broth or cooking liquid until it pours easily and coats the tortillas. This roasted salsa verde explains that adjustment as well.
Give any sauce a taste before it reaches the pan. One that pours almost like broth benefits from a short simmer. A salty sauce means the bean filling will need less salt.
Homemade sauce is worth making when you feel like the extra project. It should not be the admission price for enchiladas on a Wednesday night. Ready to cook? Return to the recipe and assemble the pan as written.
How to Make Vegetarian Enchiladas Ahead Without Getting Soggy
For an overnight pan, use the finished filling exactly as written but keep the exterior sauce off until baking time. That means no sauce in the baking dish and no sauce over the rolled tortillas while they sit in the refrigerator.
Let the cooked filling stop steaming, transfer it to a shallow container and refrigerate promptly. Once chilled, fill and roll the tortillas and keep them covered in the refrigerator. Store the sauce and cheese separately.
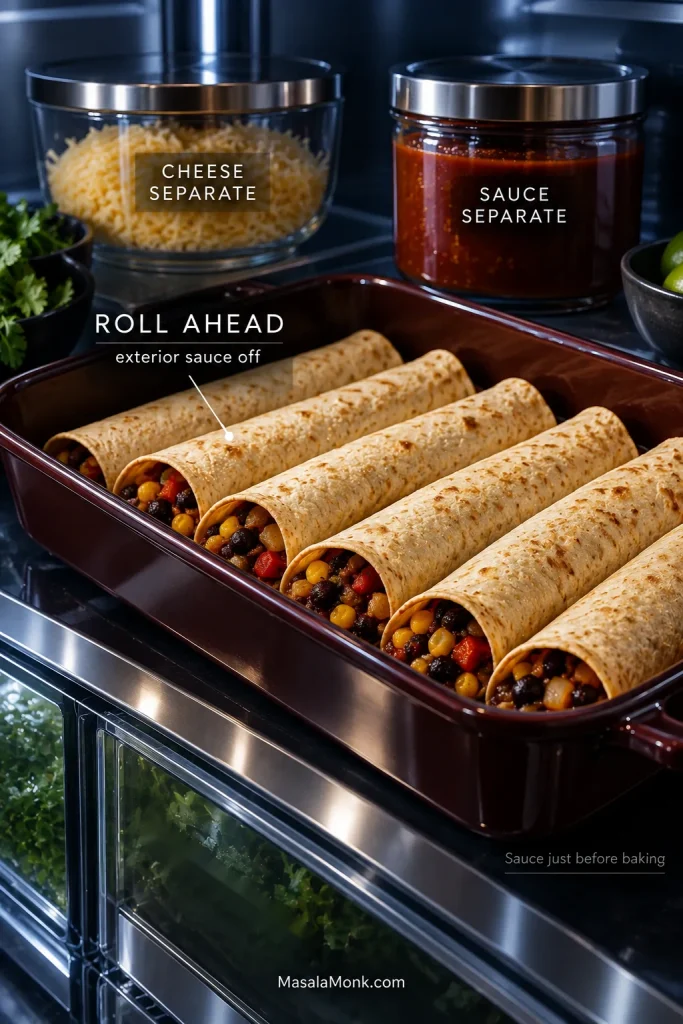
| Prep style | Work before baking | What to expect |
|---|---|---|
| Components kept separate | Warm tortillas, roll, sauce and add cheese | Closest to freshly assembled |
| Roll ahead; sauce later | Add sauce and cheese | Very good texture with little work left |
| Fully assemble overnight | Bake | Least work, but noticeably softer tortillas |
Baking Chilled Enchiladas
A pan going into the oven straight from the refrigerator will usually need about 25–35 minutes. Cover loosely for the first 15 minutes, then uncover and continue until the sauce is bubbling through the pan and the center is hot. Cooking them fresh instead? Use the standard bake cues and timing.
Refrigerated glass bakeware needs a little extra care. Follow the manufacturer’s instructions before moving a cold glass dish into a hot oven because thermal-shock tolerance varies by product.
How to Freeze Vegetarian Enchiladas
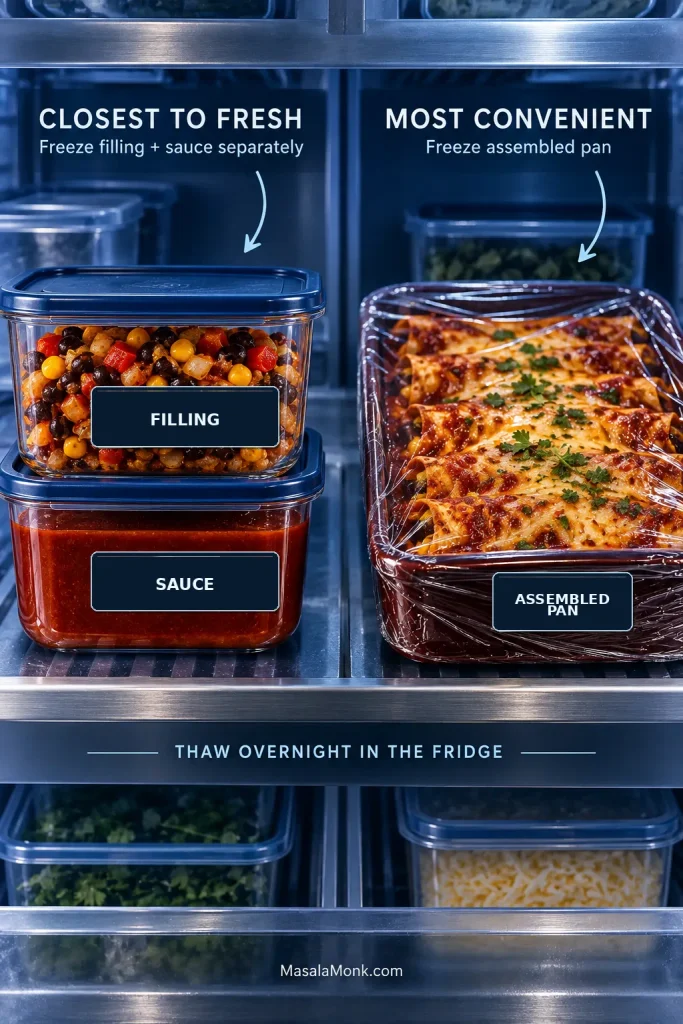
For the closest texture to a fresh pan, freeze the cooked filling and sauce separately. For best quality, use them within 2–3 months. Thaw overnight in the refrigerator, then assemble with tortillas and cheese and bake as written.
A fully assembled pan works too. Chill the cooked filling first, assemble the enchiladas in a freezer-safe baking dish, add the sauce and cheese, wrap tightly and freeze. The tortillas will be softer after thawing, but almost all of the work is already done.
Thaw the assembled pan overnight in the refrigerator, then use the chilled-pan timing above. Straight-from-frozen baking is possible, but timing varies with the pan, its depth and how solidly everything is frozen. Thawing first gives you a more even bake.
Store and Reheat Leftovers
Refrigerate leftovers promptly. USDA recommends getting perishable cooked food into the refrigerator within 2 hours and using leftovers within 3–4 days. Reheat them to 165°F / 74°C.
For freezer quality, USDA guidance lists casseroles at about 2–3 months. See its food-safety guidance for the broader recommendations.
An oven or toaster oven keeps more texture around exposed edges. The microwave is quicker and gives you a softer tortilla. At lunch, speed may win.
Fix My Enchiladas
My Corn Tortilla Cracked While I Was Rolling It
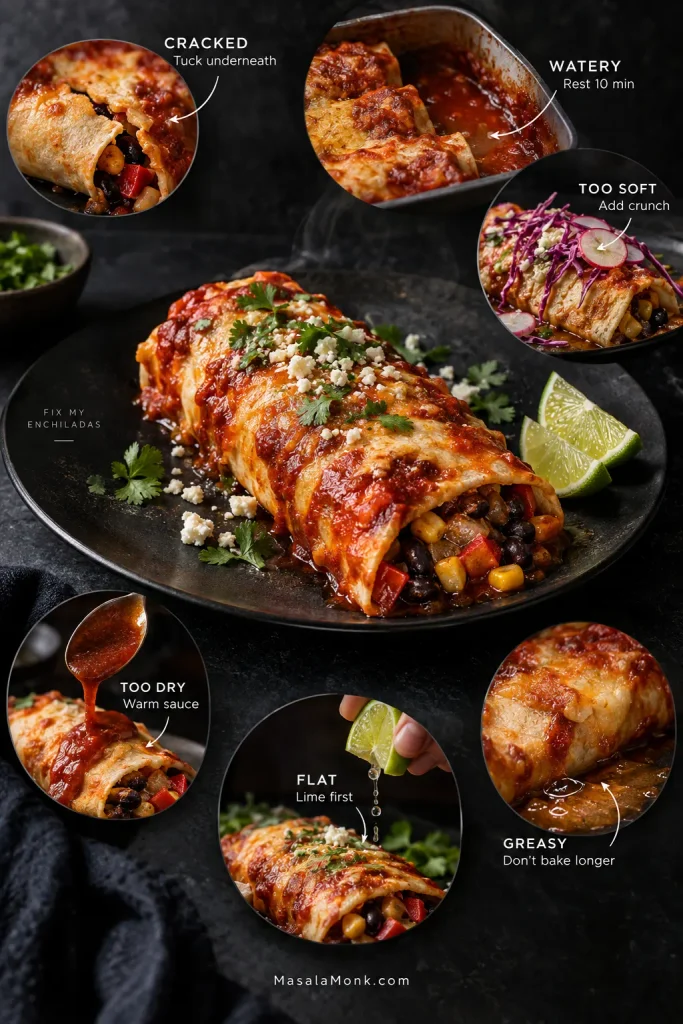
Tuck the split side underneath and keep going; a small crack rarely matters once the rolls are sitting snugly together. Before you roll the rest, revisit the tortilla warming method.
There Is Water Under the Enchiladas
Give the pan a full 10 minutes to rest before judging it. Some loose liquid may settle as the enchiladas cool slightly. Lift the rolls with a wide spatula and leave excess liquid in the dish. A very watery pan usually traces back to wet vegetables, unusually thin sauce or too much sauce underneath. For prevention next time, the Saucy, Not Soggy section brings those moisture points together.
The Tortillas Have Turned Very Soft
That doesn’t mean the pan is ruined. Let it rest a little longer, lift portions with a wide spatula and add something crisp such as cabbage, radish or pickled onion for contrast. For another overnight batch, use the make-ahead method and keep the exterior sauce separate until baking time.
The Enchiladas Are Too Dry
Warm some extra enchilada sauce and spoon it onto each plate. Crema, salsa or guacamole can bring moisture back too. On another pan, use the full sauce amount and stop baking once the center is hot and the sauce is bubbling.
The Filling Tastes Flat
At the table, lime is the fastest fix. Salsa, pickled onion, jalapeño or Cotija can help too. Next time, taste after the beans, sauce and lime are all together in the skillet.
If the filling falls out: don’t try to re-roll a hot, sauced enchilada. Spoon the filling back beside or over the tortilla and eat it as it is. During assembly, a little less filling and a few lightly crushed beans make the rolls easier to manage.
If the pan looks greasy: that sheen is often fat released by the cheese. Let the pan rest and spoon off any obvious excess around the edges if you want to. Extra oven time usually makes the problem worse.
What to Serve With Vegetarian Enchiladas
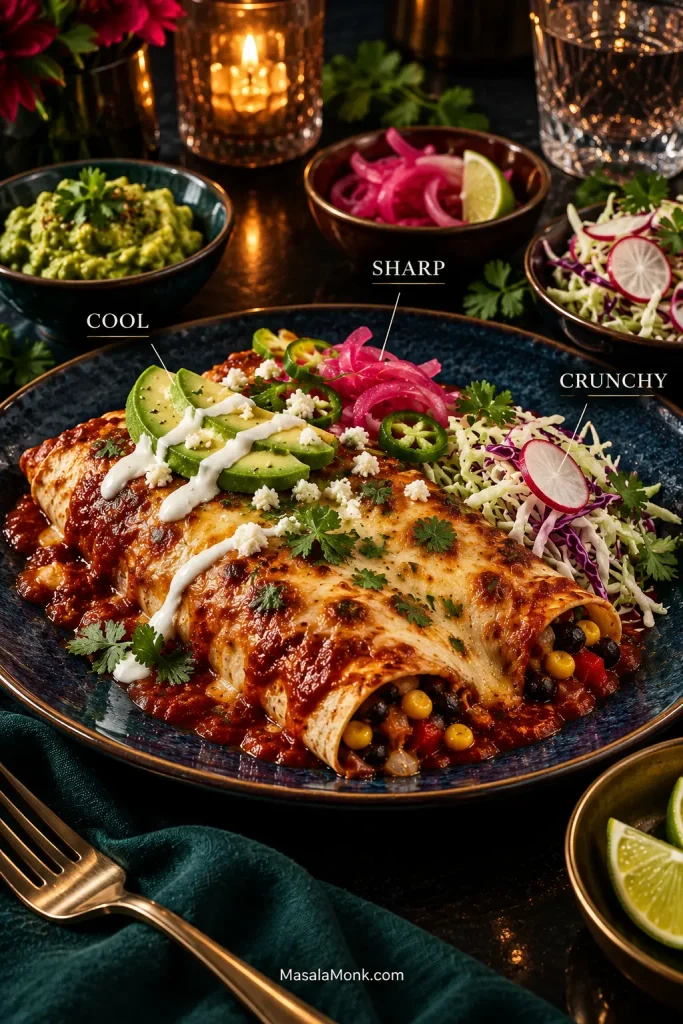
The enchiladas already bring warm tortillas, beans, chile sauce and cheese. You don’t need every topping in the refrigerator. Pick one cool thing, one sharp thing and, if you want it, something crunchy.
- Cool: avocado, guacamole, sour cream or crema
- Sharp: lime wedges, pickled red onion, salsa or fresh/pickled jalapeño
- Crunchy: shredded cabbage, radish or a simple cabbage slaw
- Cheese at the table: Cotija for a salty, assertive finish or queso fresco for a milder fresh-cheese crumble
Finish with cilantro if you like it. For a fuller meal, Mexican-style rice or a simple salad is enough.
Vegetarian Enchiladas FAQs
Can I Use Black Beans Cooked From Dried?
Yes. Use about 1½ cups / 250 g cooked, well-drained black beans in place of the canned beans.
Can I Make These Gluten-Free?
Yes. Use certified gluten-free corn tortillas and check the labels on the enchilada sauce and any packaged seasoning blends.
Can I Make These Vegan?
Yes. The black bean and vegetable filling is already plant-based. Choose an enchilada sauce made without meat stock and use a dairy-free cheese that melts well, or leave the cheese off and finish with avocado, salsa and vegan crema. Without cheese, taste the filling carefully before rolling because you lose some salt and richness.
How Many Enchiladas Should I Serve Per Person?
For a main meal, plan on about 2 medium flour-tortilla enchiladas or 2–3 smaller corn-tortilla enchiladas per person. Substantial sides may bring that down; larger appetites may want more.
Back to the recipe · Back to top
When the pan comes out of the oven, give it those few minutes to settle. The sauce will still be bubbling between the rolls, the cheese will have browned in patches, and a few tortilla corners will be darker and drier than the sauced centers.
At the table, add the cold things: avocado against hot chile sauce, crema melting into the cheese, sharp pickled onion, a squeeze of lime over warm black beans and sweet corn.
Then it is simply dinner: bubbling sauce, browned cheese, lime, sweet corn, and a second enchilada that suddenly seems like a very good idea.








