
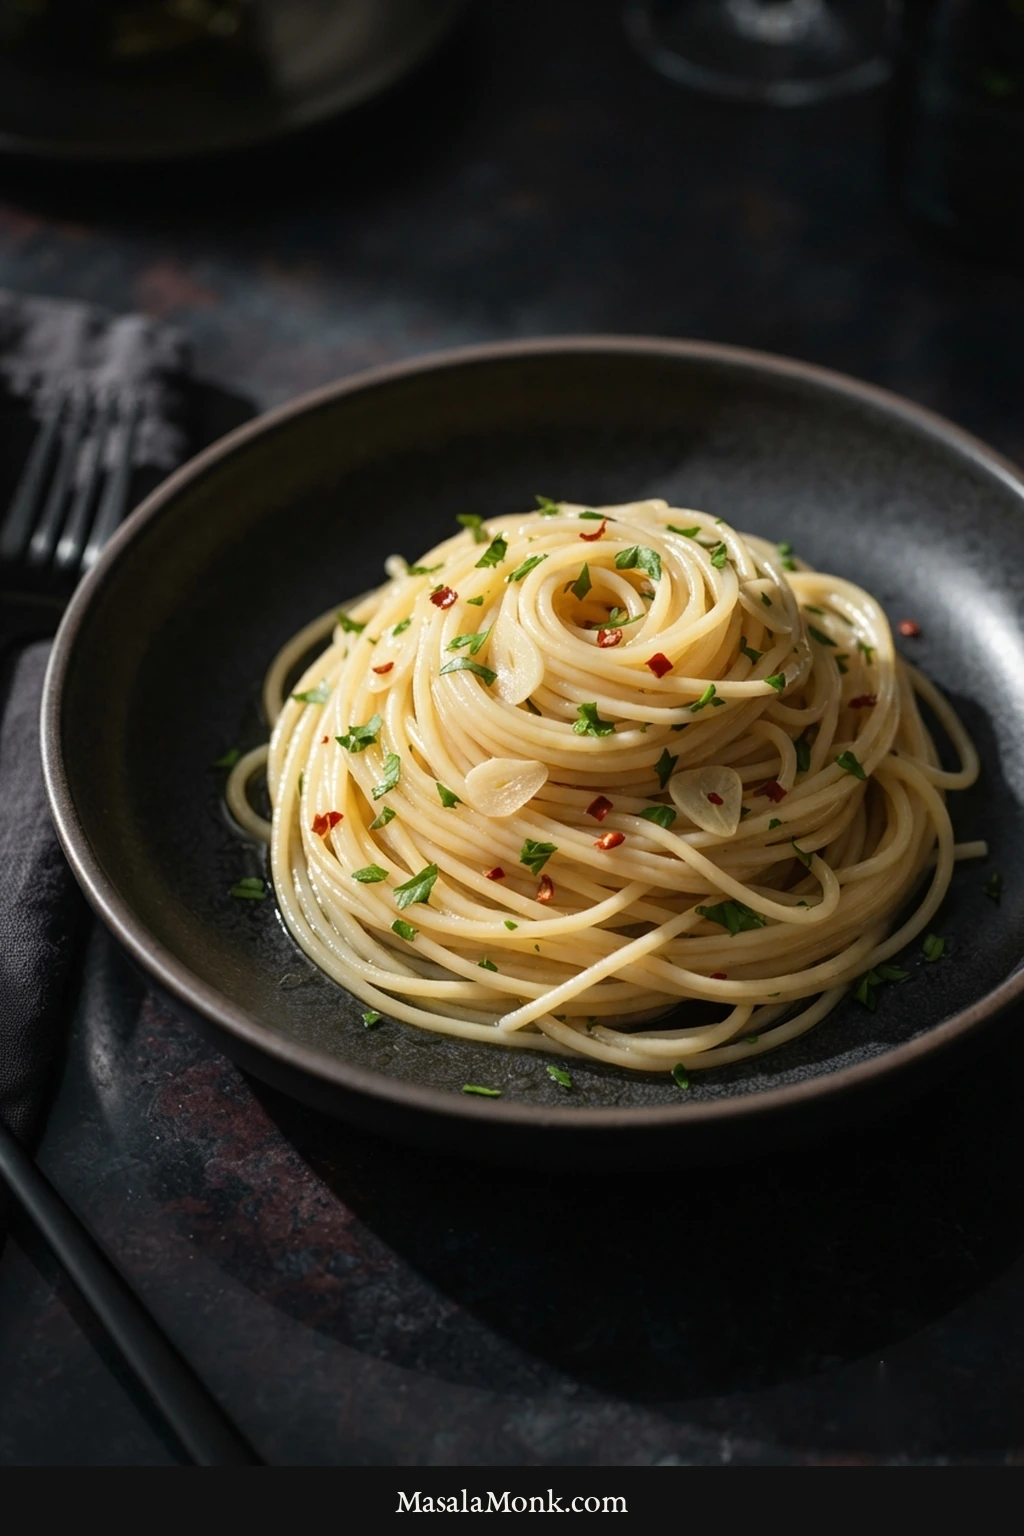
The awkward thing about aglio e olio is that you can use all the right ingredients and still end up with oily spaghetti. Or dry spaghetti. Or garlic that went from fragrant to bitter while you were looking at the pasta pot.
Spaghetti aglio e olio is a simple Italian pasta of garlic, extra-virgin olive oil, and spaghetti, finished with starchy pasta water until the strands are lightly silky. Most of the action happens during the last few minutes in the pan.
Aglio e olio—roughly AH-lyoh eh OH-lyoh—means garlic and oil. When it lands right, the garlic is fragrant rather than harsh, the olive oil still tastes fresh, and a little chile warmth lingers behind it if you use any. Once you know what to watch in the pan, most of the mystery disappears.
Read the Pan Before You Start
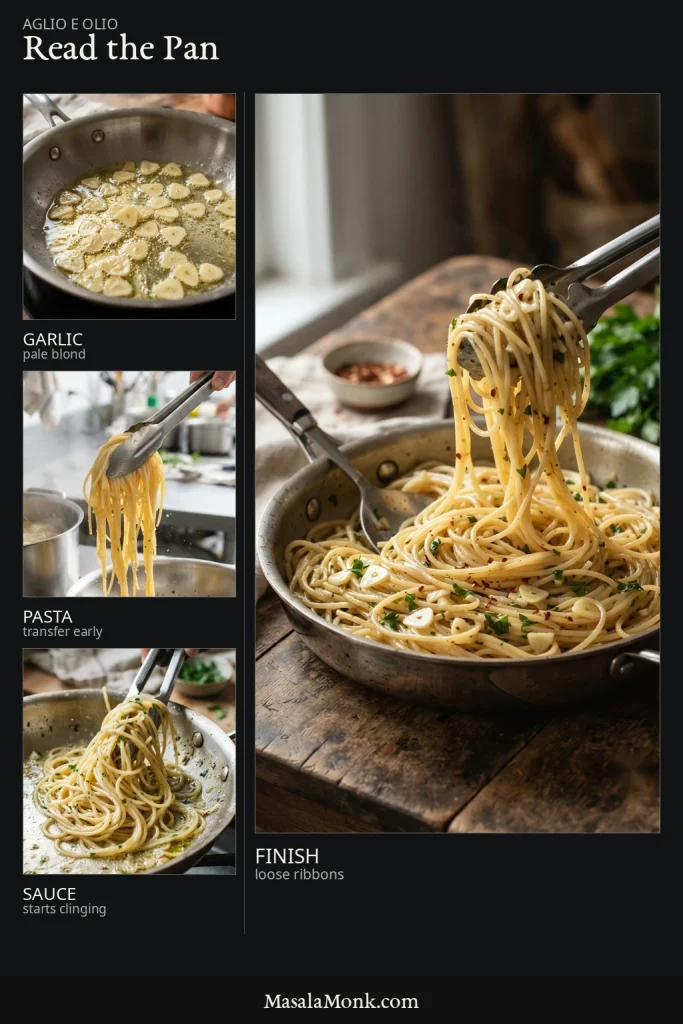
| Watch | The moment you want |
|---|---|
| Garlic | Pale straw to light blond, fragrant, with no deep browning |
| Spaghetti | Move it to the skillet while the center is still a little firmer than you want to eat |
| Sauce | The oil and water begin following the strands instead of pooling separately underneath |
| Finish | The spaghetti moves freely and falls from the tongs in loose ribbons |
Keep those four cues in mind. They will tell you more than an extra thirty seconds on a timer.
Spaghetti Aglio e Olio Recipe
Spaghetti tossed with gently cooked garlic, extra-virgin olive oil, starchy pasta water, optional chile, and parsley. No cream or butter is needed to make the sauce coat the noodles.
Equipment
- Large pasta pot
- 12-inch / 30 cm wide sauté pan or deep skillet
- Tongs
- Heatproof measuring cup or ladle
- Sharp knife
A wide pan makes this easier. It gives the spaghetti room to move and exposes more liquid to evaporation, so you can toss freely and see what the sauce is doing underneath.
No 12-inch skillet? Cook the garlic in your widest skillet. If there is not enough room to toss the spaghetti freely, transfer the garlic-oil-water mixture to the emptied pasta pot and finish the spaghetti there.
Ingredients
- 12 oz / 340 g dried spaghetti
- 2.5 L / about 2.6 qt water, for cooking the pasta
- 20 g fine sea salt; roughly 1 tablespoon for many fine salts, but weighing is much more reliable
- ⅓ cup / 80 ml extra-virgin olive oil, divided; use ¼ cup / 60 ml for the garlic and up to 1 tablespoon + 1 teaspoon / 20 ml to finish
- 18 g fresh garlic, about 5–6 medium or 4 large cloves, sliced about 1/16 inch / 1–2 mm thick
- ¼–½ teaspoon red pepper flakes, or 1 small fresh red chile/peperoncino thinly sliced, to taste
- ¼ cup / about 15 g finely chopped flat-leaf parsley, optional but recommended
- At least 1¼ cups / 300 ml pasta cooking water, reserved from the pot
- Finely grated Parmesan or Pecorino Romano, optional for serving
Before You Start
- Olive oil: Use one that tastes fresh on its own. Fruity, grassy, mild, or peppery can all be good; stale or rancid cannot. If the labels are confusing, the differences between virgin olive oil and extra-virgin olive oil are worth knowing before you choose a bottle.
- Another long pasta: Linguine works too. Follow its own cooking time and move it to the skillet while the center is still firm.
- Gluten-free spaghetti: The starch in the cooking water can still help the oil and water come together. Start checking early, since some gluten-free varieties soften or break more quickly.
Save more pasta water than you expect to use. Start with 6 tablespoons / 90 ml in the pan. Keep the rest close by for adjustments.
Instructions
1. Start the Spaghetti
Bring 2.5 L / about 2.6 qt water to a rolling boil. Add 20 g fine sea salt, then the spaghetti.
Stir during the first minute so the strands separate. Check the package time. You will move the pasta to the skillet about 2 minutes before its usual al dente point, so begin checking early rather than waiting for the timer to finish.
2. Start the Garlic With About 5–6 Minutes Left on the Pasta
Put ¼ cup / 60 ml olive oil and the sliced garlic into a cold 12-inch / 30 cm skillet. Set it over low to medium-low heat.
The slices will soften, turn translucent, and begin to sizzle gently. As the raw sharpness gives way to a sweeter garlic aroma, watch for pale straw to light blond around the edges. Depending on the pan and burner, that usually takes about 3–5 minutes.
Add red pepper flakes or fresh chile for the final 20–30 seconds.
Do not wait for deeply golden garlic. The slices keep cooking in hot oil after they reach the color you want.
3. While the Garlic Cooks, Reserve the Pasta Water
As the spaghetti gets close to its transfer point, scoop out at least 1¼ cups / 300 ml pasta water. Water collected later in cooking is generally starchier, which makes it especially useful for helping the oil and water cling to the spaghetti.
4. Cool the Garlic With the First Splash of Pasta Water
Once the garlic is pale blond, pull the skillet off the heat. Carefully add 6 tablespoons / 90 ml hot pasta water, then return the pan to medium heat.
The water starts the sauce and slows the garlic’s cooking at the same time. Some sputtering is normal. If the oil was smoking or the water spits violently, let the pan cool briefly before continuing.
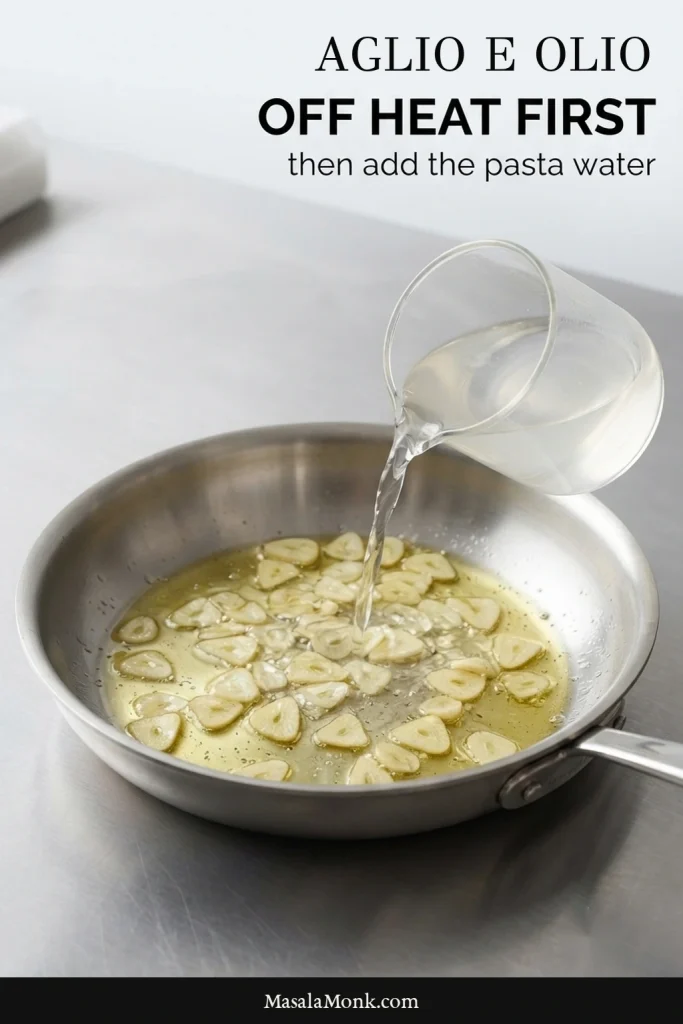
The oil and cloudy water may still look separate at this point. That’s fine for now.
Garlic ready first? Pull the skillet off the heat, add the measured water, and wait for the pasta. If the spaghetti is nearly ready while the garlic still looks raw, give the garlic another moment instead of rushing it.
5. Finish the Spaghetti in the Skillet
Transfer the spaghetti with tongs while the center is still a little firmer than you want to eat. Some cooking water clinging to the strands is useful.
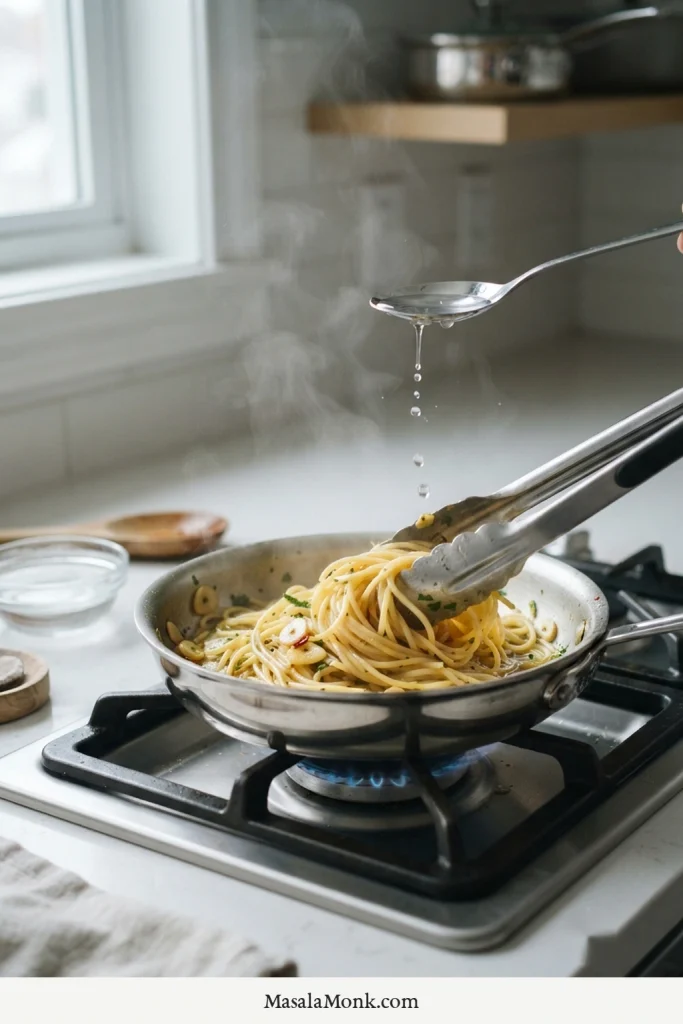
Keep the skillet around medium heat and toss the spaghetti through the garlic oil and water for about 1½–2 minutes. The main thing is to keep enough fluid sauce in the pan for the spaghetti to finish cooking while you toss.
As the sauce comes together, the pan should look less like separate oil and water and more like one fluid coating around the spaghetti. If plenty of liquid remains, nudge the heat toward medium-high. If the pan starts drying before the spaghetti is tender, lower the heat and add reserved water 1–2 tablespoons / 15–30 ml at a time.
If repeated splashes vanish almost immediately, adding more water is not always the answer. A crowded pan, too little tossing, or excessive heat can leave you chasing the sauce while the pasta keeps cooking.
6. Stop Before the Pan Looks Dry
You’re there when the spaghetti carries a thin coating, moves freely, and falls back from the tongs in loose ribbons. Very little clear oil should be sitting underneath.
A little fluid sauce left in the pan is welcome. It tightens quickly once the spaghetti leaves the heat.
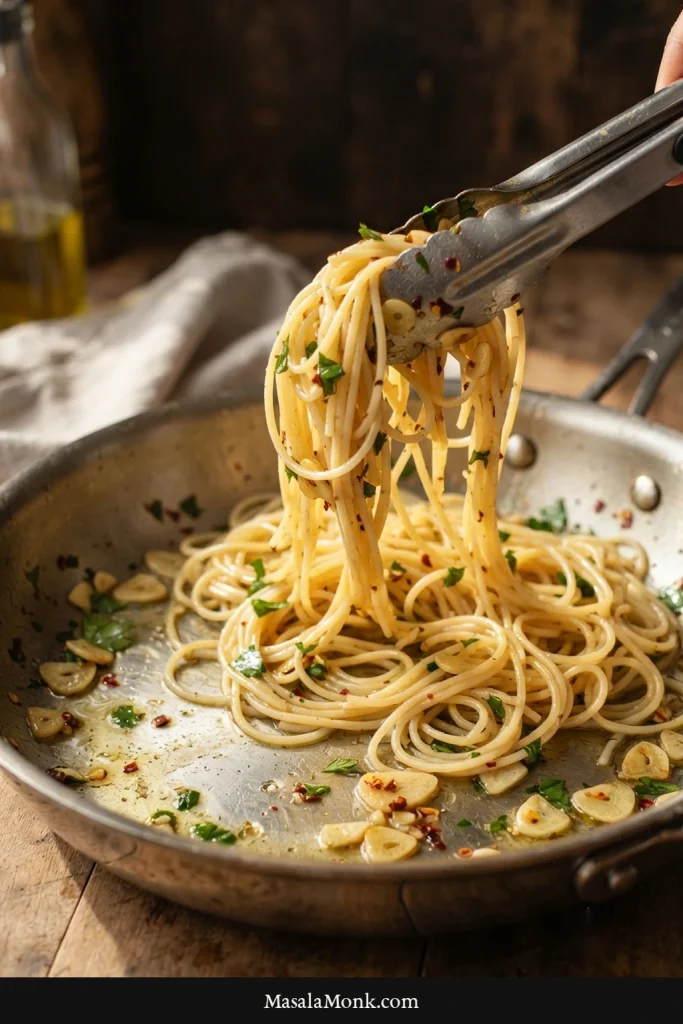
7. Finish Off the Heat
Turn off the heat. Toss in some of the remaining olive oil for a fresher olive-oil flavor, then add the parsley. You may not need all 1 tablespoon + 1 teaspoon / 20 ml.
If the finishing oil begins collecting at the bottom, add 1 tablespoon / 15 ml hot pasta water and toss again. The finished spaghetti should still feel loose rather than slick or heavy.
Taste for salt, then serve immediately. Parmesan or Pecorino can go on at the table if you want it.
If the pasta looked oily, dry, sticky, or difficult to control, start with what you saw in the pan—the fixes are not all the same. Diagnose what happened →
Troubleshooting & Technique Guide
Get the Sauce Right
Get the Garlic Right
Fix It & Finish It
Getting the Sauce to Cling
The final toss creates the emulsion: starch in the cooking water helps the olive oil cling to the spaghetti instead of collecting underneath.
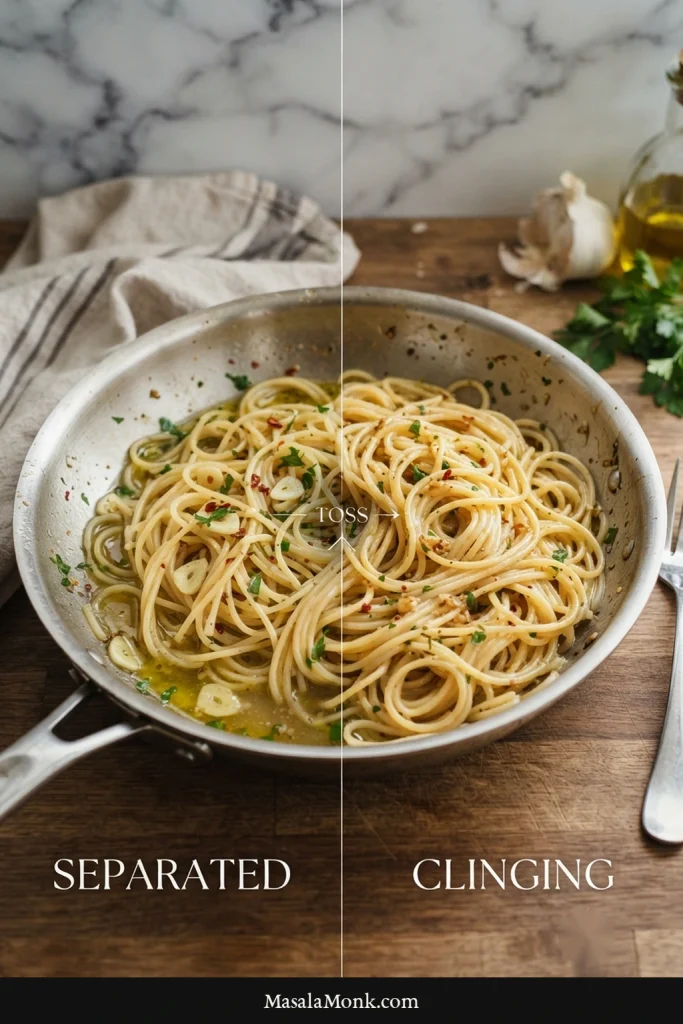
Oil still pooling underneath the spaghetti? Fix oily, dry pasta →
More Pasta Water Is Not Always Better
A moderate pot of water gives you cooking water with enough starch to be useful later. In the skillet, start with a controlled amount and add more only when the noodles need it. Extra water cannot compensate for excessive heat, too little movement, or an overcrowded pan.
Finish the Spaghetti in the Pan, Not the Pot
The skillet finish still counts as cooking time. Move perfectly al dente spaghetti into the pan and it can only get softer while the sauce comes together.
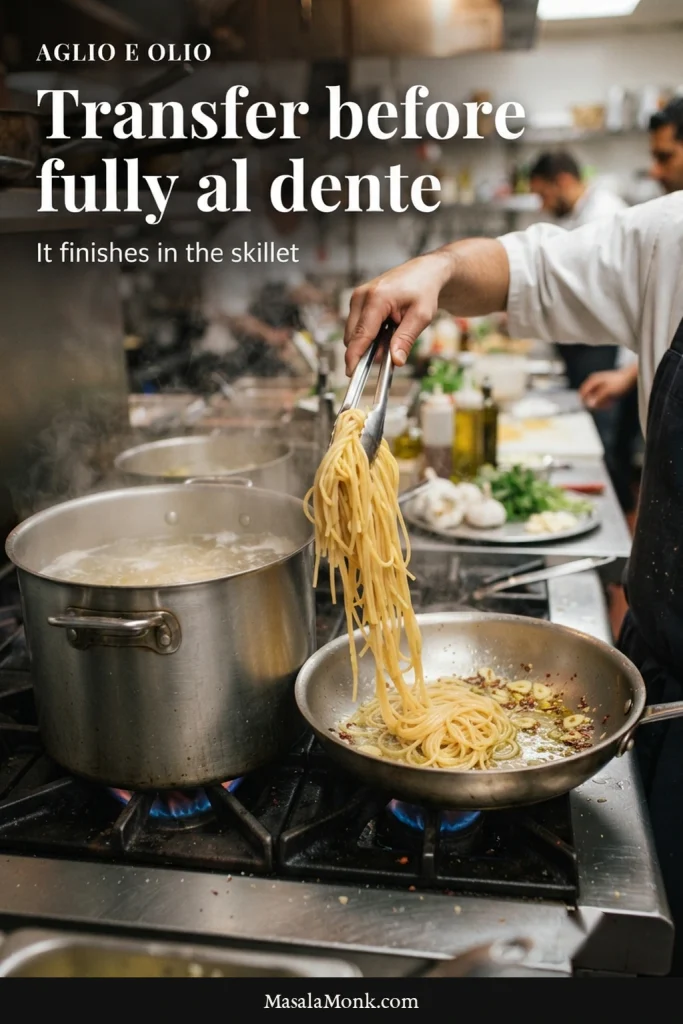
Transferring it early gives you room to work without racing the pasta. For spaghetti labeled 10 minutes to al dente, that can mean beginning to check it around minute 7½–8 rather than waiting for the full timer.
Garlic Is the Step You Cannot Really Undo
A tight sauce can be loosened and a watery one can reduce. Once badly browned garlic has flavored the oil, the bitterness is much harder to escape.
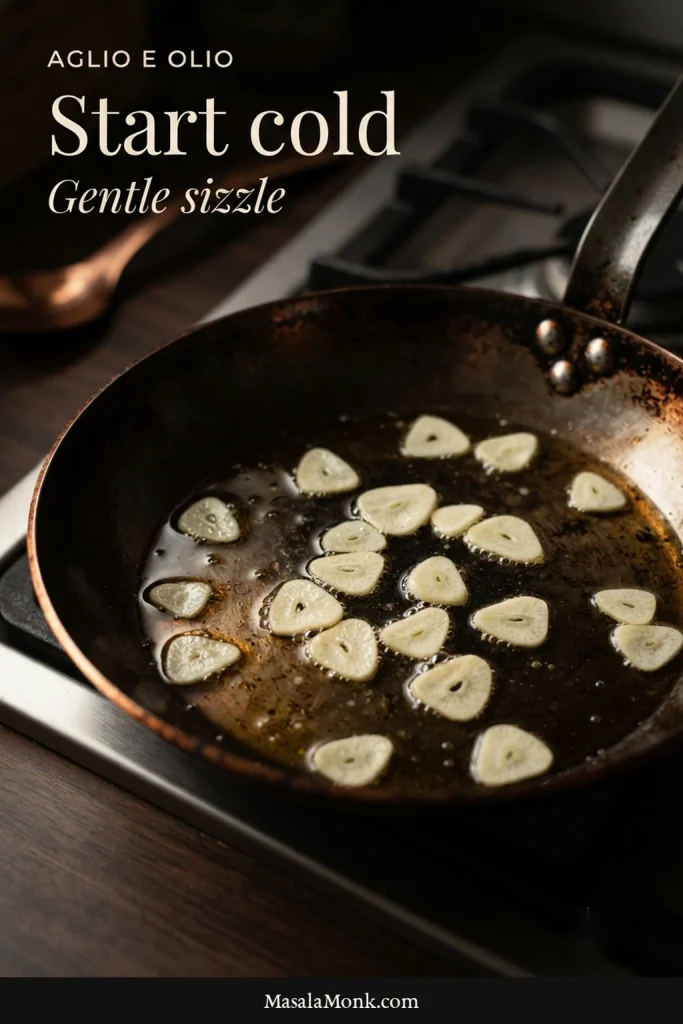
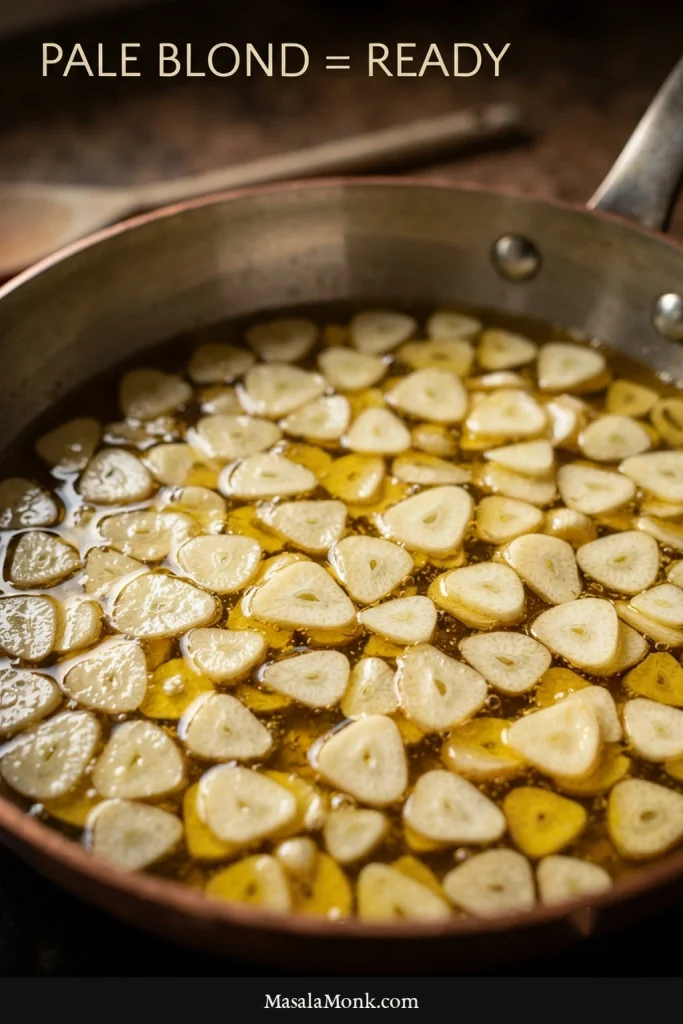
How Pale Is Pale Enough?
- Opaque: still raw.
- Soft and translucent: fragrant and getting close.
- Pale straw to light blond: ready for the pasta water.
- Clearly brown or darker: farther than needed for this version.
On an older electric coil, move the whole skillet off the burner as the garlic gets close. Turning the dial down does not instantly remove the heat already beneath the pan.
Garlic browning too quickly? Go to garlic control →
Why Thin Slices and a Cold Start Help
Minced garlic releases its flavor quickly, but it burns quickly too. Thin slices give you more time to judge the color, while a cold start slows the early cooking enough to make that change easier to catch.
When Aglio e Olio Goes Wrong
If aglio e olio has ever felt strangely difficult for something with such a short ingredient list, the pan usually tells you why. Look at what is happening before reaching for more oil or another ladle of water.
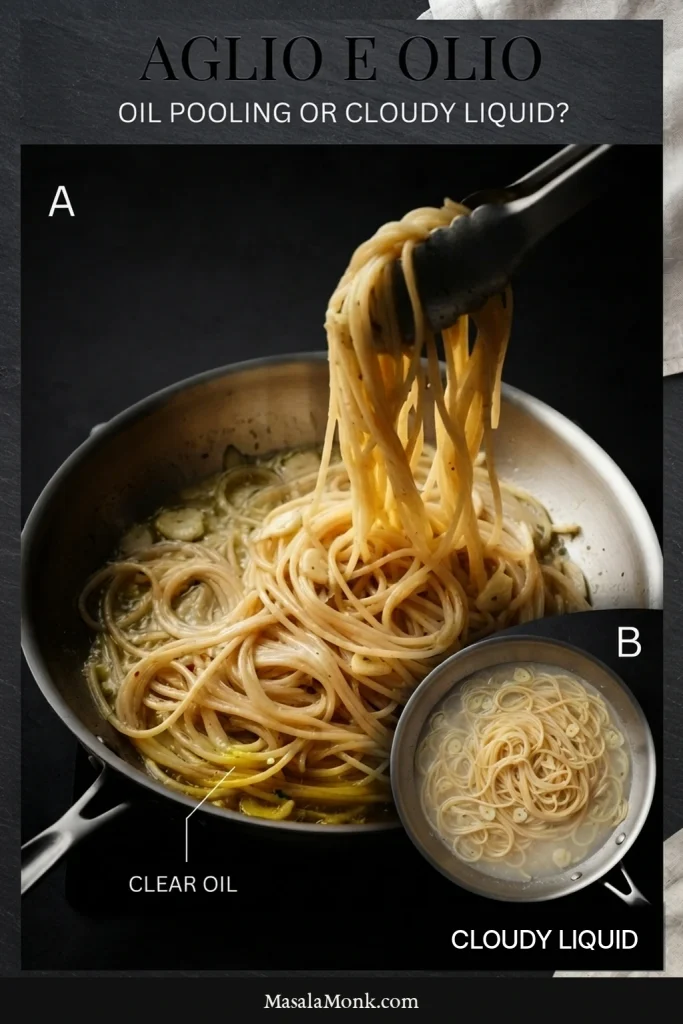
| What you see or taste | Do this now |
|---|---|
| Clear oil pooling underneath | If the pasta is dry too, add 1–2 tablespoons hot starchy water and toss firmly |
| Dry but greasy | Add a little water while tossing; more oil will make it worse |
| Cloudy liquid sloshing around | Keep the pasta moving and let some liquid reduce |
| Sticky or tacky spaghetti | Add 1–2 tablespoons hot pasta water and take the pan off the heat |
| Bitter garlic | Badly browned garlic is best restarted |
| Bland pasta | Check salt first, then garlic flavor and the olive oil itself |
| Pasta turning soft | Stop cooking; next time move it from the pot earlier |
| Water spits violently | Pull the pan off the burner before adding more |
My Pasta Is Oily Even After I Added Water
Water alone does not guarantee a good sauce. Clear oil beneath otherwise dry spaghetti usually means the pan needs a splash of starchy water plus more tossing.
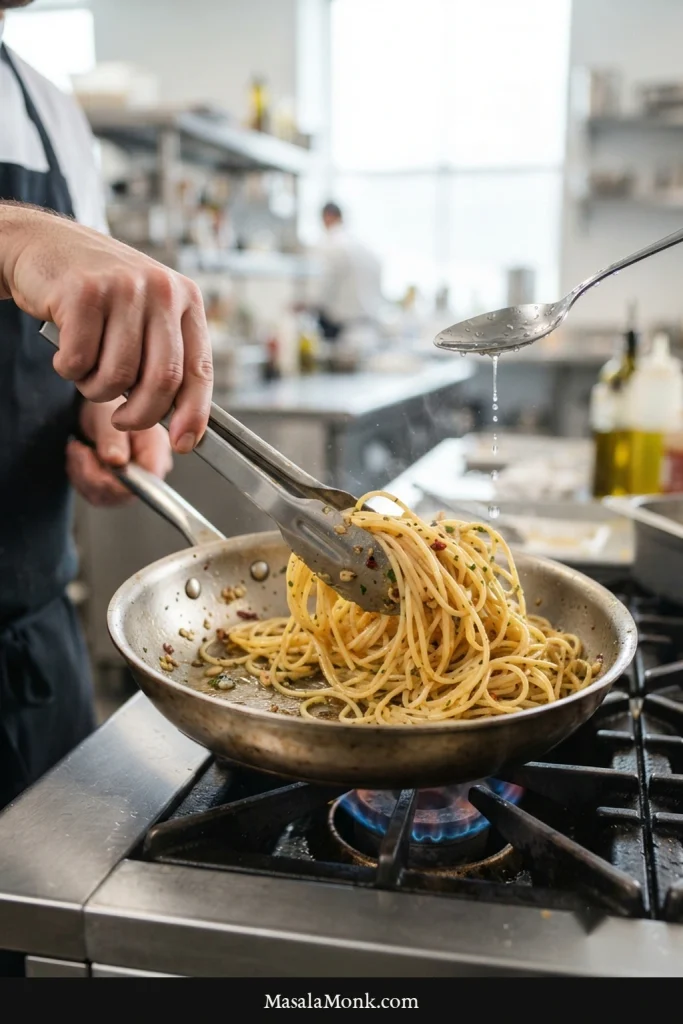
If plenty of cloudy liquid is already moving around the pan, work with what you have first. Another large ladle just gives you more liquid to reduce.
The Spaghetti Keeps Swallowing the Sauce
This often shows up with a crowded pan. The noodles keep absorbing water while you wait for the sauce to come together, so each splash seems to vanish.
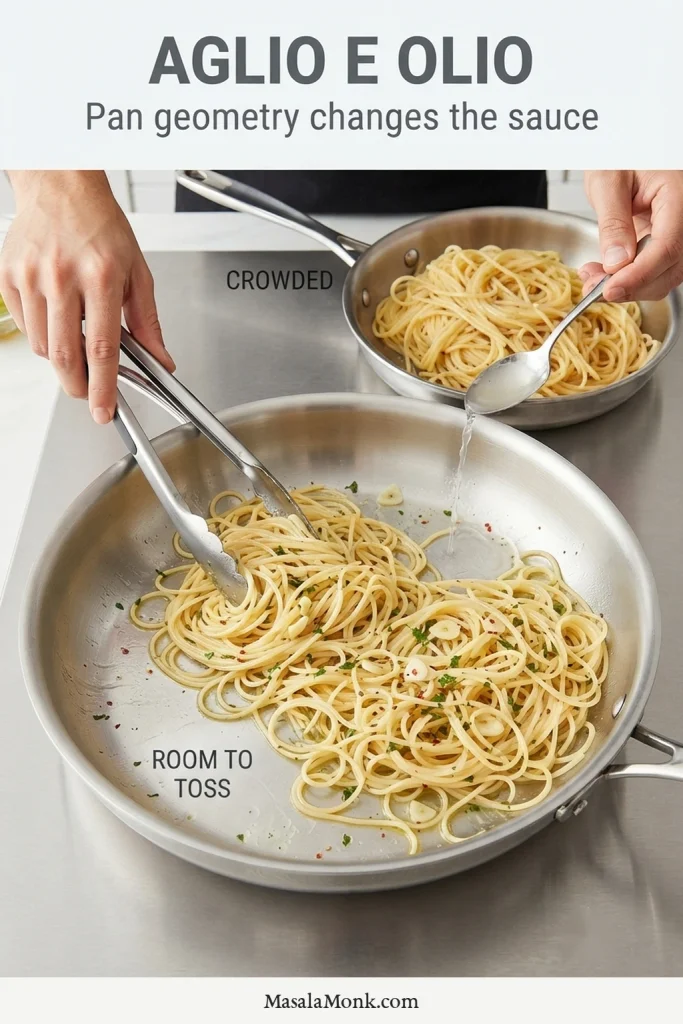
That’s one reason the main recipe uses 12 oz / 340 g spaghetti in a 12-inch pan instead of a full pound / 454 g.
If you’re doubling the recipe, use a substantially larger sauté pan or cook two batches. Twice the ingredients inside the same pan does not behave like the original batch.
My Garlic Is Bitter—or Barely Tastes Like Garlic
Dark garlic can taste bitter even when you used plenty of it. At the other extreme, slices that barely warmed may never have flavored the oil properly.
If the pasta tastes good but you want more garlic next time, use a little more. Cooking the same amount darker gives you a different flavor, not simply more of it.
It Still Tastes Bland
Check the salt first. There is very little else in the bowl to compensate for underseasoned pasta.
If the salt seems right, taste the olive oil and think back to the garlic. Did the slices have enough gentle cooking time to flavor the oil?
You may also simply prefer a louder pasta. There is no reason to keep adding things until aglio e olio becomes another dish. Cajun shrimp pasta deliberately goes bigger with browned shrimp, chile, cream, and Parmesan.
Cooking another batch? Back to the recipe →
Chile, Cheese, Lemon—or Shrimp?
Garlic, olive oil, spaghetti, and salt are enough to make the dish. Peperoncino and parsley are both at home here. Beyond that, cook according to what you actually want to eat.
Fresh Chile or Red Pepper Flakes
Dried red pepper flakes bloom quickly in the oil and can scorch if left there too long, which is why they go in near the end of the garlic cooking. Fresh chile gives a brighter, fresher kind of heat.
Parmesan or Pecorino
Neither cheese is needed for the sauce. If you want one, Pecorino is sharper and saltier, while Parmesan is usually rounder and a little sweeter. The differences among Parmesan, Parmigiano Reggiano, Pecorino, and other hard cheeses can help if you’re deciding what to buy.
With egg-free pasta and no optional cheese, the base dish is vegan. If you’re adding cheese but need the meal to remain vegetarian, check the label for vegetarian or microbial rennet; traditional Parmigiano Reggiano uses calf rennet under the official Parmigiano Reggiano guidelines.
Lemon
If you want lemon, start with finely grated zest; it adds fragrance without much extra liquid. Add a squeeze of juice off the heat only if you want more acidity.
Shrimp or Prawns
Sear shrimp or prawns first and take them out of the pan. Build the garlic-oil sauce, then return the seafood near the end so it stays tender.
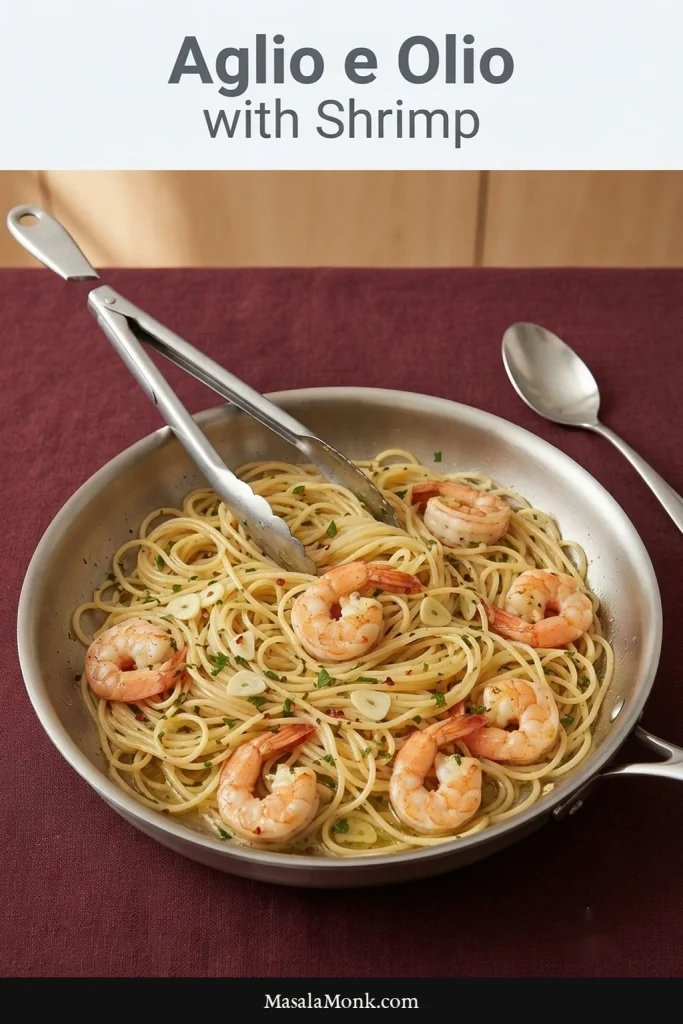
For a richer pasta built around garlic, shrimp, butter, and lemon, the shrimp scampi recipe takes that idea further.
Serve It While the Sauce Still Moves
Aglio e olio is at its best straight from the skillet. The noodles keep absorbing moisture as they sit, so the sauce gets tighter and the oil becomes more noticeable.
Warm bowls help if you have them. More importantly, get everyone to the table before the final toss rather than finishing the pasta and then rounding people up.
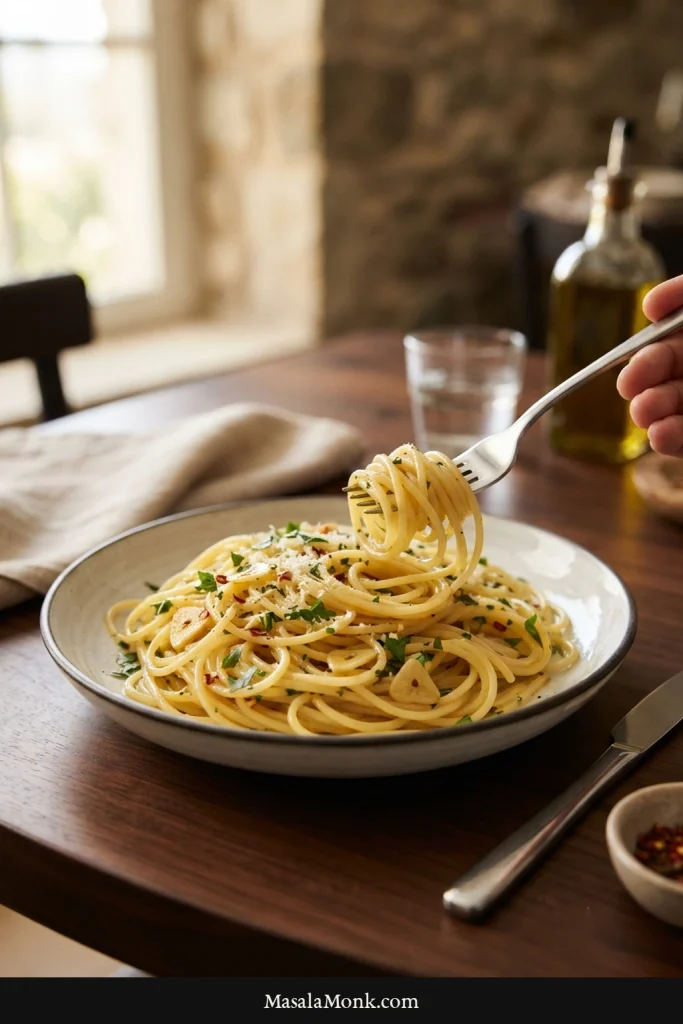
At the table, the strands should still slip easily around the fork, with enough sauce to keep them glossy but not enough oil to leave a slick behind. A little parsley gives the richness some freshness and color.
For a fuller dinner, a lemony chickpea salad brings cucumber, tomato, herbs, and crunch without burying the pasta under another rich dish.
Storing Leftovers
For the best texture, eat leftovers the next day. Refrigerate them within 2 hours of cooking, or within 1 hour when the surrounding temperature is above 90°F / 32°C, and use within 3–4 days. Those storage limits follow USDA food-safety guidance.
Reheating Without Making It Greasy
Put the spaghetti in a skillet with a splash of water. Warm gently and toss until the strands loosen and the pasta is piping hot throughout—165°F / 74°C if you’re checking with a thermometer. Add more water by the tablespoon only when needed.
The next time you make aglio e olio, watch the pan more than the timer. A few good ingredients and a few attentive minutes are enough to turn garlic, olive oil, and pasta water into dinner.








