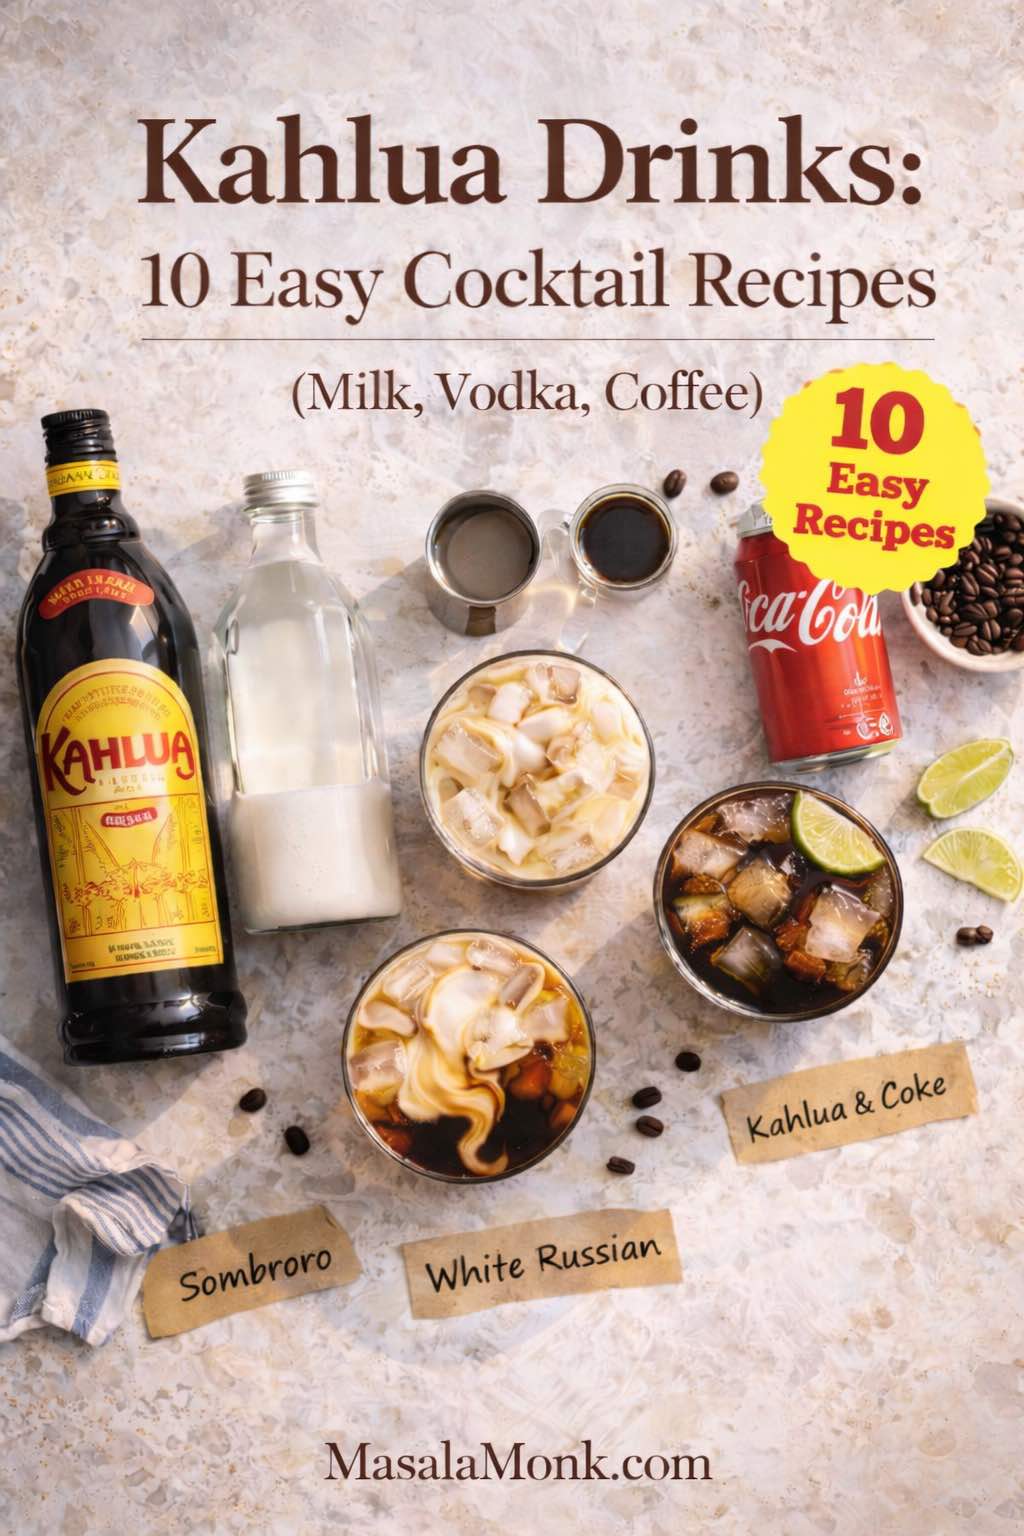
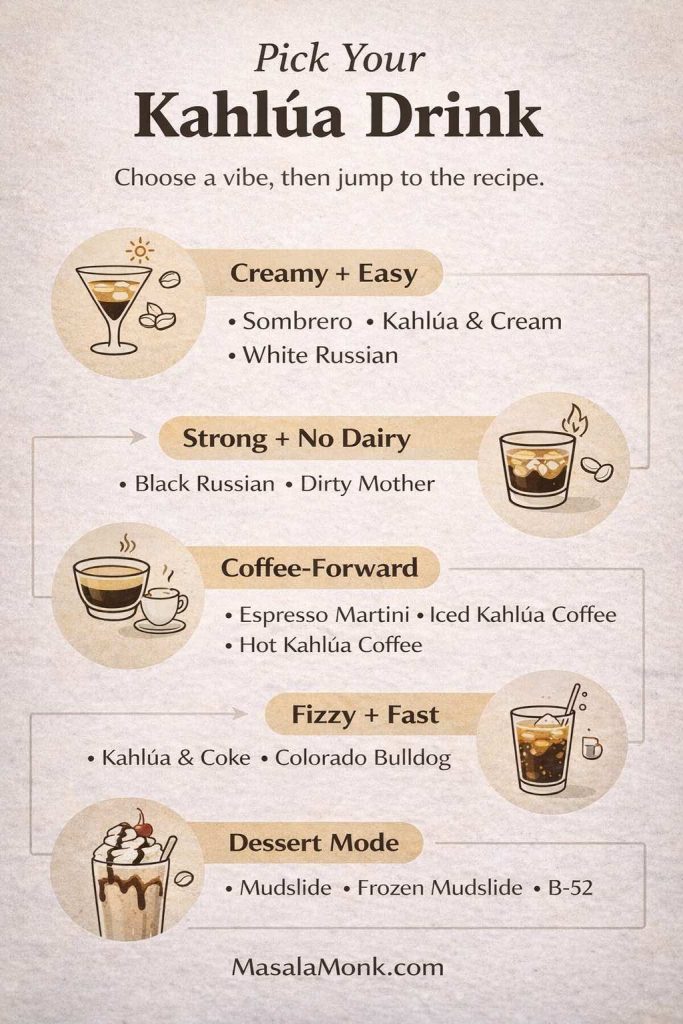
Kahlua drinks have a way of making ordinary evenings feel a little more intentional. Maybe it’s the familiar aroma—coffee, caramel, a hint of vanilla—or maybe it’s the way this coffee liqueur slips so easily into what’s already in your kitchen. Either way, drinks using Kahlua don’t demand a crowded bar cart. In fact, the best Kahlua drink recipes often start with everyday staples: milk, cream, vodka, coffee, Coke, and a handful of ice.
That’s exactly what you’ll find here: kahlua cocktail recipe classics you can build with confidence, plus the kind of variations that keep things interesting when you’re in the mood to tweak. Some nights call for a creamy Kahlua and cream drink recipe that tastes like dessert in a glass. Other times, vodka and Kahlua drinks like a White Russian or a Black Russian are the cleanest answer. And when you want something modern, nothing beats an espresso martini with Kahlua—cold, foamy, and café-scented.
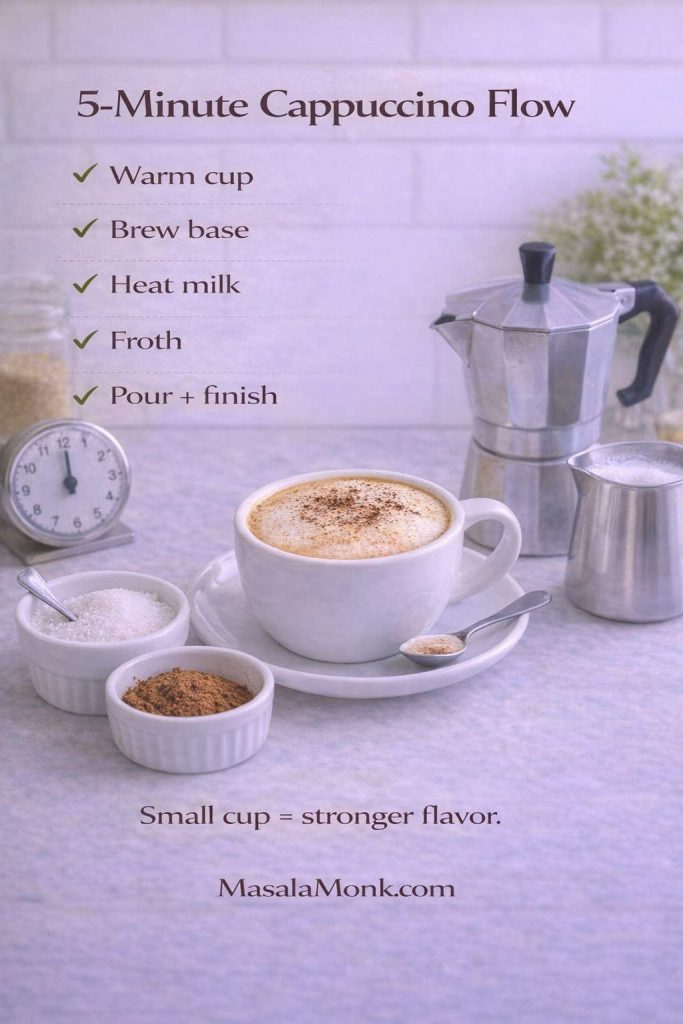
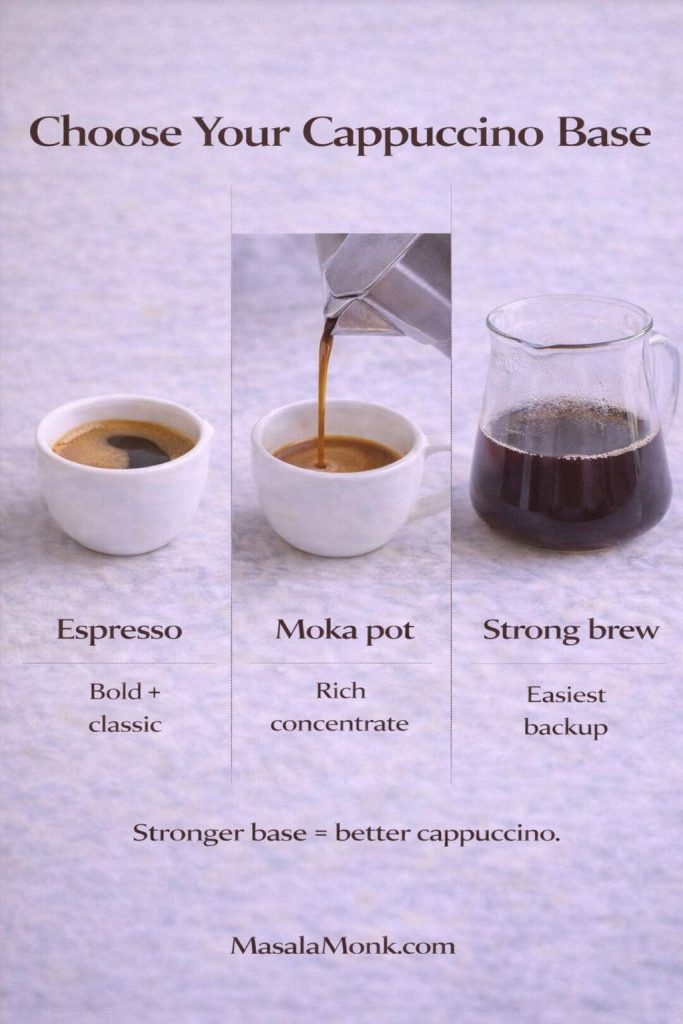
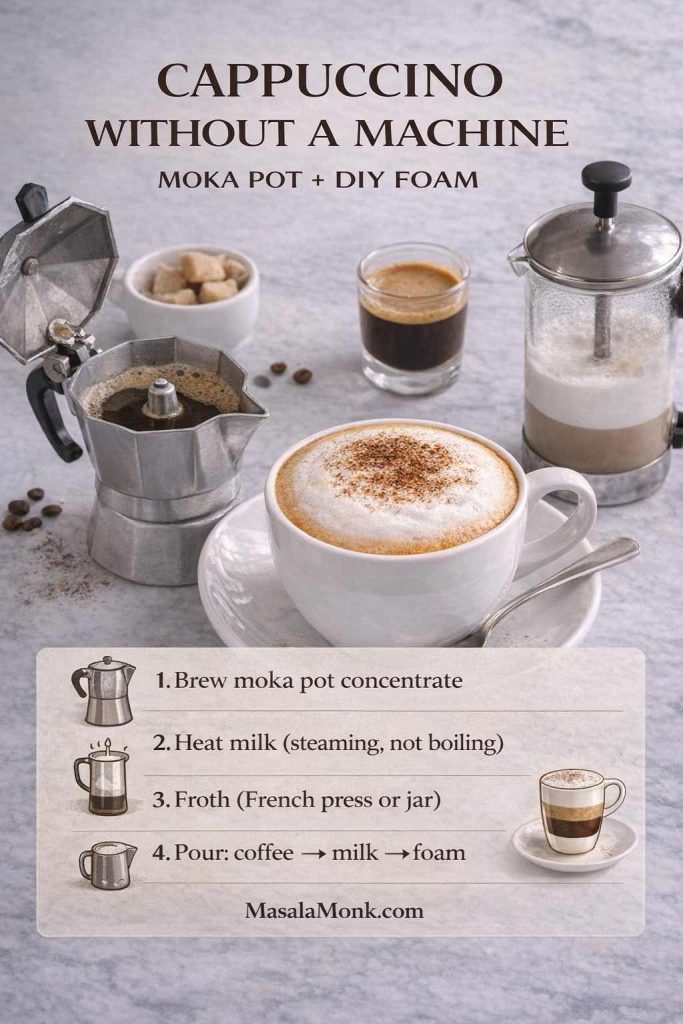
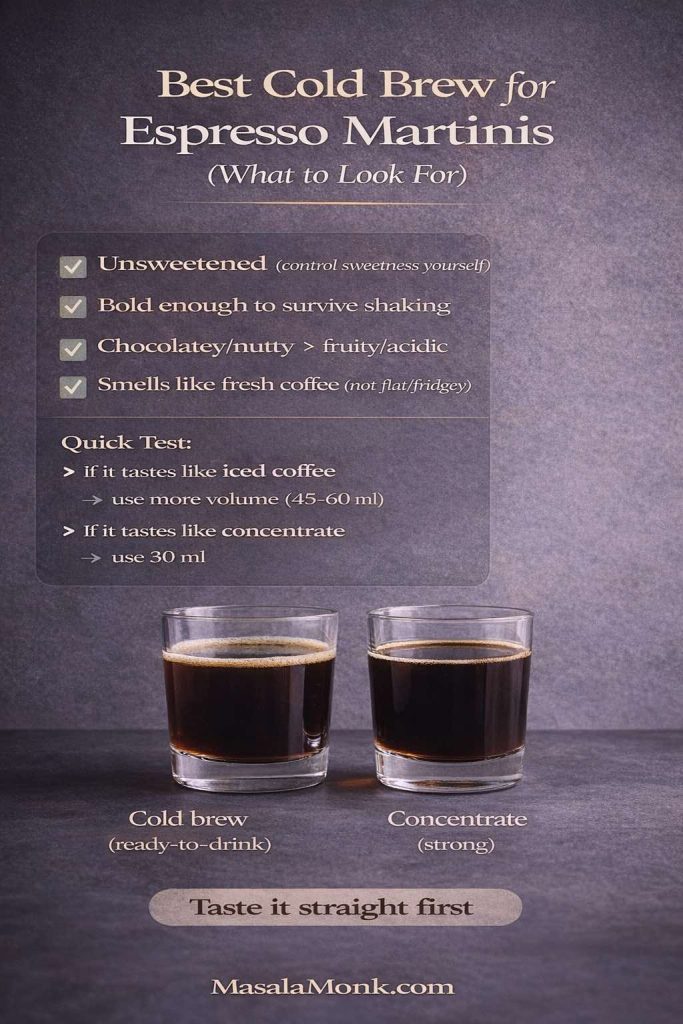
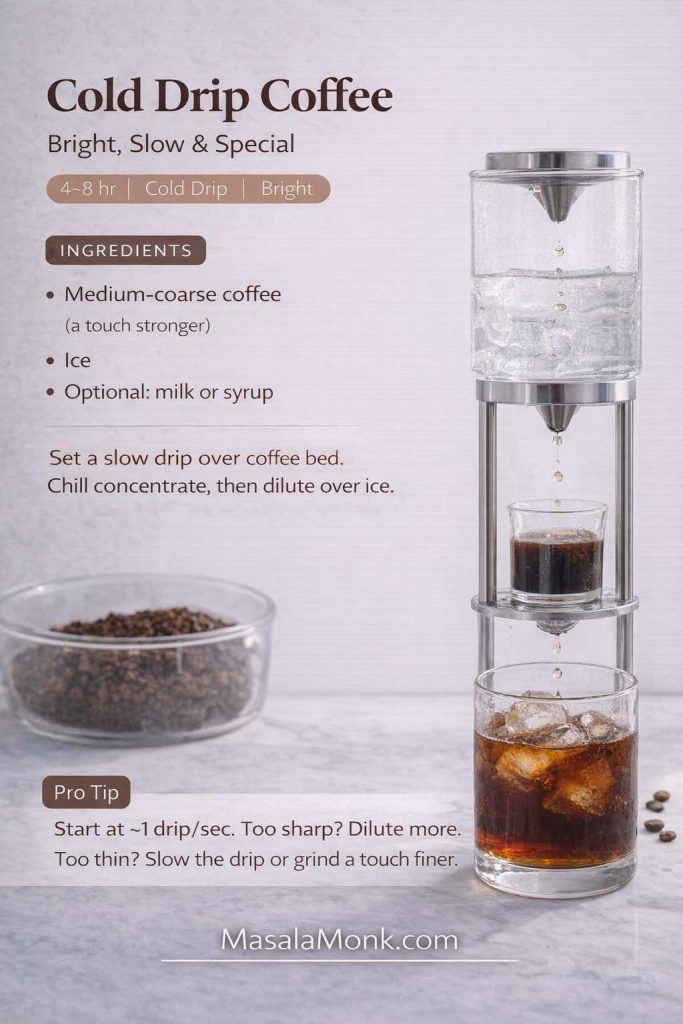
Before you start pouring, one detail matters more than it seems: coffee strength. Whenever a recipe uses espresso, cold brew, or strong coffee, you’ll get a much better drink if the coffee is bold enough to stand up to ice and alcohol. If you want a simple, espresso-like concentrate without a machine, this guide to Moka Pot Mastery is a good place to start. Likewise, if you’re still getting comfortable with coffee intensity and extraction, Masala Monk’s Quick Espresso Guide helps you understand what “strong enough” actually means in a practical way.
Now, with the basics in place, let’s make some genuinely satisfying kahlua liqueur drinks—starting with the easiest combinations and building toward the showstoppers.
Kahlua drinks with milk that feel like an iced latte (but better)
Milk and Kahlua drinks are popular for a reason: they’re creamy without being heavy, sweet without being cloying, and easy enough to make while you’re still chatting in the kitchen. Even better, they’re forgiving—so you can adjust ratios to taste without ruining the vibe.
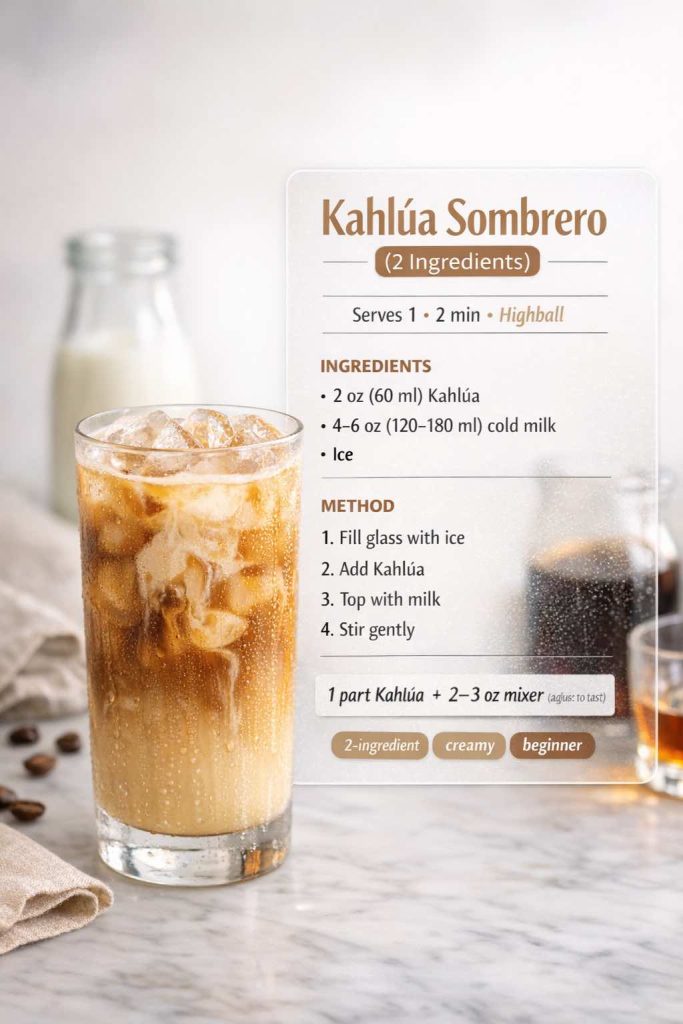
Kahlua Sombrero drink (milk + Kahlúa, the simplest classic)
If you’re collecting kahlua drink ideas that require almost zero effort, this is the one. The Kahlúa Sombrero is a true two-ingredient drink: Kahlúa + milk over ice. Kahlúa’s official version keeps it beautifully minimal, which is exactly why it works: Kahlúa Sombrero Drink Recipe.
Serves: 1
Glass: Highball (or any tall glass)
Ingredients
- 60 ml (2 oz) Kahlúa
- 120–180 ml (4–6 oz) cold milk (start with 4 oz, add more to taste)
- Ice
Method
- Fill a highball glass with ice.
- Pour in the Kahlúa.
- Add cold milk, starting with 120 ml (4 oz).
- Stir gently, then taste. Add a little more milk if you want it lighter.
Variations that still taste “Sombrero,” not random
- Extra creamy: Use half-and-half instead of milk. The drink turns silkier and feels more dessert-like.
- Oat milk Sombrero: Oat milk makes the coffee flavor taste rounder and more “latte-ish,” especially when everything is very cold.
- Mocha Sombrero: Drizzle a little homemade chocolate syrup inside the glass first. If you like a quick syrup that tastes rich without being fussy, try this 3-minute homemade chocolate syrup.
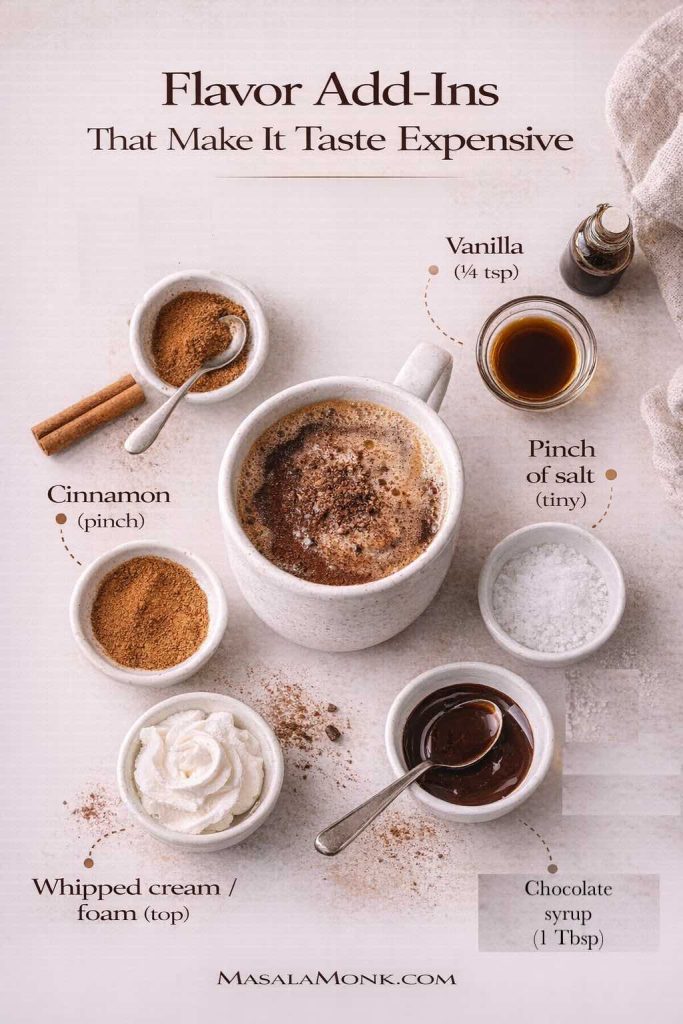
- Spiced finish: Dust the top with cinnamon or cocoa. It’s subtle, yet the aroma makes the whole drink feel more deliberate.
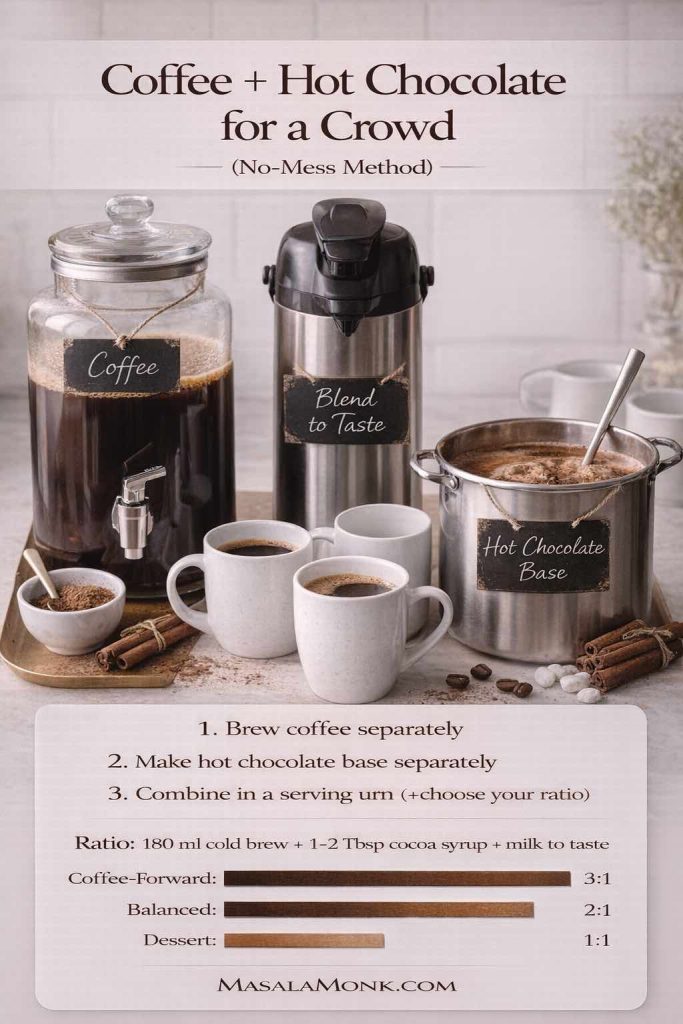
Make it for a group (without turning into a bartender)
Pour Kahlúa into glasses first, then add milk. This way, you’re not measuring perfectly; you’re building the drink in a way that stays consistent. As a result, everyone gets roughly the same strength, and you still get to adjust per person (“lighter” or “stronger”) in seconds.
Also Read: Cranberry Moscow Mule Recipe: A Festive Holiday Cocktail With Easy Variations
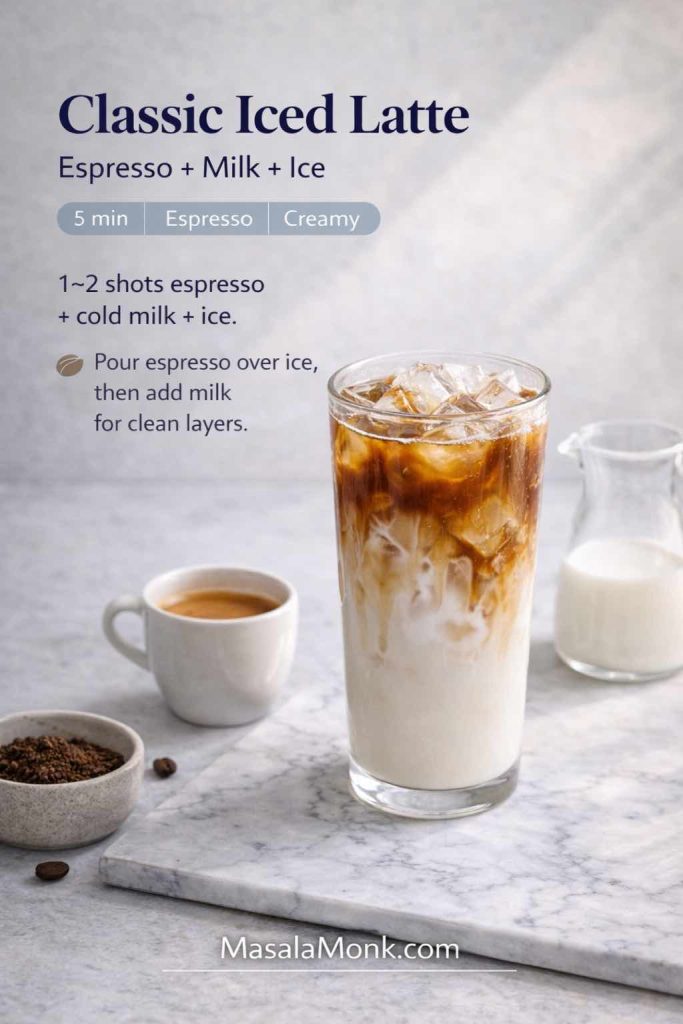
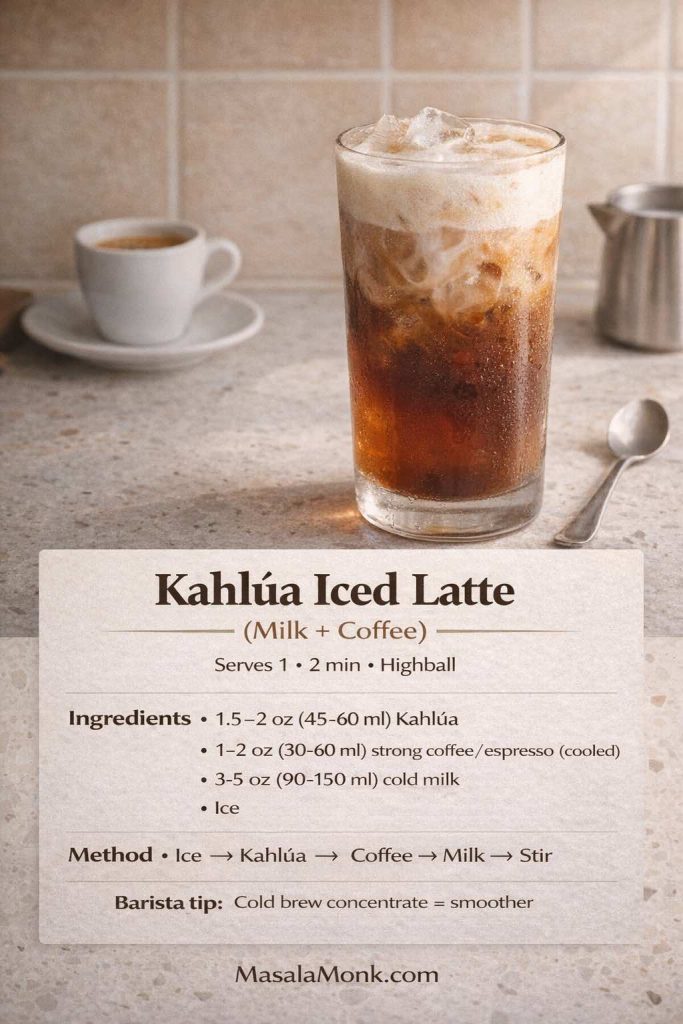
Kahlua drinks with milk and coffee (a stronger “grown-up iced latte”)
Sometimes the Sombrero is almost too gentle. In that case, a splash of strong coffee deepens the coffee note and pulls the sweetness back into balance.
Serves: 1
Glass: Highball
Ingredients
- 45–60 ml (1.5–2 oz) Kahlúa
- 30–60 ml (1–2 oz) strong coffee or espresso, cooled
- 90–150 ml (3–5 oz) cold milk
- Ice
Method
- Fill a glass with ice.
- Add Kahlúa.
- Pour in cooled espresso or strong coffee.
- Top with milk and stir.
Variations
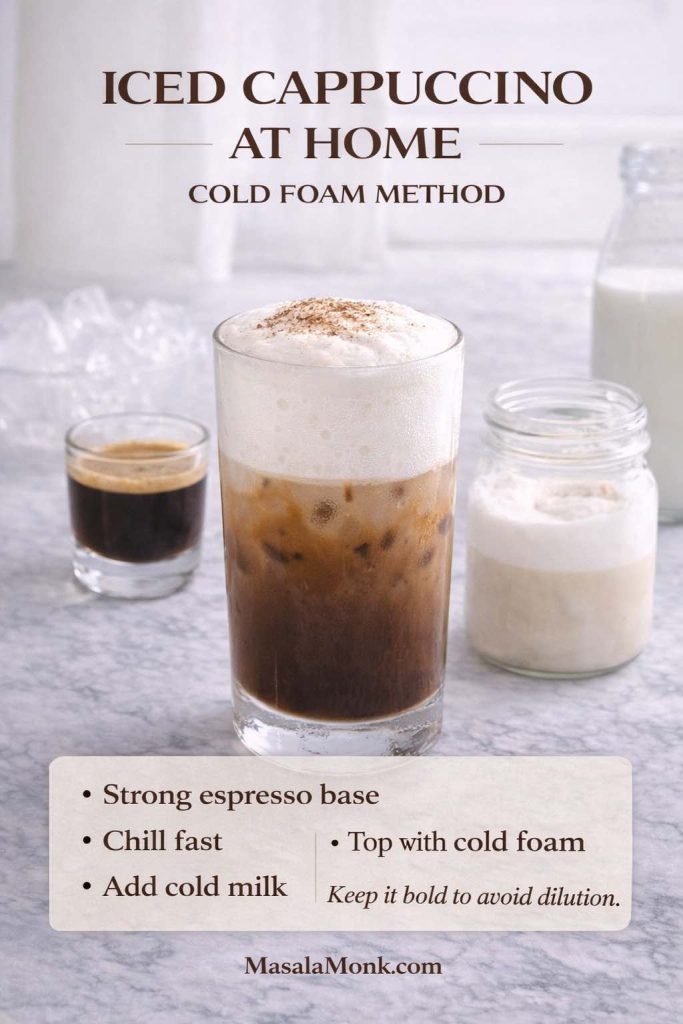
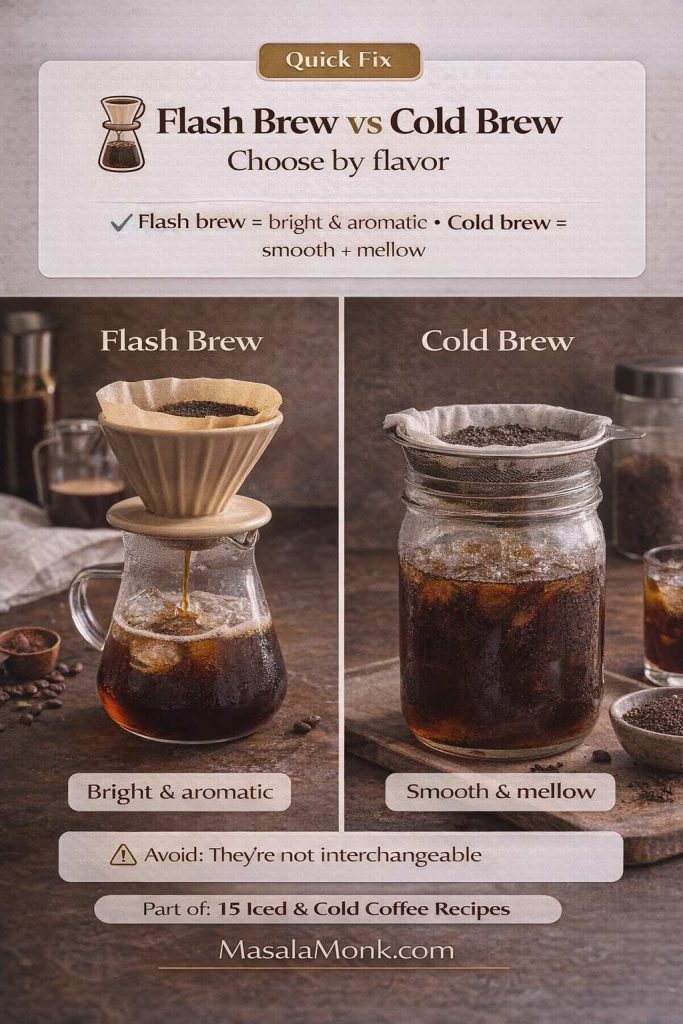
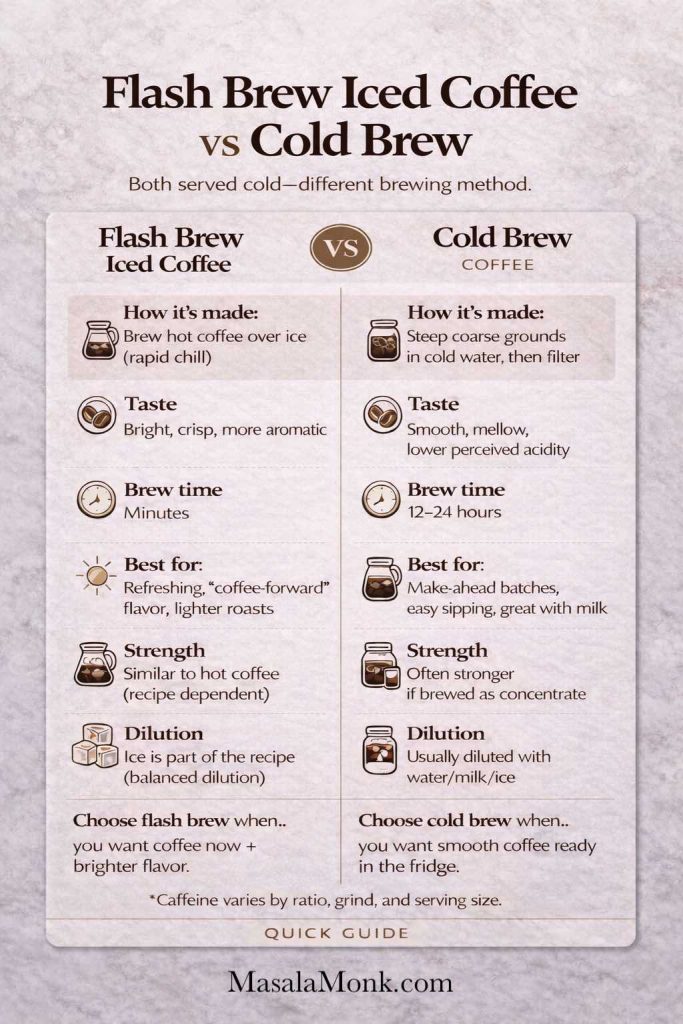
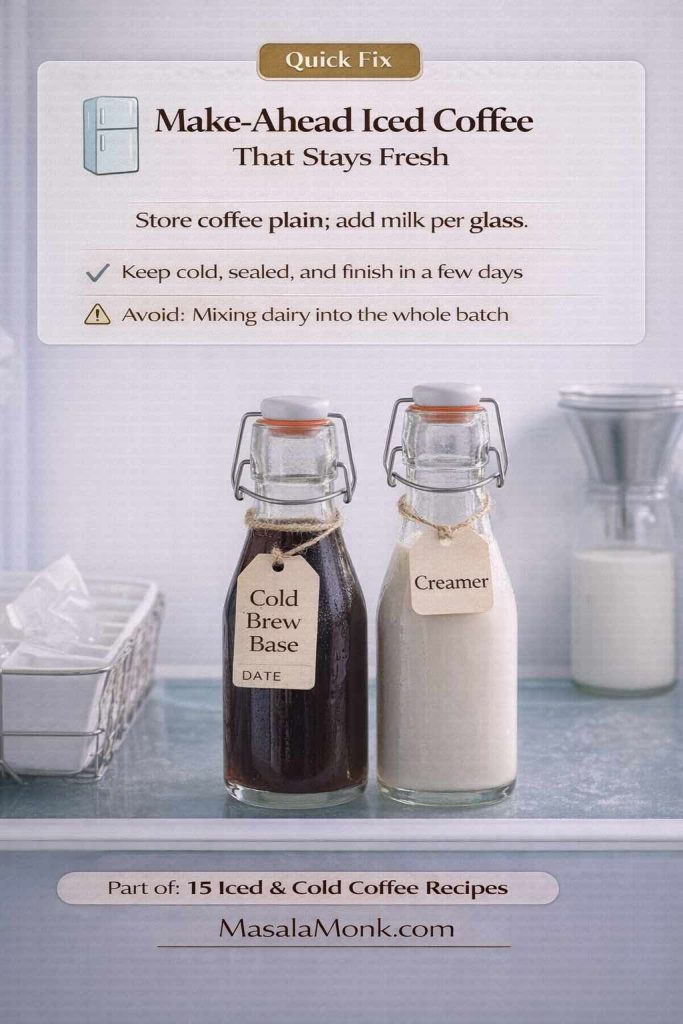
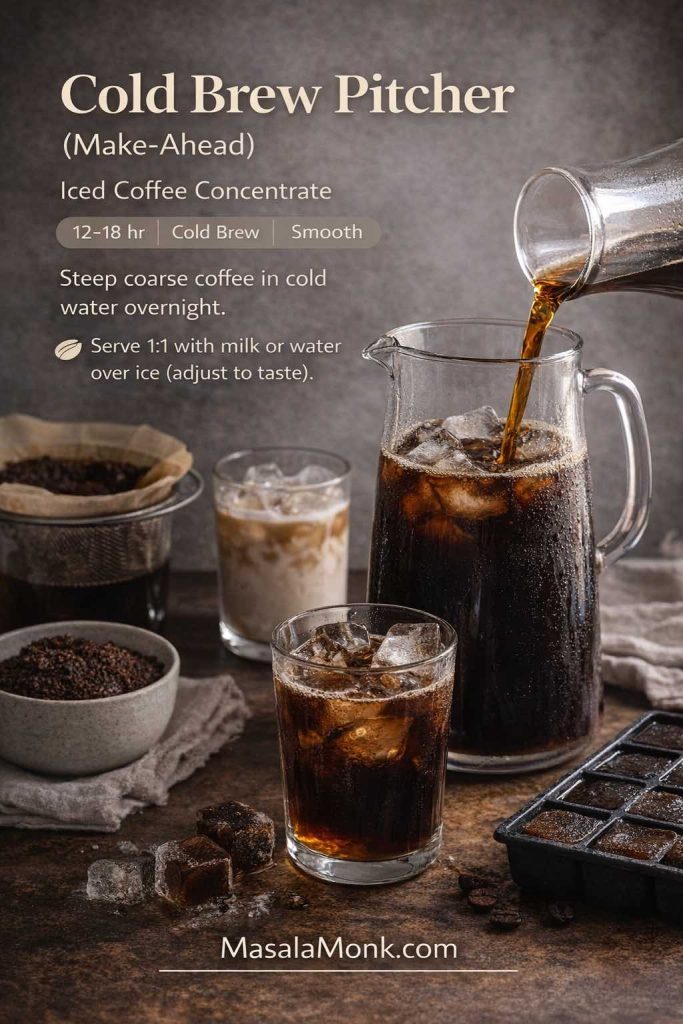
- Cold brew version: Use cold brew concentrate for a smooth, intense coffee base. If you want a clear concentrate method and dilution approach, Serious Eats has a practical recipe: Cold Brew Iced Coffee Recipe.
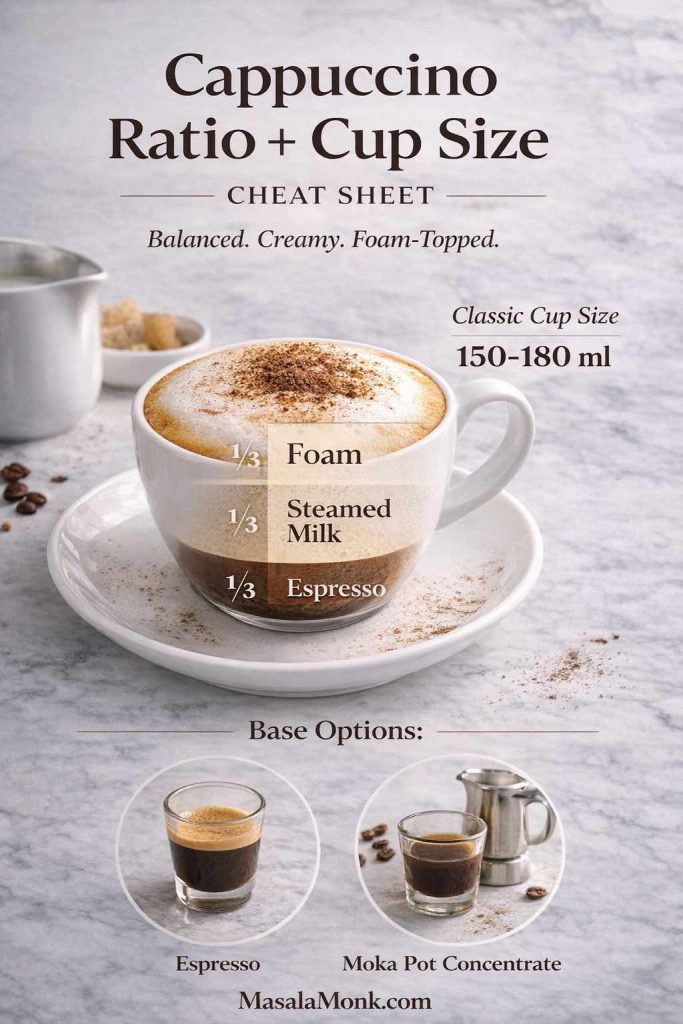
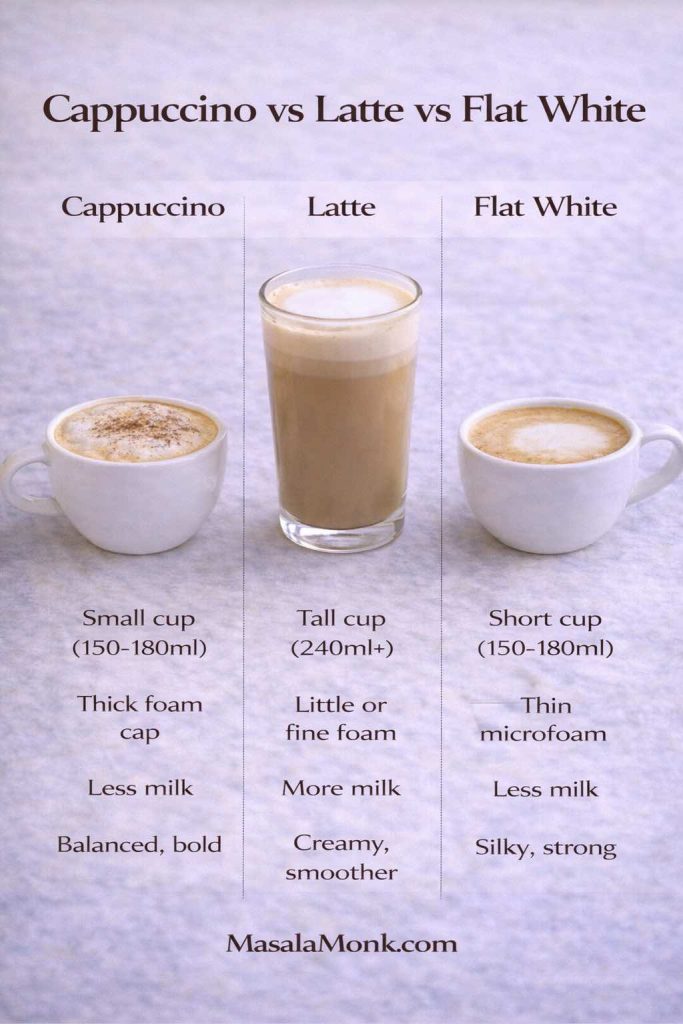
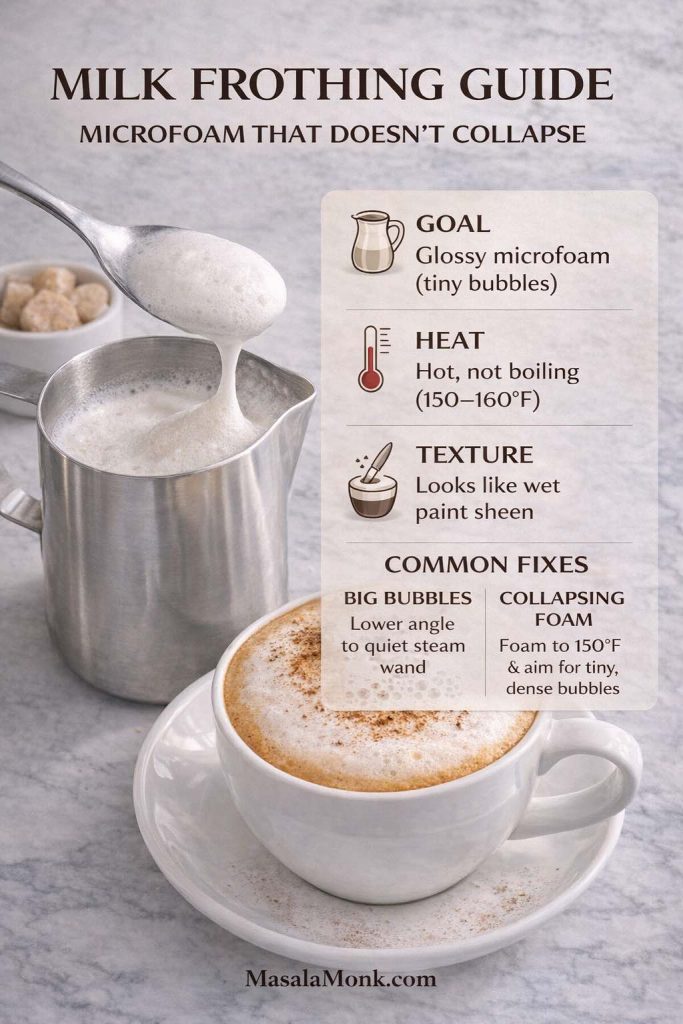
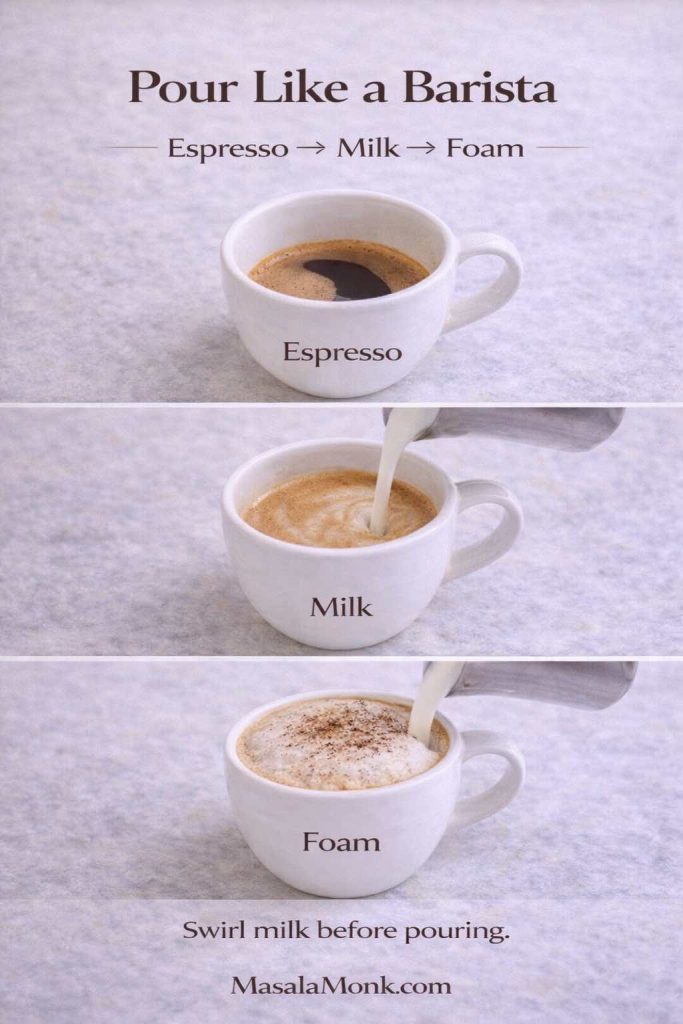
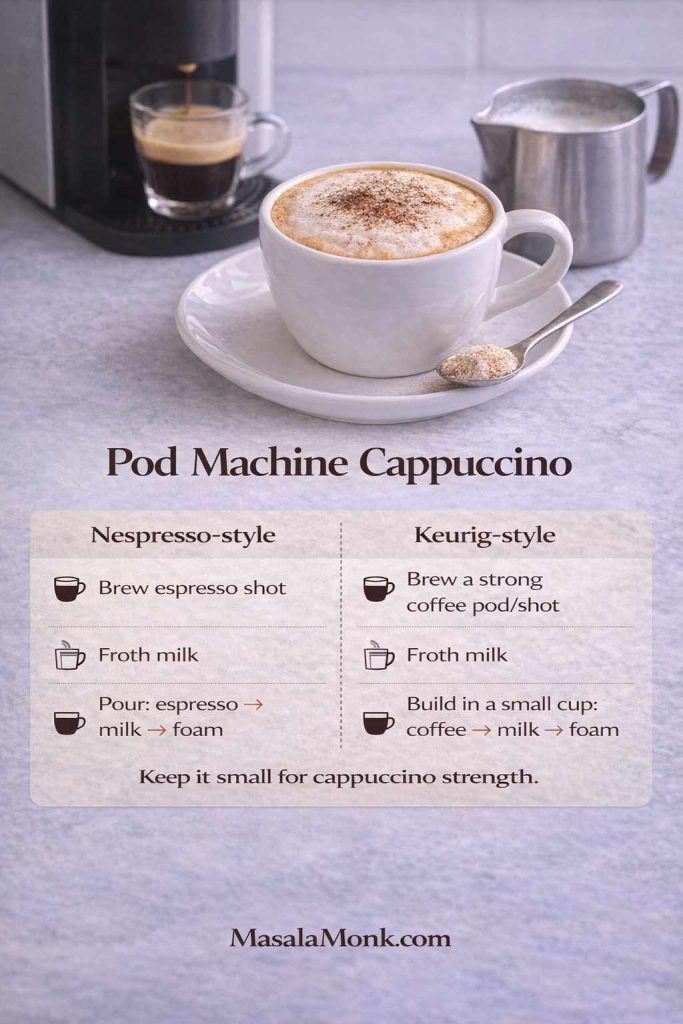
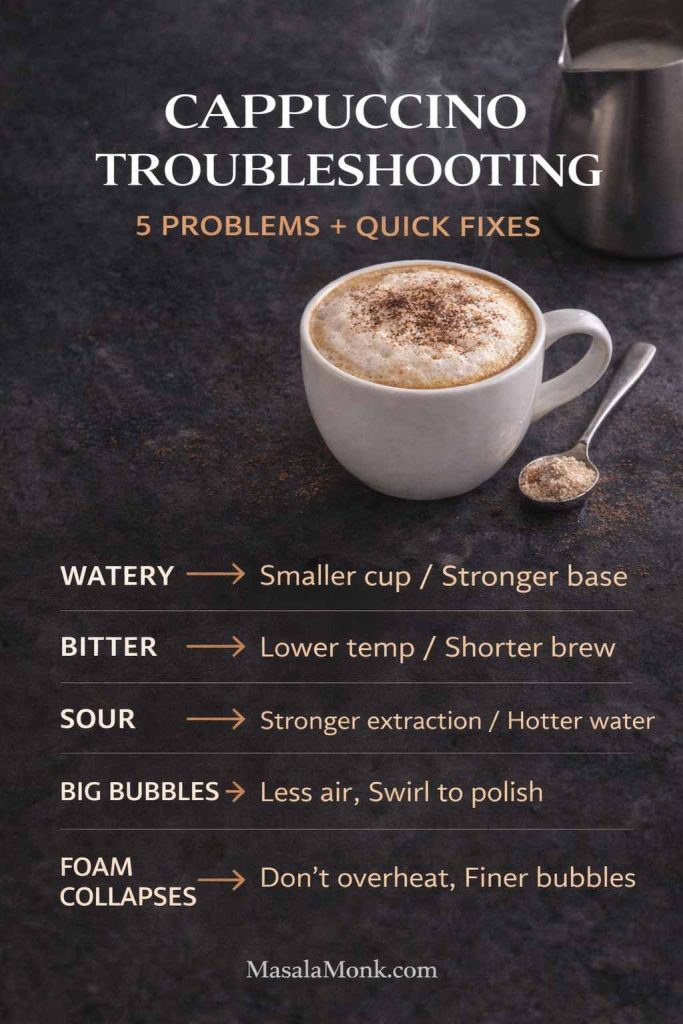
- Froth the milk: If you like café textures, froth the milk lightly before pouring. Masala Monk’s cappuccino recipe is aimed at cappuccino, yet the milk-handling tips translate beautifully to foamy iced drinks too.
- Iced coffee playground: If you enjoy switching between cold brew, iced latte, and frappe-style textures, this roundup of iced coffee recipes gives you plenty of bases that pair well with coffee liqueur.
Also Read: Baked Ziti Recipe Collection: 15 Easy Variations
Kahlua and cream drink recipes that taste like dessert in a glass
Cream changes everything. It doesn’t just make Kahlúa richer—it makes it slower, softer, and more “after dinner.” If you’re in the mood for cocktails with Kahlua that feel like a treat, cream is your best friend.
Kahlua and cream drink recipe (the minimalist indulgence)
This is the stripped-down version of the White Russian—no vodka, just coffee liqueur and cream. It’s fast, comforting, and surprisingly elegant. Kahlúa’s official method is as simple as it sounds: Kahlúa and Cream Drink Recipe.
Serves: 1
Glass: Rocks glass
Ingredients
- 60 ml (2 oz) Kahlúa
- 45–60 ml (1.5–2 oz) heavy cream (or half-and-half for lighter)
- Ice
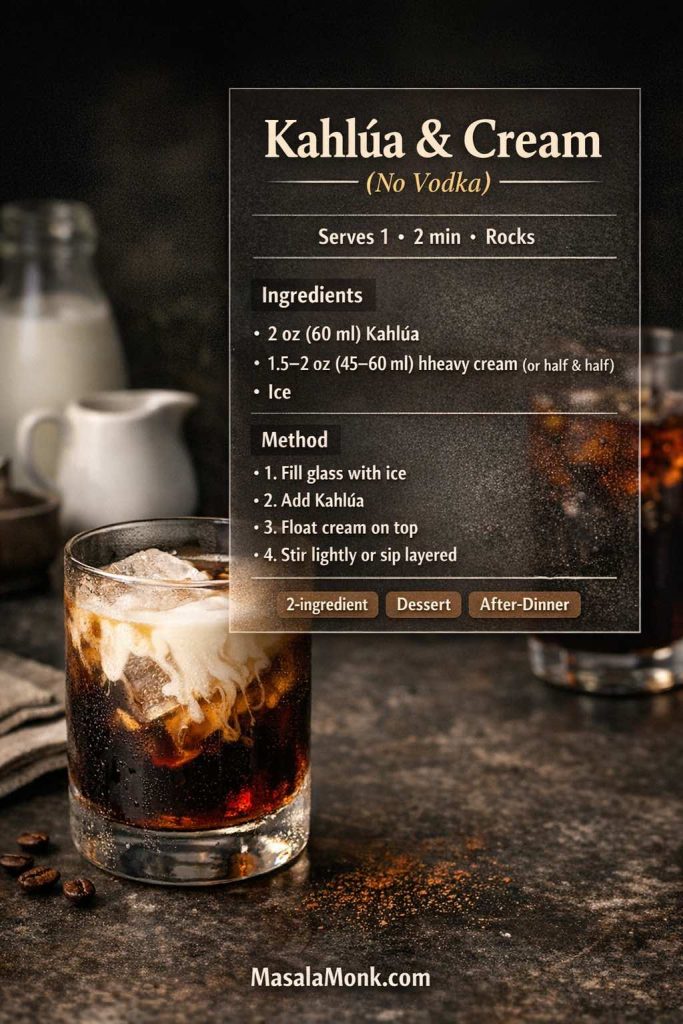
Method
- Fill a rocks glass with ice.
- Pour in the Kahlúa.
- Slowly add cream.
- Stir lightly—or leave it layered and let it mingle as you sip.
Variations
- “Cream cloud” style: Float the cream gently so you get a creamy top and a coffee-rich bottom. The first sip is soft; the last sip is deeper.
- Pinch of salt: If the drink tastes too sweet, a tiny pinch of salt instantly balances it. The flavor stays dessert-like, yet it becomes cleaner.
- Chocolate ripple: Add a thin swirl of chocolate syrup inside the glass first. Again, this homemade chocolate syrup is a great option because it blends smoothly.
- Plant-based cream: Oat-based creamers tend to keep the drink thick and velvety, while coconut cream makes it taste like a coconut-coffee dessert.
Serve it with something that makes sense
Creamy coffee drinks love a slightly bitter or deeply chocolate dessert. For an easy pairing, these double chocolate chip cookies fit the mood without competing.
Also Read: Manhattan Cocktail Recipe (Classic + 6 Variations)
Whipped cream that doesn’t collapse (for the nights you want the full dessert vibe)
If you want whipped cream on Mudslides or iced Kahlúa coffee, stability and texture matter. Serious Eats lays out multiple methods (hand, mixer, processor) in a way that’s easy to follow: The Best Ways to Make Whipped Cream.
This isn’t about being fancy. Instead, it’s about keeping your topping soft and cloud-like long enough to enjoy the drink, rather than watching it melt into a sad puddle.
Vodka and Kahlua drinks that belong in every home bar
Vodka and Kahlua drinks are classics because vodka adds strength without stealing the show. Meanwhile, Kahlúa brings sweetness and coffee depth. With cream, you get something dessert-like. Without cream, you get something cleaner and sharper.
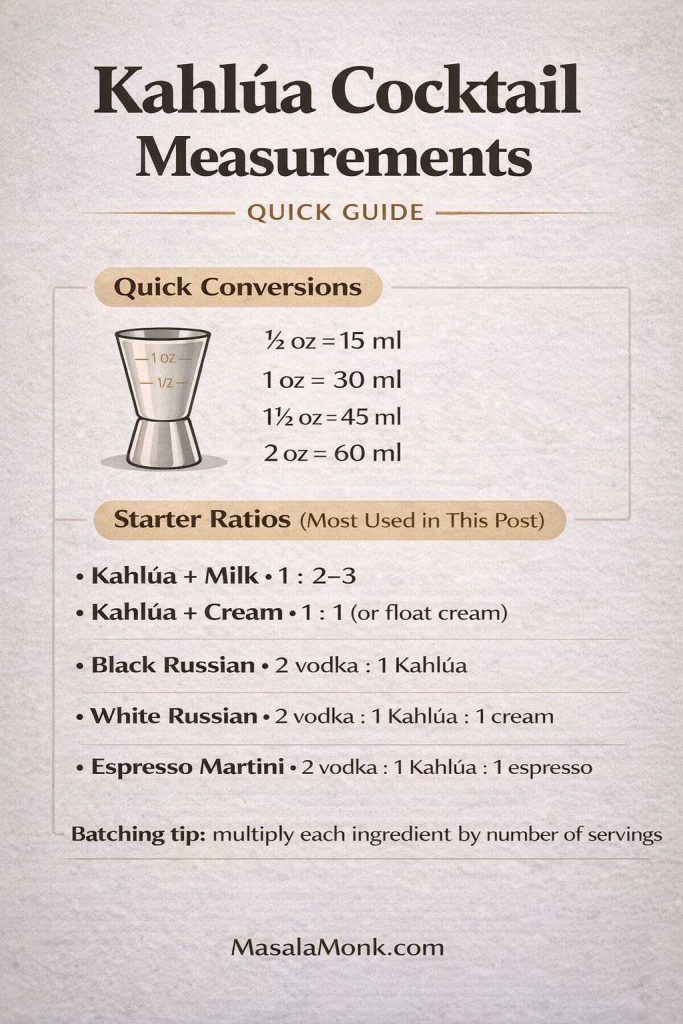
Kahlua White Russian drink (the creamy icon)
The White Russian is arguably the most famous of all drinks made with Kahlua. It’s rich, smooth, and almost absurdly satisfying when served ice-cold. Kahlúa’s official recipe keeps it classic: White Russian Recipe. If you want a second trusted reference with a clear format, Liquor.com also maintains a classic build: White Russian.
Serves: 1
Glass: Rocks glass
Ingredients
- 60 ml (2 oz) vodka
- 30 ml (1 oz) Kahlúa
- 30 ml (1 oz) heavy cream (or half-and-half / milk)
- Ice

Method
- Fill a rocks glass with ice.
- Add vodka and Kahlúa.
- Stir briefly to chill.
- Slowly pour cream over the top.
- Stir lightly if you prefer a uniform drink, or keep it layered.
Variations (still a White Russian, just smarter)
- Milk version: Replace cream with cold milk for a lighter finish. The drink shifts toward “iced coffee dessert” rather than “liquid cream.”
- Oat milk White Russian: Oat milk gives thickness without dairy and plays nicely with coffee sweetness.
- Extra coffee-forward: Add a tiny splash of espresso or strong coffee. It keeps the drink from feeling overly sweet.
- Dessert finish: Dust cocoa on top, or add a micro-drizzle of chocolate syrup.
- Brunch-style pairing: Serve with something salty and crunchy to balance the creamy sweetness. For a spicy option that wakes up your palate, try baked jalapeño poppers.
Batch it without losing the texture
Mix vodka + Kahlúa in a jug and keep it in the fridge. When it’s time to serve, pour that chilled base over ice, then finish each glass with cream. This way, you keep the “fresh cream” look and feel, rather than pre-mixing everything into a uniform beige pitcher.
Also Read: Chicken Salad Sandwich: Classic Base + 10 Global Variations
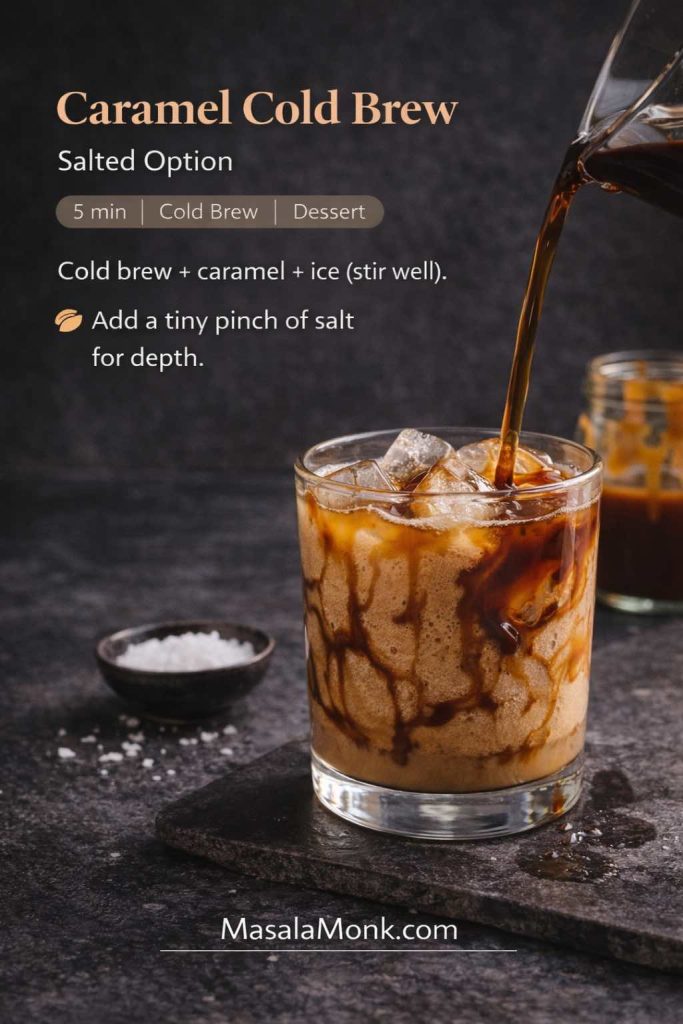
Cold Brew White Russian (the modern coffee upgrade)
If you love the White Russian but want it more coffee-forward, this version is a natural next step. Kahlúa’s official build adds cold brew to the standard structure: Cold Brew White Russian Drink Recipe.
Serves: 1
Glass: Rocks glass
Ingredients
- 45 ml (1.5 oz) vodka
- 30 ml (1 oz) Kahlúa
- 30 ml (1 oz) cold brew (or strong chilled coffee)
- 30 ml (1 oz) cream (or oat creamer)
- Ice
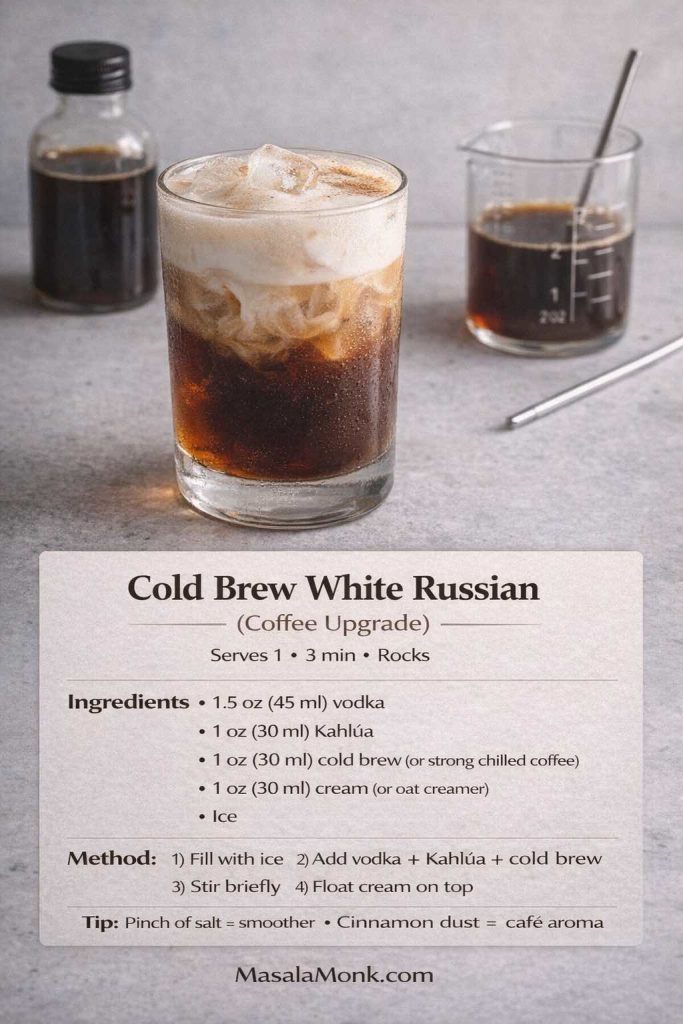
Method
- Fill a rocks glass with ice.
- Add vodka, Kahlúa, and cold brew.
- Stir briefly.
- Float cream on top.
Variations
- Concentrate-friendly: If your cold brew isn’t strong enough, use a concentrate method and dilute carefully. Serious Eats explains concentrate ratios and dilution clearly: Cold Brew Iced Coffee Recipe and A Guide to Cold Brew Coffee.
- Salted cold brew version: A tiny pinch of salt makes the coffee taste rounder and less sharp, especially if your brew leans bitter.
- Cinnamon finish: A very light dusting makes it smell like a café pastry without turning the drink into a spice bomb.
Also Read: Vodka Pasta (Penne alla Vodka) + Spicy Rigatoni, Chicken, and Gigi Recipes
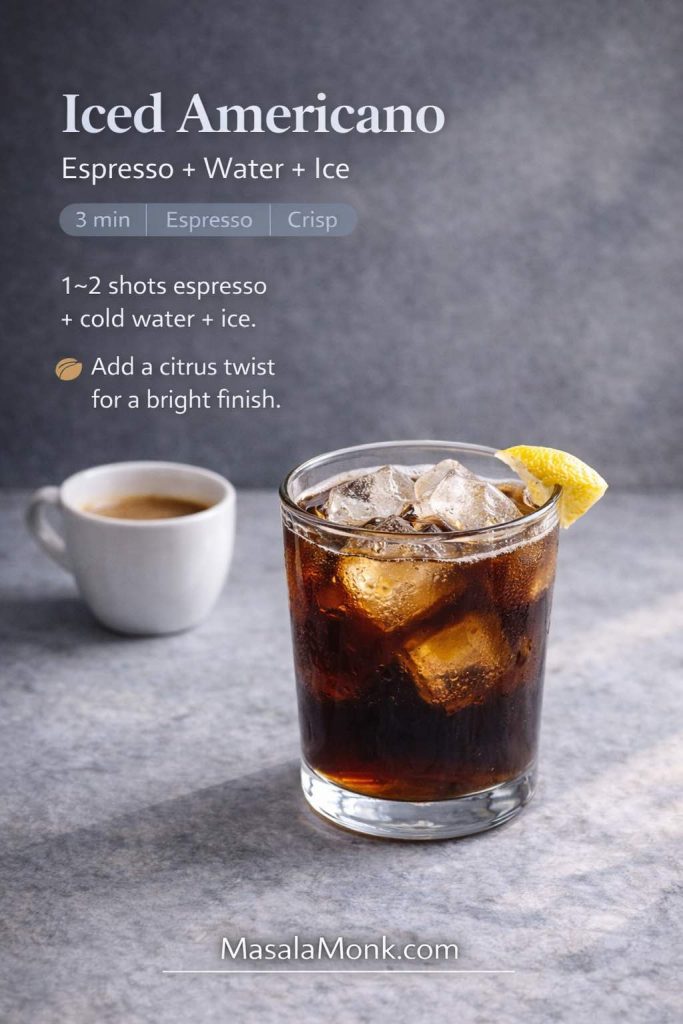
Black Russian (the clean, no-dairy classic)
The Black Russian is the sharp, stirred cousin of the White Russian. It’s still sweet, yet it feels more like a true cocktail. Kahlúa’s official recipe is straightforward: Black Russian Drink Recipe. Liquor.com’s version also emphasizes the chilled, stirred style: Black Russian.
Serves: 1
Glass: Rocks glass
Ingredients
- 60 ml (2 oz) vodka
- 30 ml (1 oz) Kahlúa
- Ice
- Optional garnish: cherry or orange peel
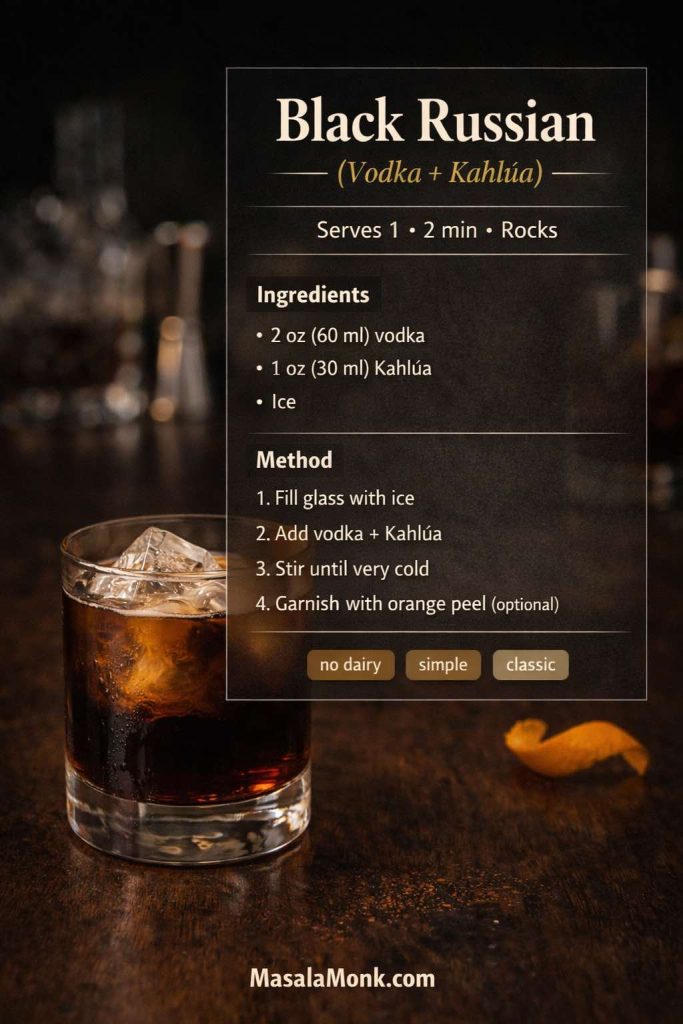
Method
- Fill a rocks glass with ice.
- Add vodka and Kahlúa.
- Stir until very cold.
- Garnish if you like, then sip slowly.
Variations
- Less sweet: Reduce Kahlúa slightly and increase vodka a touch. It becomes more spirit-forward, less dessert-like.
- Orange peel lift: Express an orange peel over the glass, then discard it. The aroma makes the coffee note feel brighter.
- Chilled glass: If you chill the glass first, the drink stays crisp longer, which helps the sweetness feel more restrained.
What to serve alongside
Because the Black Russian is cleaner than the creamy drinks, it pairs beautifully with salty snacks. If you want a no-stress party platter idea, these easy potato appetizers offer a lot of options without pulling attention away from the drink.
Also Read: Oat Pancakes Recipe (Healthy Oatmeal Pancakes)
Kahlua cocktail recipe with brandy: the Dirty Mother
Brandy and coffee liqueur is an underrated pairing. It’s warm, round, and just a little old-school in the best possible way. The Dirty Mother is essentially a Black Russian with brandy instead of vodka, and it’s a perfect after-dinner pour. Kahlúa’s official recipe is here: Dirty Mother Drink Recipe.
Dirty Mother (Kahlúa + brandy, stirred and smooth)
Serves: 1
Glass: Rocks glass
Ingredients
- 45–60 ml (1.5–2 oz) brandy
- 30 ml (1 oz) Kahlúa
- Ice
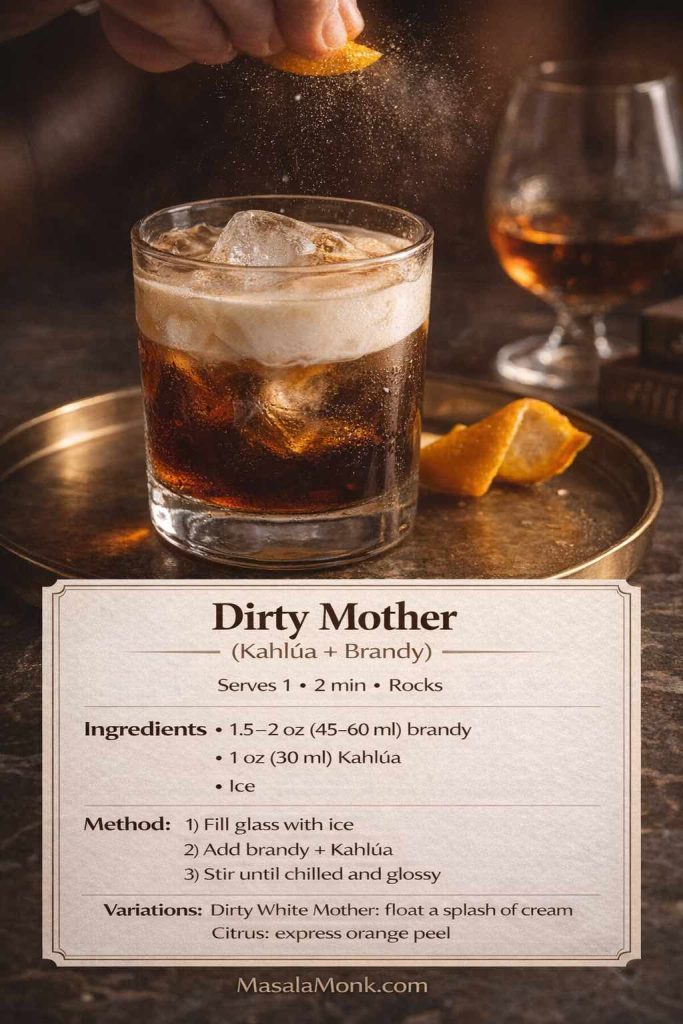
Method
- Fill a rocks glass with ice.
- Add brandy and Kahlúa.
- Stir until chilled and glossy.
Variations
- Dirty White Mother: Add a small splash of cream on top. It becomes richer and more dessert-like while keeping the brandy warmth.
- Citrus aroma: Express orange peel over the glass. Brandy loves citrus; coffee loves citrus; the result feels quietly sophisticated.
- Longer drink: Add a cube or two of ice and sip slowly—the dilution actually improves the balance over time.
Dessert pairing that fits the mood
If you want a dessert that matches the caramel warmth, sticky toffee pudding is an excellent companion—soft, sweet, and deeply comforting without clashing with coffee flavors.
Also Read: How to Cook Tortellini (Fresh, Frozen, Dried) + Easy Dinner Ideas
Kahlua mudslide cocktail recipe (creamy, dreamy, and party-friendly)
If someone says they don’t like “cocktails,” then happily drinks a Mudslide, you’ll understand why this drink has a reputation. It’s creamy, sweet, and dessert-forward, yet it’s still a legitimate cocktail when made cold and balanced. Kahlúa’s official Mudslide is a solid baseline: Mudslide Recipe. Liquor.com also maintains a classic Mudslide structure: Mudslide.
Classic Mudslide (shaken, cold, and properly smooth)
Serves: 1
Glass: Rocks glass
Ingredients
- 30 ml (1 oz) vodka
- 30 ml (1 oz) Kahlúa
- 30 ml (1 oz) Irish cream liqueur
- Ice
- Optional: chocolate drizzle, cocoa dusting, whipped cream
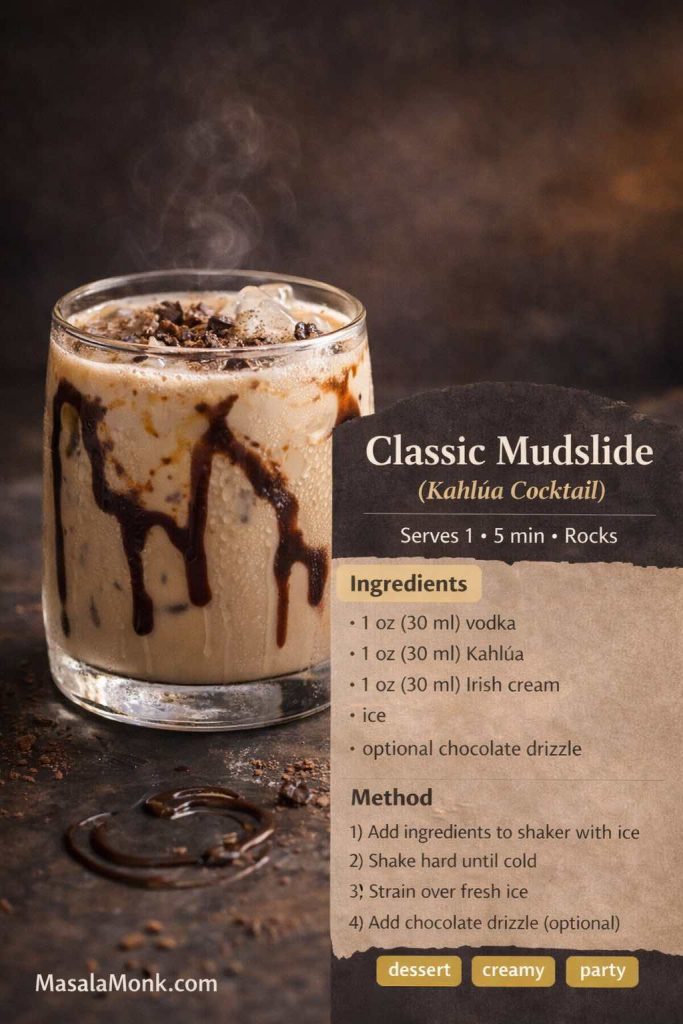
Method
- Fill a shaker with ice.
- Add vodka, Kahlúa, and Irish cream.
- Shake hard until the shaker feels very cold.
- Strain into a rocks glass filled with fresh ice.
- Finish with a light chocolate drizzle or cocoa dusting if you want.
Variations
- Lighter Mudslide: Add a splash of milk and reduce Irish cream slightly. It becomes easier to sip without feeling heavy.
- Extra chocolate: Use a thin swirl of homemade chocolate syrup inside the glass before pouring.
- Whipped cream top: If you go this route, the topping matters—this guide to making whipped cream helps you keep it soft and stable.
- Spiced Mudslide: A whisper of cinnamon or a tiny pinch of salt can make the coffee-chocolate combination taste more “grown-up.”
Serve something savory so the night stays balanced
Since Mudslides lean sweet, pairing them with something savory keeps the table from feeling like pure dessert. A warm, crowd-friendly option is a dip situation—this spinach dip recipe collection gives you multiple variations depending on whether you want cold, baked, or artichoke-style.
Also Read: How to Cook Perfect Rice Every Time (Recipe)
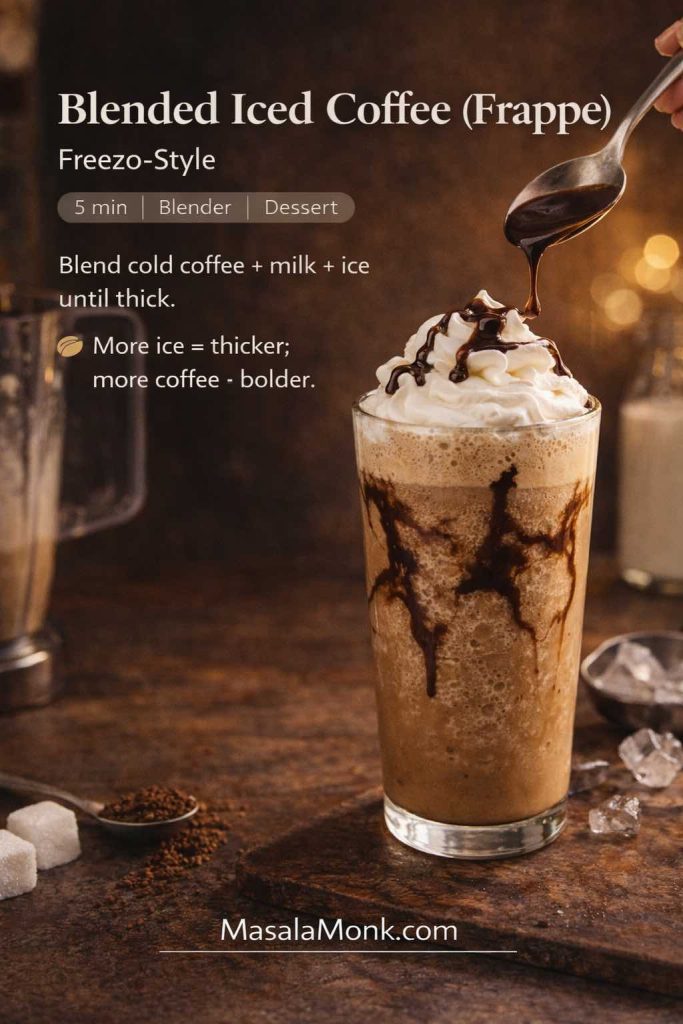
Frozen Mudslide (blended dessert energy)
For celebrations, a frozen Mudslide is pure fun. Kahlúa’s official frozen version leans into ice cream, which is exactly what makes it so crowd-pleasing: Frozen Mudslide Drink Recipe.
Serves: 1 large or 2 smaller
Glass: Tall glass
Ingredients
- 30 ml (1 oz) vodka
- 30 ml (1 oz) Kahlúa
- 30 ml (1 oz) Irish cream liqueur
- 3 scoops vanilla ice cream
- Ice (optional, for thicker texture)
- Optional: chocolate sauce swirl
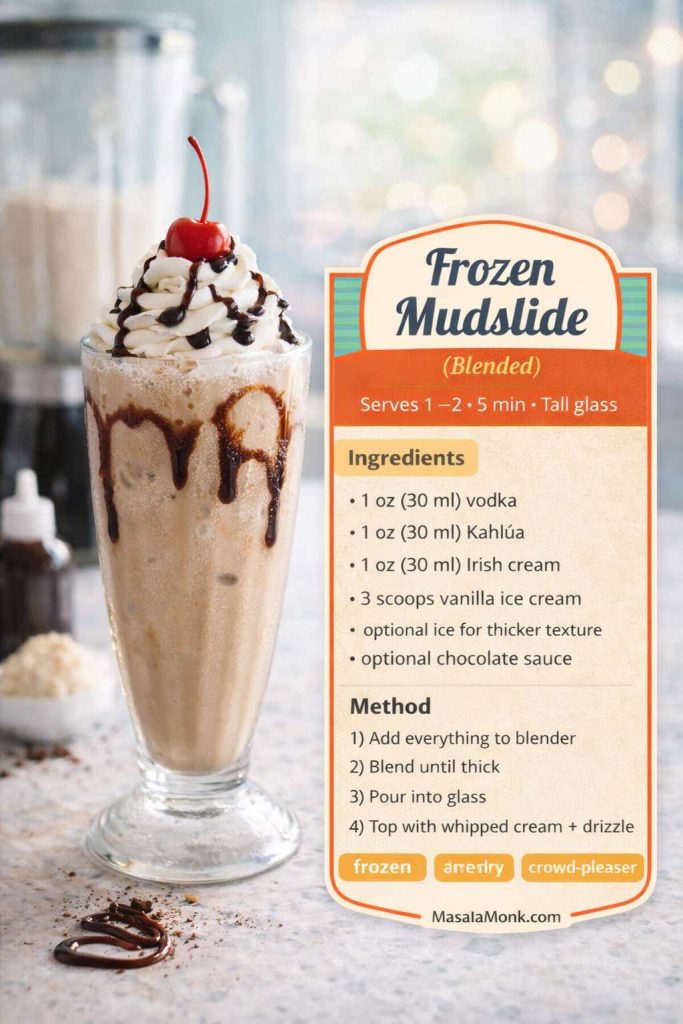
Method
- Add vodka, Kahlúa, Irish cream, and ice cream to a blender.
- Blend until thick and smooth.
- If you want it thicker, add a little ice and blend again.
- Pour into a glass and finish with a light chocolate swirl if you like.
Variations
- Mocha frozen version: Add a spoon of espresso or strong coffee. It sharpens the coffee note and keeps the sweetness from dominating.
- Salted finish: A tiny pinch of salt makes the drink taste richer and more balanced.
Also Read: Vegan Mayo Recipe Guide: 5 Plant-Based Mayonnaise
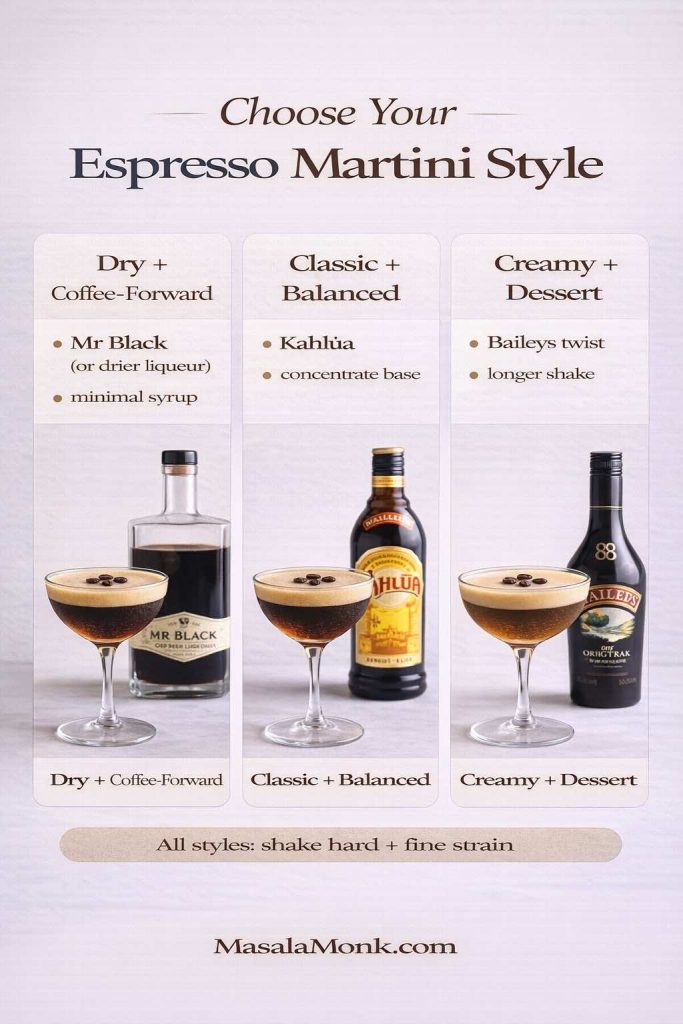
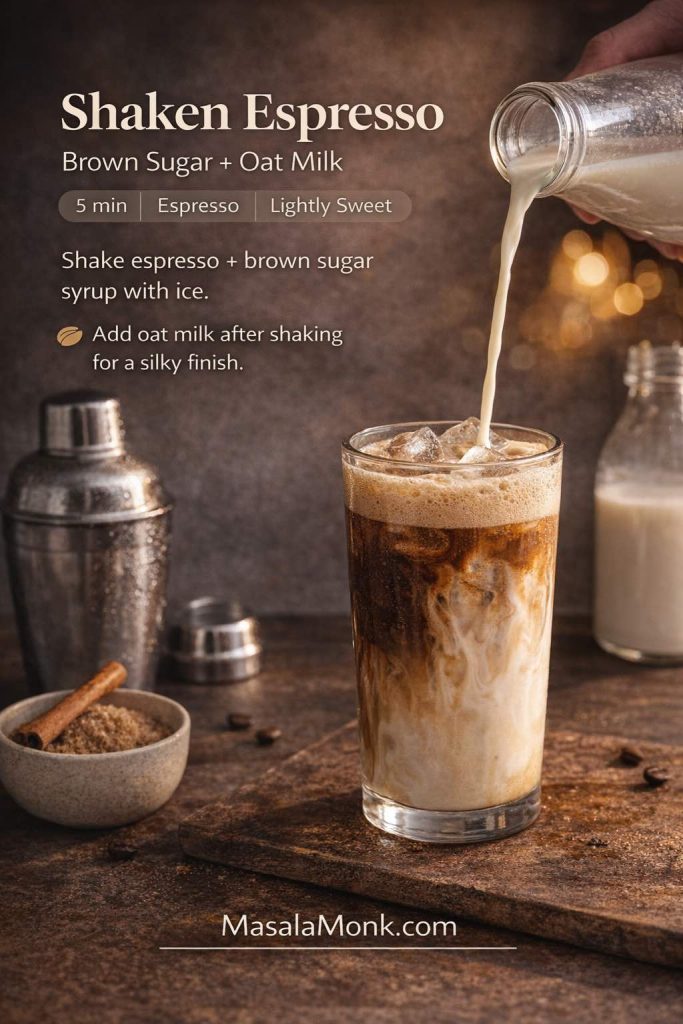
Espresso martini with Kahlua (the café cocktail that feels like a night out)
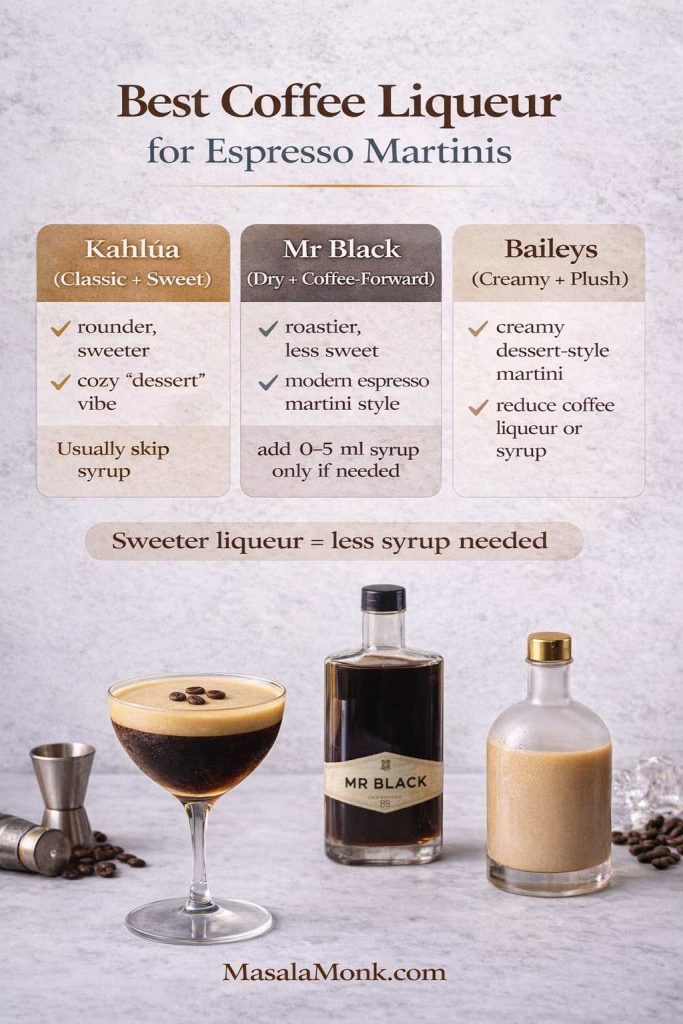
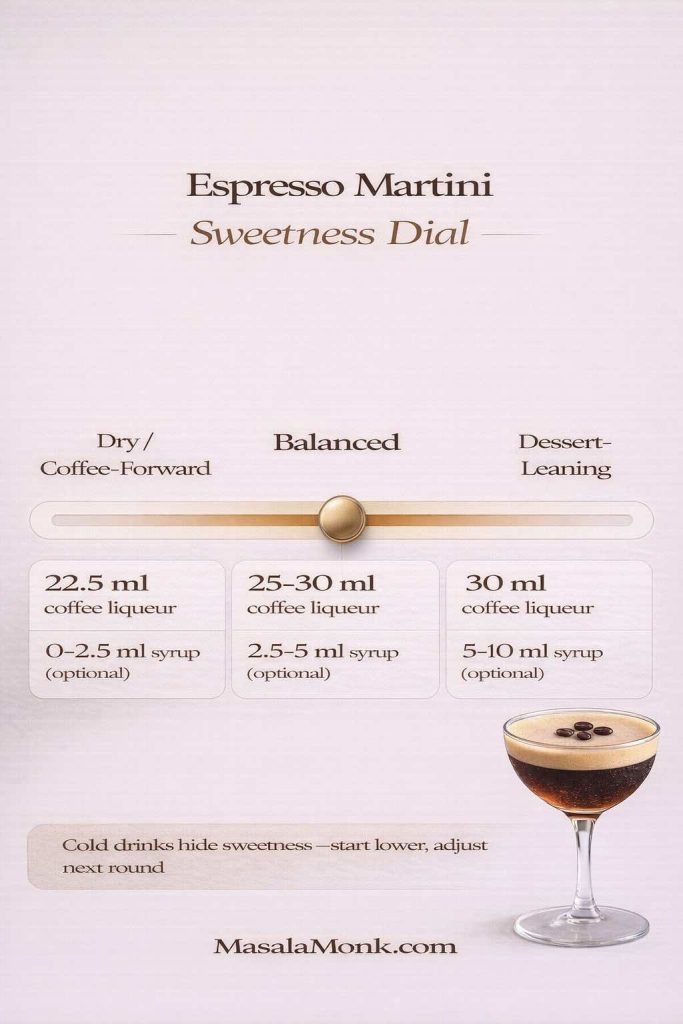
Among modern kahlua cocktail recipe favorites, the espresso martini keeps winning because it’s simple, elegant, and intensely aromatic. It also looks impressive, even when you’re making it in your kitchen. Kahlúa’s official espresso martini recipe is a great starting point: Espresso Martini. Liquor.com also offers a classic structure, including a small amount of syrup for balance: Espresso Martini.
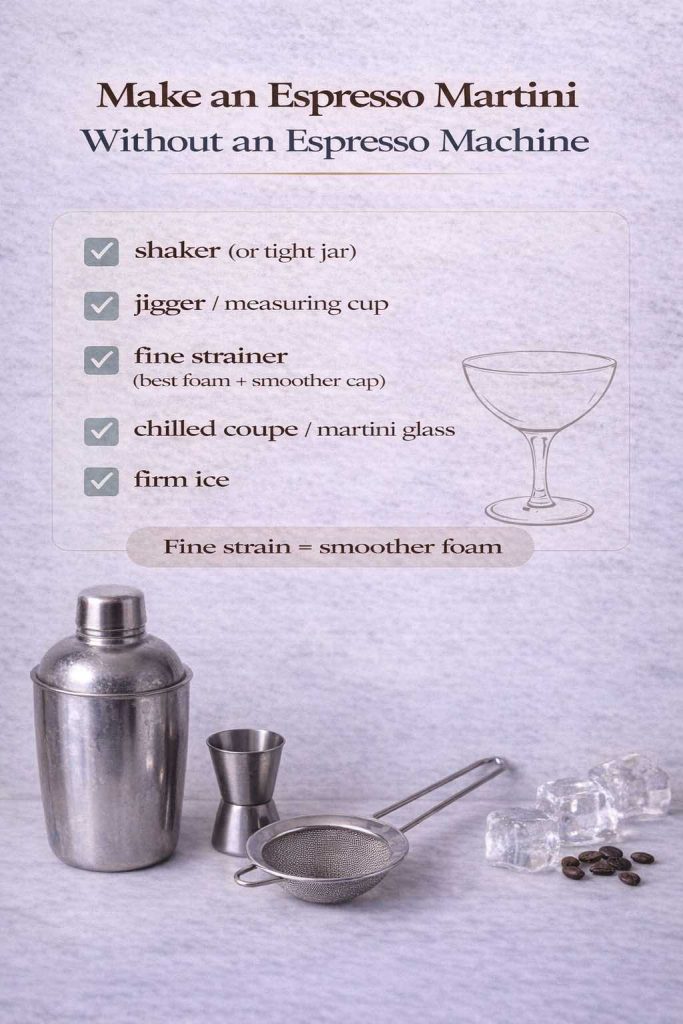
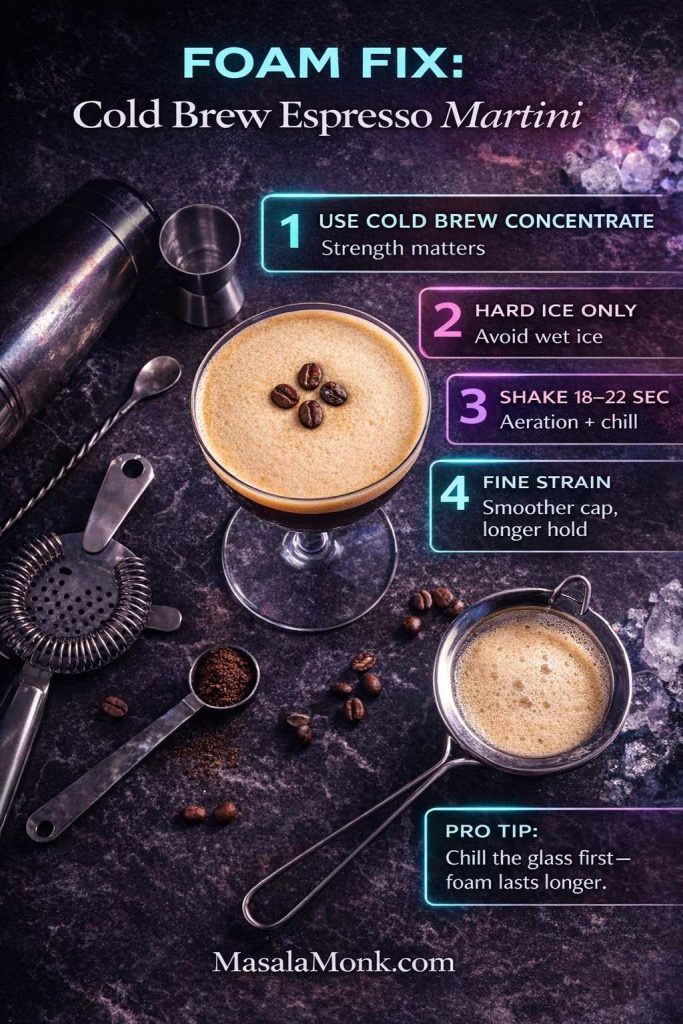
Classic Kahlua espresso martini (strong, cold, foamy)
Serves: 1
Glass: Martini or coupe
Ingredients
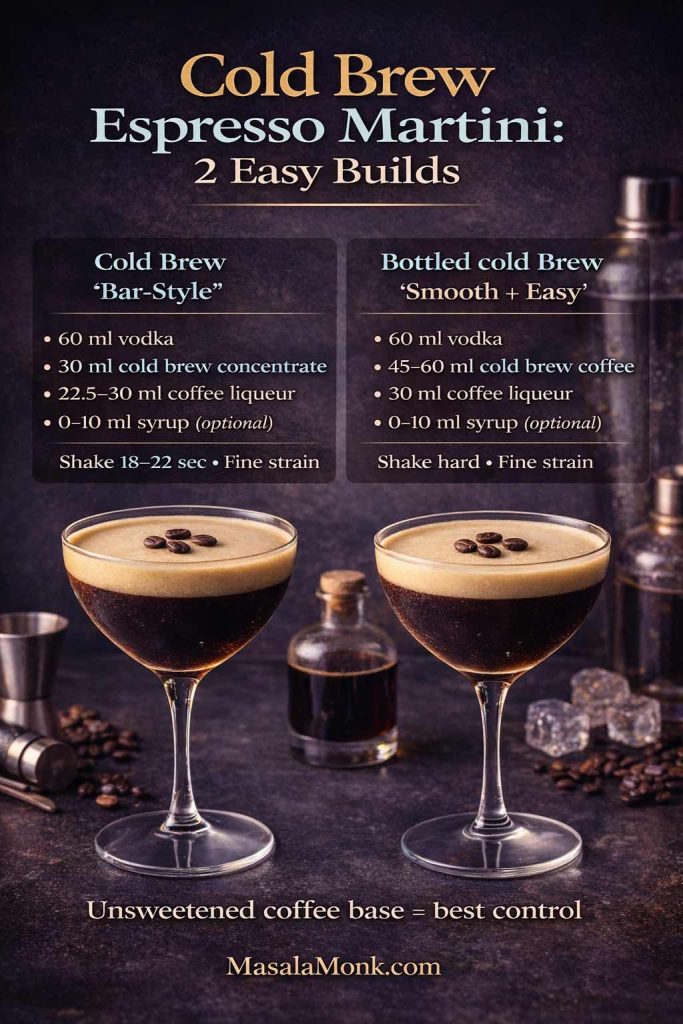
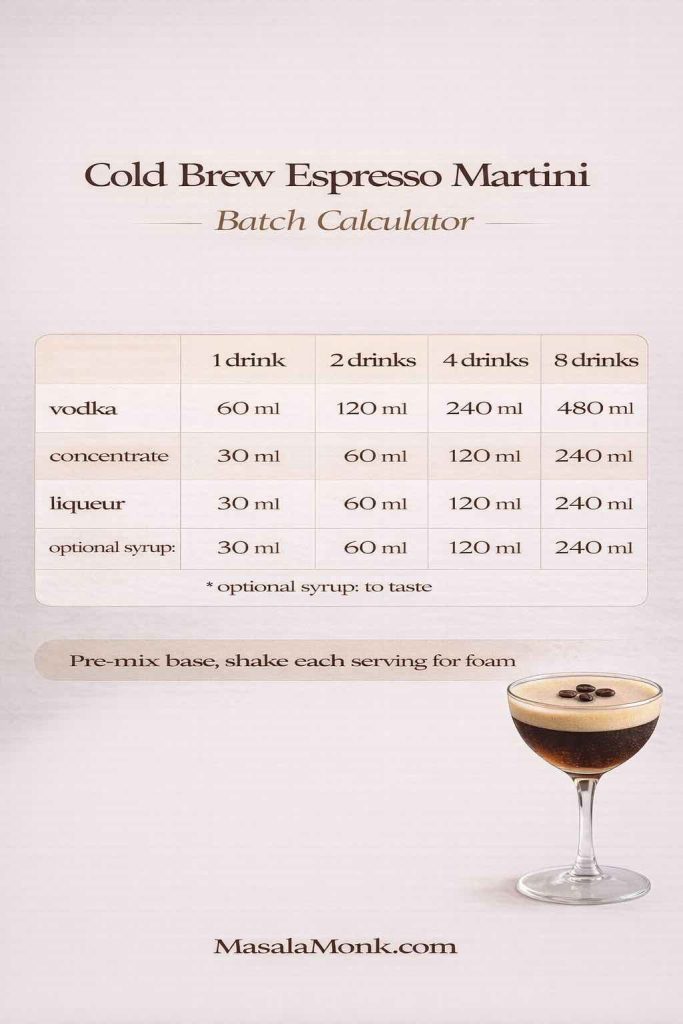
- 60 ml (2 oz) vodka
- 30 ml (1 oz) Kahlúa
- 30 ml (1 oz) espresso, cooled (or strong coffee concentrate)
- Ice
- Optional: 5–10 ml (1–2 tsp) simple syrup (only if you want it sweeter)
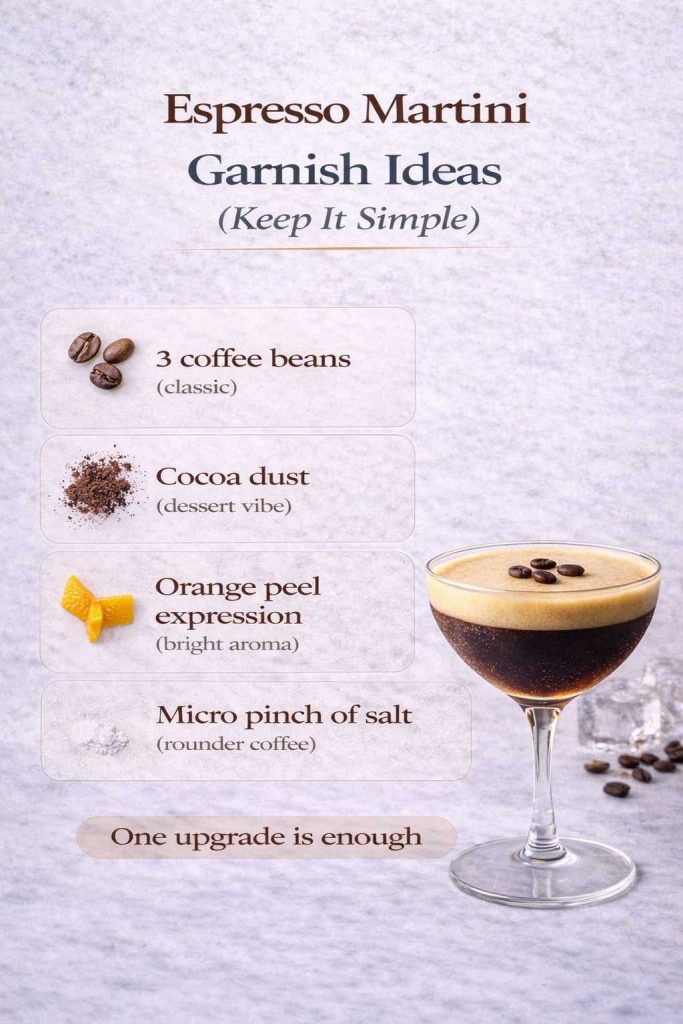
- Garnish: 3 coffee beans (optional)
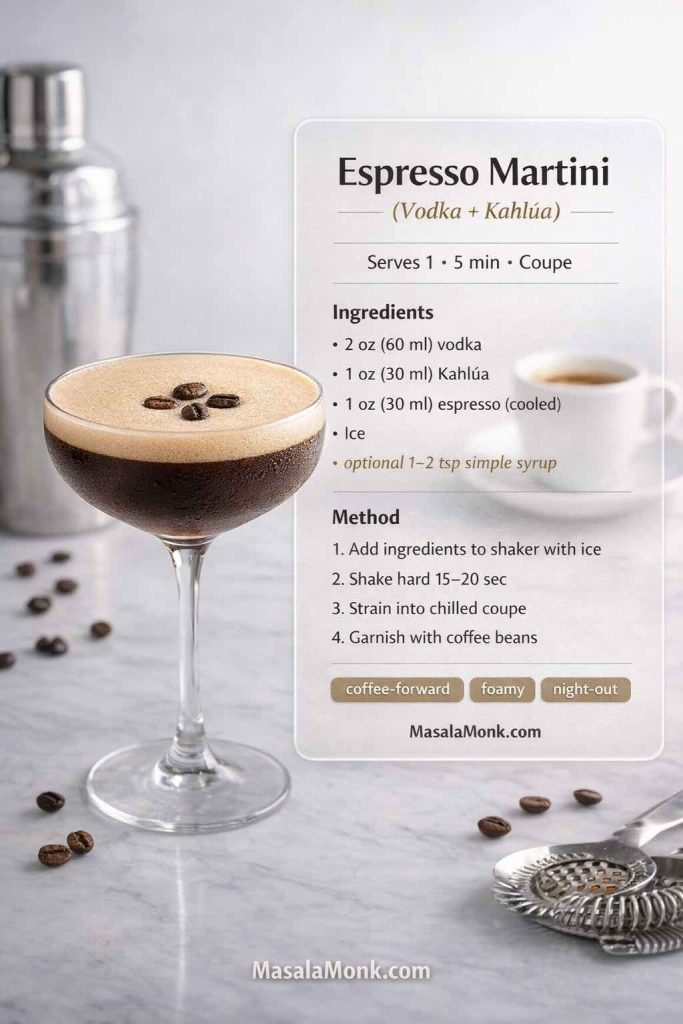
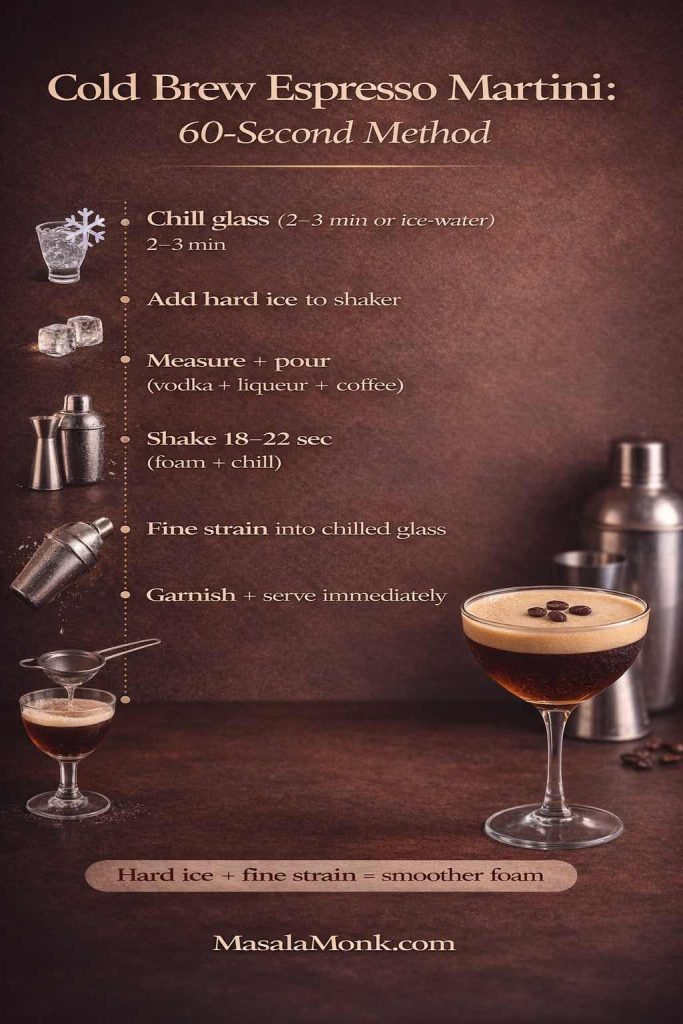
Method
- Brew espresso, then let it cool for a few minutes so it’s not steaming hot.
- Fill a shaker with ice.
- Add vodka, Kahlúa, and cooled espresso.
- Shake hard for 15–20 seconds until the shaker feels icy cold.
- Strain into a chilled martini glass (fine strain if you want a smoother foam).
- Garnish if you like, then serve immediately.
Variations that keep it coherent
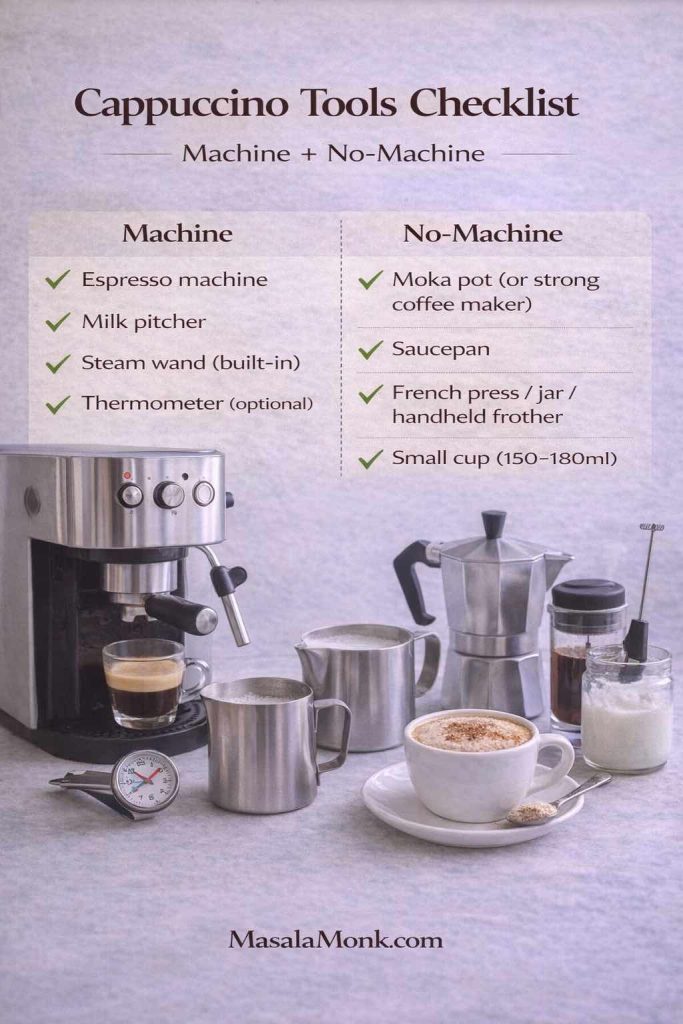
- Moka pot version: If you don’t have espresso, moka pot coffee makes an excellent substitute because it’s concentrated. Start with Moka Pot Mastery if you want to dial it in.
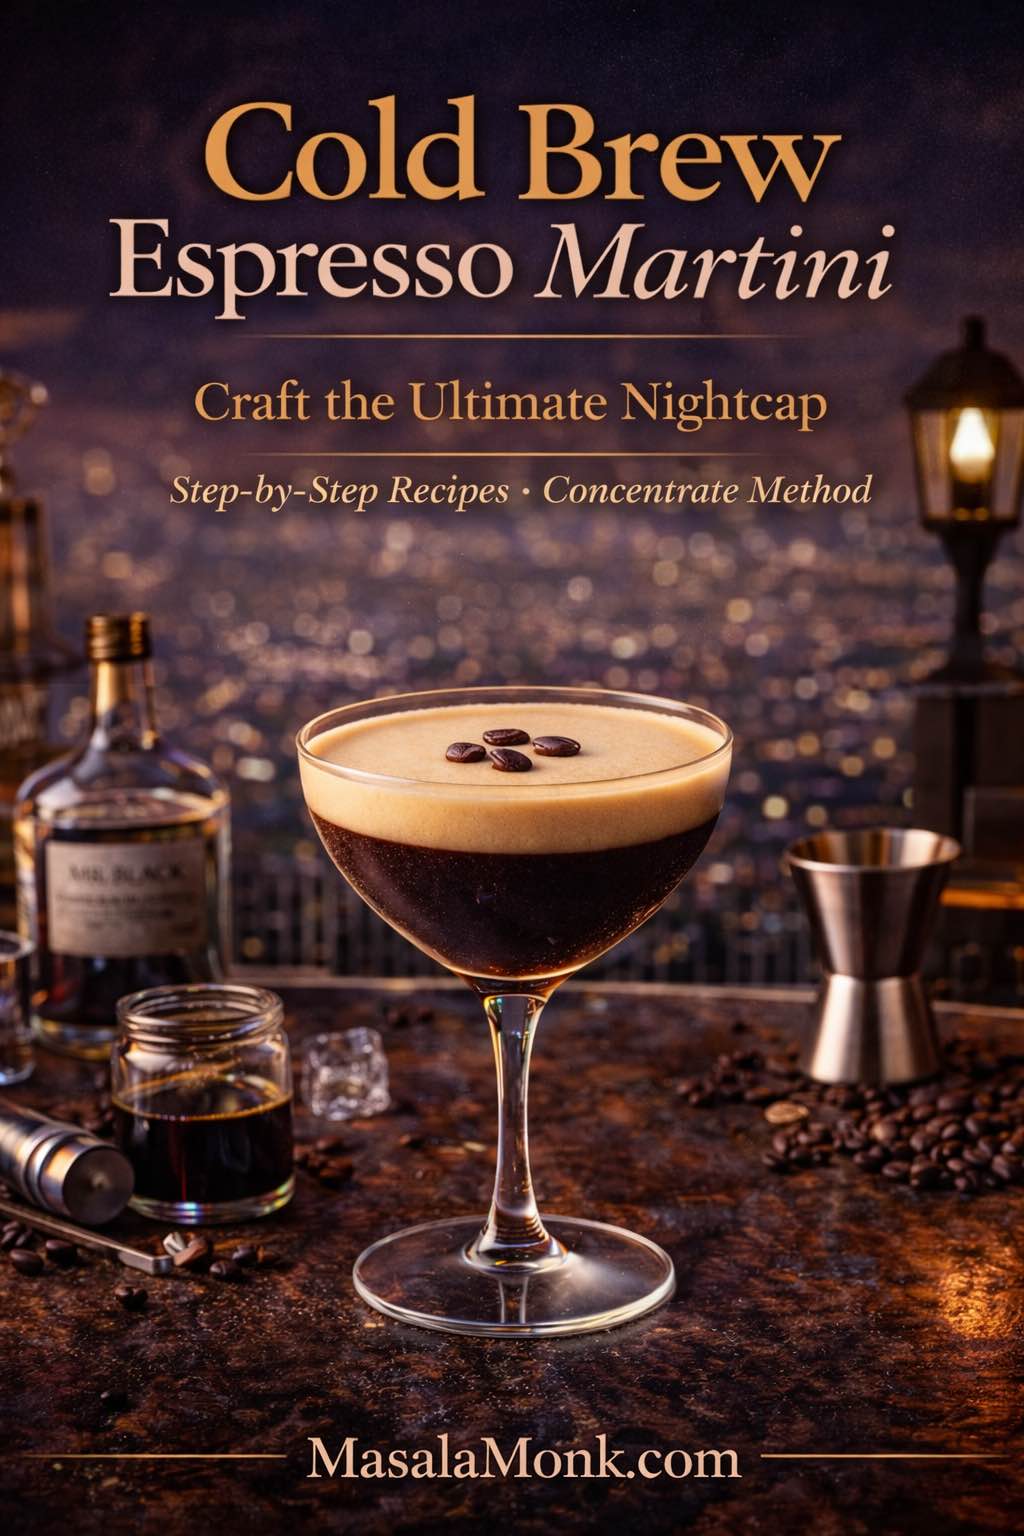
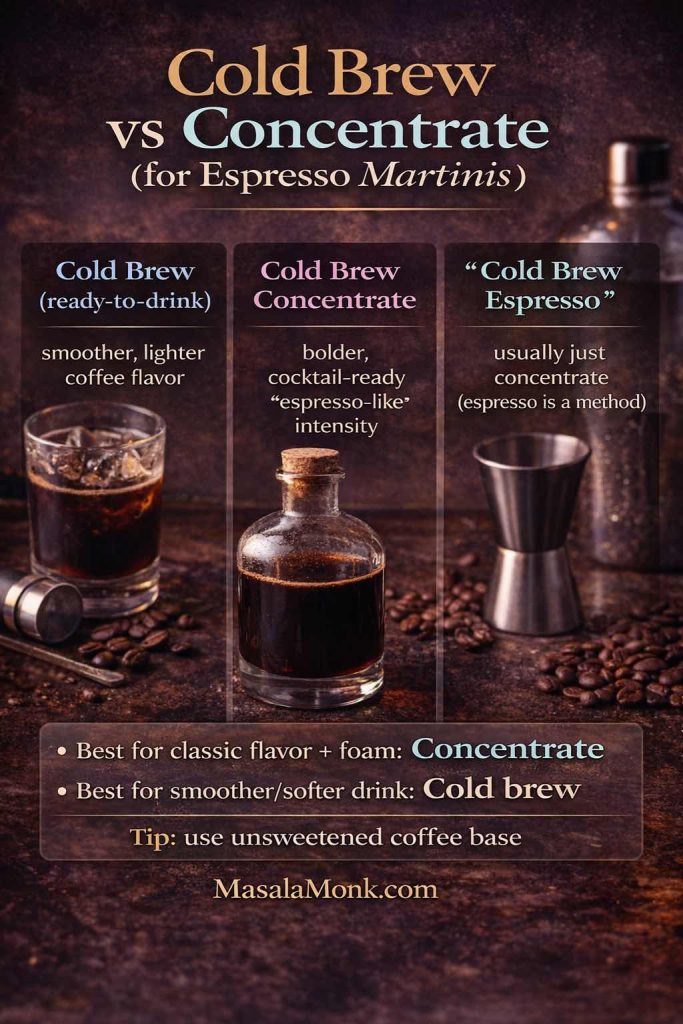
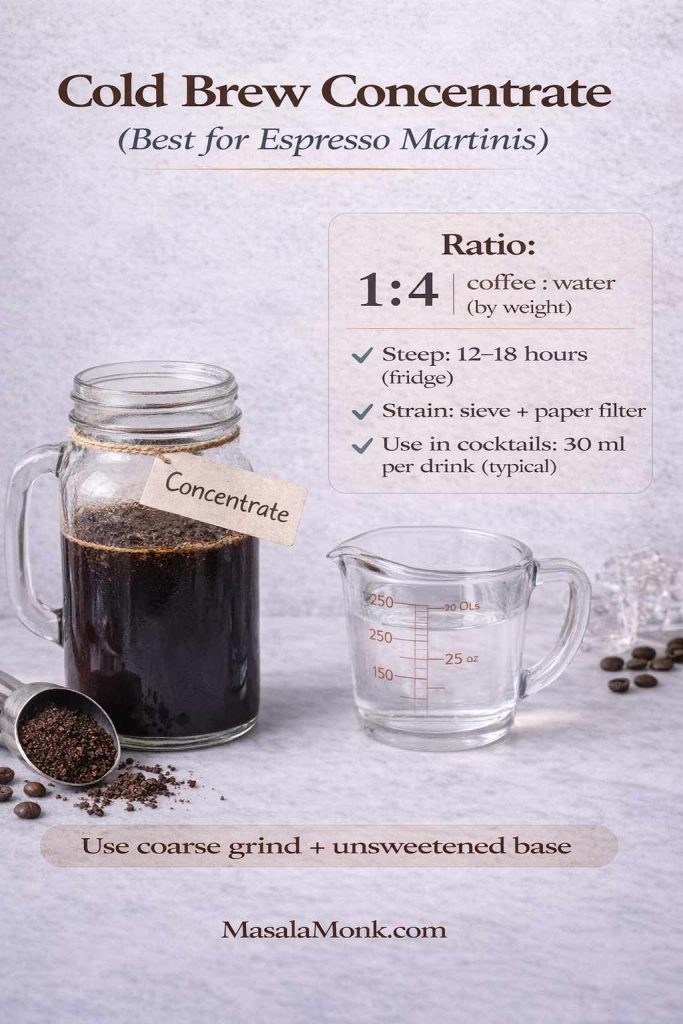
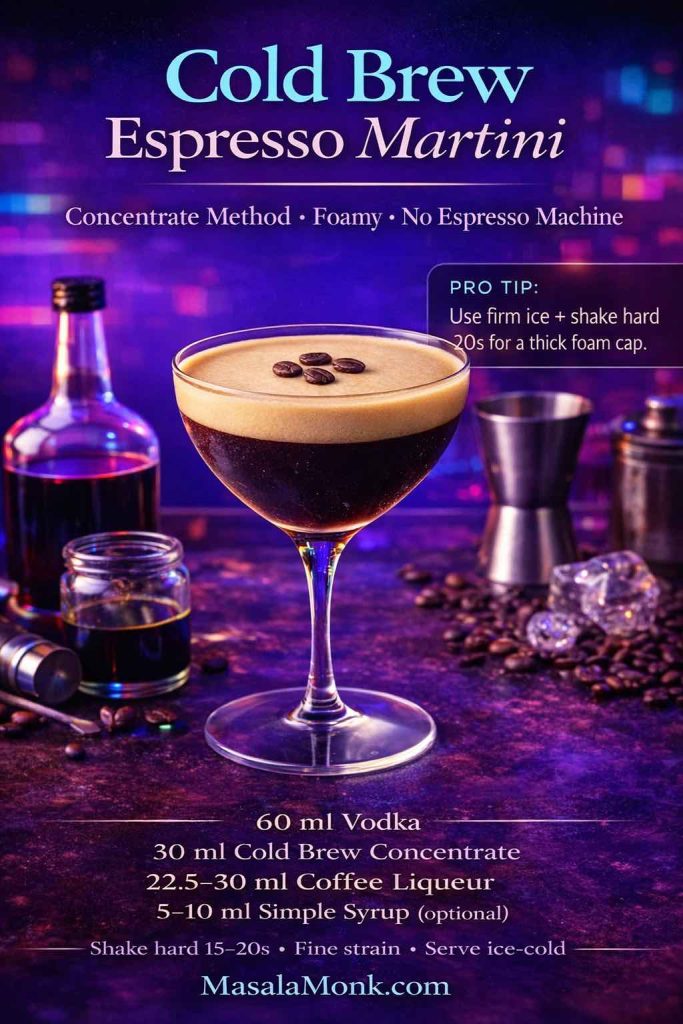
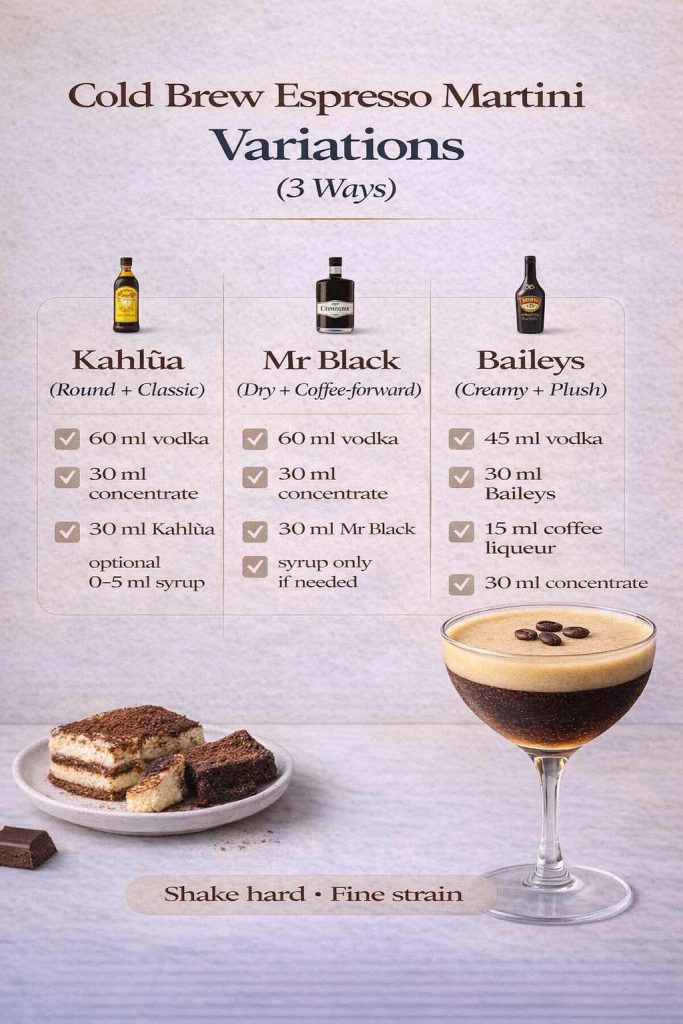
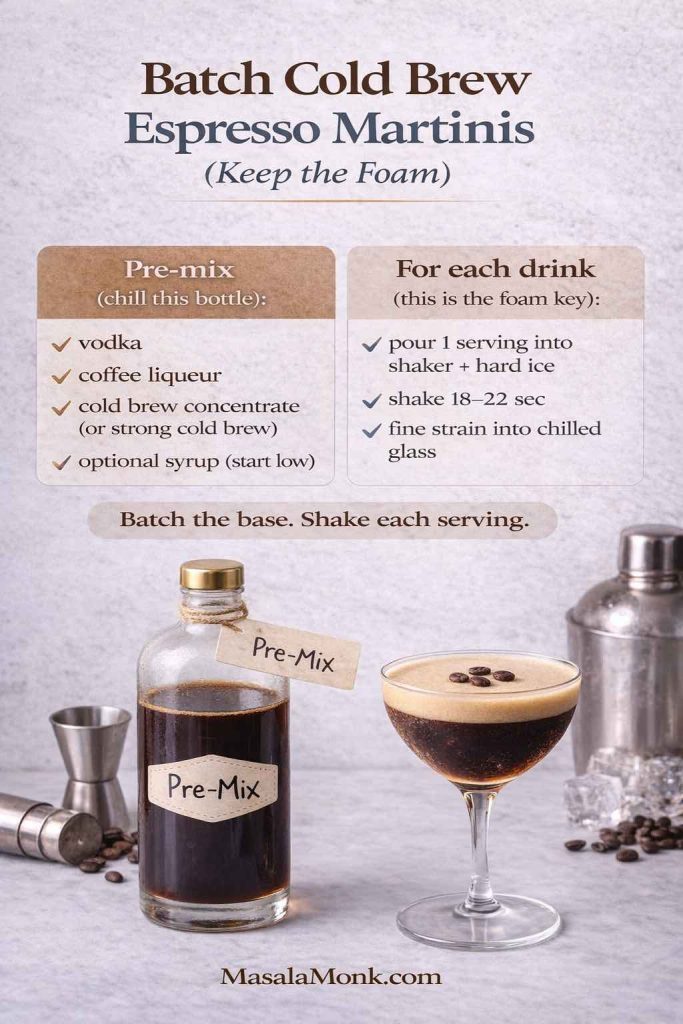
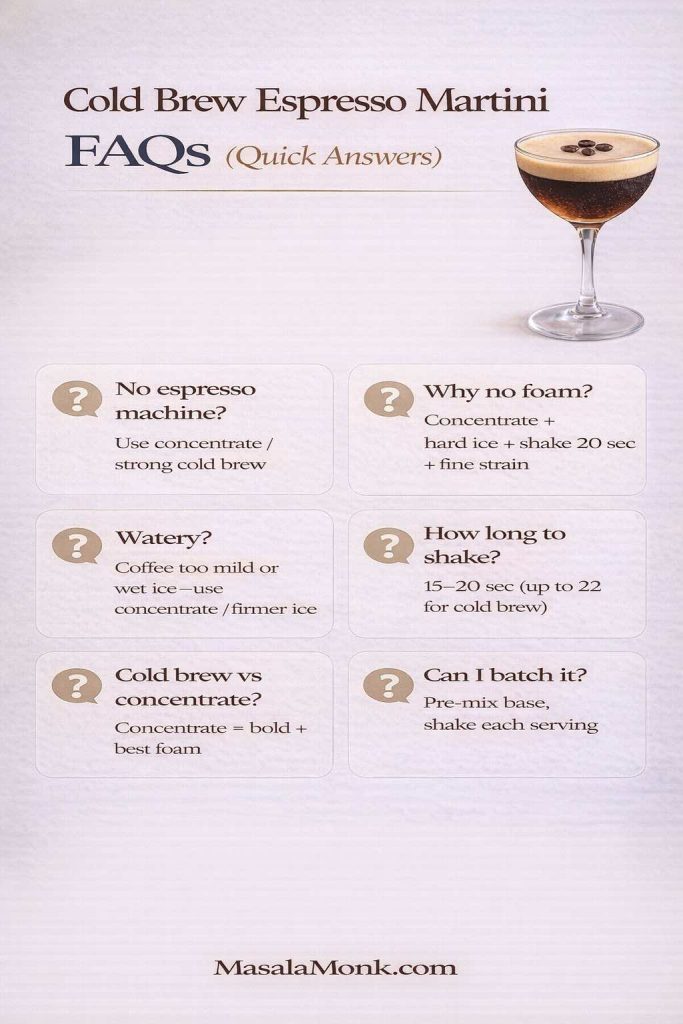
- Cold brew espresso martini style: Cold brew concentrate is smoother and easier for batching. Masala Monk’s cold brew espresso martini recipe is a helpful reference when you want that cold, clean coffee note.
- Spiced espresso martini direction: If you like the idea of warming spices alongside coffee, Masala Monk’s spiced espresso martini ideas can inspire flavor pairings that still feel intentional rather than chaotic.
- Chocolate-leaning espresso martini: A light chocolate swirl in the glass (not a heavy pour) makes it taste like mocha without burying the coffee.
If you’re serving this at a gathering
Make sure the espresso (or concentrate) is already chilled before guests arrive. That way, you’re not juggling hot coffee and melted ice at the same time. Once everything is cold, shaking becomes the fun part rather than the stressful part.
Also Read: Strawberry Smoothie Recipes (12 Easy Blends + Bowls & Protein Shakes)
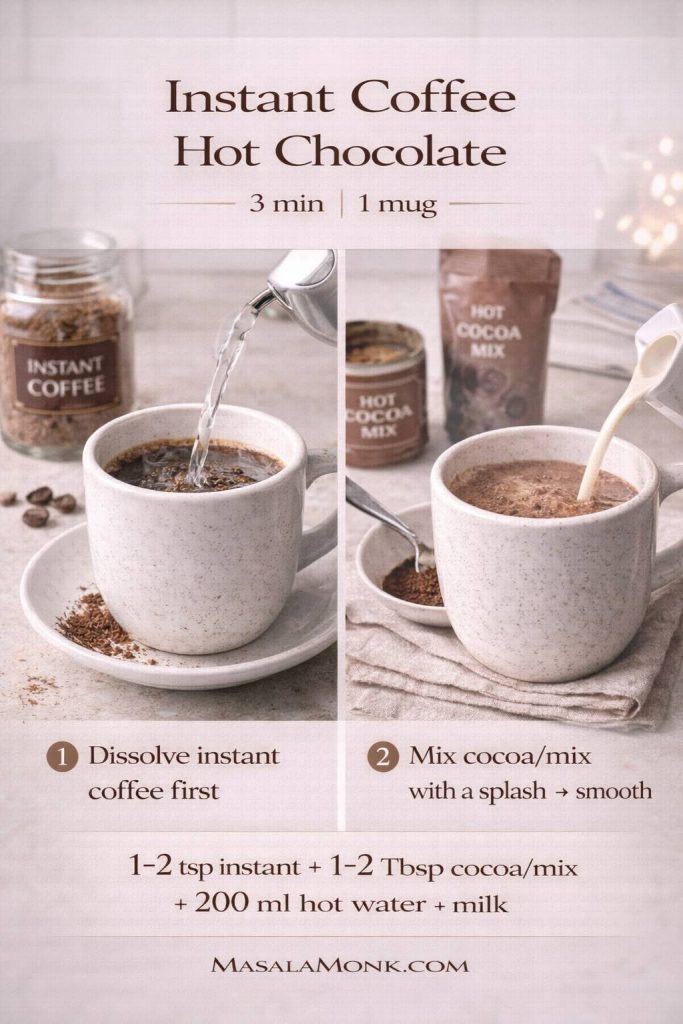
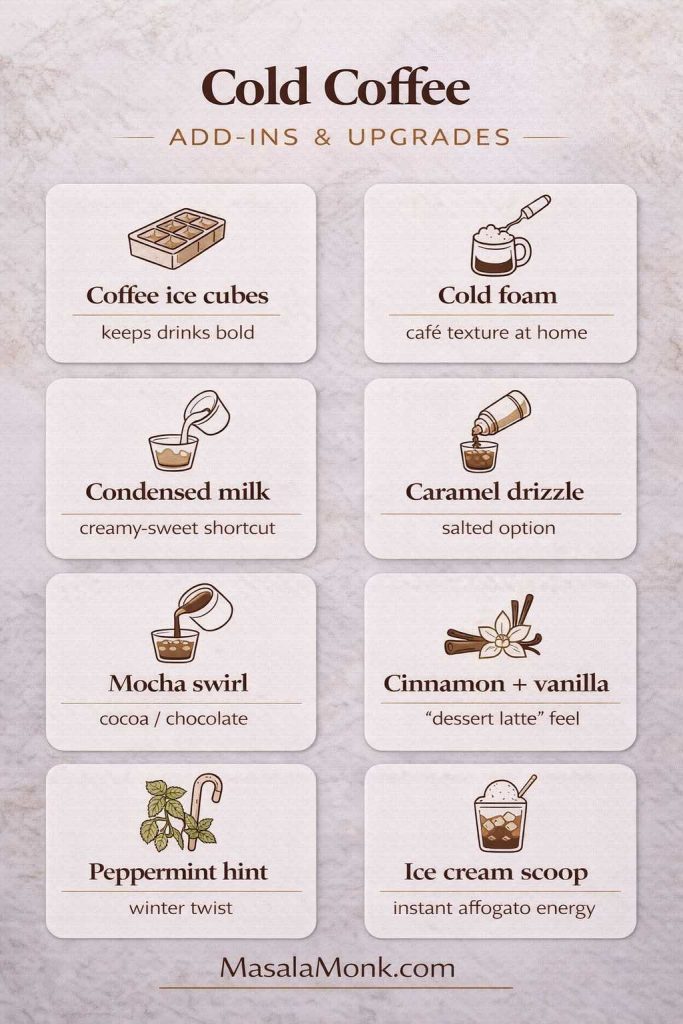
Kahlua coffee drinks for hot nights, cold nights, and lazy afternoons
Not every good drink needs a shaker. Kahlua coffee drinks are proof that simple can still feel special, especially when your coffee base is strong and your ingredients are properly chilled.
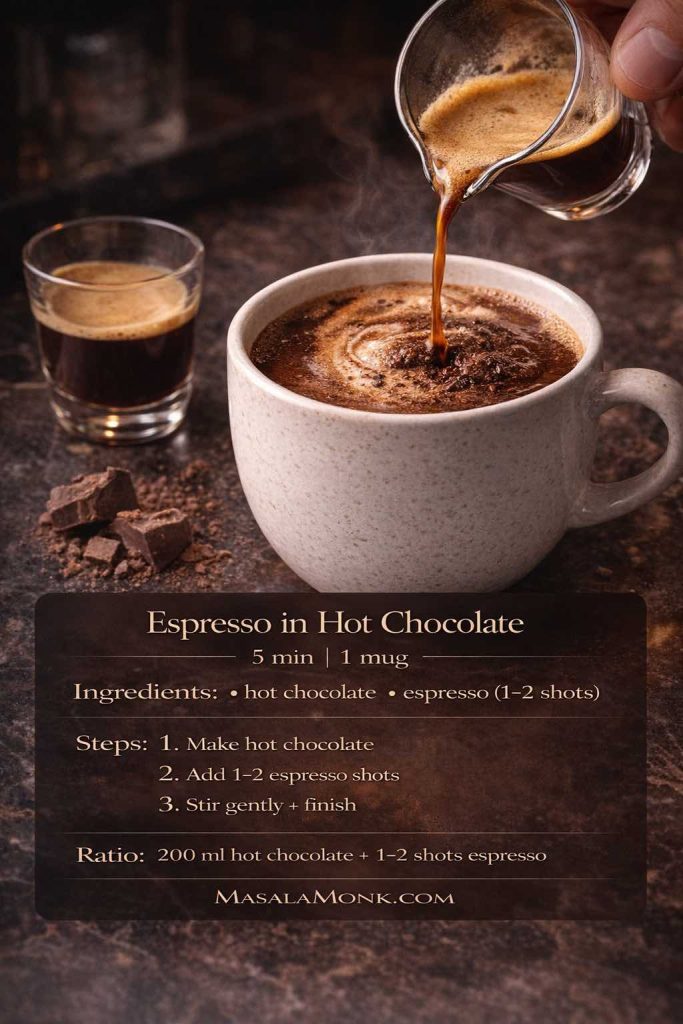
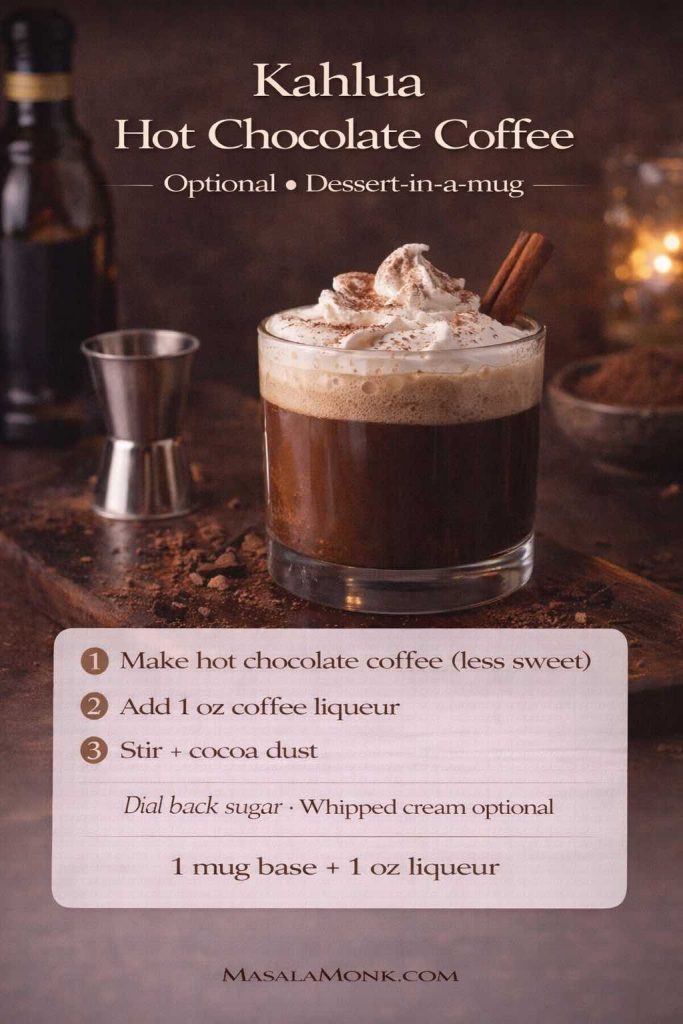
Hot Kahlua coffee (the cozy classic)
Serves: 1
Glass: Mug
Ingredients
- 180–240 ml (6–8 oz) hot coffee
- 30–45 ml (1–1.5 oz) Kahlúa
- Optional: 15–30 ml (0.5–1 oz) cream
- Optional: cinnamon, cocoa, or a small chocolate drizzle
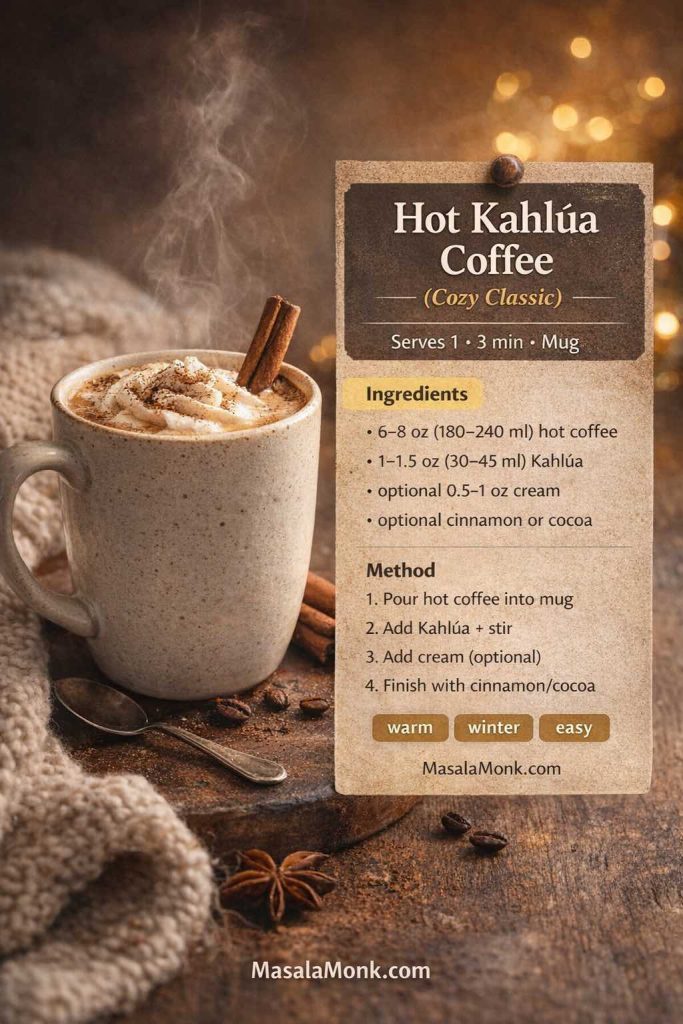
Method
- Pour hot coffee into a mug.
- Add Kahlúa and stir.
- Add cream if you want it softer and richer.
- Finish with a small dusting of cinnamon or cocoa if you like.
If you want to explore coffee bases that taste better in general—not just for cocktails—Masala Monk’s coffee brewing methods guide is a great deep dive into why different methods taste different.
Also Read: Air Fryer Chicken Wings (Super Crispy, No Baking Powder)
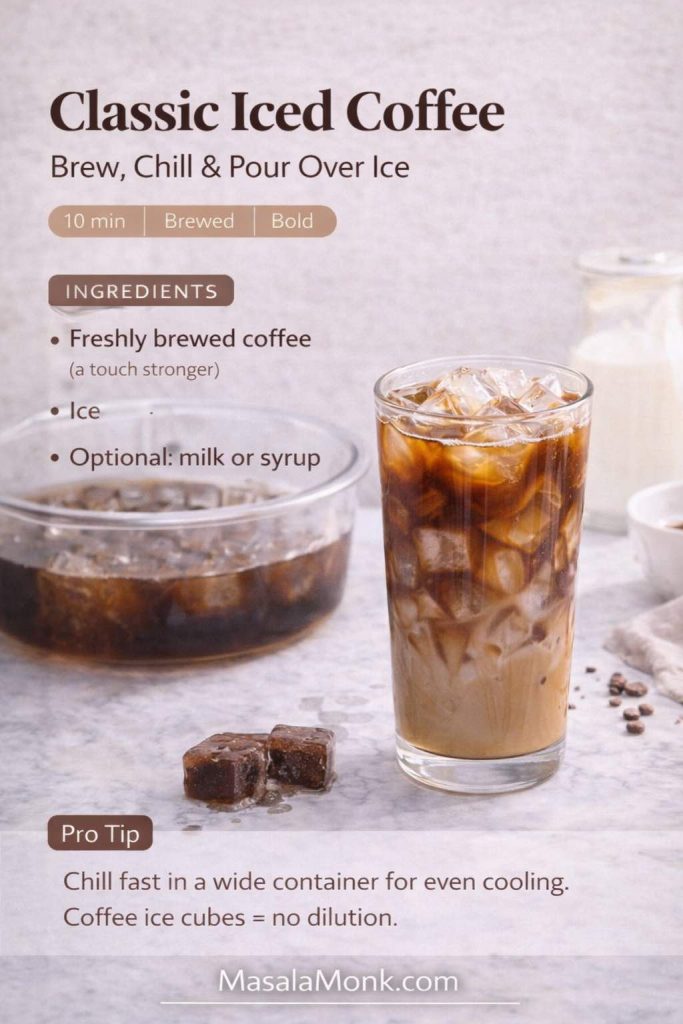
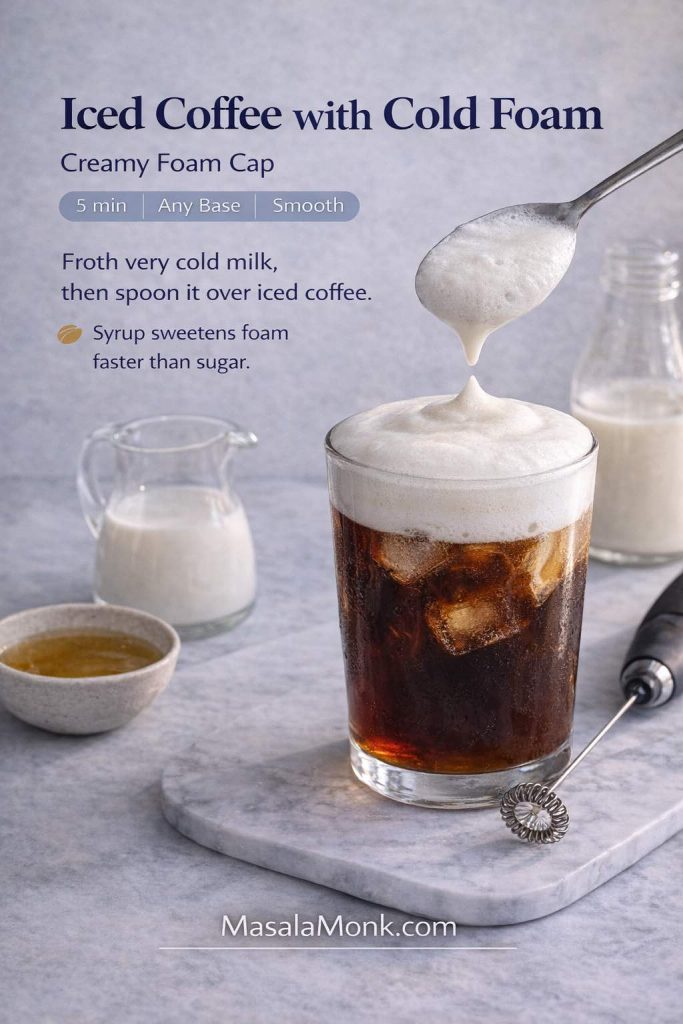
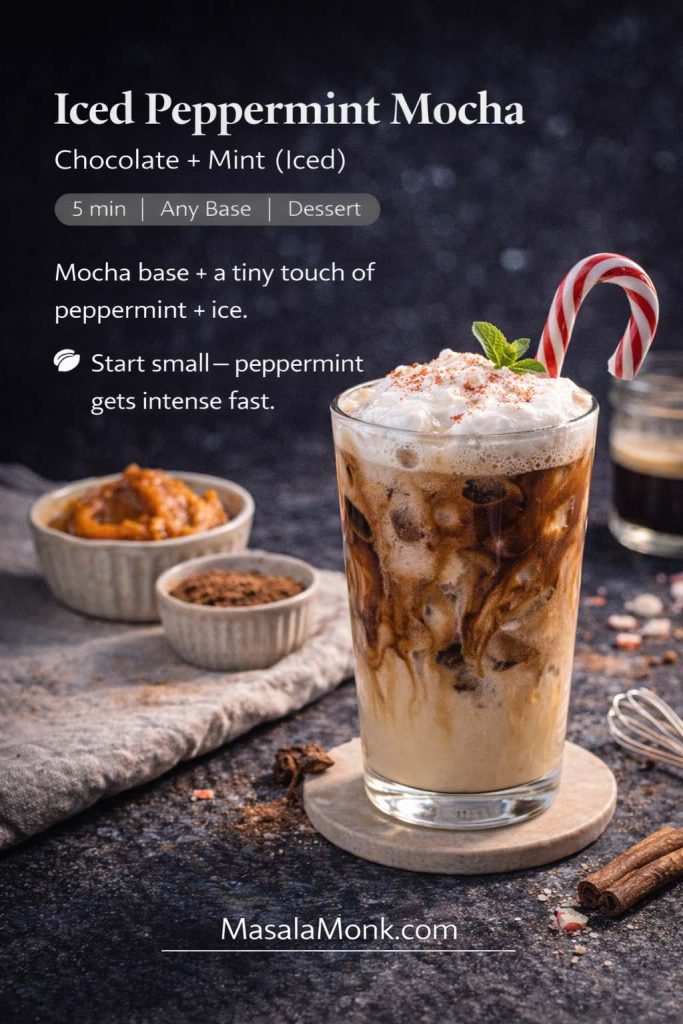
Iced Kahlua coffee (easy, crisp, surprisingly refreshing)
Serves: 1
Glass: Highball
Ingredients
- 150–180 ml (5–6 oz) strong coffee or cold brew
- 30–45 ml (1–1.5 oz) Kahlúa
- Optional: 60–90 ml (2–3 oz) milk or oat milk
- Ice
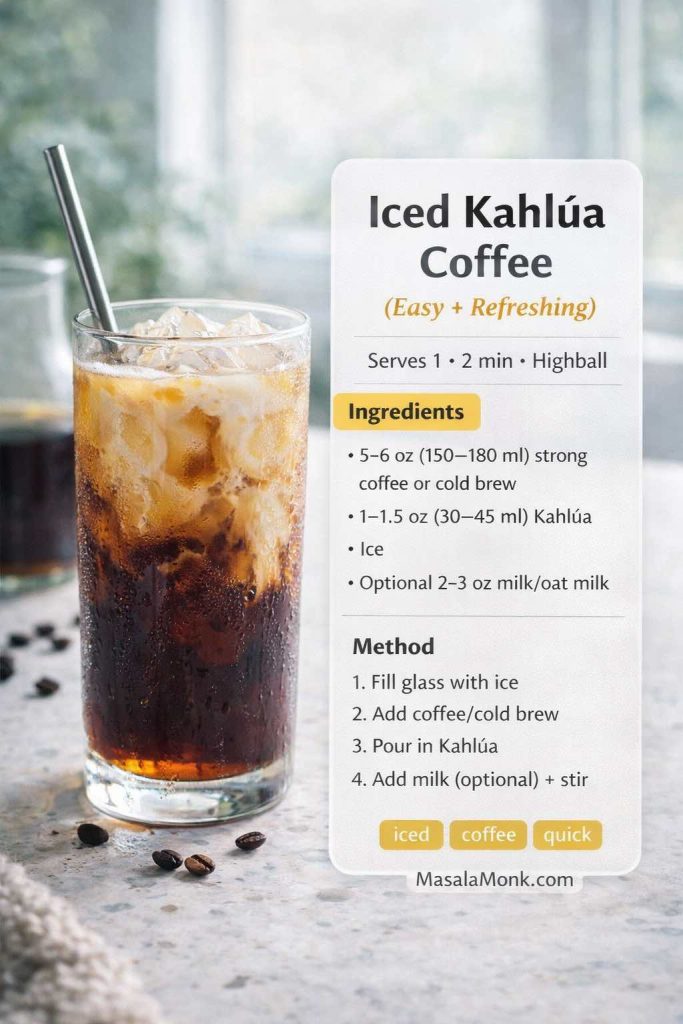
Method
- Fill a tall glass with ice.
- Add coffee (or cold brew).
- Pour in Kahlúa.
- Add milk if you want it creamy.
- Stir and serve.
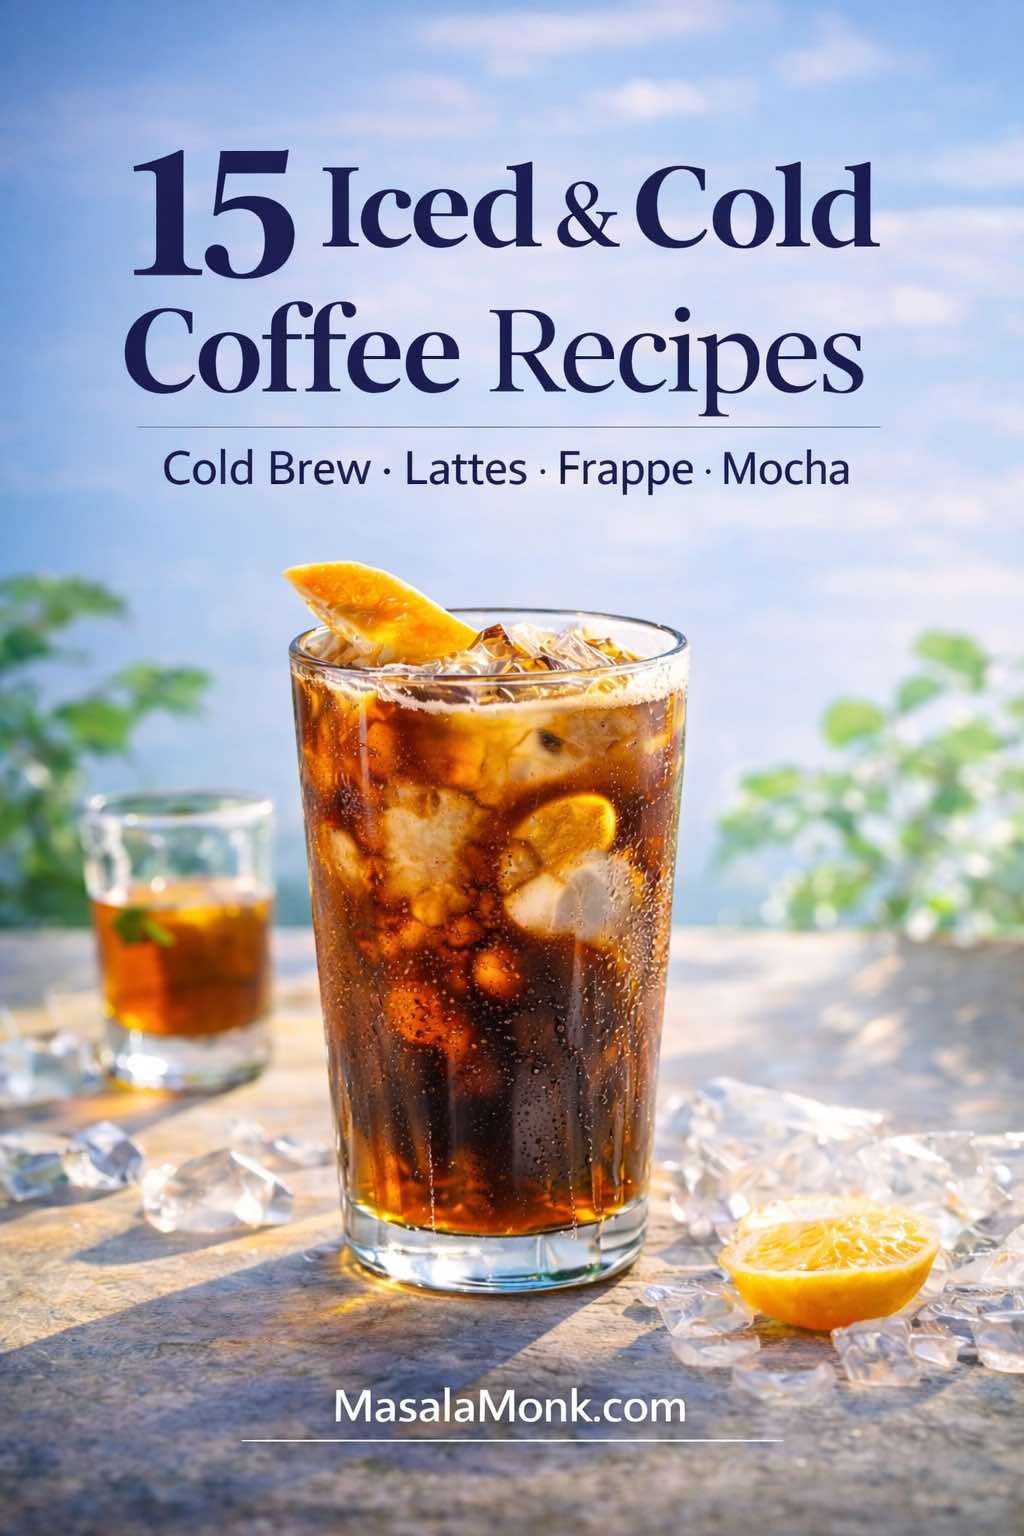
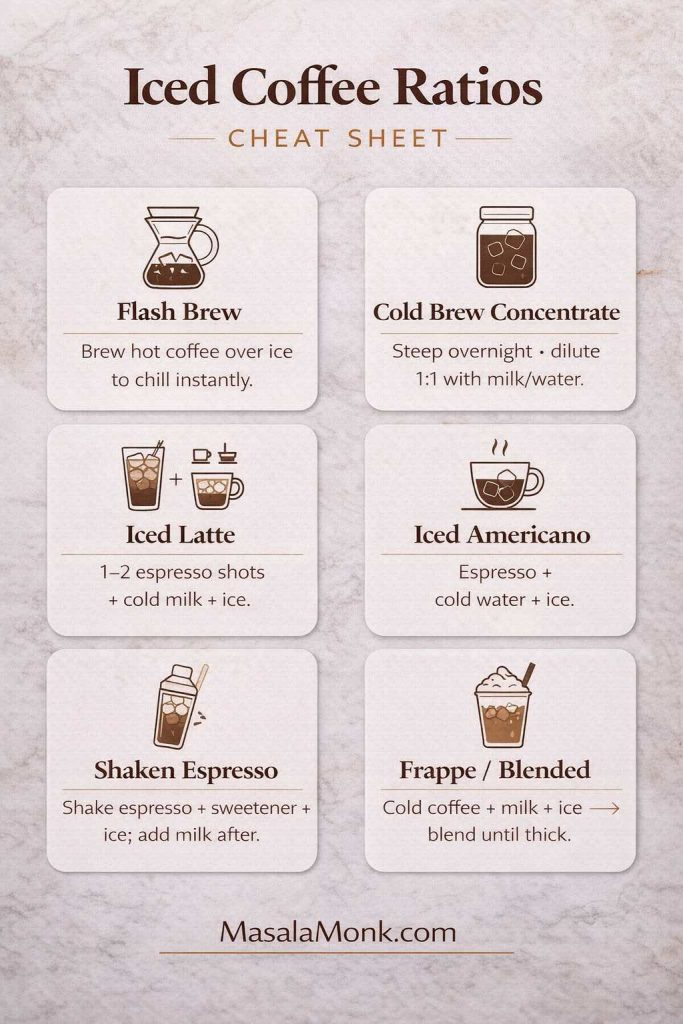
If you love rotating through iced styles, you’ll get a lot of inspiration from Masala Monk’s iced coffee recipes and the quick comparison in Iced Coffee Simplified.
Also Read: Classic Deviled Eggs (Easy) + 8 Flavorful Variations
Kahlua drinks with Coke (fizzy, fun, and way better than it sounds)
Kahlua and Coke is one of those combinations that feels almost too simple, until you taste the way cola spice and coffee sweetness meet in the middle. The result is fizzy, lightly dessert-like, and genuinely easy to enjoy.
Kahlua and Coke (the fast highball)
Serves: 1
Glass: Highball
Ingredients
- 45 ml (1.5 oz) Kahlúa
- 150–180 ml (5–6 oz) cola, chilled
- Ice
- Optional: lime wedge
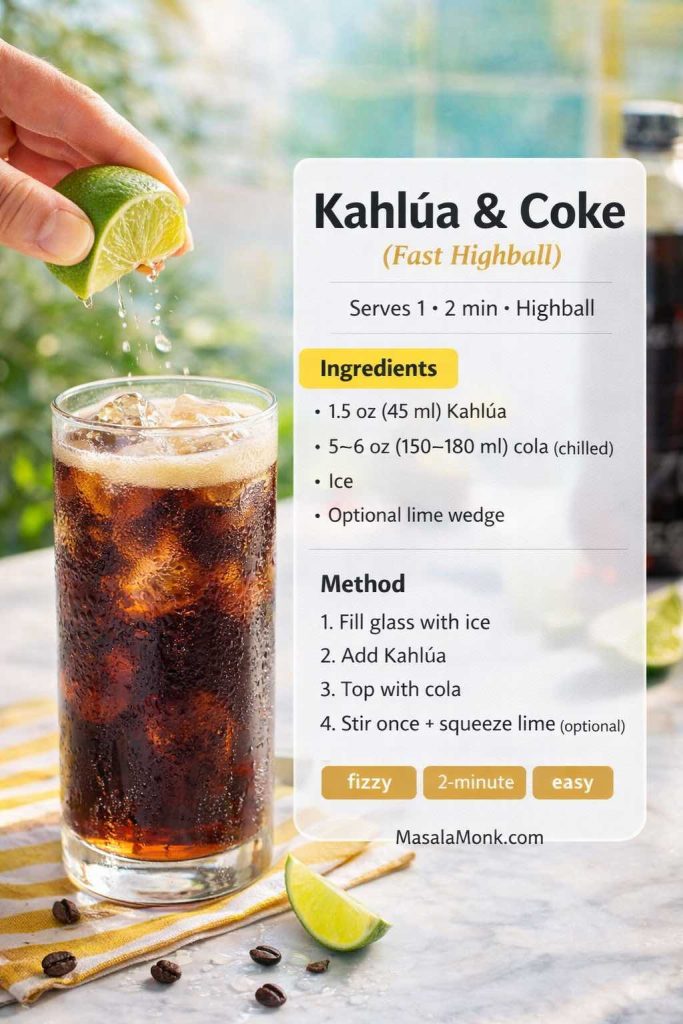
Method
- Fill a glass with ice.
- Add Kahlúa.
- Top with cola.
- Stir once, lightly.
- Add a squeeze of lime if you want brightness.
Variations
- Creamy cola twist: Add a splash of milk or cream. It turns into a float-like dessert drink.
- Coffee-forward fizz: Add a tiny splash of cold brew first, then top with cola.
Also Read: Pumpkin Spice, Your Way: Master Blend, Variations & Real-World Recipes
Colorado Bulldog (vodka + Kahlua + cream, finished with cola)
If you want a drink that sits directly between a White Russian and a cola highball, this is it. Kahlúa’s official recipe is a reliable reference: Colorado Bulldog Drink Recipe.
Serves: 1
Glass: Short glass (rocks)
Ingredients
- 45 ml (1.5 oz) vodka
- 30 ml (1 oz) Kahlúa
- 30 ml (1 oz) cream (or half-and-half)
- Cola, to top (about 60–90 ml / 2–3 oz)
- Ice

Method
- Add vodka, Kahlúa, and cream to a shaker with ice.
- Shake briefly until cold.
- Strain into a rocks glass filled with fresh ice, leaving space at the top.
- Top with cola and stir gently once.
What to serve with it
Because it’s creamy and fizzy, something spicy and crunchy works beautifully. A tray of baked jalapeño poppers disappears fast with drinks like this, especially when you want a snack that feels party-ready without being complicated.
Also Read: Pepper Sauce Recipe Guide: Classic Vinegar Heat to Chipotle, Ají & Peppercorn
Kahlua shot drinks that feel like tiny desserts
Kahlua shot drinks are easy to serve, easy to sip, and friendly for guests who prefer sweet flavors. At the same time, they can look surprisingly impressive with minimal effort.
Classic creamy Kahlua shot (simple, smooth, no layering stress)
Serves: 1 shot
Glass: Shot glass
Ingredients
- 20 ml (about 2/3 oz) Kahlúa
- 20 ml (about 2/3 oz) Irish cream (or heavy cream)
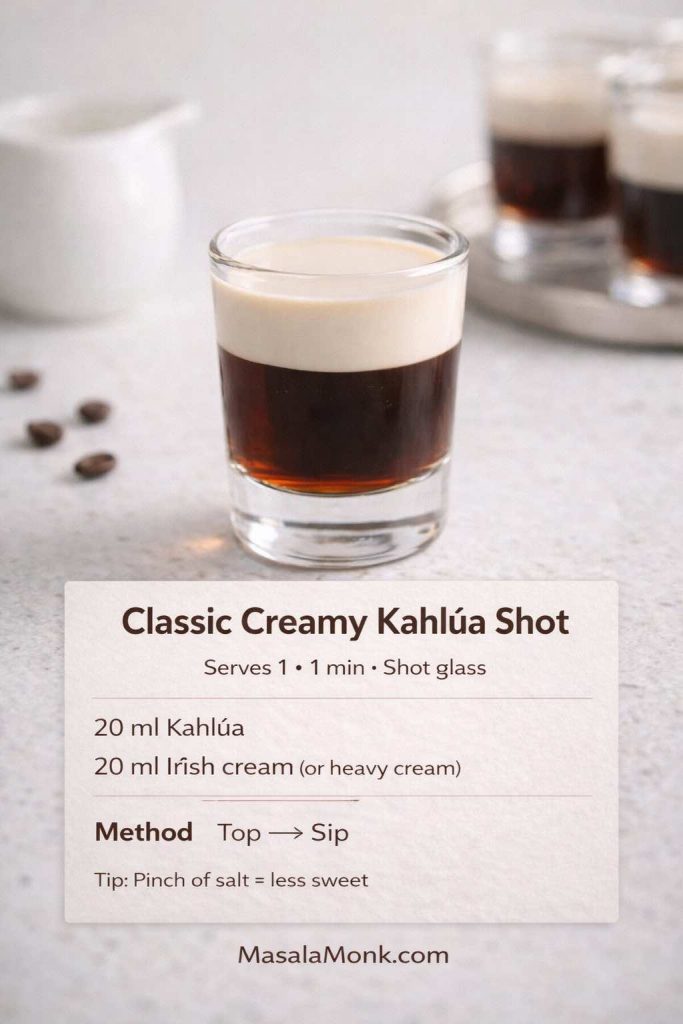
Method
- Pour Kahlúa into a shot glass.
- Top with Irish cream or heavy cream.
- Sip immediately.
Variation
If you want it to taste a little less sweet and more like coffee, add a tiny pinch of salt to the cream before pouring. It’s subtle, yet it makes the flavor feel more balanced.
Also Read: Crock Pot Lasagna Soup (Easy Base + Cozy Slow-Cooker Recipes)
B-52 shot (layered, classic, always a crowd-pleaser)
The B-52 is the shot that looks like a magic trick: three neat layers, each with its own flavor. Kahlúa’s official recipe explains the equal-parts layering style: B-52 Shot Recipe.
Serves: 1 shot
Glass: Shot glass
Ingredients
- 15 ml (1/2 oz) Kahlúa
- 15 ml (1/2 oz) Irish cream liqueur
- 15 ml (1/2 oz) triple sec (orange liqueur)
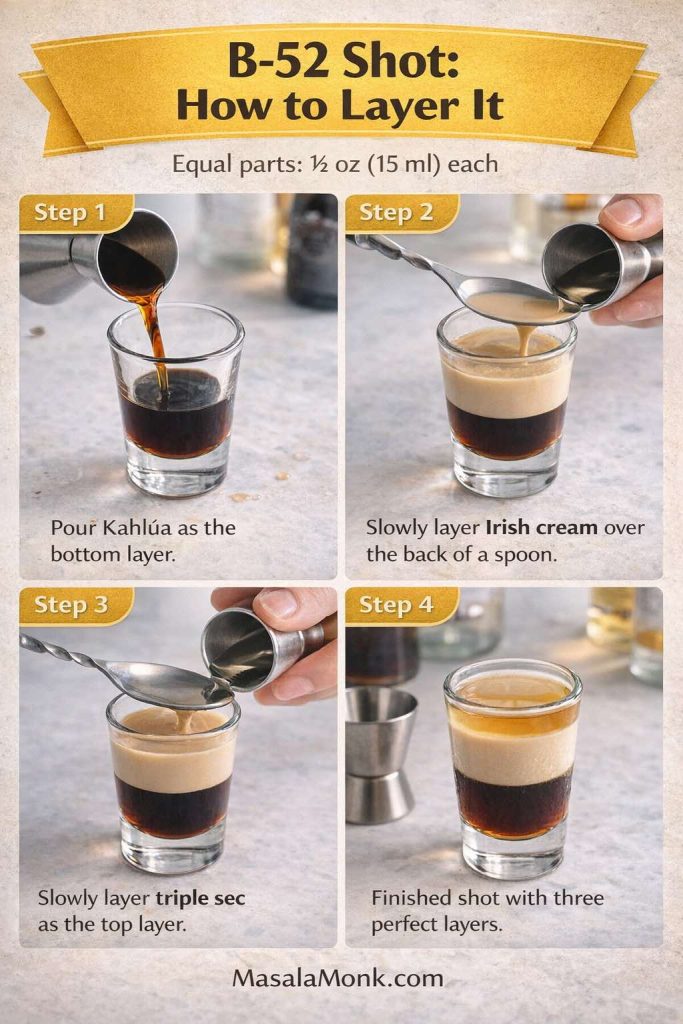
Method
- Pour Kahlúa into a shot glass.
- Very slowly layer Irish cream over the back of a spoon so it floats.
- Very slowly layer triple sec the same way, forming the top layer.
- Serve immediately.
Variations
- Less sweet: Use slightly less triple sec and slightly more Irish cream for a softer top.
- Dessert pairing: Churros are a perfect match for coffee-and-cream shots. If you want a full churros guide with dough and sauce options, Masala Monk’s how to make churros is a great starting point, and the classic pairing is hard to beat: BBC Good Food’s churros with chocolate dipping sauce.
Also Read: High Protein Overnight Oats | 5 Recipes (Low Calorie, Vegan, Bulking & More)
A few more Kahlua drinks that keep the theme going
At this stage, you’ve got a well-rounded lineup of drinks with Kahlua—milk-based comfort pours, creamier dessert-style cocktails, vodka classics, coffee-forward martinis, fizzy cola highballs, and easy party shots. Even so, if you’d like to stretch the bottle further without sliding into oddball mashups, one simple guideline keeps everything on track: stay within the same flavor family.
For example, coffee and dairy naturally belong together, so milk or cream will almost always feel seamless. Likewise, coffee and vodka pair cleanly because vodka adds strength without competing. Meanwhile, coffee and cola can be surprisingly harmonious—the fizz and spice lift the sweetness instead of fighting it. In the same way, coffee and chocolate tend to amplify each other, making dessert-style builds taste intentional rather than accidental. Finally, coffee and warmer spirits like brandy work beautifully when you want something mellow and after-dinner.
Once that pattern clicks, improvising becomes far easier—because instead of guessing, you’re simply choosing combinations that already make sense.
Masala Monk’s guide on what mixes well with Baileys is a surprisingly useful companion for Kahlúa because it explores the same creamy, dessert-leaning flavor world. Even when you’re not mixing Baileys specifically, it’s a helpful way to think about what tastes harmonious together.
If you’re building a snack table alongside these Kahlua drinks
Creamy and sweet cocktails are more enjoyable when there’s something savory nearby. A few options that pair naturally without stealing attention:
- A dip centerpiece, like these spinach dip variations.
- Crisp, salty bites from this roundup of potato appetizers.
- Something cheesy and playful, like these Indian-inspired cheese balls.
- A spicy snack that keeps the palate awake, like baked jalapeño poppers.
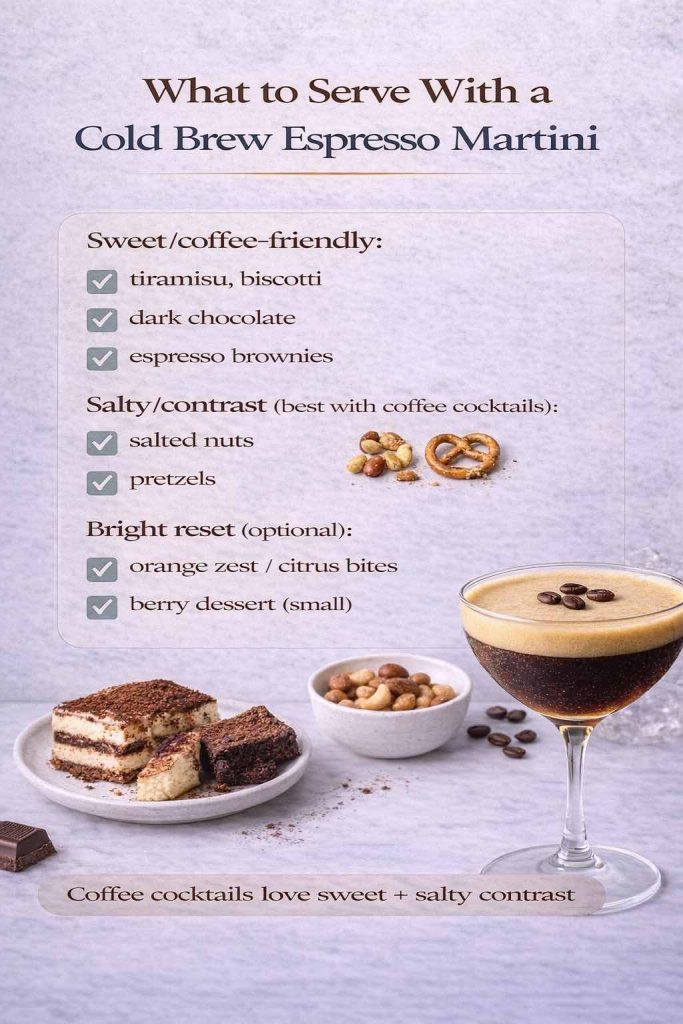
And if you’re leaning into dessert pairings instead, you already have some easy wins:
- Chocolate-forward treats like double chocolate chip cookies.
- Caramel warmth from sticky toffee pudding.
- Café-style dessert energy with churros and a classic chocolate dip.
One last round: how to make these Kahlua drinks taste “clean” instead of sugary
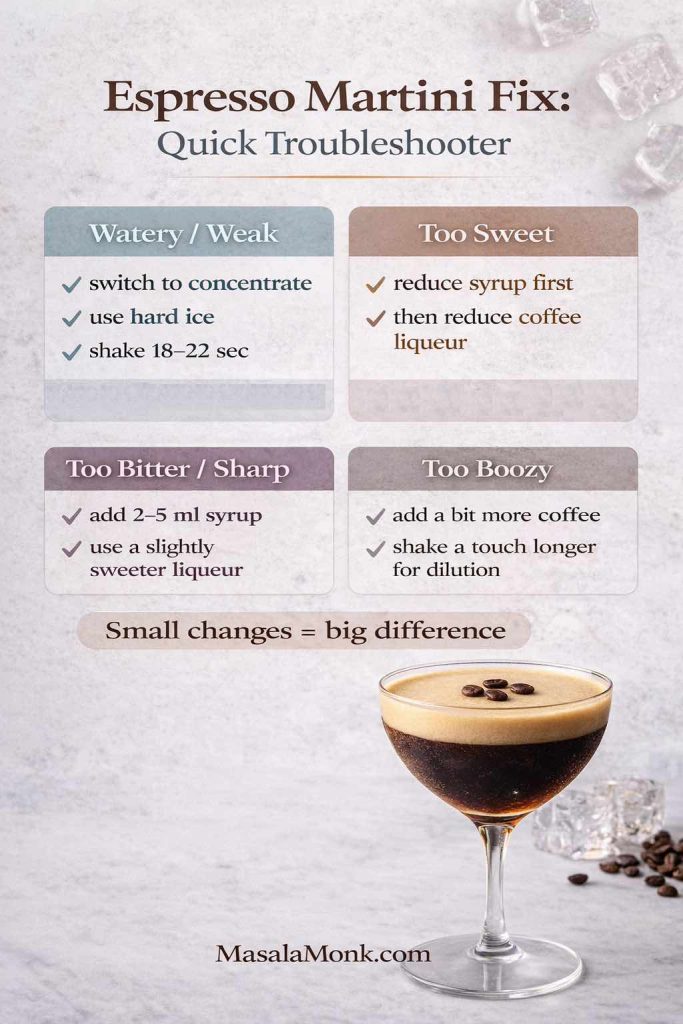
Even though Kahlúa is sweet by design, your drink doesn’t have to taste sugary. A few small choices change the entire finish:
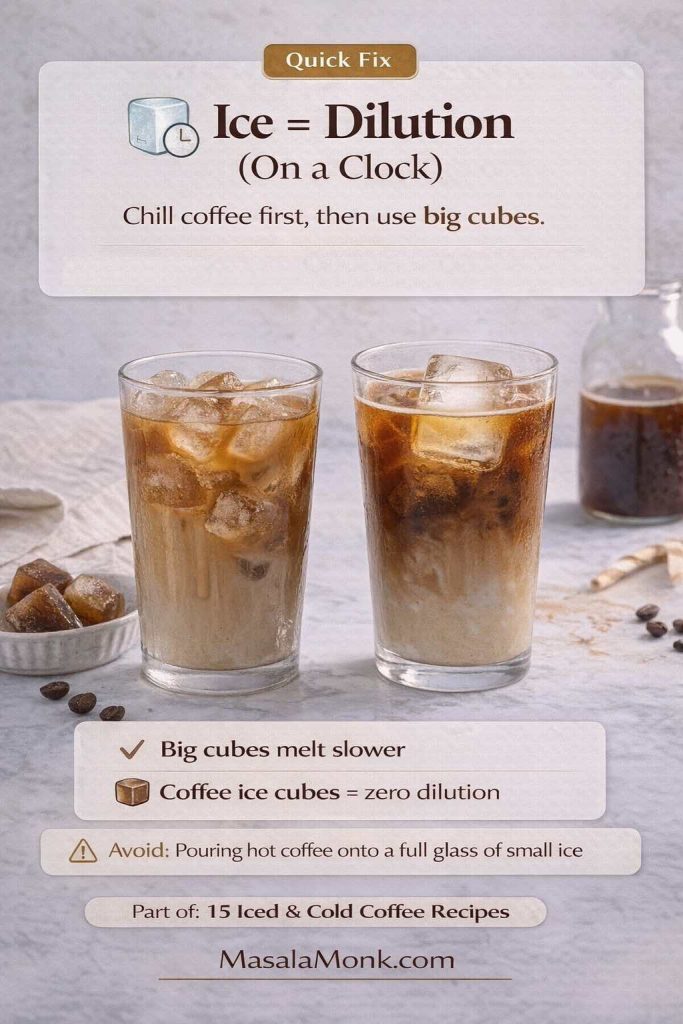
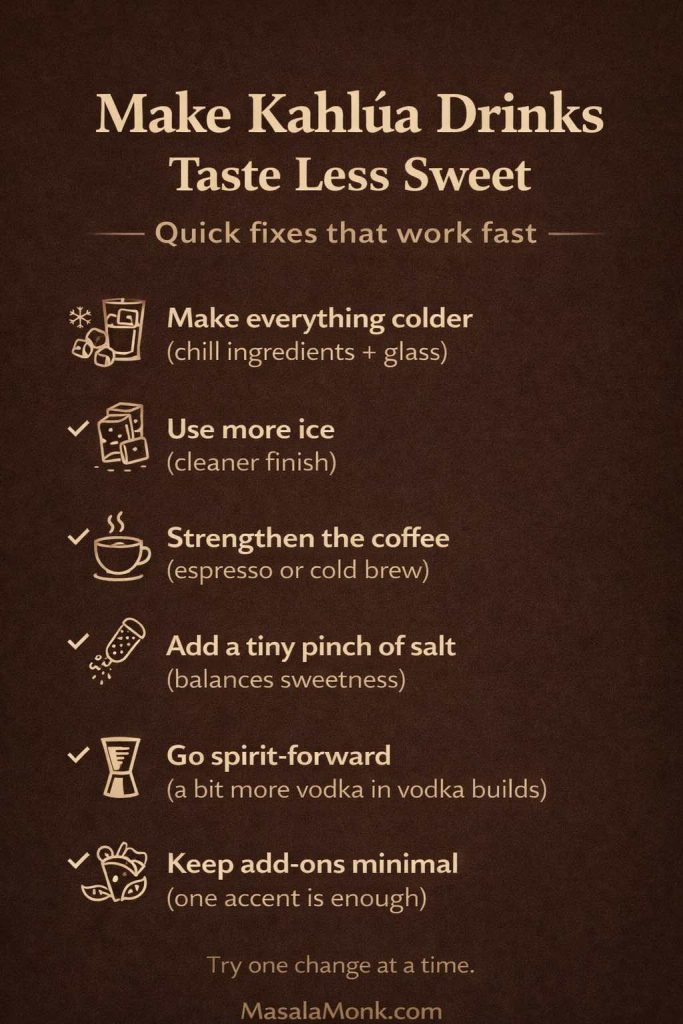
- Make everything colder. Cold ingredients reduce the perception of sweetness and keep the coffee note sharper.
- Use enough ice. Plenty of ice chills quickly and prevents the drink from warming up too fast.
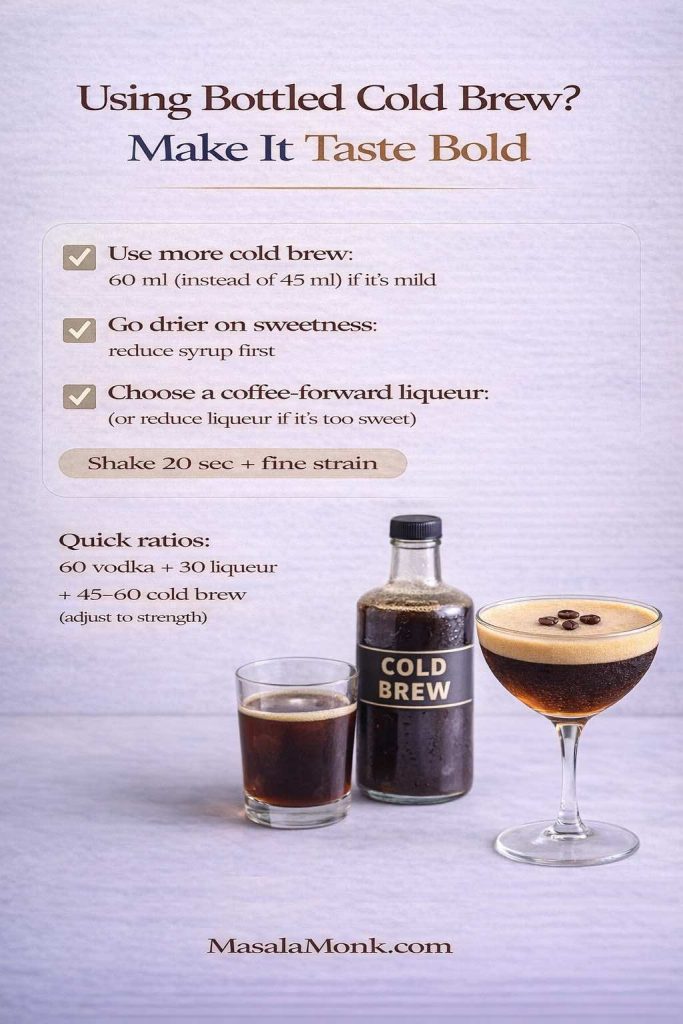
- Strengthen the coffee base when you add coffee. Weak coffee makes watered-down drinks. Strong coffee makes the coffee liqueur taste richer.
- Keep additions intentional. One accent (chocolate, cinnamon, orange peel) is usually enough. Two can be great. Five makes the drink confused.
If you enjoy going deeper on coffee strength and methods, it’s worth exploring both Masala Monk’s coffee brewing methods overview and the practical cold brew resources from Serious Eats: Cold Brew Iced Coffee Recipe and A Guide to Cold Brew Coffee. Once your coffee base improves, nearly every coffee cocktail improves with it.
Also Read: Béchamel Sauce for Lasagna: Classic, Vegan & Ricotta Sauce Recipe
Closing: the best Kahlua drinks are the ones you’ll actually make again
It’s easy to collect recipes and never repeat them. On the other hand, the best Kahlua drinks are the ones that slide naturally into your routine: a Sombrero when you want something easy and creamy, a White Russian when you want a classic, a Black Russian when you want it clean, a Mudslide when you want dessert, and an espresso martini when you want something that feels like a night out.
Start with one recipe that matches your mood, then use the variations to make it yours. After that, you’ll stop wondering what to mix with Kahlua—because you’ll already have a short list of favorites that never disappoint.
Also Read: Green Chutney Recipe (Coriander–Mint / Cilantro Chutney)
FAQs: Kahlua drinks, mixers, and easy recipe questions
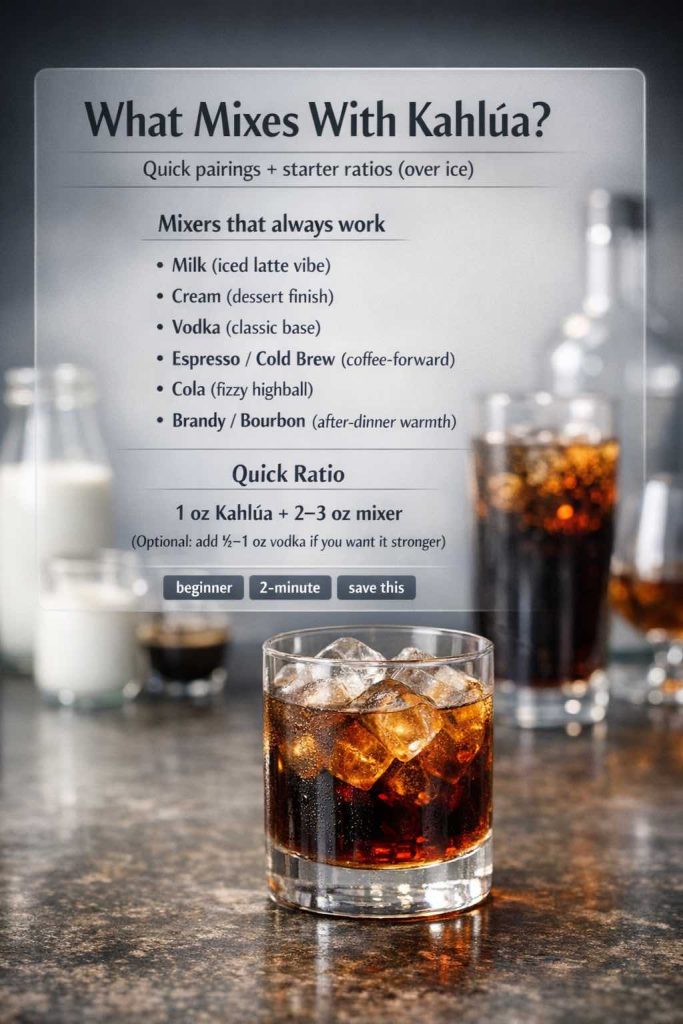
1) What can you mix with Kahlua?
Kahlúa mixes well with milk, cream, vodka, coffee, cola, and even cold brew concentrate. In practice, the easiest starting point is either a milk-and-Kahlua drink for a smooth, mellow sip or a vodka and Kahlua drink for a cleaner cocktail base.
2) What are the easiest Kahlua drinks to make at home?
To keep it simple, start with Kahlua and milk, Kahlua and cream, or Kahlua and Coke. After that, move to classic Kahlua drink recipes like a White Russian or Black Russian once you’re comfortable with the basic flavor balance.
3) What are the best Kahlua drink recipes for beginners?
Beginner-friendly options include the Kahlua Sombrero drink, a straightforward Kahlua and cream drink recipe, and a Black Russian. These drinks using Kahlua are low-effort and teach you how sweetness, coffee notes, and dilution behave over ice.
4) What are the best Kahlua drinks with milk?
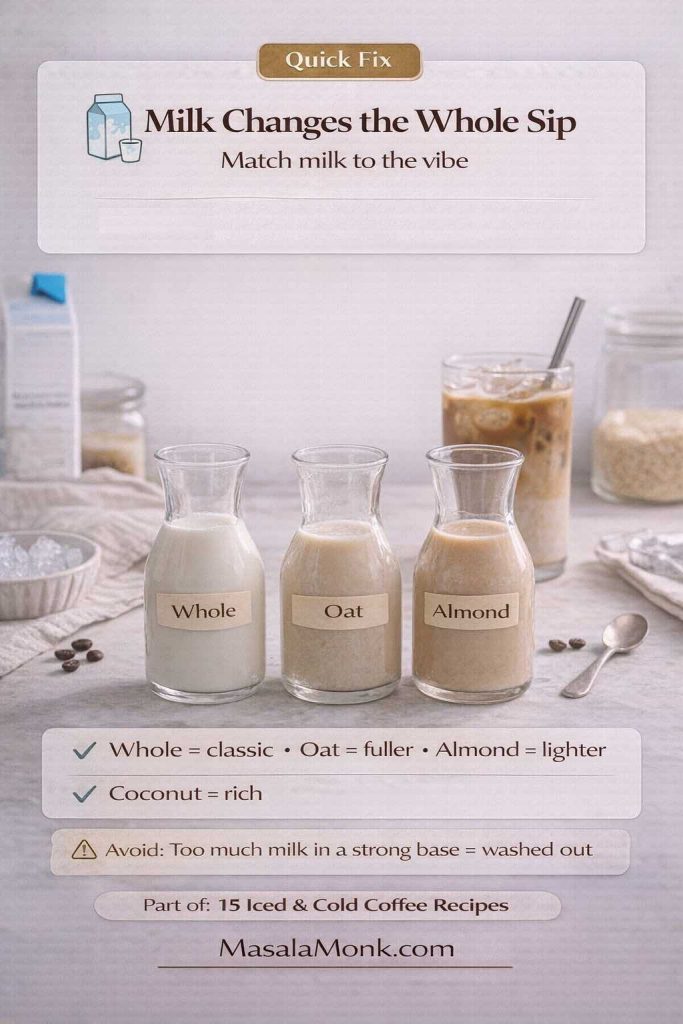
Kahlua drinks with milk include the Sombrero, lighter “latte-style” mixes with a splash of coffee, and milk-based variations of the White Russian. Additionally, oat milk and almond milk can shift the texture and sweetness without changing the overall idea.
5) Is Kahlua good with milk?
Yes—milk softens the sweetness and highlights the coffee flavor, which is why milk and Kahlua drinks feel like a café-style treat. Moreover, choosing a richer milk (or a thick plant milk) can make the drink taste closer to dessert.
6) What’s the difference between a Kahlua and cream drink and a White Russian?
A Kahlua and cream drink uses coffee liqueur and cream only, while a White Russian adds vodka for extra strength and a drier finish. Consequently, the Kahlua and cream drink recipe tends to taste sweeter and softer, whereas the White Russian feels more like a cocktail.
7) What are the most popular vodka and Kahlua drinks?
The most popular vodka & Kahlua drinks are the White Russian and the Black Russian. In comparison, the White Russian is creamy and dessert-like, while the Black Russian is spirit-forward and simpler.
8) Can you make a White Russian with milk instead of cream?
Absolutely. Using milk creates a lighter White Russian that still keeps the classic coffee-cream profile. Alternatively, half-and-half offers a middle ground if you want it smoother than milk but less heavy than cream.
9) What are the best drinks with Kahlua and vodka besides the Russians?
Beyond the White Russian and Black Russian, you can use vodka and Kahlua as the base for dessert-style cocktails such as Mudslide-inspired builds, or you can lean into coffee-forward mixes by adding espresso for an espresso martini with Kahlua.
10) What is the Kahlua Mudslide cocktail recipe supposed to taste like?
A Mudslide is creamy, sweet, and coffee-chocolate adjacent—closer to a dessert drink than a sharp cocktail. Even so, when it’s properly chilled and balanced, it still finishes cleanly rather than tasting heavy.
11) What can you mix with Kahlua for a quick party drink?
For speed, Kahlua and Coke is one of the fastest options. Likewise, simple creamy shooters are easy Kahlua drink ideas for groups because they pour quickly and don’t require shaking.
12) Is Kahlua and Coke a good combination?
Yes—cola brings fizz and spice, and Kahlúa adds coffee sweetness. As a result, Kahlua and Coke tastes like a grown-up soda dessert, especially over plenty of ice.
13) What are good Kahlua shot drinks?
Popular kahlua shot drinks include simple creamy Kahlua shots and layered dessert-style shots. Notably, layered options work best when you pour slowly so the layers stay distinct.
14) What’s the best way to make an espresso martini with Kahlua?
Use strong espresso (cooled slightly), vodka, and Kahlúa, then shake hard with ice to build foam. Afterward, strain into a chilled glass so the top stays smooth and creamy.
15) How do you make an espresso martini no Kahlua?
If you’re making an espresso martini no Kahlua, replace Kahlúa’s coffee-and-sweetness role with strong coffee or cold brew concentrate plus a small amount of sweetener. Then shake with vodka and ice until you get the same foamy texture.
16) What are Kahlua coffee drinks?
Kahlua coffee drinks include hot coffee spiked with Kahlúa, iced Kahlúa coffee with cold brew, and creamier “latte-style” mixes. In the same vein, you can adjust sweetness and texture by choosing milk, cream, or a plant-based alternative.
17) What’s the best substitute for Kahlua in recipes?
If Kahlúa isn’t available, use another coffee liqueur, or combine strong coffee with a little sweetener to mimic the flavor and sweetness. Ultimately, the goal is to preserve the coffee note and the gentle caramel-like sweetness.
18) Are Kahlua martini recipes the same as an espresso martini?
Not exactly. Kahlua martini recipes often mean vodka and Kahlúa shaken and served up, while an espresso martini includes espresso for deeper coffee intensity and a thicker foam. Therefore, a Kahlua martini can be simpler and sweeter, whereas the espresso martini leans bolder.
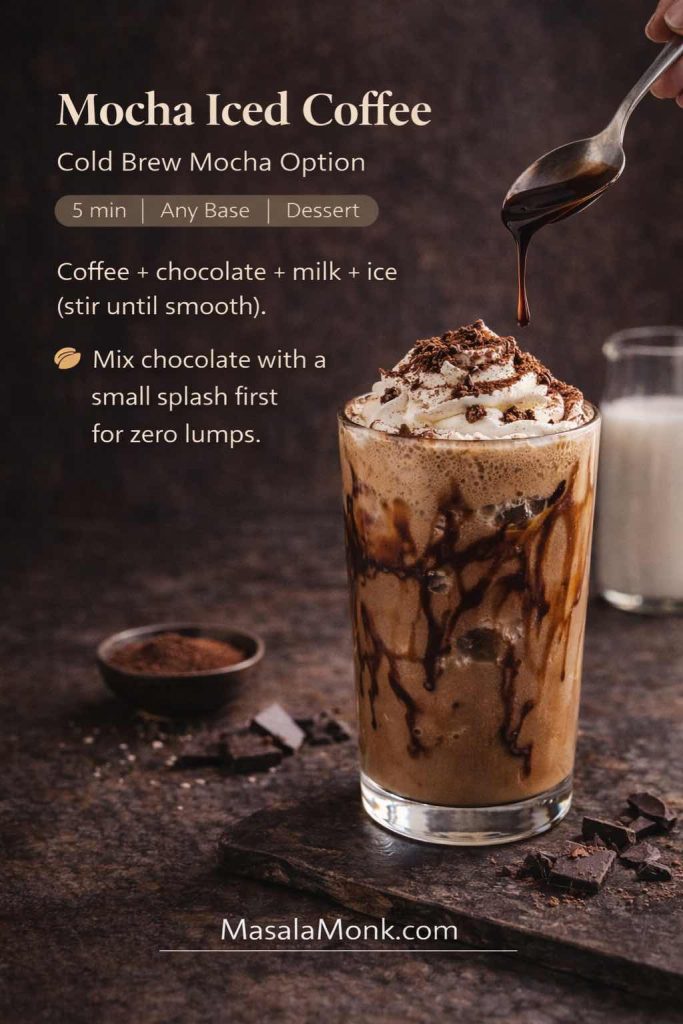
19) What is a chocolate Kahlua martini?
A chocolate Kahlua martini is a dessert-style martini that combines vodka and Kahlúa with a chocolate element such as cocoa or chocolate syrup. Meanwhile, adding a small splash of cream can make it softer and more indulgent.
20) How can you make Kahlua drinks less sweet?
To reduce sweetness, increase dilution with ice, use stronger coffee when coffee is included, or add a bit more vodka in vodka and Kahlua drinks. Additionally, a tiny pinch of salt can make the sweetness feel more balanced without changing the drink’s identity.