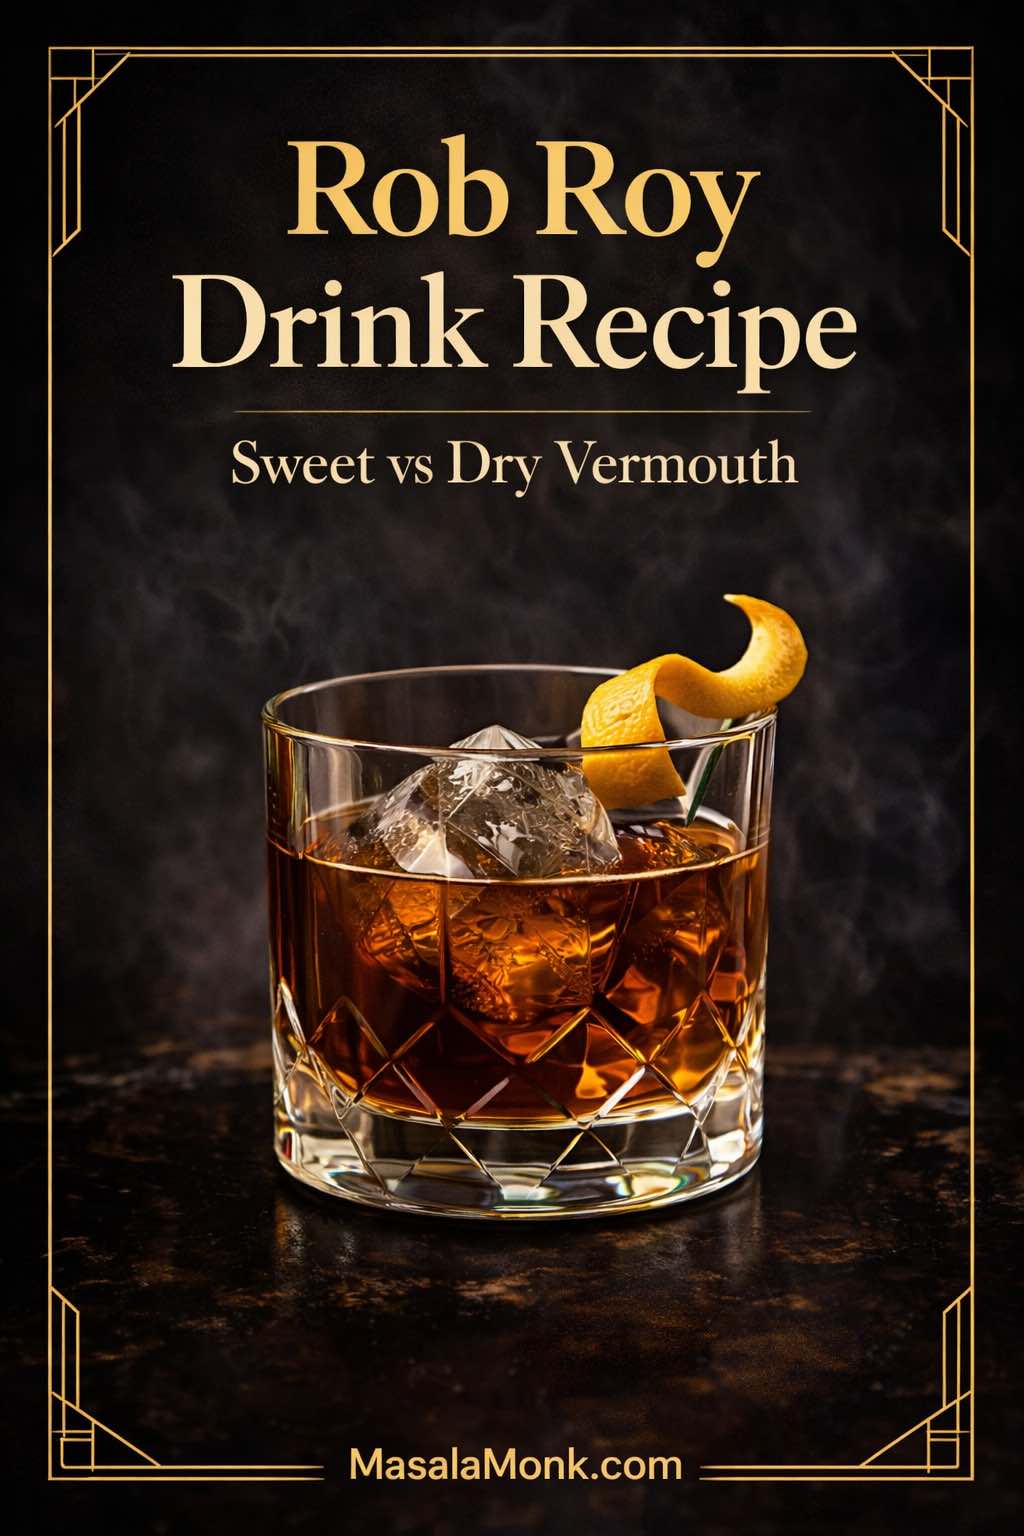
There are drinks that feel like a performance, and then there are drinks that feel like a decision. A Rob Roy belongs to the second camp—and this Rob Roy drink recipe is the kind of classic you reach for when you want the night to slow down, not because you’re trying to be fancy, but because you want something steady and satisfying in your hands. It arrives dark and glossy, the aroma lifting before you even take a sip. The first taste is warm and structured: whisky depth, vermouth richness, a faint bitter edge that keeps everything from going soft.
A Scotch classic worth knowing
That’s why a Rob Roy drink recipe is worth learning properly. Not because it’s complicated (it isn’t), but because it rewards attention. Cold becomes part of the flavor. Dilution reshapes texture. Fresh vermouth changes the aroma in a way you can’t miss. After a few rounds, it’s easy to see why people fall hard for spirit-forward cocktails.
If you’ve heard it described as a cousin of the Manhattan, that’s a useful way to place it. The Rob Roy cocktail uses the same basic architecture—whisky, vermouth, bitters—yet the switch to Scotch whisky shifts the accent. Depending on the Scotch, it can taste honeyed, fruity, toasted, or gently smoky. In other words, the drink has range without needing extra ingredients.
What follows is a full guide you can actually use: classic Rob Roy ingredients, the classic Rob Roy cocktail recipe, and the variations that genuinely earn their place—perfect Rob Roy, dry Rob Roy, and sweet Rob Roy. Along the way, you’ll get practical clarity on how to make a Rob Roy, how to mix a Rob Roy without fuss, and how to serve it up or on the rocks so it fits the moment.
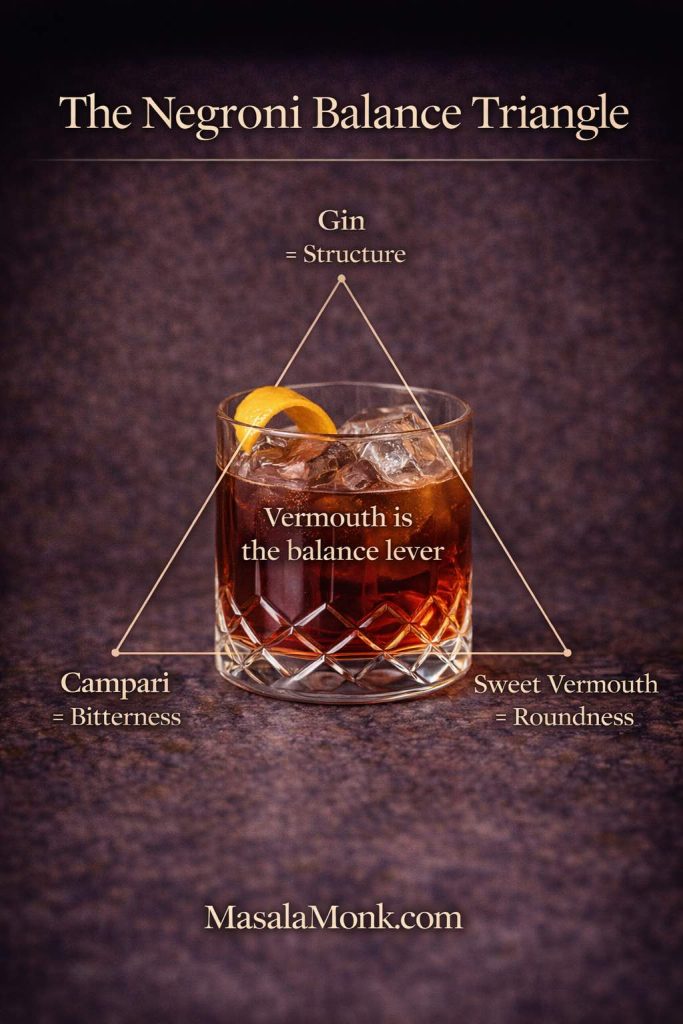
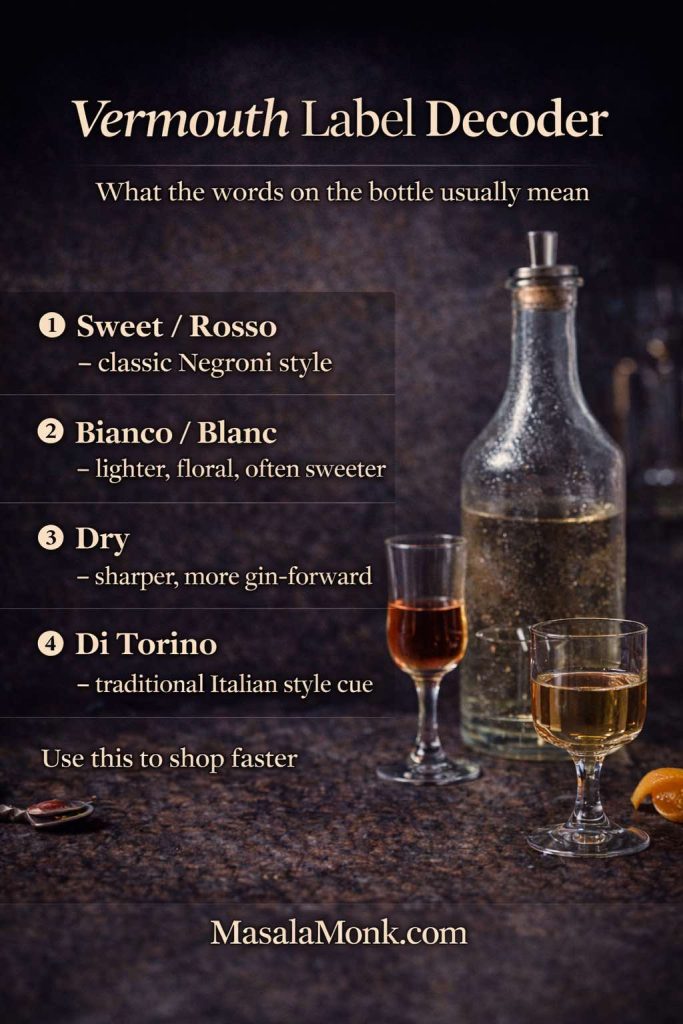
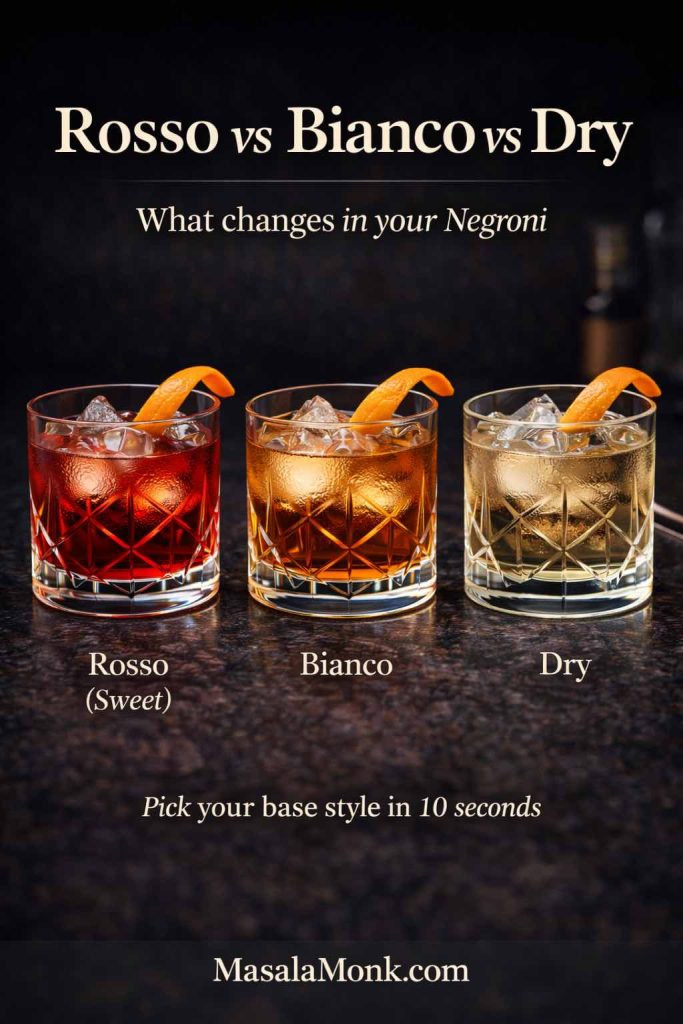
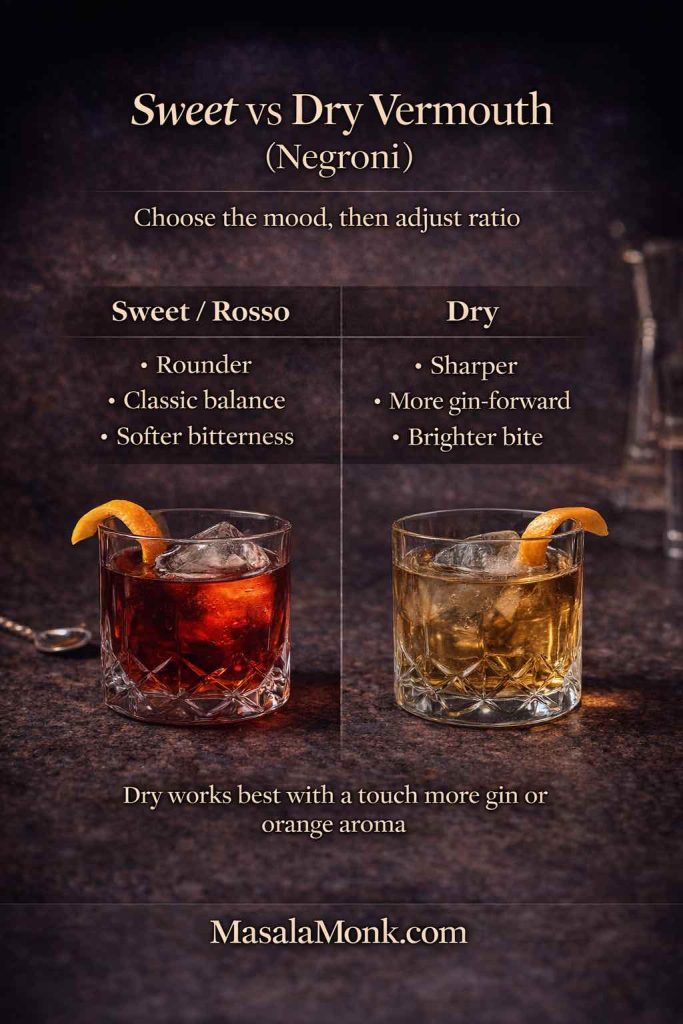
Also Read: Best Vermouth for a Negroni Cocktail Drink Recipe
Rob Roy Drink Recipe: What It Is and Why It Works
A Rob Roy is a whisky cocktail built with Scotch whisky, vermouth, and bitters, stirred with ice until it’s cold enough to feel silky, then strained into a glass and finished with a garnish. If you’ve ever wanted a definition you could say out loud without sounding like you’re reading a textbook, that’s it.
Still, the reason it works is more interesting than the definition. The Rob Roy is a “balance” cocktail, meaning it’s designed around a tension that feels good: strength and softness, sweetness and bitterness, warmth and chill. Scotch provides the backbone. Vermouth adds body, aromatics, and a kind of herbal sweetness that makes the drink feel complete rather than merely boozy. Bitters add shape, keeping the edges crisp enough that you want another sip.
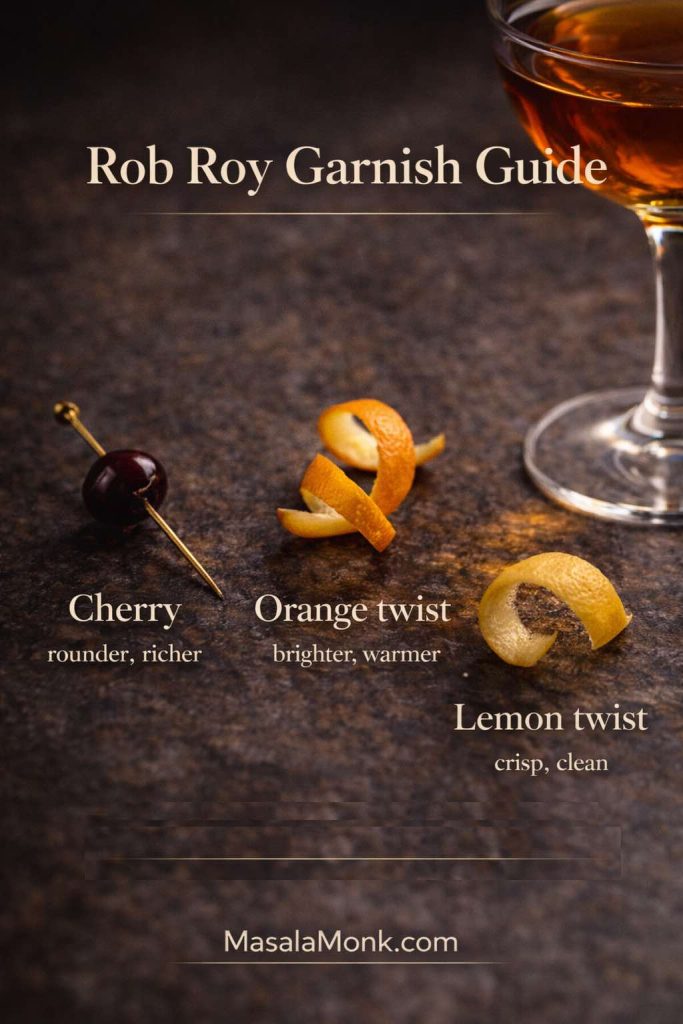
This is also why the Rob Roy drink doesn’t need a long ingredient list. It isn’t trying to be flashy. It’s trying to be satisfying in a way that feels composed. Even the garnish is more about aroma than decoration. A cherry makes the drink feel rounder; a twist makes it feel brighter. Those small choices matter because the cocktail is so clean.
If you like seeing a classic spec from a major cocktail source, you can compare what you make at home with the version on Liquor.com’s Rob Roy recipe. The core idea stays the same, even as different bartenders nudge the details.
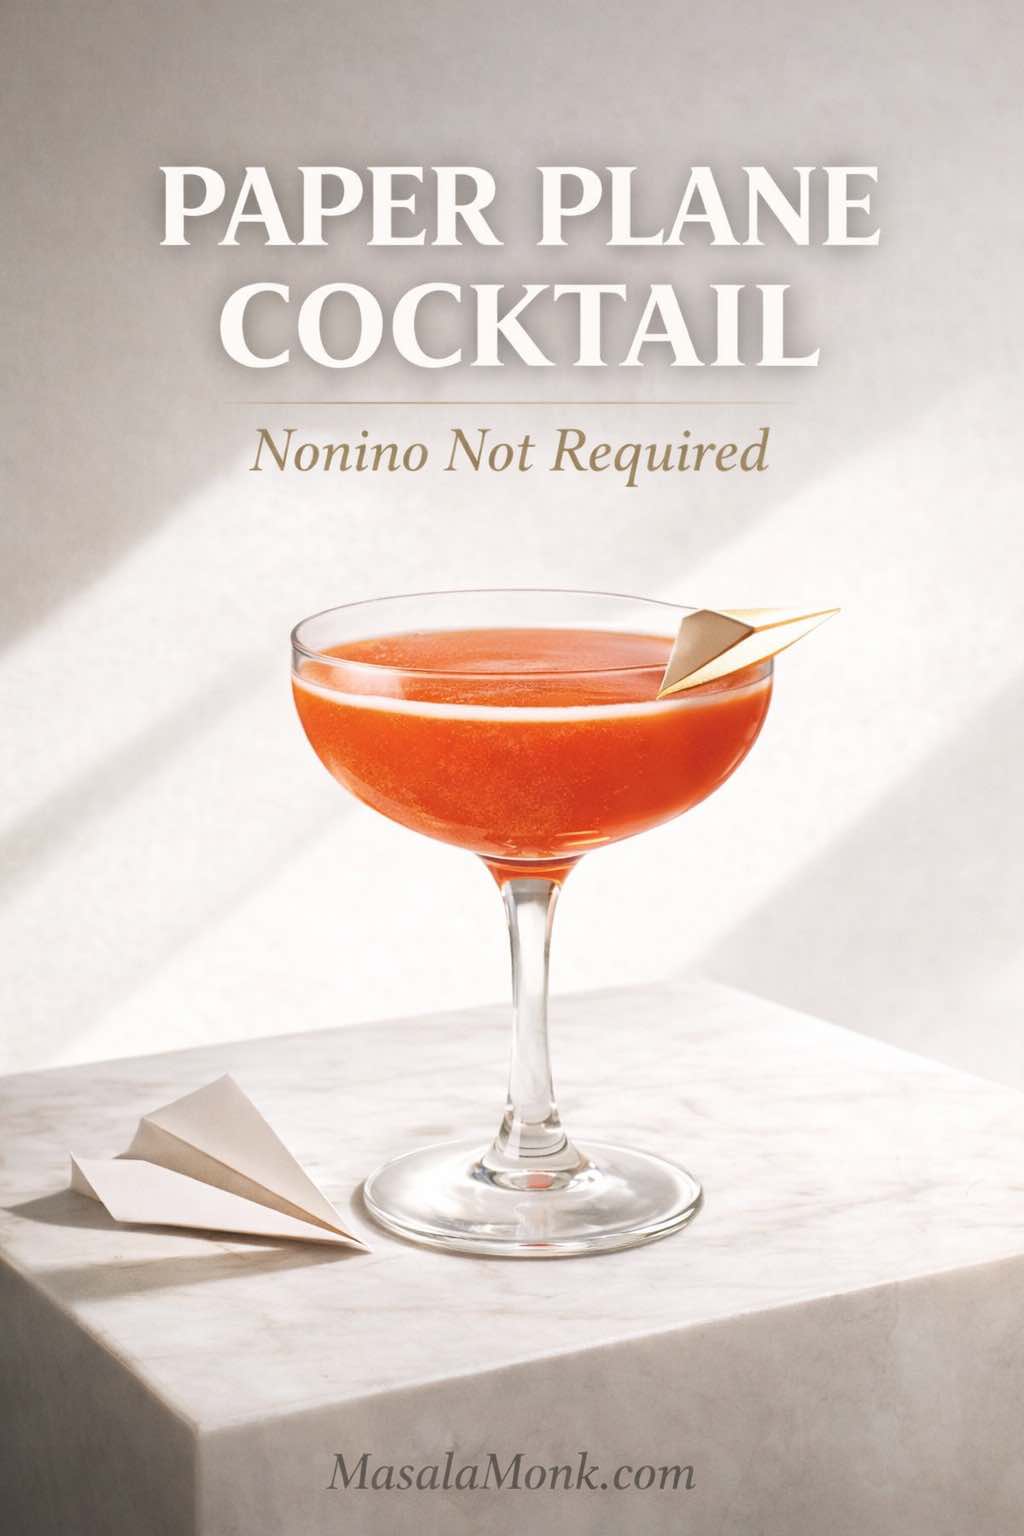
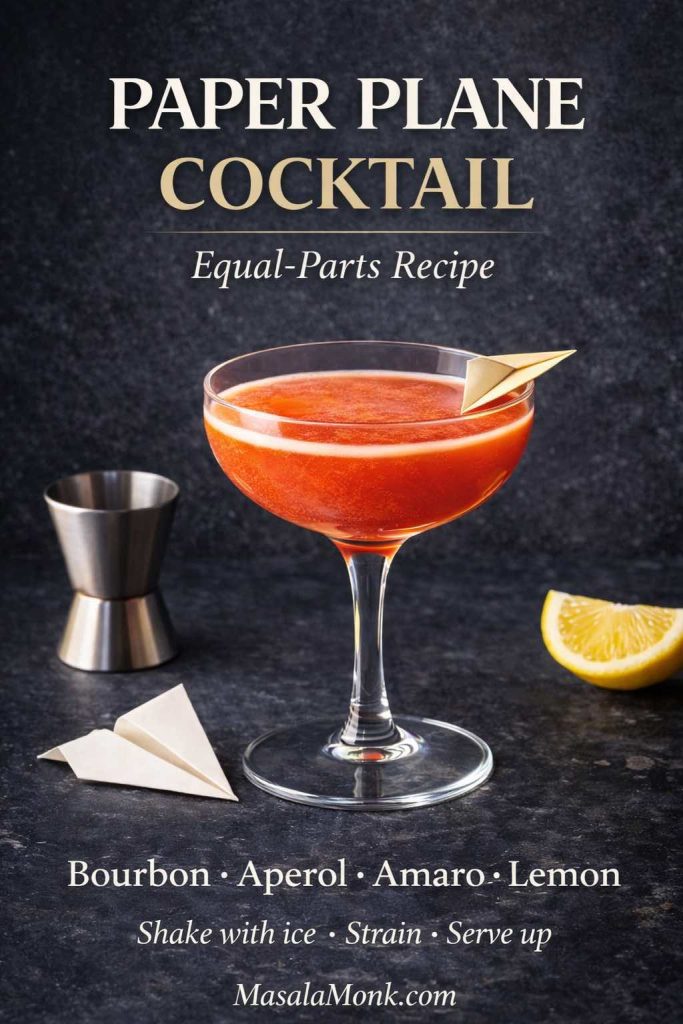
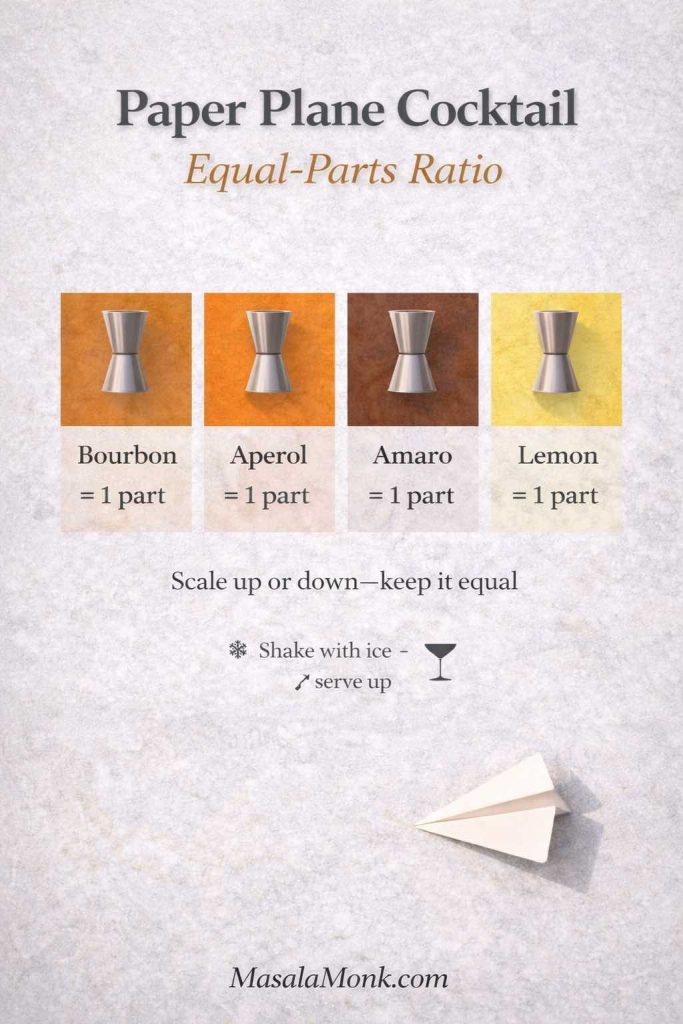
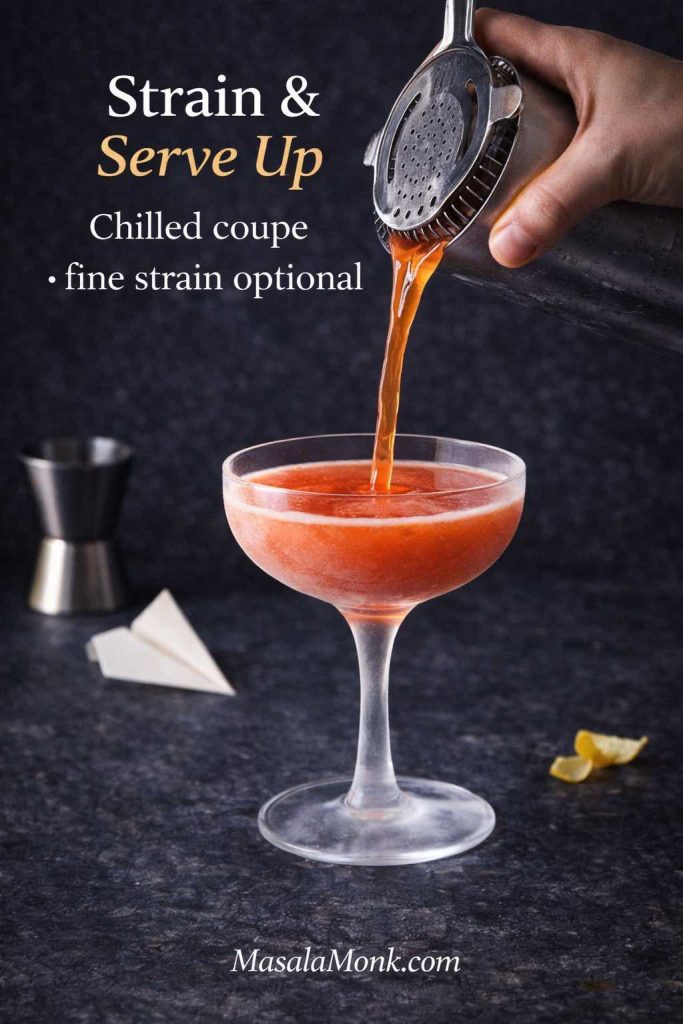
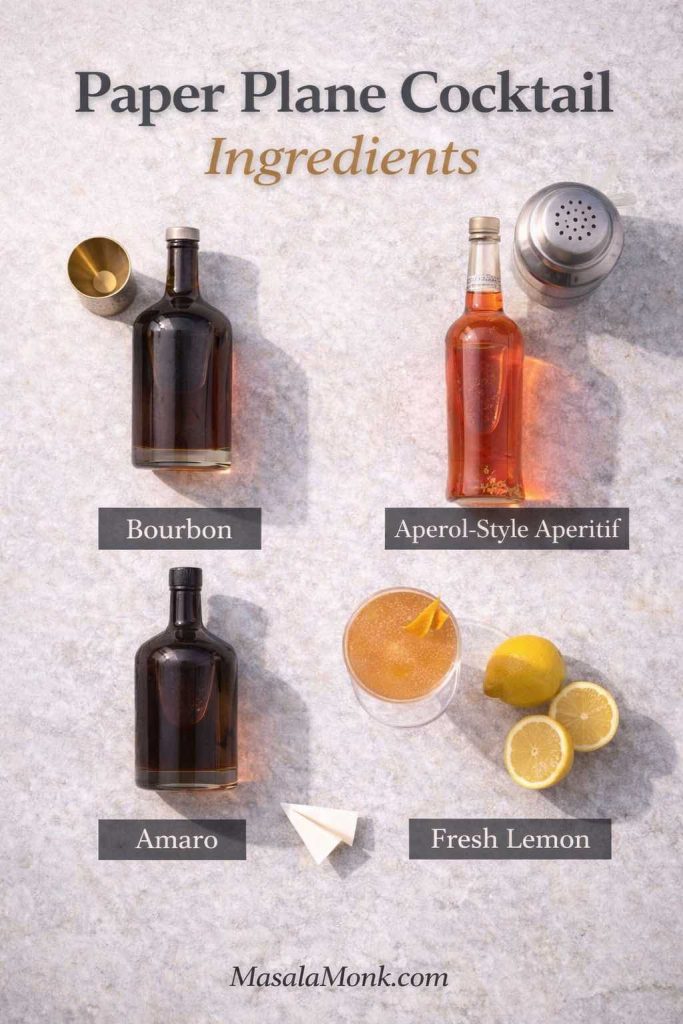
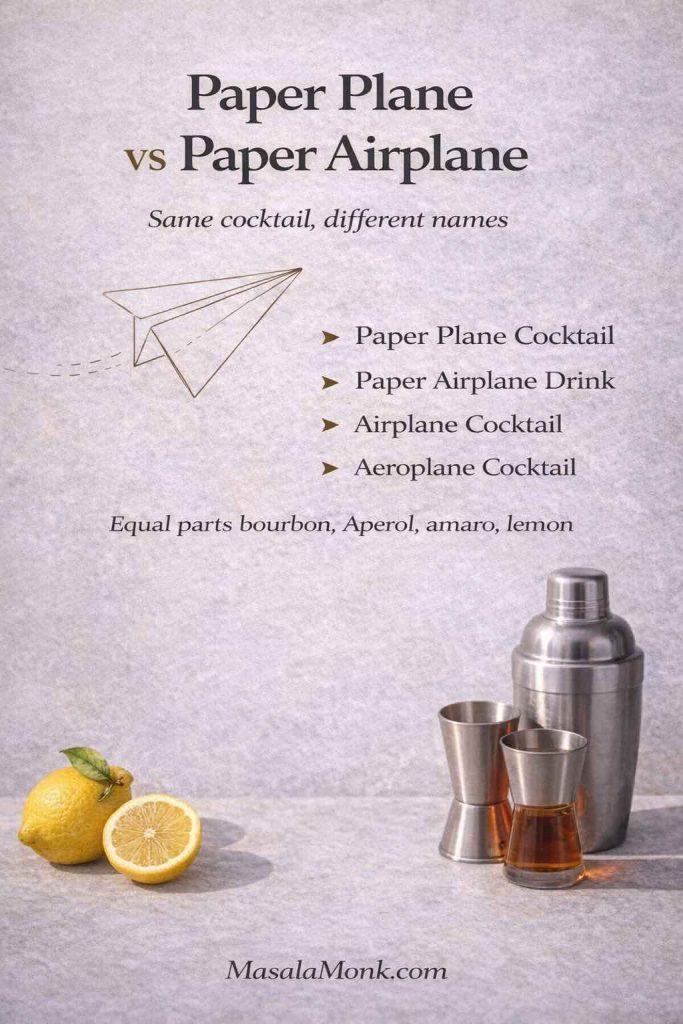
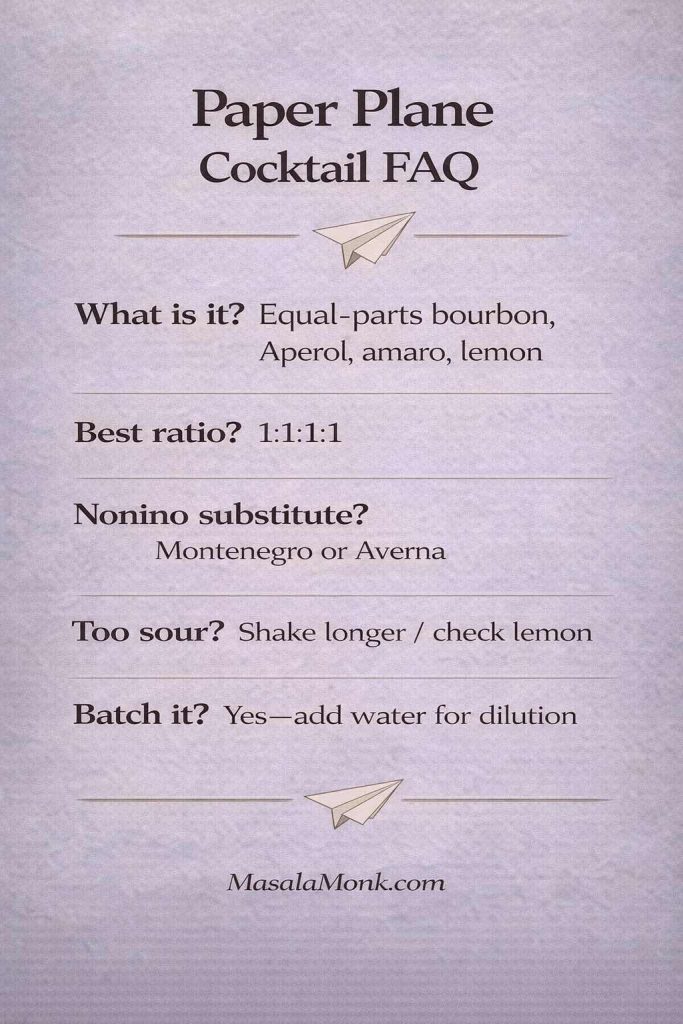
Also Read: Paper Plane Cocktail Recipe + Best Amaro Substitutes & Tips
Rob Roy Ingredients for the Classic Cocktail Drink Recipe
You’ll see a lot of ways people ask for this—rob roy ingredients, ingredients for a rob roy, rob roy drink ingredients, ingredients of a rob roy—and they all come down to the same simple lineup:
- Scotch whisky
- Sweet vermouth
- Aromatic bitters
- Garnish (cherry or citrus twist)
That list is short, but each ingredient pulls real weight. In a drink with five or six components, one slightly tired bottle might not show up as strongly. In a three-ingredient classic, it absolutely does.
Scotch whisky for Rob Roy
Scotch whisky is the soul of this drink. If you want a robust, steady Rob Roy cocktail, a blend can be a great choice—smooth, consistent, friendly to vermouth. That’s why you’ll see people use familiar blends and why there are so many “brand + Rob Roy” combinations floating around in cocktail culture.
On the other hand, a single malt can make a Rob Roy feel more distinctive—more fruit, more honey, more oak, or more smoke depending on what you pour. That can be wonderful. It can also become intense quickly. The beauty of the Rob Roy is that it lets you discover what you like without needing a lab.
If you want a clear overview of Scotch categories—single malt vs blended Scotch and what those terms actually mean—the Scotch Whisky Association’s guide to Scotch whisky categories is a simple, authoritative explainer.
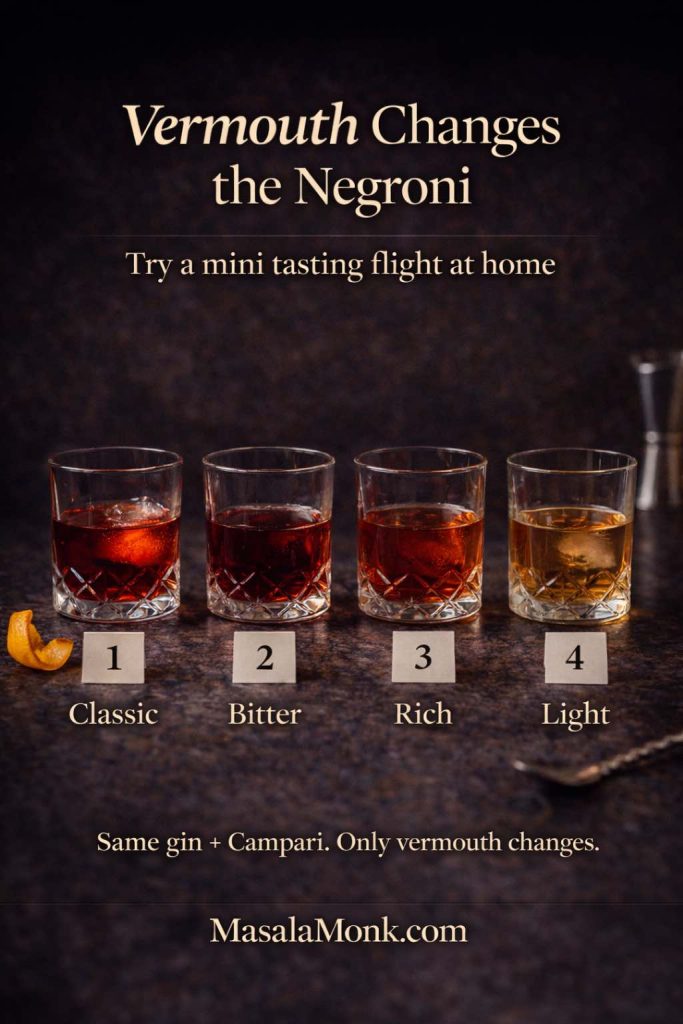
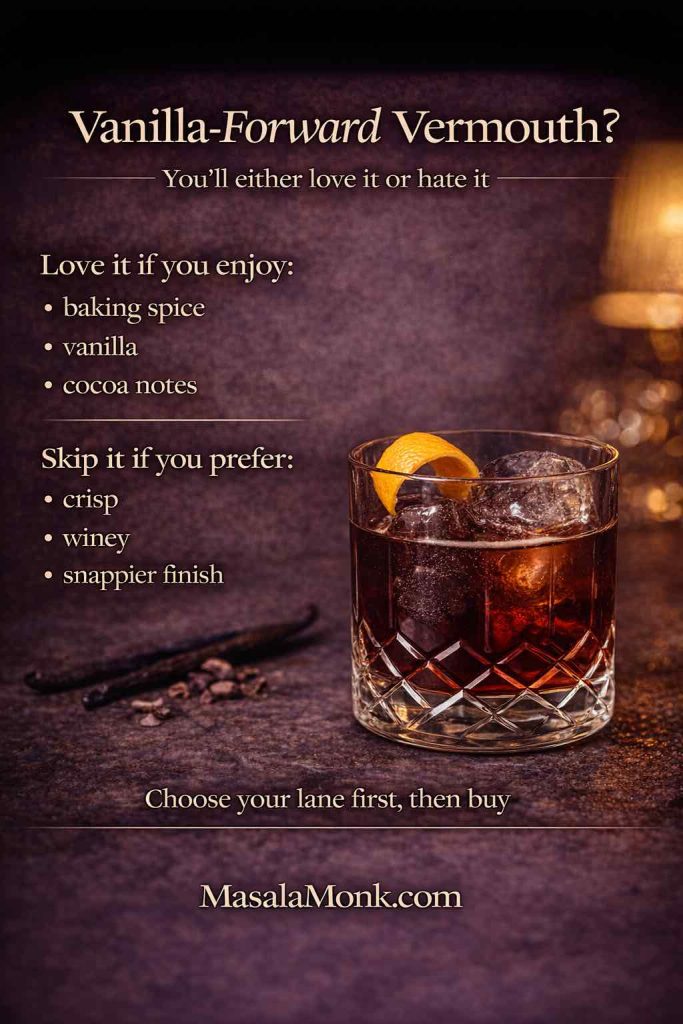
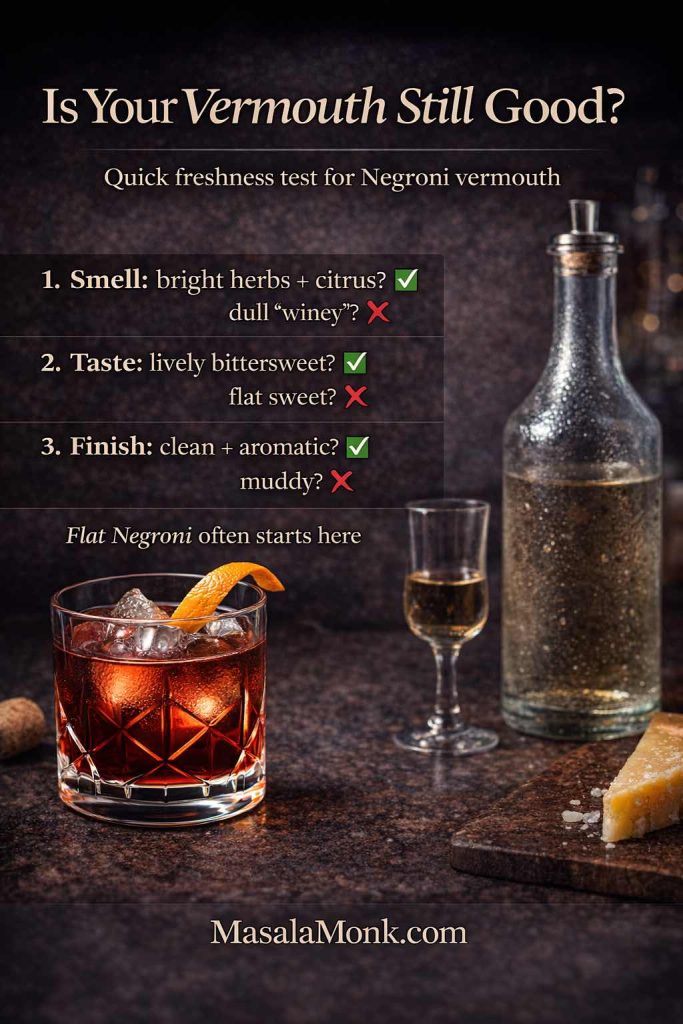
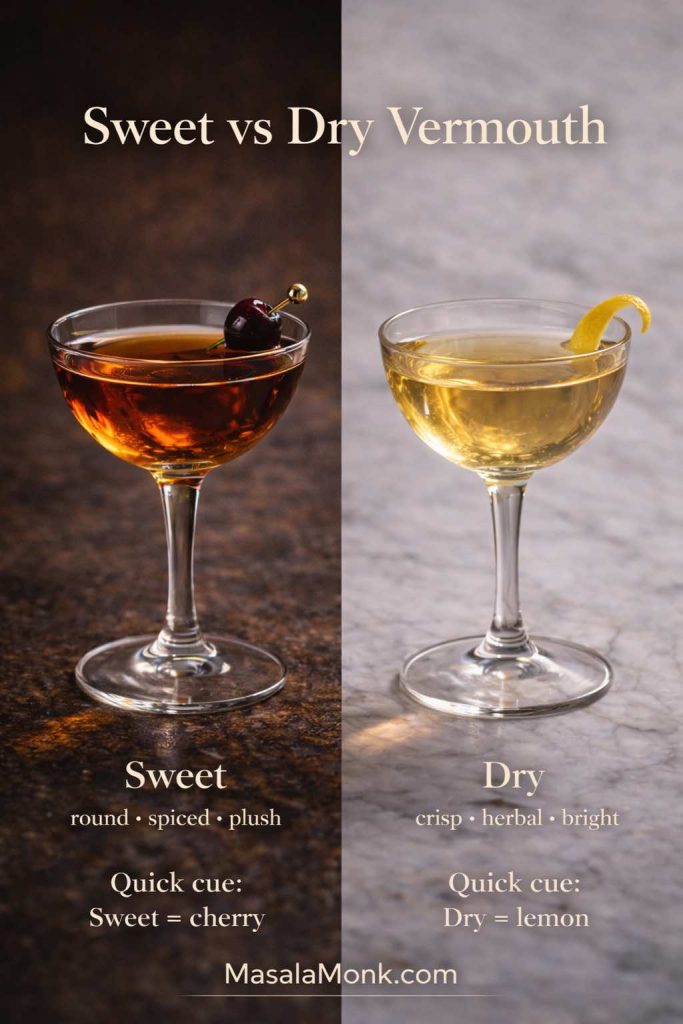
Sweet vermouth (and why freshness matters)
Sweet vermouth is the ingredient that turns whisky into a cocktail rather than “whisky plus something.” It contributes sweetness, yes, but also bitterness and aromatics: herbs, spice, dried fruit. It’s the bridge between the whisky’s warmth and the bitters’ structure.
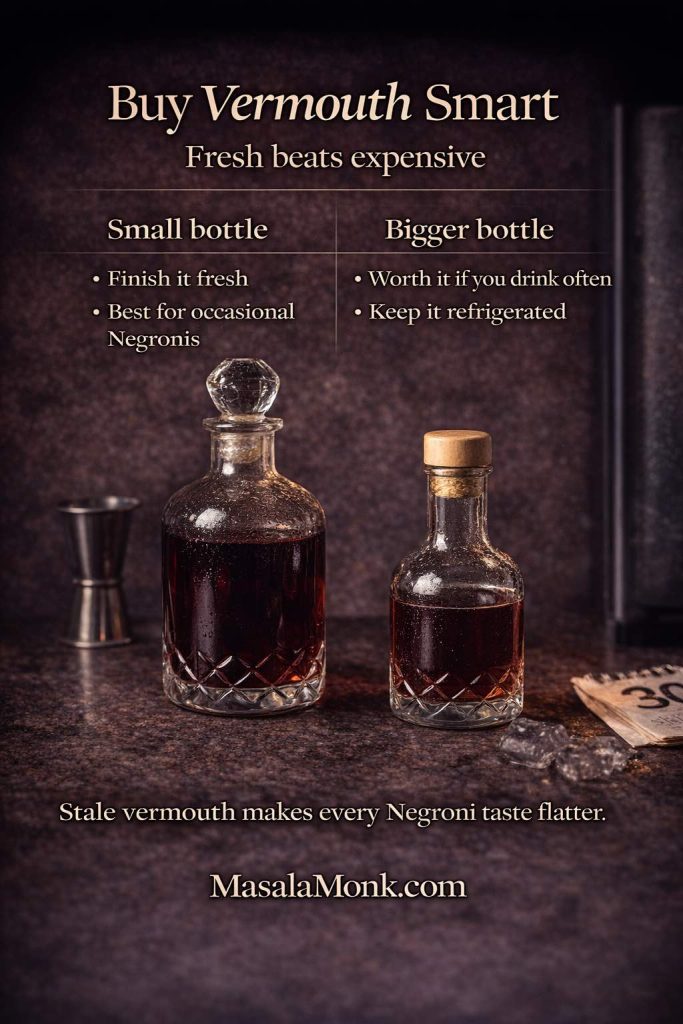
Because vermouth is a fortified, aromatized wine, it changes after opening. Treat it like wine, not like whisky. That’s where the biggest “home cocktail glow-up” lives. If you want to understand why, The Spruce Eats’ vermouth overview is a solid reference on what vermouth is and how it behaves.
Aromatic bitters (Angostura and the “two dashes” magic)
Bitters act like seasoning. They tighten the drink, deepen the aroma, and keep the vermouth sweetness from feeling floppy. Angostura is the classic choice and is often what people mean when they reference bitters in whisky cocktails. If you enjoy the backstory behind the bottle, the official Angostura “Our Story” page is a fun, quick read.
Garnish (Rob Roy garnish)
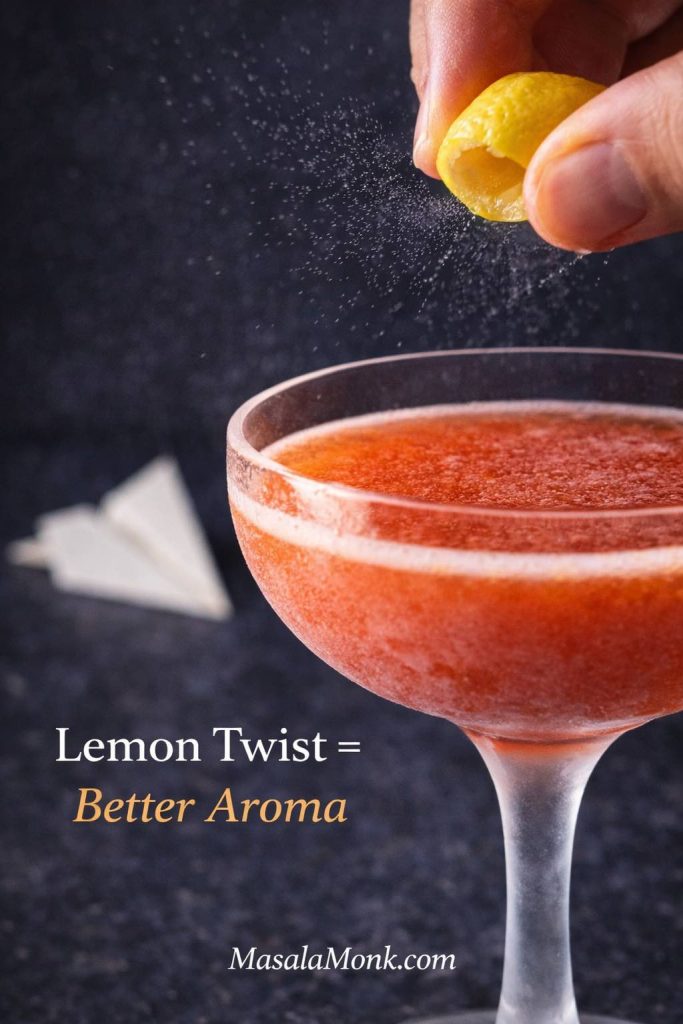
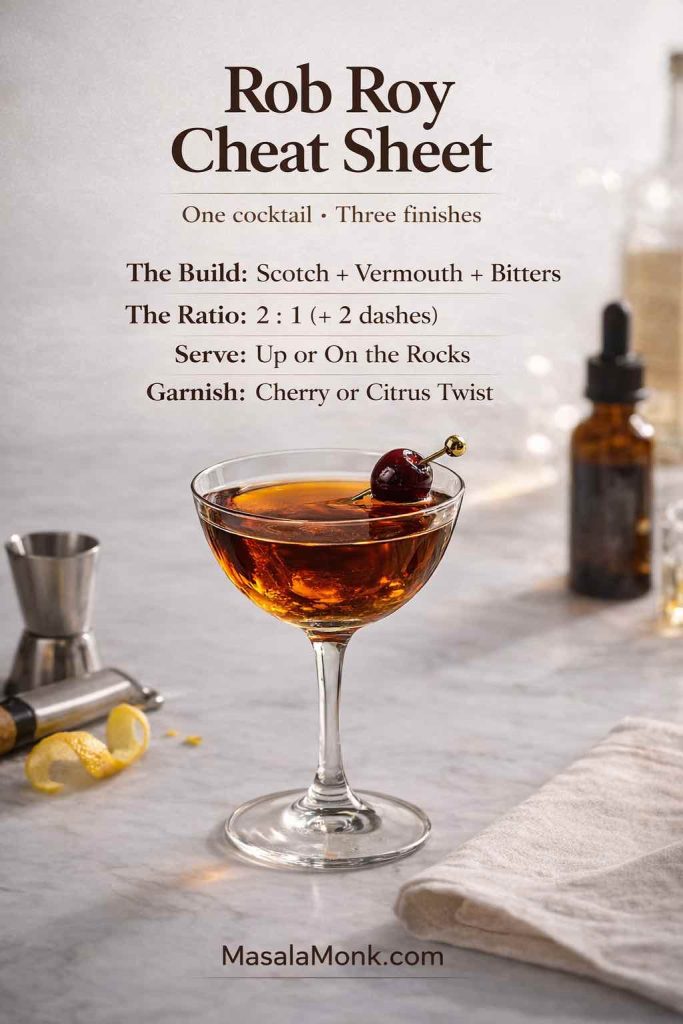
A Rob Roy garnish is more than garnish; it’s aroma. A cherry leans into the drink’s richness. An orange twist makes it feel vivid. A lemon twist makes it feel clean and lifted—especially in a dry Rob Roy drink.
If you’re only going to do one garnish well, choose the one you love most and repeat it. Consistency teaches you faster than constantly switching.
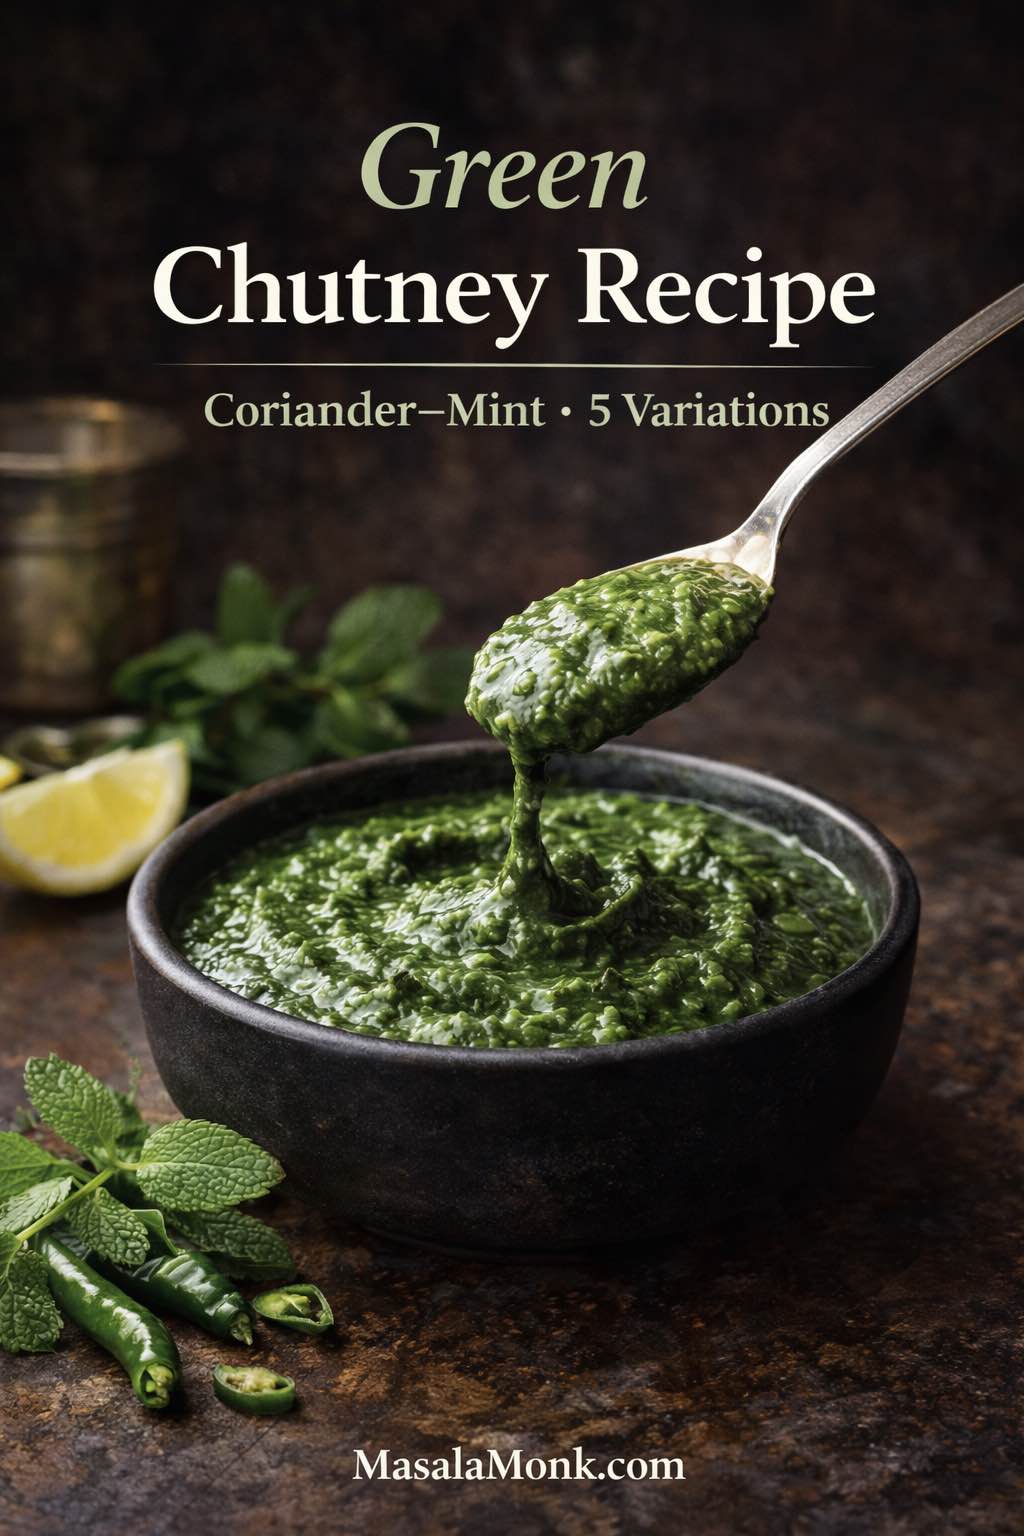
Also Read: Green Chutney Recipe (Coriander–Mint / Cilantro Chutney)
How to Make a Rob Roy: The Stir That Changes Everything
“How to make a Rob Roy” sounds like it should be elaborate—because the drink feels elegant—yet the method is almost minimalist. You stir with ice, you strain, you garnish.
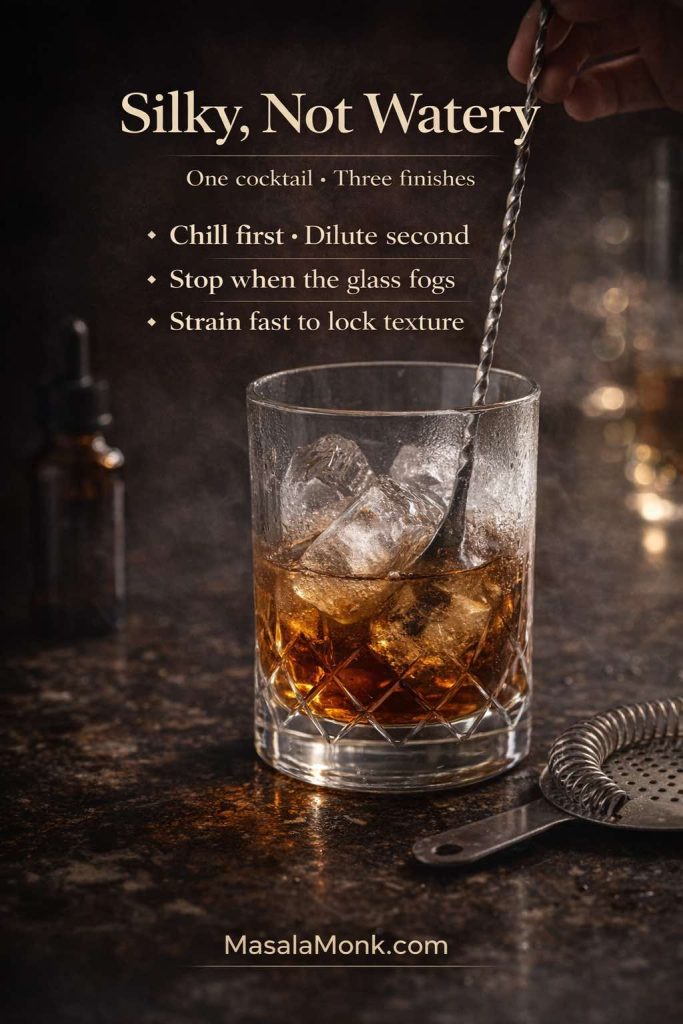
Still, that stir is doing the heavy lifting. It’s not just mixing. It’s chilling the drink to the right temperature and adding the right amount of water so the flavors become unified instead of separate.
The reliable method (how do you make a Rob Roy or how to mix a Rob Roy)
- Chill the glass if you’re serving the drink up. Even a quick chill helps.
- Add Scotch whisky, vermouth, and bitters to a mixing glass (or any sturdy glass you can stir in).
- Add plenty of ice.
- Stir until the drink is very cold and slightly glossy.
- Strain into your glass.
- Add the garnish.
That’s the whole method. What makes it special is how it feels when it’s done right: smooth, cohesive, not harsh.
Rob Roy up vs Rob Roy on the rocks
A Rob Roy up is precise and aromatic. It stays concentrated. It feels like a tailored choice.
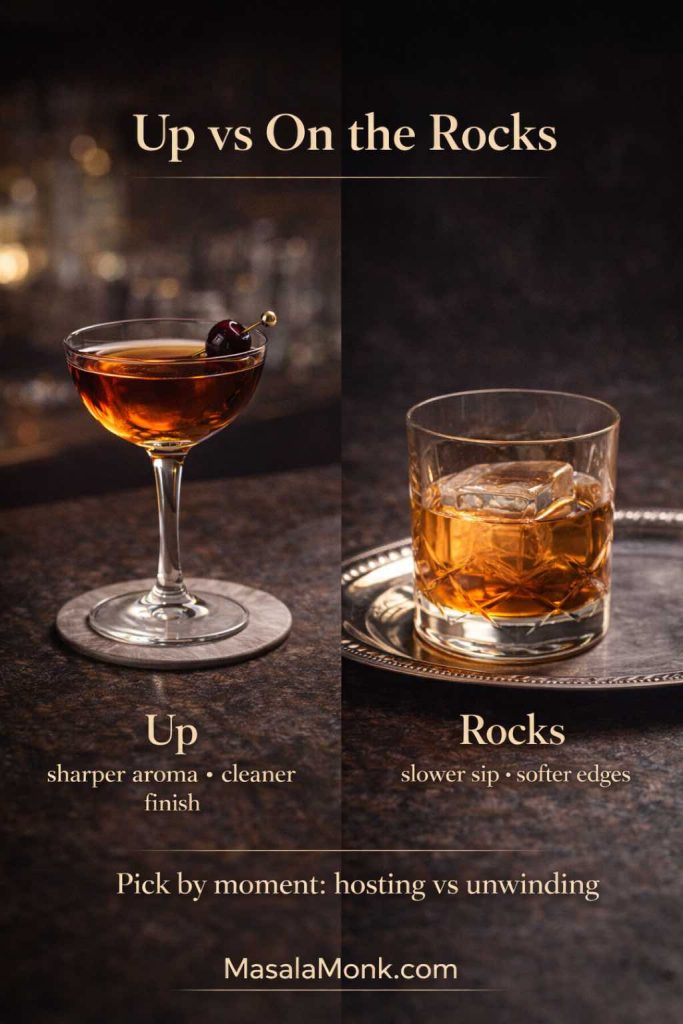
A Rob Roy on the rocks is slower and softer. It evolves as the ice melts, becoming gentler over time. This style is especially nice when you’re eating, because the cocktail stays in step with snacks and conversation rather than demanding your attention.
Neither is “better.” They’re just different versions of comfort.
Also Read: Sandwich for Breakfast: Breakfast Sandwich Recipe + 10 Variations
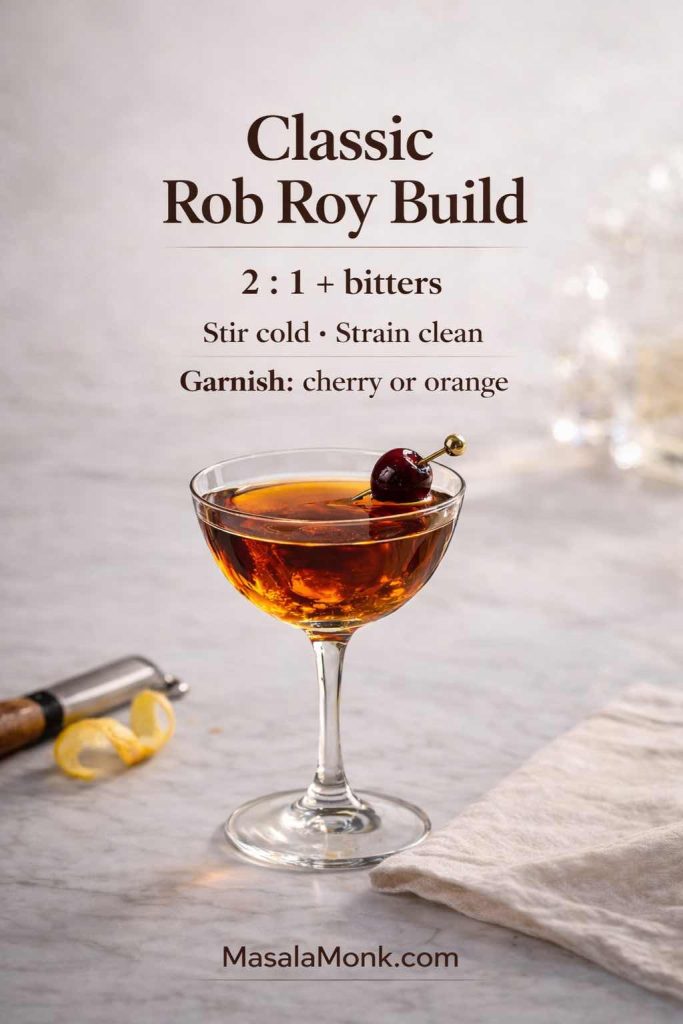
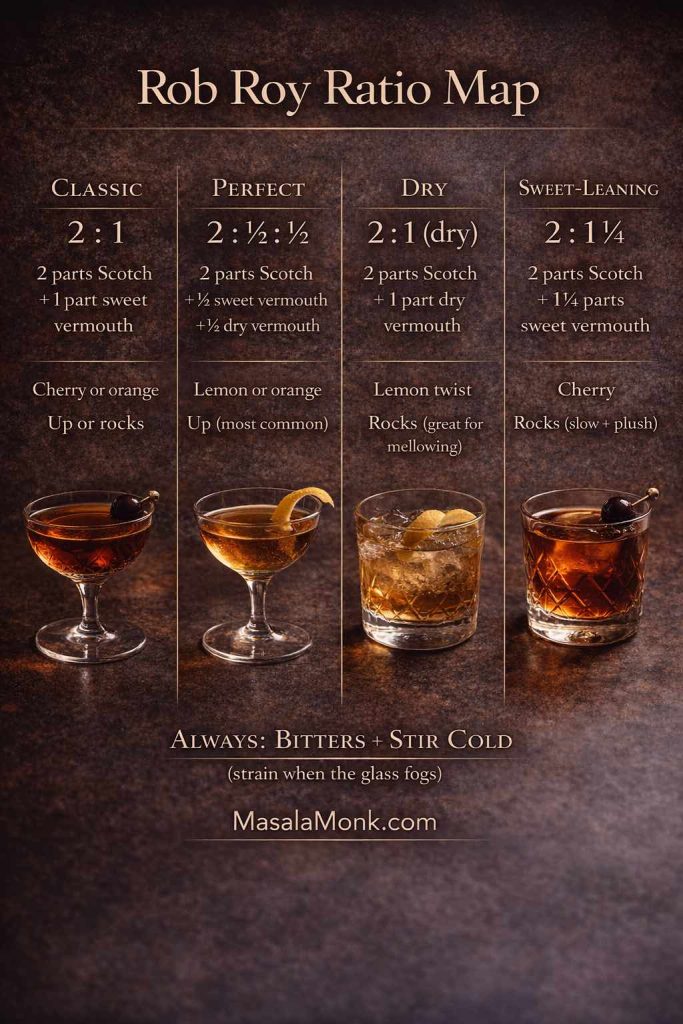
Rob Roy Drink Recipe: The Classic Ratio (and the ml version)
Here is the classic Rob Roy drink recipe in a clean, dependable ratio:
- 2 oz (60 ml) Scotch whisky
- 1 oz (30 ml) sweet vermouth
- 2 dashes aromatic bitters
Stir with ice until very cold, strain, garnish.
If you prefer thinking in milliliters, this is your rob roy cocktail recipe ml version: 60 ml Scotch, 30 ml sweet vermouth, bitters.
This ratio is popular for a reason. It’s whisky-forward without being aggressive, and the vermouth stays present without turning the drink syrupy. It’s also the easiest place to start if you’re going to explore variations.
Also Read: Strawberry Smoothie Recipes (12 Easy Blends + Bowls & Protein Shakes)
Rob Roy Cocktail Drink Recipe Variations: Perfect, Dry, and Sweet
The best variations aren’t gimmicks. They’re different expressions of the same template. Each one works because it adjusts the vermouth in a way that changes the drink’s personality without breaking its structure.
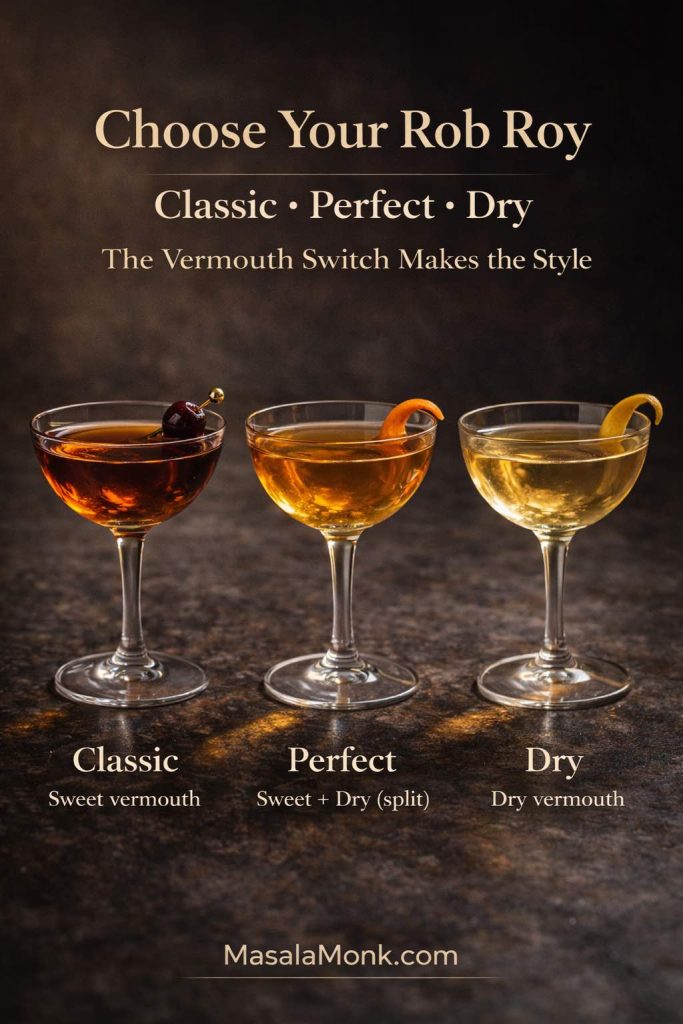
Perfect Rob Roy
A perfect Rob Roy uses both sweet and dry vermouth. The result sits beautifully in the middle: aromatic and balanced, less sweet than the classic, yet still rich enough to feel satisfying.
Perfect Rob Roy ingredients
- 2 oz (60 ml) Scotch whisky
- ½ oz (15 ml) sweet vermouth
- ½ oz (15 ml) dry vermouth
- 2 dashes aromatic bitters
Stir, strain, garnish with a lemon or orange twist.
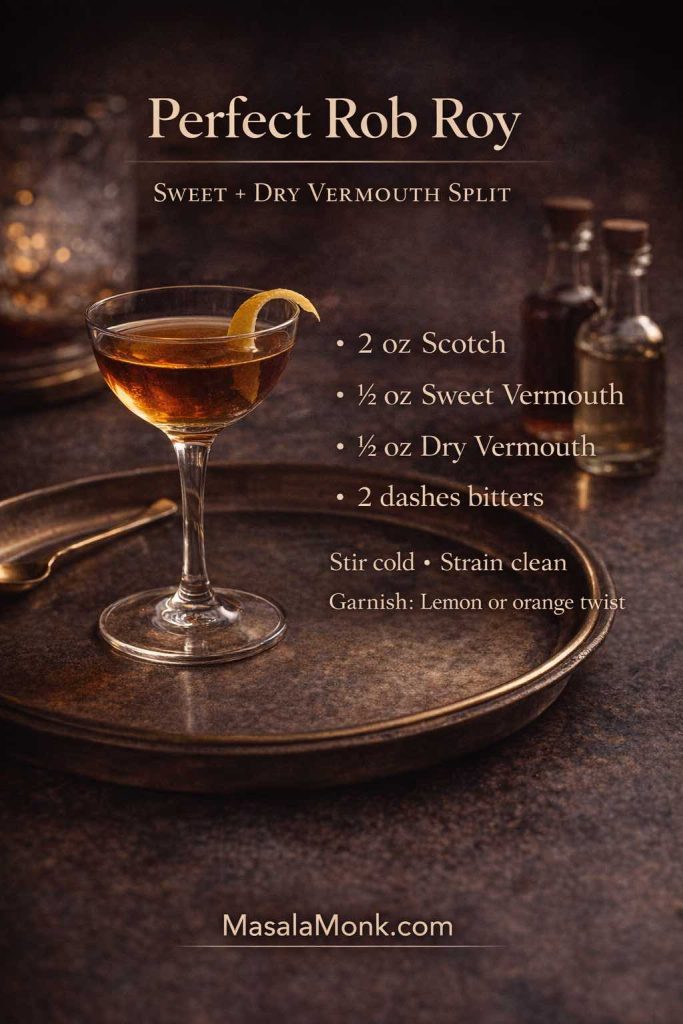
This is often the “crowd-pleaser” version. If someone says they want a Rob Roy but worry it will be too sweet, the perfect Rob Roy recipe is a confident answer. It’s also a wonderful way to use both vermouth styles without making a drink that feels like an experiment.
You might see people casually call it a “perfect Rob Roy martini” because it’s served in a martini-style glass. The build is still a stirred Scotch cocktail; the glass is simply a serving choice.
Recipe for perfect Rob Roy (simple recap): 60 ml Scotch, 15 ml sweet vermouth, 15 ml dry vermouth, bitters, stirred and strained.
Dry Rob Roy
A dry Rob Roy swaps sweet vermouth for dry vermouth. That single change makes the drink sharper and more lifted. It can feel brisk, herbal, and surprisingly refreshing while still being unmistakably whisky-forward.
Dry Rob Roy drink recipe
- 2 oz (60 ml) Scotch whisky
- 1 oz (30 ml) dry vermouth
- 1–2 dashes aromatic bitters
Stir, strain, garnish with a lemon twist.
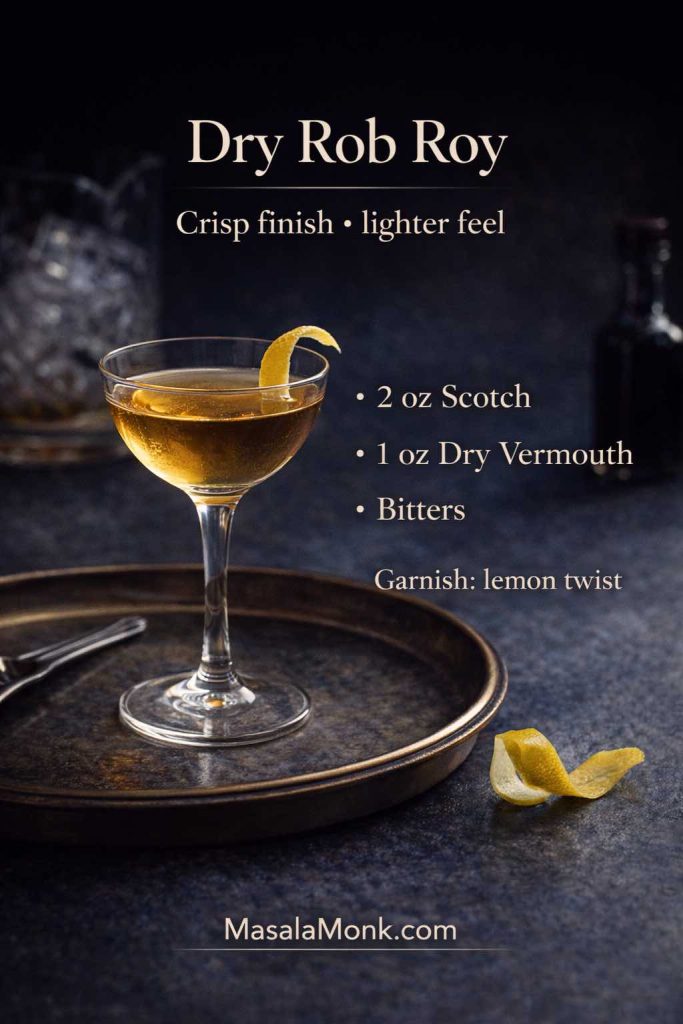
If you’ve ever wanted a Rob Roy that feels less plush and more precise, this is it. It’s also a strong choice when you’re serving snacks that are rich or spicy, because the dry vermouth’s crispness cuts through heaviness.
Dry Rob Roy on the rocks is particularly good. It slows the drink down, and the gradual dilution can make the dry vermouth feel more perfumed rather than sharp. If you like a citrus finish, a lemon twist is the natural pairing—this is essentially what people mean by “dry Rob Roy on the rocks with a twist.”
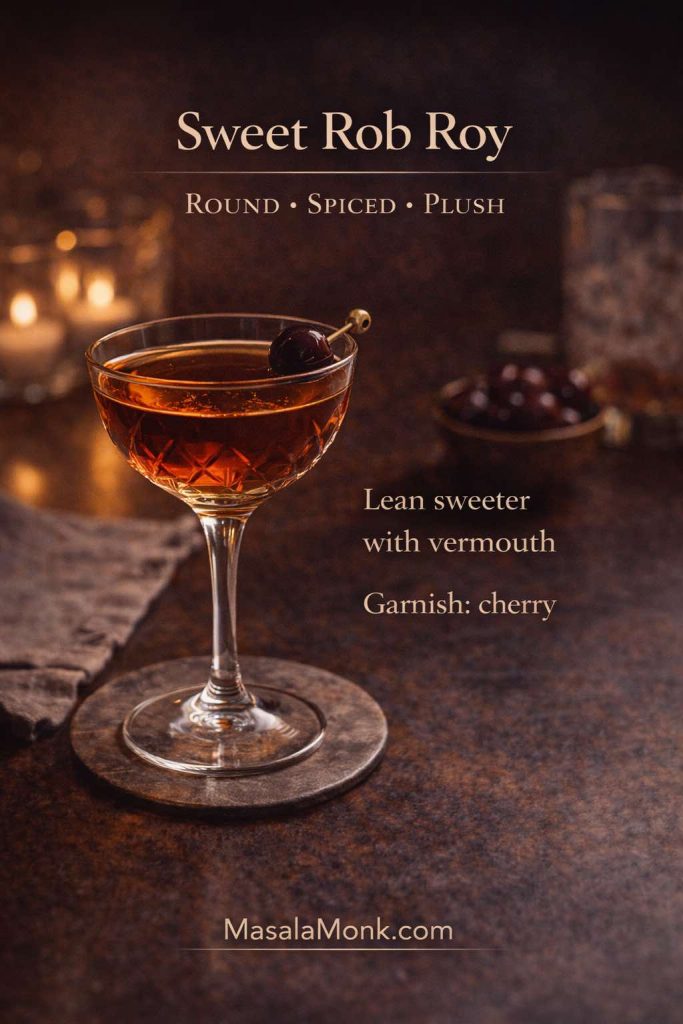
Sweet Rob Roy Drink Recipe
A classic Rob Roy already uses sweet vermouth, yet sometimes you want the cocktail to lean rounder—more lush and comforting, less sharp. That’s where a sweet Rob Roy recipe comes in.
There are two clean ways to achieve it without turning the drink into a sugar bomb:
- Choose a richer sweet vermouth.
- Nudge the ratio slightly toward vermouth.
Sweet Rob Roy drink recipe (richer lean)
- 2 oz Scotch whisky
- 1¼ oz sweet vermouth
- 2 dashes bitters
Stir, strain, garnish with a cherry or orange twist.
A sweet Rob Roy on the rocks can be especially lovely on a cold evening. The ice gradually softens the drink and stretches the experience, keeping it smooth and leisurely.
Also Read: Classic Rum Punch + 9 Recipes (Pitcher & Party-Friendly)
Rob Roy Glass, Rob Roy Cocktail Glass, and the Role of Presentation
A Rob Roy doesn’t require special glassware, but it does benefit from a thoughtful choice. The right glass helps aroma rise and keeps the drink feeling “finished.”
- For Rob Roy up, a coupe or Nick & Nora is ideal. The shape gathers aroma, and the drink feels elegant in your hand.
- For Rob Roy on the rocks, a rocks glass is the classic. It’s comfortable, stable, and suits slow sipping.
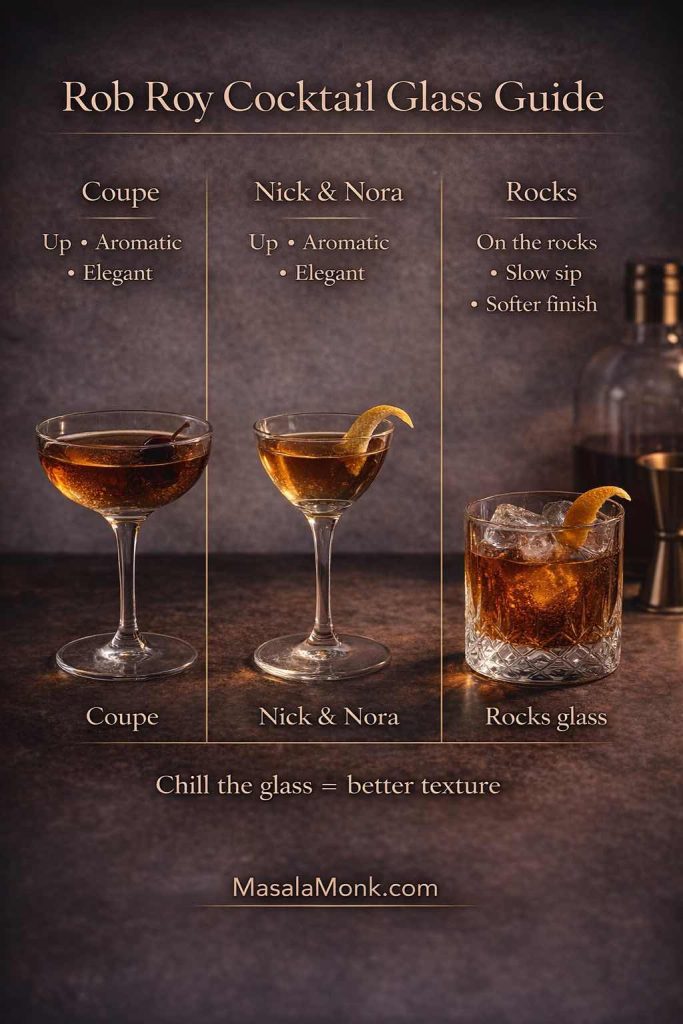
If you’re working with what you have, a small wine glass can do the job surprisingly well—just chill it first. The drink cares more about temperature than tradition.
Also Read: Moscow Mule Recipe (Vodka Mule): The Master Formula + 9 Variations
Best Scotch for a Rob Roy Drink Recipe
It’s natural to wonder about the best scotch for a rob roy or the best scotch for rob roy cocktail, especially because Scotch can vary so wildly. Instead of chasing a single “correct” bottle, focus on the experience you want.
If you want smooth, classic, and easy
A blended Scotch is often perfect. It tends to be balanced, which helps the vermouth and bitters integrate seamlessly. This is also the easiest direction for hosting, because the drink will land well with the widest range of palates.
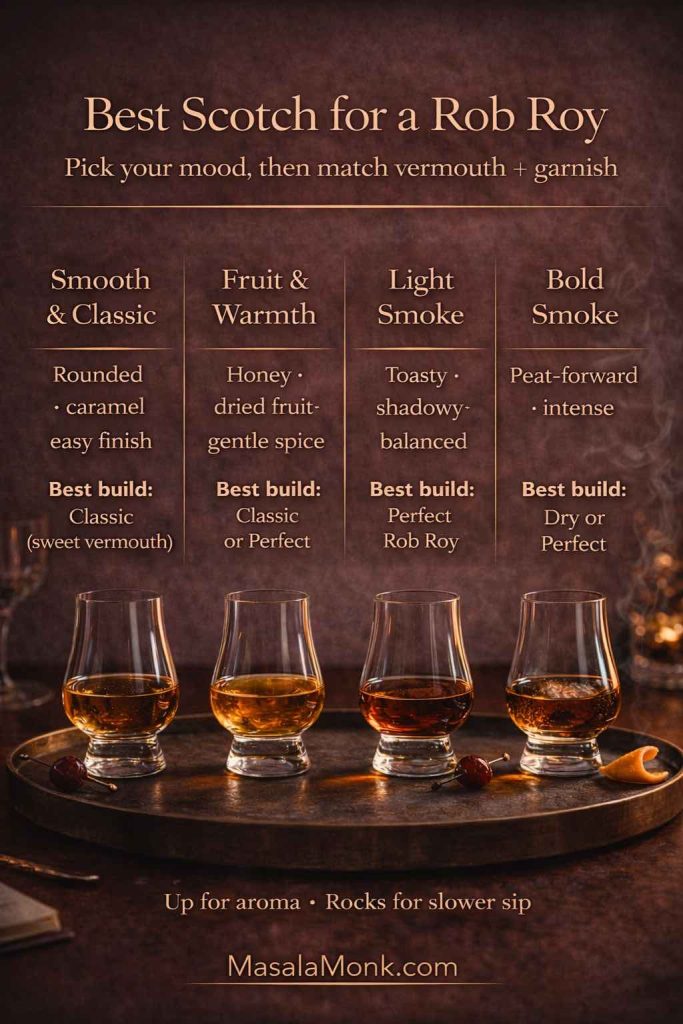
If you want fruit and warmth
Try a Scotch with honeyed, orchard-fruit notes. It can make the Rob Roy feel like dried apricots, toast, and gentle spice. An orange twist often works beautifully here.
If you want a whisper of smoke
A lightly peated Scotch can be wonderful in a Rob Roy. The smoke adds a shadowy complexity without overwhelming the vermouth. A cherry garnish can make this version feel especially rich.
If you want bold smoke
Heavily peated whisky can dominate the Rob Roy. For smoke lovers, that intensity can be thrilling. For a more balanced pour where the vermouth still speaks, a gentler Scotch tends to work better.
If you’re ever unsure what category a bottle fits into, the Scotch Whisky Association’s categories page makes it easy to decode the label without turning it into homework.
Also Read: 7 Pizza Sauce Recipes | Marinara, White Garlic, Alfredo, Buffalo, BBQ, Vodka & Ranch
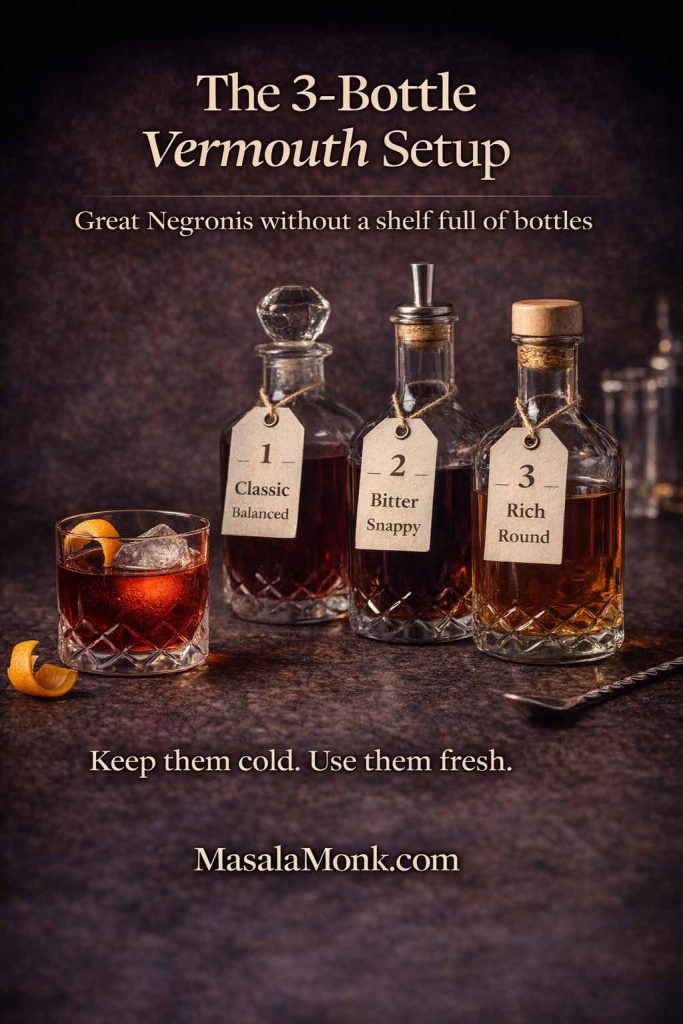
Best Vermouth for a Rob Roy Cocktail Drink Recipe
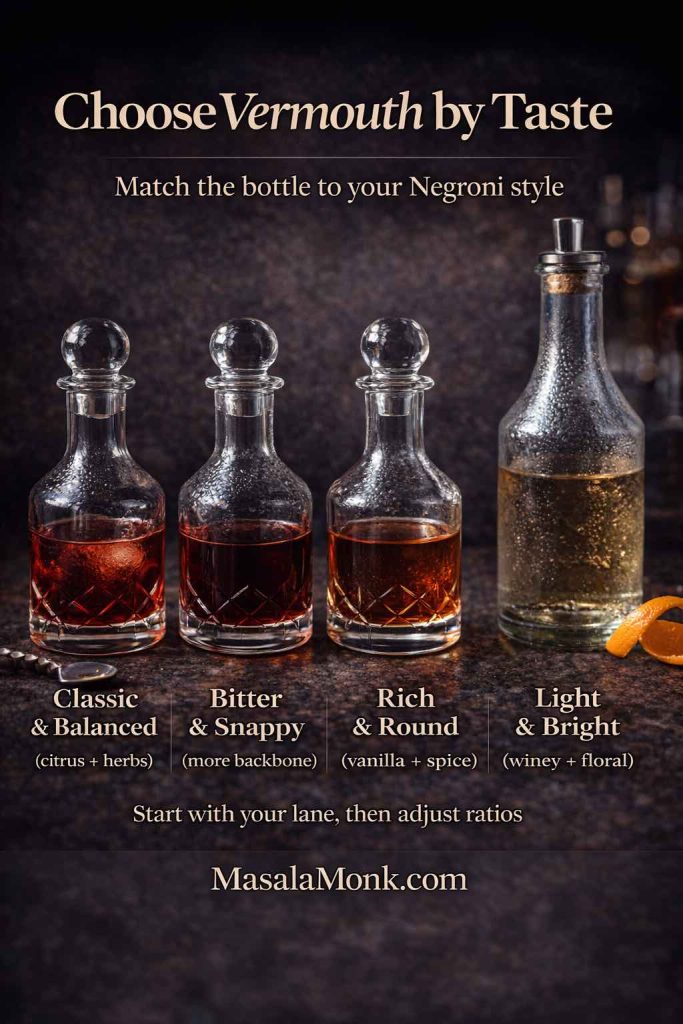
Because vermouth plays such a visible role in the flavor, “best vermouth for rob roy” is a more meaningful question than it first appears. A Rob Roy can taste plush and dessert-like with one vermouth, then herbal and bittersweet with another—all without changing the whisky.
Match vermouth to the Scotch’s personality
If your Scotch is soft and honeyed, a more herbal sweet vermouth can add contrast and complexity. If your Scotch is smoky or spicy, a rounder, fruitier sweet vermouth can soften the edges and make the drink feel cohesive.
For dry Rob Roy variations, fresh dry vermouth matters even more because there’s less sweetness to disguise dullness. A crisp, lively dry vermouth makes the cocktail feel lifted. A tired dry vermouth can make it feel thin.
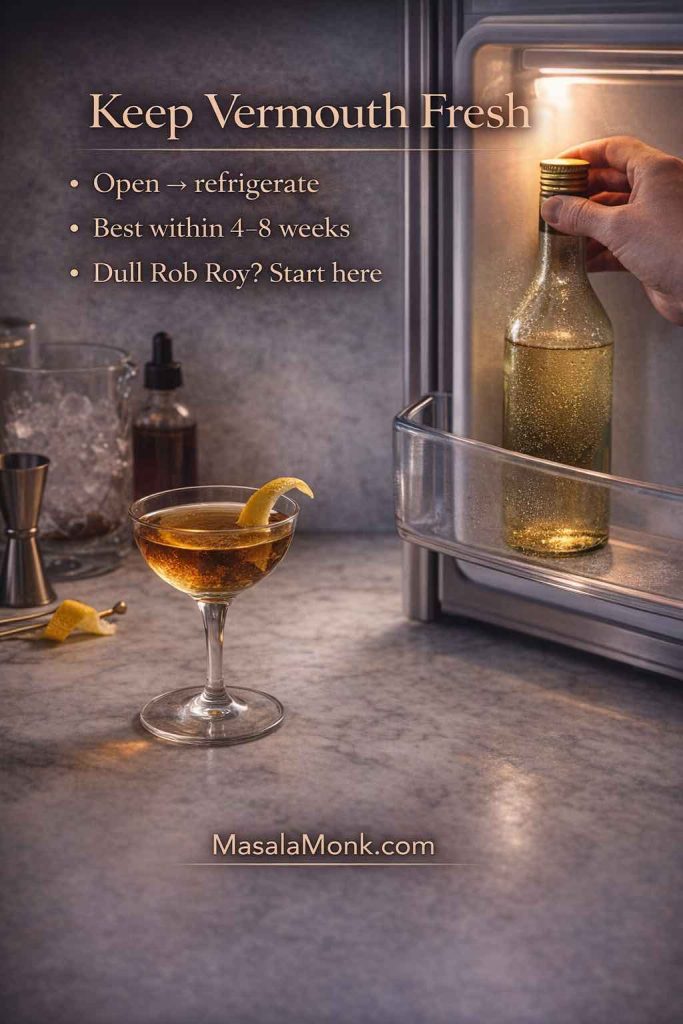
Treat vermouth like what it is: fortified wine
Refrigerate it after opening, and use it while it still tastes vibrant. If you want a clear baseline on what vermouth is and why it behaves this way, The Spruce Eats’ vermouth explainer is a practical, readable guide.
This one habit—keeping vermouth fresh—often makes the difference between a home Rob Roy that tastes “fine” and one that tastes genuinely polished.
Also Read: Vodka Pasta (Penne alla Vodka) + Spicy Rigatoni, Chicken, and Gigi Recipes
Rob Roy Cocktail History: A Classic With Staying Power
The Rob Roy has a kind of longevity that only a few drinks earn. It survives because it’s simple, adaptable, and built on ingredients that make sense together. You can keep the structure the same and change the character dramatically just by switching Scotch or vermouth.
If you like having a deeper, reference-style page that also discusses background and variations, Difford’s Guide’s Rob Roy entry is a rich resource. If you prefer a straightforward mainstream reference spec, Liquor.com’s Rob Roy recipe is clean and widely cited.
Neither link is required to enjoy the drink. They simply add context for anyone who likes knowing where a classic sits in the broader cocktail world.
Also Read: Marinara Sauce Recipe: Classic Homemade Marinara
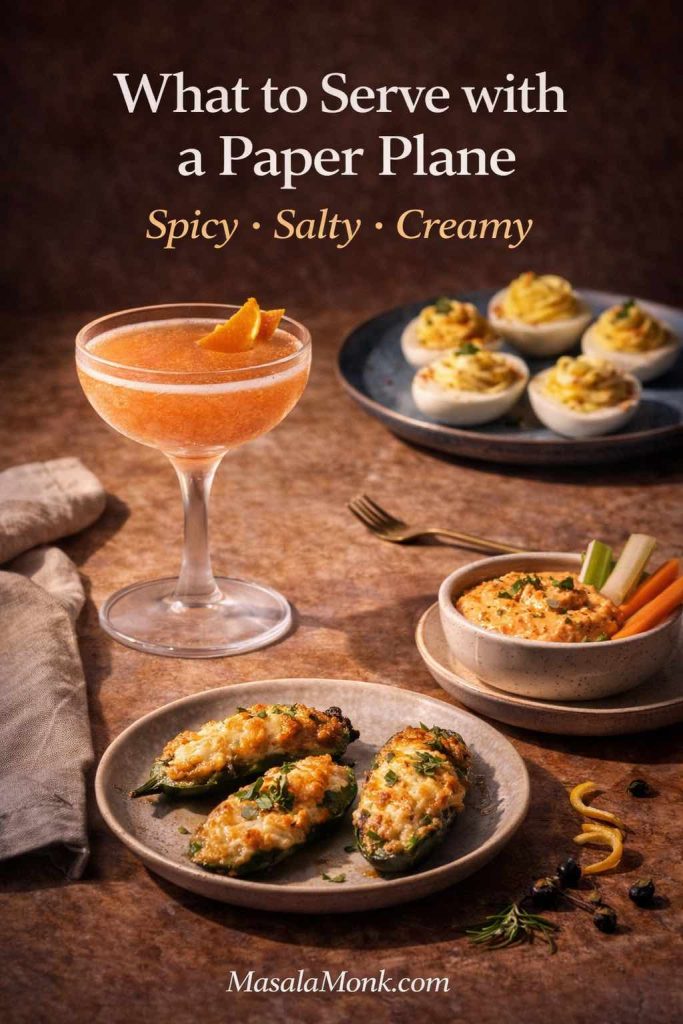
A Rob Roy Night at Home: Food Pairings That Make the Cocktail Shine
A Rob Roy is strong by design, which means it loves food—especially salty, creamy, crunchy bites that can stand up to whisky and vermouth. If you’re hosting, it also helps to choose foods that don’t require constant kitchen attention. The whole point is to enjoy the evening, not run a restaurant.
Build a board that does most of the work
A snack board is the easiest “make it feel special” move in home hosting. Cured meats, aged cheeses, olives, pickles, a little fruit, a few crackers—it’s the kind of spread that makes a Rob Roy feel inevitable.
If you like structure, MasalaMonk’s guide to the 3-3-3-3 charcuterie board approach makes it easy to build something abundant without overbuying.
A Rob Roy on the rocks pairs beautifully with a board because the drink’s slow evolution mirrors slow grazing.
Add something spicy and creamy for energy
Baked jalapeño poppers are a near-perfect match for whisky cocktails: heat, creaminess, a crispy bite, and enough boldness to keep your palate interested.
MasalaMonk’s baked jalapeño poppers recipe is ideal when you want something that feels “party food” without being complicated. If you’re pouring dry Rob Roy drinks, the crispness of dry vermouth plays especially well with spicy, rich bites.
Keep one classic, tidy bite on the table
Deviled eggs are quietly perfect for spirit-forward cocktails. They’re creamy, savory, and familiar in a way that makes the evening feel relaxed. They also behave well on a table—no drama, no mess.
MasalaMonk’s deviled eggs recipe includes variations, which is handy if you want to keep things classic or add a small twist without turning it into a theme.
A perfect Rob Roy feels particularly at home with deviled eggs because both land in that satisfying middle ground—rich, yet balanced.
Let a dip anchor the center of the spread
A dip is an effortless way to make a gathering feel abundant. People naturally gather around it, scoop, snack, and talk. Better still, dips can be made ahead, which keeps your evening calm.
For bold and indulgent, MasalaMonk’s buffalo chicken dip covers different cooking methods so you can choose what fits your schedule. For creamy comfort, MasalaMonk’s spinach dip recipes offer multiple variations that work for different crowds.
If you want a warm, garlicky “dip delivery system” that feels more satisfying than crackers alone, homemade garlic bread is hard to beat. MasalaMonk’s homemade garlic bread loaf turns dips into something that feels almost like a meal.
Finish with crunch and salt
At some point, crunchy and salty becomes essential—especially alongside strong cocktails. Wings are a classic for a reason: crispy texture, bold flavor, endlessly snackable.
MasalaMonk’s air fryer chicken wings are a great option when you want crispness without fuss. Pair wings with a Rob Roy up if you want a more “bar” feel, or keep it on the rocks if you want the drink to drift slowly while people snack.
If you want a vegetarian-friendly crunchy option, potato appetizers are basically guaranteed to disappear. MasalaMonk’s potato appetizer ideas give you multiple directions—crispy, cheesy, party-friendly—without locking you into one format.
Add a cooling counterpoint so the table doesn’t feel heavy
If your spread leans spicy or rich, something cool and bright keeps everything from feeling too much. Tzatziki does that beautifully—yogurt tang, cucumber freshness, herbal lift.
MasalaMonk’s Greek tzatziki sauce guide gives a reliable base plus variations, making it easy to match whatever else you’re serving.
Also Read: Oat Pancakes Recipe (Healthy Oatmeal Pancakes)
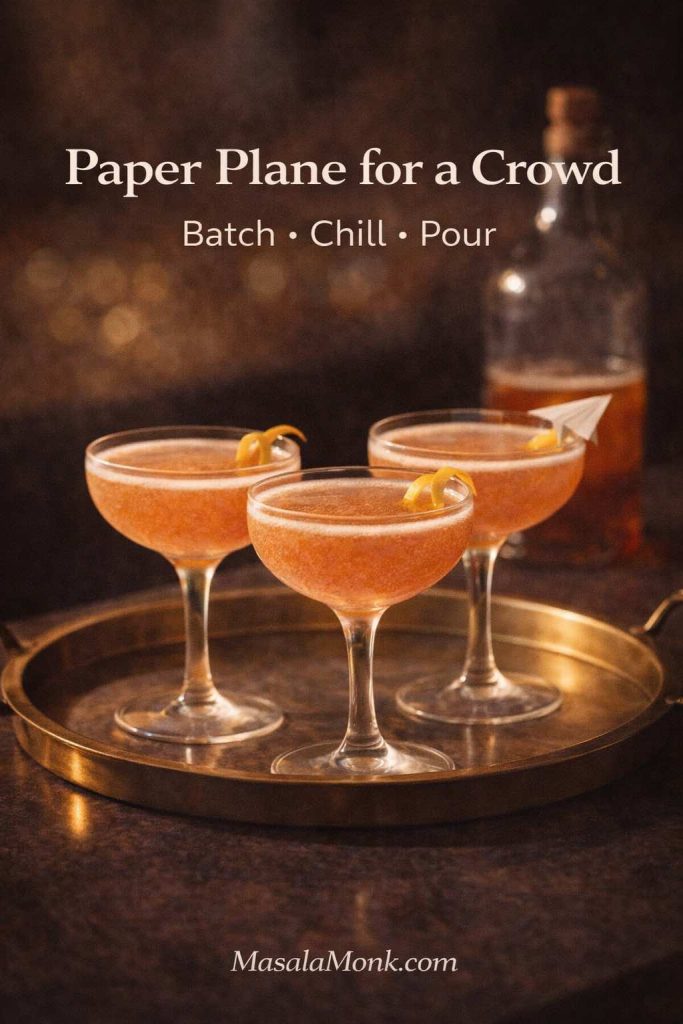
Rob Roy Drink Recipe for Hosting: Easy Rounds at Home
One of the most charming things about this cocktail is how quietly it supports hosting. Stirring replaces shaking, so there’s no noise and no mess. Citrus doesn’t need to be juiced, and no syrup demands a prep session. As a result, you can make excellent drinks and still stay part of the room.
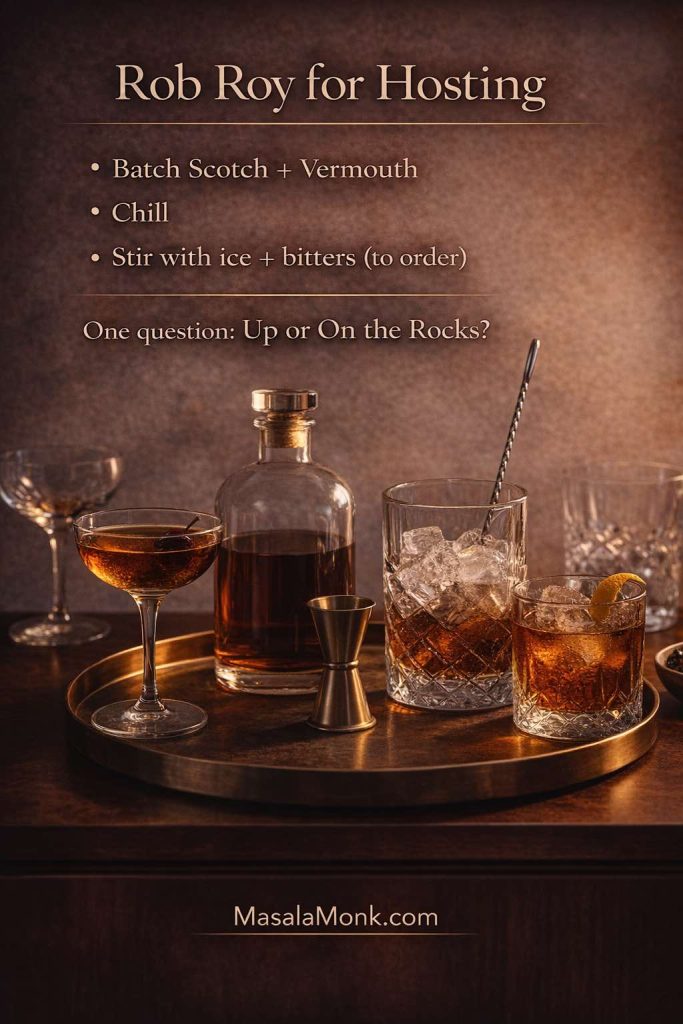
A simple approach that works wonderfully is to offer a few choices that cover most preferences:
- Classic Rob Roy (sweet vermouth)
- Perfect Rob Roy (half sweet, half dry vermouth)
- Dry Rob Roy (dry vermouth)
Then the only question you ask is “up or on the rocks?” It feels personal to guests, yet it keeps your workflow calm.
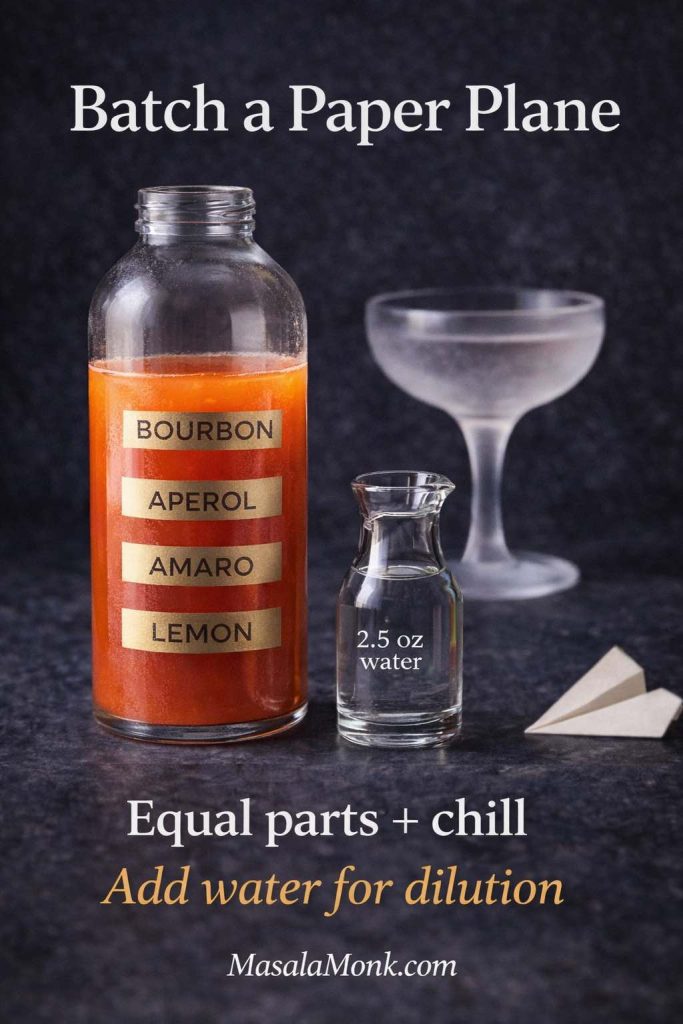
If you’re making a round, you can batch the base (Scotch + vermouth) in a bottle in the fridge, then add bitters and stir each drink with ice as needed. This keeps the pacing smooth and lets you stay present.
Also Read: How to Make Eggless Mayo at Home (Egg Free Mayonnaise Recipe)
Common Rob Roy Missteps (And How to Smooth Them Out)
Even with a simple recipe, your first few attempts might not taste exactly the same. That isn’t a failure; it’s the nature of a drink where temperature and dilution matter.
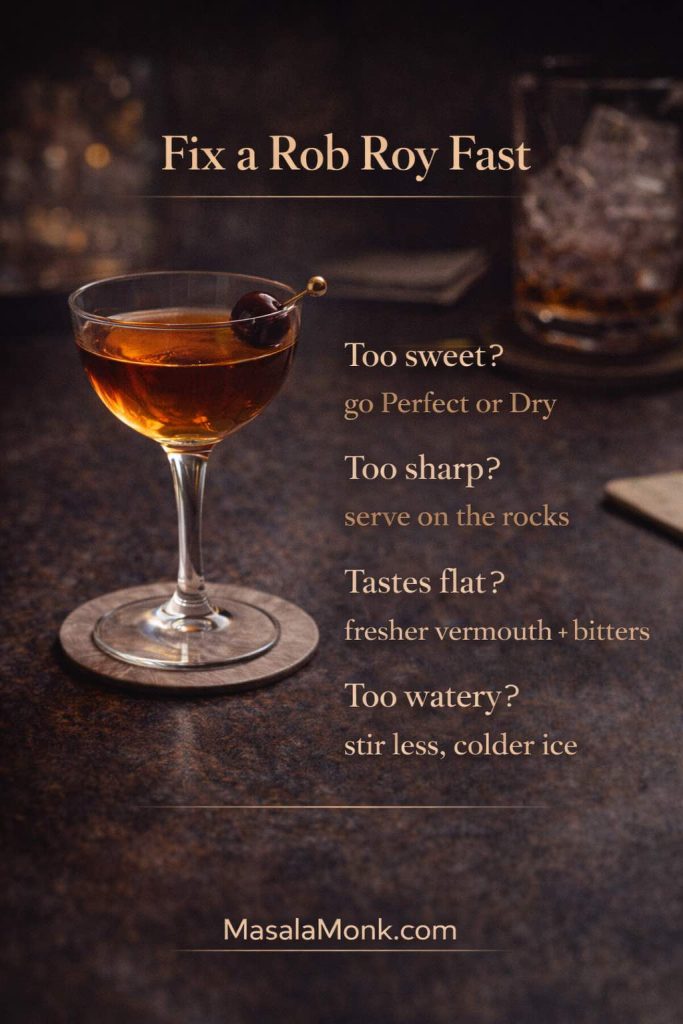
If it tastes flat
Vermouth is often the culprit. Fresh vermouth tastes aromatic and alive; tired vermouth tastes muted. Refrigeration and sensible use timelines help preserve flavor. The Spruce Eats’ vermouth guide explains the logic clearly.
If it tastes too sweet
Move toward a perfect Rob Roy recipe or a dry Rob Roy. Those variations are designed for exactly this preference. They change the drink’s balance without changing its identity.
If it tastes too sharp
Serve it on the rocks, or choose a softer Scotch. Both options smooth the experience without requiring new ingredients.
If it tastes watery
Stir a bit less, use colder ice, and strain promptly. Also, avoid using ice that’s already half-melted; it can dilute the drink before you even begin.
Also Read: Belgian Waffle Recipe + 5 Indian Twists on a Breakfast Classic
The Rob Roy as a House Cocktail You Can Make Yours
After you make this drink a few times, something shifts. It stops being “the Rob Roy drink recipe you learned” and becomes “your Rob Roy.” One Scotch will read warm and honeyed; another will land dry and structured. Preferences sharpen quickly—cherry versus twist, up versus on the rocks, quick and focused versus slow and mellow.
In time, a default emerges: the one you mix without thinking when someone’s at the door. Sometimes it’s the classic Rob Roy cocktail recipe because sweet vermouth rounds the whisky in exactly the way you like. Other nights, the perfect Rob Roy fits better because balance feels like the point. For a crisper profile, a dry Rob Roy drink makes sense; when winter calls for comfort, a sweet Rob Roy on the rocks can feel just right.
None of those choices are wrong. The drink endures because it isn’t a novelty—it’s a structure that holds taste, mood, and company with quiet confidence.
Once it clicks, you’ll find yourself reaching for it far more often than you expected.
Also Read: Double Chocolate Chip Cookies – Easy Recipe with 7 Variations
FAQs about Rob Roy Drink & its Recipe
1) What is a Rob Roy drink?
A Rob Roy drink is a classic Scotch-based cocktail made by stirring Scotch whisky with vermouth and bitters, then serving it either up or on the rocks. In essence, it’s a spirit-forward drink with a smooth, aromatic finish.
2) What are the Rob Roy ingredients?
The core Rob Roy ingredients are Scotch whisky, sweet vermouth, and aromatic bitters. Finally, it’s finished with a garnish—most commonly a cherry or a citrus twist.
3) What are the ingredients for a Rob Roy cocktail specifically?
Ingredients for a Rob Roy cocktail typically include 2 oz (60 ml) Scotch whisky, 1 oz (30 ml) sweet vermouth, and 1–2 dashes bitters. Additionally, a cherry or orange twist is a classic garnish choice.
4) How do you make a Rob Roy?
To make a Rob Roy, combine Scotch whisky, sweet vermouth, and bitters in a mixing glass with ice. Next, stir until thoroughly chilled, then strain into a chilled glass (for “up”) or over fresh ice (for “on the rocks”). Afterward, add your garnish.
5) How to make a Rob Roy cocktail that tastes balanced?
For a balanced Rob Roy cocktail, start with the classic 2:1 ratio (Scotch to sweet vermouth). Then, stir long enough to chill and lightly dilute the drink. If it still feels too sweet, shift toward a perfect Rob Roy or dry Rob Roy variation.
6) What is the best Rob Roy drink recipe ratio?
The most widely used Rob Roy drink recipe ratio is 2 oz Scotch whisky to 1 oz sweet vermouth, plus bitters. Alternatively, you can slightly increase the whisky for a drier profile or increase vermouth for a rounder profile.
7) What is the Rob Roy cocktail recipe in ml?
A common Rob Roy cocktail recipe ml build is 60 ml Scotch whisky + 30 ml sweet vermouth + 1–2 dashes bitters. Then, stir with ice and strain.
8) What is a perfect Rob Roy?
A perfect Rob Roy uses both sweet and dry vermouth instead of only sweet vermouth. Consequently, it tastes more aromatic and less sweet than the classic.
9) What is the perfect Rob Roy recipe?
The perfect Rob Roy recipe is 2 oz (60 ml) Scotch whisky, ½ oz (15 ml) sweet vermouth, ½ oz (15 ml) dry vermouth, plus bitters. Then, stir with ice, strain, and garnish.
10) What are perfect Rob Roy ingredients?
Perfect Rob Roy ingredients include Scotch whisky, sweet vermouth, dry vermouth, and bitters—plus a garnish such as lemon or orange twist. Notably, the vermouth is split evenly to create the “perfect” balance.
11) What is a dry Rob Roy?
A dry Rob Roy is a Rob Roy variation made with dry vermouth instead of sweet vermouth. As a result, it’s crisper, lighter, and less sweet.
12) What is the dry Rob Roy recipe?
The dry Rob Roy recipe is 2 oz (60 ml) Scotch whisky, 1 oz (30 ml) dry vermouth, and 1–2 dashes bitters. Then, stir with ice, strain, and garnish with a lemon twist.
13) What does “Rob Roy drink dry” mean?
“Rob Roy drink dry” generally refers to the dry Rob Roy variation (using dry vermouth). In some cases, it can also mean reducing sweet vermouth in the classic recipe for a drier taste.
14) What is a sweet Rob Roy?
A sweet Rob Roy typically leans richer by emphasizing sweet vermouth—either by choosing a fuller-bodied sweet vermouth or by slightly increasing the vermouth portion. Thus, it becomes rounder and more dessert-like.
15) What is the sweet Rob Roy drink recipe?
A sweet-leaning sweet Rob Roy drink recipe can be 2 oz Scotch whisky, 1¼ oz sweet vermouth, and bitters. Then, stir and strain; garnish with cherry or orange twist.
16) How to make a Rob Roy on the rocks?
To make a Rob Roy on the rocks, prepare the cocktail by stirring with ice first. Then, strain over fresh ice in a rocks glass. Thereafter, garnish as desired.
17) What is “dry Rob Roy on the rocks with a twist”?
This phrase usually refers to serving a dry Rob Roy over ice and finishing it with a citrus twist—most often lemon. Accordingly, it highlights both the serving style (on the rocks) and the garnish (twist).
18) What does “Rob Roy up” mean?
“Rob Roy up” means the cocktail is served without ice in the glass, strained into a chilled coupe or similar stemmed glass. Hence, the drink stays concentrated and aromatic.
19) What is the best vermouth for Rob Roy?
The best vermouth for Rob Roy depends on the style you prefer. For the classic, use sweet vermouth with a flavor profile you enjoy; for a dry Rob Roy, use a crisp dry vermouth. Furthermore, freshness matters—vermouth tastes best when stored properly after opening.
20) What is the best Scotch for a Rob Roy cocktail?
The best Scotch for a Rob Roy cocktail is one you enjoy the taste of, since it remains front and center. Generally, blended Scotch makes a smooth, approachable Rob Roy, while certain single malts can add extra character.
21) What is the difference between a Manhattan and a Rob Roy?
A Manhattan typically uses rye or bourbon, while a Rob Roy uses Scotch whisky. Otherwise, both often share the same template: whisky, vermouth, and bitters.
22) What does “Rob Roy recipe scotch” refer to?
“Rob Roy recipe scotch” simply emphasizes that Scotch whisky is the base spirit in the Rob Roy cocktail recipe. In other words, the drink is essentially the Scotch version of a Manhattan-style build.
23) Can I make a Rob Roy cocktail recipe without bitters?
You can make a Rob Roy without bitters, but it will usually taste flatter and less structured. If you’re out of bitters, try reducing vermouth slightly to keep the drink from feeling overly sweet.
24) What are common Rob Roy garnish options?
Common Rob Roy garnish options include a cherry (classic), orange twist (bright), and lemon twist (crisp). Depending on your preference, the garnish can push the drink warmer or fresher.
25) Is “Rob Roy recipe bourbon” actually a Rob Roy?
A “Rob Roy recipe bourbon” isn’t technically a Rob Roy because the defining feature is Scotch whisky. If you use bourbon, you’re closer to a Manhattan-style cocktail, even if the method is the same.