
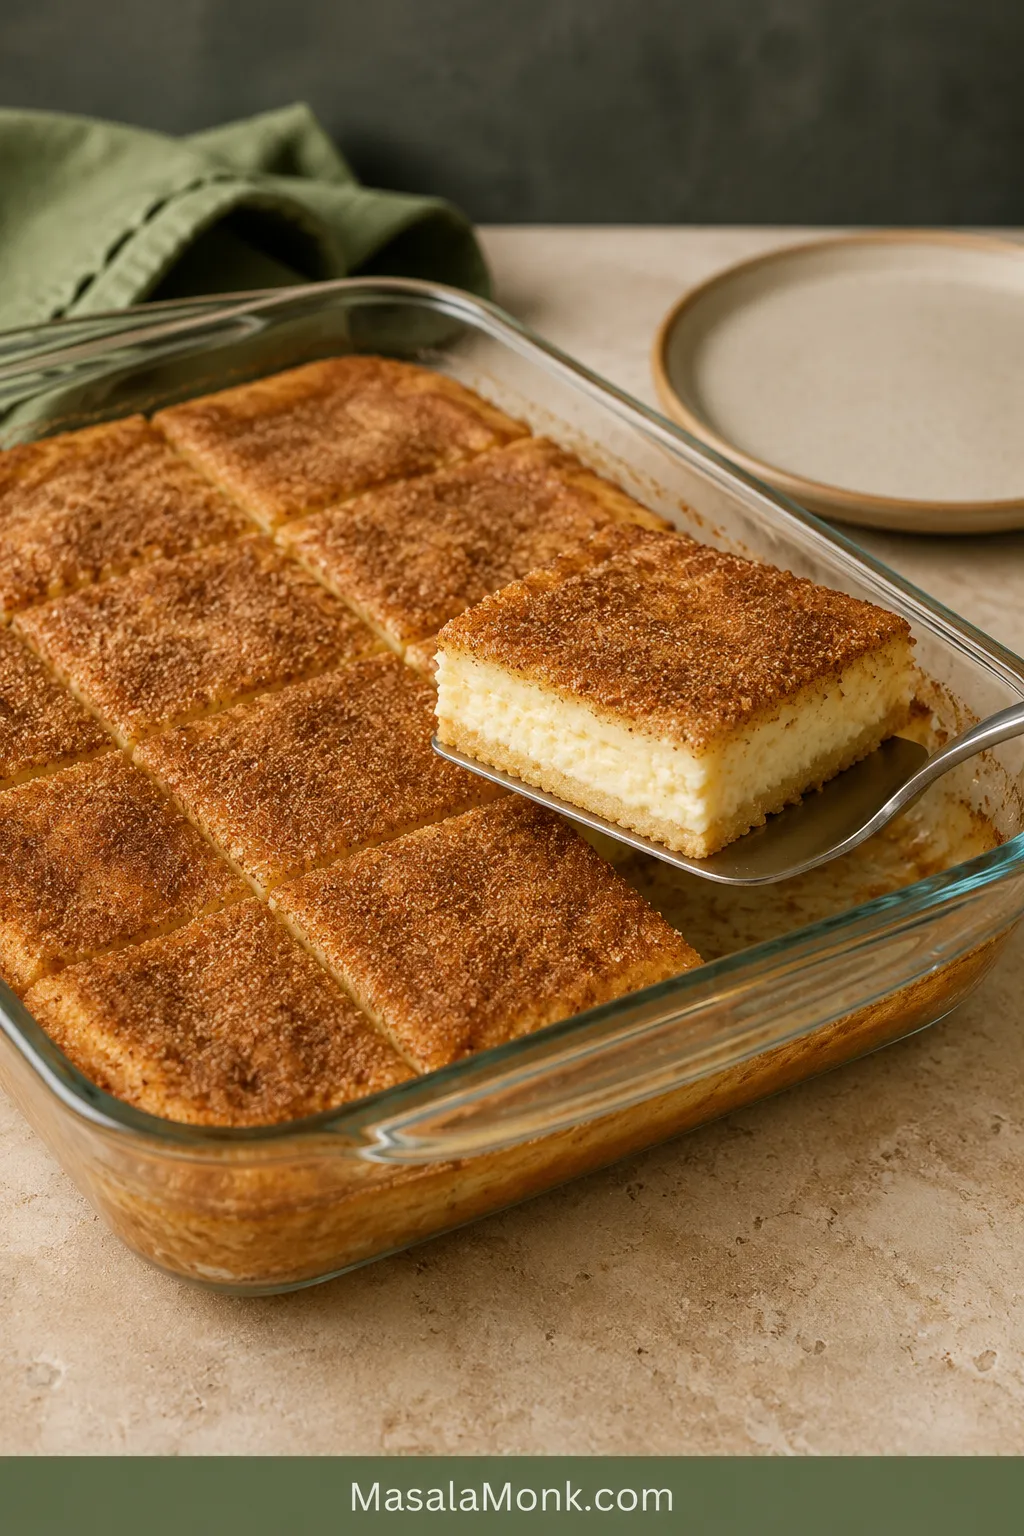
Two packages of crescent dough, one creamy filling and a cinnamon-sugar crust turn into a pan of Sopapilla Cheesecake with about 20 minutes of hands-on work. The top bakes golden and lightly crisp, the center settles into a smooth cheesecake layer, and the kitchen smells like cinnamon rolls and cheesecake arriving at the same time.
Yet one quiet problem trips people up: the upper pastry can look beautifully golden while the dough underneath is still pale and gummy.
Golden on top is not enough—check the bottom before you pull the pan.
Quick Answer: How to Make Sopapilla Cheesecake
Sandwich a lightly sweetened cream cheese filling between two cold crescent-dough sheets. Brush the top with melted butter, cover it with cinnamon sugar and bake at 350°F / 175°C.
In a conventional oven, begin checking at about 28 minutes. The edges should look set with only a gentle wobble in the middle, and the lower pastry should look baked through—not pale and doughy. Cool for at least 20 minutes, or wait about one hour for bars that hold an edge.
Sopapilla Cheesecake Recipe
Easy Sopapilla Cheesecake Bars
Creamy, tangy cheesecake between tender crescent layers, finished with a crisp cinnamon-sugar top that tastes buttery without feeling heavy.
| Active preparation | 20 minutes |
|---|---|
| Conventional oven | Begin checking at 28 minutes; usually 30–35 minutes |
| Fan-assisted oven | Start checking at about 25 minutes; continue until all three doneness cues are present |
| Cooling | 20 minutes to 1 hour |
| Total, excluding softening | About 1¼–2 hours |
| Optional chilling | 2–3 additional hours for the neatest squares |
| Yield | 16 standard bars |
| Pan | 9×13 inches / 23×33 cm |
Before you begin: Set out the cream cheese and egg. The cream cheese may need 45–60 minutes to soften; cutting it into smaller pieces will shorten the wait.
Equipment and Pan Choice
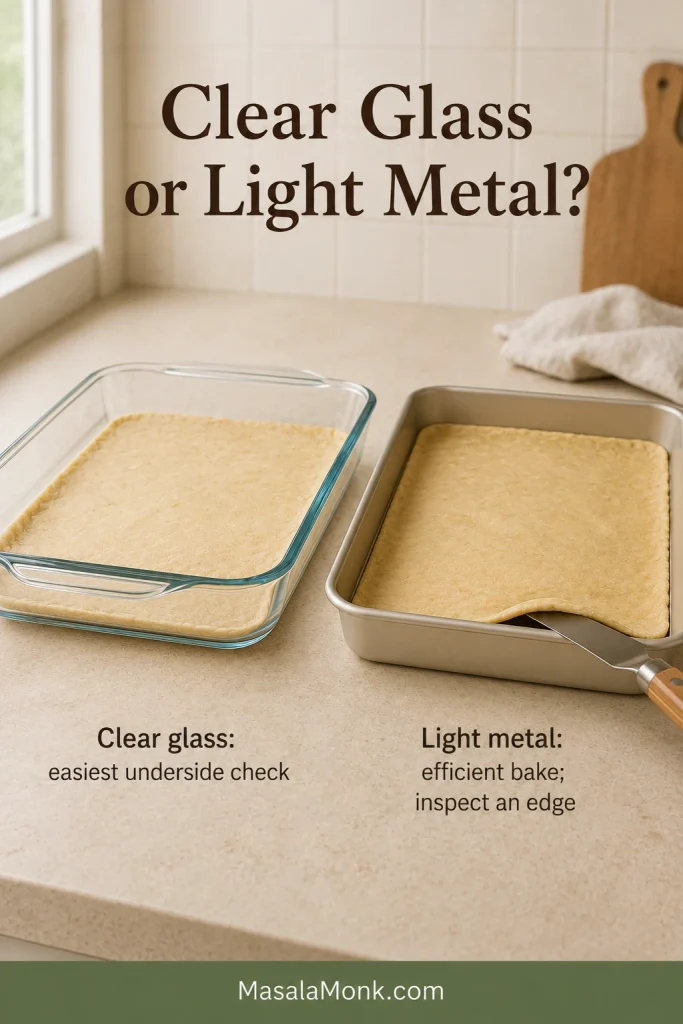
- 9×13-inch / 23×33 cm clear glass baking dish for the easiest underside check, or a light-colored metal baking pan
- Large mixing bowl and electric mixer
- Flexible spatula and thin spatula
- Parchment paper for shaping the upper dough
- Small bowl and pastry brush or spoon
Pastry Layers
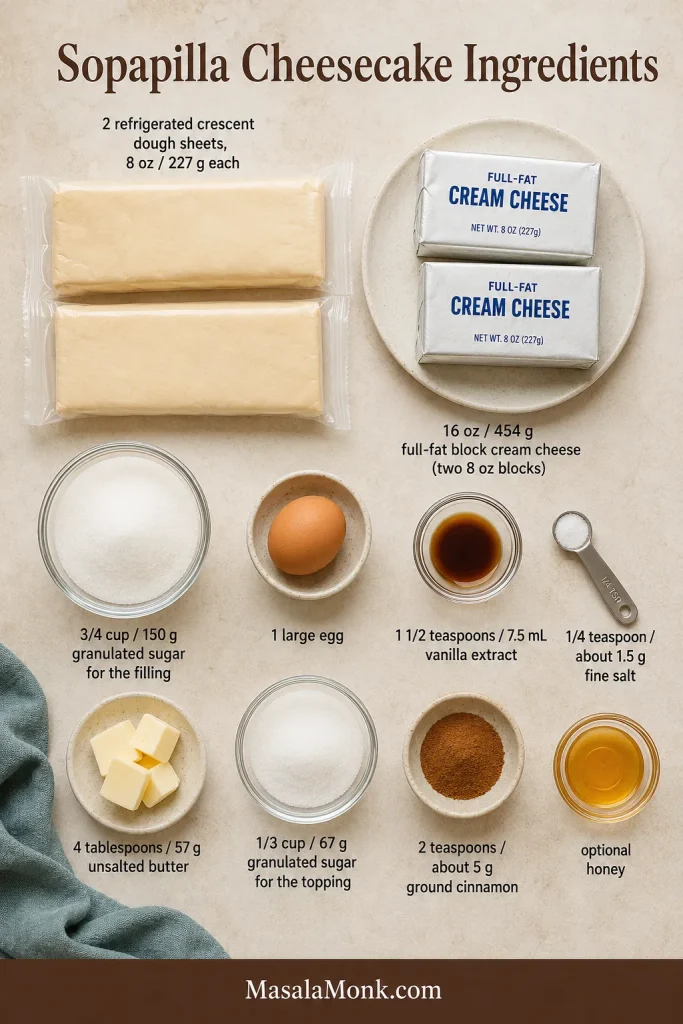
- 2 packages refrigerated crescent dough sheets, 8 oz / 227 g each, 16 oz / 454 g total
- Nonstick cooking spray or a small amount of additional softened butter, for the pan
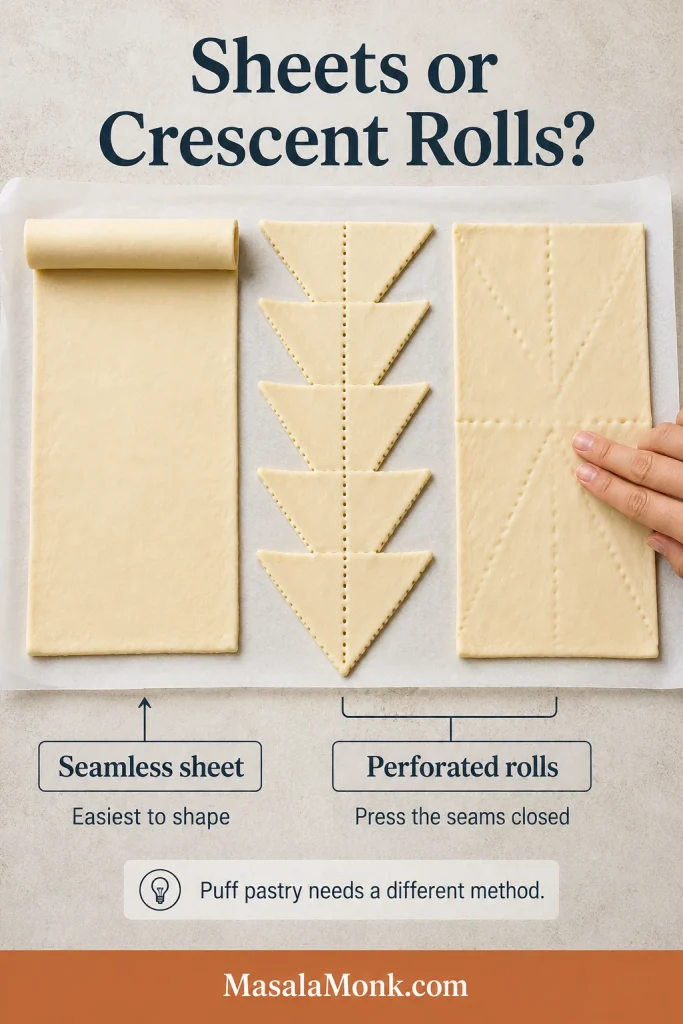
Regular perforated crescent rolls work too. Press the seams closed before assembling the dessert.
Cheesecake Filling
- 16 oz / 454 g full-fat block cream cheese, softened
- ¾ cup / 150 g granulated sugar
- 1 large egg, about 50 g without the shell, at room temperature
- 1½ teaspoons / 7.5 mL vanilla extract
- ¼ teaspoon fine salt, about 1.5 g
Cinnamon-Sugar Top
- 4 tablespoons / 57 g unsalted butter, melted and slightly cooled
- ⅓ cup / 67 g granulated sugar
- 2 teaspoons ground cinnamon, about 5 g
- 2–4 tablespoons / 30–60 mL honey, optional, for serving
Before mixing, separate the filling sugar from the cinnamon-topping sugar. One sweetens the cheesecake layer, while the other creates the crisp upper crust; the ingredient board below shows the complete full-pan quantities together.
Instructions
Assemble the Layers
- Prepare the oven and pan. Arrange a rack in the middle. Preheat to 350°F / 175°C conventional, or 325°F / 160°C fan-assisted. Lightly coat the pan with nonstick spray or additional softened butter. Mix the cinnamon and topping sugar in a small bowl.
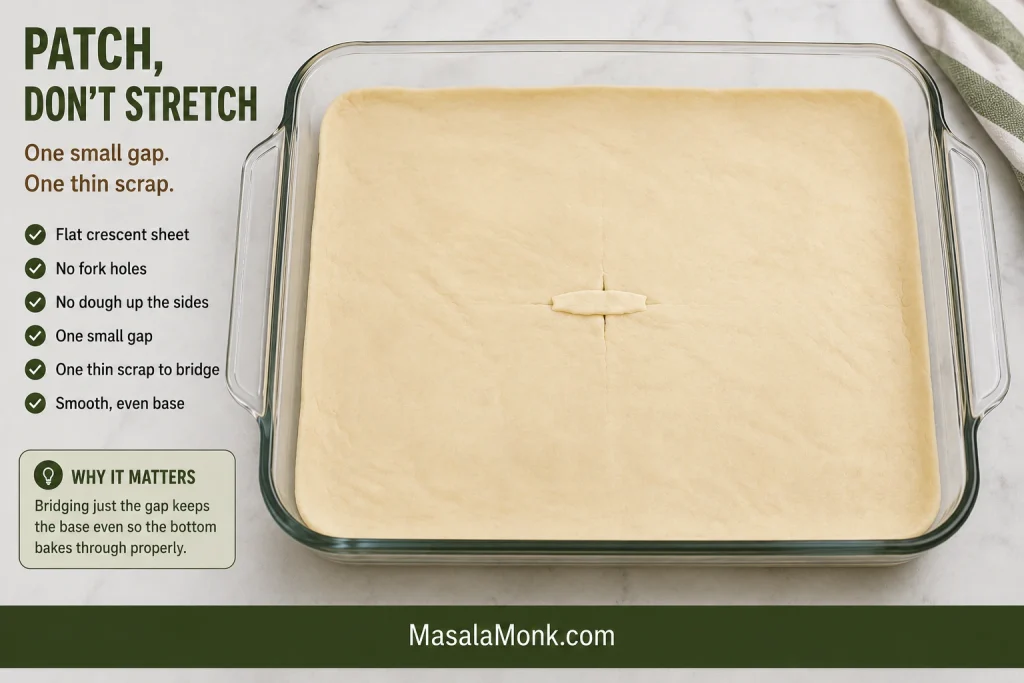
- Fit the lower dough into the pan. Press one crescent sheet toward the corners without pulling it paper-thin. If a small gap remains, patch it with a scrap of dough instead of stretching the whole sheet further. Seal any perforations.
A small gap does not require reshaping the whole base; bridge it with one thin scrap and keep the dough flat across the pan.
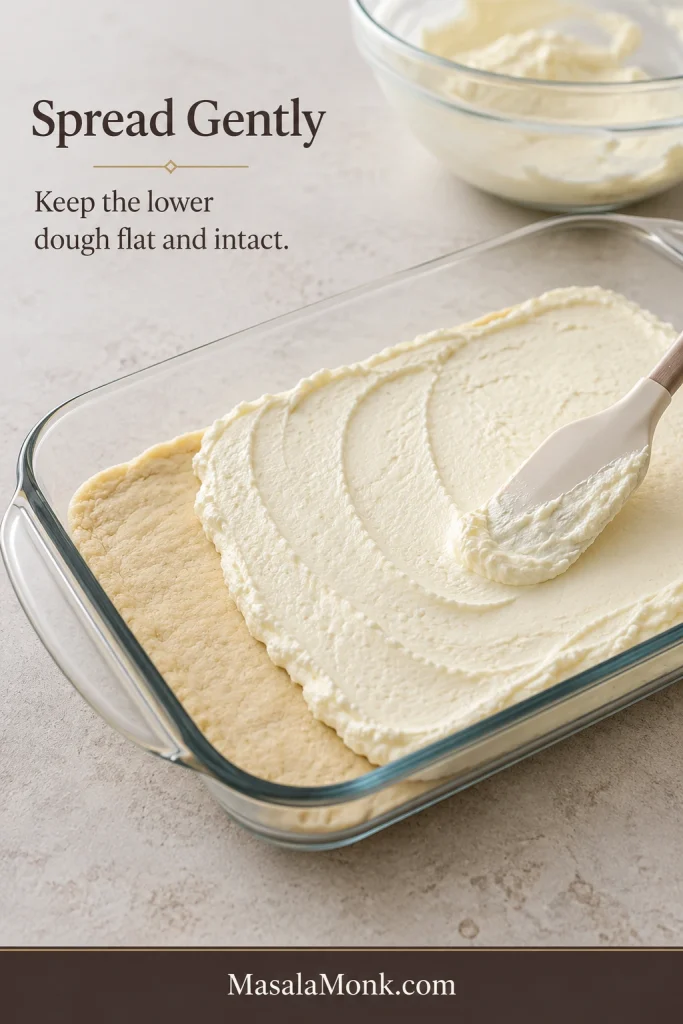
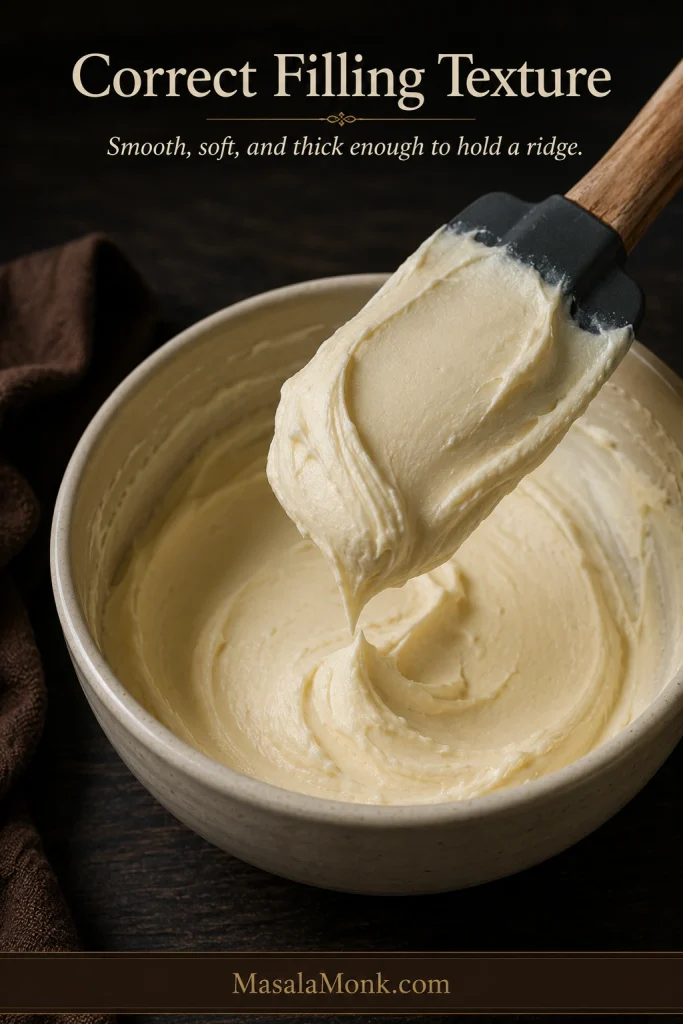
- Mix and spread the filling. Beat the softened cream cheese until smooth, scraping the bowl once. Add the sugar and salt, followed by the egg and vanilla. Mix only until combined, then spread the filling gently over the lower dough.
Place several small mounds across the lower dough, then join them with light strokes so the spatula does not drag or fold the base.
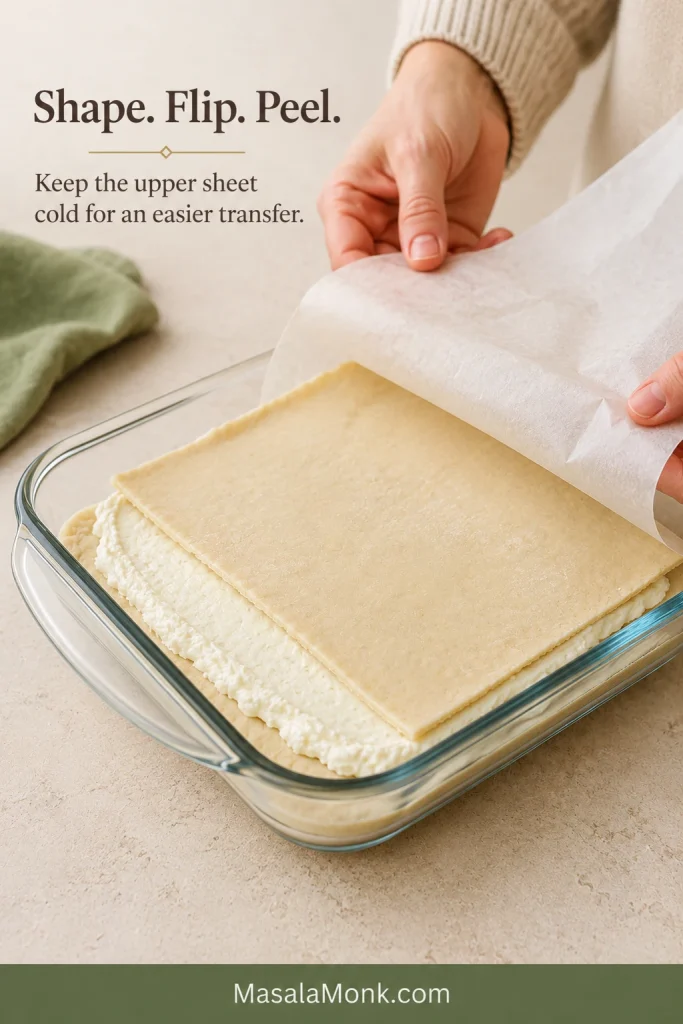
- Add the upper dough. Shape the second sheet on parchment, flip it over the cheesecake and peel away the paper. If the dough tears, stop stretching and patch the gap with a small scrap. The sheet doesn’t need to reach every corner perfectly.
Shape the upper sheet while it is cold, flip it onto the filling and peel away the parchment before the dough softens.
Bake, Check and Serve
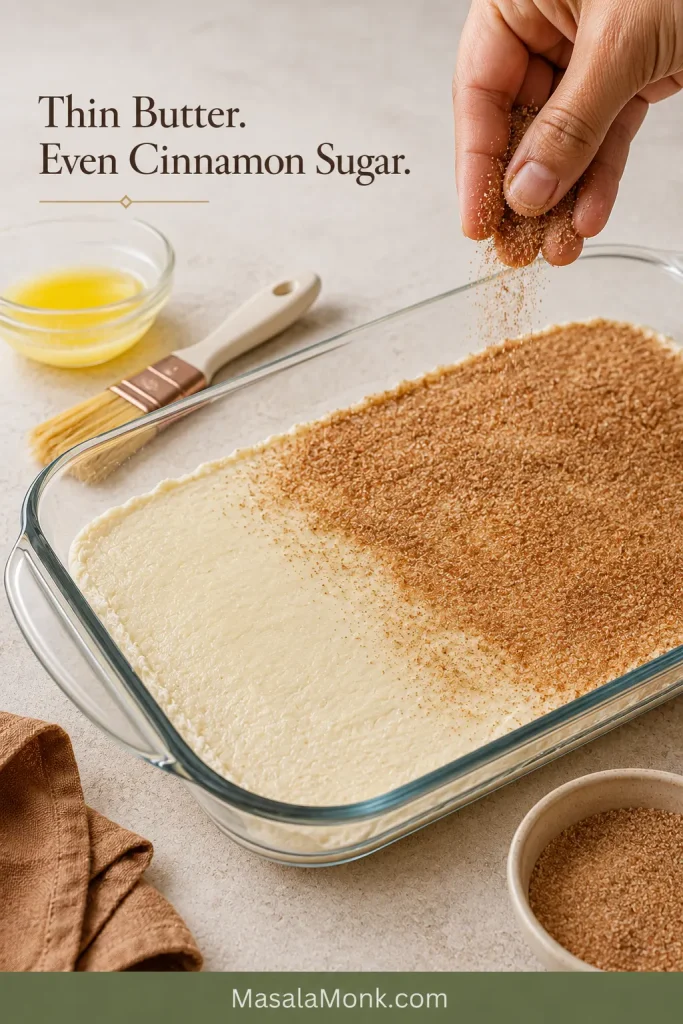
- Top and bake. Spread the slightly cooled butter over the dough, then cover it evenly with cinnamon sugar. Begin checking a conventional oven at about 28 minutes and a fan-assisted oven at about 25 minutes. The edges should look set, with only a gentle wobble in the middle.
Spread the butter thinly, then add the cinnamon sugar in an even layer so no area begins the bake wet or bare.
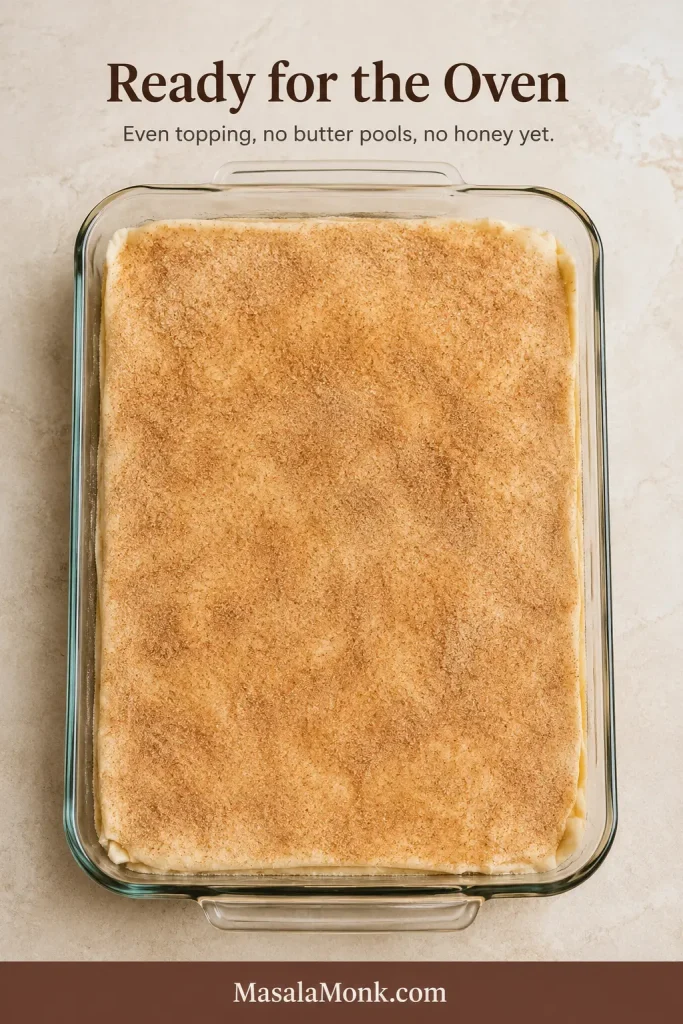
Before the pan goes into the oven, check that no filling is exposed through a large tear and that the butter forms a light sheen rather than standing pools.
- Check the lower pastry. Glass dish: Look through the bottom for pastry that appears baked instead of white and raw. Metal pan: Lift one exposed corner gently with a thin spatula. It should lift as pastry and show visible layers without smearing like paste. Top already dark? Cover it loosely with foil while the base finishes.
- Cool to the texture you want. Rest the pan for at least 20 minutes for warm, soft pieces served on plates, or about one hour for bars that hold an edge. Chill the cooled pan for 2–3 hours for the neatest squares.
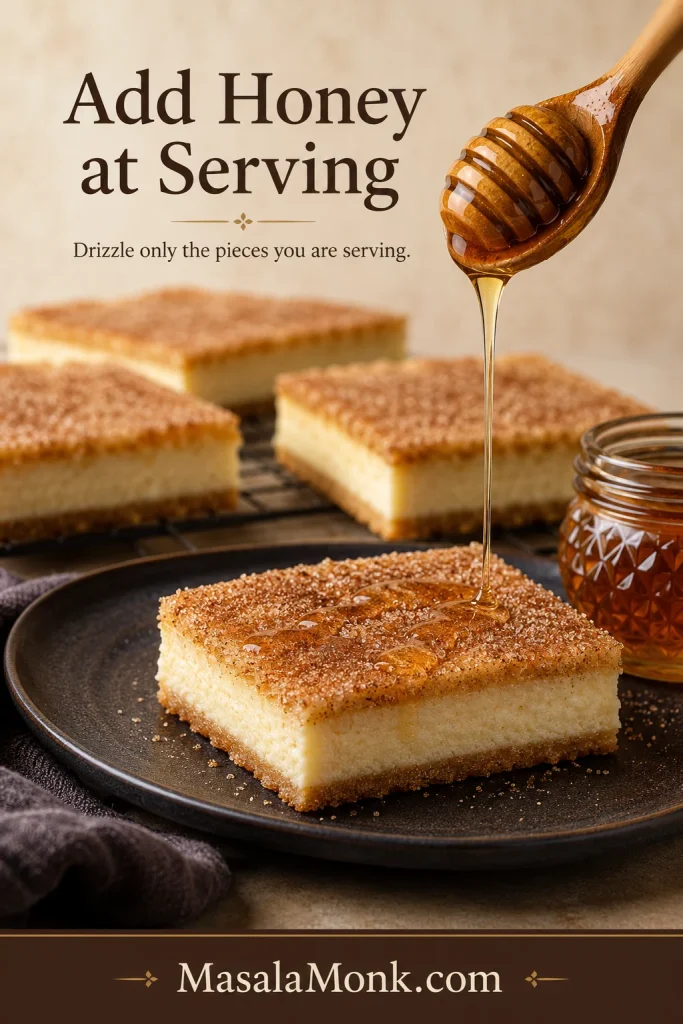
- Cut and serve. Press down with a long, sharp knife instead of sawing through the pastry. Wipe the blade between cuts. Add honey just before serving when you want the cinnamon top to stay crisper.
In This Guide
Choose Your Serving Texture
The cleanest square and the crispiest square are rarely the same square. Serving time determines which texture you get because cooling firms the cheesecake while gradually softening the pastry.
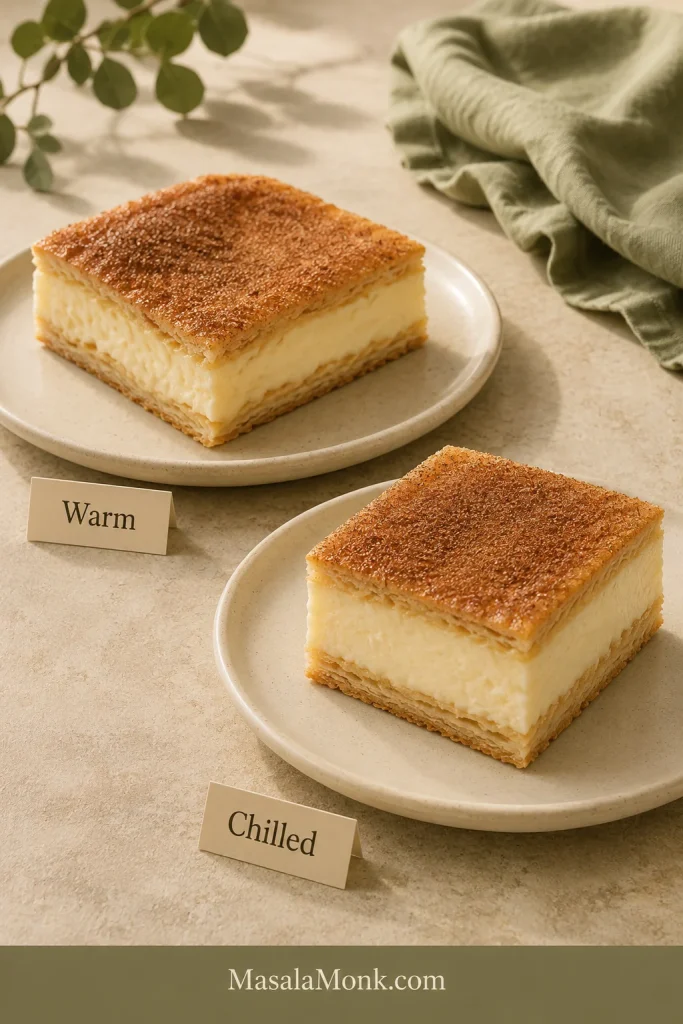
| If You Want | Cooling Time | What to Expect |
|---|---|---|
| Warm dessert pieces | 20–30 minutes | Fragrant pastry and a soft center; best served on plates |
| Creamy bars that hold an edge | About 1 hour | A delicate cinnamon crackle with a center that stays together when cut |
| Neat potluck squares | Cool fully, then chill 2–3 hours | The firmest center and tidiest edges, with a less crisp refrigerated crust |
| Make-ahead dessert | Chill overnight | Very neat pieces; let them stand briefly before serving for a softer bite |
Cutting, Carrying and Serving
For a buffet or potluck, chill and transport the bars in their original pan, then move them to a serving tray after arrival. The colder center holds its shape better, while the pan protects the edges from shifting in transit.
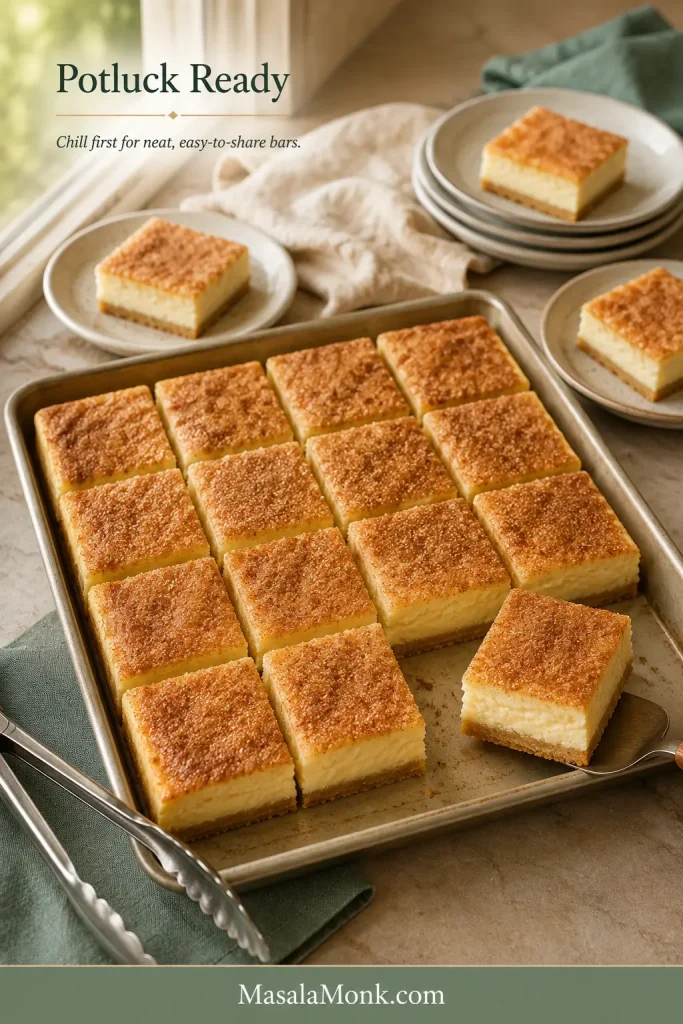
A warm first piece may lean or smear a little. That is simply what warm cheesecake does—not a sign that the bake failed.
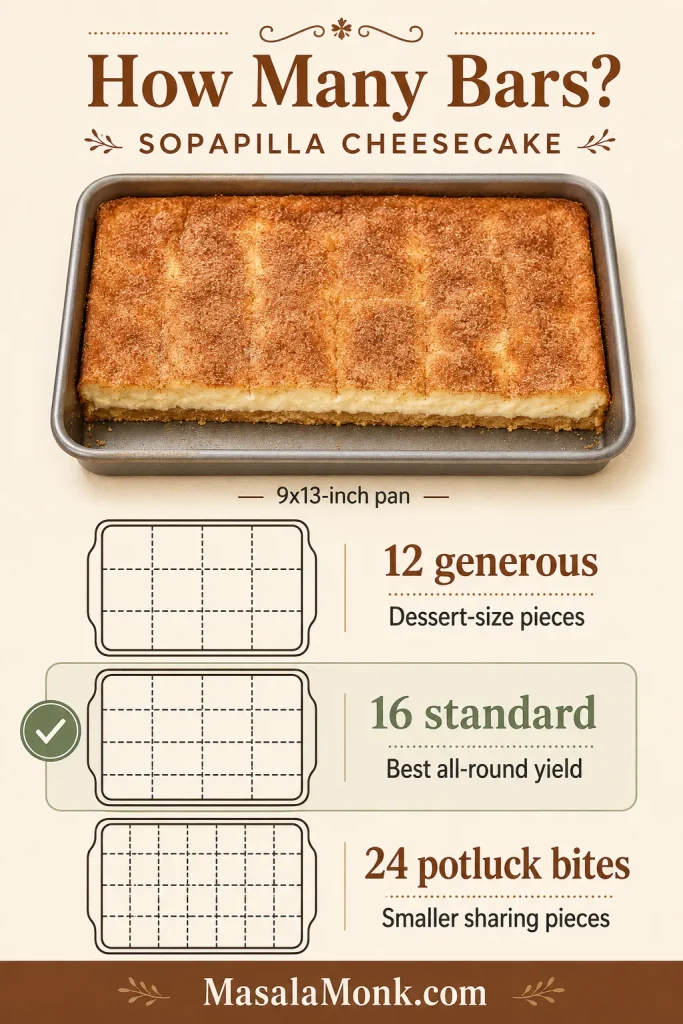
For clean slices, press down decisively with a sharp knife and wipe the blade after each cut. Divide the pan into 12 large pieces, 16 standard bars or 24 smaller potluck squares. Cooling plays the same useful role in these pecan pie bars, where the filling becomes easier to portion after it settles.
Prefer a fully chilled dessert with a crumb crust? This no-bake cream cheese pie is the closer match.
What Is Sopapilla Cheesecake—and What Makes This Version Different?
Sopapilla Cheesecake lands somewhere between cheesecake bars, a cream cheese danish and cinnamon pastry. Sweetened cream cheese sits between two thin layers of refrigerated crescent dough, finished with butter and cinnamon sugar.
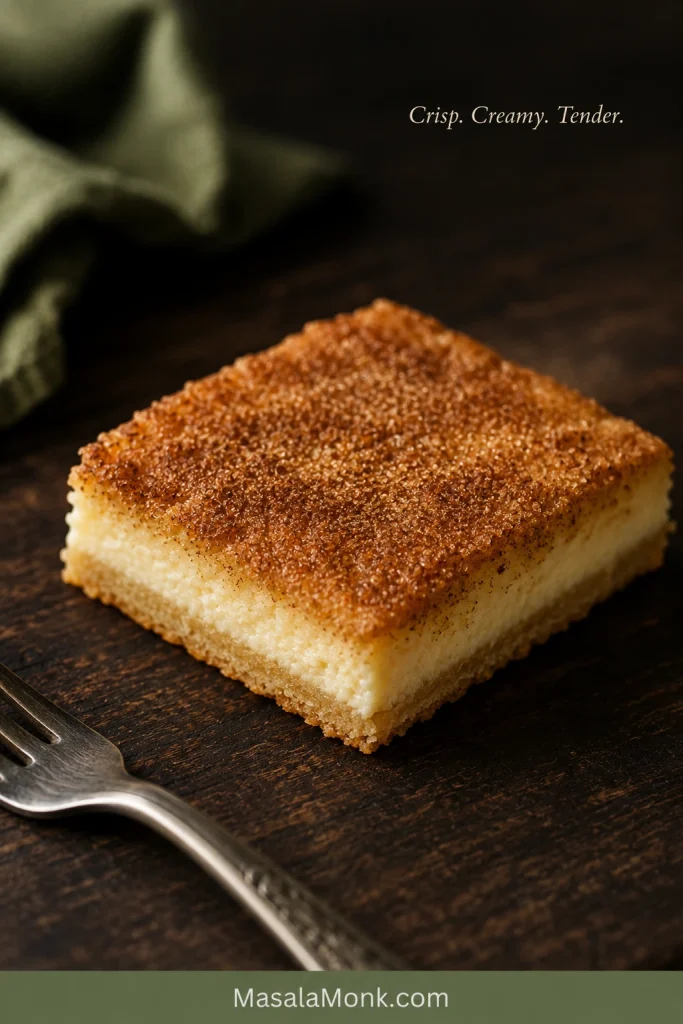
You may also see this recipe called crescent roll cheesecake bars or Churro Cheesecake. Some websites use the name “Mexican Cheesecake Bars,” though that is a loose online recipe label rather than one traditional Mexican cheesecake style.
It needs no crumb crust, springform pan or water bath. A New York cheesecake is the better choice when you want a tall, dense center and a more traditional baked-cheesecake structure.
One Egg and Two Blocks of Cream Cheese
Two pans of Sopapilla Cheesecake can look almost identical and still cut very differently. One egg helps this filling hold together without turning firm or custardy. Two blocks of cream cheese create a generous center while leaving the crescent layers noticeable in every bite.
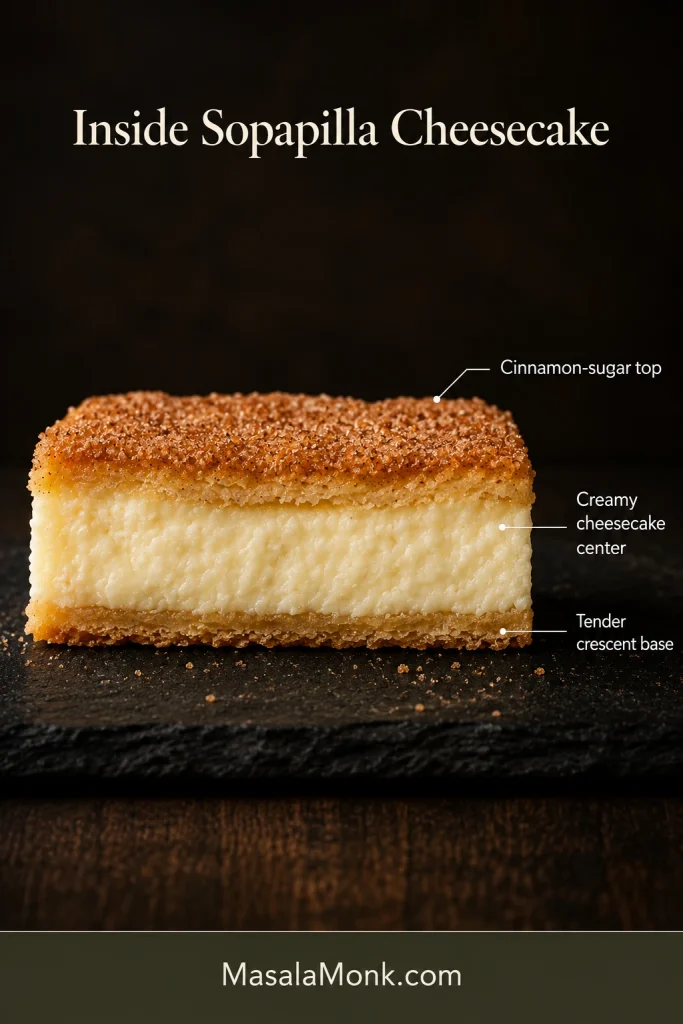
Why the egg matters: Leave it out of this filling and the center becomes looser and more pastry-like. A third block of cream cheese changes the depth and texture enough to require its own egg, sugar and baking balance.
Cold Dough and Softened Cream Cheese
Leave each dough package refrigerated until it is needed. Cold dough behaves; warm dough stretches, sticks and fights back.
The cream cheese needs the opposite treatment. It should press easily while still feeling cool and holding its shape. Tiny specks may disappear during baking, but smooth out any larger cold lumps before spreading the filling. Tub-style cream cheese can contain more moisture and may leave the center loose.
Sugar, Butter and Cinnamon
The filling remains lightly sweet so the cream cheese tang still comes through. A thin, even coat of butter helps the cinnamon sugar bake into a crisp top without leaving oily patches.
Honey is optional. Pour it over warm pastry when you want it to soak in. To keep the remaining crust crisper, add it only to the pieces being served.
For the full yeast-dough version of that cinnamon aroma, this cinnamon roll recipe takes the longer, softer route.
Which Crescent Dough Works Best?
Crescent dough is not merely the shortcut here; its tender, lightly flaky texture is part of the dessert people expect.
- Seamless crescent sheets are the easiest to shape and transfer.
- Perforated crescent rolls work well once the seams are pressed closed.
- Puff pastry flakes more dramatically and needs its own temperature, chilling and timing.
How to Tell When It Is Done
Once the top smells deeply of cinnamon, it is tempting to pull the pan. Give the center and lower pastry one final check first.
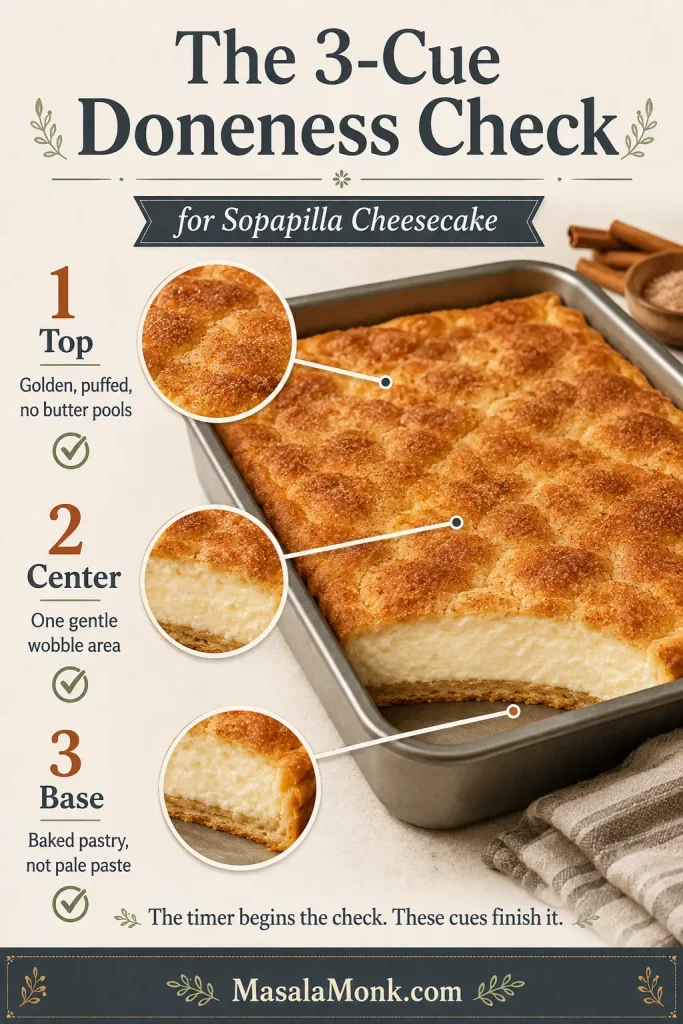
- Top: puffed, richly golden and mostly free of standing butter.
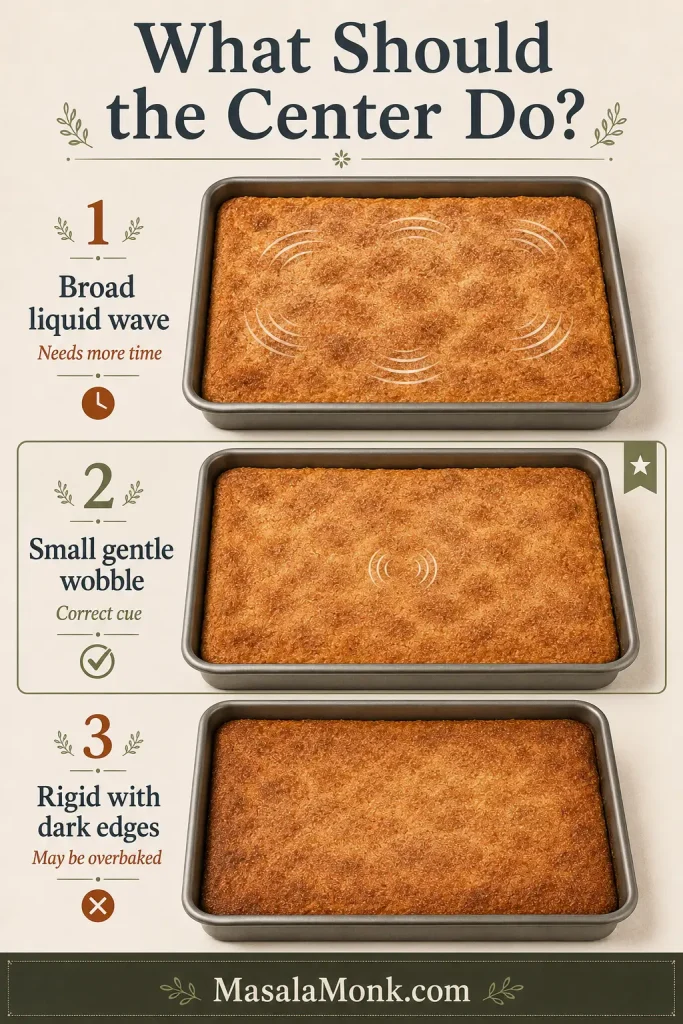
- Center: set around the edges, with one small area in the middle moving gently as a unit.
- Base: baked into a tender sheet that lifts without smearing or clinging like paste.
A liquid wave crossing the pan means the filling needs more time. Once all three cues are present, remove the pan. After cooling, the cinnamon top should crackle lightly under the knife.
How the Pan Changes the Check
- Clear glass: easiest for first-time bakers because the lower pastry remains visible.
- Light-colored metal: heats efficiently and may finish earlier. Check one exposed corner or edge with a thin spatula.
- Ceramic: looks attractive on the table, though thick walls may slow the bake.
- Dark metal: browns the edges more aggressively, so begin checking early.
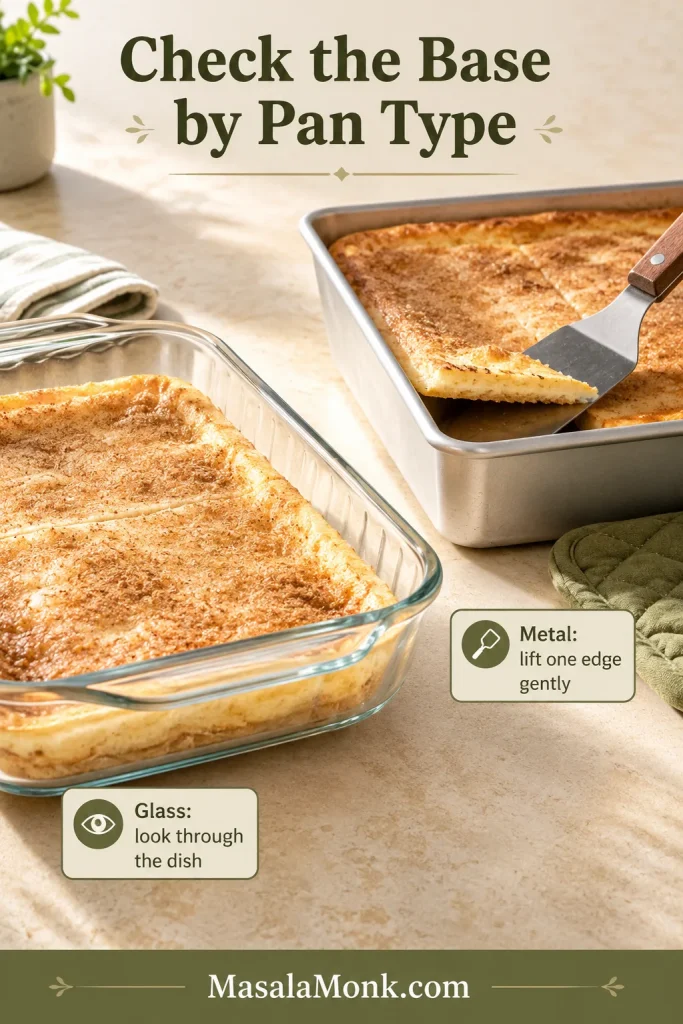
If the surface is already dark, protect it loosely with foil while the base finishes.
Troubleshooting
Most problems come down to ingredient temperature, uneven butter or not giving the pan enough baking or cooling time.
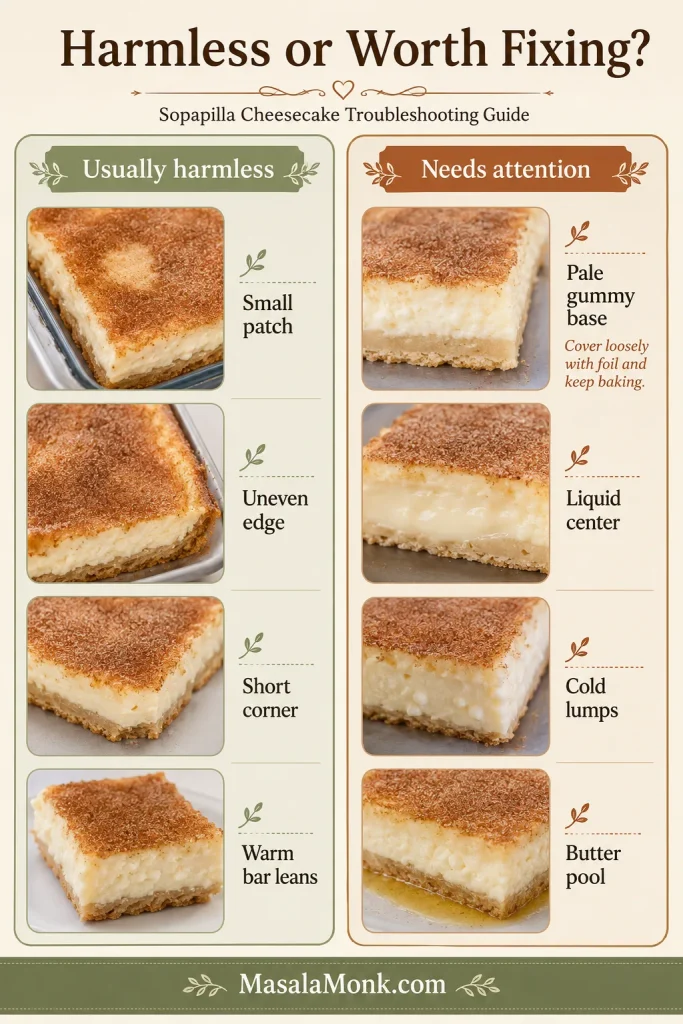
| Problem | Why It Happens and What to Do |
|---|---|
| Top is dark but the base is pale | The upper sheet finished first. Protect the surface with foil and let the base continue baking. |
| Upper dough tore | The sheet became warm or was stretched too far. Patch the tear with a small dough scrap. |
| Filling contains white lumps | The cream cheese was still too cold. Smooth large lumps before assembly; tiny specks are unlikely to matter. |
| Hot bars fall apart | The center has not cooled enough to hold an edge. Serve the pieces on plates or let the pan cool longer. |
| Topping looks greasy or powdery | The butter pooled or missed parts of the dough. Spread it in a thin, even coat before adding the cinnamon sugar. |
| A previous batch stayed doughy underneath | Confirm that the oven reaches the set temperature, use clear glass when you want to monitor the base and allow additional baking time after the top looks ready. |
Still troubleshooting? Review the doneness checks Return to the recipe Back to top ↑
How to Make a Half Batch
When a full party pan feels like too much, an 8×8-inch / 20×20 cm pan gives you the same layered dessert in a more manageable batch.
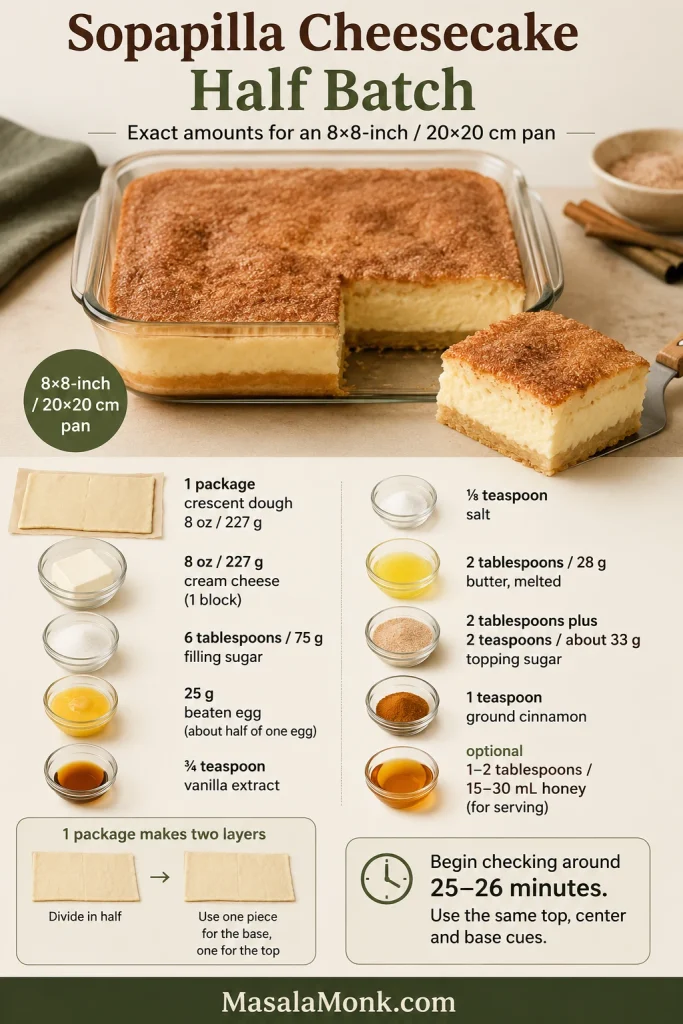
Cut one crescent sheet crosswise. Shape each half separately on parchment to roughly 8×8 inches—one for the base and one for the top.
The pastry will be slightly thinner than in the full batch, so stop stretching if it begins to tear and patch the gap instead. With perforated rolls, use four triangles per layer.
| Ingredient | Half-Batch Amount |
|---|---|
| Crescent dough | 1 package, 8 oz / 227 g, divided equally |
| Full-fat block cream cheese | 8 oz / 227 g |
| Filling sugar | 6 tablespoons / 75 g |
| Egg | Whisk one large egg and use 25 g, or about 1 tablespoon plus 2 teaspoons |
| Vanilla | ¾ teaspoon |
| Fine salt | ⅛ teaspoon |
| Butter | 2 tablespoons / 28 g |
| Topping sugar | 2 tablespoons plus 2 teaspoons / about 33 g |
| Cinnamon | 1 teaspoon |
| Honey, optional | 1–2 tablespoons / 15–30 mL |
Begin checking around 25–26 minutes. Use the same top, center and base cues; depending on the pan, the half batch may still need close to the full baking time.
Choose what comes next: Make the full 9×13 recipe Explore ingredient changes See storage and freezing
Variations and Ingredient Changes
Small Flavor Changes
- Add 1–2 teaspoons finely grated orange or lemon zest to the filling.
- Replace up to ¼ teaspoon of the vanilla with almond extract.
- Reduce the topping sugar by 1–2 tablespoons for a less sweet cinnamon crust.
Can You Make Sopapilla Cheesecake Without Egg?
If you simply leave the egg out of this filling, it will be looser and more pastry-like after baking. That can still be enjoyable, but it will not hold the same edge as the main version after cooling.
When avoiding both eggs and the oven matters more than keeping the crescent layers, this no-bake cheesecake recipe is the simpler option.
Changes That Need Their Own Method
Fruit filling releases moisture directly above the lower dough, making a gummy base more likely. Pumpkin, homemade dough and gluten-free pastry also change the moisture level or the way the bars hold together.
Each can produce a good dessert, but none is a simple add-in for the method above.
Make Ahead, Storage and Freezing
This is an easy dessert to make a day ahead, especially when neat party squares matter more than a crisp, just-baked top. Chill the whole pan overnight, cut it while cold and let the pieces stand briefly before serving.
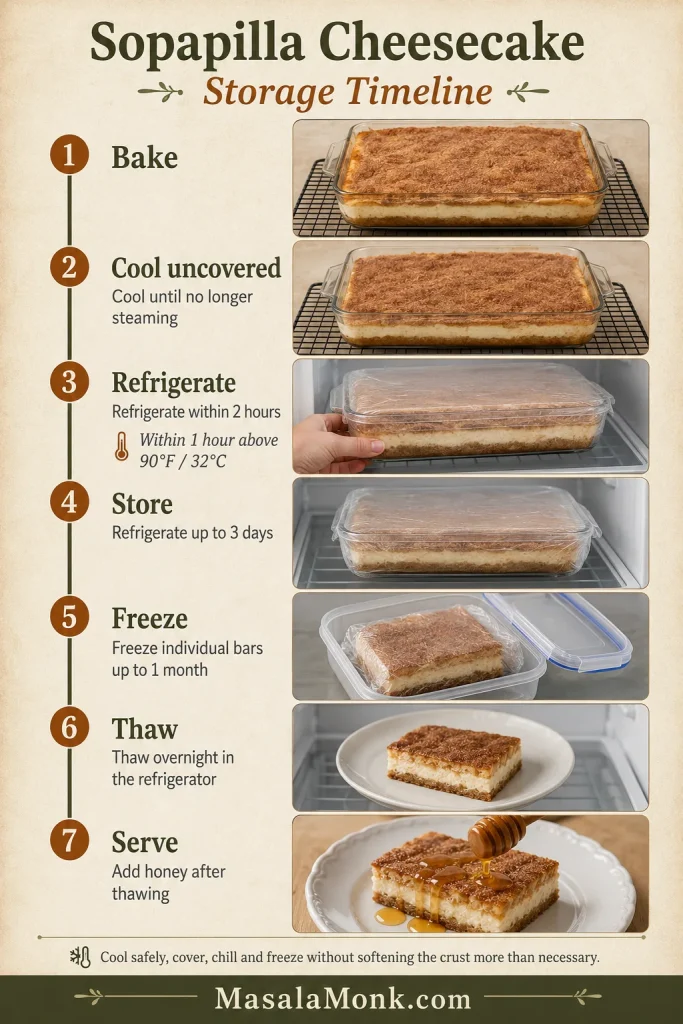
Does Sopapilla Cheesecake Need to Be Refrigerated?
Yes. Keep the bars at room temperature for no more than two hours—or one hour when the temperature is above 90°F / 32°C—in line with USDA guidance for perishable food. Let the pan cool uncovered until it is no longer steaming, then cover and refrigerate it. Store the bars for up to three days.
To take the chill off a refrigerated bar, leave it at room temperature for about 15 minutes. For a faster result, warm it at half microwave power in five-second bursts and stop as soon as the center softens slightly.
Freezing
- Freeze fully cooled individual bars without honey.
- Wrap each piece tightly and place it in a freezer-safe container.
- Freeze for up to one month for the best pastry quality.
- Thaw overnight in the refrigerator.
- Add honey after thawing.
The cheesecake layer freezes well, though the pastry will be less crisp after thawing.
Refrigerated dough is useful for other quick bakes too. This apple cinnamon roll bake takes the same shortcut in a fruitier direction.
Sopapilla Cheesecake vs Churro Cheesecake
The names overlap in many online recipes. Recipes called “Churro Cheesecake” usually put more emphasis on the cinnamon-sugar coating, while “Sopapilla Cheesecake” more often includes honey and references the fried pastry behind the name.
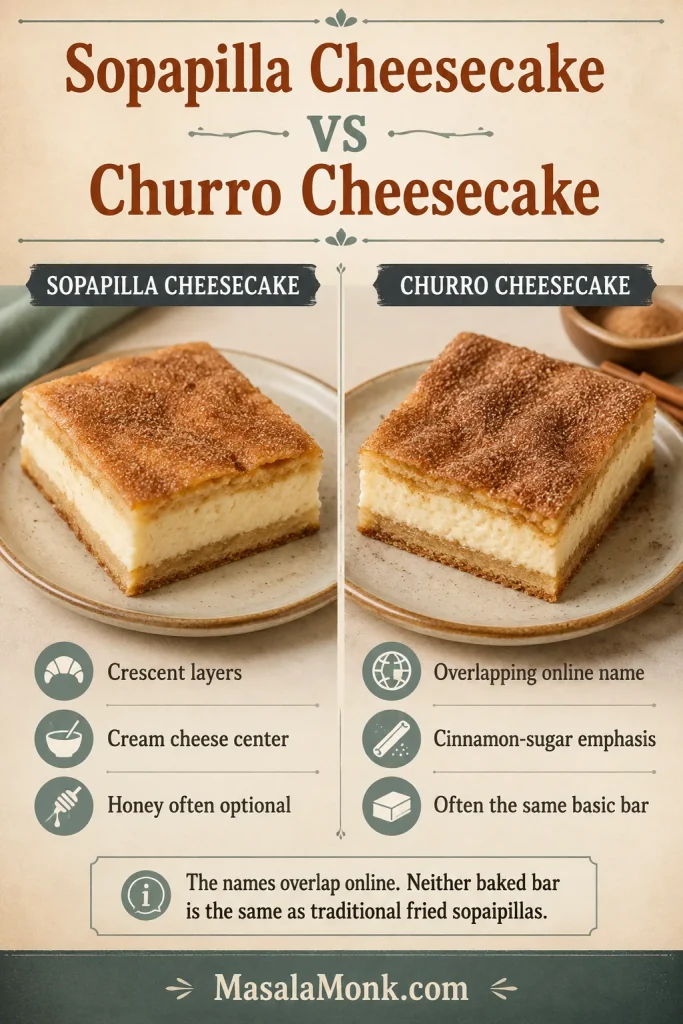
Sopaipilla is another common spelling of sopapilla. In New Mexico, traditional sopaipillas are puffed pieces of fried dough commonly served with honey. The crescent-roll dessert borrows that combination but bakes it into cheesecake bars.
For the crisp fried dough itself, this guide to homemade churros follows a different technique altogether.
Frequently Asked Questions
Can I Use Regular Crescent Rolls Instead of Sheets?
Yes. Press the seams closed before transferring the dough, and keep the sheet cold so it remains easy to move. See the crescent dough comparison for the easiest handling method.
Can I Bake Sopapilla Cheesecake the Day Before?
Yes. Bake and chill the pan overnight, cut it while cold and let the bars stand briefly before serving. Follow the make-ahead and storage guide for cooling and refrigeration timing.
Why Is the Bottom Dough Still Raw?
The cream cheese layer insulates the lower dough, so it may need longer than the golden top. Protect the surface with foil and follow the glass- or metal-pan check in the doneness guide.
Can I Use Low-Fat or Tub-Style Cream Cheese?
Full-fat block cream cheese is the most dependable choice for a filling that sets neatly. Tub-style and lower-fat products can contain more moisture and may leave the center looser after cooling. The filling-texture section shows what properly softened block cream cheese should look like.
Keep the dough cold, bake the lower layer through and cool the pan to the texture you want. Those choices matter more than a perfectly smooth top.
A Pan Worth Sharing
At its best, every bite moves from a crisp cinnamon-sugar crust to a smooth cheesecake center and tender pastry underneath. It is easy enough for an ordinary evening and generous enough for a crowded table.
The first warm corner belongs to the cook; the rest of the pan is made for sharing.
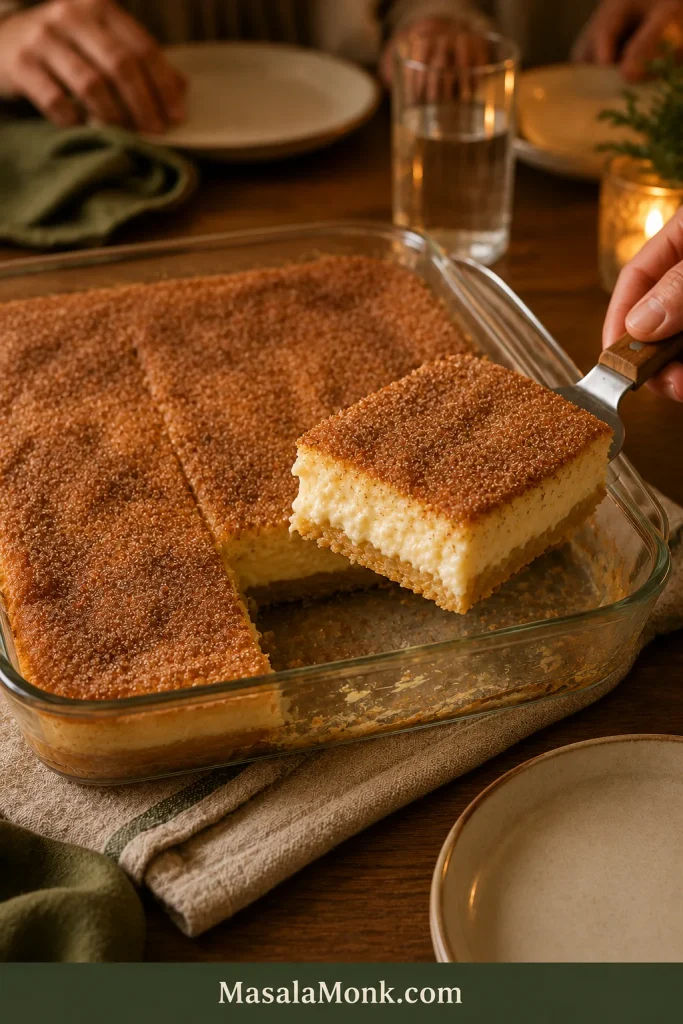
Did you serve the bars warm and soft or chill them for neat squares? Leave a comment and tell us which texture won at your table.








