
This post was last updated on
• Recipe research and editorial by MasalaMonk.com.
Ravioli can be a quiet bowl of buttered pasta on a Tuesday or the dish you bring out when dinner deserves a little ceremony. Either way, a good ravioli recipe lives or dies on surprisingly small details: cook the pasta gently, keep the filling inside it, and use a sauce that coats rather than floods. This guide covers those basics first, then takes ravioli in a distinctly MasalaMonk direction with ghee, curry leaves, kasuri methi, paneer, keema and chutneys.
Making everything from scratch? Start with the egg dough, sealing guide and six filling ideas. Using refrigerated or frozen ravioli? Skip straight to the cooking times and sauces.
The five main twists move from butternut squash with brown ghee and curry leaves to mushroom malai, lobster with a curry-leaf tadka, makhani-style tomato cream and crisp toasted ravioli with Indian chutneys. None of them needs a long spice list. One or two well-chosen Indian flavors are enough when they make sense with the filling already inside.
The same approach runs through our Indian-inspired Alfredo pasta. For a brighter, herb-led pasta night, the pesto pasta guide is a useful companion—especially for the pasta-water and sauce-cling techniques that come up here too.
One thing is worth settling before the flour comes out: ravioli does not need to look factory-perfect. A slightly wonky edge is harmless. Trapped air, watery filling and a violent boil are the things that cause trouble. Get those under control and the rest becomes much more forgiving.
Ravioli Cooking Times: Fresh, Frozen & Refrigerated
The package matters less than the water and the finish. Fresh ravioli needs the gentlest handling; frozen ravioli needs a little more time without a hard boil; refrigerated ravioli sits somewhere in between. In all three cases, have the sauce warm before the pasta is done. Filled pasta deteriorates quickly when it sits wet in a colander.
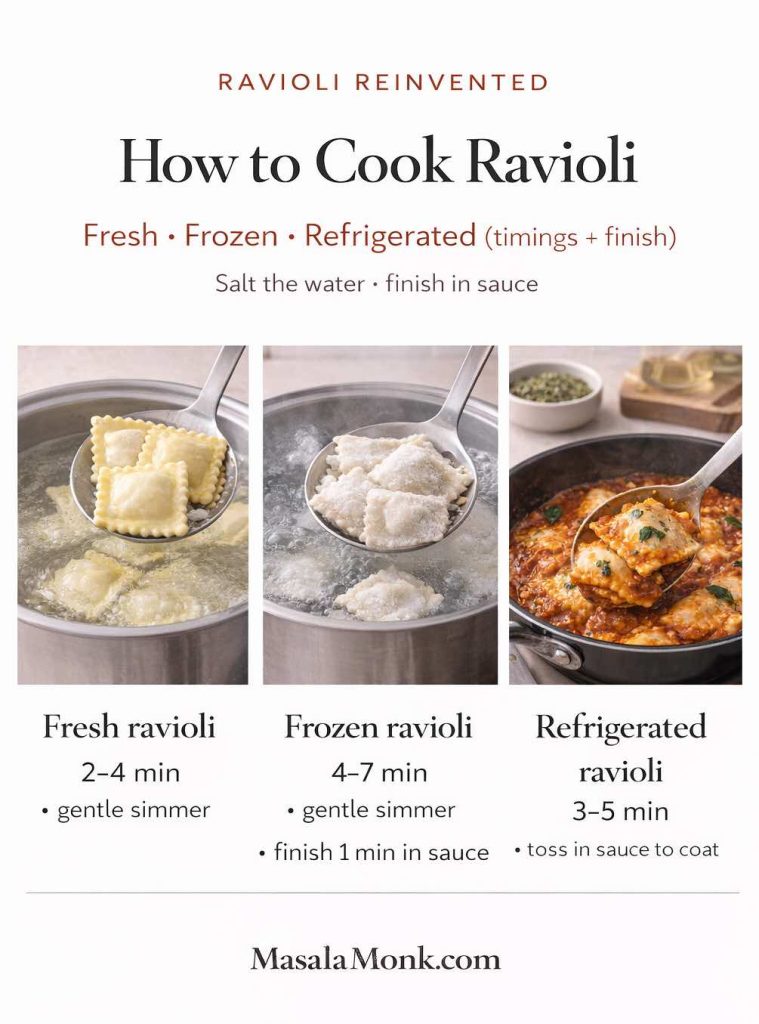
Treat the timings below as check windows, not a stopwatch. Ravioli size, wrapper thickness and filling all change the final minute, so use the clock to know when to start checking and texture to decide when to stop.
For a second visual reference on rolling, filling and shaping handmade pasta, King Arthur’s ravioli guide is a useful companion. If you cook stuffed pasta often, our tortellini cooking guide covers the same fresh-versus-frozen timing problem in a different shape.
How to Cook Fresh Ravioli Without Bursting
Fresh ravioli is delicate enough that a wide pot helps. Salt the water, bring it to a boil, then ease it back to a lively simmer before the pasta goes in. You want small, steady bubbles moving the ravioli around—not a rolling boil that throws one piece into another.
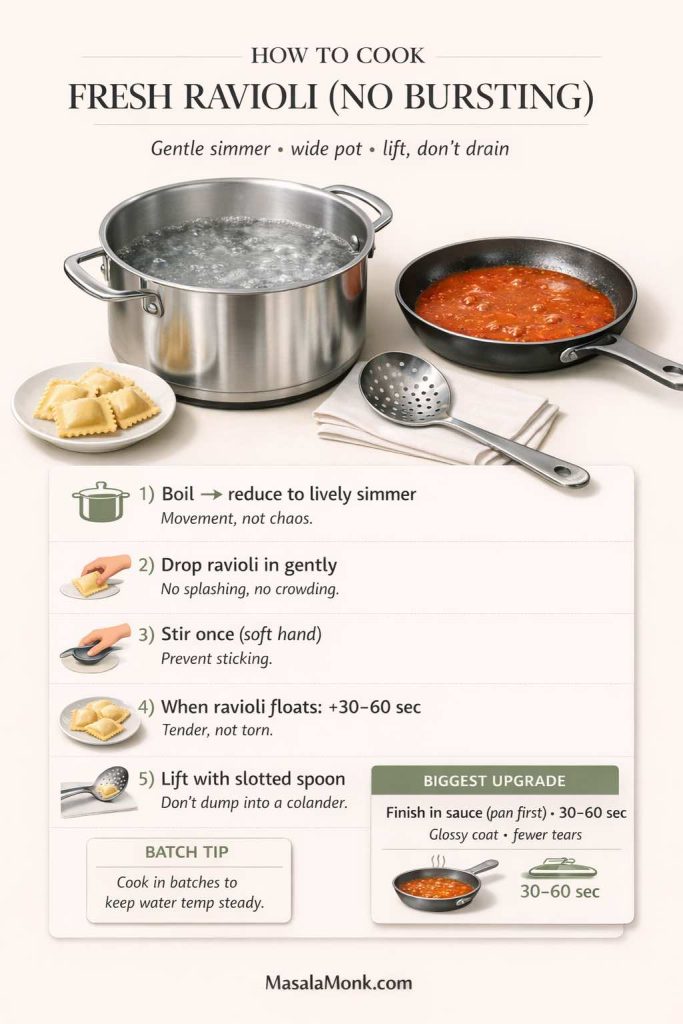
Use this simple rhythm:
- Bring water to a boil, then reduce to a lively simmer.
- Drop ravioli in gently.
- Stir once with a soft hand to prevent sticking.
- When ravioli floats, give it another 30–60 seconds.
- Lift out with a slotted spoon, not a colander.
Warm the sauce in a wide skillet before the ravioli is ready. Lift the pasta straight into that pan, add a spoonful of cooking water if the sauce needs loosening, and spoon the sauce over gently. Aggressive tossing is what stresses delicate seams; thirty to sixty seconds is usually enough to coat the surface.
Very delicate handmade ravioli is easier to manage in batches. The water temperature recovers faster, the pieces have room to move, and you can lift them out without fishing through a crowded pot.
How to Cook Frozen Ravioli So It Stays Tender
Cook frozen ravioli straight from the freezer. Thawing softens the wrapper before the filling is hot and makes sticking more likely. Once the pieces go into the pot, keep the water at a steady simmer and stir only enough to stop them settling on the bottom.
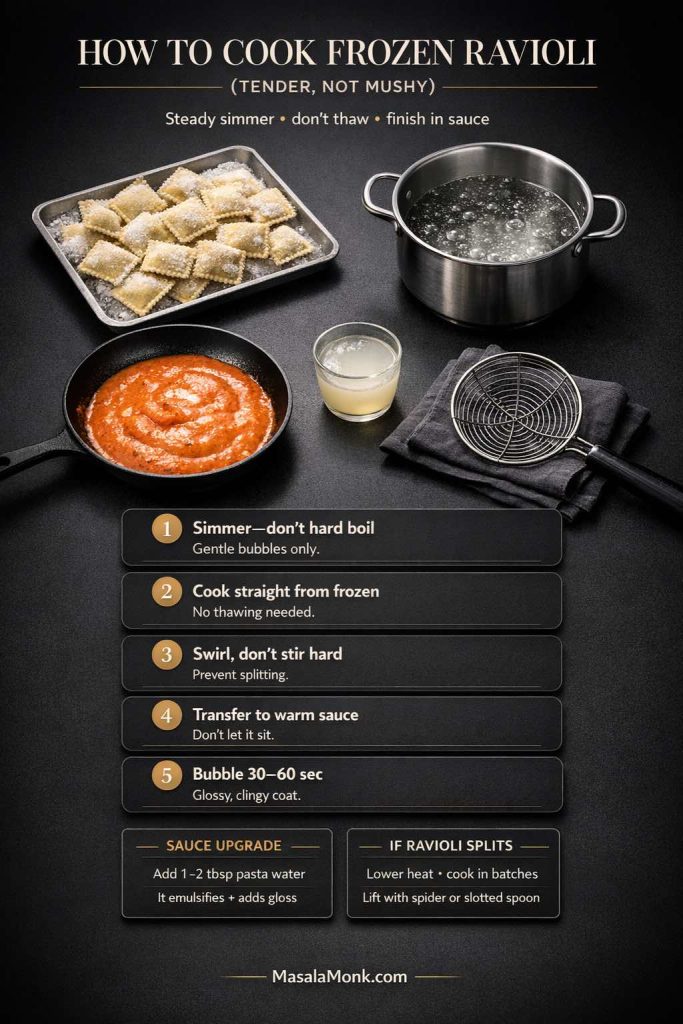
Lift frozen ravioli directly into warm sauce and let it bubble there for 30–60 seconds. A tablespoon or two of starchy cooking water helps butter, tomato or cream sauce cling to the wet wrapper instead of pooling underneath. That brief pan finish does more for the bowl than an elaborate garnish.
If frozen ravioli splits, lower the heat first. A gentle swirl is often enough to prevent sticking, and a spider or slotted spoon is kinder than pouring the whole pot through a colander.
How to Cook Refrigerated Ravioli
Refrigerated ravioli is quick but usually sturdier than handmade pasta. Treat it much like fresh ravioli: salted water, a controlled simmer and an early check for doneness.
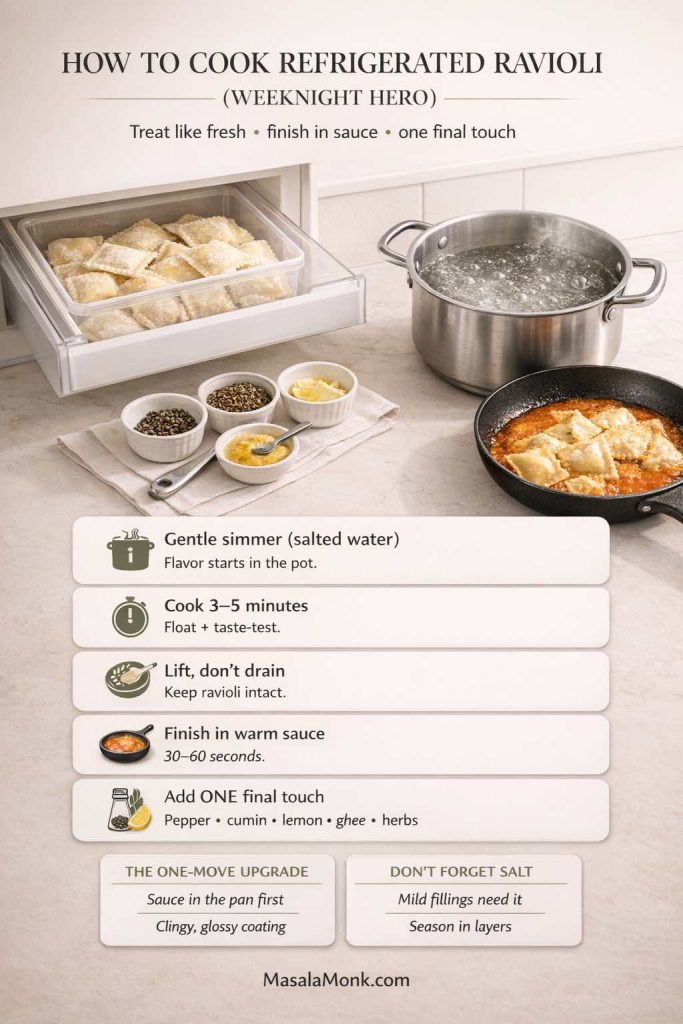
Once it reaches the sauce, choose one finishing note: black pepper for bite, lemon for acidity, toasted cumin for warmth, spiced ghee for aroma, or fresh herbs for lift. The filling is already seasoned; several accents at once usually blur it.
That small finish is often all a refrigerated packet needs to feel like a composed dinner.
Do not leave all the seasoning to the sauce. A mild cheese or spinach filling benefits from properly salted cooking water; otherwise the wrapper can taste flat even when the sauce is well balanced.
↑ Back to Ravioli Recipe Contents
Ravioli Dough, Sealing & Shortcut Wrappers
Homemade dough is worth doing when the making is part of the evening. On a busy night, wonton wrappers are a completely different—but useful—route. Whichever path you take, the same rules decide whether the ravioli survives: a dry-enough filling, clean edges, trapped air pressed out and a firm seal.
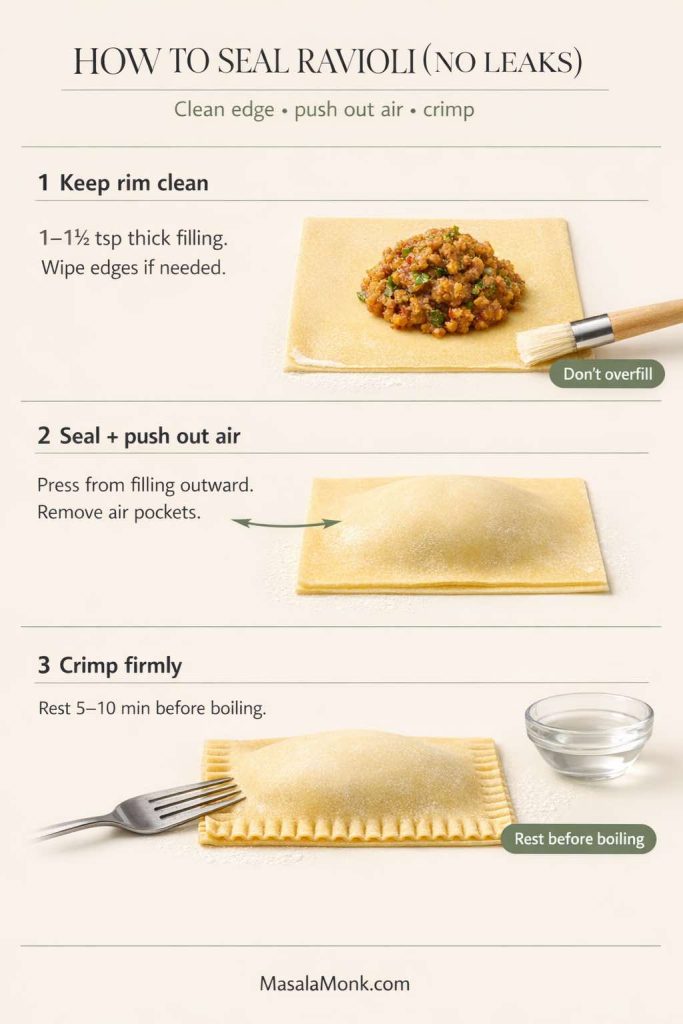
How to Seal Ravioli Without Leaks
Most leaks begin before the ravioli reaches the pot. Keep the border free of filling, press outward from the center to remove trapped air, and use a modest amount of filling so the dough is not stretched tight. A short 5–10 minute rest after shaping helps the seam settle before cooking.
Classic Egg Ravioli Dough
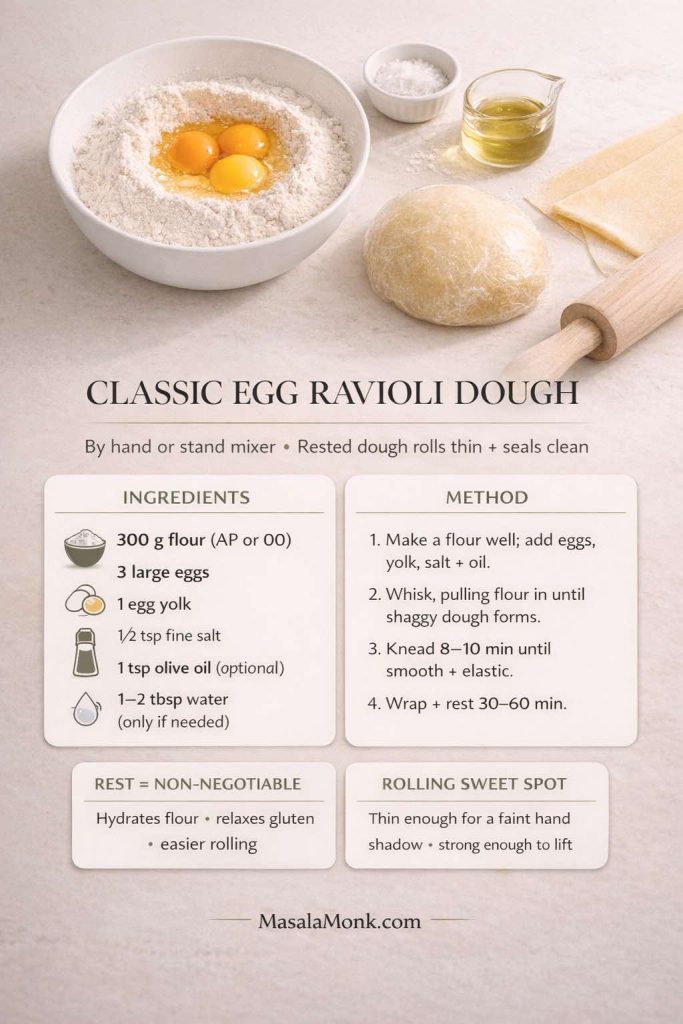
By hand or in a mixer, the dough needs to become smooth enough to stretch without tearing and relaxed enough to roll thin. The 30–60 minute rest does more for easy rolling than adding extra water to a tight dough.
Ingredients
- 300 g flour (all-purpose works; 00 flour is lovely if you have it)
- 3 large eggs
- 1 egg yolk (for elasticity and richer color)
- 1/2 tsp fine salt
- 1 tsp olive oil (optional, helps handling)
- 1–2 tbsp water only if needed
Method
- Make a mound of flour, create a well, add eggs, yolk, salt, and oil.
- Whisk inside the well, slowly pulling flour inward until a shaggy dough forms.
- Knead 8–10 minutes until smooth and elastic.
- Wrap and rest 30–60 minutes.
During the rest, the flour finishes hydrating and the gluten relaxes. The dough should roll with much less spring-back afterward. Keep the sheets thin and the filling modest; thick pasta and overfilled centers are two common reasons homemade ravioli feels heavy.
The dough itself is covered in full here; use the sealing guide above when you start shaping so the filling stays away from the border.
A useful visual test: hold the sheet over your hand. You should be able to see a faint shadow through it, but the sheet should still lift without stretching under its own weight. If it feels leathery, keep rolling; if it looks translucent and fragile around the edges, stop.
Eggless Ravioli Dough
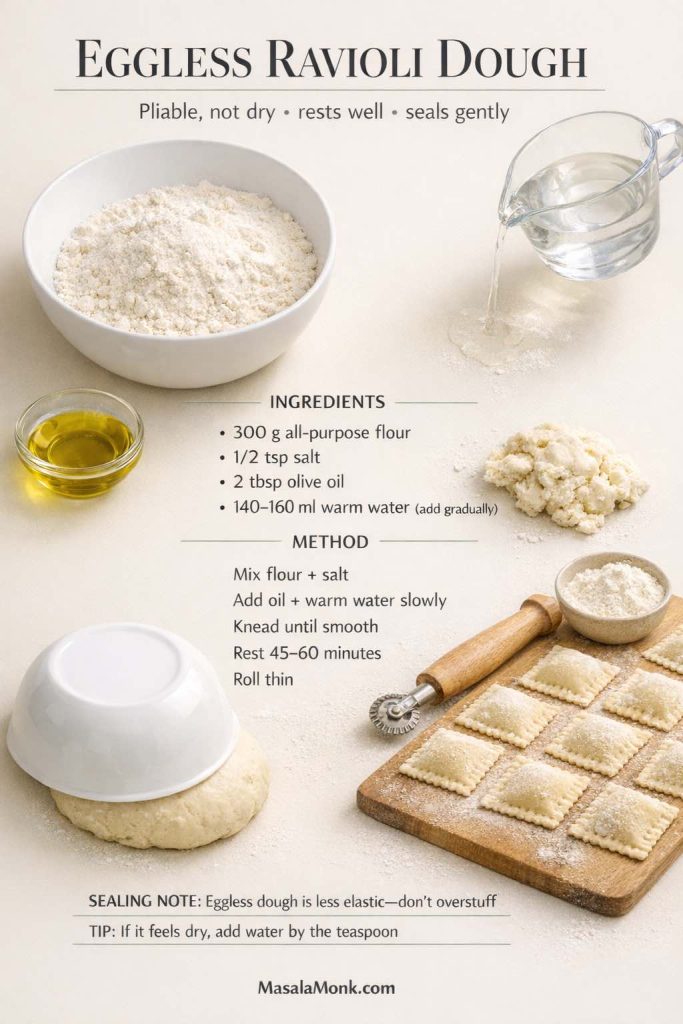
Eggless dough has less built-in elasticity, so hydration matters more. Add the warm water gradually and stop when the dough is smooth and pliable rather than sticky.
Ingredients
- 300 g all-purpose flour
- 1/2 tsp salt
- 2 tbsp olive oil
- ~140–160 ml warm water (add gradually)
Knead until smooth, rest 45–60 minutes, and roll thin. Eggless dough can be slightly less elastic, so seal carefully and avoid overstuffing.
Wonton-Wrapper Ravioli for a Faster Night
Wonton wrappers do not taste exactly like fresh pasta, but they solve the hardest part of homemade ravioli: getting thin, even sheets. They work best with a thick filling and a gentle simmer.
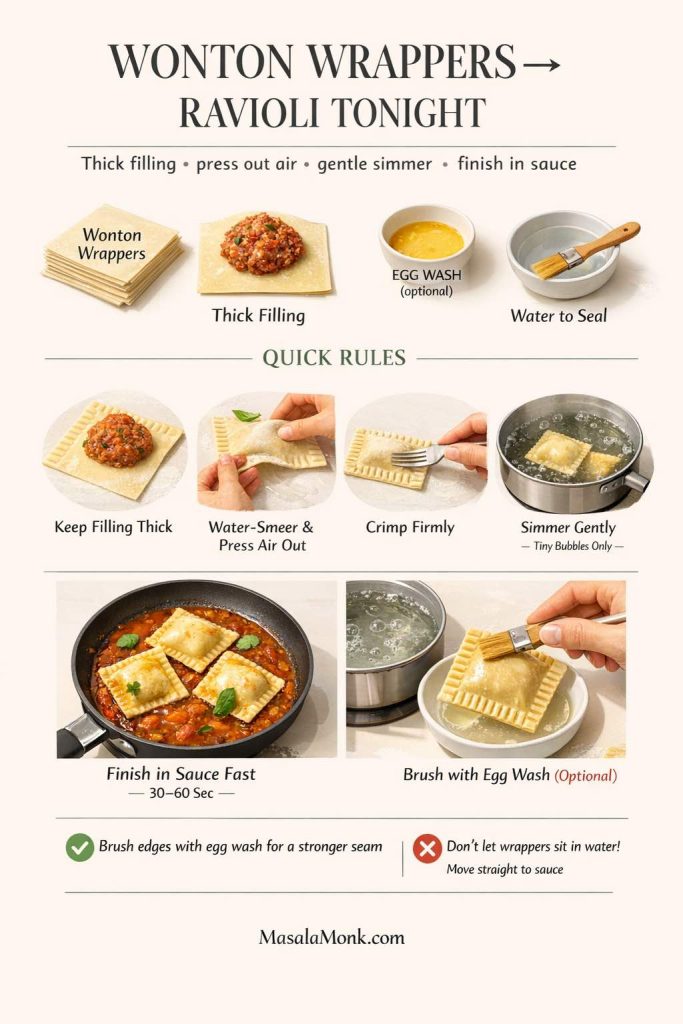
For the cleanest seals:
- Keep filling thick, not wet.
- Seal with a thin smear of water, press out air, and crimp firmly.
- Simmer gently—don’t boil hard.
- Finish in sauce quickly; don’t let wrappers sit too long in water.
Expect a softer, slightly more delicate wrapper than classic pasta dough. That difference matters less once the ravioli is filled well and moved straight from the pot into sauce.
A thin brush of egg wash gives the seam a little more insurance, particularly with wetter fillings. Keep the water gentle and serve soon after cooking; wonton wrappers soften faster than egg-pasta sheets.
↑ Back to Ravioli Recipe Contents
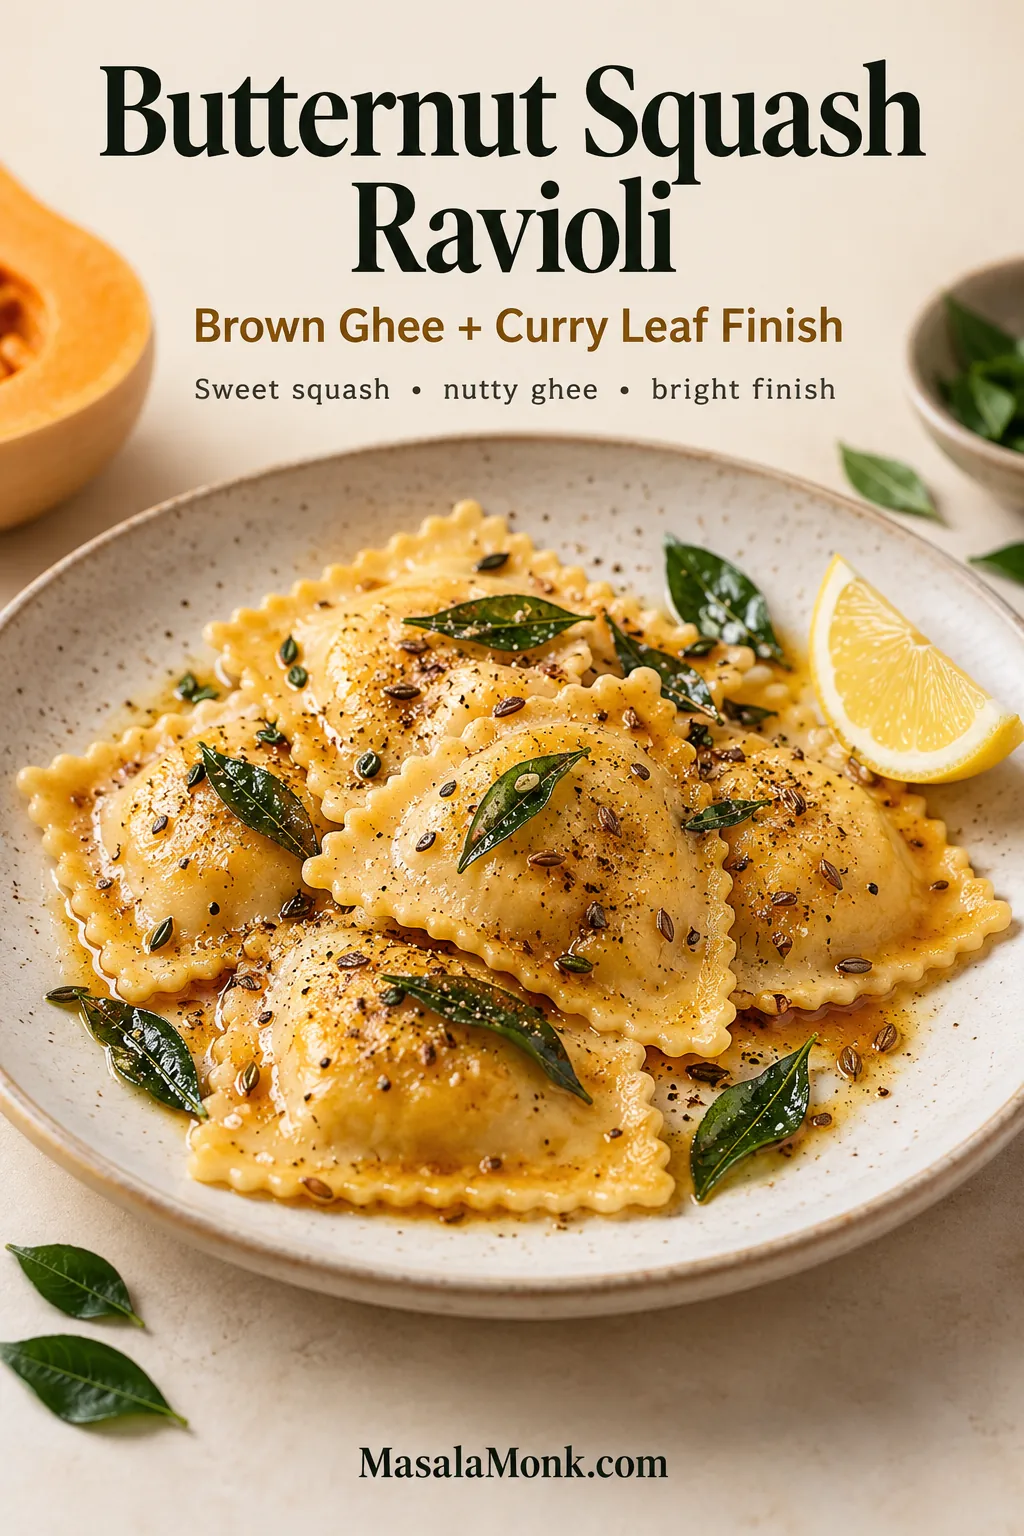
Twist 1: Butternut Squash Ravioli with Brown Ghee & Curry Leaves
Butternut squash is naturally sweet, so it needs nuttiness, aroma and a little acidity around it. Brown butter and sage do that beautifully. Here, ghee brings its own toasted, nutty character while curry leaves add a sharper, citrusy-herbal edge.
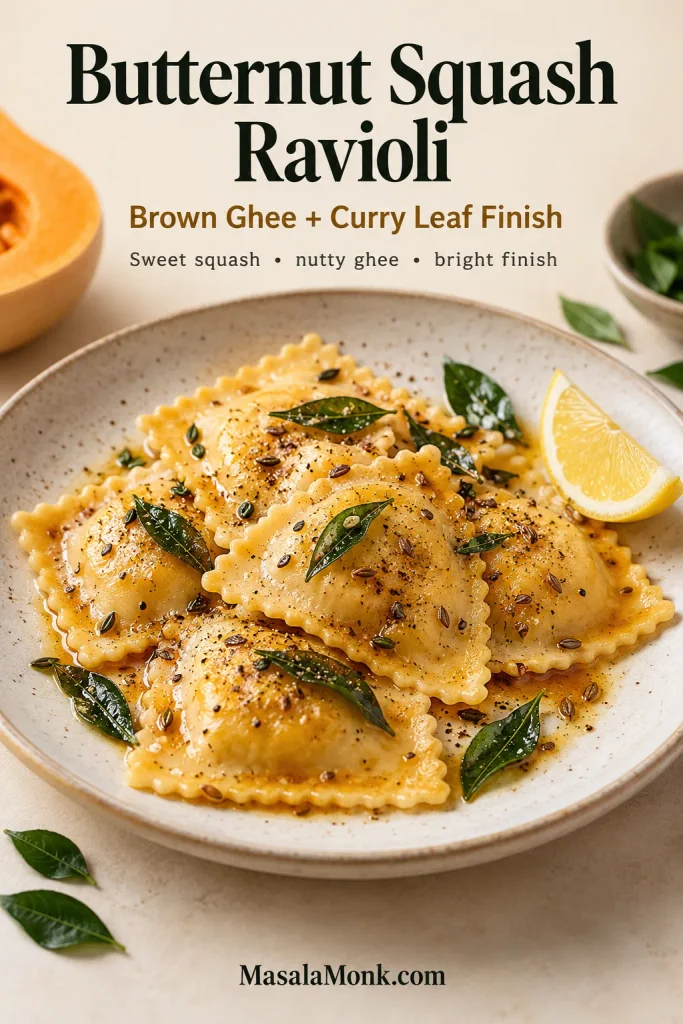
The result should still read as squash ravioli first. Here, “brown ghee” means ghee warmed until fragrant and slightly deeper in color—not butter browned with its milk solids, because finished ghee has already had most of those removed. Let the curry leaves splutter in the hot fat, add cumin and black pepper, and reach for lemon only if the filling needs a brighter edge.
Brown Ghee & Curry Leaf Sauce for Squash Ravioli
Use this finish with homemade or store-bought squash ravioli, and with pumpkin ravioli too. It is especially useful when the filling tastes sweeter than expected.
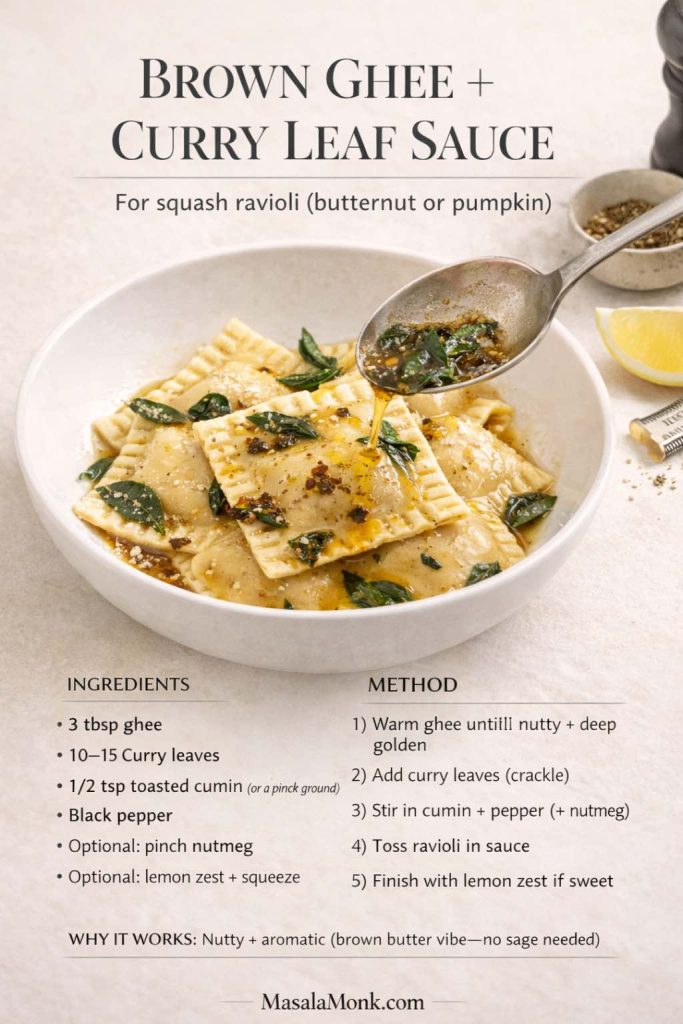
Ingredients
- 3 tbsp ghee
- 10–15 curry leaves (fresh is best; dried works in a pinch)
- 1/2 tsp toasted cumin seeds or a pinch of ground cumin
- Black pepper
- Optional: pinch of nutmeg
- Optional: lemon zest + a squeeze of lemon
Method
- Warm ghee in a small pan until fragrant and slightly deeper in color; do not try to brown it like whole butter.
- Add curry leaves. They’ll crackle and perfume the ghee.
- Stir in cumin and black pepper.
- Add nutmeg for a warmer, slightly sweet background note.
- Toss cooked ravioli in the sauce and finish with lemon zest if the ravioli is very sweet.
Ghee already brings toasted, nutty flavor; blooming curry leaves and cumin in it adds aroma without turning the finish into a gravy. That is enough contrast for sweet squash, with lemon as an optional final correction.
Pumpkin Ravioli Variation
Pumpkin ravioli can take a small pinch of Kashmiri chili in the ghee. Use it for color and gentle warmth, not enough to turn the sauce hot.
A few roasted pistachios are optional but useful: the crunch gives very soft pumpkin ravioli some texture, and their nuttiness echoes the nutty ghee.
Butternut Squash & Cumin-Paneer Ravioli Filling
For homemade squash ravioli, the filling needs to sit in a mound rather than spread. Roasting concentrates the squash; a short cook after mashing removes more moisture; paneer adds body without making the center runny.
Yield: enough filling for roughly 24–30 standard ravioli.
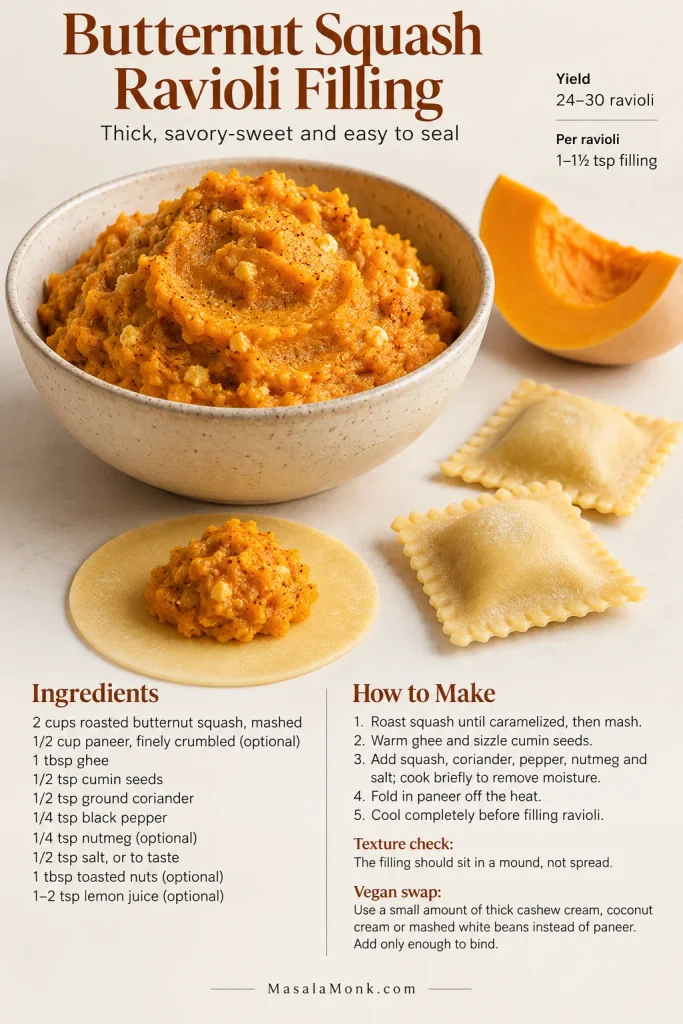
Ingredients
- 2 cups roasted butternut squash (roast cubes until caramelized, then mash)
- 1/2 cup paneer, finely crumbled (optional but excellent)
- 1 tbsp ghee
- 1/2 tsp cumin seeds
- 1/2 tsp ground coriander
- 1/4 tsp black pepper
- 1/4 tsp nutmeg (optional, but gorgeous with squash)
- 1/2 tsp salt (adjust)
- 1 tbsp finely chopped toasted nuts (optional)
- 1–2 tsp lemon juice (optional, for brightness)
Method
- Roast squash until edges caramelize, then mash until smooth.
- Heat ghee, add cumin seeds, let them sizzle briefly.
- Stir in mashed squash and spices, cook 2–3 minutes to evaporate excess moisture.
- Fold in paneer off heat so it stays creamy.
- Let cool completely before filling ravioli.
Vegan swap: replace the paneer with a small amount of thick cashew cream, coconut cream or mashed white beans. Add only enough to bind; a loose filling is much harder to seal.
Assembly: use about 1 to 1½ teaspoons for a standard ravioli. It should look slightly underfilled before sealing. Press out the air and use the no-leak sealing method above.
For a tangier variation, replace part of the paneer with goat cheese. Keep the amount modest so the filling remains squash-forward and the curry-leaf ghee still has room to come through.
Twist 2: Mushroom Ravioli with a Peppery Malai-Style Sauce
Mushroom ravioli already carries plenty of earthiness, so the sauce does not need a large spice list. Brown more mushrooms, use black pepper generously and let a small pinch of kasuri methi sit in the background.
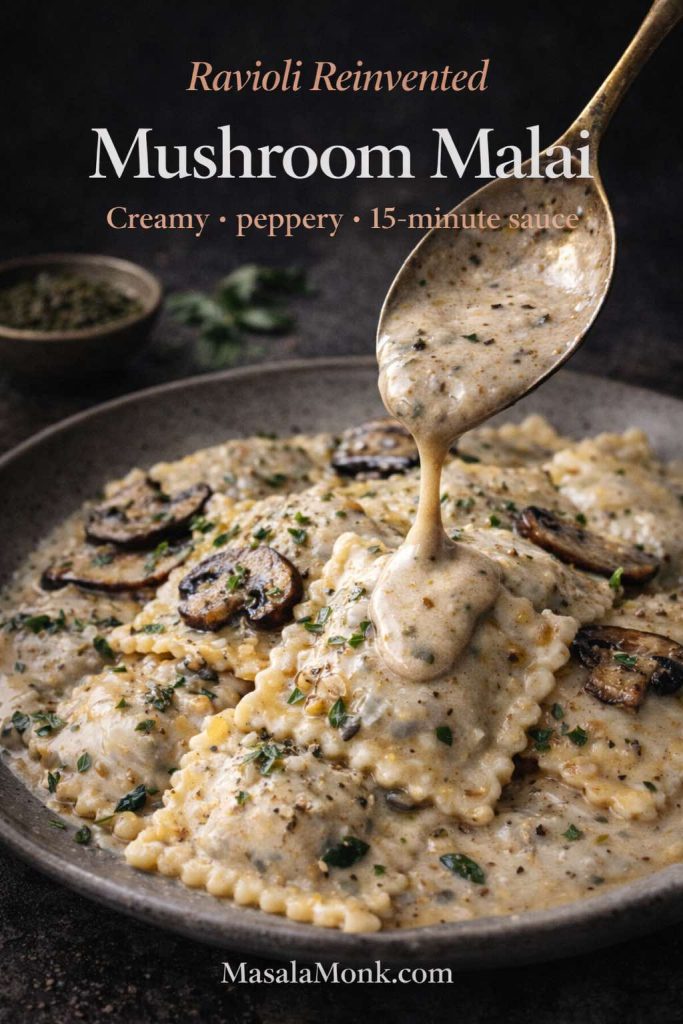
This is closer to a peppery mushroom cream than a curry. Cream rounds the browned mushrooms, cumin adds warmth, and crushed kasuri methi gives the finish a dry, savory aroma that works unexpectedly well with ricotta or cheese-filled pasta.
Creamy Mushroom Malai Sauce
The sauce suits mushroom ravioli best, but it is also good with cheese or spinach-filled ravioli. Once the mushrooms are sliced, the sauce itself usually comes together in about 15 minutes; wetter mushrooms may need a little longer to give up their water and brown. For a more classic version without the Indian finish, see our creamy mushroom sauce guide.
Ingredients
- 2 tbsp butter or ghee
- 250–300 g mushrooms, sliced
- 2 cloves garlic, minced
- 1/2 tsp black pepper (more if you love peppery sauces)
- Pinch of cumin (or a few cumin seeds toasted first)
- 1/2 cup cream (or cashew cream for a plant-based ravioli dinner)
- 1/4 tsp kasuri methi, crushed between your palms
- Salt
- A splash of pasta water
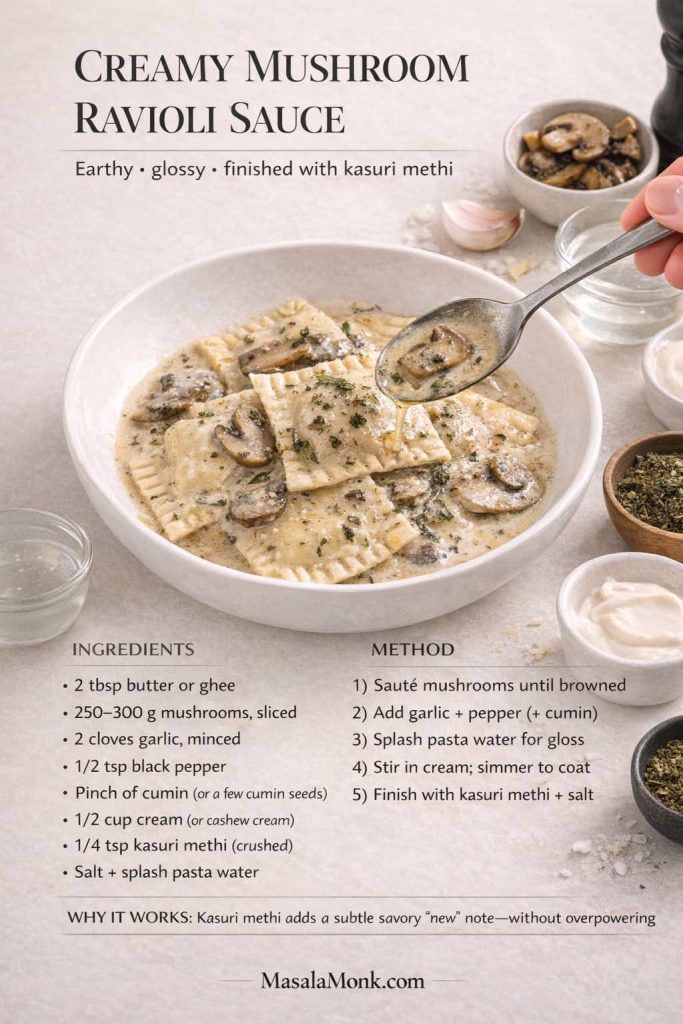
Method
- Sauté mushrooms in butter/ghee until they release water and start browning.
- Add garlic and pepper; cook until fragrant.
- Add a splash of pasta water to create a glossy base.
- Stir in cream; simmer until thick enough to coat a spoon.
- Finish with kasuri methi and adjust salt.
Crush the kasuri methi between your palms before adding it at the end. Heat softens its aroma quickly, so a late addition gives you the most character without making the sauce taste medicinal or dusty.
For a Darker, More Savory Mushroom Finish
For a darker, more savory finish, push the mushrooms further. Let them brown until their edges are dark, use a little more black pepper, and finish with butter or ghee and Parmesan.
Three small changes are enough:
- Brown mushrooms harder for deeper savoriness.
- Use more black pepper than you normally would.
- Finish with a small gloss of butter/ghee and a sprinkle of Parmesan.
The sauce ends up darker, nuttier and more savory without one perfume dominating the bowl.
Because the sauce is rich, a bitter green salad or simply dressed vegetables make a better counterpoint than another creamy side. Keep the plate fairly spare and let the mushrooms do the work.
Mushroom Masala & Ricotta Ravioli Filling
Mushrooms can look ready while they are still steaming out water. Keep cooking until the pan stops looking wet and the chopped mushrooms begin to brown; only then cool them completely before folding in the ricotta.
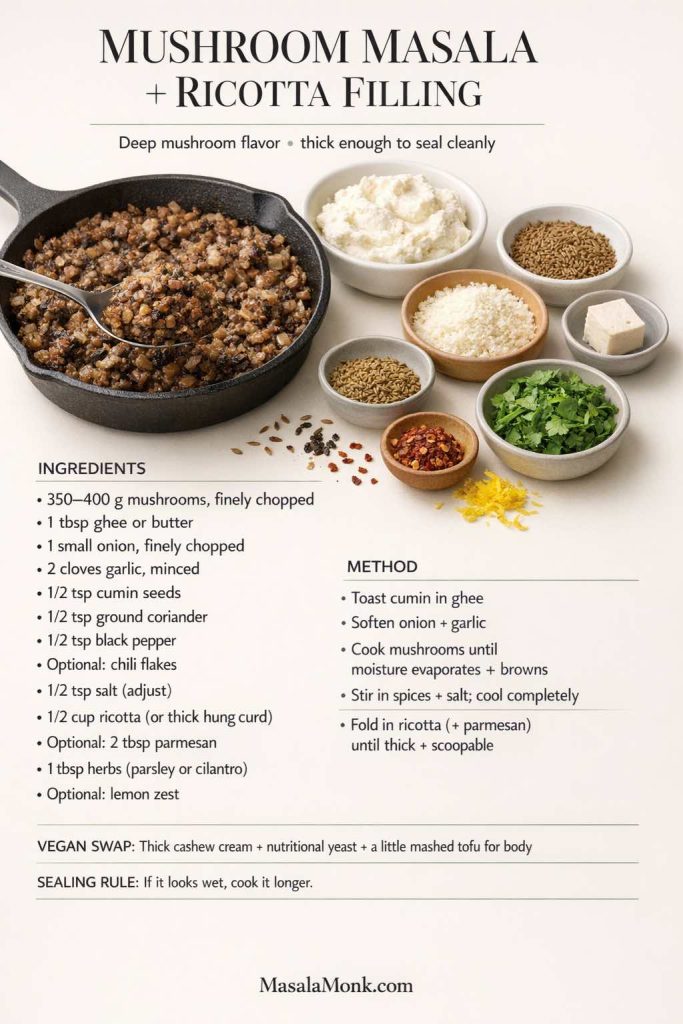
Ingredients
- 350–400 g mushrooms, finely chopped (a mix is best, but even one type works)
- 1 tbsp ghee or butter
- 1 small onion, finely chopped
- 2 cloves garlic, minced
- 1/2 tsp cumin seeds
- 1/2 tsp ground coriander
- 1/2 tsp black pepper
- 1/4 tsp chili flakes (optional)
- 1/2 tsp salt (adjust)
- 1/2 cup ricotta (or thick hung curd; ricotta is classic)
- 2 tbsp grated Parmesan (optional, but helps structure)
- 1 tbsp chopped herbs (parsley or cilantro—either works)
- 1 tsp lemon zest (optional)
Method
- Heat ghee, toast cumin seeds briefly.
- Add onion, cook until translucent, then add garlic.
- Add mushrooms and cook until moisture evaporates and the mixture browns.
- Stir in spices and salt, cook another minute.
- Cool completely.
- Fold in ricotta and Parmesan; mix until thick and scoopable.
Vegan option: use thick cashew cream, a spoonful of nutritional yeast and a little mashed tofu. Add them after the mushrooms cool, and stop as soon as the filling holds its shape.
Pair the filling with the mushroom malai sauce for a deep, earthy plate, or use a lighter butter-and-pepper finish when you want the filling to stand out more.
Twist 3: Lobster Ravioli with Butter-Garlic Cream & Curry Leaves
Lobster and crab ravioli need a lighter hand than meat or mushroom fillings. The seafood is delicate, the filling is usually already rich, and a heavy sauce can flatten both. Butter, garlic, cream and lemon make a familiar base; the Indian turn comes from a small curry-leaf and Kashmiri-chili tadka at the end.
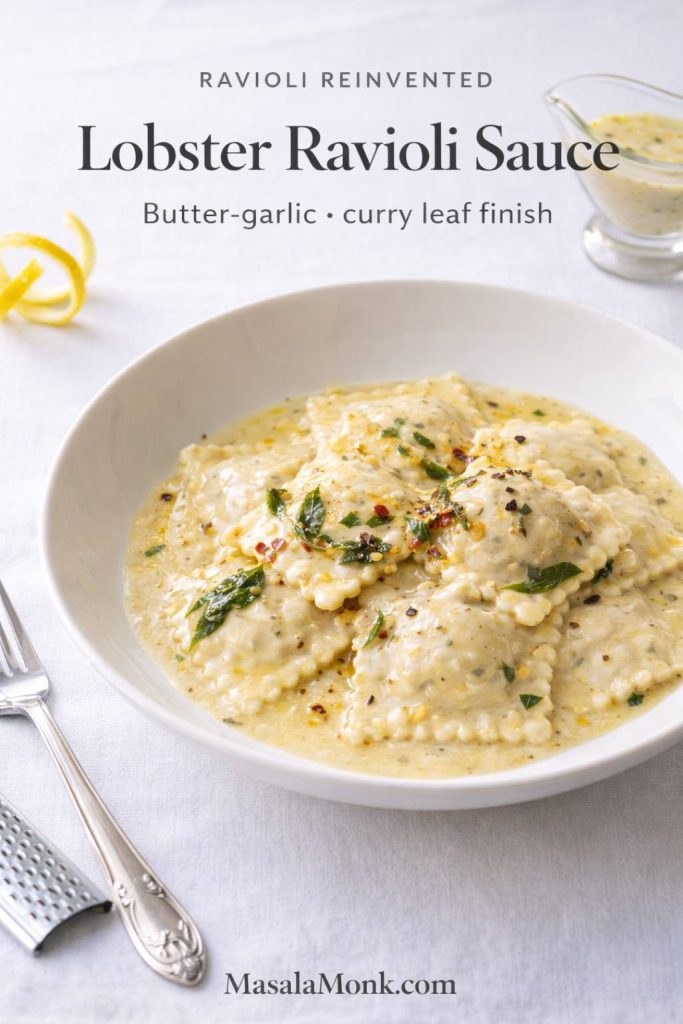
Keep the garlic pale; browned garlic becomes too assertive here. Use pasta water to loosen the cream until the sauce moves around the ravioli when the pan tilts instead of hiding the filling.
Butter-Garlic Cream Sauce for Lobster Ravioli
This sauce is deliberately short: butter, garlic, cream, pasta water, lemon and black pepper.
Ingredients
- 2 tbsp butter (or ghee)
- 2 cloves garlic, minced
- 1/2 cup cream
- Lemon zest + a squeeze of lemon
- Black pepper
- A splash of pasta water
Method
- Melt butter, sauté garlic gently (don’t brown it aggressively).
- Stir in cream and a splash of pasta water.
- Simmer until slightly thick and glossy.
- Finish with lemon and pepper.
Make the tadka separately so the curry leaves stay crisp and aromatic.
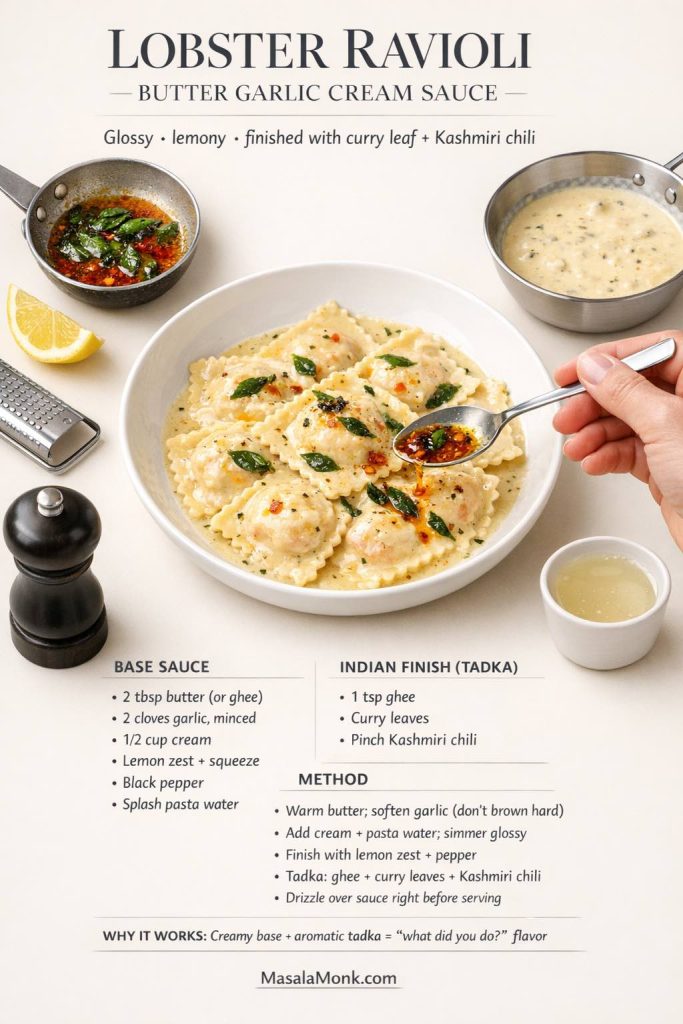
Curry Leaf & Kashmiri Chili Tadka
In a separate small pan:
- Warm 1 tsp ghee.
- Add a handful of curry leaves (they crackle instantly).
- Add a pinch of Kashmiri chili.
Drizzle the tadka over the plated ravioli at the last moment. Simmering it into the cream dulls the curry-leaf aroma; the hot ghee should stay distinct while the chili adds color and mild warmth.
If you are preparing the seafood filling from scratch, keep cooked lobster or crab cold until you mix the filling and refrigerate shaped ravioli promptly. FoodSafety.gov’s fish and shellfish guidance is the external safety reference used for this section.
How to Balance a Butter-Garlic Ravioli Sauce
Butter and cream can make seafood ravioli taste dull if there is no acidity. Add lemon zest first, then a small squeeze of juice after the pan comes off the heat. Black pepper gives the sauce bite; pasta water keeps the fat and cream from feeling greasy.
The same base also works with cheese or spinach ravioli, although the curry-leaf tadka is especially good with lobster and crab.
Lobster or Crab Ravioli Filling
For homemade seafood ravioli, chop the cooked lobster or crab finely enough that the filling can be portioned cleanly. Ricotta or cream cheese binds the pieces and reduces free liquid; the short chill makes the mixture easier to seal.
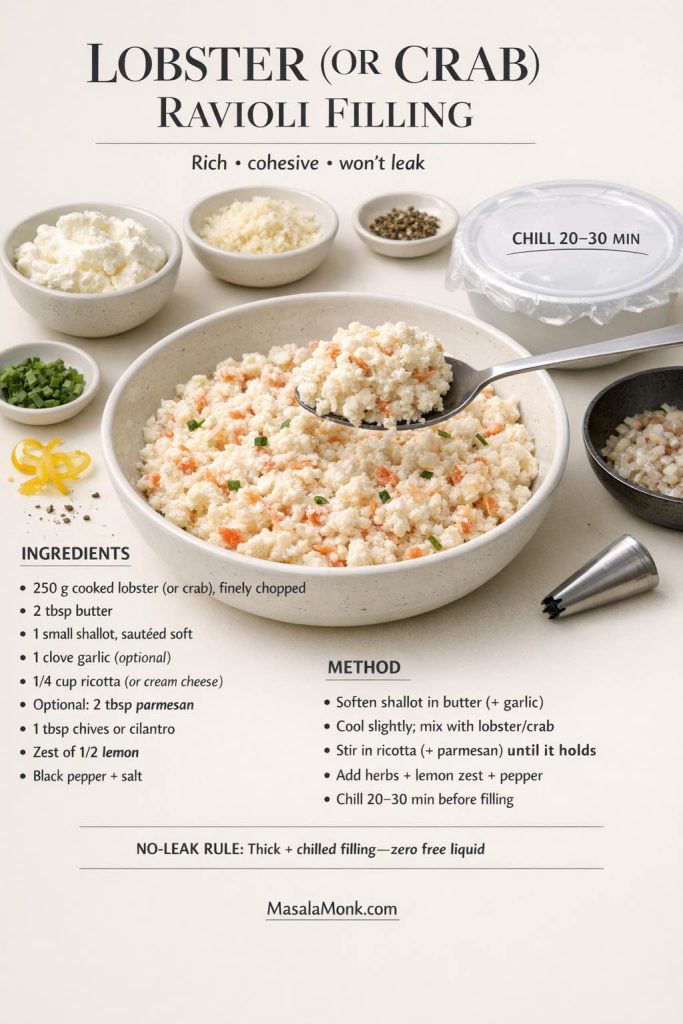
Ingredients
- 250 g cooked lobster meat (or crabmeat), finely chopped
- 2 tbsp butter
- 1 small shallot (or very finely chopped onion), sautéed until soft
- 1 clove garlic, minced (optional)
- 1/4 cup ricotta (or cream cheese for a firmer set)
- 2 tbsp grated Parmesan (optional)
- 1 tbsp chopped chives or cilantro
- Zest of 1/2 lemon
- Black pepper
- Salt to taste
Method
- Sauté shallot in butter until soft; add garlic briefly if using.
- Cool slightly, then combine with chopped lobster/crab.
- Stir in ricotta and Parmesan until the mixture holds together.
- Add herbs, lemon zest, pepper, and salt.
- Chill 20–30 minutes so it firms up before filling.
Texture check: the chilled filling should hold on a teaspoon without dripping. If it looks loose, chill it longer before adding more cheese or binder.
Pair it with the butter-garlic cream sauce for the lightest treatment, or move to the tomato-cream sauce below for more acidity.
Twist 4: Makhani-Style Tomato-Cream Sauce for Ravioli
The tomato base should look dark and concentrated before the cream ever goes in. Cream then turns it glossy without washing out the tang, while kasuri methi arrives as a dry, savory aroma at the end; use garam masala only as a tiny background note.
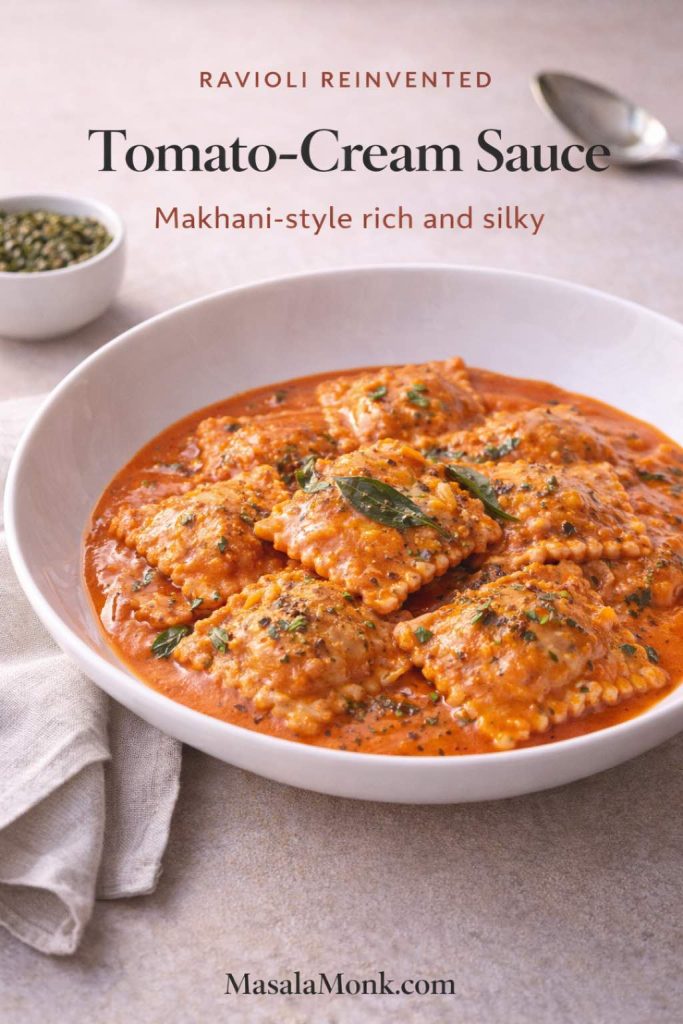
Tomato-Cream Sauce That Clings to Ravioli
A ravioli sauce should leave a thin coating on the pasta when you lift it from the pan. If tomato liquid runs straight back to the bottom, reduce it longer before adding cream.
Ingredients
- 2 tbsp butter or ghee
- 2 cloves garlic
- 2 tbsp tomato paste
- 1/2 cup crushed tomatoes or passata
- 1/2 cup cream (or cashew cream)
- Pinch of kasuri methi
- Pinch of garam masala (optional, keep it light)
- Salt, pepper
- Pasta water
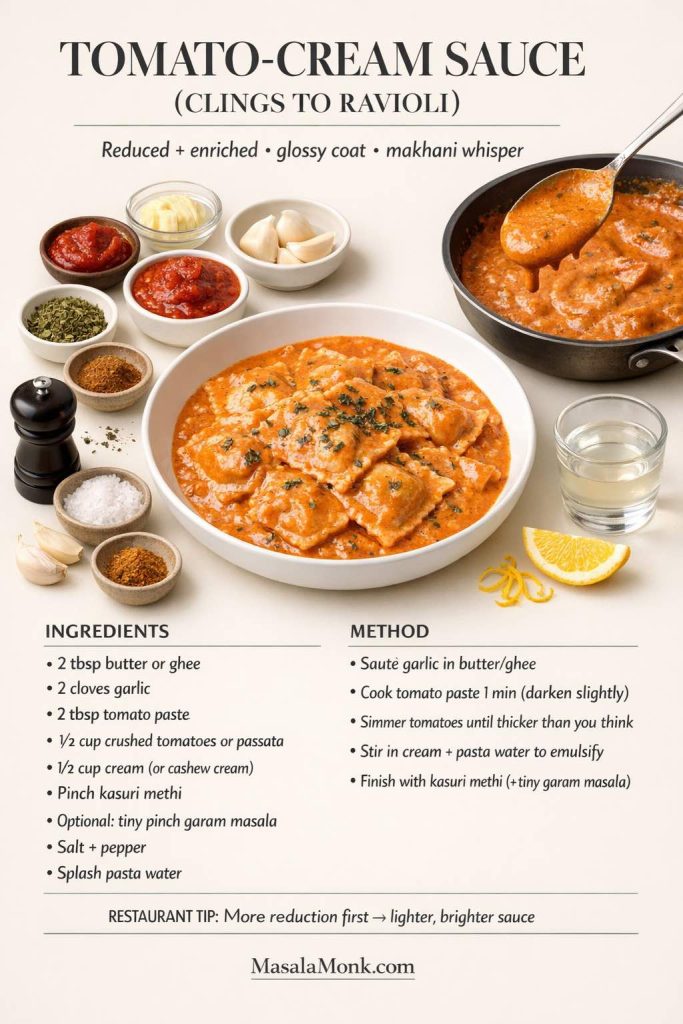
Method
- Heat butter/ghee, sauté garlic.
- Add tomato paste and cook it for a minute until it darkens slightly.
- Add crushed tomatoes; simmer until thicker than you think it needs to be.
- Add cream/cashew cream and a splash of pasta water to emulsify.
- Finish with kasuri methi and, optionally, a tiny pinch of garam masala for a more distinctly makhani finish.
Use it with lobster, crab, cheese or meat-filled ravioli. A brighter homemade tomato base also works here; our fresh tomato sauce guide explains how to reduce tomatoes without losing their clean flavor.
Keep Tomato-Cream Sauce Rich but Balanced
When the sauce tastes heavy, adjust the edges before changing the whole recipe:
- lemon zest
- black pepper
- a hint of heat
- or simply more reduction before adding cream
Taste again after each adjustment. Often a little acid or pepper is enough to make the tomato and cream feel separate and clear rather than muddy.
For a dairy-free version, cashew cream gives the sauce body without introducing a strong coconut flavor. Add it after the tomato has reduced and keep the heat gentle once it is in the pan.
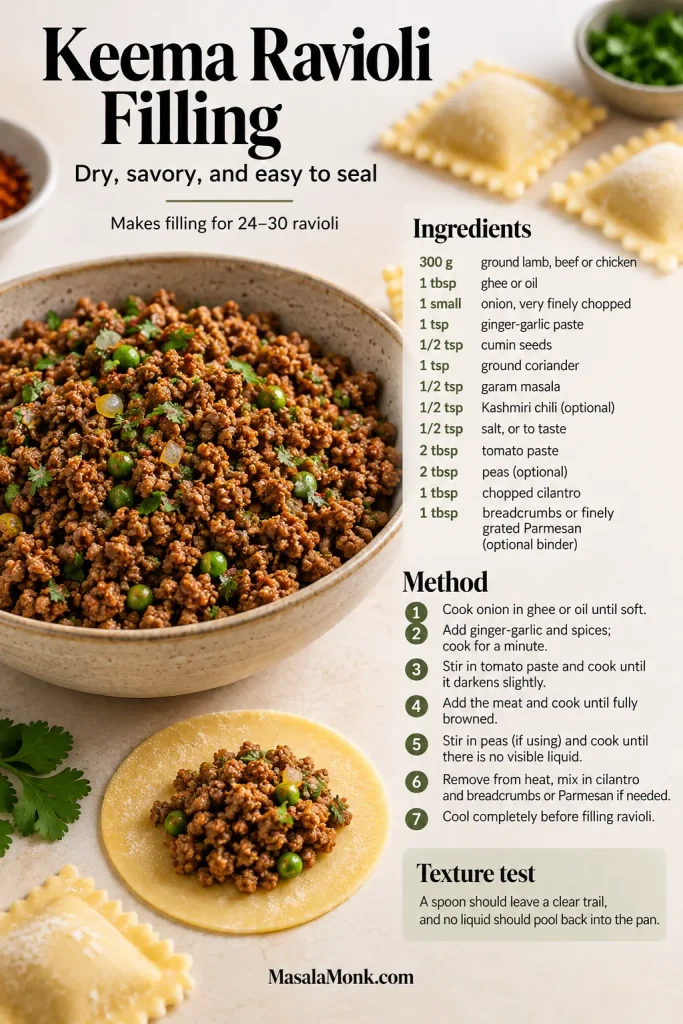
Keema Ravioli Filling
Keema makes a naturally good ravioli filling because minced meat can be cooked down until dry, finely textured and intensely seasoned. The important part is evaporating the tomato and meat juices before the mixture cools.
Yield: enough filling for roughly 24–30 standard ravioli.
Ingredients
- 300 g ground meat (lamb, beef, or chicken)
- 1 tbsp ghee or oil
- 1 small onion, very finely chopped
- 1 tsp ginger-garlic paste (or minced ginger + garlic)
- 1/2 tsp cumin seeds
- 1 tsp ground coriander
- 1/2 tsp garam masala
- 1/2 tsp Kashmiri chili (optional)
- 1/2 tsp salt (adjust)
- 2 tbsp tomato paste (or finely chopped tomato cooked down)
- 2 tbsp peas (optional, classic keema touch)
- 1 tbsp chopped cilantro
- 1 tbsp breadcrumbs or finely grated Parmesan (optional binder)
Method
- Heat ghee, toast cumin seeds.
- Add onion, cook until golden.
- Add ginger-garlic, cook until fragrant.
- Add meat, break it up, cook until browned.
- Stir in spices, salt, and tomato paste; cook until the mixture looks dry and cohesive.
- Add peas if using; cook briefly.
- Cool completely; fold in cilantro and a binder if needed.
Texture check: drag a spoon through the pan. The path should stay visible and no liquid should run back into it. If the keema is dry but too crumbly, bind it with a spoonful of ricotta, cream or finely grated Parmesan.
Two sauces work particularly well:
- butter-garlic cream with curry leaf tempering for a luxurious feel, or
- tomato-cream makhani style for a warmer, more tomato-forward finish.
Twist 5: Toasted Ravioli with Chutney Dips
Toasted ravioli changes the texture completely: the wrapper becomes crisp, the filling stays soft, and suddenly a pasta dinner can be eaten with your fingers. Cheese, meat and mushroom fillings all work; very delicate seafood ravioli is better saved for a sauce.
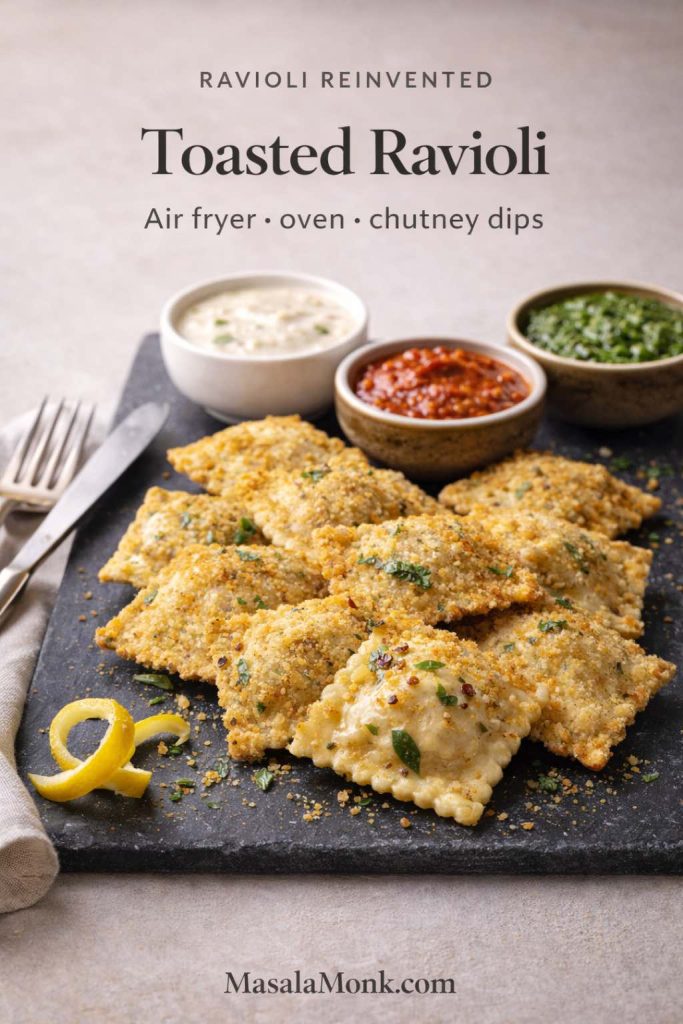
Marinara still works, but chutneys are what make this feel different from a standard toasted-ravioli plate; the detailed dip pairings come later.
For one batch
- 450 g / 1 lb ravioli (cheese, meat or mushroom; refrigerated or frozen)
- 1 tbsp neutral oil or cooking spray, plus more as needed
- 1 large egg, beaten (optional, for breading)
- 1 cup breadcrumbs or panko (optional, for breading)
- Coconut chutney, kara chutney, thecha or marinara, for serving
For meat-filled ravioli, follow the package directions and make sure the filling is fully cooked before serving. The times below are crisping ranges; they are not a substitute for safely cooking a raw meat filling.
Air-Fryer Toasted Ravioli
Refrigerated ravioli is easiest to bread because the surface is pliable. Frozen ravioli can work too; if the coating will not adhere while it is rock-hard, thaw it only long enough to become easy to handle. Ravioli size and package directions still take priority.
Method
- For a breaded crust, dip the ravioli in beaten egg, coat in breadcrumbs or panko and mist lightly with oil. For an unbreaded version, toss the ravioli with a thin film of oil.
- Air fry in a single layer at 390°F / 200°C for 6–10 minutes, flipping halfway. Start checking at 6 minutes.
- Remove the ravioli when the edges are deep golden and the shell feels crisp; serve while the coating is still dry and crunchy.
Air fryers vary in fan strength and basket size, so the range matters more than one exact minute. Small refrigerated ravioli may finish near the lower end; larger or frozen pieces can take longer.
Oven-Baked Toasted Ravioli
Heat the oven to 425°F / 220°C. A rack over a sheet pan keeps hot air moving around both sides; without a rack, flip the ravioli halfway so the underside does not steam against the tray.
- Arrange breaded ravioli in a single layer on a lightly oiled rack or sheet pan and mist the tops with oil.
- Bake for 10–15 minutes, flipping halfway if the ravioli sits directly on the tray.
- Pull the tray when the crumb coating is dry, crisp and golden at the edges.
Quick comparison: toasted ravioli three ways. Air frying is the easiest small-batch option, the oven handles a tray with less fuss, and deep-frying gives the crispest shell.
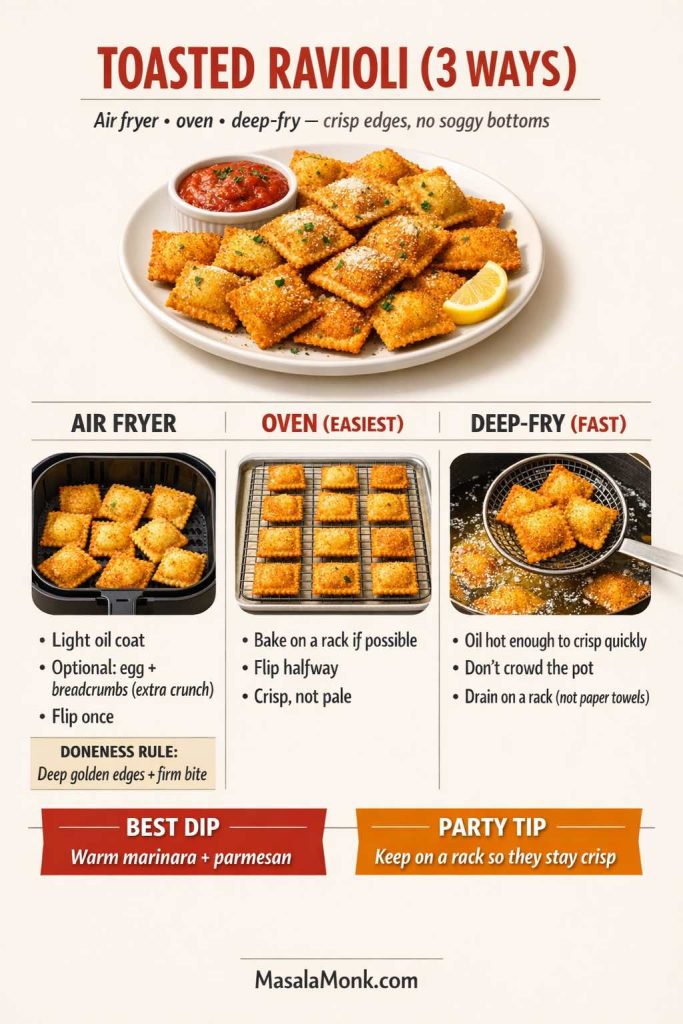
Deep-Fried Ravioli
Deep-frying gives the most even, brittle crust. Use a thermometer if you have one and give the oil time to return to temperature between batches; each new handful cools it quickly.
- Heat about 2 inches / 5 cm neutral oil to 350°F / 175°C.
- Fry in uncrowded batches for about 2–4 minutes, turning as needed, until the coating is evenly deep golden.
- Lift to a wire rack and let the oil return to 350°F / 175°C before adding the next batch.
The rack matters because steam can escape from underneath; a flat paper-lined plate softens the crust more quickly.
Chutney Dips for Toasted Ravioli
Choose dips with different jobs—one cool, one tangy or roasted, and one hot:
- For cool, creamy contrast: South Indian coconut chutney, especially with cheese or spinach ravioli.
- For roasted chili and tomato depth: kara chutney.
- For sharper garlic heat: thecha; serve a smaller spoonful because it can dominate a mild filling.
A platter works best when one dip cools, one brings acidity and one brings heat. That gives each bite somewhere different to go without burying the ravioli.
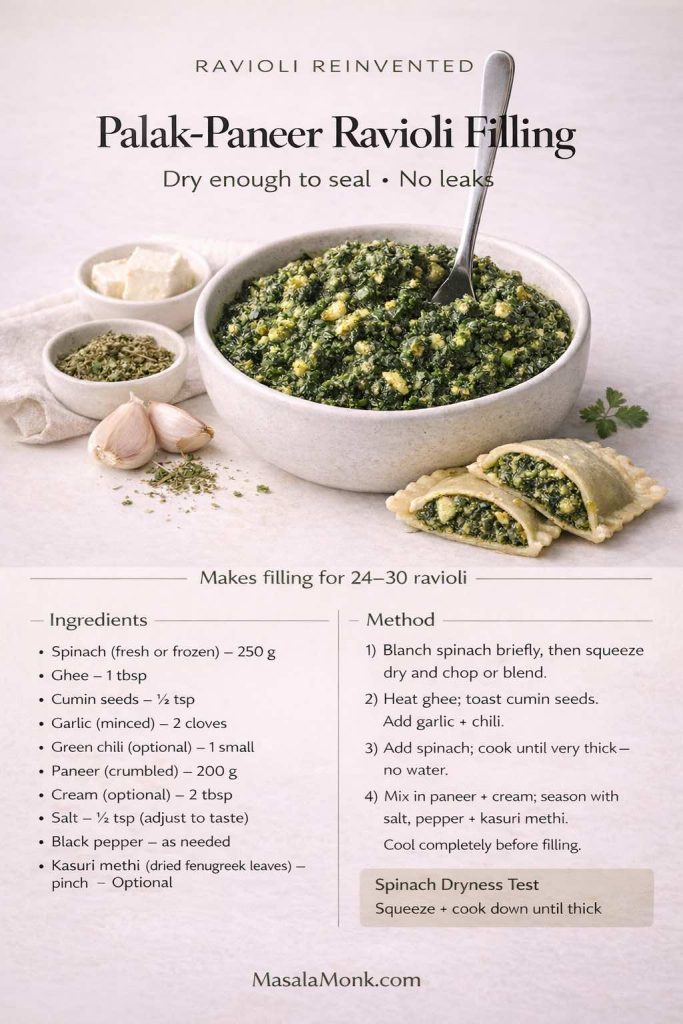
Palak-Paneer Ravioli Filling
Palak-paneer filling works because both components help with structure: squeezed spinach loses the water that causes leaks, while crumbly paneer absorbs moisture and keeps the center tender.
Yield: enough filling for roughly 24–30 standard ravioli.
Ingredients
- 250 g spinach (fresh or frozen)
- 1 tbsp ghee
- 1/2 tsp cumin seeds
- 2 cloves garlic, minced
- 1 small green chili (optional, adjust)
- 200 g paneer, crumbled finely
- 2 tbsp cream (optional, for richness; use only if the filling remains thick)
- 1/2 tsp salt (adjust)
- Black pepper
- Optional: pinch of kasuri methi
Method
- Blanch spinach quickly, squeeze out moisture, then chop finely or blend.
- Heat ghee, toast cumin seeds, add garlic and chili.
- Add spinach and cook until thick and not watery.
- Mix in paneer, salt, pepper and kasuri methi. Add cream only if wanted and the filling is still thick enough to hold its shape.
- Cool completely before filling ravioli.
Squeezed spinach and crumbly paneer leave very little free liquid, which is why this filling seals so reliably. For softer homemade paneer, our homemade paneer guide explains how pressing time changes the texture.
It also holds up well in the baked ravioli casserole later in the post because the filling remains cohesive under longer heat.
↑ Back to Ravioli Recipe Contents
Ravioli Variations: Keto, Low-Carb, Vegan & Gluten-Free
Ravioli is a three-part construction: wrapper, filling and sauce. Change one of those and the other two need to carry a little more of the texture or flavor. That is the useful way to think about keto, vegan and gluten-free versions.
Keto Ravioli with a Cheese Wrapper
With a mozzarella wrapper, the filling has to do more of the structural work. Keep it compact and fairly dry, and work while the cheese is just pliable enough to fold without cracking.
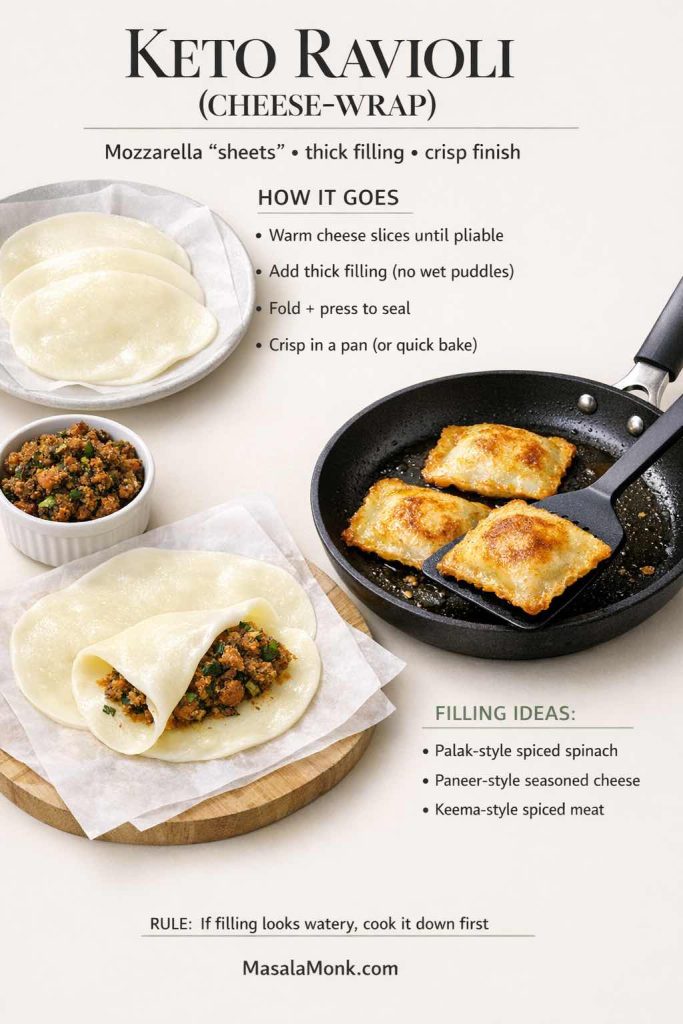
How it goes
- Use thin mozzarella slices as “sheets.”
- Warm until pliable.
- Add a thick filling, fold, and seal.
- Crisp lightly in a pan or bake briefly.
Thick, strongly seasoned fillings work best:
- palak-style spiced spinach
- paneer-style seasoned cheese
- keema-style spiced meat
A Lower-Carb Ravioli Plate
If you are lowering carbs without replacing the pasta wrapper, treat ravioli as a smaller part of the plate:
- choose a richer sauce (butter-garlic cream, mushroom malai, tomato-cream)
- add protein and vegetables on the side
- serve fewer ravioli, but make each bite count
Vegan Ravioli Filling Ideas
Vegan fillings are easiest to seal when they are naturally thick:
- lentil filling (dal-style, reduced until thick)
- spiced mushroom-onion filling
- coconut vegetable filling with mustard seeds and curry leaves
Pair lentil or mushroom fillings with tomato sauce for contrast, or use a coconut-based sauce when you want a softer, rounder finish.
Gluten-Free Ravioli
Gluten-free ravioli is more sensitive to hydration and handling than the egg dough above. Use a gluten-free pasta dough or wrapper formula designed for filled pasta rather than simply swapping flour cup-for-cup, then keep the filling thick and the simmer gentle.
The mechanics do not change: clean border, modest filling, trapped air pressed out, firm seal. Use the same sealing checklist and handle the gluten-free wrapper with less stretching.
Vegan Red Lentil Dal Ravioli Filling
Red lentils are unusually well suited to ravioli because they become cohesive as they cook down. The filling should mound on a spoon; if it spreads, keep reducing it.
Ingredients
- 1 cup red lentils
- 2 1/2 cups water
- 1 tbsp oil
- 1/2 tsp cumin seeds
- 1 small onion, finely chopped
- 1 tsp ginger-garlic paste
- 1 tsp ground coriander
- 1/2 tsp turmeric
- 1/2 tsp salt (adjust)
- Lemon juice
- Chopped cilantro
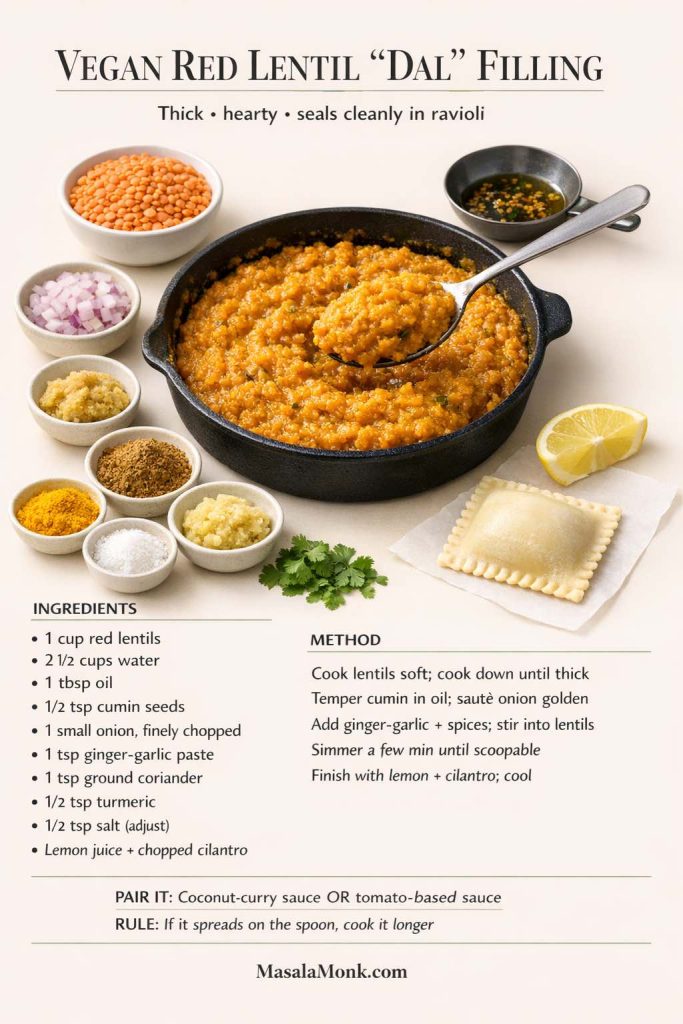
Method
- Cook lentils until soft; then cook down until thick.
- In a separate pan, temper cumin in oil, sauté onion until golden.
- Add ginger-garlic and spices, then stir into lentils.
- Cook another few minutes until the mixture is scoopable.
- Finish with lemon and cilantro, then cool.
Use a tomato-based sauce for acidity or a coconut-based sauce for a softer finish. Let the lentils provide the body rather than trying to mimic cheese.
How to Match Ravioli with the Right Sauce
There is no single best sauce because the filling has already done half the seasoning. Ask what it needs next: sweet squash likes nutty fat and acid, mushrooms like pepper and restrained cream, seafood wants brightness, and mild cheese is flexible.
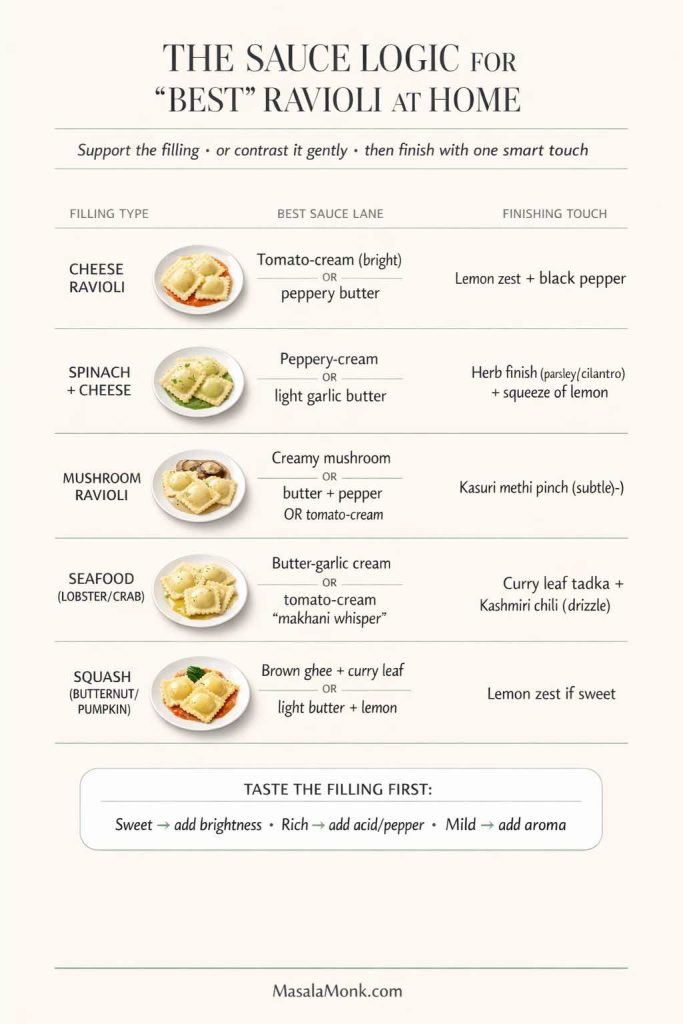
Sauces for Cheese Ravioli
Mild cheese fillings are flexible. Good options include:
- tomato-cream sauce with a little brightness
- butter sauce with black pepper and lemon zest
- a thin drizzle of spiced ghee for an Indian accent without changing the whole dish
Cheese ravioli is also one of the easiest choices for toasting because the filling usually stays stable while the wrapper crisps.
Sauces for Spinach & Cheese Ravioli
Spinach-and-cheese ravioli usually needs pepper, acid or garlic more than extra richness:
- cream sauce that’s peppery and not too thick
- a light garlic butter sauce
- or a spinach-forward sauce that feels palak-inspired
If the bowl tastes flat, add black pepper and a little lemon before adding more cheese or cream.
Sauces for Mushroom Ravioli
Mushroom ravioli can go rich or spare:
- mushroom malai cream sauce for richness
- butter sauce with pepper for something lighter
- tomato-cream for a contrasting tang
Sauces for Seafood Ravioli
For lobster or crab fillings, keep the sauce bright:
- butter-garlic cream with curry leaf tadka
- tomato-cream makhani style for a richer, warmer finish
Sauces for Squash Ravioli
For butternut or pumpkin fillings, balance the sweetness:
- ghee + curry leaves (nutty, aromatic)
- or a lighter butter sauce with lemon zest for balance
Taste the filling before deciding on the finish. Sweet fillings need brightness, rich fillings need acid or pepper, and mild fillings benefit from aroma. That small check prevents most sauce mismatches.
↑ Back to Ravioli Recipe Contents
Build a Ravioli Dinner Without Overthinking It
Once the ravioli and sauce are decided, the rest of dinner should get simpler. Rich or creamy bowls benefit from something sharp and green; crisp ravioli can stand on its own as a snack; and a crowd is usually easier to feed with a baked or slow-cooker version than with individual plates.
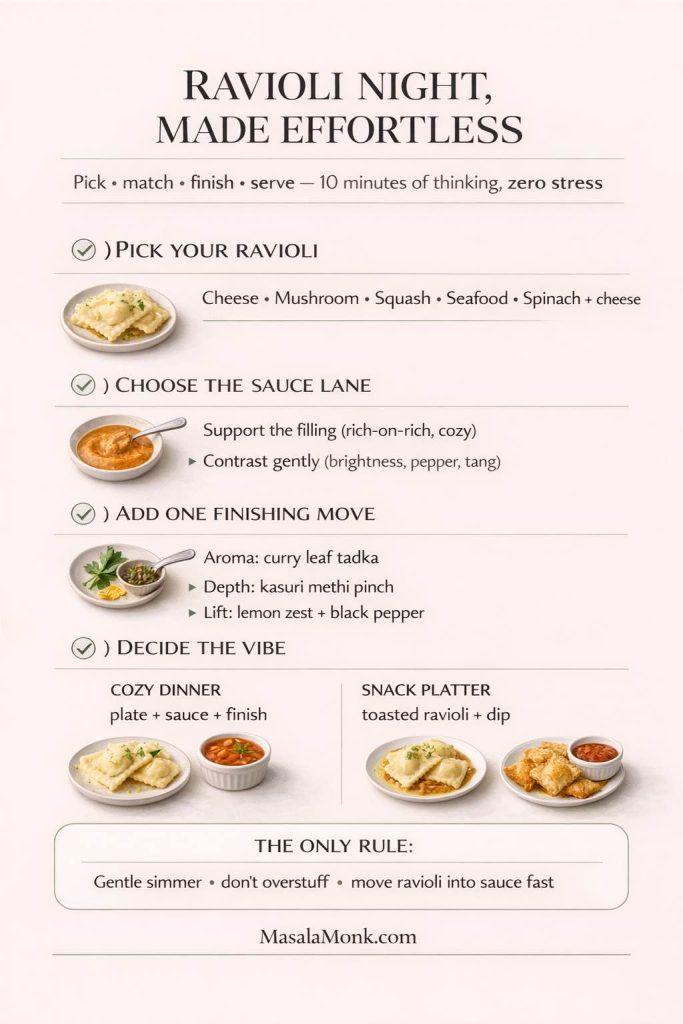
Toasted ravioli with two contrasting chutneys is enough for a snack plate. Mushroom ravioli with the malai-style sauce needs little more than a bitter salad or green vegetable; squash or lobster ravioli can take a lemony salad when the sauce is rich.
When the job is feeding more people, move away from individual plating. The baked casserole and slow-cooker versions below trade delicacy for convenience and are much easier to serve at the table.
Baked Ravioli Casserole
Baked ravioli uses the filled pasta as both noodle and filling layer, which is why it comes together faster than lasagna. Frozen cheese or meat ravioli is the most forgiving choice. Keep the sauce thick enough to coat the layers, cover for most of the bake, then uncover only long enough to brown the top.
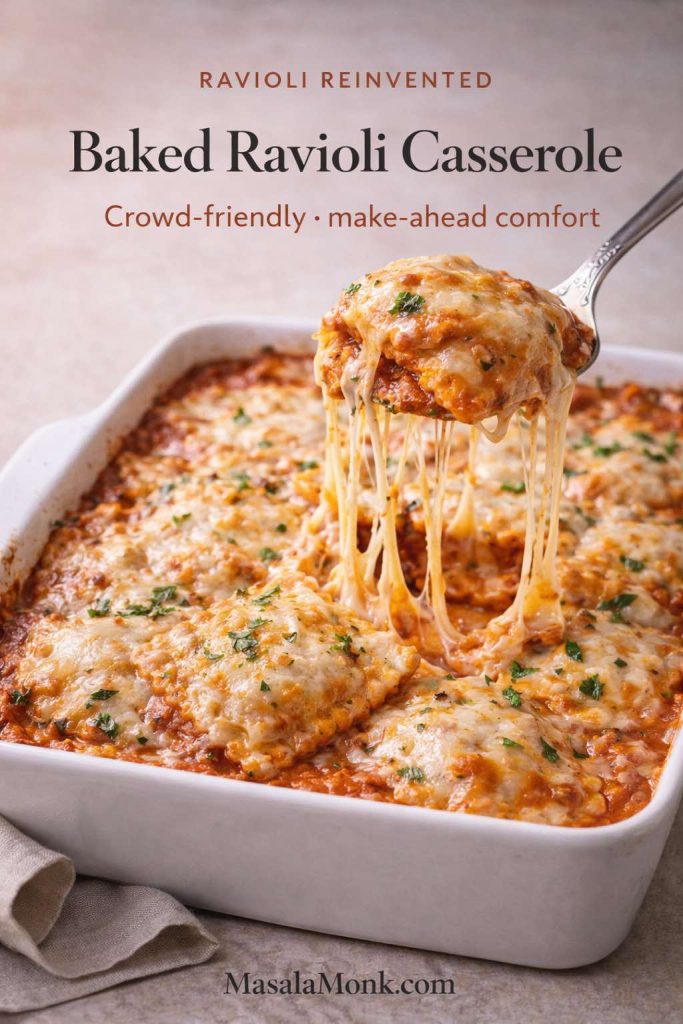
Baked Ravioli Casserole Recipe
Ingredients
- 1 to 1.5 kg ravioli (frozen or refrigerated)
- 3–4 cups sauce (choose one below)
- 2 cups shredded mozzarella (or a mix of mozzarella + cheddar)
- 1/2 cup Parmesan (optional)
- 1 tbsp butter or ghee (for greasing)
- Optional: sautéed mushrooms, spinach, or cooked keema as an extra layer
Sauce options
- Tomato-cream makhani-style sauce: thick, glossy, clingy
- Mushroom malai sauce: rich and earthy
- Simple marinara-style tomato sauce finished with curry leaf tempering (lighter, still special)
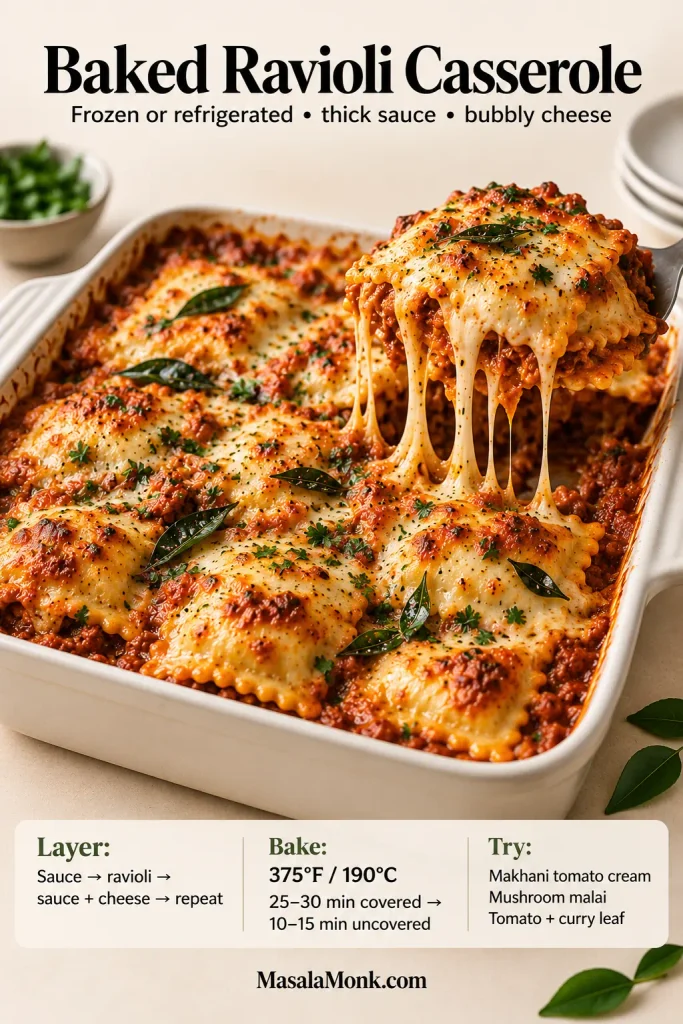
For meat-filled ravioli, use commercially prepared ravioli whose package directions allow this baking method, or make sure a homemade meat filling is fully cooked. The casserole times below are baking ranges, not a substitute for safely cooking a raw meat filling.
Method
- Heat oven to 190°C / 375°F.
- Grease a baking dish with butter/ghee.
- Add a thin layer of sauce.
- Layer ravioli in a single layer.
- Spoon sauce over, then add cheese.
- Repeat layers until you’re done, finishing with sauce and cheese.
- Cover with foil and bake 25–30 minutes.
- Uncover and bake another 10–15 minutes until bubbly and browned.
Make ahead: assemble the casserole earlier in the day, cover and refrigerate it, then bake when needed. A chilled casserole may take a little longer; use a hot, bubbling center and browned top as the final cues.
Each ravioli already contains a filling, so the casserole does not need a separate ricotta layer. For a fuller bake, add one thin layer of keema or browned mushrooms between the ravioli; too many extras make the layers heavy and wet.
Finish after baking, not before: a spoonful of curry-leaf ghee keeps its aroma, while crushed kasuri methi gives a tomato-cream casserole a drier, savory edge. If baked pasta is the format you cook most often, our baked ziti guide goes deeper on saucy layers and preventing a dry bake.
Baking Lobster Ravioli
Lobster ravioli needs enough sauce to stay moist in the oven. Use:
- a gentle tomato-cream sauce
- or a butter-cream sauce with lemon
Do not chase a dark crust with seafood-filled ravioli. Bake only until the center is hot and the sauce bubbles; prolonged heat can make the lobster or crab filling firm and dry.
Crock Pot Ravioli / Slow Cooker Ravioli Lasagna
Slow-cooker ravioli is essentially a shortcut lasagna: frozen ravioli, thick sauce and cheese layered directly in the crock pot. It is less precise than boiling ravioli to order, but useful when the meal needs to hold for a group.
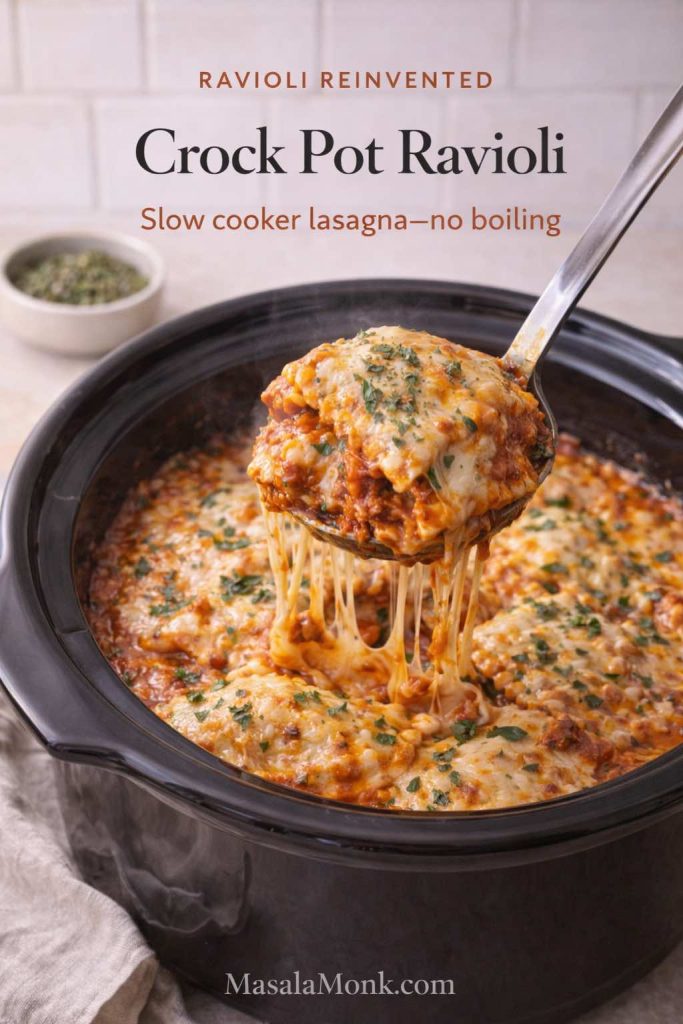
Crock Pot Ravioli Recipe
Ingredients
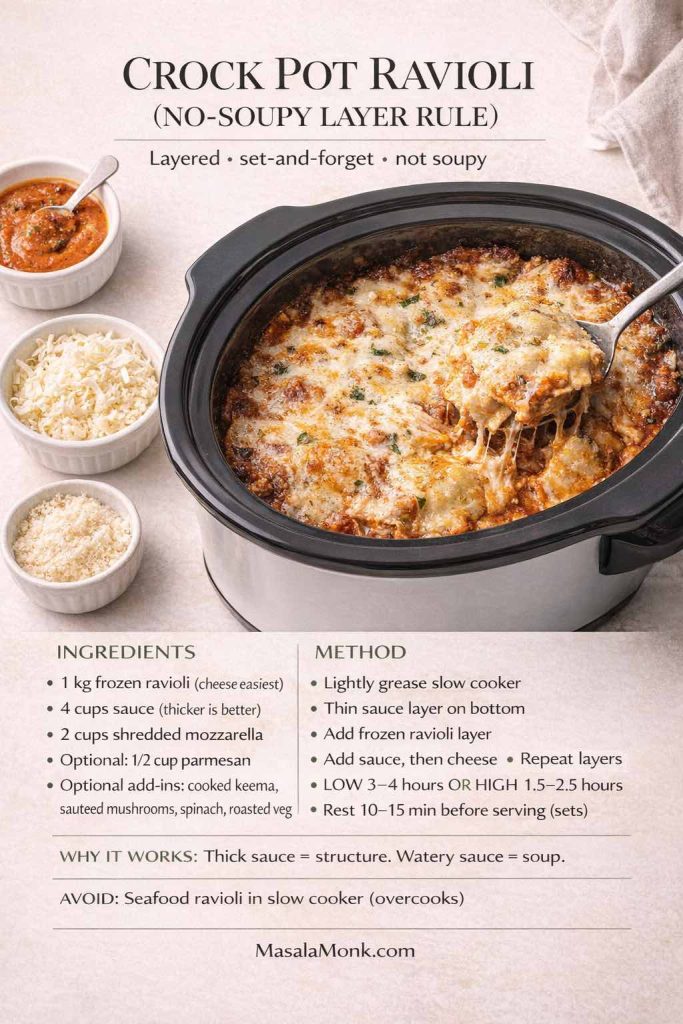
- 1 kg frozen ravioli (cheese ravioli is the easiest starting point)
- 4 cups sauce (thicker is better)
- 2 cups shredded mozzarella
- 1/2 cup Parmesan (optional)
- Optional add-ins: cooked keema, sautéed mushrooms, spinach, or roasted vegetables
Method
- Lightly grease the slow cooker.
- Spread a thin layer of sauce on the bottom.
- Add a layer of frozen ravioli.
- Add sauce, then cheese.
- Repeat layers.
- Cook on LOW for 3–4 hours or HIGH for 1.5–2.5 hours, depending on your slow cooker.
- Let it sit 10–15 minutes before serving so it sets.
Use a thick sauce. The slow cooker traps steam, so a loose sauce becomes thinner as the ravioli cooks. Start thicker than you would for stovetop pasta and let the finished dish rest before serving.
Indian-Inspired Slow Cooker Variations
- Makhani-style: use the tomato-cream sauce and add a light kasuri methi finish at the end.
- Keema ravioli lasagna: add the cooked keema filling as a thin layer between ravioli.
- Palak-paneer: layer the spinach-paneer filling lightly between ravioli, or use spinach-and-cheese ravioli with a creamy sauce.
Skip seafood-filled ravioli in the slow cooker. Cheese, mushroom, spinach, squash and cooked-keema versions tolerate the longer holding time far better.
↑ Back to Ravioli Recipe Contents
Why These Indian-Inspired Ravioli Twists Work
These five combinations work because the Indian element answers something the ravioli already needs:
- Curry leaves take over sage’s aromatic role with squash, while ghee keeps the nutty richness that sweet fillings already like.
- Mushrooms can handle kasuri methi because both lean earthy; cream keeps the combination familiar rather than turning it into a heavy curry.
- Lobster gets the tadka at the very end, so aroma arrives on top of the butter-garlic sauce without burying the seafood.
- Tomato and cream already sit close to makhani territory; a little dried fenugreek nudges the sauce in that direction without changing its basic identity.
- Crisp ravioli needs contrast more than another heavy sauce, which is why coconut chutney, kara chutney and thecha work so well beside it.
Use the same logic beyond these recipes: identify whether the filling is sweet, earthy, rich or mild; choose a sauce with the right weight; then add one Indian accent only where it improves aroma, acidity or texture.
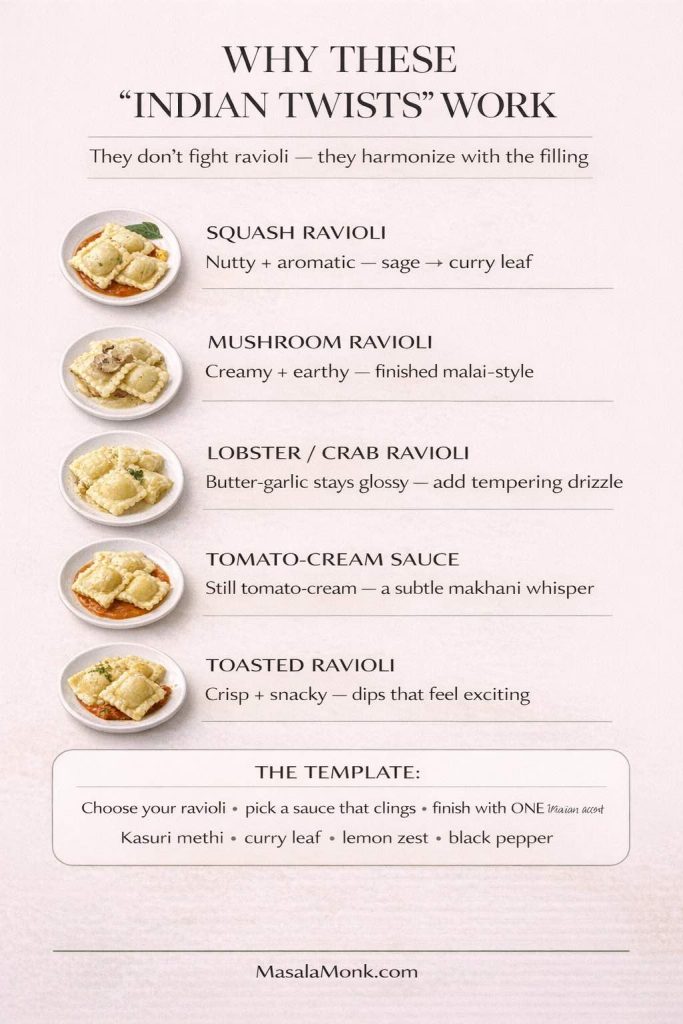
That restraint is what keeps the crossover coherent. Curry leaves take over the aromatic job sage often does with squash. Kasuri methi deepens cream without taking over the sauce, and chutneys sit beside crisp ravioli because contrast is the point. The pasta should still taste like ravioli when you are done.
Ravioli FAQs
The full methods live above; these are the few questions that still benefit from a quick answer.
Cooking & Timing
1) How do you cook ravioli so it doesn’t fall apart?
Use a wide pot and keep the water at a lively simmer, not a rolling boil. Stir once, then lift cooked ravioli with a slotted spoon straight into warm sauce. Handmade ravioli also depends on clean seams and pressed-out air; see How to Seal Ravioli Without Leaks.
Dough & Sealing
2) What flour is best for ravioli dough?
All-purpose flour works well in most kitchens, while Italian “00” flour can give a silkier sheet. A little semolina can add chew, but good kneading and enough rest matter more than chasing one perfect flour.
3) How thin should ravioli dough be?
Thin enough that you can see a faint shadow of your hand through the sheet, but sturdy enough to lift without stretching or tearing. Thick dough makes the seams bulky; paper-thin dough is more likely to split around the filling.
Sauces & Fillings
4) What is the best sauce for ravioli?
Match the sauce to the filling: cheese is flexible, mushroom likes pepper and restrained cream, squash likes nutty fat and acidity, and seafood benefits from butter and lemon. Use the ravioli sauce chart for a quick match.
5) What makes a good homemade ravioli filling?
Flavor matters, but texture decides whether the ravioli survives. A good filling is cool, thick and scoopable with no loose liquid. The squash-paneer, mushroom-ricotta, lobster, keema, palak-paneer and red-lentil fillings in this guide all follow that rule.
Serving & Leftovers
6) Is ravioli healthy?
It depends on the wrapper, filling, sauce and portion. For a lighter plate, choose a vegetable or lean-protein filling, use a less-heavy sauce and serve a modest ravioli portion with vegetables or salad.
7) What is the best way to reheat ravioli?
For sauced ravioli, warm it gently in a covered skillet with a spoonful of water or extra sauce. For toasted ravioli, use the oven or air fryer so the coating crisps again. Avoid high microwave heat for long stretches; filled pasta dries at the edges quickly.
8) How should cooked ravioli be stored?
Cool leftovers promptly, refrigerate them in a covered container and keep enough sauce with the pasta to prevent the wrapper drying out. Seafood-filled ravioli deserves extra care with chilling and reheating; use the FoodSafety.gov seafood guidance linked in the lobster section for handling details.









[…] pasta in general, you might like MasalaMonk’s playful take on variation and filling ideas in this ravioli piece. It’s a nice reminder that stuffed pasta can be flexible and […]
[…] Also Read: Ravioli Recipe Reinvented: 5 Indian-Inspired Twists on the Italian Classic […]
[…] Also Read: Ravioli Recipe Reinvented: 5 Indian-Inspired Twists on the Italian Classic […]
[…] Also Read: Ravioli Recipe Reinvented: 5 Indian-Inspired Twists on the Italian Classic […]
[…] Also Read: Ravioli Recipe Reinvented: 5 Indian-Inspired Twists on the Italian Classic […]
[…] Also Read: Ravioli Recipe Reinvented: 5 Indian-Inspired Twists on the Italian Classic […]
[…] Also Read: Ravioli Recipe Reinvented: 5 Indian-Inspired Twists on the Italian Classic […]
[…] Also Read: Ravioli Recipe Reinvented: 5 Indian-Inspired Twists on the Italian Classic […]
[…] Also Read: Ravioli Recipe Reinvented: 5 Indian-Inspired Twists on the Italian Classic […]
[…] Also Read: Ravioli Recipe Reinvented: 5 Indian-Inspired Twists on the Italian Classic […]