Posted on 3 Comments

Fermented RAGI (Finger Millet) IDLIS- Gluten Free | Gut Friendly | Breakfast Recipe

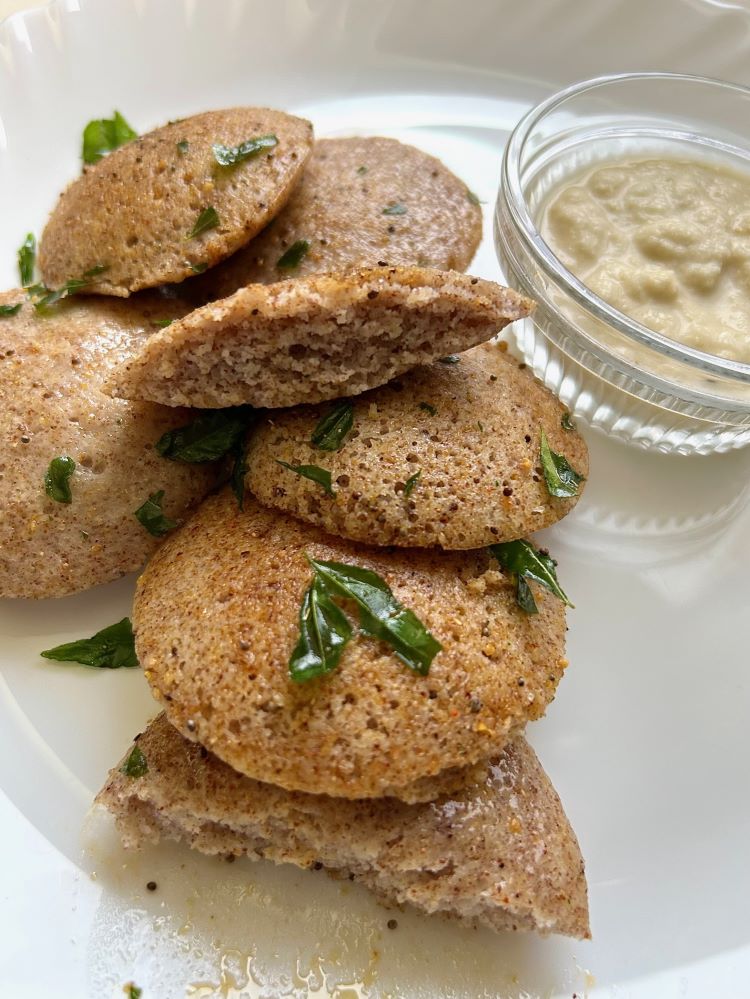
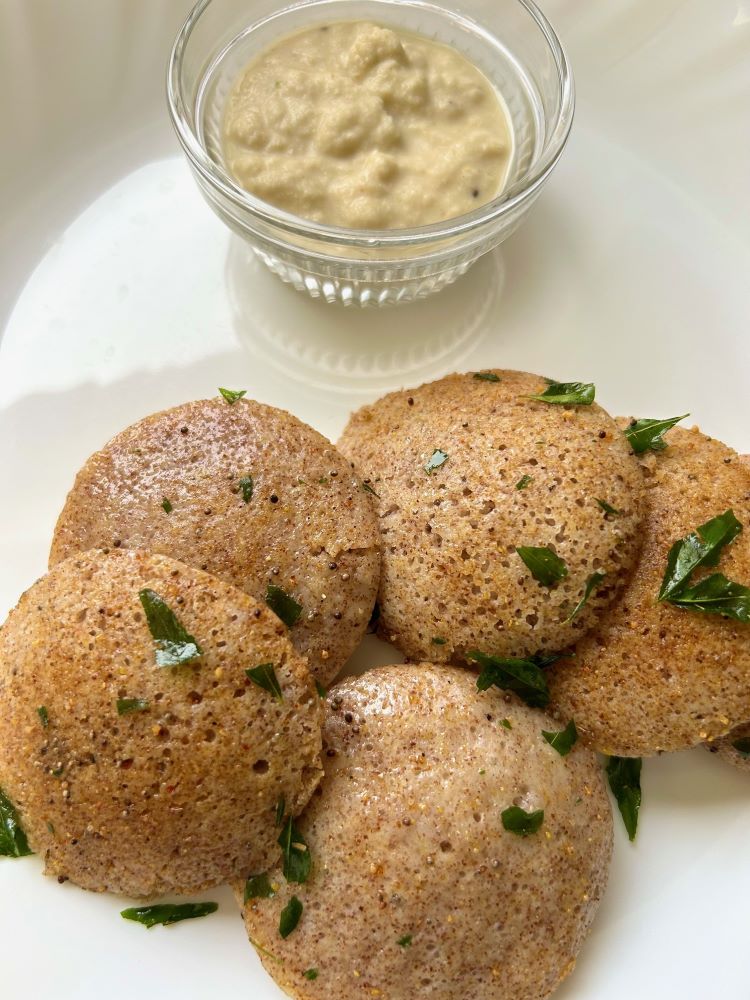
At home Idlis is our favourite breakfast. Ragi idli is a nutritious wholesome South Indian meal. They are light, easy on stomach and have tremendous health benefits. Idlis are like steamed cakes made with lentils and idli rice. Ragi idli is just another variation where ragi is replaced by rice. The batter of these ragi idlis will also be beneficial for making dosas the next day. I like to serve these millet idlis with Coconut Chutney or Kara Chutney.

Ragi idli is made using idli rice, flattened rice (poha), ragi flour, urad dal and fenugreek seeds. The ingredients are first soaked and then the batter is prepared by grinding the ingredients followed by fermentation, then the batter is steamed to make idlis. This batter yields consistent results. The idlis will always be pillowy soft and totally melt in mouth.

Not just Ragi idlis or dosas, if you are a pancake lover, you can also try these, Ragi Pancakes or these Millet Cutlets which you can easily make at home in 10 minutes using minimal oil. They come out absolutely delicious and are so healthy.

Given the health benefits of ragi, these steamed cakes become a superfood which not only has benefits of whole grains, but it is also fermented. 
Why fermented food is good for you? 

Fermented foods like idli, dhokla, dosa are a fabulous addition to your diet.

  • It helps in increasing immunity and improves digestion. 
  • It also increases the bio availability of minerals. It breaks down proteins, carbohydrates and other minerals in a way making it easily available to our body. 
  • Also a lot of good bacterias are at play when your food is fermenting. All fermented foods are natural probiotic. It’ll strengthen your immune system making you disease resistant.
  • The lactic acid bacteria which helps in fermentation also creates omega 3 fatty acids, essential for the immune system. It will help to remove toxins and helps your body build a healthy gut flora. 

Here are 5 excellent reasons why this millet should be in your diet.

  1. High fibre content: Ragi is high in dietary fibre which will help to promote proper digestion and keep your bowel movements in check. 
  2. Rich in Calcium: It is an ultimate non-dairy source of calcium. Just 100 grams of Ragi can give you 344 mg of calcium.
  3. Supports Gluten- Free Diet: Ragi is a great choice if you are on a gluten-free diet – it’s naturally gluten-free! No need to worry about hidden gluten as it’s a safe and delicious way to enjoy your meals.
  4. Child Nutrition: It helps to fulfil child’s nutritional needs. It is rich in protein, calcium, iron, zinc and other essential nutrients.
  5. Treats Anaemia: Since Ragi is an excellent source of iron too, which is essential for producing red blood cells, it helps to fight off anaemia.

With all such goodness and nutrition packed in this humble dish, let’s get to the recipe now

Recipe: serves 4

Ingredients: measuring cup size 250 ml

  1. Ragi flour: 1 cup
  2. Idli Rice/Parboiled Rice or Broken Rice: 1 cup
  3. White Split Urad dal: 1/2 cup
  4. Flattened Rice/Poha: 1/4th cup
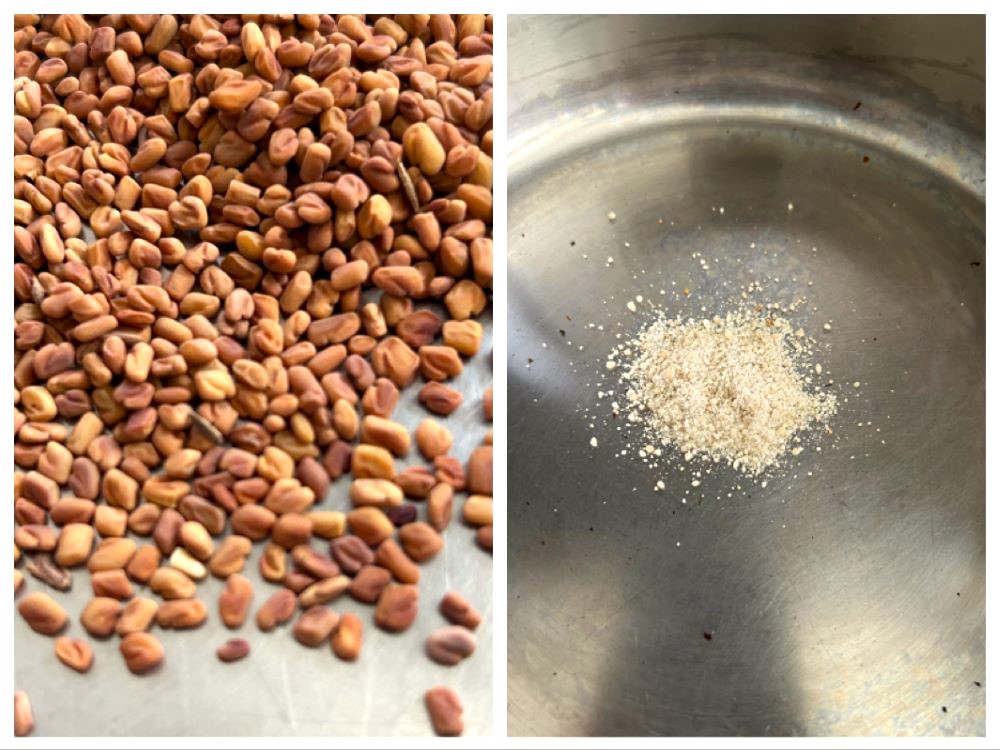
  5. Fenugreek seeds/Methi dana: 1/4th tsp
  6. Rock Salt or any non-iodised salt: As per taste
  7. Oil/ghee for greasing
  8. Water as required for making batter and steaming 

Method: 

  • Wash rice and poha 3 to 4 times. Soak them in enough water for 5 hours. 
  • Wash urad dal and fenugreek seeds 3 to 4 times and soak for 5 hours. 
  • Drain the water from dal and rice. First grind urad dal to a smooth and fluffy batter. Add little water at a time to get a smooth paste. Do not add too much water in one go. 
  • Then grind rice and poha to a smooth batter using water as required. Again, don’t add too much water. Add little at a time. 
  • In large steel bowl, mix together both dal and rice batter. 
  • Add roughly 3/4th cup of water to ragi flour and make a smooth consistency batter. Make sure there are no lumps. 
  • Mix Ragi batter with rice and dal batter till it completely incorporates. 
  • Add rock salt as per taste. Cover the bowl with a lid and keep the batter in dark warm place for 9 hours or more. I had to keep it for 12 hours.
  • The batter will double and become fluffy and airy. Give a gentle mix before making the idlis. Do not mix rigorously or you will lose the airiness of the batter. 
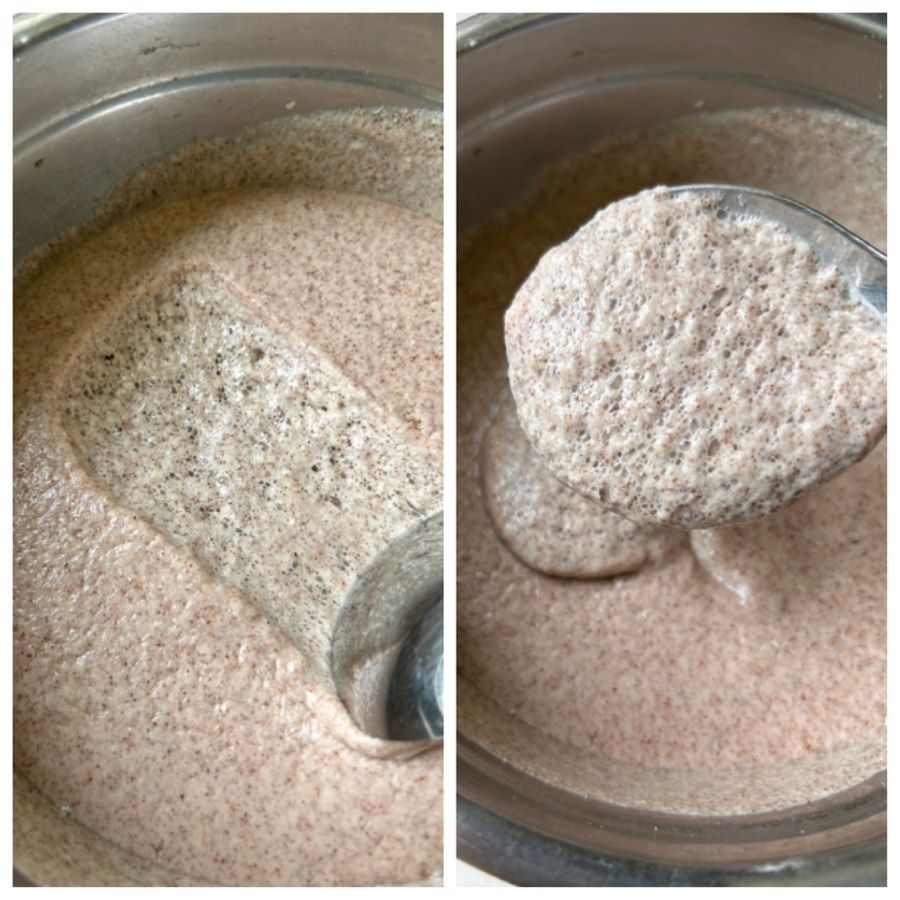
  • In an idli maker, bring water (roughly 3″ above) to boil. Grease idli moulds with oil/ghee. Fill in the cavities with the batter.
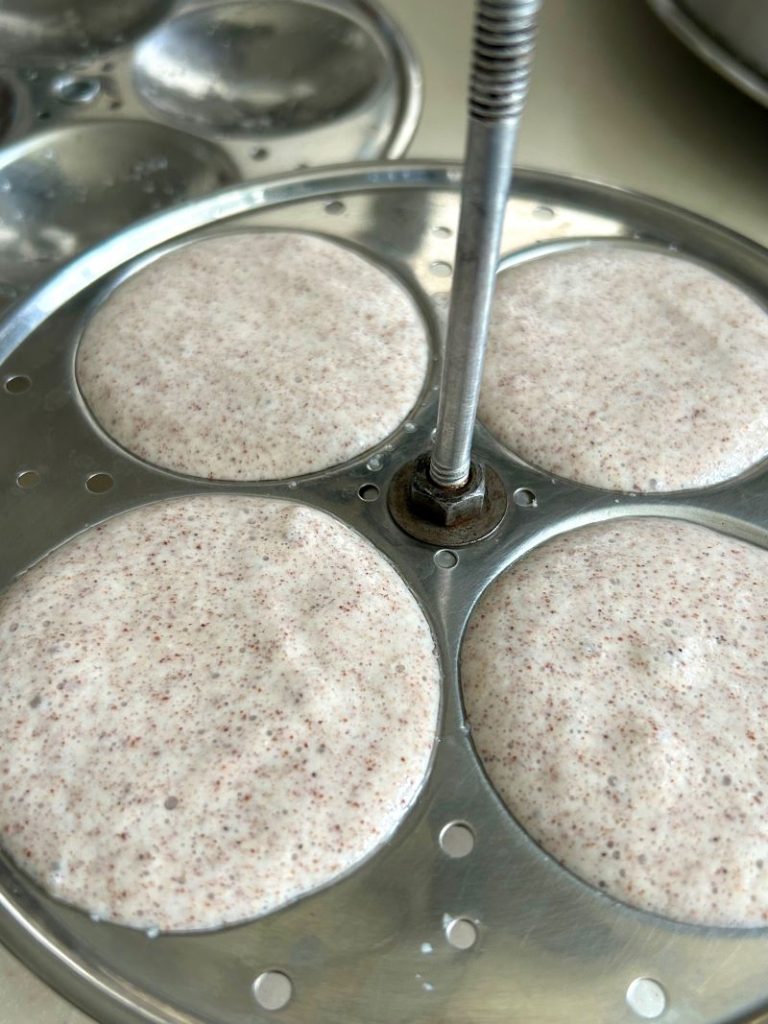
  • Now, steam the idlis in idli maker for 10 to 12 minutes or till toothpick inserted at the centre comes out clean. It shouldn’t be sticky.

Tips for fermentation: – 

  1. Add rock salt to the batter before fermenting. Salt helps in fermentation. Do not use iodised salt. 
  2. Do not skip Fenugreek seeds. It helps the batter to get bubble like texture. Also, it’s makes dosa crispier. 
  3. Add enough water while grinding dal and rice to get smooth and fluffy batter. Do not add water in one go. Keep adding little at a time. This will give you soft idlis. 
  4. Mix the final batter with your hands for a minute and then keep it at a warm place. The warmth in your hand will help in fermentation. 

I hope you enjoyed reading this recipe and will give it a try. Do let me know if you do. I would love to hear from you guys. Here’s to healthy eating! 🙂
Posted on 4 Comments

South Indian Coconut Chutney

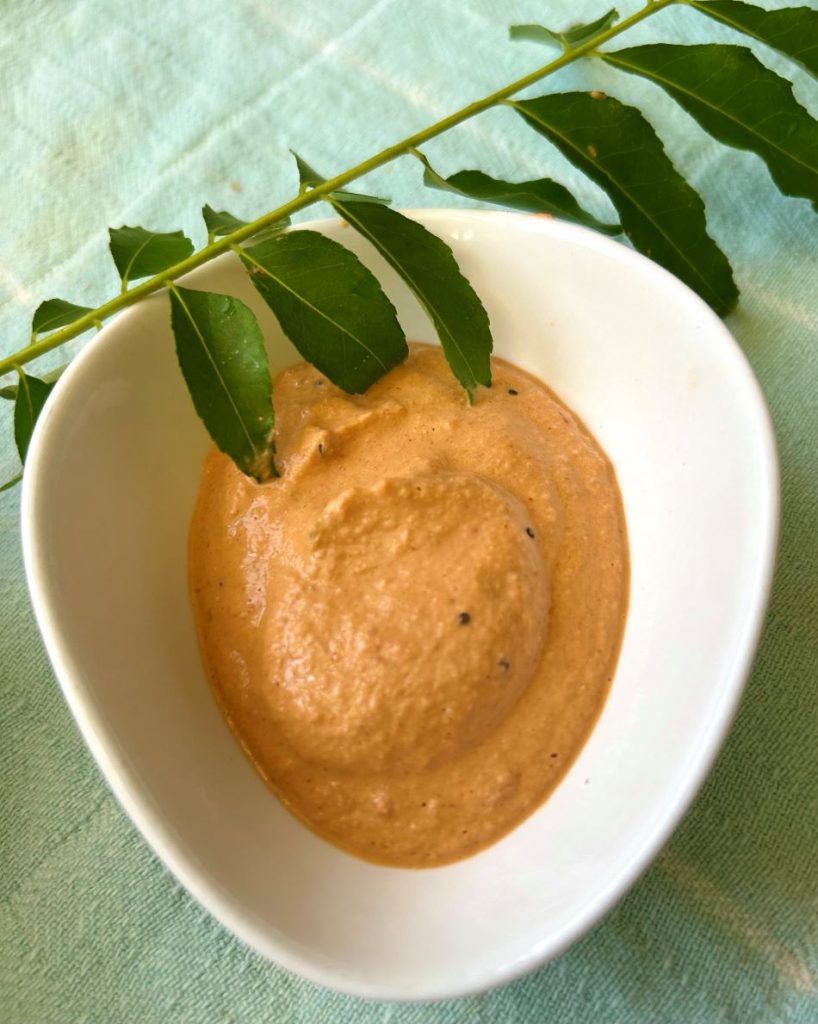
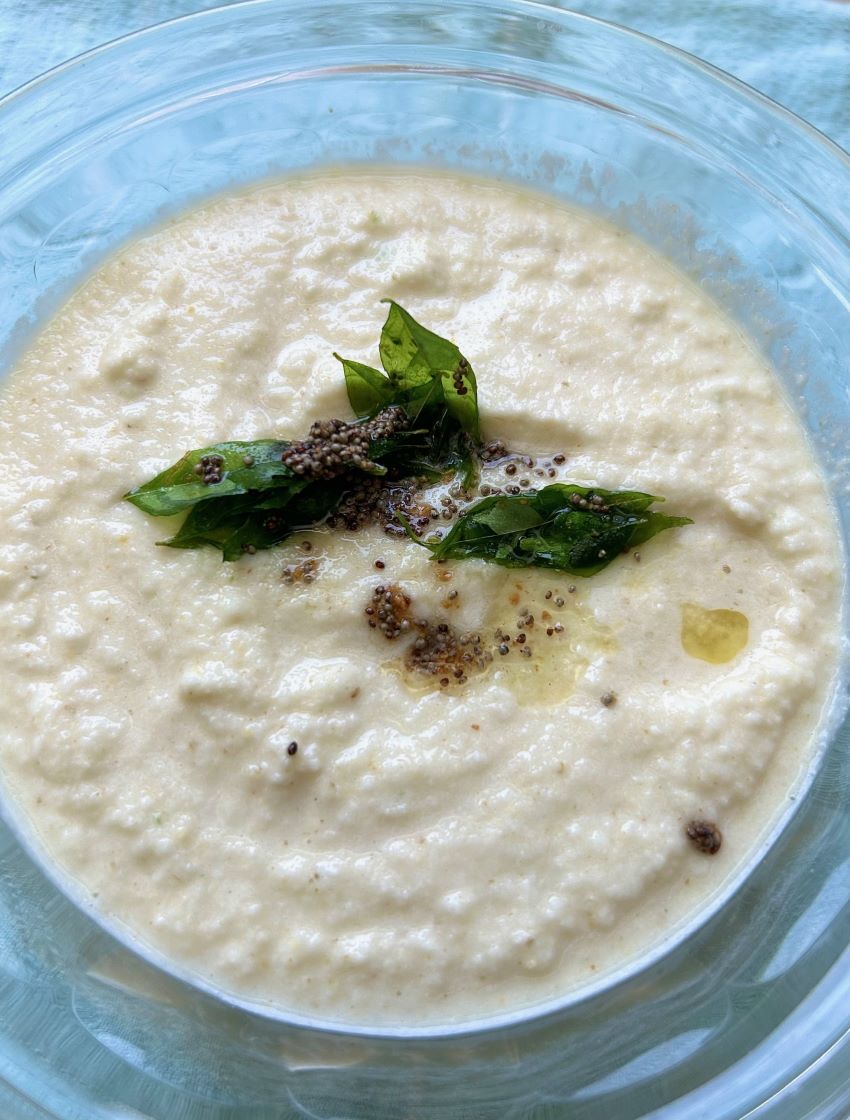
Coconut chutney is one of the most popular chutneys in South Indian cuisine. It is made round the year and is a common side dish in South Indian households. It is lightly spiced, nutty with natural and refreshing sweetness of coconut. It is made with fresh coconut, green chilli and lentil as prime ingredients. It is then tempered with mustard seeds, asafoetida and curry leaves. 

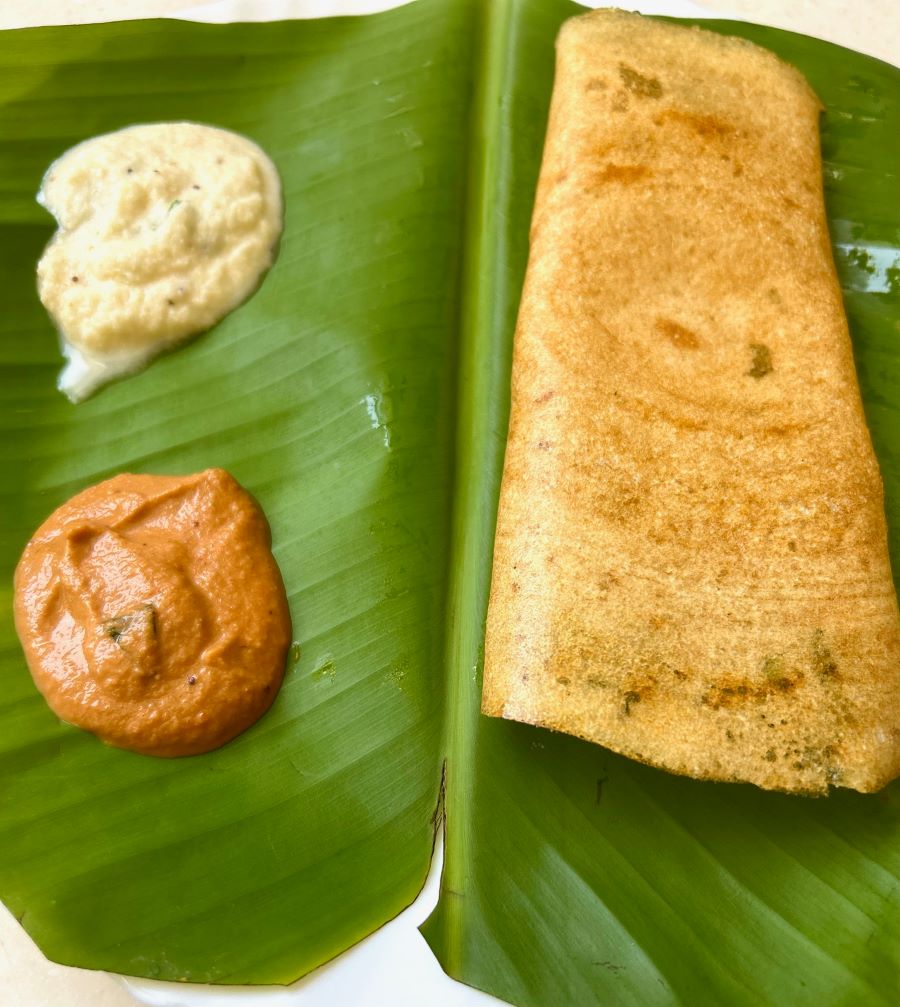
Though there are several recipes of coconut chutney with their own variations and style but out of all I find this to be the best. Honestly, I don’t feel the need of sambar with dosa or idli when I’ve this chutney as side. It’s pretty good. Also, it is great for kids since it is not spicy and has mild sweetness of coconut. My little one calls this Snowman Chutney. He loves this chutney with idlis, dosa and paniyarams.

You can also check out my other South Indian chutney recipes- Kara Chutney and Tangy Spicy Peanut Chutney

Apart from taste, having coconut chutney along with your meals has several health benefits too. 

  • Since coconut is rich in fibre, it can help in easy bowel movement. Eating it during summers and monsoon season can also prevents digestion-related problems such as indigestion and diarrhea.
  • Coconuts are especially high in manganese which is essential for bone health and the metabolism of carbohydrates, proteins, and cholesterol.
  • They’re also rich in copper and iron, which help form red blood cells, as well as selenium, an important antioxidant that protects your cells.
  • Coconuts are low in carbs and high in fibre and good fats, which may be beneficial for blood sugar control.

Let’s see how we can make this delicious and healthy Coconut Chutney

Recipe

Ingredients: 

  • 1 cup Fresh Chopped Coconut with brown skin peeled
  • 1 inch Ginger roughly chopped 
  • 1 tbsp Lemon Juice
  • 1 small Green Chilli
  • 1 tsp Cumin Seeds
  • 2 tbsps Roasted Channa Dal/Bengal Gram
  • 2 tsps Oil (I like to use either Groundnut or Coconut oil)
  • Rock salt or Salt to taste
  • Water: 1/2 cup or as required 

For Tempering: 

  • 1/2 tsp Mustard seeds
  • 1 sprig Curry leaves
  • A pinch of Hing/Asafoetida

Method: 

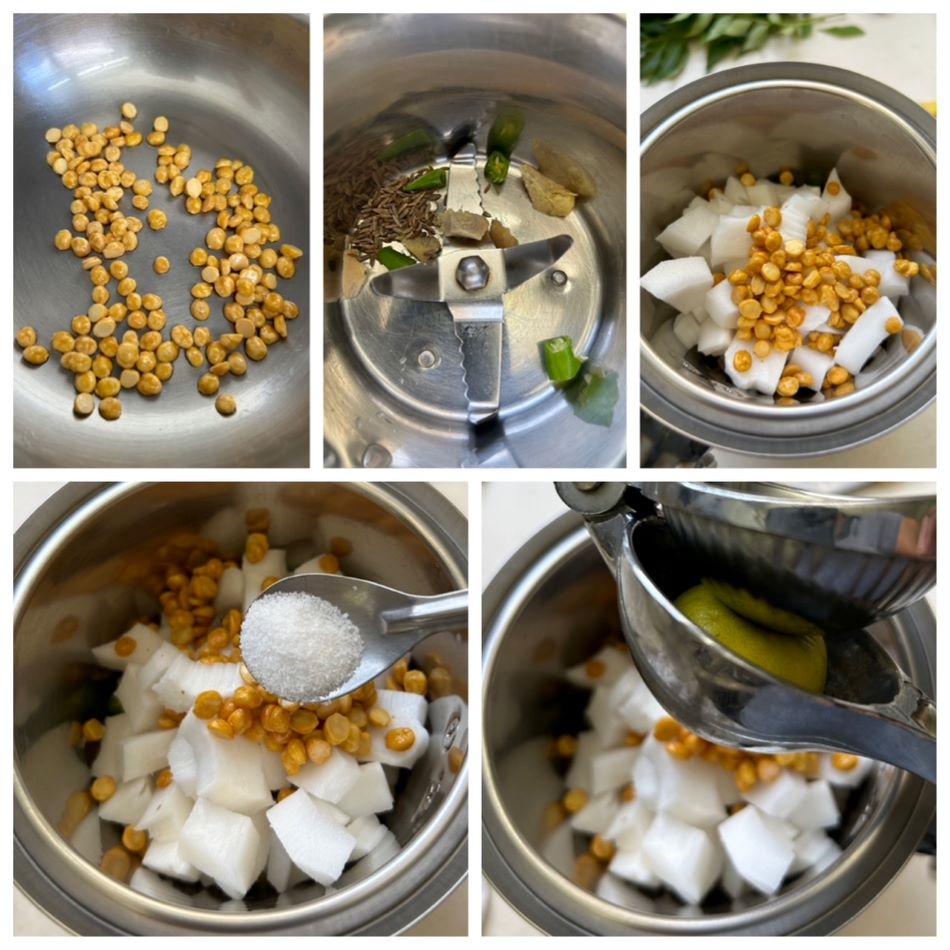
  • Wash and pat dry channa dal. Add 1 tsp oil in a pan and roast the dal till golden brown. 
  • Add, coconut, roasted channa dal, lemon juice, ginger, chilli, 1/4th cup water and salt in a blender. 
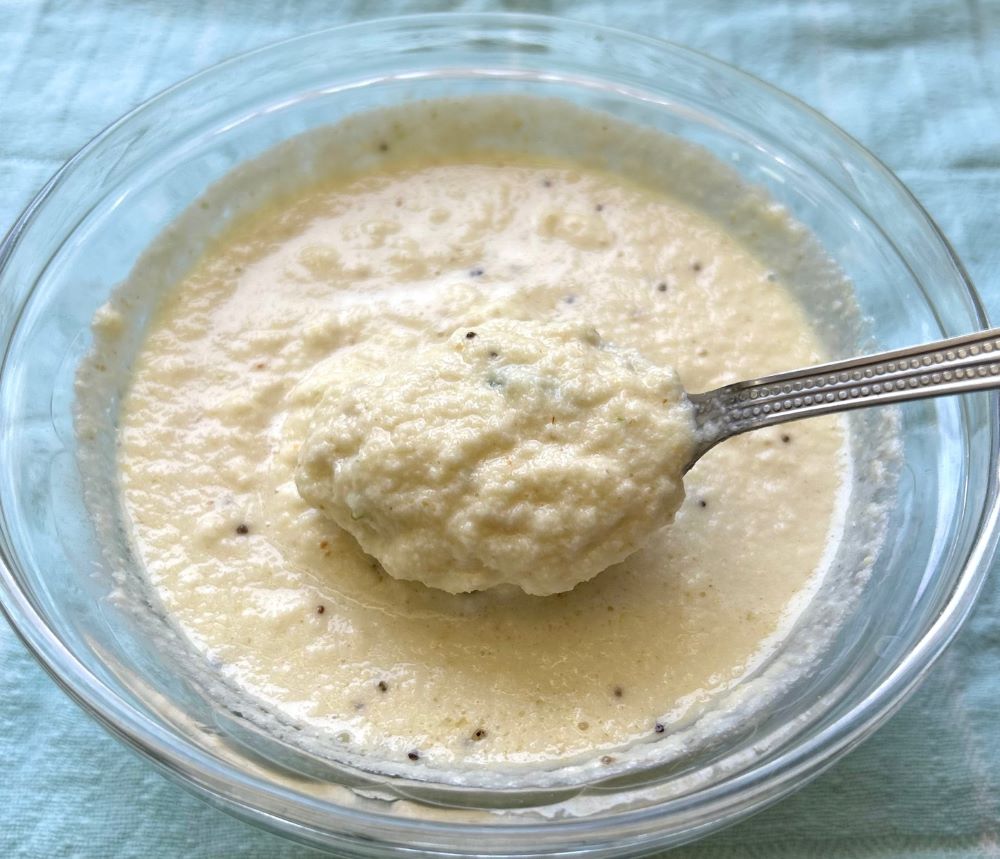
  • Give a blitz. Now open and scrape off the sides. Add remaining water and blend again to get a smooth paste. You can more water if required but make sure to add little at a time. 
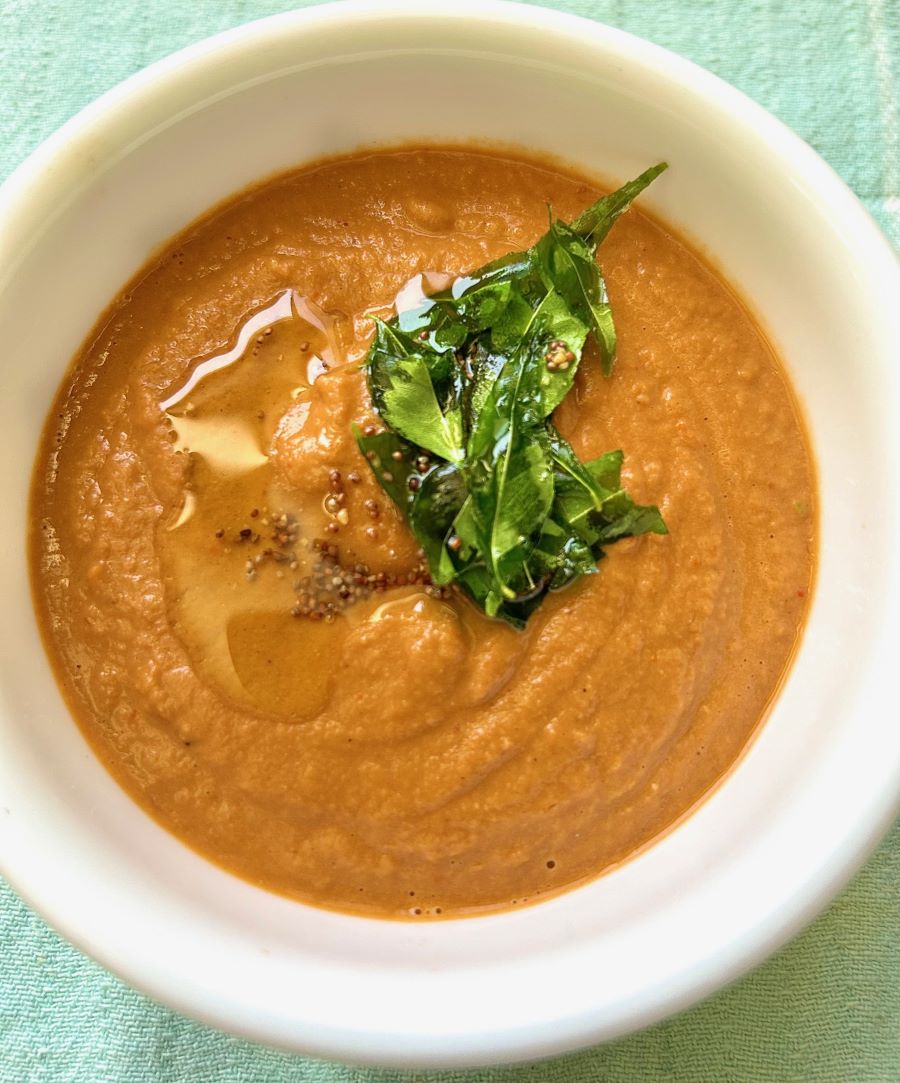
  • For tempering: To hot oil, add mustard seeds, curry leaves and hing. Cook till everything splutters. Pour the tempering over the chutney. Mix well. 
  • Your Chutney is ready to be served. 

Notes: 

  1. If you want whiter chutney, make sure to scrape the brown skin of coconut. 
  2. You can easily make this chutney watery because in the beginning it will feel that you will need more water for blending but add little water at a time while blending.
  3. Use fresh coconut, that’s shell is pale in color than the dark brown colour or dried coconut. Fresh coconut’s chutney tastes the best while the other might taste a little oily. 
  4. Do temper the chutney. It not only enhances the taste but also increases its shelf life. 
  5. You can store the chutney in refrigerator for 3-4 days. It might thicken a little after refrigeration. You can add few tbsps of warm water to loosen it.

Do try this recipe and let me know in the comments section how you liked it. Would love to hear it from you guys. 🙂 Happy eating!

Posted on 5 Comments

Kara Chutney- South Indian Chutney- Idlis | Dosa

Chutneys are special when it comes to Indian cuisine. India is the origin of different varieties of regional chutneys. They are super versatile. You can relish it as a condiment, use it as an ingredient, and even as a spread. Not just that, chutneys enhance flavor, provide texture contrast, preserve ingredients and hold cultural significance.

South Indian cuisine is not just about coconut chutney. There is so much variety and one such variety is Kara Chutney which originated in Tamil Nadu where kara means spicy. This chutney is typically made with onion, garlic, tomatoes and red chilies. This chutney because of its spiciness and lot of other flavours pairs perfectly well with foods that do not have lot of complicated flavour combinations like idli, dosa, appams. 

I am a hardcore chutney fan. I need variation when it comes to having chutneys with idli or dosa, even if it is a slight one. And this kara chutney is like an explosion of flavour in your mouth. It is delicious to the core. In fact it is my favourite chutney from South Indian cuisine. You can obviously make it less spicy by adding lesser dried chilies. I also like this Spicy Tangy Peanut Chutney which also pairs great with dosas and idlis. It is made with no onion or garlic. You can give this a try too. 

Originally kara chutney does not contain any coconut but I like to add a little bit to cut down on spice and also I feel coconut kind of balances all the other overpowering flavours of garlic, onion, lentils and tomatoes.

Let’s see how to make Kara Chutney my style with step by step recipe. 

Recipe: serves 4

Ingredients 

  • Onion: 1/2 cup
  • Channa Dal/Bengal gram: 1 tbsp
  • White Split Urad Dal: 1 tbsp
  • Arhar Dal: 1 tbsp
  • Tomatoes: 1 cup
  • Garlic: 2 cloves
  • Dried Red Chillies: 2 (you can increase or reduce as per your liking)
  • Coconut: 2 tbsps
  • Tamarind: 1/2 tsp
  • Water: 1/2 cup
  • Salt to taste
  • Oil: 2 tbsp (I used groundnut oil)

For Tempering

  • Mustard seeds: 1 tsp
  • Curry Leaves: 1 sprig
  • Asafoetida/Hing: a pinch
  • Oil: 1 tsp

Instructions 

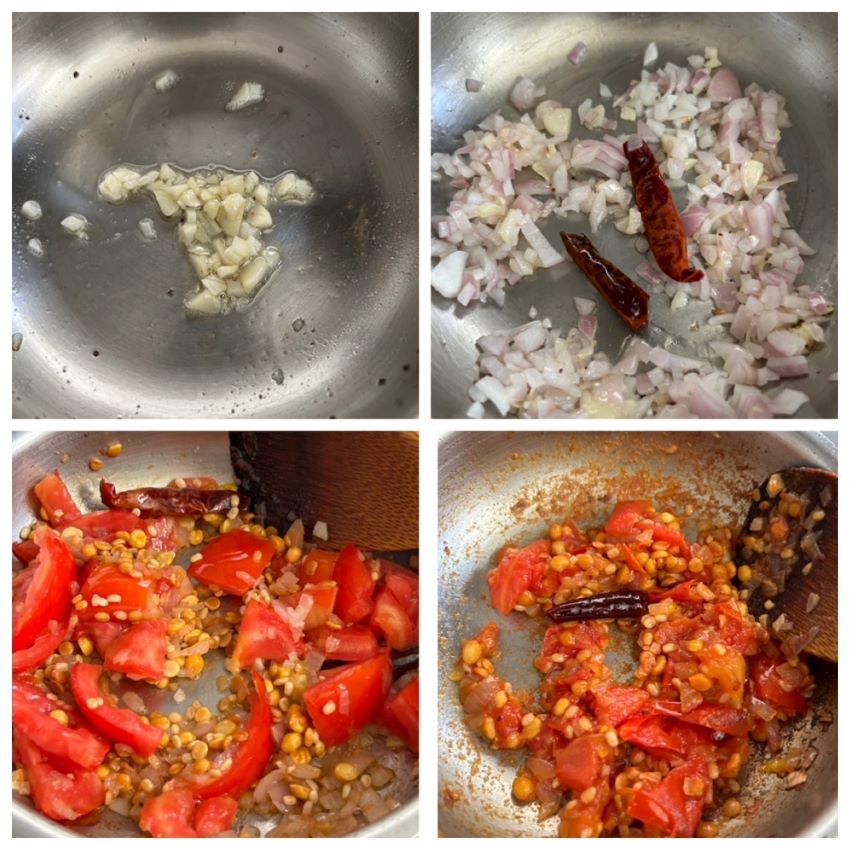
  • In a pan, heat 1 tbsp oil. Now add all the lentils. Roast till fragrant and lightlish brown in colour. Take it out and set aside.
  • Now add a tbsp of oil and add roughly chopped garlic. Sauté till rawness goes.
  • Then add onion and dry red chilies. Cook onions till they become translucent. 
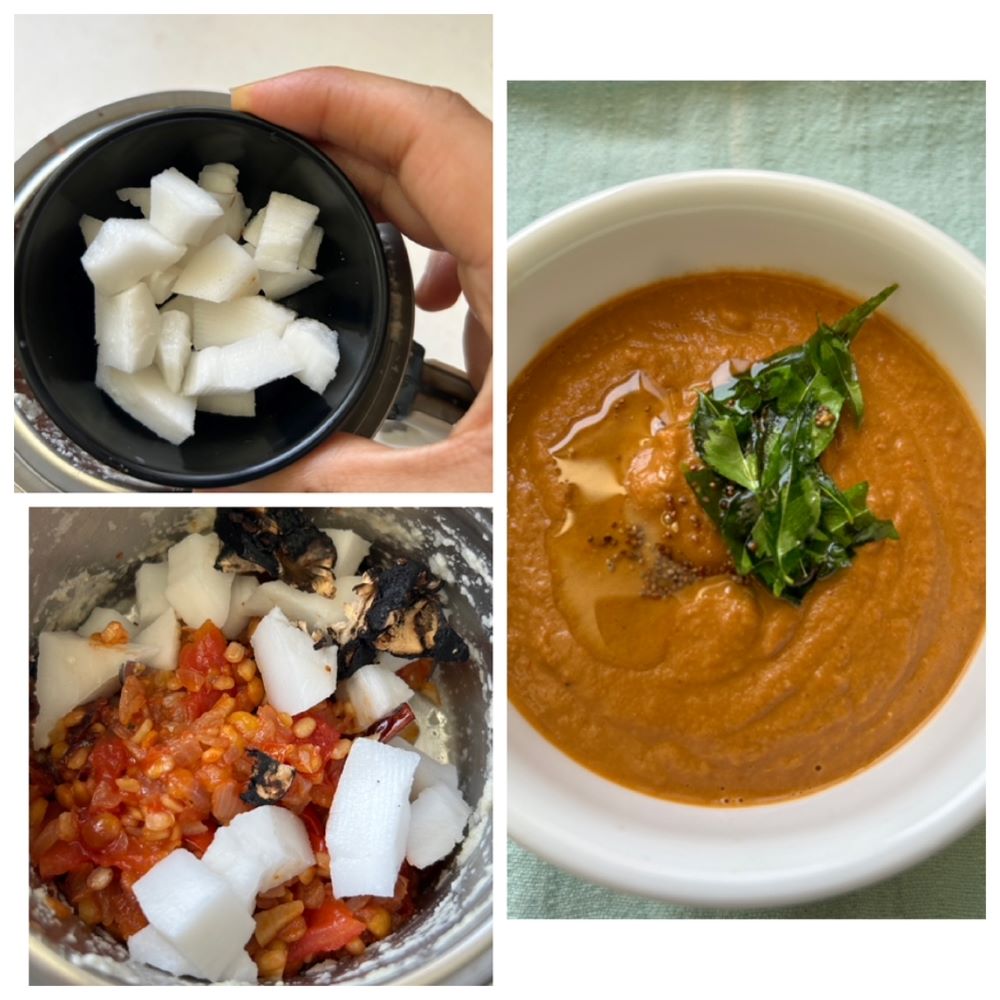
  • Now add roughly chopped tomatoes, salt and the fried lentils. Cook everything till tomatoes get mushy and soft. 
  • Switch off the flame and allow to cool. Then in a blender, add tamarind, coconut and 1/4th cup of water and give a blitz. 
  • Remove the lid, scrape the sides and then add remaining water. Blend again till it becomes a smooth paste. You can add little more water if required.
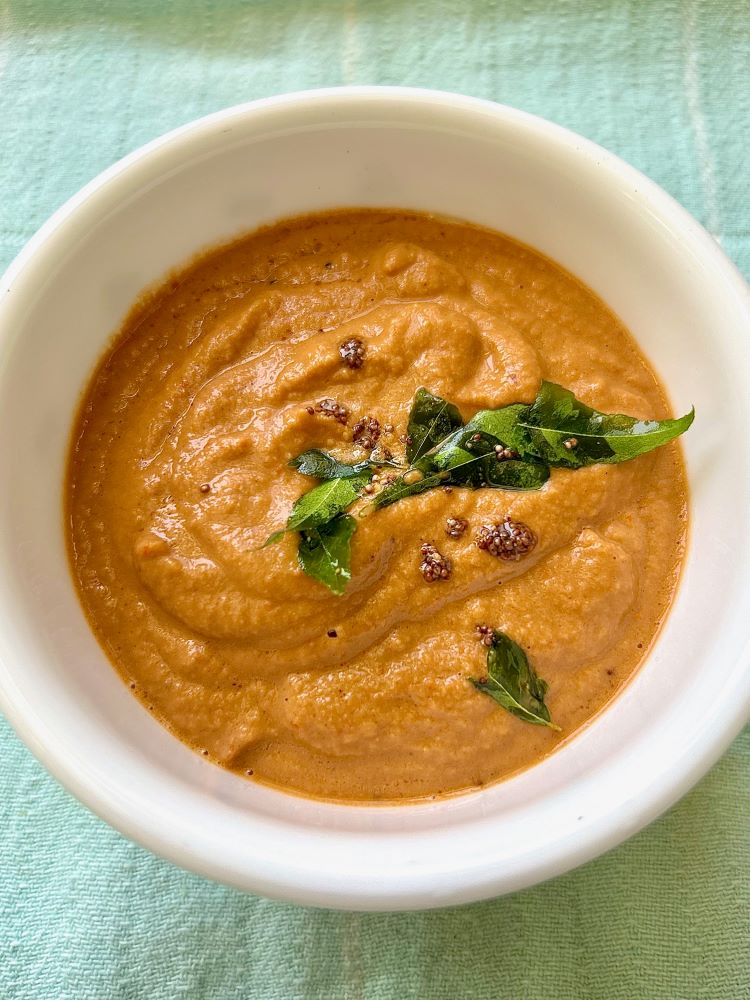
  • For tempering: Heat a tsp of oil. Add mustard seeds and a pinch of hing. Allow it to splutter. Switch off the flame and then add curry leaves. Let the leaves rest in the oil for a few seconds and then pour it over the chutney and mix well.
  • Check for saltiness and tanginess. If you want it more tangy, at this stage you can add little bit of lemon juice. 
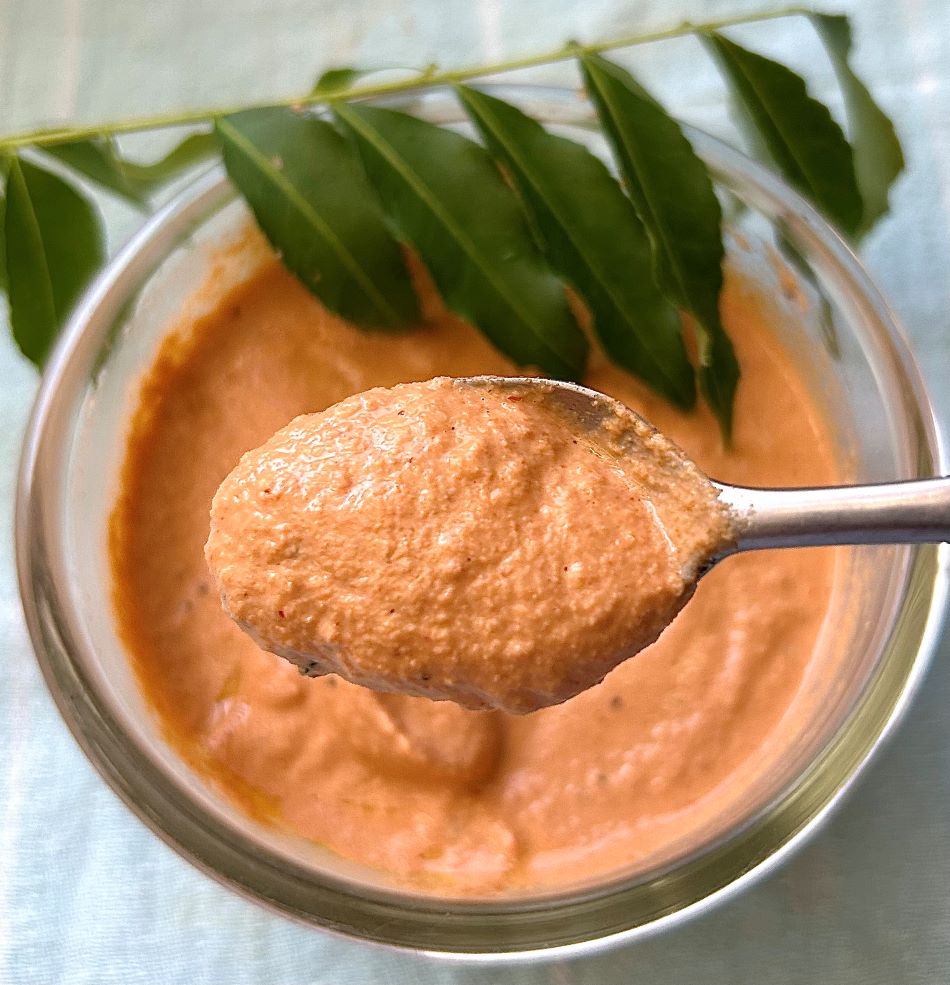
  • Serve kara chutney with idli, dosa or uttapam. This spicy chutney also goes well with paniyarams.

Note: Store the leftover chutney is refrigerator and consume within a week.

You should definitely try this chutney if you are a fan of South Indian cuisine. Do let me know in the comments if you do. Would love to hear from you.

Posted on 5 Comments

Healthy Tangy Spicy Peanut Chutney- No Onion, No Garlic

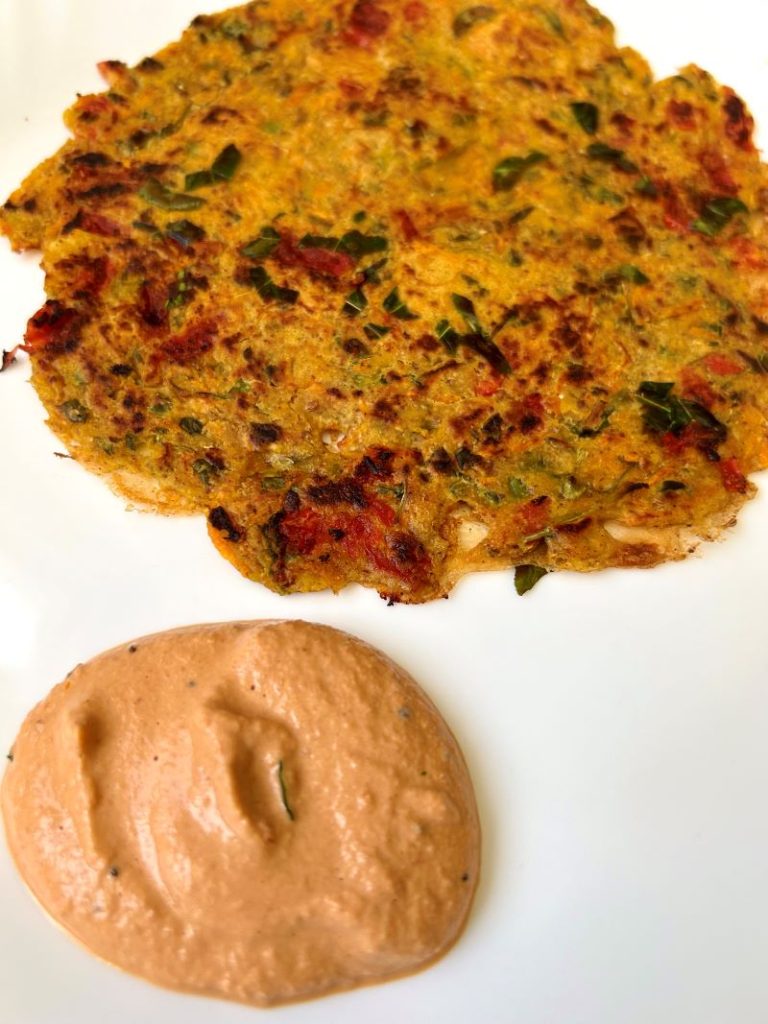
Peanut Chutney also known as Groundnut Chutney is a flavourful, delicious Indian chutney.  It is an easy and a tasty chutney made with peanuts and is served popularly along with South Indian breakfast dishes. The texture of this chutney is thick and creamy with of course great blend of flavours. Among all the other Indian chutneys, this groundnut chutney is quite unique, given that there is no addition of coconut, onion or garlic. 

It is made with just few everyday ingredients and is flavour bomb. You can serve this chutney with idlis, dosas, Indian savoury pancakes, pakoras, flatbreads or wraps. It is excellent to brighten up your meal and add a lot flavour to your dish. 

This Indian peanut chutney is protein-packed and boost the nutrition profile of your everyday breakfast meal and it is naturally vegan too. I made this Iron Rich Pancake for breakfast. It is made with chickpea flour and sattu, both of which are great sources of protein as well. But I wanted to add more protein to my vegetarian meal, so I decided to make this Peanut Chutney. One bite of this and the flavours just blew my mind. You guys have to try this to believe it. You can also try pairing this chutney with this Semolina pancakes or this Karnataka style Coconut dosa.

I kept this recipe in some way traditional by using raw peanuts which are roasted and then ground with other ingredients. I have also kept the skin of the peanuts. Peanut skins have the highest antioxidant levels compared to other parts of the peanut, and roasted peanut with skins have a high antioxidant capacity. 

The traditional version is usually made with only 6 ingredients such as roasted peanuts, garlic, green chilies, cumin seeds, salt and tamarind. All of these are ground with water to a smooth chutney & most often it is not tempered.

The traditional version is great too but I’ll share with you a way to add maximum punch with minimal ingredients that you will actually always make this peanut chutney without onion and garlic. This flavourful chutney can also be taken in any vrat. So save this recipe for your next Navratri fast.

How to make Peanut Chutney?

Ingredients 

  1. Raw Peanuts: 1/2 cup
  2. Roma Tomato: 1 medium size
  3. Dry Red Chillies: 3 (you can increase or decrease chilli as per your liking)
  4. Salt to taste
  5. Groundnut oil: 1 tbsp
  6. Lemon juice: 2 tbsps or to taste
  7. Water: 1/4th cup or as required

For Tempering 

  1. Groundnut oil: 1 tbsp
  2. Mustard seeds: 1/2 tsp
  3. Curry leaves: 5-6

Instructions

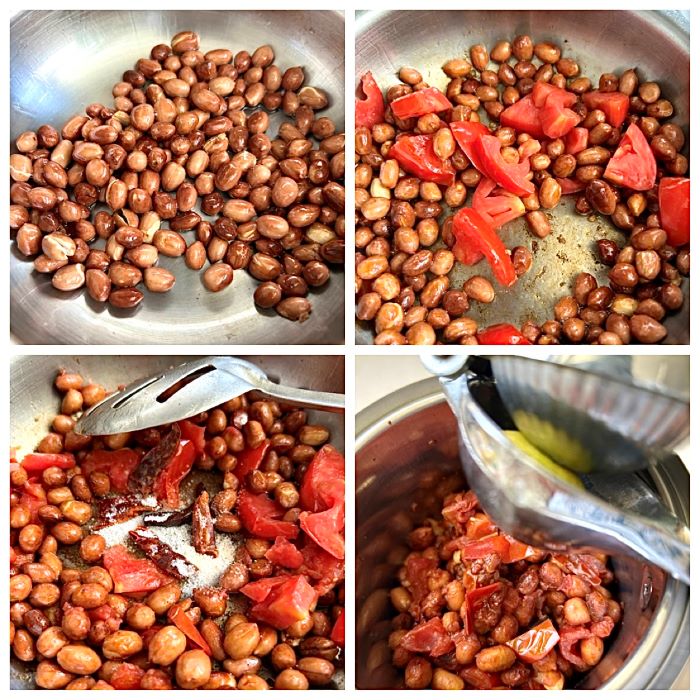
  • In a flat bottom pan, heat 1 tbsp oil to a medium heat. Add raw peanuts and roast till they change colour and become fragrant. 
  • Once peanuts are roasted, in the same pan add roughly chopped tomato, salt and dried chilli. Cook on a medium to low flame till tomato becomes mushy. If the need be, you can sprinkle some water to cook tomato.
  • Remove from heat and allow it to cool a little. Then add everything to a mixer grinder. Add lemon juice and 1/8th cup of water. 
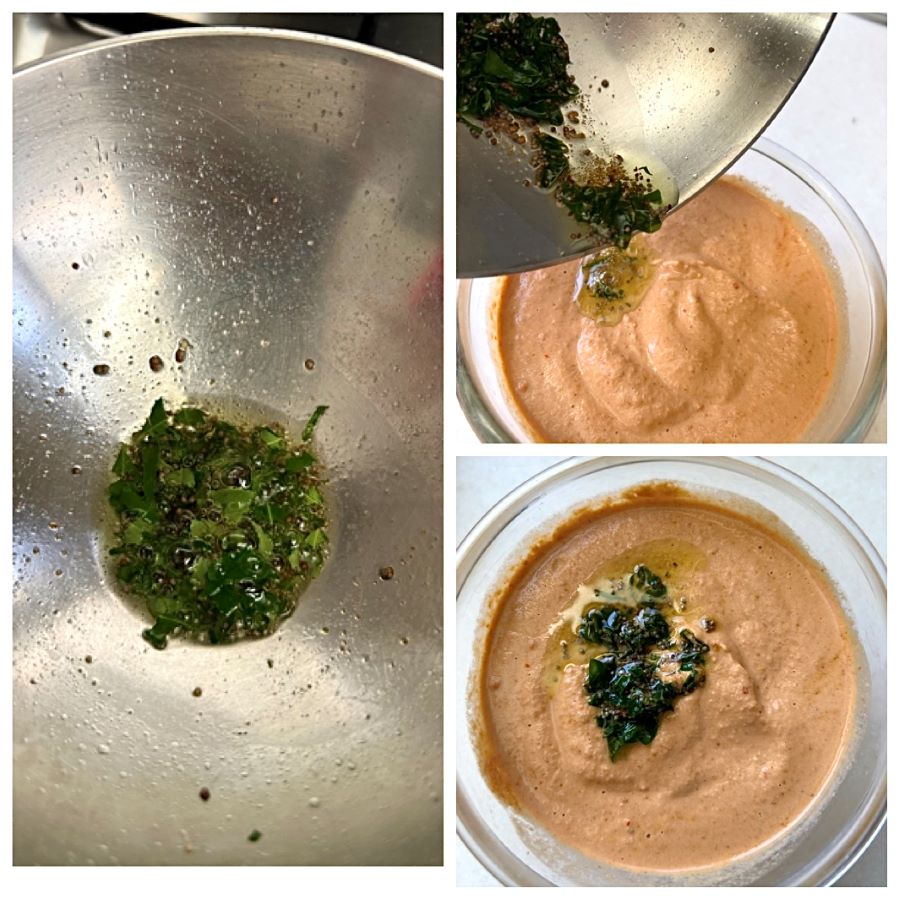
  • Give it a blitz. Now add remaining water and blend till it becomes smooth and creamy. You can add more water if required but don’t add too much. Add little at a time. 
  • Empty the chutney into a bowl. For tempering, heat a tbsp of oil. Add mustard seeds and asafoetida/hing. Let mustard seeds splutter. Turn off the flame. 
  • Now add curry leaves and swirl it around. Let curry leaves rest in oil for 15-20 seconds then add this tempering to the chutney and mix well.
  • Check for salt and lemon juice. Adjust as per your liking. Your chutney is ready to serve.

Notes: 

  1. You can adjust the consistency by adding less or more water, but do not make the consistency runny or thin.
  2. Store your peanut chutney in an air-tight container. Refrigerate and use within a week.
  3. To make groundnut chutney, always use fresh dry peanuts. Do not use peanuts that have gone rancid.
  4. In case raw peanuts are not available, you can make this chutney with roasted salted peanuts. In that case, please be mindful of additional salt. 
  5. You can replace lemon juice with tamarind. Rinse or soak the tamarind in some water before you blend it with the remaining ingredients.

I genuinely encourage you to try this recipe because it is absolutely delicious. Do let me know in the comments section if try this recipe. Happy eating! 🙂

Posted on 1 Comment

Authentic Sambar Masala Recipe- Sambar Podi

People ask me if its worth grinding your own spices and the short and sweet answer is absolutely yes! Grinding spices is fast and an easy process. It is an aromatic experience that you will not forget and might even become obsessed with it. There is ZERO COMPARISON between fresh and pre-ground versions. When you are grinding your own spices, you have a complete quality control over the quality of the ingredients you are using and you are also saving yourself from consuming all the unnecessary preservatives that are added to some spice mixes to increase their shelf life.

I love Sambar! If you guys are sambar lovers like me, you would know the key to making good sambar lies in the masala. That’s what I am here to share with you guys. This recipe will help you to make fragrant and flavorful homemade sambar powder. It can also be added to other south Indian dishes like lemon rice, masala idlis or dosa. 

It has been almost a decade since I have stopped buying sambar powder. None of them come close to the one made freshly at home with quality ingredients. There is just something so satisfying about grinding your own masalas at home. My kitchen is filled with the aroma of spices, and sambar sings with the flavors of freshly toasted spices. That being said, I do admit, I don’t make all the masalas at home. That’s too much. I do buy some spice powders from the store but whenever I get an authentic fool-proof recipe like this, it’s hard for me to go back to store-bought masalas.

 So what makes a good sambar?

  • The right propotion to vegetables and lentils and a perfect balance of sourness, spiciness and sweetness.
  • The vegetables you add make a huge difference to the taste of your sambar.
  • Vegetables like small pearl onions, drumstick, yellow pumpkin have a distinct taste to them and elevate the taste of a sambar. Some like to add brinjal too.
  • Similarly the choice of dal used affects a sambar’s taste. Mostly sambars are made with toor dal or a combination of toor and moong dal.
  • Everyone has a different recipe for the spice mix. Some keep it simple with basic ingredients, some decide to add a lot more, some use pre ground spices, some grind it fresh. All these factors have a huge imapact on the taste of your sambar. And yes a good SAMBAR MASALA plays a huge part in the taste of your sambar.

Recipe: makes roughly 200 grams

Ingredients

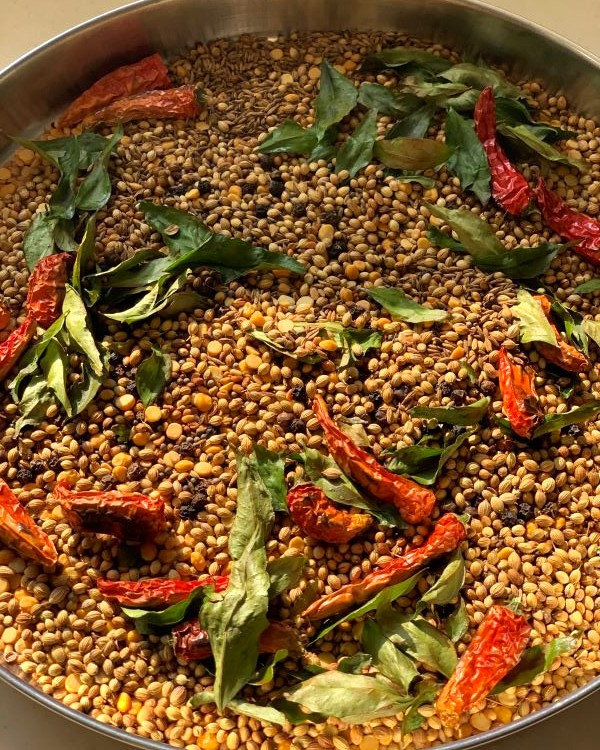
  1. Coriander seeds: 1/2 cup
  2. Chana dal/Bengal gram: 1/4th cup
  3. White Split Urad dal: 2 tbsps
  4. Cumin seeds/Jeera: 2 tbsps
  5. Fenugreek seeds/Methi dana: 1 tbsp
  6. Mustard seeds: 1 tbsp
  7. Dry Red Chillies: 20 (I added 15; depends how hot you like it)
  8. Curry leaves: Handful
  9. Black peppercorns: 1.5 tbsp
  10. Asafoetida/Hing: 1/2 tsp
  11. Turmeric powder: 1 tbsp

Instructions 

  • Take a heavy bottom wide flat pan. Heat it on a very low heat.
  • Take a wide plate to collect all the roasted spices and lentils. 
  • Wash and towel dry both the lentils.
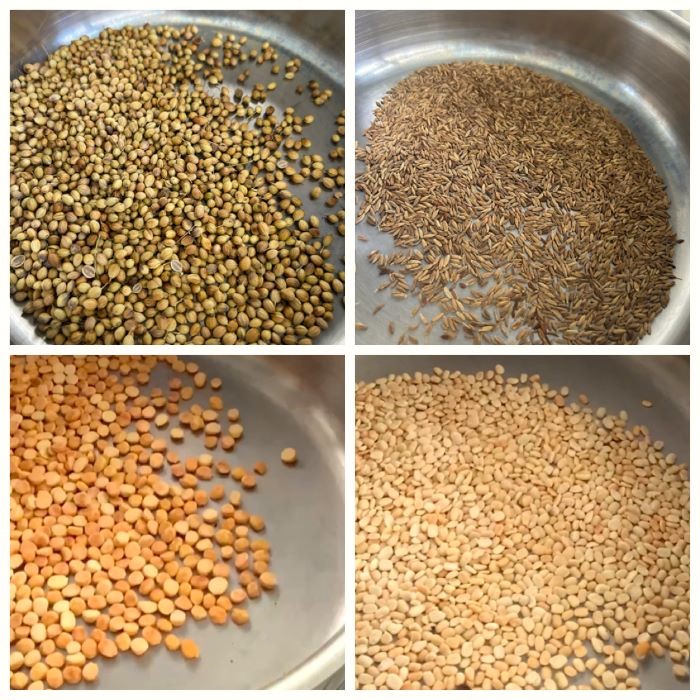
  • Firstly, roast channa dal on low flame till it becomes fragrant and turns couple of shades darker. Chana dal will take the most time to roast. Take it off heat and put it on a wide plate.
  • Now roast urad dal till it turns lightish brown. Urad dal will be done the quickest, because of the size of the lentils. Keep aside.
  • Next add cumin seeds and roast them till they become darker and give out a very nice aroma.
  • After cumin seeds, roast coriander seeds. Roast on low flame till the coriander seeds get well roasted. When well roasted – the coriander seeds will turn lightly reddish, and also leave a light aroma.
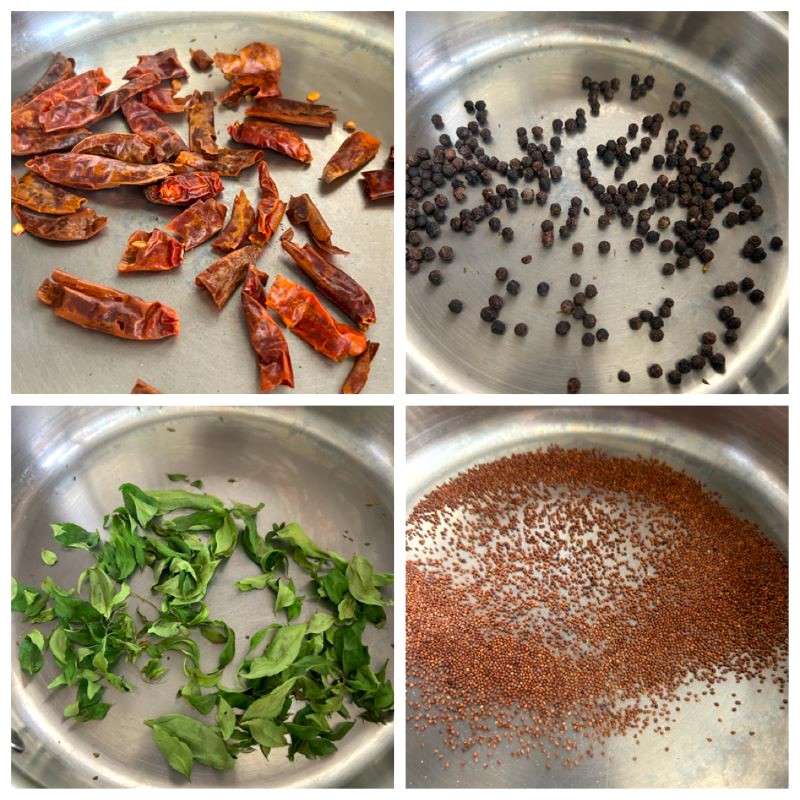
  • Now add in dry red chillies and roast them for few minutes till it starts becoming fragrant. Ensure to not burn the chillies. When well roasted – they will turn deeper in color.
  • Next add black pepper corns and roast for a minute or two on low flame. 
  • After black pepper, add mustard seeds. Roast till they start spluttering. Keep aside.
  • Now, roast curry leaves till leaves shrink and become crisp.
  • Finally, roast fenugreek seeds or methi dana for a minute on low flame till it becomes golden.
  • After switching off the flame, add asafoetida or hing in the pan while the pan is still hot. Roast for 10 to 15 seconds and mix it with other spices.
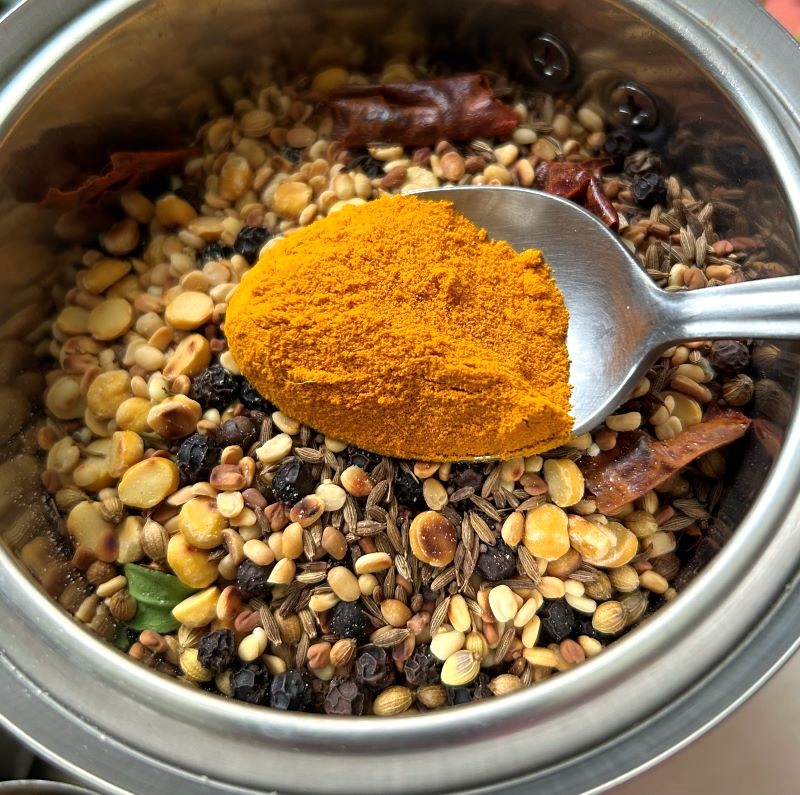
  • Once the spices have cooled a little, add everything in a dry mixer. Add turmeric powder and grind everything to a fine powder.
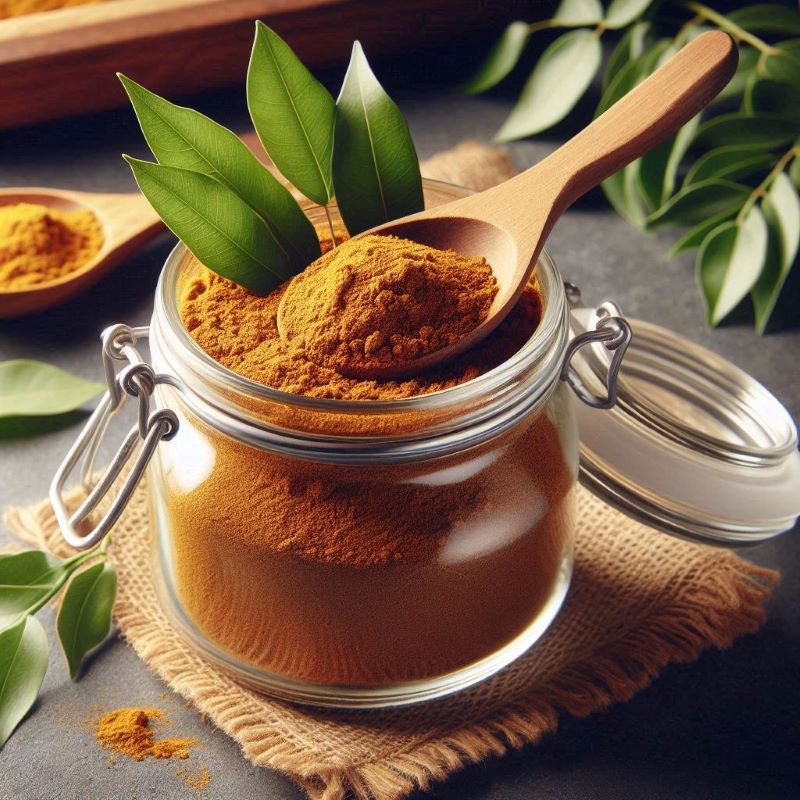
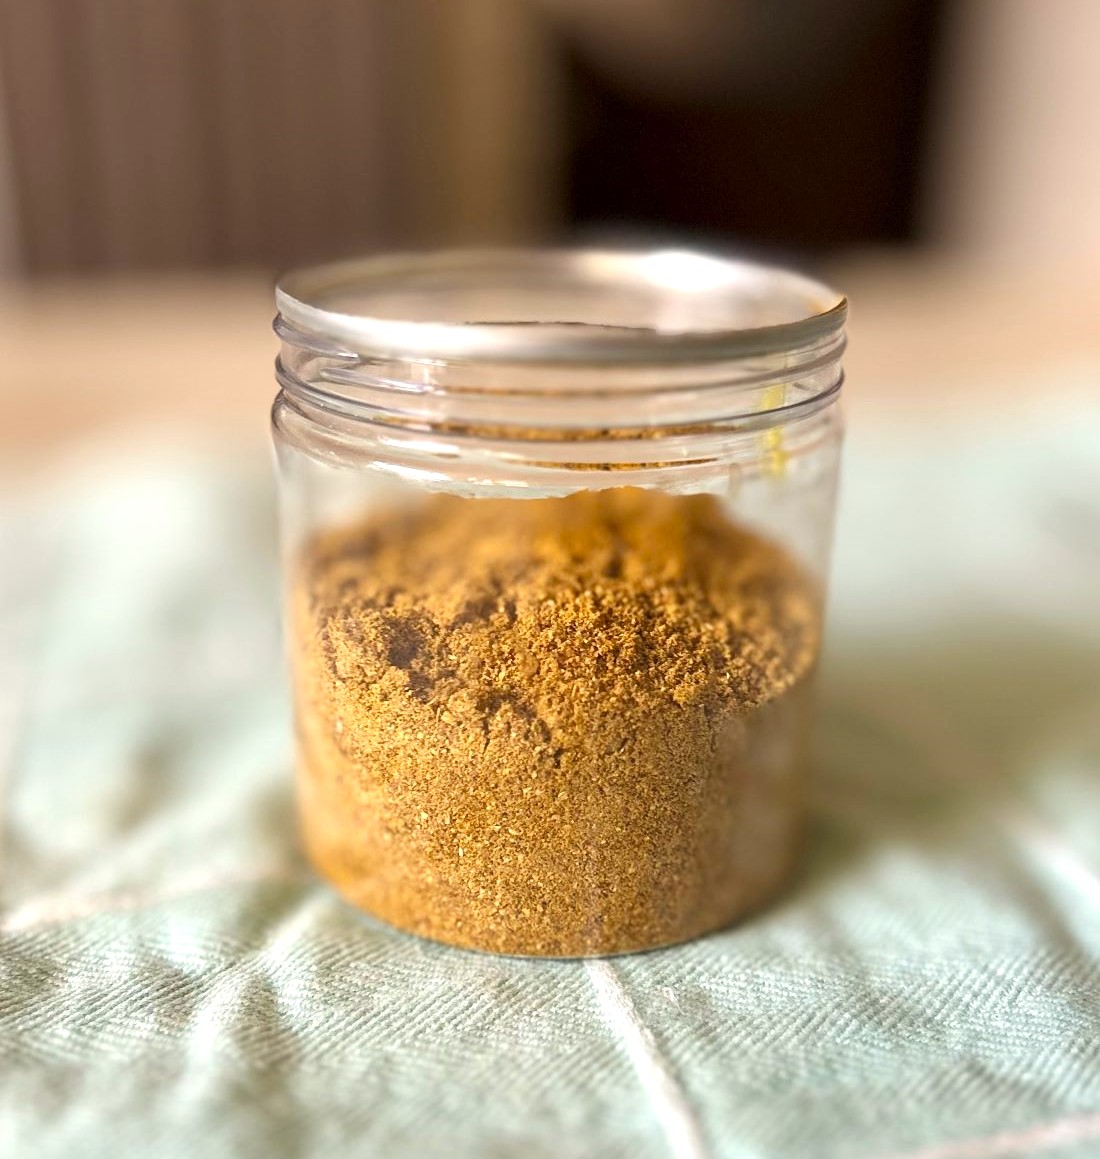
  • Sambar powder is ready to use or store. For storing – store it in a dry and air tight glass container at room temperature.

Notes

  1. Low flame is critical to get a good even roast on the ingredients, so do not try and speed up the process by increasing the flame.
  2. You can dry roast everything simultaneously on different burners if you can keep a hawk’s eye on all the spices. This will definitely save you time though.
  3. Sambar powder is best stored in a dry and air tight glass container at room temperature.
  4. This Sambar masala will last you 1 year. Spices in general last a long, long time. But yes! After a while they start to lose their potency.
  5. You can easily double or triple this recipe depending upon your requirement.
  6. People who have celiac disease, please be sure to read the label on asafoetida/hing. Many commercial brands process hing powder with wheat.

I hope you find this recipe useful. If you did then please let know in the comments below.