
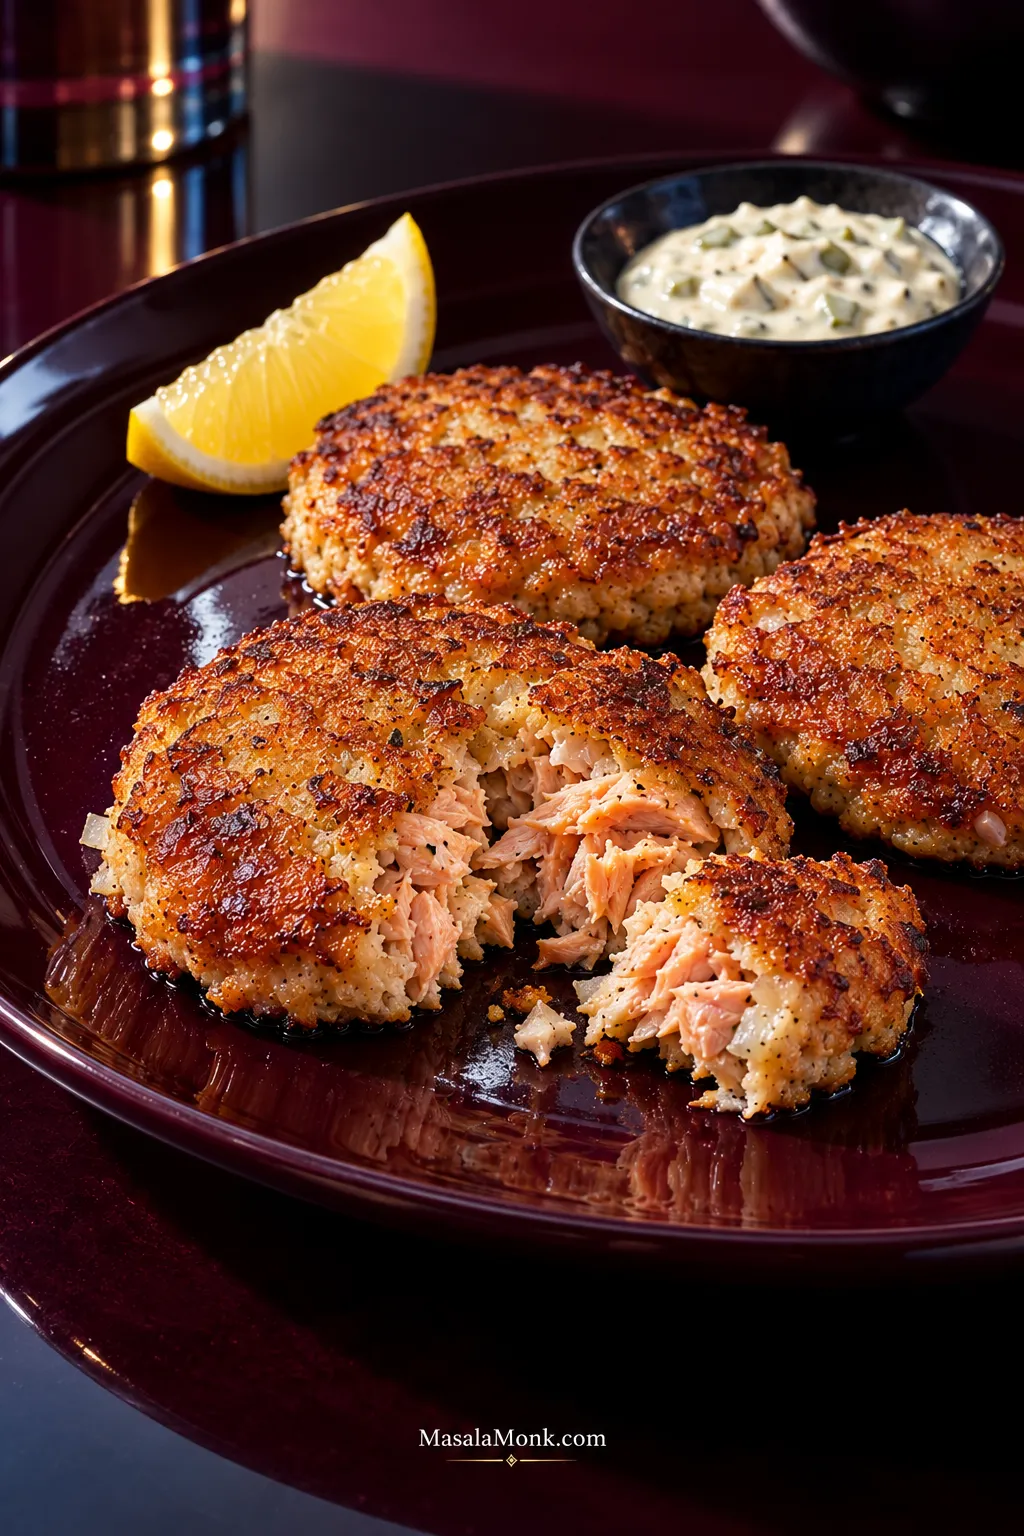
The first salmon patty is usually the one that tells you whether dinner is going to be easy.
You slide a spatula underneath, start to turn it, and the middle threatens to split. The natural response is to add more crackers or breadcrumbs next time. Keep doing that and the patties may eventually hold beautifully while tasting more like the binder than the salmon.
In this salmon patties recipe, the mixture should stay soft enough for a moist, flaky center while still holding together in your hand. Canned salmon keeps dinner practical, and a short rest gives the Saltine crumbs time to absorb the moisture around them.
Get that balance right and the reward is simple: deeply browned, crisp edges around a tender center with visible flakes of salmon.
In This Guide
Salmon Patties Recipe
Yield: 6 medium patties
Prep: about 15 minutes
Rest: 5–10 minutes
Cook: about 12–16 minutes for two batches, plus a quick test piece
Total: about 35–40 minutes
Method: skillet
Ingredients
- 1 can (14.75 oz / 418 g) pink salmon
- 1 large egg
- About 12 standard Saltine crackers (roughly 36 g; brands vary), finely crushed, plus more only if needed
- 2 tablespoons very finely minced or grated onion
- 1 tablespoon (15 g) mayonnaise
- 1 teaspoon Dijon mustard
- 1 tablespoon (15 ml) fresh lemon juice
- ¼ teaspoon freshly ground black pepper
- Fine salt, as needed after tasting the test piece
- 2–3 tablespoons (30–45 ml) neutral cooking oil, or enough to coat the skillet generously, plus more between batches if needed
The base is intentionally simple. Dill or parsley takes the flavor in a fresher direction, while Old Bay or Cajun seasoning makes the patties warmer and spicier. Choose one direction rather than piling several onto the salmon.
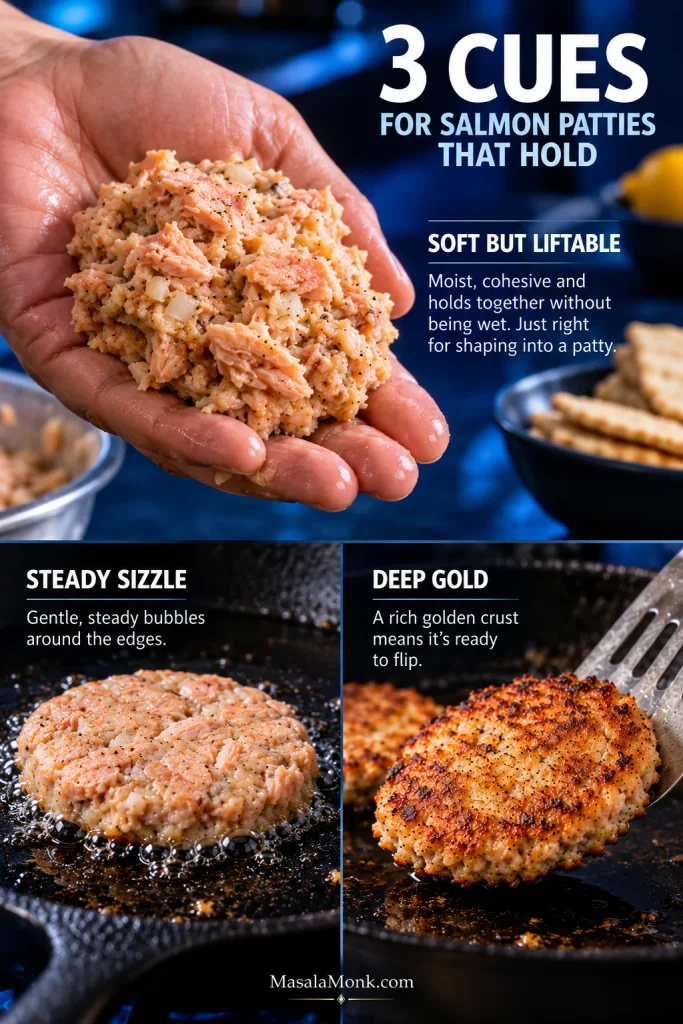
Three cues are worth remembering: soft but liftable in the bowl, an immediate steady sizzle in the skillet, and deep gold before the first flip.
How to Make Salmon Patties
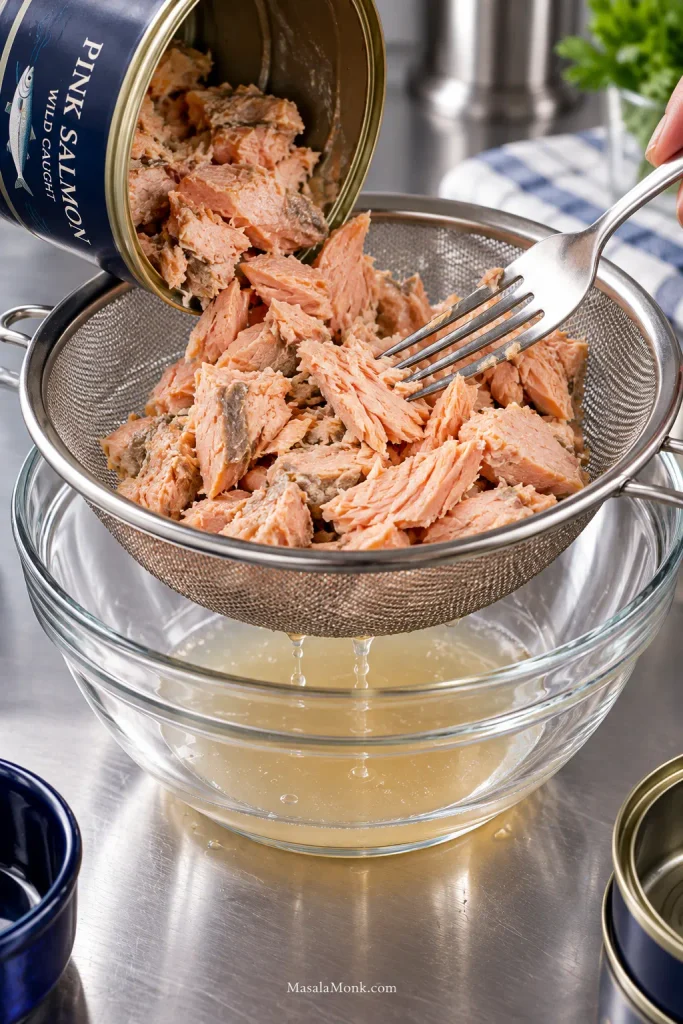
- Drain and flake the salmon. Set a small bowl underneath as you drain it, and save a tablespoon or two of the liquid for now. Transfer the salmon to a mixing bowl. Remove visible skin or larger bones if you prefer, then break the fish into flakes with a fork, leaving some larger pieces for texture.
- Mix. Add the egg, very finely minced or grated onion, mayonnaise, Dijon mustard, lemon juice, and black pepper. Keep the onion pieces small; these patties cook quickly, and larger pieces can stay sharp. Fold gently, then mix in the crushed Saltines just until everything comes together.
- Rest for 5–10 minutes. Give the crumbs time to absorb moisture. During the final 2–3 minutes, set a 10- to 12-inch skillet over medium heat and add enough oil to coat the bottom generously.
- Check and taste. Press a small handful in your palm. It should hold when lifted while still feeling moist. A bowl that is noticeably wetter or drier can be corrected with the 30-second mixture check below. Once the oil gives you a steady sizzle, fry a teaspoon-sized test piece. Make sure it holds together, taste it while hot, and adjust salt, pepper, lemon, or seasoning now.

Shape, Fry and Flip
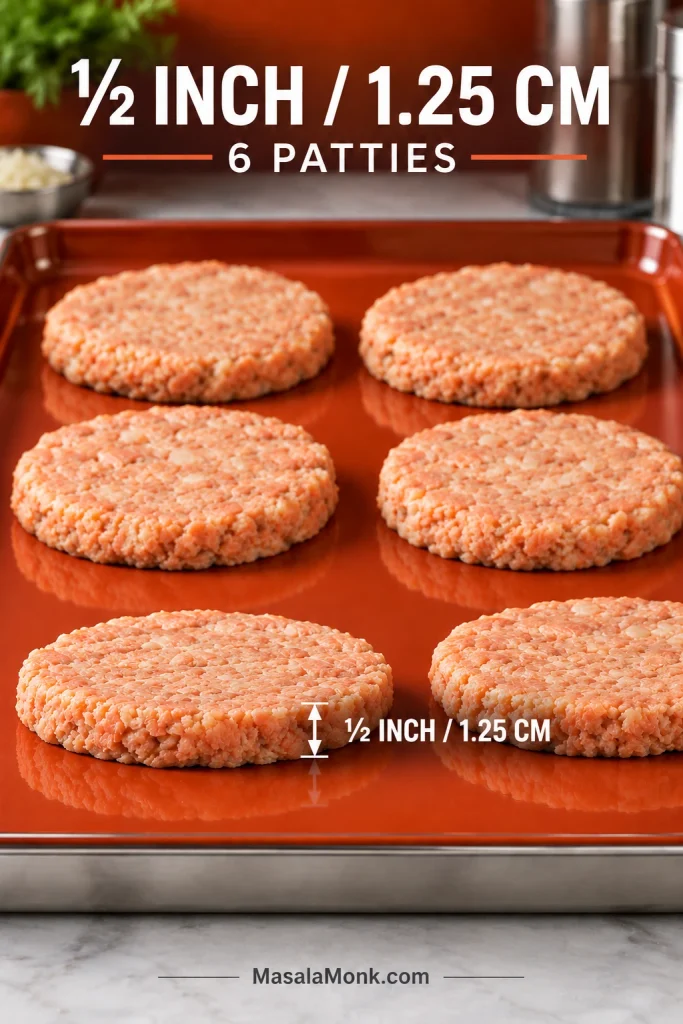
- Shape. Divide the salmon into 6 equal portions and form patties about ½ inch / 1.25 cm thick. Press only as much as needed to bring them together.
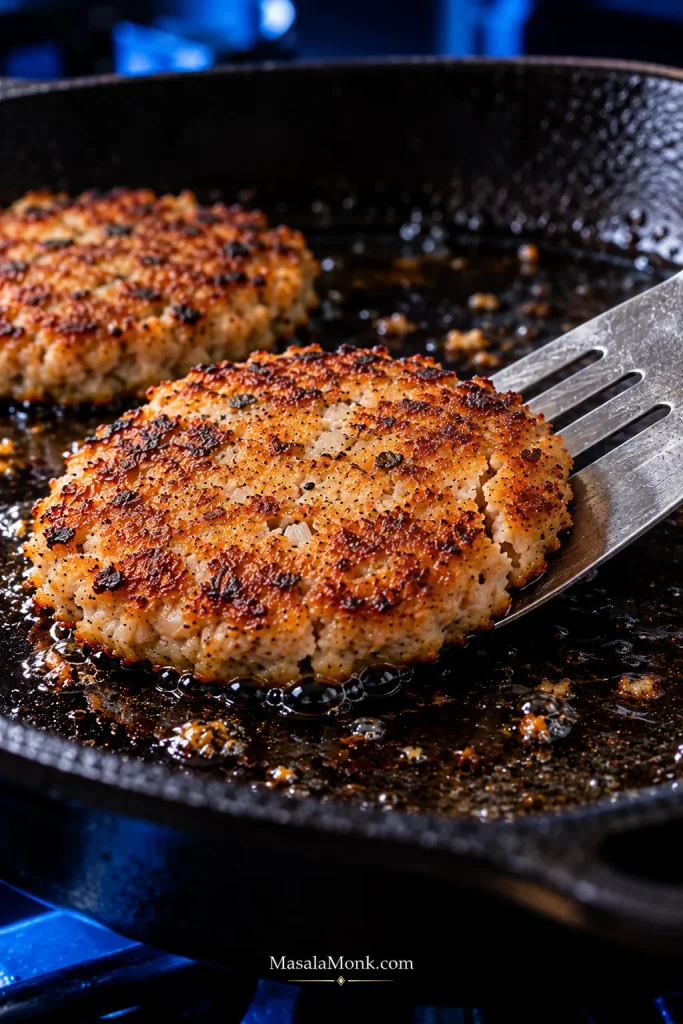
- Fry in two batches of three. Bring the oil back to a steady sizzle if needed, then add 3 patties with space around them. Cook for roughly 3–4 minutes, until the underside is deeply golden and the outer edge looks set.
- Turn once. Slide a wide, thin spatula fully underneath each patty. If it still clings to the skillet, give it another 30–60 seconds. Flip and cook another 3–4 minutes, until the second side is golden and the center is hot and set. If you check with a thermometer, aim for 160°F / 71°C in the center; that’s the USDA safe temperature for dishes containing egg. Transfer to a plate, add a little more oil if the pan needs it, and repeat with the remaining 3 patties.
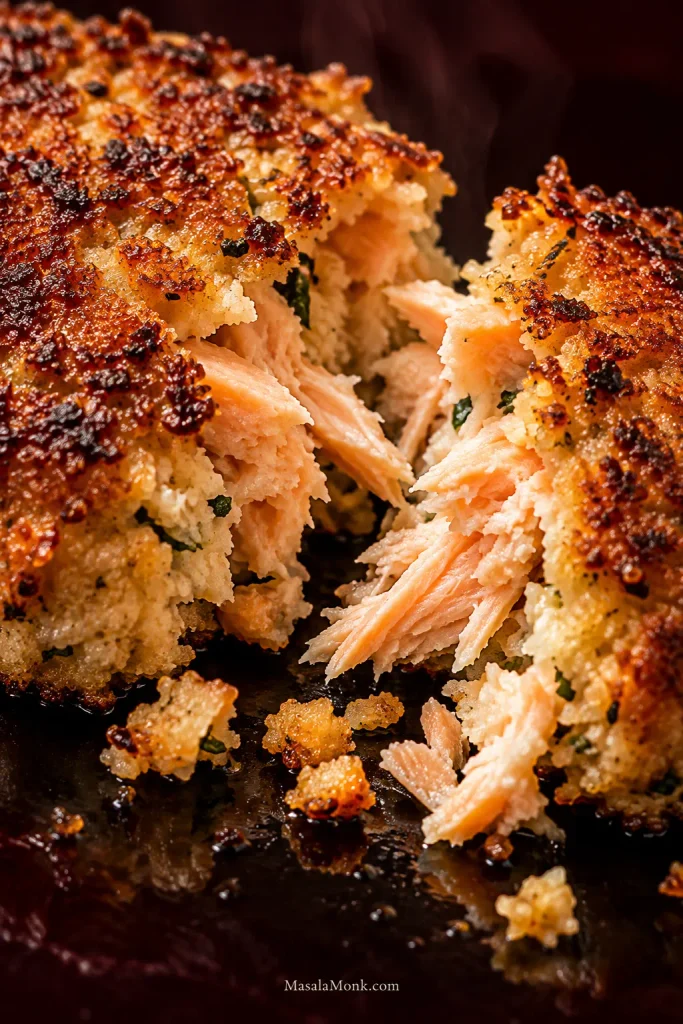
- Eat them while they’re crisp. Keep the cooked patties in a single layer so steam doesn’t soften the crust. Break one open; the center should look moist and flaky, with recognizable pieces of salmon rather than a dense paste.
The 30-Second Mixture Check
Give the crumbs their full rest before changing the mixture. A loose, wet bowl may need more binder; a dry one needs moisture, not another handful of crackers.
| What you notice | What it means | What to do |
|---|---|---|
| Slumps, smears, or loses its edge | Too wet, or not fully rested | Finish the rest. If it still slumps, add crushed Saltines about 1 tablespoon at a time. |
| Presses together, lifts intact, stays moist | Ready | Fry the test piece, then shape the patties. |
| Cracks badly or crumbles | Too dry | Add mayonnaise or reserved salmon liquid about 1 teaspoon at a time. |
| Feels stiff and dense | Probably too much binder | Stop adding crumbs. Loosen with a small amount of moisture if necessary. |
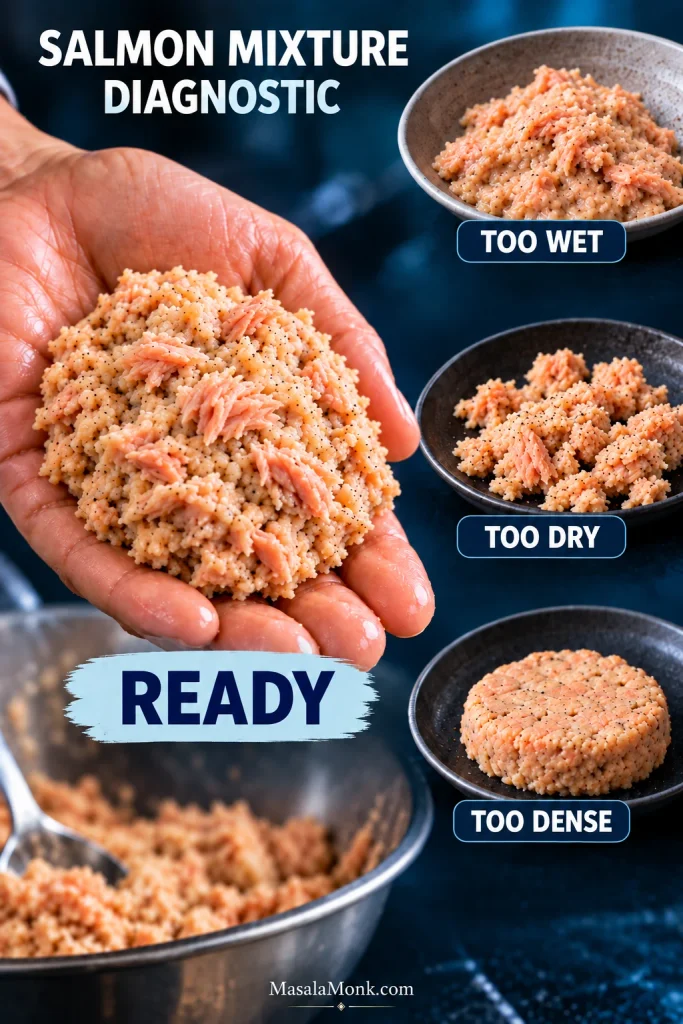
A dry salmon patty can still fall apart. You want something soft enough to stay tender and cohesive enough to lift cleanly.
Mixture ready? Shape the patties →
If It Won’t Release, Don’t Flip It Yet
A patty that still sticks to the skillet or bends in the middle when you slide a spatula underneath needs more time on the first side. Use the color underneath as your guide; burner settings vary from stove to stove.
When a Salmon Patty Is Ready to Flip
- Look for deep gold underneath rather than pale yellow.
- At the edge, the surface should look set instead of glossy.
- The patty should begin releasing cleanly from the skillet.
- Use a wide spatula so the whole patty is supported during the turn.
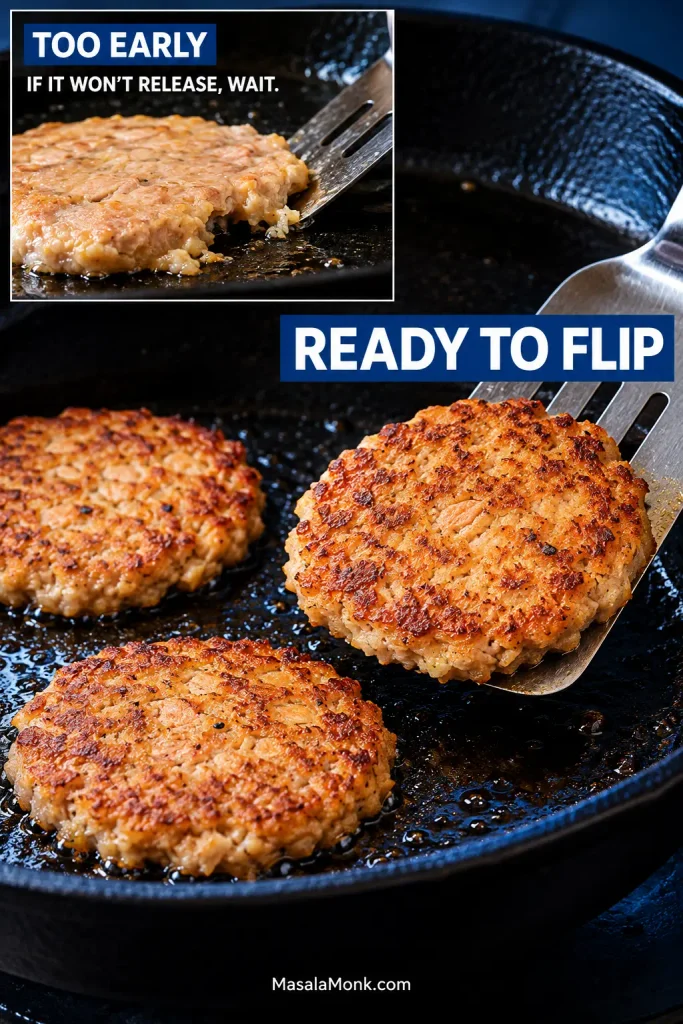
Cast iron gives you a strong crust; nonstick makes release especially easy. Stainless steel works when it is properly preheated and has enough oil.
Already cooked them? If the texture still seems off, troubleshoot the finished patties.
If the Finished Patties Still Aren’t Right
The mixture check handles the raw bowl, and the crust cues handle the first flip. Once the patties are cooked, their texture shows you what to change next time.
| What happened | Likely reason | Next batch |
|---|---|---|
| Dry and mealy | Too much binder, naturally dry salmon, or too much cooking | Use less crumb and stop cooking once the center is set. |
| Soft or mushy inside | Too much moisture, thick patties, or not enough cooking | Keep them around ½ inch thick and cook until the center is set. |
| Pale, soft or greasy crust | Oil too cool, crowded skillet, or moving the patties too soon | Wait for a steady sizzle, leave room around each patty, and let the first side brown before turning. |
What a Good Salmon Patty Looks Like Inside
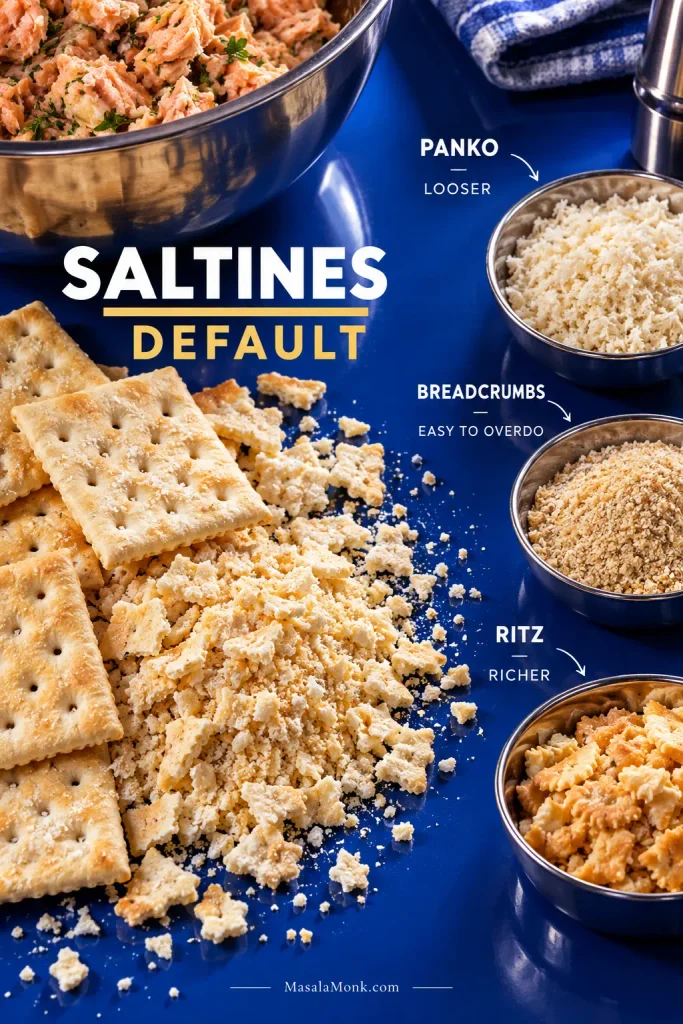
Saltines, Panko or Breadcrumbs?
The egg and crushed Saltines do most of the holding in this version. A spoonful of mayonnaise keeps the mixture from feeling dry while the crumbs rest.
Saltines are the default here. They disappear into the salmon easily, absorb moisture well, and already bring some salt to the bowl.
Panko gives the mixture a looser texture. Start conservatively, let it sit, and add more only after you see how well the salmon holds.
Plain breadcrumbs are dependable but easy to overdo. Once the bread becomes more noticeable than the salmon, adding more won’t improve the patty.
Ritz crackers make a richer, more buttery version. Different crumbs and crackers absorb differently, so I would not treat them as automatic cup-for-cup substitutes before checking the rested mixture.
For the flour-and-cornmeal style often associated with Southern salmon croquettes, our salmon croquettes recipe follows that branch much further.
One Can of Salmon Isn’t Always One Can
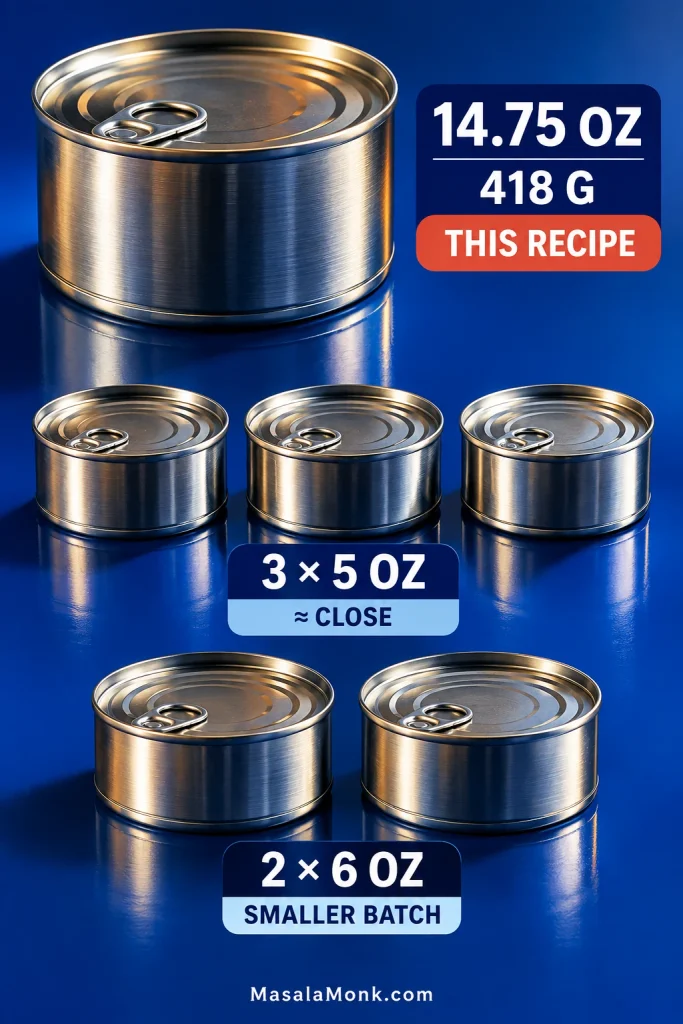
This recipe starts with one 14.75-ounce / 418 g can before draining. Can sizes vary enough that “one can” is no longer a useful measurement by itself.
Package weight includes the packing liquid, so two cans with similar labelled weights may not leave exactly the same amount of salmon after draining.
Three 5-ounce cans are close to the labelled amount used here. Two 6-ounce cans make a smaller batch, so scale the egg as well as the crumbs instead of using a full egg and then adding extra dry binder to compensate. Beating the egg first makes it easier to use only part of it.
Which Canned Salmon Works Best?
Pink or red? For a milder, generally less expensive option, pink salmon works well with the lemon, onion, and mustard in this recipe. Red salmon or sockeye gives you a stronger salmon flavor. Canned salmon can also smell much stronger straight from the can than it tastes after frying; the lemon, mustard, onion, and browned crust make the finished flavor noticeably more balanced.
Using a pouch? Pouch salmon can be drier than salmon packed with more liquid. Begin with less crumb and check the mixture after it rests.
Skin and bones? The soft canned bones are edible and can be mashed into the salmon. You do not have to make yourself enjoy them, though. Pull out the obvious bones and skin if you’d rather not deal with them.
Changed the package size? Before shaping, run the mixture check again.
What to Serve with Salmon Patties
You can lean into the comfort-food side of the dish or put something cool and crisp next to the hot patties.
- Classic comfort: creamy mashed potatoes with peas, green beans, or corn.
- Southern-style supper: a wedge of Southern cornbread with greens, slaw, or green beans.
- Cold and crunchy: creamy coleslaw, either alongside the patties or tucked into a sandwich with lettuce and pickles.
- Lighter: a sharp cucumber salad gives the plate cool crunch without another rich element.
- Breakfast or brunch: smaller patties with eggs and grits or biscuits.
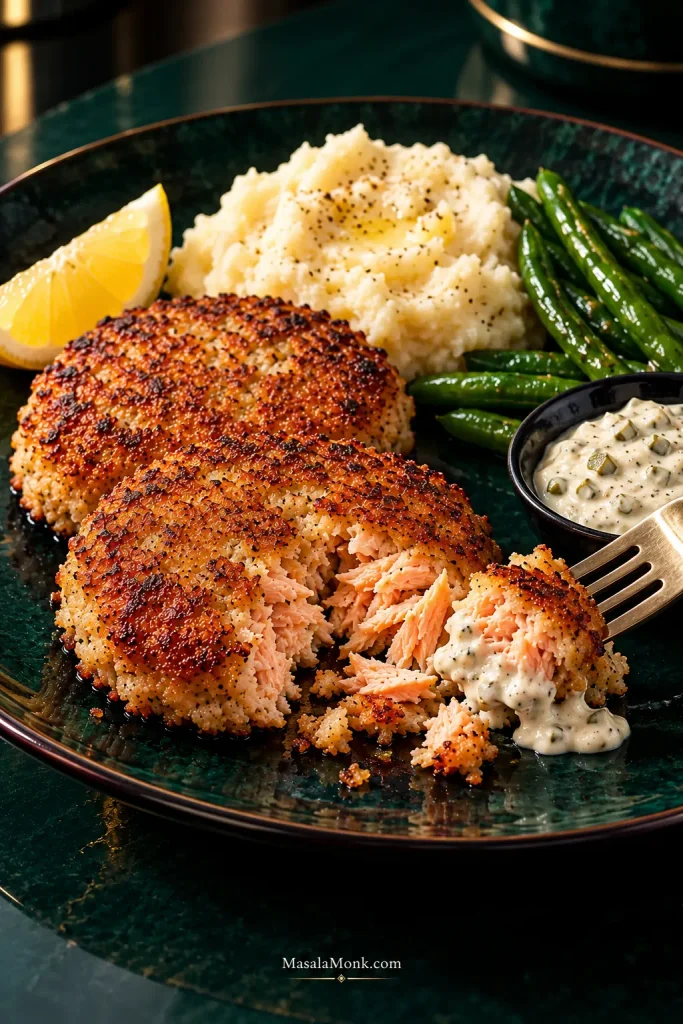
For the plate I’d make first: hot salmon patties, mashed potatoes, something green, a wedge of lemon, and cold homemade tartar sauce. Crisp crust, soft potatoes, something fresh, something sharp. Nothing on the plate is doing the same job.
Make Ahead, Freeze & Reheat
Make ahead. Shape the patties up to 24 hours ahead, cover them, and refrigerate until you’re ready to cook. This matches USDA guidance for dishes containing raw egg.
Refrigerate leftovers. Cool cooked patties promptly, keep them covered, and use them within about 3–4 days, which is also the refrigerated storage window in USDA fish-storage guidance.
Freeze after cooking. Cool the patties, freeze them in a single layer until firm, then transfer them to a freezer-safe container with parchment between layers. USDA storage guidance lists cooked fish at up to about 3 months in the freezer for best quality. That is storage guidance rather than a promise that the crust will be identical after freezing.
Best Way to Reheat Salmon Patties
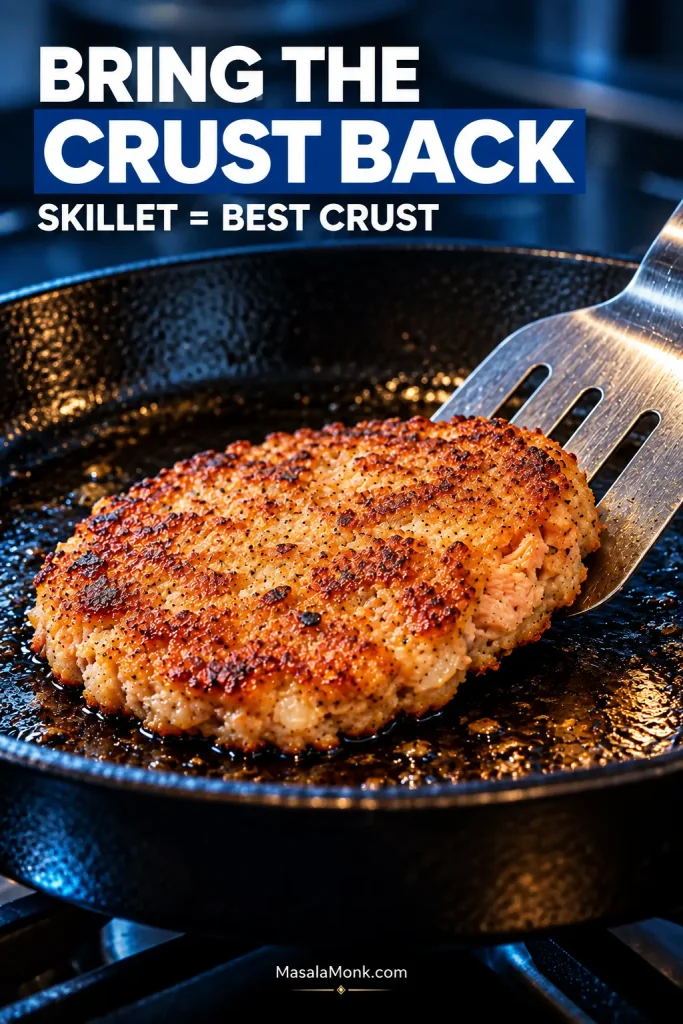
A skillet does the best job of bringing the fried crust back. An air fryer works well too, and the oven is handy for several patties at once. The microwave is fastest but softens the outside. Whichever method you use, USDA leftover guidance recommends reheating to 165°F / 74°C throughout.
Salmon Patties FAQ
Can salmon patties be made without eggs?
Not by simply leaving the egg out of this exact recipe. This formula relies on egg for structure, so an eggless version is better made from a recipe designed around a different binder.
Can I use fresh salmon instead of canned?
Yes—cooked fresh salmon can replace canned salmon, but raw salmon is not a direct 1:1 substitute for this recipe. Flake leftover cooked salmon gently and expect to adjust the moisture because it may be drier than canned fish. Raw salmon needs a formula built around uncooked fish.
What’s the difference between salmon patties, salmon cakes, and salmon croquettes?
There is no universally fixed difference between salmon patties and salmon cakes; the names often overlap. In American home cooking, especially in the South, “salmon croquettes” often refers to a closely related style that may lean more heavily on flour, cornmeal, coating, or a distinct frying method.
There is something satisfying about turning a can from the cupboard into six hot, golden patties. This is the kind of dinner that asks very little from the refrigerator and still gets to the table crisp, warm, and substantial.
The next can may be wetter, and another brand of crackers may absorb differently. What matters is learning what the salmon should feel like before it reaches the pan—and what the first side looks like when it’s ready to turn.
Once you know those two things, you’ll probably need the measurements less than you expect.








