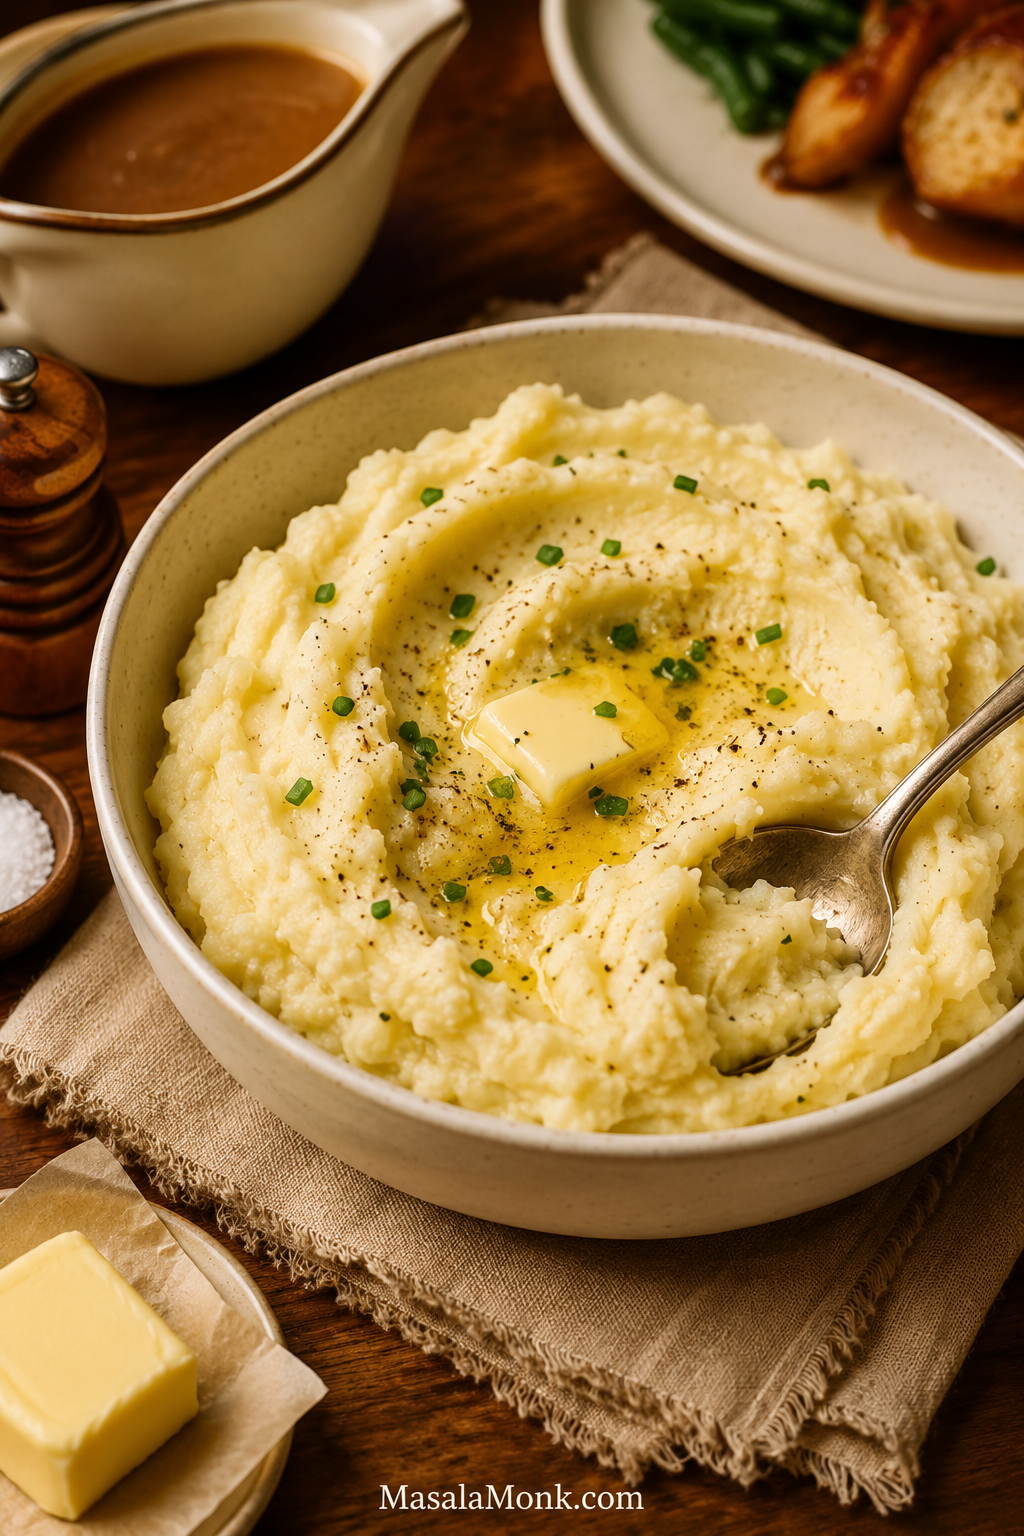
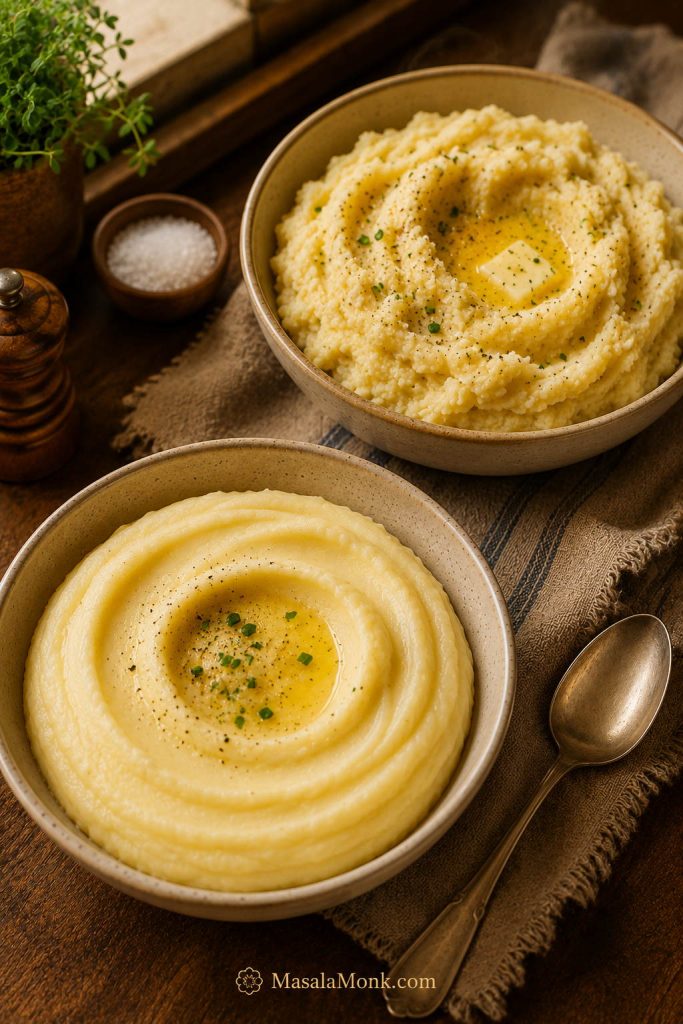
This is the mashed potato bowl people reach for first: soft, buttery, creamy enough to feel rich, and fluffy enough to hold a spoonful of gravy. It works for holidays, roast dinners, weeknights, and those “everything else is ready but the potatoes need help” moments.
The ingredients are simple, but the finish matters. Yukon Gold potatoes make the mash naturally creamy, russets make it lighter, warm milk blends in smoothly, and a gentle hand keeps the texture soft instead of sticky.
This recipe is built for real mashed potato moments: the holiday batch, the weeknight side, the dry mash that needs saving, the no-milk emergency, and the serving dish that has to stay warm while dinner catches up.
Quick Answer: How to Make Mashed Potatoes
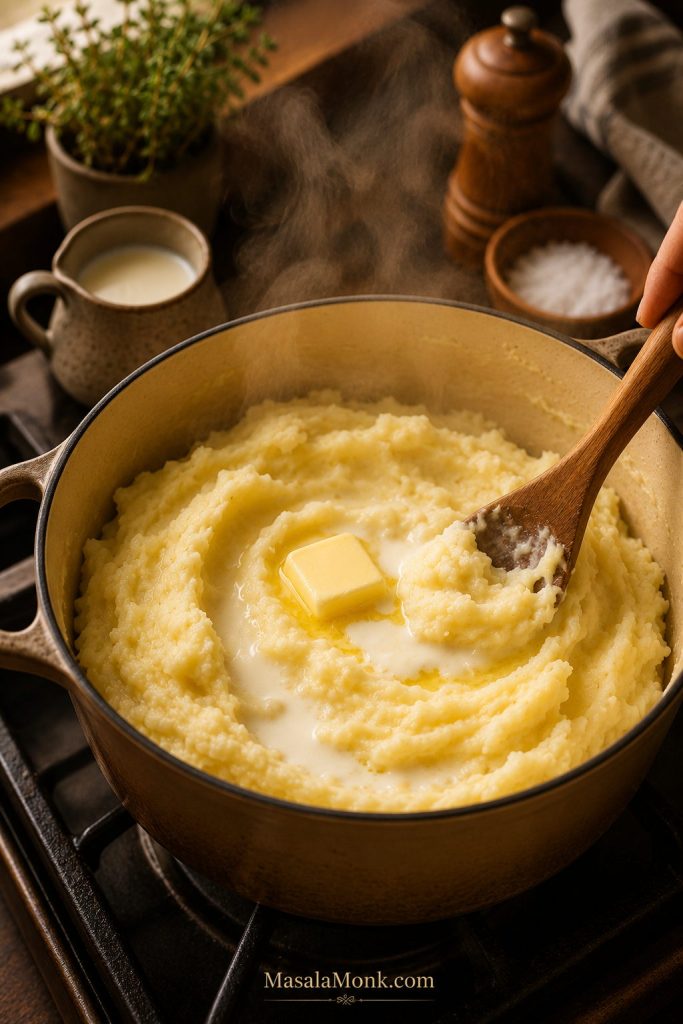
To make mashed potatoes, simmer peeled potato chunks in cold salted water until very tender, drain well, dry them briefly in the hot pot, then mash with butter and warm milk or cream. Season to taste and add more warm liquid only until the potatoes are soft, creamy, and spoonable.
The finish is where the bowl is won. Dry the potatoes well, add warm liquid gradually, and stop as soon as the mash looks soft and spoonable.
Recipe at a Glance
| Best potatoes | Yukon Gold, russet, or a 50/50 mix |
|---|---|
| Texture | Creamy, fluffy, buttery, and soft enough for gravy |
| Prep time | 15 minutes |
| Cook time | 20 minutes |
| Total time | 35 minutes |
| Servings | 4 generous or 5 smaller side servings |
| Best tool | Masher for cozy homemade texture; ricer or food mill for a smoother, lighter finish |
| Main mistake to avoid | Overmixing, especially with a blender or food processor |
Creamy Mashed Potatoes Recipe
Description: Creamy, fluffy mashed potatoes made with Yukon Gold or russet potatoes, warm milk, butter, and a gentle method that keeps the mash soft, gravy-ready, and easy to rescue if dinner gets ahead of you.
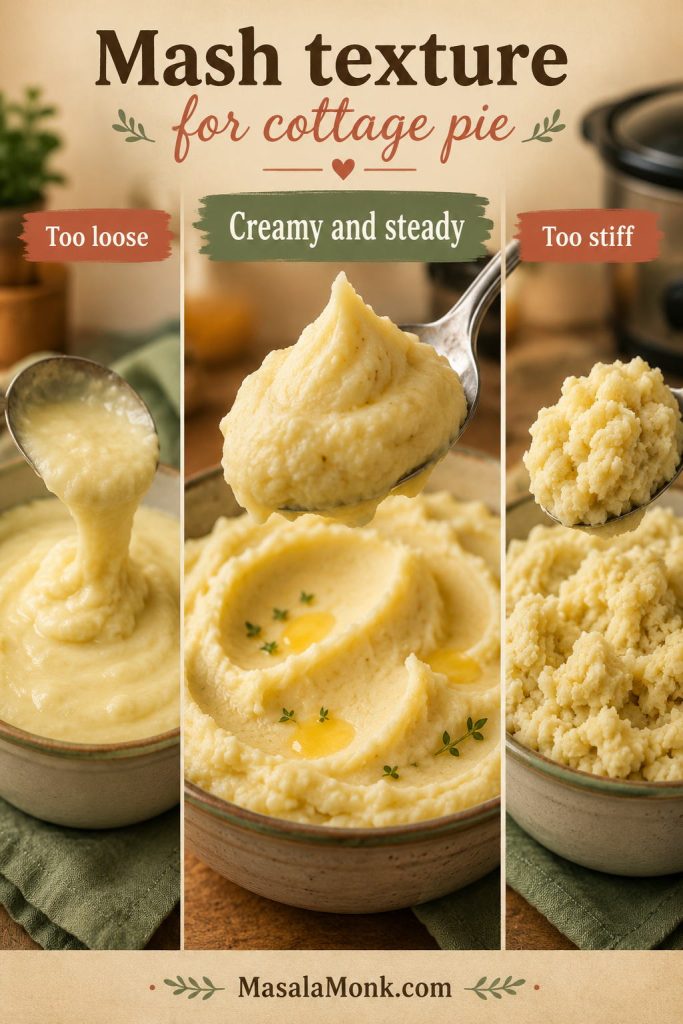
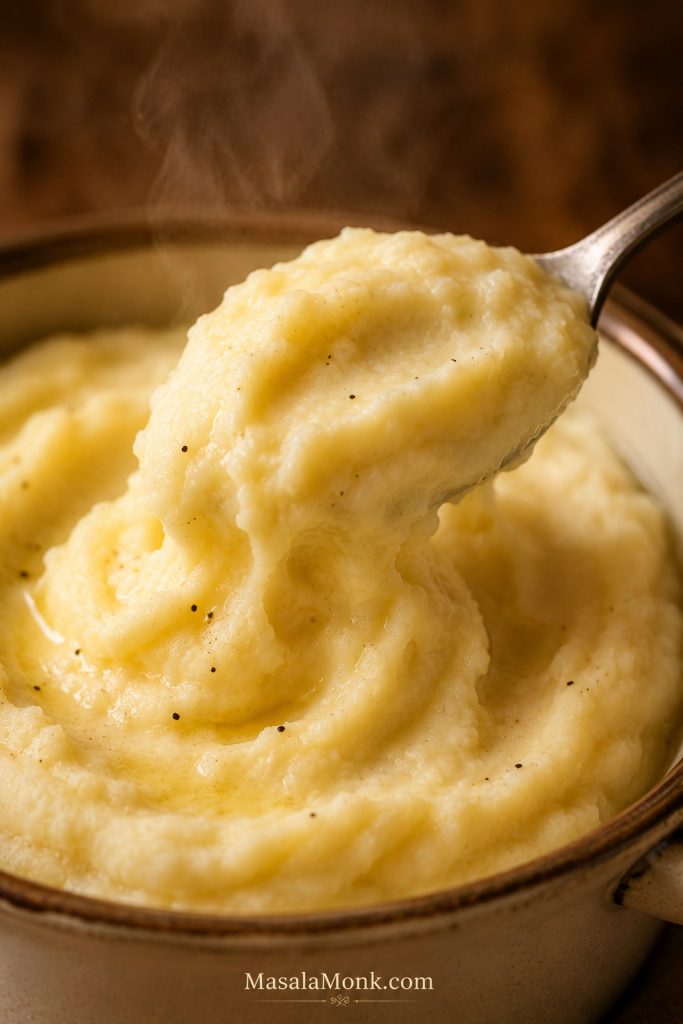
Success cue: Soft, steamy, spoonable potatoes that hold gentle ridges when dragged with a spoon and fall slowly instead of pouring or clumping.
Base Ingredients
- 1 kg / 2.2 lb Yukon Gold potatoes, russet potatoes, or a mix
- 75–100 g / about 5–7 tbsp unsalted butter
- 180–240 ml / 3/4–1 cup whole milk, half-and-half, or milk and cream, warmed
- 2 tsp to 1 tbsp kosher salt for the cooking water, depending on pot size and water volume
- Fine salt, added gradually after mashing, to taste
- 1/4–1/2 tsp black pepper
Optional Add-Ins
- 60 ml / 1/4 cup sour cream
- 60–100 g / 2–3.5 oz cream cheese
- Chopped chives, parsley, extra melted butter, or gravy for serving
Instructions
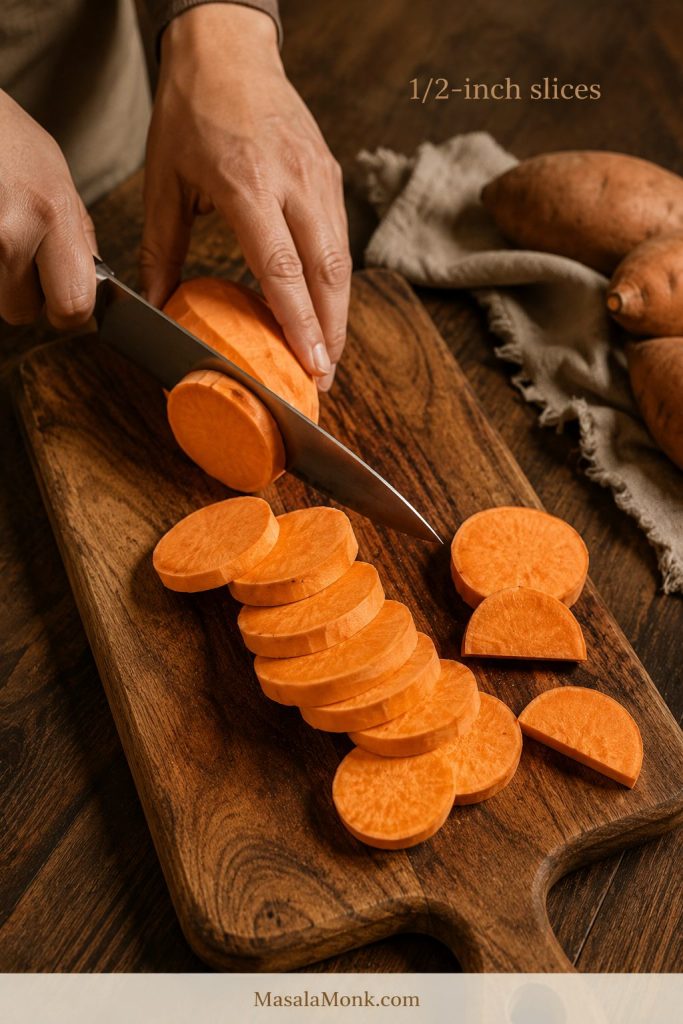
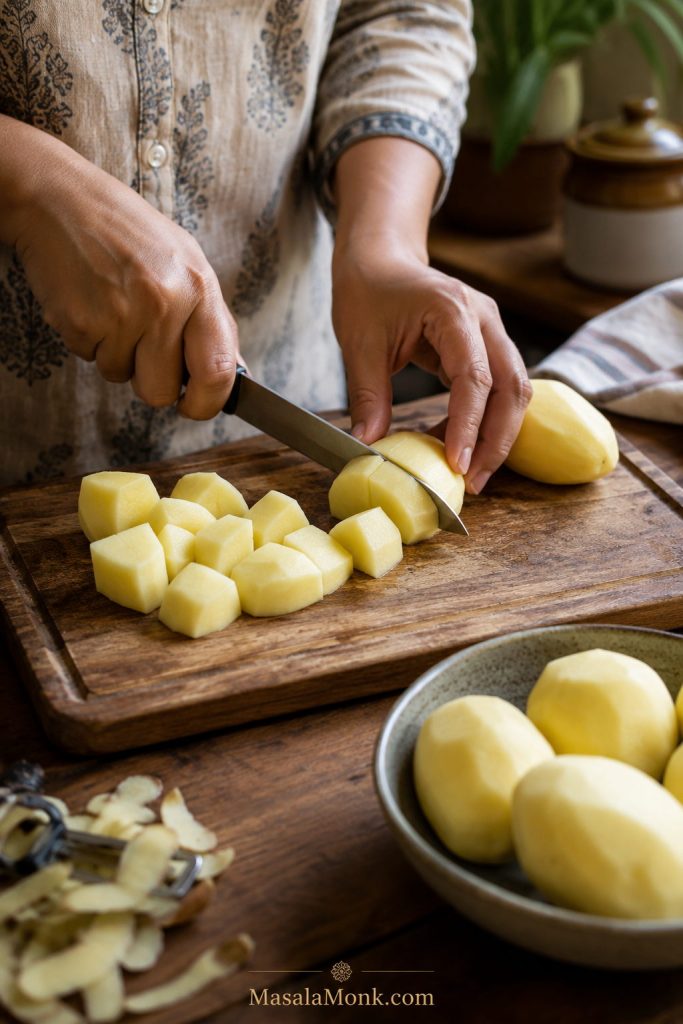
- Peel the potatoes for a smooth bowl, or scrub them well if making a rustic version with some skin. Cut into even 1 1/2–2 inch / 4–5 cm chunks.
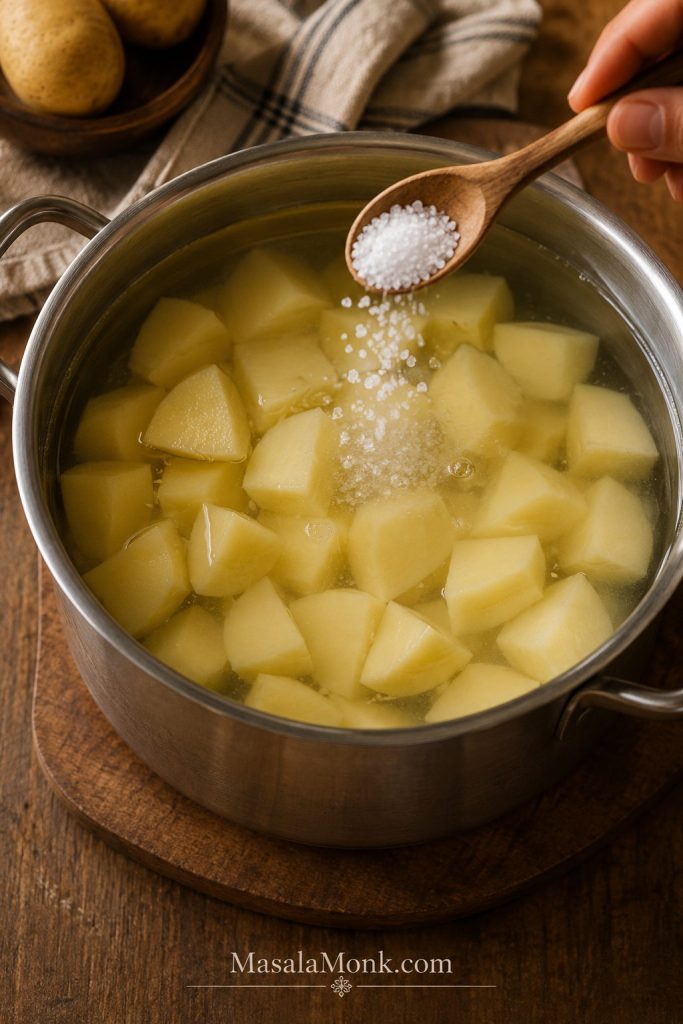
- Place the potatoes in a large pot and cover with cold water by about 1 inch / 2.5 cm. Add kosher salt to the water.
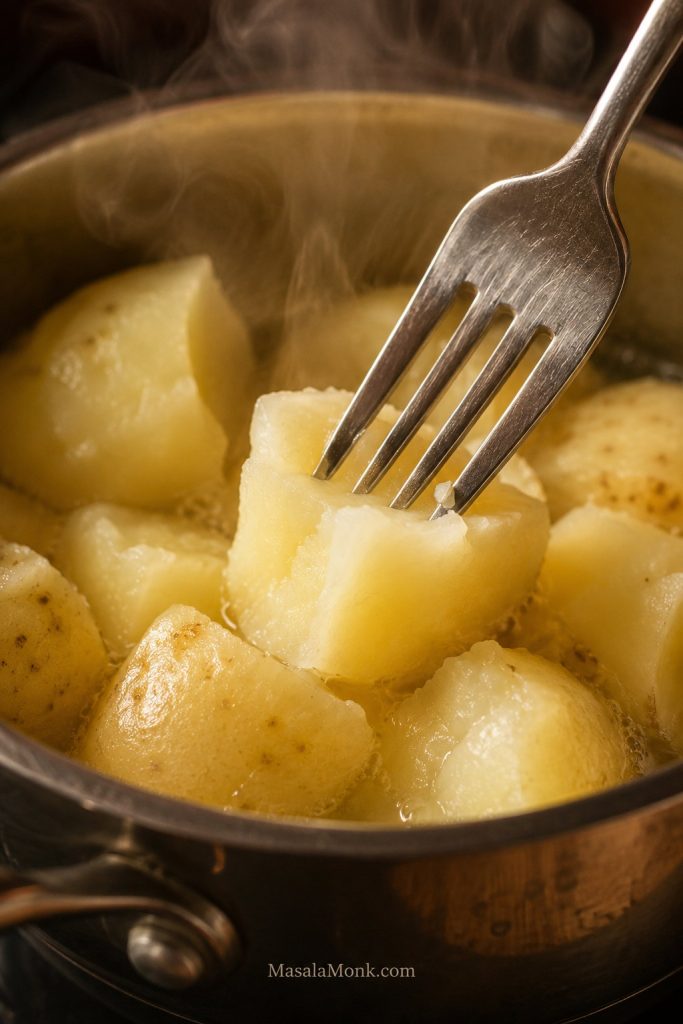
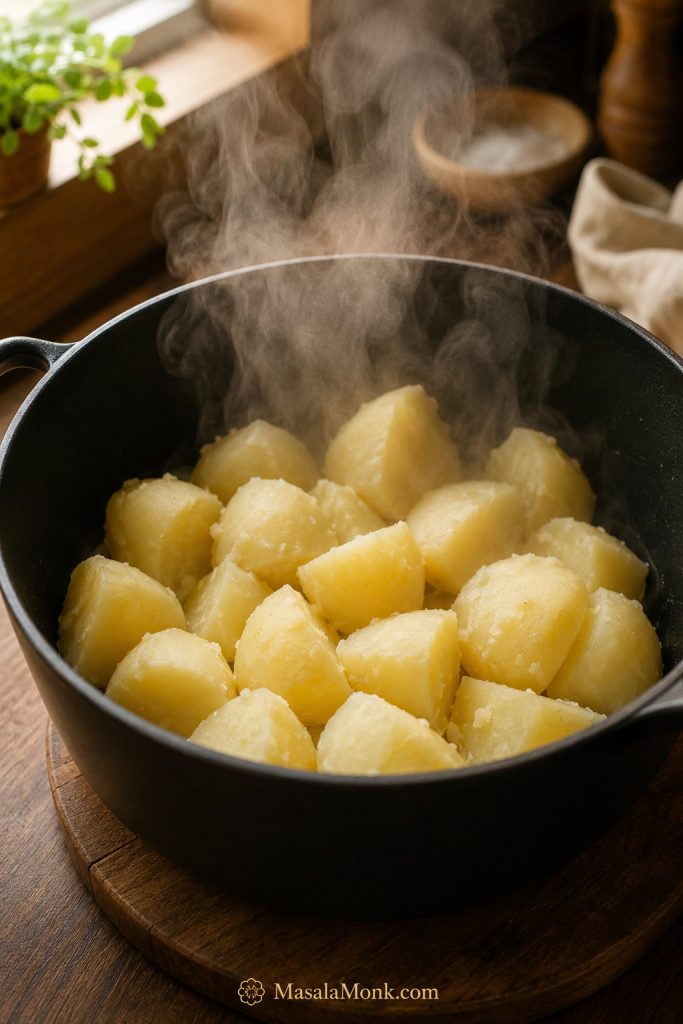
- Bring to a boil, then reduce to a steady simmer. Cook for 15–20 minutes, or until a fork slides through easily with almost no resistance.
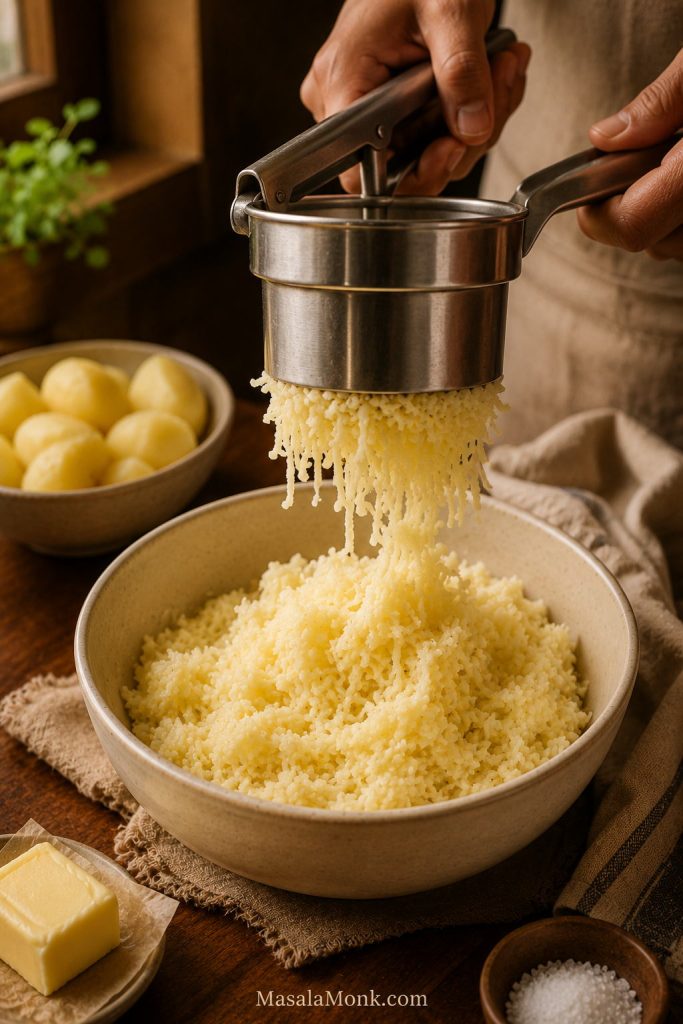
- Drain well. Return the potatoes to the hot empty pot for 30–60 seconds so extra steam escapes and the surface looks dry. Do not rinse them.
- Mash gently with a potato masher. For a smoother finish, use a ricer or food mill.
- Add the butter and about 180 ml / 3/4 cup warm milk or cream. Mash or fold gently until creamy.
- Add more warm milk or cream only as needed. Start with less; you can always loosen the mash once the texture tells you what it needs.
- Season with fine salt and pepper. Taste and adjust. Add sour cream or cream cheese if using. Serve hot with extra butter, herbs, or gravy.
Recipe Notes
- For the best all-purpose bowl, use a 50/50 mix of Yukon Gold and russet potatoes.
- The potatoes are ready to mash when a fork slides through with almost no resistance. If they fight back at all, cook them longer.
- Do not rinse after draining. Let steam escape in the hot pot instead.
- A masher, ricer, or food mill keeps you in control. Save the blender for soups.
- If using sour cream or cream cheese, add less milk at first. You can loosen the potatoes later, but you cannot easily remove excess liquid.
- For make-ahead prep, make the mash slightly looser than usual and reheat gently with extra warm milk or butter.
Mashed Potatoes Guide
Before You Cook
Choose Your Mashed Potato Texture
Before you start, decide what kind of mash you want on the table. A fluffy classic mash and a rich holiday batch use the same base method, but they need slightly different choices.
Once you choose the texture first, the rest of the recipe becomes easier: the potato, tool, dairy, and add-ins all have a job.
| You want | Use | Do this |
|---|---|---|
| Creamy everyday mash | Yukon Gold potatoes | Use warm milk and butter; mash gently. |
| Fluffy classic mash | Russet potatoes | Use a ricer or light masher; avoid heavy mixing. |
| Best balanced mash | 50/50 Yukon Gold and russet | Use moderate milk, enough butter, and stop when spoonable. |
| Rich holiday mash | Yukon/russet mix + sour cream or cream cheese | Make slightly looser before chilling or holding. |
| No-milk mash | Reserved potato water, broth, butter, or olive oil | Add slowly so the mash loosens without turning soupy. |
Once the style is clear, the potato choice becomes easier. Yukon Golds lean creamy, russets lean fluffy, and a mix gives the safest balance.
The Mashed Potato Texture Rule
Most mashed potato problems happen in the last few minutes, not at the ingredient stage. The right mash should look relaxed, not wet; soft, not slumped; ridged, not rubbery. Once you know that cue, the recipe becomes much easier to trust.
Why This Recipe Works
Great mashed potatoes do not come from adding every rich ingredient at once. They come from tender potatoes, enough salt, good draining, warm dairy, and a light hand at the end.
In practice, great mashed potatoes come down to moisture control and starch control. Cook the potatoes until fully tender, let surface steam escape after draining, then fold in fat and dairy without beating the mash into paste. That is what keeps the bowl creamy and light instead of watery or gluey.
Yukon Gold potatoes bring a naturally buttery texture. Russets are drier and fluffier. Using both gives you a reliable middle ground: rich enough for holidays, but not so dense that the serving dish feels heavy.
The drying step matters because boiled potatoes carry surface moisture. Letting steam escape in the hot pot keeps the mash from turning watery before the butter and milk go in.
Work the starch as little as possible after cooking. The more you beat the potatoes, the more the texture moves toward sticky and pasty.
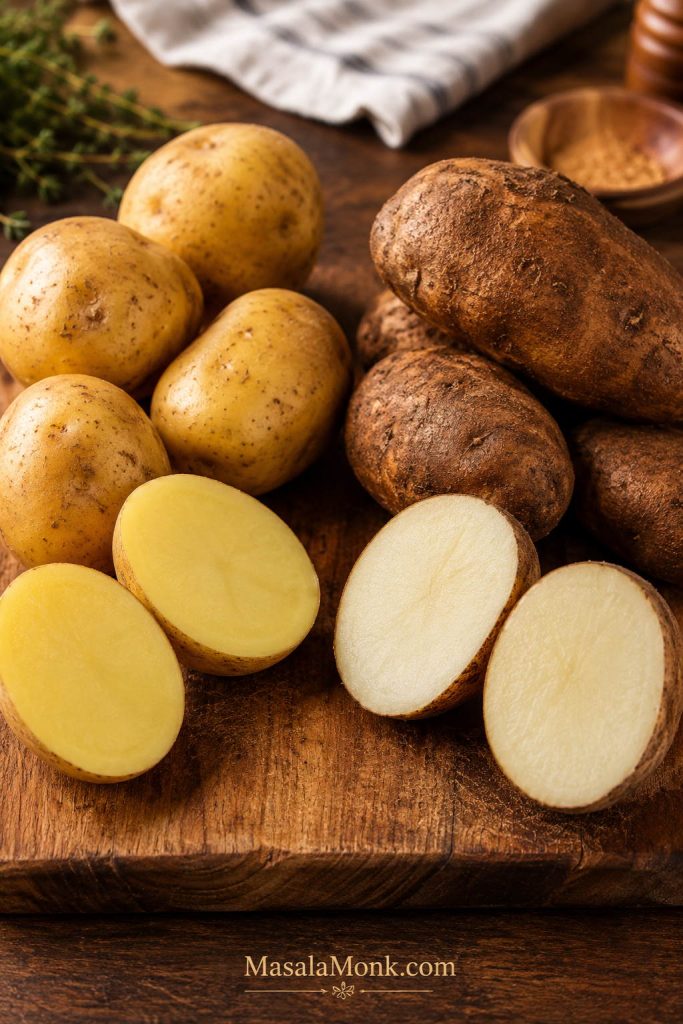
Best Potatoes for Mashed Potatoes
Potato choice decides whether the mash leans creamy, fluffy, rustic, or dense. If you are standing in the store and do not want to think about it, buy Yukon Golds. Choose russets for the fluffiest result, or use both if you want the best balance.
| Potato | Texture | Best for |
|---|---|---|
| Yukon Gold | Creamy, buttery, naturally rich | Smooth everyday mashed potatoes |
| Russet / Idaho | Fluffy, light, slightly drier | Classic fluffy mashed potatoes |
| Yukon Gold + Russet mix | Creamy and fluffy | Best all-purpose mashed potatoes |
| Red potatoes | Waxy, rustic, holds shape | Skin-on mashed potatoes |
| New potatoes / fingerlings | Firm and waxy | Not ideal for classic mash |
Peel the potatoes for a smooth finish. For a rustic mash, leave some or all of the skin on, especially with Yukon Gold or red potatoes. Russet skins are thicker, so they are usually better peeled unless you want a very rustic texture.
Red potatoes are delicious, but they do not give the same classic fluffy texture as russets or the same smooth richness as Yukon Golds. Waxy new potatoes and fingerlings hold their shape well, but they do not mash into the same soft finish.
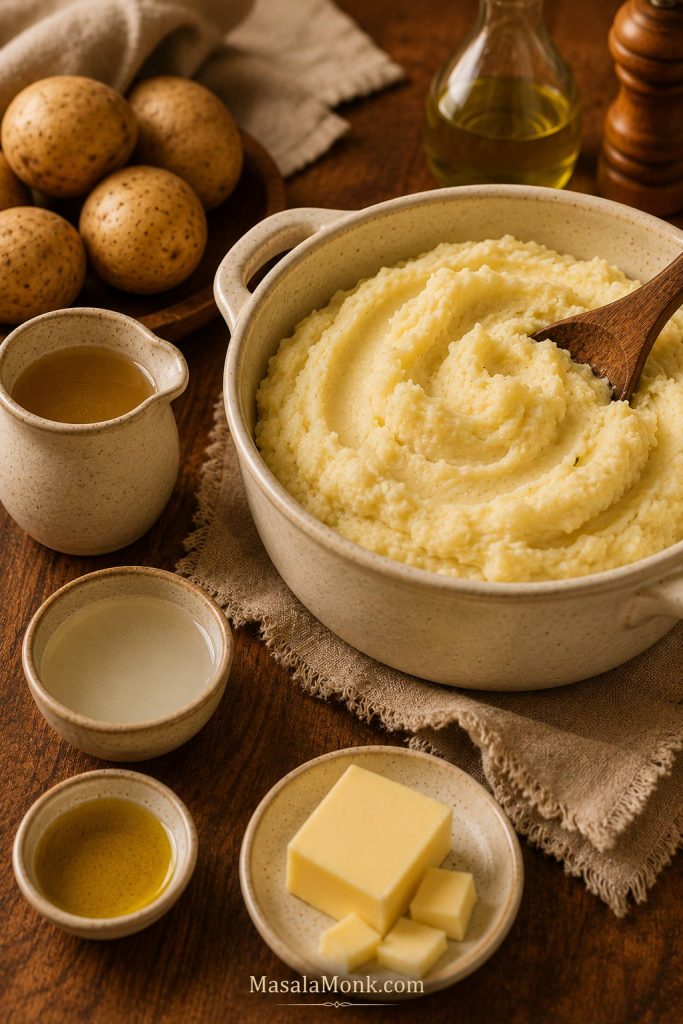
The Best Ratio
This ratio keeps the recipe flexible without turning it into a guessing game. You can scale it for two people, eight people, or a full holiday table without losing the texture.
For every 1 kg / 2.2 lb potatoes, use 75–100 g butter and 180–240 ml warm milk, half-and-half, or cream. Start with the lower amount of liquid, then add more only if the potatoes need it.
For salt, season the cooking water generously but carefully. For 1 kg / 2.2 lb potatoes, start with about 2 teaspoons kosher salt in a medium pot, or up to 1 tablespoon for a large pot of water. The water should taste seasoned, not harshly salty. After mashing, add fine salt in small pinches or 1/4 teaspoon increments until the flavor tastes full and balanced.
Kosher salt brands vary in weight, so use the cooking-water amount as a starting point and trust the final tasting step more than the spoon measurement.
| Ingredient | Everyday creamy mash | Richer holiday mash |
|---|---|---|
| Potatoes | 1 kg / 2.2 lb | 1 kg / 2.2 lb |
| Butter | 75 g / about 5 tbsp | 100 g / about 7 tbsp |
| Milk or half-and-half | 180 ml / 3/4 cup | 240 ml / 1 cup |
| Optional sour cream | Skip or use 2 tbsp | 60 ml / 1/4 cup |
| Optional cream cheese | Skip | 60–100 g / 2–3.5 oz |
This is the ratio that keeps you from guessing when the guest count changes.
Ingredients
With mashed potatoes, a short ingredient list does not mean the details do not matter. The potato decides the texture, the butter softens the edges, the dairy loosens the mash, and the salt makes the whole dish taste complete.
The amounts are in the recipe card and ratio table above. Here is what each one does once it hits the potatoes.

Potatoes
Yukon Gold potatoes make the mash naturally creamy and buttery. Russets make it lighter and fluffier. A mix gives the most reliable everyday result.
Peel them for a smooth bowl, or scrub them well and leave some skin on for a rustic version.
Butter
Butter gives richness, but it also helps the texture feel soft instead of dry. Unsalted butter gives you more control; salted butter works if you season carefully at the end.
Milk, half-and-half, or cream
Whole milk gives a classic creamy texture. Half-and-half or cream makes the mash richer. Warm the dairy before adding it so it blends smoothly instead of cooling the potatoes down and making the texture tighten.
Salt
Salt the boiling water and season again after mashing. With so few ingredients, blandness has nowhere to hide. If the potatoes taste dull, they usually need a little more salt, butter, or both.
Black pepper
Black pepper gives a gentle warmth. Use white pepper if you want the potatoes to look very smooth without black specks.
Sour cream or cream cheese
Sour cream adds tang and balances the richness of butter. Cream cheese makes the mash thicker and richer, which is especially useful for make-ahead prep. Add less milk at first when using either one.
Herbs and toppings
Chives, parsley, thyme, roasted garlic, melted butter, parmesan, or crispy bacon can all be added depending on the meal. When using salty add-ins like parmesan, bacon, salted butter, broth, or gravy, season lightly at first and adjust at the end.
Equipment
You are not trying to purée potatoes into smoothness. You are breaking them down gently, then folding in enough butter and dairy to make them soft. That is why a masher, ricer, or food mill is safer than anything that spins fast.
- Potato masher: best for a classic homemade bowl with a little texture.
- Ricer: best for a very smooth, light finish.
- Food mill: useful for larger batches or silky mash.
- Hand mixer: okay on low speed, but stop as soon as the potatoes are smooth.
- Blender or food processor: save these for soups; they can make mashed potatoes gluey.
Tool choice matters most when the potatoes are already tender. Before mixing too far, see How to Avoid Gluey Mashed Potatoes.
How to Make Mashed Potatoes Step by Step
Start with the recipe card if dinner is already moving. The step-by-step notes below are for getting the texture exactly right — not just edible, but soft, warm, and worth passing around again.
1. Peel and cut the potatoes
Peel the potatoes if you want a smooth bowl. If you prefer a rustic finish, scrub them well and leave some or all of the skin on.
Cut into even 1 1/2–2 inch / 4–5 cm chunks. The pieces do not need to be tiny, but they should be similar in size so they cook evenly.
If you cut them ahead, keep them covered in cold water in the refrigerator for a few hours. Drain before cooking and start with fresh cold water so the flavor stays clean.
2. Start in cold salted water
Place the potato chunks in a large pot and cover with cold water by about 1 inch / 2.5 cm. Add kosher salt to the water; use about 2 teaspoons for a medium pot or up to 1 tablespoon for a larger pot.
Starting in cold water helps the pieces cook evenly. Salted water seasons them from the inside instead of leaving all the seasoning for the end.
3. Boil until very tender
Bring the water to a boil, then reduce to a steady simmer. Cook for 15–20 minutes, depending on the size of the pieces.
Use the clock only as a guide; the fork test tells you the truth. When a fork slides through with almost no resistance, the potatoes are ready to mash. Around the edges, they may look slightly softened, but the centers should be fully tender, not chalky.
Slightly over-tender potatoes mash better than undercooked ones. Do not leave cooked potatoes sitting in the hot water after they are tender, or they can absorb more water and make the final mash too thin.
4. Drain and dry
Drain very well in a colander. Then return the potatoes to the hot empty pot for 30–60 seconds. Shake the pot gently once or twice so steam escapes.
Skip the rinse after draining. The hot pot does the work here: it lets steam escape without washing away flavor. The potatoes should steam instead of shine.
5. Mash gently
Use a potato masher for a classic texture. For a smoother bowl, pass the potatoes through a ricer or food mill.
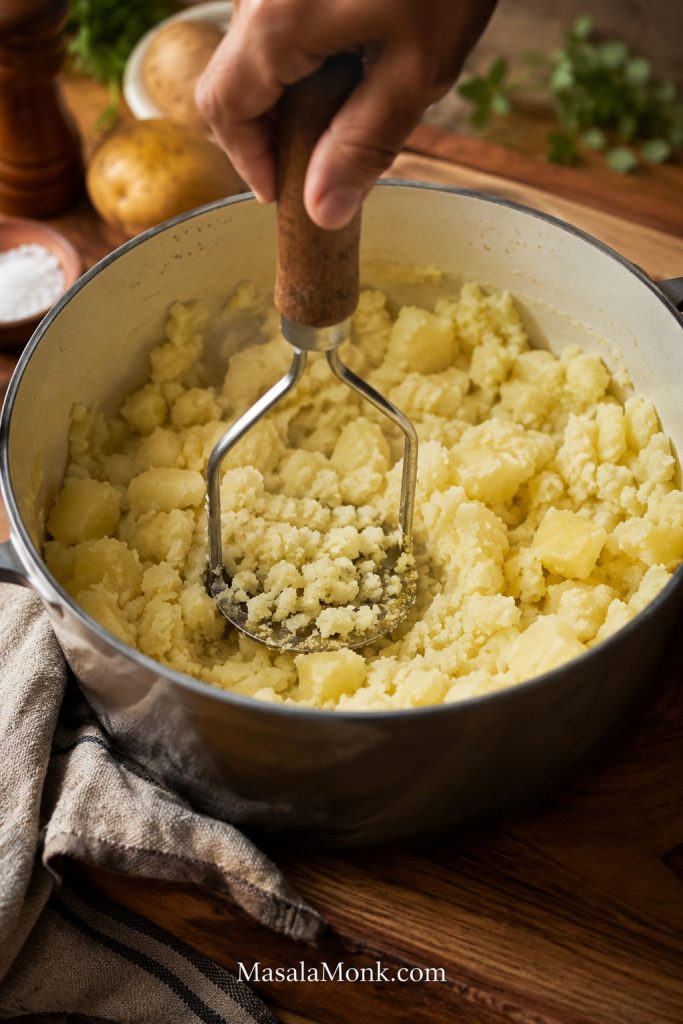
If you use a hand mixer, keep it on low speed and stop as soon as the potatoes are smooth.
6. Add butter and warm milk gradually
Warm the milk, half-and-half, or cream before adding it. It should be warm to the touch or lightly steaming, not boiling. Add the butter and about 3/4 cup / 180 ml warm liquid first, then mash or fold gently.
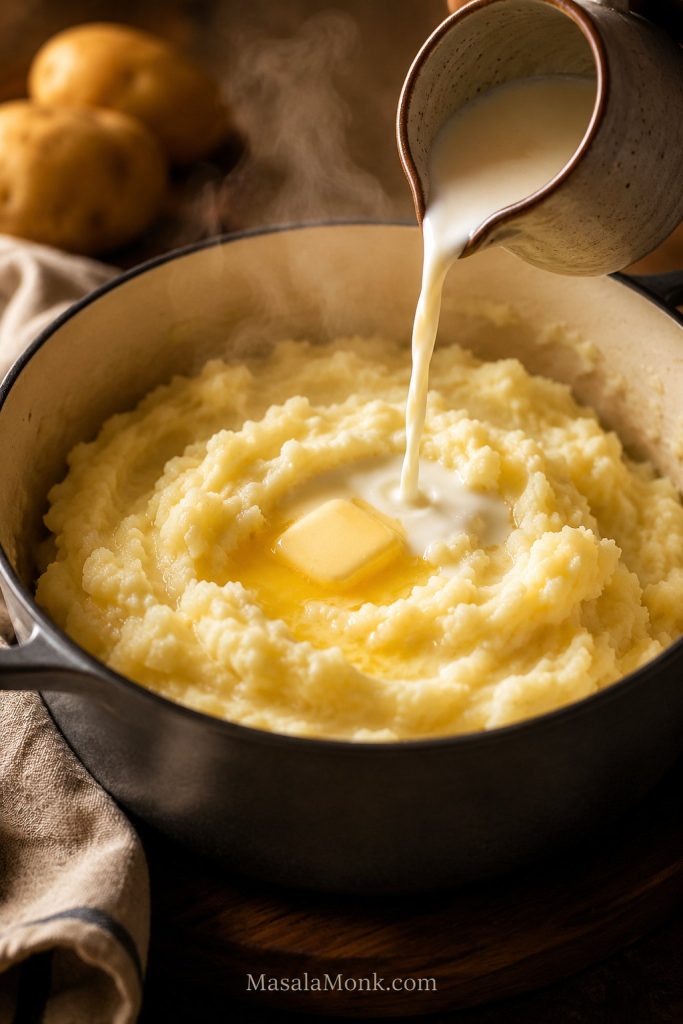
Start with less liquid; you can always loosen the mash once the texture tells you what it needs. Stop when it mounds softly on a spoon — that is the sweet spot before it turns too thin.
Final texture cue: soft, spoonable mashed potatoes
The final texture should be easy to see before you taste it. The mash should mound softly on a spoon, hold gentle ridges for a moment, and fall back without stretching, pouring, or clumping.
7. Season and finish
Taste before serving. Add fine salt in small pinches or 1/4 teaspoon increments, then add pepper, more butter, or a splash of warm milk if needed.
If dinner is moving fast, this is the moment to slow down for one minute. The potatoes are cooked; this last minute is what keeps them soft, warm, and worth serving.
If the texture is not where you want it yet, do not keep mixing blindly. Use the troubleshooting guide to fix dry, watery, lumpy, bland, or gluey mashed potatoes.
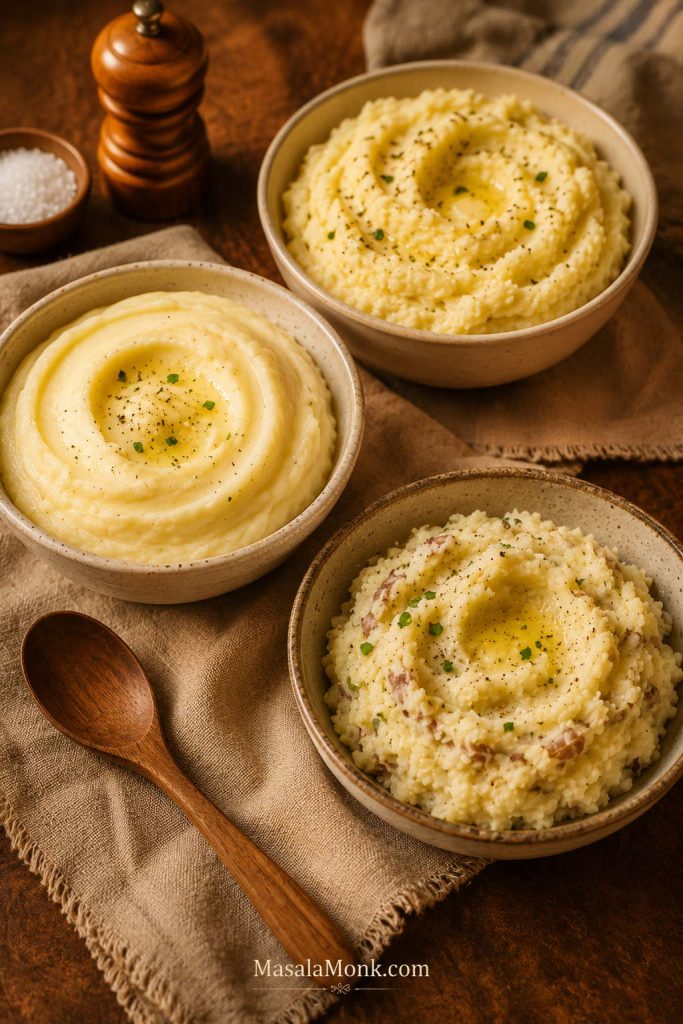
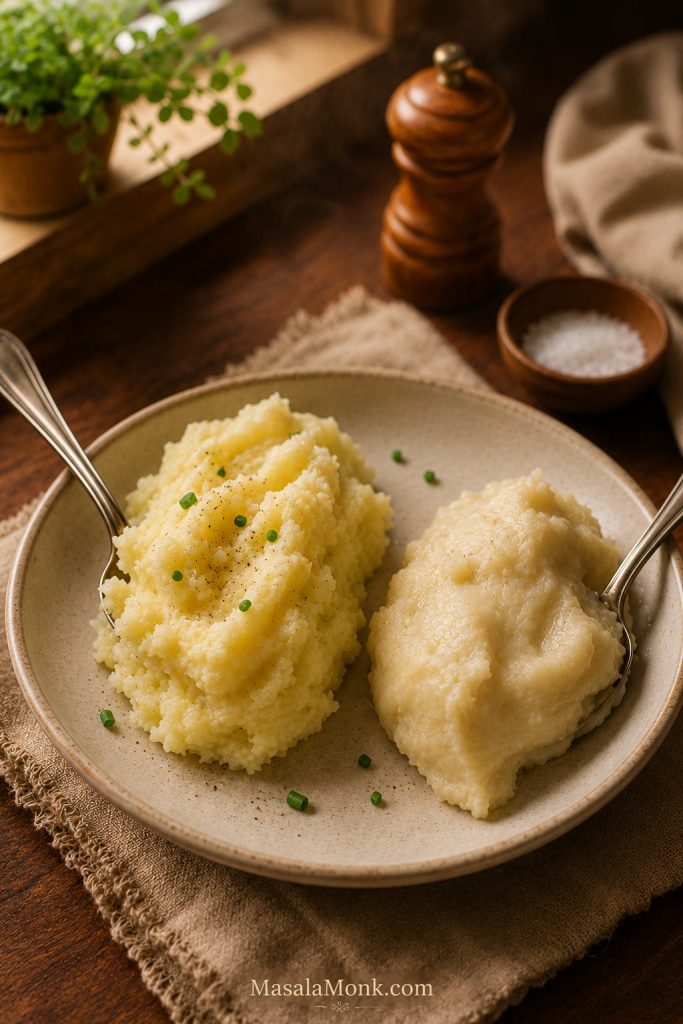
Creamy vs Fluffy Mashed Potatoes
Not every batch should be the same. Some dinners need rich, creamy potatoes. Others need a lighter mash that can hold gravy without feeling heavy. Neither version is better; the best texture is the one that fits the meal.
For a fluffy bowl
Use mostly russets, moderate liquid, and a light hand. Stop mixing as soon as the potatoes look soft.
For a creamy bowl
Use more Yukon Golds, warm half-and-half or cream, and a little more butter.
For a rich holiday batch
Add sour cream or cream cheese, but reduce the milk at first. You can always loosen the mash later.
For a rustic finish
Leave some skin on and use a potato masher. The uneven texture works beautifully beside gravy and roast meats.
If you think of these as whipped potatoes, use a ricer first, then fold in the butter and milk until smooth. Avoid aggressive whipping; the texture can move from smooth to gluey quickly.
For this creamy, classic version, skip rinsing after boiling and let the potatoes dry in the hot pot instead. If you are chasing an ultra-fluffy russet-only style, some methods rinse away extra starch, but this version keeps the process simpler and the flavor fuller.
How to Avoid Gluey Mashed Potatoes
Gluey mashed potatoes are frustrating because they usually happen at the very end, after everything looked fine. The good news is that the problem is predictable: sticky texture usually comes from overworked starch.
| Do this | Avoid this |
|---|---|
| Use a masher, ricer, or food mill | Blender or food processor |
| Cook until fully tender | Mashing undercooked centers |
| Fold gently after mashing | Beating hard after smooth |
| Add liquid gradually | Pouring everything in at once |
| Stop when spoonable | Trying to fix texture by mixing more |
If the potatoes are already gluey, do not keep beating them. Truly gluey mash will not fully return to fluffy, but you can soften the mouthfeel with warm butter or cream. If it is very dense, use the leftovers for potato cakes, croquettes, soup, or a casserole topping.
How to Fix Mashed Potatoes That Went Wrong
A batch of imperfect mashed potatoes is usually not a disaster. Before you add more liquid or start mixing harder, pause and match the problem to the right fix.
The goal is not perfection at every step. The goal is knowing when to stop, when to loosen, and when to turn imperfect potatoes into something else delicious.
Texture problems
| Problem | Why it happened | How to fix it |
|---|---|---|
| Gluey texture | Overmixed starch, blender, food processor, or too much beating | Stop mixing. Gently fold in warm butter or cream. If the mash is truly gluey, repurpose dense leftovers instead of trying to whip them back. |
| Watery texture | Potatoes were not drained or dried well, or too much liquid was added | Warm gently over low heat to release moisture. Fold carefully. Add potato flakes only as a last resort. |
| Lumps | Potatoes were undercooked or cut unevenly | Cook potatoes until completely tender. Use a ricer next time for smoother results. |
| Dry texture | Not enough liquid or fat, or reheated without moisture | Add warm milk, cream, broth, or butter a little at a time. |
| Too thin | Too much milk or cream | Warm gently to evaporate moisture. Add a few potato flakes only if needed. |
| Too stiff | Not enough warm liquid | Loosen a little at a time, folding only until the texture comes back. |
| Sticky after using a hand mixer | The potatoes were beaten too long | Stop mixing immediately. Fold in warm butter or cream. Use leftovers for cakes or casserole topping if needed. |
| Grainy after reheating | The mash was too lean or reheated too aggressively | Warm slowly and fold in butter, cream, or sour cream until smoother. |
Flavor and serving problems
| Problem | Why it happened | How to fix it |
|---|---|---|
| Bland flavor | Cooking water was not salted, or not enough final seasoning was added | Add salt gradually, then finish with butter, pepper, herbs, garlic, sour cream, or cheese. |
| Flat flavor even after salting | They may need fat, tang, herbs, or deeper seasoning | Add butter, black pepper, chives, roasted garlic, sour cream, parmesan, or a little gravy. |
| Got cold before serving | They sat too long or the serving dish was cold | Reheat gently with warm milk or butter. Next time, warm the serving dish and keep them covered. |
| Too much garlic or pepper | The seasoning is overpowering the potatoes | Fold in more plain mash if available, or soften the flavor with cream, butter, or sour cream. |
Most fixes are small. The important thing is not to panic-mix the potatoes into a worse texture. Serve them warm if they still taste good, or save them for cakes, croquettes, soup, or a casserole topping where the texture can work in your favor.
Variations
Once the base mash is right, variations should support the meal, not bury the potatoes. Keep the flavor simple for rich mains, or add garlic, cheese, herbs, or tang when the potatoes need to carry more of the plate.
Garlic Mashed Potatoes
Use roasted garlic when you want mellow sweetness, sautéed garlic when you want a sharper savory edge, and garlic butter when you want the flavor to spread through the whole mash. For a deeper version with the garlic balance already worked out, use this garlic mashed potatoes recipe.
Cream Cheese Mashed Potatoes
Use cream cheese when you want a thicker, richer mash that reheats well. Let it soften first so it melts in easily, and add less milk at the beginning.
Sour Cream Mashed Potatoes
Use sour cream when you want tang that cuts through butter, gravy, steak, pork chops, or roast chicken. It makes the mash taste richer without feeling too heavy.
Loaded Mashed Potatoes
Fold in shredded cheddar, crispy bacon, chopped chives, and a spoonful of sour cream. Loaded mashed potatoes work well as a side dish or as the base for a comfort-food plate.
Parmesan Herb
Fold in grated parmesan, chopped parsley, chives, thyme, or a little roasted garlic. Parmesan adds saltiness and depth, so taste before adding more salt.
Buttermilk
Use warm buttermilk for a tangy Southern-style version. Keep the heat gentle and do not boil the buttermilk.
Extra Buttery
For holiday-style potatoes, increase the butter to 100–125 g / about 7–9 tbsp per 1 kg / 2.2 lb potatoes and use half-and-half or a mix of milk and cream.
Mashed Potatoes Without Milk
If this is an emergency “I already boiled the potatoes and there is no milk” moment, start with reserved potato water and butter. It is the safest fix because the water is already starchy and neutral.
No milk does not mean no comfort. It just means choosing the right liquid for the job. Potato water keeps the flavor clean, broth makes it more savory, and olive oil or vegan butter can add richness without dairy.
Plant milk can work, but choose an unsweetened neutral version. Potato water is usually safer because it tastes like potato, not oat, almond, or coconut.
| Situation | Best substitute | Notes |
|---|---|---|
| No milk at home | Reserved potato water + butter | Neutral, easy, and already starchy enough to loosen the mash. |
| No milk, but dairy is okay | Cream cheese, sour cream, or thick plain yogurt | Add gently so the flavor does not become too tangy or thin. |
| More savory flavor | Warm chicken or vegetable broth | Good with gravy, meatloaf, chicken, pork chops, and roast dinners. |
| Dairy-free version | Olive oil + reserved potato water | Gives richness without dairy. Add slowly. |
| Vegan version | Vegetable broth + vegan butter or olive oil | Use neutral plant milk only if you like the flavor. |
If the no-milk mash still feels dry, stiff, or too thin, use the troubleshooting table. For leftovers or dairy-free make-ahead prep, see how to reheat mashed potatoes gently.
Make-Ahead Mashed Potatoes
Mashed potatoes are usually not finished in a quiet kitchen. They happen while gravy is thickening, mains are resting, and someone is asking when dinner is ready.
Make-ahead mashed potatoes are not about being fancy. They are about giving yourself one less thing to panic over when the oven is full, the gravy is waiting, and dinner is moving fast.
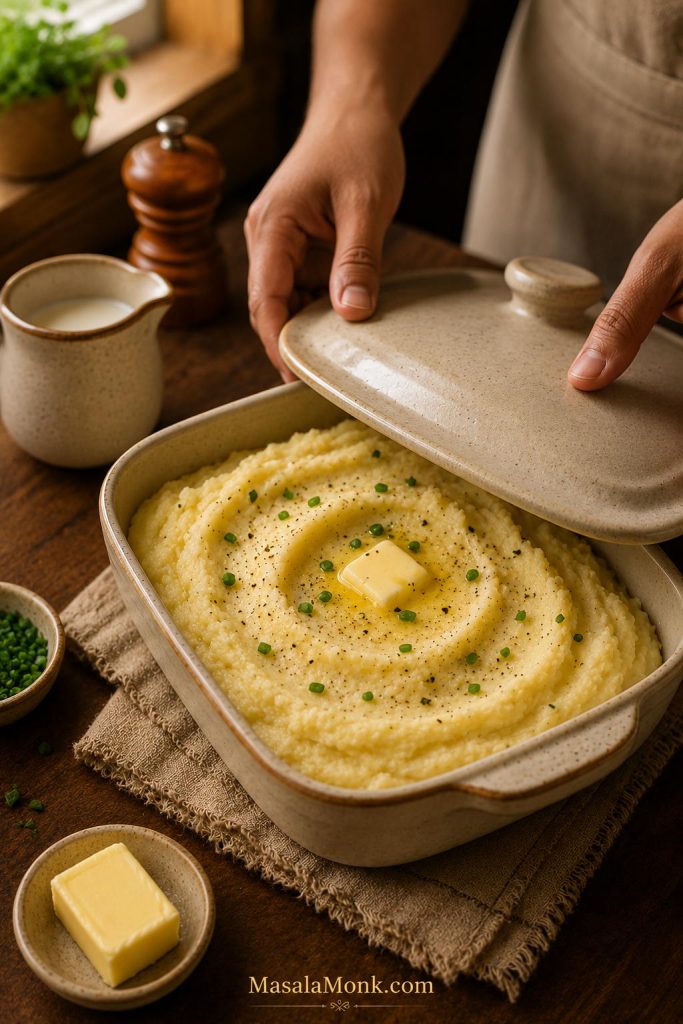
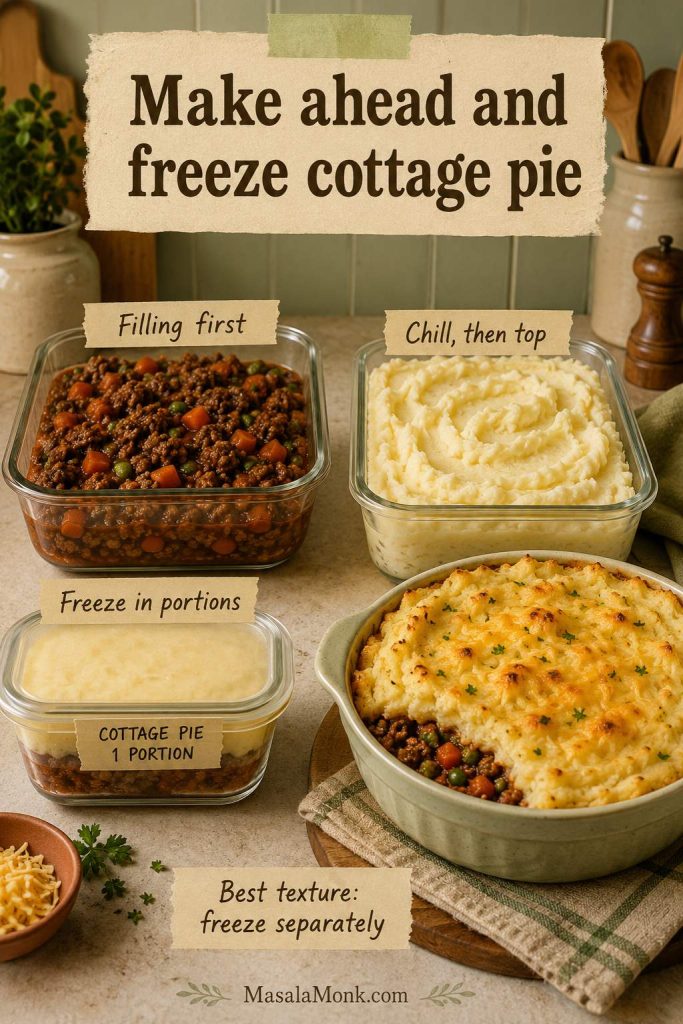
For the best texture, make them up to 1–2 days ahead, keep them covered in the refrigerator, and reheat gently with extra warm milk, cream, butter, sour cream, or cream cheese.
The most important trick is to make them slightly softer than usual before chilling, because the fridge will firm them up. A little extra moisture and fat gives you room to reheat without drying them out.
For holiday serving, warm the serving dish, cover the potatoes tightly, and keep extra warm milk or butter nearby for a quick loosen before they go to the table.
Make-Ahead Method
- Prepare the base recipe as usual.
- Make the mash slightly looser than you want it at serving time.
- Add a little extra butter, milk, cream, sour cream, or cream cheese so it stays soft.
- Cool and store in a covered shallow dish or airtight container in the refrigerator.
- Reheat gently with extra warm milk or butter.
- Stir only as much as needed to bring the texture back.
Once the potatoes are made ahead, the real success comes from reheating them well. Jump to How to Reheat Mashed Potatoes before serving.
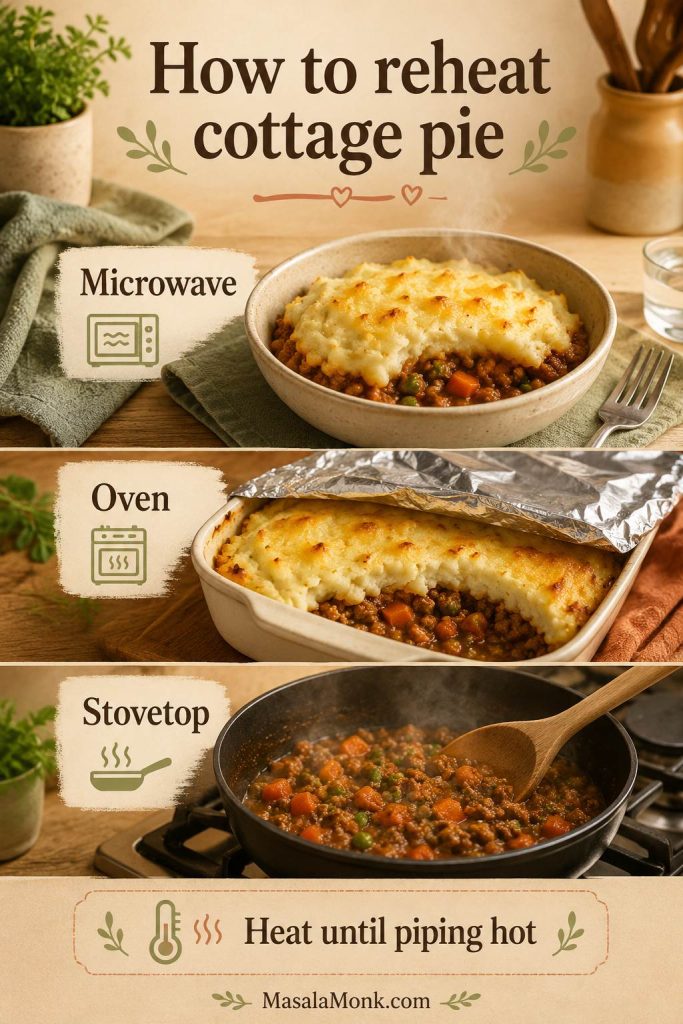
How to Reheat Mashed Potatoes
Cold mashed potatoes rarely look promising at first. They firm up in the fridge, but they usually come back with low heat, patience, and a little extra moisture.
Reheating is less about stirring hard and more about giving the potatoes back moisture slowly. Warm them gently for texture, but make sure leftovers are hot all the way through. If you are checking with a thermometer, aim for 165°F / 74°C.
| Method | How to do it | Best for |
|---|---|---|
| Stovetop | Place in a pot over low heat. Add warm milk, cream, or butter and stir gently until hot. | Small to medium batches |
| Oven | Place in a covered baking dish and reheat at 350°F / 175°C for 25–40 minutes. Add butter on top if the potatoes look dry. | Holiday meals and larger batches |
| Microwave | Reheat at medium power in short intervals, stirring every 1–2 minutes. Add a splash of milk or cream. | Leftovers and single servings |
| Slow cooker | Reheat first, then keep warm in the slow cooker. Add butter or milk if the surface starts drying out. | Holding for a crowd |
How Much to Make Per Person
A good side-dish estimate is 225–250 g / 1/2 lb raw potatoes per person. For a holiday meal with many sides, you can go slightly lower. For a mashed-potato-heavy dinner with gravy, meatballs, steak, or chicken, plan a little more.
If mashed potatoes are the side everyone reaches for first, round up. Leftovers are easier to use than an empty serving dish is to explain.
| People | Raw potatoes | Approx. butter | Approx. milk/cream |
|---|---|---|---|
| 2 | 500 g / 1.1 lb | 40–50 g | 90–120 ml |
| 4 | 1 kg / 2.2 lb | 75–100 g | 180–240 ml |
| 8 | 2 kg / 4.4 lb | 150–200 g | 360–480 ml |
| 10 | 2.25 kg / 5 lb | 170–225 g | 420–540 ml |
| 20 | 4.5 kg / 10 lb | 340–450 g | 850 ml–1.1 L |
For a lighter meal with many sides, use the lower end. For gravy-heavy dinners, holiday plates, or mashed-potato lovers, use the higher end.
What to Serve with Mashed Potatoes
Mashed potatoes are often the quiet thing holding the whole plate together. When they are soft, warm, and well-seasoned, even a simple dinner feels more complete.
The easiest rule is simple: if the main dish has gravy, pan juices, cream sauce, onion sauce, or mushrooms, mashed potatoes probably belong beside it.
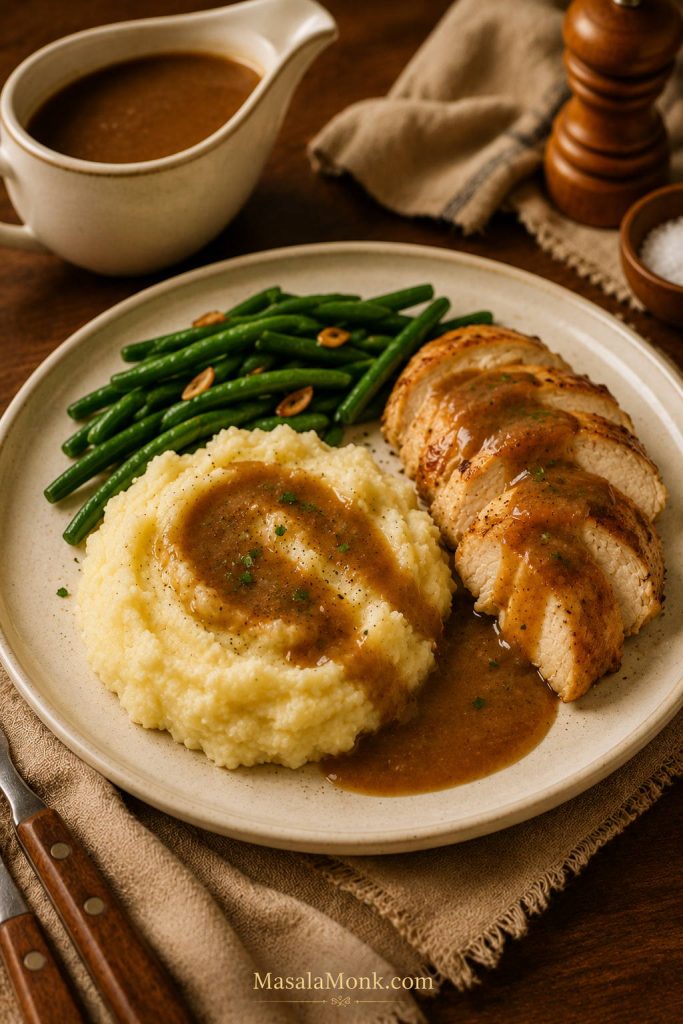
Best mashed potato pairings
Think of mashed potatoes as the soft landing for the plate: one saucy main, one green vegetable, and one simple extra like rolls, salad, or roasted carrots is usually enough.
Keep the potatoes plain and buttery when the main dish is strongly flavored. Add garlic, cheese, sour cream, or herbs when the main dish is simple.
| Meal type | Best pairings | Why it works |
|---|---|---|
| Gravy-heavy comfort dinners | Meatloaf, meatballs, smothered pork chops, creamy mushroom mains | The potatoes soak up sauce and make the plate feel complete. |
| Beef dinners | Steak, pot roast, roast beef, beef stew, cottage pie | Beef and mashed potatoes are classic because the richness balances well with butter and salt. |
| Chicken dinners | Roast chicken, chicken gravy, creamy mushroom chicken, slow cooker French onion chicken | Mashed potatoes turn chicken into a fuller comfort meal. |
| Pork dinners | cream of mushroom pork chops, pork loin, sausages, ham | Pork works well with creamy mash, mustardy sauces, onion gravy, or pan juices. |
| Seafood | Salmon, white fish, fish cakes, shrimp in garlic butter | Keep the potatoes simple so they do not overpower the fish. |
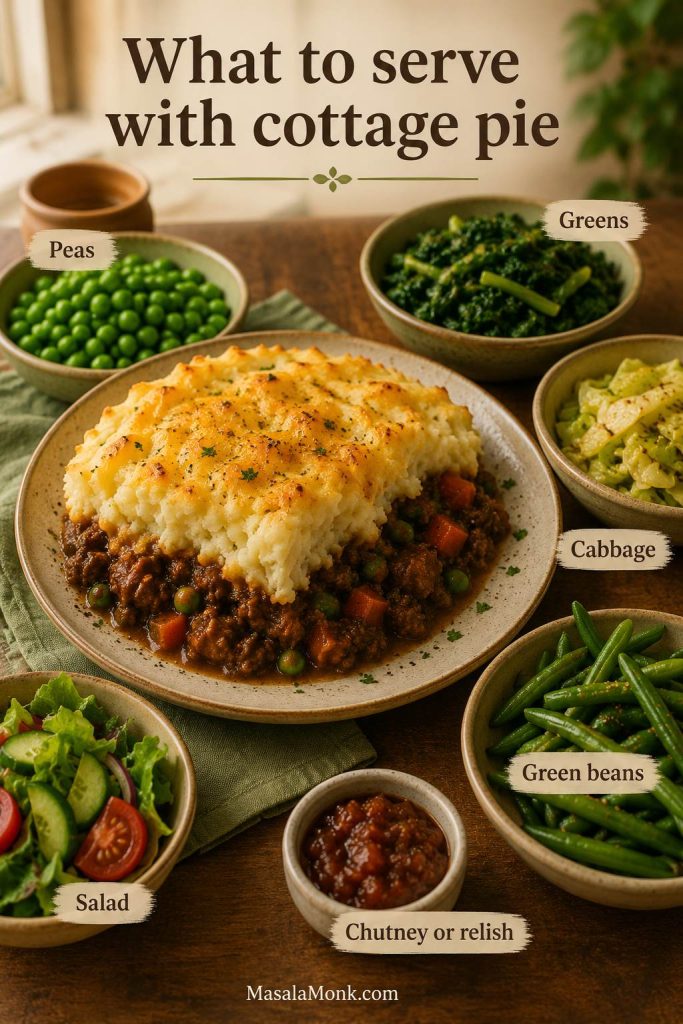
| Vegetarian meals | Mushroom gravy, lentils, roasted mushrooms, green beans, peas, carrots | Earthy vegetables and legumes pair well with buttery potatoes. |
| Holiday plates | Turkey, ham, stuffing, gravy, sweet potato casserole, hashbrown casserole | Mashed potatoes are the soft, savory anchor for a full holiday spread. |
If the main dish does not have much sauce, add a simple brown gravy, mushroom gravy, chicken gravy, or onion gravy. Mashed potatoes taste best when there is something warm and savory to spoon over the top.
What to Do with Leftover Mashed Potatoes
Leftovers are not a problem here. Cold mash is one of those rare leftovers that can become better at holding its shape the next day. Leftover mash is already halfway to something crispy.
Use it for potato cakes, breakfast patties, croquettes, or fish cakes when you want something crisp outside and soft inside.
- Mashed potato pancakes
- Potato cakes
- Croquettes
- Fish cakes
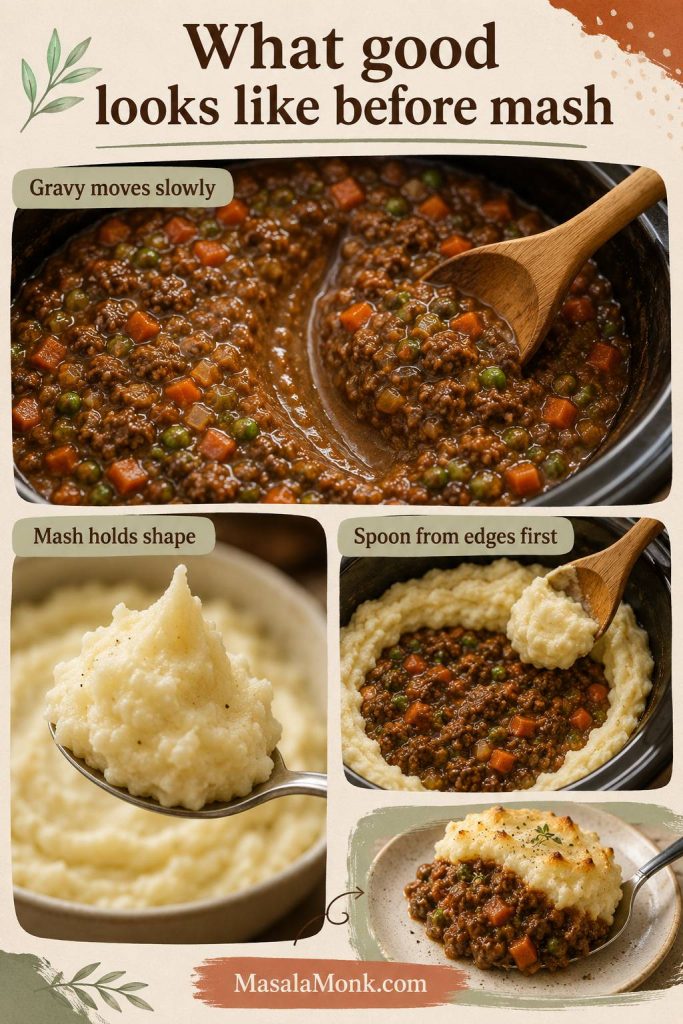
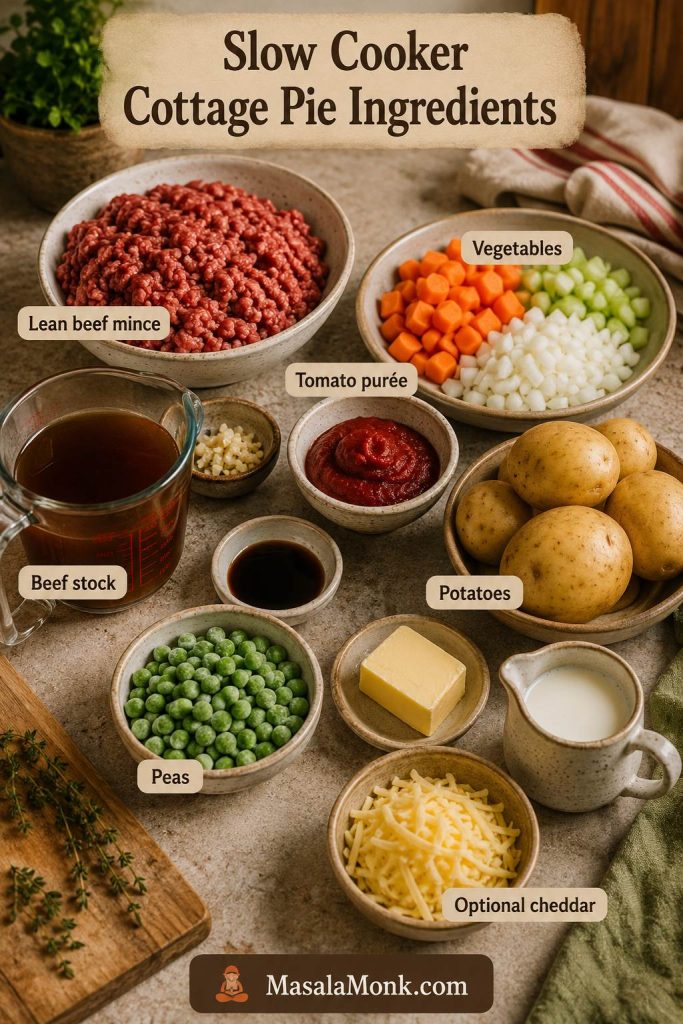
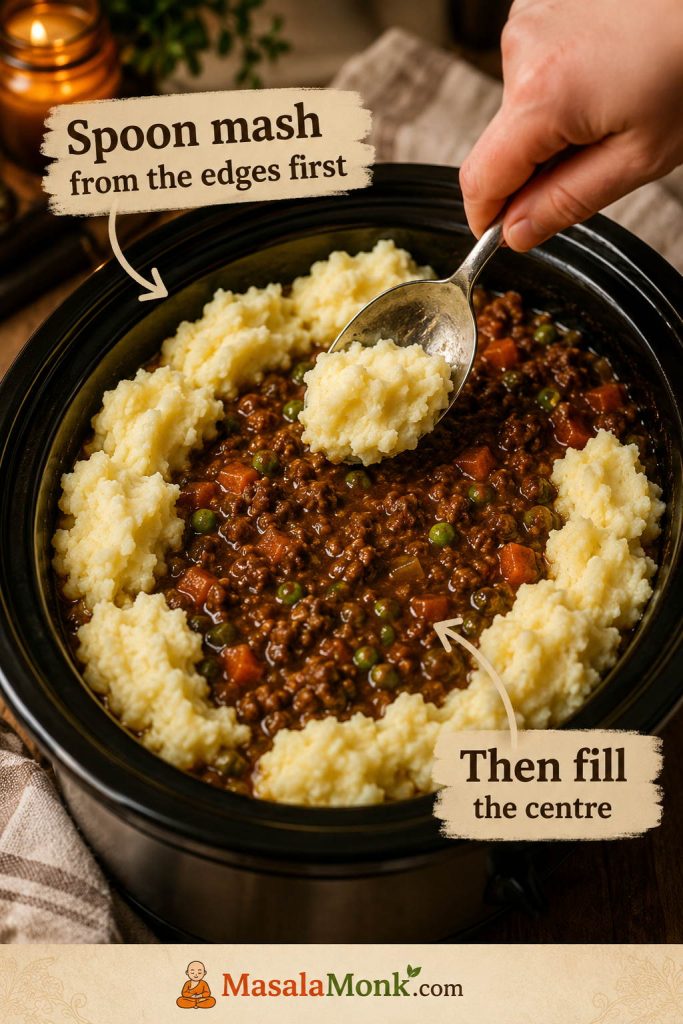
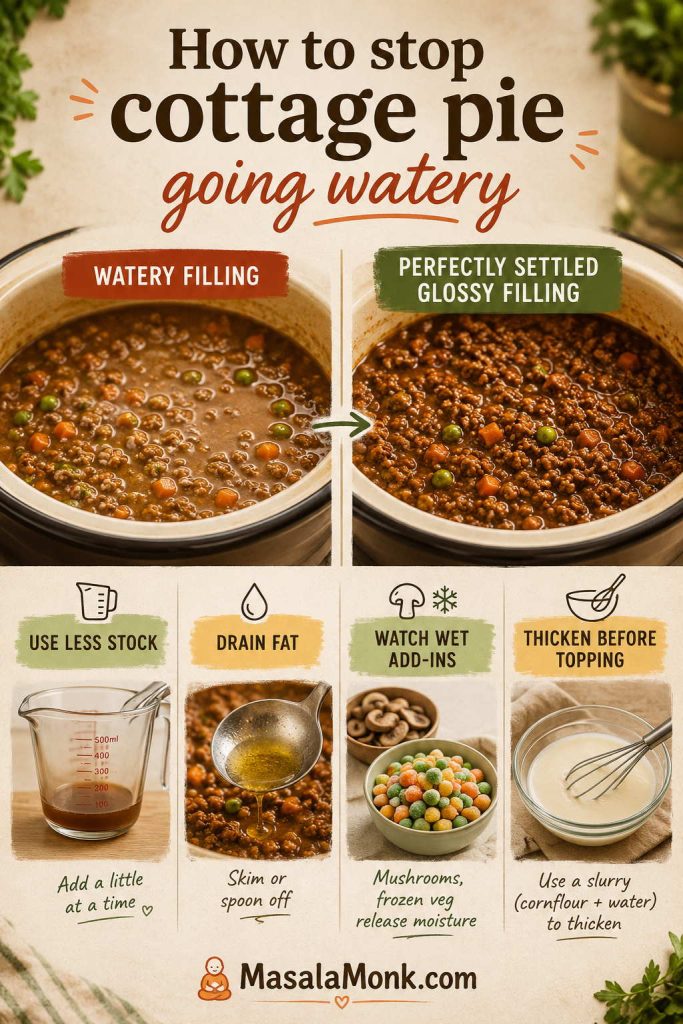
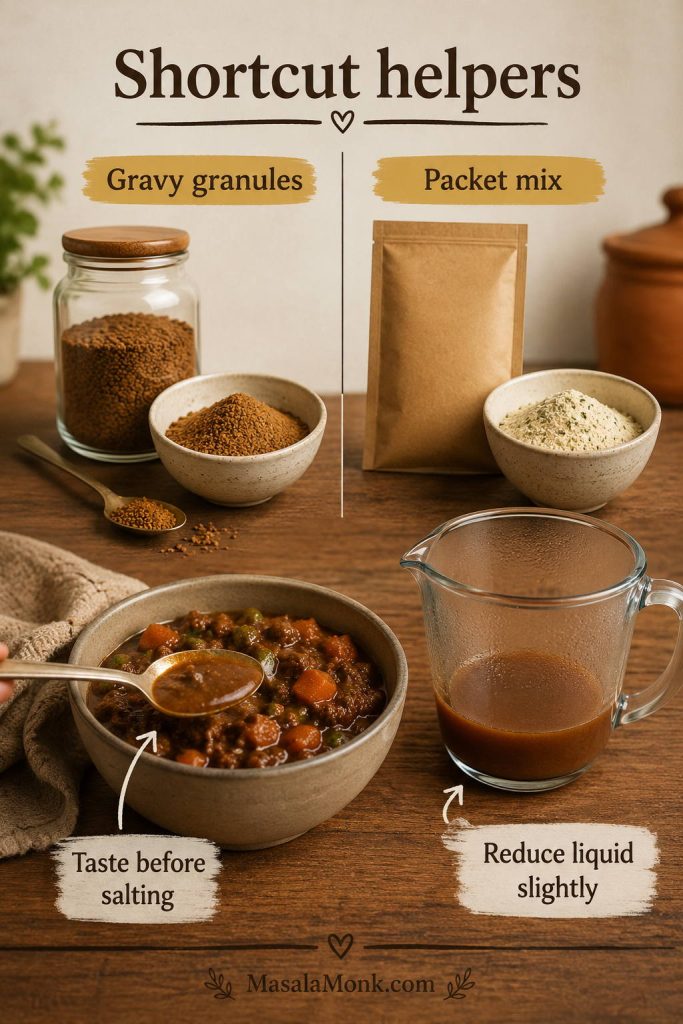
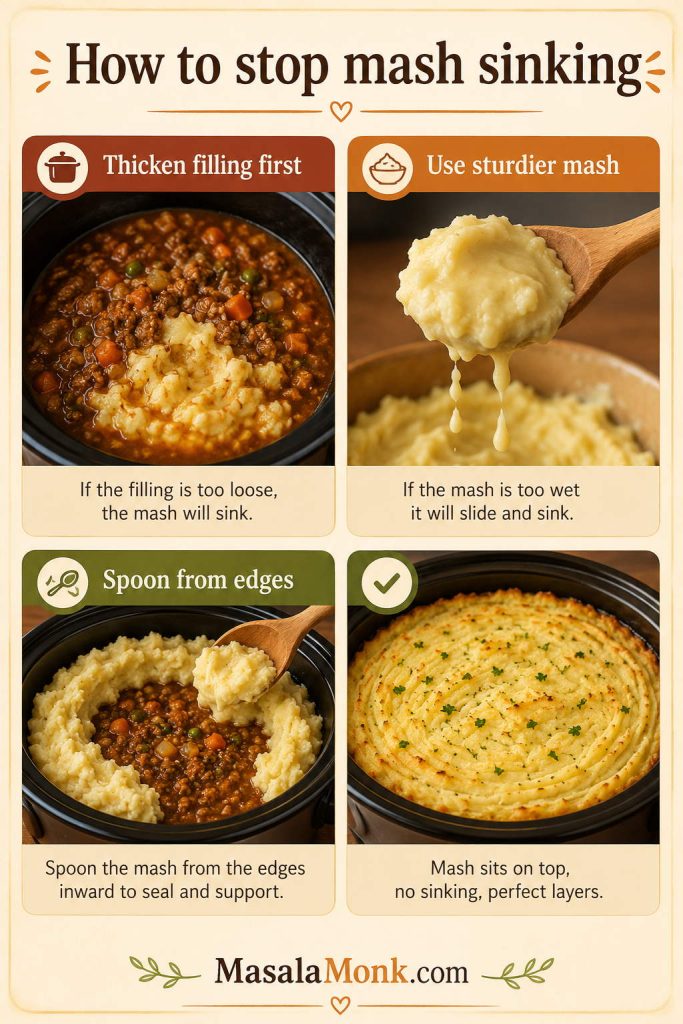
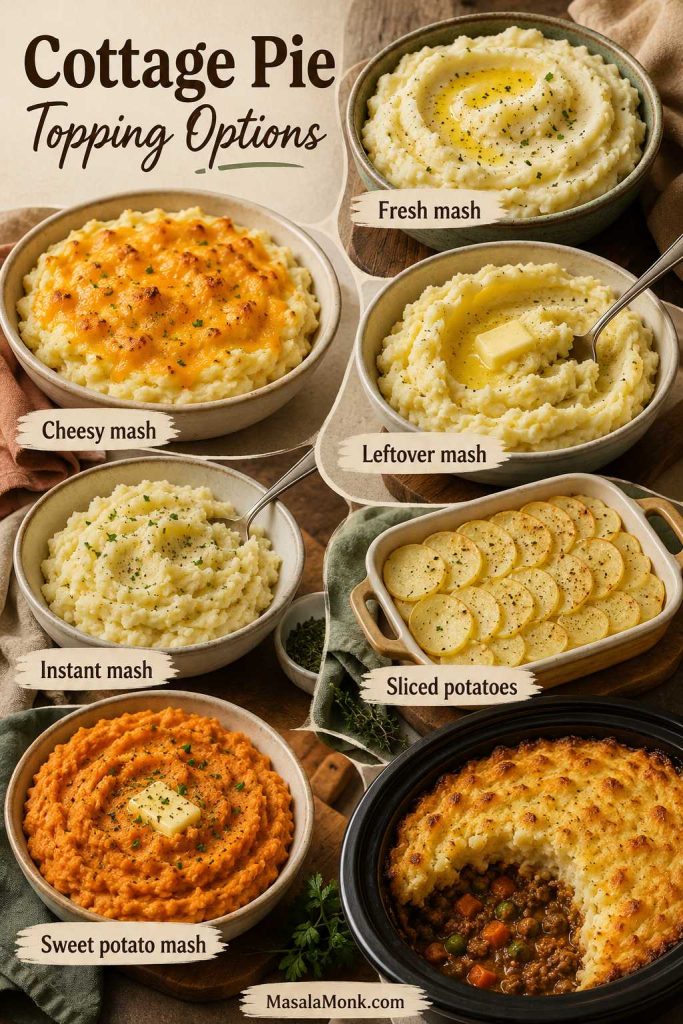
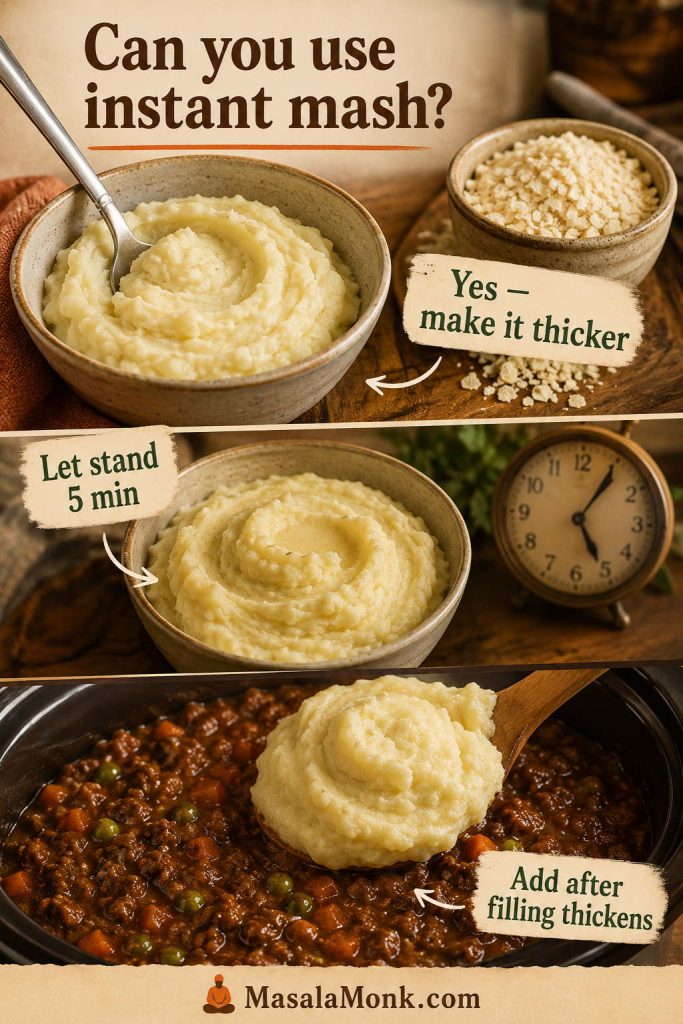
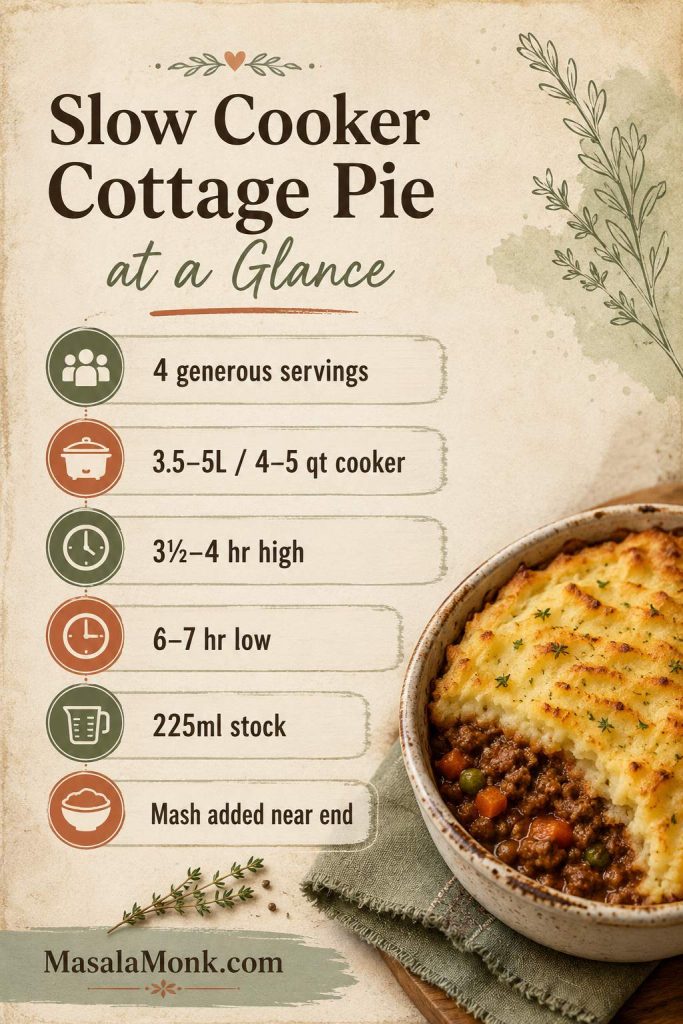
- Shepherd’s pie or cottage pie topping
- Potato soup
- Loaded mashed potato casserole
- Breakfast patties
- Waffles
- Stuffed rolls
- Crispy fried mashed potato balls
For quick mashed potato cakes, start with 2 cups cold mashed potatoes, 1 egg, 2–4 tablespoons flour or breadcrumbs, and a little cheese or herbs. Shape into patties and cook in a lightly oiled skillet until golden on both sides.
If you would rather turn leftovers into a full casserole-style dinner, use the mash as a topping for cottage pie, or move into another cozy potato bake like tater tot casserole. It keeps the same comfort-food mood while changing the texture completely.
If the leftover mashed potatoes are very soft, add flour, breadcrumbs, or grated cheese a little at a time before shaping them into cakes or patties. Cold mash holds together better than warm mash.
How to Store Mashed Potatoes
Store leftovers in an airtight container in the refrigerator for 3–4 days. When reheating, make sure they are hot all the way through; if you are checking with a thermometer, aim for 165°F / 74°C. For detailed safety guidance, the USDA leftovers guide is useful.
As they warm, add a splash of milk, cream, broth, or a little butter so the texture turns creamy again instead of dry or stiff.
Can You Freeze Mashed Potatoes?
Yes, they can be frozen, but the texture depends on how much fat and dairy they contain. A batch made with butter, cream, sour cream, or cream cheese freezes better than a lean version made with only potatoes and water.
To freeze, cool the mash completely and pack it into freezer-safe containers. The texture is usually best within the first month. It can be kept frozen longer, but it may become more watery or grainy over time.
Thaw overnight in the refrigerator and reheat gently with extra milk, cream, or butter. If the texture looks a little separated after thawing, warm the potatoes slowly and fold in extra butter or cream.
FAQs
These are the questions that usually come up once the potatoes are already peeled, boiling, or waiting on the stove.
1. What are the best potatoes for mashed potatoes?
Yukon Golds and russets are the safest choices. Yukon Golds make the mash creamy and buttery; russets make it lighter and fluffier. A mix gives the best balance.
2. Should I peel potatoes for mashed potatoes?
Peel them for a smooth mash. Leave some or all of the skin on for a rustic texture, especially with Yukon Gold or red potatoes.
3. Do you start mashed potatoes in cold or boiling water?
Start potatoes in cold water so the pieces cook evenly from outside to center. Boiling water can soften the edges before the middle is cooked.
4. How long should potatoes boil for mashed potatoes?
Potato chunks usually take 15–20 minutes. They are ready when a fork slides through easily with almost no resistance.
5. Why are my mashed potatoes gluey?
They turn gluey when the starch is overworked. This often happens from using a blender, food processor, or beating the potatoes too much.
6. Can I fix gluey mashed potatoes?
You can improve them, but you usually cannot make truly gluey potatoes fluffy again. Stop mixing, fold in warm butter or cream, and use dense leftovers for cakes, croquettes, soup, or casserole topping.
7. How do I make mashed potatoes without milk?
Use reserved potato cooking water, warm broth, olive oil, vegan butter, or unsweetened plant milk. Add gradually and taste as you go.
8. Can I use cream instead of milk?
Yes. Cream makes the potatoes richer and thicker. Use all cream for a holiday-style mash, or part milk and part cream for balance.
9. Can I use a hand mixer for mashed potatoes?
Yes, but use low speed and stop as soon as the potatoes are smooth. Overmixing can make the texture gluey.
10. Can I make mashed potatoes ahead of time?
Yes. Make them slightly softer than usual, refrigerate for 1–2 days, then reheat gently with extra warm milk, cream, or butter. Sour cream or cream cheese helps them reheat smoothly.
11. How do I reheat mashed potatoes without drying them out?
Reheat gently over low heat or in a covered dish. Add warm milk, cream, broth, or butter a little at a time until creamy again.
12. Can you freeze mashed potatoes?
Yes, but they freeze best with enough butter, cream, sour cream, or cream cheese. Thaw overnight and reheat slowly with extra dairy or fat.
13. How much mashed potato do I need per person?
Plan on about 225–250 g / 1/2 lb raw potatoes per person. For 4 people, use about 1 kg / 2.2 lb; for 8 people, use about 2 kg / 4.4 lb.
14. What can I add to mashed potatoes for more flavor?
Add roasted garlic, sour cream, cream cheese, parmesan, chives, parsley, black pepper, browned butter, cheddar, bacon, or gravy.
15. What is the secret to creamy mashed potatoes?
Use Yukon Gold potatoes, drain them well, add warm dairy gradually, and stop before the mash is overworked. Butter and warm half-and-half make the creamiest everyday version.
Final Thoughts
Once the method is in your hands, you can take the same potatoes creamy, fluffy, garlicky, cheesy, dairy-free, make-ahead, or gravy-ready without learning a new recipe each time.
That is why this method is worth saving: it gives you a good bowl when everything goes right, and a way back when the potatoes need help.