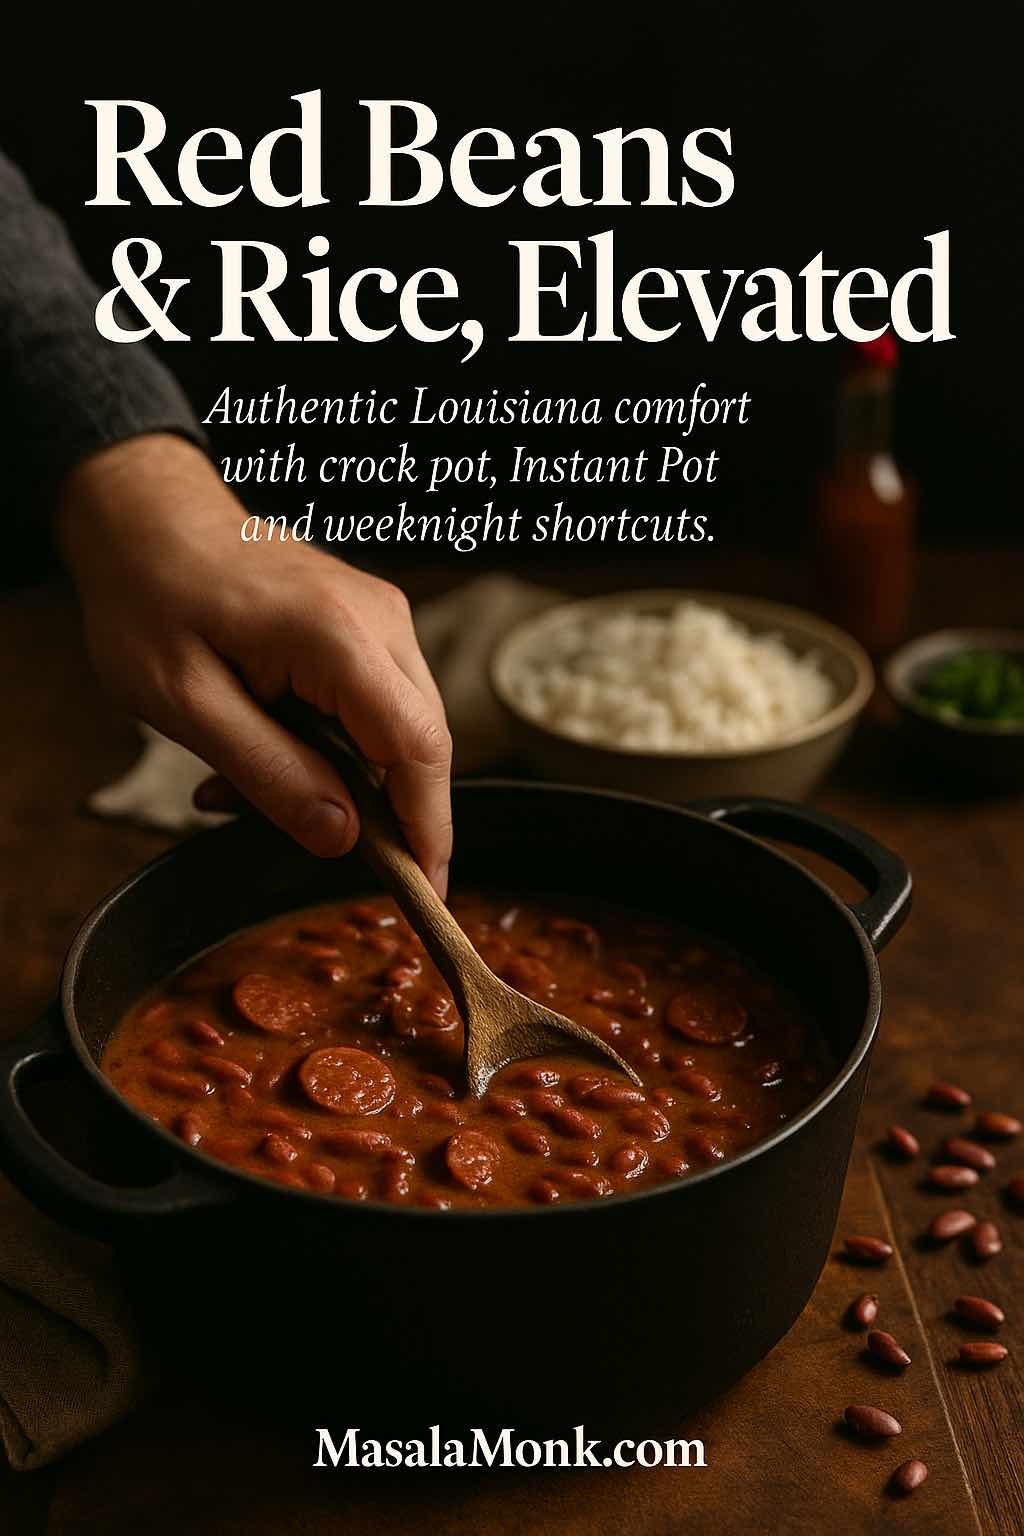
Red beans and rice is one of those meals that feels like it’s been simmering forever in the background of life. It’s the pot your grandmother had bubbling on the back burner, the dish that shows up quietly at big family gatherings, the weeknight saver when you want something cheap, filling and full of flavour without fuss. In Louisiana, red beans and rice isn’t just another beans and rice recipe; it’s a weekly ritual with roots in Monday laundry day and leftover Sunday ham bones, when a pot could sit and cook itself while the rest of the work got done.
This version leans into that history but still fits modern kitchens. You’ll get an authentic Louisiana red beans and rice recipe you can make on the stovetop, adapt for a crock pot or slow cooker, or convert into an Instant Pot red beans and rice shortcut when you’re short on time. Along the way, there are options for using canned red beans, adding andouille sausage, keeping things vegetarian or vegan, and even nudging the dish towards other beans and rice traditions from Puerto Rico, Jamaica and India.
What Makes Red Beans and Rice So Special?
At first glance, red beans and rice looks simple: a pot of creamy red beans and a bowl of plain rice. Yet once you dive in, you realise there are layers of story and technique sitting underneath.
In Louisiana Creole cooking, red beans and rice is considered an emblematic dish. Classic versions combine small red beans with the “trinity” of onion, celery and bell pepper, plus thyme, bay leaves, a little cayenne and some kind of pork bone or sausage, all simmered low and slow until the beans are soft and the liquid turns velvety. That bean mixture is then ladled over rice rather than cooked together like a pilaf.

Historically, ham was often served on Sunday, and the leftover ham bone was too valuable to waste. On Monday, which was usually washday, beans went on the stove with that bone and the trinity, and the pot gently simmered while laundry was scrubbed and dried. The result was a hands-off, deeply flavoured red beans and rice dish that became a comforting start to the week.
As Louisiana tourism boards love to point out, the Monday tradition grew from Sunday ham bones and long laundry days, and you can read a concise version of that story in this brief history of red beans and rice from Louisiana.
Today, people mix things up with smoked sausage instead of ham bones, turkey instead of pork, or even entirely meatless red beans and rice meals. The idea remains the same, though: inexpensive ingredients, long cooking, big flavour.
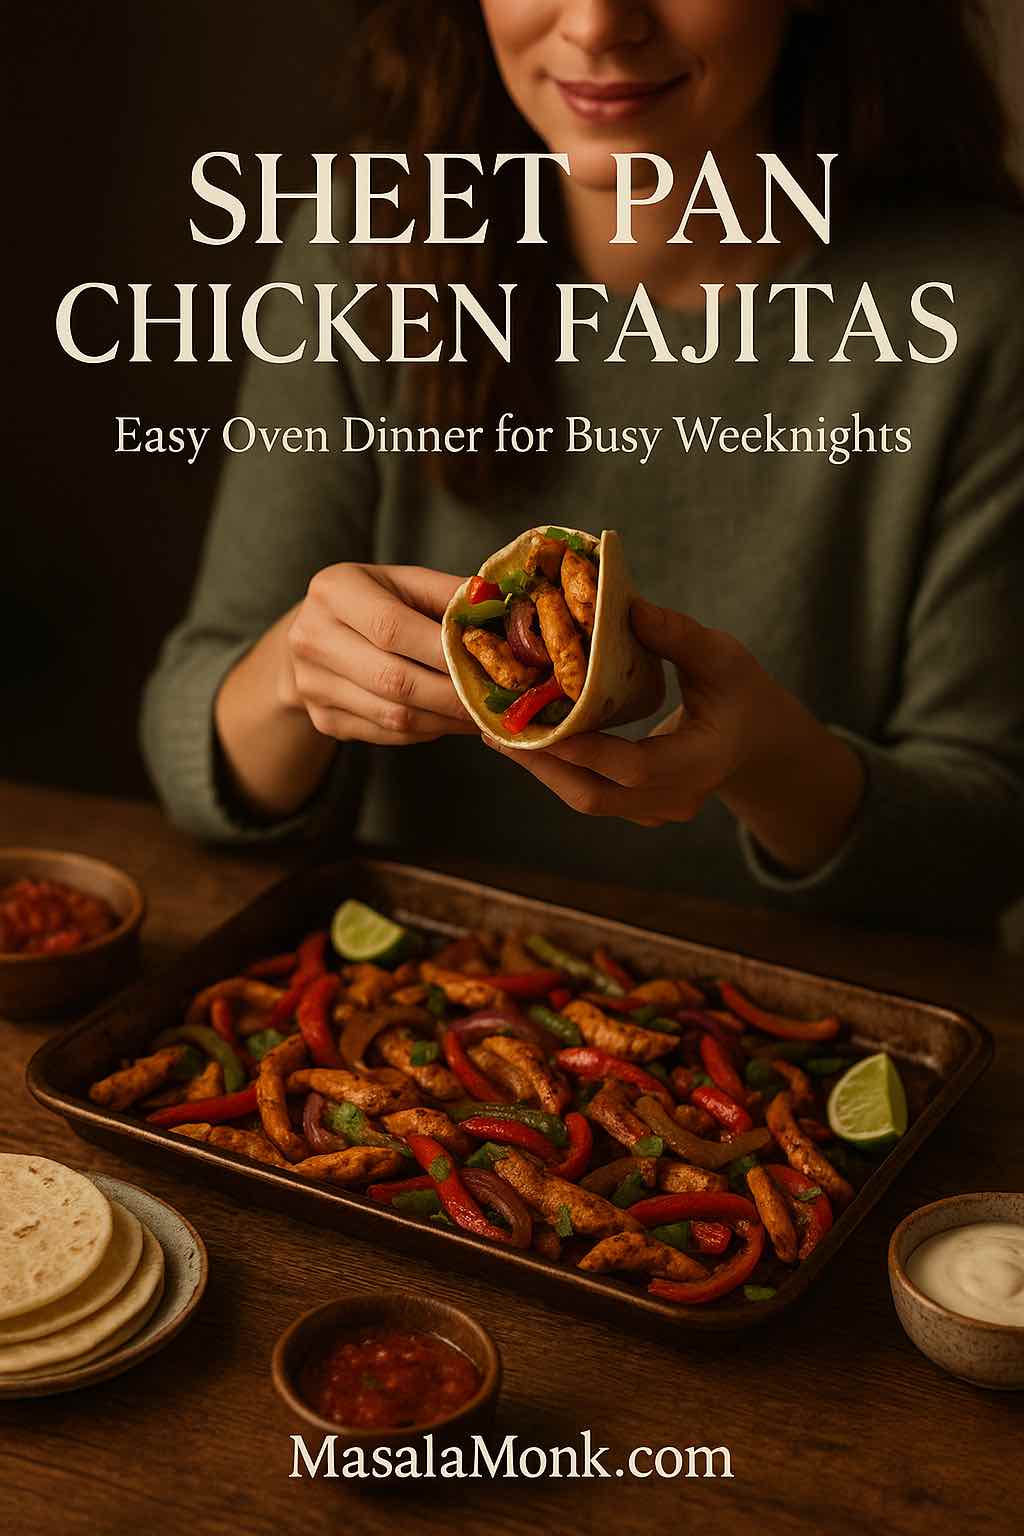
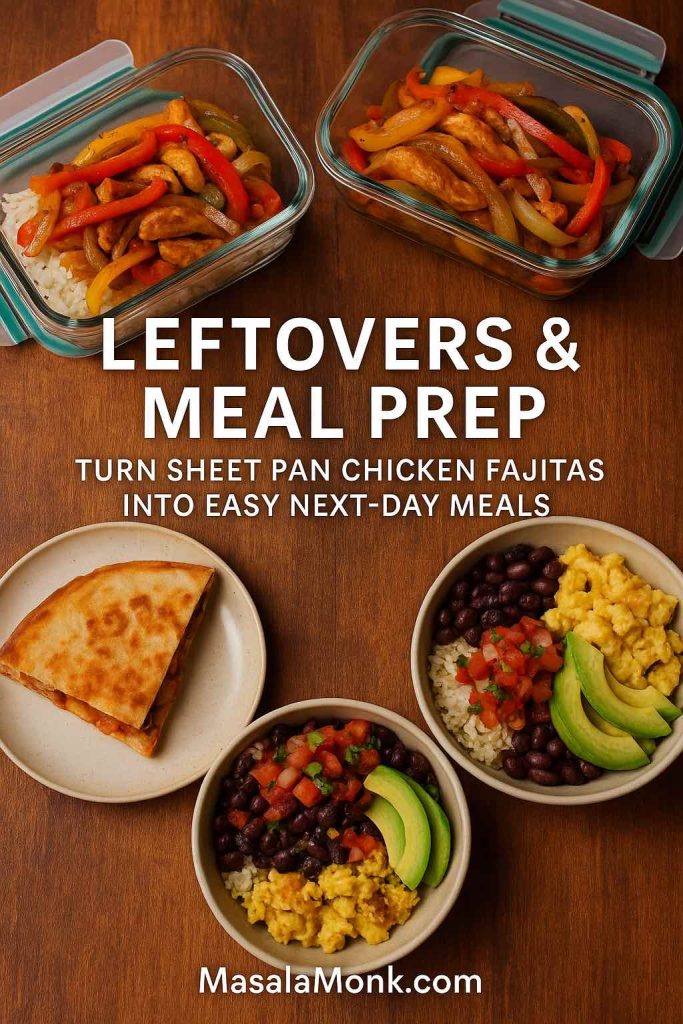
Also Read: Sheet Pan Chicken Fajitas Recipe (Easy One-Pan Oven Fajitas)
Choosing the Right Beans
Because beans sit right at the heart of any good red beans and rice recipe, choosing the right ones matters.
Small Red Beans vs Kidney Beans
Traditional New Orleans red beans and rice uses small red beans, which keep their shape yet turn wonderfully creamy inside. If you can’t find them, red kidney beans are a great substitute and often easier to source globally. They’re the same beans you might already be using in rajma, chilli or salads, so they slide neatly into your existing pantry habits.

If you enjoy trying regional varieties, something like the Himalayan Rajma – Red Kidney Beans gives you that creamy texture with a slightly earthier flavour. It also lets you use the same bag for both rajma chawal and Louisiana-style red beans and rice, which keeps meal planning simple.
Dried Beans vs Canned Beans
From there, you have a choice between dried and canned:
- Dried beans are cheaper, have better texture and soak up flavour over a long simmer.
- Canned red beans let you throw together an easy red beans and rice supper in under an hour, with no soaking or long boiling.
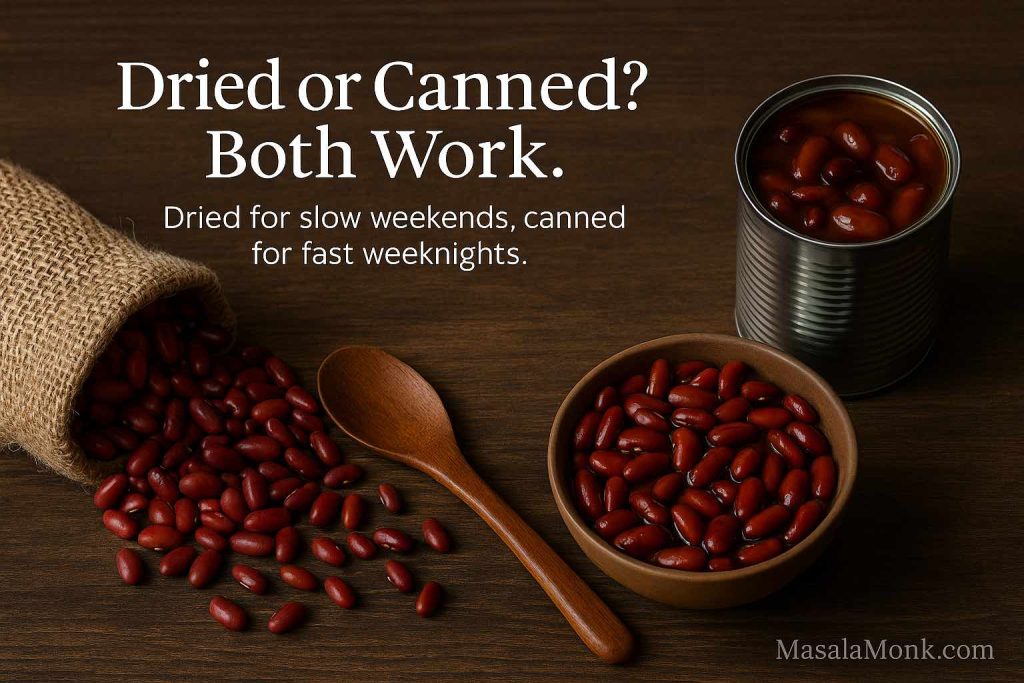
Nutritionally, both are excellent. Beans provide protein, fibre, folate, iron, potassium and magnesium while remaining low in fat and naturally free of cholesterol, which is why organisations like the American Heart Association recommend them as part of a heart-healthy eating pattern.
If you’re mostly cooking on weekends or enjoy slow kitchen days, dried beans are worth the time. If you’re juggling work, kids and life, keeping a few cans of red beans in the cupboard means a fast red beans and rice meal is never far away.
Also Read: Katsu Curry Rice (Japanese Recipe, with Chicken Cutlet)
The Rice Question: What to Serve Underneath
Red beans without rice is basically a bean stew. Add rice and suddenly the whole thing turns into a complete beans and rice dish: protein, carbs, fibre and flavour in each bite.
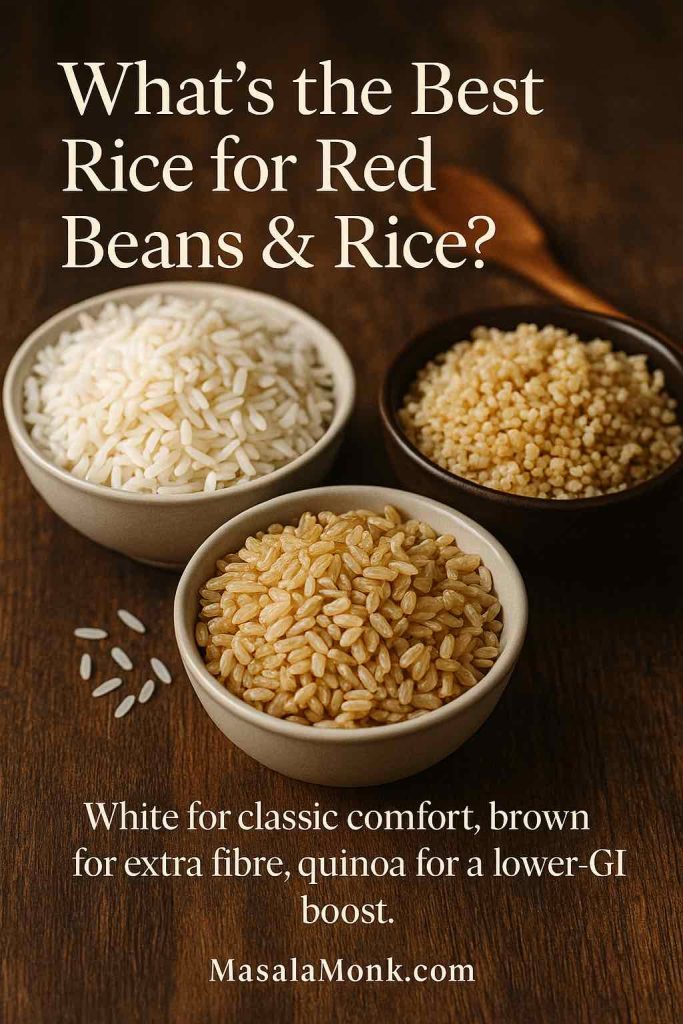
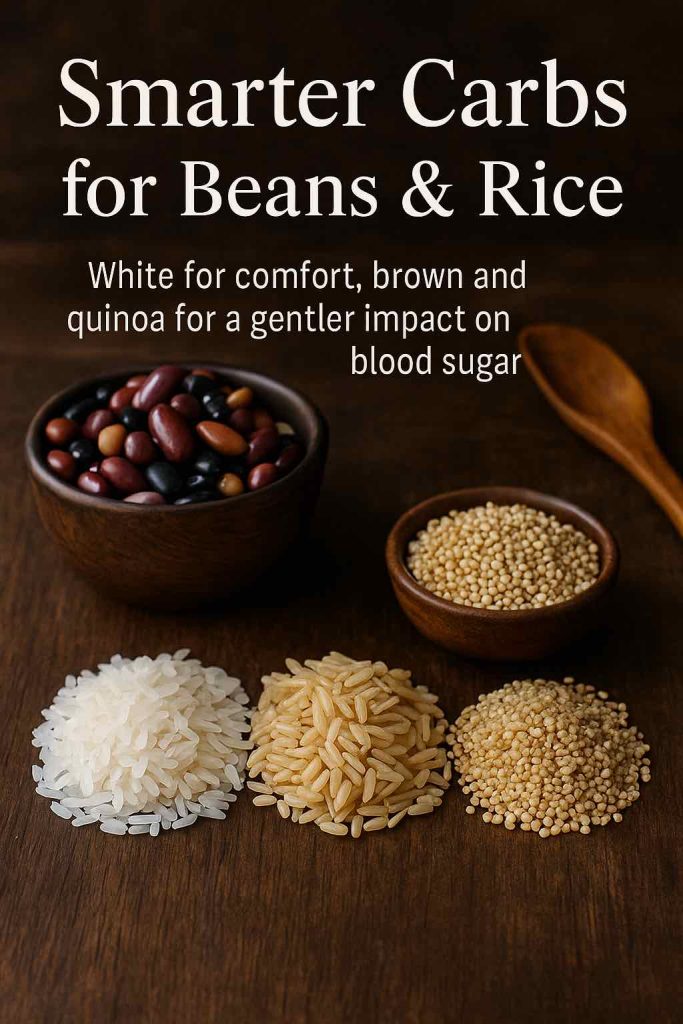
Best Rice for Red Beans and Rice
Louisiana cooks often reach for long-grain white rice because it stays fluffy, absorbs sauce, and doesn’t clump. Basmati works very well if that’s your everyday rice, especially because its glycemic index tends to run lower than some other white rice varieties.
However, you can absolutely adapt:
- Brown rice brings extra fibre and a nuttier taste; it usually has a lower or medium GI compared with many white rices.
- Quinoa offers more protein and fibre and generally sits in the low-GI range, which can benefit blood sugar control.
If you’re curious about swapping some or all of the rice for quinoa, the breakdown in the MasalaMonk article “Quinoa vs Rice: Calories, Carbs, GI & Healthier Choice” explains exactly how each behaves in terms of glycemic index, macros and satiety.
Meanwhile, if you’d rather keep classic white rice but blunt the blood sugar spike a bit, there’s also a detailed guide on how to reduce the glycemic impact of rice using cooking, cooling and reheating tricks instead of relying only on rice type.
Building the Flavour: Trinity, Sausage and Seasoning
Once you’ve chosen your beans and rice, the next step in this red beans recipe is to build a base that tastes like Louisiana on a rainy day.
The Holy Trinity
Cajun and Creole cooking often start with what locals call the “trinity”:
- Onion
- Celery
- Green bell pepper
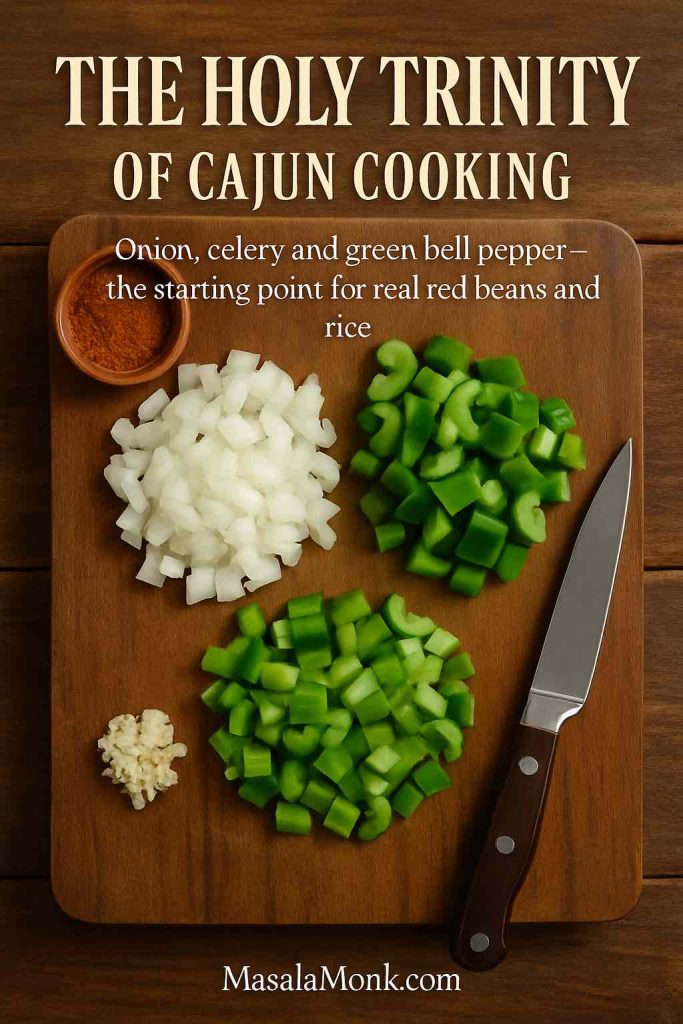
These three are diced and slowly sautéed until they soften and begin to turn sweet and golden. Garlic usually joins them shortly afterwards, adding another layer of fragrance. This combination forms the backbone of Cajun red beans and rice, much like onion, ginger and garlic form the base of many North Indian bean curries.
Andouille, Ham and Other Meats
After the trinity has cooked down, you usually add:
- Andouille sausage or another smoked sausage
- Sometimes a ham hock, pork bones or smoked turkey neck
- Occasionally bacon at the very beginning for extra depth

The sausage browns in the pan, leaving behind browned bits that will dissolve into the beans later. The bones or hocks infuse the pot during the long simmer, creating a savoury backbone that makes the dish feel complete even with a relatively small amount of meat.
If you want a sausage-heavy beans and rice dinner, you can easily double the sausage and turn it into a beans and rice with sausage special, perfect for game day or big family gatherings.
Homemade Red Beans and Rice Seasoning Mix
While store-bought Cajun blends are handy, making your own red beans and rice seasoning mix gives you full control over salt and spice. A basic mix might include:
- Paprika and a little smoked paprika
- Garlic powder and onion powder
- Dried thyme and oregano
- Black pepper
- Cayenne for heat
- Bay leaves (added whole during cooking)
- Salt to bring everything together
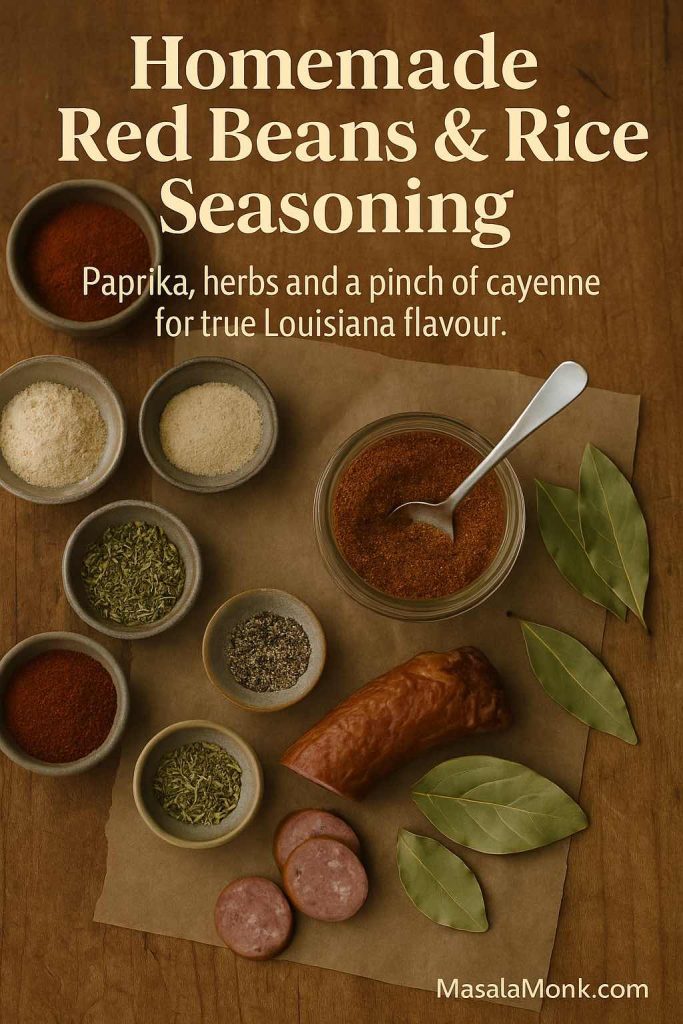
This simple combination is enough to transform plain beans into a richly seasoned Cajun red beans dish without feeling complicated. Once you’re comfortable with it, you can experiment further, drawing inspiration from other blend-heavy cuisines—much like a carefully balanced garam masala or chaat masala elevates otherwise simple ingredients.
Also Read: Easy Lemon Pepper Chicken Wings (Air Fryer, Oven & Fried Recipe)
Authentic Louisiana Red Beans and Rice: Stovetop Method
Now that the pieces are in place, it’s time to pull them together into a red beans and rice recipe you can rely on.
Step 1: Soak and Prep the Beans
For stovetop cooking, soaking helps beans cook more evenly and reduces overall time:
- Rinse about 1 cup (200 g) dried small red beans or kidney beans and pick out any stones.
- Place them in a large bowl, cover with plenty of water and soak overnight.
- Before cooking, drain and rinse the beans.
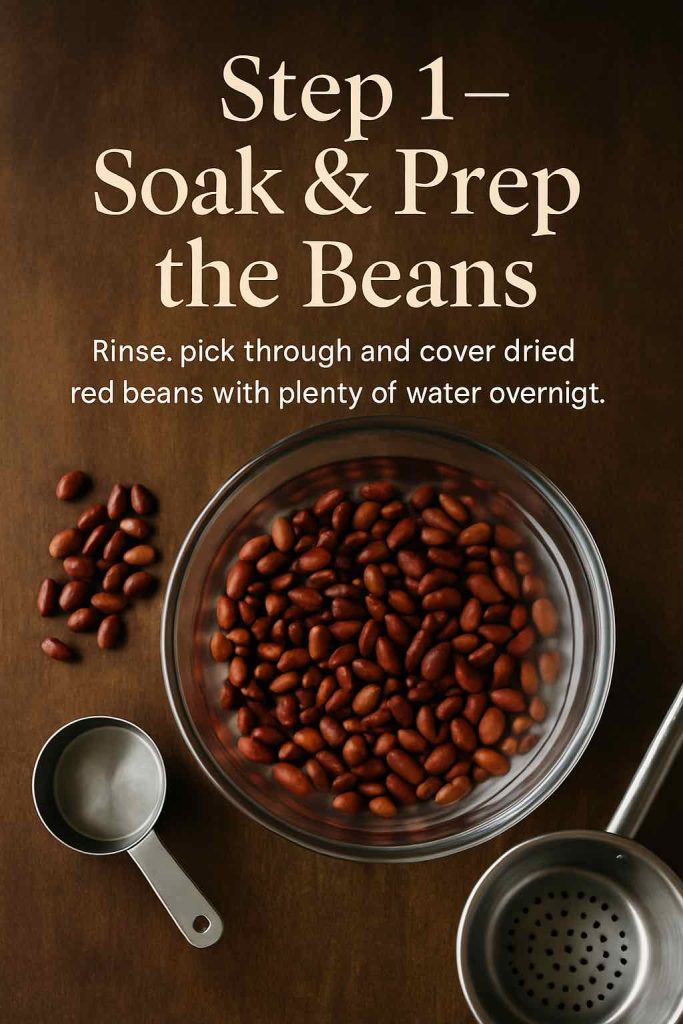
If you forget to soak, don’t panic; you can still make a traditional red beans and rice dish. You’ll just need to simmer a bit longer and keep an eye on the liquid level.
Step 2: Sauté the Trinity and Sausage
Next, start building texture and flavour:
- Warm a spoonful of oil or bacon fat in a heavy pot over medium heat.
- Add chopped onion, celery and green bell pepper with a pinch of salt. Cook, stirring occasionally, until softened and lightly golden.
- Stir in minced garlic and cook a minute or so, just until fragrant.
- Add sliced andouille or other smoked sausage. Let it brown lightly so the edges crisp and browned bits form on the bottom of the pot.

At this point, your kitchen already smells like a proper beans and rice dinner, even before the beans go in.
Step 3: Add Seasoning and Beans
Once the sausage has taken on some colour:
- Sprinkle in your red beans and rice seasoning mix and stir well so the spices coat the vegetables and sausage.
- Toast the spices for 30–60 seconds; they should smell vivid but not burn.
- Add the soaked beans, bay leaves, and any ham hock or smoked turkey you’re using.
- Pour in enough water or stock to cover everything generously.
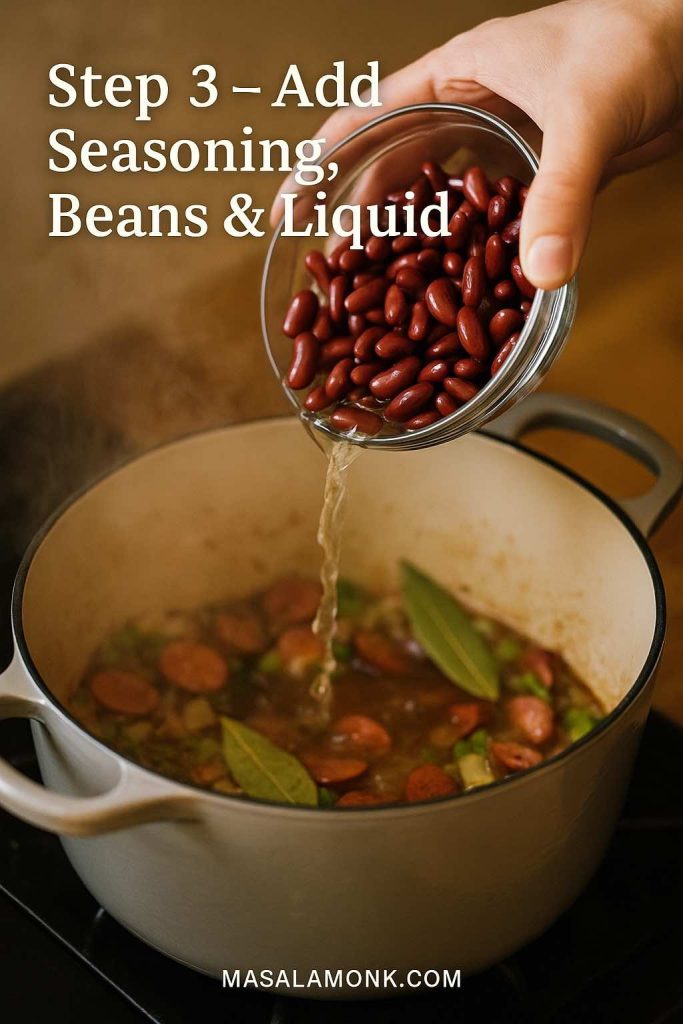
Bring the pot up to a gentle boil, then immediately lower to a soft simmer. Too vigorous a boil can split the beans before they’ve had a chance to soften inside.
Step 4: Simmer Low and Slow
Now the red beans recipe becomes a waiting game in the best possible way:
- Let the pot simmer slowly, partially covered, for 1½–2 hours.
- Stir occasionally so nothing sticks; top up with a splash of water or stock if the level drops too much.
- As the beans soften, mash a spoonful against the side of the pot and stir back in. This gradually thickens the cooking liquid into a creamy sauce.
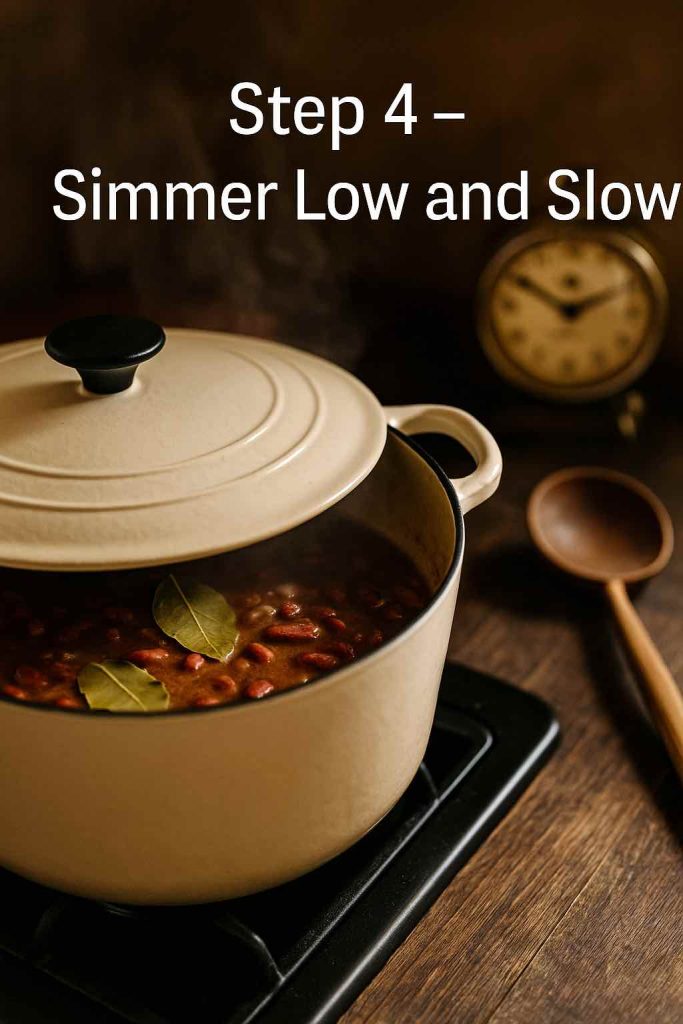
By the time the beans are fully tender, you’ll have a glossy, rich pot of Cajun red beans that clings just right to a spoon. Adjust salt, black pepper and cayenne at the very end so you can taste exactly what’s happening. If you enjoy comparing methods, this authentic Louisiana red beans and rice recipe on Allrecipes follows a very similar path with slightly different timing and spice levels.
Step 5: Cook the Rice and Serve
While the beans are simmering, cook your rice (How to Cook Perfect Rice Every Time (Recipe):
- Rinse long-grain rice until the water runs mostly clear.
- Combine rice, water and a pinch of salt in a pot.
- Bring to a boil, then cover and cook on low until the water is absorbed and the rice is tender.
- Let it rest off the heat for about 10 minutes, then fluff with a fork.

To serve, spoon rice into bowls, ladle the red beans over the top, and finish with sliced green onions and hot sauce at the table. For many people, this simple bowl is the best red beans and rice recipe they’ll ever need; yet it’s also the perfect base for countless variations.
Also Read: How to Make Churros (Authentic + Easy Recipe)
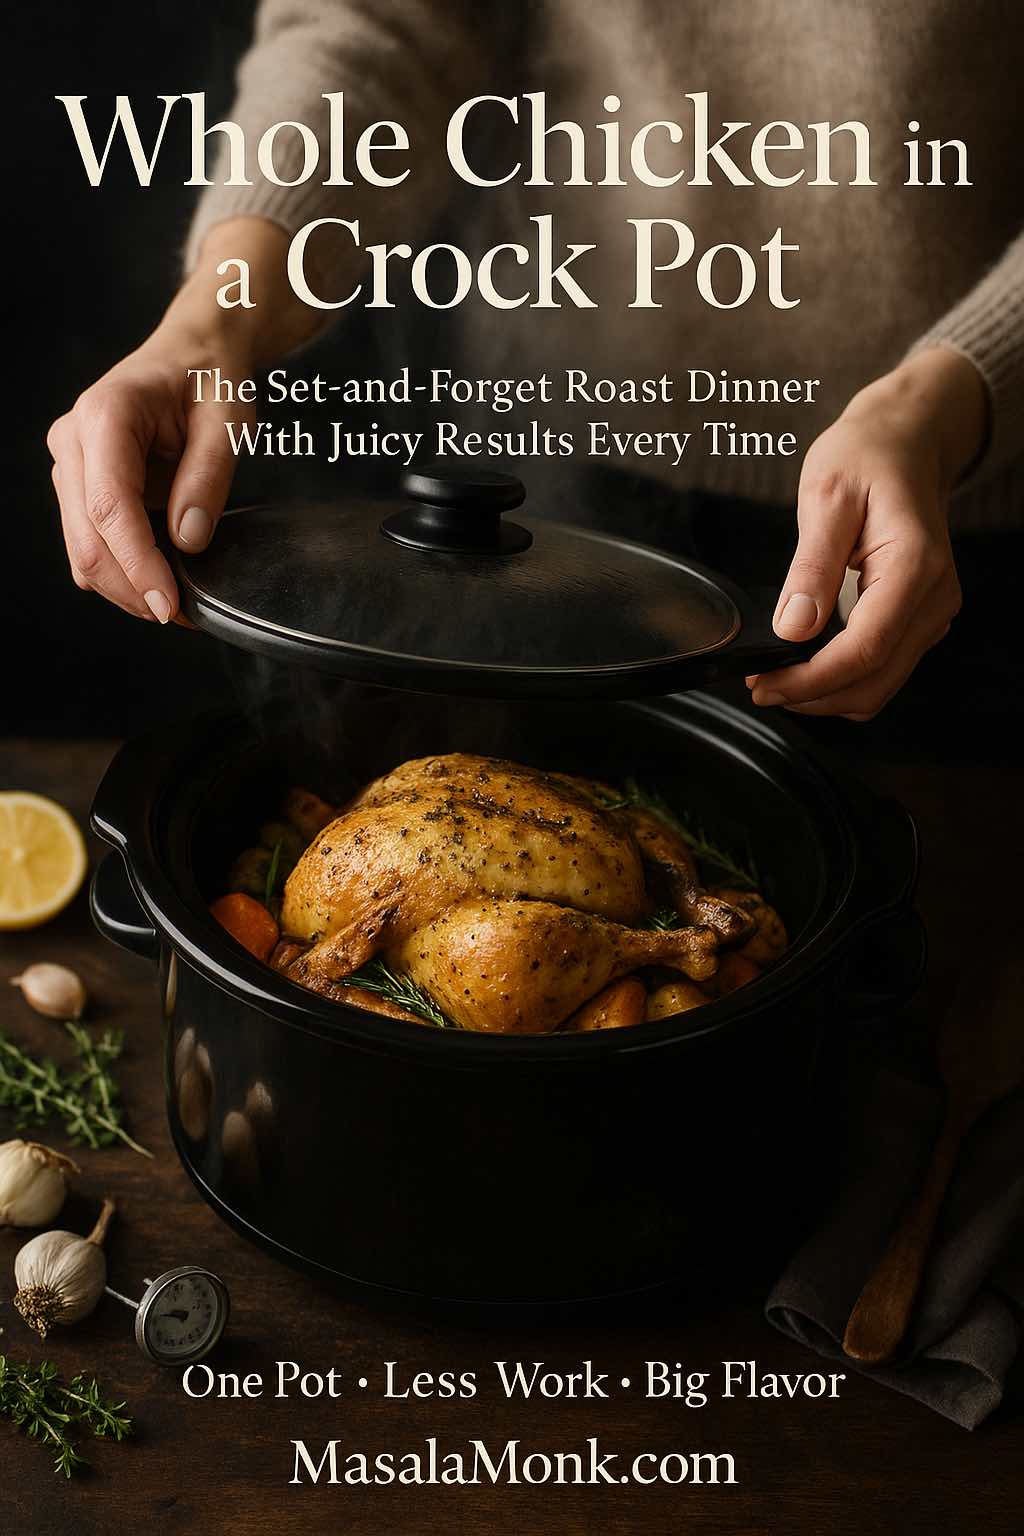
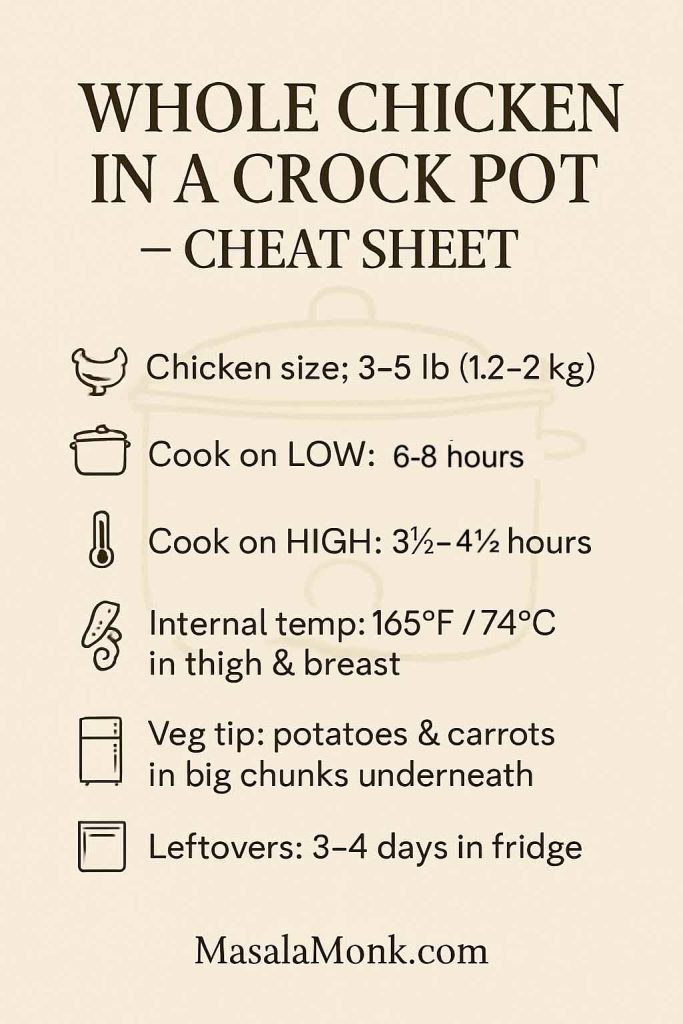
Slow Cooker / Crock Pot Red Beans and Rice
On days when you want the house to do the cooking while you’re out, a crock pot red beans and rice version is incredibly handy.
To adapt the stovetop method for a slow cooker:
- Sauté the onion, celery, bell pepper, garlic and sausage in a pan first. This step adds depth that you won’t get from throwing everything in raw.
- Move the sautéed mixture to the slow cooker.
- Add soaked beans, seasoning mix, bay leaves and enough liquid to cover by several centimetres.
- Cook on LOW for 7–9 hours or HIGH for 4–5 hours, until the beans are soft and starting to break down.
- Near the end, mash some beans against the side of the crock pot and stir to thicken.
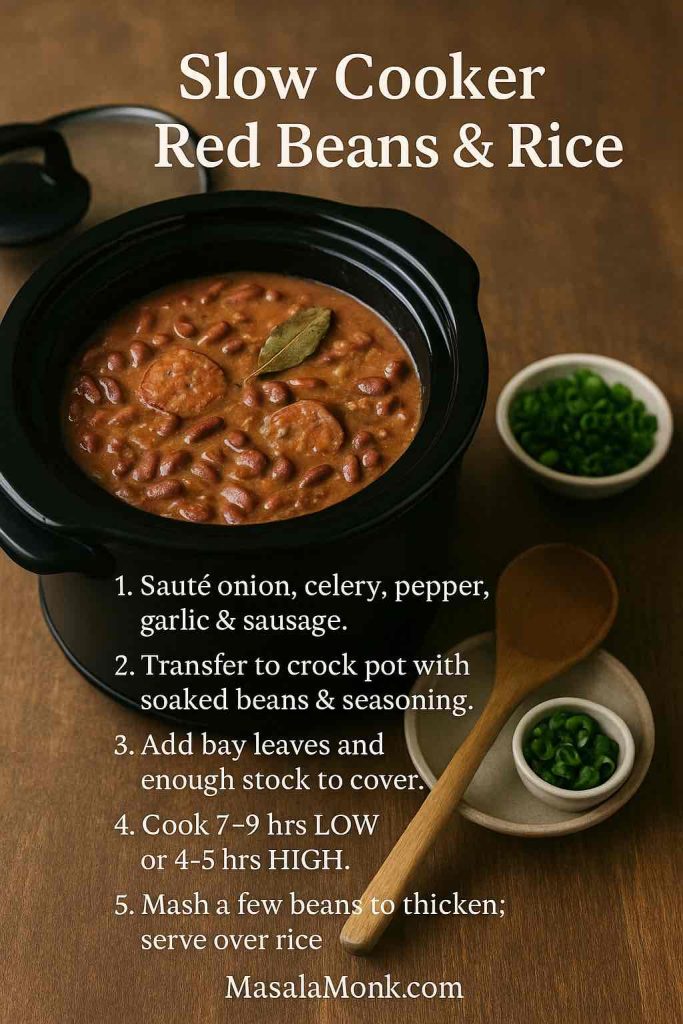
Meanwhile, you can cook rice separately on the stove or in a rice cooker. This approach also plays well with other slow cooker recipes; for example, you might use a second crock pot to make a whole chicken with vegetables so guests can choose between beans and rice or tender shredded chicken over the same bowl of rice.
Because this style of cooking is so forgiving, it readily supports other beans and rice crockpot combinations: black beans with Cajun seasoning, mixed beans with extra vegetables, or even a sausage-heavy red beans and rice crock pot dish for a crowd.
Also Read: French 75 Cocktail Recipe: 7 Easy Variations
Instant Pot Red Beans and Rice
When you’re pressed for time, pressure-cooking red beans and rice makes a lot of sense. An Instant Pot or similar pressure cooker can turn dried beans into creamy, tender red beans in under an hour of active cooking, which is especially useful for weeknights.
To make an Instant Pot red beans and rice recipe:
- Use the Sauté mode to cook the onion, celery, bell pepper, garlic and sausage just as you would on the stove.
- Once fragrant and lightly browned, add your seasoning mix and toast briefly.
- Add rinsed, unsoaked red beans, bay leaves and enough water or stock to just cover the beans.
- Seal the lid and cook on HIGH pressure. Many cooks find 35–45 minutes with a natural release works well, though the exact timing depends on bean type and age.
- Allow the pressure to drop naturally for at least 15–20 minutes, then open the pot.
- Mash some beans and simmer briefly on Sauté mode if you’d like the sauce thicker.
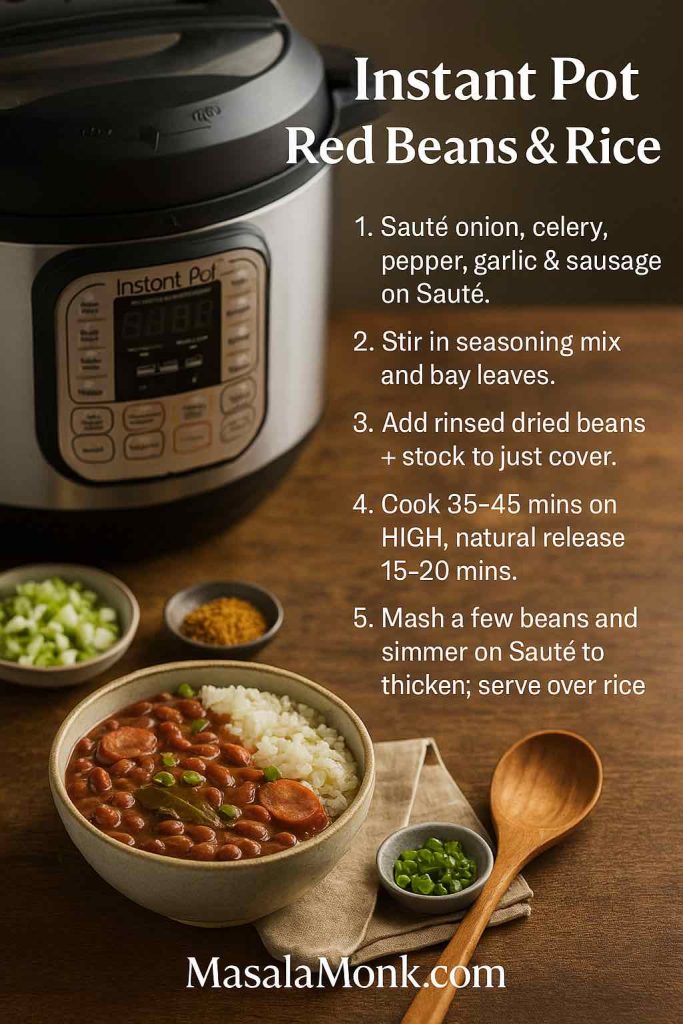
Cook the rice separately either in another pot or in a second round in the Instant Pot, because red beans and rice cook at slightly different rates and you want the beans to get extra time to turn creamy. For a more technical walkthrough (including exact water ratios and timing for a 1-pound bag of beans), the Instant Pot New Orleans-style red beans and rice from Camellia is a great reference.
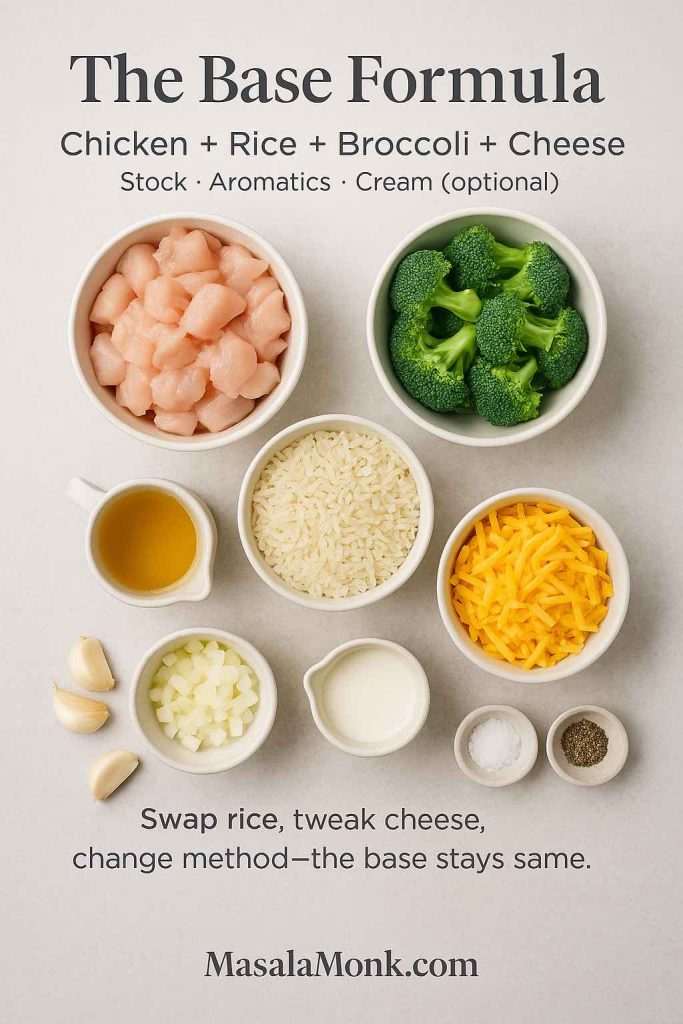
If you enjoy this approach, you’ll probably also appreciate how other one-pot meals such as Cheesy Chicken Broccoli Rice – 4 Ways seamlessly move between Instant Pot, casserole and crock pot formats without losing comfort factor. That way, the same appliance that delivers your red beans can later produce a cheesy rice bake with almost no extra learning curve.
Quick and Easy Red Beans and Rice with Canned Beans
Of course, some evenings you don’t have the bandwidth for soaking beans or monitoring a long simmer. In those moments, canned red beans are a gift.
Here’s a straightforward easy red beans and rice recipe using canned beans:
- Sauté onion, celery and green bell pepper in a little oil until soft and fragrant.
- Add garlic and sliced sausage, browning the sausage lightly.
- Stir in your red bean seasoning mix and bay leaves.
- Add canned red beans (drained and rinsed) along with enough water or stock to make a loose stew.
- Simmer for 20–30 minutes, mashing some beans as they soften to create body.
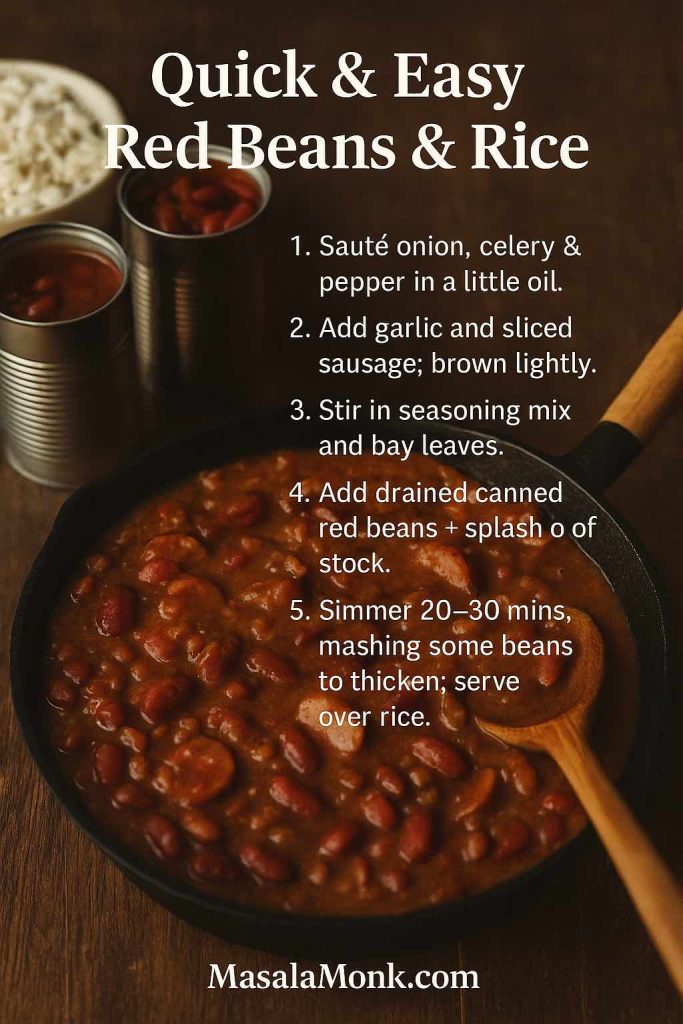
Because canned beans are already cooked, you’re mainly letting flavours blend and the sauce thicken. Serve over freshly cooked rice, and you’ve got a homely red beans and rice meal with very little effort. This trick also works nicely when you’ve bought a boxed red beans and rice mix but want to boost it with real vegetables, extra sausage and fresh seasoning.
Also Read: 10 Best Chicken Sandwich Recipes (BBQ, Parm, Buffalo & More)
Sausage-Heavy Red Beans and Rice
Sometimes, the craving is very specific: beans and rice and sausage, all in one bowl. In that case, you simply tilt the ratios.
To make a beans and rice with sausage feast:
- Double the amount of andouille or smoked sausage in the base recipe.
- Brown the sausage deeply at the beginning to build extra flavour.
- Consider adding small chunks of ham or leftover roasted meat.
- Keep the beans slightly firmer so you have a mix of creamy sauce and distinct beans and sausage pieces.

This style feels right at home at backyard barbecues, football watch parties or potlucks. It also pairs beautifully with starters like wings or dips; for example, you could set out platters of vegetables around one of MasalaMonk’s spinach dip recipes and let the red beans and rice act as the anchor of the table.
Vegetarian and Vegan Red Beans and Rice
Despite its reputation as a sausage-and-ham dish, red beans and rice adapts beautifully to vegetarian and vegan cooking.
To make a meatless red beans and rice recipe:
- Replace animal fat with olive oil or another neutral plant oil.
- Skip the sausage and ham hock altogether, or use a plant-based sausage if you enjoy that texture.
- Use vegetable stock or water as the cooking liquid.
- Emphasise smoked paprika and perhaps a drop of liquid smoke to bring in the depth you’d usually get from pork.

Because beans themselves are rich in protein, fibre and a suite of vitamins and minerals, they’re a cornerstone of many plant-based diets and are associated with improved heart health, lower cholesterol, and better blood sugar regulation.
If you love vegetarian bean dishes, you might also enjoy the contrast between Louisiana red beans and rice and North Indian rajma. An authentic Punjabi style rajma curry served over rice gives a tomato-forward, spiced counterpart to the smoky, thyme-and-bay-leaf notes of this Creole classic.
Beans and Rice Around the World
Once you get comfortable with this authentic red beans and rice recipe, it quickly becomes part of a wider beans and rice family.
In Puerto Rico, for instance, beans and rice often show up as habichuelas guisadas con arroz—stewed beans with sofrito, sazón, olives and sometimes potatoes, ladled alongside or over rice. While in Jamaica, you’ll meet rice and peas, a coconut-infused rice cooked with red kidney beans (the “peas”), thyme and Scotch bonnet pepper, typically served with jerk chicken or fish.

Where as in India, rajma chawal mirrors the same comforting beans-plus-rice logic in a completely different spice language. Even within the US, beans and rice show up as black beans with rice in Cuban cooking, hoppin’ John in the South made with black-eyed peas and rice, or Tex-Mex rice and beans baked under cheese.
When you view your pot of red beans this way, it stops being a single, isolated recipe and becomes a template you can tweak: more coconut here, extra tomato there, different spices everywhere.
Also Read: Whiskey Sour Recipe: Classic Cocktail, Best Whiskey & Easy Twists
Beans, Rice and Your Body
Beyond comfort, there’s another reason red beans and rice keeps showing up in so many cultures: it’s nutritionally smart when you balance portions and ingredients.
Why Beans Are Such a Good Idea
Beans and other legumes are one of the most nutrient-dense, budget-friendly foods you can buy. They bring together:
- Plant protein
- Soluble and insoluble fibre
- B-vitamins like folate
- Minerals such as iron, potassium and magnesium
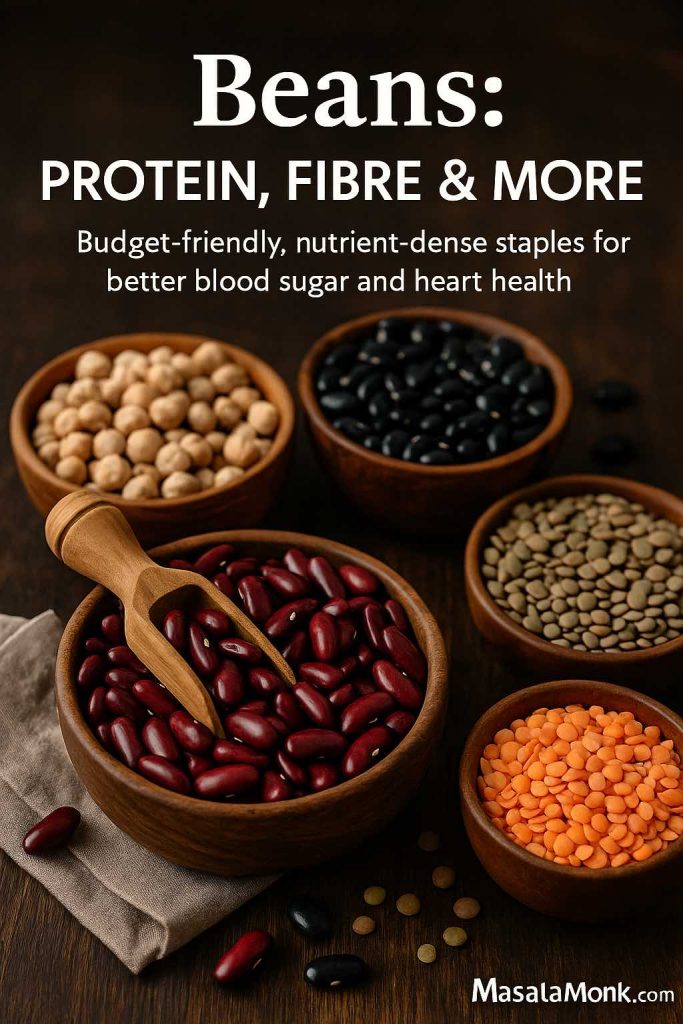
Regular bean intake is associated with improved heart health, better cholesterol profiles, more stable blood sugar and even easier weight management thanks to the combination of protein and fibre increasing satiety.
If you’d like to lean into beans more broadly in your diet, MasalaMonk has a helpful overview of using beans for diabetes and blood sugar management, as well as a piece on how beans can act as a superfood for weight loss without expensive supplements or products.
Choosing and Cooking Rice Wisely
Rice, meanwhile, is neither angel nor villain. It’s a familiar, soothing carbohydrate that fits many cultures; however, its effect on blood sugar depends on type and preparation.
- White rice often has a higher glycemic index, meaning it raises blood sugar more quickly.
- Brown rice tends to sit in the medium-GI range, providing a slower release of glucose.
- Quinoa and some other whole grains boast lower GIs and additional fibre, making them helpful options for people managing diabetes or insulin resistance.
You can also reduce the glycemic impact of rice by adjusting how you cook and cool it, which is exactly what the MasalaMonk guide on lowering rice GI explores in depth. Combined with the fibre and protein from beans, a bowl of red beans and rice can absolutely fit into a thoughtful eating pattern rather than feeling like a “cheat” meal.
Serving Ideas and Full Meal Inspiration
Once your pot of red beans and rice is ready, you can keep things as simple or as elaborate as you like.
On a busy Monday, a scoop of beans over rice with a drizzle of hot sauce might be all you need. On weekends, though, you might want to build a bigger table around it:
- Starters and sides: A fresh board of crunchy vegetables, bread and one or two spinach dip variations gives guests something to snack on while the rice finishes steaming.
- Additional mains: A crock pot whole chicken or a pot of lasagna soup lets meat lovers or pasta fans join in without you cooking multiple complex meals.
- More rice-centric meals: Later in the week, you can switch gears completely with cheesy chicken broccoli rice or even turn leftover plain rice into gourmet arancini balls, giving your beans and rice habit a playful Italian twist.
- Dessert: If you want to keep a gentle theme of rice running through the meal, you might follow this savoury Louisiana dish with an authentic mango sticky rice, which brings a sweet, tropical finish without feeling heavy.
For drinks, you can keep things easy with cold beer or iced tea, yet red beans and rice also sits nicely alongside a tray of cocktails. A classic Bloody Mary or Bloody Maria echoes the savoury, spicy notes of the dish, while a bright mimosa or lemon drop martini offers something sparkling and citrusy on the side.

Making Red Beans and Rice Your Own
The beauty of an authentic red beans and rice recipe is that once you’ve made it a couple of times, it becomes second nature—and then, slowly, it becomes yours.
Maybe you discover you like your red beans extra creamy, so you mash more of them and thin the pot with stock. Perhaps you fall for a meatless red beans and rice version loaded with vegetables and served over quinoa. Or you might decide your signature beans and rice meal will always include sausage, hot sauce, and a big salad on the side.
However you tweak it, the fundamental idea holds steady: a pot of beans, a bowl of rice, a little attention to seasoning, and enough time for everything to come together. When you ladle that first spoonful over steaming rice and breathe in the smell of smoky beans and bay leaves, you’ll understand why Monday red beans and rice became a tradition—and why, once you’ve cooked it for yourself, it tends to stay in the rotation for years.

FAQs
1. What beans work best for a classic red beans and rice recipe?
Small red beans are the classic choice because they get creamy inside while holding their shape. Red kidney beans also work very well and are easier to find, so they’re perfect if you already use them in other bean dishes.
2. Can I use kidney beans instead of red beans?
Yes, kidney beans can absolutely replace small red beans in a red beans and rice recipe. They give a slightly meatier bite, yet still turn tender and creamy when cooked long and slow.
3. Do I really need to soak the beans first?
Soaking isn’t strictly required, but it helps the beans cook more evenly and a bit faster. If you plan a long stovetop simmer or a crock pot red beans and rice, soaking is very helpful, especially with older beans.
4. How long should I soak red beans?
Aim for 6–12 hours in plenty of water. If you forget, you can do a “quick soak” by boiling the beans for a couple of minutes, turning off the heat, and letting them sit covered for about an hour before draining.
5. Can I make red beans and rice with canned beans?
Definitely. Canned beans are ideal for an easy red beans and rice recipe when you’re short on time. Just rinse them, then simmer with sautéed aromatics, seasoning, and a bit of water or stock until the sauce thickens.
6. What kind of rice should I serve with red beans and rice?
Long-grain white rice is traditional because it stays fluffy and soaks up the sauce beautifully. Brown rice or a mix of white and brown is also great if you prefer more fibre and a nuttier flavour.
7. Can I cook the beans and rice together in one pot?
It’s possible, but not ideal for an authentic red beans and rice dish. The beans need much longer to soften and get creamy, so cooking the rice separately keeps it from turning mushy.
8. How do I make the sauce thicker and creamier?
Once the beans are tender, mash a portion of them against the side of the pot and stir them back in. Let the mixture simmer uncovered until the liquid reduces to a rich, gravy-like consistency.
9. Is red beans and rice supposed to be spicy?
It’s usually gently spicy rather than fiery. You can start with a small amount of cayenne or hot seasoning and add extra at the end, letting everyone adjust heat with hot sauce at the table.
10. What’s the difference between Cajun and Creole red beans and rice?
Cajun red beans and rice tends to be more rustic, smoky and robust, often relying heavily on sausage and simple spices. Creole versions may include more herbs or a touch of tomato, giving a slightly more layered, city-style flavour.
11. Can I make red beans and rice in a slow cooker?
Yes, red beans and rice crock pot style is very popular. Sauté the vegetables and sausage first, then transfer everything to the slow cooker with soaked beans and liquid, and let it cook on low until the beans are soft and creamy.
12. How do I adapt red beans and rice for the Instant Pot?
Use the sauté function for the trinity and sausage, then add beans, seasoning and liquid. After that, pressure cook on high until the beans are tender, allow a natural release, and finish by mashing some beans to thicken.
13. How can I make a vegetarian or vegan red beans and rice recipe?
Skip the sausage and ham hock and use oil instead of animal fat. Rely on a bold red beans and rice seasoning mix, vegetable broth and smoked paprika (or a little liquid smoke) to build deep flavour without meat.
14. Is red beans and rice a healthy meal?
Red beans and rice can be very nourishing, especially when you use plenty of beans and a moderate amount of sausage and fat. The beans provide fibre and protein, and you can boost the balance further by serving a salad or vegetables on the side.
15. Why are my red beans still hard after a long cook?
Very old beans, hard water, or adding acidic ingredients too early can keep beans from softening. Next time, use fresher beans, cook them in plain water or stock first, and wait to add vinegar or lots of tomato until the beans are nearly tender.
16. Can I freeze leftover red beans and rice?
Yes, the bean portion freezes very well. It’s best to freeze the red beans separately, then cook fresh rice when you reheat, so the texture stays light and fluffy.
17. How much sausage should I add to red beans and rice?
For a balanced pot, one medium sausage (about 225–300 grams) is usually enough for four to six servings. If you’re aiming for a beans and rice with sausage focus, you can add more to make it extra hearty.
18. How do I make a very simple 3-ingredient red beans and rice?
For the bare minimum, combine cooked red beans, cooked rice, and a flavourful seasoning blend or spiced oil. Warm everything together until the beans are hot and slightly saucy, then adjust salt and chilli to taste.
19. Can I turn this into a meal prep dish for the week?
Yes, red beans and rice is excellent for meal prep. Store the beans and rice in separate containers, then mix them only when reheating so the rice doesn’t absorb too much sauce and lose its texture.
20. What should I serve with red beans and rice?
A simple green salad, coleslaw or roasted vegetables are all good companions for a red beans and rice dinner. For a more indulgent spread, you can add cornbread, garlic bread, or a light dessert to round out the meal.