
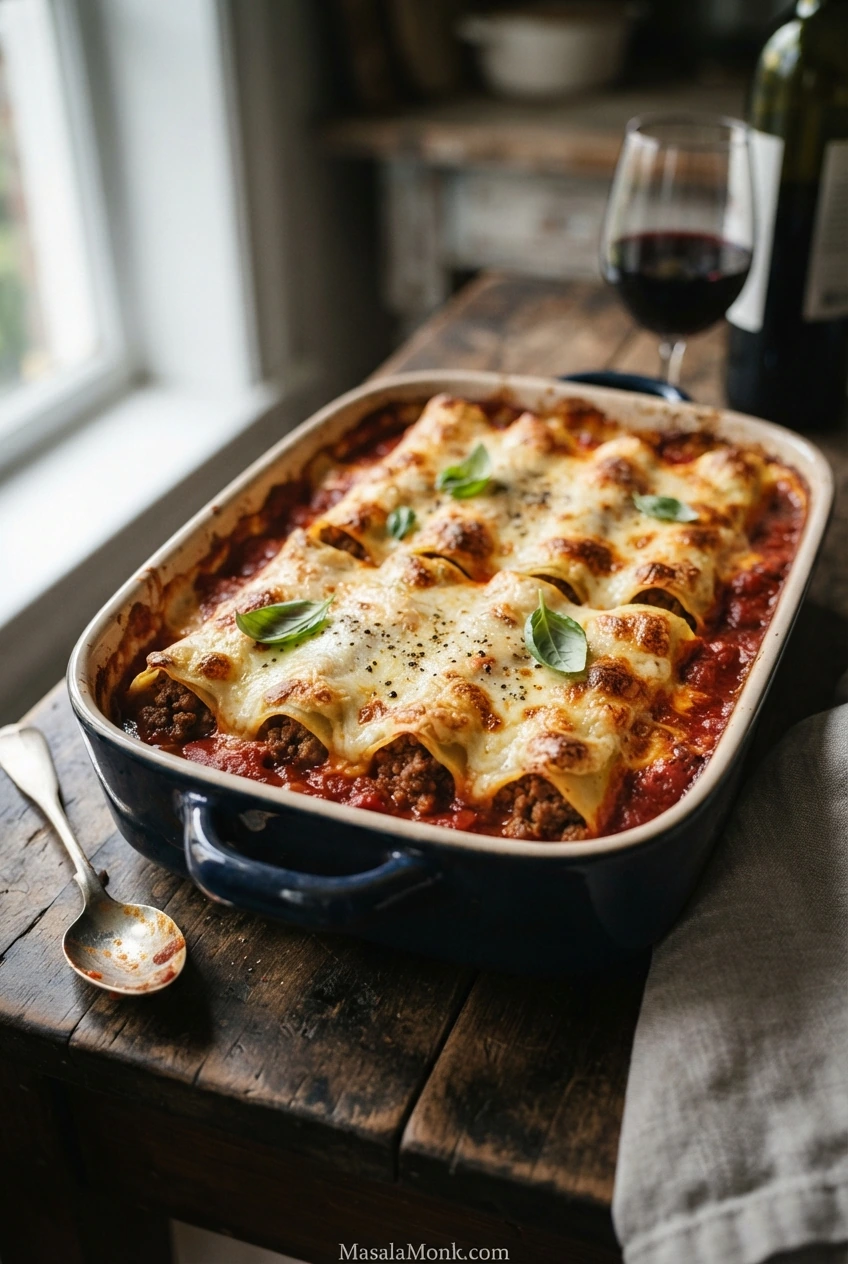
Cut into a piece of beef cannelloni and the tender pasta reveals a savory meat filling surrounded by tomato sauce. Béchamel spreads over the tubes as they bake, with Parmesan turning golden in patches on top. The tomato brings brightness to the beef and creamy white sauce.
This cannelloni recipe makes Italian-style meat cannelloni with ground beef, onion, carrot, celery, tomato sauce and homemade béchamel. It serves four generously or six with sides. Oven-ready dried tubes make the dish more approachable without the work of preparing fresh pasta from scratch.
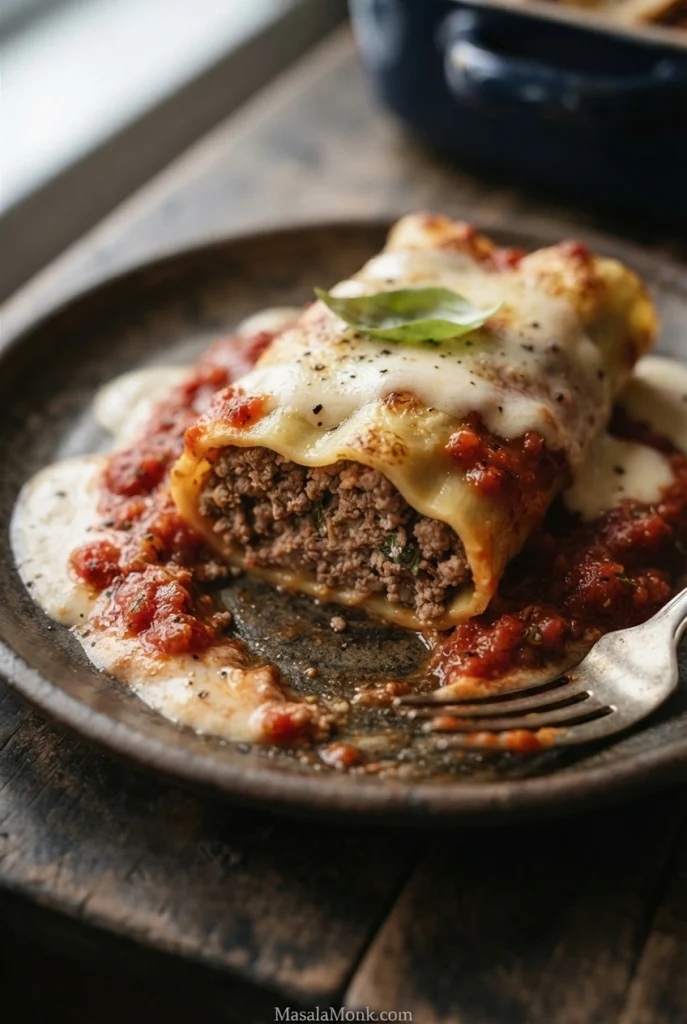
There is some hands-on work, especially filling the tubes, but the beef and sauces can be made ahead. Focus on three things: a moist, finely textured filling, enough tomato sauce around the pasta, and a covered bake that makes the tubes tender before the cheese is browned.
Ready to cook? Jump to Ingredients or Jump to Instructions. For pasta alternatives, troubleshooting and make-ahead advice, use the guide below.
In This Guide
- Classic Italian Meat Cannelloni Recipe
- What to Serve with Cannelloni
- Choosing Cannelloni Pasta
- Filling Tubes Without Breaking Them
- Troubleshooting Common Problems
- Variations and Other Cannelloni Styles
- Make-Ahead, Freezing and Reheating
- Frequently Asked Questions
Classic Italian Meat Cannelloni Recipe
Recipe at a Glance
- Servings: 4 generous portions or 6 moderate portions with sides
- Pasta: One 250 g (about 9 oz) packet of oven-ready dried cannelloni tubes
- Preparation, stovetop cooking and assembly: Approximately 60–75 minutes
- Baking: Approximately 40–55 minutes, plus extra covered time if needed
- Resting: 10 minutes
- Total time: Approximately 1 hour 50 minutes to 2 hours 20 minutes; allow longer if the pasta needs additional covered baking
- Oven: 180°C / 350°F conventional or 160°C / 320°F fan-assisted
- Baking dish: Approximately 23 × 33 cm (9 × 13 inches), about 5–6 cm (2–2½ inches) deep, or a smaller deep dish that fits your filled tubes
Before You Start: Pasta and Timing
Use oven-ready, no-preboil cannelloni tubes for this method. They go into the dish dry and soften as they bake in sauce. Other dried tubes may require boiling or soaking; check the packet before filling them. If you are considering a different pasta format, see the pasta options and comparison before assembling.
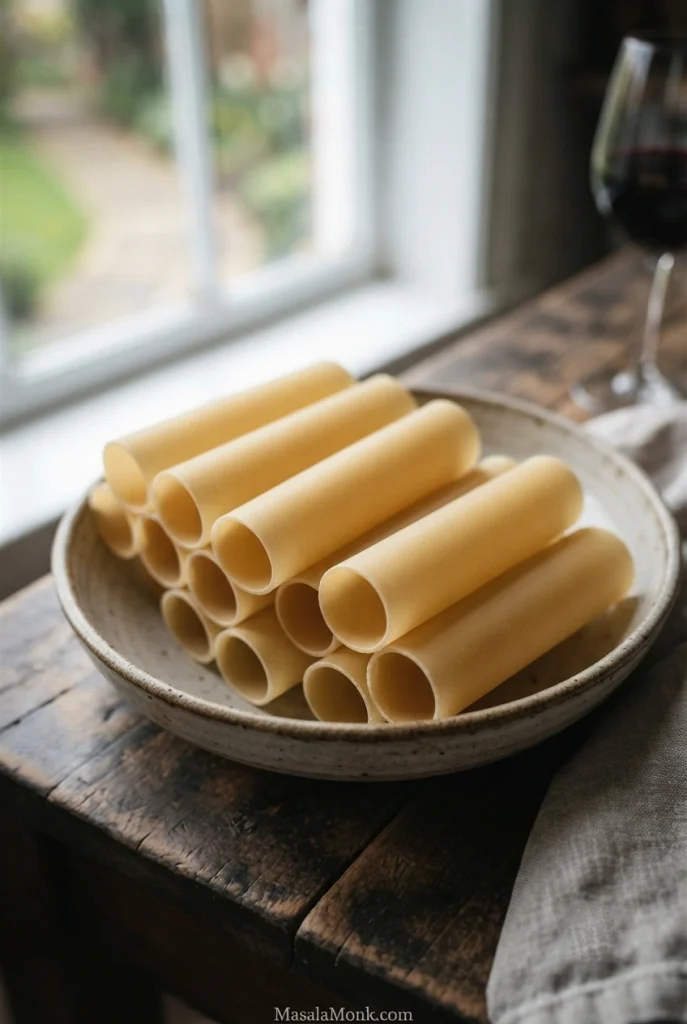
Tube sizes vary, so a 250 g packet doesn’t guarantee a fixed number of filled pieces. Fill as many as the beef mixture allows and arrange them in one layer. The dish should fit the tubes without leaving broad empty areas; save unused dry pasta for another meal.
To save time, make the tomato sauce while the beef simmers. If you prefer to cook one component at a time, finish the beef first and prepare the sauces afterward.
Ingredients
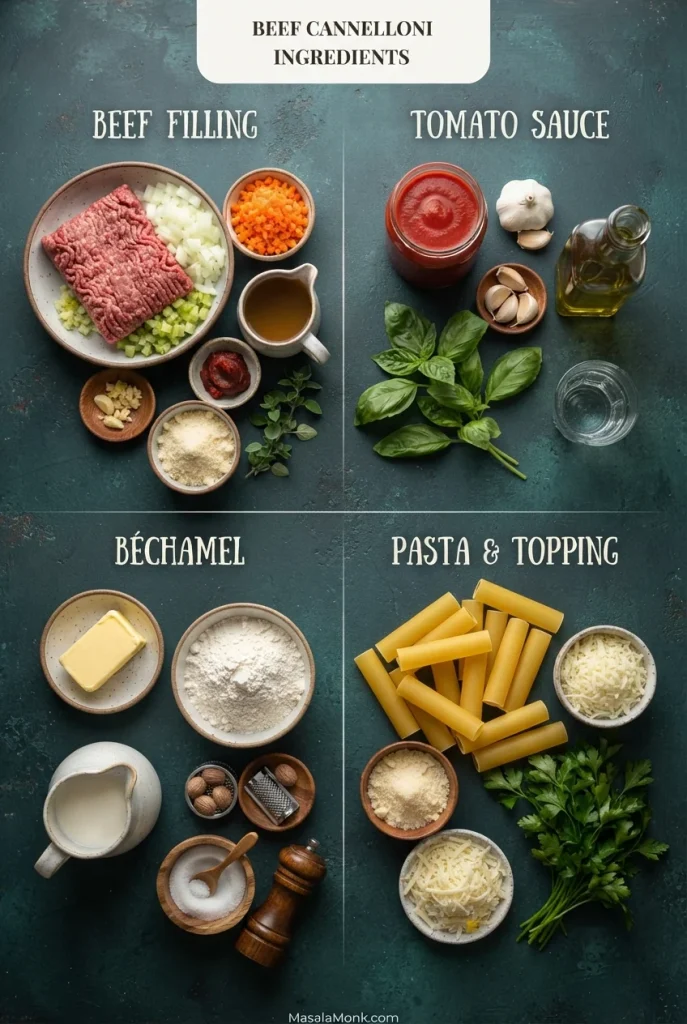
For the Beef Filling
- 500 g (about 1 lb 2 oz) lean ground beef
- 15 ml (1 tablespoon) olive oil
- 120 g (about 4 oz) onion, very finely chopped
- 80 g (about 3 oz) carrot, very finely chopped
- 60 g (about 2 oz) celery, very finely chopped
- 10 g garlic, about 3 cloves, minced
- 30 g (about 2 tablespoons) tomato paste
- 120 ml (½ US cup) unsalted or low-sodium beef stock
- 40 g (about 1½ oz) finely grated Parmesan or Parmigiano Reggiano
- ½ teaspoon dried oregano, optional
- ½ teaspoon fine salt to start, plus more to taste
- ¼ teaspoon freshly ground black pepper
For the Tomato Sauce
- 700 g (about 25 oz by weight) smooth tomato passata
- 250 ml (about 1 US cup) water or unsalted stock
- 15 ml (1 tablespoon) olive oil
- 2 garlic cloves, crushed or finely chopped
- 6–8 fresh basil leaves, or ½ teaspoon dried basil
- ½ teaspoon fine salt to start
- ¼ teaspoon freshly ground black pepper
Measure passata by weight. The 250 ml water or stock is added when making the sauce, not a second time during assembly.
For the Béchamel Sauce
- 35 g (about 1¼ oz or 2½ tablespoons) unsalted butter
- 35 g (about 1¼ oz) plain or all-purpose flour, approximately ¼ US cup plus 2 teaspoons when spooned and leveled
- 500 ml (about 2 US cups) whole milk
- A small pinch of ground nutmeg
- ¼ teaspoon fine salt to start
- Freshly ground white or black pepper, to taste
Weigh the butter and flour for the most consistent result. Volume equivalents are approximate.
For the Pasta and Topping
- One 250 g (about 9 oz) packet of oven-ready, no-preboil dried cannelloni tubes; use as many as needed
- 40 g (about 1½ oz) finely grated Parmesan or Parmigiano Reggiano
- 75 g (about 2½ oz) grated low-moisture mozzarella, optional
- Fresh basil or parsley, for serving
You’ll need 80 g Parmesan in total: 40 g in the filling and 40 g over the top.
Equipment
Have a large frying pan, two saucepans, a whisk, wooden spoon or spatula, a deep baking dish, aluminum foil and a piping bag with a wide plain opening ready. A sturdy food-safe bag with a corner cut off also works. An instant-read thermometer is useful for checking doneness.
Three Checks for Better Cannelloni
Three things matter most as the dish comes together:
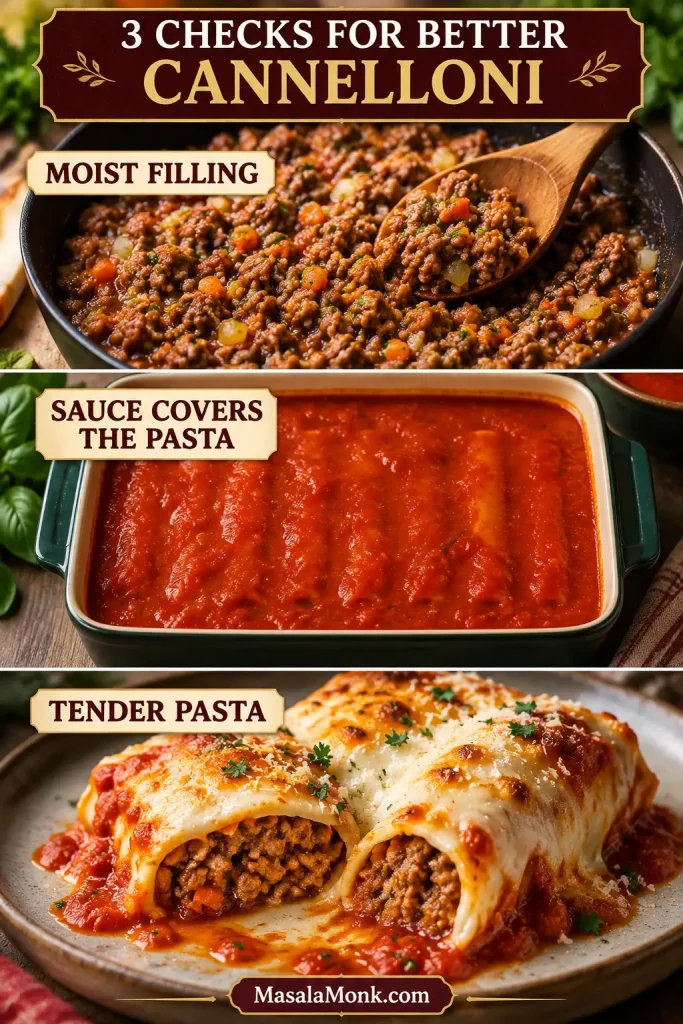
- Moist, cohesive beef filling: It should hold together loosely without stock pooling underneath.
- Pasta surrounded by sauce: Tomato sauce should reach between the tubes and cover their ends.
- Tender pasta at the center: Test a central tube before serving, rather than relying on the topping’s color.
How to Make Cannelloni
Step 1: Cook the Beef Filling
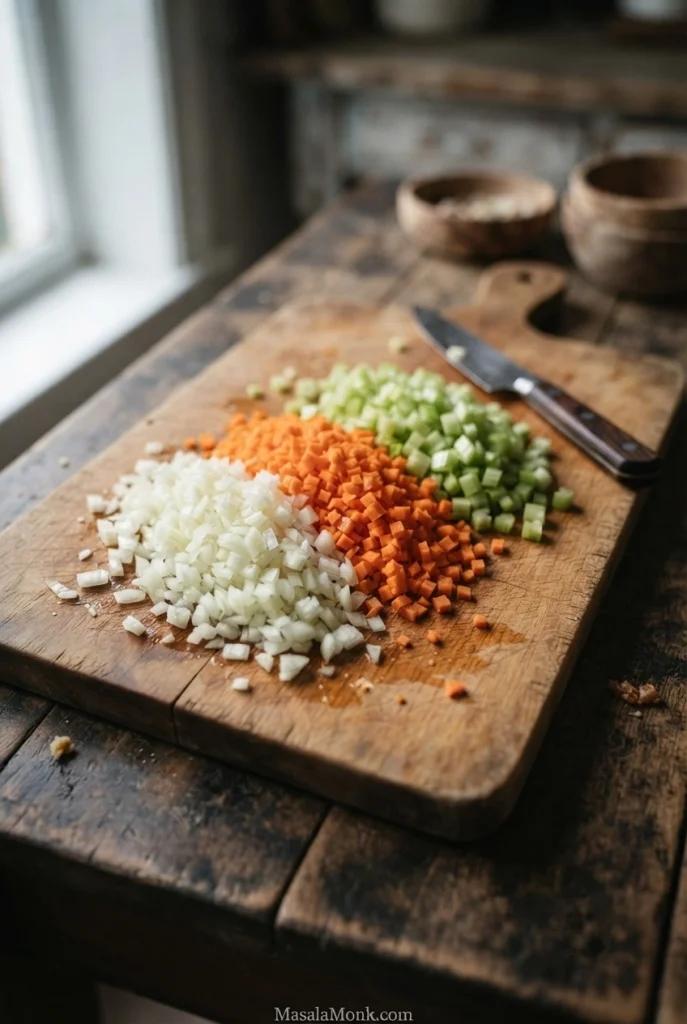
Heat the olive oil in a large frying pan over medium heat. Add the onion, carrot and celery and cook for 7–9 minutes, stirring occasionally, until softened and the onion turns translucent. Small, well-softened vegetable pieces add sweetness without leaving bulky chunks inside the tubes.
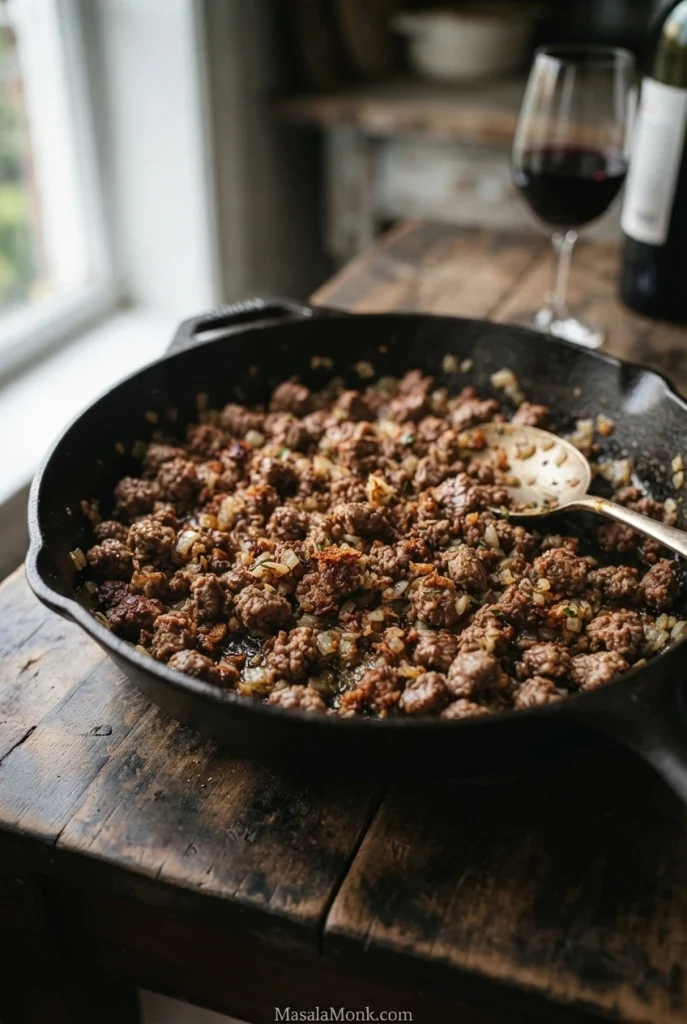
Stir in the garlic and cook for another 30 seconds. Increase the heat to medium-high, add the ground beef and break it into small pieces with a wooden spoon. Cook for about 7–10 minutes, breaking up clumps, until browned and fully cooked. The beef should reach 71°C / 160°F, in line with FoodSafety.gov’s safe minimum cooking temperatures. Spoon off excess rendered fat if necessary.
Simmer and Finish the Beef Filling
Add the tomato paste, oregano if using, salt and pepper. Stir for another minute to coat the beef, then add the stock. Reduce the heat to medium-low and simmer uncovered for 10–15 minutes, stirring occasionally.
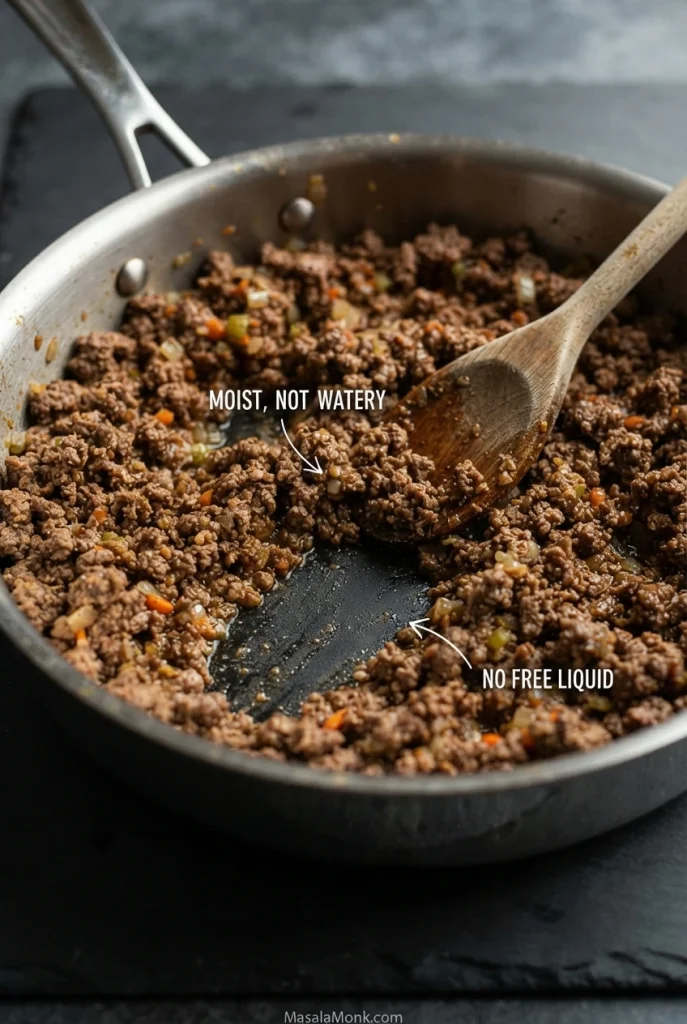
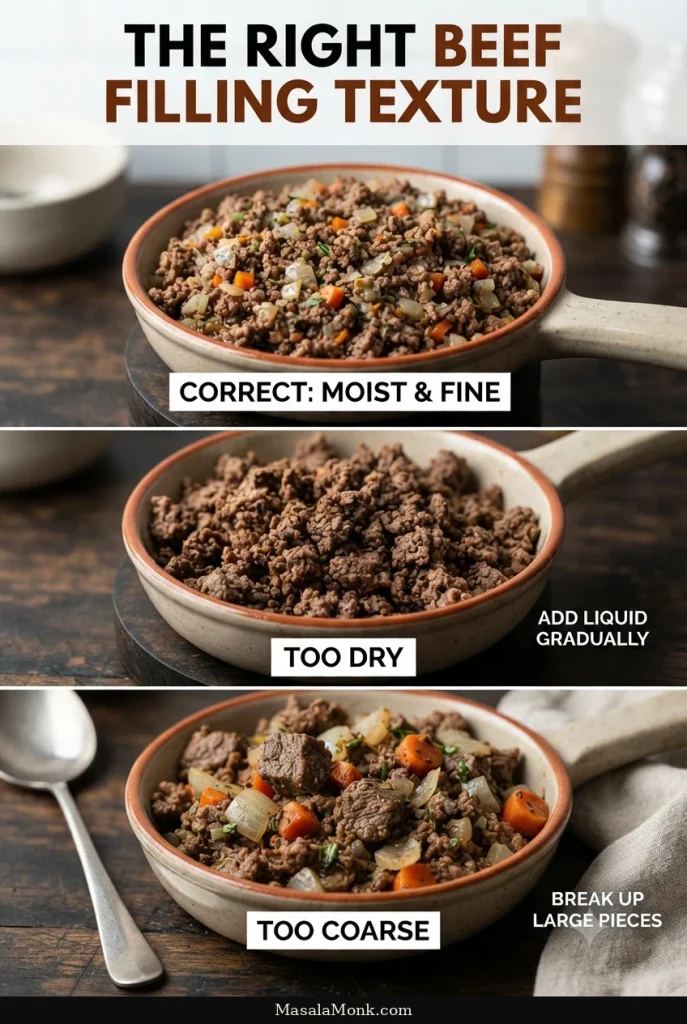
The filling is ready when it’s moist and cohesive, with no pool of stock beneath it. Draw a spoon across the pan: the gap should remain briefly rather than filling immediately with liquid. If the mixture is crumbly, add tomato sauce or water a tablespoon at a time until it holds together without becoming wet.
Remove from the heat and stir in 40 g Parmesan. Taste a little of the fully cooked filling and adjust the seasoning, remembering that Parmesan and stock already contribute salt.
Cool the filling promptly until comfortable to handle. Chop any large pieces finer or give the mixture a couple of brief pulses in a food processor. It should be finely textured, not puréed. Refrigerate if assembly is delayed.
Step 2: Make the Tomato Sauce
Warm the olive oil in a saucepan over medium-low heat. Add the garlic and cook for 30–45 seconds, just until fragrant.
Pour in the passata and 250 ml water or stock. Season with salt and pepper, bring to a gentle simmer and cook for 8–10 minutes. Stir in the basil near the end, then taste and adjust the seasoning.
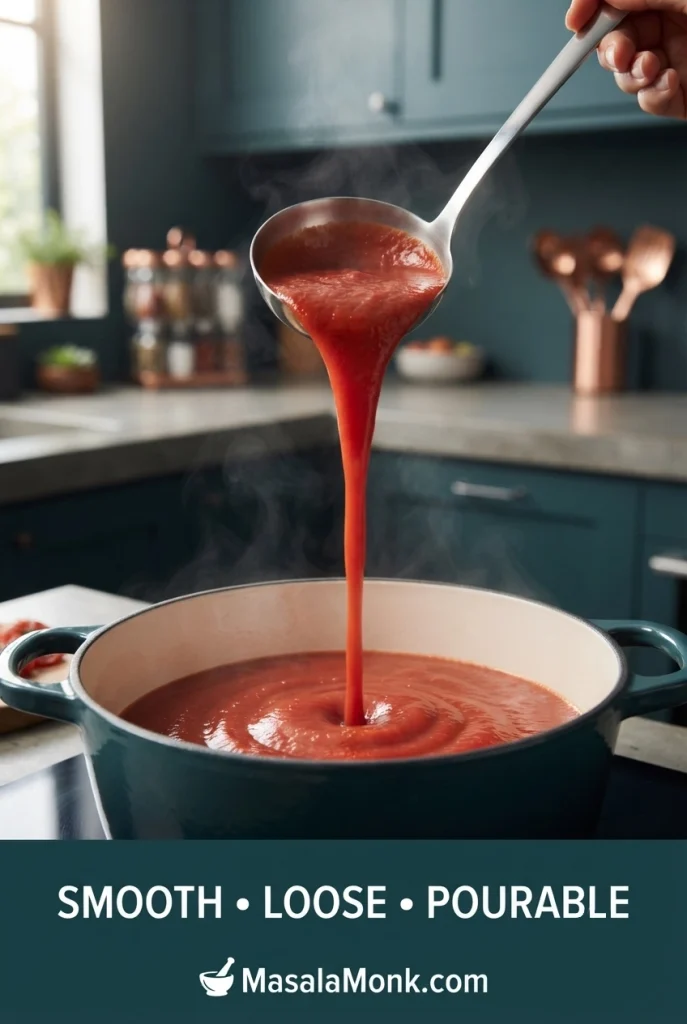
The sauce should pour easily from a spoon. Like a simple homemade marinara sauce, it begins with tomato, garlic and basil, but stays looser because dry cannelloni needs moisture to cook.
Step 3: Prepare the Béchamel
Melt the butter in a saucepan over medium-low heat. Add the flour and whisk for 1–2 minutes until it forms a smooth, pale roux.
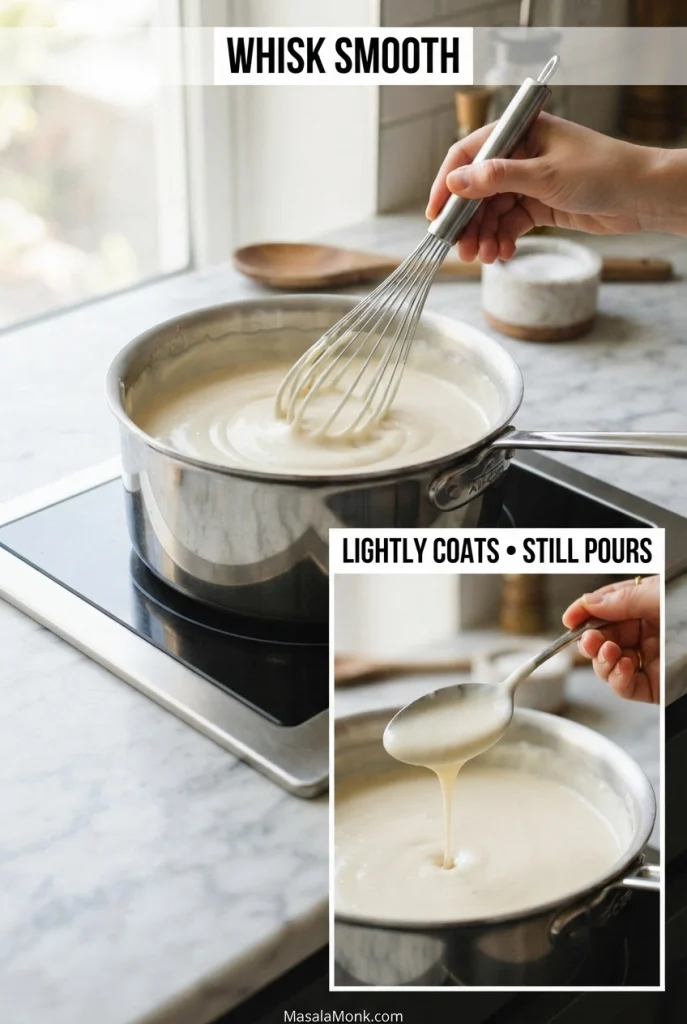
Start with a splash of milk and whisk until smooth. Repeat with a few more additions, then gradually whisk in the rest. Bring to a gentle simmer and cook for 3–5 minutes, stirring regularly. Season with nutmeg, salt and pepper.
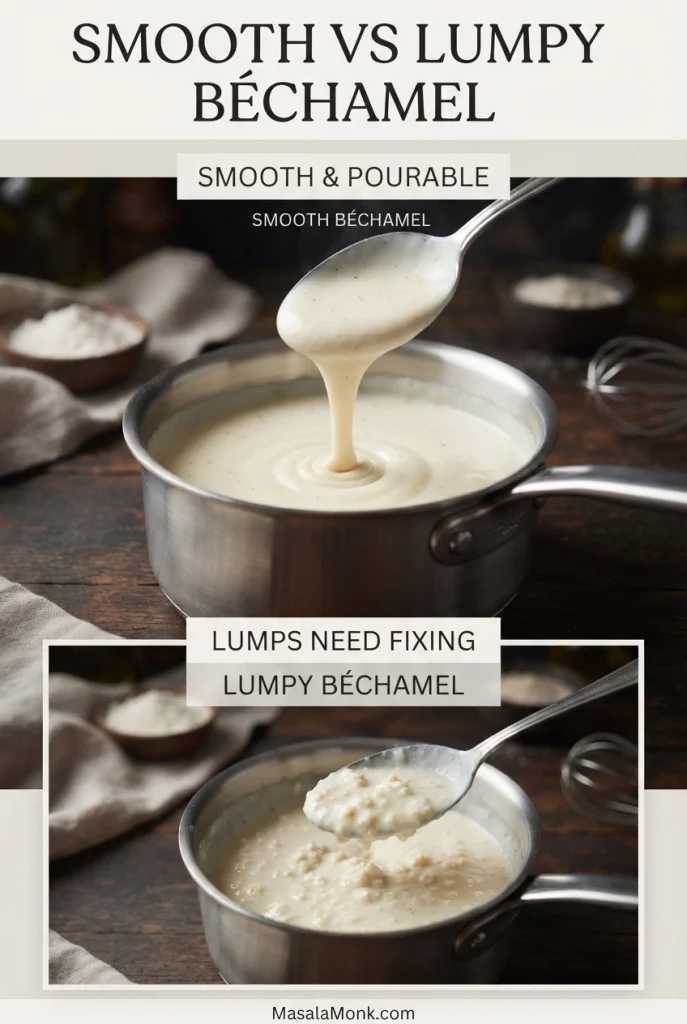
Equal weights of butter and flour form the roux; gradually whisking in the milk helps prevent lumps. The béchamel should lightly coat a spoon but still pour easily. If it thickens while standing, whisk in 15–30 ml (1–2 tablespoons) warm milk. Cover until assembly.
Step 4: Fill the Cannelloni Tubes
Set a tray beside the cooled filling and fit a piping bag with a wide plain opening. Test a spoonful of beef by squeezing it through the bag into a bowl. It should move with steady, gentle pressure.
Large pieces can block the opening; chop them finer. If the filling is too dry to move smoothly, mix in tomato sauce one tablespoon at a time until it pipes without becoming runny.
Fill the Tubes Without Forcing Them
Fill the bag about halfway. Insert the opening gently into one end of a dry tube and squeeze until the meat reaches toward the opposite end. Turn the tube around and fill any remaining space from that side.
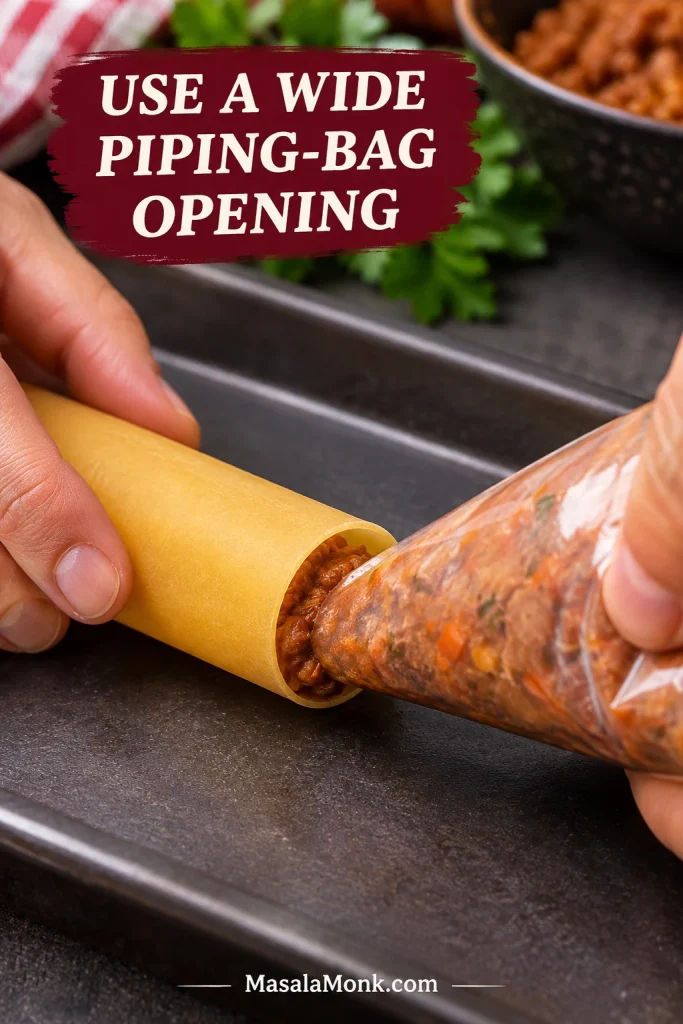
Hold the tube in one hand or stand several upright in a stable, narrow container. The first tube is often the awkward one. Once you find the right pressure, the filling should slide in without cracking the pasta. The tubes don’t need to look identical.
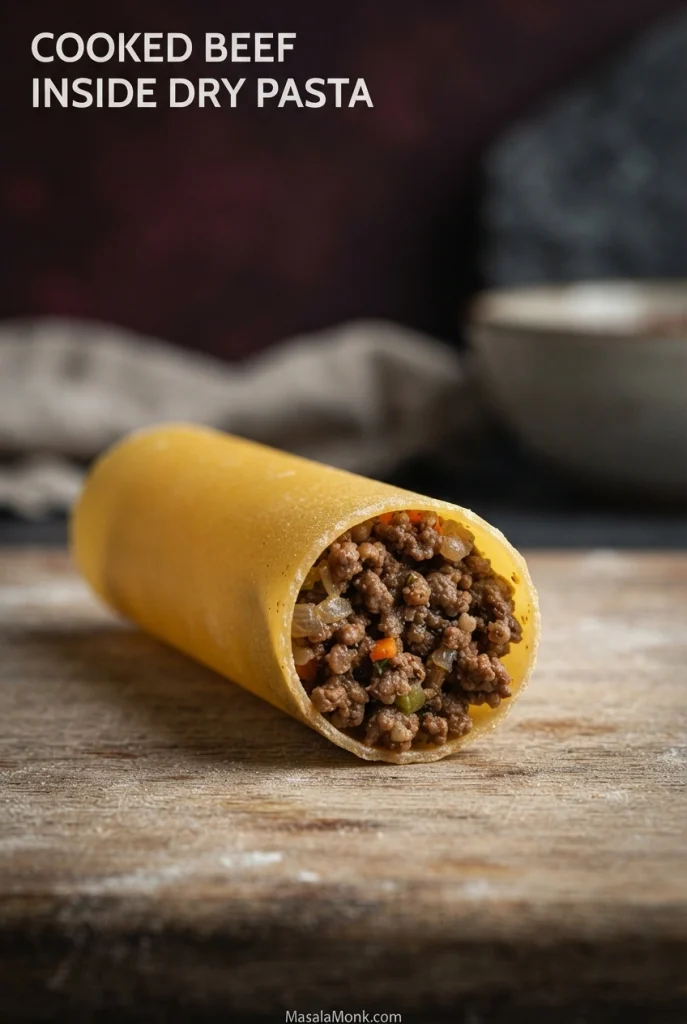
Continue until you’ve used the filling or filled all the available tubes. Save unused dry pasta for another meal, and refrigerate surplus cooked filling promptly.
Step 5: Assemble the Baking Dish
Preheat the oven to 180°C / 350°F conventional or 160°C / 320°F fan-assisted.
- Spread about 200–250 ml tomato sauce across the bottom of a deep baking dish.
- Arrange the filled cannelloni side by side in one layer, leaving narrow gaps for sauce.
- Spoon tomato sauce over and between the tubes until each is surrounded and the ends are covered.
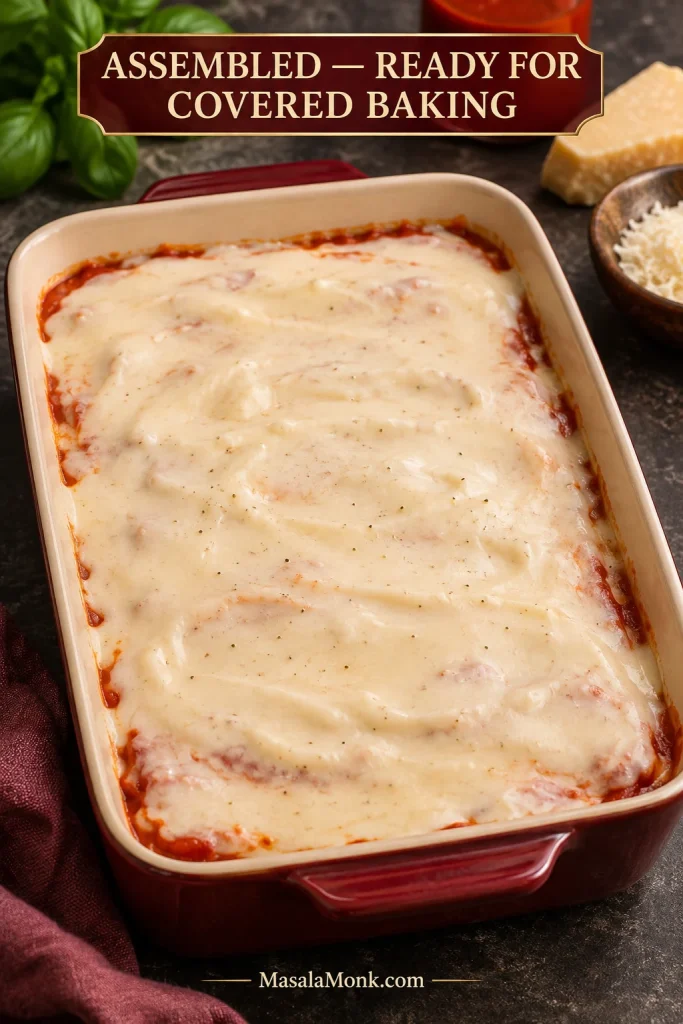
- Spread the béchamel across the top. Reserve the Parmesan and optional mozzarella for the uncovered finish.
Check the sauce coverage: The tubes should rest in tomato sauce with no exposed dry ends. This batch makes plenty of sauce because oven-ready pasta absorbs moisture. Use most or all of it when needed for coverage; if a smaller number of tubes leaves genuine surplus, save that sauce for serving.
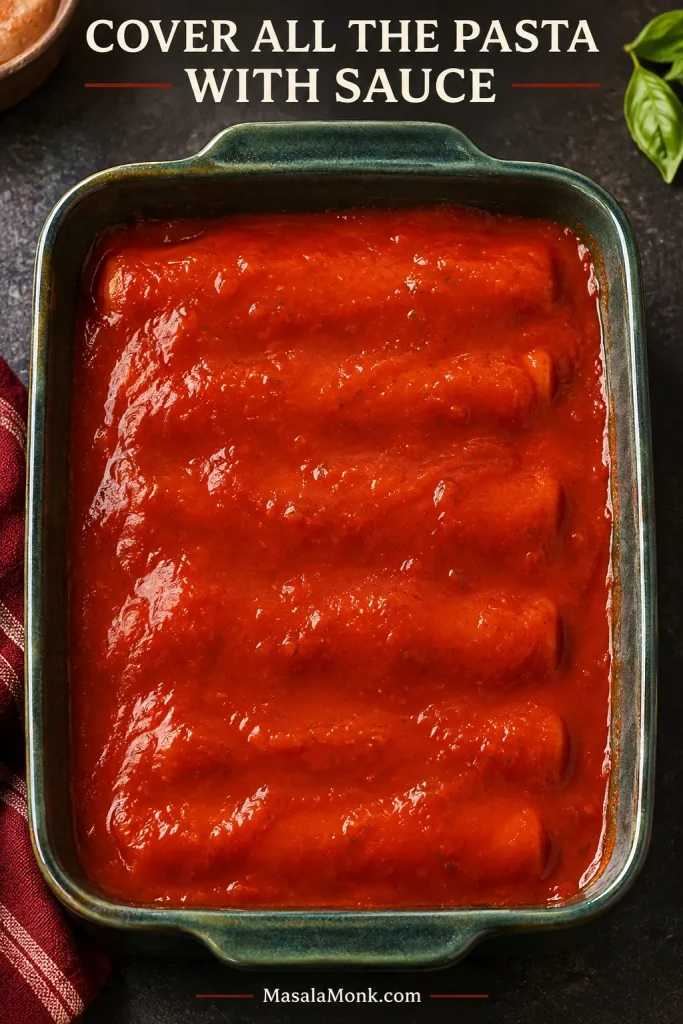
Using two dishes? Divide the tubes, tomato sauce and béchamel between them. Each dish must have sauce beneath, between and above its pasta. If either is short of sauce, make extra rather than leaving tubes exposed.
Once the filled tubes are tucked under both sauces, most of the hands-on work is finished.
Step 6: Bake Covered
Cover securely with foil and bake for 30 minutes. Leave a little clearance between the foil and béchamel. The cover retains moisture while the dried pasta softens; uncovering comes later, once the central tubes are hydrated.
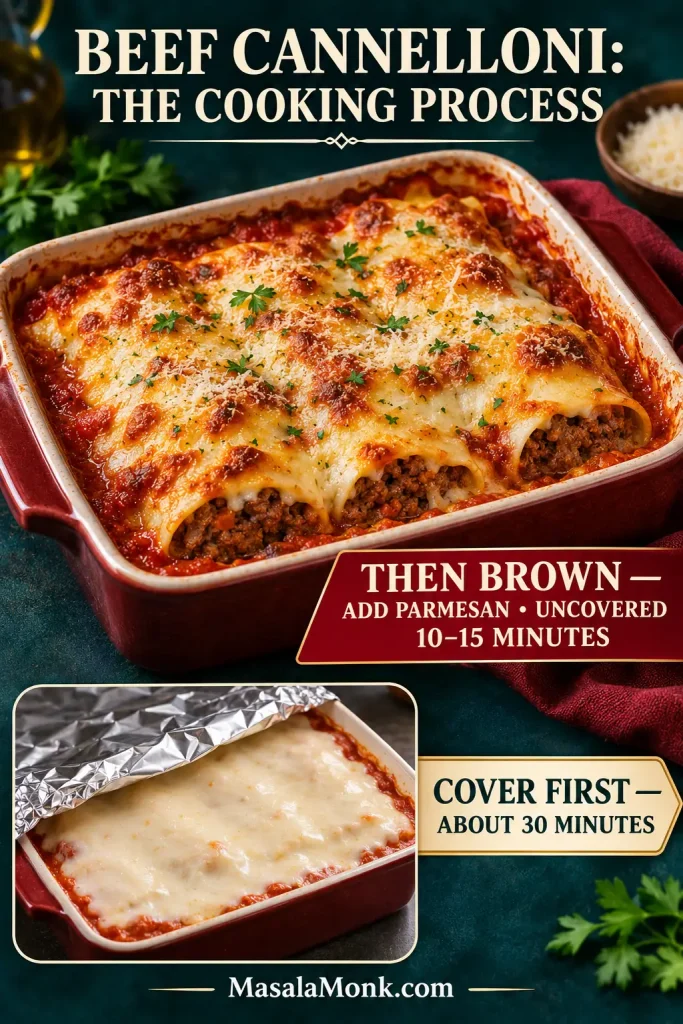
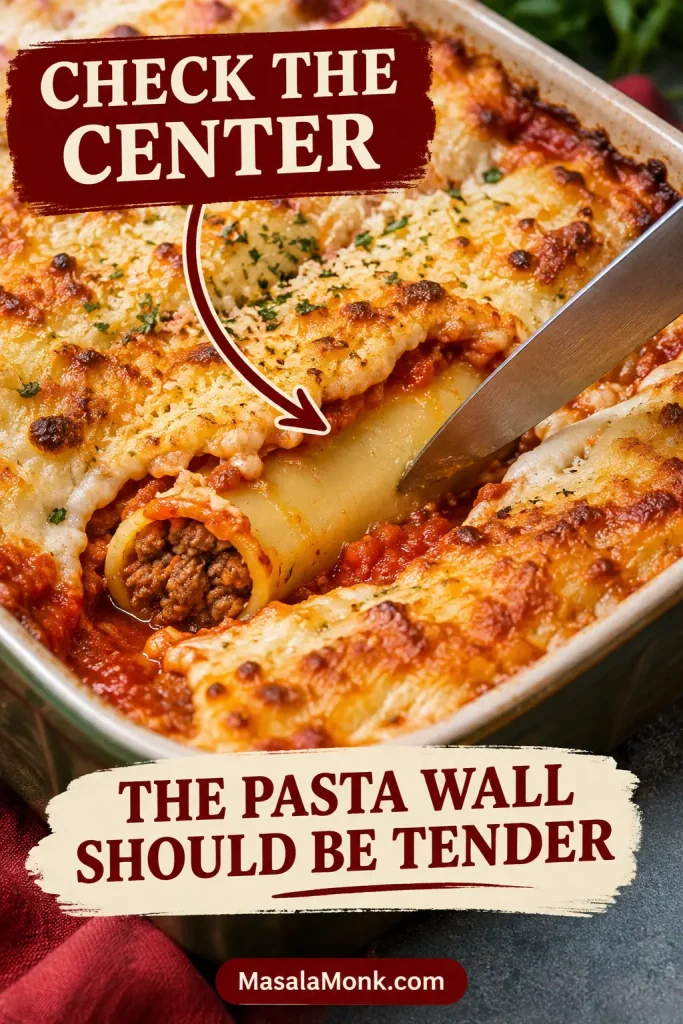
Carefully lift the foil away from your face and hands. Push a thin knife or skewer through the pasta wall of a tube near the center, rather than testing only the softer meat filling.
Before uncovering, the pasta should be hydrated throughout, with no hard or chalky core. Slight firmness is fine; it will finish cooking uncovered.
If the pasta is still hard, cover and bake for another 5–10 minutes, then check again. Add a little hot tomato sauce or about 30 ml (2 tablespoons) hot water only where the pasta looks dry. When plenty of sauce remains, extra covered baking time may be all it needs. For persistent problems, see the troubleshooting guide.
Step 7: Add the Cheese and Finish Baking
Remove the foil and scatter the remaining 40 g Parmesan over the béchamel. Add the optional mozzarella for a more melted topping.
Return to the oven uncovered for 10–15 minutes. Tomato sauce should bubble around the edges while the béchamel develops golden patches where the Parmesan browns.
Before serving, the pasta must be fully tender. A thin knife should pass through the wall of a central tube without meeting a firm layer. The center of the finished meat casserole should also reach 74°C / 165°F. Check the filling in a central tube with an instant-read thermometer, without touching the dish.
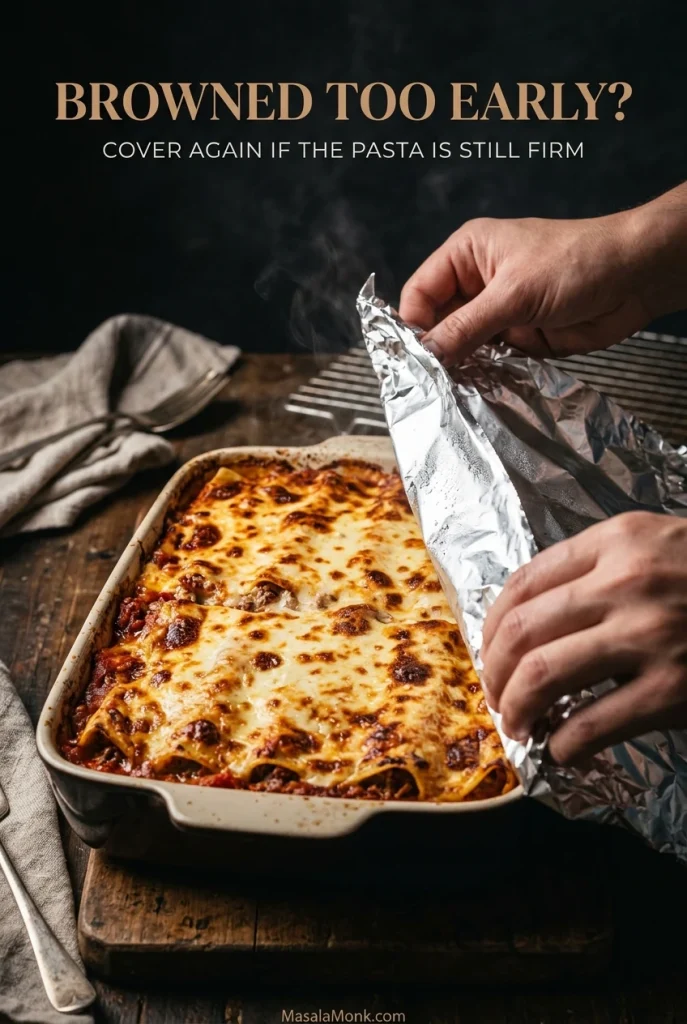
If the topping browns before the pasta has finished cooking, replace the foil and continue baking at the same temperature.
Step 8: Rest and Serve
Let the cannelloni rest for 10 minutes after removing it from the oven. Bubbling settles and the sauces thicken slightly, making the filled tubes easier to lift.
Transfer to plates with a broad spatula or serving spoon, adding tomato sauce and béchamel to each portion. The pasta should cut easily around the savory beef filling. Finish with fresh basil, parsley or more Parmesan.
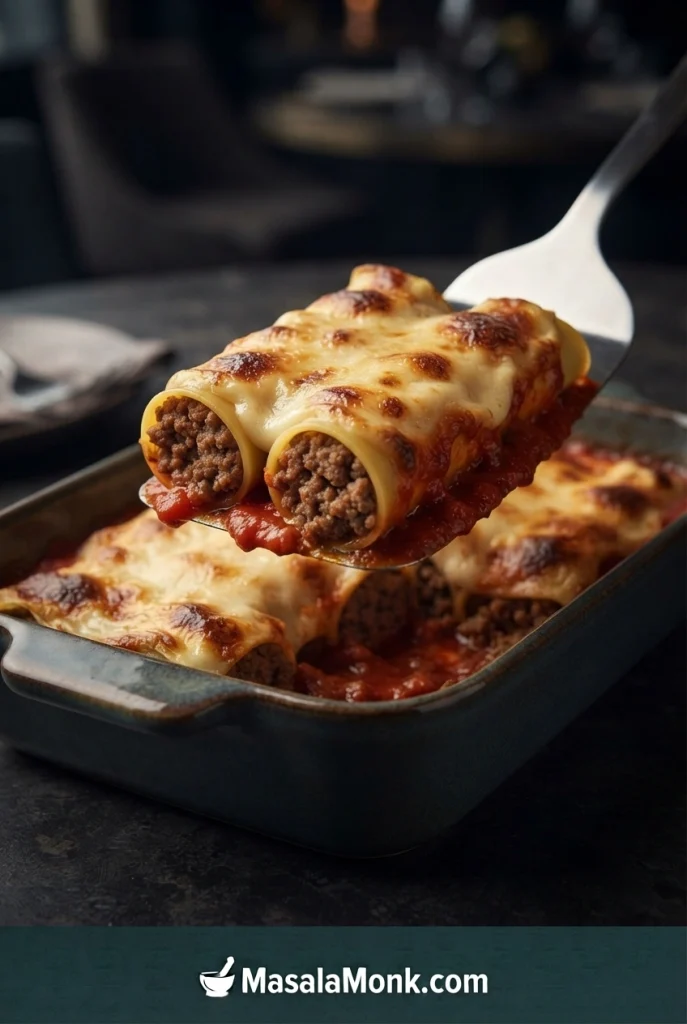
The first serving may loosen a neighboring tube or two. That’s normal with a generously sauced pasta bake.
What to Serve with Cannelloni
A crisp green salad with lemon and olive oil cuts through the richness of the beef and béchamel. Roasted zucchini, peppers or sautéed greens also work well alongside the pasta.
Warm homemade focaccia is excellent for scooping up the tomato sauce left on the plate.

Which Cannelloni Pasta Should You Use?
Use the main recipe for oven-ready dried tubes. For other pasta formats, this comparison explains what changes in preparation and baking.
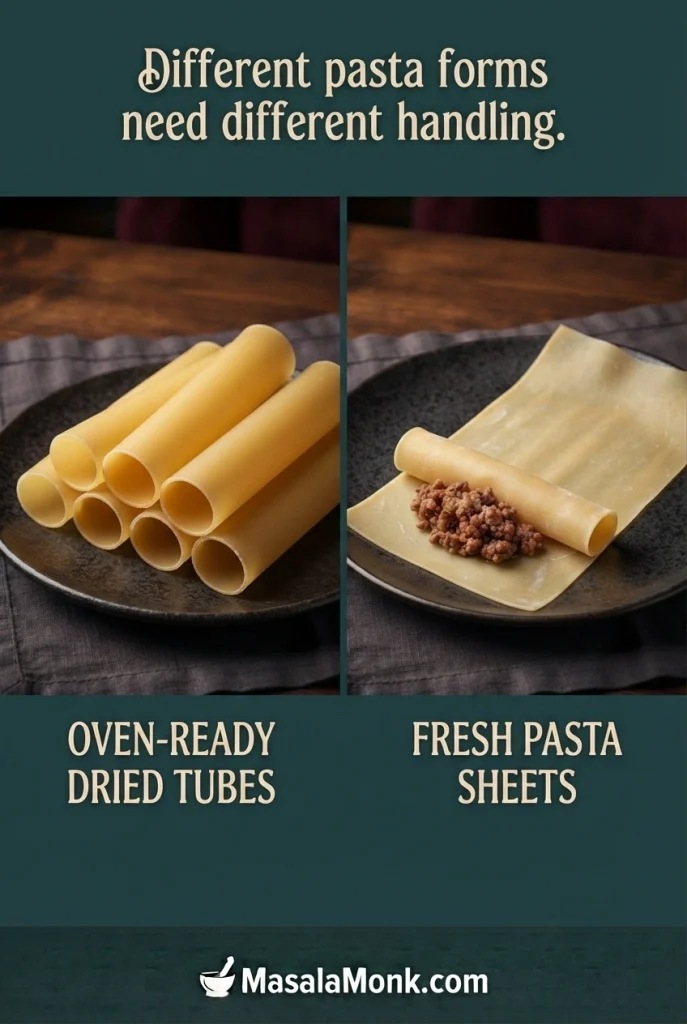
For example, Barilla’s Collezione cannelloni is designed to be filled and baked without precooking. Other dried tubes may need boiling or soaking, so follow their packet directions.
| Pasta type | Preparation | What changes |
|---|---|---|
| Oven-ready dried tubes | Fill dry and bake in sauce | Use the main covered-baking method |
| Dried tubes requiring precooking | Boil or soak as instructed | Handle gently and adjust baking time |
| Fresh egg-pasta sheets | Fill and roll; blanch if required | Often cook more quickly |
| Fresh lasagne sheets | Cut and roll when pliable | Thickness affects baking time |
| Gluten-free pasta | Follow product directions | Hydration and breakage may differ |
Using Fresh Pasta or Lasagne Sheets
Fresh sheets let you spread the cooked filling over pasta and roll it up instead of piping it into narrow tubes. Cut pliable sheets into rectangles about 10 × 15 cm (4 × 6 inches), adjusting for thickness and dish size. Add a modest amount of filling near one short edge, roll with a slight overlap and arrange seam-side down.
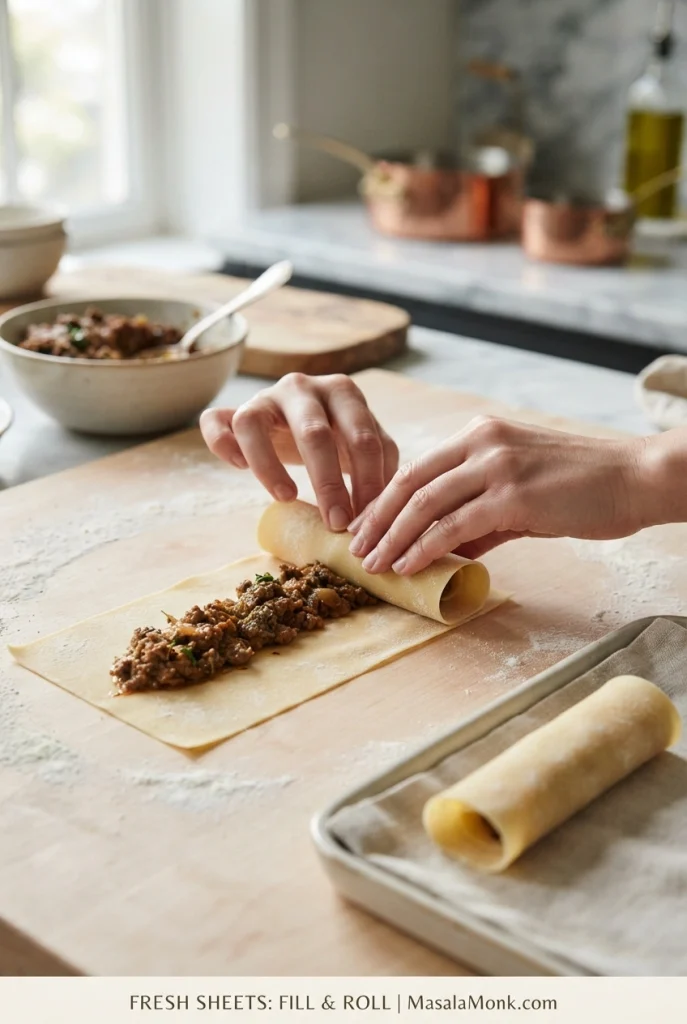
Blanch fresh sheets when the dough or package instructions require it. For thin, already-blanched sheets, begin checking tenderness after about 20–25 minutes; thicker or unblanched sheets can take longer. The main recipe’s sauce and baking times are intended for dried oven-ready tubes, so adjust them for fresh pasta while keeping the rolls well coated.
For homemade egg-pasta dough, the rolling technique in our homemade ravioli recipe is useful. Cannelloni uses larger rectangles instead of sealed pasta pockets.
How to Fill Cannelloni Without Breaking the Tubes
Already cracked a tube? A small split isn’t always a problem. If it still holds the filling, place the cracked side down in the baking dish and cover with sauce. Set aside pieces that have shattered or can no longer hold the meat.

When cracks happen repeatedly, ease the piping pressure and use the filling technique in Step 4. Coarse filling needs finer chopping; dry filling needs a little tomato sauce, added gradually.
For a different stuffed-pasta meal that’s easier to fill with a spoon, baked stuffed shells use a larger, open pasta shape.
Cannelloni Troubleshooting: What Went Wrong?
| Problem | Likely cause | What to do |
|---|---|---|
| Hard pasta center | Needs more covered cooking | Cover and bake longer; add sauce if dry |
| Crispy tube ends | Ends exposed above sauce | Cover with sauce and return under foil |
| Cheese browns early | Top finishes before pasta | Replace foil and continue baking |
| Filling jams | Coarse or dry mixture | Chop finer or add sauce gradually |
| Tubes crack | Excess pressure | Fill gently; turn minor cracks downward |
| Sauce remains watery | Excess liquid after baking | Rest; reduce separable sauce if necessary |
| Dry meat filling | Reduced too far | Serve with sauce; retain more moisture next time |
| Lumpy béchamel | Milk incorporated unevenly | Whisk gently or strain |
| Fresh rolls unravel | Loose seams or overfilling | Arrange seam-side down beneath sauce |
| Portions fall apart | Soft pasta or loose sauce | Rest and lift with a broad spatula |
Why Is My Cannelloni Still Hard?
A hard center usually means the pasta needs more covered baking time, moisture around exposed sections, or both. Check the sauce first. Add hot tomato sauce or about 30 ml (2 tablespoons) hot water where it’s dry; then cover, bake another 5–10 minutes and test the wall of a central tube. If there’s plenty of sauce, continue covered baking without adding more liquid.
With dried tubes that required boiling first, extra covered baking may help, although the texture can differ from the manufacturer’s intended result. Trying to empty and boil stuffed tubes is unlikely to work well.
Why Is My Cannelloni Watery?
Give the baked dish its full 10-minute rest before judging the sauce. It looks looser while bubbling straight from the oven.
If the pasta is tender but a large amount of liquid remains, lift out the portions carefully. Where excess sauce can be separated without dismantling the dish, simmer it briefly until thicker and spoon it back over the pasta. Continuing to bake tender tubes may make them overly soft.
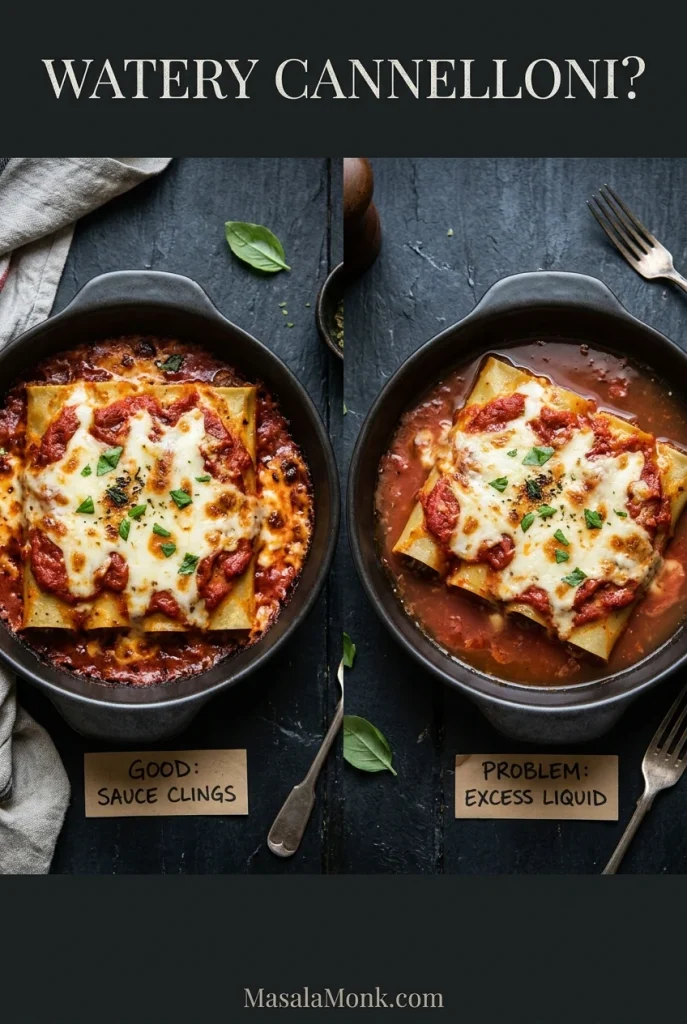
Next time, use a dish that holds the filled tubes in a fairly full layer. A few tubes spread across a very large pan can leave more sauce than the pasta absorbs.
How Do You Fix Lumpy Béchamel?
Take the saucepan off the heat and whisk firmly. Small lumps may smooth out with gentle reheating; strain out persistent ones. Our béchamel sauce guide explains how to combine the roux and milk smoothly.
Cannelloni Variations and Other Italian-Style Fillings
Some changes work within this recipe; others use different fillings and sauce proportions and are best treated as separate dishes.
Beef and Pork Cannelloni: A Direct Substitution
Replace the 500 g ground beef with 250 g ground beef and 250 g ground pork. Cook as directed, removing excess fat if necessary. The meat mixture should reach 71°C / 160°F.
A slowly cooked ragù like the one in our Bolognese sauce recipe develops a deeper meat flavor. Reduce extra liquid and chop the meat finely before using it to fill cannelloni.
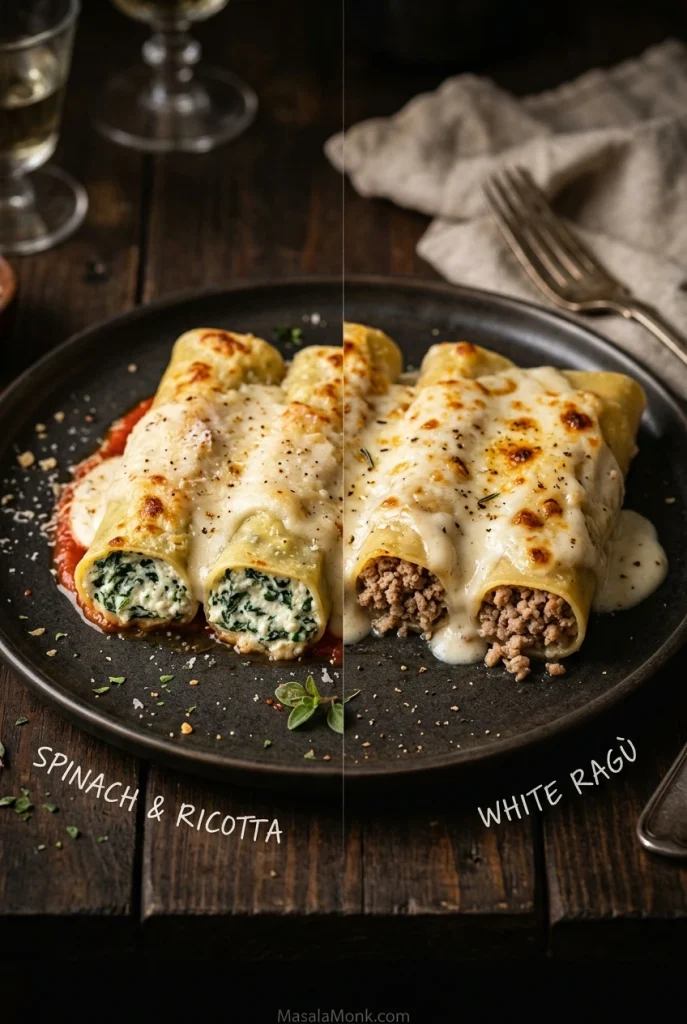
Spinach and Ricotta Cannelloni: A Different Filling
Spinach and ricotta is a classic meat-free style: the spinach is cooked, squeezed dry and chopped before mixing with ricotta, Parmesan and seasoning. Because its texture and moisture differ from cooked beef, it needs a separate filling formula. For another complete vegetarian baked-pasta option, try vegetable lasagna.
White Ragù Cannelloni
Some Italian versions use slowly cooked meat without tomato, finished with béchamel. This rich, savory style works well with fresh egg-pasta sheets, but needs a different sauce balance from the main recipe.
Gluten-Free Cannelloni
Choose gluten-free tubes or sheets and follow their preparation instructions. Different starch blends absorb moisture differently, and some are fragile. Use a suitable gluten-free thickener for the béchamel and check packaged stock and other ingredients.
Cannelloni, Manicotti and Lasagna
Cannelloni commonly uses smooth tubes or rolled fresh pasta; Italian-American manicotti may use ridged tubes or thin crêpes. Lasagna layers pasta, filling and sauce instead of enclosing individual portions.
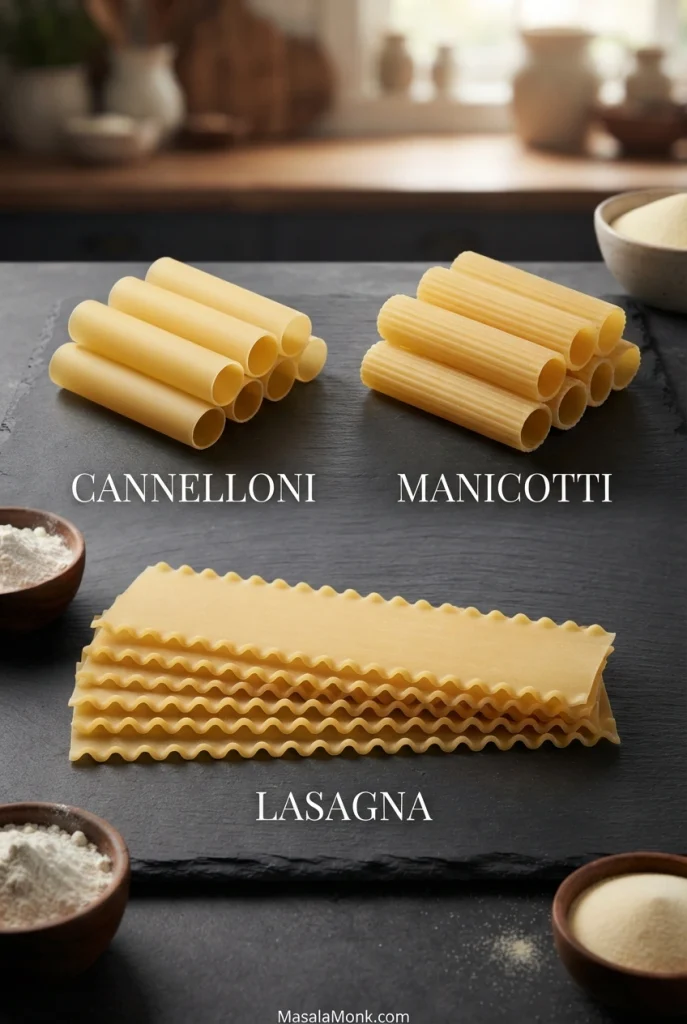
For beef, tomato and creamy sauce without piping individual tubes, classic homemade lasagna is a good alternative. Stuffed shells with meat offer another spoon-filled pasta shape.
Make-Ahead Cannelloni, Freezing and Reheating
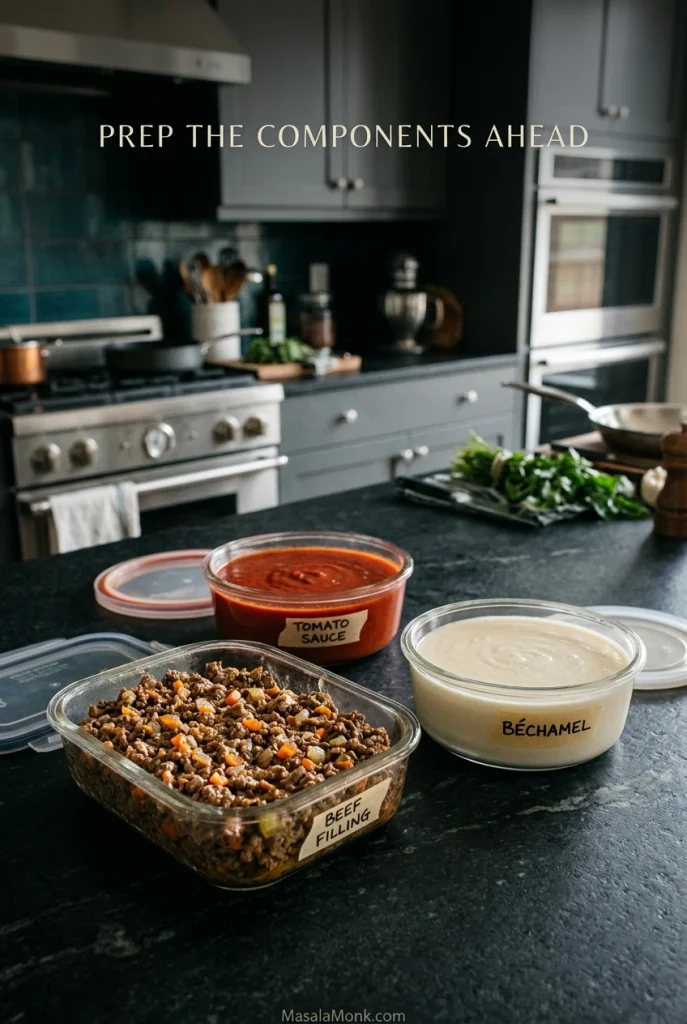
For a dinner with guests, make the beef filling, tomato sauce and béchamel the day before, then fill and assemble the pasta when you’re ready. You can also refrigerate the complete assembled dish overnight.
Prepare the Filling and Sauces a Day Ahead
Cook the filling and sauces as directed. Cool promptly in shallow containers, cover and refrigerate at or below 4°C / 40°F.
When assembling, warm the sauces gently until pourable. Loosen thick tomato sauce with a splash of water or stiff béchamel with warm milk. Keep the cooked beef chilled until you’re ready to fill the pasta.
Can You Assemble Cannelloni the Night Before?
Yes. Assemble with cooled ingredients, cover tightly and refrigerate promptly. Before baking, check that sauce still surrounds the tubes. Add a little thin tomato sauce where absorption has left dry or exposed areas.
A chilled casserole may need additional covered baking time. Follow the manufacturer’s guidance when moving glass or ceramic cookware between cold and hot environments.
Freezing Cannelloni Before Baking
Assemble in a freezer-safe dish using fully cooked, promptly cooled meat and sauces. Cover securely and freeze. For best eating quality, aim to use the dish within 2–3 months.
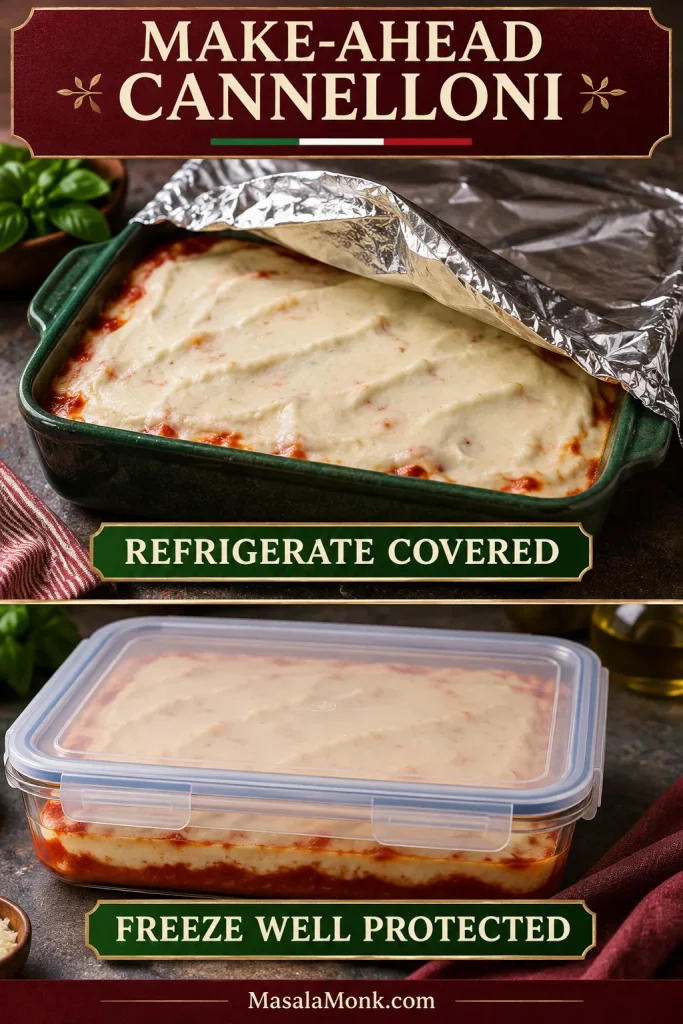
Thaw in the refrigerator until completely defrosted in the center; a deep casserole can take longer than two days. Do not thaw on the counter.
The pasta may absorb some sauce during storage and thawing, making it slightly softer than a freshly assembled version. Check sauce coverage before baking and add thin tomato sauce to dry areas if needed. Bake covered until tender and the center reaches 74°C / 165°F; add topping cheese near the end.
Storing and Reheating Leftovers
Refrigerate cooked cannelloni within two hours, or within one hour when the surrounding temperature exceeds 32°C / 90°F. Divide large amounts into shallow covered containers and keep at or below 4°C / 40°F.
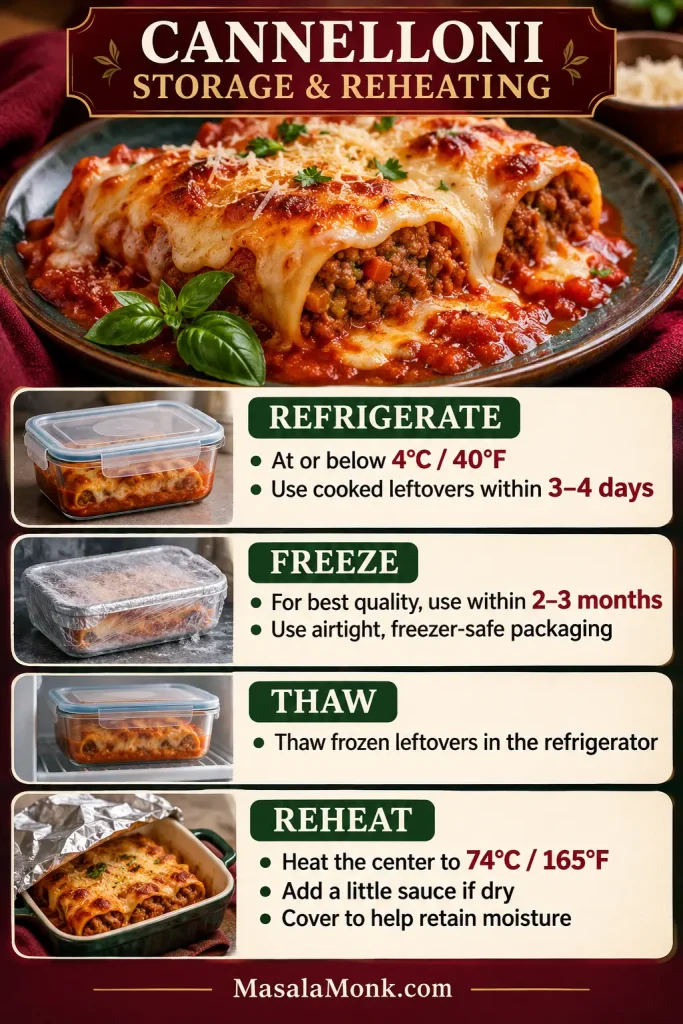
Eat refrigerated leftovers within 3–4 days or freeze individual portions for longer storage.
Reheat covered in an ovenproof dish at about 170–180°C / 340–355°F, adding a spoonful of tomato sauce if the pasta looks dry. Heat the center to 74°C / 165°F.
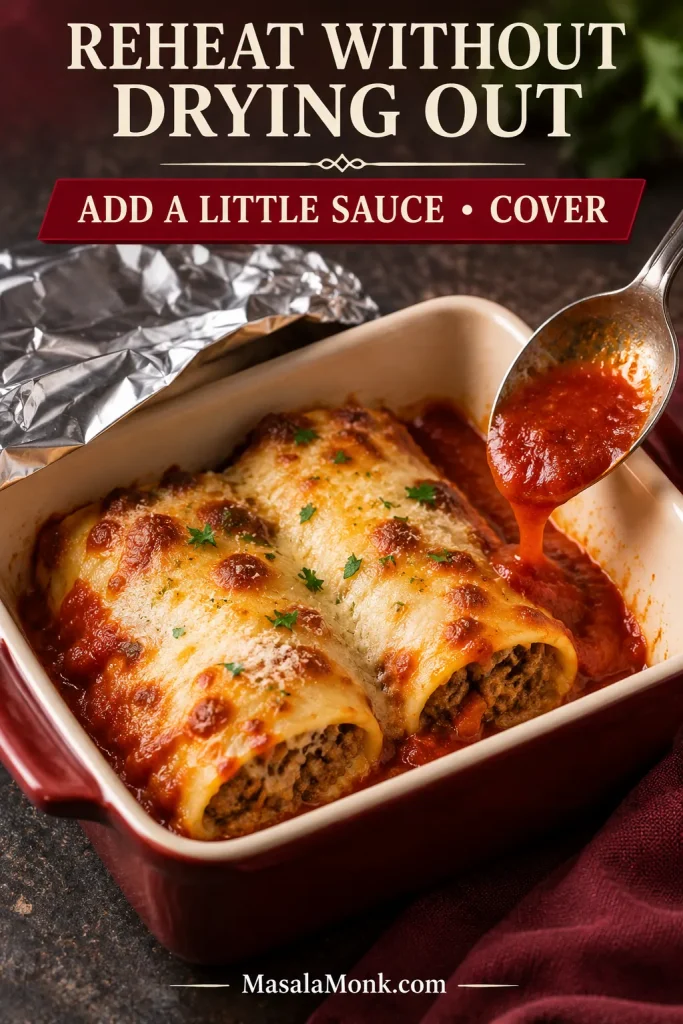
Microwave individual portions in a covered microwave-safe dish. Rotate or rearrange during heating where possible, allow standing time, and check several places with a food thermometer to confirm they all reach 74°C / 165°F.
Frequently Asked Questions About Cannelloni
1. Do You Need to Boil Cannelloni Tubes Before Baking?
No, if they’re labeled oven-ready or no-preboil. Other dried tubes may require boiling or soaking first; follow the packet.
2. How Many Cannelloni Tubes Do You Need Per Person?
Tube sizes differ, so use as many as the beef filling makes and divide the baked dish into four generous or six moderate portions. Count the filled tubes before baking if you want to divide them evenly.
3. Can You Make Cannelloni with Lasagne Sheets?
Yes. Spread cooked filling on pliable sheets, roll and arrange seam-side down. Adjust baking time and sauce for the thickness and preparation of the pasta.
4. How Do You Fill Cannelloni Without a Piping Bag?
Use a sturdy food-safe bag with a corner cut off. A small spoon works for wider tubes. Keep the filling finely textured and moist enough to move without excessive pressure.
5. Why Is My Cannelloni Still Hard After Baking?
It usually needs more covered cooking or moisture around a dry area. Add hot tomato sauce where needed and bake covered until a central tube is tender.
6. Can You Make Cannelloni Without Béchamel?
Yes, but no-preboil tubes still need enough liquid to soften. Use additional tomato sauce to replace the missing coverage rather than simply omitting béchamel.
7. Can You Add Ricotta to the Beef Filling?
Yes. For a modest variation, mix about 100 g well-drained ricotta into the cooled beef mixture. It makes the filling creamier and increases its volume, so you may need extra tubes.
8. Can You Assemble Cannelloni a Day Ahead?
Yes. Assemble with cooled ingredients, refrigerate promptly and check sauce coverage before baking. A chilled casserole may need additional covered time.
9. Is It Better to Freeze Cannelloni Before or After Baking?
Both work. Freeze a fully sauced unbaked dish for later baking or cooked portions for reheating. The pasta may soften slightly after thawing.
10. How Do You Know When Meat Cannelloni Is Fully Cooked?
A central tube should have a tender pasta wall without a hard or chalky core. The meat casserole should also reach 74°C / 165°F at its center.
Which cannelloni tubes did you use, and how many did the filling make? If you’ve cooked this recipe, share the pasta brand and whether it needed extra covered baking time.








