There’s something deeply comforting about a bowl of warm soup — especially when it’s both delicious and good for you. That’s why vegan lentil soup recipes for weight loss have become a favorite among health-conscious eaters, busy families, and anyone craving a wholesome, satisfying meal. For a quick primer on why lentil soup fits weight-loss goals, see this overview from Healthline on lentil soup and weight management: Lentil Soup for Weight Loss: Does It Help?. (Healthline)
Unlike many “diet foods” that leave you hungry an hour later, lentil soups are hearty, nourishing, and full of flavor. They give you the best of both worlds: comfort food that feels indulgent, and nutrition that supports your goals. Moreover, lentils are incredibly versatile — they pair beautifully with Mediterranean spices, creamy coconut curry flavors, or simple garden vegetables.
In the recipes below, you’ll find five variations designed to keep your meals exciting: from a quick Instant Pot red lentil detox soup to a slow-cooked coconut curry green lentil soup, and even a Mediterranean-style vegetable-packed version. Each one is completely plant-based, loaded with protein and fiber, and thoughtfully crafted to be filling yet light.
While you are here, also have a look at our detailed post: Are Lentils Good for Weight Loss? Benefits, Recipes, and Science Explained
So, if you’re ready for meals that will warm your body, nourish your soul, and help you on your weight-loss journey, let’s dive into the wonderful world of lentils.
Why Vegan Lentil Soup Recipes for Weight Loss Really Work
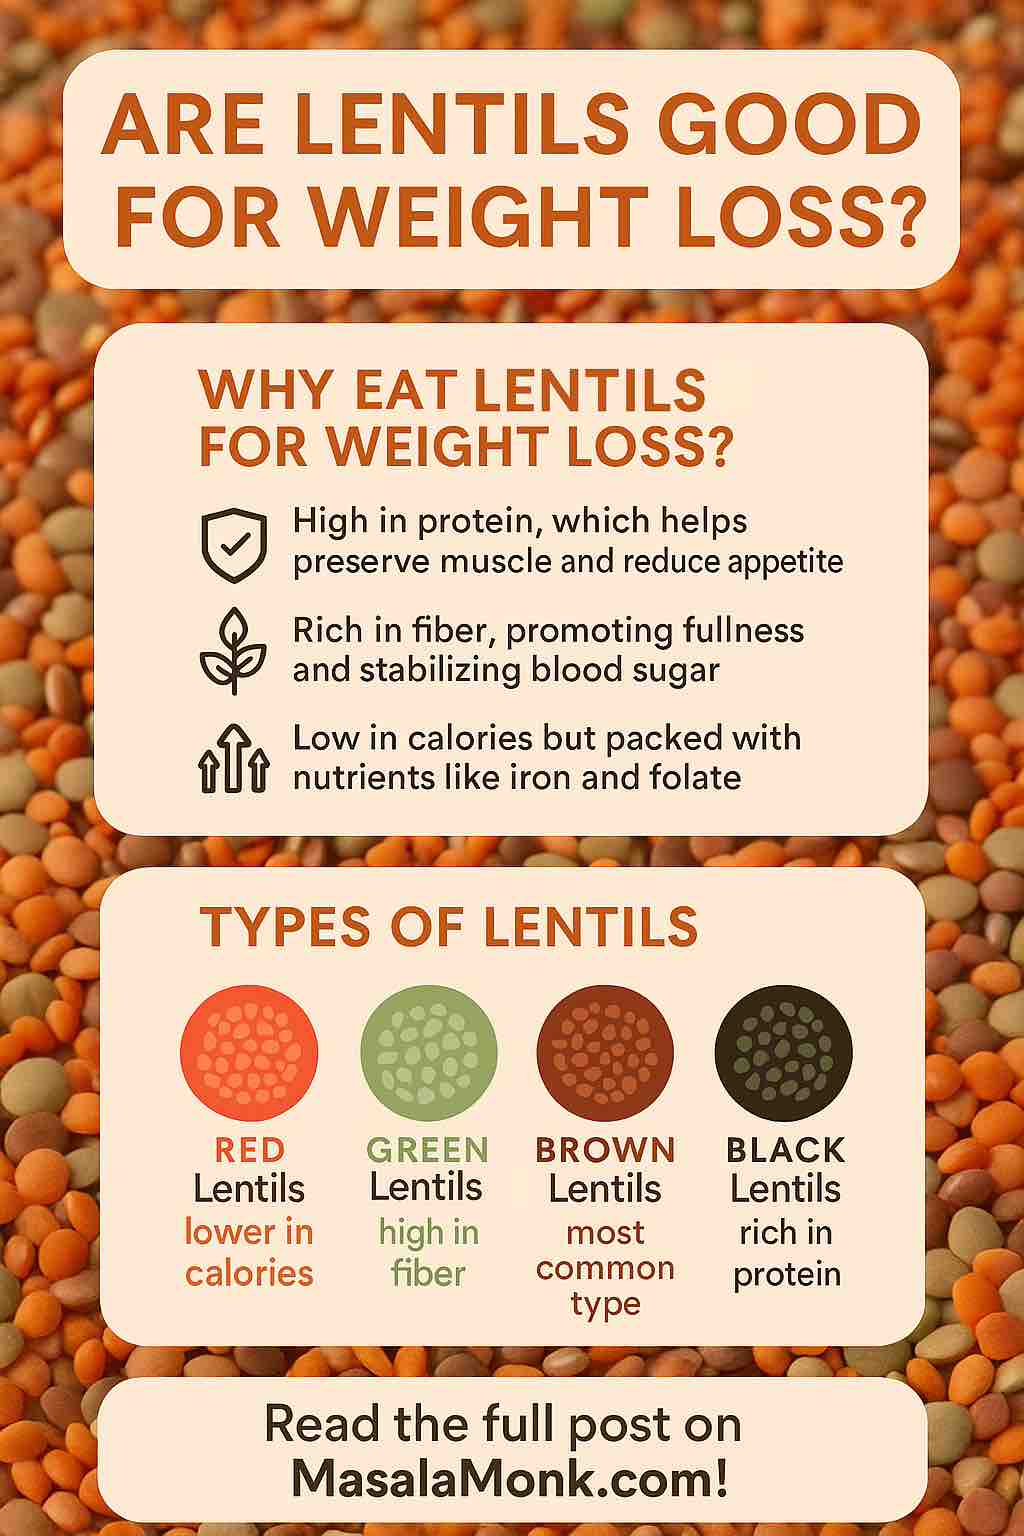
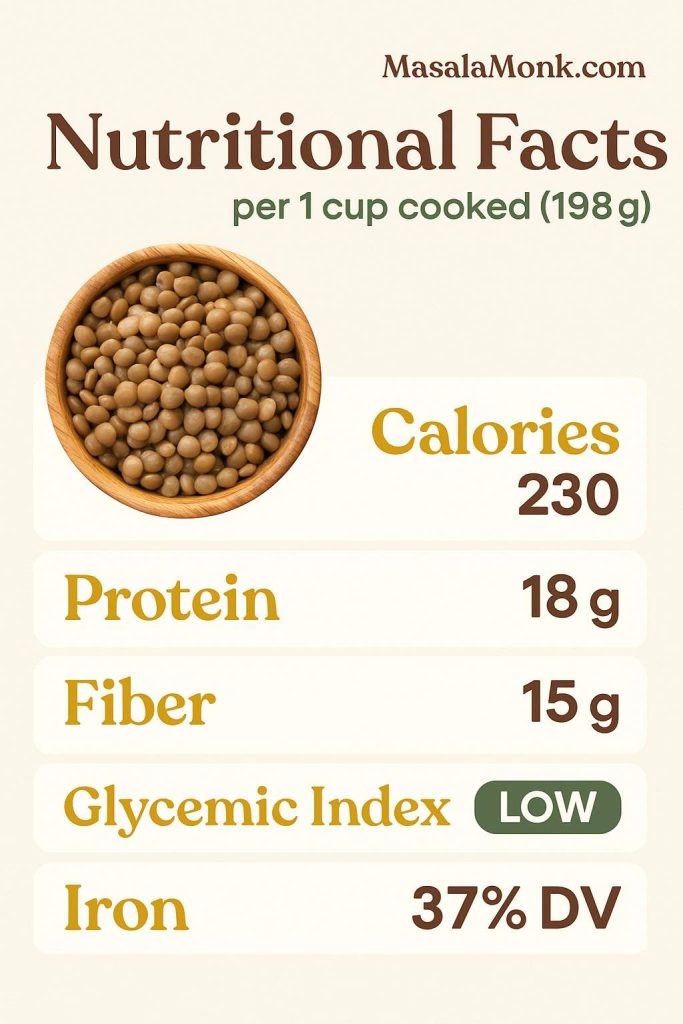
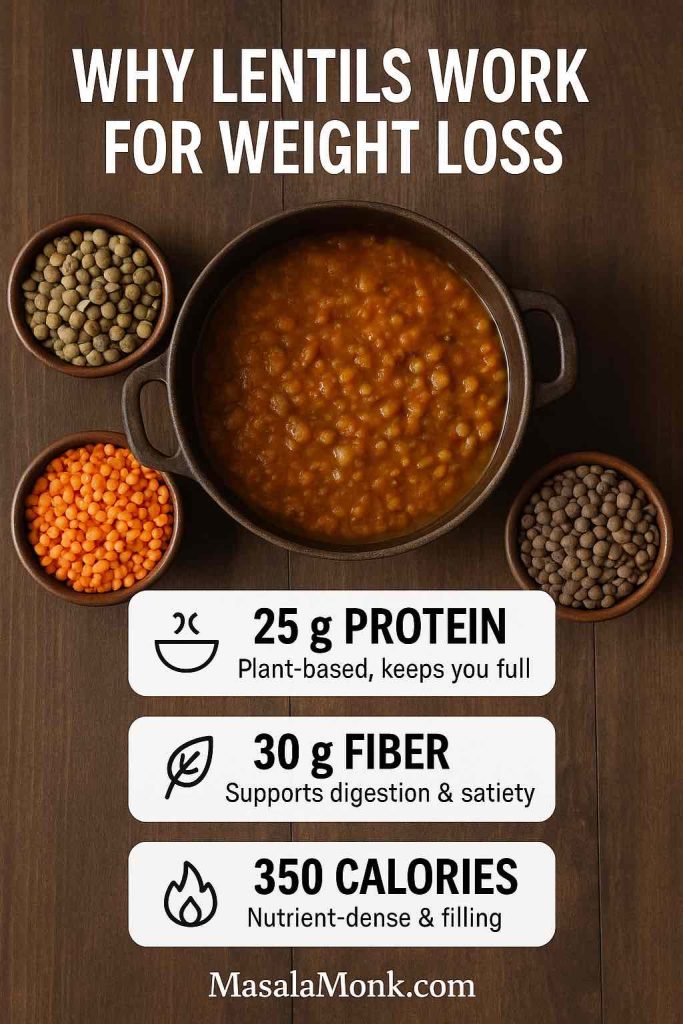
Lentils are often described as a “superfood,” and for good reason. One cup of cooked lentils provides roughly 18g protein and 15–16g fiber—a combo linked with fullness and steady energy. Source: University of Rochester Medical Center (nutrition table): Lentils, cooked, 1 cup. (University of Rochester Medical Center)
In addition, lentils are naturally low in fat and cholesterol-free, making them heart-friendly as well as waistline-friendly. The Cleveland Clinic notes that the soluble fiber in lentils can help lower LDL cholesterol, support blood-sugar control, and enhance satiety—key reasons they work so well in weight-management meals: Health Benefits of Lentils. (Cleveland Clinic)
Another reason vegan lentil soup recipes are ideal for weight loss is their adaptability. For example, if you want a light detox-friendly meal, red lentils with turmeric and ginger work beautifully – see our primer on red lentils for weight loss. If you prefer something more hearty, green or brown lentils hold their shape well and can turn a simple vegetable broth into a full meal.
Moreover, lentil soups are perfect for meal prep – for planning help, tap our post – plant-based high-protein meal-prep ideas using lentils. You can cook a big batch, store it in the fridge, and reheat portions throughout the week. This makes it easier to stay on track with healthy eating, because a nourishing option is always ready when hunger strikes. In short, lentil soup is one of the most practical, filling, and budget-friendly meals you can add to your weight-loss routine.
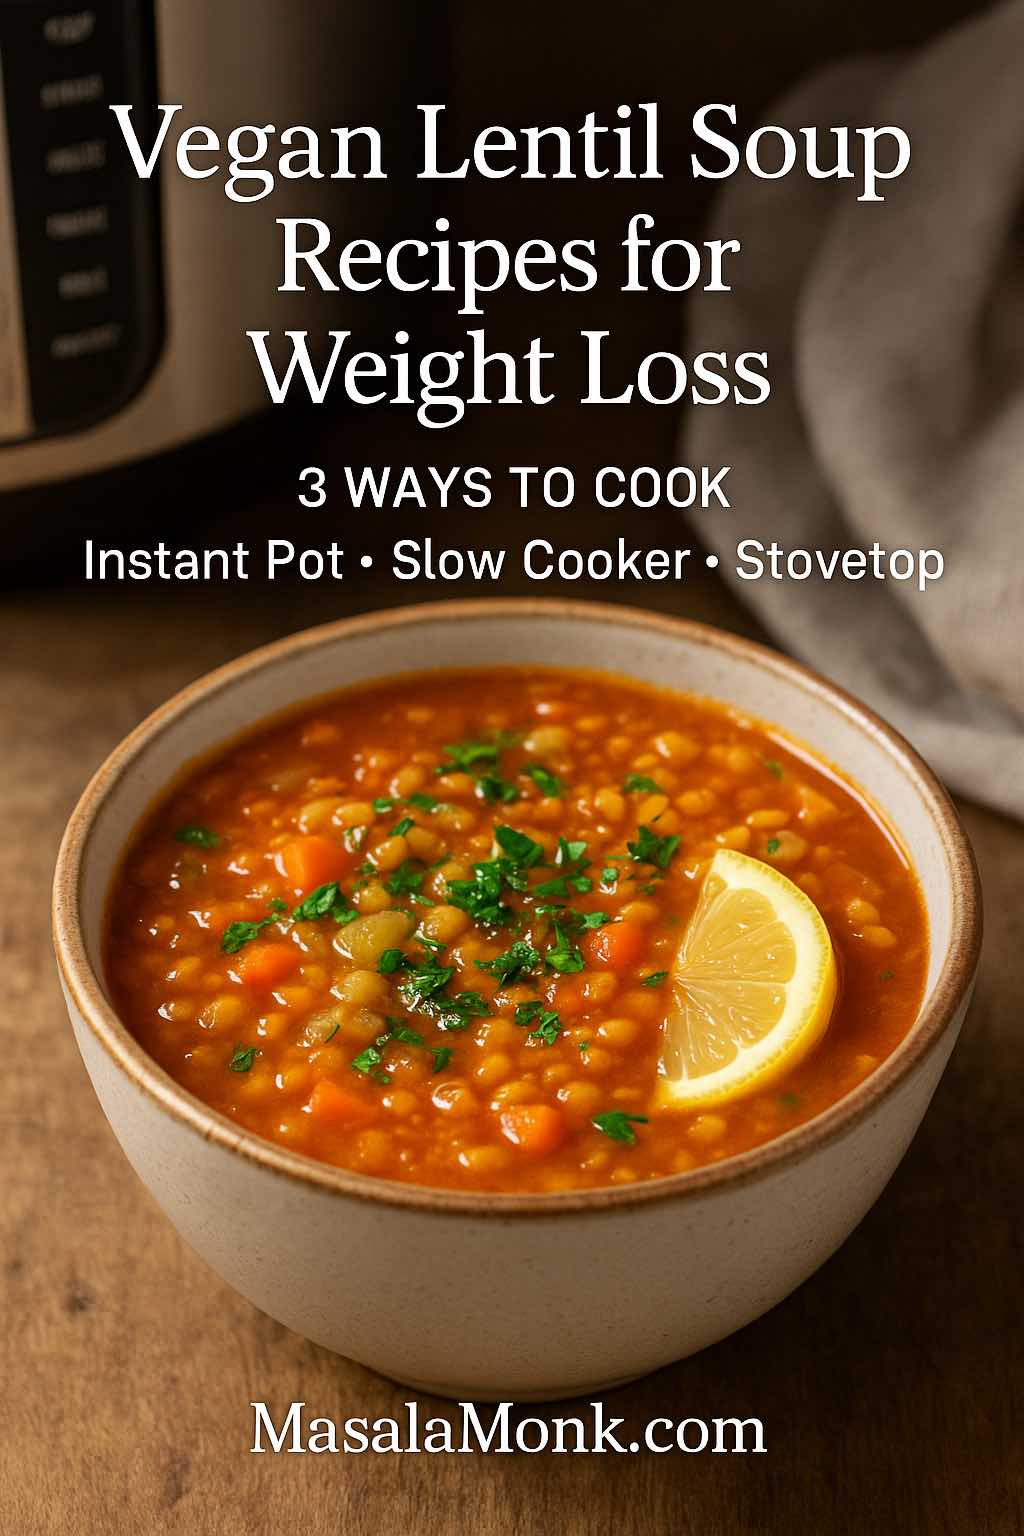
🍲 Cooking Lentil Soup 3 Ways – Instant Pot, Slow Cooker & Stovetop
One of the best things about lentil soup is how forgiving and flexible it is. No matter your cooking style, you can make it work for you. Here are three easy methods to try:
- Instant Pot Lentil Soup
If you’re pressed for time, the Instant Pot is a lifesaver. It cooks lentils quickly and evenly, turning what would normally take 30–40 minutes on the stove into a hearty soup in under 15 minutes of pressure cooking. In addition, you don’t have to babysit the pot — just set it and let the pressure do the work. This method is ideal for busy weeknights or anyone who wants maximum flavor with minimal effort. For a pressure-cooker friendly template, see our curried lentil soup workflow inside this Lentils instead of chicken meal-prep post. - Slow Cooker Lentil Soup
On the other hand, if you like coming home to a kitchen filled with the aroma of simmering spices, the slow cooker is your best friend. You simply toss in your lentils, veggies, and broth in the morning, and by evening you’ll have a deeply flavorful, ready-to-eat soup. The long cooking process allows the flavors to meld together beautifully. This method is perfect for weekends, meal prep, or when you just want the comfort of knowing dinner is waiting for you. - Stovetop Lentil Soup
Of course, the classic stovetop method has its own charm. It gives you the most control — you can taste, adjust seasonings, and tweak as you go. Moreover, stovetop cooking is great for those times when you want to be hands-on in the kitchen and enjoy the process of creating something wholesome. With this method, you can easily experiment by adding more vegetables, spices, or finishing touches like a squeeze of lemon or a swirl of coconut milk. If Mediterranean flavors are your thing, this Guide to the Mediterranean Diet shows why lentil soups fit the pattern perfectly.
In short, whether you’re an Instant Pot enthusiast, a slow-cooker devotee, or someone who loves the simplicity of stovetop cooking, there’s a Vegan Lentil Soup Recipes for Weight Loss – that fits seamlessly into your routine.
🍵 5 Hearty Vegan Lentil Soup Recipes for Weight Loss
Now that we’ve explored why lentils are such a powerhouse for health and weight management, let’s get into the heart of this post: the recipes. These soups are more than just meals — they’re nourishing bowls of comfort designed to keep you full, energized, and satisfied.
Each recipe highlights a different cooking method, flavor profile, or health benefit. You’ll find everything from a quick Instant Pot detox soup to a slow-cooked coconut curry and even a Mediterranean-inspired vegetable mix. In addition, every recipe is vegan, high in protein, and naturally supportive of weight loss.
So, whether you’re cooking for busy weeknights, prepping for the week ahead, or simply craving something cozy, these five soups will give you plenty of variety without complicating your kitchen routine.
1. 🥣 Instant Pot Red Lentil Detox Soup (Vegan & Low Sodium)
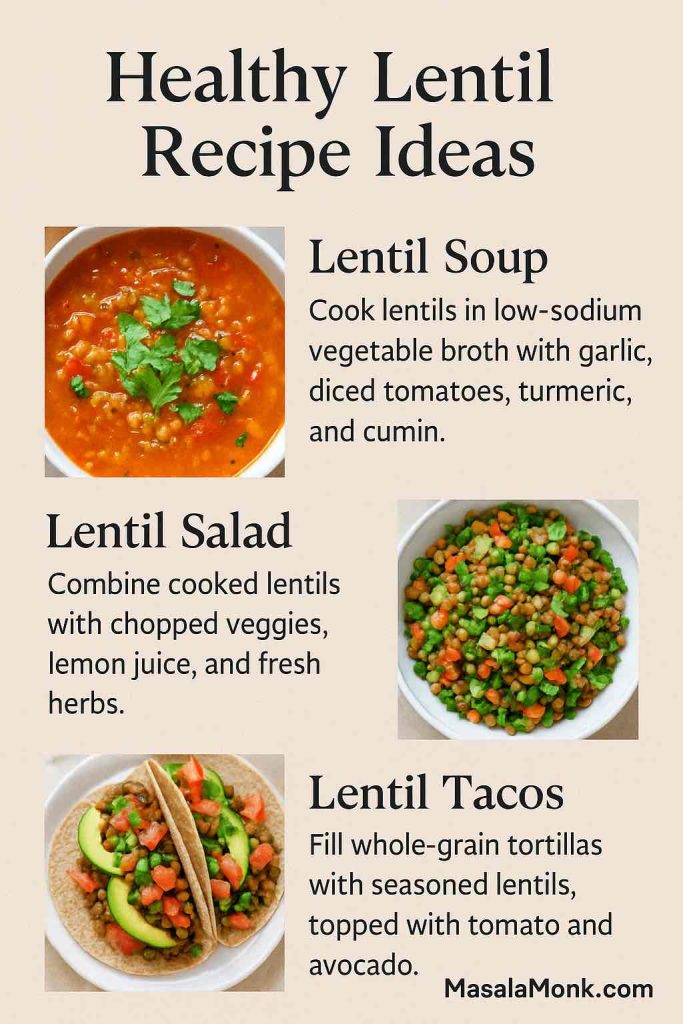
There’s nothing quite as comforting — or as quick — as a bowl of red lentil soup made in the Instant Pot. This version is light yet hearty, packed with warming spices like turmeric and ginger, which not only give it a golden glow but also boost its detox benefits. For more on using masoor for weight management, see Red Lentil Recipes for Weight Loss.

Because it’s made with red lentils, this soup cooks down to a silky texture without the need for cream or thickeners. It’s also naturally vegan, low in sodium, and perfect for weight loss since it’s filling while staying low in calories.
🛒 Ingredients
- 1 cup red lentils, rinsed
- 1 medium carrot, diced
- 1 stalk celery, diced
- 1 small onion, chopped
- 3 garlic cloves, minced
- 1 tsp turmeric
- 1 tsp cumin
- 1 tsp grated fresh ginger
- 4 cups low-sodium vegetable broth
- Juice of ½ lemon
- Salt & pepper (to taste, optional)
- Fresh parsley or cilantro for garnish
👩🍳 Instructions
- Add the onion, carrot, celery, garlic, and spices (turmeric, cumin, ginger) into the Instant Pot with a splash of broth. Sauté for 2–3 minutes.
- Stir in the rinsed lentils and the remaining broth.
- Lock the lid and cook on High Pressure for 10 minutes.
- Let the pressure release naturally for 5 minutes, then do a quick release.
- Stir in the lemon juice, taste, and adjust seasoning.
- Ladle into bowls, garnish with parsley or cilantro, and serve warm.
🌱 Options & Tweaks
- For Detox: Add extra ginger and turmeric, or a pinch of cayenne for metabolism support.
- For Extra Veggies: Toss in spinach, zucchini, or bell peppers just before serving.
- For Meal Prep: Double the recipe and freeze in portions — it reheats beautifully.
- For More Creaminess: Blend half the soup and stir it back in for a silky finish.
- For Slow Cooker: Cook on low for 6–7 hours or high for 3–4 hours.
2. 🥥 Golden Coconut Curry Green Lentil Soup (Slow Cooker or Instant Pot)
If you love soups that feel creamy and indulgent yet remain completely plant-based, this coconut curry green lentil soup will quickly become a staple in your kitchen. The coconut milk gives it a luscious texture, while curry powder, turmeric, and garlic infuse it with warming spice.

Moreover, green lentils hold their shape beautifully, making this soup hearty enough for a main meal. It’s versatile too — cook it low and slow in the crock pot, or whip it up in the Instant Pot when you need dinner fast. Best of all, it’s naturally vegan, gluten-free, and weight-loss friendly when made with light coconut milk.
🛒 Ingredients
- 1 cup green lentils, rinsed
- 1 medium sweet potato, peeled & cubed
- 1 cup spinach or kale (add at the end)
- 1 small onion, diced
- 2 garlic cloves, minced
- 1 tbsp curry powder
- 1 tsp turmeric
- 1 can (400 ml) light coconut milk
- 3 cups vegetable broth (low sodium, if preferred)
- 1 tbsp olive oil
- Fresh cilantro or parsley for garnish
- Juice of ½ lime (optional, for brightness)
👩🍳 Instructions
Instant Pot Method:
- Set the Instant Pot to sauté mode. Add olive oil, onion, garlic, curry powder, and turmeric. Cook for 2–3 minutes until fragrant.
- Add green lentils, sweet potato, and vegetable broth. Stir to combine.
- Seal lid and cook on High Pressure for 12 minutes. Allow natural release for 10 minutes.
- Stir in coconut milk and greens. Cook on sauté mode for another 2–3 minutes.
- Adjust seasoning, add lime juice if desired, garnish with cilantro, and serve.
Slow Cooker Method:
- Add all ingredients (except coconut milk, greens, and lime) to the slow cooker.
- Cook on Low for 7–8 hours or High for 4 hours.
- Stir in coconut milk and greens just before serving. Garnish and enjoy.
🌱 Options & Tweaks
- For Weight Loss: Use ½ can of light coconut milk and increase greens or zucchini.
- For Extra Protein: Add chickpeas or quinoa.
- For More Heat: Stir in chili flakes, cayenne, or harissa paste.
- For Creamier Texture: Purée half the soup before serving.
- Make Ahead: This soup thickens beautifully the next day, making it great for meal prep.
3. 🍅 Mediterranean Lentil & Vegetable Soup (Healthy & Easy)
This Mediterranean-inspired lentil and vegetable soup is light, vibrant, and full of garden-fresh flavors. Think of it as sunshine in a bowl: olive oil, ripe tomatoes, zucchini, carrots, celery, and a sprinkle of herbs that make the broth fragrant and refreshing.
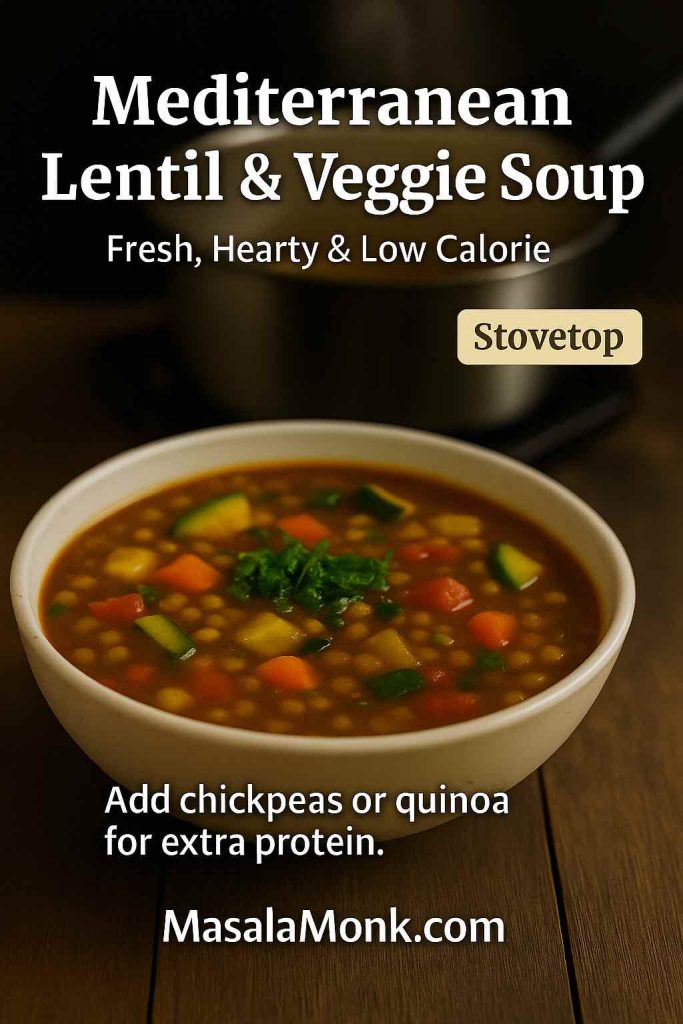
What makes this soup special is its balance — it’s hearty enough to be filling, yet light enough for those focusing on weight loss. Moreover, it’s a flexible recipe: you can make it on the stovetop for a classic feel or in a pressure cooker when you’re short on time. Either way, it’s a wholesome, vegan lentil and vegetable soup that fits perfectly into a healthy lifestyle.
🛒 Ingredients
- 1 cup brown or green lentils, rinsed
- 1 medium zucchini, diced
- 1 medium carrot, diced
- 1 stalk celery, diced
- 1 small onion, diced
- 3 garlic cloves, minced
- 1 can (400 g) diced tomatoes
- 2 tbsp olive oil
- 1 tsp smoked paprika
- 1 tsp oregano (or Italian herbs mix)
- 4 cups vegetable broth (low sodium preferred)
- Salt & pepper, to taste
- Fresh parsley or basil for garnish
- Optional: juice of ½ lemon for brightness
👩🍳 Instructions
Stovetop Method:
- Heat olive oil in a large pot. Add onion, carrot, celery, and garlic; sauté until softened.
- Stir in smoked paprika, oregano, and lentils. Mix well.
- Add diced tomatoes and broth. Bring to a boil, then reduce to simmer.
- Cook for 30–35 minutes, until lentils are tender.
- Stir in zucchini during the last 10 minutes of cooking.
- Finish with lemon juice and garnish with parsley or basil before serving.
Pressure Cooker Method:
- Sauté onion, garlic, carrot, and celery in olive oil.
- Add spices, lentils, tomatoes, and broth.
- Seal and cook on High Pressure for 15 minutes.
- Quick release, then stir in zucchini and simmer on sauté mode for 5 minutes.
🌱 Options & Tweaks
- For Low Sodium: Use fresh herbs and lemon juice instead of extra salt.
- For More Protein: Stir in cooked chickpeas or quinoa.
- For Extra Veggies: Add spinach, kale, or bell peppers at the end.
- For a Creamier Soup: Blend half the mixture before serving.
- Meal Prep Friendly: Stores well in the fridge for 4–5 days, flavors deepen with time.
If you want to build a full Mediterranean plate around it, do read What is the Mediterranean Diet? Free PDF Meal Plan Inside and add a crisp side from Wholesome and Nutritious: 5 Lentil Salad Recipes to Support Your Weight Loss Goals.
4. 🥕 Classic Brown Lentil Soup (Homemade & Weight Loss Friendly)
Sometimes, the simplest recipes are the most satisfying. This classic brown lentil soup is a homemade staple that feels cozy and familiar, like something you’d want on a chilly evening. It’s rich in flavor thanks to onions, garlic, carrots, and celery, yet light enough to be part of a weight loss-friendly meal plan.

What makes this recipe stand out is its versatility. You can keep it plain and rustic, or enhance it with lemon juice, fresh herbs, or even a touch of cumin for an earthy note. Moreover, it’s one of the most budget-friendly vegan lentil soups you can make — a pot of this soup stretches into several hearty servings that taste even better the next day.
🛒 Ingredients
- 1 cup brown lentils, rinsed
- 1 medium onion, diced
- 1 medium carrot, diced
- 2 stalks celery, diced
- 2 garlic cloves, minced
- 1 tsp ground cumin
- ½ tsp black pepper
- 4 cups low-sodium vegetable broth
- 2 tbsp lemon juice
- 1 tbsp olive oil
- Salt, to taste
- Fresh parsley for garnish
👩🍳 Instructions
Stovetop Method:
- Heat olive oil in a pot. Add onion, carrot, celery, and garlic. Cook until softened.
- Stir in cumin, pepper, and lentils. Mix well to coat.
- Add broth and bring to a boil. Reduce heat and simmer for 35–40 minutes, until lentils are tender.
- Stir in lemon juice before serving. Adjust seasoning and garnish with parsley.
Pressure Cooker Method:
- Sauté onion, garlic, carrot, and celery in olive oil.
- Add cumin, lentils, broth, and pepper. Stir well.
- Seal and cook on High Pressure for 12 minutes.
- Natural release for 5 minutes, then quick release. Stir in lemon juice and serve.
🌱 Options & Tweaks
- For Weight Loss: Skip the olive oil and cook veggies in a splash of broth.
- For More Protein: Add cooked quinoa or barley.
- For Extra Veggies: Mix in spinach, kale, or diced tomatoes.
- For a Creamy Version: Blend part of the soup for a thicker texture.
- For Meal Prep: Stores well in the fridge for 4 days and freezes for up to 3 months.
Sometimes, the simplest recipes are the most satisfying. If you like a firmer bite, try French green (Puy) lentils — here’s How to Cook Puy Lentils for Weight Loss: Tips and 5 Flavorful Ideas. Or bulk it out with grains using our quinoa + lentil meal-prep ideas in 10 Plant-Based Meal Prep Ideas: Using Quinoa as a Protein Source.
5. 🌶 Moroccan Spiced Red Lentil Soup (Vegan & Detox-Friendly)
If you’re craving bold flavors with a nourishing base, this Moroccan-inspired red lentil soup is just the thing. Fragrant spices like cumin, coriander, cinnamon, and turmeric create a warm, slightly sweet depth of flavor that pairs beautifully with the creaminess of red lentils.

Because red lentils cook quickly and break down into a velvety texture, this recipe is ideal when you want a detox-friendly, vegan soup that feels indulgent yet is naturally light. Moreover, with its anti-inflammatory spices and plant-based protein, it’s a fantastic option for both weight loss and overall wellness.
🛒 Ingredients
- 1 cup red lentils, rinsed
- 1 medium carrot, diced
- 1 small onion, diced
- 3 garlic cloves, minced
- 1 tsp ground cumin
- 1 tsp ground coriander
- 1 tsp turmeric
- ½ tsp cinnamon
- 1 can (400 g) diced tomatoes
- 4 cups vegetable broth (low sodium preferred)
- 1 tbsp olive oil
- Salt & pepper, to taste
- Fresh cilantro or parsley, for garnish
- Optional: juice of ½ lemon
👩🍳 Instructions
Stovetop Method:
- Heat olive oil in a pot. Add onion, carrot, and garlic. Cook until softened.
- Stir in cumin, coriander, turmeric, and cinnamon. Cook for 1 minute until fragrant.
- Add red lentils, tomatoes, and broth. Bring to a boil.
- Reduce heat and simmer for 20–25 minutes, until lentils are soft and soup thickens.
- Stir in lemon juice, season to taste, and garnish with cilantro.
Pressure Cooker Method:
- Sauté onion, garlic, and carrot in olive oil. Stir in spices.
- Add lentils, tomatoes, and broth. Mix well.
- Cook on High Pressure for 10 minutes.
- Quick release, stir, and finish with lemon juice and herbs.
🌱 Options & Tweaks
- For Extra Detox: Add grated ginger and extra turmeric.
- For Creaminess: Blend part of the soup and stir it back in.
- For More Heft: Add diced sweet potato or butternut squash.
- For a Spicy Kick: Toss in cayenne or chili flakes.
- For Freezer Meals: This soup freezes beautifully for make-ahead portions.
For more lentil varieties to play with, meet Beluga (black) lentils in Boost Weight Loss with Beluga Lentils: Benefits and 5 Savory Recipes — sturdy, protein-dense, and great in stews if you want to swap.
Serving Ideas for Vegan Lentil Soup Recipes for Weight Loss
By now, you’ve seen just how versatile lentil soups can be. However, a soup rarely has to stand alone. In fact, pairing these hearty bowls with the right sides can turn them into complete, balanced meals that are satisfying without being heavy.
For example, a slice of warm whole-grain bread or a piece of naan can soak up the broth and make the meal feel extra cozy. Alternatively, a crisp green salad with lemon vinaigrette adds freshness and crunch, creating a lovely balance against the warmth of the soup. If you want something heartier, roasted vegetables or even a small serving of brown rice or quinoa on the side will round out the dish while keeping everything plant-based. For a deeper dive into lentil nutrition (fiber, folate, polyphenols), Harvard’s Nutrition Source has an excellent explainer: Lentils – The Nutrition Source. (The Nutrition Source)
Moreover, these Vegan Lentil Soup Recipes for Weight Loss are wonderful for family dinners or gatherings because they’re naturally gluten-free, vegan, and adaptable. With just a few tweaks, you can please everyone at the table while staying aligned with your weight-loss goals.
Get some salad ideas Wholesome and Nutritious: 5 Lentil Salad Recipes to Support Your Weight Loss Goals or pair get Quinoa inspiration from 10 Plant-Based Meal Prep Ideas: Using Quinoa as a Protein Source.
Meal Prep & Storage for Vegan Lentil Soup Recipes
One of the best things about vegan lentil soup recipes for weight loss is how meal-prep friendly they are. Unlike some soups that lose flavor over time, lentil soups actually taste better the next day as the spices and aromatics meld together.
If you plan to enjoy them throughout the week, simply let the soup cool completely, then store it in airtight containers in the fridge. For food-safe storage, USDA/FSIS guidelines state most cooked leftovers can be refrigerated 3–4 days and frozen 3–4 months. Practical tip: cool soups in shallow containers for faster chilling, then reheat gently with a splash of water/broth if thickened. Reference: Leftovers and Food Safety. (Food Safety and Inspection Service)
When reheating, you can warm the soup gently on the stovetop, stirring occasionally, or pop it into the microwave for a quick meal. If it thickens during storage (which is common with lentils), just add a splash of water or broth to bring it back to the perfect consistency.
In addition, these soups are excellent for batch cooking. Making a double batch and freezing half ensures that you’ll always have a healthy, high-protein, and fiber-rich meal ready to go — a lifesaver on busy days. For step-by-step planning (portioning, reheating, macro ideas), see our Plant-Based High-Protein Meal Prep Ideas: Using Lentils Instead of Chicken and 10 Vegetarian And High Protein Meal Prep Ideas from Indian Cuisine.
Variations of Vegan Lentil Soup Recipes for Weight Loss
While we’ve shared five of our favorite recipes, the beauty of lentil soup lies in how endlessly customizable it is. In other words, you can adapt these soups to suit your taste buds, your pantry, and even the season. Prefer a firmer texture? Try Puy (French green) lentils. Craving pasta night without derailing macros? Our Lentil Pasta for Weight Loss guide keeps the vibe but ups the protein.
For extra bulk, try adding grains such as quinoa, barley, or brown rice. This not only stretches the soup further but also makes it even more filling — great for active days when you need sustained energy. If you prefer creamier soups, stir in a swirl of coconut milk, cashew cream, or blend a portion of the soup for a velvety finish.

Spices are another way to transform a simple pot of lentils into something extraordinary. For instance, Mediterranean herbs like oregano and basil create a light and fresh profile, while Moroccan spices such as cumin, coriander, and cinnamon add depth and warmth. Alternatively, if you love bold flavors, go for Indian-inspired seasonings like curry powder, garam masala, or turmeric.
Moreover, you can make your soups more veggie-packed by tossing in seasonal produce. Spinach, kale, zucchini, bell peppers, and even sweet potatoes can all find a home in these bowls. Not only does this keep things interesting, but it also boosts the nutritional value and variety of your meals.
🌱 Final Thoughts: Why Lentil Soups Deserve a Spot in Your Routine
At the end of the day, these vegan lentil soup recipes for weight loss are more than just dishes — they’re tools for building a healthier, more balanced lifestyle. They’re easy to make, budget-friendly, and incredibly forgiving in the kitchen. And yes, as far as lentils go – they’re backed by nutrition science on protein, fiber, and heart health (Ref: Cleveland Clinic and Harvard). (Cleveland Clinic, The Nutrition Source)
Unlike fad diets or complicated meal plans, soups like these make healthy eating sustainable. They allow you to nourish your body while still enjoying the comfort of a warm, hearty bowl. In short, they’re proof that wholesome food can also be deeply satisfying.
So, whether you’re on a weight-loss journey, looking to add more plant-based meals to your diet, or simply craving something cozy and flavorful, these lentil soups are here to support you. Try one, try them all, and don’t be afraid to make them your own.
👉 If you enjoyed this collection, share it with a friend, or let us know in the comments which recipe you’re trying first. After all, food is always better when it’s shared.
❓ Frequently Asked Questions About Vegan Lentil Soup
1. Is lentil soup good for weight loss?
Yes! Lentil soup is excellent for weight loss because it’s high in plant-based protein and fiber, both of which help keep you full for hours. Moreover, it’s naturally low in fat and calories, making it a nourishing, satisfying option without feeling heavy. Read more: Are Lentils Good for Weight Loss? Benefits, Recipes, and Science Explained
2. Which type of lentils is best for soup?
It depends on the texture you prefer. For example, red lentils cook quickly and create a creamy soup, while green or brown lentils hold their shape for chunkier, more rustic bowls. In short, all types of lentils can work — you just need to choose the style you enjoy most.
3. Can I make lentil soup in an Instant Pot?
Absolutely! In fact, lentil soup is one of the easiest Instant Pot meals. Simply add your ingredients, set it to high pressure, and let it cook for about 10–12 minutes. As a result, you’ll have a hearty, flavorful soup in less time than it takes on the stovetop.
4. How do I make lentil soup low sodium but still tasty?
Great question. Instead of relying on salt, focus on flavor boosters: garlic, onion, herbs, lemon juice, and warming spices like cumin or turmeric. In addition, cooking with low-sodium broth allows you to control seasoning without sacrificing taste.
5. Can I freeze vegan lentil soup?
Yes, and it freezes beautifully! First, let the soup cool completely, then portion it into freezer-safe containers. Moreover, frozen lentil soup will last up to 3 months. When you’re ready to enjoy it again, thaw overnight in the fridge or reheat gently on the stovetop.
6. How long does lentil soup last in the fridge?
Lentil soup will keep for 4–5 days in the refrigerator when stored in an airtight container. Furthermore, the flavors often deepen the next day, making it even more delicious as leftovers.
7. How can I make lentil soup creamier without dairy?
It’s simple! Blend a portion of the soup and stir it back in for natural creaminess. Alternatively, add a splash of coconut milk or cashew cream for a rich, velvety texture that stays 100% vegan.
8. Can I add extra protein to vegan lentil soup?
Of course. In addition to the protein already in lentils, you can stir in quinoa, barley, or chickpeas. As a result, your soup becomes even more filling and perfect for post-workout meals or active days.
9. What spices go well in lentil soup?
Lentil soup is a blank canvas for flavors. For instance, Mediterranean herbs like oregano and basil create a light, fresh taste, while Moroccan spices such as cumin, coriander, and cinnamon add warmth. Alternatively, curry powder and turmeric bring an Indian-inspired twist.
10. Can I use cooked lentils in soup?
Yes — if you already have cooked lentils, simply shorten the cooking time. In fact, just simmer them with vegetables, broth, and spices for 10–15 minutes. This method is a great way to use leftovers while still enjoying a hearty, homemade soup.