In the world of plant-based eating, cauliflower is having a serious moment—and for good reason. Mild in flavor but mighty in versatility, this humble cruciferous vegetable has transcended its reputation as just a bland side dish. Today, chefs and home cooks alike are slicing, charring, crusting, roasting, and saucing cauliflower into showstopping centerpieces that rival the heartiness of a traditional steak.
If you’re looking to reduce meat, go vegan, or simply try something fresh and satisfying, cauliflower “steaks” are an easy, flavorful, and deeply rewarding place to start.
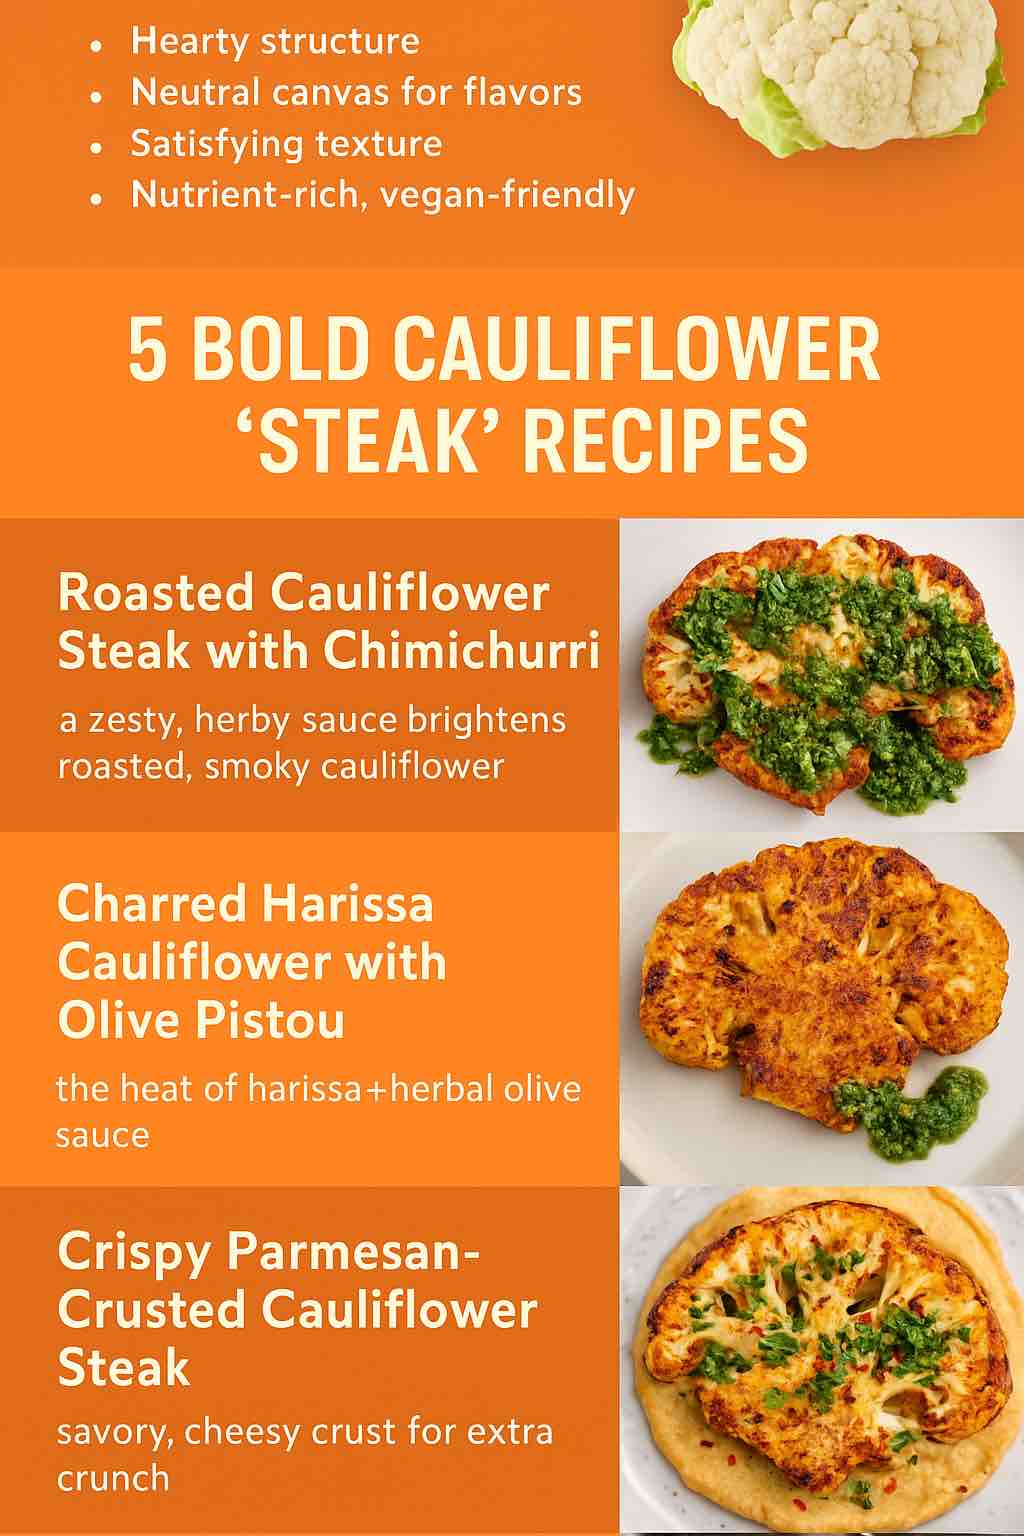
🔥 Why Cauliflower Makes a Great Steak Alternative
Let’s get one thing straight: cauliflower will never taste exactly like a ribeye—and that’s not the point. What makes cauliflower so compelling isn’t imitation but transformation.
Here’s why cauliflower works so well in “steak-style” dishes:
- Hearty structure – Its dense florets hold shape when sliced thick and roasted or grilled.
- Neutral canvas – Cauliflower readily absorbs seasoning, marinades, and sauces.
- Satisfying texture – When roasted, the exterior crisps while the interior stays tender.
- Nutrient-rich – High in fiber, vitamin C, and antioxidants—without the saturated fat.
- Vegan-friendly – Ideal for meatless meals without compromise.
🧂 Let’s Cook: 5 Flavor-Packed Cauliflower Steak Recipes
Here are five modern, chef-tested ways to make cauliflower the star of your plate.
🌿 1. Roasted Cauliflower Steak with Chimichurri
Perfect for: Weeknight dinners or meal prep
Why it works: The bright, herby tang of chimichurri cuts through the caramelized cauliflower crust for a zesty, refreshing bite.
Ingredients:
- 1 large head of cauliflower
- 3 tbsp olive oil
- 1 tsp garlic powder
- 1 tsp smoked paprika
- Salt and pepper
Chimichurri:
- 1 cup flat-leaf parsley (finely chopped)
- 2 cloves garlic (minced)
- 2 tbsp red wine vinegar
- ½ cup olive oil
- ½ tsp chili flakes
- Salt to taste
Method:
- Preheat oven to 425°F (220°C). Line a baking sheet with parchment.
- Slice cauliflower into ¾-inch “steaks.” You’ll get 2–3 good ones per head.
- Brush both sides with olive oil, garlic powder, paprika, salt, and pepper.
- Roast 25–30 mins, flipping once, until golden brown and crisped at the edges.
- While roasting, mix chimichurri ingredients in a bowl and let sit to meld.
- Serve steaks drizzled with chimichurri and a side of quinoa or couscous.
🧄 2. Charred Harissa Cauliflower with Olive Pistou
Perfect for: Date night or impressing dinner guests
Why it works: The heat of harissa plus the richness of olive pistou = gourmet-level flavor.
Ingredients:
- 1 large head cauliflower
- 2 tbsp olive oil
- 1 tsp harissa powder (or paste)
- ½ cup vegetable broth
- 2 tbsp vegan butter
Olive Pistou:
- ⅓ cup pitted olives (Castelvetrano or kalamata)
- Zest of 1 lemon
- Juice of ½ lemon
- 1 tbsp chopped parsley
- 1 garlic clove, grated
- ¼ cup olive oil
Method:
- Heat olive oil in a cast iron pan over medium-high heat.
- Sear cauliflower steaks for 3–4 minutes per side until deeply charred.
- Reduce heat, add broth and butter, cover, and steam for 5 more minutes.
- Blend pistou ingredients into a rough paste.
- Plate steaks with a dollop of pistou and garnish with lemon zest.
🧀 3. Crispy Parmesan-Crusted Cauliflower Steak
Perfect for: Comfort food cravings
Why it works: A savory, cheesy crust gives you that crisp outer layer people love in grilled cheese or schnitzel.
Ingredients:
- 1 head cauliflower
- ½ cup grated parmesan or vegan cheese alternative
- 2 tbsp olive oil
- ½ tsp paprika
- ½ tsp garlic powder
- Salt & pepper
Optional Dip:
- Mashed avocado, lemon juice, jalapeño, and Greek yogurt (or coconut yogurt)
Method:
- Preheat oven to 450°F (230°C).
- Slice cauliflower, brush with olive oil, and season.
- Press one side of each steak into the grated parmesan.
- Roast parmesan-side down for 15 mins, flip, and roast another 10 mins.
- Serve with creamy dip and a sprinkle of chili flakes.
🧆 4. Cauliflower Steak with Roasted Garlic Hummus
Perfect for: Plant-forward meal prep or weekend brunch
Why it works: Roasted garlic and chickpeas bring creaminess and depth to the base, turning your steak into a full meal.
Ingredients:
- 1 head cauliflower
- 1 bulb garlic
- 3 tbsp olive oil
- 1 tsp turmeric
- ½ tsp cumin
- Salt & pepper
Hummus:
- 1 can chickpeas (drained)
- 1–2 cloves roasted garlic
- ¼ cup tahini
- Juice of 1 lemon
- 2 tbsp olive oil
- Water to thin
Method:
- Roast garlic bulb (wrapped in foil with olive oil) at 400°F for 40 mins.
- Meanwhile, roast cauliflower steaks seasoned with spices.
- Blend hummus ingredients until smooth and creamy.
- Spread hummus on a plate, top with roasted cauliflower, fresh herbs, and chili oil.
🌶️ 5. Sticky Sesame Cauliflower “Wings” (Bonus!)
Perfect for: Party snacks, gameday, or lunch bowls
Why it works: Sweet, sticky, spicy sauce clings to crispy cauliflower for addictive bites.
Ingredients:
- 1 head cauliflower, cut into florets
- ½ cup flour
- ½ cup plant milk
- 1 tsp garlic powder
- 1 cup breadcrumbs
Sauce:
- 3 tbsp maple syrup
- 2 tbsp tamari
- 1 tbsp rice vinegar
- 1 tsp sesame oil
- 1 tsp sriracha
- 1 clove garlic, minced
Method:
- Mix flour, milk, and garlic powder into a batter.
- Dip florets, coat with breadcrumbs, and bake at 425°F for 30–35 mins.
- Meanwhile, simmer sauce until thick.
- Toss hot cauliflower in sauce, garnish with sesame seeds and scallions.
🧠 Practical Tips for Cauliflower Success
- Cut properly: Slice from top to stem to keep steaks intact. Outer florets can be used for “wings” or soups.
- Don’t skimp on oil: A light coat ensures even browning and crisp texture.
- Use high heat: Roasting at 425°F+ caramelizes the edges for that golden finish.
- Preheat your pan: Especially if grilling or pan-roasting.
- Pair wisely: Serve with grains, legumes, sauces, or salads to make it a full meal.
🧾 Final Thoughts
Cauliflower’s rise isn’t just a trend—it’s a testament to how we can creatively rethink plant-based food without compromise. Whether you’re looking to impress guests, meal-prep for the week, or just eat more vegetables, cauliflower steak is a deeply satisfying place to start.
It’s hearty. It’s bold. And it absolutely holds its own on the plate.
Ready to make your own? Let me know which version you want to start with?
🙋♀️ Frequently Asked Questions (FAQs)
1. Can I make cauliflower steaks ahead of time?
Yes! You can slice and season the steaks up to 1 day in advance. Store them in an airtight container in the fridge. Roast or grill them fresh for the best texture.
2. How do I keep cauliflower steaks from falling apart?
Use a very sharp knife and cut from top to stem to keep the core intact. Choose large heads of cauliflower—they hold together better. Avoid very small or loose heads.
3. What can I do with the leftover florets?
Leftover florets are perfect for:
- Cauliflower “wings”
- Stir-fries or curries
- Soups or blended into cauliflower mash
4. Can I grill cauliflower steaks instead of roasting them?
Absolutely! Preheat the grill to medium-high, brush steaks with oil, and grill 4–5 minutes per side. Use foil or a grill pan if they’re fragile. A cast iron skillet works well too.
5. What’s a good sauce if I don’t have chimichurri or tahini?
Try:
- Pesto
- Salsa verde
- Garlic aioli (vegan if needed)
- Peanut or miso-ginger sauce for Asian twists
6. Are these cauliflower steaks filling enough for dinner?
Yes—with the right sides. Pair with grains (like quinoa, farro, or couscous), legumes (chickpeas or lentils), or a hearty dip to round out the meal.
7. Can I make this gluten-free?
Definitely. Just skip the breadcrumbs or use gluten-free versions in crusted recipes. Everything else (veggies, spices, sauces) is naturally gluten-free.
8. How thick should I slice cauliflower for steaks?
Aim for ¾ inch to 1 inch thick slices. Thinner slices will cook faster but break more easily. Thicker slices hold together well and give a more steak-like experience.
9. Can I freeze cauliflower steaks?
Raw: You can freeze uncooked steaks (par-blanch first) for up to 2 months.
Cooked: Not recommended—the texture will become mushy. Instead, store cooked leftovers in the fridge for up to 3 days.
10. What’s the best way to reheat leftovers?
Use an oven or air fryer to reheat at 375°F (190°C) for 10–15 minutes. Avoid the microwave—it softens the crisp edges.