Potatoes are the great equalizer. They delight picky kids and impress seasoned food lovers; they soothe weeknights and energize parties. More importantly, they deliver drama for pennies: shattering edges, buttery interiors, and aromas that make people drift toward the platter. Yet truly memorable potato appetizers don’t happen by accident. Instead, they rely on three repeatable disciplines—dryness, direct heat, and bold finishing—that turn humble spuds into the first tray to disappear.
Why Potato Appetizers Win (Speed, Texture, Crowd-Love)
First, dryness. After boiling or rinsing, water clings to starch. However, a quick steam-dry in a colander (or on a warm sheet pan) drives off surface moisture. Consequently, oil clings, seasoning sticks, and browning starts immediately instead of after a texture-killing wait.
Second, direct heat. A preheated, lightly oiled sheet pan (or a hot grill, or an uncrowded air-fryer basket) mimics restaurant sizzle. Therefore, you get fast contact browning and true crisp edges. Similarly, spacing matters; if pieces touch, they steam. Besides, shaking once mid-cook exposes new sides to hot air and evens color.
Third, bold finishing. Richness loves lift. So, add acid, add herbs, add something cool and bright. A squeeze of lemon on croquettes. A cool dairy dip with bacon-wrapped bites. A tuft of dill on canapés. Moreover, contrast—crisp vs. creamy, hot vs. cool, salty vs. sweet—keeps guests returning to the board of potato appetizers.
Crisp rule (memorize this): Parboil, steam-dry, and cook on a preheated, lightly oiled surface—or air-fry in a single, uncrowded layer. Consequently, edges shatter while centers stay plush.
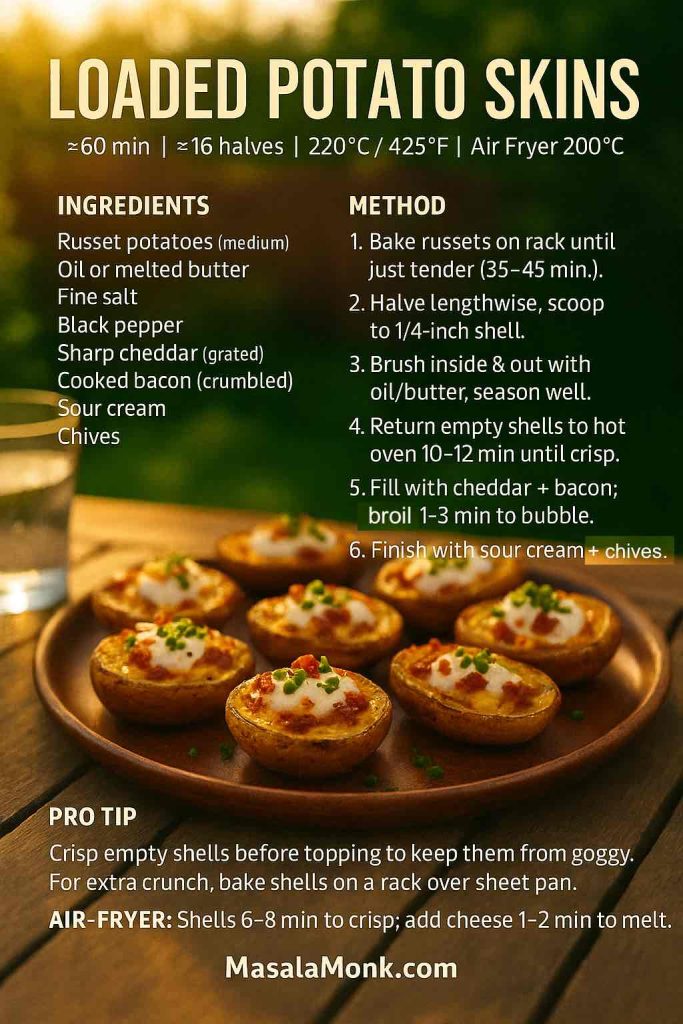
1) Loaded Potato Skins — The Icon of Potato Appetizers
At a glance — Time: ~60 min • Yield: 16 halves • Oven: 220°C / 425°F • Air fryer: 200°C / 390°F
How to: Bake russets, scoop to a ¼-inch shell, crisp empty shells, then fill and broil.
Intro
Among potato appetizers, loaded skins are nostalgic and—done right—surprisingly elegant. The trick isn’t the topping; it’s the shell. Crisp the empty shell first, then melt the cheese. Consequently, every bite lands hot, crunchy, and creamy at once.
Ingredients
Russet potatoes (medium), butter or neutral oil, fine salt, pepper, sharp cheddar (grated), cooked bacon (crumbled), sour cream, chives.
Method
- Scrub and prick; bake on a rack until just tender (35–45 min).
- Halve lengthwise; carefully scoop to a ¼-inch shell.
- Brush inside and out with butter/oil; season assertively.
- Return empty shells to the oven 10–12 min until glassy-crisp.
- Add cheddar and bacon; broil briefly until bubbling.
- Finish with sour cream and chives.
Air-Fryer Option
Crisp empty shells 6–8 min; fill; air-fry 1–2 min to melt.
Why This Order Works
Crisping the shell first blocks moisture from seeping back. For bar-style upgrades (including “potato cups”), see Serious Eats’ better potato skins; for smoke, adapt grilled potato skins.
Variations & Swaps
Jalapeño-cheddar; buffalo chicken + blue-cheese drizzle; black beans + corn + scallion + lime.
Make-Ahead & Storage
Bake and scoop shells up to 2 days ahead; keep chilled. Re-crisp, then top. Hold briefly on a low oven rack.
Serve & Pairing
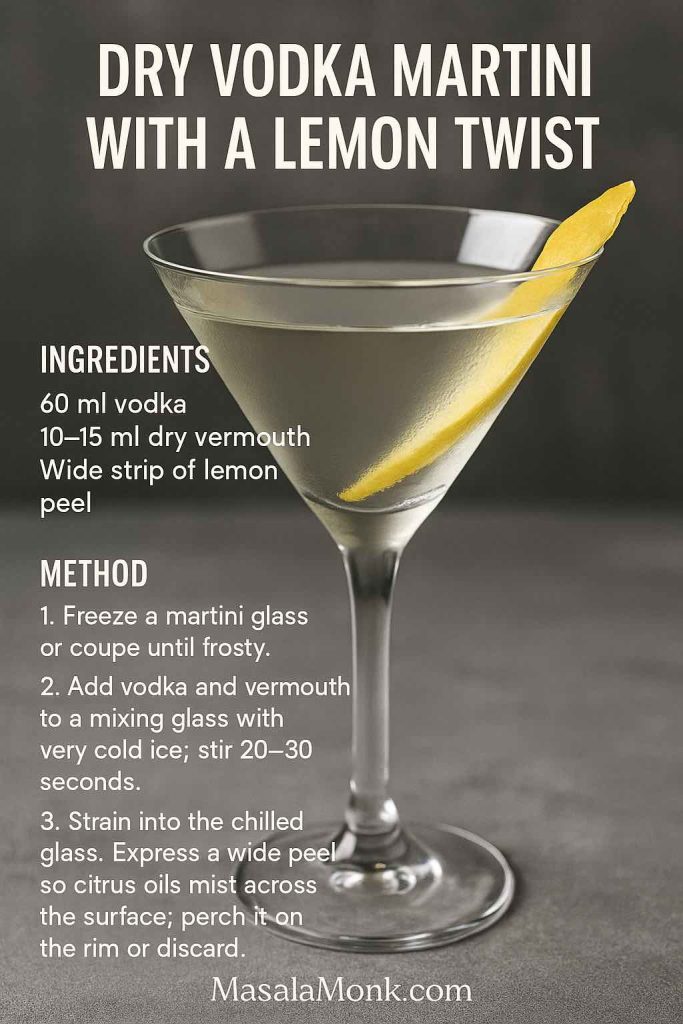
Drizzle or dunk in blue cheese dip; the tang cuts cheddar and bacon without dulling the crunch. If you’re pouring, a bright Lemon Drop Martini resets the palate between bites.
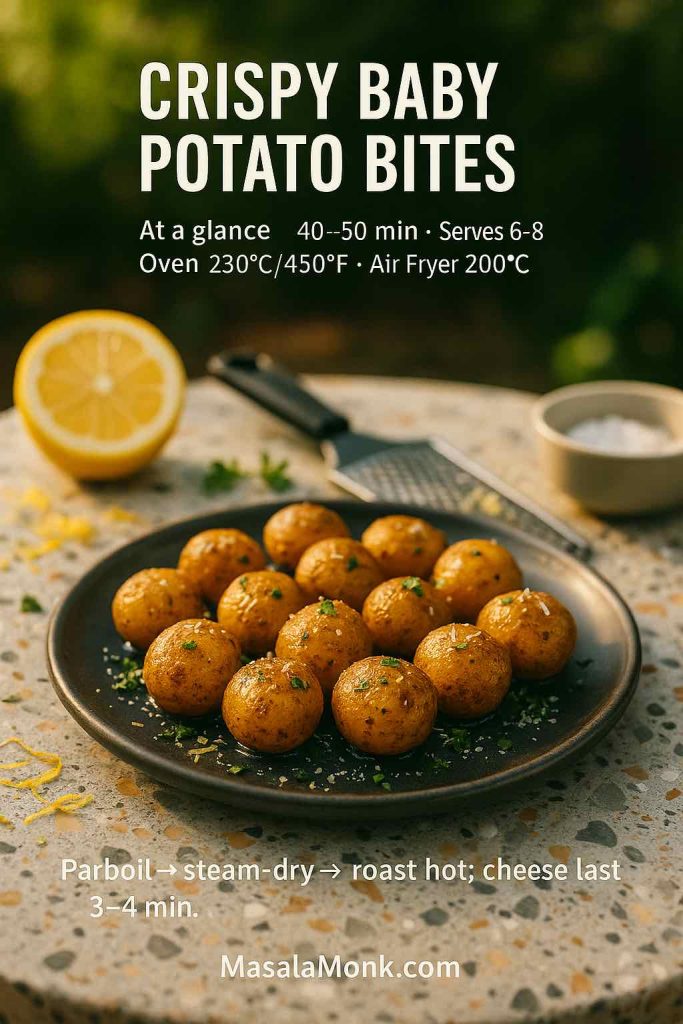
2) Crispy Baby Potato Bites — Crowd-Proof Potato Appetizers
At a glance — Time: 40–50 min • Serves: 6–8 • Oven: 230°C / 450°F • Air fryer: 200°C / 390°F
How to: Parboil → steam-dry → roast on a preheated, oiled tray; add cheese at the end.
Intro
These low-effort, high-glory potato appetizers thrive on dryness and heat. Parboil, steam-dry, and roast on a hot, oiled tray. Then, in the last minutes, shower with parmesan so it fuses into a lacy crust.
Ingredients
Baby potatoes, oil, salt, garlic powder (optional), finely grated parmesan (optional), lemon.
Method (oven)
- Parboil 8–10 min until just tender; drain.
- Steam-dry 5 min until surfaces look matte.
- Toss with oil, salt, and optional garlic powder.
- Preheat an oiled sheet pan; roast 20–25 min, shaking once.
- In the final 3–4 min, add parmesan so it melts and crisps.
- Finish with lemon zest and a squeeze of juice.
Air-Fryer Option
Single layer; 14–18 min; shake once; cheese in the last 2 min.
Why They Crisp
Dryness + hot contact = fast browning. The same logic powers smashed potatoes—see RecipeTin Eats’ ultra-crispy method.
Variations & Swaps
Lemon-pepper + parsley; Cajun + lime; ranch + chive; peri-peri + a touch of honey.
Make-Ahead & Storage
Parboil ahead; roast to finish just before serving. Re-crisp on a hot tray for 5–7 min if needed.
Serve & Pairing
Keep it simple: lemon wedges at the ready, and a pitcher of watermelon mocktails on ice—clean, cold, and refreshing alongside the crust.
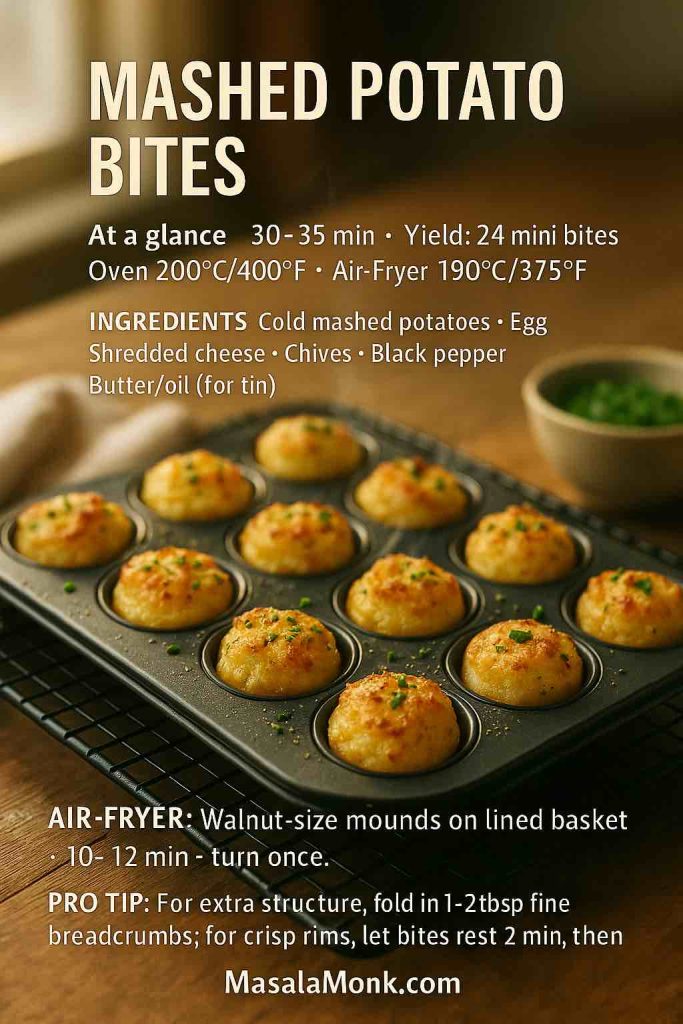
3) Mashed Potato Bites — Mini-Muffin Potato Appetizers
At a glance — Time: 30–35 min • Yield: 24 mini bites • Oven: 200°C / 400°F • Air fryer: 190°C / 375°F
How to: Mix cold mash + egg + cheese, portion into a mini-muffin tin, bake until puffed and bronzed.
Intro
Cold mash is a blank canvas. With egg and cheese, it behaves like soft dough that puffs and bronzes in mini-muffin wells. Consequently, you get crisp rims and creamy centers—without deep-frying. For the base approach, see The Kitchn’s mashed-potato puffs.
Ingredients
Cold mashed potatoes, egg, shredded cheese, chives, black pepper, butter or oil for greasing.
Method
- Mix mash, egg, cheese, chives, and pepper until cohesive.
- Grease a mini-muffin tin; pack to the rim.
- Bake 18–22 min until bronzed and lightly puffed.
- Loosen while warm so rims stay crisp.
Air-Fryer Option
Walnut-sized mounds on a lined basket; 10–12 min, turning once.
Variations & Swaps
Caramelized onions; crisp bacon; roasted corn; finely chopped spinach + nutmeg. Add a spoon of fine breadcrumbs if you want extra structure.
Make-Ahead & Storage
Bake, cool, and refrigerate up to 24 hours; re-crisp 6–8 min in a hot oven.
Serve & Pairing
These are plush, so contrast lightly—chives, lemon, and a grown-up zero-proof lane from lychee mocktails (crisp, floral, not cloying).
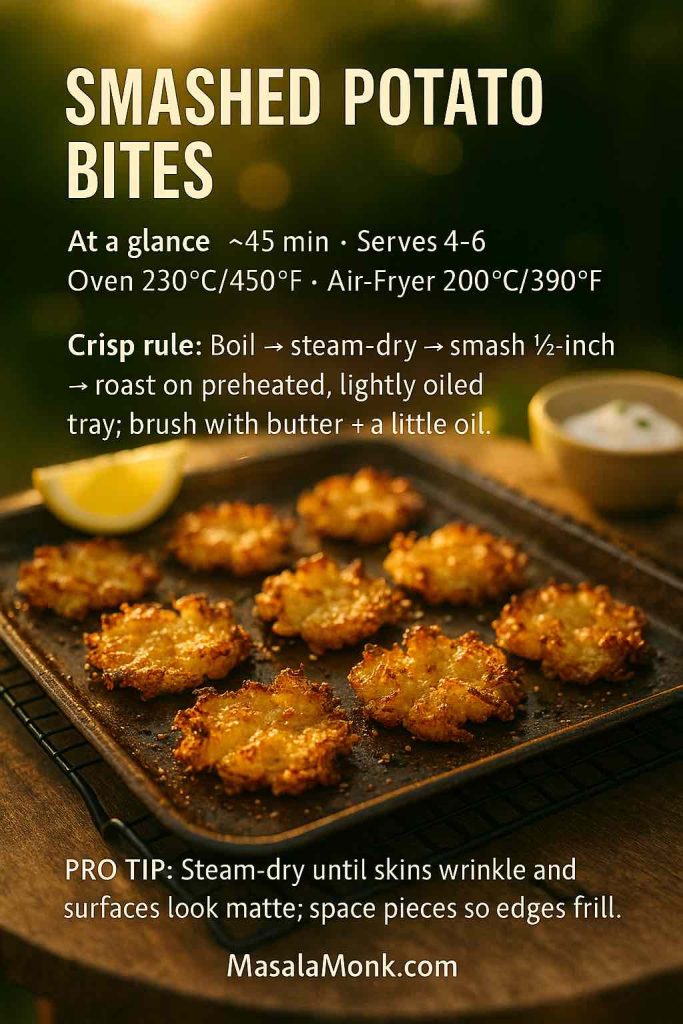
4) Smashed Potato Bites — Shatter-Crisp Potato Appetizers
At a glance — Time: ~45 min • Yield: 4–6 servings • Oven: 230°C / 450°F
How to: Boil → steam-dry → smash to ½-inch → roast with butter + a little oil.
Intro
When you want “how are these so crispy?” reactions, make smashed bites. Boil; steam-dry; smash thin; roast on a hot, oiled tray. Thus the edges frill like lace while the centers remain plush. For a masterclass, see RecipeTin Eats’ smashed potatoes.
Ingredients
Small waxy potatoes, butter, oil, salt, pepper.
Method
- Boil until just tender; drain.
- Steam-dry thoroughly so skins wrinkle and surfaces roughen.
- Transfer to a hot, oiled tray; smash to ½-inch with a glass.
- Brush with butter + oil; season generously.
- Roast 20–25 min until undersides are deep gold and edges frill.
Air-Fryer Option
Smash on a board; move carefully to the basket; cook in one layer 12–16 min, turning once.
Variations & Swaps
Luxe: crème fraîche + chive. Bold: chili crisp + scallions. Bright: lemon zest + parsley + olive oil.
Make-Ahead & Storage
Boil and smash earlier; hold covered (not stacked). Roast to finish just before service so edges stay shattery.
Serve & Pairing
Serve while they’re shatter-crisp; a dot of lemon is enough. If you’re pouring, a citrus-forward Lemon Drop Martini works beautifully between bites.
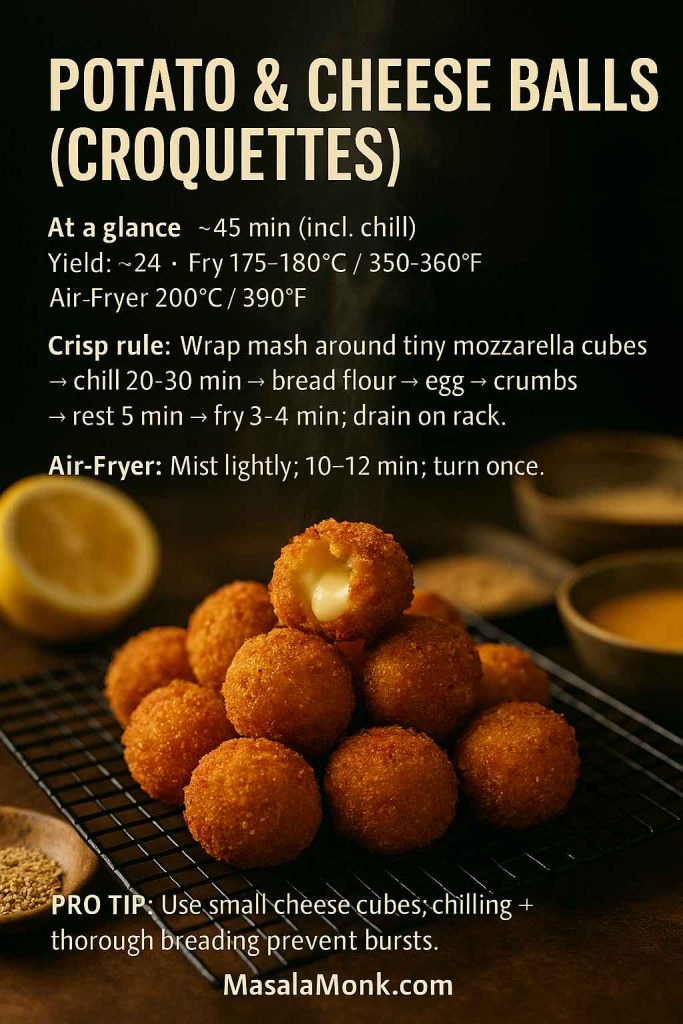
5) Potato-and-Cheese Balls (Croquettes) — Party Croquette Potato Appetizers
At a glance — Time: ~45 min (incl. chill) • Yield: ~24 • Fry: 175–180°C / 350–360°F • Air fryer: 200°C / 390°F
How to: Wrap seasoned mash around tiny mozzarella cubes, chill, bread thoroughly, then fry or air-fry.
Intro
Plush inside, crackly outside, and endlessly adaptable—these croquettes are party catnip. Because the centers turn molten, you need a firm exterior. Therefore, chilling and thorough breading matter most.
Ingredients
Mashed potatoes, salt, pepper, tiny mozzarella cubes (or cheddar), flour, eggs, breadcrumbs, oil.
Method
- Wrap mash around cheese cubes; roll tight.
- Chill 20–30 min so balls set.
- Bread: flour → egg → crumbs; rest 5 min to hydrate crumbs.
- Fry 3–4 min to deep gold; drain on a rack.
Air-Fryer Option
Mist lightly; cook 10–12 min, turning once.
Variations & Swaps
Cheddar cubes; smoked mozzarella; feta folded into the mash; herbs in the crumb.
Make-Ahead & Storage
Form and bread; freeze on a tray; fry from frozen, adding 1–2 min.
Serve & Pairing
Set croquettes on a warm board and pass lemon wedges; for game-night energy that still reads fresh, shake up watermelon margarita variations.
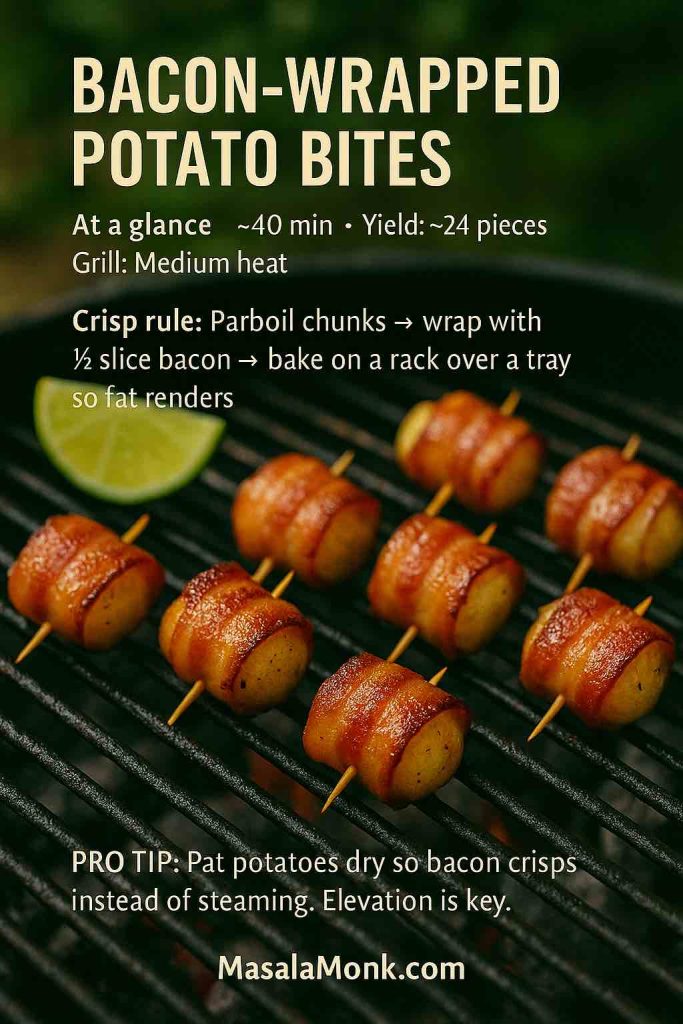
6) Bacon-Wrapped Potato Bites — Smoky-Savory Potato Appetizers
At a glance — Time: ~40 min • Yield: ~24 pieces • Oven: 220°C / 425°F
How to: Parboil chunks → wrap with ½ slice bacon → bake on a rack over a tray so fat renders.
Intro
Salty-smoky bacon around tender potato is simple, yes, yet irresistible. However, if you bake on a flat tray, bottoms stew. On a rack, fat renders away and edges lacquer instead.
Ingredients
Potato chunks, bacon halves, toothpicks, black pepper, optional maple-chili glaze, lime.
Method
- Parboil chunks; pat completely dry.
- Wrap each with half a slice of bacon; secure with a pick.
- Arrange on a rack over a tray; roast until mahogany.
- Finish with pepper; rest 3–4 min.
Air-Fryer Option
If your basket has a raised grate, cook 12–16 min, turning once.
Variations & Swaps
Brush a thin maple-chili glaze during the last 2–3 min; or keep it simple with pepper + lime.
Make-Ahead & Storage
Parboil and wrap earlier; chill on a rack. Roast just before serving for maximum crisp.
Serve & Pairing
Let the bacon lead, then finish with cracked pepper and lime; for the zero-proof crowd, pour from these low-sugar summer mocktails—cold, bright, and not syrupy.
7) Sweet-Potato Rounds — Color-Forward Potato Appetizers
At a glance — Time: 35–40 min • Yield: ~24 rounds • Oven: 220°C / 425°F
How to: Roast ½-inch rounds → top with whipped goat cheese + pecans + honey → finish with thyme + chili.
Intro
Not every platter should be brown and crunchy. These glossy coins bring color, perfume, and balance. Moreover, their sweet-salty-creamy-crunchy profile resets the palate between heavier potato appetizers. For ratios and presentation cues, see Well Plated’s sweet-potato rounds and Recipe Runner’s goat-cheese bites.
Ingredients
Sweet potatoes, oil, salt, goat cheese, toasted pecans, honey, thyme, chili flakes.

Method
- Slice into ½-inch rounds; toss with oil and salt.
- Roast 18–22 min, flipping once for even caramelization.
- Cool briefly; pipe or spoon whipped goat cheese.
- Top with pecans; thread on honey; finish with thyme + chili.
Air-Fryer Option
One layer; 12–15 min, turning once.
Variations & Swaps
Whipped feta; walnuts; date syrup; orange zest; microgreens.
Make-Ahead & Storage
Roast rounds; cool and chill. Rewarm briefly; pipe cheese and finish at the last minute.
Serve & Pairing
The goat cheese and honey want something lifted and clean; add a tiny squeeze of orange zest and, if readers ask nutrition questions, point them (once) to sweet-potato benefits & nutrition.
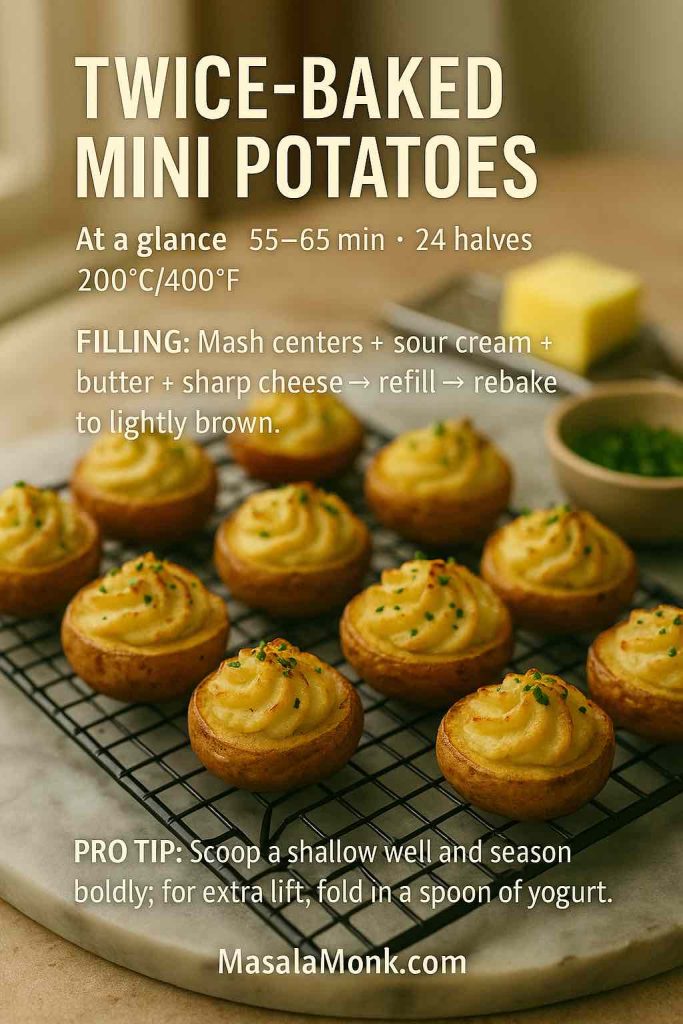
8) Twice-Baked Mini Potatoes — Elegant Potato Appetizers
At a glance — Time: 55–65 min • Yield: ~24 halves • Oven: 200°C / 400°F
How to: Roast → scoop a shallow well → mash centers with sour cream + butter + cheese → rebake.
Intro
These read like tiny jackets with whipped, tangy centers. Because they’re structured, they travel well and hold heat. Additionally, they welcome endless flavor detours and pair seamlessly with other potato appetizers. For a flame-kissed direction (easy to scale to minis), see Serious Eats: grilled, loaded twice-baked potatoes.
Ingredients
Small potatoes, sour cream, butter, sharp cheese, salt, pepper, chives.
Method
- Roast until tender; cool slightly; halve.
- Scoop a shallow well; mash centers with sour cream, butter, and cheese; season boldly.
- Refill neatly; bake again until peaks brown lightly.
- Top with chives.
Air-Fryer Option
If the oven is crowded, set tops in a preheated basket 3–5 min.
Variations & Swaps
Caramelized onions + gruyère; jalapeño + cheddar; harissa + feta + mint. Russets yield fluffier fillings; baby yellows lean creamy.
Make-Ahead & Storage
Assemble to the second bake; chill on a tray; bake to finish right before service.
Serve & Pairing
If dairy comes up in comments, a calm sidebar on sour cream & keto answers it without derailing the recipe.
9) Stuffed Baby Potatoes & Fingerling Canapés — Polished Potato Appetizers
At a glance — Time: ~45 min • Yield: ~30 canapés • Oven: 200°C / 400°F
How to: Roast tiny potatoes → trim a tiny base to stand → scoop a small well → pipe fillings.
Intro
When you want one-bite elegance, make these. They look expensive yet stay simple. Meanwhile, because you control the filling, the flavor can skew Mediterranean, American, or Nordic without changing the base—useful when you’re composing a board of mixed potato appetizers. Prefer a lacy base? Pan-fry bite-size boxty using Serious Eats’ template.
Ingredients
Petite potatoes, oil, salt, dill, lemon zest, sour cream or yogurt, feta, roasted red pepper, olive tapenade, parsley, goat cheese, capers.
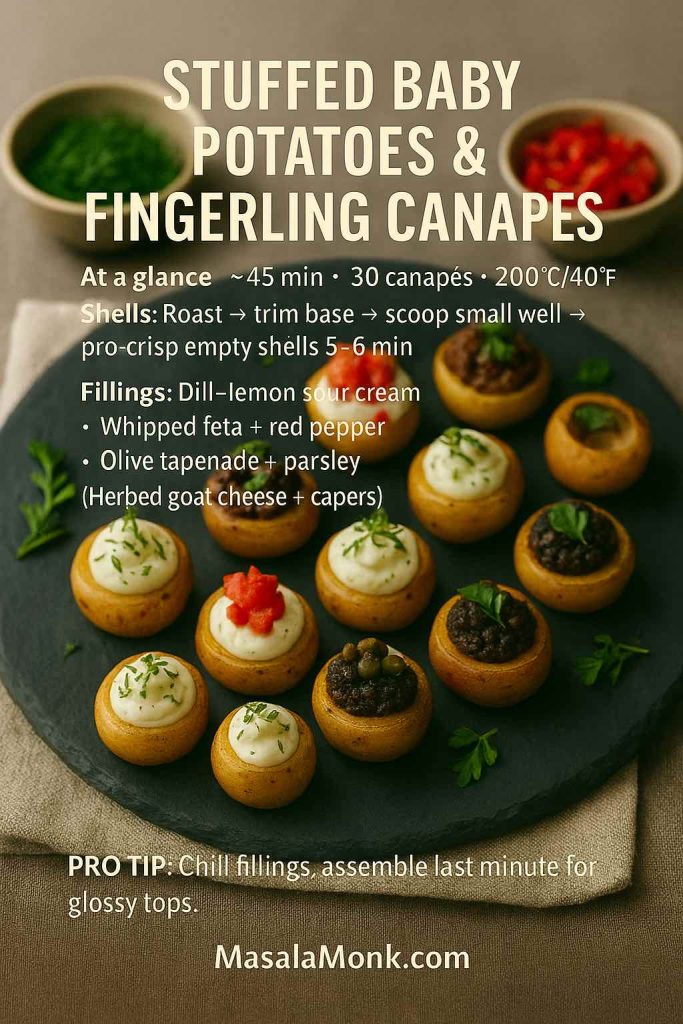
Method (shells)
- Roast until just tender; cool briefly.
- Trim a tiny base so each stands; scoop a small well from the top.
- Pipe fillings: dill-sour cream + lemon zest; whipped feta + roasted red pepper; olive tapenade + parsley; herbed goat cheese + capers.
Air-Fryer Option
Crisp the empty shells 5–6 min to “set” them before filling.
Variations & Swaps
For a cold platter, chill shells; spoon in a tangy potato-salad spoonful just before guests arrive.
Make-Ahead & Storage
Prepare shells and fillings separately; keep chilled. Assemble at the last minute so everything looks glossy, not weepy.
Serve & Pairing
Go bright and modern with a mango martini—fruity nose, clean finish, easy to batch for a crowd.
10) Indian Aloo Starters — Aloo Tikki → Chaat (Festival-Style Potato Appetizers)
At a glance — Time: 35–45 min • Yield: 18–24 • Pan or Air fryer: medium-high / 200°C
How to: Mix spiced mash with ginger, chilies, coriander + a bit of cornflour → form patties → pan-fry/air-fry → turn into chaat with chutneys + yogurt + sev.
Intro
This is the show-stopper path: simple spiced patties that transform into chaat with chutneys, yogurt, sev, and onion. Because textures contrast wildly—hot vs. cool, crisp vs. creamy—the plate feels like a mini festival of potato appetizers. For garnish cadence and proportion cues, use Bon Appétit’s aloo tikki as a frame.
Ingredients
Boiled potatoes, grated ginger, chopped green chilies, coriander leaves, garam masala, cumin, chaat masala, salt, cornflour, oil; plus yogurt, tamarind and green chutneys, sev, onion for chaat.
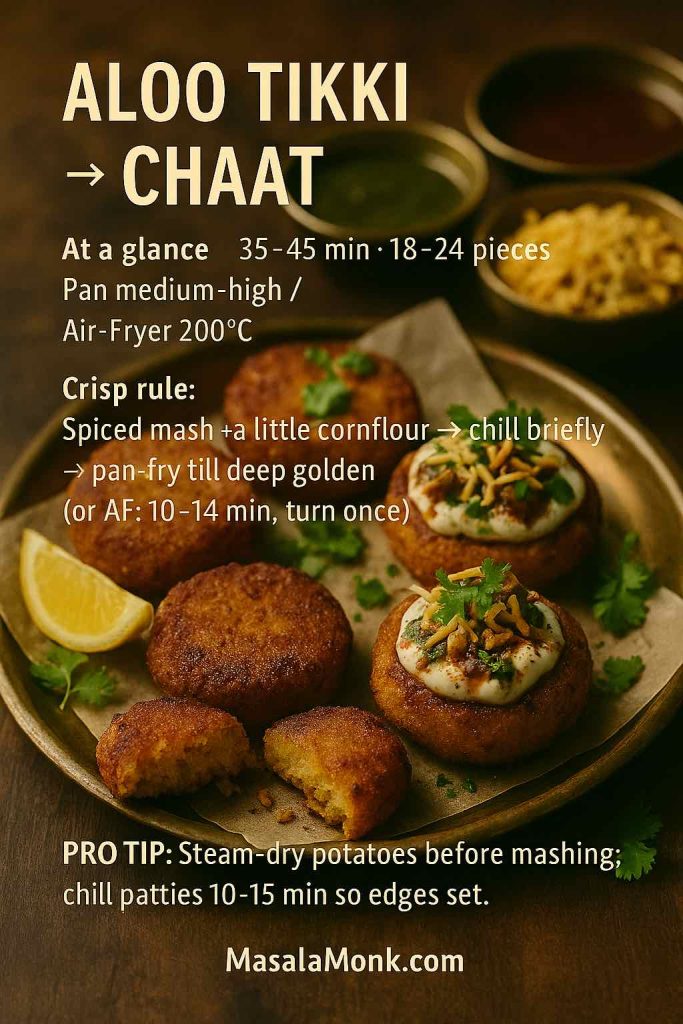
Method
- Mash potatoes with spices and herbs; season confidently.
- Add cornflour; form small patties; chill briefly so edges set.
- Pan-fry in shallow oil until deep golden; or brush with oil and air-fry, flipping once.
- For chaat, plate hot tikkis; spoon tamarind + green chutneys; add thick yogurt, sev, onion, and a final dusting of chaat masala.
Air-Fryer Option
Lightly oil both sides; cook 10–14 min, turning once; rest 2 min.
Variations & Swaps
Stuff with a pea masala; add beet for color; or swap some potato with sweet potato.
Make-Ahead & Storage
Form patties and chill up to a day. Fry to order. Hold cooked tikki briefly in a low oven.
Serve & Pairing
Because the plate is lively—hot, cool, crisp, creamy—keep drinks crisp and not sweet: digestive-leaning ACV & cranberry mocktails pair surprisingly well.
Smarter Hosting for Potato Appetizers (Make-Ahead, Reheat & Flow)
- Skins: bake, scoop, and pre-crisp empty shells up to two days ahead; re-crisp 5–7 min, then top and broil.
- Croquettes: form and bread; freeze on a tray; fry from frozen, adding 1–2 min.
- Smashed: boil and smash earlier; roast right before serving so edges keep their shatter.
- Canapés: keep bases and fillings separate; assemble last minute so textures stay lively.
- Air-fryer juggling: when the oven is full, finish small trays in the air fryer; however, never stack or they’ll steam. Crowding kills crisp; if color stalls, this roundup of common air-fryer mistakes is a fast rescue.
Fast fixes
If skins feel limp, give empty shells more high heat before topping. And if croquettes threaten to burst, chill longer and bread thoroughly. Bites look pale? Raise heat and spread them out. If the air fryer under-browns, add a minute or two and shake once. Therefore, service stays smooth while stress stays low.
Ingredient Notes That Actually Help Potato Appetizers
Potatoes
- Russet: drier flesh, fluffy interiors—ideal for skins and twice-baked minis.
- Waxy baby reds or yellows: hold shape—best for bites, smashed, and canapés.
- Yukon Gold: creamy all-rounder—great for mash-based fillings and croquettes.
For diet-minded readers, one calm pointer is enough: how potatoes can fit a weight-loss plan—portioning and cooking method matter more than panic.
Cheese
Cheddar for melt and flavor; parmesan for lacy finishes; gruyère for nutty depth; feta or goat cheese for salty brightness; mozzarella for stretch. Additionally, grate fresh—pre-shredded blends often resist quick melt.
Acid & Heat
Balance richness with lemon or lime. Add chili (fresh or flake) or a cool dairy dip for lift. Instead of heavy sauces, offer small bowls so guests tune their own bite of potato appetizers.
Scaling Smart
Double trays; stagger oven times by 10 minutes. As a result, hot food flows without bottlenecks. For board layout sanity, the charcuterie 3-3-3-3 rule keeps things balanced without overbuying.
Conclusion: Small Bites, Big Joy
Ultimately, potato appetizers multiply delight while minimizing effort. Once you lean into dryness and direct heat, the rest becomes play—choose a cheese, pick an herb, add a spark of acid, and finish confidently. Meanwhile, the structure of these recipes lets you prep ahead and still serve crisp food without guarding the oven door. Consequently, the platters return empty, the room gets louder, and you—finally—enjoy your own party.
FAQs
1) What are the best potatoes for potato appetizers (skins, bites, and hors d’oeuvres)?
For crispy shells and fluffy centers, russets win; their drier flesh makes loaded potato skins and twice-baked minis sing. Meanwhile, waxy baby reds or yellows hold shape beautifully for crispy potato bites, smashed bites, and stuffed baby potatoes. Yukon Golds sit happily in the middle—creamy enough for mashed potato bites and croquettes, yet sturdy enough for pan work.
2) How do I keep potato skins extra crisp and not soggy?
First, bake whole potatoes until just tender. Then, scoop to a ¼-inch shell, brush inside and out with oil or butter, and—crucially—re-crisp the empty shells before filling. Consequently, moisture won’t creep back in, and the final broil merely melts cheese instead of steaming the shell.
3) Oven vs. air fryer: which method is best for potato appetizers?
Both shine, but differently. The oven handles big trays and yields even browning; the air fryer delivers fast, concentrated heat for small batches. Therefore, use the oven for parties and the air fryer when you want a quick round of baked potato bites or air-fryer potato appetizers before guests arrive.
4) What temperatures and times should I start with (so I don’t guess)?
As a starting grid:
- Loaded potato skins: 220°C / 425°F until tender; re-crisp shells 10–12 minutes; broil to finish.
- Crispy potato bites: 230°C / 450°F for 20–25 minutes; shake once.
- Smashed potato bites: 230°C / 450°F for 20–25 minutes after smashing thin.
- Mashed potato bites (mini muffin): 200°C / 400°F for 18–22 minutes.
- Croquettes: fry at 175–180°C / 350–360°F for 3–4 minutes.
Adjust by a few minutes for size and spacing; if color stalls, spread pieces out.
5) How do I adapt these potato appetizers for the air fryer?
Go single-layer, preheat if your model suggests it, and avoid crowding. Generally: bites 14–18 minutes at ~200°C / 390°F; smashed 12–16 minutes; mashed-bite mounds 10–12 minutes; skins 6–8 minutes to crisp shells, then 1–2 minutes after topping. Shake once mid-cook and, moreover, add cheese in the final 1–2 minutes so it melts without over-browning.
6) Can I make potato appetizers ahead for a party?
Absolutely. Bake and scoop skins a day or two ahead, then re-crisp just before service. Boil and smash smashed bites in advance; roast to finish right before serving. Form and bread croquettes earlier and freeze; fry from frozen, adding 1–2 minutes. As a result, you get hot platters with almost no last-minute stress.
7) What’s the secret to truly crispy potato bites?
Dryness + direct heat. After parboiling, let potatoes steam-dry until surfaces turn matte. Next, roast on a preheated, lightly oiled tray (or a hot air-fryer basket) with room to breathe. Finally, season assertively; salt draws out a touch of moisture and helps browning, while a last-minute sprinkle of finely grated hard cheese creates a lacy crust.
8) How do I prevent croquettes, cheese balls, or potato and cheese balls from bursting?
Chill the formed balls so they firm up, bread thoroughly (flour → egg → crumbs), and rest 5 minutes so crumbs hydrate. Fry hot enough to set the crust quickly, but not so hot the outside browns before the center warms. Similarly, tiny cheese cubes inside behave better than large ones.
9) What about sweet potato appetizers—any quick rules?
Because sweet potatoes run moister and sweeter, slice thicker (about ½-inch) for rounds and roast hot for caramelized edges. Pair with salty, tangy toppings—goat cheese, feta, herbs, citrus—to balance sweetness. Consequently, sweet potato bites feel bright and modern, not dessert-like.
10) Which cheeses melt best for cheesy potato bites and skins?
Sharp cheddar melts smoothly and tastes assertive. Parmesan turns lacy and crisp in the final minutes. Gruyère adds nutty depth; mozzarella brings stretch but needs salt and acid for balance. For twice-baked minis, a mix (cheddar + a little parmesan) gives both flavor and texture.
11) What are easy vegetarian or gluten-free swaps for potato hors d’oeuvres?
Skip bacon and lean on smoked paprika, roasted peppers, or crisped mushrooms for savory depth. Most recipes are naturally gluten-free if you avoid breadcrumbs; for croquettes, use gluten-free crumbs or a thin rice-flour coating. Likewise, plant-based yogurt or cashew cream can stand in for sour cream on canapés.
12) Can I freeze any of these potato appetizers?
Yes—especially croquettes and mashed potato bites. Freeze in a single layer until firm, then bag. Bake/fry from frozen, adding a minute or two. As for loaded potato skins, freeze the empty, pre-crisped shells; thaw briefly, re-crisp, fill, and broil.
13) How many pieces per person should I plan for party potato appetizers?
For a spread with multiple items, plan 3–4 pieces per person per hour—more at the start, fewer later. For a game-day or all-apps party, scale to 6–8 pieces per person total, mixing rich bites (skins, croquettes) with lighter or zesty options (smashed bites with lemon, sweet-potato rounds).
14) What are smart seasoning lanes that always work?
Go “bright and salty”: lemon zest, parsley, and olive oil. Or “spicy and cool”: chili flakes plus a creamy element on the side. Alternatively, try “herby and nutty”: dill, chive, and a dusting of parmesan. Meanwhile, a squeeze of citrus just before plating wakes up every one of these potato appetizers.
15) My air-fryer potato appetizers aren’t browning—what now?
First, reduce the load and cook in two rounds; crowding traps steam. Next, pat drier and add a teaspoon more oil to help conduction. Finally, raise the temperature slightly or extend 1–3 minutes. Therefore, you’ll get color without overcooking the centers.
16) Which dips pair well (besides the usual suspects) with appetizers made with potatoes?
Think “contrast, not camouflage.” Blue cheese dip adds tangy punch to loaded potato skins and bacon-wrapped bites. A lemony yogurt or thin sour-cream sauce lifts smashed potato bites and twice-baked minis. For sweet potato hors d’oeuvres, go clean—whipped feta or light goat cheese with herbs.
17) Any quick plating tips so my potato party snacks look premium?
Yes—group by texture and temperature. Put hot-and-crisp items together so aromas stack; nearby, set warm-and-creamy bites for contrast. Add a color break with sweet-potato rounds. Garnish sparingly: chives, dill, thin radish slices, and lemon wedges. Consequently, your board looks intentional, not crowded.
18) How do I keep baked potato appetizers hot without losing crunch?
Use a low oven (90–100°C / 200–210°F) and a wire rack so air circulates under the pieces. Instead of holding for long stretches, serve in waves—small trays every 10–15 minutes. As a result, guests always meet crisp edges and creamy centers.
19) What’s the simplest way to turn leftovers into tomorrow’s potato appetizer bites?
Chill leftover mash, fold in an egg and a little grated cheese, then portion into a mini-muffin tin and bake until puffed. Alternatively, form patties and pan-sear for quick mashed potato bites. Meanwhile, leftover skins re-crisp beautifully; refill with whatever cheese or veg you have.
20) Lastly, what are the biggest mistakes to avoid with easy potato appetizer recipes?
Overcrowding trays, skipping the steam-dry step, and adding cheese too early (it over-browns before the potatoes crisp). Also, scooping skins too thick (they eat heavy) or too thin (they collapse). Fix these, and—therefore—your potato appetizers will reliably steal the show.