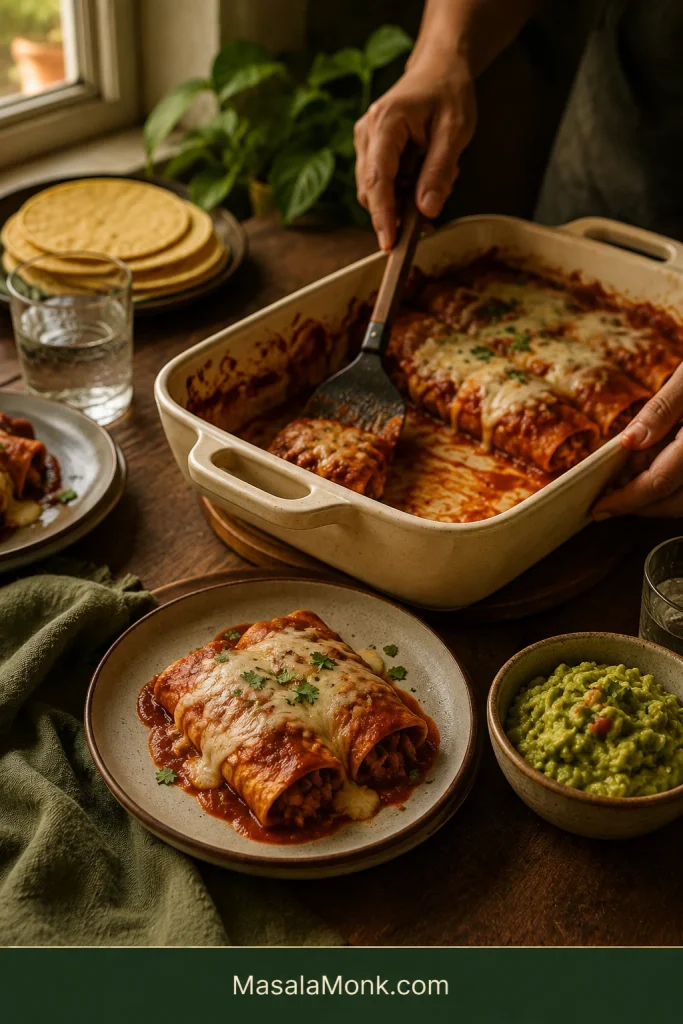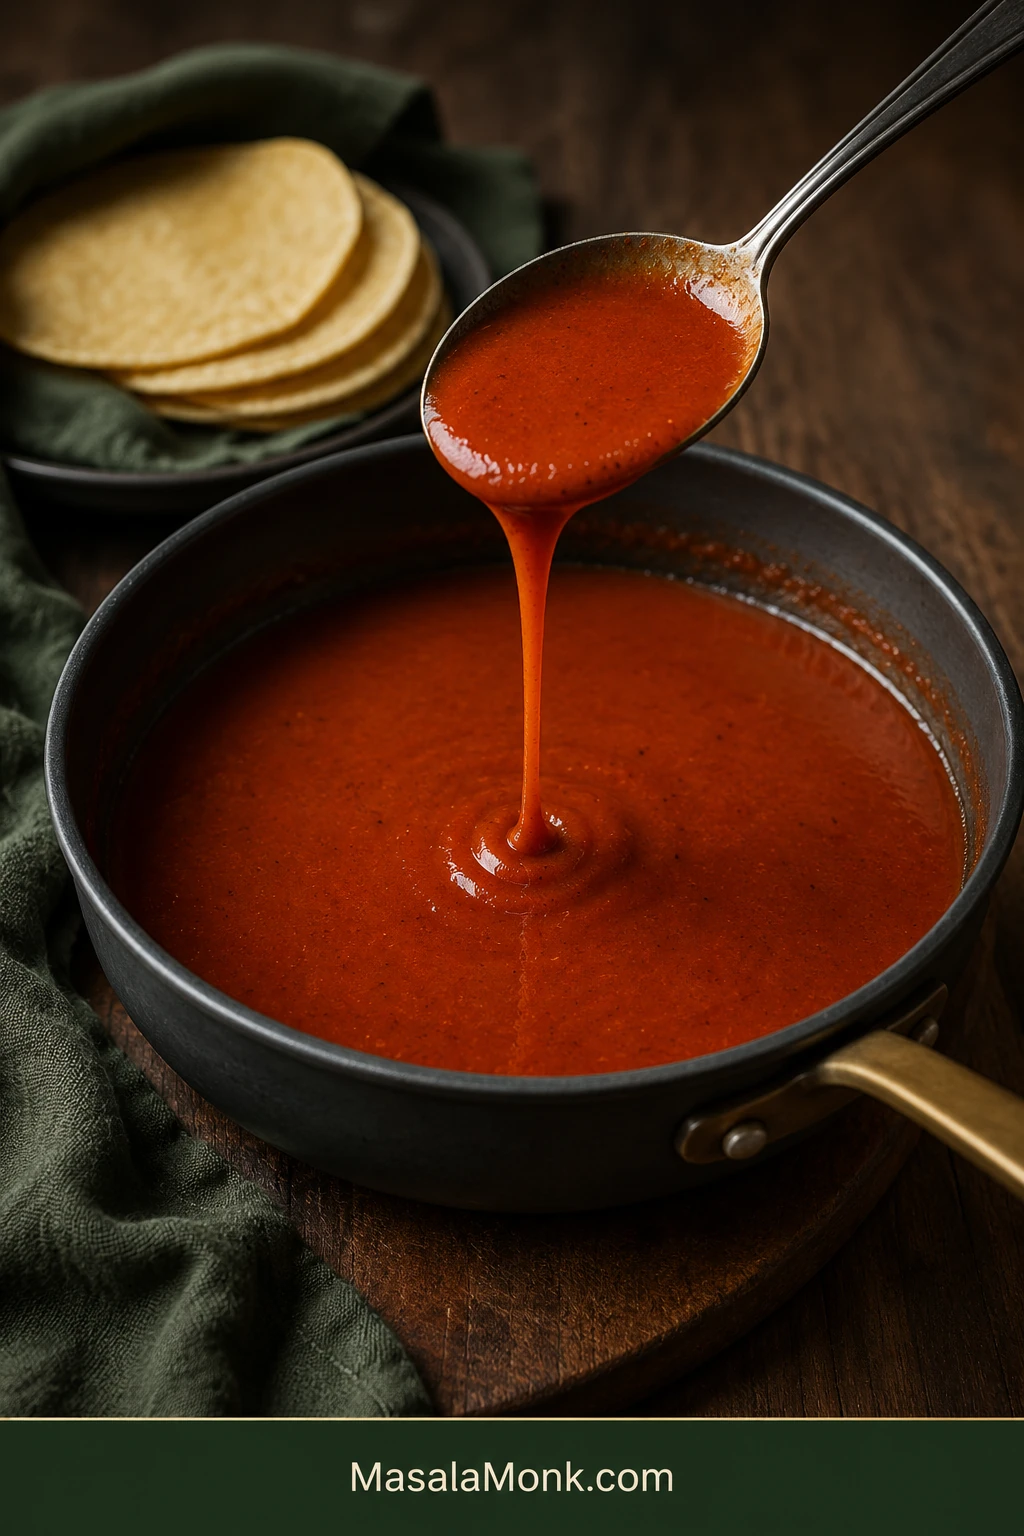
A good red enchilada sauce should pour in a smooth red ribbon, cling lightly to a tortilla, and taste of warm chile before the tomato underneath rounds everything out. Savory and flowing, it needs enough body to coat without becoming heavy.
And it does not need to turn dinner into a project. In about 15 minutes, one saucepan and one whisk give you about 2 cups, with no blender, strainer or dried-chile prep.
If you know what kind of chili powder you are using and what ready sauce looks like, you are most of the way there. After that, the sauce is pretty forgiving.
The short version
Four things matter most: keep the roux light, warm the spices only until fragrant, whisk the first splash of broth completely smooth, and take the pan off while the sauce still flows easily. Salt and a little apple cider vinegar bring the finished sauce into balance.
Whole-dried-chile sauces and darker Tex-Mex chili gravy follow different methods. This is the quick pantry-style red sauce for enchilada night.
How to make red enchilada sauce
Makes: about 2 cups · Time: about 15 minutes · Equipment: 2-quart (about 2-liter) or larger saucepan and whisk
Ingredients
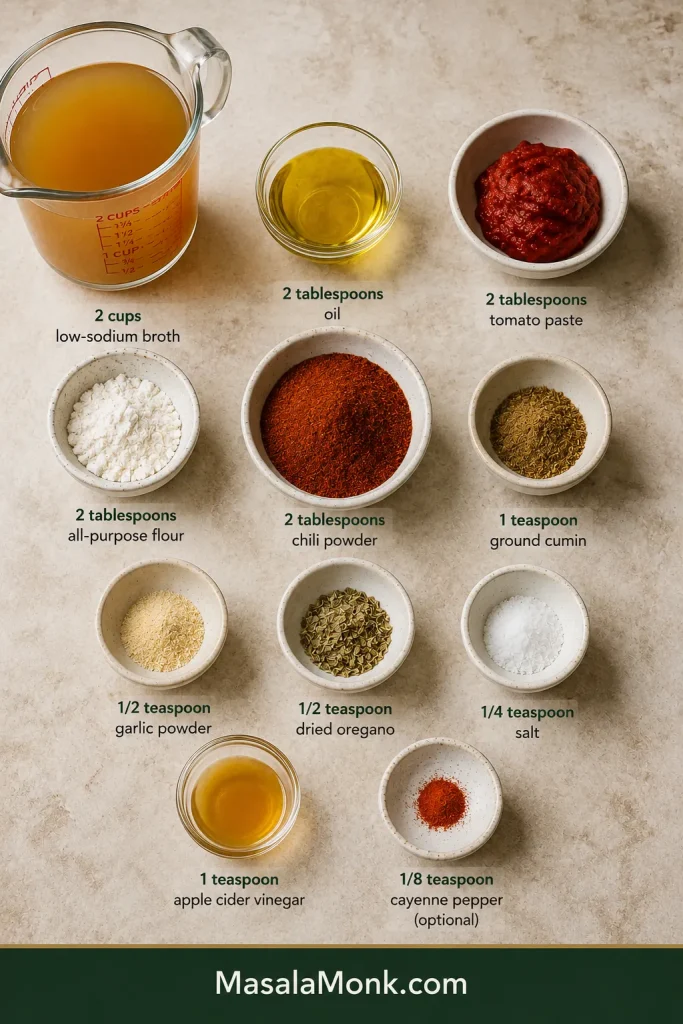
- 2 tablespoons (30 mL) neutral oil or mild olive oil
- 2 tablespoons (about 16 g) all-purpose flour
- 2 tablespoons American-style chili powder — preferably a mild blend; if the brand is unfamiliar, use 1 tablespoon for your first batch
- 1 teaspoon ground cumin
- ½ teaspoon garlic powder
- ½ teaspoon dried Mexican oregano or regular dried oregano
- 2 tablespoons (about 32 g) tomato paste
- 2 cups (480 mL) low-sodium chicken or vegetable broth
- ¼ teaspoon fine salt, then more to taste
- 1 teaspoon (5 mL) apple cider vinegar
- ⅛ teaspoon cayenne, optional, for extra heat
No American-style chili powder? Use the fallback below.
Method
- Get everything ready. Measure the broth and keep it beside the stove. Stir together the chili powder, cumin, garlic powder and oregano. Once those spices hit the hot pan, the broth needs to follow quickly.
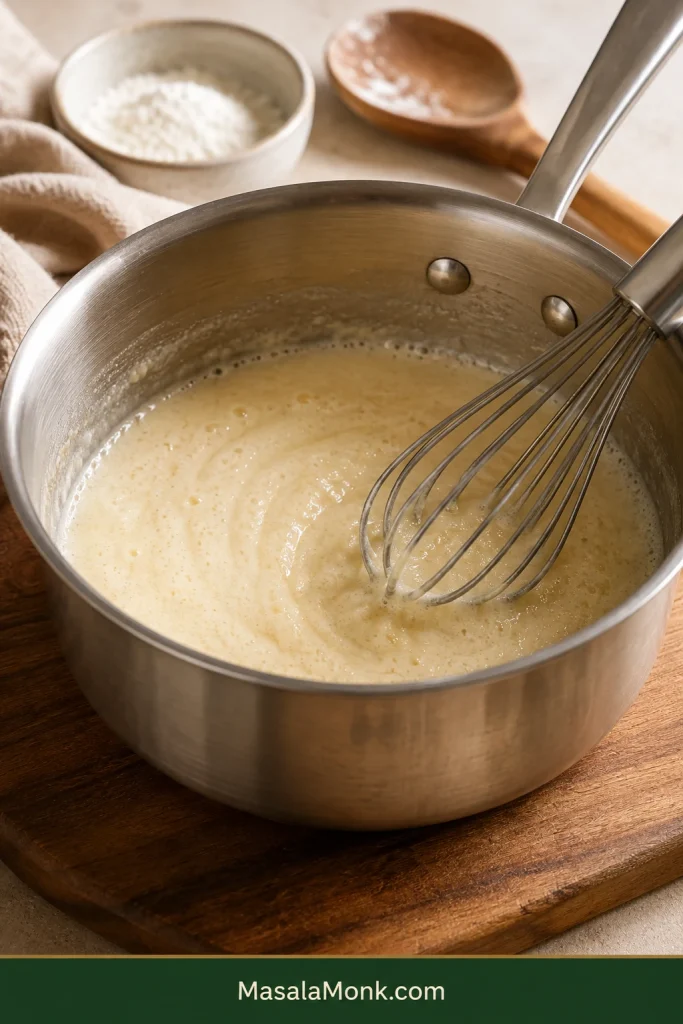
- Cook the flour. Warm the oil over medium heat. Whisk in the flour and cook for about 1 minute. It should bubble gently and lose its raw-flour smell without becoming dark brown.
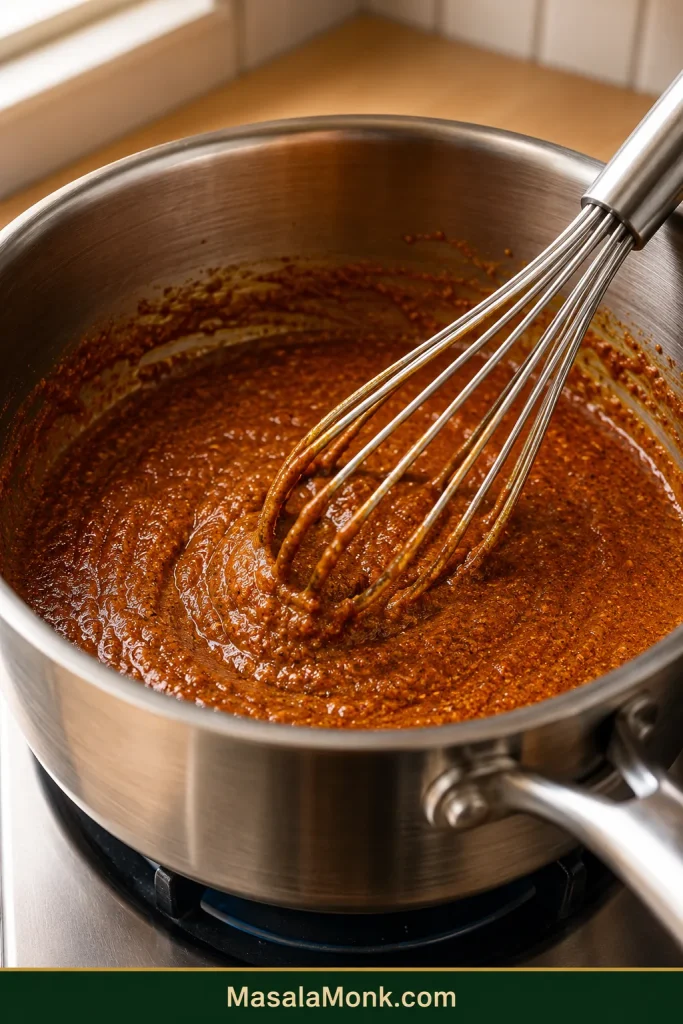
- Wake up the spices. Whisk in the seasonings for about 15–20 seconds. Warm chile and cumin should become fragrant almost immediately. That aroma is your cue to keep moving.
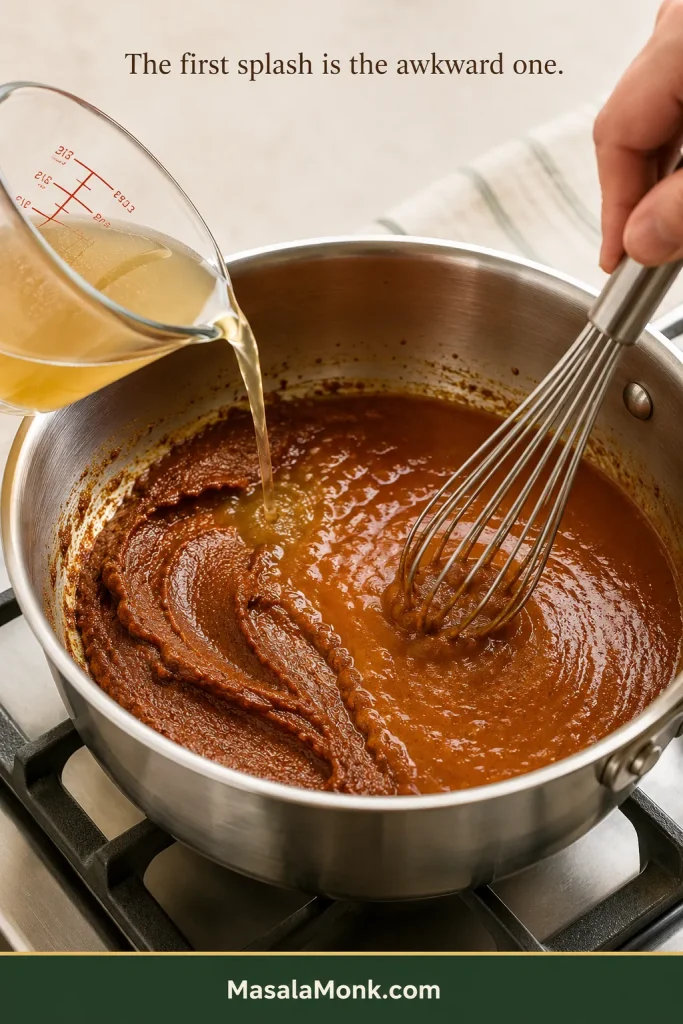
- Make the first splash count. Add ¼ cup (60 mL) broth and whisk until completely smooth. The first splash is the awkward one; when that is lump-free, the rest becomes easy.
- Add the remaining broth and tomato paste. Pour in the rest of the broth while whisking, then whisk in the tomato paste until no streaks remain.
- Simmer until it coats but still pours. Bring the sauce to a gentle simmer and cook for roughly 2–5 minutes. Saucepan width and burner strength matter more here than the clock. Stop when it flows easily from a spoon but leaves a thin red film behind. Err slightly loose; the sauce thickens as it stands.
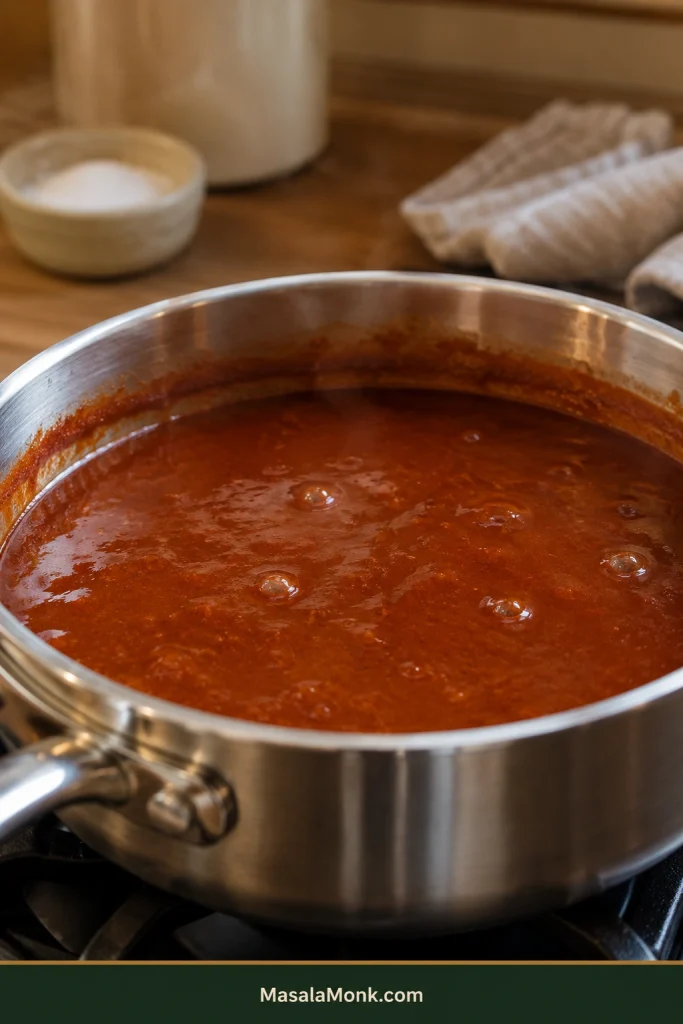
- Finish the sauce. Stir in the vinegar and ¼ teaspoon salt. Taste before adding more salt or heat. The vinegar should make the sauce taste brighter, not vinegary. Add cayenne only when you want more fire.
How do you know when enchilada sauce is ready?
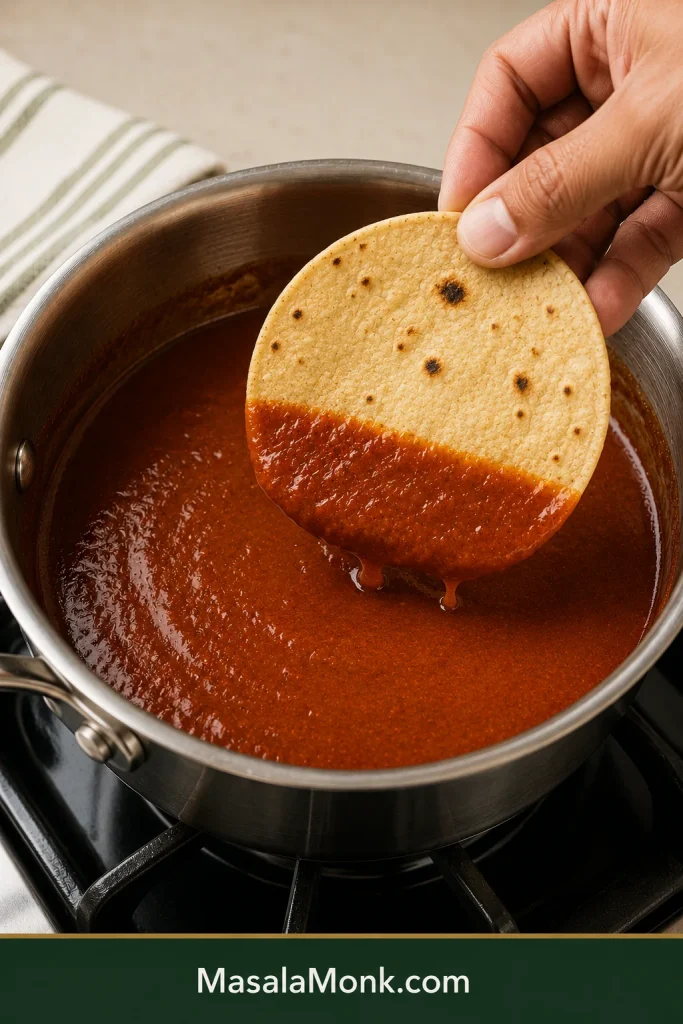
Enchilada sauce is ready when it pours freely, leaves a thin coating on a spoon and clings lightly to a tortilla.
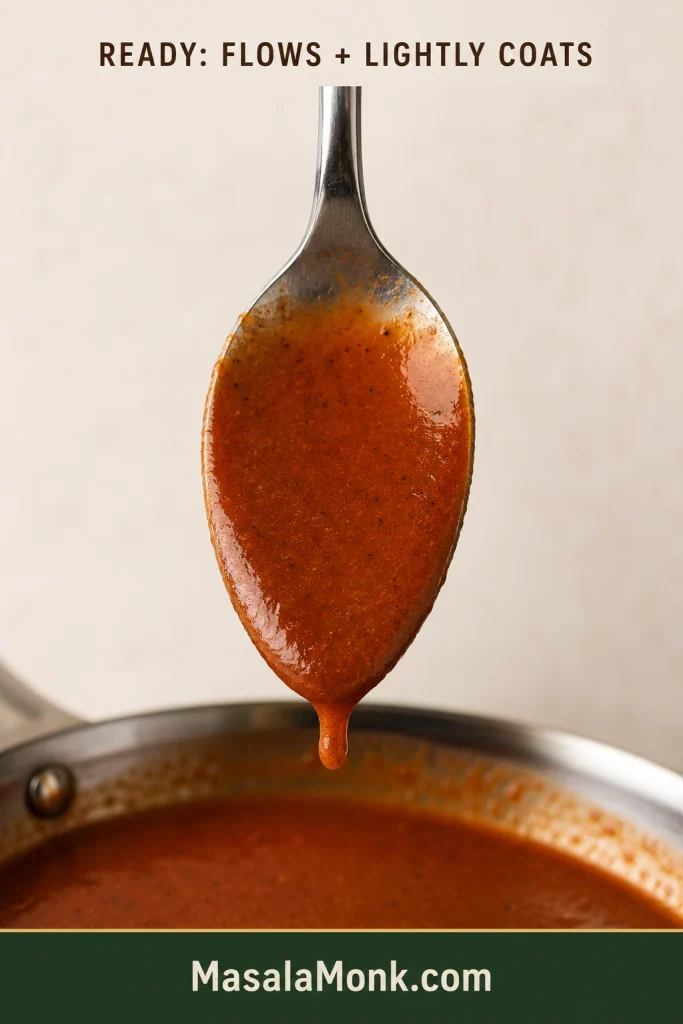
Taste it too. You should get warm, earthy chile, savory broth and tomato underneath, with brightness at the end keeping everything lively. No single flavor should dominate.
Drag the edge of a tortilla through the saucepan. The sauce should hang on instead of running straight off. Spoon it over a warm tortilla and that deep, savory chile aroma should arrive immediately—the sauce is there to make the filling and cheese taste richer, not simply wetter.
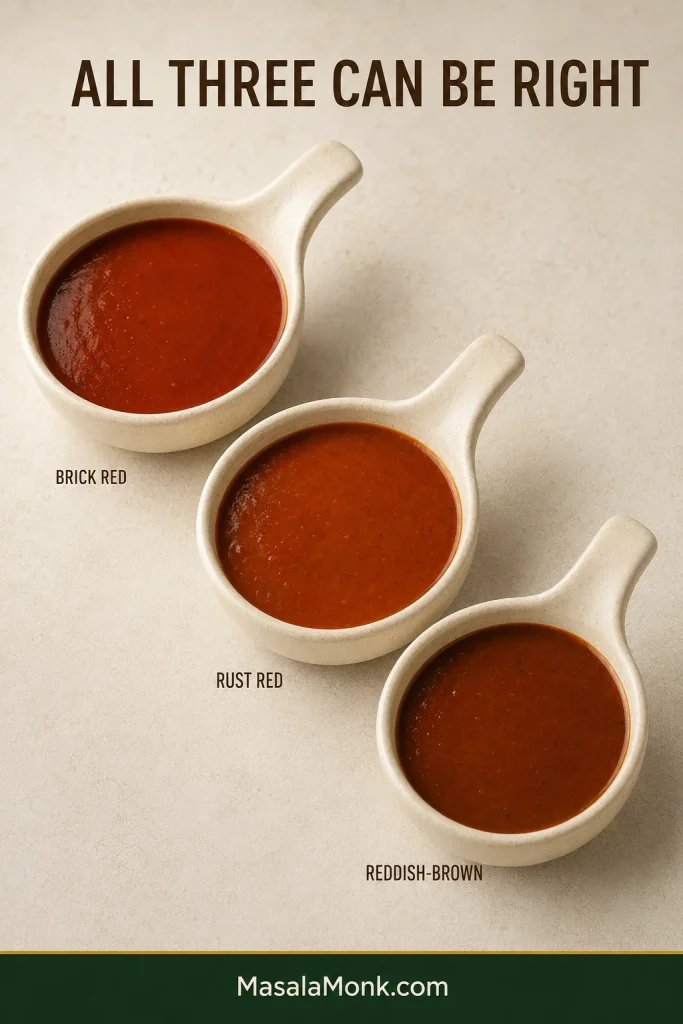
If your sauce comes out brick red, rust red or reddish-brown, that can still be exactly right. Chili powders vary considerably in color, so trust the texture and taste instead of trying to match one particular shade.
What if the enchilada sauce is too thin or too thick?
| What you see | Next move |
|---|---|
| Runs almost like broth | Simmer another minute and check again. |
| Pours freely and leaves a light coating | Take it off the heat. |
| Falls in heavy ribbons or sits like gravy | Whisk in broth or water 1 tablespoon (15 mL) at a time. |
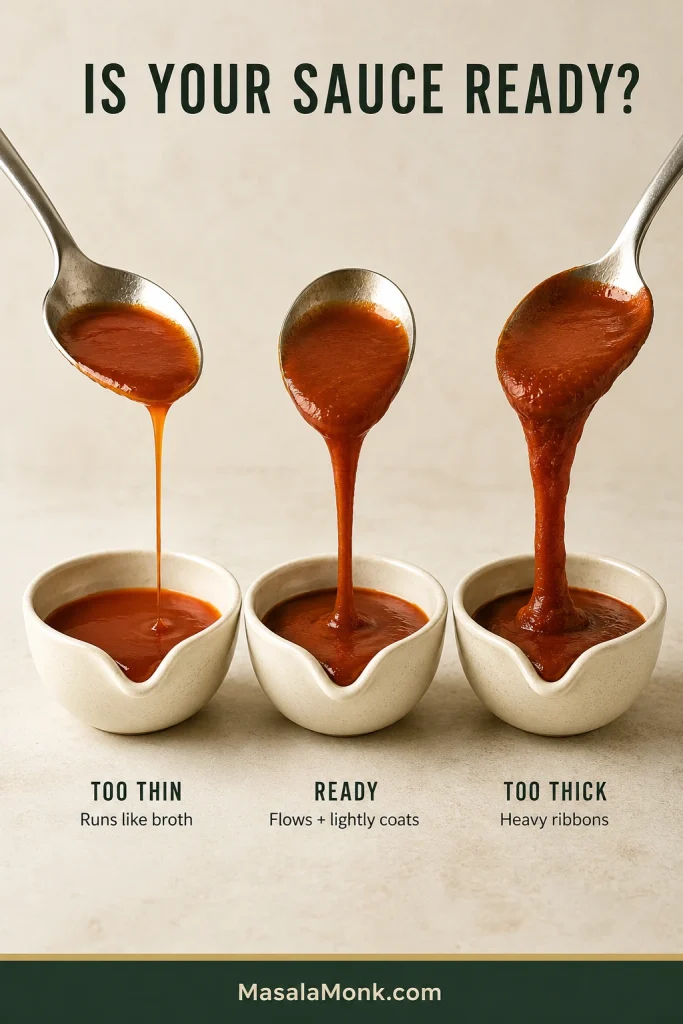
Most consistency problems are easy to correct. Burnt chile is the stubborn one, which is why the brief spice bloom matters more than chasing an exact number of seconds.
If the chile tastes good and the sauce coats the spoon, you have already done the important part.
Sauce still not right? Go to troubleshooting →
What is red enchilada sauce made of?
This red enchilada sauce is made with chili powder, oil, flour, broth, tomato paste, cumin, garlic, oregano, salt and vinegar.
Chile drives the flavor and color. The roux is deliberately light—just enough to help the sauce cling to a tortilla while keeping it fluid. Broth and tomato paste build the base; cumin, garlic and oregano round it out, and salt and vinegar bring everything into balance.
Nothing here needs to shout. The ingredients should taste like they have settled into one sauce rather than arriving one at a time.
Most of them are straightforward. Chili powder is the exception.
Which chili powder should you use?
For this recipe, use American-style chili powder—a seasoning blend—not cayenne or the same volume of pure ground chile.
This is where recipes written in different countries can go spectacularly sideways. In the US and Canada, “chili powder” commonly means a fairly mild blend containing ground chile or paprika along with seasonings such as cumin, garlic and oregano. A tablespoon or two does not necessarily make a dish fiercely hot.
Elsewhere, a jar labelled “chilli powder” may contain only ground hot chile. If the ingredient list says 100% ground chile, cayenne, or names one hot pepper as the only ingredient, treat it as pure chile rather than the bulk seasoning used here.
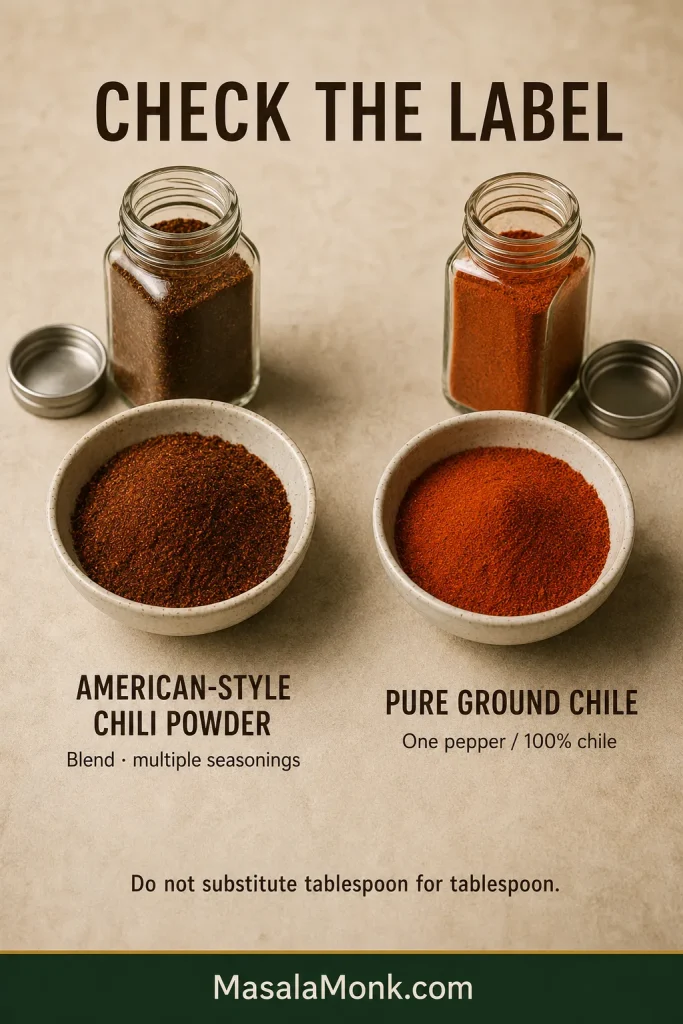
Cayenne and hot Indian red chile powder are better added by the pinch.
No American-style chili powder?
For the gentlest fallback, use 2 tablespoons sweet paprika as the bulk red seasoning.
For more chile character, replace 1 or 2 teaspoons of that paprika with a ground chile whose heat you already know—such as ancho powder or a familiar Kashmiri chile powder. Keep the cumin, garlic and oregano in the main recipe as written.
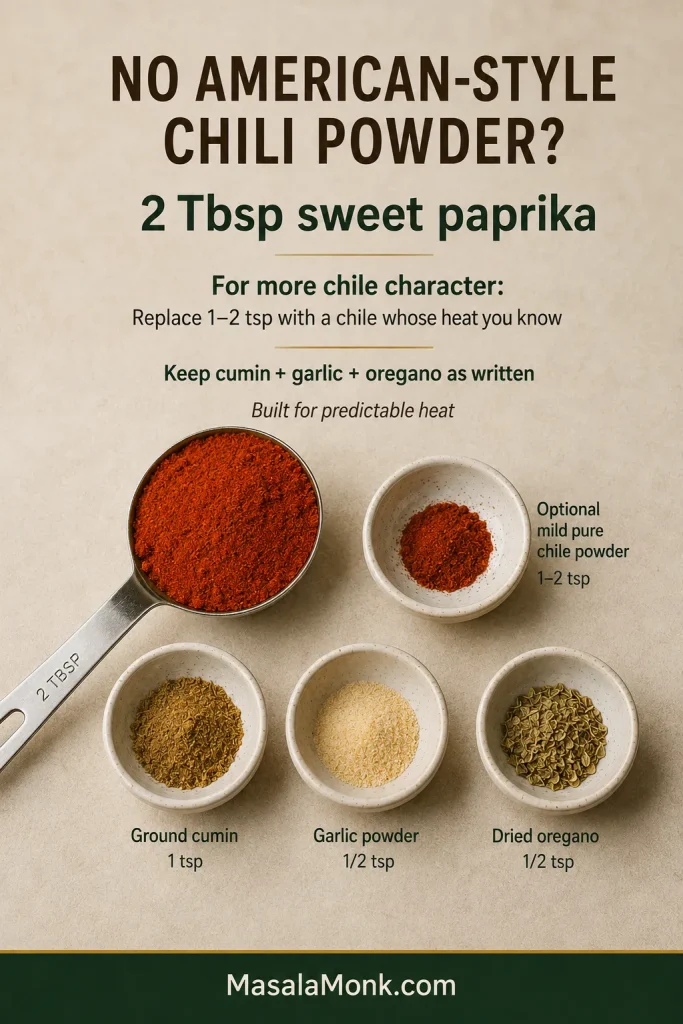
It will not taste exactly like every American chili-powder blend; the point of this fallback is predictable heat.
Choose your heat: gentle, classic or hot
More chile flavor does not have to mean more heat. Let the base carry the chile character; use cayenne or another hot chile when you actually want more fire.
- Unfamiliar blend or heat-sensitive eaters: use 1 tablespoon American-style chili powder and no cayenne. For the first batch, stop there. Once you know the blend, use the full 2 tablespoons next time.
- Classic: use the full 2 tablespoons once you know that amount gives you the heat you want.
- Hot: make the classic version, then stir in about ⅛ teaspoon cayenne after simmering. Taste before adding another pinch.
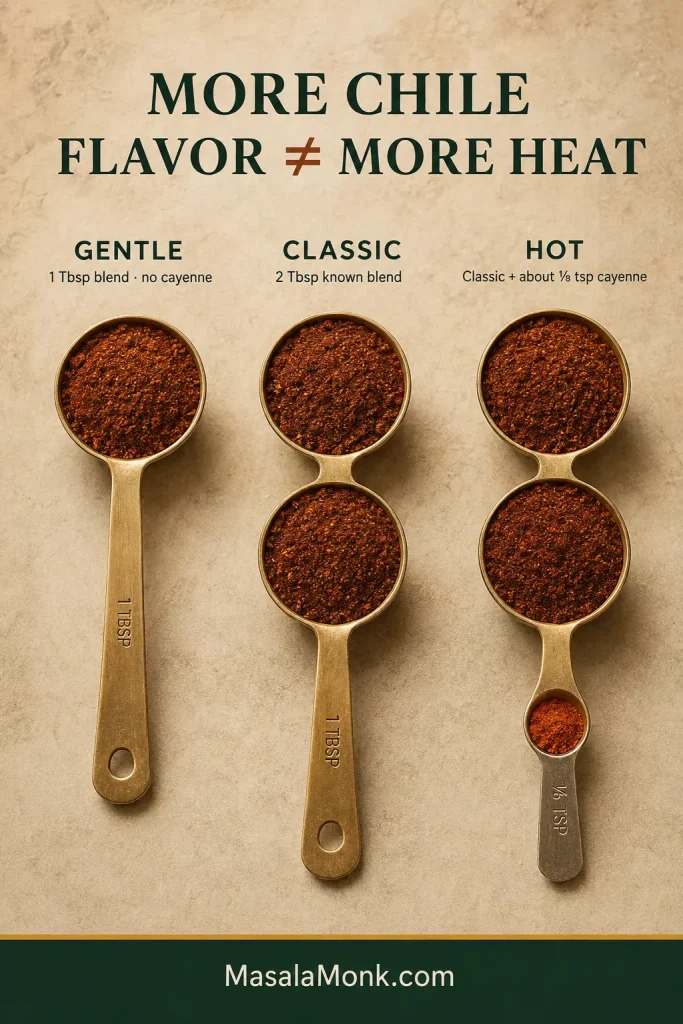
Everyone seems to have a different definition of “medium.” Keeping the main batch comfortable and passing extra pepper sauce at the table is often easier than making the whole pan hot.
Already made it too hot? Go straight to the spicy-sauce rescue →
Still unsure what your jar contains? McCormick’s chili powder guide explains the difference between American chili seasoning and straight ground chile.
Tomato paste, tomato sauce or no tomato?
Tomato is a style choice, not a requirement in every red enchilada sauce. Some sauces contain none at all, while others use tomato as a major part of the base.
| Tomato choice | What it gives you |
|---|---|
| Tomato paste | Concentrated depth and body with very little extra liquid |
| US canned tomato sauce / plain passata | A softer, more tomato-forward sauce with more liquid |
| Fresh tomatoes | Fresh flavor but variable water; usually more cooking and often blending |
| No tomato | A sauce driven more directly by chile and broth |
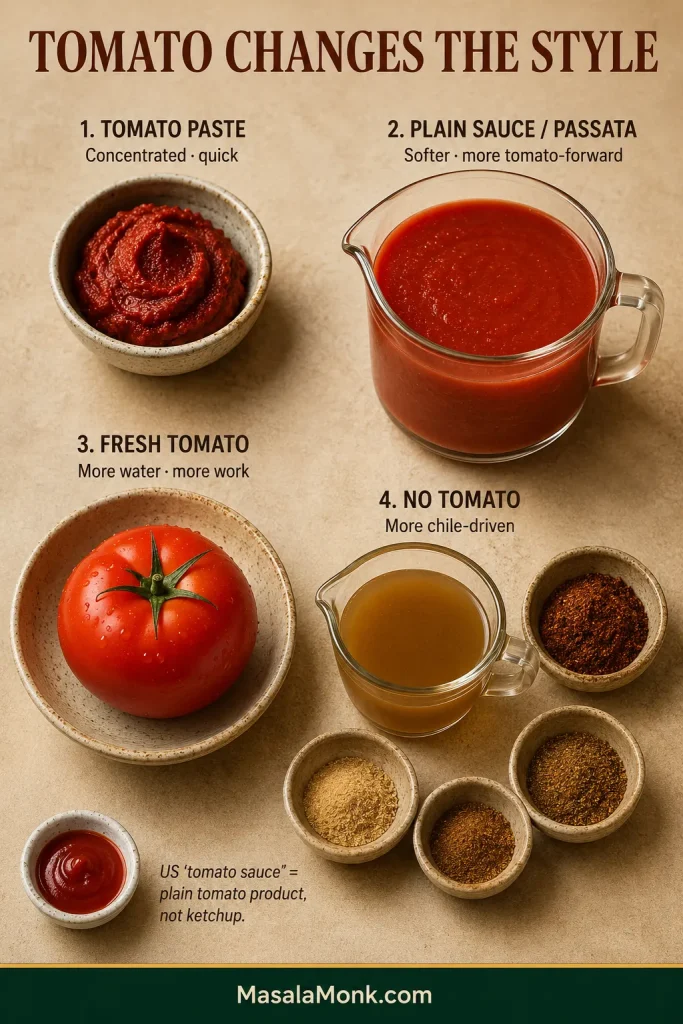
Two tablespoons of tomato paste give this version depth and body while keeping the cooking time short. The chile still arrives first; tomato fills in behind it instead of becoming the main event.
American “tomato sauce” is not ketchup
In an American ingredient list, canned tomato sauce generally means a smooth, fairly plain tomato product. Plain passata or strained tomatoes are much closer equivalents in places where that style of canned sauce is uncommon. Ketchup and seasoned pasta sauce bring much more sweetness, salt and seasoning.
Want a green tomatillo sauce instead? Our salsa verde recipe is the better fit.
Red enchilada sauce troubleshooting
Most batches that look a little wrong are still dinner. Find the closest problem, make one adjustment, then taste again before changing anything else.
| Problem | First thing to do |
|---|---|
| Much too spicy | Add broth and tomato paste, then simmer briefly. For extreme heat, use the rescue below. |
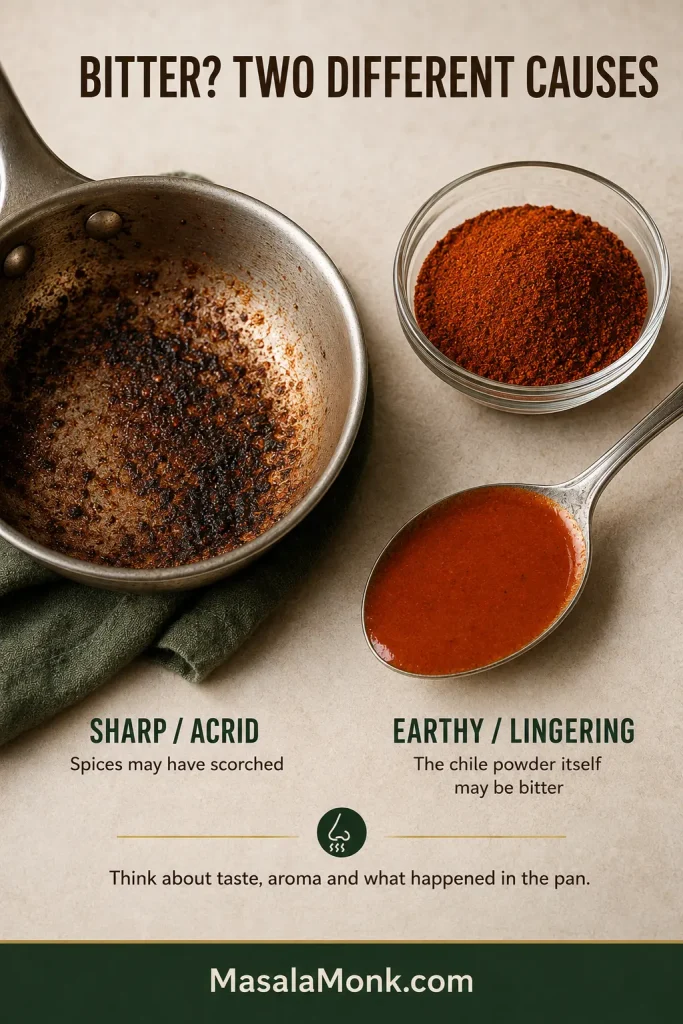
| Bitter | Check whether the spices scorched or the chile powder itself tastes bitter; compare the two causes below. |
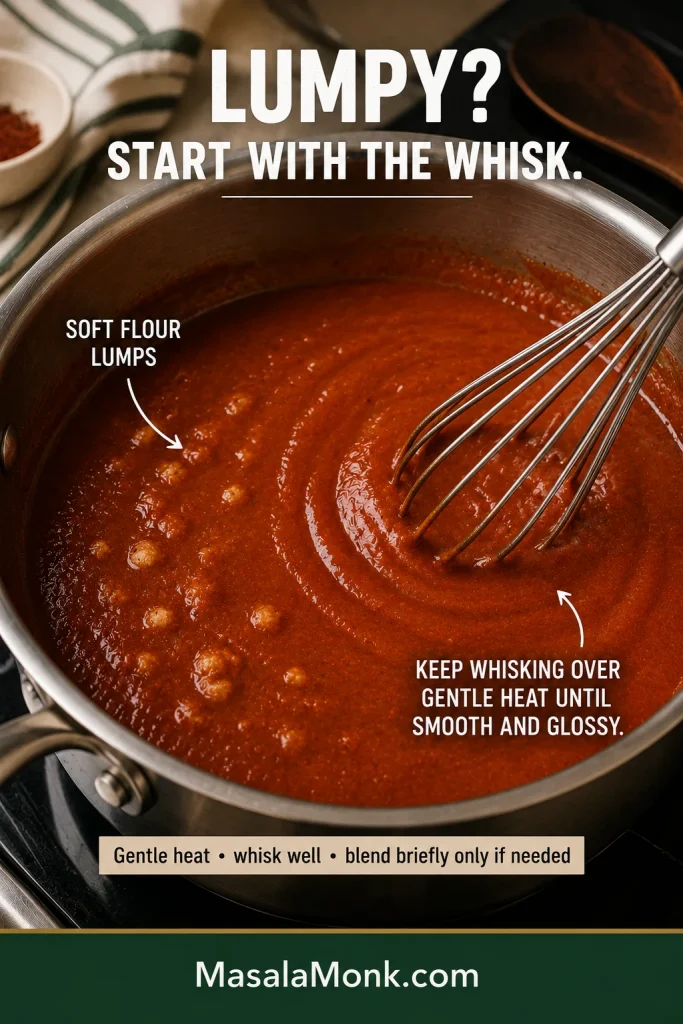
| Lumpy | Whisk vigorously over gentle heat; see the lumpy-sauce fix below if needed. |
| Flat or bland | Add salt first, then a few drops of vinegar. |
| Floury or chalky | Simmer gently; loosen with broth if the sauce also feels heavy. |
| Grainy or gritty | Simmer and whisk. Strain or blend briefly if coarse spice particles remain distracting. |
| Too tomato-forward | Check the salt first. Extra tomato changes the balance; a large amount of raw chili powder will not restore it. |
| Too salty | Loosen with unsalted broth or water. |
How to fix lumpy enchilada sauce
Start with vigorous whisking over gentle heat. If the sauce is also heavy, loosen it with a small splash of broth before reaching for a blender; soft flour pockets often smooth out once the sauce can move freely.
The sauce is painfully spicy. Is it salvageable?
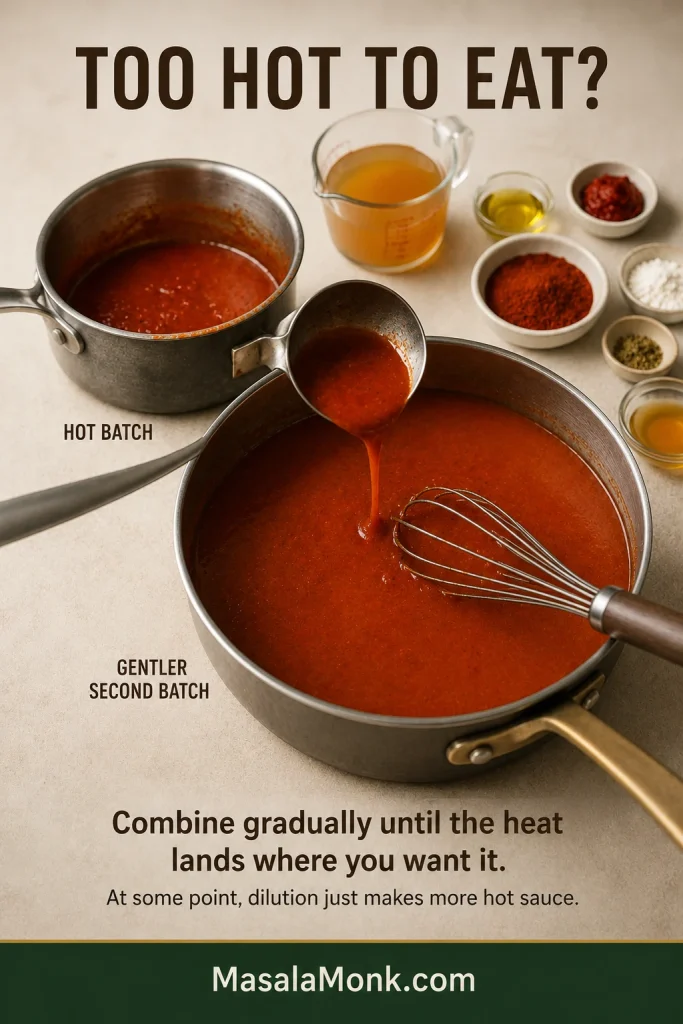
A sauce that is merely hotter than planned can usually take more broth and tomato paste; simmer briefly after adding them so the tomato paste blends back into the sauce. Once tablespoons of genuinely hot chile have gone into the pan, though, dilution has limits. At some point you are simply making more hot sauce.
A second batch made without the offending hot chile is often the cleaner rescue. Stir the fiery sauce into it gradually until the heat lands somewhere you actually want to eat.
Why does enchilada sauce sometimes taste bitter?
Burnt bitterness usually tastes sharp and acrid, and you may remember the spices darkening quickly or smelling harsh in the pan. That points back to the spice bloom.
A more earthy, lingering bitterness can come from the chile powder itself. If nothing scorched but you still dislike the bitter edge, changing the chili powder next time may help more than changing your technique.
↑ Back to top · Back to the recipe
How much enchilada sauce do you need?
How much homemade enchilada sauce equals one can?
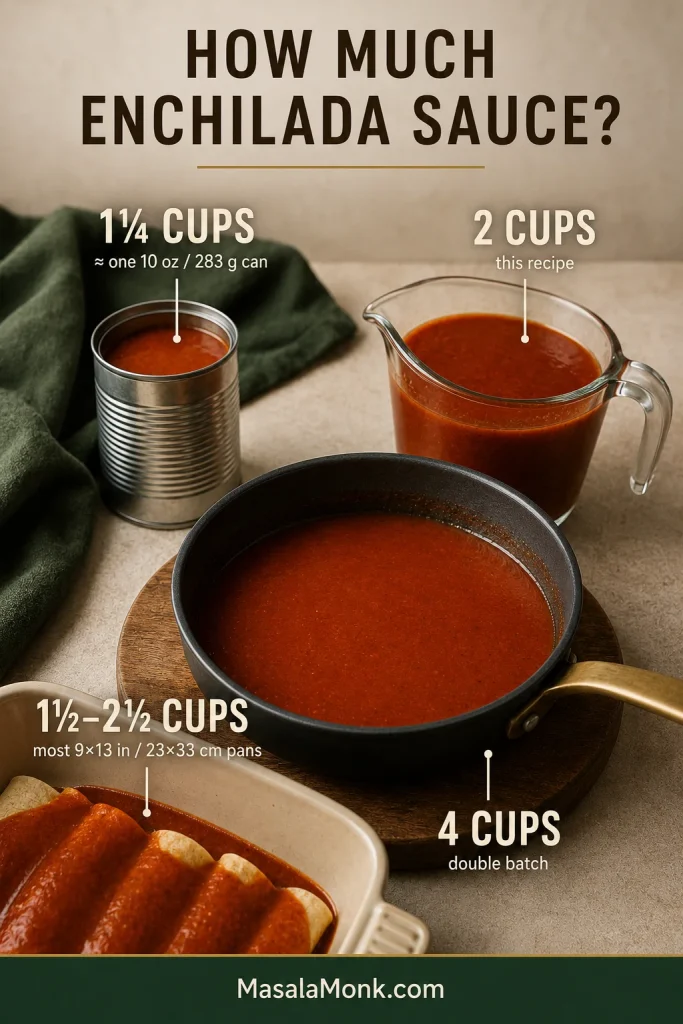
Use about 1¼ cups of homemade sauce in place of one standard 10-ounce (283 g) can of enchilada sauce. Brands vary in thickness, so a small difference in volume rarely matters in most recipes.
This 2-cup batch replaces roughly 1½ standard cans.
How much sauce for a 9×13-inch pan?
For most 9×13-inch (23×33 cm) enchilada pans, 1½–2½ cups is a useful range.
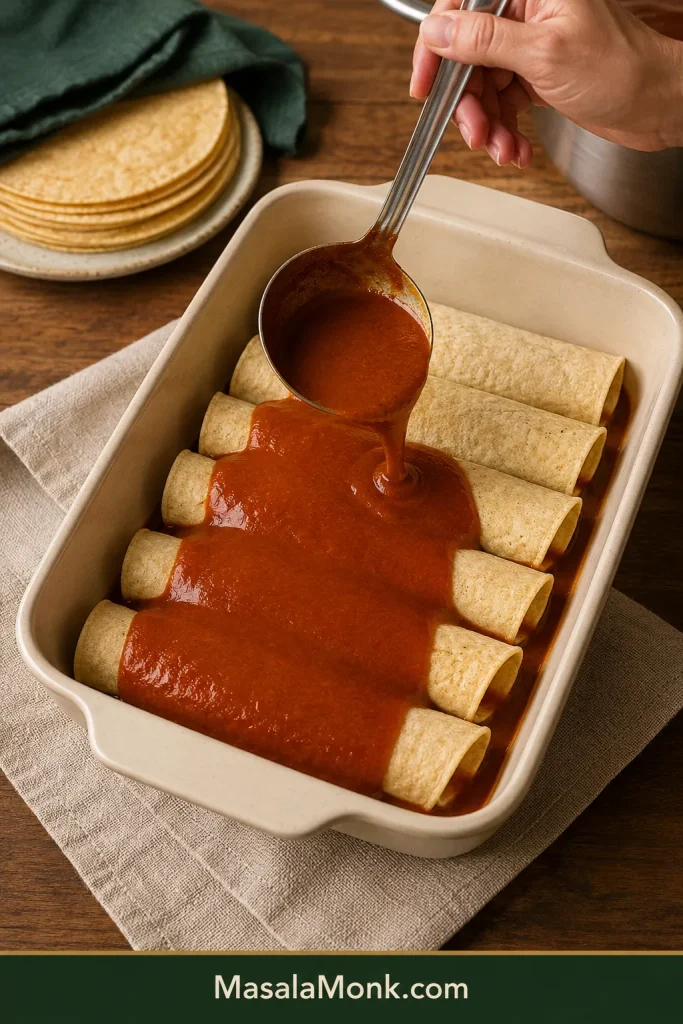
Sauce mainly underneath and over the top puts you near the lower end. Coat each tortilla generously or add sauce to the filling and you will use more.
Aim for generously sauced tortillas that still hold their shape. Tortilla preparation matters too, but flooding the pan can push the finished texture toward mushy instead of saucy.
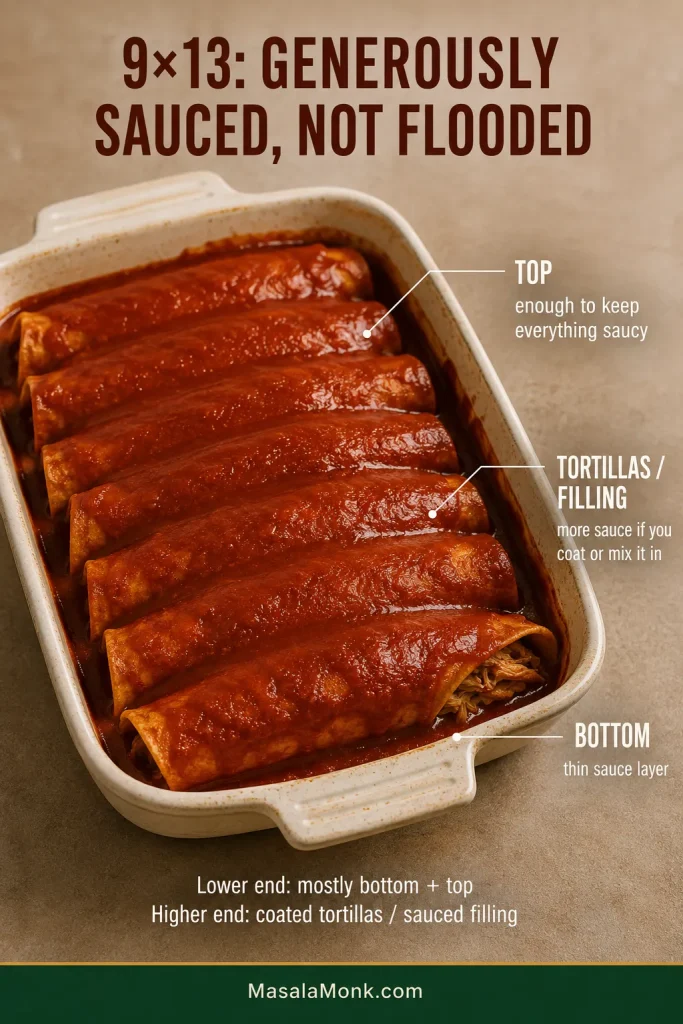
Our easy chicken enchiladas show how sauce can be distributed across the bottom, filling and top without leaving the finished pan swimming.
Need more? Make 1½ batches for about 3 cups, or double everything for about 4 cups. A larger saucepan makes a doubled batch much easier to whisk.
Already have a can? Use it.
Some nights, opening the can is exactly the right decision.
Homemade gives you control; canned sauce gives you dinner faster. Both are useful.
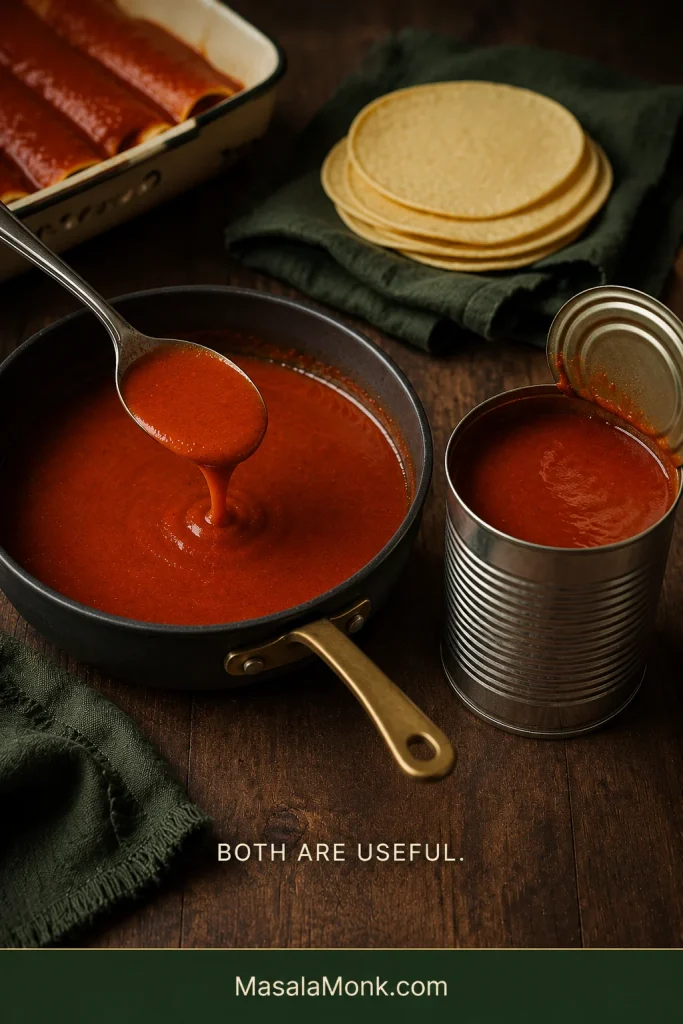
Warm canned sauce before deciding what it needs. Broth can loosen a heavy sauce. Cumin or oregano can deepen one that tastes flat. A few drops of lime or vinegar can wake up a dull batch.
That is all “better than canned” needs to mean here.
Swaps and substitutions
Chicken or vegetable broth both work; use vegetable broth for a vegetarian or vegan sauce. Water works in a pinch, though you will want to pay closer attention to seasoning at the end. Neutral oil and mild olive oil both work too.
Gluten-free and flourless options
A cup-for-cup or 1:1 gluten-free flour blend designed to replace wheat flour is the closest swap for the roux. Different blends thicken differently, so trust the spoon test; the exact cooking time may vary. Need it strictly gluten-free? Check the broth and packaged spice-blend labels too.
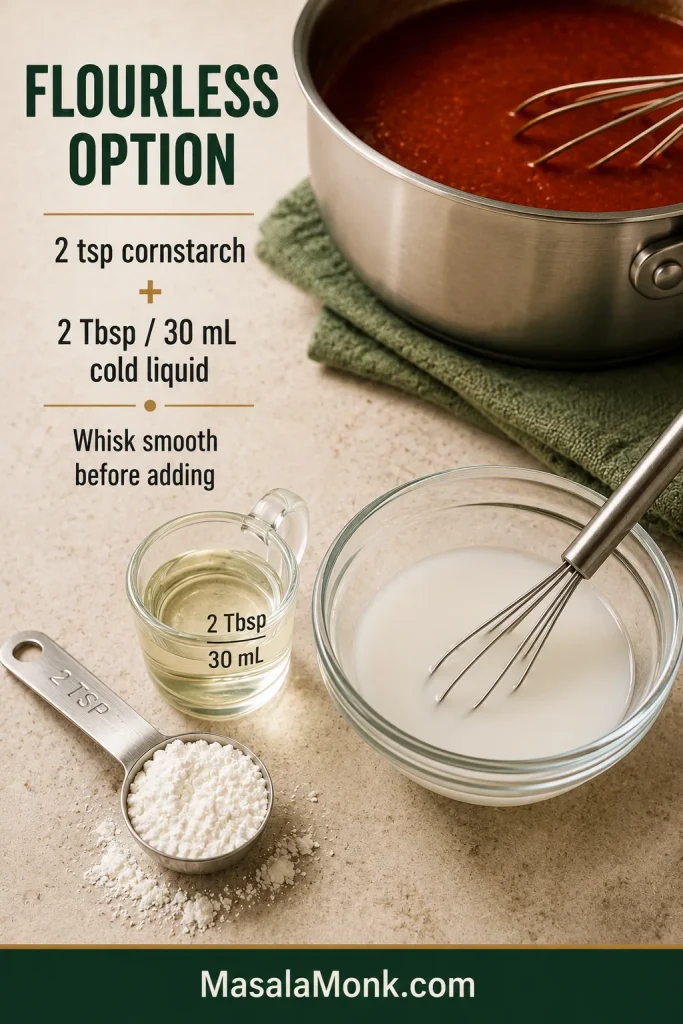
For a flourless sauce, skip the flour and initial roux. Briefly warm the spices in the oil, then add the broth and tomato paste. Start with 2 teaspoons cornstarch mixed with 2 tablespoons (30 mL) cold broth or water. Whisk the slurry into the simmering sauce, cook for about a minute and check the consistency before adding more.
Using tomato sauce instead? Tomato sauce brings much more water, so it changes both the flavor and thickness. For best results, use a sauce formulated around tomato sauce or passata.
Want to use whole dried chiles? If you want the deeper character of guajillo, ancho or other whole dried chiles, start with a sauce designed for them. They need their own soaking or toasting, blending and sometimes straining method.
← Back to the recipe · ↑ Back to top
Ways to use leftover or extra enchilada sauce
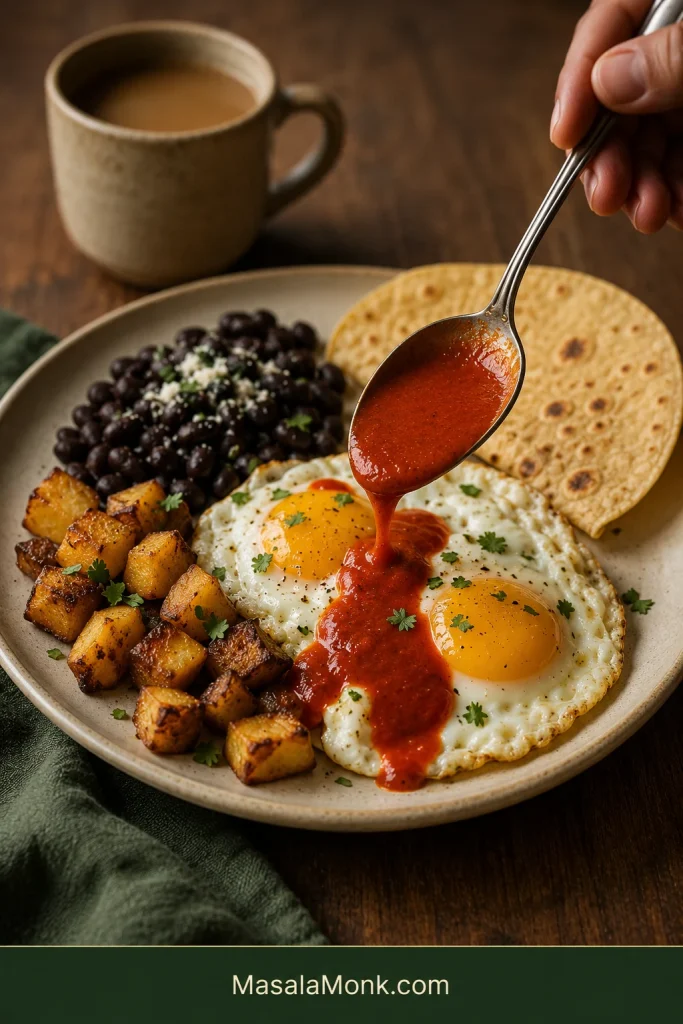
Even half a cup is worth keeping. Once it is in the fridge, think of it less as leftover sauce and more as a head start on the next meal.
- About ½ cup: spoon it over eggs, breakfast potatoes or beans, or add it after reheating one of our breakfast burritos.
- About 1 cup: make a small batch of chilaquiles, stir it into rice or beans, or use it for a small tray of cheese enchiladas.
- A full batch: use it for rolled chicken, beef, cheese or vegetable enchiladas.
- About 3 cups: scaled-up batches work well for layered dishes; our chicken enchilada casserole is a good example.
At the table, the enchiladas do not need a dozen competing sides. Something cool such as fresh guacamole is plenty against warm chile and melted cheese.
Storage, freezing and make-ahead
Refrigerator: Cool the sauce, transfer it to a covered container and refrigerate promptly. Plan to use it within 4 days. It will look thicker straight from the refrigerator; a splash of broth and gentle heat will loosen it again.
Make-ahead: Prepare the sauce ahead, cool and refrigerate it, then warm gently before assembling the enchiladas. Add a splash of broth if it has thickened.
Freezer: Freeze cooled sauce in tightly sealed freezer-safe containers or bags. One-cup portions are especially handy. For best quality, aim to use it within about 3 months.
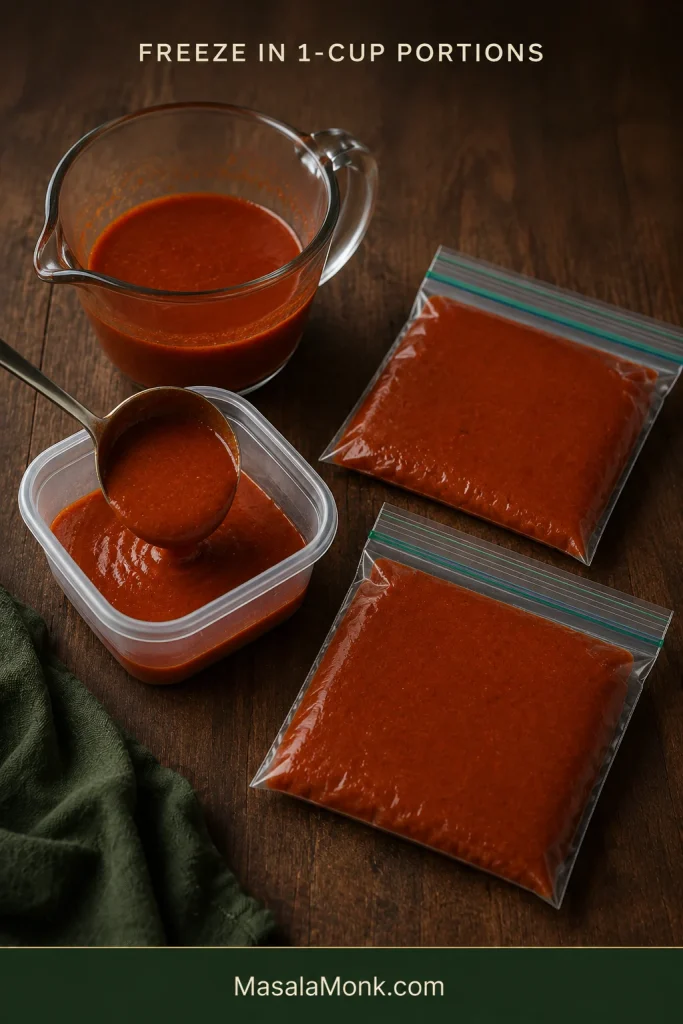
Thawing and reheating: Thaw in the refrigerator, then warm over low to medium-low heat. A flour-thickened sauce can look slightly uneven after freezing. Gentle heat and a whisk usually bring it back together; add broth if it needs loosening.
Can this sauce be canned for shelf storage?
This roux-thickened recipe was made for the refrigerator and freezer, not shelf-stable home canning. For pantry storage, use a preservation recipe specifically developed and tested for canning. The National Center for Home Food Preservation explains why acidity, ingredient proportions and thickeners matter in tested tomato-and-chile preservation recipes.
If you make it, tell us which chili powder you used and how the heat landed—brand and country are especially useful here.
The first batch teaches you your chili powder—how strong it tastes, how much heat it carries and what you would change next time. After that, it becomes the kind of saucepan recipe you start making by feel.
Give the flour its minute, let the spices wake up, whisk the broth smooth, and take the pan off while the sauce still flows.
Then it is just enchilada night.