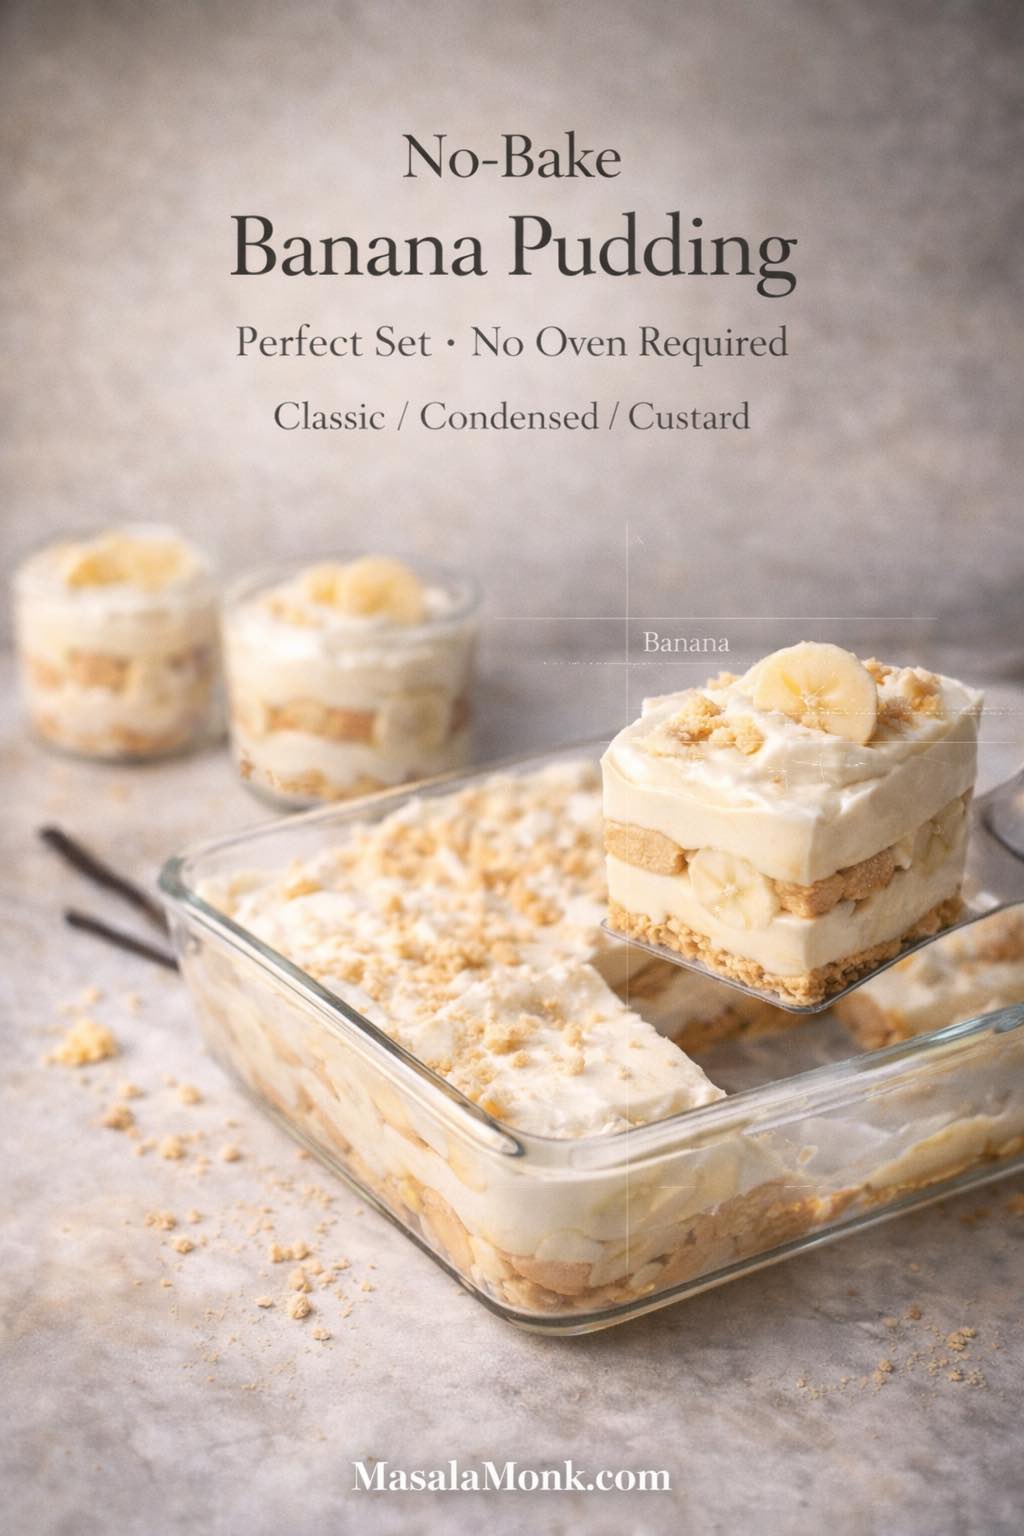
Some desserts ask you to measure, mix, bake, cool, frost, and pray nothing cracks. Banana pudding doesn’t demand that kind of ceremony. Instead, it leans into a simpler rhythm: slice bananas, whip something creamy, stack it with cookies, and let the fridge do the patient work. By the time you come back, the layers have transformed—cookies soften into cake-like sheets, bananas mellow into perfume, and the pudding turns thicker, silkier, and somehow more “finished” than it had any right to be.
That’s the heart of banana pudding (no bake). It’s comforting without being fussy, familiar without feeling boring, and flexible enough to match whatever your pantry—and mood—happen to be today. You can keep it classic with vanilla wafers and pudding mix, push it richer with sweetened condensed milk, go fully homemade with a stovetop custard (still no oven required), or make a dairy-free version that doesn’t taste like a compromise.
If you’re building a no-oven dessert lineup, you can round out the table with something bright and tangy like this no-bake blueberry cheesecake or something spiced and crunchy like these Lotus Biscoff dessert cups. Still, banana pudding is the one that disappears first—because it feels like home in a bowl.
No-bake banana pudding, five recipes (pick the vibe before you start)
Before you pull out a dish, decide what you want your banana pudding to be: airy and light, thick and tangy, extra creamy, old-fashioned, or plant-based. Once you choose, everything else—milk amount, cookie choice, chill time—falls neatly into place.
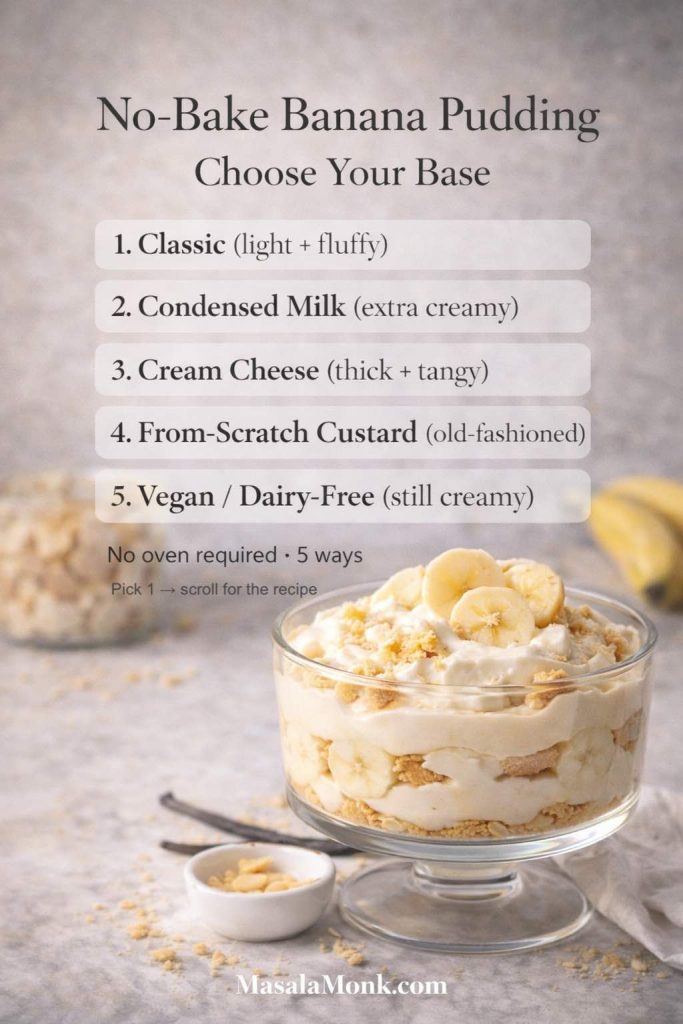
The classic (light, fluffy banana pudding, reliably set)
This is the “banana pudding recipe” most people picture: instant vanilla pudding, whipped cream, bananas, and vanilla wafers. It’s easy, and it still tastes like a celebration.
The condensed milk version (extra creamy banana pudding, no-cook)
If you love a richer spoon and a dessert that holds up longer at gatherings, banana pudding with sweetened condensed milk is the move. It’s no-bake, no oven, and still feels indulgent.
The cream cheese banana pudding recipe (thick, tangy, cheesecake-style)
Cream cheese makes the layers sturdier and adds a gentle tang that keeps the sweetness from feeling heavy. It also nods toward a banana pudding cheesecake no bake style without turning the whole thing into a separate dessert.
The from-scratch custard (homemade, old-fashioned, no oven required)
This one tastes the most “made.” You’ll cook a simple stovetop custard, chill it, then layer as usual. The payoff is deeper vanilla flavor and a silkier texture that feels unmistakably homemade.
The vegan/dairy-free banana pudding (still creamy, still classic recipe)
A well-made vegan banana pudding can be every bit as satisfying. The secret is a pudding base that sets firmly, plus a chill long enough to knit the layers together.
Also Read: Sweetened Condensed Milk Fudge: 10 Easy Recipes

The ingredients that matter (and why each one changes the texture)
Banana pudding can look like a simple list on paper, yet a few small choices decide whether you end up with clean, scoopable layers or a soft, slumped bowl of sweetness. Luckily, the fixes are straightforward.
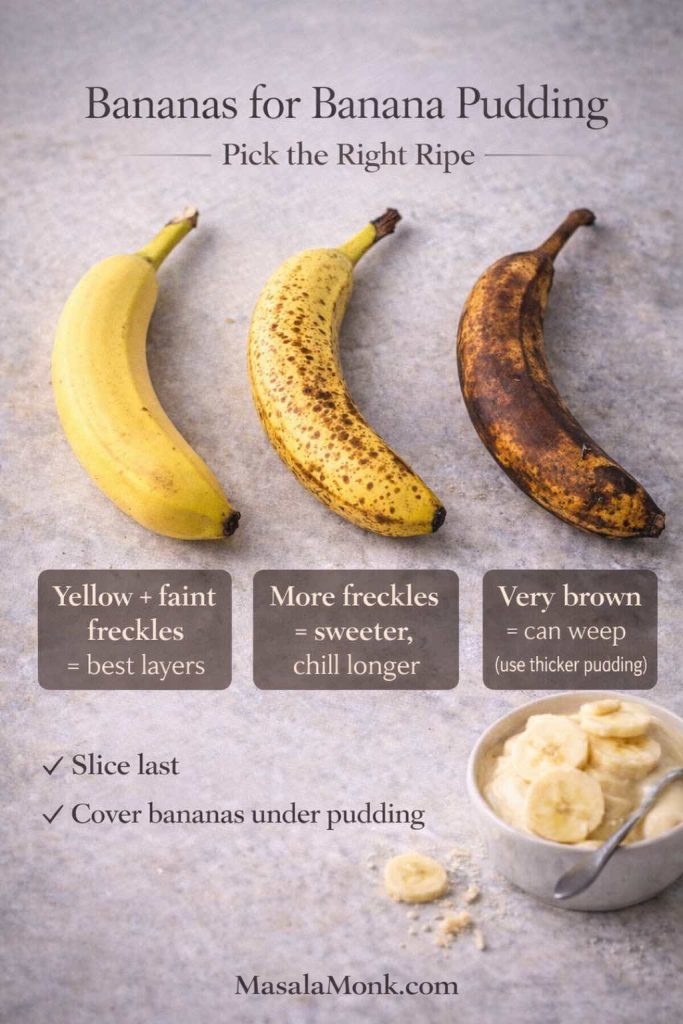
Bananas: ripe, but not collapsing
Aim for bananas that are yellow with light freckles—fragrant, sweet, and tender without being watery. If they’re very ripe (lots of brown), they’ll still taste great; however, they can release more moisture as they sit. In that case, you’ll want a thicker pudding base and a little more chill time.
Creamy base: pudding mix, custard, or condensed milk
- Instant pudding mix gives a consistent set and keeps the method truly no-cook.
- Stovetop custard brings the “homemade banana pudding” depth, and it still stays no oven required.
- Condensed milk adds body and richness, which helps the pudding stay thick even after hours in the fridge.
Cream: optional, but it changes everything
Whipped cream folded into the pudding base makes the texture lighter, almost mousse-like. It also softens the sweetness so each bite feels more balanced. If you’ve ever wondered about the difference between heavy cream and whipping cream for desserts, this quick explainer on heavy cream is a helpful reference—especially when you’re deciding what will whip most reliably.
Cookies: the quiet backbone of the whole dessert
Cookies aren’t just garnish here. They’re structure. They’re sponge. And then they’re the reason banana pudding becomes cohesive instead of just “bananas with pudding.”
Also Read: Kahlua Drinks: 10 Easy Cocktail Recipes (Milk, Vodka, Coffee)
Cookies for banana pudding (vanilla wafers, plus the best swaps)
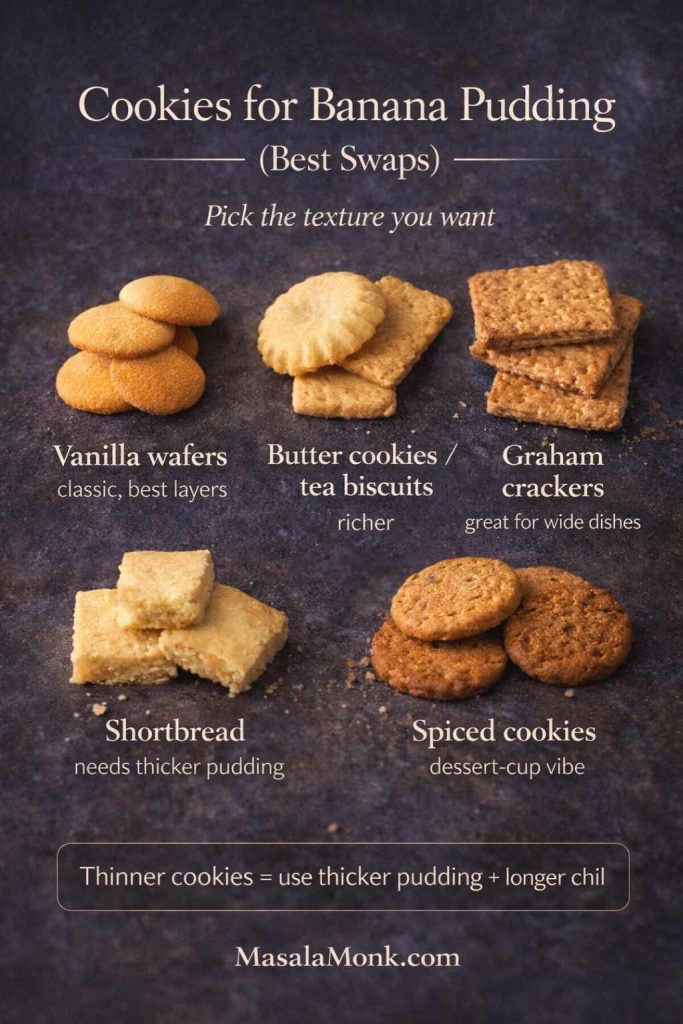
If you want the most classic finish, vanilla wafers are hard to beat. They soften into tidy layers rather than dissolving instantly, and their gentle vanilla flavor keeps the dessert focused on bananas and cream.
Banana pudding with vanilla wafers (the classic layering cookie)
Vanilla wafers create that signature texture: soft, cake-like, and spoonable, yet still layered. They also look beautiful through glass if you serve banana pudding in jars.
Vanilla wafer alternatives that still behave well in banana pudding
Sometimes you want a different cookie, either for flavor or because you’re working with what you have.
- Butter cookies or tea biscuits: richer, more “bakery” tasting
- Graham crackers: slightly honeyed; great for wide dishes and jars
- Shortbread: dense and buttery; best paired with a thicker pudding base
- Spiced cookies: cozy, dramatic, and excellent in dessert cups
If you lean toward delicate cookies, keep your pudding thicker and don’t rush the chill. Otherwise, the layers can turn too soft before serving.
Also Read: Sourdough Recipe: 10 Easy Bread Bakes (Loaves, Rolls & Bagels)
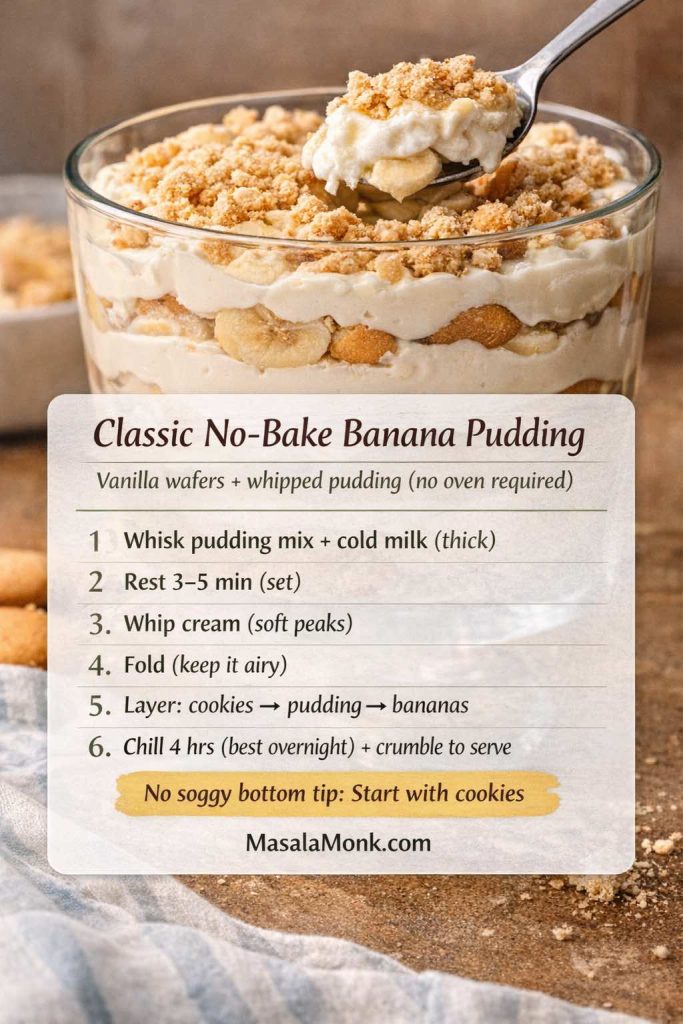
No-bake banana pudding: the classic recipe (vanilla wafers + whipped pudding)
This is the version to make when you want the most reliable outcome with the least effort. It also gives you the cleanest foundation for variations later.
Ingredients (serves 8–10)
- 3–4 medium ripe bananas
- 1 box instant vanilla pudding mix (about 90–100 g)
- Cold milk (use the amount on the box as your starting point)
- 250–350 ml whipping cream, chilled
- 1–2 teaspoons vanilla extract (optional)
- Vanilla wafers (or your cookie choice)
- A small pinch of salt (optional, but surprisingly important)
Method
- Make the pudding base. Whisk pudding mix with cold milk until it thickens, then let it stand for a few minutes so it sets properly.
- Whip the cream. Beat chilled cream until soft peaks. Add vanilla if you want a warmer, dessert-shop aroma.
- Fold gently. Fold whipped cream into the pudding base until it looks airy and uniform. Don’t stir aggressively; instead, turn the mixture over itself so you keep the lift.
- Slice bananas at the last moment. This keeps them fresher and helps reduce browning.
- Layer. In a dish: cookies → pudding → bananas. Repeat until you run out, finishing with pudding on top.
- Chill. Refrigerate for at least 4 hours. Overnight is even better because the cookies soften evenly and the pudding tightens into a more cohesive slice-and-scoop texture.
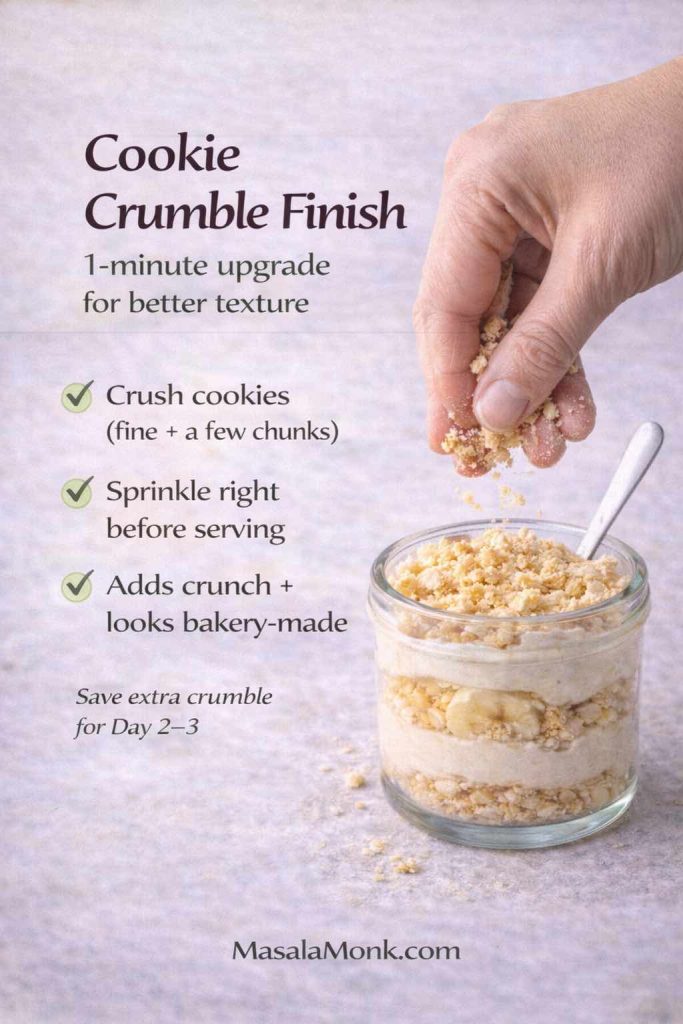
A small finishing move that changes the whole dessert
Right before serving, crumble a handful of cookies over the top. The contrast—soft layers underneath, crunchy crumb on top—makes each bite feel more alive.
If you enjoy layered puddings and want another “simple but elegant” idea, this savoiardi chocolate vanilla pudding has a similarly satisfying spoon texture, just with a more dramatic chocolate-and-cream vibe.
Also Read: Cold Brew Espresso Martini: How to Make It (Step-by-Step Recipe)
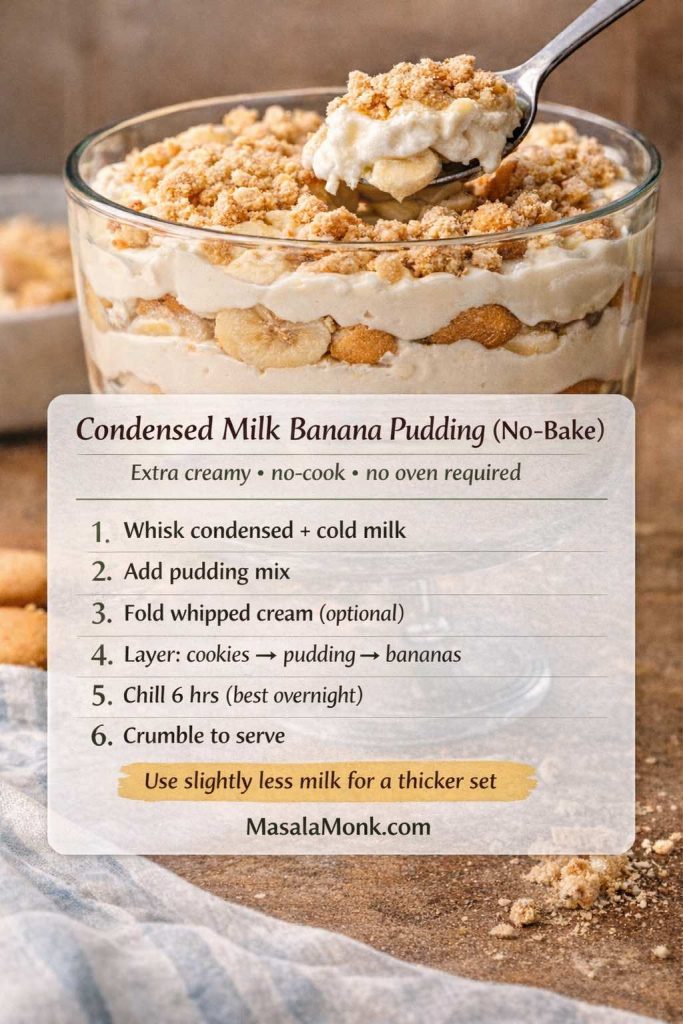
No-cook banana pudding with sweetened condensed milk (extra creamy, no oven required)
When you want banana pudding that tastes richer and holds up longer—especially if it’s sitting out for a while at a gathering—condensed milk is the shortcut that feels like a secret.
This variation also makes it easier to keep the pudding thick even after chilling, which is helpful if you’re using cookies that soften quickly.
Ingredients
- 1 can sweetened condensed milk (about 395–400 g)
- 1 box instant vanilla pudding mix (about 90–100 g)
- Cold milk (start with slightly less than the box suggests)
- Whipped cream (optional but recommended)
- Bananas
- Vanilla wafers or other cookies
Method
- Whisk condensed milk and cold milk until smooth and glossy.
- Add the pudding mix and whisk until thickened.
- Fold in whipped cream if you want a lighter finish.
- Layer cookies, bananas, pudding, repeating until the dish is full.
- Chill longer than the classic—aim for 6 hours or overnight—so the layers become neatly sliceable.
If you’re the type who loves make-ahead fridge sweets, you might also enjoy peanut butter fudge. It’s a different texture entirely, yet it hits that same “chill, slice, share” convenience.
Also Read: 10 Vegan Chocolate Cake Recipes (Easy, Moist, & Dairy-Free)
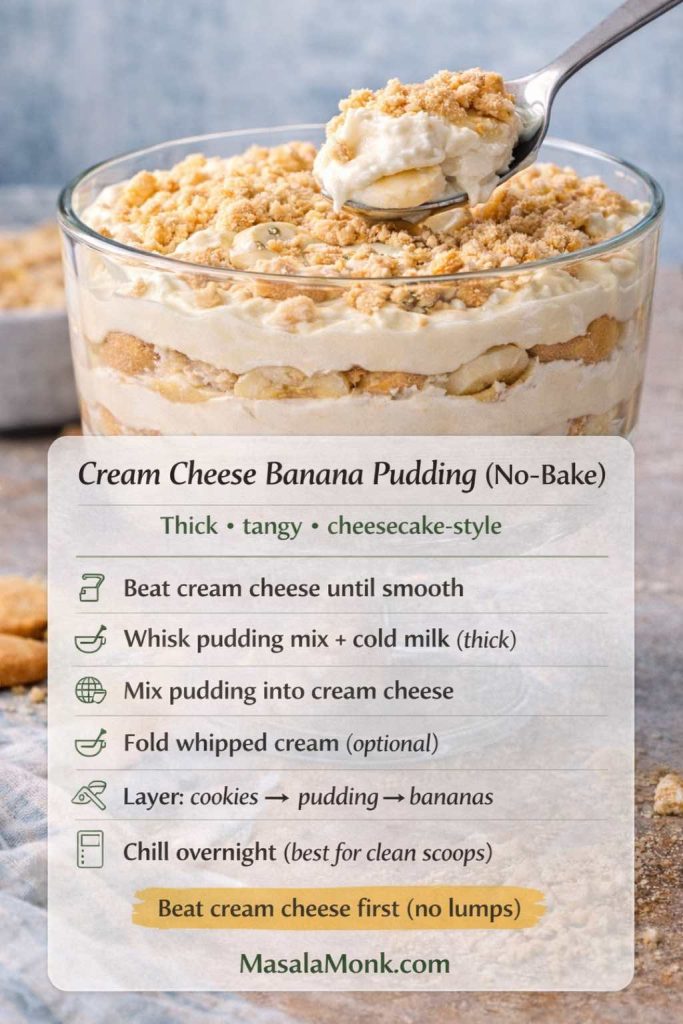
Cream cheese no-bake banana pudding (thick, tangy, cheesecake-style recipe)
Cream cheese changes the personality of banana pudding. The dessert becomes thicker and slightly tangy, with a richer mouthfeel that feels closer to a cheesecake filling. It’s a wonderful choice if you like desserts that scoop cleanly and don’t slump.
Ingredients (serves 8–10)
- 225 g cream cheese, softened
- 1 box instant vanilla pudding mix
- Cold milk (use a little less to keep it thick)
- 250–350 ml whipping cream, whipped to soft peaks
- Optional: 1 can sweetened condensed milk for extra richness
- Bananas
- Cookies (vanilla wafers are perfect here)
Method
- Beat the cream cheese until completely smooth. Take your time—lumps are stubborn once you add everything else.
- Blend in condensed milk if using, until creamy and glossy.
- Whisk pudding mix with cold milk separately until thick, then fold or beat it into the cream cheese mixture.
- Fold in whipped cream to lighten the base.
- Layer with bananas and cookies, then chill overnight for the best structure.
If you want to lean into the cheesecake mood, serve this version alongside no-bake blueberry cheesecake for a dessert table that feels intentional rather than accidental.
Also Read: Cranberry Moscow Mule Recipe: A Festive Holiday Cocktail With Easy Variations
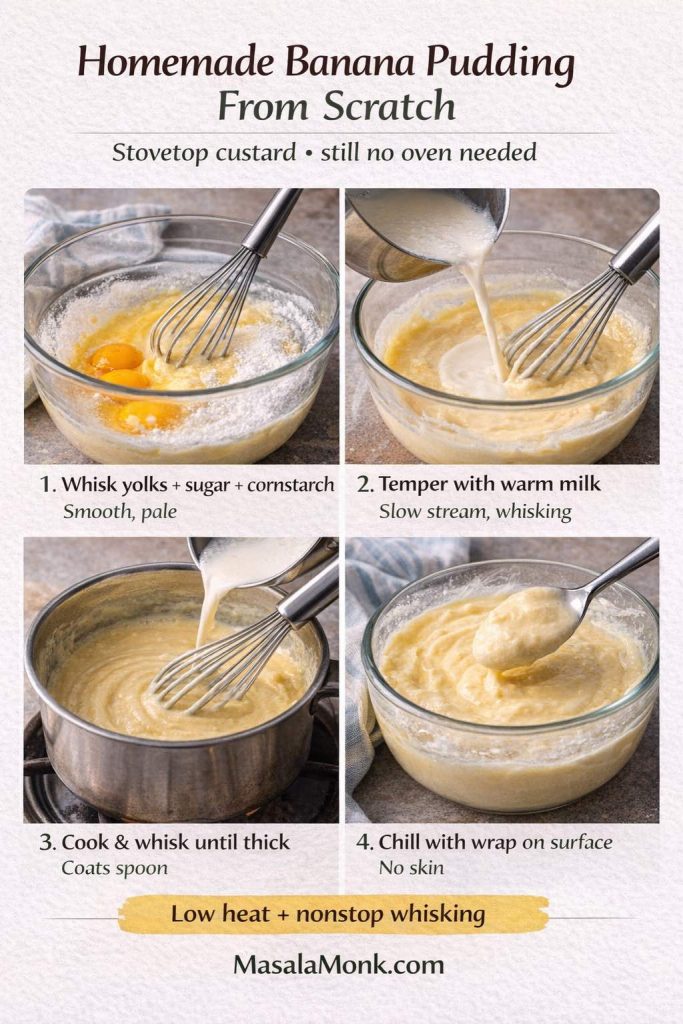
Homemade banana pudding from scratch (stovetop custard, still no oven needed)
This is the method that turns banana pudding into something you might proudly bring to a holiday dinner. It tastes deeper, it feels silkier, and it carries a quiet confidence that instant mix can’t quite replicate.
Even so, it’s still simple. You’re making a vanilla custard thickened with egg yolks and cornstarch, then chilling it until cold and spoonable. After that, you layer it exactly the same way.
For a dependable reference on how stovetop pudding thickens, King Arthur’s simple stovetop vanilla pudding is a useful baseline. If you enjoy understanding the “why” behind the method, Serious Eats has a clear explanation in their guide to vanilla pastry cream, which shares many of the same principles.
Ingredients (serves 8–10)
- 500 ml milk (2 cups)
- 90–120 g sugar (adjust to taste)
- 3 egg yolks
- 20–25 g cornstarch (about 3 tablespoons)
- Pinch of salt
- 2 teaspoons vanilla extract
- 25–30 g butter (optional, for extra silkiness)
- Bananas
- Vanilla wafers (or cookie of choice)
Method
- Whisk the yolks, sugar, cornstarch, and salt until smooth and slightly thickened. This mixture should look pale and glossy.
- Warm the milk in a saucepan until steaming. Do not boil—you want it hot enough to temper the eggs, not hot enough to scramble them.
- Temper slowly. Whisk a little warm milk into the yolk mixture, then a little more, building the temperature gradually.
- Return to the pan and cook. Pour the tempered mixture back into the saucepan and cook on medium heat, whisking constantly. In a few minutes, it will shift from thin to thick. Keep whisking until it’s pudding-like and coats the back of a spoon.
- Finish off the heat. Remove the pan from the heat and stir in butter (if using) and vanilla.
- Cool correctly. Press a sheet of plastic wrap directly onto the surface so a skin doesn’t form. Let it cool to room temperature, then refrigerate until fully cold.
- Layer and chill again. Once the custard is cold and thick, layer cookies, bananas, and custard. Chill at least 4–6 hours, ideally overnight.
To make it “old fashioned” banana pudding without an oven
Keep the custard thicker and skip folding in whipped cream. The result is dense, silky, and unmistakably homemade—very much the old-fashioned homemade banana pudding feeling, while still staying no oven required.
Also Read: Baked Ziti Recipe Collection: 15 Easy Variations
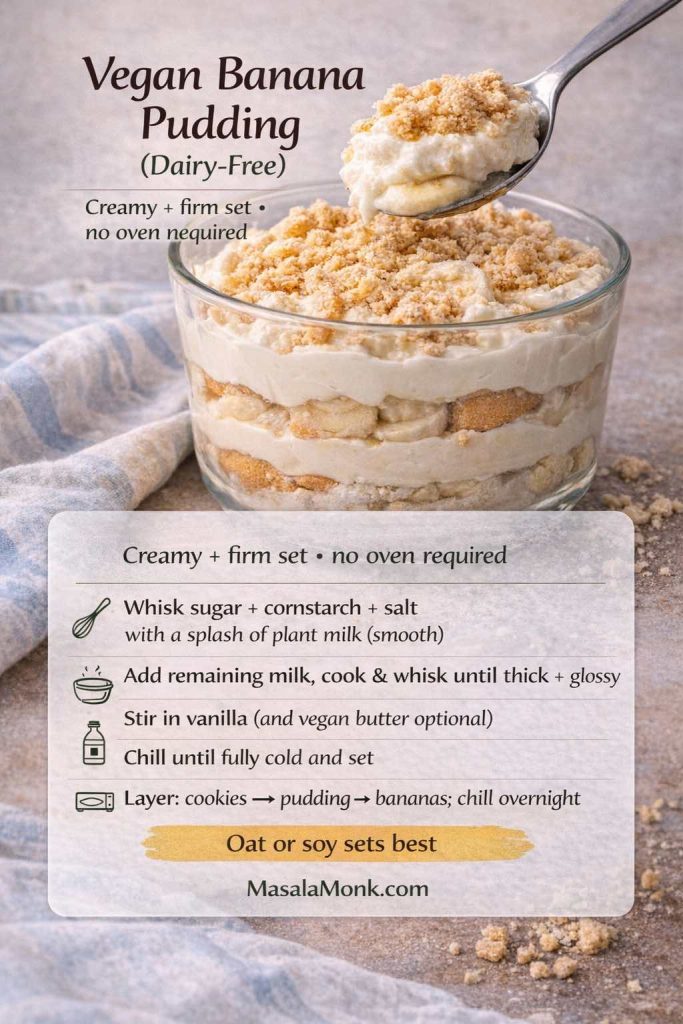
Vegan and dairy-free banana pudding (no-bake, no oven, still satisfying)
A dairy-free banana pudding shouldn’t feel like a side quest. It should taste like banana pudding—fragrant bananas, vanilla warmth, and a creamy base that sets properly.
The key is choosing a plant milk that thickens well (oat and soy are excellent), then cooking a quick pudding base with cornstarch. After that, you chill it fully before layering.
If you like fridge-set desserts, you might also enjoy the textures in this collection of chia pudding recipes. The flavors differ, yet the “make it, chill it, enjoy it” rhythm is beautifully similar.
Ingredients (serves 6–8)
- 500 ml plant milk (oat or soy recommended)
- 50–70 g sugar (adjust to taste)
- 20–25 g cornstarch (about 3 tablespoons)
- Pinch of salt
- 2 teaspoons vanilla extract
- 1–2 tablespoons vegan butter (optional)
- Bananas
- Vegan-friendly cookies (vanilla-style if possible)
Method
- Make a slurry. Whisk cornstarch, sugar, and salt with a splash of the plant milk until smooth.
- Add the remaining milk and cook in a saucepan on medium heat, whisking constantly.
- Cook until thick. Once it turns glossy and pudding-like, remove from the heat.
- Stir in vanilla and vegan butter if using.
- Cool with wrap on the surface, then refrigerate until cold and set.
- Layer with bananas and cookies, then chill overnight so the cookie layers soften and the pudding becomes cohesive.
Also Read: Rob Roy Drink Recipe: Classic Scotch Cocktail (Perfect + Dry + Sweet Variations)
Banana pudding cheesecake no-bake style (a variation without changing the whole plan)
If you love cheesecake desserts but still want the nostalgic banana pudding texture, you can build a banana pudding cheesecake no bake variation by combining the cream cheese base with a crumb layer.
- Crush cookies and press them into the bottom of your dish (a little melted butter helps, though it’s optional if your cookie crumbs are already buttery).
- Add a thick cream cheese pudding layer, then bananas, then more pudding, then cookies.
- Chill overnight so it slices cleanly.
For another easy, fruit-forward no-bake dessert that feels “party ready,” keep no-bake blueberry cheesecake in your back pocket—it complements banana pudding beautifully without competing for the same flavor space.
Also Read: Green Chutney Recipe (Coriander–Mint / Cilantro Chutney)
How to layer no-bake banana pudding so it turns cake-y, not soggy
Layering seems obvious until you scoop and realize the cookies dissolved too fast or the bananas slid around like they were on ice. A few simple habits fix that.
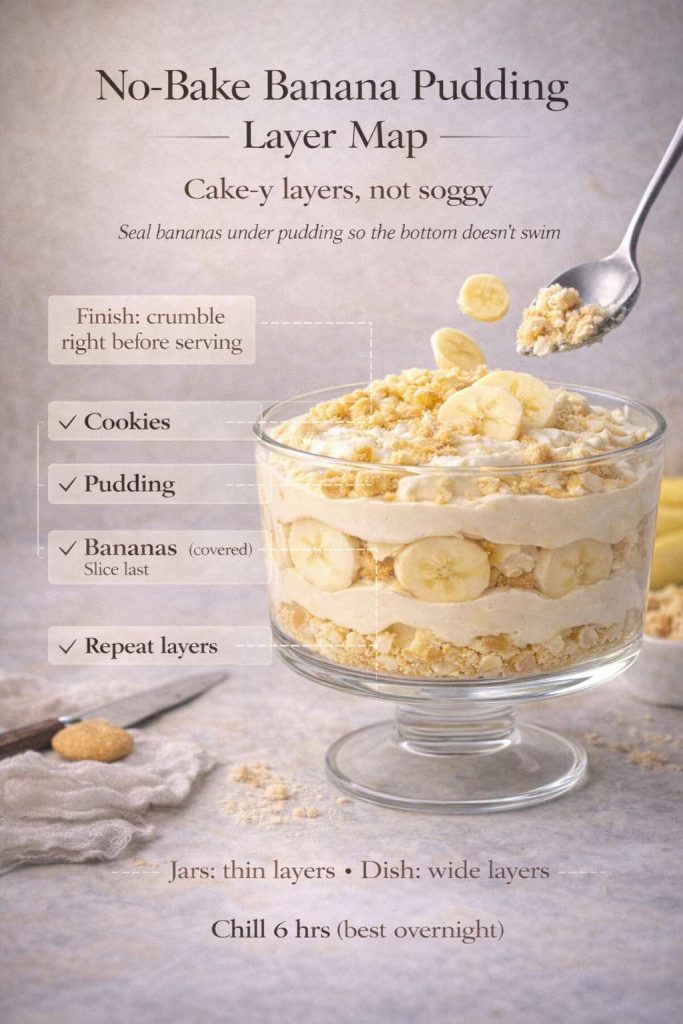
Start with cookies, not pudding
Cookies at the base give the dessert structure. They also absorb moisture from the pudding gradually, which helps the bottom layer set rather than swim.
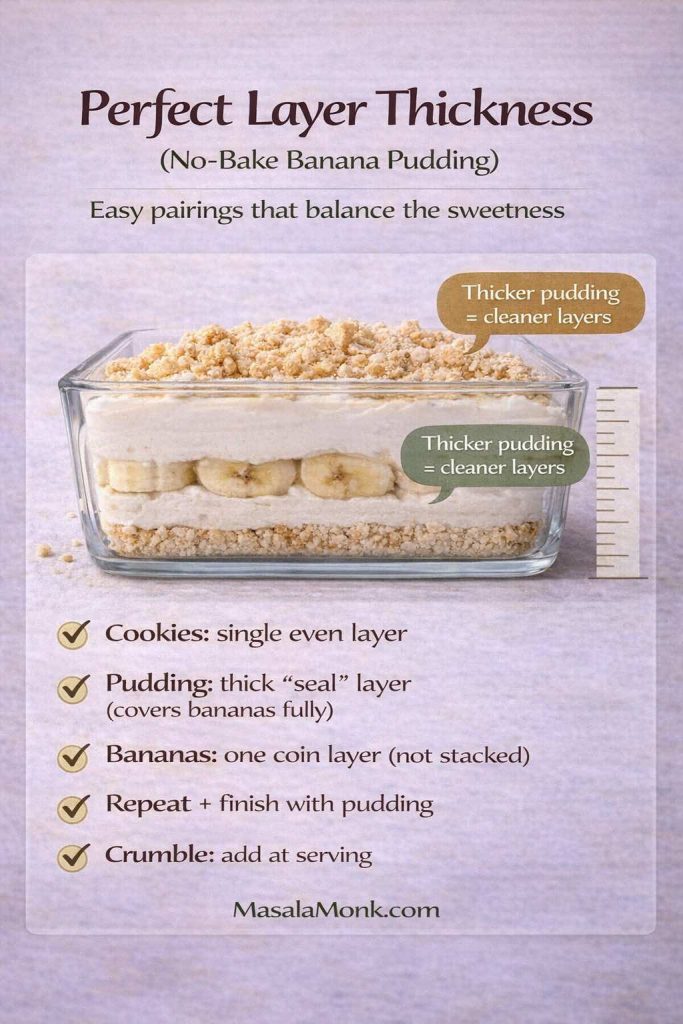
Keep banana slices medium-thick
Thin slices vanish into the pudding; thick slices can feel slippery. Aim for coins that hold their identity without taking over.
Seal bananas under pudding
Bananas brown when exposed to air. Covering them with pudding slows that down while keeping the layers tidy.
Chill longer than you think you need
Four hours works. Overnight is better. The difference isn’t subtle: cookies soften evenly, the pudding firms, and the flavors knit into a single, harmonious spoonful.
If you’re serving in jars, build thinner layers. That way, every bite picks up banana, cookie, and pudding together.
Also Read: Paper Plane Cocktail Recipe + Best Amaro Substitutes & Tips
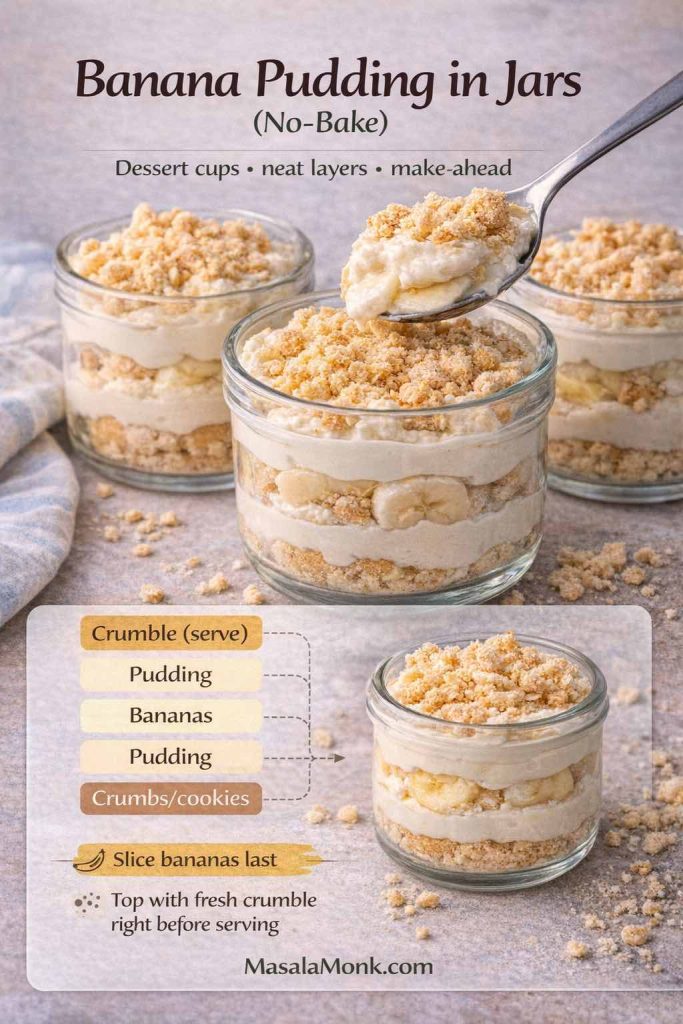
No-bake banana pudding in jars (dessert cups that look as good as they taste)
Banana pudding served in a dish feels nostalgic. Banana pudding served in jars feels modern and intentional—especially if you’re bringing dessert to a gathering or setting up a dessert table.
Why jars work so well
- They protect the layers so the pudding stays neat
- They’re easy to portion and transport
- They look beautiful through the glass
If you love the “dessert cup” presentation, you’ll also like the vibe of these Lotus Biscoff dessert cups. They’re different in flavor, yet they share the same layered, chilled charm.
Jar layering rhythm
Cookies (or crumbs) → pudding → bananas → pudding → cookie crumble on top.
Then chill.
Just before serving, add fresh crumble again so the top stays crisp.
Also Read: Sandwich for Breakfast: Breakfast Sandwich Recipe + 10 Variations
Make-ahead timing (how to plan banana pudding without stress)
Banana pudding is at its best when it has time to rest, which makes it a natural make-ahead dessert. Still, timing matters—especially if you want bananas to look good and layers to hold.
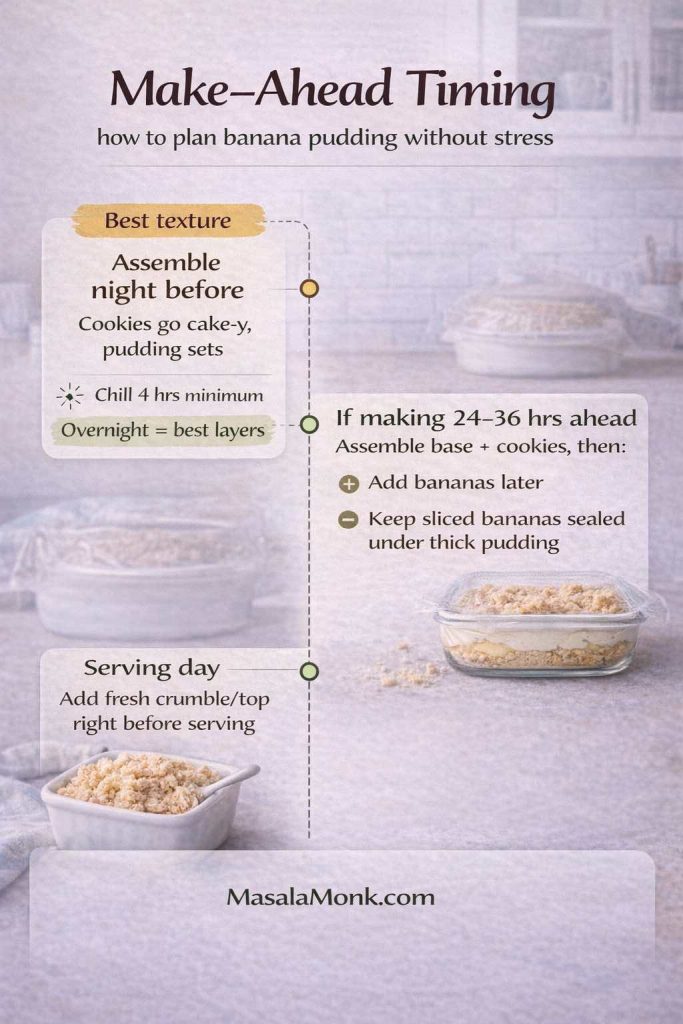
The sweet spot: assemble the night before
When you assemble banana pudding the evening before, you get the best of everything: the cookies soften, the pudding sets, and the bananas mellow without turning watery.
If you need to assemble earlier
If you’re making it more than a day in advance, consider one small adjustment: assemble the pudding and cookies first, then add bananas closer to serving time. Alternatively, you can keep bananas protected under thicker pudding layers so air exposure stays minimal.
Food safety basics for fridge desserts
Since banana pudding contains dairy—and sometimes eggs, if you make custard—good refrigeration habits matter. The general guidance on keeping perishable foods safe (including cooling and refrigeration) from FoodSafety.gov is a solid reference to follow. For egg-based custards in particular, the FDA’s overview of egg safety is worth a quick read if you want extra peace of mind.
For leftovers, the USDA’s advice on leftovers and food safety is a reliable guide for how long chilled desserts typically stay safe in the fridge.
Also Read: Classic Rum Punch + 9 Recipes (Pitcher & Party-Friendly)
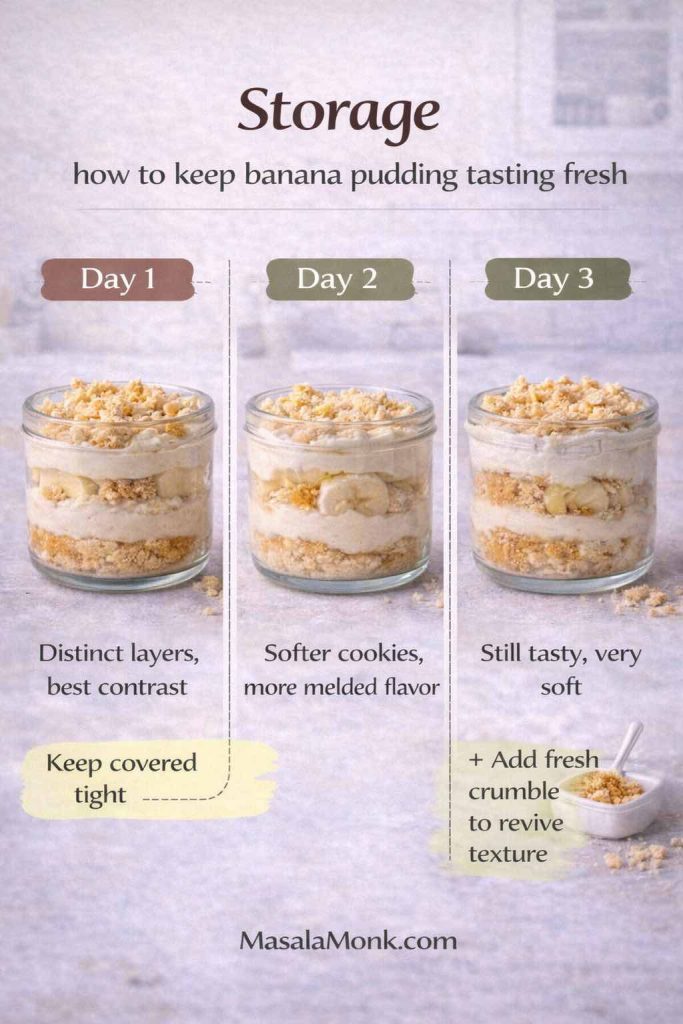
Storage (how to keep banana pudding tasting fresh)
Cover it tightly
Banana pudding absorbs fridge odors easily. A tight lid or well-sealed wrap keeps the flavor clean and keeps the top from drying out.
Keep it cold, consistently
Avoid leaving the pudding out for long stretches, especially in warm rooms. Serve what you need, then return the dish to the fridge.
Expect the texture to evolve
On day one, layers are distinct. By day two, the cookies soften further. By day three, it’s still delicious—just more uniformly soft. If you like a bit of crunch, save extra cookie crumble to add at the end.
Serving ideas that make banana pudding feel “new” again
Banana pudding is classic for a reason, yet it also welcomes a few thoughtful finishing touches.
A light drizzle (without turning it into a chocolate dessert)
A small drizzle can make the surface look glossy and special, particularly when you’re serving guests. This 3-minute chocolate syrup works beautifully if you keep it subtle—just enough to accent the bananas and vanilla, not drown them.
A cookie “snow” finish
Crumble cookies over the top right before serving. It’s simple, yet it adds crunch and makes the presentation more inviting.
A dessert table that feels balanced
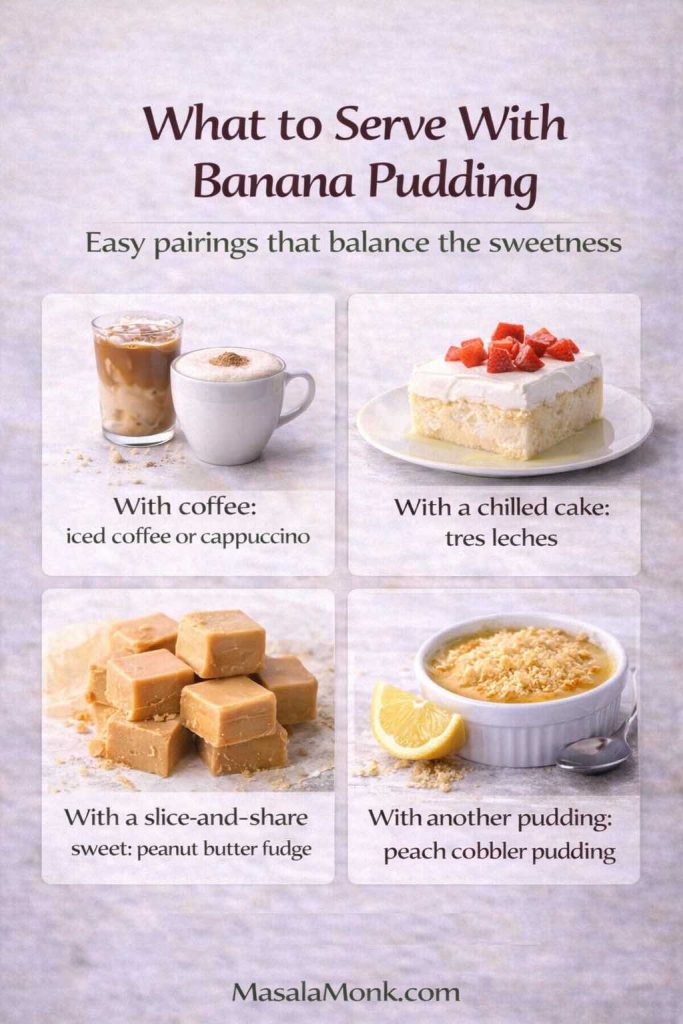
If you’re putting together multiple sweets, pair banana pudding with something that contrasts its creamy softness:
- A chilled milk-soaked cake like tres leches cake
- A slice-and-share option like peanut butter fudge
- Another pudding-style dessert with a different flavor profile, like this peach cobbler pudding
For even more ideas in the same cozy category, this Pudding Palooza dessert roundup is a fun way to keep the theme going without repeating the same flavors.
Pair it with coffee (cold or foamy)
Banana pudding loves coffee. The sweetness and vanilla play nicely against roasted notes, especially after a meal.
- If you want something refreshing, browse these iced coffee recipes and pick a cold brew or latte-style option.
- If you’d rather keep it warm and classic, a homemade cappuccino makes the whole dessert moment feel café-like.
Strawberry Smoothie Recipes (12 Easy Blends + Bowls & Protein Shakes)Also Read:
Troubleshooting (so your banana pudding turns out thick, creamy, and layered)
Even a simple dessert can misbehave. Fortunately, banana pudding is forgiving, and the fixes are usually quick.
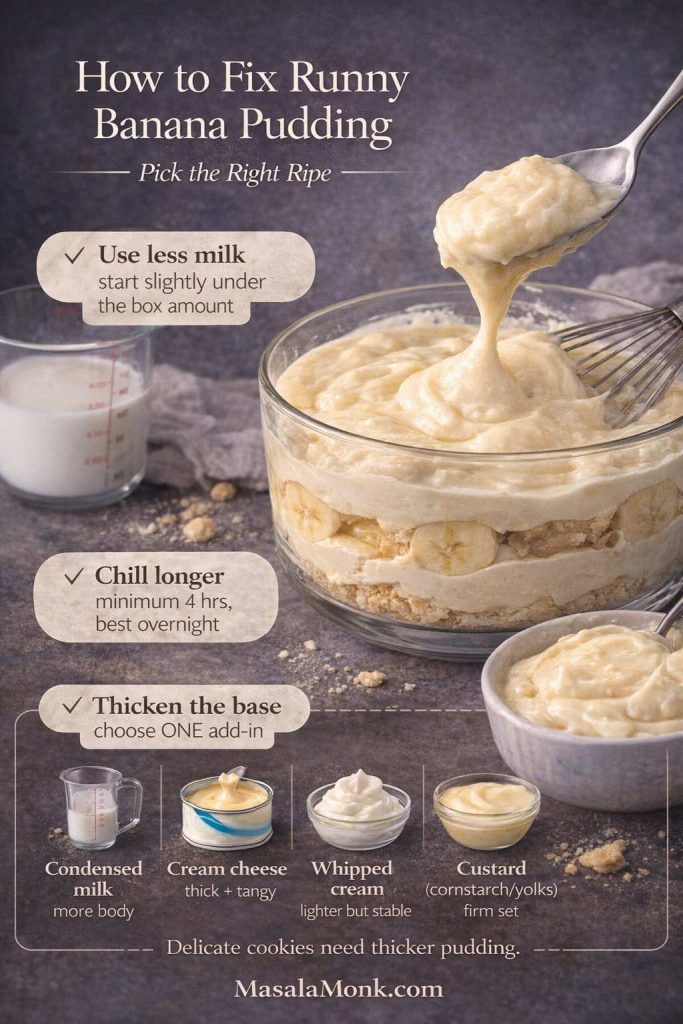
If the pudding feels runny
Most often, it’s too much milk or not enough time in the fridge. Next time, reduce the milk slightly. For now, chill it longer—covered—so it can finish setting properly.
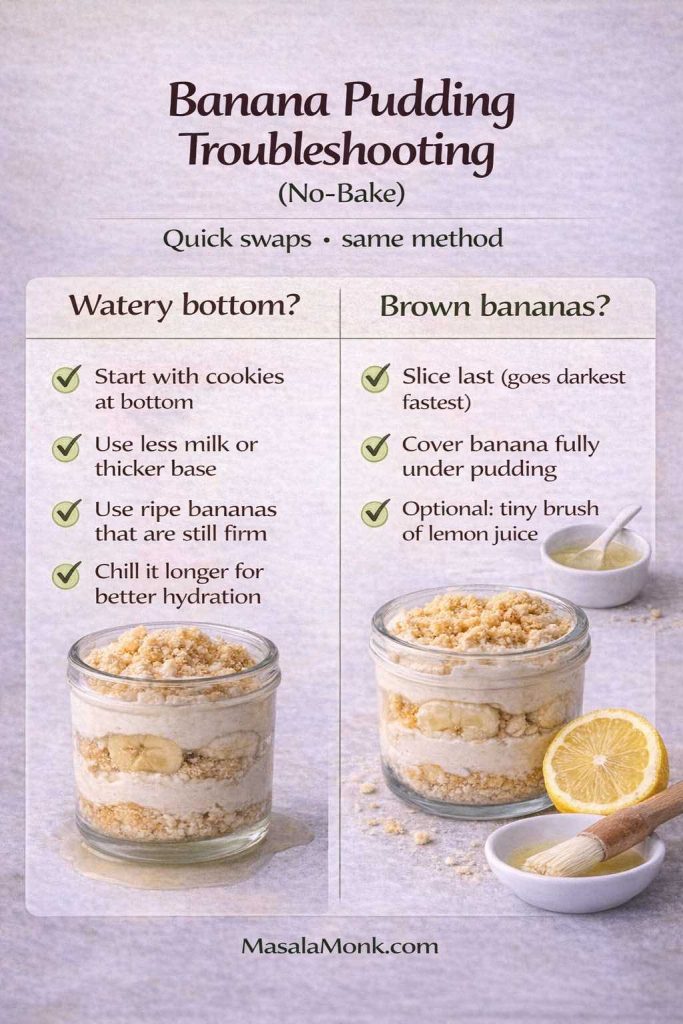
If a watery layer appears at the bottom
Overripe bananas can release moisture, and thin pudding can’t hold it. Use slightly firmer ripe bananas and make a thicker pudding base, especially if you’re layering with delicate cookies.
If the cookies dissolved into mush
That’s usually a thickness issue. Thicker pudding slows down cookie breakdown. Vanilla wafers, butter cookies, and shortbread also hold up better than delicate biscuits.
If the bananas browned
Slice bananas right before layering, then cover them with pudding so air can’t reach them. If you need extra protection, a very light brush of lemon juice can help; keep it subtle so the pudding doesn’t taste citrusy.
If your from-scratch custard turned lumpy
Heat was likely too high, or whisking paused. You can strain the custard through a fine sieve, then return it to gentle heat briefly while whisking to smooth it out. After that, chill as usual.
Also Read: Daiquiri Recipe (Classic, Strawberry & Frozen Cocktails)
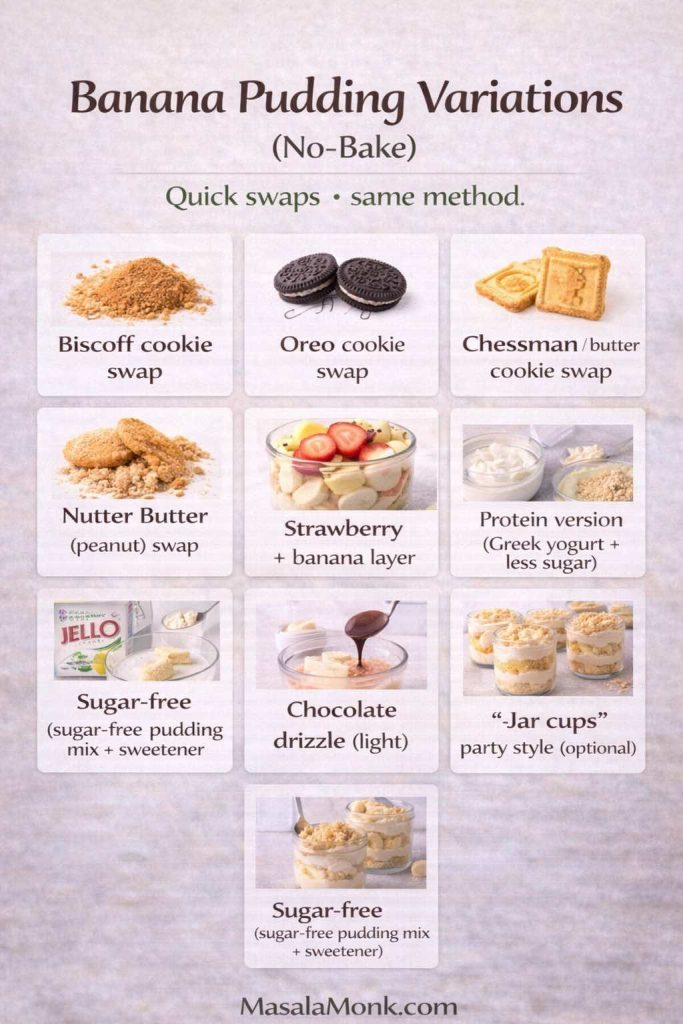
A few variations that keep the banana pudding recipe feeling fresh
Once you’ve made banana pudding once, it becomes dangerously easy to make it again—so it helps to rotate small changes that make it feel new.
Make it more “vanilla-forward”
Use a little extra vanilla extract, and add a pinch of salt to sharpen the flavor. It’s still banana pudding, just brighter and more aromatic.
Make it more “cookie-forward”
Double down on the cookie layers and finish with a generous crumble on top. You’ll get more contrast between soft and crisp.
Make it richer without adding fuss
Use sweetened condensed milk in the base. It adds richness and a thicker finish without requiring custard-making.
Make it more homemade (without using an oven)
Go the stovetop custard route. It takes a little longer, yet the flavor payoff is worth it—especially when you want a truly homemade banana pudding from scratch feeling.
Make it plant-based
Use a thick dairy-free pudding base and vegan-friendly cookies. Given enough chill time, the dessert becomes cohesive and satisfying.
Also Read: Oat Pancakes Recipe (Healthy Oatmeal Pancakes)
Bringing it all together (the no-oven dessert you’ll make again and again)
No-bake banana pudding is one of those desserts that meets you where you are. It can be a quick weeknight treat made from a banana pudding mix and a box of wafers. Then can be a party-ready dish made with sweetened condensed milk for extra creaminess. And it can even be an old-fashioned, homemade banana pudding from scratch with stovetop custard—still no oven required, still wonderfully simple once you learn the rhythm.
Most importantly, it’s the kind of dessert that invites seconds without demanding perfection. So make it classic, make it creamy, make it tangy, or make it dairy-free. Either way, give it time in the fridge, spoon it generously, and let the layers do what they do best: turn a few humble ingredients into something that feels like comfort you can share.
Also Read: What to Mix with Jim Beam: Best Mixers & Easy Cocktails
FAQs
1) Can I make banana pudding with no oven required?
Yes. Banana pudding is naturally a no-oven dessert because the pudding sets in the fridge. Whether you use instant pudding mix, a no-cook condensed milk base, or a stovetop custard, you can still finish the entire dish without turning on the oven.
2) What’s the difference between no-bake banana pudding and no-cook banana pudding?
No-bake banana pudding simply means you don’t bake it. Meanwhile, no-cook banana pudding usually means you also skip stovetop cooking—so you rely on instant pudding mix (and sometimes sweetened condensed milk) to thicken everything.
3) How long does banana pudding need to chill to set properly?
In most cases, banana pudding needs at least 4 hours to set; however, overnight chilling gives the best texture. As it rests, the pudding firms up and the cookies soften into a cake-like layer.
4) How do I keep bananas from turning brown in banana pudding?
First, slice bananas right before layering. Next, cover the banana layer completely with pudding so less air reaches the fruit. If you want extra protection, lightly brushing banana slices with a tiny amount of lemon juice can help—just use it sparingly so the pudding doesn’t taste citrusy.
5) What are the best bananas for banana pudding?
Choose bananas that are yellow with a few brown freckles. They’re sweet and aromatic, yet still firm enough to hold their shape. On the other hand, bananas that are very brown can release more moisture, which may thin the layers.
6) What are the best cookies for banana pudding?
Vanilla wafers are the classic choice because they soften evenly and keep the layers structured. That said, butter cookies, graham crackers, and shortbread also work well—especially if you prefer a richer, more buttery base.
7) Can I make banana pudding with vanilla wafers and still keep it from getting soggy?
Absolutely. Use a thicker pudding base, layer cookies evenly, and chill long enough so the moisture absorbs gradually rather than flooding the cookies. Additionally, adding a fresh cookie crumble on top right before serving brings back a crisp contrast.
8) Can I make banana pudding with sweetened condensed milk?
Yes, and it’s one of the creamiest no-oven options. Sweetened condensed milk adds richness and body, so the pudding holds its shape more reliably. Even so, it’s best to chill it longer—ideally 6 hours or overnight—for the cleanest scoops.
9) Can I make banana pudding from scratch without baking?
You can. Instead of baking, you cook a quick stovetop custard (milk, sugar, egg yolks, and cornstarch), then chill it until thick. After that, you layer it with bananas and cookies just like any banana pudding (no bake) version.
10) Why is my banana pudding runny?
Usually, it comes down to one of three things: too much milk, not enough chill time, or a pudding base that didn’t fully thicken before layering. To fix it next time, reduce the milk slightly and let the pudding stand a few minutes before assembling.
11) Why does banana pudding get watery at the bottom?
Most often, very ripe bananas release liquid as they sit. Similarly, a thinner pudding base can’t “hold” that moisture. Therefore, using slightly firmer ripe bananas and a thicker pudding base helps keep the layers stable.
12) Can I make banana pudding ahead of time?
Yes—banana pudding is one of the best make-ahead desserts. In fact, making it the night before usually improves the texture because the cookies soften evenly and the flavors meld.
13) How long does banana pudding last in the fridge?
Typically, banana pudding tastes best within 24–48 hours. After that, it’s still enjoyable, though the cookies can become very soft and the bananas may darken slightly. Keep it tightly covered to maintain freshness.
14) Can I freeze banana pudding?
Freezing isn’t ideal. Although it may be safe, the texture often suffers because pudding can separate when thawed, and bananas can become mushy. Instead, it’s better to refrigerate and enjoy within a couple of days.
15) How do I make banana pudding thicker without changing the flavor?
Start by using a little less milk, then chill longer. Moreover, folding in whipped cream after the pudding thickens can help the dessert feel thicker and more stable. For an even denser option, try the cream cheese variation.
16) Can I make banana pudding with cream cheese?
Yes. Cream cheese makes banana pudding thicker, slightly tangy, and more “cheesecake-like.” As a result, it holds its shape well and scoops cleanly, especially after an overnight chill.
17) What’s the easiest banana pudding recipe for beginners?
A classic no-bake banana pudding using instant vanilla pudding mix, milk, whipped cream, bananas, and vanilla wafers is the easiest. Since it’s no-cook and no oven required, it’s also the most forgiving.
18) Can I make vegan banana pudding that still tastes creamy?
Yes. A dairy-free banana pudding can be creamy if the pudding base is thickened properly (often with cornstarch) and chilled until fully set. Also, choosing a vanilla-style vegan cookie keeps the flavor closer to traditional banana pudding.
19) Can I make banana pudding without vanilla wafers?
Definitely. You can use butter cookies, graham crackers, shortbread, or similar crisp cookies. Just keep in mind that thinner cookies soften faster, so a thicker pudding base and a longer chill can make a big difference.
20) How do I layer banana pudding so every scoop has all the layers?
Use evenly spaced cookie layers, slice bananas to a similar thickness, and spread pudding all the way to the edges each time. Finally, let it chill long enough so the layers settle—then scoop straight down to capture cookie, banana, and pudding in one bite.


