Posted on 2 Comments

Fermented Garlic Honey: Benefits, Safety, and How to Use This Ancient Remedy

Fermented garlic honey in a glass jar with garlic cloves, natural remedy for immunity, cough relief, and heart health.

Introduction: The Jar That Keeps Showing Up

A jar of fermented garlic honey doesn’t look like much at first glance. Cloves of garlic float in amber syrup, shifting slowly as bubbles rise to the surface. Yet this unassuming mixture has traveled through centuries and across cultures, passed quietly from healer to healer, grandmother to grandchild.

Today, it sits in two worlds at once: the old one, where food was medicine by default, and the new, where wellness trends sweep through TikTok and Instagram. People keep jars on countertops not only because they’re beautiful to watch — garlic softening into translucence, honey loosening into liquid gold — but because they work. A spoonful eases coughs, a clove softens a sore throat, and the flavor itself can transform a recipe.

It is more than a honey garlic remedy. It is survival wisdom, dressed in sweetness.


What Is Fermented Garlic Honey?

At heart, fermented garlic honey is just two ingredients: raw garlic and raw honey. But when you leave them together, something extraordinary happens. Honey draws water from the garlic, lowering its thickness just enough to allow fermentation. Slowly, day by day, the mixture becomes alive.

  • Garlic sheds its sharp edge, turning mellow and almost buttery.
  • Honey loosens, fizzing gently, and develops a tangy, savory undertone.
  • The jar itself begins to smell like a conversation between opposites — sweet, pungent, earthy, floral.

Unlike kombucha or sourdough, there’s no starter to maintain, no strict temperature to hold. You don’t need to be an expert fermenter. Instead, you need patience, curiosity, and the willingness to let nature do its quiet work.

And although the name sounds modern, the practice is ancient. Egyptians gave garlic to laborers for stamina. Greeks trusted it before athletic competitions. Chinese medicine prescribed it for clearing phlegm. Honey, meanwhile, was wound healer, throat soother, energy restorer. Inevitably, the two were combined. What we call “fermented garlic honey” today is simply a rediscovery of something humans have always known: these ingredients are stronger together.


The Benefits of Fermented Garlic Honey

The magic of fermented garlic honey lies not only in what it does inside the body, but also in how it fits into daily life. It is remedy and ritual, food and comfort. Below are the layers of benefit — scientific, practical, and cultural.

Fermented Garlic Honey as a Winter Shield

When cold winds arrive and the first sniffles spread, people reach instinctively for jars like this one. Garlic contributes compounds with antimicrobial properties, while honey brings soothing sweetness and antibacterial enzymes. In India, home remedies like honey-infused garlic (Recipe) are still trusted to ease coughs and boost immunity. Together, they feel like a shield during cold and flu season — a point echoed in MasalaMonk’s guide to garlic and honey as a dynamic duo for health.

Research backs this up. In fact, both garlic and honey show strong antibacterial activity on their own, and lab studies suggest the combination may inhibit pathogens like Streptococcus pneumoniae and Staphylococcus aureus even more effectively (Healthline, Taste of Home).

But immunity isn’t just chemistry. There’s also the ritual: stirring a spoonful of garlic in raw honey into warm lemon water on a frosty morning, or swallowing a clove when you feel a tickle in your throat. It’s a habit that makes the body feel protected and the mind reassured.

  • Garlic: antimicrobial compounds.
  • Honey: enzymes + soothing sweetness.
  • Together: a ritual that feels protective.

A Honey Garlic Remedy for Coughs and Sore Throats

Modern studies have shown honey to be more effective than many over-the-counter cough syrups. Add garlic, softened by weeks of fermentation, and you have a remedy that soothes in two ways: sweetness coating the throat, savory warmth lingering after.

The Cleveland Clinic notes, however, that while honey and garlic are each well-studied, there’s little direct research on fermented garlic honey itself — meaning most evidence comes from their individual benefits (Cleveland Clinic).

Parents especially prize this approach. It feels safer than chemical syrups and connects them to generations of tradition.

  • A spoonful before bed → calm nights.
  • A clove stirred into tea → warmth with depth.
  • Gentle enough for children (over one year old).
A spoonful of fermented garlic honey stirred into lemon tea for cough and cold relief.
Fermented garlic honey offers gentle cough and sore throat relief when stirred into warm lemon water.

Antioxidant and Anti-Inflammatory Support

Science tells us garlic and honey carry antioxidants — compounds that protect cells from damage — and anti-inflammatory agents that reduce internal stress. Tradition tells us the same story in different words: garlic as a cleanser, honey as a balancer.

What matters most is how people feel. Some notice easier digestion; others say seasonal allergies feel lighter. For many, it’s simply the steadying comfort of a daily dose that tastes good and feels good.

A 2020 review in the Journal of Nutrition linked garlic consumption to reduced risks of atherosclerosis, hypertension, and diabetes, crediting its antioxidant and anti-inflammatory power (PMC Review).

Garlic bulb and honey drop with molecular graphics representing antioxidants and antimicrobial benefits.
Science confirms fermented garlic honey carries antioxidants, antimicrobials, and heart-health benefits.

Fermented Garlic and Honey Benefits for the Heart

Garlic’s role in supporting circulation is centuries old. Modern studies link it to cholesterol and blood pressure benefits. A related MasalaMonk feature on garlic water benefits for high blood pressure shows just how potent these compounds can be, even in simple preparations. Honey contributes minerals like potassium and magnesium and is kinder to blood sugar than refined sweeteners.

The result isn’t a miracle cure — instead, it’s a daily nudge toward balance, a quiet support for cardiovascular health woven into the diet.

Recent clinical work goes further: a 2022 randomized controlled trial found that fermented garlic extract improved blood flow, nitric oxide levels, and blood pressure markers in healthy adults (PubMed Study).


A Daily Tonic That’s Actually a Pleasure

Unlike raw garlic swallowed whole or pungent herbal tonics forced down, fermented garlic honey is something people want to take. Its flavor makes consistency possible. And in wellness, consistency is everything.


Rooted in Tradition, Resonating Today

Ayurvedic practitioners called garlic warming and honey harmonizing. In Traditional Chinese Medicine, garlic moved stagnant qi while honey nourished the lungs. In Egypt, honey sealed wounds while garlic gave strength to workers.

These weren’t separate threads — they were part of a global recognition that some ingredients belong together. Today, when someone posts a jar of fermented honey and garlic on TikTok, they’re unknowingly participating in that long lineage.


Fermented Garlic Honey Safety: Clearing the Botulism Myth

Every time fermented garlic honey trends online, so does a wave of worry. The word botulism pops up in comments, often shouted louder than the remedy itself. Fear spreads faster than facts — so let’s pause and examine safety with clarity.

Botulism is a serious illness caused by the bacterium Clostridium botulinum. It thrives in low-acid, oxygen-poor environments. On paper, garlic and honey in a jar might look like an invitation. Yet reality is more nuanced.

Nutritionists interviewed by Parents.com acknowledge the popularity of fermented garlic honey online but emphasize that while the risk of botulism is extremely low, it has not been formally studied in depth. Their advice: enjoy it safely, but don’t use it as a replacement for medical treatment if symptoms are severe (Parents.com).

  • Honey is naturally low in water and highly resistant to botulism spores.
  • Garlic does introduce moisture, but fermentation gradually increases acidity, creating conditions that are unfriendly to harmful bacteria.
  • Generations of practice back this up: herbalists, homesteaders, and healers across cultures have kept jars of garlic in honey safely for centuries.
Jar of fermented garlic honey stored safely in a pantry, illustrating botulism myth explained.
Fermented garlic honey is safe when prepared correctly — follow simple best practices for storage and fermentation.

Ultimately, a jar of fermented honey and garlic is a living system. It doesn’t need fussing, but it does need attention — the same way you’d watch a sourdough starter or sauerkraut crock.

Best Practices for Safe Fermentation

To keep your jar both effective and safe, follow these common-sense guidelines:

  • Use raw honey → pasteurized honey won’t ferment.
  • Choose fresh garlic → firm cloves, free of mold or sprouts.
  • Keep garlic submerged → honey should always cover the cloves.
  • Release gas in the first week → burp the jar daily to avoid pressure buildup.
  • Store cool and dark → a pantry is better than a sunny counter.
  • Trust your senses → if you ever see mold or smell something unpleasant, discard and start again.

And one final note: no honey, fermented or not, should ever be given to infants under one year of age. Their immune systems aren’t ready.

Handled with this ordinary care, fermented garlic honey is considered safe for healthy adults. The risks are no greater than those of any kitchen ferment — and the benefits are far more rewarding.

If you prefer quicker remedies, MasalaMonk shares DIY natural cough syrups that deliver some of the same benefits in just a few days.


How to Make Fermented Garlic Honey at Home

There is a quiet pleasure in making your own jar. The process is simple, but the act itself feels almost ceremonial.

Picture a small pile of garlic cloves on the counter. You peel them one by one, skins flaking like paper. Each clove gets a light crush, just enough to release its juices. You drop them into a glass jar, where they clink softly against the glass.

Then comes the honey. Thick and golden, it pours slowly, folding over the garlic, trapping tiny air bubbles that shimmer before rising. You tilt the jar, making sure every clove is coated, suspended in amber.

The lid goes on — loose, not tight — because this jar will breathe. Over the first week, you’ll notice bubbles form. You’ll open it daily, just briefly, to let the gases sigh out. Slowly the honey thins, the garlic turns translucent, and the aroma becomes layered: sweet, tangy, savory.

There’s no single day when it’s “done.” Some people taste after three weeks, others wait six. Each jar is slightly different, and that’s part of the beauty. You’re not following strict steps so much as entering a relationship with garlic, honey, and time.

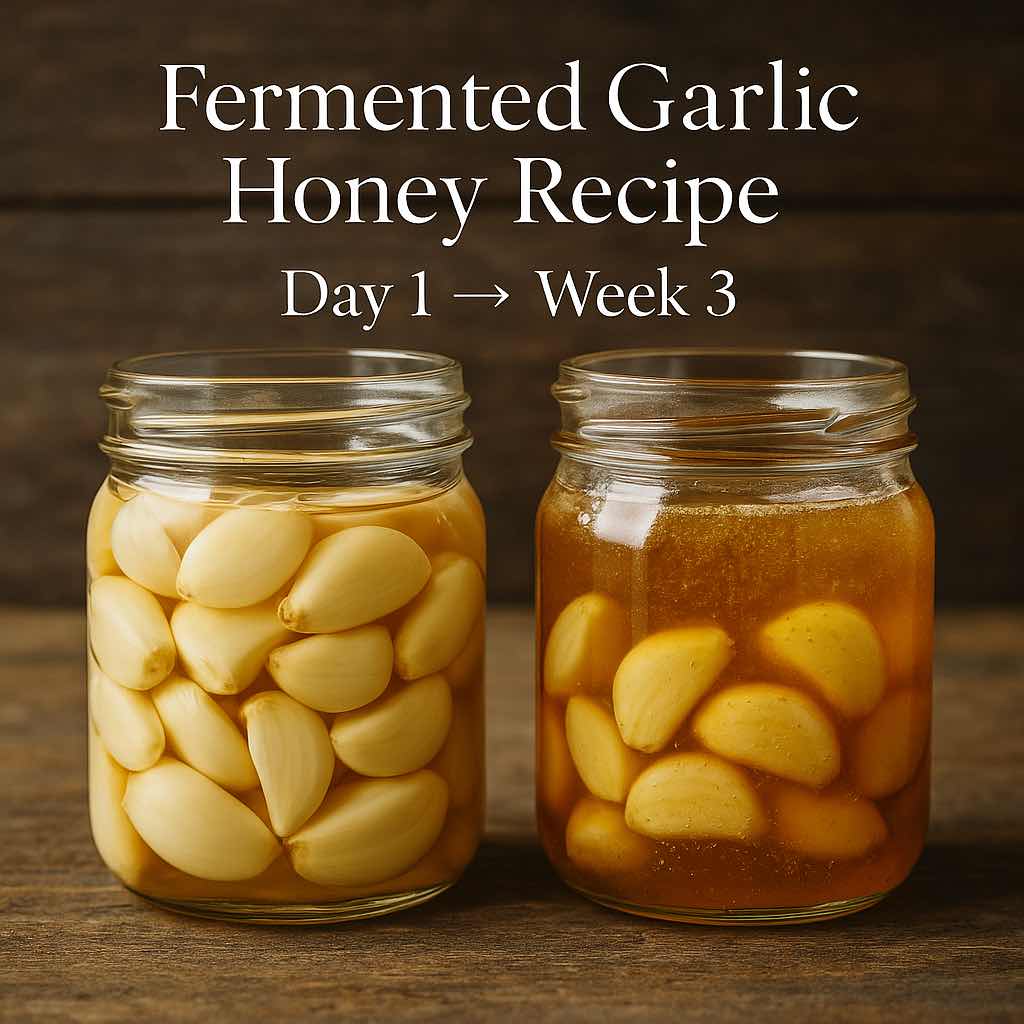
Fermented garlic honey recipe showing jars on Day 1 and after 3 weeks, garlic cloves turning translucent and honey bubbling.
Fermentation transforms garlic and honey from pungent to mellow, bubbly, and tangy.

Wellness experts like Joy Bauer have shared approachable versions of this recipe, sometimes suggesting a splash of vinegar to increase acidity for extra safety assurance (EatingWell).

The Process in Brief

  • Peel and lightly crush fresh garlic cloves.
  • Place them in a clean glass jar.
  • Pour raw honey until the cloves are submerged.
  • Cover loosely and leave at room temperature.
  • Burp the jar daily during the first week.
  • Taste after 3–4 weeks; let it age longer for deeper flavor.

The result is not just food, not just medicine. It is a jar that connects you to tradition, patience, and the quiet transformation of simple things.


How to Use Fermented Garlic Honey

The real magic of fermented garlic honey is its versatility. A single jar can live in the medicine cabinet, the kitchen, and the morning wellness ritual — shifting roles as easily as honey itself slips from spoon to cup.

As a Natural Remedy

It’s midnight, and a cough won’t let you sleep. Instead of reaching for a neon-colored syrup, you open a jar and let a spoonful of garlic-rich honey coat your throat. The sweetness soothes instantly; the mellow garlic heat lingers like a quiet ember.

Parents especially appreciate this gentle approach. It feels safer than chemical syrups, ties them to tradition, and tastes good enough that children over one year old will accept it without fuss.

Quick ways to use it as a remedy:

  • A teaspoon swallowed slowly for sore throats.
  • Stirred into warm lemon water for cough relief.
  • A daily spoonful in winter as an immune-support ritual.

In the Kitchen

Cooks have embraced fermented honey and garlic for its culinary depth. A chef might brush it over salmon before roasting, where it caramelizes into a glaze both sweet and savory. Another drizzles it across roasted carrots, where earthy roots meet golden tang.

At home, it appears on cheese boards, spooned over goat cheese and bread, transforming a simple snack into something elegant. Guests pause, surprised: “What is this?” It’s both familiar and entirely new.

Chef brushing fermented garlic honey glaze onto salmon fillets before roasting.
Fermented garlic honey caramelizes beautifully when used as a glaze for salmon, chicken, or roasted vegetables.

Culinary inspirations:

  • Glaze for chicken, salmon, or roasted vegetables.
  • Drizzle over cheeses, breads, or flatbreads.
  • Whisk into vinaigrettes or marinades.
  • Blend into sauces for shrimp, tofu, or grilled meats.

As a Daily Wellness Ritual

Morning routines are personal — some brew coffee, others meditate. For many, a teaspoon of fermented garlic honey stirred into warm lemon water has become a ritual. Others take it further, blending it into immunity shots like this Flu Bomb recipe with ginger, lemon, and apple cider vinegar. Paired with apple cider vinegar, it creates a bracing tonic that wakes the body gently.

Some prefer it at night: a spoonful before bed, a comfort that signals the day’s end. It is both small and profound — the kind of act that keeps wellness woven into ordinary life.

Ideas for daily practice:

  • Morning tonic: garlic honey + lemon + apple cider vinegar.
  • Evening comfort: a spoonful straight from the jar.
  • Seasonal support: daily teaspoon during flu season.

Why Fermented Garlic Honey Resonates Today

Why now? Why does this simple jar of garlic in raw honey capture imaginations in 2025 as much as it did centuries ago?

Part of the answer is trust. People are weary of pills, syrups, and supplements wrapped in marketing. A jar you make yourself feels tangible, honest. You can see the garlic, taste the honey, watch the bubbles rise. Wellness becomes something visible and real.

It also resonates because it belongs to two worlds at once:

  • Ancient: Egyptians feeding garlic to workers, Ayurveda blending honey into tonics, Chinese medicine using both to balance the body.
  • Modern: wellness influencers filming bubbling jars, chefs experimenting with glazes, scientists publishing studies on antioxidants and allicin.

Even mainstream lifestyle outlets like Vogue have covered its rise, noting that while science is still catching up, the cultural appeal of a jar you can make yourself — and actually enjoy taking — is undeniable (Vogue).

We crave stories, and fermented garlic honey gives us one. Watching a jar transform over weeks is an antidote to instant gratification. Sharing it with a friend or online community turns food into connection. Even its quiet fizzing is a reminder that life is always in motion, even in something as humble as garlic and honey.

Beyond the kitchen, MasalaMonk even explores garlic’s benefits for skin, showing how versatile this ingredient has always been.


Conclusion: A Golden Habit Worth Keeping

Fermented garlic honey is not a miracle cure. It won’t erase every cough or guarantee immunity. But it doesn’t need to. Its value lies in something deeper: the way it makes caring for yourself feel nourishing, simple, and connected to tradition.

One spoonful soothes a sore throat. Another brightens a recipe. A clove shared connects you to generations who trusted the same golden mixture.

So peel the cloves. Pour the honey. Let the jar sit and change. What you’ll have is more than a remedy or an ingredient — it’s a golden companion, alive with sweetness, savor, and the quiet reassurance that sometimes the oldest wisdom is still the best.

Jar of fermented garlic honey on rustic table with bread and cheese, daily wellness habit.
A golden habit worth keeping — fermented garlic honey for both wellness and the kitchen table.

FAQs

1. What is fermented garlic honey?

Fermented garlic honey is made by submerging fresh garlic cloves in raw honey and allowing them to ferment naturally. The honey becomes thinner and tangy, while the garlic softens and sweetens, creating a living remedy that doubles as a versatile kitchen ingredient.


2. How long does fermented garlic honey take to make?

It usually takes 3–4 weeks before it’s ready to taste. By then, the honey loosens and bubbles appear. The flavor deepens over time, so some people enjoy it young and mild, while others prefer letting it ferment for several months.


3. Is fermented garlic honey safe?

Yes — when prepared correctly, fermented garlic honey is safe for healthy adults. Use raw honey, fresh garlic, and make sure the cloves stay submerged. Burp the jar during the first week to release gases. The main caution: never give honey, fermented or not, to infants under one year old.


4. What are the health benefits of fermented garlic honey?

The combination offers:

  • Immune support during cold and flu season.
  • Cough and sore throat relief, thanks to honey’s soothing effect.
  • Antioxidants and anti-inflammatory compounds that support overall health.
  • Cardiovascular benefits, as garlic may help with circulation and cholesterol.

5. How should I use fermented garlic honey?

There are countless ways to enjoy it:

  • Take a teaspoon daily as a tonic.
  • Stir into warm tea or lemon water.
  • Brush onto salmon, chicken, or roasted vegetables.
  • Drizzle over cheeses, breads, or flatbreads.

6. Can I make fermented garlic honey with store-bought honey?

Only if the honey is raw and unpasteurized. Most supermarket honey is pasteurized, which kills the enzymes and microbes needed for fermentation. Look for raw honey from local beekeepers or natural food stores.


7. How long does fermented garlic honey last?

When stored in a sealed jar in a cool, dark place, it can last for many months — even over a year. Its flavor evolves over time but generally stays safe as long as there’s no mold or off odors.


8. Should fermented garlic honey be refrigerated?

No, it doesn’t need refrigeration. In fact, cold temperatures may slow or halt fermentation. A pantry or cupboard is ideal, away from direct sunlight and heat sources.


9. What if my garlic turns green or blue?

Sometimes garlic develops a blue or green tint during fermentation. This is a natural reaction between garlic’s sulfur compounds and trace minerals. It looks surprising but is safe to eat.


10. Do I eat the garlic cloves or just the honey?

Both! The cloves become soft, mellow, and slightly sweet, while the honey is rich and tangy. Many people eat the cloves whole as medicine or chop them into dishes, while using the honey as a syrup or glaze.


11. Can fermented garlic honey cause botulism?

The risk is extremely low when made properly. Honey itself is inhospitable to botulism spores, and fermentation increases acidity, which makes conditions even less favorable. Following best practices — raw honey, fresh garlic, full submersion, and regular burping — keeps your jar safe.


12. Can I cook with fermented garlic honey?

Yes. Cooking will destroy some probiotic activity, but the flavor remains incredible. It’s excellent in marinades, glazes, stir-fries, and salad dressings. Many people keep one jar for remedies and another for cooking.


13. Can I add other ingredients to fermented garlic honey?

Yes. Ginger, lemon peel, chili peppers, and apple cider vinegar are popular additions. Each creates a new variation — spicy, citrusy, or more medicinal. Just make sure added ingredients are fresh and fully covered in honey.


14. Why is my honey crystallizing?

Raw honey naturally crystallizes over time. This doesn’t mean it’s spoiled. You can gently warm the jar in your hands or place it in warm (not boiling) water to re-liquify it without harming the ferment.


15. Can children take fermented garlic honey?

Yes — but only if they are over one year old. Children under twelve months should never be given honey due to the risk of infant botulism. For older children, a small spoonful can be a safe and soothing remedy.

Posted on 1 Comment

6 Wellness Shot Recipes to Boost Your Immune System

Flat lay cover image showing six colorful wellness shots arranged in a hexagon with fresh ingredients including turmeric, ginger, lemon, garlic, elderberries, carrot, and apple cider vinegar, with text overlay “6 Immunity Wellness Shot Recipes."

When cold and flu season rolls around, many of us look for natural ways to give our immune system an extra edge. One option that’s grown in popularity is the immunity wellness shot — a small, concentrated drink that packs in fresh ingredients known for their immune-supportive benefits.

But do these shots really work? While no single drink can prevent illness, research suggests that certain foods — like turmeric, ginger, garlic, citrus, and elderberry — may help reduce inflammation, improve antioxidant defenses, and even shorten the duration of colds and flu. Spices have long been part of traditional immunity remedies—discover the power of Indian spices for immunity in our in-depth guide.

In this article, you’ll discover 6 immunity wellness shot recipes, each explained in detail with the science behind why these ingredients are recommended.


What Are Immunity Wellness Shots?

Immunity wellness shots are small (1–3 ounce) juice blends taken in a single sip. They’re made with concentrated fresh ingredients like roots, herbs, and citrus, and are designed to provide a quick hit of vitamins, antioxidants, and bioactive compounds.

Typical ingredients include:

  • Turmeric — contains curcumin, a compound known for anti-inflammatory and antioxidant effects. According to Harvard Health, curcumin has been studied for its ability to modulate immune responses.
  • Ginger — rich in gingerols and shogaols, which have antioxidant and antimicrobial activity. A review summarized by Healthline notes that ginger has long been used to help with colds and inflammation.
  • Citrus fruits — oranges, lemons, and limes provide vitamin C, which the NIH reports can slightly shorten the length of colds in regular users.
  • Garlic — contains allicin, which was linked to fewer colds in a randomized human trial published in the Advances in Therapy journal (PubMed study).
  • Elderberry — meta-analyses show elderberry extract reduces flu symptom duration and severity (NCBI meta-analysis).
  • Apple cider vinegar (ACV) — though not studied as much as other ingredients, ACV is a fermented food, and fermented foods are strongly tied to gut and immune health (Harvard Health on fermented foods).

Benefits of Immunity Wellness Shots

So why combine these ingredients into small shots? Research highlights several potential benefits:

  • Inflammation control — Chronic inflammation weakens immunity. Compounds in turmeric (curcumin) and ginger (gingerols) help reduce inflammatory markers such as IL-6 and TNF-α (NCBI research on curcumin).
  • Antioxidant protection — Vitamin C, curcumin, and gingerols protect immune cells from oxidative stress caused by free radicals.
  • Antimicrobial action — Garlic and ginger show antimicrobial activity in lab studies, and elderberry may directly inhibit flu viruses.
  • Gut health support — Fermented foods like apple cider vinegar encourage a healthy microbiome, which plays a central role in immune function.

6 Best Immunity Wellness Shot Recipes

When it comes to building resilience, variety matters. That’s why we’ve gathered six different immunity wellness shots, each with its own flavor profile, nutrient strengths, and cultural background. From fiery ginger to soothing honey, from vibrant turmeric to tangy elderberry, these recipes are simple, quick, and can be made with ingredients you likely already have in your kitchen.

Before we dive into the step-by-step recipes, remember: these shots aren’t meant to replace a balanced diet or medical treatment. Instead, think of them as daily allies—little boosts you can integrate into your wellness routine to keep your immune system strong and supported.


🟠 1. Turmeric Ginger Immunity Shot

There’s a reason turmeric and ginger are the poster children of natural remedies. Bright, golden, and fiery, this little shot has been used for centuries in Ayurvedic traditions to fight off seasonal sniffles and morning sluggishness. If you’re looking for an easy way to start your day with a burst of warmth and antioxidants, this is it.

Ingredients

  • 1-inch fresh turmeric root (or ½ tsp turmeric powder)
  • 1-inch fresh ginger root
  • Juice of ½ lemon
  • Pinch of black pepper
  • ½ cup water
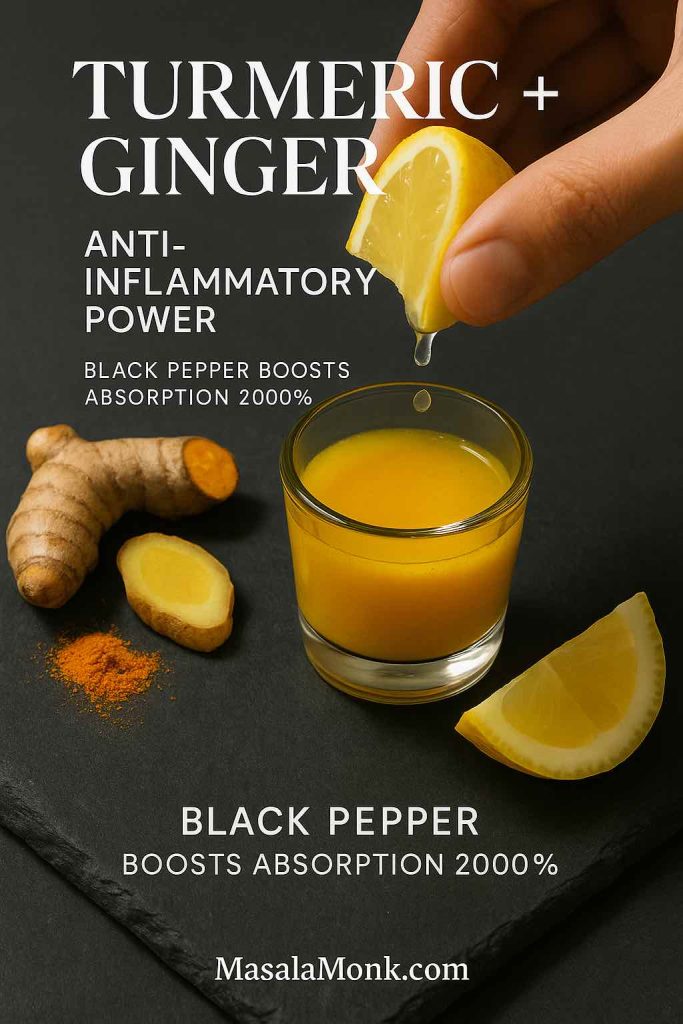
Close-up of a turmeric ginger immunity shot with fresh turmeric, ginger, and lemon, highlighting its anti-inflammatory benefits.
Turmeric and ginger combined with lemon and black pepper deliver a powerful anti-inflammatory boost in one small shot.

Instructions (step-by-step)

  1. First, peel and chop the turmeric and ginger into small pieces.
  2. Next, add them to a blender along with lemon juice and water.
  3. Then, blend until smooth.
  4. After blending, strain the liquid through a fine sieve if you prefer a smoother shot.
  5. Finally, sprinkle a pinch of black pepper on top and enjoy right away.

👉 Why it works: Turmeric’s curcumin has powerful anti-inflammatory benefits, and black pepper makes it more bioavailable. Ginger adds antioxidants, while lemon brings in vitamin C.

To see how this synergy works in another recipe, try Turmeric, Ginger & Black Pepper Tea for Well-Being.

Why we recommend it:
Turmeric’s active compound curcumin has been widely studied for its anti-inflammatory and immune-modulating effects. On its own, it’s poorly absorbed, but a study in Planta Medica found that combining it with black pepper (piperine) increases absorption by nearly 2,000% (PubMed study on piperine). Ginger provides additional antioxidants, and lemon adds vitamin C.

💡 Pro Tip: If the flavor feels too strong, add a splash of fresh orange juice for sweetness and an extra vitamin C kick.


🟠 2. Lemon Cayenne Immune Shot

Sharp, spicy, and invigorating — this shot is like sunshine in liquid form. Perfect for sluggish mornings or when you feel a cold creeping in, it gives you a quick kick of vitamin C and natural heat that wakes up your circulation.

Ingredients

  • Juice of 1 lemon
  • ¼ tsp cayenne pepper
  • 1 tsp honey (optional)
  • ½ cup warm water
Bright yellow lemon cayenne immunity shot with lemon halves and cayenne pepper, designed to support circulation and energy.
A fiery blend of lemon and cayenne pepper, rich in vitamin C and circulation-boosting compounds, perfect for mornings.

Instructions

  1. Begin by squeezing the juice of one lemon into a glass.
  2. Next, pour in the warm (not hot) water.
  3. Then, stir in cayenne pepper and honey until well combined.
  4. Lastly, sip slowly if you’re sensitive to spice—or take it as a quick shot for a fiery boost.

👉 Why it works: Lemons provide vitamin C, cayenne boosts circulation, and honey soothes the throat while adding antibacterial support.

Also Read: Cayenne Pepper for Weight Loss: Spicing Up Your Diet Plan! 🌶️

Why we recommend it:
Lemons provide vitamin C, which according to a Cochrane review summarized by the NIH, may shorten the duration of colds in regular users. Cayenne contains capsaicin, which shows anti-inflammatory potential in animal and human studies (NCBI on capsaicin). Honey has antimicrobial properties and is recommended as a cough soother by the Mayo Clinic.

💡 Pro Tip: To balance the heat, mix in a few drops of fresh ginger juice or dilute with extra water for beginners.


🟠 3. Garlic Honey Wellness Shot

This is the strong one — and yes, it works. For generations, raw garlic and honey have been combined as a natural immunity booster. The taste is bold, but the payoff is worth it: garlic’s allicin has been studied for cold prevention, while honey brings natural antibacterial sweetness.

Ingredients

  • 1 small raw garlic clove (crushed)
  • 1 tsp raw honey
  • Juice of ½ lemon
  • ¼ cup water
Creamy garlic honey wellness shot with garlic cloves and honeycomb, highlighting its traditional cold-fighting properties.
Raw garlic and honey — an ancient cold remedy backed by modern studies, shown to reduce cold frequency.

Instructions

  1. First, crush the garlic with the side of a knife to release allicin.
  2. Let it rest for 5 minutes to maximize its potency.
  3. Next, combine garlic with lemon juice, water, and honey in a blender or cup.
  4. Finally, drink immediately for the strongest effect.

👉 Why it works: Garlic is backed by human studies showing fewer colds, while honey and lemon add both flavor and immune-friendly nutrients.

This combo has been around for centuries—explore our honey infused garlic ancient remedy for a traditional take.

Why we recommend it:
Garlic is one of the few foods tested in human trials for cold prevention. In a 12-week randomized trial, participants who took garlic supplements had significantly fewer colds than those taking placebo (PubMed study). Honey provides antibacterial and antioxidant effects, while lemon juice adds vitamin C.

💡 Pro Tip: If the taste is too intense, chase it with a slice of apple or cucumber for a quick palate cleanse.


🟠 4. Elderberry Ginger Immunity Shot

Sweet and tangy with a spicy twist, this shot tastes almost like a health tonic you’d want to sip slowly. Elderberries have been shown to reduce flu symptoms, and pairing them with ginger and lemon makes this immunity wellness shot recipe a flu-season favorite.

Ingredients

  • 2 tbsp elderberry syrup (homemade or store-bought)
  • 1-inch fresh ginger root
  • Juice of ½ lemon
Deep purple elderberry ginger immunity shot with fresh elderberries, ginger, and lemon, promoting flu-season support.
Elderberry paired with ginger and lemon — clinically shown to help shorten flu duration and ease symptoms.

Instructions

  1. Grate or finely slice the ginger.
  2. Next, blend the ginger with elderberry syrup and lemon juice.
  3. Then, strain if desired for a smoother consistency.
  4. Serve chilled for a refreshing immune boost.

👉 Why it works: Elderberry shortens flu duration, ginger brings warming anti-inflammatory support, and lemon adds vitamin C.

For more on natural immune boosters, see how the ginger, garlic & lemon immunity trio can help.

Why we recommend it:
A 2019 meta-analysis of randomized controlled trials concluded that elderberry supplementation reduced upper respiratory symptoms and shortened flu duration (PubMed meta-analysis). Ginger and lemon provide additional anti-inflammatory and antioxidant benefits.

💡 Pro Tip: Store-bought elderberry syrup often contains sweeteners—opt for unsweetened if you prefer a lower-sugar option.


🟠 5. Carrot Turmeric Citrus Shot

Bright orange, slightly sweet, and refreshing — this shot feels more like a mini juice than medicine. It’s packed with beta-carotene from carrots and vitamin C from oranges, making it a great daily wellness choice.

Ingredients

  • 1 medium carrot (juiced)
  • 1-inch turmeric root
  • Juice of 1 orange
  • Pinch black pepper
Bright orange carrot turmeric citrus shot with carrot slices, turmeric root, and orange wedges, supporting skin and immunity.
A vibrant carrot, turmeric, and orange shot delivering beta-carotene and vitamin C for skin and immune resilience.

Instructions

  1. Juice the carrot and turmeric root. (If you don’t have a juicer, blend with water and strain.)
  2. Next, stir in the fresh orange juice.
  3. Add a pinch of black pepper.
  4. Finally, drink immediately while it’s fresh and bright.

👉 Why it works: Carrots support mucous membrane defenses, oranges bring immune-boosting vitamin C, and turmeric + pepper fight inflammation.

Why we recommend it:
Carrots provide beta-carotene, which the NIH highlights as essential for maintaining the integrity of mucous membranes, the body’s first line of defense against pathogens. Oranges add vitamin C, while turmeric and pepper enhance anti-inflammatory activity.

💡 Pro Tip: Add a squeeze of lime for extra tang and to balance the earthy turmeric flavor.


🟠 6. Apple Cider Vinegar Immune Wellness Shot

This one is tangy, zesty, and surprisingly refreshing when balanced with honey. ACV has long been used in folk medicine for digestion and gut health, and when combined with ginger and lemon, it makes a powerhouse immune tonic.

Ingredients

  • 1 tbsp apple cider vinegar (with the “mother”)
  • ½ inch fresh ginger root
  • Juice of ½ lemon
  • ½ tsp honey
Pale amber apple cider vinegar wellness shot with lemon wedges, ginger slices, and ACV bottle, highlighting gut health benefits.
Apple cider vinegar with ginger and lemon — a tangy tonic that supports gut health and immune function.

Instructions

  1. Grate or mince the ginger.
  2. Add it to a glass with ACV, lemon juice, and honey.
  3. Stir thoroughly until the honey dissolves.
  4. Drink as a quick shot, or dilute with extra water if it feels too strong.

👉 Why it works: ACV supports gut health (linked to immunity), ginger reduces inflammation, and honey balances both flavor and function.

Learn more about the role of apple cider vinegar for wellness in boosting health and metabolism.

Why we recommend it:
Apple cider vinegar hasn’t been studied directly for immunity, but as a fermented food it may support a healthy microbiome, which plays a critical role in immune system regulation (Harvard Health on fermented foods). Ginger and lemon bring additional immune-friendly antioxidants, and honey balances the sharp flavor.

💡 Pro Tip: Always use a straw to protect your teeth from the acidity, and rinse your mouth with water afterward.


How Often Should You Drink Immunity Shots?

For most people, one immunity wellness shot per day is enough. Morning is a popular choice, since many ingredients are energizing on an empty stomach.

That said, moderation is important:

  • Turmeric and ginger may cause digestive upset in large amounts.
  • Garlic can irritate digestion or interact with blood-thinning medications.
  • Apple cider vinegar should always be diluted to protect your teeth and stomach lining.

Rotating between different recipes helps you get a wider range of nutrients while avoiding excess.


Final Thoughts

These 6 immunity wellness shot recipes combine some of the most research-supported natural ingredients for immune health. From turmeric and ginger’s anti-inflammatory power, to garlic’s cold-fighting allicin, to elderberry’s flu symptom relief, each shot delivers a potent burst of support in just a few ounces.

They aren’t miracle cures, but as part of a balanced lifestyle with good sleep, exercise, and nutrition, they can be a refreshing, health-promoting ritual.

Why not try one of these recipes tomorrow morning and give your immune system a natural boost?

If you enjoyed these shots, you might also love our anti-inflammatory drinks for wellness collection.

❓ Frequently Asked Questions

1. Can I really make immunity wellness shots at home?

Absolutely! The beauty of these recipes is that they’re simple, quick, and use everyday ingredients. Instead of buying expensive bottled shots, you can blend turmeric, ginger, lemon, or garlic in just a few minutes and enjoy them fresh.


2. How often should I drink immunity wellness shots?

Most people do well with just one shot a day, usually in the morning. However, it’s best to rotate between different recipes throughout the week. This way, you get a variety of nutrients while keeping things balanced.


3. Do immunity shots actually work?

While no shot can guarantee you won’t get sick, research shows that ingredients like garlic, elderberry, and vitamin C can help reduce the severity and duration of colds and flu. Think of them as a natural support system, not a miracle cure.


4. Can I store these shots in advance?

Yes, but freshness is key. Most recipes can be stored in the fridge for up to 2–3 days in an airtight container. However, shots with garlic or lemon taste best when consumed immediately, as their active compounds fade quickly.


5. What’s the best time of day to take a wellness shot?

Morning is ideal, since the ingredients can be energizing and are absorbed well on an empty stomach. That said, if your stomach is sensitive, you might prefer to take them after a light meal.


6. Can kids drink immunity shots too?

Yes, but with some adjustments. Skip the cayenne pepper for children, and use smaller portions of ginger or garlic. Always dilute the shot a little more, and consult your pediatrician if your child has health conditions.


7. Are there any side effects of taking immunity wellness shots?

Since these are concentrated drinks, too much can cause issues. For example, turmeric and ginger may irritate sensitive stomachs, garlic can interact with blood-thinners, and apple cider vinegar should always be diluted to protect teeth and digestion. Moderation is key.


8. Do I need a juicer to make these immunity wellness shot recipes?

Not at all! A blender works just fine. Simply blend the ingredients with water, then strain with a fine sieve or cheesecloth if you prefer a smoother consistency. A juicer can make the process easier, but it’s not required.


9. Can I add other ingredients to the recipes?

Definitely! These shots are flexible. You can add a pinch of cinnamon for warmth, fresh mint for freshness, or even a splash of orange juice for sweetness. Just remember: the more colorful your ingredients, the more antioxidants you’ll likely get.


10. Which immunity wellness shot is the most powerful?

That really depends on your body and taste. Many people swear by the turmeric ginger shot for daily wellness, while others love the elderberry shot during flu season. The best approach is to try them all and notice how your body responds.

Posted on 2 Comments

Coconut Oil for Psoriasis

Coconut Oil for Psoriasis: A Gentle Ally in a Lifelong Journey

Living with psoriasis is rarely just about skin. It’s about waking up to itchiness that disrupts your sleep, feeling self-conscious about flakes on your shirt, and sometimes explaining — yet again — that psoriasis is not contagious. Many people turn to natural remedies when flare-ups hit, and one option that keeps coming up is coconut oil for psoriasis, a gentle yet time-tested approach that offers relief beyond prescription creams or harsh shampoos.

Coconut oil has been used for centuries in tropical regions to soothe dry skin, condition hair, and even heal minor wounds. Today, these traditions are being revisited with scientific curiosity. Could something as simple and affordable as coconut oil really help people manage psoriasis more comfortably?

Many people confuse psoriasis with other skin issues. If you’re not sure what you’re dealing with, our guide on Scalp Psoriasis vs Seborrheic Dermatitis helps you understand the difference.

In this article, we’ll go deep — really deep — into the science, history, and everyday practicality of using coconut oil for psoriasis. We’ll explore what researchers have discovered, what dermatologists advise, and how real people can thoughtfully weave it into their daily routines.

⚠️ Note: This post is for general educational purposes only and should not replace professional medical advice. Please consult a dermatologist for personalized care.

Do read our detailed guide where we discuss on using various aspects of Coconut Oil on skin here: Coconut Oil for Skin: Frequently Asked Questions.


1. Understanding Psoriasis: The Starting Point

To appreciate why coconut oil might help, we need to understand what psoriasis is — and what it is not.

Psoriasis is a chronic autoimmune disease, not just a skin problem. In this condition, the immune system speeds up the skin cell turnover cycle dramatically. Instead of the normal 28–30 days it takes for a skin cell to mature and shed, it happens in about 3–4 days. This rapid cycle causes skin cells to pile up before the old ones can be shed, creating raised, scaly plaques that are red, itchy, and sometimes painful.

Infographic comparing normal vs psoriasis skin cell turnover, showing how psoriasis causes faster buildup of skin cells.
Psoriasis speeds up skin cell turnover to just 3–4 days, compared to the normal 28, leading to red, scaly plaques that are often mistaken for other skin conditions.

Common areas include:

  • Elbows and knees, where plaques can crack and bleed.
  • Scalp, where scales can flake onto clothes and resemble stubborn dandruff.
  • Lower back and other friction points.
  • Nails, which may show pitting, ridges, or discoloration.

Psoriasis isn’t contagious, but it often carries social stigma. According to the National Psoriasis Foundation, up to 30% of people with psoriasis also develop psoriatic arthritis, which causes joint stiffness and pain.

Current treatments vary:

  • Topical creams and ointments (like corticosteroids or vitamin D analogues) can reduce inflammation.
  • Phototherapy, where skin is exposed to UV light under medical supervision.
  • Systemic treatments (like methotrexate, cyclosporine, or biologics) target the immune system itself.

Yet even with advanced therapies, dermatologists emphasize one simple daily habit: keep skin moisturized. Moisturized skin flakes less, itches less, and responds better to medicated treatments (Medical News Today). That’s where coconut oil may shine.

Read More: Eczema vs Psoriasis vs Dermatitis


2. Coconut Oil 101: More Than a Kitchen Ingredient

We often think of coconut oil as something for frying or smoothies, but the oil extracted from coconuts has a long history in both medicine and self-care. In Ayurveda, the traditional medicine system of India, coconut oil is described as a “cooling” oil, used to calm heat, irritation, and inflammation.

Portrait of a person holding coconut oil jar with text highlighting lauric acid, vitamin E, and polyphenols as key skin-friendly nutrients.
Virgin coconut oil is rich in lauric acid, vitamin E, and polyphenols — compounds that moisturize, reduce inflammation, and support skin barrier health in psoriasis.

Types of Coconut Oil

Not all coconut oils are created equal:

  • Virgin coconut oil (VCO): Cold-pressed from fresh coconut meat. This is the most beneficial for skin because it retains antioxidants and bioactive compounds.
  • Refined coconut oil: Made from dried copra, then bleached and deodorized. It loses many natural properties during processing.
  • Fractionated coconut oil (MCT oil): A liquid form that contains mostly medium-chain triglycerides like caprylic and capric acid, but not the full nutrient profile.

When it comes to psoriasis care, virgin coconut oil is the gold standard.

What’s Inside the Jar?

  • Lauric acid (about 50%): Known for antimicrobial and anti-inflammatory activity (Verywell Health).
  • Caprylic and capric acid: Support the skin’s natural defenses.
  • Vitamin E: An antioxidant that helps protect skin from oxidative stress.
  • Polyphenols: Plant-based compounds that calm inflammation.

This unique composition explains why coconut oil is not just a moisturizer — it may also have therapeutic effects on irritated or inflamed skin.


3. What Research Really Says About Coconut Oil and Psoriasis

Many natural remedies are promoted without evidence, so it’s worth asking: what do studies actually say?

Clinical Trials

  • A 1993 PubMed study found that coconut oil, when applied before phototherapy, reduced UV penetration. In simple terms: don’t use it right before light treatment.
  • In an Indian Journal of Dermatology trial, patients using coconut oil — with or without medicated tar — saw 57–64% improvement in scalp psoriasis. This suggests coconut oil has standalone benefits.
  • An observational study showed that scaling improved within 4–6 weeks of using virgin coconut oil daily. By weeks 6–8, redness also decreased.

Mechanisms at Play

Laboratory research explains why:

  • Coconut oil reduces inflammatory markers like TNF-α and IL-6 (NCBI).
  • It helps the skin produce proteins that strengthen the skin barrier.
  • Compared to mineral oil, coconut oil is more effective in improving hydration in dry skin conditions (ResearchGate trial).

Beyond Psoriasis

  • In children with eczema, virgin coconut oil reduced severity better than mineral oil (Healthline). While eczema and psoriasis are different, both involve skin barrier disruption and inflammation, making the findings relevant.
  • A scalp microbiome study showed coconut oil improved the balance of healthy bacteria and reduced fungal overgrowth — a potential game-changer for scalp psoriasis.

Bottom line? Coconut oil won’t cure psoriasis, but it can ease symptoms, reduce flaking, and make medicated treatments more effective.

⚠️ Note: This post is for general educational purposes only and should not replace professional medical advice. Please consult a dermatologist for personalized care.

Coconut oil works best as part of a broader natural toolkit. Beyond oils, spices and herbs can reduce inflammation. See our Top 10 Natural Anti-Inflammatory Remedies for ideas backed by research.

For DIY lovers, there are simple blends — like turmeric masks combined with coconut oil. Try recipes from our DIY Turmeric Skincare Guide.


Person massaging scalp with coconut oil alongside a step-by-step guide for managing scalp psoriasis naturally.
A simple 4-step scalp psoriasis care routine: warm coconut oil, massage gently, cover overnight, and wash with medicated shampoo for best results.

4. Coconut Oil for Scalp Psoriasis: Practical How-To

Scalp psoriasis is often the hardest to manage. The plaques can feel tight, itchy, and hard to remove. Shampoo alone rarely helps because thick scales block active ingredients from penetrating.

Here’s a practical way to use coconut oil:

  1. Warm 1–2 teaspoons of virgin coconut oil in your hands.
  2. Massage gently into affected areas of the scalp.
  3. Cover with a shower cap or towel, and leave it overnight.
  4. In the morning, comb out softened scales.
  5. Wash with a medicated shampoo (salicylic acid, coal tar, or vitamin D analogues).

Tips:

  • Repeat 2–3 times a week.
  • Don’t overdo it — too much oil can clog pores or make hair greasy.
  • Avoid using it just before phototherapy.

Many people find this not only softens plaques but also creates a calming, self-care ritual that reduces the stress of dealing with scalp psoriasis.

Scalp psoriasis can be particularly challenging. Coconut oil helps loosen plaques and reduce itching, but it isn’t the only natural moisturizer. You might also explore Shea Butter for Scalp Psoriasis, which many find equally soothing.

Disclaimer

This article is for educational and informational purposes only. It is not intended as medical advice and should not replace consultation with a qualified healthcare provider. Psoriasis can vary greatly from person to person, so always talk to your dermatologist or healthcare professional before starting any new treatment or home remedy, including the use of coconut oil


5. Coconut Oil for Other Psoriasis Types

While scalp psoriasis gets the most attention, coconut oil can support other types:

  • Plaque psoriasis (elbows, knees): Helps soften thick patches.
  • Inverse psoriasis (skin folds): May reduce friction but be careful, as excess moisture in folds can cause irritation.
  • Nail psoriasis: Massaging into cuticles may reduce brittleness, though research is limited.
  • Genital psoriasis: Can ease dryness, but note that coconut oil weakens latex condoms.
  • Facial psoriasis: Use sparingly, especially if acne-prone — coconut oil can clog pores.

Psoriasis on hands can be painful and disruptive. Coconut oil softens rough patches and restores moisture, but if you’re unsure whether your symptoms are psoriasis or eczema, check out Palmar Psoriasis vs Hand Eczema for clarity.


6. DIY Blends and Everyday Uses

Many people mix coconut oil with other soothing agents:

  • Coconut oil + aloe vera: Cools and hydrates.
  • Coconut oil + turmeric: Anti-inflammatory boost from Ayurveda.
  • Coconut oil + apple cider vinegar: ACV reduces itch, coconut oil restores moisture (WebMD).
  • Coconut oil + neem-based creams: Traditional blends like Sorion are studied for psoriasis (Research Registry).

While not all combinations are clinically proven, they often make self-care more pleasant and personalized.


7. Dermatologists’ Perspective

When living with psoriasis, it’s natural to wonder what the experts recommend. While many people experiment with home remedies like coconut oil, dermatologists stress the importance of keeping expectations realistic—while also recognizing that coconut oil can play a gentle, supportive role in managing symptoms.

Portrait of dermatologist with speech bubble saying “Coconut oil = emollient, not a cure,” emphasizing professional guidance for psoriasis care.
Dermatologists remind patients that coconut oil is an emollient — soothing and supportive, but not a cure. It works best when paired with prescribed psoriasis treatments.

Coconut Oil as an Emollient, Not a Cure

Dermatologists often highlight that coconut oil works as an emollient, which means it helps lock in moisture and create a protective barrier over the skin. According to Medical News Today, there is no conclusive scientific evidence that coconut oil can cure psoriasis. However, its natural moisturizing and anti-inflammatory properties can make skin feel less dry and irritated—providing comfort alongside prescribed treatments.

Dr. Kurt Ashack, a dermatologist at Michigan State University, explains that coconut oil forms an occlusive seal, much like petroleum jelly, while also offering antimicrobial and anti-inflammatory benefits. This makes it especially helpful for dry, peeling plaques, though it should always be seen as a complementary step—not a replacement for medical care (HealthCentral).


Best Way to Apply Coconut Oil

Experts recommend applying coconut oil immediately after a warm shower, when the skin is still slightly damp. This helps the oil trap hydration more effectively. A thin layer, massaged in circular motions, is usually enough to make skin feel softer and calmer. This simple daily ritual can be both soothing and practical (HealthCentral).


Scalp Psoriasis: Preparing the Ground

Scalp psoriasis is notoriously difficult to manage, but coconut oil can help soften stubborn scales. Dermatologists quoted by Byrdie note that using coconut oil overnight can loosen plaques, making medicated shampoos or treatments more effective. Similarly, Healthline points out that coconut oil may provide temporary relief from itching and flaking, though it shouldn’t be relied on as the only treatment.


Dermatologists with Psoriasis Trust Oils Too

Interestingly, even dermatologists who live with psoriasis themselves often turn to natural oils. One expert quoted by the Global Healthy Living Foundation shared that she applies jojoba oil or coconut oil at night to help soften scales—because skin’s natural repair processes are most active during sleep. This practical advice blends medical science with lived experience.


Evidence from Clinical Guidelines

On a broader level, clinical evidence does support the use of coconut oil as a supportive therapy. A rapid evidence summary published by the Joanna Briggs Institute concluded that virgin coconut oil shows Level B evidence for psoriasis care, especially when access to corticosteroid creams is limited. While not a cure, it can be a cost-effective, natural addition to skincare routines.

⚠️ Note: This post is for general educational purposes only and should not replace professional medical advice. Please consult a dermatologist for personalized care.


Hope with Balance

In the end, dermatologists advise approaching coconut oil with hope but caution. It can ease dryness, reduce itchiness, and make plaques more manageable. But for moderate to severe psoriasis, coconut oil is best used alongside prescribed treatments such as topical steroids or systemic medications (Verywell Health).


Key Takeaway: Dermatologists recognize coconut oil as a safe, soothing companion to medical treatments—not a standalone cure. By using it strategically (after showers, overnight on the scalp, or layered under other therapies), you can bring more comfort into your daily routine while still following your doctor’s guidance.


8. Pros and Cons: A Balanced View

ProsCons
Natural, affordable, widely availableNot a cure
Hydrates and softens plaquesMay clog pores
Reduces scaling and itchCan block UV in phototherapy
Supports scalp microbiomeLimited psoriasis-specific trials
Pros and Cons of Coconut Oil for Psoriasis

Choosing the right oil can feel overwhelming. While coconut oil is a great start, some prefer Castor Oil for Psoriasis due to its thicker texture and different fatty acid profile.

Similarly, turmeric has long been used in Ayurvedic practices. Pairing the two may enhance results — see our deep dive into Turmeric for Psoriasis.


9. Choosing and Using Coconut Oil Wisely

Not all coconut oils are created equal. If you’re considering adding it to your psoriasis care routine, choosing the right type—and knowing how to use it properly—can make a big difference. Dermatologists and nutrition experts alike stress that the quality of coconut oil matters, as does the way you apply it.


Virgin vs. Refined Coconut Oil

When it comes to skincare, dermatologists generally recommend virgin coconut oil over refined varieties. Virgin coconut oil is extracted without high heat or chemicals, which helps it retain more antioxidants and beneficial fatty acids. These compounds are thought to contribute to its anti-inflammatory and antimicrobial properties, which can be soothing for irritated skin.

Refined coconut oil, on the other hand, often undergoes bleaching and deodorizing, which can strip away some of these natural benefits. While it’s still moisturizing, it may not offer the same skin-friendly extras that virgin oil provides.


Look for Cold-Pressed and Organic Options

If possible, reach for cold-pressed, organic virgin coconut oil. Cold-pressing helps preserve delicate nutrients, while organic certification ensures fewer pesticide residues. This can be especially important if you’re applying oil to sensitive areas such as the scalp or face.


Patch-Test Before You Commit

Even natural remedies can sometimes trigger reactions. Experts recommend doing a patch test—apply a small amount of coconut oil to a discreet area of skin and wait 24 hours. If there’s no redness, itching, or rash, it’s likely safe to use more broadly.


Best Times to Apply Coconut Oil

Timing makes coconut oil more effective. For psoriasis-prone skin, dermatologists suggest:

  • After a warm shower – Apply a thin layer while your skin is still slightly damp to lock in hydration.
  • Before bed – Letting coconut oil sit overnight allows it to soften plaques and relieve tightness.
  • Before medicated treatments – For scalp psoriasis, gently massaging coconut oil into plaques can help loosen scales, making medicated shampoos work better (Healthline).

When Coconut Oil May Not Be Enough

While coconut oil is generally safe and soothing, dermatologists caution that it may not be sufficient for moderate to severe psoriasis. In those cases, it’s best used as a supportive step alongside prescribed treatments. If you notice worsening symptoms, persistent itching, or pain, consult your dermatologist before continuing use (Verywell Health).


Storage and Shelf Life

Finally, remember that coconut oil has a shelf life of about two years when stored in a cool, dark place. Keep it in a clean, dry container and always use clean hands or a spoon to scoop it out. This prevents contamination and keeps your oil fresh for longer.

Key Takeaway: To get the most benefit, choose organic, cold-pressed virgin coconut oil, patch-test before regular use, and apply at the right times—especially after bathing or before bed. Used wisely, coconut oil can be a simple yet comforting tool in your broader psoriasis care plan.


Conclusion: A Gentle Ally in a Lifelong Journey

Psoriasis is a marathon, not a sprint. While medical treatments target the immune system, daily self-care makes a huge difference in comfort and quality of life. Coconut oil may not erase psoriasis, but it can:

  • Moisturize dry skin.
  • Soften stubborn scales.
  • Improve scalp health.
  • Create a calming ritual in an otherwise stressful routine.

For many, that’s not just “alternative medicine” — it’s practical, everyday support that makes life with psoriasis a little more manageable.

Disclaimer

This article is for educational and informational purposes only. It is not intended as medical advice and should not replace consultation with a qualified healthcare provider. Psoriasis can vary greatly from person to person, so always talk to your dermatologist or healthcare professional before starting any new treatment or home remedy, including the use of coconut oil.

Frequently Asked Questions About Coconut Oil for Psoriasis

1. Can coconut oil really help with psoriasis?

Yes, coconut oil may help relieve dryness, itching, and flaking associated with psoriasis. Thanks to its moisturizing and anti-inflammatory properties, it can soften plaques and calm irritation. However, it works best as a supportive care option rather than a standalone treatment.


2. Is coconut oil good for scalp psoriasis?

Absolutely. Many people find that applying coconut oil on scalp psoriasis helps loosen scales and reduce itchiness. For best results, massage it into the scalp, leave it on overnight, and wash gently the next morning with a mild shampoo.


3. Which is the best coconut oil for psoriasis?

Dermatologists usually recommend organic, virgin, cold-pressed coconut oil. This type retains the highest levels of antioxidants and beneficial fatty acids, making it more soothing for sensitive, psoriasis-prone skin.


4. How do you use coconut oil for psoriasis on the scalp?

A practical routine is to warm a small amount of oil in your hands, massage it gently into affected areas, and cover your head with a shower cap overnight. This softens plaques and makes medicated shampoos more effective the next day.


5. Can coconut oil treat psoriasis naturally?

Coconut oil is often considered part of natural psoriasis treatment. While it can’t cure the condition, it may reduce flare-up discomfort, hydrate dry skin, and support overall skin barrier health when used regularly.


6. Does coconut oil help with plaque psoriasis?

Yes, applying coconut oil for plaque psoriasis may soften the thickened, scaly patches and make them less painful. Pairing it with dermatologist-recommended treatments usually yields the best results.


7. Are there side effects of using coconut oil for psoriasis?

For most people, coconut oil is safe. However, some may experience clogged pores or mild irritation. To avoid this, always patch-test on a small area before applying it widely, especially on the face or sensitive areas.


8. Can I mix coconut oil with other remedies like apple cider vinegar?

Yes, some people combine coconut oil and apple cider vinegar for scalp psoriasis to boost effectiveness. Vinegar may help reduce itch and balance scalp pH, while coconut oil provides moisture. Always consult a dermatologist before trying combinations.


9. Is coconut oil helpful for psoriatic arthritis?

While coconut oil may soothe dry skin linked with psoriasis, there is no scientific evidence that it helps psoriatic arthritis directly. Still, as part of a holistic self-care routine, it can improve comfort and skin health.


10. How long does it take to see results from coconut oil for psoriasis?

Consistency is key. Some people notice softer skin and reduced flaking within a week of regular use, especially on the scalp. However, improvements in psoriasis symptoms vary, and long-term management usually requires medical treatments too.

Further Reading & References

If you’re interested in exploring more about coconut oil for psoriasis and natural skin health, here are some trusted resources and additional reads:

Scientific Studies & Expert Resources

  • Topical Coconut Oil and Skin Health – A review in the International Journal of Molecular Sciences shows that virgin coconut oil supports the skin barrier and reduces inflammatory markers like TNF-α and IL-6. Read the study here.
  • Moisturizer Effectiveness on Dry Skin – Research found coconut oil works as well as mineral oil in hydrating and smoothing dry skin. See the findings.
  • Coconut Oil Before Phototherapy – A controlled trial revealed that applying coconut oil before PUVA or UVB light therapy does not improve outcomes. View the study.
  • Dermatologists’ Tips for Scalp Psoriasis – The American Academy of Dermatology explains how scale softeners, gentle care, and avoiding scratching can make treatments more effective. Read more here.
  • Natural Oils and Skin Barrier Repair – A scientific review emphasizes how fatty acid profiles (like lauric acid in coconut oil) influence skin repair. Learn more.

Additional Context & Resources

  • Managing Psoriasis Symptoms – Mayo Clinic outlines simple routines like lukewarm baths, moisturizing, and avoiding harsh triggers. Check the guide.
  • Botanical Treatments for Psoriasis – A 2023 review looks at how essential oils and plant extracts can complement traditional treatments. Explore the review.

Related Reads from MasalaMonk

Posted on 3 Comments

Turmeric Benefits for Skin and Face

TURMERIC Benefits for SKIN & Face

Turmeric Benefits for Skin and Face have been celebrated for centuries in Ayurveda and natural skincare. This golden spice, also known as haldi, is packed with curcumin — a powerful antioxidant and anti-inflammatory compound. Because of these properties, turmeric is often used to heal acne, fade dark spots, brighten skin tone, and restore a natural glow.

Modern research supports these claims—a 2016 systematic review of 18 human studies found that topical and oral turmeric improved multiple skin conditions, from acne to photoaging (PubMed).

Moreover, turmeric is incredibly versatile. It can be applied directly as a face mask, combined with oils for moisturizing, or even consumed as turmeric tea for inside-out skincare benefits. By understanding the full range of turmeric benefits for skin and face, you can use it more effectively and safely.

In this guide, we will explore 7 proven turmeric benefits for skin and face, along with DIY remedies, mask recipes, and tips to make the most of this ancient beauty secret. Whether you struggle with acne, hyperpigmentation, or simply want brighter skin, turmeric offers a natural and effective solution.

7 Proven Turmeric Benefits for Skin and Face

1. Turmeric Benefits for Acne and Pimples

One of the most well-known turmeric benefits for skin and face is its ability to fight acne. Thanks to its antimicrobial and anti-inflammatory properties, turmeric helps reduce breakouts while calming redness and swelling. In fact, studies suggest curcumin can inhibit acne-causing bacteria and balance excess oil production. As a result, regular application of a turmeric mask or paste may keep pimples under control more effectively than harsh chemical treatments.

Woman applying turmeric paste on face to fight acne naturally.
🔥 Fights acne naturally – turmeric’s antibacterial and anti-inflammatory power.

In fact, researchers note that curcumin may be a well-tolerated, low-cost option for inflammatory skin diseases like acne and eczema (PMC).


2. Turmeric Benefits for Hyperpigmentation and Dark Spots

Another important turmeric benefit for face and skin is reducing hyperpigmentation. Curcumin, the active compound in turmeric, can slow down melanin production, which causes dark patches and uneven skin tone. Over time, using turmeric masks, scrubs, or even turmeric soap may help fade dark spots naturally. Moreover, pairing turmeric with lemon juice or honey can enhance these brightening effects.

☀️ Turmeric helps fade dark spots by slowing melanin and evening skin tone.

Studies highlight curcumin’s inhibition of collagenase and elastase enzymes, which can otherwise worsen pigmentation and wrinkles. This explains why turmeric has been a key cosmetic in India for skin brightening rituals for centuries (IJDVL).


3. Turmeric Benefits for Glowing Skin and Brightness

If you are looking for a natural way to achieve radiant skin, turmeric is a proven option. Its antioxidants neutralize free radicals, while its anti-inflammatory nature improves circulation. This dual action restores skin’s natural glow and brightness. Additionally, drinking turmeric tea or golden milk provides inside-out nourishment, further supporting skin radiance.

Smiling woman holding a cup of Turmeric Latte.
✨ Nature’s glow secret – turmeric for radiant skin from Ayurveda to science.

Discover even more advantages in The Golden Spice: 5 Benefits of Turmeric for Skin Health.


4. Benefits of Turmeric for Anti-Aging and Wrinkles

With age, skin begins to lose elasticity and firmness. Fortunately, one of the less-discussed turmeric benefits for skin and face is its anti-aging power. Curcumin stimulates collagen production, improves hydration, and reduces fine lines and wrinkles. By using turmeric oil or turmeric-infused creams, you can promote youthful, supple skin without relying entirely on synthetic products.

Woman gently touching her cheek while holding a bowl of turmeric face mask; portrait highlighting turmeric’s anti-aging benefits.
💛 Reduces wrinkles naturally — turmeric may help support collagen and restore elasticity.

Curcumin not only protects against free radical damage but also guards skin against UVB rays, improves collagen synthesis, and supports elasticity. A recent review emphasized curcumin’s role in anti-aging skincare and wound repair (MDPI).


5. Turmeric Benefits for Psoriasis, Eczema, and Sensitive Skin

For people struggling with skin conditions like psoriasis, eczema, or dermatitis, turmeric offers gentle relief. Its soothing nature reduces inflammation, itching, and scaling. In fact, both topical and oral turmeric have been found helpful in managing chronic inflammatory skin conditions. However, it is best to patch-test before using turmeric on sensitive skin to avoid irritation.

Turmeric paste applied gently to calm irritated sensitive skin.
🌱 Calms irritation and redness – soothing relief for sensitive skin & psoriasis.

Learn how turmeric supports chronic skin conditions like psoriasis in our article Harnessing the Healing Power of Turmeric for Psoriasis.


6. Burnt Turmeric Benefits for Skin and Face

Recently, many people have been searching for “burnt turmeric” or “roasted turmeric” remedies. Traditionally, burnt turmeric is believed to improve absorption and healing when applied to skin. While scientific evidence is still limited, anecdotal reports suggest it may help with scars and pigmentation. Therefore, if you plan to try it, use small amounts, always patch-test, and pair it with a carrier oil like coconut or olive oil.

Burnt turmeric shown on a wooden plate as a natural scar treatment.
🌿 Burnt turmeric – an age-old remedy to heal scars naturally.

7. Drinking Turmeric Tea Benefits for Skin & Face

Finally, turmeric isn’t only about topical application. Consuming turmeric tea provides antioxidants and boosts natural detoxification. This helps reduce oxidative stress, which is one of the biggest causes of premature aging, acne, and dull skin. By drinking turmeric tea regularly, you support your skin’s health from the inside, making it more resistant to environmental damage.

Cup of turmeric tea with spices for natural skin glow and wellness.
☕ Glow from within – turmeric tea boosts skin health & immunity.

Johns Hopkins highlights curcumin as a powerful polyphenol that improves overall skin resilience (Hopkins Medicine).


Other Popular Turmeric Benefits for Skin and Face

Turmeric Benefits for Melasma (Patchy Hyperpigmentation)

Melasma is stubborn, but turmeric can help reduce excess melanin activity over time. Apply a thin mask of turmeric, yogurt, and a few drops of almond oil 2–3 times weekly; then follow with sunscreen daily. Consistent, gentle use is key—expect gradual evening of tone rather than instant “whitening.”

Benefits of Turmeric with Vitamin C for Brightening

Vitamin C and turmeric work synergistically: curcumin calms inflammation while vitamin C supports pigment control and antioxidant repair. You can:

  • Use a vitamin C serum in the morning, then a light turmeric gel/cream at night; or
  • DIY a mask: 1 tsp yogurt + ½ tsp turmeric + a few drops of fresh lemon (vitamin C) for 10 minutes max.
    Tip: If you’re sensitive, replace lemon with rose water to avoid stinging.

Turmeric and Black Pepper — Should You Use It on Skin?

Black pepper (piperine) is known to boost oral curcumin absorption. Topically, it’s often too irritating, especially on the face. If you want bioavailability benefits, drink turmeric tea with a pinch of black pepper and healthy fat (like ghee/coconut milk) and keep facial formulas pepper-free.

See how to maximize turmeric’s potency in Turmeric & Curcumin Absorption and Bioavailability.

Turmeric Scrub Benefits for Hyperpigmentation & Dark Areas (Inner Thighs/Bikini Line)

Friction and ingrowns can cause dark patches. A gentle scrub 1–2×/week helps:

  • 1 tsp turmeric + 1 tbsp oat flour or sugar + 1 tbsp coconut oil.
    Massage lightly for 60–90 seconds, then rinse. Follow with SPF if the area gets sun.
    Important: Avoid scrubbing over active ingrowns or open lesions.

Turmeric for Hidradenitis Suppurativa (HS) — Supportive Care

HS is inflammatory and painful. While turmeric won’t “cure” HS, its anti-inflammatory action may soothe flare edges. Use a cool compress, then dab a thin mix of aloe gel + a pinch of turmeric around—not on—open lesions. Consult a dermatologist for primary treatment; consider oral turmeric (with medical approval) as supportive care.

Wound Healing / Burn Relief Benefit of Turmeric

Turmeric benefits extend beyond beauty. Animal model studies show topical curcumin accelerates epithelial healing and reduces inflammation in radiation-induced skin burns, suggesting possible uses in wound management (PMC).


Raw Turmeric vs Powder vs Oil – Which Is Best for Skin?

When it comes to using turmeric for beauty, many people wonder whether raw turmeric, turmeric powder, or turmeric oil works best. Each form has unique strengths, and choosing the right one depends on your skin goals.

Infographic comparing raw turmeric, turmeric powder, and turmeric oil.
⚖️ Which form is best? Powder, Raw, or oil – turmeric skincare choices explained.

Raw Turmeric Benefits for Skin and Face

Raw turmeric (often called kasturi haldi or wild turmeric) is one of the purest ways to use this spice for skincare. Because it contains high levels of curcumin and natural essential oils, it can brighten the skin, reduce acne, and give a natural glow. Moreover, unlike regular cooking turmeric, kasturi haldi is less likely to stain the skin yellow, which makes it a popular choice for face masks.

💡 Best use: Mix grated raw turmeric with yogurt, honey, or aloe vera for a DIY mask to fight pimples and dullness.


Turmeric Powder Benefits for Face & Skin Care

Turmeric powder is the most widely available and versatile form. It is rich in antioxidants and can easily be added to DIY masks, scrubs, and even soaps. In addition, turmeric powder works well for treating dark spots, pigmentation, and blemishes. However, it tends to stain the skin, so combining it with ingredients like milk or coconut oil helps tone down the yellow effect.

💡 Best use: Use a turmeric powder + chickpea flour (besan) mask to reduce excess oil and brighten skin tone naturally.


Benefits of Turmeric Oil for Face and Skin

Turmeric essential oil is a concentrated extract that delivers benefits more directly to the skin. Because it is potent, even a few drops mixed with a carrier oil (like jojoba, almond, or coconut oil) can help calm inflammation, fade scars, and moisturize deeply. Furthermore, turmeric oil is often found in serums and creams designed for hyperpigmentation and anti-aging.

💡 Best use: Apply diluted turmeric oil as a spot treatment for acne scars, fine lines, or dark patches.


Which Form Is Best?

  • For everyday masks and scrubs, turmeric powder is the easiest to use.
  • For sensitive skin or bridal glow routines, raw turmeric or kasturi haldi is preferred since it stains less.
  • For targeted treatment of scars, dark spots, and wrinkles, turmeric oil is the most effective option.

In short, each type has a place in your skincare routine. By combining them smartly, you can unlock the full range of turmeric benefits for skin and face.


DIY Turmeric Masks and Remedies for Face

One of the easiest ways to enjoy turmeric benefits for skin and face is through simple DIY masks and scrubs. By combining turmeric with natural ingredients like honey, yogurt, or lemon, you can address acne, dark spots, dryness, and dullness without relying on harsh chemicals. Because Turmeric Benefits for Skin and Face vary by concern, choose the mask that targets your goal—acne, dark spots, glow, or dryness—and repeat it consistently.

Flatlay of turmeric face mask ingredients including turmeric, yogurt, honey, and lemon.
🧡 DIY Haldi Mask – simple turmeric recipe for glowing skin.

Haldi Mask for Acne and Pimples

Haldi masks are a traditional remedy for acne-prone skin. Thanks to turmeric’s antibacterial and anti-inflammatory effects, these masks can reduce breakouts while calming irritation.

Recipe:

  • 1 teaspoon turmeric powder
  • 2 teaspoons chickpea flour (besan)
  • 2–3 teaspoons rose water or plain yogurt
  • Mix into a paste and apply for 15 minutes.

💡 Best for: Controlling oil, preventing pimples, and achieving a clear complexion.


Turmeric and Honey Mask Benefits for Clear Skin

Turmeric combined with honey creates a powerful antibacterial mask. Honey hydrates the skin while turmeric reduces redness and swelling.

Recipe:

  • 1 teaspoon turmeric
  • 1 tablespoon raw honey
  • Apply to face for 10–15 minutes, rinse with lukewarm water.

💡 Best for: Acne, inflammation, and glowing skin.


Benefits of Turmeric and Lemon for Skin Brightening

When brightening and fading dark spots is the goal, turmeric and lemon juice are a great combo. Lemon contains vitamin C, which enhances the skin-lightening effect of turmeric.

Recipe:

  • 1 teaspoon turmeric powder
  • 1 teaspoon lemon juice
  • 1 teaspoon yogurt (optional to reduce stinging)
  • Apply evenly, leave for 10 minutes, rinse well.

💡 Best for: Hyperpigmentation, dark patches, and uneven tone.


Turmeric and Olive Oil Benefits for Dry Skin

For people with dry or flaky skin, turmeric mixed with olive oil provides deep moisturization while soothing irritation.

Recipe:

  • ½ teaspoon turmeric
  • 1 tablespoon olive oil
  • Apply gently as a thin layer and leave for 10–15 minutes.

💡 Best for: Dryness, redness, and fine lines.


Benefits of Turmeric Scrub for Exfoliation

A turmeric scrub helps remove dead skin cells while brightening and refreshing the skin.

Recipe:

  • 1 teaspoon turmeric
  • 1 tablespoon sugar or oatmeal
  • 1 tablespoon coconut oil
  • Massage gently in circular motions for 3–5 minutes, then rinse.

💡 Best for: Glow boost, smoother texture, and skin rejuvenation.


For more pairings, natural, and DIY options, have a look at these posts and guides:


Safety Tips for Using Turmeric on Skin and Face

While the turmeric benefits for skin and face are powerful, it’s equally important to use this golden spice correctly. Because turmeric is highly pigmented and active, applying it the wrong way may cause stains, irritation, or other side effects.

Turmeric safety infographic with do’s and don’ts for skincare use.
💡 Safety first – important tips before applying turmeric on your skin.

Despite promising results, experts stress that clinical evidence is still limited, especially for deep wounds or burns (Cambridge Media). Harvard Health also notes that while turmeric is safe for most people, it may cause irritation if applied too frequently and should always be patch-tested first (Harvard Health).

Therefore, to enjoy the full range of Turmeric Benefits for Skin and Face without setbacks, always patch-test, avoid over-exfoliation, and wear sunscreen daily—especially when targeting pigmentation. Below are key safety tips to keep in mind.


Patch Test Before Applying Turmeric on Face

Before applying turmeric to your entire face, test it on a small area of skin (like your wrist or jawline). This ensures you don’t react with redness or itching, especially if you have sensitive skin or conditions like eczema.

💡 Tip: If irritation occurs, wash off immediately and discontinue use.


How to Reduce Turmeric Staining on Skin

One common concern with turmeric powder is that it leaves a yellow tint on the skin. This is harmless, but it can be annoying. To reduce staining:

  • Mix turmeric with yogurt, milk, or honey instead of water.
  • Wash off with a gentle cleanser after masking.
  • Use kasturi haldi (wild turmeric), which is less likely to stain.

Safe Use of Turmeric Oil for Skin

Turmeric oil is potent. Never apply it directly to the skin; always mix a few drops with a carrier oil like coconut, jojoba, or almond oil. This prevents burning or irritation.


How Often Should You Use Turmeric Masks?

For most skin types, using turmeric masks 2–3 times per week is safe and effective. Overuse may dry out the skin or cause sensitivity.


Turmeric for Skin Whitening – Myth vs Reality

Many searches ask, “Is turmeric good for face whitening?” While turmeric does not bleach skin, it can brighten complexion by reducing pigmentation, scars, and uneven tone. In other words, turmeric helps reveal your natural glow rather than artificially “whitening” the skin.

For more on turmeric’s brightening effects as a glow mask, see Is Turmeric Good for Your Face?


Consult Before Using Supplements

While applying turmeric topically is generally safe, oral turmeric supplements can sometimes interact with medications or cause rare side effects like digestive issues. Always consult a healthcare provider before taking high-dose turmeric pills.

Check out 10 Serious Side Effects of Turmeric before starting supplements.


FAQs on Turmeric Benefits for Skin and Face

Q1. Is burnt turmeric good for skin and face?
Yes, burnt turmeric (or roasted turmeric) is a traditional remedy believed to help with scars, pigmentation, and wound healing. While scientific studies are limited, many still use it as part of natural skincare. Always mix with a carrier oil and patch-test before applying to avoid irritation.

Q2. What does turmeric do to skin and face?
Turmeric benefits for skin and face include reducing acne, calming redness, fading dark spots, and boosting natural glow. Its anti-inflammatory and antioxidant properties also improve skin texture and overall health.

Q3. What are the benefits of drinking turmeric tea for skin and face?
Drinking turmeric tea helps fight free radicals, reduce oxidative stress, and slow premature aging. These benefits support acne control, hydration, and glowing skin from the inside out.

Q4. What are the benefits of applying turmeric on face daily?
Applying turmeric on the face may reduce pimples, fade scars, brighten skin tone, and improve elasticity. It is often used in masks, scrubs, and spot treatments for acne, dark spots, and dullness. Always dilute turmeric with honey, yogurt, or oils to avoid staining.

Q5. Does turmeric make skin and face whiter?
No, turmeric does not bleach skin. Instead, turmeric helps reduce pigmentation, dark patches, and uneven skin tone, revealing a naturally brighter complexion. It is best considered a skin brightener and glow booster, not a whitening agent.


Conclusion

In conclusion, the many turmeric benefits for skin and face make this golden spice one of the most powerful natural remedies in skincare. From reducing acne and dark spots to boosting radiance and slowing down aging, turmeric works both on the surface and from within. Moreover, whether you use it as a raw ingredient, powder, oil, or even as turmeric tea, its versatility makes it easy to include in your daily routine.

However, while turmeric is generally safe, it is important to use it wisely—always patch-test, dilute when necessary, and avoid overuse. By combining turmeric with simple natural ingredients like honey, lemon, or olive oil, you can create effective DIY masks and scrubs that give lasting results without harsh chemicals.

Ultimately, turmeric offers a gentle, affordable, and time-tested solution for healthier, glowing skin. If you’re ready to embrace natural skincare, now is the perfect time to try these remedies and unlock the full potential of turmeric benefits for skin and face.

Posted on 1 Comment

Electrolyte Drinks for Hangovers: 5 Easy DIY Recipes to Rehydrate Fast

Cover image for MasalaMonk’s guide to DIY electrolyte drinks for hangover recovery.

We’ve all been there — you wake up after a fun night out, your head is pounding, your mouth feels like sandpaper, and even the thought of getting out of bed seems impossible. That’s the dreaded hangover. And while there’s no magical cure, one of the most effective ways to bounce back is by turning to electrolyte drinks for hangovers.

Why electrolytes? Because alcohol doesn’t just dehydrate you — it also flushes essential minerals like sodium, potassium, and magnesium out of your system. These electrolytes are key for keeping your body’s fluid balance, energy levels, and even muscle function in check. Without them, you’re left feeling sluggish, foggy, and completely drained.

The good news is you don’t need to rely on expensive hydration powders or neon-colored sports drinks. With just a few simple ingredients from your kitchen, you can make powerful DIY electrolyte drinks that will help rehydrate your body, restore balance, and ease those brutal hangover symptoms. In this guide, we’ll walk through exactly why electrolytes matter, the key ingredients you’ll need, and finally share five easy homemade recipes to help you feel like yourself again.

Also Read: Top 12 Hangover Remedies from Around the World


💧 Why Electrolytes Are Important for Hangover Recovery

So, why do hangovers hit so hard — and how do electrolytes help? It all comes down to the way alcohol affects your body. When you drink, alcohol acts as a diuretic, which is just a fancy way of saying it makes you pee more often. Every bathroom trip isn’t just flushing out water, though — it’s also draining your body of vital electrolytes. Over time, this imbalance doesn’t just leave you dehydrated; it can even put added stress on your kidneys if recovery is neglected. Masala Monk’s piece on Alcohol & Kidney Health: The Hard Truth highlights just how serious that strain can be.

Research shows that alcohol can directly promote hangover symptoms, from headaches and dizziness to fatigue and nausea. That’s why after a night of drinking, you often wake up with:

  • Headaches and dizziness – your brain is literally dehydrated.
  • Extreme fatigue – low potassium and magnesium mess with your energy.
  • Muscle cramps or weakness – your sodium levels are out of balance.
  • Nausea or stomach upset – dehydration and salt loss irritate digestion.

Replenishing electrolytes helps fix this imbalance. Sodium and potassium restore fluid balance, magnesium supports energy production, and natural sugars (like from honey or fruit) actually help your body absorb electrolytes more effectively. This combination allows your body to rehydrate faster than with plain water, giving you relief from headaches, fatigue, and nausea much more quickly.

Think of it this way: drinking water is like patching a hole in the bucket, while drinking an electrolyte drink for hangovers is like filling the bucket back up with the right mix of fluids and minerals. It’s the missing piece your body desperately needs after alcohol.


🥬 Key Ingredients in DIY Electrolyte Drinks for Hangovers

Now that we know why electrolytes matter, let’s talk about what goes into making them. The beauty of DIY electrolyte drinks is that you can craft them at home with everyday ingredients — no need for fancy powders or overpriced bottles. Here are the building blocks that make an electrolyte drink effective for hangover recovery:

  • Water – The foundation of hydration. Your body is mostly water, and it needs a lot of it after drinking.
  • Salt (sodium chloride) – A small pinch goes a long way in restoring sodium levels and keeping fluid balance in check.
  • Citrus juice (lemon, lime, orange) – Adds potassium for energy and vitamin C for immune support. Plus, the fresh flavor makes the drink more enjoyable.
  • Natural sweeteners (honey, maple syrup) – A touch of natural sugar helps your body absorb electrolytes faster while giving you an energy lift.
  • Coconut water – Nature’s electrolyte drink, packed with potassium and magnesium.
  • Ginger – Calms nausea and eases stomach discomfort, a common hangover symptom.
  • Apple cider vinegar – Provides trace minerals, supports digestion, and balances pH levels.

When you mix these simple ingredients in the right way, you create more than just a drink — you make a natural hangover recovery remedy that rehydrates your body and helps you feel human again. Just like when you’re battling dehydration from illness, replenishing sodium and potassium quickly restores fluid balance. Masala Monk’s guide on Electrolytes and Diarrhea explains how these minerals speed up hydration.

And the best part? You can mix and match depending on what you have at home. Whether it’s a quick lemon-honey blend, a coconut water mix, or a soothing ginger tea, these DIY options are versatile, effective, and way healthier than grabbing a sugar-packed sports drink.

🥤 DIY Electrolyte Drinks for Hangovers You Can Make at Home

Now that we’ve covered why electrolytes are so important — and the key ingredients that make them work — let’s get practical. You don’t need to stock up on pricey sports drinks or hydration powders; some of the best electrolyte drinks for hangovers can be made right in your own kitchen.

These five recipes are quick, natural, and use ingredients you probably already have at home. Each one has its own strengths — some are great for easing nausea, others are perfect for restoring energy — so you can choose whichever best fits how you’re feeling. In fact, many of the same soothing ingredients are recommended for sensitive situations like pregnancy — see Masala Monk’s post on Best Electrolyte Drinks for Pregnancy for ideas that overlap beautifully with hangover recovery.


🍋 Lemon & Honey Electrolyte Water for Hangovers

This simple recipe is a lifesaver the morning after drinking. The fresh lemon juice restores potassium, honey gives you quick energy, and a pinch of salt helps your body absorb fluids faster. It’s light, refreshing, and much easier on your stomach than plain water.

Lemon juice being squeezed with honey drizzled into a glass for homemade electrolyte hangover recovery drinks.
Lemon and honey electrolyte drink – a refreshing way to rehydrate after alcohol.

Ingredients (1 serving):

  • 2 cups filtered water
  • 1 tablespoon fresh lemon juice
  • 1 tablespoon raw honey
  • ¼ teaspoon sea salt
  • Optional: a pinch of baking soda for extra balance

Instructions:

  1. Combine water, lemon juice, honey, and salt in a glass.
  2. Stir until fully dissolved.
  3. Chill in the fridge or add ice before drinking.

Why it works: This DIY electrolyte drink rehydrates quickly while being gentle on the stomach — perfect if you wake up groggy and dehydrated.

Also Read: Benefits of Lemon and Lime Water: Refreshing Hydration with a Citrus Twist


🥥 Coconut Water Electrolyte Mix for Hangovers

If you need something naturally sweet and hydrating, coconut water is your best friend. In fact, studies suggest coconut water may provide hydrating effects similar to sports drinks. Lifestyle experts also note that a tall glass of coconut water is often recommended for hangover recovery, making it a perfect DIY base. It’s packed with potassium and magnesium, making it one of the best natural hangover recovery drinks. Adding lime juice and a touch of salt boosts its effectiveness.

Man drinking homemade coconut water electrolyte mix to rehydrate after a hangover.
Coconut water with lime, honey, and sea salt – a natural electrolyte-rich hangover cure.

Ingredients (1 serving):

  • 1 cup coconut water
  • ½ cup filtered water
  • Juice of ½ lime
  • ¼ teaspoon sea salt
  • 1 teaspoon honey or maple syrup (optional)

Instructions:

  1. Mix all ingredients in a tall glass.
  2. Stir well and chill before serving.

Why it works: Coconut water is nature’s sports drink, and when combined with lime and salt, it becomes a powerful rehydration tool for hangovers.

Also Read: Natural Pressure Regulator: How Coconut Water Can Help Manage High Blood Pressure

🌿 Ginger & Salt Electrolyte Tea for Hangovers

Sometimes a hangover comes with nausea, and the thought of chugging something sweet or cold isn’t appealing. That’s where this warm ginger tea comes in. Ginger has natural anti-nausea properties, while the salt and honey gently restore lost electrolytes.

Fresh ginger, lemon, and salt arranged for making a warm ginger electrolyte tea for hangovers
Warm ginger and salt electrolyte tea – soothing hangover remedy for nausea and dehydration.

Ingredients (1 serving):

  • 1 cup hot water
  • 1 teaspoon fresh grated ginger (or 1 ginger tea bag)
  • ½ tablespoon raw honey
  • ⅛ teaspoon sea salt
  • Optional: squeeze of lemon for extra vitamin C

Instructions:

  1. Brew the ginger in hot water for about 5–7 minutes.
  2. Strain (if using fresh ginger) and stir in honey and salt.
  3. Let cool slightly, then sip slowly.

Why it works: This soothing electrolyte drink for hangovers hydrates while calming an upset stomach — perfect if you wake up queasy.

Also Read: Ginger And Its Stunning Health Benefits


🍊 Orange Juice & Sea Salt Recovery Drink for Hangovers

If your hangover has left you tired and foggy, this bright and refreshing drink gives you a vitamin C and energy boost while replenishing electrolytes. Orange juice adds potassium and natural sugars, while sea salt improves hydration.

Young person stirring orange juice and sea salt electrolyte drink for hangover recovery.
Orange juice with sea salt – a refreshing vitamin C and electrolyte boost for hangovers.

Ingredients (1 serving):

  • 1 cup fresh orange juice
  • 1 cup filtered water
  • ¼ teaspoon sea salt
  • 1 teaspoon honey (optional)

Instructions:

  1. Mix orange juice, water, and salt in a glass.
  2. Stir until combined and serve cold over ice.

Why it works: This is a quick rehydration drink after alcohol that helps fight fatigue while giving your immune system a boost.

Also Read: Orange Juice: Soothing Sore Throats and 5 Other Health Benefits


🍎 Apple Cider Vinegar & Honey Hydration Drink for Hangovers

For those hangovers that come with bloating or digestive discomfort, apple cider vinegar can be surprisingly helpful. Paired with honey and salt, it creates a balanced electrolyte drink that supports digestion while hydrating your body.

Glass of apple cider vinegar and honey electrolyte hydration drink for hangover relief and digestion support.
Apple cider vinegar and honey electrolyte drink – supports digestion and hydration after drinking.

Ingredients (1 serving):

  • 2 cups filtered water
  • 1 tablespoon raw apple cider vinegar (with “the mother”)
  • 1 tablespoon honey
  • ¼ teaspoon sea salt
  • Optional: dash of cinnamon for flavor

Instructions:

  1. Add apple cider vinegar, honey, and salt to water.
  2. Stir until honey dissolves completely.
  3. Drink chilled or at room temperature.

Why it works: Apple cider vinegar provides trace minerals and aids digestion, making this a smart hangover recovery drink when your stomach needs extra care.

Also Read: 5 Benefits of having Apple Cider Vinegar (ACV) on Empty Stomach


These DIY electrolyte drinks for hangovers are quick, affordable, and made with real ingredients — no artificial colors, no heavy sugar, just natural rehydration. Whether you need something light and refreshing, soothing for nausea, or energizing for fatigue, there’s a recipe here to help you bounce back after a night of drinking.

Remember: the best strategy is prevention — alternating water or an electrolyte drink between alcoholic beverages and having one before bed can help reduce the severity of a hangover. But when those mornings hit hard, these homemade recipes can make all the difference.


🔎 Quick Guide: Best DIY Electrolyte Drinks for Hangovers

Not sure which recipe to try first? Here’s a simple breakdown so you can pick the drink that matches your hangover symptoms:

RecipeBest ForKey Benefits
🍋 Lemon & Honey Electrolyte Water for HangoversMorning rehydrationGentle on the stomach, restores sodium + potassium, quick hydration boost
🥥 Coconut Water Electrolyte Mix for HangoversBefore bed or during drinkingHigh in potassium & magnesium, naturally sweet, prevents dehydration
🌿 Ginger & Salt Electrolyte Tea for HangoversNausea & upset stomachSoothes digestion, replaces lost electrolytes, hydrating without being heavy
🍊 Orange Juice & Sea Salt Recovery Drink for HangoversMidday recovery & fatigueVitamin C boost, natural sugar for energy, balances hydration
🍎 Apple Cider Vinegar & Honey Hydration Drink for HangoversDigestive discomfort & bloatingAids gut health, provides trace minerals, rehydrates with balanced electrolytes
Comparison Chart for Natural Electrolyte Drinks for Hangovers

🛡️ Extra Tips to Prevent Hangovers with Electrolytes

Of course, the best cure is always prevention. While these homemade electrolyte drinks for hangovers work wonders the next morning, you can also use them before and during your night out to minimize symptoms. Here are a few tips:

  • Hydrate before drinking: Have a glass of water or an electrolyte drink before heading out.
  • Alternate drinks: A good rule of thumb is one glass of water or electrolytes for every alcoholic drink.
  • Refuel before bed: A quick DIY electrolyte mix before you sleep can lessen hangover severity.
  • Choose lighter drinks: Dark liquors like whiskey and rum contain more congeners (byproducts of fermentation) that worsen hangovers.

A little planning goes a long way — and your morning self will thank you.

Prevention is the smartest strategy. If you’re curious about speeding up recovery beyond hydration, check out Masala Monk’s practical guide on How to Get Alcohol Out of Your System Fast.


🌱 Why DIY Electrolyte Drinks Beat Store-Bought

You might be wondering: why not just grab a sports drink? While store-bought options like Gatorade or Pedialyte can help, they often come with excess sugar or additives. As per The Guardian, Electrolyte sachets may only provide minor support for hangovers, so if you want a cleaner, more natural approach, homemade drinks are usually the better option.

  • Less sugar: Many sports drinks are loaded with sugar, which can actually make nausea worse.
  • More natural: DIY recipes use real fruit juice, honey, and sea salt instead of artificial dyes and additives.
  • Customizable: You can adjust sweetness, saltiness, or flavor depending on what your body needs.
  • Budget-friendly: Ingredients like lemon, honey, and salt cost pennies compared to pricey hydration powders.

In short, homemade electrolyte drinks give you all the benefits without the unnecessary extras.

Read More about Pedialyte and Electrolytes for Diarrhea and more about  Is Energy drink Gatorade Worth the Hype?


✅ Final Thoughts on Electrolyte Drinks for Hangovers

Hangovers may be a painful reminder of a fun night, but recovery doesn’t have to be miserable. By replenishing your body with fluids and minerals, you can bounce back faster, ease symptoms, and feel like yourself again.

These DIY electrolyte drinks for hangovers are simple, natural, and effective — whether you need quick rehydration, nausea relief, or digestive support. And remember, prevention is key: sip electrolytes before bed, alternate them during drinking, and you’ll likely wake up feeling much better.

So next time you find yourself dreading the morning after, skip the neon sports drink and try one of these homemade remedies instead. Your body (and your wallet) will thank you.


Smiling person holding a fresh electrolyte drink with bold text encouraging hydration.
Try these DIY electrolyte drinks for hangovers – stay hydrated with MasalaMonk.com.

❓ Frequently Asked Questions About Electrolyte Drinks for Hangovers

Even after learning the recipes, you might still have questions about how electrolytes really help, when to drink them, and which options are best. To make this guide even more useful, here are answers to some of the most common questions about electrolyte drinks for hangovers.


1. What are the best electrolyte drinks for hangovers?

The best electrolyte drinks for hangovers are those that restore sodium, potassium, and magnesium while rehydrating your body. DIY options like lemon-honey water, coconut water mixes, or ginger tea work well. Store-bought choices like Pedialyte, Liquid I.V., or LMNT are also popular.


2. Do electrolytes really help a hangover?

Yes, as per EatingWell as well – electrolytes absolutely help with hangovers. Alcohol dehydrates you and depletes essential minerals. Replacing them helps your body absorb fluids faster, reduces headaches, boosts energy, and eases nausea.


3. Should I drink electrolytes before or after drinking alcohol?

Ideally, both. Having an electrolyte drink before and during drinking can prevent severe dehydration. Drinking electrolytes before bed and the next morning helps speed up recovery and reduce hangover symptoms.


4. Are homemade electrolyte drinks better than store-bought?

Homemade electrolyte drinks are often healthier because you control the ingredients. They usually have less sugar, no artificial dyes, and can be customized to your taste. Store-bought options like Gatorade or Pedialyte work too, but DIY recipes are more natural and budget-friendly.


5. Can coconut water cure a hangover?

Coconut water can’t “cure” a hangover, but it’s an excellent natural rehydration drink. It’s packed with potassium and magnesium, which help restore electrolyte balance and fight fatigue. Adding a pinch of salt makes it even more effective.


6. Is Gatorade good for hangovers?

Yes, Gatorade can help because it contains sodium and potassium. However, it’s higher in sugar and lower in electrolytes compared to medical-grade drinks like Pedialyte. If you don’t like the taste of DIY mixes, Gatorade is a convenient option.


7. How much electrolyte drink should I have for a hangover?

Start with one serving (about 2 cups / 500 ml) in the morning. If symptoms persist, you can sip another throughout the day. The key is to drink slowly and steadily so your body absorbs the fluids.


8. Can I drink electrolyte water while drinking alcohol?

Absolutely. Alternating alcohol with water or electrolyte drinks is one of the best ways to prevent hangovers. It slows down dehydration and keeps your mineral balance more stable.


9. Do electrolyte powders like Liquid I.V. or LMNT work for hangovers?

Yes, both Liquid I.V. and LMNT are popular for hangover recovery. Liquid I.V. contains glucose and sodium for fast absorption, while LMNT is sugar-free and high in sodium, great for those avoiding added sugars. Both are effective depending on your needs.


10. What’s the fastest way to rehydrate after drinking?

The fastest way is to combine water + electrolytes. Plain water alone won’t fully restore balance. A DIY electrolyte drink, coconut water with salt, or a packet like Pedialyte or DripDrop will help you recover more quickly and feel better faster.


🔑 Pro Tip:

There’s no one-size-fits-all hangover solution. Try different electrolyte drinks and see which one helps your body the most. The key is consistency — hydrate before, during, and after drinking for the best results.