
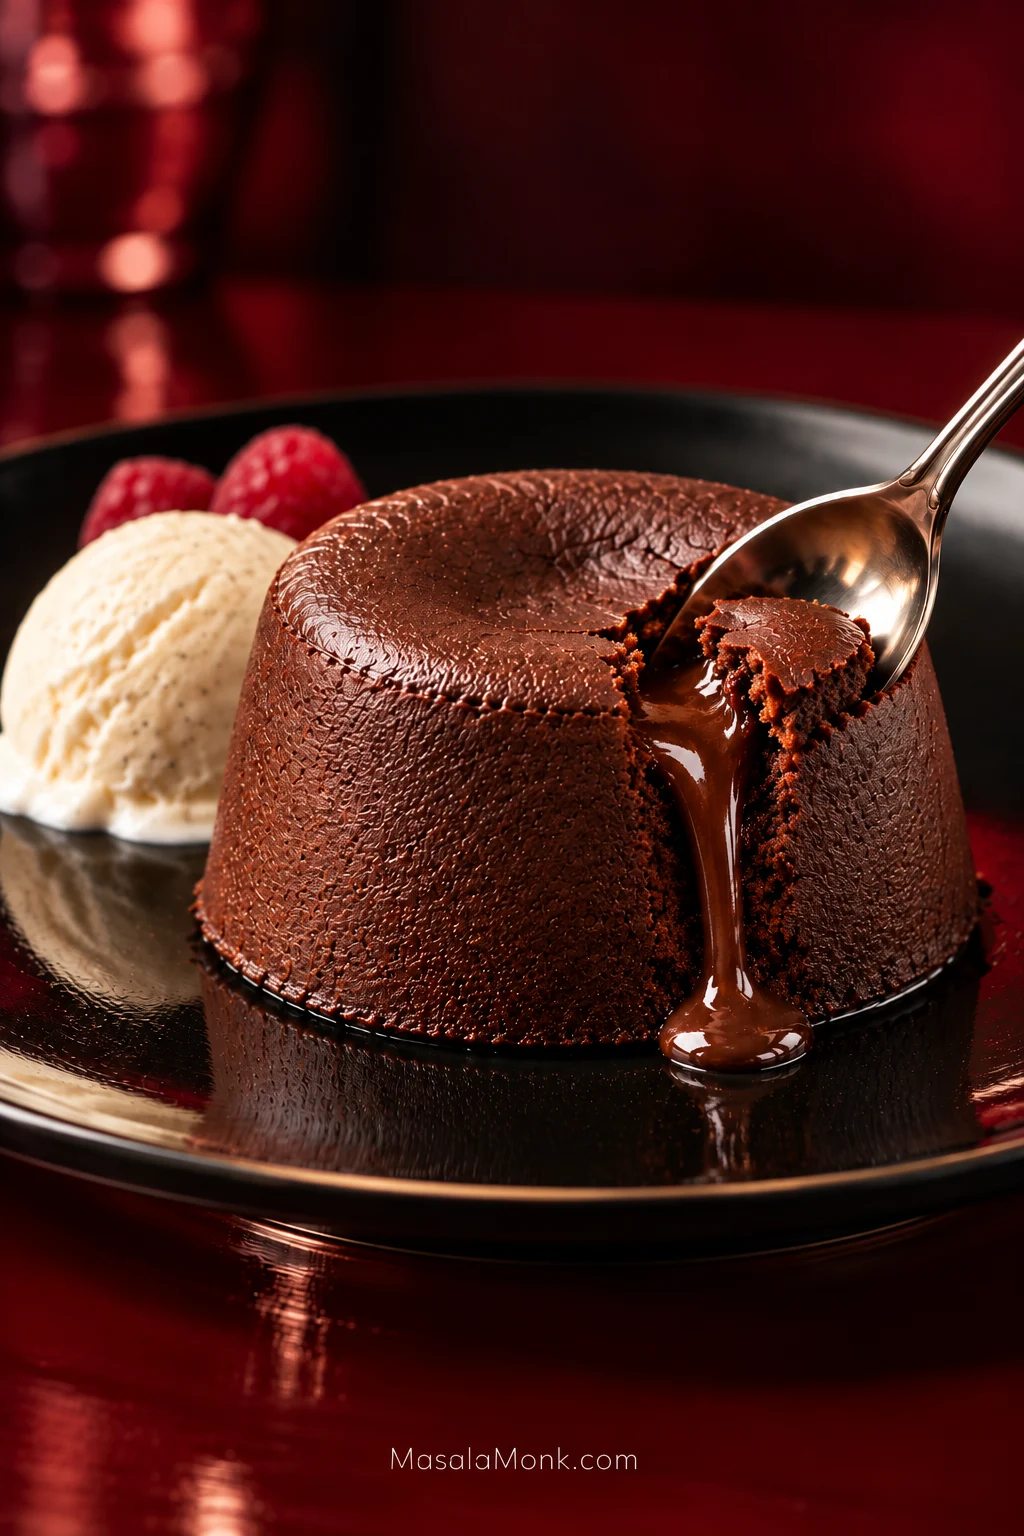
Break into one while it is still warm and the spoon should meet a little resistance from the tender outer cake, then almost none as it reaches the molten chocolate middle. Add cold vanilla ice cream beside it and the first spoonful gives you warm cake, flowing chocolate and melting ice cream all at once.
This chocolate lava cake recipe uses the classic method: real chocolate, butter, two whole eggs plus two extra yolks, and just enough flour to help the outside hold together. There is no hidden square of chocolate or separate ganache filling. The batter itself creates the molten center.
Mixing is straightforward; the bake deserves your attention. Ramekin shape, batter depth and even another 30–60 seconds in the oven can change what happens when you cut into the cake.
You’re looking for the moment when the cake can stand on the plate while the middle is still soft enough to flow.
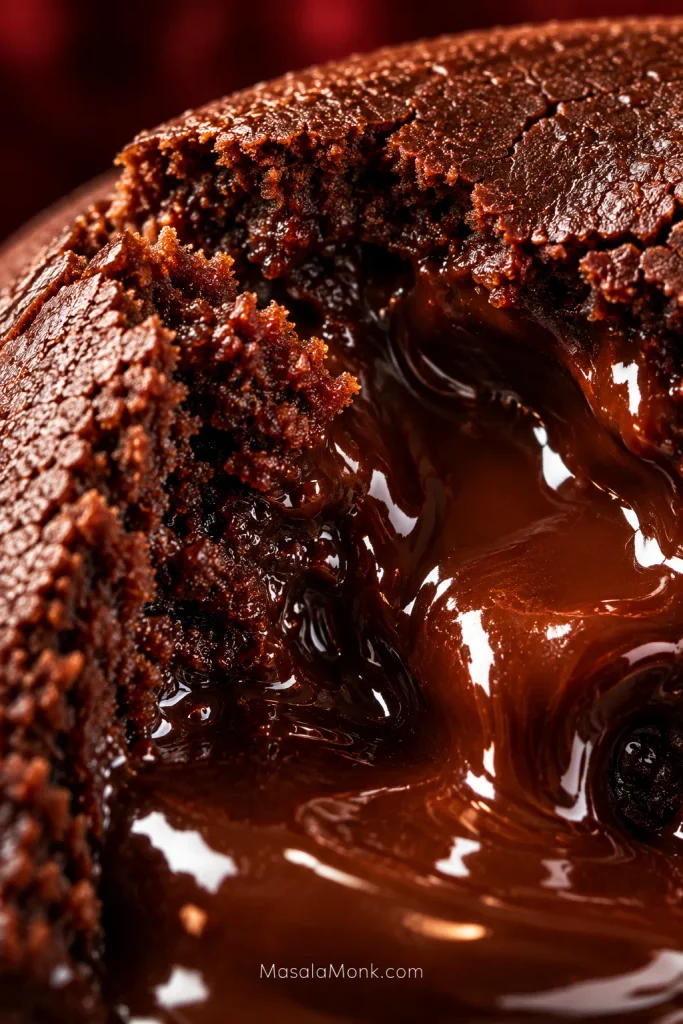
Chocolate Lava Cake Recipe
Oven: 425°F / 220°C, conventional. Best served: immediately.
Ingredients
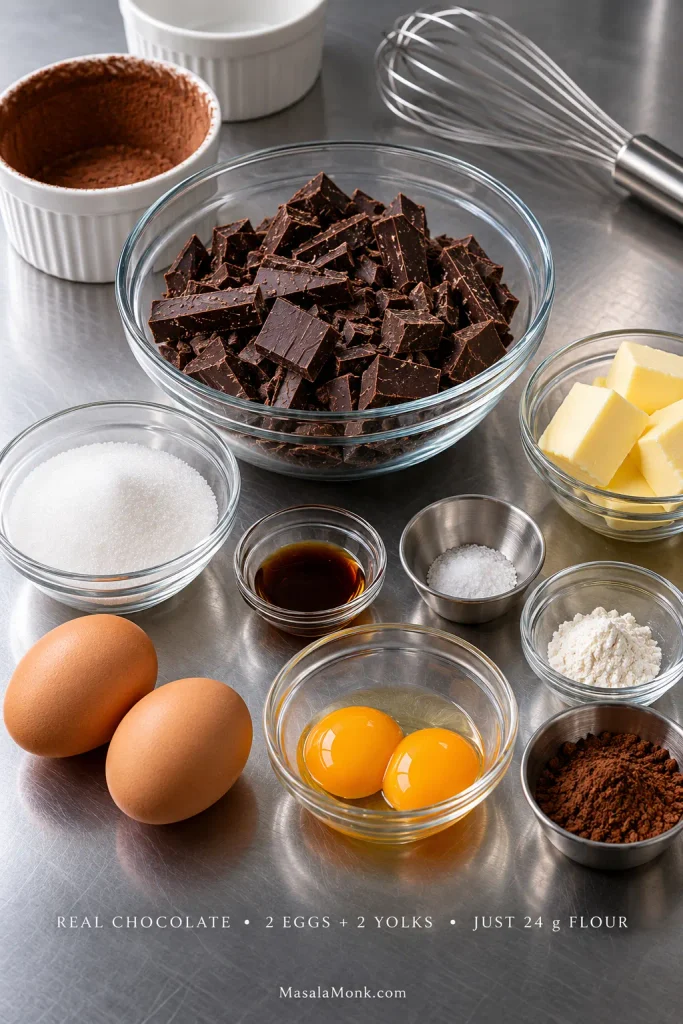
- 6 oz / 170 g semisweet or 60–70% bittersweet chocolate, preferably a bar suitable for melting, finely chopped
- ½ cup / 4 oz / 113 g unsalted butter, plus more for the ramekins
- 2 large eggs, ideally not refrigerator-cold
- 2 additional large egg yolks, ideally not refrigerator-cold
- ¼ cup / 50 g granulated sugar
- 1 teaspoon vanilla extract
- ¼ teaspoon fine salt
- 3 tablespoons / 24 g all-purpose flour
- Unsweetened cocoa powder, for coating the ramekins
Equipment
- 4 oven-safe 6 oz / 180 ml ramekins
- Baking sheet
- 2 mixing bowls, including one heatproof bowl
- Electric hand mixer or stand mixer
- Silicone spatula
- Digital kitchen scale, if available
Method
1. Heat the oven and prepare the ramekins
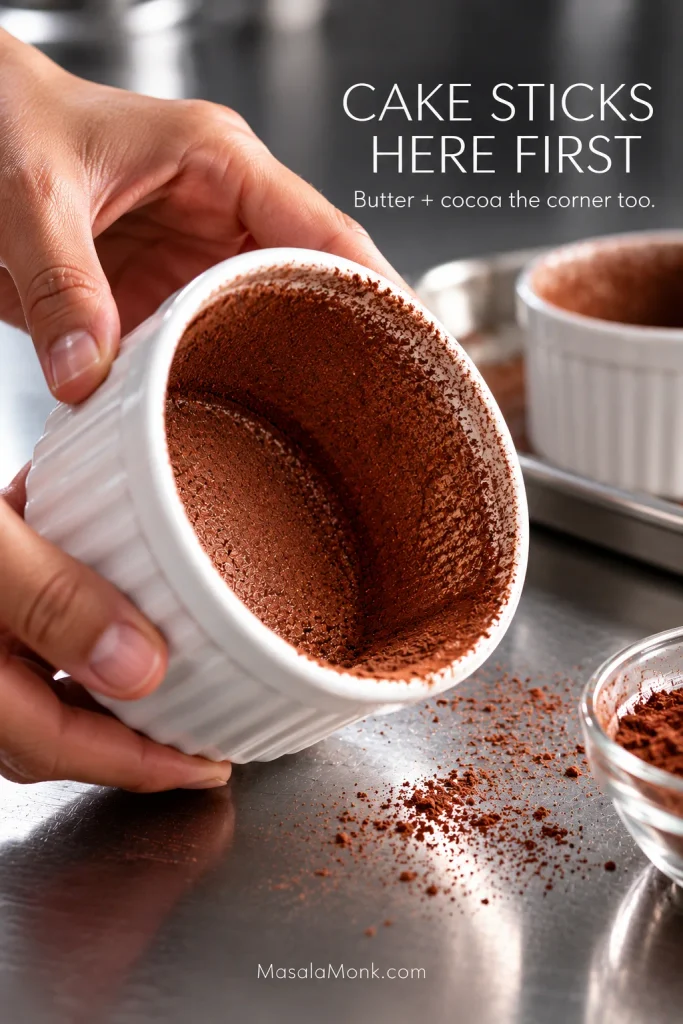
Heat a conventional oven to 425°F / 220°C. Butter the bottom and sides of four ramekins thoroughly, including the corner where the base meets the wall.
Add a little unsweetened cocoa powder and turn each ramekin until the butter has a thin coating. Tip out the loose excess. A light film is enough.
Set the ramekins on a baking sheet so all four can go into the oven together.
2. Melt the chocolate and butter
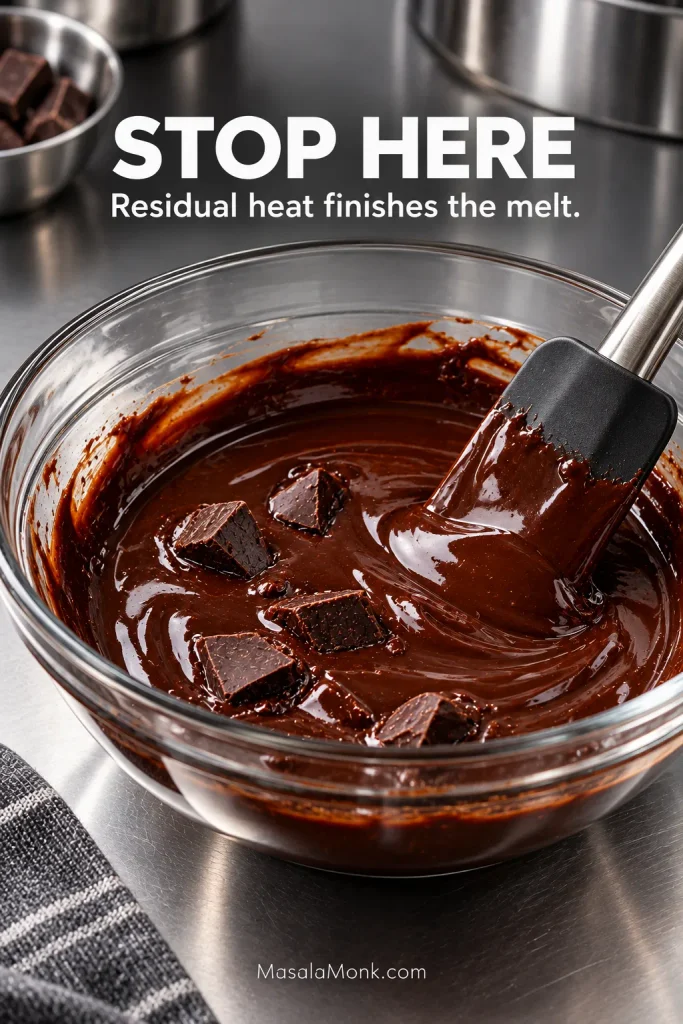
Put the chopped chocolate and butter in a heatproof bowl. Microwave in short bursts, stirring well between each one, until almost completely melted. Stop while a few small pieces remain and let the residual heat take care of them.
You can also melt them gently over barely simmering water. Once smooth, leave the mixture for 2–3 minutes. It should still be warm and fluid when it meets the eggs, but it shouldn’t be steaming.
3. Beat the eggs, yolks and sugar
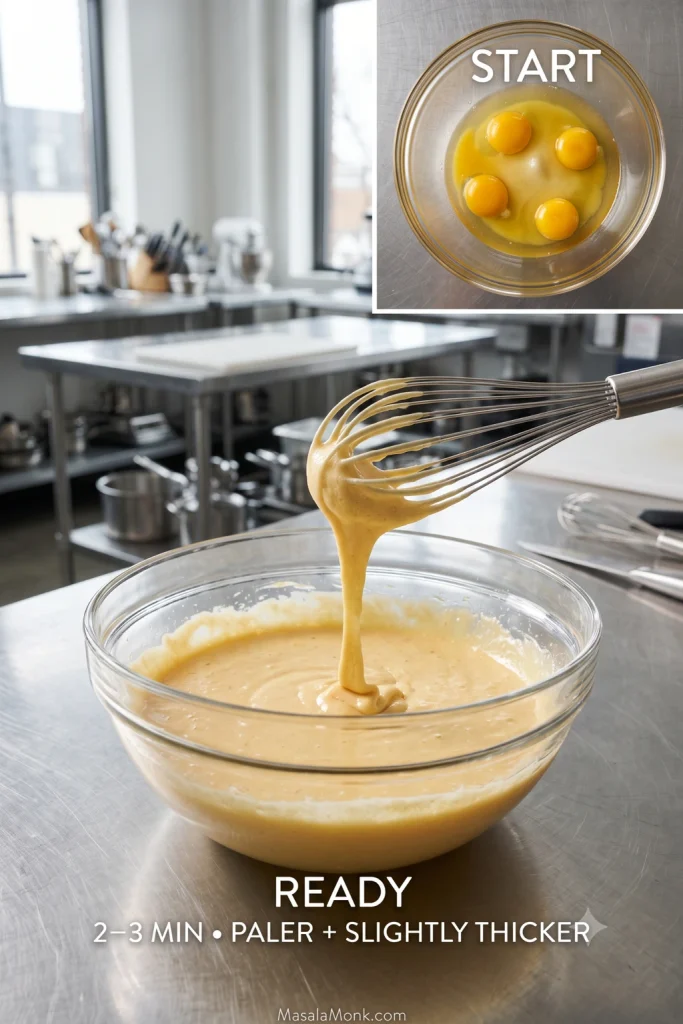
Combine the 2 whole eggs, 2 extra yolks and sugar in a second bowl. Beat with an electric mixer for about 2–3 minutes, until the mixture looks noticeably paler and slightly thicker.
You don’t need the volume of a sponge-cake batter. Beat in the vanilla and salt.
If the eggs are straight from the refrigerator, give them a little time to lose the hard chill before mixing. Very cold eggs can make the warm chocolate mixture thicken more quickly as the two come together.
4. Fold the batter together
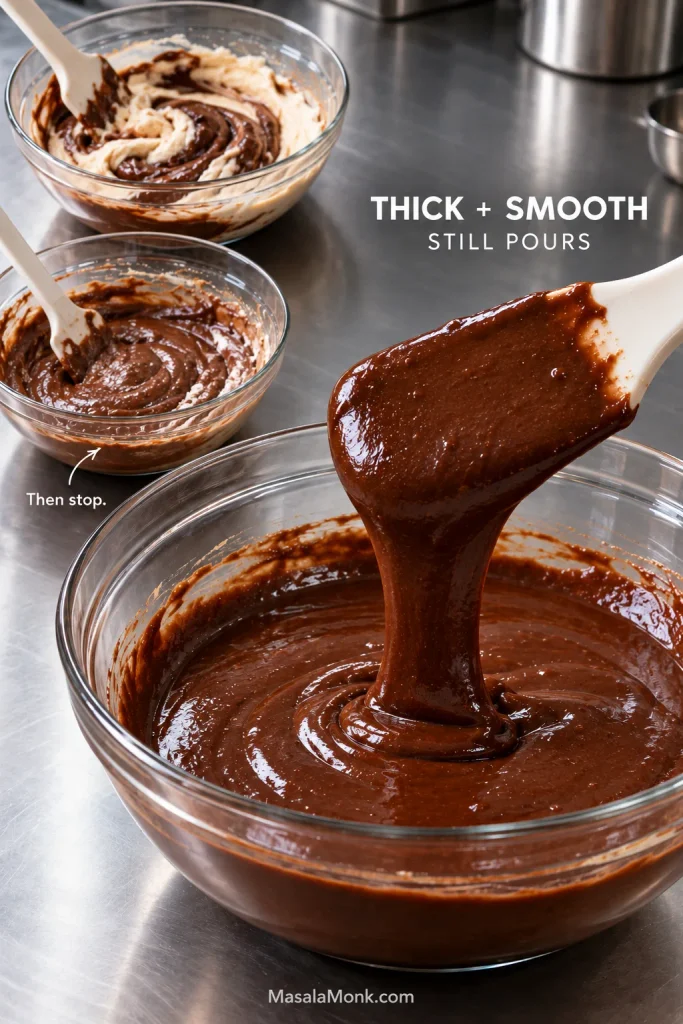
Pour the warm chocolate-butter mixture into the eggs in two additions, folding gently with a flexible spatula after each. The batter will turn darker and glossy as the chocolate goes in.
Sprinkle the flour over the surface and fold until the dry streaks disappear. Scrape along the bottom once or twice in case any flour is hiding there, then stop.
The finished batter should be thick and smooth but still pour easily.
5. Portion the batter
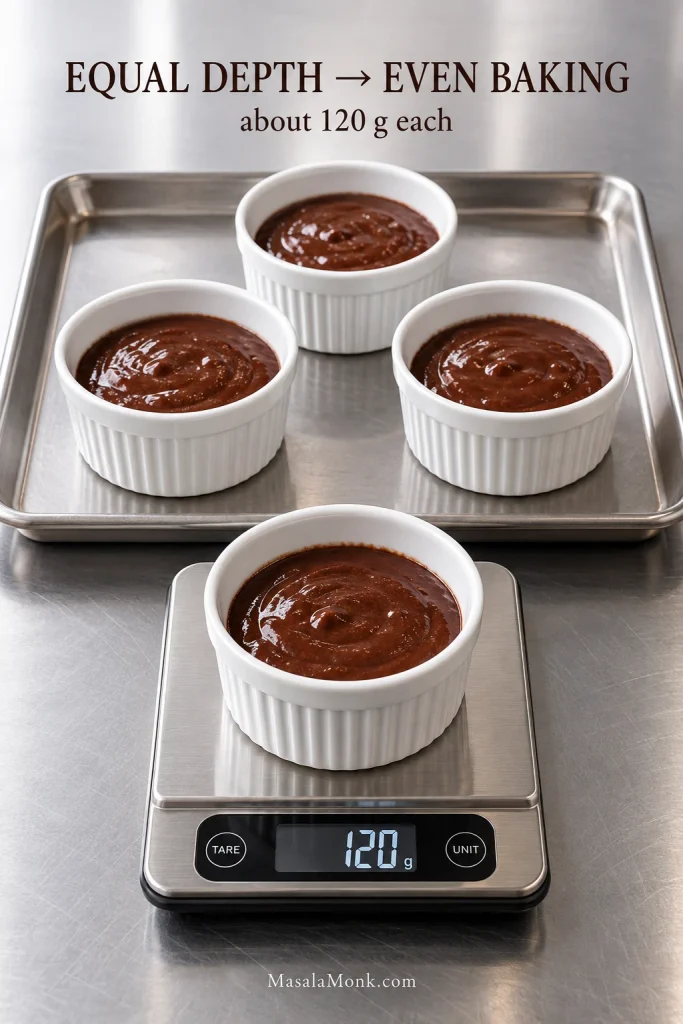
Divide the glossy batter among the four ramekins. If you’re weighing the portions, aim for about 120 g in each. Don’t worry about chasing the last gram left on the bowl or spatula; equal portions matter more than an exact number.
6. Bake
Put the baking sheet in the oven. At 9 minutes, look before you touch anything. Nine minutes is the first check, not the finish line.
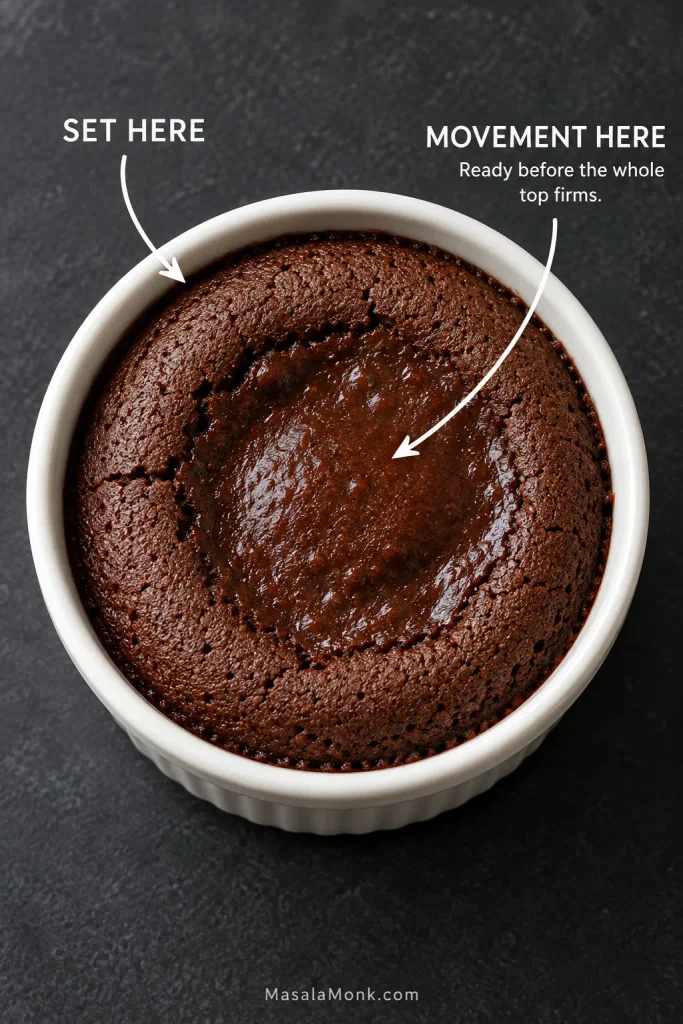
With 6-ounce ramekins, expect the cakes to reach the right stage around 10–12 minutes. Watch the surface as much as the clock: the edge should look set and less glossy while a smaller area in the middle still moves when you gently nudge the baking sheet.
Don’t wait for the entire top to become firm.
Not sure what ready looks like? See the Lava Window ↓
7. Rest, invert and serve
Take the cakes from the oven and leave them in their ramekins for about 1 minute. Put a serving plate over one ramekin, hold both securely with oven mitts and turn them over together.
Leave the ramekin upside down for about 10 seconds, then lift it straight up. If the cake stays standing, the most uncertain part is over. Serve it while the center is still at its softest.
Those last few minutes are what separate a cake that collapses from one that flows and one that has already turned fudgy. Fortunately, the change isn’t invisible. You can watch it happen.
The Lava Window: How to Tell When Chocolate Lava Cake Is Done
The top doesn’t finish all at once. At the edge, the wet shine disappears first and the surface begins to look more matte. Meanwhile, the middle catches up later. That short gap between the two is the window you’re trying to catch.
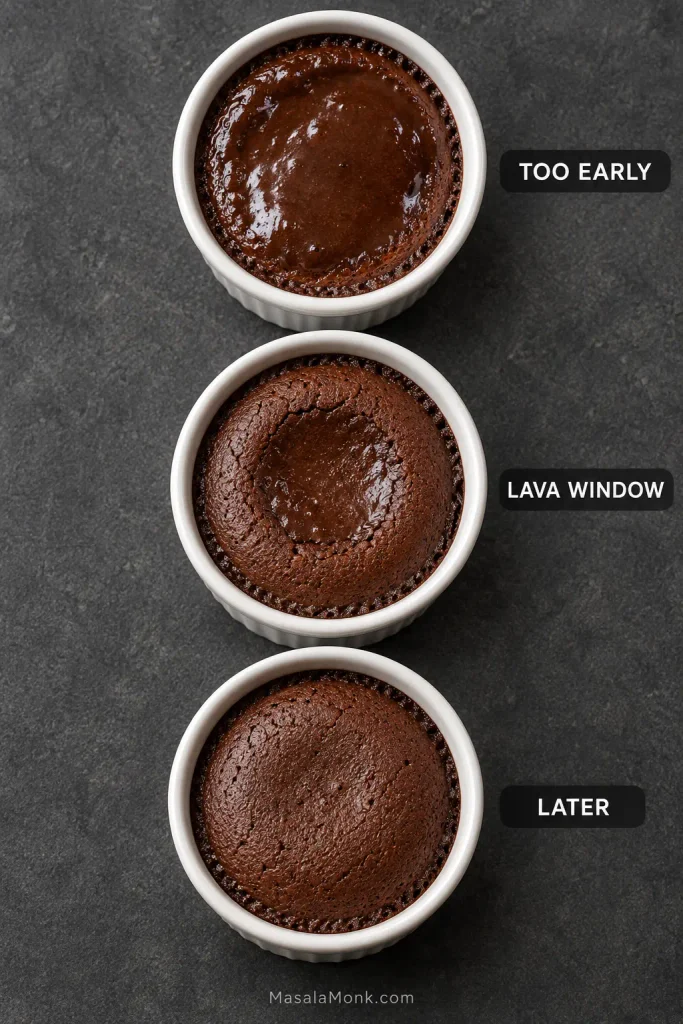
| What you see | What it means | Likely result |
|---|---|---|
| The edge still looks weak and most of the top ripples when nudged | The cake needs more time | It may collapse when inverted |
| The outer ring is set, most of the wet shine is gone and only a smaller central area gives | The cake can support the softer middle | Molten or very soft center |
| The surface is firm almost all the way across | The middle has cooked further | Thicker, fudgy center with little visible flow |
Watch Where the Cake Still Moves
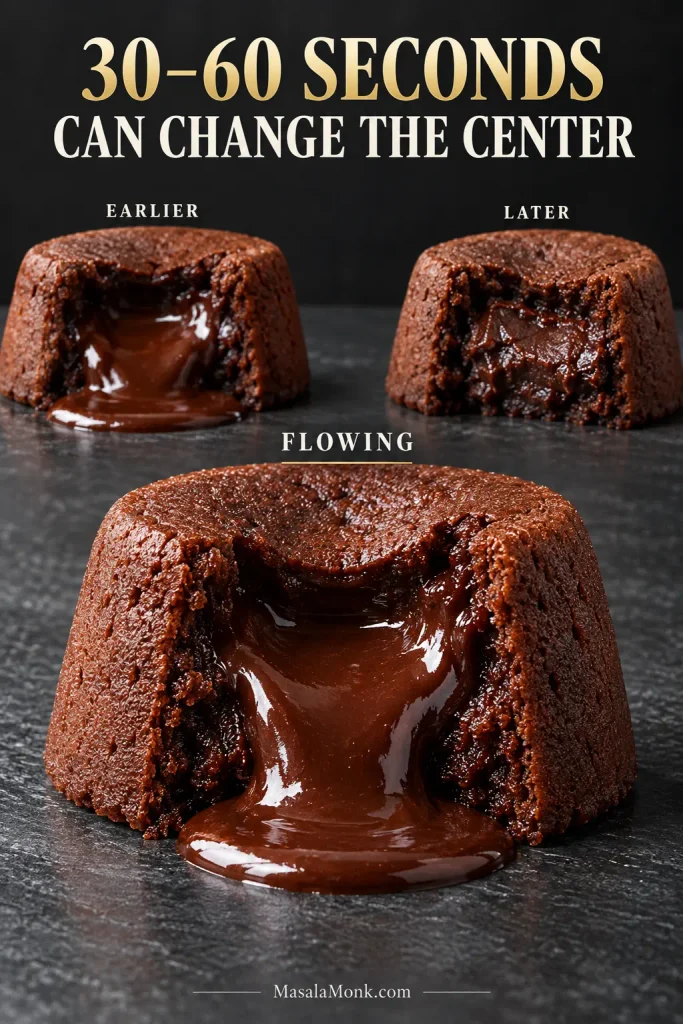
Pull the cake toward the earlier side of that window and the center will be looser, although the cake will also be more delicate. Another minute can turn flowing chocolate into something much thicker.
If you cut into one and find a rich, fudgy middle instead of a dramatic flow, dessert isn’t ruined. You simply baked it a little past the flowing stage. Start checking the next batch 30–60 seconds sooner.
With an unfamiliar oven or ramekin, one tester cake can tell you more than another paragraph of timing advice. Cut into it, see where the center landed, then adjust the remaining cakes in small increments.
↑ Back to the recipe · Check your ramekin ↓ · Troubleshoot a cake ↓
Your Ramekin Changes the Clock
Two ramekins can both hold 6 ounces and still bake differently. A wide, shallow dish and a narrow, deep one put the same amount of batter into different shapes. The deeper fill will generally take longer for heat to reach the middle.
Not sure what your ramekin holds? Fill it to the rim with water, pour that water into a measuring jug and check the volume. Then notice how deeply the batter sits once the ramekin is filled. Capacity is useful; batter depth often tells you more about how that particular cake is likely to bake.
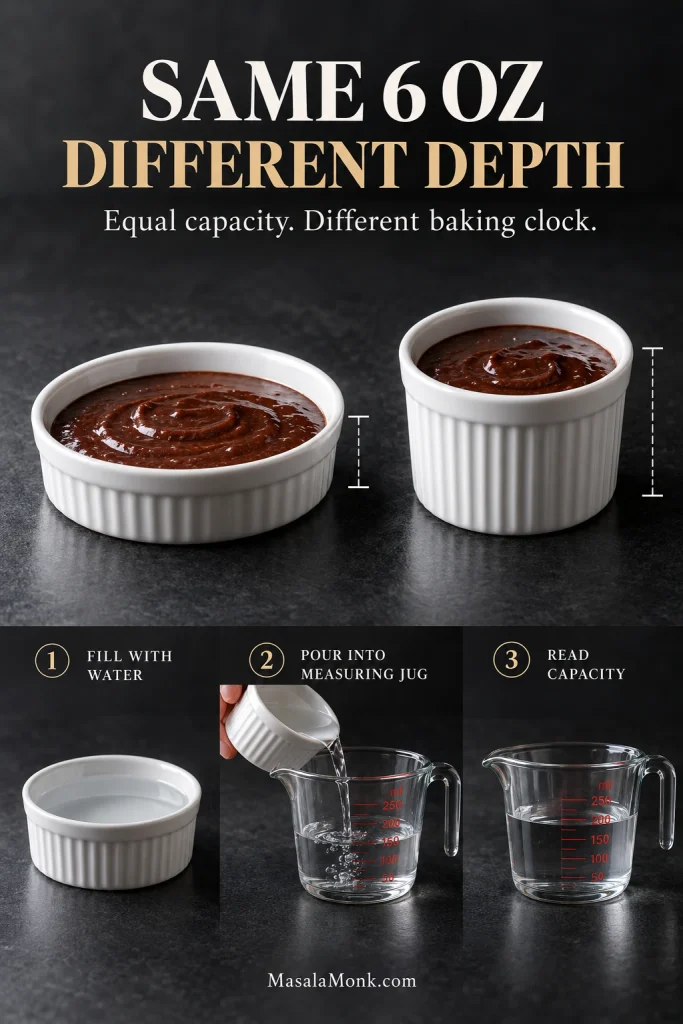
| Vessel | How to portion | What to expect |
|---|---|---|
| 6 oz / 180 ml ceramic ramekin | About 120 g batter | Main method; first check at 9 minutes |
| Smaller ramekin | Keep some headroom rather than filling to the rim | A shallower or smaller portion may reach the molten stage sooner |
| Standard metal muffin well | Divide the batch evenly among 6 wells without filling to the rim | Metal and shallower portions can change the bake considerably; begin checking earlier |
| Larger or deeper ramekin | Judge by batter depth, not capacity alone | A deeper cake generally needs more time |
No ramekins? Use a muffin pan
Butter and lightly cocoa-coat six standard metal muffin wells, then divide the batter evenly among them without filling to the rim. Skip paper liners.
Muffin pans vary in both metal thickness and well size, so don’t give them the 9-minute ramekin clock. Start checking earlier and use the same visual cue: set edges with movement still confined to the middle.
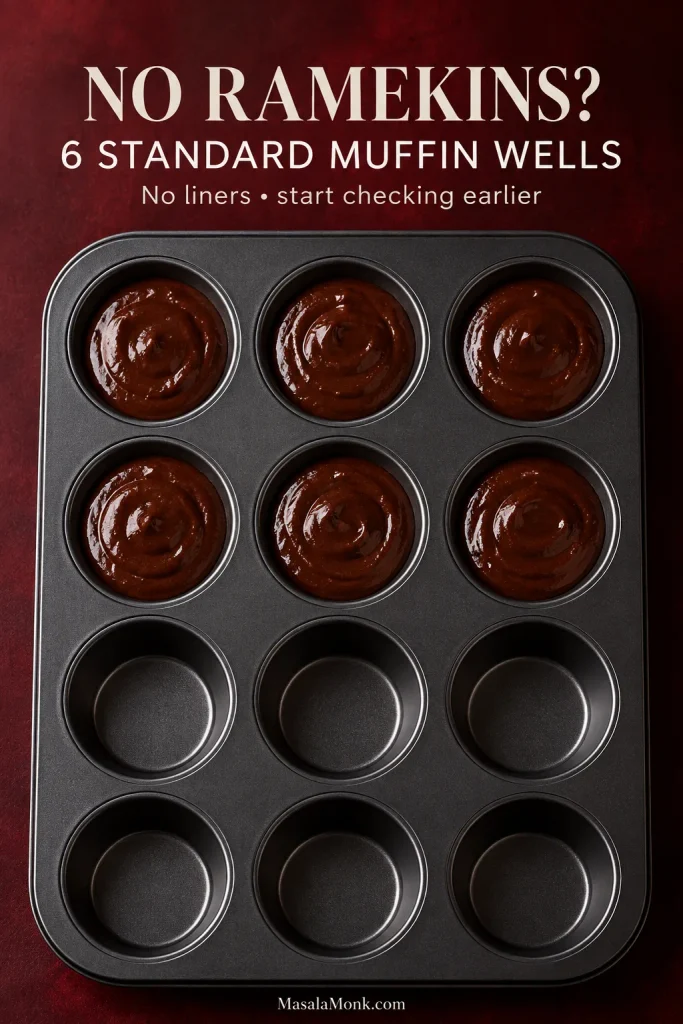
When the cakes are ready, put a flat baking sheet or board over the pan and invert the whole thing at once. Lift the pan away rather than trying to pry six delicate cakes from their wells one by one.
Getting the Lava Cake Out Is Part of the Recipe
The flip is the moment that makes many people hesitate, because it immediately reveals whether the cake has enough structure. The shell has to earn the flip.
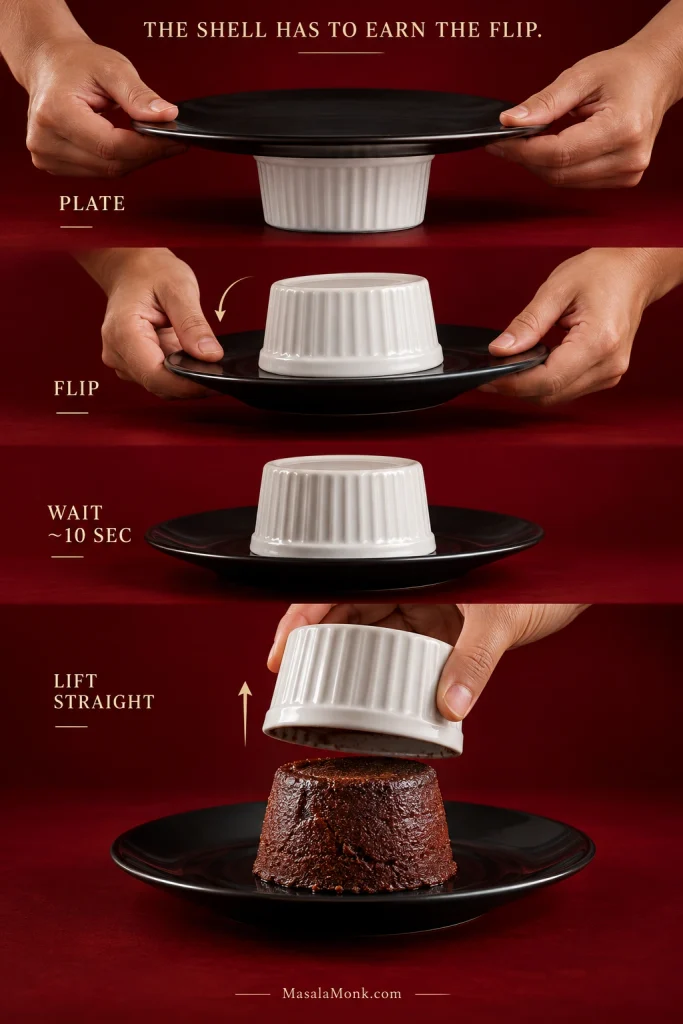
If the cake stays behind in the ramekin, look first at the butter-and-cocoa coating. When the ramekin lifts cleanly but the cake immediately slumps, it probably needed a little more time in the oven.
For a cake that sticks, turn the ramekin upright rather than shaking it. Run a thin knife gently around the top edge, replace the plate and invert again.
After flipping, leave the ramekin in place for about 10 seconds. Lift it straight up and let the cake be.
No Lava? Chocolate Lava Cake Troubleshooting
If something went wrong, start with the cake you actually got. Its center, shape and release usually tell you where to look next.
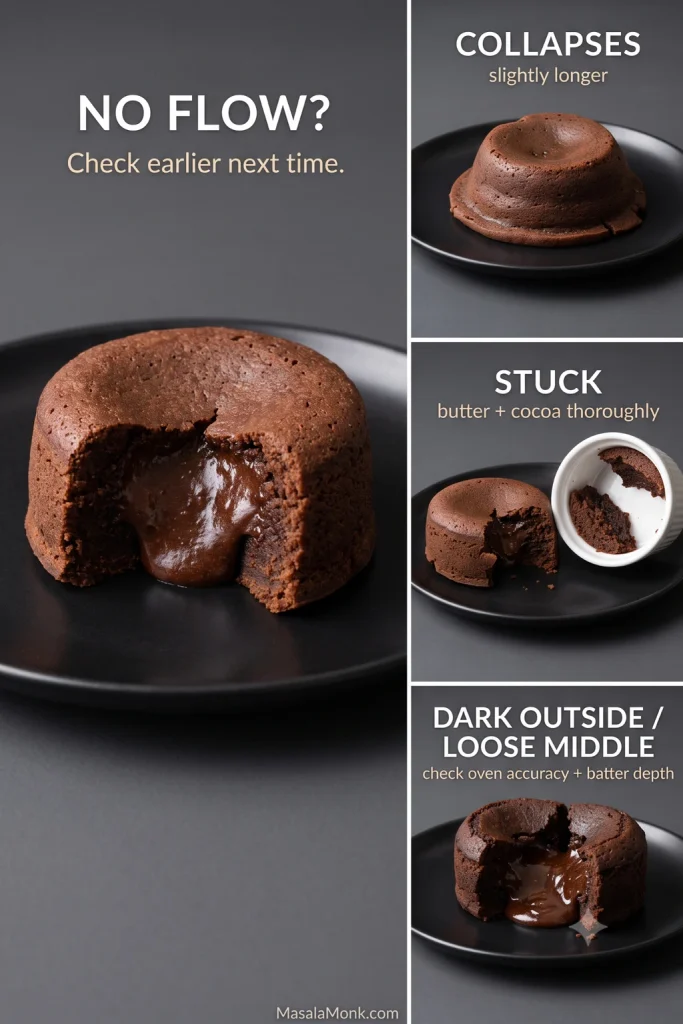
| What happened | Likely place to look | Next time |
|---|---|---|
| No flowing center | Bake time or batter depth | Begin checking earlier |
| Soft and fudgy, but not flowing | Just beyond the molten window | Pull the cakes 30–60 seconds earlier |
| Cake releases but slumps or collapses | Not enough of the cake has set | Bake slightly longer |
| Outside gets very dark while the middle stays extremely loose | Oven heat or a particularly deep vessel | Check oven accuracy and batter depth |
| Cake stays in the ramekin | Butter-and-cocoa coating | Coat the base, walls and bottom corner thoroughly |
| Muffin-pan cakes bake through | Smaller, shallower portions in conductive metal | Start checking earlier |
↑ Back to the recipe · Make them ahead ↓ · ↑ Back to top
Why This Lava Cake Batter Works
The proportions give the cake enough structure to hold together while keeping the middle exceptionally soft. Whole eggs help the cake hold together, while the extra yolks keep it rich and tender. Briefly beating the eggs with the sugar adds a little air before the chocolate and butter go in.
The entire batch contains only 24 g of flour. Weigh it if you can; an extra spoonful matters more here than it would in a forgiving everyday cake. You can see the same sensitivity to flour and bake time in a fudgy brownie recipe.
Real chocolate also gives the batter body as well as flavor. Semisweet and bittersweet bars contain cocoa solids, cocoa butter and sugar, which is why cocoa powder can’t simply replace them gram for gram. This guide to cacao, chocolate and dark chocolate explains what those labels mean.
Make Them Ahead, Bake Them at the Last Minute
Lava cakes are easiest to make ahead as unbaked batter. For make-ahead planning, keep the filled ramekins covered and refrigerated and use within 2 days.
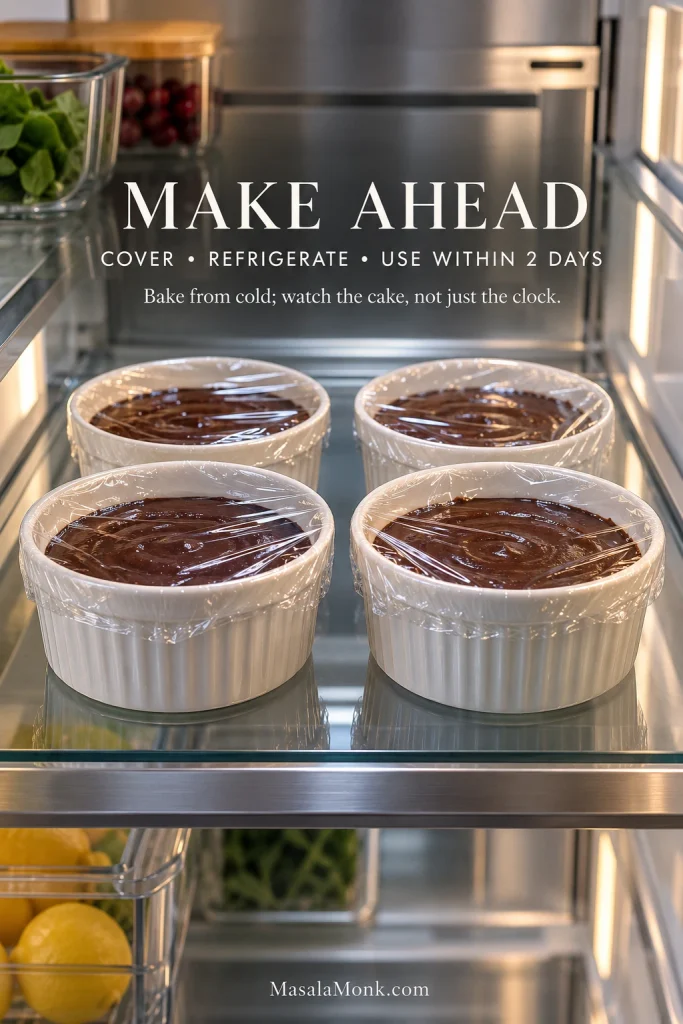
Bake them directly from the refrigerator when dessert is getting close. Cold batter will generally need longer than the fresh-batter 10–12 minute range, so use the same visual cues rather than automatically adding a fixed number of minutes. Look for a set, less-glossy edge with movement still confined to the middle.
The mixing bowls can already be washed and put away; only the short bake, the flip and the ice cream are left when everyone is ready for dessert.
Choosing the Chocolate
Semisweet chocolate is the easiest all-round choice. A bar around 60–70% cacao gives you a darker, less sweet cake. Both work with the same basic method, although the sweetness and flavor of the center will change with the chocolate you use.
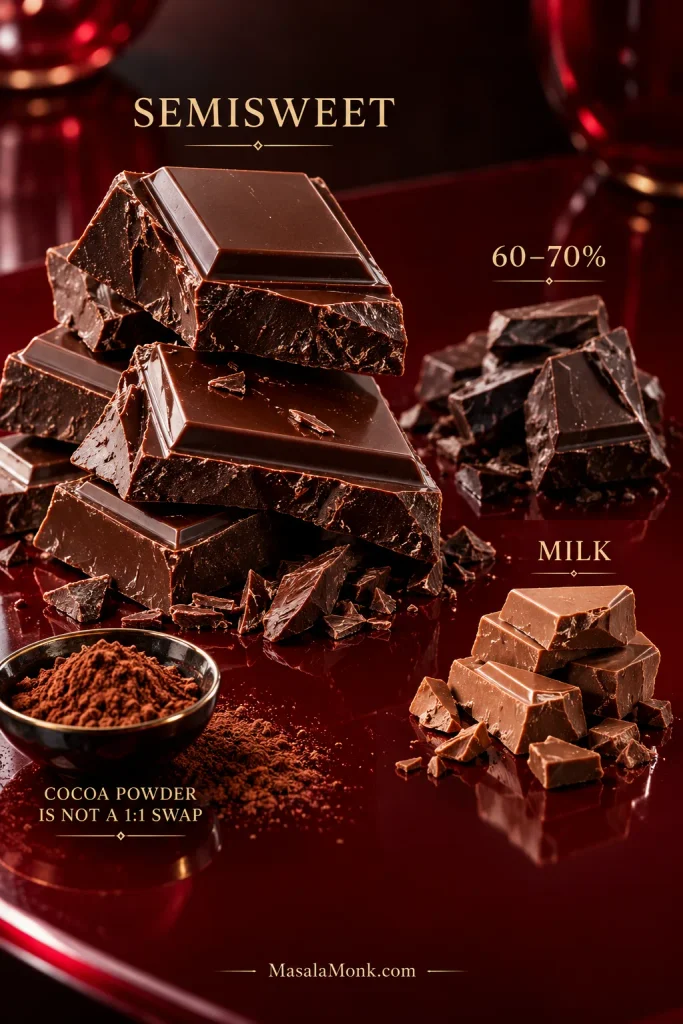
Chopped bar chocolate is the most predictable choice for melting. Chocolate chips can work, but many are formulated to hold their shape during baking and may not melt as fluidly. Milk chocolate makes the cake considerably sweeter and changes the balance of cocoa solids, sugar and fat.
Can you use cocoa powder instead of chocolate?
Not in the same amount and with the same formula. Unsweetened cocoa powder doesn’t bring the cocoa butter and sugar contained in a chocolate bar, so swapping one for the other changes more than the chocolate flavor.
For this style of inverted lava cake, keep real chocolate in the batter. A cocoa-based version needs its own formula.
A filled-center lava cake behaves differently because some of the flow comes from a separate filling rather than the point at which you stop baking. Our S’mores Lava Cake uses a separate chilled chocolate center along with marshmallow, so its molten middle doesn’t depend on the cake batter alone.
Chocolate Lava Cake FAQs
Are lava cake and molten chocolate cake the same thing?
Usually. The names are commonly used for the same general dessert: an individual chocolate cake with a set exterior and a much softer center. Exact recipes and techniques vary.
Is chocolate lava cake supposed to be raw in the middle?
The goal here is a very soft, molten center, but that isn’t the same thing as deliberately eating raw cake batter. Standard flour is a raw food, and raw or undercooked eggs can also carry food-safety risk. The FDA advises against eating raw flour, dough or batter.
Pasteurized shell eggs or pasteurized egg products can reduce the egg-related risk in recipes served with undercooked egg, but they do not make raw flour safe. People at higher risk from foodborne illness—including young children, older adults, pregnant people and people with weakened immune systems—should avoid raw or undercooked egg and raw-flour preparations.
Can I make one large lava cake instead of individual cakes?
Not by simply moving this batter to a large pan and keeping the same timing. A larger cake heats differently, so use a recipe developed for a large-format molten cake.
Why doesn’t chocolate lava cake need baking powder?
The eggs, brief aeration and small amount of flour provide the structure this cake needs. The goal isn’t a tall, airy crumb; it is enough cake around the outside to hold a much softer middle.
Get the Ice Cream Ready Before the Cakes Come Out
Vanilla ice cream is hard to beat here. It starts melting as soon as it touches the warm cake, while raspberries or strawberries bring a little acidity against all that chocolate. A small pinch of flaky salt works too.
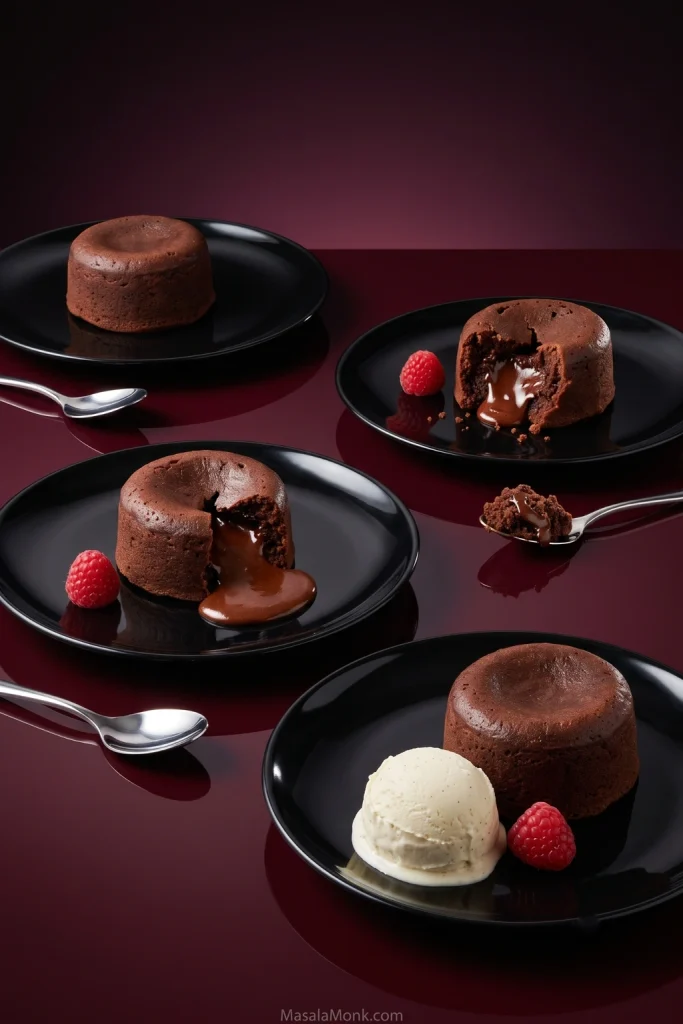
If you want to make the ice cream as well, this KitchenAid vanilla ice cream guide gives you a base you can finish well before the cakes go into the oven.
Leftover cakes can be cooled, covered and refrigerated. Reheat them gently if you like, but expect the center to be soft and fudgy rather than flowing again. These are at their best the first time they leave the oven.
Have the plates, ice cream and berries ready before the cakes come out. Invert them and eat while the cake is still warm and the middle is still doing exactly what you baked it to do.
↑ Back to the recipe · ↑ Back to the Lava Window · ↑ Back to top








