Posted on 4 Comments

Baked Chicken Breast Recipe

Sliced golden baked chicken breast with pan juices, lemon, parsley, potatoes, and green beans on a plate.

This baked chicken breast recipe is for anyone who has pulled a tray of chicken from the oven and wondered why it turned out dry, bland, rubbery, or unevenly cooked. Chicken breast is not hard to cook, but it is unforgiving: a few extra minutes can turn tender slices into dry, chalky pieces.

The fix is simple and specific. First, pound the thick end, then coat the chicken with oil and seasoning, bake it hot, check the center, and rest before slicing. Most dry chicken breast is not a marinade problem; instead, it is usually a thickness, timing, or resting problem.
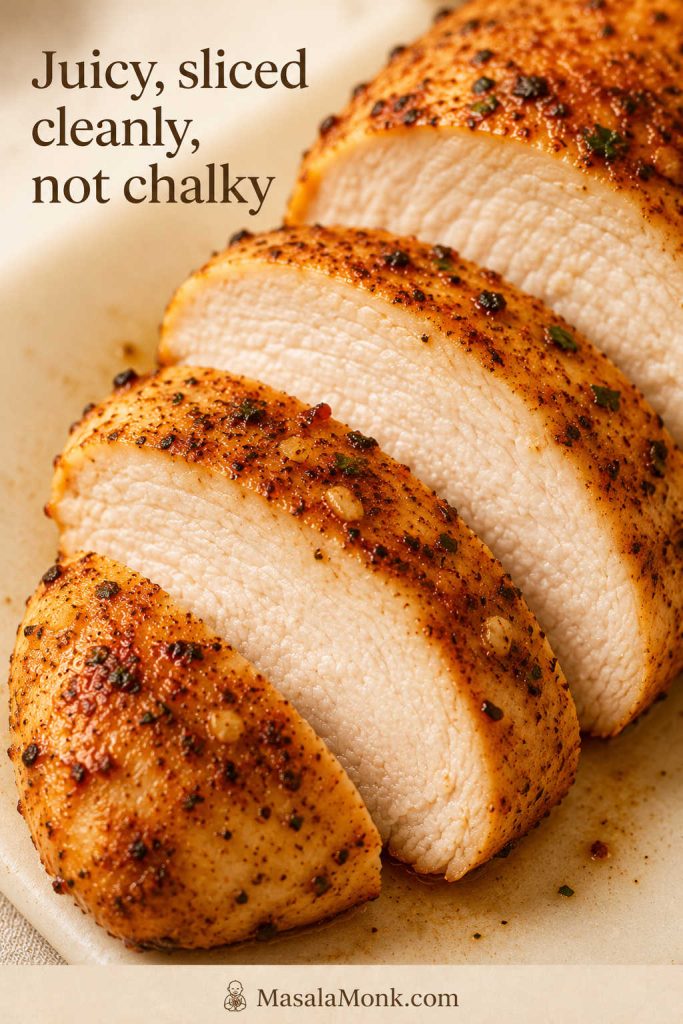
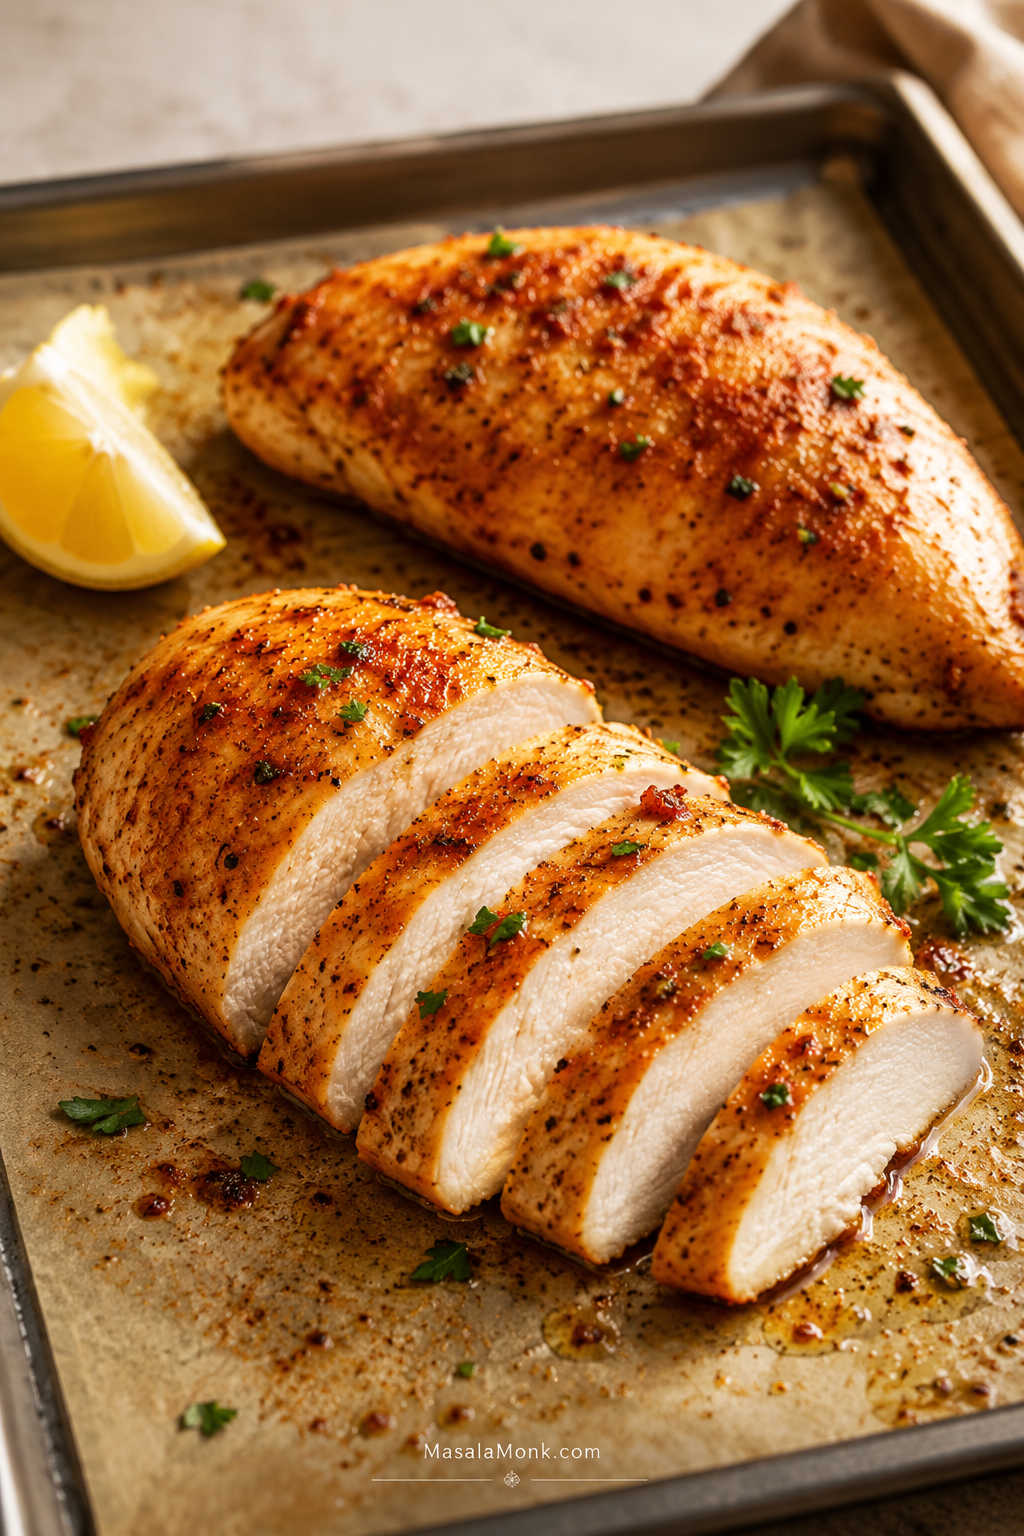
Close-up of sliced baked chicken breast showing a moist white interior and browned seasoned edges.
When chicken breast is cooked well, the slices look clean, tender, and moist enough to serve without hiding them under sauce.

The MasalaMonk rule for chicken breast is simple: make it even, bake it hot, check the center, and rest before slicing. No single timer can understand the chicken breast in front of you, especially when one piece is thick, another is thin, and the pack is uneven.

When the thickness and timing are right, the chicken slices cleanly, tastes seasoned across the surface, and stays useful enough for dinner tonight and lunches later.
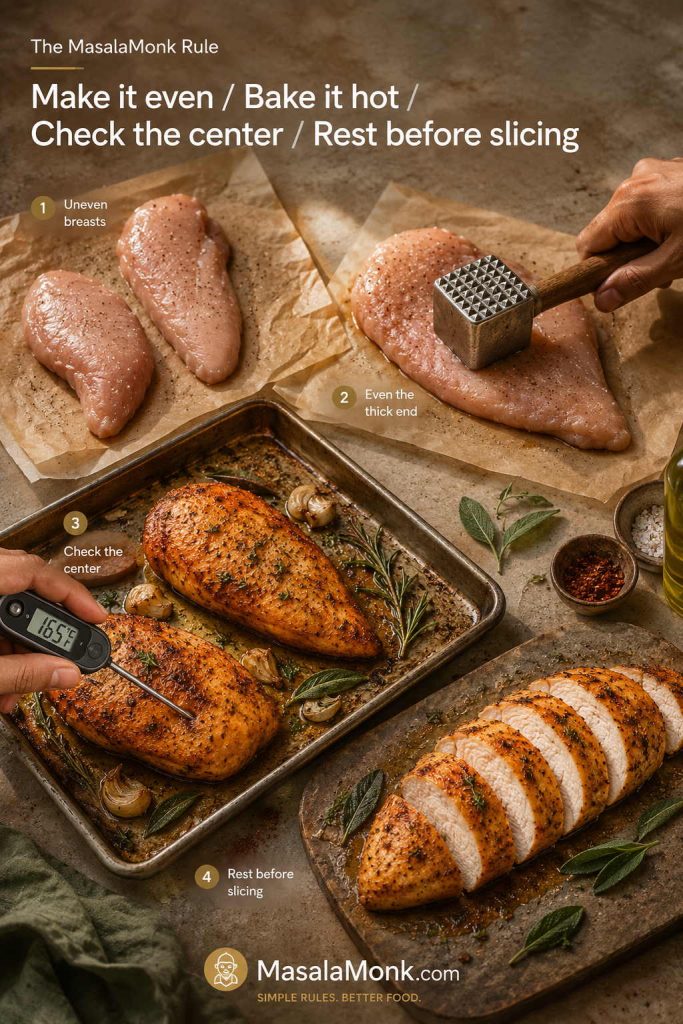
MasalaMonk rule graphic showing baked chicken breast steps: make it even, bake it hot, check the center, and rest before slicing.
Once the chicken is even in thickness, the oven can work more predictably; after that, temperature and resting protect the texture.

The main method uses 425°F / 220°C for tender, lightly browned boneless skinless chicken breast, with clear timing for 350°F, 375°F, 400°F, 425°F, and 450°F. You will also get help for thin chicken, large pieces, bone-in chicken, frozen chicken, meal prep, storage, reheating, and dry-chicken fixes.

Quick Answer: How to Bake Chicken Breast

For juicy baked chicken breast, pound the thick end so the pieces cook evenly, rub the chicken with oil and seasoning, then bake uncovered at 425°F / 220°C until the center of the thickest piece reaches 165°F / 74°C. Rest for at least 5 minutes before slicing.

At 425°F / 220°C, medium boneless skinless chicken breasts usually take 18 to 22 minutes. Thin pieces may finish in 10 to 14 minutes, while very large or thick breasts can need 24 to 30 minutes or more. The clock gives you a window; the thermometer gives you the answer.

Use this baked chicken breast recipe as the base method, then adjust the timing based on the size, thickness, and cut of chicken you have.

Need to compare thin, medium, large, or extra-large pieces? Go straight to the bake time chart.

Baked Chicken Breast at a Glance

Question Best answer
Best oven temperature 425°F / 220°C for tender, lightly browned chicken breast
Fan or convection oven 400°F / 200°C fan, or reduce by about 25°F and check early
Normal bake time 18–22 minutes for medium breasts at 425°F
Wider timing range 16–25 minutes for most boneless breasts, depending on size and thickness
Safe internal temperature 165°F / 74°C in the center of the thickest piece
Best cut Boneless skinless chicken breasts, close in size
Best thickness Even thickness, ideally about 3/4–1 inch / 2–2.5 cm for average breasts
Rest time At least 5 minutes before slicing
Best tool Instant-read thermometer

Average-size, thawed, boneless chicken breasts that are close in thickness can follow the main recipe directly. Use the extra charts when your chicken is thin, very large, bone-in, frozen, or when your oven is already set to a different temperature.
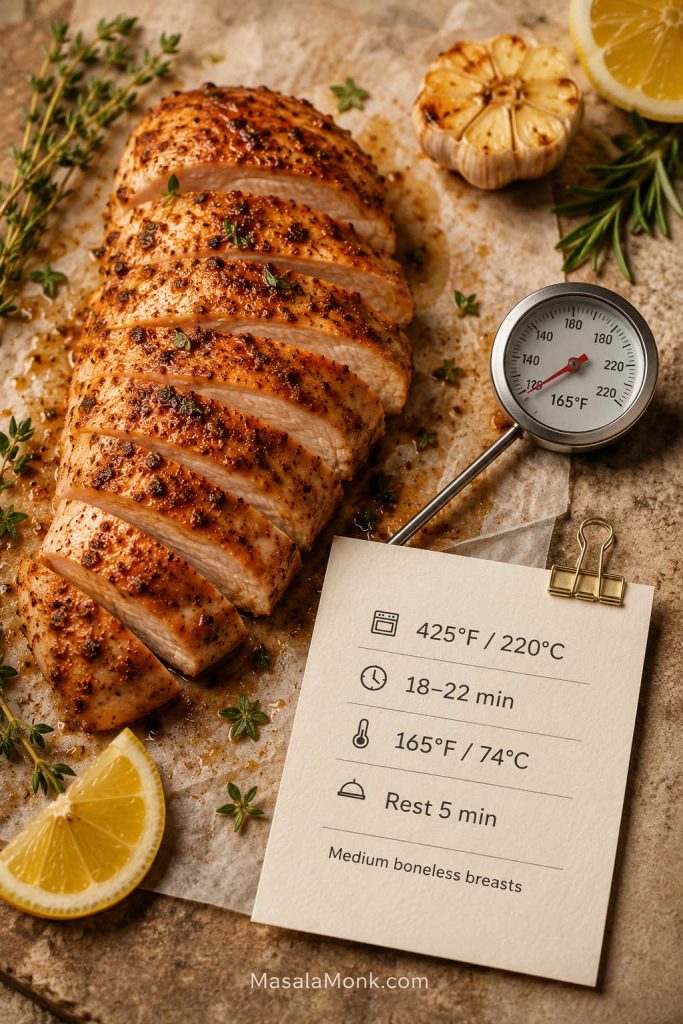
Baked chicken breast at-a-glance guide showing 425°F, 18 to 22 minutes, 165°F internal temperature, and 5 minutes rest.
These numbers are a strong starting point, but once the tray goes into the oven, thickness and internal temperature matter more than the timer.

Working with thin cutlets, extra-large pieces, or a different oven temperature? The thin vs thick chicken guide and oven temperature chart will be more useful than one fixed timer.

The Simple Method in Practice

In practice, this comes down to a few moves: pound the thick end so the chicken cooks evenly, oil the surface so the seasoning sticks, season all sides, bake hot, check the thickest piece, and rest before slicing.

Once you understand what the chicken in front of you needs — thinner timing, thicker prep, or a little more rest — the recipe becomes much less stressful.

Ingredients for Baked Chicken Breast

The seasoning here is built from pantry basics, so the chicken tastes good on its own. At the same time, it still fits into salads, bowls, wraps, pasta, sandwiches, and meal-prep boxes.
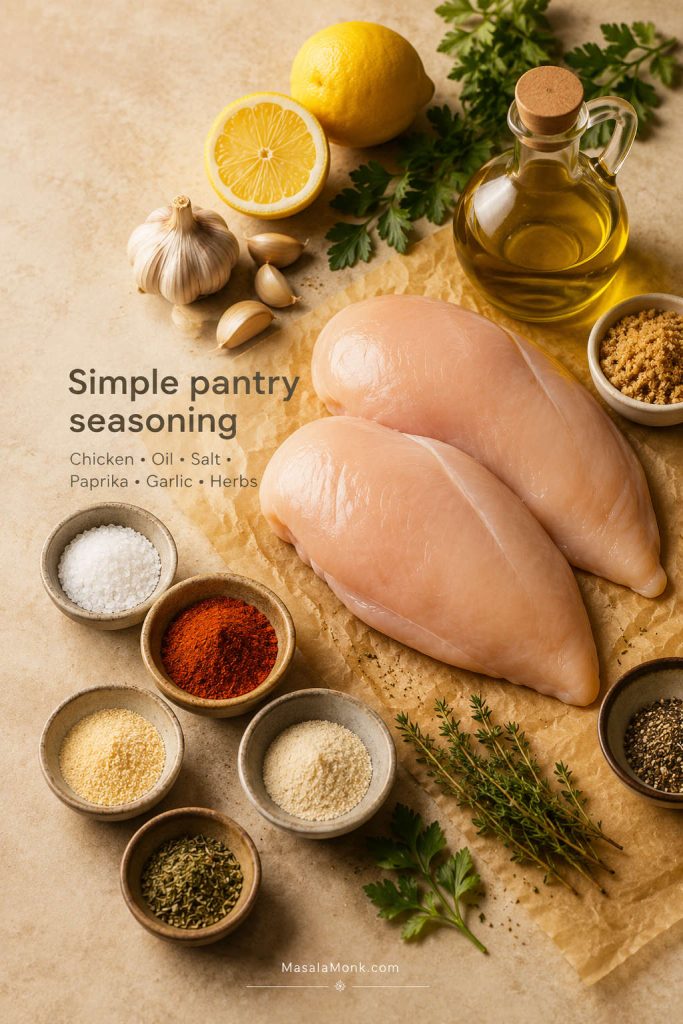
Ingredients for baked chicken breast including raw chicken, olive oil, paprika, garlic powder, herbs, salt, pepper, lemon, and parsley.
Simple pantry seasoning works because oil helps the spices cling to the chicken, so every slice tastes seasoned instead of flat.
Ingredient US amount Metric amount Why it matters
Boneless skinless chicken breasts 4 medium breasts, 5–8 oz each 600–900g total The main cut for fast, easy oven baked chicken breast
Olive oil or avocado oil 1 1/2 tbsp 22 ml Helps seasoning stick and protects the surface
Fine salt 1 tsp About 6g Seasons the chicken properly, not just the outside
Paprika or smoked paprika 1 tsp 2–3g Adds color, warmth, and gentle flavor
Garlic powder 1 tsp About 3g Gives the chicken a savory base
Onion powder 1/2 tsp 1–2g Rounds out the seasoning
Black pepper 1/2 tsp About 1g Adds mild heat
Italian seasoning, oregano, or thyme 1 tsp About 1g Adds herby flavor without needing a marinade
Brown sugar, optional 1–2 tsp 4–8g Helps browning, especially if you are not broiling
Lemon wedges or parsley, optional For serving For serving Adds freshness at the end

Best Chicken Breast to Use

Use boneless skinless chicken breasts that are close in size. Most supermarket packs are uneven: one breast may be thick enough to need pounding, while another may already be thin enough to overcook early.
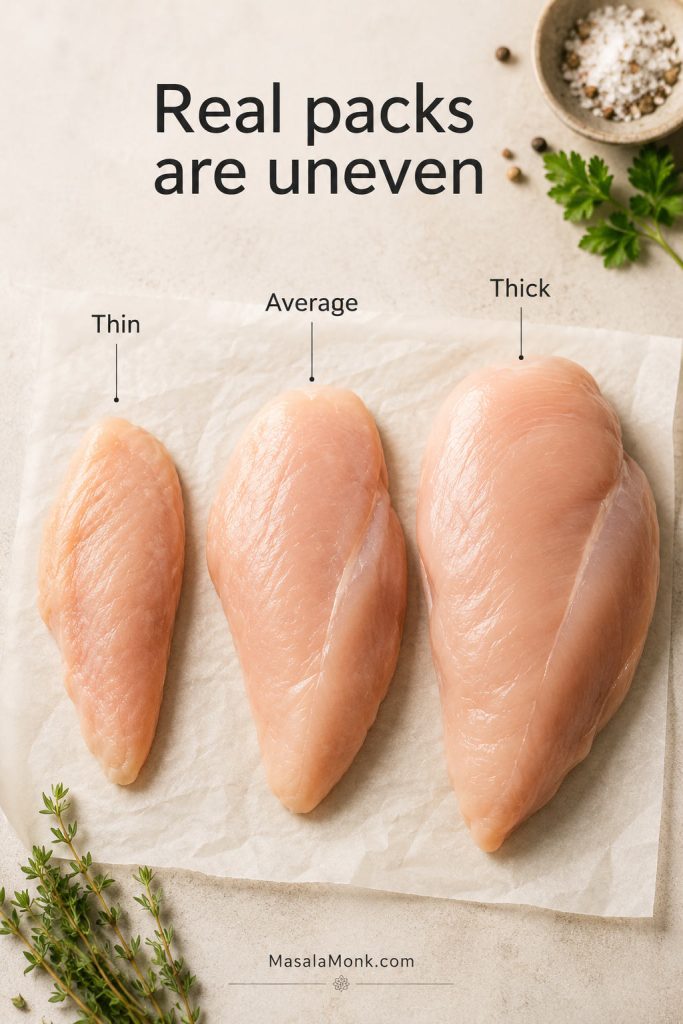
Three raw chicken breasts of different thicknesses labeled thin, average, and thick on parchment.
Since most supermarket packs are uneven, checking thickness before baking is more useful than treating every piece like it needs the same time.

For this method, similar-size pieces matter more than buying perfectly shaped chicken. As a result, the closer the pieces are in thickness, the easier it is to avoid dry edges and undercooked centers.

Very large chicken breasts are often thick at one end and thin at the other. For the best texture, pound only the bulky end until the piece is closer to one thickness, or slice extra-large breasts horizontally into two thinner pieces. That one step does more for tenderness than adding another sauce or spice.

Best Seasoning for Baked Chicken Breast

The best seasoning for baked chicken breast gives salt, savoriness, color, and aroma without requiring a long marinade. Salt, paprika, garlic powder, onion powder, black pepper, and herbs are enough for a reliable everyday version.

The seasoning should look like a real coating, not a few dusty patches. Because chicken breast is mild, it needs enough salt and spice across the whole surface. If the top looks barely seasoned before baking, the finished chicken will probably taste flat.
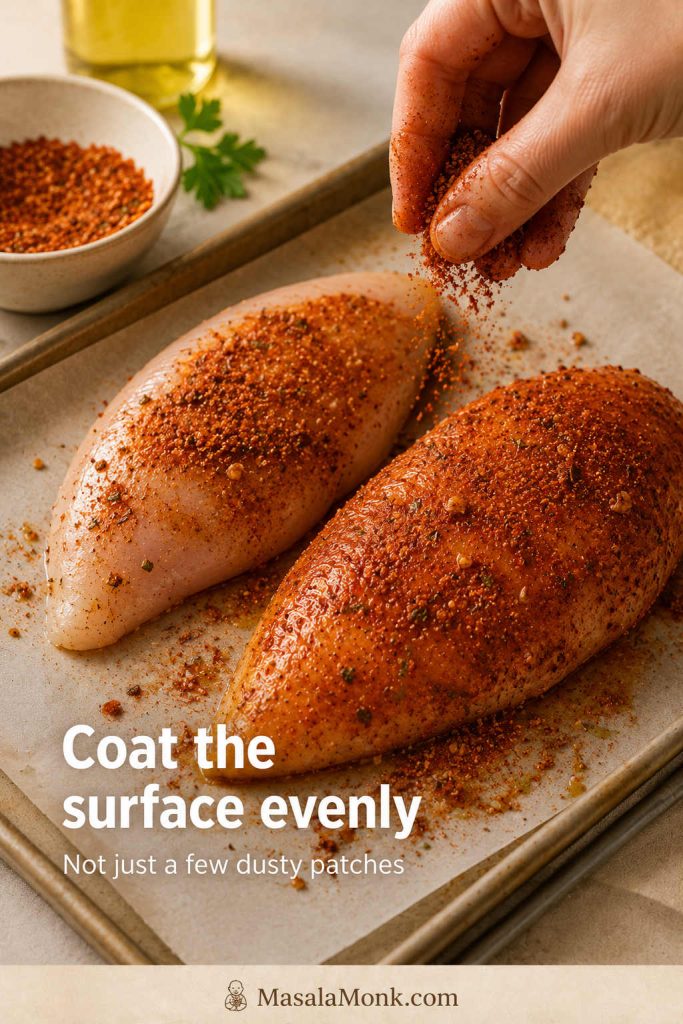
Raw chicken breast being coated with paprika garlic seasoning before baking.
A visible coating matters because chicken breast is mild; without enough seasoning on the surface, the finished slices can taste plain.

The brown sugar is optional, but useful. Although it does not make the chicken taste sweet, it helps the paprika-garlic coating brown faster, especially because boneless skinless chicken breast has no skin to crisp.

Salt note: This recipe uses fine salt. If you use kosher salt, you may need a little more by volume because the crystals are larger. Seasoning should taste balanced, not harshly salty.

Oil or Butter?

Oil is the easiest choice for high-heat baking because it coats the chicken evenly and handles the oven well. Butter tastes great, but it can brown faster, so it is often better as a finishing sauce with garlic, lemon, herbs, or pan juices.

Equipment You Need

You do not need special equipment, but a thermometer makes a huge difference. Without one, baked chicken breast often goes dry because the cook is guessing by time, color, or juices instead of checking the center of the thickest piece.
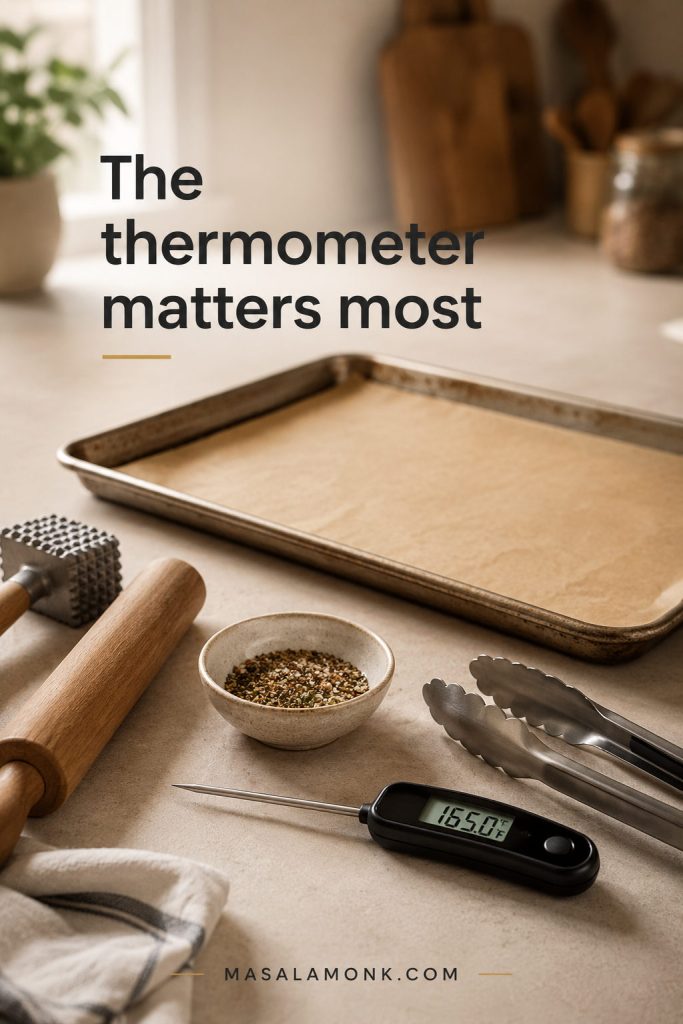
Equipment for baked chicken breast including an instant-read thermometer, sheet pan, parchment, tongs, and a meat mallet.
A thermometer and a way to even the thick end do more for juicy baked chicken breast than a long list of special tools.

No thermometer yet? Read what to do if you do not have one, but a thermometer is still the most reliable way to avoid dry chicken.

  • Instant-read thermometer: the most important tool for tender, safe chicken.
  • Rimmed sheet pan or metal baking dish: good for high heat and even cooking.
  • Parchment paper or foil: useful for cleanup and to prevent sticking.
  • Meat mallet or rolling pin: helps even out thick chicken breasts.
  • Small bowl: for mixing the seasoning.
  • Tongs: for handling seasoned chicken neatly.
  • Cutting board: for resting and slicing after baking.
Pan note: For very high heat, a rimmed sheet pan or metal baking dish is more predictable than glass. If you use a glass baking dish, check the manufacturer’s temperature limit and avoid sudden temperature changes.

How to Make Baked Chicken Breast

This method uses a plain, reliable oven approach: boneless skinless chicken breasts, baked uncovered, with enough seasoning to taste good on their own and enough flexibility to use later in other meals.
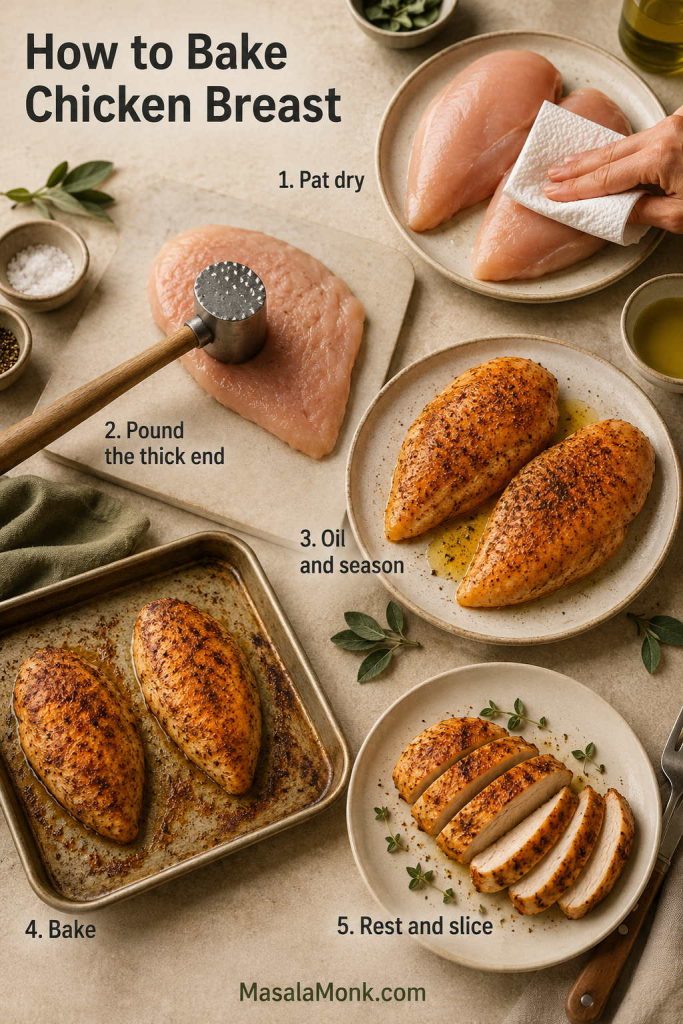
Step-by-step guide for baking chicken breast showing drying, pounding, seasoning, baking, and resting.
Each step solves a different problem: moisture on the surface, uneven thickness, weak seasoning, uncertain doneness, or slicing too soon.

1. Preheat the oven

Preheat the oven to 425°F / 220°C. Use the middle rack so the chicken cooks evenly. For a fan or convection oven, use 400°F / 200°C fan and start checking a few minutes early.

Fan and convection ovens move hot air more aggressively, so chicken can cook faster and brown sooner. Reduce the temperature by about 25°F / 15–20°C and start checking a few minutes before the chart says.

2. Pat the chicken dry

Pat the chicken breasts dry with paper towels. A dry surface helps the oil and seasoning cling better. Otherwise, very wet chicken can steam in the pan and release more liquid.

3. Pound the thick end

When the thick end is much taller than the thin end, gently pound only the bulky part with a meat mallet or rolling pin. Aim for an even piece, roughly 3/4 inch to 1 inch / 2 to 2.5 cm thick for average chicken breasts.
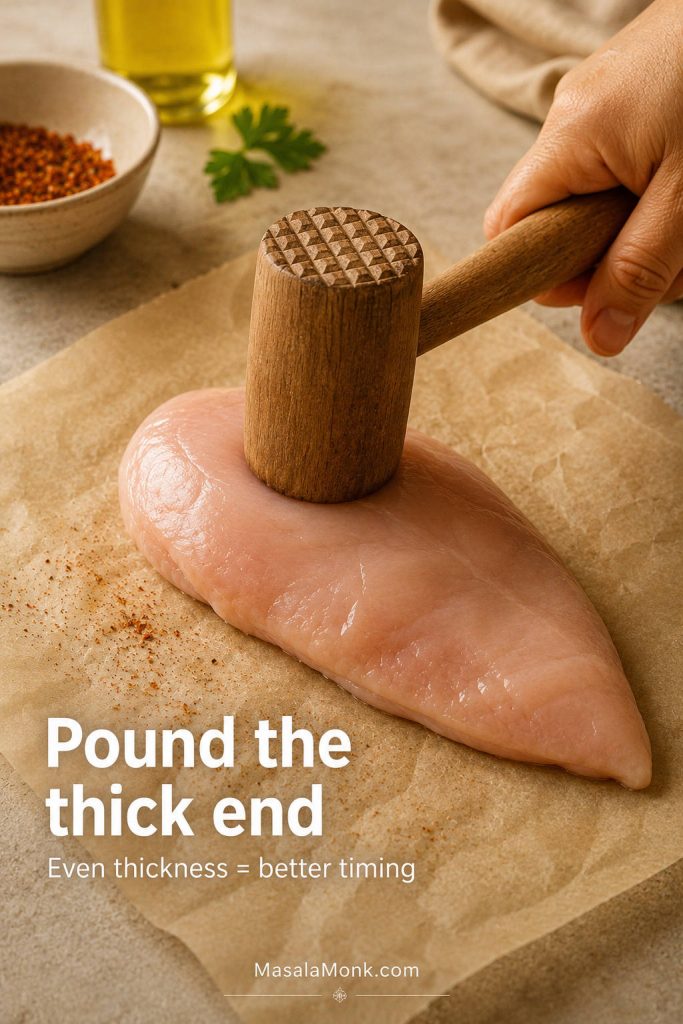
Raw chicken breast being pounded at the thick end to create a more even thickness before baking.
Pounding the thick end helps the center and edges finish closer together, so you are not waiting on one bulky section while the rest dries.

When to Slice Large Chicken Breasts Horizontally

Extra-large chicken breasts usually need a different move: slice them horizontally into thinner pieces instead of forcing one thick piece to cook evenly. This makes the timing more predictable and, more importantly, helps avoid a dry outside with an undercooked center.
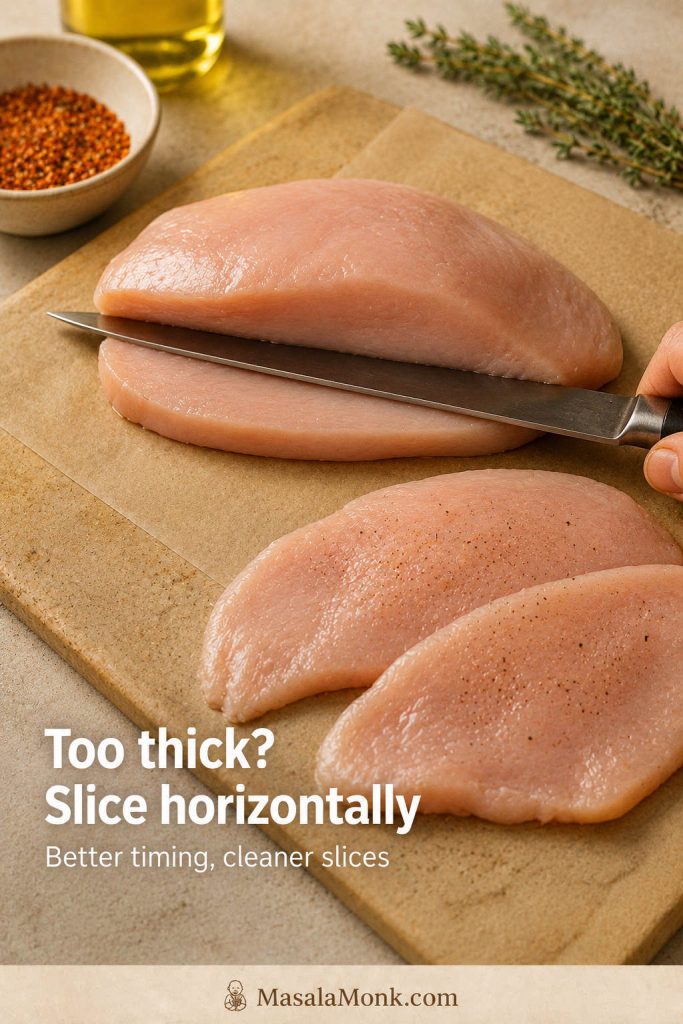
Extra-large raw chicken breast being sliced horizontally into thinner pieces before baking.
For extra-large chicken breasts, slicing horizontally creates thinner pieces that season better, cook faster, and finish more evenly.

4. Season the chicken

Mix the salt, paprika, garlic powder, onion powder, black pepper, herbs, and optional brown sugar in a small bowl. Then rub the chicken with oil and coat both sides with the seasoning. Season all sides, not just the top.

5. Bake uncovered

Arrange the chicken in a single layer with a little space between pieces. Place the smoother side up if you want the best presentation. Bake on the middle rack, uncovered, until each piece reaches the safe temperature.
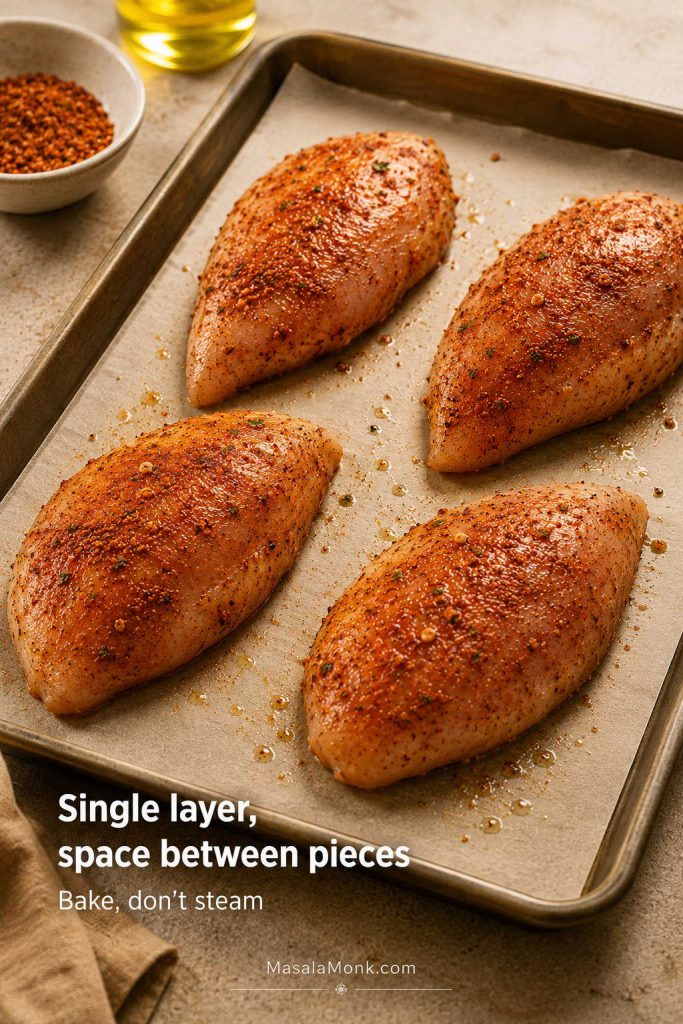
Seasoned chicken breasts spaced apart in a single layer on a parchment-lined sheet pan before baking.
Before baking, the tray should look organized: seasoned pieces in one layer, with enough room for heat to move around them.

Smaller or thinner pieces should come out early. Waiting for the largest breast is how the smaller one turns dry.

What the Chicken Should Look Like After Baking

When the chicken comes out of the oven, look for a lightly browned surface, seasoning that still clings, and a small amount of pan juice rather than a watery tray.
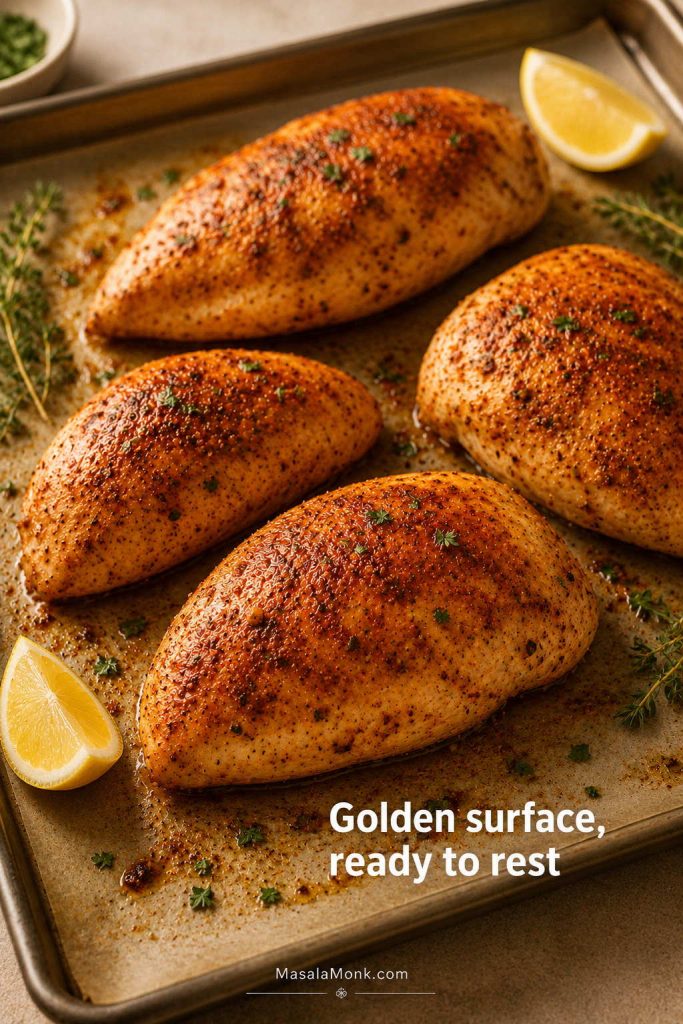
Golden baked chicken breasts on a sheet pan with herbs, lemon, browned bits, and light pan juices.
Look for light browning, seasoning clinging to the surface, and a small amount of pan juice—not a tray full of liquid.

For a full tray dinner instead of plain baked chicken breast, this Sheet Pan Chicken Fajitas recipe uses the same oven-friendly logic with sliced chicken, peppers, onions, and smoky seasoning.

6. Rest before slicing

Move the chicken to a cutting board and rest for at least 5 minutes. Then slice against the grain for the most tender texture. For meal prep, let the chicken cool before packing it into containers.
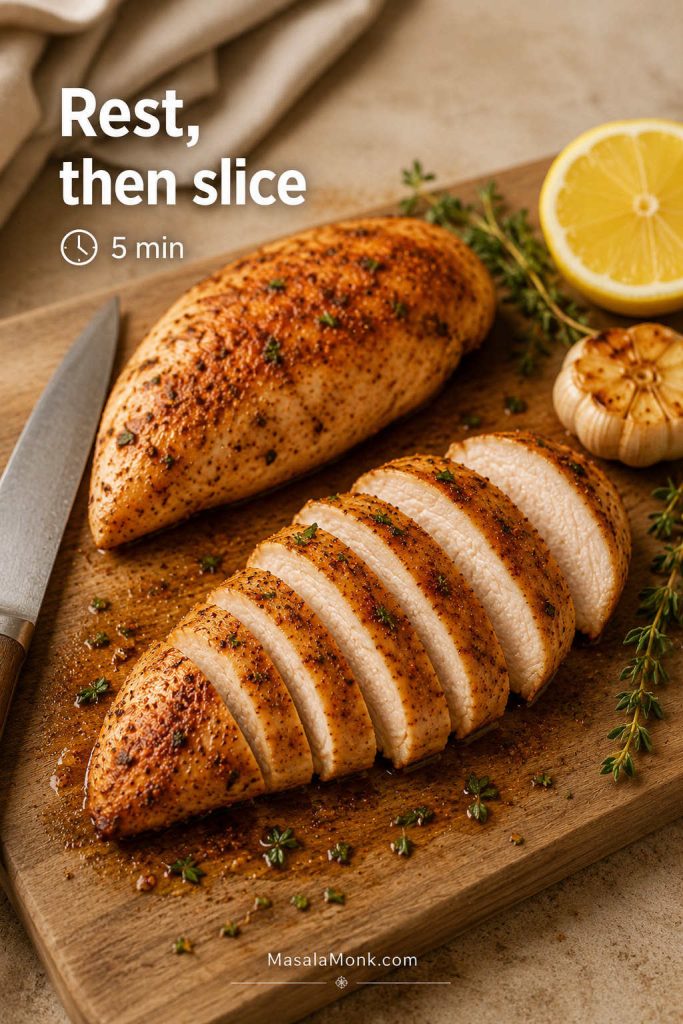
Baked chicken breast resting and sliced on a cutting board with herbs and lemon.
After baking, resting first and slicing second helps the chicken hold its texture instead of losing juices immediately on the board.

Should You Cover Chicken Breast While Baking?

For this recipe, bake the chicken uncovered. Covering traps steam and can make the surface wetter instead of lightly browned. However, covered baking can work well for saucy or casserole-style chicken recipes.

Do You Need to Flip Chicken Breast?

No, not for this method. Chicken arranged in a single layer on a sheet pan or shallow baking dish can bake without flipping. A wet pan or uneven oven may make flipping once useful, but it is not required.

What Good Baked Chicken Breast Looks Like

Good baked chicken breast should have a lightly browned, seasoned surface and a center that slices cleanly without looking wet, raw, chalky, or stringy. When you cut it after resting, you may see a little juice, but the board should not flood immediately.

The slices should bend slightly instead of crumbling, and the cut surface should still look moist enough to eat without hiding it under sauce. A breast that looks dry around the edges but underdone in the center was probably too thick or uneven before it went into the oven. Next time, pound the thick end or slice the breast horizontally before baking.
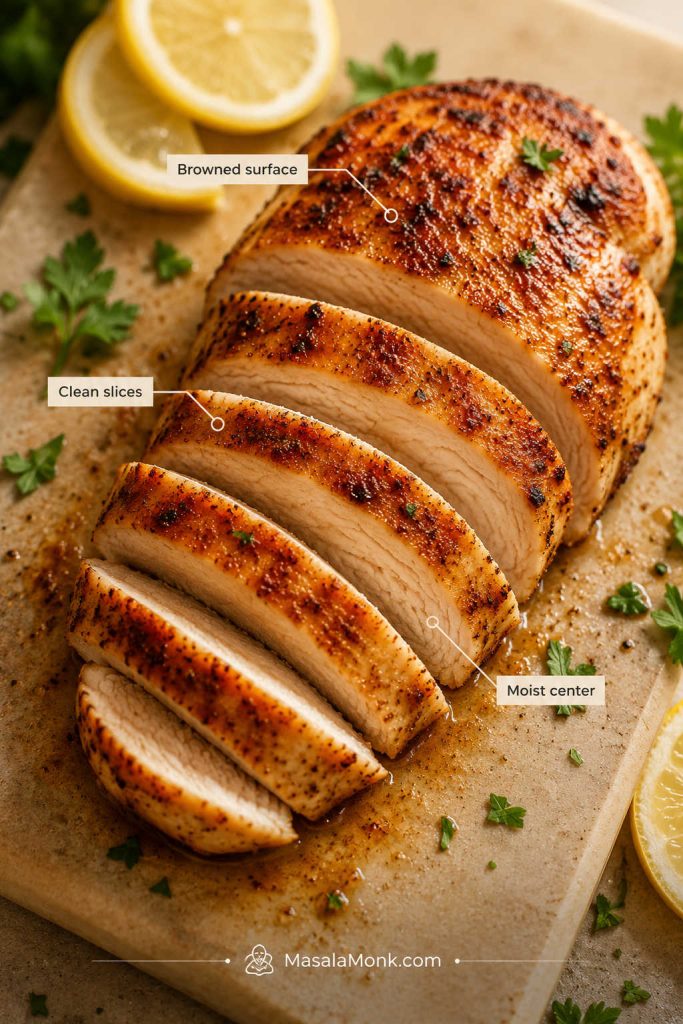
Sliced baked chicken breast labeled with browned surface, clean slices, and moist center.
Good baked chicken breast should look seasoned, slice cleanly, and stay moist without needing sauce to hide the texture.

How Long to Bake Chicken Breast

With this method, medium boneless chicken breast usually takes 18 to 22 minutes at 425°F / 220°C. Thin pieces can finish in 10 to 14 minutes, while large thick breasts may need 24 to 30 minutes or more.

Use 18 to 22 minutes as the normal starting point for medium chicken breasts. However, the wider 16 to 25 minute range covers smaller, thinner, larger, or uneven pieces. There is no single perfect timer setting because two pieces from the same pack can cook differently.

As a general rule, thin chicken breast cooks fast and dries fast. Thick chicken breast needs either more time or better prep, such as pounding or slicing horizontally. Smaller pieces may finish several minutes before larger ones, so remove them as they are done.

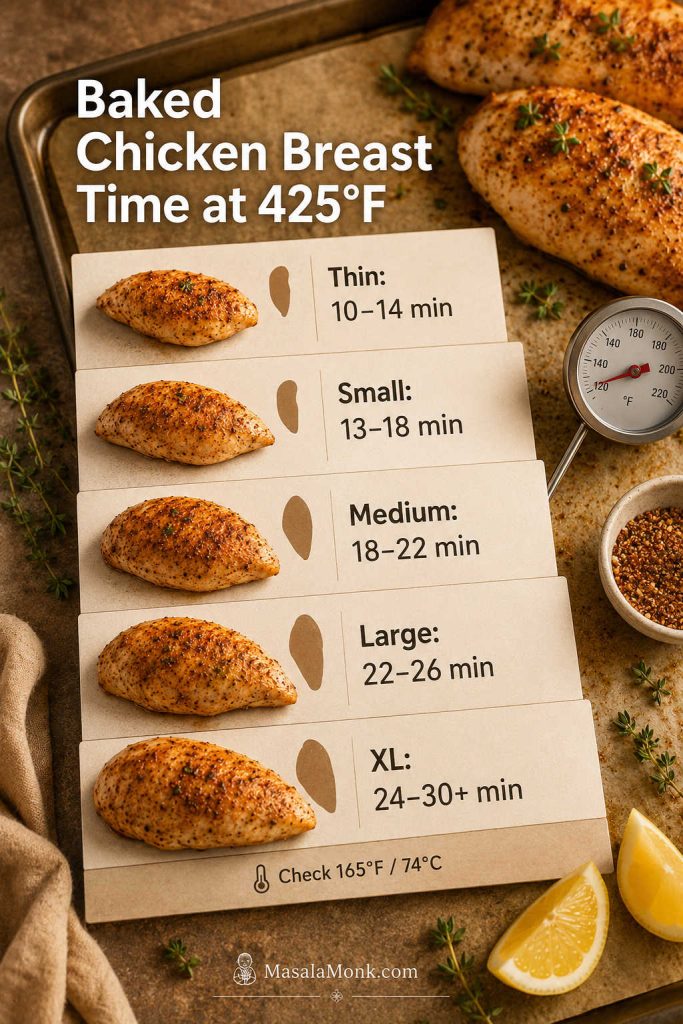
Baked Chicken Breast Time at 425°F / 220°C

Chicken breast size Approx weight Thickness guide Approx bake time at 425°F / 220°C
Thin-sliced breast or cutlet 3–5 oz About 1/2 inch / 1.25 cm 10–14 minutes
Small breast 5–6 oz / 150–180g 0.6–0.8 inch / 1.5–2 cm 13–18 minutes
Medium breast 7–8 oz / 200–225g 3/4–1 inch / 2–2.5 cm 18–22 minutes
Large breast 9–10 oz / 255–285g About 1 inch / 2.5 cm 22–26 minutes
Extra-large breast 11–12 oz / 310–340g Usually thick unless split or pounded 24–30+ minutes
The thermometer decides. These times are estimates. Once the center of the thickest piece reaches 165°F / 74°C, the chicken is ready to rest.
Baked chicken breast time chart at 425°F with timing for thin, small, medium, large, and extra-large pieces.
Use this bake-time chart as a starting point; then, check the thickest part because thickness can change the timing by several minutes.

Using 350°F, 375°F, 400°F, or 450°F instead? Use the oven temperature chart next.

Best Oven Temperature for Baked Chicken Breast

The best oven temperature for most boneless skinless chicken breasts is 425°F / 220°C. It is hot enough to cook quickly and brown lightly, but still manageable if you check early and use similar-size pieces.

That said, 425°F is not the only correct temperature. A 400°F / 200°C oven is better when you want a slightly gentler bake or have larger pieces. When the breasts are even in thickness, 425°F gives faster cooking with better surface color.
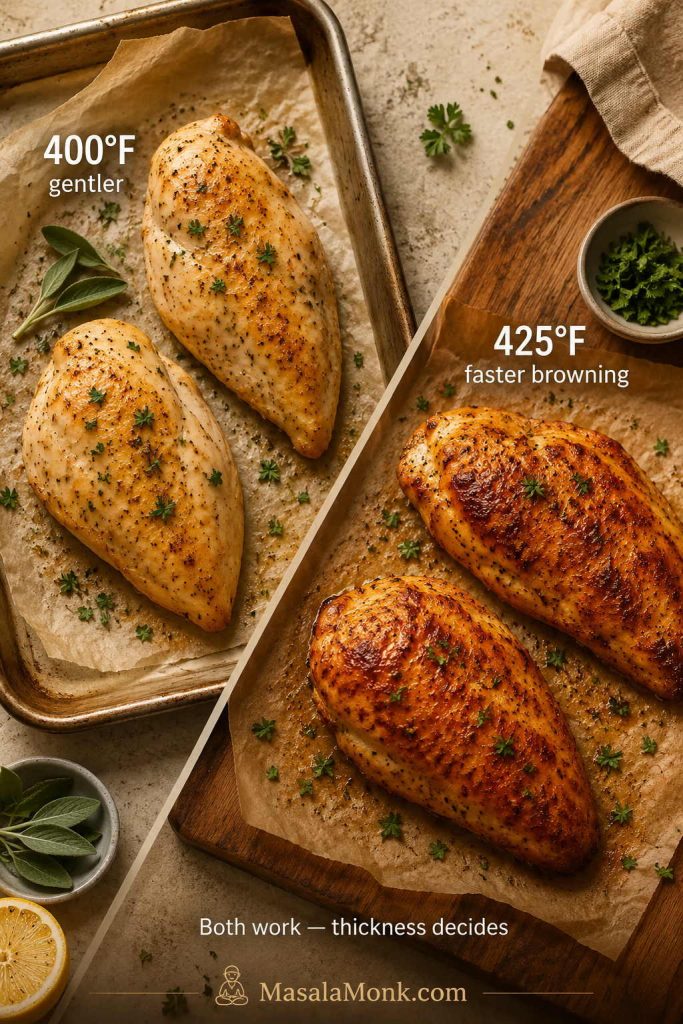
Comparison of baked chicken breast at 400°F and 425°F with gentler baking and faster browning notes.
For larger or less even pieces, 400°F gives you more margin; for even breasts, 425°F helps the surface brown before the meat dries out.

Chicken Breast Oven Temperature Chart

Use this chart when your oven is already set to a different temperature, your chicken is larger than average, or you simply feel more comfortable with a gentler bake. The timing changes, but the final check stays the same.

Oven temperature Best for Approx time for medium boneless breast
350°F / 175°C Gentle bake, less browning, slower cooking 25–35 minutes
375°F / 190°C Larger or thicker breasts, gentler cooking 22–30 minutes
400°F / 200°C Balanced weeknight bake 18–26 minutes
425°F / 220°C Best default for tender, lightly browned chicken 16–25 minutes
450°F / 232°C Fastest bake, best for thinner/even pieces, less forgiving 15–22 minutes

If you are unsure, choose 425°F for plain seasoned chicken breast, 400°F for a slightly gentler middle ground, and 375°F for very large pieces or saucier recipes. Lower heat is not automatically juicier; it just gives the chicken more time in the oven, so temperature checking still matters.
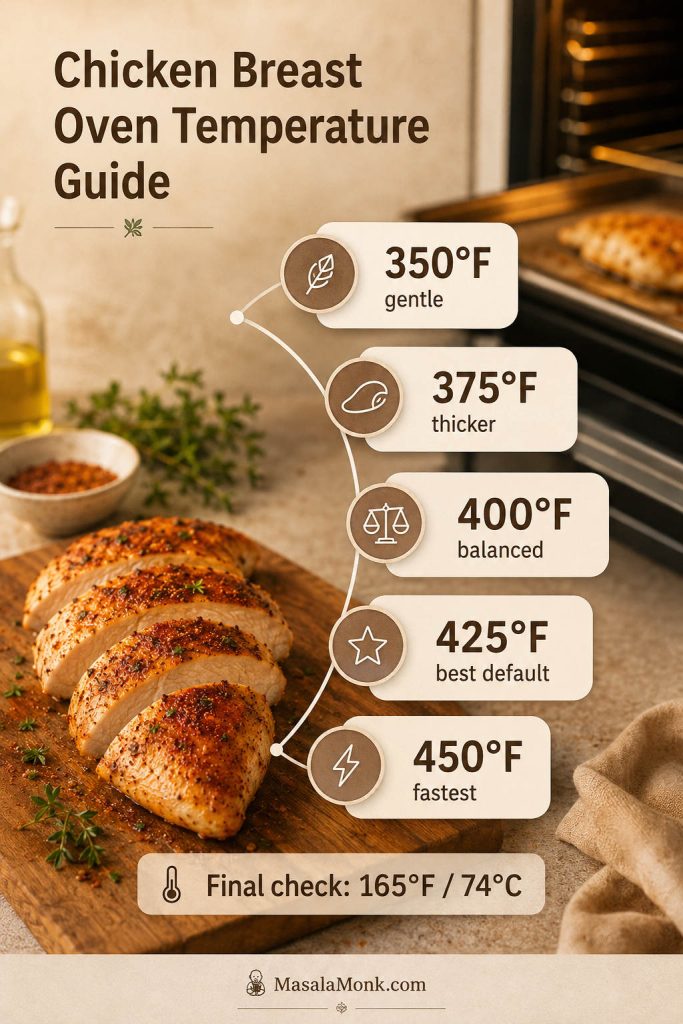
Chicken breast oven temperature guide showing 350°F, 375°F, 400°F, 425°F, and 450°F options.
Lower oven temperatures are gentler, while higher temperatures brown faster; however, every version still needs the same 165°F / 74°C doneness check.

Whichever oven temperature you choose, finish with the internal temperature check instead of relying only on time.

How Long to Bake Chicken Breast at 350°F

At 350°F / 175°C, medium boneless chicken breasts usually take about 25 to 35 minutes. This temperature is gentle, but it gives less browning and can dry the chicken if it stays in the oven too long.

How Long to Bake Chicken Breast at 375°F

At 375°F / 190°C, medium boneless chicken breasts usually take about 22 to 30 minutes. This is a good option for thicker pieces or recipes with a wetter marinade or sauce.

How Long to Bake Chicken Breast at 400°F

At 400°F / 200°C, medium boneless chicken breasts usually take about 18 to 26 minutes. This is a balanced middle temperature if you do not want to bake as hot as 425°F.

How Long to Bake Chicken Breast at 425°F

At 425°F / 220°C, medium boneless chicken breasts usually take about 16 to 25 minutes, depending on thickness. This is the default temperature for the main recipe because it gives the best balance of speed, tenderness, and light browning.

How Long to Bake Chicken Breast at 450°F

At 450°F / 232°C, chicken breast cooks fast, often in about 15 to 22 minutes. This temperature can work well for even pieces, but it is less forgiving. Check early, and avoid using bakeware that is not rated for high heat.

Internal Temperature for Baked Chicken Breast

The safe internal temperature for baked chicken breast is 165°F / 74°C in the center of the thickest piece. Use an instant-read thermometer and measure the largest breast first. Do not rely only on color, juices, or the outside texture.

You can use the FoodSafety.gov safe minimum internal temperature chart as the authority for poultry doneness. It lists chicken, turkey, and other poultry at 165°F / 74°C.
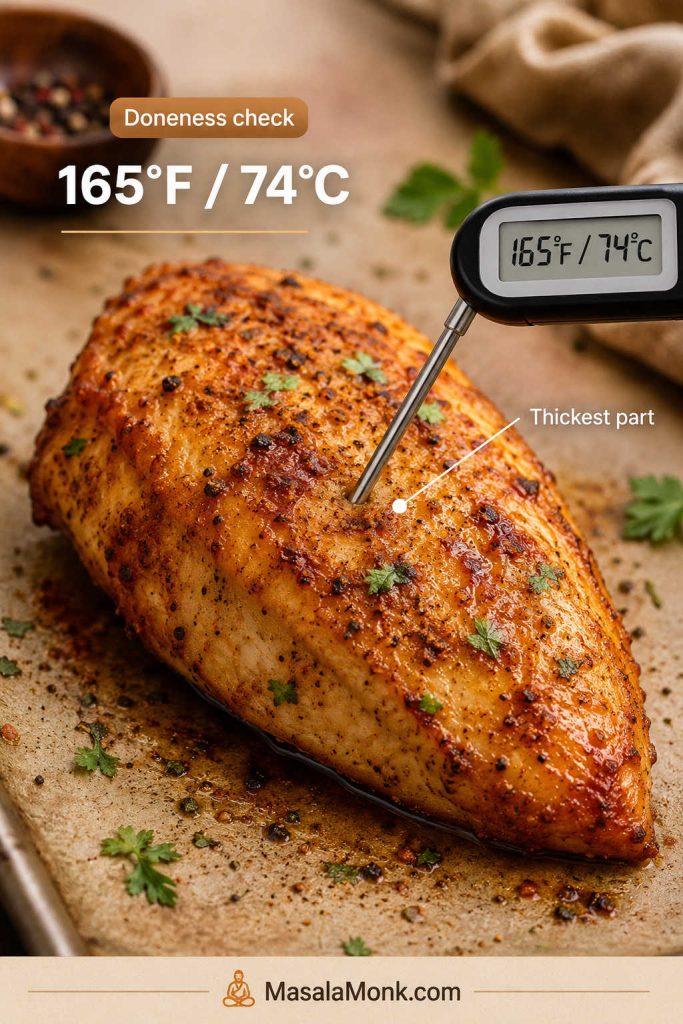
Instant-read thermometer inserted into the thickest part of baked chicken breast showing 165°F / 74°C.
The timer can only estimate doneness; the thermometer tells you when the thickest part has reached 165°F / 74°C.

When checking the temperature, avoid touching the pan. For bone-in chicken breast, insert the thermometer near the deepest part of the meat without touching bone.

Can You Pull Chicken Breast at 160°F?

The simplest safety rule is to cook chicken breast until the thickest part reaches 165°F / 74°C. Some experienced cooks remove chicken around 160°F and let carryover heat finish the last few degrees while it rests, but that only makes sense if you are using an accurate thermometer and the chicken continues rising to 165°F. If you want the clearest beginner-friendly target, use 165°F.

What If You Do Not Have a Thermometer?

A thermometer is the only reliable way to know chicken has reached 165°F / 74°C without overcooking it. Without one, use the timing chart only as an estimate and cut into the thickest piece to check that it is no longer pink. Color and juices are less reliable than temperature, so an instant-read thermometer is worth buying if you cook chicken often.

Thin vs Thick Chicken Breast

Thickness matters more than the number on the timer. A thick 6 oz chicken breast can take longer than a flatter 8 oz chicken breast because heat has to reach the center.

For thin-sliced chicken breast or cutlets, start testing around 8 to 10 minutes at 425°F / 220°C. Thin pieces dry out quickly, so do not wait for the same timing you would use for a full chicken breast.
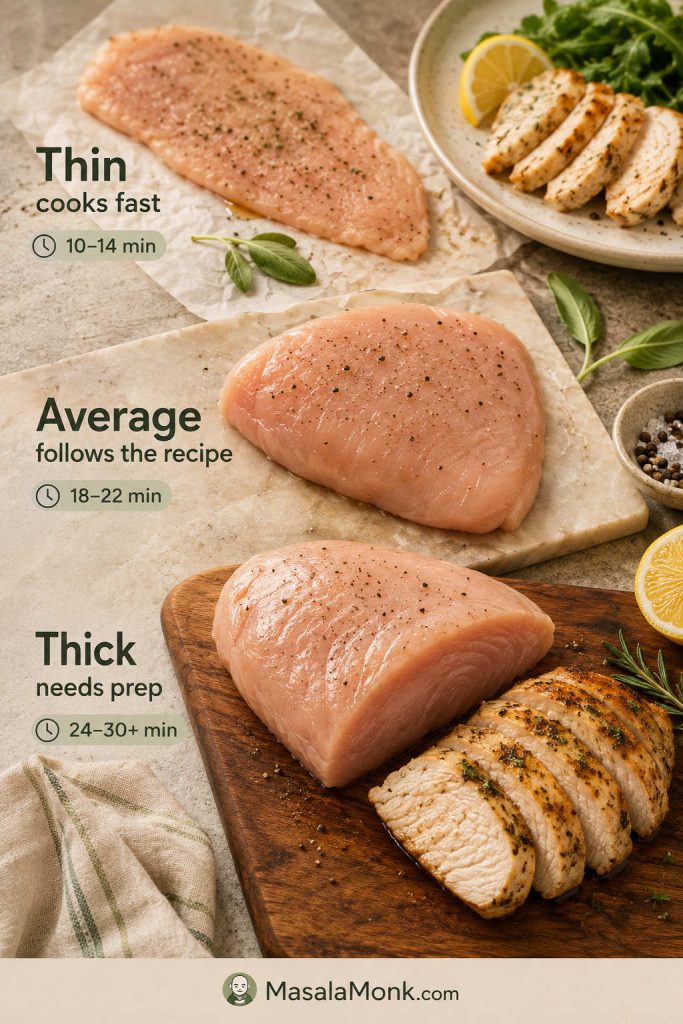
Thin, average, and thick chicken breasts with bake-time cues for each size.
Thin pieces need speed, average pieces follow the recipe more closely, and thick chicken breasts usually need prep before timing becomes reliable.
Type What to do Timing note
Thin-sliced chicken breast Season lightly, bake fast, check early Often 10–14 minutes at 425°F
Average chicken breast Use the main recipe method Usually 18–22 minutes at 425°F
Large thick chicken breast Pound, butterfly, or slice horizontally Can take 24–30+ minutes if left thick
Uneven pieces Sort by size or remove smaller pieces early Do not force every piece to finish at the same time

Why Large Chicken Breasts Cook Unevenly

Large chicken breasts can look done at the edges before the center is ready. That is why thick pieces need either a gentler bake, more time, or better prep before they go into the oven.
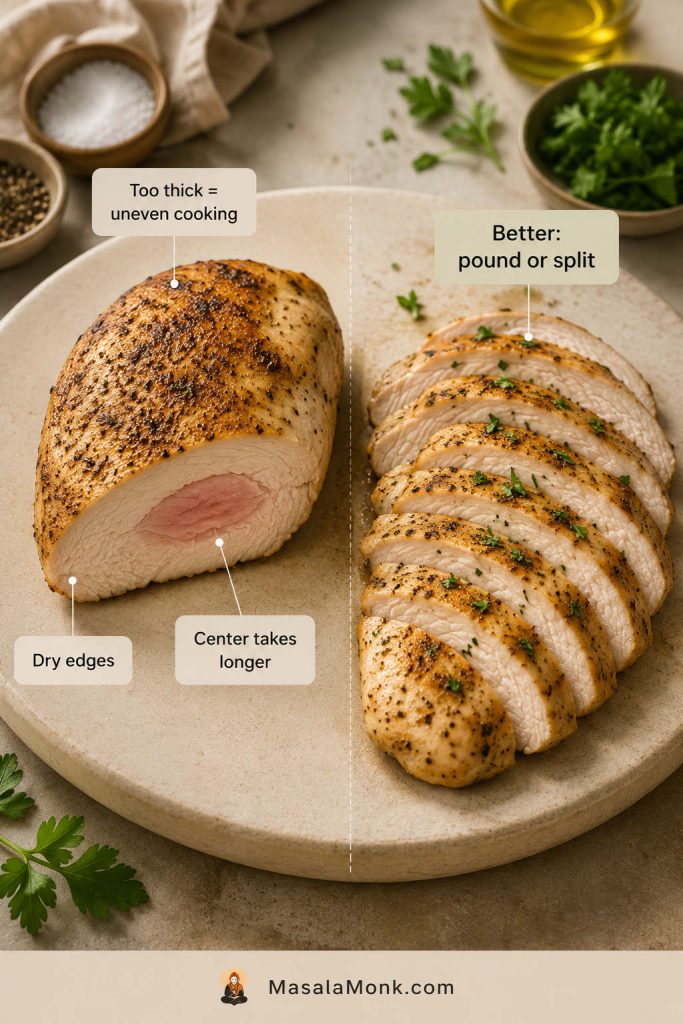
Large thick baked chicken breast showing dry edges and a center that takes longer, compared with better pounded or split chicken.
A thick chicken breast can dry around the edges while the center lags behind, which is why pounding or splitting changes the result.

Boneless Skinless vs Bone-In Chicken Breast

This recipe is written for boneless skinless chicken breast because it is the most common choice for quick dinners and meal prep. Bone-in skin-on chicken breast, also called split chicken breast, is juicier and more flavorful, but it takes longer.
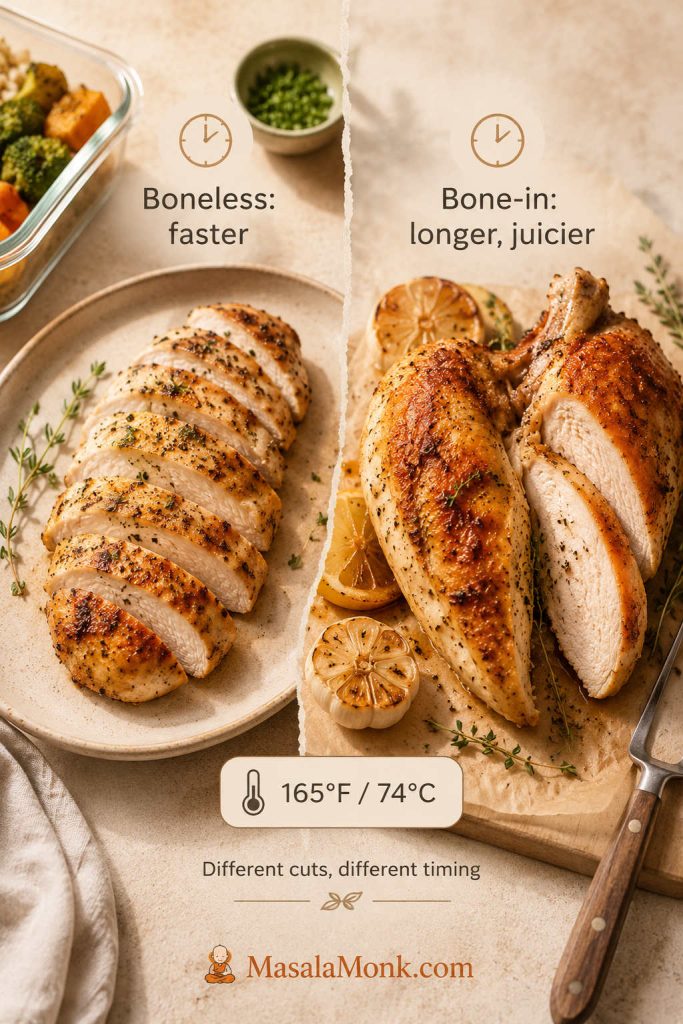
Boneless sliced chicken breast compared with bone-in split chicken breast, with 165°F / 74°C doneness cue.
Boneless chicken breast is faster for weeknight cooking, while bone-in split breast takes longer and gives you a little more forgiveness.
  • Boneless skinless chicken breast: fastest, leanest, easiest for salads, bowls, wraps, pasta, and sandwiches.
  • Bone-in skin-on chicken breast: more flavorful and forgiving, but slower to bake.
  • Do not use the same bake time for both. Bone-in chicken breast needs more time, and the thermometer should go near the thickest part without touching bone.

As a rough guide, bone-in split chicken breasts often need closer to 35 to 45 minutes at 400°F / 200°C, depending on size. However, the thermometer still decides, so check the thickest part of the meat without touching bone.

Why This Method Keeps Chicken Breast Juicy

Chicken breast usually gets dry for one of three reasons: the pieces are uneven, the chicken is baked too long, or it is sliced before the juices settle. Seasoning can make chicken taste better, but it cannot fully rescue meat that has been overcooked.

This method fixes those problems directly. Pound the thick end, coat the surface with oil and seasoning, bake hot, measure the thickest piece, and rest before slicing. Once you stop treating the timer as a guarantee, baked chicken breast becomes much easier to repeat.

  • Use similar-size pieces. Chicken breasts of the same size cook more evenly.
  • Pound the thick end. This prevents the thin end from drying out while the center finishes.
  • Do not skip the oil. Oil helps protect the surface and carries flavor.
  • Bake hot and uncovered. A hot oven cooks the chicken efficiently and gives better color.
  • Let temperature decide. Overcooking is the main reason chicken breast gets dry.
  • Remove smaller pieces early. If one breast is thinner, it may finish before the others.
  • Rest before slicing. Give the juices a few minutes to settle.
  • Slice against the grain. This makes the chicken feel more tender.

If your chicken breast keeps turning out dry, it probably does not mean you are bad at cooking chicken. It usually means the pieces needed a little prep before they went into the oven.

Should You Brine Chicken Breast Before Baking?

You do not need to brine chicken breast for this recipe. If the chicken is even in thickness and you use a thermometer, it can still come out tender and moist. However, a quick brine can help if your chicken breasts are very large, very lean, or often turn out dry.

If dinner is in 30 minutes, skip the brine and focus on the bigger wins: even thickness, oil, seasoning, hot oven, and a reliable doneness check.

Quick Chicken Breast Brine

  • 4 cups / 950 ml cold water
  • 2 tbsp kosher salt, or 1 tbsp fine salt
  • Brine for 15–30 minutes
  • Pat very dry before seasoning
  • Use less salt in the seasoning after brining
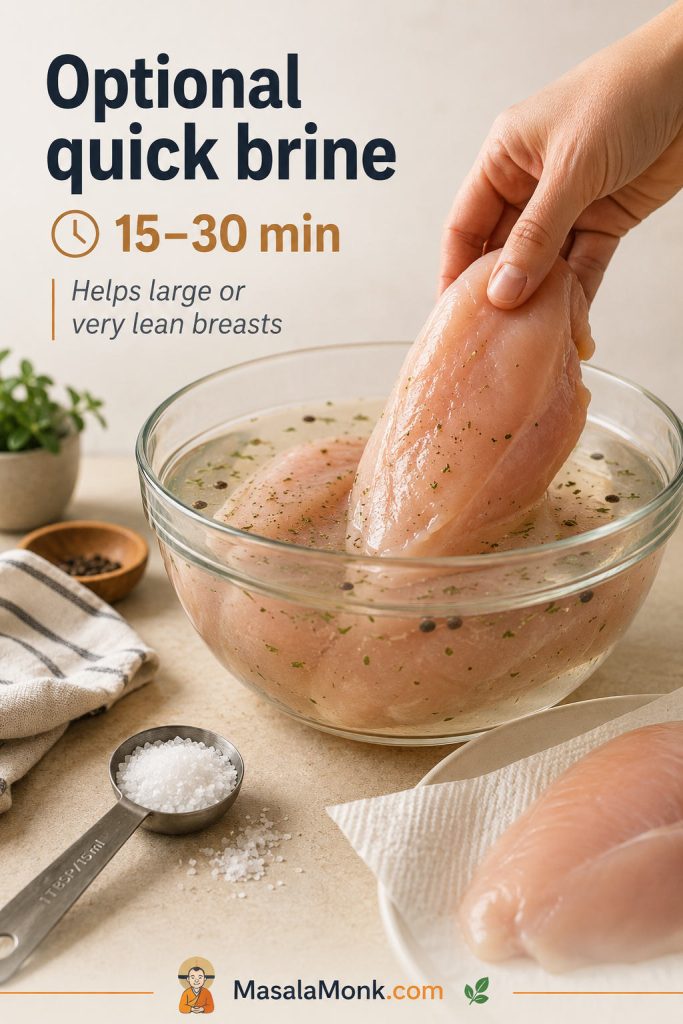
Raw chicken breast being placed in a glass bowl of saltwater brine with salt and herbs nearby.
A quick brine can help large or very lean chicken breasts, although it still cannot replace even thickness or a proper temperature check.
Salt note: Different salts have different crystal sizes. A tablespoon of fine salt is not the same as a tablespoon of flaky kosher salt. If you are unsure, brine lightly and reduce the salt in the seasoning rub.

Can You Marinate Chicken Breast Before Baking?

Yes, you can marinate chicken breast before baking. A short marinade of 30 minutes can add flavor, while a longer marinade can help with meal prep. However, very acidic marinades can change the texture if the chicken sits too long.

If the chicken has been sitting in a wet marinade, do not pour all of that liquid into the pan. Let excess drip off first and pat the surface lightly if needed. A little moisture is fine, but too much liquid makes the chicken steam instead of bake, which reduces browning and can create watery pan juices.
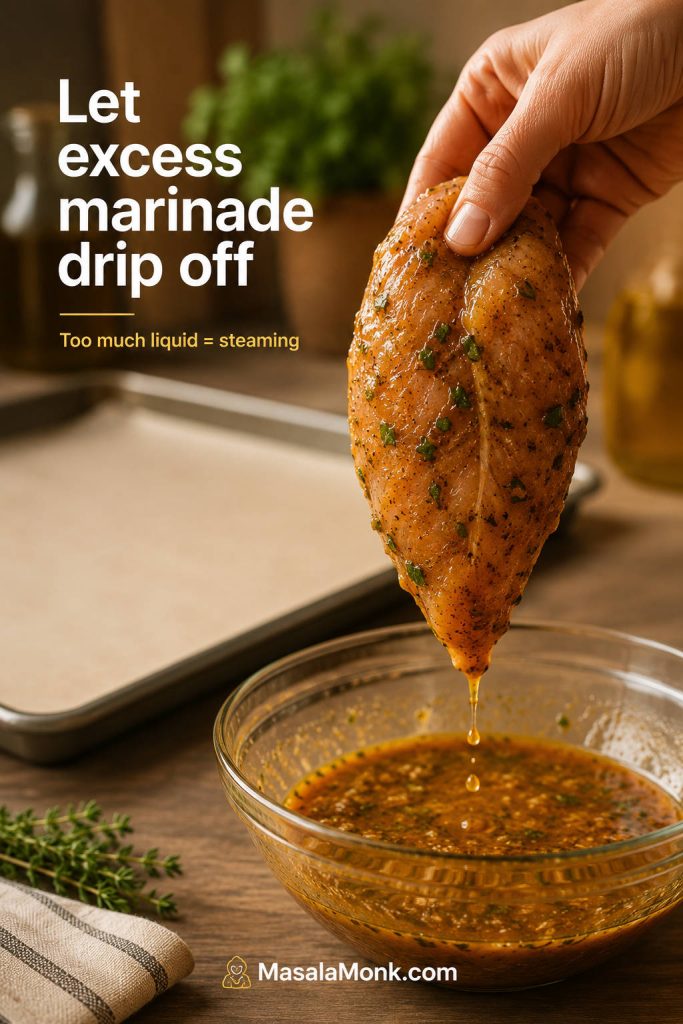
Marinated chicken breast being lifted from a bowl so excess marinade can drip off before baking.
Let excess marinade drip off before baking, because too much liquid in the pan makes the chicken steam instead of brown.

Can You Bake Frozen Chicken Breast?

For best results, thaw chicken breast before baking. Thawed chicken seasons more evenly, cooks more predictably, and is easier to pound before it goes into the oven.

If baking from frozen, make sure the pieces are separated, not frozen together in a block. As a rough guide, frozen chicken breast can take about 1.5 times as long as thawed chicken, especially if the pieces are thick. Check the thickest piece carefully because the chicken still needs to reach 165°F / 74°C.
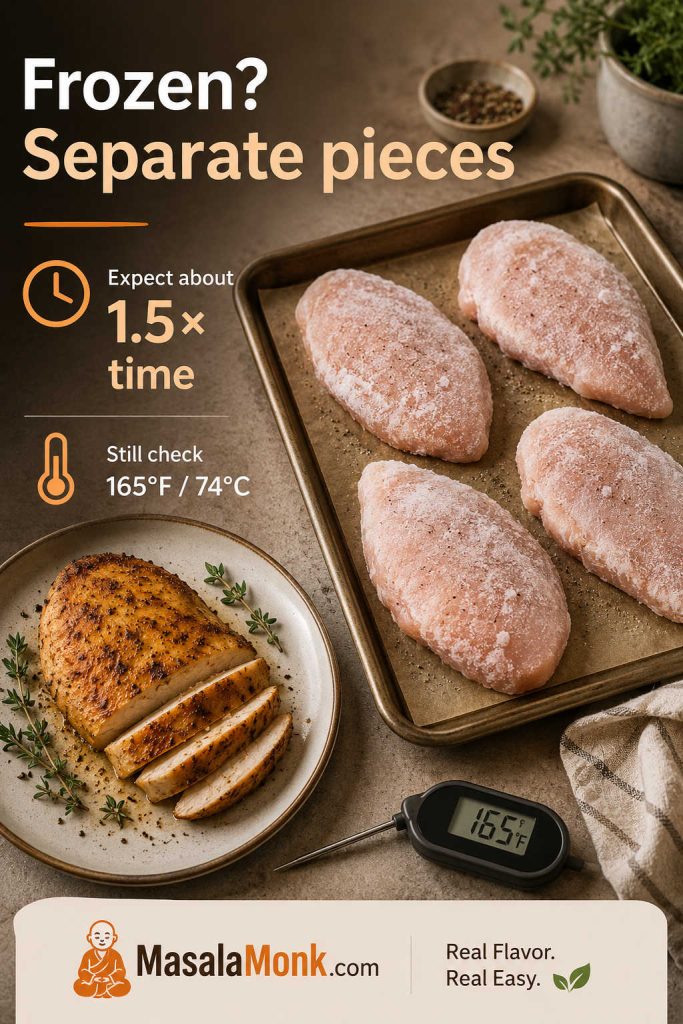
Separated frozen chicken breasts on a sheet pan with timing and 165°F internal temperature guidance.
Separated frozen chicken breasts cook more predictably than a frozen block, although the thermometer still matters more than the clock.

Because frozen chicken needs longer, use timing as a rough guide and finish with the internal temperature check.

Do not thaw chicken on the counter. Refrigerator thawing is the easiest safe method; cold-water and microwave thawing are faster, but the chicken should be cooked right away afterward. For a deeper safety reference on thawing chicken and cooking from frozen, the USDA FSIS Chicken from Farm to Table guide explains safe thawing methods and cooking guidance.

Baked Chicken Breast Variations

Once the method is working, the flavor can change easily. Keep the same oven temperature and doneness target, then adjust the seasoning or sauce.

For sweet sauces like BBQ or honey mustard, bake the chicken almost all the way first, then brush on the sauce during the final few minutes. This gives flavor without burning the sugars.

Six Baked Chicken Breast Flavor Directions
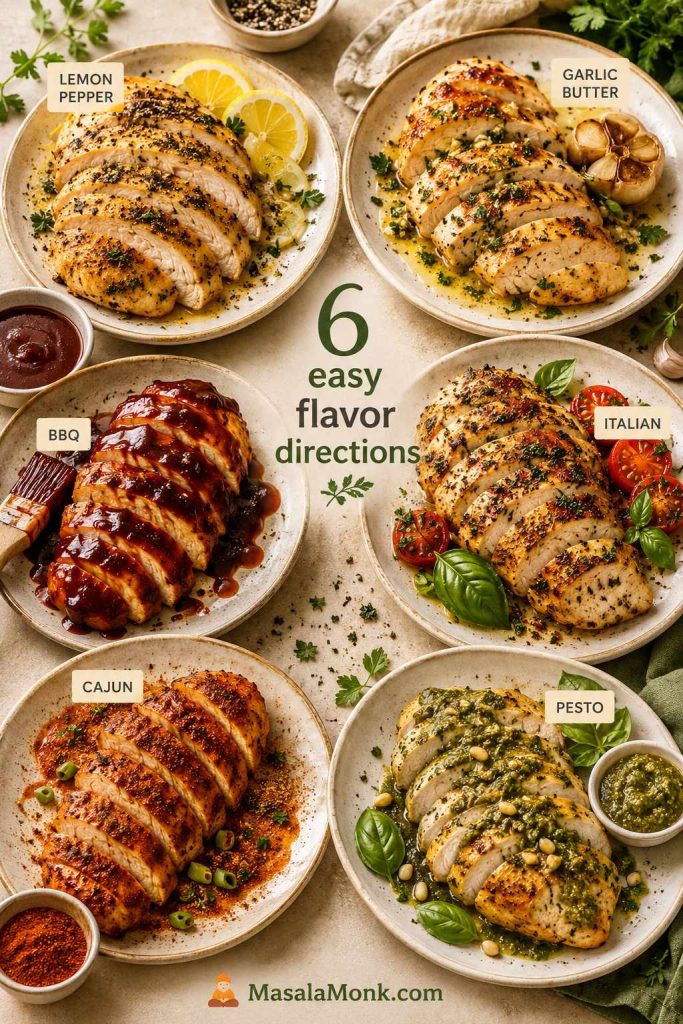
Six baked chicken breast flavor variations including lemon pepper, garlic butter, BBQ, Italian, Cajun, and pesto.
Once the base method works, lemon pepper, BBQ, Cajun, pesto, and other flavor directions can change the meal while keeping the same doneness target.
  • Lemon pepper baked chicken breast: use lemon pepper, garlic powder, and a squeeze of fresh lemon after baking.
  • Garlic butter baked chicken breast: finish with melted butter, minced garlic, parsley, and pan juices.
  • BBQ baked chicken breast: bake most of the way, brush with barbecue sauce near the end, and return to the oven briefly.
  • Italian baked chicken breast: use Italian seasoning, garlic, paprika, and a little parmesan after baking.
  • Cajun baked chicken breast: use Cajun seasoning and serve with rice, salad, or pasta. If you want a creamier pasta dinner, this Cajun Chicken Pasta is a natural next recipe.
  • Honey mustard baked chicken breast: brush with honey mustard near the end so the sugars do not burn.
  • Pesto baked chicken breast: spoon pesto over the chicken after baking, or add it during the final few minutes. Leftover sliced chicken also works well in Chicken Pesto Pasta.
  • Spicy chili-lime chicken breast: use chili powder, paprika, garlic, lime juice, and a little oil.

When to Use Another Chicken Method

Use another method when the result changes. This recipe is best for simple seasoned chicken breast. For saucy shredded chicken, these Crock Pot Chicken Breast Recipes are better for pull-apart chicken that stays moist in its cooking juices. For creamy pasta or a complete tray meal, use a recipe built for that result instead of forcing this plain baked method to do everything.

Sauces and Serving Ideas

The nice thing about simple baked chicken breast is that it does not trap you into one meal. When you are serving it as a main dish, a quick sauce makes it feel more complete without changing the basic method.

Easy Sauces for Baked Chicken Breast
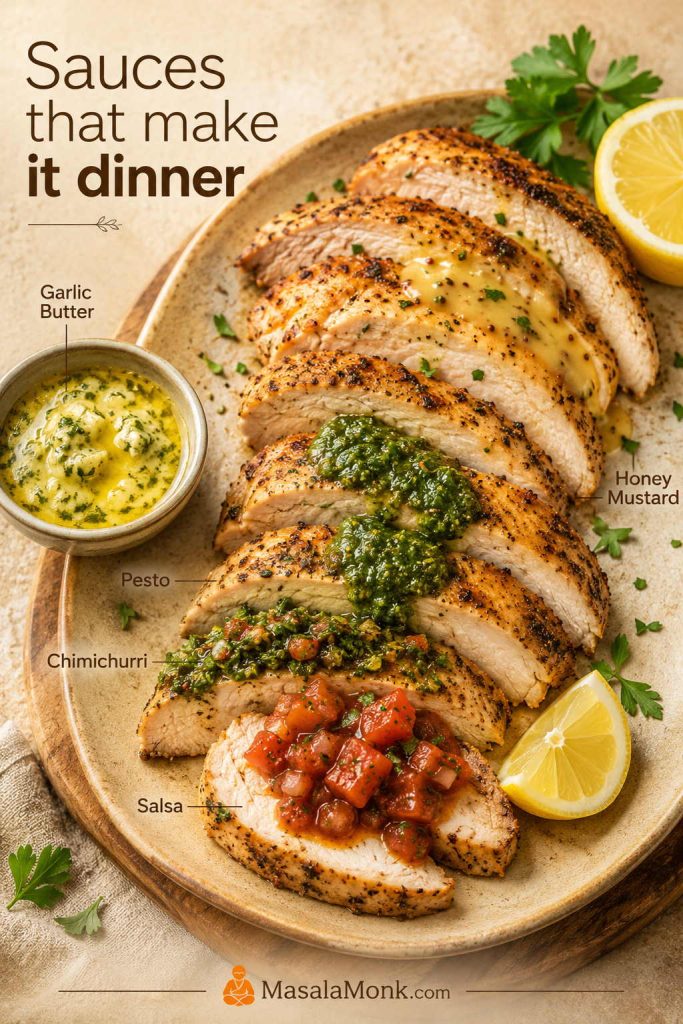
Sliced baked chicken breast served with garlic butter, pesto, chimichurri, honey mustard, and salsa.
A sauce gives baked chicken breast a second life at the table; garlic butter, pesto, chimichurri, honey mustard, or salsa can change the whole meal.
  • Garlic butter
  • Lemon pan juices
  • Honey mustard
  • Barbecue sauce
  • Pesto
  • Salsa
  • Mushroom cream sauce
  • Yogurt herb sauce
  • Hot sauce and butter

For a fresh herb sauce that makes plain baked chicken breast taste brighter, try spooning over homemade chimichurri. It works especially well when the chicken is sliced for rice bowls, potatoes, vegetables, or next-day lunches.

What to Serve with Baked Chicken Breast
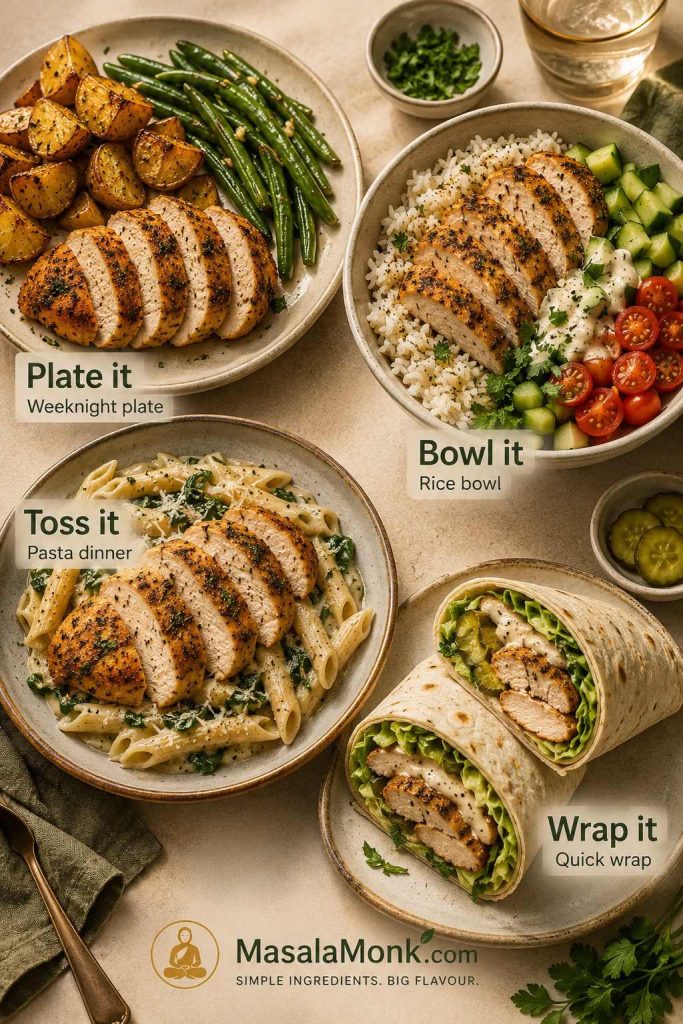
Four serving ideas for baked chicken breast including a weeknight plate, rice bowl, pasta dinner, and wrap.
Pairing chicken with potatoes, rice, pasta, or wraps turns it into a complete meal instead of just plain protein on a plate.
  • Weeknight plate: sliced chicken, roasted potatoes, green beans, and garlic butter or pan juices.
  • Rice bowl: chicken, rice, cucumber, tomatoes, herbs, and chimichurri or yogurt sauce.
  • Meal-prep lunch: cold sliced chicken, potato salad, greens, and a lemony dressing.
  • Pasta dinner: cubed chicken, pesto or Cajun cream sauce, and a simple salad.
  • Quick wrap: sliced chicken, lettuce, sauce, pickles or onions, and a soft tortilla.
  • Soup or noodle bowl: sliced chicken added at the end so it warms through without drying out.

For a make-ahead side that works with cold sliced chicken, wraps, or picnic-style plates, this Potato Salad recipe guide gives you classic, lighter, and variation-friendly options.

Baked Chicken Breast for Meal Prep

This recipe works well for meal prep because the chicken can be sliced, cubed, or shredded after cooking. Keep the seasoning simple if you want to use it in several meals during the week, then save stronger sauces for the day you serve it.

The point of baked chicken breast is not just tonight’s dinner. It is tomorrow’s salad, the wrap you can make in five minutes, the pasta that needs protein, and the lunch that does not feel like punishment. When the chicken is cooked gently and stored well, it becomes useful instead of dry meal-prep filler.
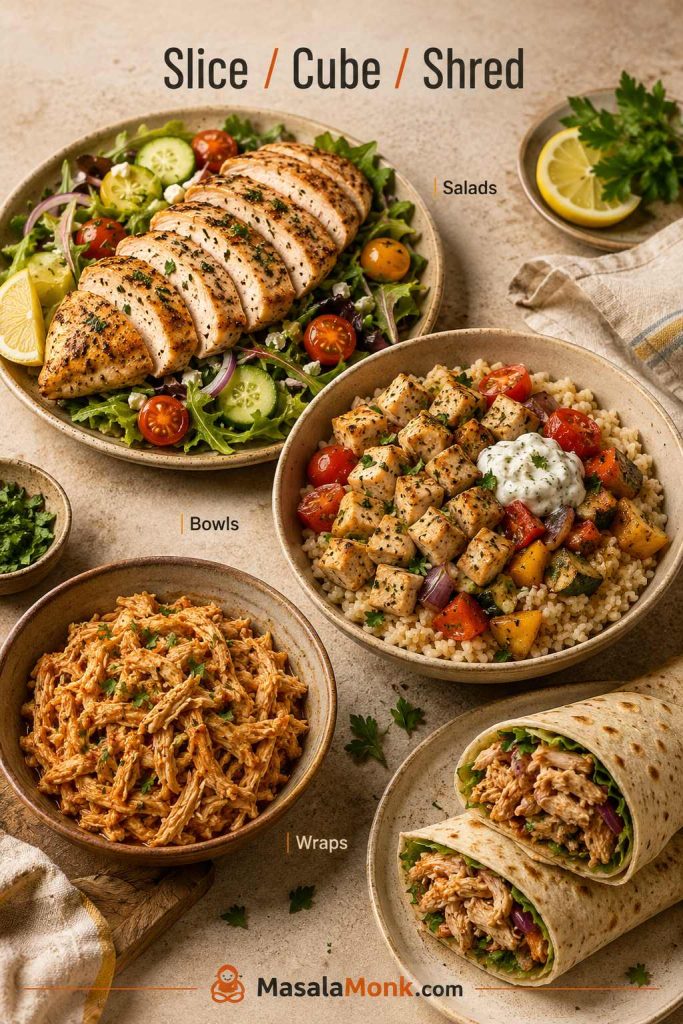
Baked chicken breast prepared three ways for meal prep: sliced for salad, cubed for bowls, and shredded for wraps.
For meal prep, slice some chicken for salads, cube some for bowls, and shred some for wraps or saucy lunches later.
  • Cool the chicken before storing.
  • Slice it for salads, bowls, wraps, and sandwiches.
  • Cube it for pasta, rice bowls, and quick skillets.
  • Shred it for tacos, soups, and saucy meals.
  • Keep sauces separate until serving when possible.

How Much Cooked Chicken Does This Make?

Four medium chicken breasts usually give enough cooked chicken for 4 dinner portions or several meal-prep portions once sliced, cubed, or shredded. For salads, wraps, or bowls, slice the chicken after resting and store it in portions so it is easy to use during the week.

For lunch prep, leftover baked chicken breast can also become sandwiches. Start with these chicken sandwich recipes if you want BBQ, Buffalo, chicken salad, pesto, or quick café-style ideas.

Storage, Freezing, and Reheating

The main reheating mistake is blasting lean chicken breast until it dries out. Instead, reheat gently and add a little moisture if the chicken has already been sliced.

Task Best method
Refrigerate Store cooled chicken in an airtight container for 3–4 days.
Freeze Cool first, wrap well, and freeze for up to 2–3 months.
Reheat in microwave Add a splash of water, broth, or sauce; cover loosely and heat gently.
Reheat on stovetop Warm sliced chicken with a little broth, sauce, or pan juices over low heat.
Avoid Overheating lean chicken breast until it becomes dry and rubbery.

For salads, wraps, and sandwiches, safely stored baked chicken breast can be used cold straight from the fridge. For a hot plate, reheat only until warmed through; lean chicken breast gets dry when it is blasted a second time.
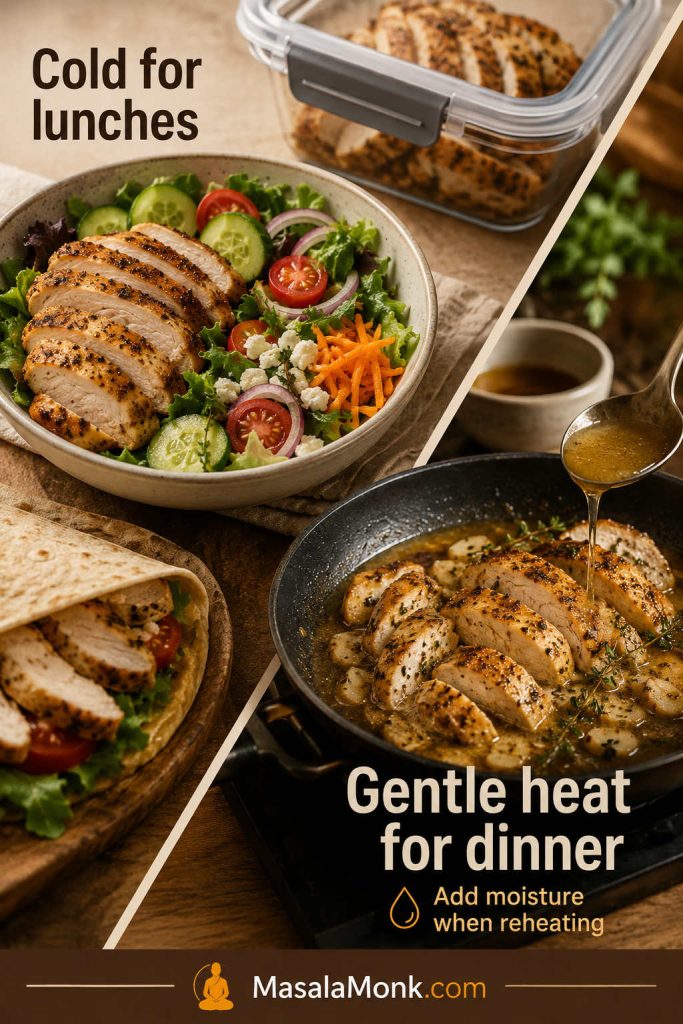
Baked chicken breast used cold in salad and wraps, plus sliced chicken reheated gently with moisture in a pan.
Safely stored chicken works cold for lunches; however, hot leftovers need gentle heat and a little moisture to stay pleasant.

Chopped or shredded leftovers are often better in moisture-rich lunches than reheated as plain slices. Fold them into chicken salad, tuck them into wraps, or mix them with a little sauce before reheating. This chicken salad sandwich recipe is a natural next step when you want leftover cooked chicken to taste intentional instead of leftover.

If the chicken already feels dry after reheating, jump to how to fix dry chicken breast instead of serving it plain.

Troubleshooting Baked Chicken Breast

Most baked chicken breast problems come from thickness, temperature, timing, or seasoning. Find the problem you had last time, then fix that one thing first.
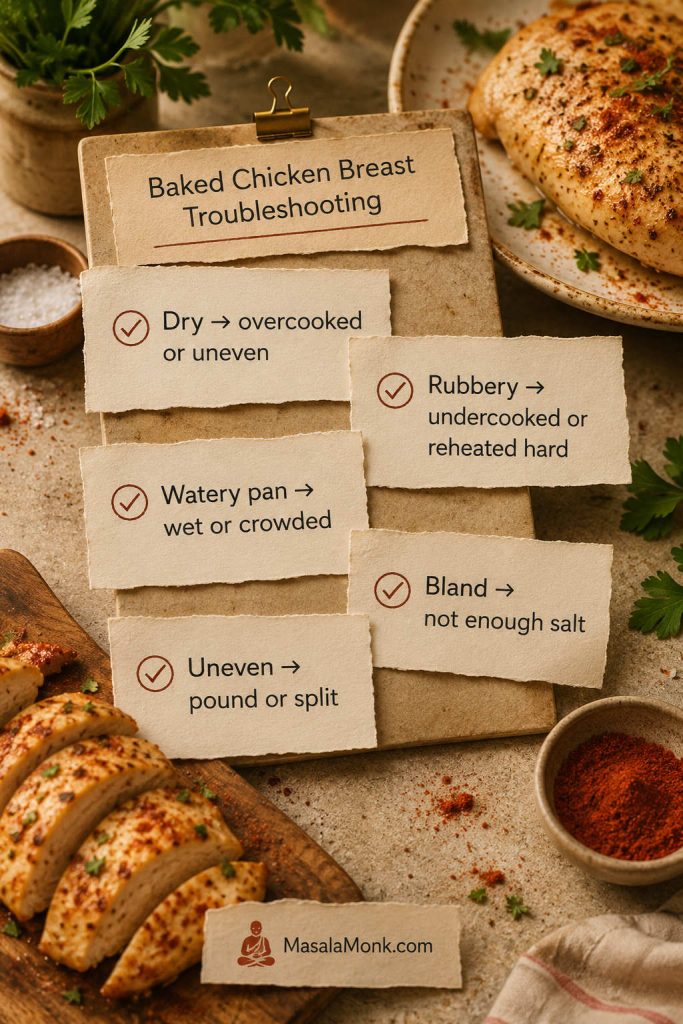
Troubleshooting guide for baked chicken breast with fixes for dry, rubbery, watery, bland, and uneven chicken.
When chicken breast turns out dry, bland, watery, rubbery, or uneven, the fix usually starts with thickness, seasoning, heat, or moisture.
Problem Likely cause Fix
Dry chicken Overcooked, uneven thickness, or sliced too soon Pound the thick end, use a thermometer, and rest before slicing.
Rubbery chicken Undercooked, cooked too low and slow, or reheated too aggressively Check the thickest part and reheat gently with moisture.
Bland chicken Not enough salt or seasoning Season all sides and use enough salt for the amount of chicken.
Watery pan juices Chicken was very wet, crowded, or heavily marinated Pat dry, avoid overcrowding, and use a rimmed sheet pan.
Outside dry, inside undercooked Chicken breast was too thick Butterfly, slice horizontally, or pound before baking.
Chicken cooked unevenly Pieces were different sizes or thicknesses Sort by size, pound thick pieces, and remove smaller pieces early.
Seasoning burned Too much sugar, broiler too long, or pan too close to heat Use less sugar, skip the broiler, or check earlier.
Chicken stuck to pan Not enough oil or no liner Use parchment or lightly oil the pan.

How to Fix Dry Chicken Breast After Baking

You cannot fully undo overcooked chicken breast, but you can make it much better. Slice it thinly across the grain and add moisture: pan juices, garlic butter, yogurt herb sauce, salsa, pesto, broth, gravy, or a creamy dressing. Dry baked chicken breast is often better chopped into chicken salad, folded into pasta, tucked into wraps, or simmered briefly in sauce than served as a plain whole breast.
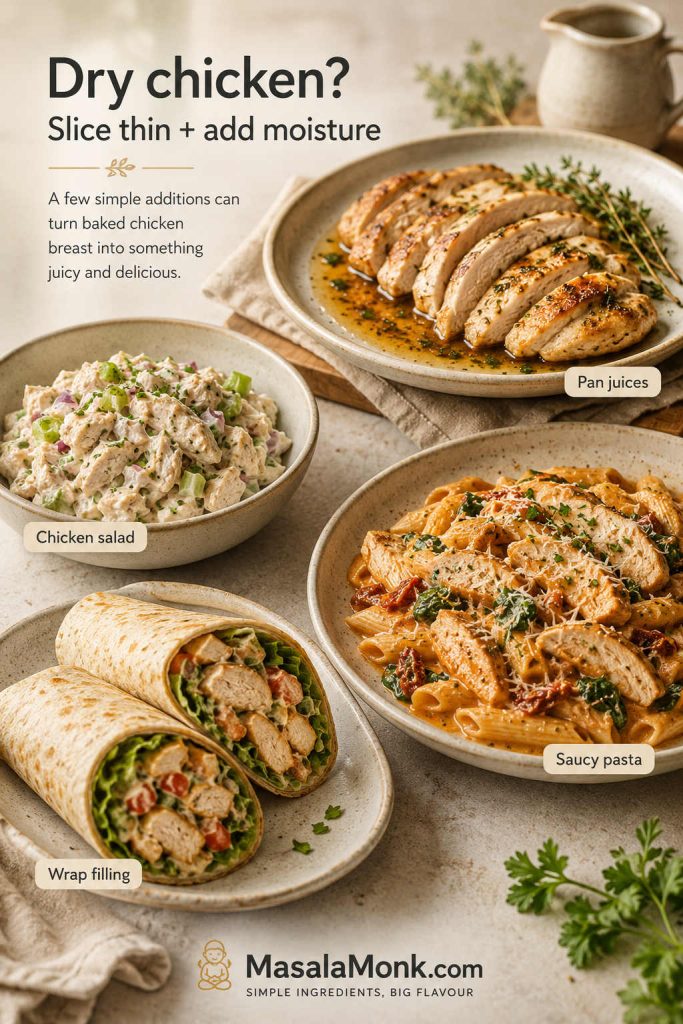
Dry baked chicken breast rescue ideas including pan juices, chicken salad, saucy pasta, and wrap filling.
Dry chicken cannot be uncooked, but slicing it thin and adding moisture can make it useful again in salads, pasta, wraps, or pan juices.
Help other readers with real timing: Chicken breast timing changes by size, thickness, oven, and pan. If you make this recipe, share your oven temperature, approximate chicken size or thickness, and how long it took to reach 165°F. Your note may help someone else avoid dry chicken.

Once you know what went wrong, return to the recipe card and adjust the thickness, timing, or temperature next time.

Common Mistakes to Avoid

  • Baking uneven pieces together without checking early: smaller pieces may finish before larger ones.
  • Skipping the oil: chicken breast is lean, so the surface needs a little fat to carry seasoning and protect texture.
  • Using the timer as a guarantee: time gets you close, but thickness and temperature decide.
  • Slicing immediately: give the chicken at least 5 minutes so the juices do not run out on the board.
  • Adding sauce too early: sweet sauces can burn at high heat, so brush them on near the end.
  • Cooking all pieces until the largest one is done: remove thinner pieces as they finish.

Baked Chicken Breast Recipe Card
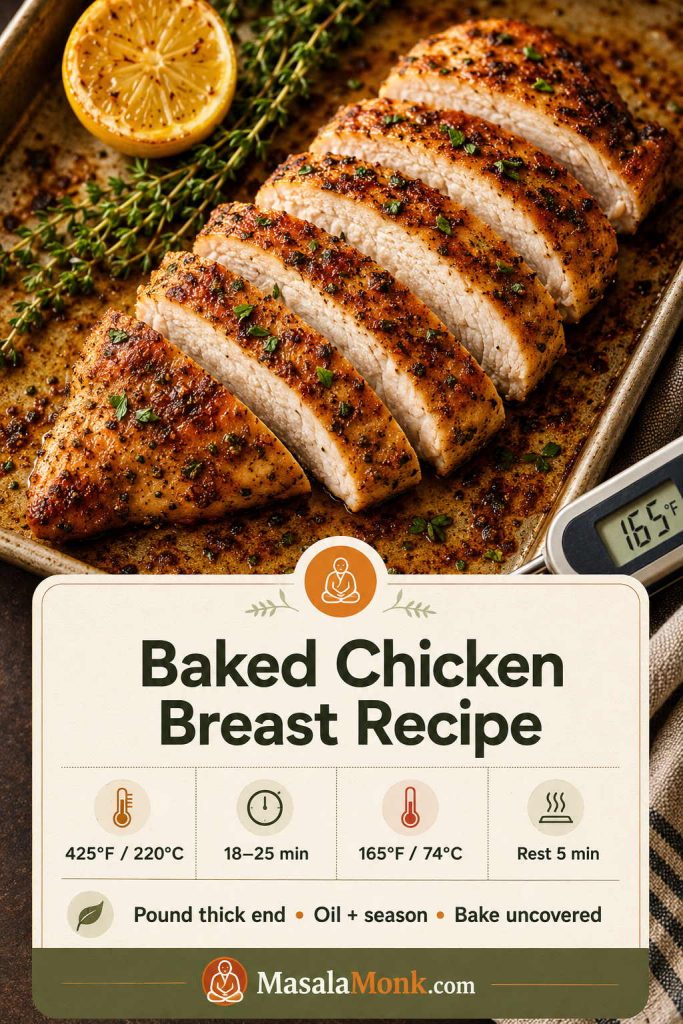
Saveable baked chicken breast recipe card with 425°F oven temperature, 18 to 25 minutes bake time, 165°F internal temperature, and 5 minute rest.
Save the core method: even the thick end, coat the surface, bake uncovered, check the internal temperature, and rest before slicing.

Baked Chicken Breast Recipe

This easy baked chicken breast recipe uses even thickness, a paprika-garlic seasoning, high oven heat, and a short rest for chicken that slices cleanly and stays useful for dinner or meal prep.

Prep Time10 minutes
Cook Time18–25 minutes
Rest Time5 minutes
Servings4

Ingredients

  • 4 boneless skinless chicken breasts, 5–8 oz / 150–225g each
  • 1 1/2 tbsp / 22 ml olive oil or avocado oil
  • 1 tsp fine salt, or to taste
  • 1 tsp paprika or smoked paprika
  • 1 tsp garlic powder
  • 1/2 tsp onion powder
  • 1/2 tsp black pepper
  • 1 tsp Italian seasoning, oregano, or thyme
  • 1–2 tsp brown sugar, optional, for better browning
  • Lemon wedges or chopped parsley, optional, for serving

Instructions

  1. Preheat the oven. Heat the oven to 425°F / 220°C. For fan or convection, use 400°F / 200°C fan and check early.
  2. Prep the chicken. Pat the chicken dry. Pound the thick end until the pieces are more even, or slice very large breasts horizontally.
  3. Mix the seasoning. In a small bowl, combine salt, paprika, garlic powder, onion powder, pepper, herbs, and optional brown sugar.
  4. Season. Rub the chicken with oil, then coat both sides evenly with the seasoning blend.
  5. Bake. Arrange in a single layer on a parchment-lined rimmed sheet pan or lightly oiled metal baking dish. Bake uncovered for 18–25 minutes, depending on size and thickness.
  6. Check doneness. Start checking smaller or thinner pieces early. Chicken breast is done when the center of the thickest part reaches 165°F / 74°C.
  7. Rest and serve. Rest for at least 5 minutes, then slice against the grain and serve with pan juices, lemon, parsley, sauce, salad, rice, potatoes, or vegetables.

Notes

  • No timer works for every chicken breast. Thickness, not just weight, changes the bake time, so check thin pieces early.
  • The seasoning should coat the surface evenly. If it looks patchy before baking, the finished chicken may taste uneven.
  • For a wet marinade, pat off excess before baking so the chicken browns better.
  • After brining, reduce the salt in the seasoning blend.
  • Smaller pieces should come out early instead of waiting for the largest piece.
  • For meal prep, cool before storing and reheat gently with a splash of broth, water, or sauce.

FAQs About Baked Chicken Breast

What is the best temperature to bake chicken breast?

For most boneless skinless chicken breasts, 425°F / 220°C is the best default. It cooks quickly, gives light browning, and works well when the pieces are similar in size. Use 400°F / 200°C if you want a gentler first try.

How long does chicken breast take in the oven?

At 425°F / 220°C, medium boneless chicken breast usually takes 18–22 minutes. Thin pieces may finish in 10–14 minutes, while large thick breasts can need 24–30 minutes or more. The safest answer still comes from checking the thickest piece, not just watching the clock.

How do I know baked chicken breast is done?

Measure the center of the thickest piece with an instant-read thermometer. Once it reaches 165°F / 74°C, the chicken is ready to rest. Color and juices can help you notice problems, but temperature is the reliable check.

Why is my baked chicken breast dry?

Usually because the chicken stayed in the oven too long, cooked unevenly, or was sliced too soon. Pound the thick end, use the thermometer, and rest before slicing. If it is already dry, slice it thin and use it with sauce, chicken salad, pasta, wraps, or rice bowls.

Should I cover chicken breast while baking?

For this recipe, bake chicken breast uncovered. Covering traps steam and can make the surface wet instead of lightly browned. Covered baking is better for saucy chicken or casserole-style recipes.

Is it better to bake chicken breast at 400°F or 425°F?

Both work. Use 400°F / 200°C when you want a slightly gentler bake or have larger pieces. Use 425°F / 220°C when the breasts are even in thickness and you want faster cooking with better surface color. Either way, use the thermometer instead of relying only on the timer.

How do I bake thin chicken breast?

Thin chicken breast cooks quickly. At 425°F / 220°C, thin-sliced chicken breast or cutlets may take only 10–14 minutes, so start checking early. Removing thin pieces on time matters more than following the timing for a full chicken breast.

What seasoning is best for baked chicken breast?

A simple mix of salt, paprika, garlic powder, onion powder, black pepper, and herbs works well for everyday baked chicken breast. Make sure it coats the surface evenly before baking so the finished chicken tastes seasoned, not patchy.

Can baked chicken breast be made ahead?

Yes. Let it cool, store it in an airtight container, and slice, cube, or shred it for salads, bowls, wraps, sandwiches, pasta, and quick dinners. Keep sauces separate when possible so the chicken stays flexible for different meals.

How do I reheat baked chicken breast without drying it out?

Reheat it gently with a splash of broth, water, sauce, or pan juices. Cover loosely and warm only until heated through. For salads, wraps, and sandwiches, safely stored chicken can also be used cold.

Can I use bone-in chicken breast?

Yes, but bone-in chicken breast takes longer than boneless chicken breast. Check near the thickest part without touching the bone, and do not use the boneless timing chart as the final guide.

The Takeaway
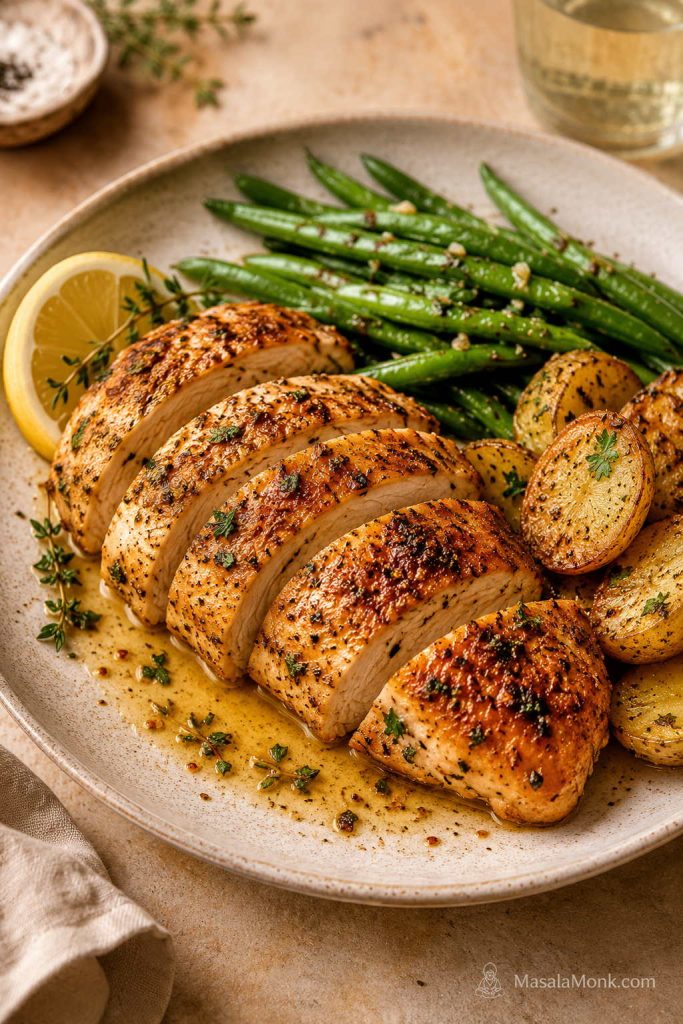
Finished baked chicken breast sliced and served with roasted potatoes, green beans, lemon, herbs, and pan juices.
When the timing and thickness are right, baked chicken breast becomes a dependable dinner protein instead of the dry part of the plate.

This baked chicken breast recipe gets easier once you stop treating the timer as the recipe. Start with the chicken in front of you: make uneven pieces more even, season them properly, bake hot, let temperature decide, and rest before slicing. Once you do that a few times, chicken breast stops feeling like the dry part of dinner and becomes one of the most useful proteins in your weeknight rotation.
Back to top

Posted on Leave a comment

Creamy Salmon Pasta Recipe

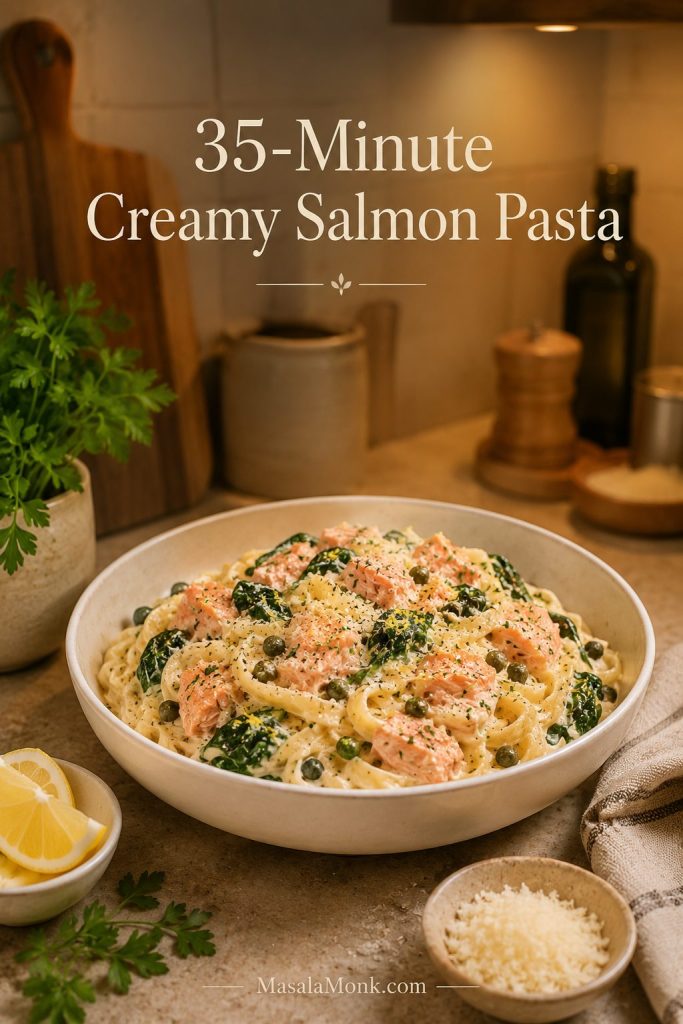
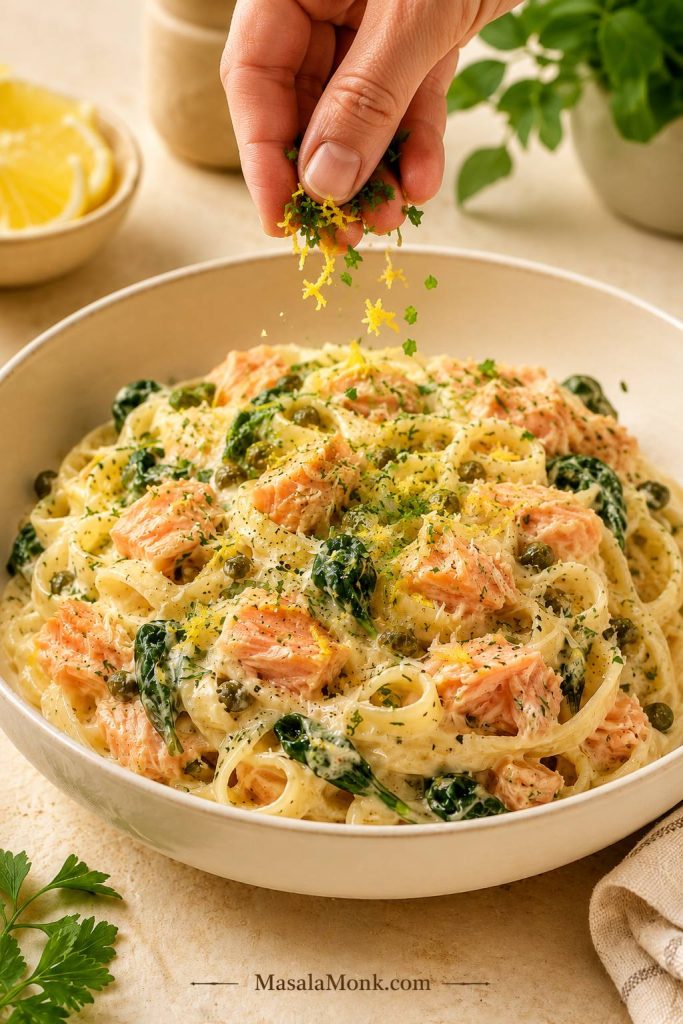
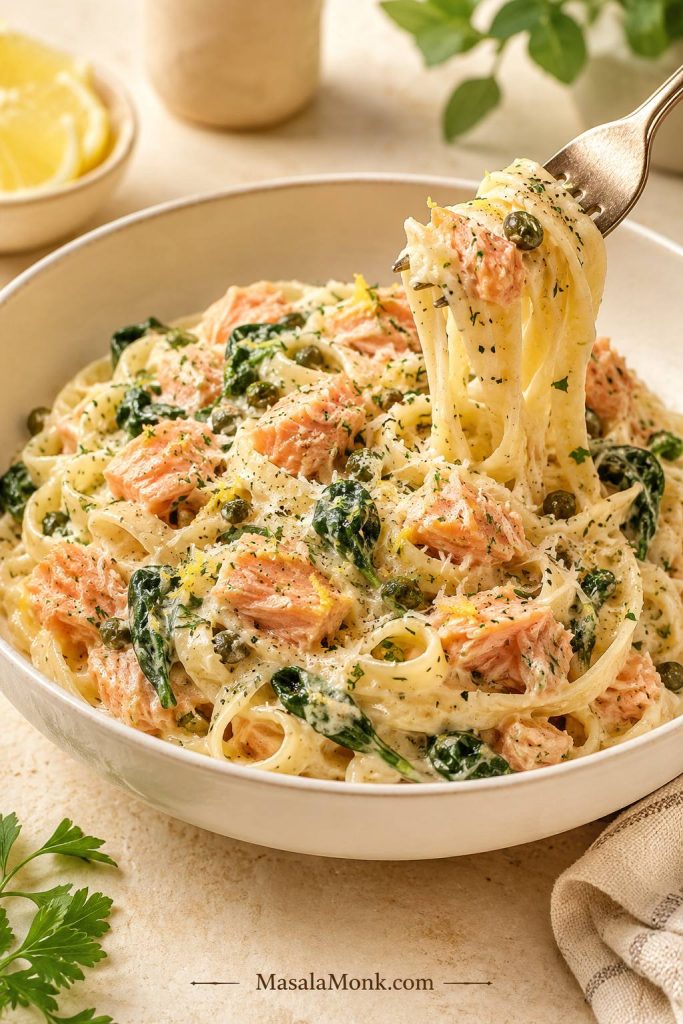
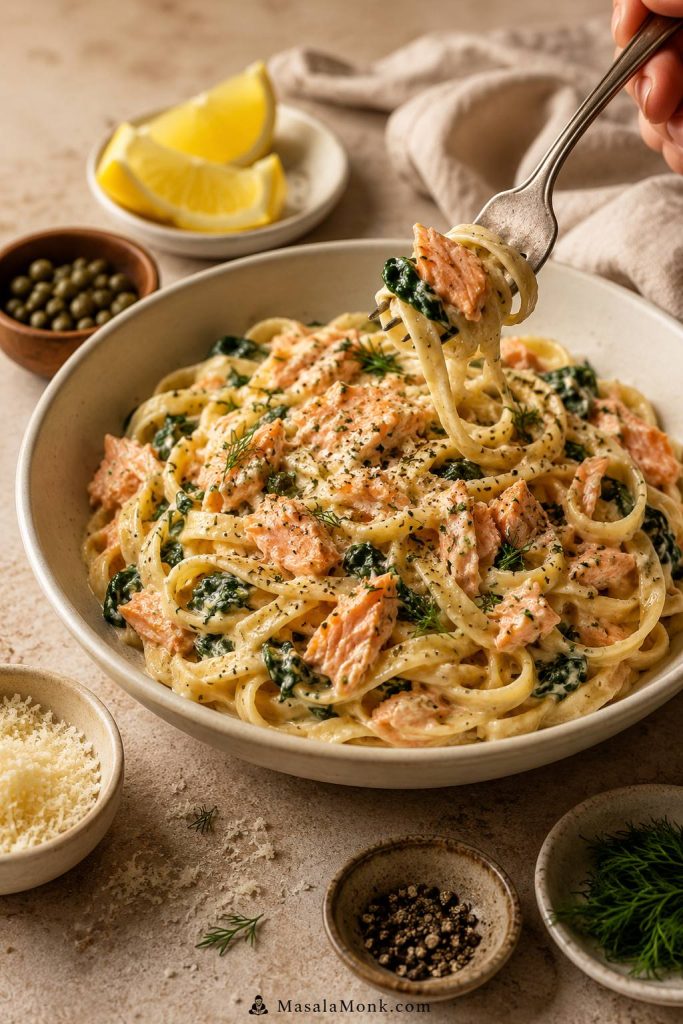
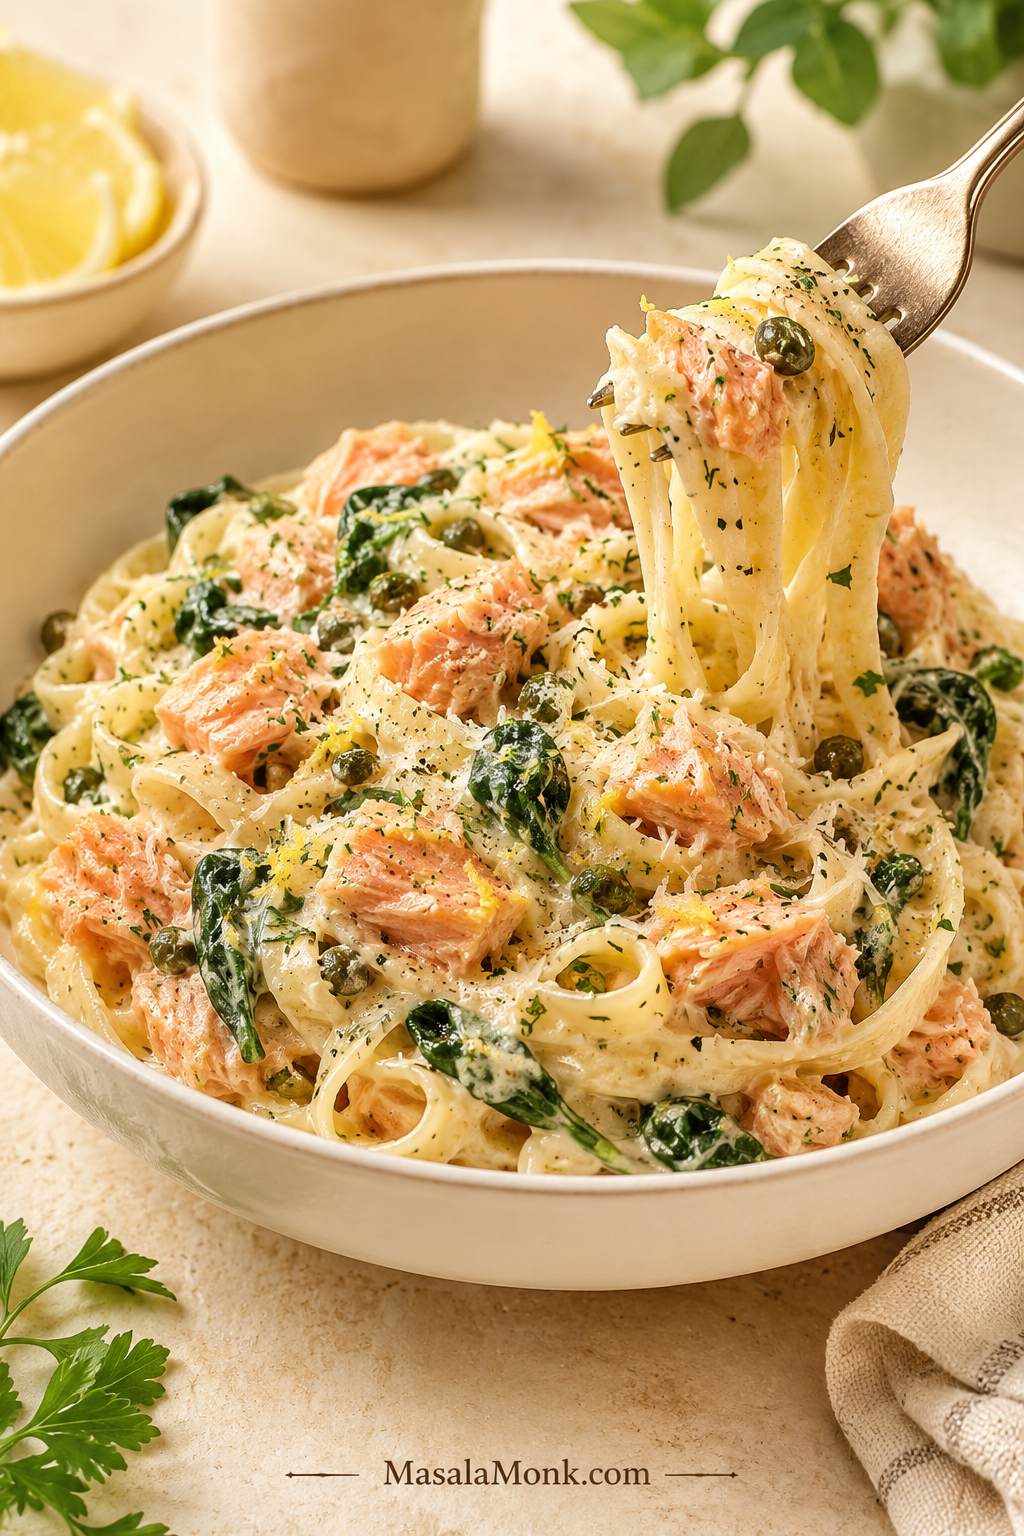
Creamy salmon pasta in a shallow bowl with salmon flakes, spinach, capers, lemon zest, Parmesan, herbs, and a fork lifting pasta.

This creamy salmon pasta recipe is the kind of 35-minute dinner that makes an ordinary night feel handled: tender salmon, silky lemon garlic cream sauce, pasta that actually holds the sauce, Parmesan, spinach, and little pops of capers. It feels restaurant-style without being fussy — rich enough to feel special, but fresh enough for another bite.

The trick is not more cream. It is control: cook the salmon separately, keep the sauce slightly looser than you think, and fold the fish in at the end so you get large, soft flakes instead of dry crumbs scattered through the pan.

The best bite has a little of everything: a ribbon of sauce-coated pasta, a soft piece of salmon, a bit of spinach, a salty caper, and enough lemon to make you want the next forkful. That is the difference between a cream pasta that feels heavy halfway through and one that stays alive to the last bite.

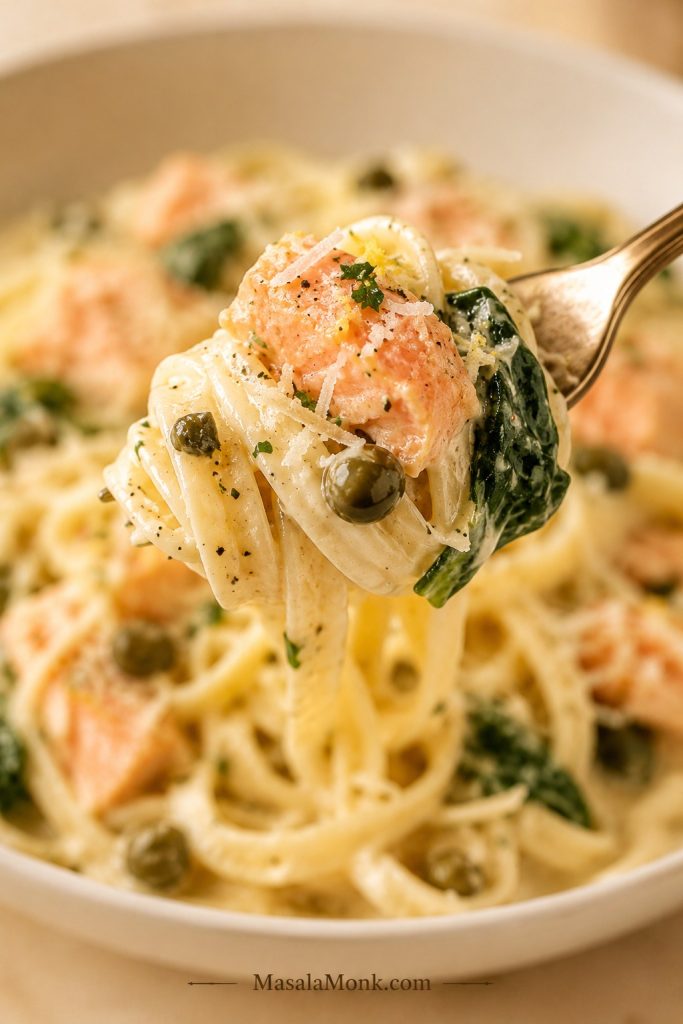
Forkful of creamy salmon pasta with pasta, salmon, spinach, capers, lemon zest, and Parmesan
A balanced forkful has pasta, salmon, spinach, caper, Parmesan, and lemon working together, so the richness stays lively.

Quick Answer: How Do You Make Creamy Salmon Pasta?

To make creamy salmon pasta, roast or pan-sear salmon until tender, boil pasta until just shy of al dente, and reserve some starchy pasta water before draining. Then, in a wide skillet, make a lemon garlic cream sauce with butter, shallot, garlic, white wine or broth, heavy cream, Parmesan, and a splash of pasta water.

Toss the pasta in the sauce first, wilt in spinach, and gently fold in large flakes of salmon at the end. Finally, finish with lemon zest, lemon juice, herbs, black pepper, and capers so the final bite tastes creamy, lifted by lemon, and savory. For the texture cue, see how to keep the sauce smooth.

Bowl of creamy salmon pasta served with lemon, Parmesan, herbs, and a 35-minute dinner cue
Because the salmon cooks separately and the pan sauce comes together quickly, this dinner feels special without becoming a project.

Creamy Salmon Pasta Recipe at a Glance

Best salmon Fresh salmon fillet, cooked separately and folded in at the end
Best pasta Fettuccine, linguine, penne, rigatoni, or spaghetti
Sauce style Lemon garlic cream sauce with Parmesan and pasta water
Total time About 35 minutes
Safe salmon temperature 145°F / 63°C, or opaque and easy to flake
Best add-in Baby spinach
Best fix for thick sauce Reserved pasta water, added 1–2 tablespoons at a time
Best finish Lemon zest, herbs, capers, Parmesan, and black pepper
Choose your version: use fettuccine or linguine for a smoother date-night feel, penne or rigatoni for a chunkier family dinner, extra lemon and capers for a sharper finish, or a little more Parmesan when the sauce needs more depth.
What it tastes like: creamy first, then lemony, garlicky, and savory, with tender salmon flakes, soft spinach, Parmesan depth, and little salty pops from capers. It should feel rich without turning stodgy.
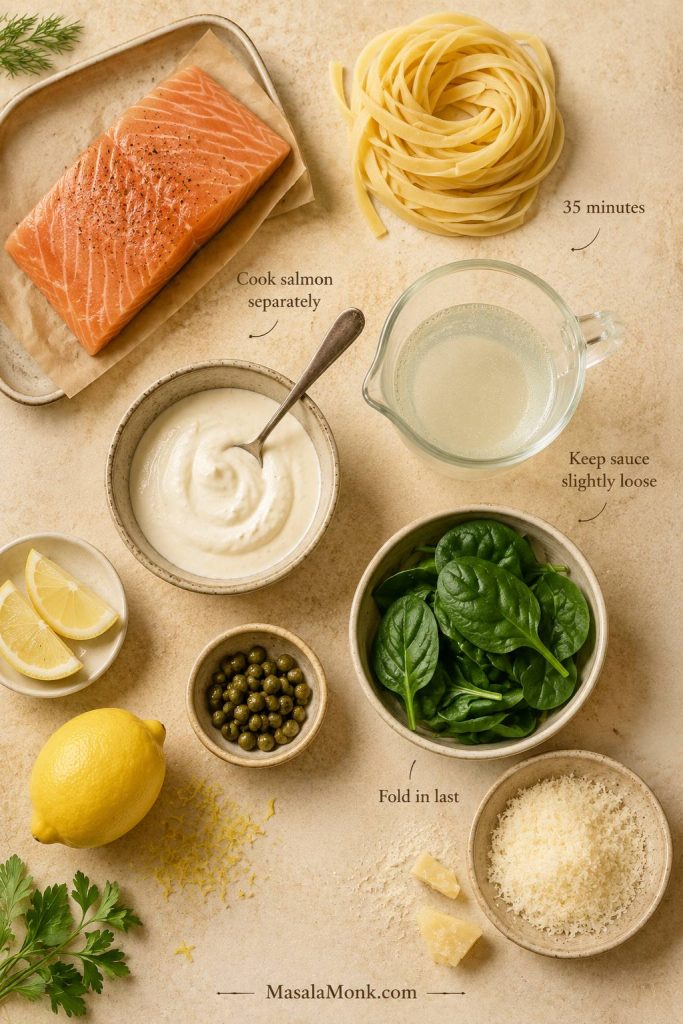
Creamy salmon pasta overview with salmon, pasta, cream sauce, lemon, capers, spinach, Parmesan, and pasta water
The whole recipe is built around three moves: cook salmon separately, keep the sauce flexible, and fold the fish in last.

Ready to cook? Go straight to the step-by-step method, or use the recipe card if you already know the sauce cues.

Why This Creamy Salmon Pasta Recipe Works

A good salmon pasta has to solve two problems at once: the fish should stay soft and juicy, and the sauce should coat the noodles without clumping or pooling. Because this version handles both, the final bowl tastes rounded by cream, lifted by lemon, and balanced by herbs and capers.

This is especially helpful if salmon pasta has disappointed you before — dry fish, sauce that tightens too fast, or a bowl that tastes rich for three bites and then starts to feel flat. The method is built to avoid those problems before they happen.

  • The salmon cooks separately. You can season it properly, cook it gently, and fold it into the pasta in large, moist flakes.
  • Pasta water keeps the sauce silky. Starchy water helps the cream and Parmesan cling to the noodles instead of turning thick and clumpy.
  • Lemon balances the richness. Lemon zest and juice keep the cream sauce clean on the finish.
  • Spinach makes it feel complete. It adds color, freshness, and a little vegetable comfort without another pan.
  • Capers and herbs wake up the salmon. Their salty, fresh finish keeps the dish from tasting flat.

Creamy weeknight pasta fans may also enjoy this Cajun chicken pasta, which uses a bolder smoky-spicy sauce but follows the same idea: the sauce should coat the pasta, not drown it.

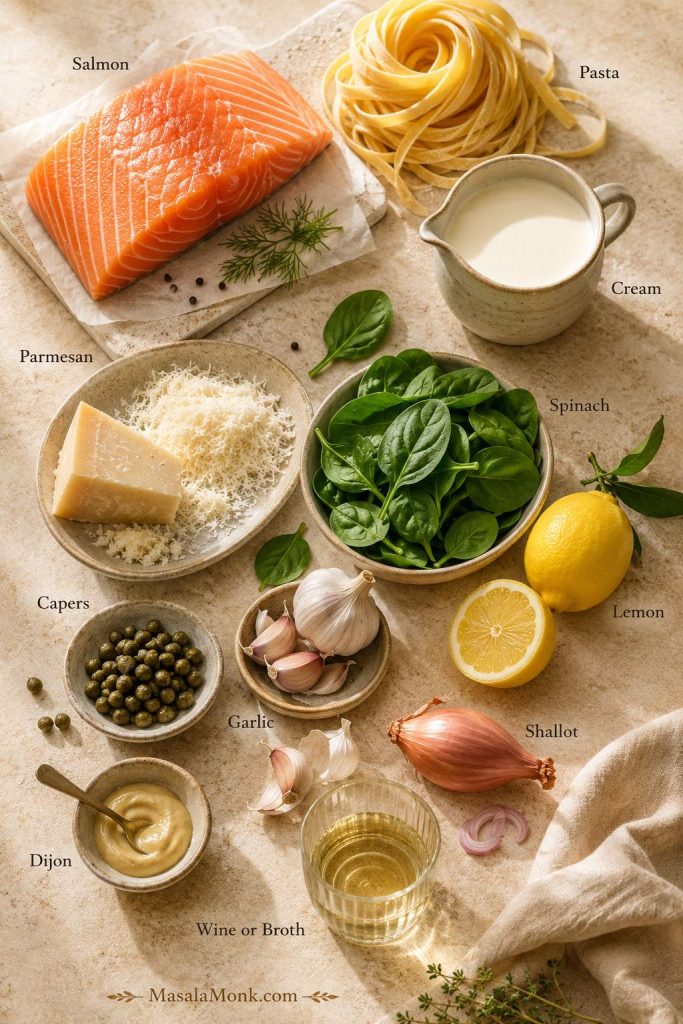
Ingredients for Creamy Salmon Pasta

The best version of this dish does not come from a long ingredient list. Instead, it comes from balance: rich salmon, enough lemon to wake up the cream, Parmesan for body, and a splash of pasta water so the sauce coats the noodles instead of weighing them down.

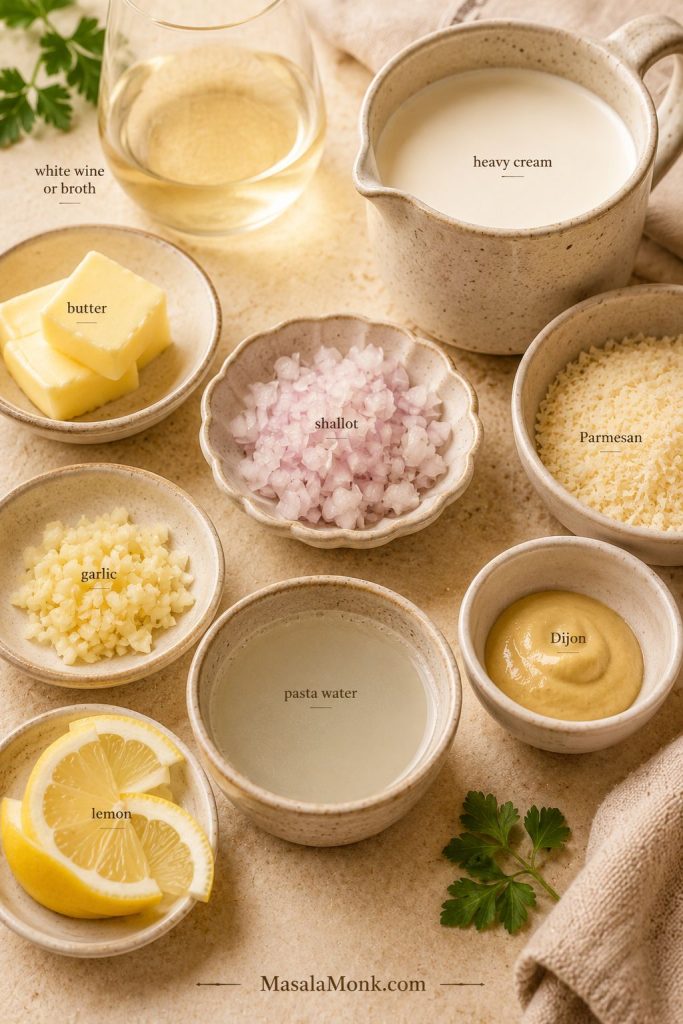
Ingredients for creamy salmon pasta including salmon, pasta, cream, Parmesan, spinach, lemon, capers, garlic, shallot, Dijon, and wine or broth
Each ingredient has a job: salmon brings richness, lemon sharpens the finish, Parmesan adds body, and pasta water helps everything cling.

Not sure which type of salmon to use? The salmon guide below covers fresh, smoked, canned, frozen, and leftover salmon.

Salmon

Fresh salmon fillet is the best choice for this recipe. Use about 1 lb / 450 g for 4 servings. Skin-on or skinless both work; after roasting or pan-searing, the salmon should break into large, moist flakes that still feel soft in the finished pasta.

Pasta

Use 12 oz / 340 g dried pasta. Fettuccine and linguine feel elegant with cream sauce, while penne or rigatoni are easier to toss with chunky salmon pieces. Spaghetti is also a perfectly good pantry option.

Cream Sauce

The sauce starts with butter, shallot, garlic, dry white wine or low-sodium broth, heavy cream, Parmesan, and reserved pasta water. Low-sodium broth is the easiest wine-free swap; then, if the sauce needs brightness, add a little extra lemon at the end. A small spoon of Dijon mustard is optional, but useful. It does not make the sauce taste mustardy; instead, it adds a quiet savory sharpness that balances the cream.

Lemon garlic cream sauce ingredients with butter, shallot, garlic, cream, Parmesan, pasta water, lemon, Dijon, and wine or broth
Instead of letting cream do all the work, garlic, Parmesan, Dijon, lemon, and starchy pasta water give the sauce more balance.

If cream sauces usually make you nervous, the sauce section explains how to keep this one smooth before the salmon goes in.

That pasta-water trick is also what makes dishes like bacon carbonara turn glossy and cohesive without needing a heavy pool of sauce.

The Fresh Finish

Lemon zest, lemon juice, herbs, and capers keep the finished pasta lively. Add lemon juice near the end, when the sauce is warm but not boiling hard, so the cream stays smooth and the lemon tastes fresh rather than sharp.

Hand adding lemon zest, herbs, capers, and black pepper to creamy salmon pasta
Add lemon, herbs, capers, and pepper near the end so the pasta tastes layered rather than one-note creamy.

Optional Vegetable Add-Ins

Baby spinach is the easiest add-in because it wilts directly into the sauce. Peas, asparagus, broccoli, cherry tomatoes, and mushrooms also work. However, firmer vegetables should be cooked first so they do not water down the sauce.

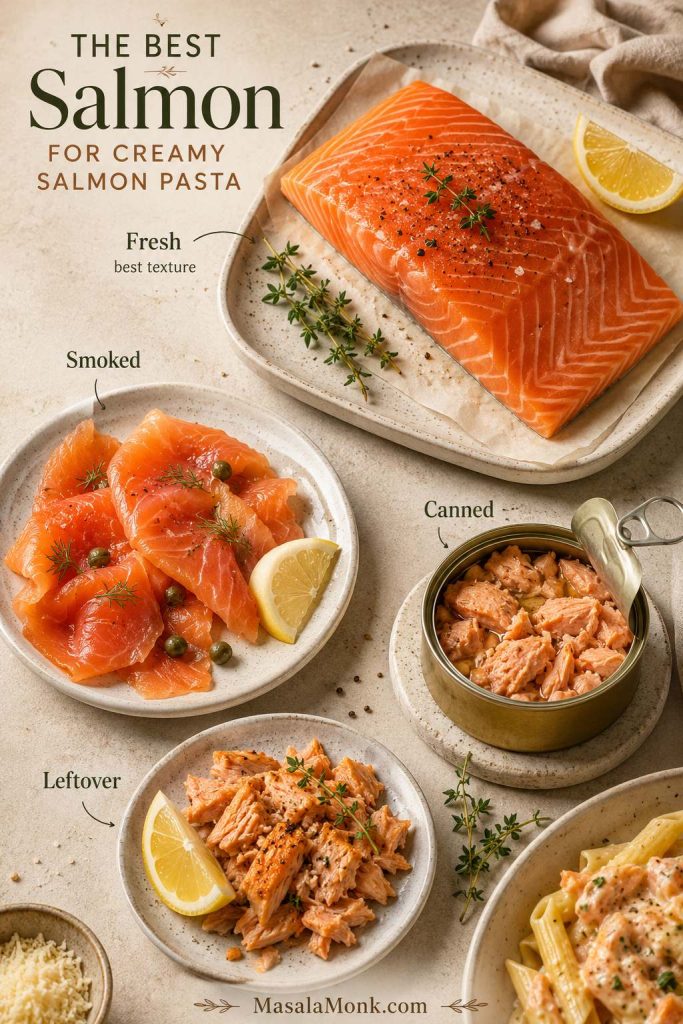
Best Salmon for Creamy Salmon Pasta

Fresh salmon gives the cleanest flavor and the best texture for this dinner-style pasta. The goal is soft flakes that stay visible in the sauce, not dry shreds that disappear into the pan.

If salmon has ever turned dry on you, this is the section that matters most. The goal is not just cooked fish; it is soft flakes that still feel generous once they hit the pasta.

Fresh salmon, smoked salmon, canned salmon, and leftover cooked salmon options for creamy salmon pasta
Fresh salmon gives the cleanest texture, although smoked, canned, and leftover salmon can still work when handled gently.

Fresh Salmon Fillet

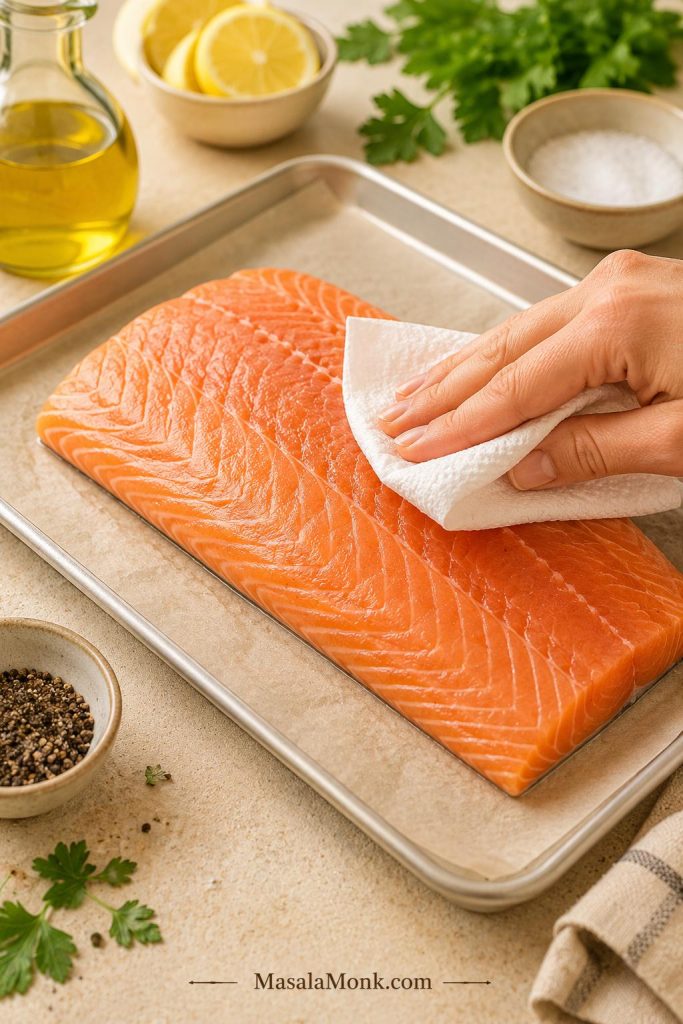
This is the most reliable option. Use one large fillet or a few smaller pieces. Pat the fish dry before seasoning so it roasts or sears cleanly instead of steaming on the surface. When buying salmon, choose fish that smells fresh and mild, not sour, fishy, or ammonia-like; the FDA seafood safety guide is a useful reference for fresh and frozen seafood handling.

Fresh salmon fillet on parchment with olive oil, salt, pepper, lemon, and a paper towel for drying
Patting salmon dry before cooking helps it roast or sear cleanly instead of steaming on the surface.

Skin-On Salmon

Skin-on salmon works well. Roast it skin-side down, then lift the salmon away from the skin after cooking. The skin does not need to go into the pasta.

Skinless Salmon

Skinless salmon is the easiest option because there is nothing to remove after cooking. Still, watch thinner pieces closely because they cook faster.

Frozen Salmon

Frozen salmon is fine as long as it is fully thawed and patted dry before cooking. After thawing, dry the surface well before seasoning. Frozen salmon should not go straight into the cream sauce because it releases moisture and makes the sauce harder to control.

Leftover Cooked Salmon

Leftover salmon can make this dinner even faster. Add it at the end and warm it gently in the sauce. Since it is already cooked, too much stirring will break it into small pieces. For a lighter rice-based meal, extra cooked salmon also works beautifully in a salmon bowl with rice, vegetables, avocado, and sauce.

Smoked Salmon

Hot-smoked salmon flakes nicely and can be used as a quick swap. Cold-smoked salmon is saltier and more delicate, so add it off heat and reduce the salt in the sauce. After that, a little extra lemon, dill, capers, or black pepper helps smoked salmon taste fresh instead of heavy.

Canned Salmon

Canned salmon gives a softer, more pantry-style version. Drain it well, remove any large bones or skin if preferred, and fold it in gently so it does not disappear into the sauce. For a crisp canned-salmon dinner instead, try these salmon croquettes.

Best Pasta Shapes for This Creamy Salmon Pasta Recipe

The best pasta shape depends on the bite you want. Long noodles give you a silky fork twirl, while short shapes make more room for salmon chunks, spinach, and capers.

Pasta shape Best for Notes
Fettuccine Classic creamy salmon pasta Wide enough to hold a silky lemon garlic cream sauce.
Linguine A slightly lighter twirl Elegant with salmon, lemon, herbs, and capers.
Spaghetti Pantry-friendly version Works well when the salmon is flaked into slightly smaller pieces.
Penne or rigatoni Chunky salmon pieces Easy to toss with spinach and larger flakes of fish.
Orzo or gnocchi Softer comfort-food versions Both absorb sauce differently, so keep the sauce looser.

For a slightly more filling pasta base, lentil pasta can work too. Cook it carefully so it stays tender rather than mushy, and use the same sauce rule from this lentil pasta guide: keep lemon, garlic, and pasta water balanced so the sauce still clings.

How to Make This Creamy Salmon Pasta Recipe

This is the part where the recipe becomes easier than it looks. You are not juggling everything at once; the salmon cooks first, the pasta water waits nearby, and the sauce comes together calmly in one skillet.

1. Cook the Salmon

First, heat the oven to 400°F / 200°C. Place the salmon on a parchment-lined baking sheet, rub it with a little olive oil, and season with salt and black pepper. Roast for 10–12 minutes for an average fillet, or until the fish is opaque and flakes easily.

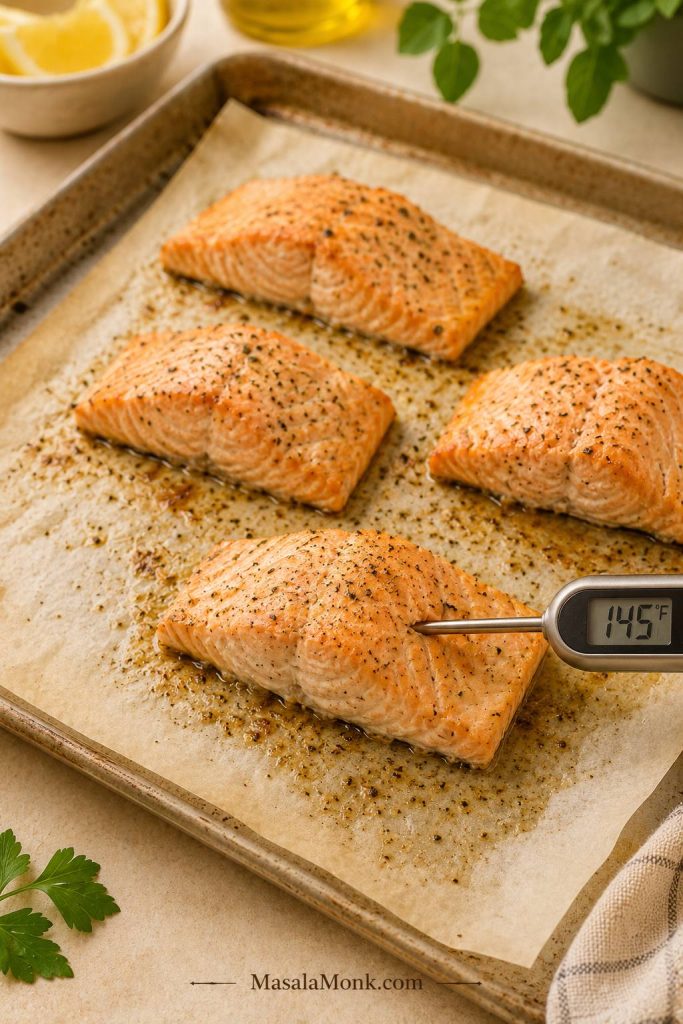
Thin fillets may need only 8–10 minutes, while thicker pieces may need 12–14 minutes. For food safety, fish should reach an internal temperature of 145°F / 63°C, or be opaque and separate easily with a fork, according to FoodSafety.gov’s safe minimum internal temperature chart.

Salmon roasting on parchment with lemon and herbs for creamy salmon pasta
Roasting the salmon separately gives you better control over doneness before the flakes meet the cream sauce.

Optional: Pan-Sear the Salmon Instead

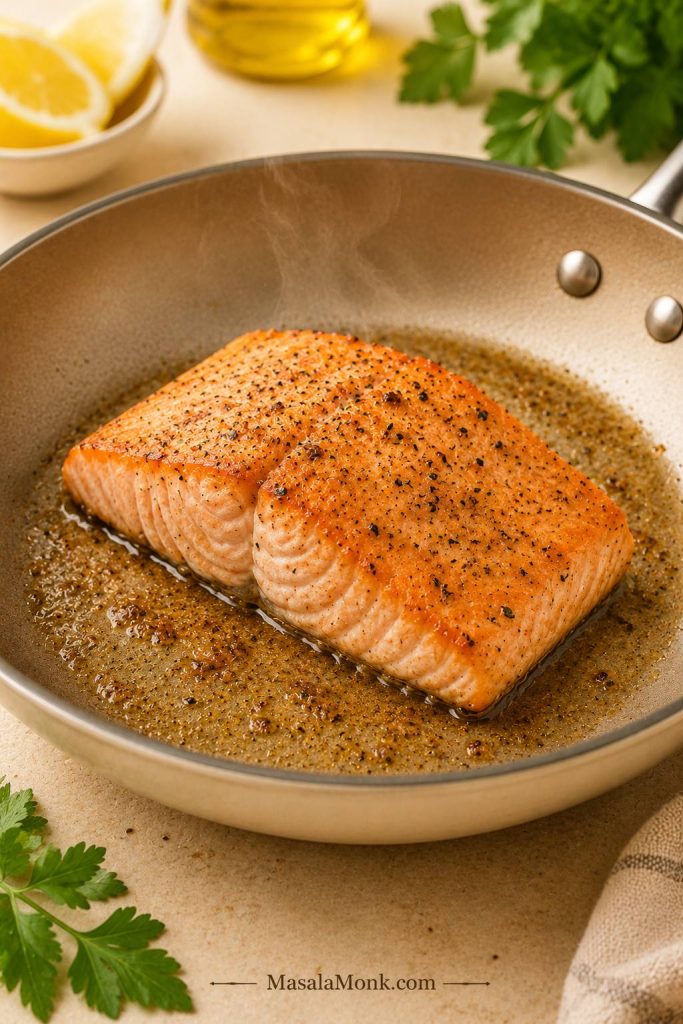
Prefer a stovetop version? Pat the salmon dry, season it, and sear it in a lightly oiled skillet over medium heat for 3–4 minutes per side, depending on thickness. Let it rest for 5 minutes, then flake it into large pieces. Keep the heat moderate so the outside browns without drying the center.

Salmon fillet searing in a skillet with a lightly browned surface for creamy salmon pasta
Pan-searing is a good stovetop option; however, moderate heat lets the surface brown before the center dries out.

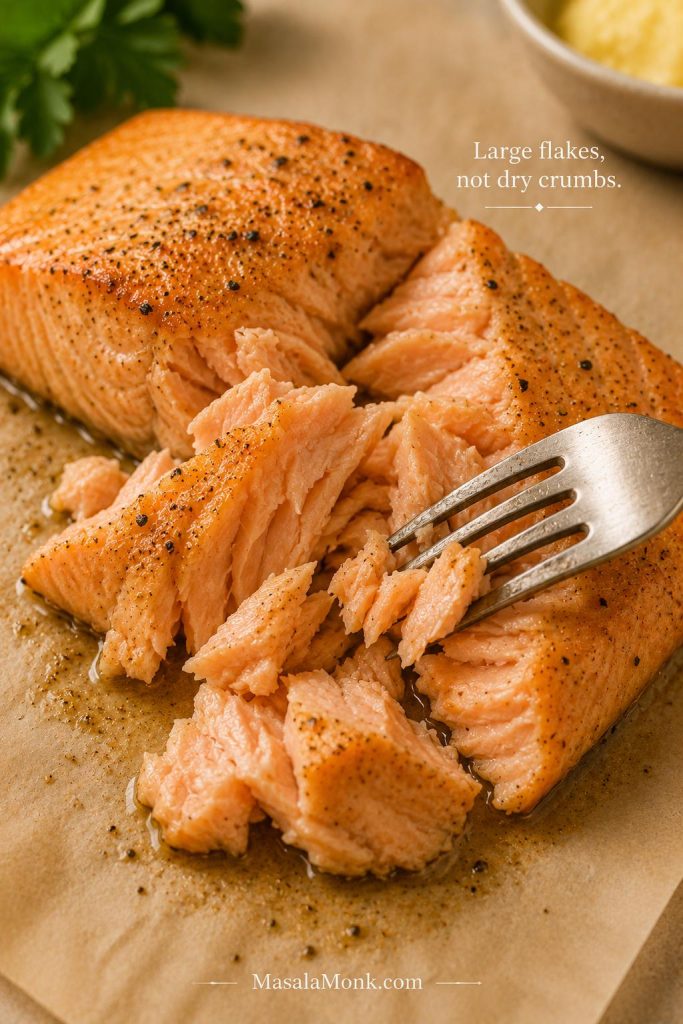
After roasting or searing, let the salmon rest for 5 minutes before flaking. Resting helps the juices settle, and larger flakes look and taste better in the finished pasta.

Cooked salmon being separated with a fork into large moist flakes
Large, moist flakes make salmon pasta feel generous, while tiny dry pieces disappear into the sauce.

2. Boil the Pasta

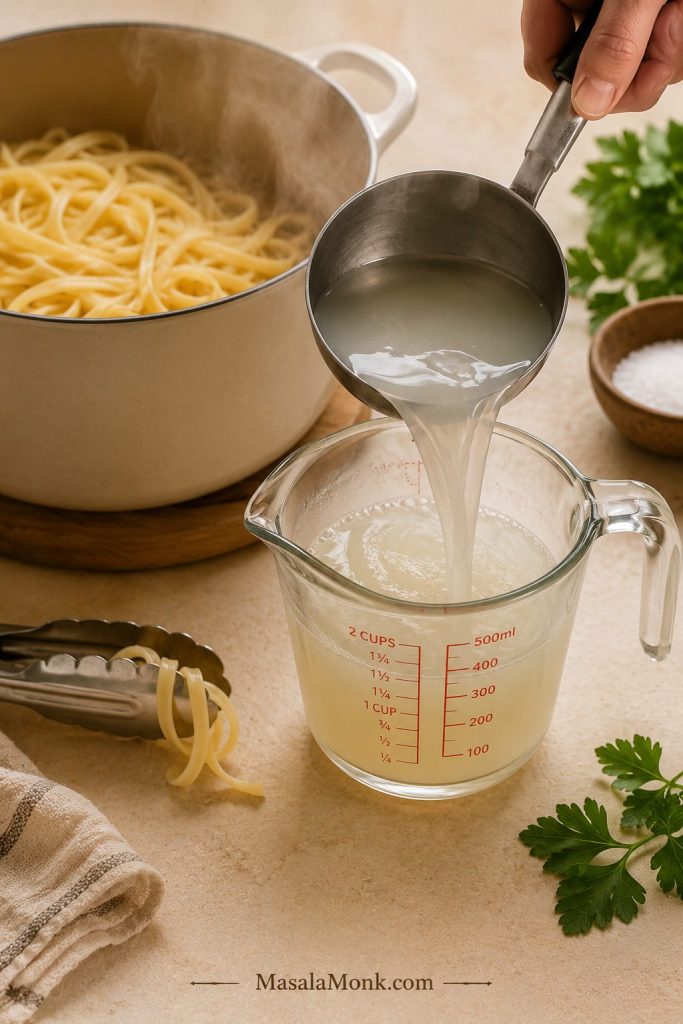
Meanwhile, bring a large pot of water to a boil and salt it well. Add the pasta and cook it about 1 minute shy of al dente. Before draining, scoop out 1 cup / 240 ml of pasta water.

Cloudy pasta water being scooped into a measuring cup beside a pot of pasta
Reserve pasta water before draining because its starch helps the lemon garlic cream sauce hold onto the noodles.

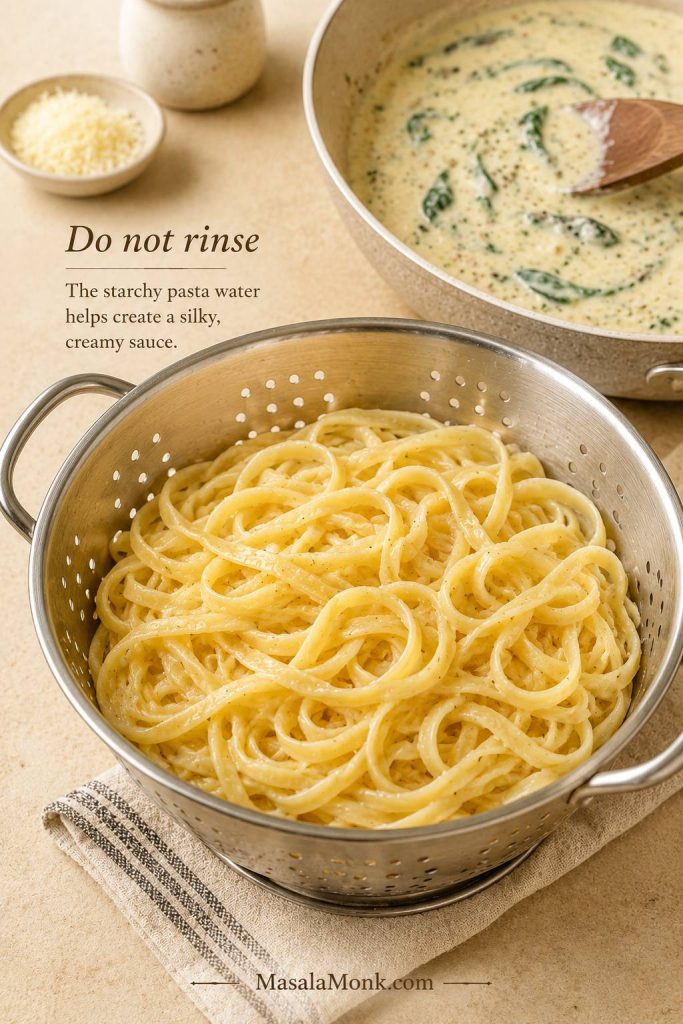
Do not rinse the pasta after draining. The starch on the surface helps the sauce cling, and that little bit of cling is what makes the finished dish feel glossy instead of watery.

Drained pasta in a colander with a small Do not rinse label beside the pasta
Do not rinse the pasta after draining; that surface starch is what helps the sauce coat instead of slide off.

You may not use all the pasta water. Still, having extra gives you control because creamy pasta sauce tightens as it sits, and pasta water is the easiest way to loosen it without making it thin. For a visual cue on when to add more, jump to the 1-minute sauce control trick.

3. Build the Lemon Garlic Cream Sauce

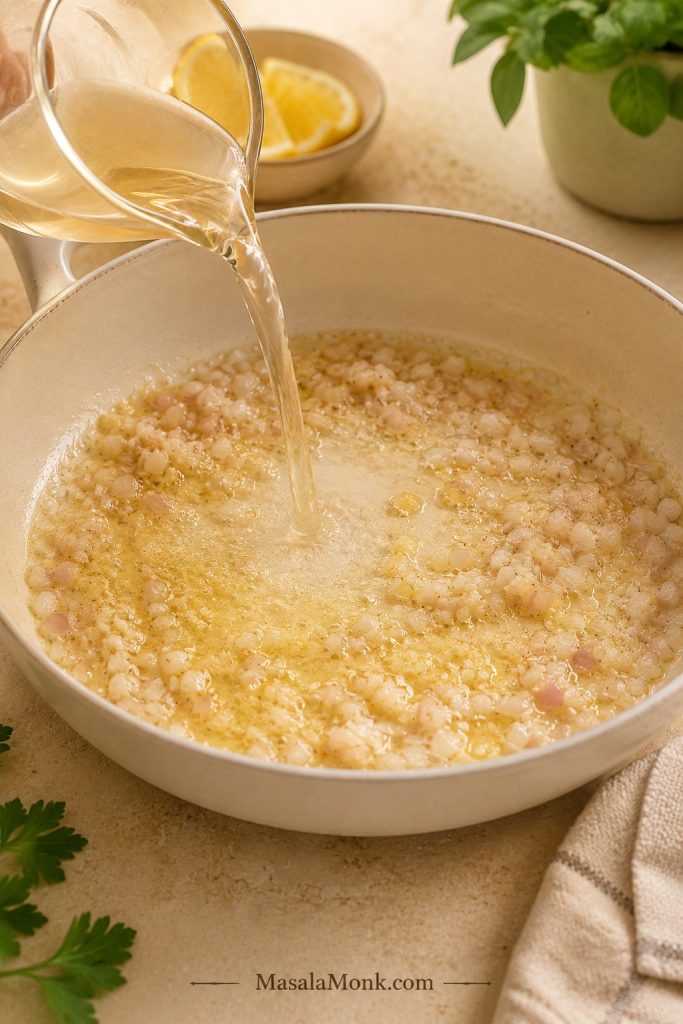
Next, in a large high-sided skillet, melt the butter with a little olive oil. Add the shallot and cook until softened. Then stir in the garlic and cook just until fragrant, about 30 seconds. Add white wine or broth and simmer briefly so the sharp edge cooks off.

At this stage, the pan should smell like garlic, butter, and lemon waiting to happen — not raw onion, scorched garlic, or plain cream.

Shallot and garlic cooking in butter while wine or broth is poured into a skillet
Let the shallot and garlic soften gently before adding cream, so the sauce tastes rounded instead of harsh.

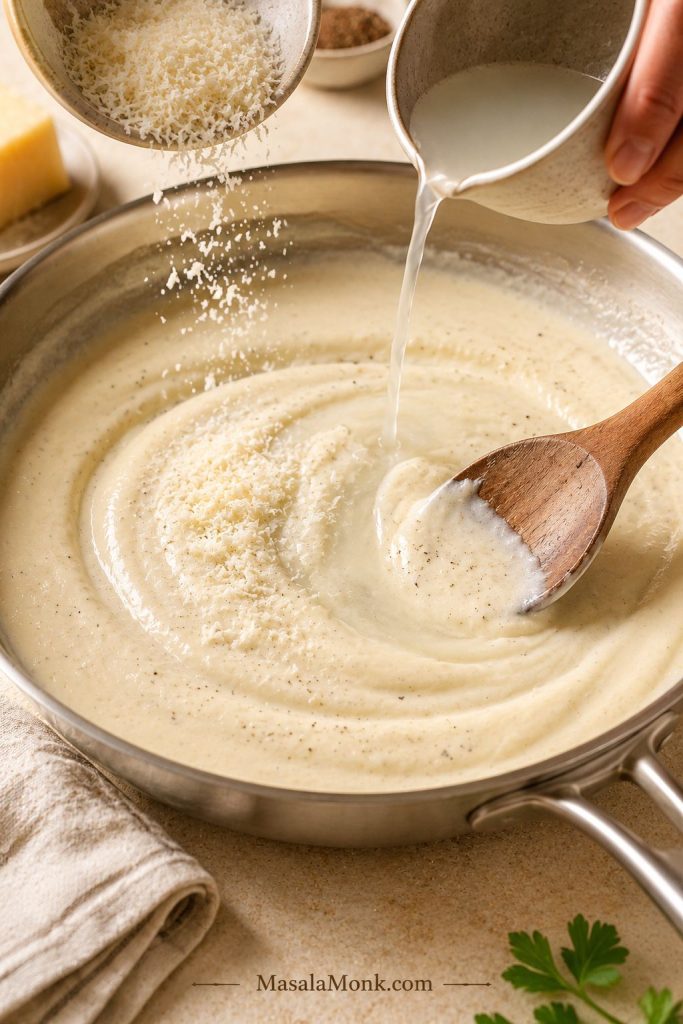
Lower the heat before adding the cream. Stir in Dijon if using, then add finely grated Parmesan a little at a time. After that, add a splash of pasta water and stir until the sauce looks creamy, loose, and glossy. It should move easily in the pan before the pasta goes in. If the sauce already looks thick before the pasta is added, loosen it now; the noodles will only make it tighter.

Parmesan and pasta water being stirred into cream sauce in a skillet
Add Parmesan gradually, then loosen with pasta water as needed, so the sauce stays smooth enough to toss.

4. Toss the Pasta, Wilt the Spinach, and Fold in the Salmon

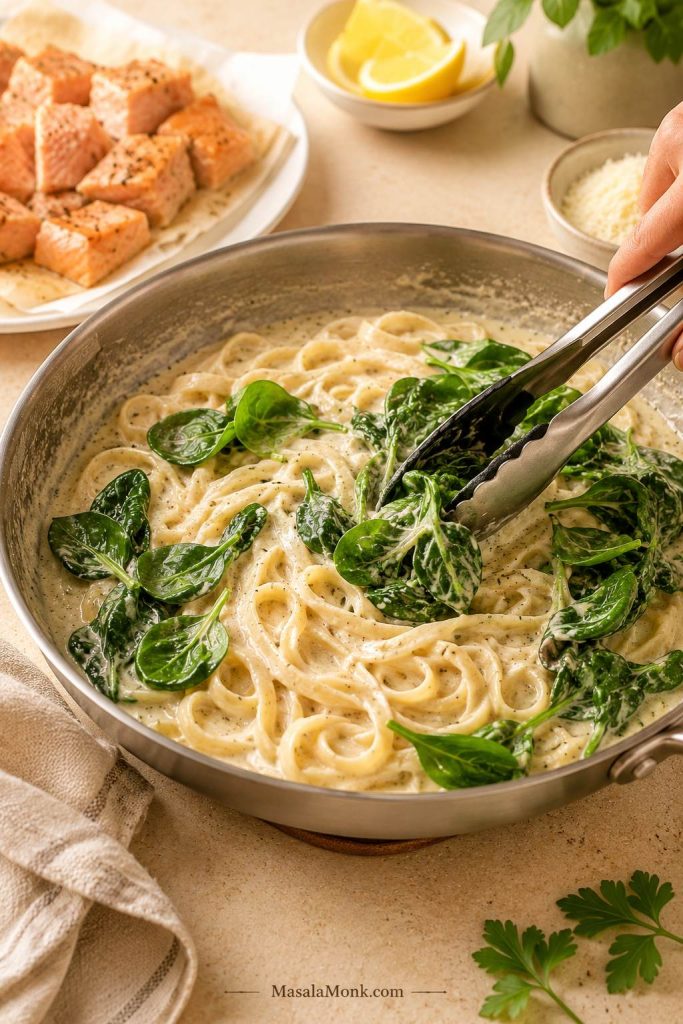
Add the drained pasta to the skillet and toss until coated. At this point, the sauce should cling to the noodles but still look fluid.

Pasta being tossed in lemon garlic cream sauce while cooked salmon rests nearby
Toss the pasta before adding salmon, because coated noodles need less stirring once the delicate fish goes in.

Add spinach and let it wilt briefly, just until bright green and soft.

Baby spinach being tossed into creamy pasta while cooked salmon waits on a plate nearby
Wilt the spinach before folding in the salmon; this keeps the greens bright and protects the fish from extra stirring.

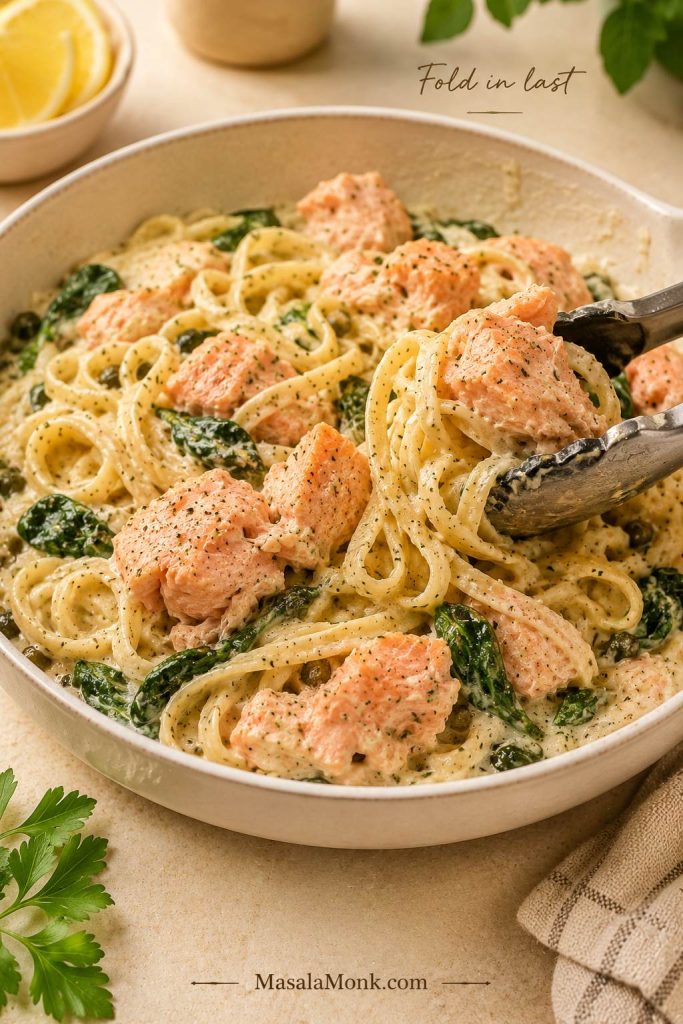
Finally, turn the heat low and fold in the salmon in large flakes with only a few gentle turns. The less you stir at this point, the prettier and softer the salmon stays. Add lemon zest, a little lemon juice, herbs, capers, and black pepper. Taste before serving: when the sauce feels too rich, add more lemon or herbs; when it feels too thick, loosen it with pasta water. For more depth, finish with a little extra Parmesan or black pepper.

Large salmon flakes being folded into creamy pasta with spinach and sauce
Fold the salmon in last with only a few turns, so the pieces stay large, soft, and visible.

If the sauce tightens, splits, or the salmon starts breaking apart, check the troubleshooting table before adding more cream.

How to Keep Creamy Salmon Pasta Sauce Smooth

The sauce should coat the pasta in a thin creamy layer rather than sitting at the bottom of the pan. Because cream sauces tighten quickly, these small details are what make the dish feel restaurant-style instead of rushed.

Cream sauces can feel intimidating at first. However, this one is mostly about patience: keep the heat gentle, add the cheese gradually, and let the pasta water do the smoothing.

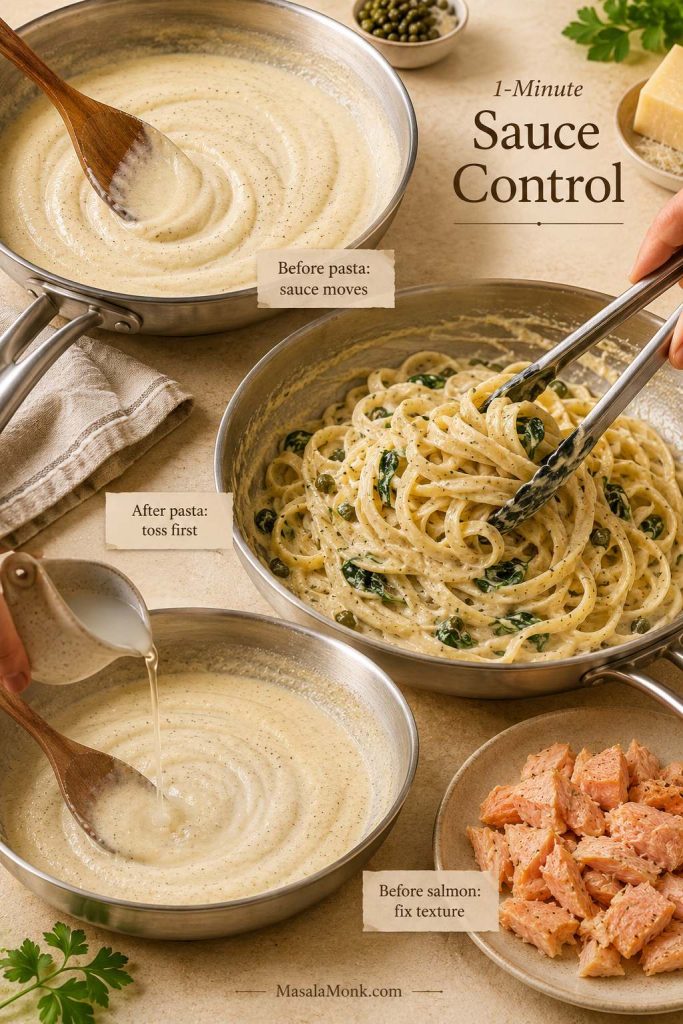
The 1-Minute Sauce Control Trick

Keep the sauce slightly looser than you want before the pasta goes in. The noodles will keep absorbing liquid, so a sauce that looks perfect in the pan can turn tight on the plate. A few spoonfuls of pasta water at the end are not a rescue move — they are the finishing move.

  • Before pasta goes in: the sauce should move easily when you tilt the pan.
  • After pasta goes in: toss first, then loosen with pasta water only as needed.
  • Before salmon goes in: fix the sauce texture now, because heavy stirring later can break the fish.
Three-stage sauce control guide with labels for before pasta, after pasta, and before salmon
Fix the sauce texture before the salmon goes in; after that, gentle folding works better than heavy stirring.
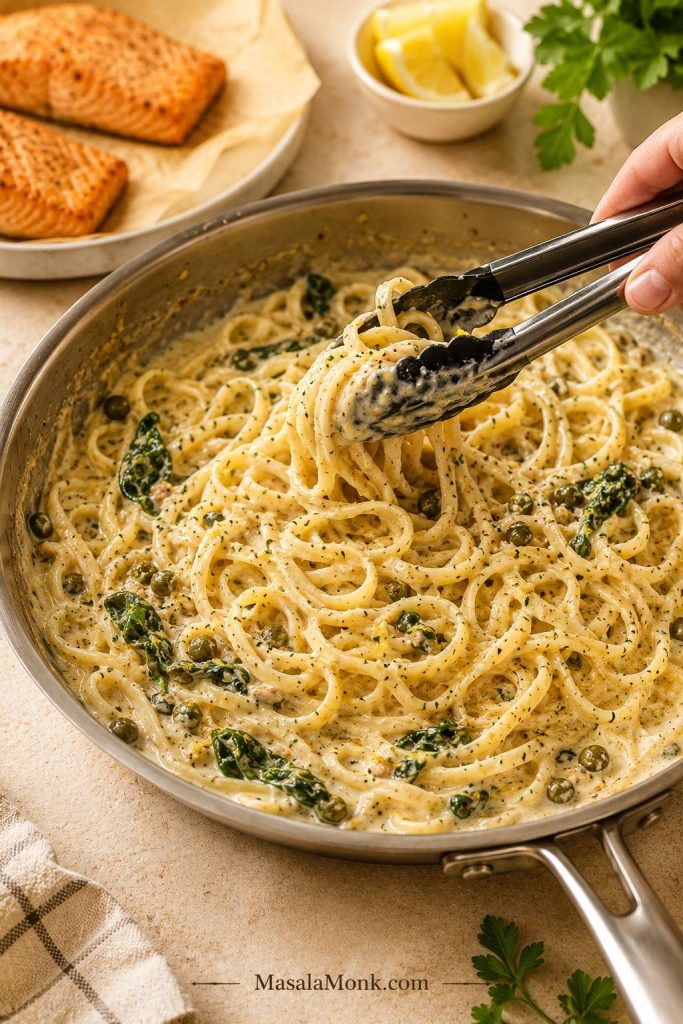
Best texture cue: when you drag tongs through the pasta, the sauce should coat the noodles and leave a light creamy trail in the pan. If it clumps, add pasta water. If it pools like soup, simmer gently for another minute before adding the salmon.
Tongs pulling creamy pasta through sauce and leaving a light trail in the pan
The sauce is ready when it coats the noodles and leaves a light trail in the pan, not when it clumps or pools.

Keep the Heat Gentle Once Cream and Cheese Go In

  • Use gentle heat after adding cream. Cream and cheese do not need aggressive boiling.
  • Finely grate the Parmesan. Fine cheese melts more smoothly than large shreds.
  • Add Parmesan gradually. Stir in small handfuls instead of dumping it all in at once.
  • Add lemon juice near the end. Lemon is essential, but hard boiling can make cream less stable.
  • Fold salmon in last. This keeps the fish tender and prevents it from shredding into dry flakes.

The same gentle-heat rule also helps in creamy macaroni and cheese, where rushing the cheese can make the sauce grainy.

Taste and Adjust Before Serving

The final forkful should taste creamy first, then lemony and savory. If it tastes rich but flat, reach for lemon, capers, herbs, or black pepper before adding more cream.

Before you serve: taste one forkful with salmon, pasta, and sauce together. A heavy finish needs lemon, a thin sauce needs Parmesan, and a flat bite usually needs capers, herbs, or black pepper. The final adjustment is where this pasta becomes yours.
Forkful of creamy salmon pasta with lemon, capers, herbs, Parmesan, and black pepper nearby
Taste before serving, then choose the fix: lemon for sharpness, capers for salt, herbs for freshness, Parmesan for depth.

Creamy Salmon Pasta Recipe

Creamy Salmon Pasta Recipe

This creamy salmon pasta recipe brings together tender salmon, pasta, spinach, capers, and a silky lemon garlic cream sauce in about 35 minutes. The sauce should coat the pasta without clumping, the salmon should stay in soft flakes, and the lemon should lift the cream instead of fighting it.

Yield 4 servings
Prep Time 15 minutes
Cook Time 20 minutes
Total Time 35 minutes

Equipment

  • Large pot or Dutch oven
  • Rimmed baking sheet or large skillet for the salmon
  • Parchment paper, if roasting
  • Large high-sided skillet for the sauce
  • Tongs
  • Measuring cup for pasta water
  • Instant-read thermometer, optional but helpful

Ingredients

For the salmon

  • 1 lb / 450 g salmon fillet, skin-on or skinless
  • 1 tsp olive oil
  • ½ tsp kosher salt
  • ¼ tsp black pepper

For the pasta and sauce

  • 12 oz / 340 g dried fettuccine, linguine, spaghetti, penne, or rigatoni
  • 2 tsp olive oil
  • 2 tbsp / 28 g butter
  • 1 medium shallot or small onion, finely chopped, about 40–60 g
  • 3–4 garlic cloves, minced, about 10–15 g
  • ½ cup / 120 ml dry white wine or low-sodium broth
  • 1 tsp Dijon mustard, optional
  • 1 cup / 240 ml heavy cream
  • ½ cup / 45–55 g finely grated Parmesan, plus more for serving
  • 1 cup / 240 ml reserved pasta water, use ¼–½ cup as needed
  • 4–5 oz / 115–140 g baby spinach
  • Zest of 1 lemon
  • 1–2 tbsp / 15–30 ml fresh lemon juice, to taste
  • 1–2 tbsp capers, drained, optional
  • 2 tbsp chopped fresh dill, parsley, or chives
  • ¼–½ tsp kosher salt for the sauce, plus more to taste
  • Additional black pepper, to taste

Instructions

  1. Cook the salmon. Heat the oven to 400°F / 200°C. Place the salmon on a parchment-lined baking sheet. Rub with 1 tsp olive oil and season with ½ tsp salt and ¼ tsp black pepper. Roast for 10–12 minutes, depending on thickness, or until the salmon is opaque and flakes easily. Rest for 5 minutes, then flake into large pieces. Stovetop option: sear the seasoned salmon in a lightly oiled skillet over medium heat for 3–4 minutes per side, then rest and flake.
  2. Cook the pasta. Bring a large pot of salted water to a boil. Cook the pasta 1 minute shy of al dente. Reserve 1 cup / 240 ml pasta water, then drain. Do not rinse the pasta.
  3. Start the sauce. In a large high-sided skillet, warm 2 tsp olive oil and melt the butter over medium heat. Add the shallot and cook for 2–3 minutes, until softened. Add the garlic and cook for 30 seconds.
  4. Deglaze. Add the white wine or broth and simmer for 1–2 minutes, scraping up any flavorful bits from the pan.
  5. Add cream and Parmesan. Lower the heat to medium-low. Stir in Dijon if using, then add the cream. Add Parmesan in small handfuls, stirring until smooth. Add ¼ cup / 60 ml reserved pasta water to loosen the sauce.
  6. Toss the pasta. Add the drained pasta to the skillet and toss until coated. Add more pasta water, 1–2 tbsp at a time, until the sauce moves easily and coats the noodles.
  7. Wilt the spinach and fold in the salmon. Toss in the spinach just until it softens, then gently fold in the salmon flakes with only a few turns.
  8. Finish with lemon, herbs, and capers. Add lemon zest, 1 tbsp lemon juice, capers if using, herbs, and black pepper. Taste, then add more lemon, salt, pepper, Parmesan, or pasta water as needed.
  9. Serve immediately. This pasta is best while the sauce is freshly tossed and the salmon is still warm and soft.

Notes

  • For the smoothest sauce, avoid boiling hard after the cream and Parmesan are added.
  • The sauce should look slightly loose before serving because pasta keeps absorbing liquid as it sits.
  • Do not rush the final fold. Once the salmon is in, a few gentle turns are enough.
  • Warm bowls help the sauce stay loose a little longer at the table.
  • Leftover cooked salmon: skip the roasting step and fold the salmon in at the end just to warm through.
  • Smoked salmon: reduce added salt and add the smoked salmon off heat.
  • Sauce getting thick? Loosen it with a splash of reserved pasta water before serving.
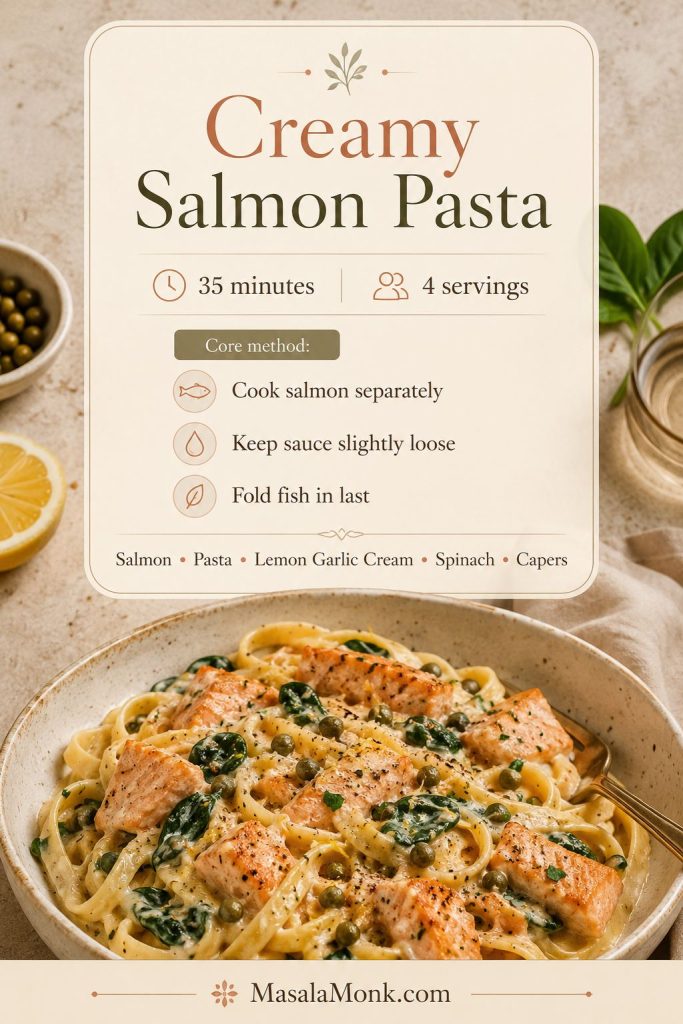
Saveable creamy salmon pasta recipe card with a bowl of salmon pasta, 35-minute time, 4 servings, and core method tips
Remember the method, not just the ingredients: cook salmon separately, keep the sauce slightly loose, and fold fish in last.

Creamy Salmon Pasta Recipe Variations

Once the base sauce makes sense, the variations are easy. Use the main recipe card as the starting point, then change the salmon or sauce direction without changing the rhythm: keep the pasta coated, warm the fish gently, and finish with something sharp, fresh, or salty enough to balance the cream.

Make It for Two

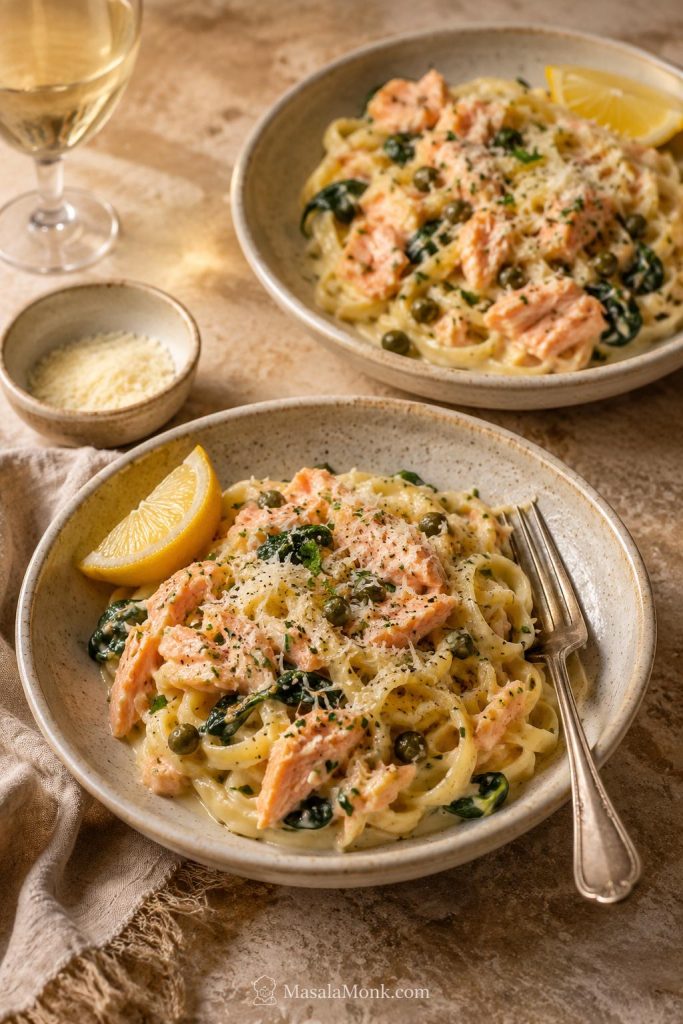
For two servings, use 8 oz / 225 g salmon, 6 oz / 170 g pasta, ½ cup / 120 ml cream, ¼ cup / 25 g Parmesan, and about ½ cup / 120 ml reserved pasta water. Keep the lemon, capers, and herbs flexible, then taste at the end.

Two bowls of creamy salmon pasta with salmon, spinach, capers, lemon, Parmesan, and forks on a warm table
For two servings, scale down the pasta and salmon, then adjust lemon, herbs, and capers at the end.

Smoked Salmon Pasta

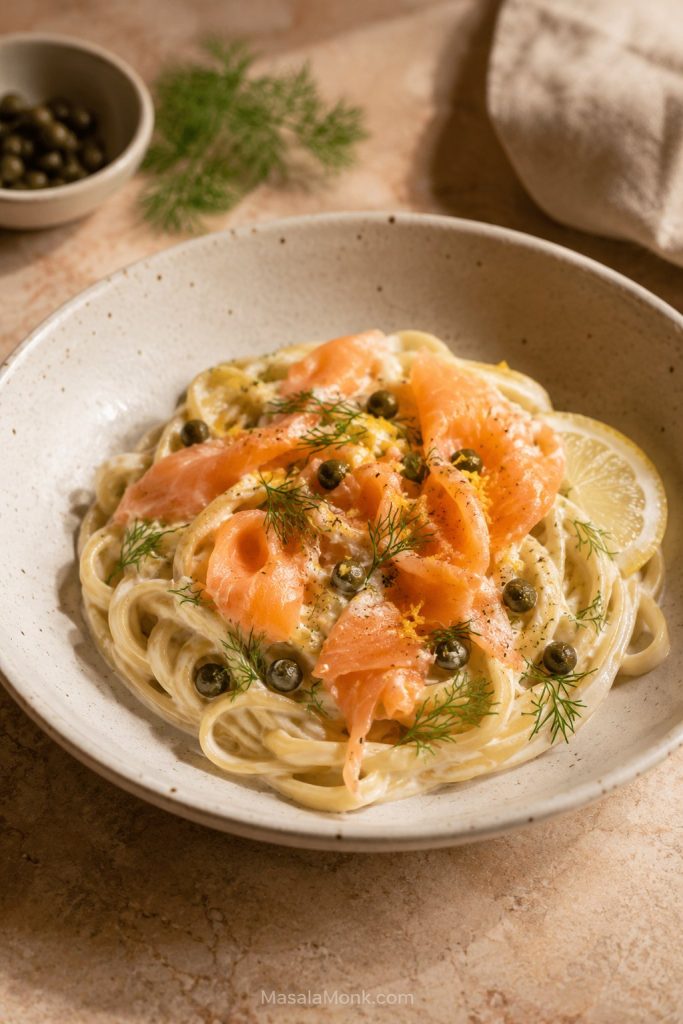
Hot-smoked salmon gives you firmer flakes, while cold-smoked salmon melts more softly into the sauce and brings a saltier, silkier finish. Add either one off heat, then lean on dill, lemon, capers, or a little cream cheese to keep the flavor fresh.

Smoked salmon pasta with creamy sauce, dill, lemon, capers, and thin salmon pieces
Smoked salmon is saltier and more delicate than roasted salmon, so add it off heat and finish with lemon and dill.

Canned Salmon Pasta

Canned salmon makes the pasta softer and more pantry-friendly. Drain it well, fold it in gently near the end, and use lemon, parsley, capers, and black pepper to keep the flavor clean and bright.

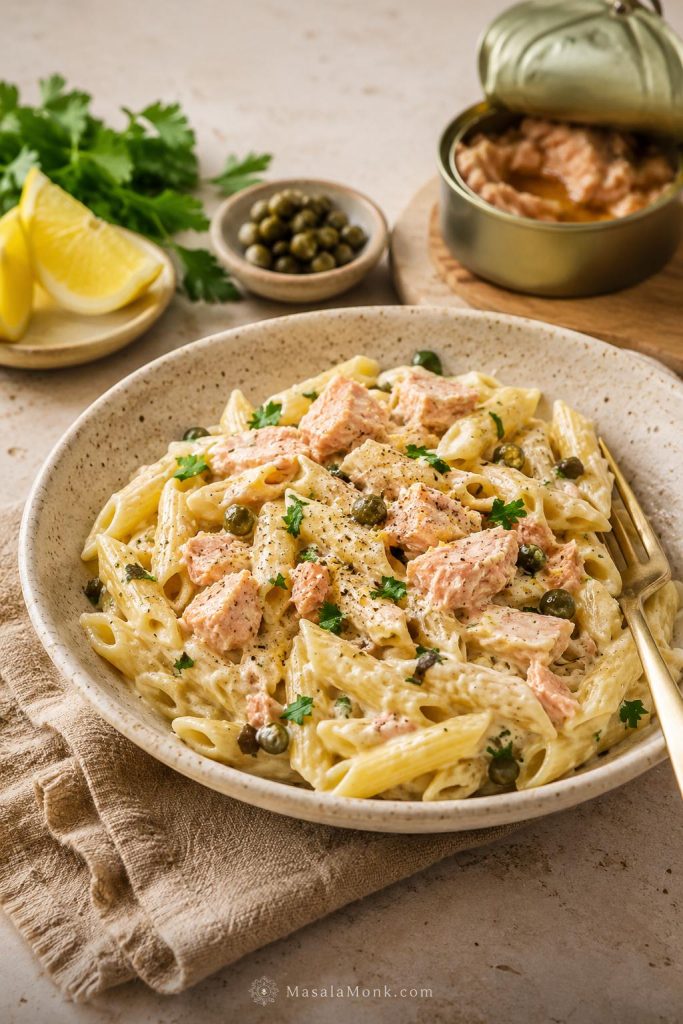
Canned salmon pasta with penne, creamy sauce, parsley, lemon, capers, and an open salmon can in the background
Canned salmon makes a practical pantry version, while lemon, parsley, capers, and pepper keep the flavor clean.

Salmon Pasta Without Cream

A lighter creamy texture can come from crème fraîche, Greek yogurt, cream cheese, or a sauce built mostly from Parmesan and pasta water. Yogurt and crème fraîche are happiest off heat or over very low heat, where they can loosen into the sauce without curdling.

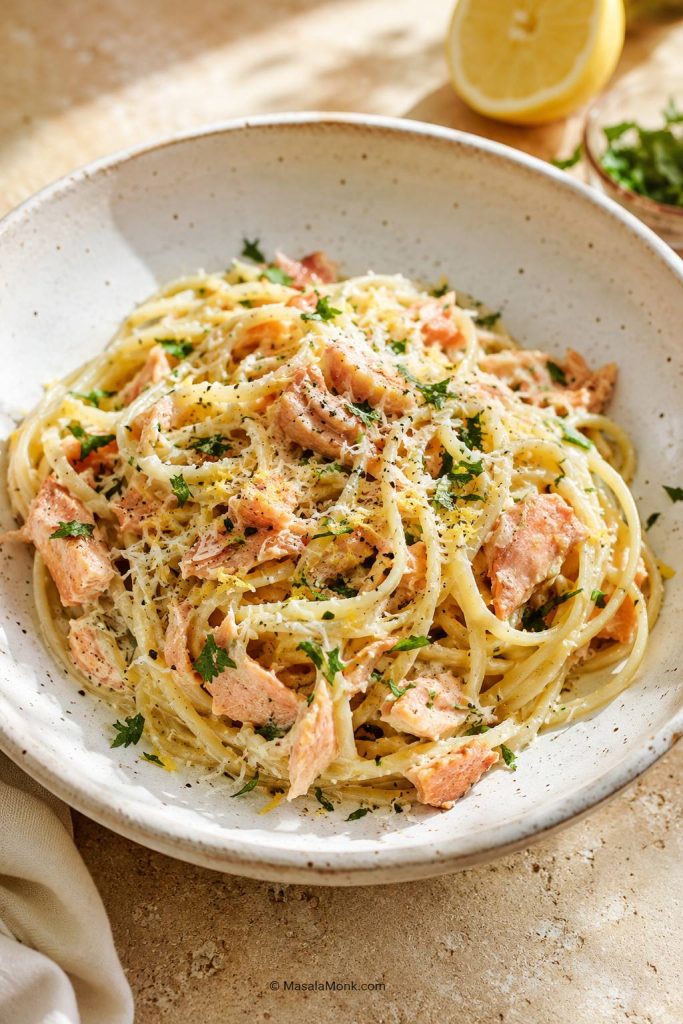
Salmon pasta without heavy cream using Parmesan, lemon, herbs, and a light sauce on spaghetti
A no-cream salmon pasta can still feel satisfying when Parmesan, pasta water, lemon, and herbs carry the sauce.

Salmon Alfredo Pasta

An Alfredo-style version leans more heavily on Parmesan and cream, with softer lemon and plenty of black pepper. For another rich pasta dinner, this chicken Alfredo pasta guide has useful sauce ideas.

Salmon Pasta Bake

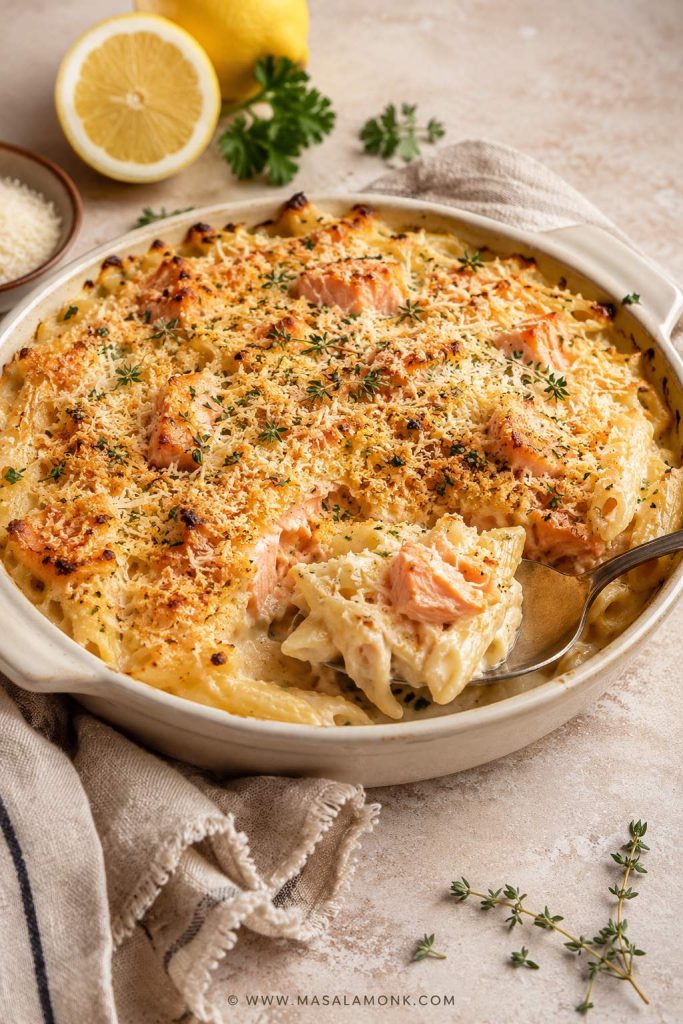
A baked version needs a looser sauce from the start because the pasta keeps drinking it in the oven. Undercook the pasta by about 2 minutes, top with Parmesan or a little panko, and bake until bubbling.

Salmon pasta bake in a cream-colored baking dish with golden Parmesan topping, herbs, and a spoonful lifted out
For a salmon pasta bake, start with a looser sauce because the pasta keeps absorbing liquid in the oven.

Salmon Pesto Pasta

Basil pesto gives salmon pasta a greener, more herbal direction. Use pesto, lemon, pasta water, and salmon flakes, then decide whether the sauce needs cream or feels bright enough without it. For homemade pesto, this pesto recipe guide has classic basil pesto plus useful variations.

Salmon Orzo

Orzo absorbs liquid quickly, so use a looser sauce and stir gently. The same lemon, garlic, cream, Parmesan, and salmon flavors work well, but the texture will be softer and more risotto-like.

Salmon Gnocchi

Gnocchi makes the dish softer and more comfort-food heavy. Keep the sauce loose, use enough lemon to balance the richness, and fold the salmon in gently so both the gnocchi and fish stay intact.

Salmon Pasta Salad

A cold salmon pasta salad needs a different base: cooked cooled pasta, flaked salmon, lemon dressing, herbs, cucumber, peas, capers, or a little yogurt-based dressing. Skip the hot cream sauce and focus on freshness.

What to Serve With Creamy Salmon Pasta

This is already a full dinner, so the best sides should make the plate feel brighter, not heavier. Think crisp salad, lemony greens, roasted vegetables, or garlic bread for the extra sauce left in the bowl.

  • Simple green salad: arugula, cucumber, lemon dressing, or a sharp vinaigrette.
  • Roasted asparagus or broccoli: both work well with lemon and Parmesan.
  • Garlic bread: cozy, useful, and great for catching extra sauce. For a homemade option, this garlic bread loaf works well beside creamy pasta.
  • Roasted cherry tomatoes: bright and juicy against the cream sauce.
  • Steamed peas: easy, sweet, and very good with salmon.
  • Lemon wedges: helpful at the table for anyone who wants a brighter plate.

Storing and Reheating Creamy Salmon Pasta

This dish is best right after tossing, while the sauce still coats the pasta easily and the salmon is warm and soft. However, leftovers can still be good if you reheat them gently so the cream stays smooth and the salmon does not dry out.

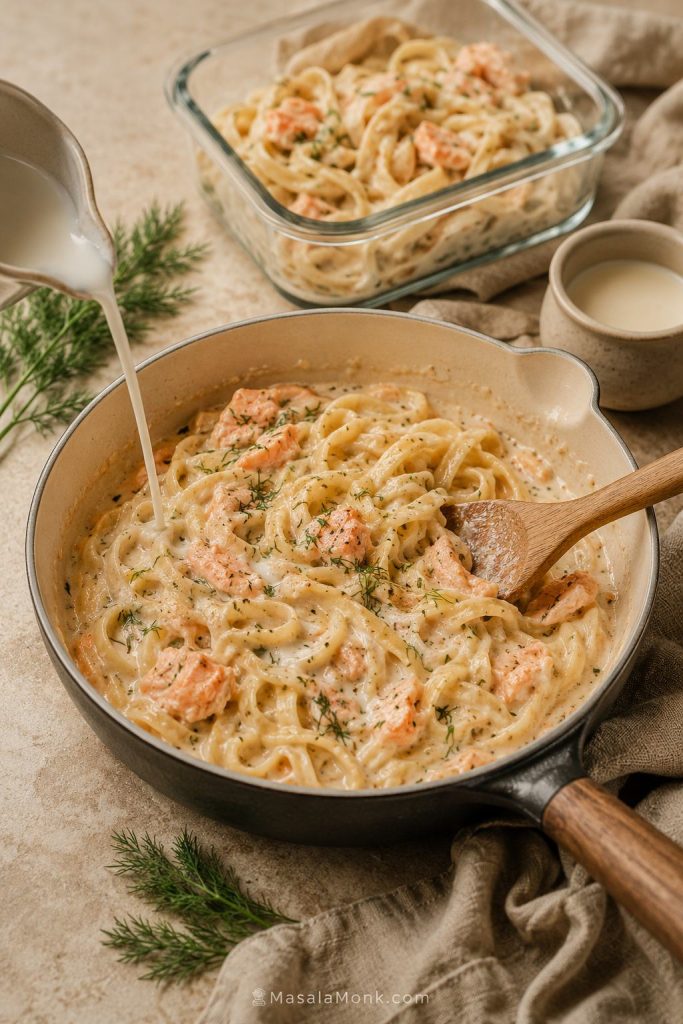
Creamy salmon pasta reheating in a skillet with a splash of liquid and leftovers in a glass storage container nearby
Reheat leftovers gently with a splash of liquid so the sauce loosens again and the salmon stays soft.

How Long Does It Keep?

Store leftovers in an airtight container in the refrigerator and use within 2 days for the best texture.

How to Reheat It

Reheat in a skillet over low heat with a splash of water, milk, cream, or broth. Stir gently until the sauce loosens. Avoid high heat, which can make the cream separate and the salmon dry.

If reheated sauce looks too thick or separated, use the same fixes in the troubleshooting section.

Microwave Method

Use short bursts at lower power and add a splash of liquid first. Stir gently between bursts. The microwave is convenient, but it can overcook salmon quickly.

Freezing

Freezing is not recommended. Cream sauces can split, pasta can soften, and salmon can become dry once thawed and reheated.

Creamy Salmon Pasta Troubleshooting: Sauce, Salmon, and Texture Fixes

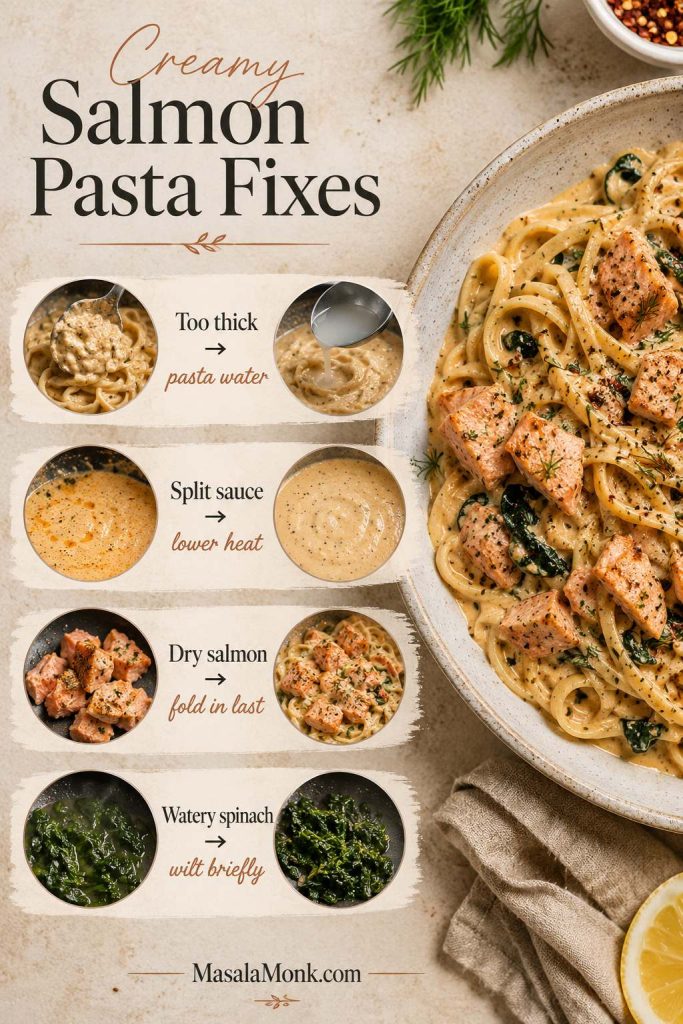
If something feels off, do not panic and do not add more cream first. A thick sauce, broken sauce, dry salmon, or watery spinach does not mean dinner is ruined; it usually means one small adjustment is needed.

Creamy salmon pasta troubleshooting board with fixes for thick sauce, split sauce, dry salmon, and watery spinach
Most salmon pasta problems are fixable: loosen thick sauce with pasta water, lower the heat if it splits, and fold salmon in last.
Problem Why it happened Fix
Sauce is too thick The pasta absorbed more liquid than expected. Add reserved pasta water 1–2 tbsp at a time and toss until glossy.
Sauce split The heat was too high, or lemon was added while the cream was boiling hard. Lower the heat, add a splash of cream or pasta water, and stir gently. Next time, add lemon near the end.
Salmon is dry It was overcooked or stirred too much in the sauce. Cook salmon separately, rest it, and fold it in last in large pieces.
Pasta tastes bland The pasta water or sauce was under-seasoned. Salt the pasta water well and finish with Parmesan, lemon, herbs, and black pepper.
Sauce tastes too heavy Too much cream, not enough acid or herbs. Add lemon zest, lemon juice, capers, herbs, or a splash of pasta water.
Pasta tastes fishy The salmon may be old, overcooked, or not balanced with enough brightness. Use fresh salmon, avoid overcooking, and finish with lemon, herbs, capers, and black pepper.
Spinach made it watery Too much spinach was added too early, or it cooked too long. Add spinach at the end and wilt it briefly. If needed, simmer the sauce for a minute before adding salmon.

FAQs

What is the best pasta for this creamy salmon pasta recipe?

Fettuccine and linguine are best for a glossy, twirlable cream sauce. Penne and rigatoni are better for larger salmon chunks and an easier forkful.

Should salmon be cooked before adding it to pasta?

Cook the salmon first, then fold it into the pasta at the end. That gives you better control over doneness and keeps the pieces tender.

Can I pan-sear the salmon instead of roasting it?

Yes. Pat the salmon dry, season it, and sear it in a lightly oiled skillet over medium heat for 3–4 minutes per side, depending on thickness. Rest it for 5 minutes before flaking so the pieces stay moist in the pasta.

Fresh salmon or smoked salmon — which is better?

Fresh salmon is better for this creamy dinner-style pasta. Smoked salmon is better for a faster, saltier version. Add smoked salmon off heat so it stays delicate.

How do you stop cream sauce from splitting?

Use gentle heat once the cream is added, stir Parmesan in gradually, and add lemon juice near the end instead of boiling it hard with the cream. Reserved pasta water also helps smooth the sauce.

Why did my salmon pasta turn dry?

The salmon may have been overcooked, the pasta may have absorbed too much sauce, or the dish may have sat too long before serving. Fold salmon in last and keep extra pasta water nearby to loosen the sauce.

What temperature should salmon be cooked to?

For food safety, fish should reach 145°F / 63°C, or be opaque and separate easily with a fork. A thermometer is the most reliable way to check.

How much pasta water should I save?

Save 1 cup / 240 ml. You may only need ¼–½ cup, but it is better to have extra because the sauce thickens as the pasta sits.

What vegetables go well with salmon pasta?

Spinach is the easiest. Peas, asparagus, broccoli, cherry tomatoes, mushrooms, and zucchini also work. Add quick-cooking vegetables near the end and pre-cook firmer vegetables so they do not water down the sauce.

Is crème fraîche better than heavy cream?

Crème fraîche gives a tangier, slightly lighter sauce. Heavy cream is easier to find and gives the most classic creamy texture. Both work.

What is the best way to reheat leftovers?

Reheat leftovers gently in a skillet over low heat with a splash of water, milk, cream, or broth. Stir slowly until the sauce loosens. Avoid high heat because it can dry out the salmon and split the sauce.

Does this creamy salmon pasta recipe freeze well?

Not really. The cream sauce can split, the pasta can become soft, and the salmon can dry out after thawing. Refrigerating leftovers for a day or two is a better choice.

How do I make this creamy salmon pasta recipe without wine?

Use low-sodium chicken broth, vegetable broth, seafood stock, or even a splash of pasta water instead. Then add a little extra lemon at the end if the sauce needs brightness.

Once you understand the rhythm — cook the salmon gently, save pasta water, keep the cream sauce calm, and fold the fish in last — this creamy salmon pasta recipe becomes the kind of dinner you can adjust without stress. Fresh salmon makes it feel cozy and polished, smoked salmon makes it faster, and extra lemon or herbs can pull the whole bowl in a brighter direction.

That is the real win here: not just a rich pasta, but a plate that still tastes cared for at the last forkful.

Did you make it with fresh salmon, smoked salmon, canned salmon, or leftovers? Tell us which version you tried — and what you adjusted at the end. Extra lemon, more capers, dill, spinach, Parmesan, or black pepper all change the personality of the bowl.

Back to top

Posted on 1 Comment

Scrambled Eggs with Cottage Cheese Recipe

Scrambled eggs with cottage cheese served on a plate with toast, chives, and black pepper.

Scrambled eggs with cottage cheese can go one of two ways: creamy, soft, and surprisingly good, or loose and a little strange. The difference is not luck. It is the ratio, the cottage cheese you use, and how gently you cook the eggs.

This recipe is built for the good version: high-protein scrambled eggs that stay tender, creamy, and satisfying without turning wet or rubbery. It walks you through the ratio, the smoother blended option, the egg-white version, microwave method, add-ins, and the fixes that keep cottage cheese eggs from turning watery.

This is especially useful if you want a higher-protein breakfast but still want food that feels warm, familiar, and satisfying. It is not trying to turn eggs into a diet trick; it is just a better, creamier scramble with more staying power.

Quick Answer: How to Make Scrambled Eggs with Cottage Cheese

To make scrambled eggs with cottage cheese, whisk 2 large eggs with 1/4 cup cottage cheese, then cook the mixture gently in a nonstick skillet over medium-low heat. Push the eggs slowly with a silicone spatula until they are thickened, creamy, and just set through.

Best Starting Ratio

The best starting ratio is 1/4 cup cottage cheese for every 2 eggs. Small-curd 2% cottage cheese gives the most reliable texture, while full-fat cottage cheese tastes richer. If the eggs look loose in the pan, use less cottage cheese next time, drain very liquid cottage cheese, avoid high heat, and cook gently long enough for extra moisture to evaporate.

The full cottage cheese egg ratio guide below shows how to make the eggs subtler, creamier, or better suited to egg whites.

You do not need milk here. Cottage cheese already adds moisture and body, so milk can push the eggs toward watery instead of creamy.

If your last batch turned loose or watery, skip ahead to the watery cottage cheese egg fixes before you cook again.

At a glance: Use 4 large eggs, 1/2 cup / 110–120g cottage cheese, and 1 tablespoon / 14g butter for 2 servings. Cook in a nonstick skillet over medium-low heat for 4–5 minutes. Most reliable cottage cheese: small-curd 2% or full-fat. Texture goal: creamy, soft, and fully set, not runny.

Ratio guide showing 2 eggs with 1/4 cup cottage cheese and 4 eggs with 1/2 cup cottage cheese.
For the easiest cottage cheese egg ratio, start with 1/4 cup cottage cheese for every 2 large eggs. Then adjust slightly if your cottage cheese is extra thick or watery.

What the Texture Should Look Like

The goal is not a runny protein hack or a rubbery diet scramble. The best version should taste like soft scrambled eggs with a little extra creaminess, body, and staying power.

Done right, the eggs taste creamy and lightly savory, not aggressively cheesy. The curds soften into the scramble, the pepper gives it a little lift, and a handful of chives or scallions makes the whole plate feel fresher.

A good plate feels simple but a little upgraded: soft eggs, gentle creaminess from the cottage cheese, enough protein to hold you over, and a texture that still feels like breakfast instead of a food trend.

Close-up of creamy scrambled eggs with cottage cheese showing soft folds, chives, pepper, and no pooling liquid.
Look for soft folds that hold together on the fork. That texture means the eggs are creamy and set, rather than loose, wet, or overcooked.

Why Add Cottage Cheese to Scrambled Eggs?

Cottage cheese changes scrambled eggs in three useful ways: it adds protein, makes the eggs more satisfying, and gives them a creamy texture when cooked gently. It is also mild enough that the eggs still taste like eggs, especially if you use a balanced ratio and season them well.

More Protein Without Protein Powder

Eggs are already a strong breakfast ingredient, but cottage cheese makes them more filling. That is why cottage cheese eggs are popular with people looking for high-protein breakfasts, lighter brunch ideas, and quick post-workout meals.

The exact protein will depend on your eggs and cottage cheese brand. If you are tracking closely, use the nutrition label on your cottage cheese and a food database such as USDA FoodData Central.

For another breakfast built around everyday protein-rich ingredients, this protein oatmeal guide uses options like eggs, yogurt, cottage cheese, paneer, nuts, and seeds without relying only on protein powder.

Creamier Texture When Cooked Gently

Cottage cheese adds moisture and body to the eggs. With medium-low heat, the curds soften into the scramble and help the eggs stay tender. With high heat, the eggs can tighten too quickly and turn rubbery before the cottage cheese has a chance to settle into the mixture.

Mild Flavor, Easy Add-Ins

These eggs do not have to taste strongly of cottage cheese. If you use small-curd cottage cheese and whisk it in well, the flavor is mild, creamy, and lightly savory. Chives, scallions, black pepper, hot sauce, chili crisp, avocado, spinach, and toast all work well with the flavor.

Ingredients for Scrambled Eggs with Cottage Cheese

You only need a few ingredients, but each one affects the final texture. In a simple recipe like this, small choices matter: the cottage cheese style, pan heat, and amount of salt all change the result.

Ingredients for scrambled eggs with cottage cheese including eggs, cottage cheese, butter, pepper, salt, and chives.
Because this recipe uses only a few ingredients, each choice matters. Thick cottage cheese, light salt, black pepper, and fresh chives help the scramble taste balanced.

Eggs

Use large eggs. Four large eggs make two servings, while two large eggs plus 1/4 cup cottage cheese make a good single serving. Whole eggs give the best flavor, color, and structure. You can add egg whites for more protein, but an all-egg-white cottage cheese scramble is easier to overcook and can turn thin if the ratio is not controlled.

Cottage Cheese

Use 1/2 cup / about 4 oz / 110–120g cottage cheese for 4 eggs, or 1/4 cup / 55–60g cottage cheese for 2 eggs. Small-curd cottage cheese is the easiest choice because it blends into the eggs more naturally. Large-curd cottage cheese works, but the curds stay more visible.

For the most reliable texture, use 2% cottage cheese. Full-fat cottage cheese gives richer eggs. Fat-free cottage cheese can work, but it often contains more moisture, so it can make the eggs wetter if you use too much.

Butter, Oil, or Cooking Spray

Butter gives the richest flavor and helps the eggs cook into soft folds. Use 1 tablespoon / 1/2 oz / 14g butter for 4 eggs. Olive oil works well if you want something lighter; use 1–2 teaspoons / 5–10ml. Cooking spray is fine for a lower-calorie version, but use a truly nonstick pan and keep the heat gentle.

Salt, Pepper, and Herbs

Cottage cheese is already salty, so season carefully. Start with black pepper and only a tiny pinch of salt, then taste after cooking. Chives, scallions, dill, parsley, and cracked black pepper are especially good here.

Best Cottage Cheese for Scrambled Eggs

The most reliable cottage cheese for scrambled eggs is small-curd 2% cottage cheese. It is creamy enough to soften into the eggs but not so rich that the scramble feels heavy. It also tends to behave better in the pan than watery fat-free cottage cheese.

Three bowls comparing small-curd, full-fat, and watery fat-free cottage cheese for scrambled eggs.
For most batches, 2% small-curd cottage cheese is the safest starting point because it softens into the eggs more evenly, while watery cottage cheese can loosen the scramble.

Small-Curd vs Large-Curd Cottage Cheese

The smaller curd disperses more evenly and gives a softer texture. Large-curd cottage cheese is fine if you like visible curds, but it can make the eggs look more uneven.

Small-curd and large-curd cottage cheese scrambled eggs compared side by side.
A smaller curd gives smoother scrambled eggs, while large-curd cottage cheese keeps more visible texture. Choose the one that matches how much curd you want to notice.

If you are cooking for someone who is skeptical of cottage cheese, use small-curd cottage cheese or blend the eggs and cottage cheese together for a smoother scramble.

For the full texture breakdown, compare the whisk, blend, and fold methods.

2%, Full-Fat, or Fat-Free?

Cottage Cheese Type Result in Scrambled Eggs Best Use
2% Creamy, balanced, reliable Best everyday choice
Full-fat Richest and softest Best for extra-creamy eggs
Low-fat Can work well, depending on brand Good if it is thick, not watery
Fat-free More likely to release moisture Use less and cook gently

If your cottage cheese looks especially liquidy, spoon off a little of the excess before adding it to the eggs. Thick, creamy cottage cheese gives you a much easier path to a soft scramble.

Should You Blend the Cottage Cheese First?

Blend the cottage cheese with the eggs if you want a smooth texture with no visible curds. Do not blend if you like the soft, slightly cheesy texture of cottage cheese eggs. For most people, whisking small-curd cottage cheese directly into the eggs is enough.

Scrambled Eggs with Cottage Cheese Ratio Guide

Start with the Balanced Ratio

The safest starting ratio is 1/4 cup cottage cheese for every 2 large eggs. Another way to think of it is about 1–2 tablespoons cottage cheese per egg, depending on how creamy or subtle you want the scramble.

If you are nervous about curds or wateriness, start with 2 tablespoons cottage cheese for 2 eggs. Then, if you love cottage cheese and want a creamier, more filling scramble, increase slightly without overloading the eggs.

Ratio Options by Texture

Style Eggs Cottage Cheese Metric Best For
Subtle / beginner 2 large eggs 2 tbsp 25–30g Less curdy, safer first try
Balanced default 2 large eggs 1/4 cup 55–60g Creamy, high-protein everyday eggs
Family batch 4 large eggs 1/2 cup / about 4 oz 110–120g Main recipe-card version
Extra creamy 2 large eggs 1/3 cup 75–80g More cottage-cheese-forward
Egg-white boosted 2 eggs + 1/4–1/3 cup egg whites 1/4 cup 60–80ml egg whites + 55–60g cottage cheese Higher-protein version
Cottage cheese scrambled eggs ratio guide showing subtle, balanced, extra creamy, and egg-white boosted versions.
The ratio changes the whole scramble. Start balanced, then go lighter for subtle cottage cheese flavor or creamier when you want a more filling breakfast.

What Testing Showed

After testing the whisked, blended, and folded versions, the tradeoff is simple: the whisked 2-eggs-to-1/4-cup cottage cheese ratio is the most reliable everyday balance. Blending makes the smoothest scramble, but it tastes a little less like classic soft eggs. Folding the cottage cheese in near the end gives the most visible curds and works only when the cottage cheese is thick, not watery.

For your first try, choose the balanced default. Once you know how your cottage cheese behaves in the pan, you can go lighter, smoother, or more cottage-cheese-forward next time.

Make this first: If this is your first time making scrambled eggs with cottage cheese, use 2 eggs, 1/4 cup / 55–60g cottage cheese, 1/2 tablespoon butter, black pepper, and medium-low heat. It is the safest balance of creamy, high-protein, and not too wet.

Once the ratio is set, use the gentle stovetop method to keep the eggs creamy instead of dry.

How to Make Scrambled Eggs with Cottage Cheese

The whole recipe comes down to gentle heat and patience. A few quiet minutes in the pan can turn the eggs into soft, creamy folds instead of dry curds or a loose scramble.

Step-by-step guide showing eggs being whisked, cottage cheese being added, eggs cooking gently, and the finished scramble.
The steps are simple, but the heat does the real work. Cook slowly so the eggs gather into soft folds instead of tightening into dry curds.

Step 1: Whisk the Eggs

Crack the eggs into a mixing bowl and whisk until the yolks and whites are fully combined. This helps the cottage cheese distribute evenly instead of sitting in pockets.

Step 2: Add the Cottage Cheese

Whisk in the cottage cheese, black pepper, and only a small pinch of salt. If you want smoother eggs, blend the eggs and cottage cheese for a few seconds instead of whisking by hand.

Step 3: Heat the Pan Gently

Warm a nonstick skillet over medium-low heat. For 2 eggs, an 8-inch skillet works well. For 4 eggs, use a 10-inch skillet. Add butter or oil and let it melt without browning.

Step 4: Cook Slowly Into Soft Folds

Pour in the egg mixture. Let the edges set for 10–20 seconds, then use a silicone spatula to slowly push the eggs from the outside of the pan toward the center. Keep moving gently so the eggs gather into soft, creamy folds instead of breaking into tiny dry curds. The pan should look calm, not sizzling.

Scrambled eggs with cottage cheese cooking gently in a nonstick pan with a silicone spatula.
A quiet pan is a good sign. When the eggs move slowly under the spatula, they have time to turn creamy before they dry out.

Step 5: Stop While Creamy, Not Runny

Remove the eggs from the heat when they are thickened, creamy, and set through. They will keep cooking slightly from residual heat, so do not wait until they look completely dry in the pan.

You will know they are ready when the eggs hold soft folds on the spatula, look creamy instead of shiny-wet, and slide onto the plate without liquid pooling behind them. If the eggs look glossy but hold together, they are usually ready; if liquid runs around them, give them a little more time over gentle heat.

Doneness guide for cottage cheese scrambled eggs showing too wet, just right, and too dry textures.
“Just right” is creamy but not runny. If the eggs still slide apart with liquid around them, keep them on gentle heat a little longer.

If the eggs still look shiny, separated, or loose, the troubleshooting section will help you fix the next batch.

For food safety, scrambled eggs should be cooked until they are not runny. The FDA’s egg safety guidance recommends cooking egg dishes thoroughly, especially when serving children, older adults, pregnant people, or anyone with a weakened immune system.

Whisk, Blend, or Fold? Three Texture Options

There is more than one way to add cottage cheese to scrambled eggs. The best method depends on whether you want the cottage cheese to disappear into the eggs or stay slightly visible.

Method How to Do It Texture Best For
Whisk Whisk cottage cheese into raw eggs Soft, lightly curdy, fluffy Best everyday version
Blend Blend eggs and cottage cheese briefly Smooth and creamy Cottage-cheese skeptics
Fold Cook eggs first, then fold cottage cheese near the end More visible curds People who like cottage cheese texture
Whisk, blend, and fold methods for adding cottage cheese to scrambled eggs.
Whisking is the everyday method, blending makes the smoothest cottage cheese eggs, and folding gives the most noticeable curd texture.

Choose blended if visible curds bother you, whisked for the easiest weekday scramble, and folded only if you actually enjoy the cottage cheese texture.

Using egg whites changes the texture, so check the egg-white version before swapping out too many yolks.

When Should You Add the Cottage Cheese?

Add cottage cheese before cooking for the whisked or blended versions. Fold it in near the end only if you want a more visible cottage cheese texture and your cottage cheese is thick enough not to loosen the eggs.

Egg Whites with Cottage Cheese

Egg whites with cottage cheese are useful if you want a lighter, higher-protein scramble, but the ratio matters. Because they contain more water than yolks, they need a little more care in the pan. Use too many whites with too much cottage cheese, and the eggs can turn thin.

Best Egg-White Ratio

For the creamiest texture, keep at least some whole egg in the scramble. The yolk adds flavor, color, and a little structure, which helps the egg whites feel less flat.

Version Use This Ratio Texture
Balanced egg-white boost 2 eggs + 1/4 cup / 60ml egg whites + 1/4 cup / 55–60g cottage cheese Creamy, lighter, still flavorful
Leaner version 1 egg + 1/2 cup / 120ml egg whites + 2–3 tbsp cottage cheese Lighter, less rich, more delicate
All egg whites 3/4 cup / 180ml egg whites + 2 tbsp cottage cheese Leanest, but easiest to overcook or make watery
Egg-white cottage cheese scrambled eggs ratio guide with balanced, leaner, and all-egg-white versions.
Egg whites add protein, but they also add water. Keeping one yolk in the mix helps cottage cheese eggs stay creamy, structured, and less likely to turn thin.

If your egg-white scramble turns thin, the watery egg fixes explain how to adjust the cottage cheese and heat.

Lighter High-Protein Version

For a lighter plate, use 1 whole egg, 1/2 cup / 120ml egg whites, and 2–3 tablespoons cottage cheese. Serve it with spinach, tomatoes on the side, or avocado toast depending on whether you want a lower-calorie breakfast or a more filling meal. It is not a shortcut or a promise; it is simply a protein-rich breakfast that can fit into many eating styles depending on what you serve with it.

How to Keep Egg-White Cottage Cheese Eggs from Getting Watery

Use a thick cottage cheese, skip the milk, and cook over medium-low heat until the eggs are set through. If liquid starts pooling in the pan, keep the heat gentle and give the eggs a little more time. Do not crank the heat up to rush them; that usually makes the eggs rubbery before the moisture cooks off.

Macro-Friendly Add-Ins

Spinach, mushrooms, scallions, tomatoes on the side, hot sauce, and herbs all work well. If you are adding mushrooms, peppers, or vegetables that release moisture, cook them first so they do not loosen the eggs.

Microwave Cottage Cheese Scrambled Eggs

The skillet version tastes best, but microwave cottage cheese eggs are useful for busy mornings, office breakfasts, and quick solo meals. The texture will be firmer than stovetop scrambled eggs, so cook in short bursts and stir often.

Mug Method for One

Whisk 1 large egg with 1 tablespoon / about 15g cottage cheese in a large microwave-safe mug. Add black pepper and a tiny pinch of salt if needed. Microwave for 30 seconds, stir, then microwave in 15–30 second bursts until the egg is just set through.

Microwave cottage cheese scrambled eggs made in a mug with a whisked egg mixture and a finished bowl of eggs.
For microwave cottage cheese eggs, short bursts are safer than one long cook. Stirring between rounds helps the center set without turning spongy.

Microwave Texture Tips

  • Use a bigger mug than you think you need.
  • Stir between bursts so the egg cooks evenly.
  • Microwave power varies, so treat the final 15–30 seconds as flexible.
  • Stop when the egg is just set, then let it stand for 20–30 seconds before eating.
  • Add herbs, hot sauce, or chives after cooking.
  • For 2 eggs, use a small microwave-safe bowl instead of a narrow mug.

Add-Ins and Serving Ideas

Scrambled eggs with cottage cheese are mild enough to go savory, spicy, herby, or brunch-style. Avoid adding raw vegetables that release a lot of water directly to the pan in large amounts. Instead, cook them first or serve them on the side.

Best Add-Ins for the Eggs

Add-In How to Use It Notes
Spinach Wilt before or during cooking Adds volume and color
Mushrooms Cook first Prevents loose eggs
Bell pepper Dice small and sauté first Good for veggie scrambles
Scallions or chives Add near the end Fresh, simple, and not watery
Tomatoes Serve on the side or add cooked Raw tomatoes can release water
Chili crisp or hot sauce Add after cooking Best for flavor contrast
Everything bagel seasoning Sprinkle after cooking Use lightly because it is salty
Add-ins for cottage cheese scrambled eggs including cooked spinach, mushrooms, chives, tomatoes, and hot sauce.
Add-ins work best after the moisture is under control. Cook mushrooms, spinach, and peppers first, then finish with herbs, hot sauce, or chili crisp.

Three Easy Ways to Serve Them

  • Simple weekday plate: cottage cheese eggs, buttered toast, black pepper, and chives.
  • Avocado toast version: mashed avocado, creamy eggs, chili crisp, and scallions on sourdough.
  • Breakfast taco version: warm tortilla, cottage cheese eggs, potatoes, salsa, and hot sauce.
Three serving ideas for cottage cheese scrambled eggs with toast, avocado toast, and a breakfast taco.
Once the base scramble is right, it can go three ways: a simple toast plate, creamy avocado toast, or a breakfast taco with potatoes and salsa.

What to Serve with Cottage Cheese Eggs

  • Buttered sourdough toast
  • Avocado toast
  • Breakfast tacos
  • Roasted potatoes or air fryer hash browns
  • Sautéed spinach or mushrooms
  • Fresh tomatoes
  • Fruit on the side
  • Hot sauce, chili crisp, or salsa

For the easiest plate, keep it simple: creamy eggs, crisp toast, something fresh, and something sharp or spicy. A little hot sauce, salsa, chili crisp, or black pepper keeps the cottage cheese from making the plate taste too mild.

Cottage cheese scrambled eggs served with crispy potatoes, fresh tomatoes, and hot sauce.
A few sides make the eggs feel complete. Crisp potatoes add contrast, tomatoes add freshness, and hot sauce cuts through the creamy cottage cheese.

If you want to turn the eggs into a handheld breakfast, tuck them into a tortilla with potatoes, peppers, salsa, or avocado. This breakfast burrito recipe has more ideas for building a filling wrap without making it soggy.

How to Fix Watery or Loose Cottage Cheese Eggs

If your first batch is not perfect, do not write off the recipe. Cottage cheese brands vary a lot, and one small ratio or heat adjustment usually fixes it.

This is the section to read if you tried cottage cheese eggs once and wondered why everyone else seemed to be getting a creamy scramble while yours looked loose, shiny, or separated.

If your eggs tasted good but looked loose, shiny, or a little separated, the recipe probably does not need to be abandoned. It usually just needs less liquid, thicker cottage cheese, or gentler heat.

Watery cottage cheese scrambled eggs compared with creamy set eggs in a troubleshooting guide.
Watery cottage cheese eggs usually come from too much liquid, high heat, or a loose cottage cheese brand. Fix those first before changing the whole recipe.

Why Cottage Cheese Eggs Turn Watery

  • Too much cottage cheese
  • Very liquid cottage cheese
  • Watery fat-free or low-fat cottage cheese
  • Heat that was too high
  • Not enough gentle cooking time
  • Raw mushrooms, tomatoes, or peppers
  • Too many egg whites
  • Added milk

Troubleshooting Watery Cottage Cheese Eggs

What Happened Most Likely Cause Next Batch Fix
Eggs tasted good but looked loose Too much liquid in the cottage cheese Drain the cottage cheese or use 2 tbsp per 2 eggs
Eggs turned rubbery and wet Heat was too high Use medium-low heat and cook a little longer
Eggs looked separated Curds released moisture before the eggs set Whisk better, use thicker cottage cheese, and stir gently
Egg-white version turned thin Too much water from whites plus cottage cheese Keep one yolk or reduce cottage cheese to 2 tbsp
Diagnostic guide showing fixes for loose, rubbery, separated, and thin egg-white cottage cheese eggs.
Use the pan clues to fix the next batch: drain liquidy cottage cheese, lower the heat, stir gently, or keep one yolk when using egg whites.

Fixes Before Cooking

Problem to Prevent What to Do
Cottage cheese looks liquidy Spoon off excess liquid or use slightly less cottage cheese
You dislike curds Blend the cottage cheese with the eggs
You want less moisture Use 2 tbsp cottage cheese per 2 eggs
Using vegetables Cook moisture-heavy vegetables first
Using egg whites Keep at least one yolk or cook gently a little longer

Fixes While Cooking

What You See Fix
Liquid pooling in the pan Keep cooking gently and fold slowly until the extra moisture evaporates
Eggs setting too fast Lower the heat or remove the pan briefly
Curds separating Stir less aggressively and use lower heat
Eggs getting rubbery Pull from the heat sooner next time and use medium-low heat

What Not to Do

  • Skip the milk; cottage cheese already brings moisture.
  • Avoid high heat, which can make the eggs tighten before the moisture cooks off.
  • Do not start with an extra-heavy cottage cheese ratio on your first try.
  • Cook mushrooms, tomatoes, or peppers first if you are adding more than a small handful.
  • Once soft folds form, stir gently instead of aggressively breaking the eggs apart.

Once the ratio and heat are right, the recipe is simple: whisk, cook gently, stop while creamy, and serve while the eggs are still soft and warm.

Scrambled Eggs with Cottage Cheese Recipe

Soft, creamy scrambled eggs with cottage cheese for a protein-rich breakfast that feels cozy, filling, and ready in about 10 minutes.

Prep Time5 minutes
Cook Time4–5 minutes
Total Time10 minutes
Yield2 servings

Approximate nutrition: One serving, made with 2 large eggs, 1/4 cup cottage cheese, and 1/2 tablespoon butter, is usually around 220–270 calories with about 18–22g protein. Exact numbers depend on your cottage cheese brand and cooking fat. Because cottage cheese brands vary widely in protein, sodium, and moisture, treat these numbers as an estimate unless you calculate with your exact label.

Equipment

  • Mixing bowl
  • Whisk or fork
  • 10-inch nonstick skillet
  • Silicone spatula

Ingredients

  • 4 large eggs
  • 1/2 cup cottage cheese, about 4 oz / 110–120g, preferably small-curd 2% or full-fat
  • 1 tablespoon butter, about 1/2 oz / 14g, or 1–2 teaspoons / 5–10ml olive oil
  • 1/8 teaspoon fine salt, optional
  • Black pepper, to taste
  • 1 tablespoon chopped chives or scallions, optional

Method

  1. Crack the eggs into a mixing bowl and whisk until the yolks and whites are fully combined.
  2. Whisk in the cottage cheese, black pepper, and a tiny pinch of salt if using.
  3. Place a nonstick skillet over medium-low heat. Add the butter or oil and let it melt without browning.
  4. Pour in the egg mixture and let the edges begin to set for 10–20 seconds.
  5. Use a silicone spatula to slowly push the eggs from the outside of the pan toward the center, forming soft folds. The pan should look calm, not sizzling.
  6. Keep cooking gently until the eggs are thickened, creamy, and set through. If liquid runs around the eggs, give them another minute over gentle heat.
  7. Remove from the heat, sprinkle with chives or scallions if using, and serve immediately.

Notes

  • Blend the cottage cheese with the eggs first for a smoother texture.
  • Use 2 tablespoons cottage cheese per 2 eggs if you want less cottage cheese texture.
  • For an egg-white boosted version, use 2 eggs, 1/4 cup / 60ml egg whites, and 1/4 cup / 55–60g cottage cheese.
  • Salt lightly because cottage cheese is already salty.
  • Use medium-low heat. High heat can make the eggs rubbery.
  • Do not add milk; cottage cheese already adds moisture.
Saveable recipe card for scrambled eggs with cottage cheese showing the main ratio, cooking time, and method notes.
This saveable version keeps the formula simple: four eggs, half a cup of cottage cheese, medium-low heat, and no milk for a creamy two-serving scramble.

Once you make it once, adjust the ratio to match your cottage cheese and your pan. Some brands melt in softly, some release more liquid, and some taste saltier than others. The recipe gets easier after the first batch.

Storage and Reheating

These are absolutely best right from the pan, so treat leftovers as a backup breakfast rather than the main plan. Still, if you have extra, they can work if you cool and reheat them gently.

For the freshest texture, make the main recipe card version right before serving.

How Long Do They Keep?

Store leftover cottage cheese scrambled eggs in an airtight container in the refrigerator for up to 2 days. Let them cool before closing the container so steam does not create extra moisture.

How to Reheat Without Making Them Rubbery

Reheat in the microwave at reduced power in 15–30 second bursts, stirring gently between bursts. Stop as soon as the eggs are warm. You can also reheat them in a nonstick skillet over low heat.

For a freezer-friendly breakfast instead of fresh scrambled eggs, use the same soft-cooked egg logic in meal prep breakfast burritos, where the eggs need to stay tender without making the tortilla soggy.

Can You Freeze Cottage Cheese Scrambled Eggs?

I would not freeze them. Eggs and cottage cheese can both release moisture after thawing, so the texture usually suffers. For a better make-ahead breakfast, try egg muffins or a sliceable frittata instead.

When you need breakfast for a table instead of one skillet, a breakfast casserole with hash browns is a better make-ahead option than stovetop scrambled eggs.

Final Serving Texture Cue

Before you leave the recipe, remember the main visual cue: the eggs should look creamy, softly folded, and set enough to hold together on the plate.

Final serving of scrambled eggs with cottage cheese with toast, a fork, cottage cheese, and a warm breakfast table setting.
A good cottage cheese scramble should feel warm and familiar, with enough protein and creaminess to make breakfast last longer than plain eggs.

FAQs About Scrambled Eggs with Cottage Cheese

What does cottage cheese do to scrambled eggs?

Cottage cheese adds protein, creaminess, and a mild savory flavor. When cooked gently, it softens into the eggs and makes them more filling without needing milk or cream.

Do scrambled eggs with cottage cheese taste like cottage cheese?

They taste creamy, lightly savory, and only a little tangy. With the balanced ratio, the eggs still taste like eggs; the cottage cheese mostly adds body and richness.

Is it better to blend cottage cheese into eggs?

Blend it if you want smooth eggs with no visible curds. This is the best choice for anyone who likes the protein boost but does not want the cottage cheese texture. Whisk it in if you like a soft, lightly curdy scramble.

Why did my cottage cheese scrambled eggs turn watery?

They probably had too much cottage cheese, a very liquidy brand, too many egg whites, raw watery vegetables, milk, or not enough gentle cooking time. Use 1/4 cup cottage cheese per 2 eggs, choose a thicker cottage cheese, and cook over medium-low heat until the eggs are set through.

What type of cottage cheese works best?

Small-curd 2% cottage cheese is the most reliable everyday choice. Full-fat cottage cheese gives richer eggs. Fat-free cottage cheese can work, but it is more likely to release moisture.

Should I add milk to cottage cheese scrambled eggs?

Skip the milk here. Cottage cheese already brings moisture and body, and adding milk can push the scramble from creamy into loose or wet.

Are cottage cheese eggs good for a high-protein breakfast?

They are a strong high-protein breakfast, especially if you use the balanced ratio of eggs plus cottage cheese instead of stretching the scramble with milk. The exact protein depends on your egg size and cottage cheese label.

Do egg whites work with cottage cheese?

Egg whites work, but the best texture usually comes from keeping at least one whole egg in the mixture. The yolk adds flavor, color, and structure, so the scramble feels creamy instead of thin.

Can I make cottage cheese scrambled eggs in the microwave?

Yes. For one serving, whisk 1 large egg with 1 tablespoon cottage cheese in a large microwave-safe mug. Microwave for 30 seconds, stir, then cook in 15–30 second bursts until set. Let it stand briefly before eating so the center finishes without becoming spongy.

What is the best ratio of cottage cheese to eggs?

The best balanced ratio is 1/4 cup cottage cheese for every 2 large eggs. Use 2 tablespoons for a subtler version, or up to 1/3 cup if you want a richer cottage-cheese-forward scramble.

Can I use boiled eggs with cottage cheese instead?

Yes, but that becomes a different kind of meal. Boiled eggs with cottage cheese work as a quick snack plate, while chopped boiled eggs mixed with blended cottage cheese become a high-protein cottage cheese egg salad.

Back to top

Posted on 2 Comments

Tuna Noodle Casserole Recipe with Egg Noodles

Baked tuna noodle casserole in a cream enamel dish with a spoonful lifted, showing egg noodles, peas, tuna flakes, creamy sauce, and golden topping.

This tuna noodle casserole recipe with egg noodles is the creamy, cozy baked dinner people usually mean when they talk about old-fashioned tuna casserole: wide egg noodles, canned tuna, peas, cream of mushroom soup, milk, optional cheddar, and a crunchy potato chip, cracker, or breadcrumb topping.

It is pantry comfort food, but it should still scoop creamy instead of baking into a dry noodle block. The key is simple: cook the noodles just shy of tender, use enough sauce for the full 9×13-inch dish, and pull the casserole when the edges are bubbling and the center still looks moist.

Close spoonful of tuna noodle casserole with saucy egg noodles, peas, tuna flakes, and crisp crumbs lifted from the dish.
This close scoop shows the goal before serving: soft egg noodles that stay moist underneath the crisp topping.

You’ll also find the no-soup version, topping choices, make-ahead and freezer notes, a small-batch option, and fixes for the usual problems: dry, watery, bland, or mushy tuna noodle casserole.

At a glance: This tuna noodle casserole uses 12 oz / 340 g wide egg noodles, 2 cans tuna, 2 cans cream of mushroom soup, 3/4 to 1 cup / 180 to 240 ml milk, 1 cup / 140 g peas, optional cheddar, and a crunchy topping. Bake in a 9×13-inch / 23×33 cm dish at 375°F / 190°C for 20 to 25 minutes, until bubbling at the edges.
Prep board with egg noodles, tuna, cream of mushroom soup, milk, peas, cheddar, crunchy topping, and bake time for tuna noodle casserole.
The classic full-pan formula starts with egg noodles, tuna, cream of mushroom soup, milk, peas, and a crisp topping, then bakes until the edges bubble.

Quick Answer: Tuna Noodle Casserole with Egg Noodles

To make tuna noodle casserole with egg noodles, boil wide egg noodles until just shy of tender. Mix them with well-drained canned tuna, peas, cream of mushroom soup, milk, seasonings, and cheddar if using. Spread into a greased 9×13-inch dish, add a crunchy topping, and bake at 375°F / 190°C for 20 to 25 minutes, until the edges bubble and the top is lightly golden.

Texture cue: before baking, the noodles should be generously coated and easy to stir. If the mixture already feels stiff in the bowl, it will be dry after baking.

Why This Tuna Noodle Casserole Works

The goal is not a fancy casserole. The goal is the old-school one done properly: creamy noodles, flaky tuna, sweet peas, and a crisp top. This version keeps the familiar cream-of-mushroom flavor while using enough sauce for a full 9×13-inch dish.

  • Wide egg noodles give the casserole its soft-but-sturdy bite.
  • Two cans of soup plus milk make enough sauce for a full pan.
  • Frozen peas add sweetness and color without extra prep.
  • Gently folded tuna stays in flakes instead of disappearing into the sauce.
  • A topping added right before baking stays crisp instead of steaming soft.

Best First Batch

If this is your first time making tuna noodle casserole, start with the classic version: cream of mushroom soup, wide egg noodles, tuna, peas, milk, and either potato chips or buttered panko on top. Once that base is right, the variations are easy.

Prefer homemade sauce instead? Jump to the tuna noodle casserole without soup section.

Version Use This When Key Change
Classic You want old-fashioned flavor Use 2 cans cream of mushroom soup and potato chips or crackers.
Extra creamy You worry about dry casserole Use the full 1 cup / 240 ml milk and optional sour cream.
No-soup You want homemade sauce Use butter, flour, milk, broth, mushrooms, onion, and celery.
Small batch You are cooking for 1–2 people Use 4 oz / 115 g noodles, 1 can tuna, and an 8×8-inch dish.
Lighter You want less richness Use more vegetables, less cheese, and the no-soup sauce option.

For the safest first batch, keep it classic: cream of mushroom soup, wide egg noodles, peas, optional cheddar, and potato chips or crackers on top. After that, adjust the sauce, topping, or vegetables to match your taste.

Five tuna noodle casserole version cues showing classic, extra saucy, no-soup, small batch, and lighter options.
Start with the classic tuna noodle casserole first, then adjust one part at a time: sauce, topping, batch size, or vegetables.

Ingredients for Tuna Noodle Casserole

The familiar version is built from pantry and freezer staples, but each ingredient still matters. Wide noodles give the casserole its soft structure, tuna adds protein, peas bring sweetness, condensed soup creates the sauce, and the topping adds the crunch that makes the bake feel finished.

Tuna noodle casserole ingredients arranged on a counter, including egg noodles, tuna, soup, milk, peas, cheddar, seasonings, and topping.
Simple pantry staples work best when each one has a job: noodles for structure, tuna for protein, peas for sweetness, and crumbs or chips for crunch.

For the biggest texture decisions, start with the egg noodle guide and the tuna comparison below.

Egg Noodles

Wide egg noodles are part of what makes this casserole taste like tuna noodle casserole instead of just tuna pasta. They are tender but sturdy, hold sauce well, and give the dish the old-school texture people expect. Cook them 1 minute shy of al dente so they finish softening in the oven without turning mushy.

Wide, medium, and extra-wide egg noodles compared for tuna noodle casserole, with wide egg noodles marked as the best first choice.
Wide egg noodles give the most familiar bite; meanwhile, thinner noodles soften faster and extra-wide noodles need a little more sauce.
Noodle Type Best For What to Know
Wide egg noodles Best old-fashioned tuna noodle casserole texture Soft, saucy, and sturdy enough for baking.
Medium egg noodles Softer casserole texture Cook quickly, so check early and avoid overboiling.
Extra-wide egg noodles More rustic, hearty texture Need enough sauce because the larger noodles absorb more.
Elbow macaroni Tuna mac-style casserole Works well, but feels less like an egg noodle casserole.
Rotini or penne Pasta bake style Better for a tuna pasta bake than this old-school noodle casserole.

Canned Tuna

Two standard 5 oz / 142 g cans of tuna are enough for a full 9×13-inch casserole without making the dish taste overwhelmingly fishy. Chunk light tuna gives a milder, softer casserole, while solid white albacore gives larger, firmer flakes. Either works, but fold the tuna in gently so it does not disappear into the sauce.

Chunk light tuna, solid white albacore, and oil-packed tuna compared in small dishes for tuna noodle casserole.
Choose tuna by texture: chunk light blends in gently, while solid white tuna gives the casserole larger, more visible flakes.
Tuna Type Best For What to Know
Chunk light tuna in water Classic mild casserole Soft, affordable, and easy to mix into the sauce.
Solid white albacore Larger tuna flakes Firmer texture and cleaner pieces, but usually stronger tasting.
Tuna packed in oil Richer flavor Drain very well or the casserole can feel heavy.

Whatever tuna you use, drain it well. Extra liquid from the can can make the sauce loose in the wrong way, while undrained oil can make the casserole taste heavy. If you want a lighter canned-tuna meal for another day, these healthy tuna salad recipes give you avocado, Greek yogurt, Mediterranean, no-mayo, and high-protein options.

Canned tuna being drained in a fine mesh strainer before adding it to tuna noodle casserole.
Drain the tuna before mixing; extra liquid can make the sauce thin before the casserole even reaches the oven.

Cream of Mushroom Soup

Condensed cream of mushroom soup is the shortcut sauce behind the old-school flavor most people expect here. For a 9×13 casserole, use 2 cans, 10.5 oz / 298 g each, then loosen the condensed soup with 3/4 to 1 cup / 180 to 240 ml milk before adding the noodles.

Milk

Milk turns the condensed soup into a bakeable sauce. Start with 3/4 cup / 180 ml for a thicker casserole, or use a full cup / 240 ml if you want the noodles more generously coated or plan to make the casserole ahead.

Cream of mushroom soup being whisked with milk to make a smooth sauce for tuna noodle casserole.
Whisk cream of mushroom soup with milk before adding noodles so the sauce coats evenly instead of staying thick in pockets.

Peas and Vegetables

Frozen peas are the easiest vegetable here because they cook quickly and add sweetness. You do not need to thaw frozen peas before mixing them in; they warm through quickly in the oven. If using larger frozen vegetables, thaw and drain them first so they do not water down the sauce.

You can also add sautéed onion, celery, mushrooms, carrots, or a small amount of spinach. Watery vegetables should be cooked or drained first.

Frozen peas being added to tuna noodle casserole mixture with drained vegetables nearby.
Frozen peas can go straight into tuna noodle casserole, while larger vegetables should be thawed and drained so they do not thin the sauce.

Cheddar Cheese

Cheddar is optional, but it makes the casserole richer and more family-dinner friendly. Use 1 cup / 113 g for a balanced version or 1 1/2 cups / 170 g for a cheesier casserole.

Crunchy Topping

Potato chips, buttery crackers, panko, breadcrumbs, and fried onions all work. Add the topping right before baking so it stays crisp instead of turning soft from the sauce.

Because condensed soup, canned tuna, cheddar, crackers, chips, and fried onions can all be salty, taste the sauce before adding extra salt. Black pepper, garlic powder, onion powder, Dijon mustard, or a small squeeze of lemon can add flavor without making the casserole too salty.

Cheddar, pepper, garlic powder, onion powder, Dijon, lemon, and crushed topping arranged for seasoning tuna noodle casserole.
Since soup, tuna, cheese, chips, and crackers can all be salty, build flavor with pepper, garlic, onion, Dijon, or lemon before adding more salt.

Equipment You Need

You do not need special equipment, but the pan size matters more than it seems. A shallow 9×13-inch / 23×33 cm baking dish is better than a deep, narrow dish because the casserole heats evenly and does not turn dense in the center before the edges are hot.

Shallow 9x13 baking dish compared with a deep narrow dish for tuna noodle casserole.
A shallow 9×13 dish spreads the tuna noodle casserole evenly, so the center heats through before the edges overbake.
  • Large pot for boiling egg noodles
  • Colander for draining noodles
  • Large mixing bowl or deep skillet
  • 9×13-inch / 23×33 cm baking dish, about 3 quarts
  • Small bowl for mixing the topping
  • Foil for make-ahead, reheating, or chilled casserole baking
  • Optional skillet or saucepan if making the no-soup sauce

How to Make Tuna Noodle Casserole

Six-step guide showing noodles, sauce, tuna and peas, casserole dish, topping, and baked tuna noodle casserole.
The order keeps the texture in check: cook the noodles, mix the sauce, fold gently, spread evenly, then add topping just before baking.

1. Boil the Egg Noodles

Bring a large pot of salted water to a boil. Add 12 oz / 340 g wide egg noodles and cook them about 1 minute less than the package’s al dente time. The noodles should bend easily but still have a little firmness in the center.

Egg noodles lifted from a pot with a one-minute-shy cue for tuna noodle casserole.
Pull the egg noodles early because they keep absorbing sauce in the oven, which helps prevent a mushy tuna noodle casserole.

2. Mix the Creamy Sauce

In a large bowl, whisk together the cream of mushroom soup, milk, black pepper, garlic powder, and onion powder. The sauce should be smooth before the noodles go in.

3. Fold in Tuna, Peas, Cheese, and Noodles

Add the well-drained tuna, frozen peas, cheddar, and cooked egg noodles. Fold gently so the tuna stays in small flakes instead of disappearing into the sauce. The noodles should be coated, but not swimming.

Tuna, peas, cheddar, egg noodles, and creamy sauce being folded together in a mixing bowl.
Gentle folding keeps the tuna in flakes and helps the sauce coat the egg noodles without turning the filling pasty.

4. Spread Into a Baking Dish

Grease a 9×13-inch / 23×33 cm baking dish and spread the mixture evenly. Do not pack it down firmly; a lighter layer heats more evenly.

Unbaked tuna noodle casserole mixture spread in a shallow dish with coated noodles, peas, tuna, and no topping yet.
Before the topping goes on, the casserole mixture should spread easily, with sauce clinging to the noodles instead of pooling in the dish.

5. Add the Crunchy Topping

Sprinkle crushed potato chips, crackers, or buttered panko over the top. If using breadcrumbs or panko, mix them with melted butter first so they brown instead of drying out.

6. Bake Until Bubbly

Bake uncovered at 375°F / 190°C for 20 to 25 minutes, until the edges are bubbling and the topping is lightly golden. Rest for 5 minutes before serving.

Tuna Noodle Casserole Recipe Card

Tuna Noodle Casserole Recipe with Egg Noodles

This is the classic pantry-style tuna noodle casserole: wide egg noodles, tuna, peas, cream of mushroom soup, milk, cheddar, and a crisp potato chip, cracker, or breadcrumb topping. It is simple, cozy, and built to stay soft, saucy, and scoopable after baking.

Prep Time15 minutes
Cook Time25 minutes
Total Time40 minutes
Yield6–8 servings

Equipment: large pot, colander, large mixing bowl, 9×13-inch / 23×33 cm baking dish, small topping bowl.

Ingredients

  • 12 oz / 340 g wide egg noodles
  • Salt for the pasta water, plus extra only if the sauce needs it
  • 2 cans tuna, 5 oz / 142 g each, drained well
  • 2 cans condensed cream of mushroom soup, 10.5 oz / 298 g each
  • 3/4 to 1 cup / 180 to 240 ml milk
  • 1 cup / 140 g frozen peas, no need to thaw
  • 1 cup / 113 g shredded cheddar cheese, optional but recommended
  • 1/2 teaspoon black pepper
  • 1/4 teaspoon garlic powder
  • 1/4 teaspoon onion powder
  • 1 cup crushed potato chips or buttery crackers, about 35 to 45 g depending on the topping

Optional Buttered Breadcrumb Topping

  • 1/2 cup / about 30 g panko or breadcrumbs
  • 2 tablespoons / 28 g melted butter
  • 2 tablespoons grated parmesan, optional

Optional Add-Ins

  • 1/2 cup chopped celery, sautéed
  • 1/2 cup chopped onion, sautéed
  • 8 oz / 225 g mushrooms, sautéed
  • 1/2 cup sour cream or 2 to 3 tablespoons mayo for an extra creamy version
  • 1 teaspoon Dijon mustard or a small squeeze of lemon for brightness

Instructions

  1. Preheat the oven. Heat oven to 375°F / 190°C. Grease a 9×13-inch / 23×33 cm baking dish.
  2. Cook the noodles. Bring a large pot of salted water to a boil. Cook the egg noodles 1 minute shy of al dente. Drain well.
  3. Make the sauce mixture. In a large bowl, whisk together cream of mushroom soup, 3/4 cup milk, black pepper, garlic powder, and onion powder. If using sour cream, mayo, Dijon, lemon, sautéed celery, onion, or mushrooms, stir them into the sauce now. Add the remaining 1/4 cup milk if the sauce looks very thick.
  4. Add the filling. Fold in the well-drained tuna, peas, cheddar, and cooked egg noodles. Mix gently so the tuna stays in flakes instead of breaking down completely.
  5. Fill the dish. Spread the mixture evenly into the prepared baking dish. It should look creamy and slightly loose, with the noodles fully coated but not swimming in sauce. If it looks stiff before baking, stir in 2 to 4 tablespoons more milk.
  6. Add topping. Sprinkle crushed potato chips or crackers over the top. If using panko or breadcrumbs, mix them with melted butter first, then sprinkle over the casserole.
  7. Bake. Bake uncovered for 20 to 25 minutes, until the edges are bubbling and the topping is lightly golden.
  8. Rest and serve. Let the casserole rest for 5 minutes before serving.

Notes

  • Taste the sauce before adding extra salt because condensed soup, tuna, cheese, chips, and crackers can all be salty.
  • For a faster bake, use 400°F / 200°C and check after 15 minutes.
  • If baking from chilled, cover loosely for the first half of baking and add 10 to 15 extra minutes.
  • Add crunchy topping right before baking, especially for make-ahead casserole.
  • For leftovers, add a splash of milk before reheating; the reheating section shows the cue.
Saveable tuna noodle casserole recipe card with servings, prep time, bake time, oven temperature, ingredients, and short method.
Keep the core tuna noodle casserole formula handy: egg noodles, tuna, soup, milk, peas, topping, and a 375°F bake until bubbling.

A quick safety note for families: for general fish-consumption guidance, especially for children or people who are pregnant or breastfeeding, see the FDA’s advice about eating fish.

How Long to Bake Tuna Noodle Casserole

The best default is 375°F / 190°C for 20 to 25 minutes. This temperature heats the casserole through without drying the noodles too quickly or burning the topping.

Oven Temperature Best Use Approximate Time
375°F / 190°C Best all-purpose creamy bake 20–25 minutes
400°F / 200°C Faster weeknight bake if the mixture is warm 15–20 minutes
425°F / 220°C Very fast bake 15–20 minutes, but watch for drying or topping browning too quickly
375°F / 190°C from chilled Make-ahead casserole from the refrigerator 30–40 minutes; cover loosely for the first half if needed
Tuna noodle casserole bake time guide with 375°F, 400°F, chilled bake times, and a bubbling-edge cue.
Bake time is a cue, not just a number; when the edges bubble and the center is hot, the casserole is ready.

The casserole is done when the edges bubble, the center is hot, and the topping is golden in spots. If the topping browns before the center is hot, loosely tent the dish with foil and continue baking.

If the casserole is coming from the fridge, check the make-ahead guidance before baking.

Should Tuna Noodle Casserole Be Covered While Baking?

Bake freshly assembled tuna noodle casserole uncovered so the topping can crisp. Cover it loosely with foil only if the casserole is cold from the refrigerator, the topping is browning too fast, or you are reheating leftovers.

Covered and uncovered tuna noodle casserole dishes showing when to bake uncovered or cover loosely with foil.
Bake fresh tuna noodle casserole uncovered for crunch; cover loosely only when reheating, baking from chilled, or slowing down browning.

Tuna Noodle Casserole with Cream of Mushroom Soup

The cream-of-mushroom version is the main recipe here because it matches the comfort-food casserole most people are looking for: quick, pantry-friendly, creamy, and familiar. For a 9×13-inch tuna noodle casserole, use 2 cans condensed cream of mushroom soup and 3/4 to 1 cup milk.

Prefer a homemade sauce? Skip ahead to the without-soup method.

Stir the soup and milk together before adding noodles so there are no thick pockets of soup. Cream of celery soup gives a lighter vegetable flavor, while one can cream of mushroom plus one can cream of chicken makes the sauce richer and more savory.

If you like understanding sauce texture, this easy cheese sauce recipe shows how milk, cheese, and gentle heat keep sauces smooth instead of grainy or gluey.

Tuna Noodle Casserole Without Soup

For a homemade version without condensed soup, make a quick white sauce with butter, flour, milk, broth, mushrooms, onion, and celery. Melt 4 tablespoons / 56 g butter in a skillet. Cook 1 small chopped onion, 1 to 2 celery ribs, and 8 oz / 225 g mushrooms until softened. Add 2 minced garlic cloves, then stir in 1/3 cup / 40 g flour.

Slowly whisk in 1 1/2 cups / 360 ml milk and 1 1/2 cups / 360 ml broth. Simmer until creamy, then fold in tuna, peas, noodles, and cheese if using. If the sauce thickens before the noodles are added, loosen it with extra milk or broth 2 tablespoons at a time.

Homemade white sauce for tuna noodle casserole being whisked with mushrooms, onion, celery, milk, and broth.
For tuna noodle casserole without soup, a quick white sauce gives you better control over salt, thickness, and mushroom flavor.

For a deeper white-sauce reference, this béchamel sauce guide explains the butter-flour-milk method that also helps a homemade tuna casserole sauce stay smooth.

Best Tuna Noodle Casserole Toppings

The topping changes the whole personality of the casserole. Potato chips make it salty and old-fashioned, crackers make it buttery, panko makes it crisp, and fried onions make it taste more like a holiday casserole.

Potato chips give you the nostalgic church-supper casserole. Buttered panko gives you a cleaner, crispier top.

Topping Best For How to Use It
Potato chips Old-fashioned salty crunch Crush lightly and add right before baking.
Ritz or buttery crackers Buttery comfort-food topping Crush coarsely; mix with a little melted butter if needed.
Panko Crispest clean topping Mix with melted butter and optional parmesan.
Breadcrumbs Classic balanced topping Use with melted butter so they brown evenly.
Fried onions Green bean casserole-style crunch Use lightly because the flavor is strong.
Potato chips, crackers, panko, breadcrumbs, and fried onions compared as toppings for tuna noodle casserole.
The topping changes the whole casserole: potato chips taste nostalgic, crackers feel buttery, and panko gives a cleaner crunch.
Old-fashioned tuna noodle casserole with crushed potato chip topping and a scooped corner showing noodles, peas, and tuna.
Crushed potato chips are the old-fashioned choice when you want salty crunch and a true retro tuna casserole finish.

Choosing a topping for a make-ahead casserole? See the make-ahead notes so the topping stays crisp.

How to Keep Tuna Noodle Casserole Creamy, Not Dry

The fix for dry tuna casserole happens before it goes into the oven, not after it comes out. Dryness usually comes from overcooked noodles, sauce that was too thick before baking, too much time in the oven, or leftovers reheated without adding moisture back.

Three-step guide showing one-minute-shy noodles, generously coated casserole mixture, and bubbling edges for creamy tuna noodle casserole.
The best texture starts before baking: slightly firm egg noodles, a generous sauce coating, and a stop point when the edges bubble.

Before Baking

  • Cook the noodles 1 minute shy of al dente.
  • Use the full 1 cup / 240 ml milk if making the casserole ahead.
  • Do not pack the noodles tightly into the baking dish.

After Baking or Reheating

  • Rest the casserole for 5 minutes, not 15 or 20.
  • For leftovers, add a splash of milk before reheating.
  • Cover while reheating, then uncover briefly to crisp the topping.
  • If a serving is already dry, stir in a spoonful of warm milk or cream before serving.
Three plates of tuna noodle casserole showing too dry, just right, and too watery textures.
The best tuna noodle casserole is soft and scoopable; if it slices like a block or leaks sauce, the balance needs adjusting.

If the casserole is already baked and the texture still seems off, use the troubleshooting guide to decide whether the issue is sauce, noodles, topping, or bake time.

No-Boil Tuna Noodle Casserole: Is It Worth It?

No-boil tuna noodle casserole works when convenience matters more than perfect noodle texture. It saves a pot, but the noodles need more liquid, a tightly covered pan, and a longer bake so they can soften in the sauce.

For the best egg noodle texture, boiling the noodles separately still gives the best result. If you do try a no-boil version, make the sauce much looser, press the noodles under the liquid, and cover the pan tightly with foil.

Add the topping only after the noodles are tender; otherwise the top can brown before the casserole is fully cooked.

No-boil tuna noodle casserole setup with noodles under sauce, foil nearby, and topping kept separate.
No-boil tuna noodle casserole needs extra liquid and patience, so keep the topping off until the noodles have softened.

Stovetop Tuna Noodle Casserole

This is the weeknight version when you want the flavor of tuna noodle casserole without waiting for a baked top. It will be softer and saucier than the oven version, and the topping is sprinkled on at the end instead of browned in the oven.

Cook the noodles separately, or simmer them gently in a creamy sauce in a Dutch oven. Stir in the tuna and peas near the end so the tuna stays flaky and the peas do not overcook. Finish each serving with crushed crackers, potato chips, or toasted breadcrumbs for crunch.

Stovetop tuna noodle casserole in a deep skillet with a serving topped with crushed crackers or chips.
The stovetop version stays softer and saucier, while the crunch comes from adding chips, crackers, or crumbs at the end.

Tuna Noodle Casserole for Two

A full 9×13-inch pan is great for family dinner, but an 8×8-inch dish or 1.5-quart baking dish is easier when you only want a few servings. Keep the sauce generous, add the topping right before baking, and check early because a smaller casserole heats faster.

Ingredient Small-Batch Amount
Egg noodles 4 oz / 115 g
Tuna 1 can, 5 oz / 142 g, drained
Peas 1/2 cup / 70 g
Cream of mushroom soup 1/2 to 2/3 can for balanced sauce, or 1 full can for extra creamy
Milk 1/4 to 1/3 cup / 60 to 80 ml
Dish 8×8-inch dish or 1.5-quart baking dish
Bake time 15–20 minutes at 375°F / 190°C
Small batch tuna noodle casserole in an 8x8 dish with two plated servings.
Use an 8×8 dish when you want the same comfort-food flavor without committing to a full 9×13 pan.

Old-Fashioned Tuna Noodle Casserole

For an old-fashioned tuna noodle casserole, keep the ingredients simple: egg noodles, canned tuna, cream of mushroom soup, milk, peas, cheddar, and crushed potato chips. Use light seasoning, add celery or onion only if you like that retro casserole flavor, and taste before salting because the soup, tuna, cheese, and chips already bring plenty.

What to Serve with Tuna Noodle Casserole

Tuna noodle casserole is rich, creamy, and filling, so the best sides are usually fresh, crisp, or simple. You do not need a heavy side dish unless you are feeding a larger crowd.

  • Fresh sides: green salad, cucumber salad, coleslaw, or tomato cucumber salad.
  • Vegetables: steamed broccoli, green beans, roasted carrots, asparagus, or peas and carrots.
  • Bread: dinner rolls, biscuits, garlic bread, or a simple slice of toasted sourdough.
  • Bright sides: pickles, lemony salad, or vinegar-based slaw to balance the creamy casserole.
Tuna noodle casserole served with green salad, green vegetables, bread, and a bright side.
Because tuna noodle casserole is rich and filling, fresh salad, green vegetables, bread, or a bright pickle-style side keeps the plate balanced.

Serve it soon after the short rest, while the sauce is still creamy and the topping has some crunch.

Make Ahead, Store, and Freeze Tuna Noodle Casserole

Make Ahead

Assemble the casserole without the crunchy topping, cover, and refrigerate for up to 1 day. When ready to bake, let it sit at room temperature while the oven preheats, stir in a small splash of milk if the noodles have absorbed too much sauce, add the topping, and bake. A chilled casserole may need 10 to 15 extra minutes. For topping choices that hold up best, jump back to the topping guide.

Make-ahead tuna noodle casserole filling in a baking dish with crunchy topping stored separately.
For make-ahead tuna noodle casserole, refrigerate the filling without the topping so the crumbs, chips, or crackers stay crisp.

Storage

Store leftovers in an airtight container in the refrigerator for 3 to 4 days. For general leftover safety guidance, see the USDA’s leftovers and food safety guide.

Freezing

You can freeze tuna noodle casserole before or after baking, but the noodles will soften slightly after thawing. For best texture, freeze the casserole without the topping, then add fresh topping before baking or reheating.

Freezer-ready tuna noodle casserole in containers with crunchy topping stored separately for later.
Freeze tuna noodle casserole without the topping; then add fresh chips, crackers, or crumbs before baking or reheating.

Reheating

To reheat, add a splash of milk, cover loosely with foil, and warm in a 325°F / 165°C oven until hot. Remove the foil for the last few minutes if you want to re-crisp the topping. For single servings, microwave gently with a splash of milk and stir halfway through. If leftovers still seem dry, check the creamy, not dry tips for moisture fixes.

Leftover tuna noodle casserole in a small dish with milk being poured in and foil nearby for reheating.
When reheating tuna noodle casserole, a small splash of milk helps loosen the sauce after the noodles absorb moisture in the fridge.

Tuna Noodle Casserole Variations

Extra Cheesy Tuna Noodle Casserole

For a cheesier family-style bake, increase the cheddar to 1 1/2 or 2 cups and sprinkle a little extra cheese under the topping. For a sharper flavor, use sharp cheddar or add parmesan to the crumb topping. If you are in a full cheesy comfort-food mood, this macaroni and cheese recipe covers stovetop, baked, and Southern-style versions with similar creamy-baked pasta logic.

Tuna Noodle Casserole with Celery, Onion, or Mushrooms

Sautéed celery, onion, or mushrooms make the casserole taste a little fresher and more homemade. Cook them in a little butter before adding them to the dish so they add flavor without releasing too much water in the bake.

Healthier Tuna Noodle Casserole

For a lighter but still creamy version, use whole wheat egg noodles or a higher-protein pasta, add more vegetables, reduce the cheese, and use the no-soup sauce option.

Tuna Noodle Casserole Without Peas

Leave the peas out or replace them with corn, broccoli, mushrooms, spinach, or mixed vegetables. If using watery vegetables, cook or drain them first.

Tuna Hotdish

Tuna hotdish is often very similar to tuna noodle casserole, especially in Midwestern-style cooking. It usually means a creamy baked casserole with noodles or another starch, canned tuna, vegetables, and a crunchy topping.

Troubleshooting Tuna Noodle Casserole

Most tuna casserole problems are fixable once you know whether the issue came from the noodles, the sauce, the topping, or the bake time.

Tuna noodle casserole troubleshooting guide with fixes for dry, watery, mushy, and soggy topping problems.
Most tuna casserole problems come from the noodles, sauce, topping, or bake time; once you spot the cause, the fix is usually simple.
Problem Likely Cause Fix
Dry casserole Too little sauce, overcooked noodles, or overbaking Add more milk before baking, cook noodles short, and bake only until bubbly.
Mushy noodles Noodles boiled too long or held too long before baking Cook 1 minute shy of al dente and bake soon after mixing.
Watery sauce Undrained tuna, too much milk, or watery vegetables Drain tuna well, do not overdo the milk, thaw and drain larger frozen vegetables, and bake uncovered.
Bland flavor Not enough seasoning or too much plain pasta Add black pepper, garlic powder, onion powder, mustard, sharp cheddar, or a squeeze of lemon.
Soggy topping Topping added too early, casserole covered while hot, or leftovers stored with topping Add topping right before baking. For leftovers, refresh with a few new crumbs or chips after reheating.
Topping browns too fast Oven too hot or topping too close to broiler Tent loosely with foil and continue baking until the center is hot.

Once baked, the tuna noodle casserole should scoop easily, with creamy noodles underneath and a lightly crisp topping on top. If it looks bubbly at the edges and still moist in the center, it is ready.

FAQs

Do you cook egg noodles before baking tuna casserole?

Cook the egg noodles first, but stop about 1 minute before they are fully al dente. They will continue softening in the oven.

How much milk do you add to tuna noodle casserole?

For a 9×13-inch tuna noodle casserole with 2 cans of condensed soup, use 3/4 to 1 cup / 180 to 240 ml milk. Use the full cup if you want it creamier or are making it ahead.

Do you need one or two cans of cream of mushroom soup?

For a full 9×13-inch casserole with 12 oz / 340 g egg noodles, 2 cans of condensed soup give the best creamy texture. One can is better for a smaller casserole.

What kind of tuna works best?

Chunk light tuna works well for a softer, milder casserole, while solid white albacore gives larger flakes and a firmer bite. Drain either type well.

Should tuna noodle casserole be covered while baking?

Bake it uncovered if the casserole is freshly assembled. Cover loosely with foil only if it is chilled, reheating, or browning too quickly before the center is hot.

Why is my tuna noodle casserole dry?

It probably had too little sauce, overcooked noodles, or baked too long. The casserole should come out when the edges are bubbling, not when the top looks dry.

What can replace cream of mushroom soup?

Cream of celery soup is the closest easy swap. Cream of chicken makes the sauce richer, and a homemade butter-flour-milk sauce gives you the most control over salt and texture.

Can tuna noodle casserole be made ahead?

Make it up to 1 day ahead, but leave off the topping until just before baking. If the noodles absorb too much sauce in the fridge, stir in a small splash of milk before baking.

Can you freeze tuna noodle casserole?

Freezing works, though the noodles soften after thawing. Freeze without the topping for the best texture, then add fresh topping before baking or reheating.

Is tuna hotdish the same as tuna noodle casserole?

They are very similar. “Hotdish” is often the Midwestern term for a creamy baked casserole with a starch, protein, vegetables, and a topping.

What vegetables go well in tuna noodle casserole?

Peas are the classic choice, but celery, onion, mushrooms, carrots, broccoli, spinach, corn, and mixed vegetables all work. Cook or drain watery vegetables first so they do not thin the sauce.

Posted on 1 Comment

Healthy Homemade Granola Bars Recipe

Stack of chewy homemade granola bars with oats, seeds, chocolate chips, honey, and nut butter on a warm neutral surface.

A good healthy homemade granola bars recipe should give you bars that are chewy, sturdy, lightly sweet, and easy to pack without crumbling into oat clusters. This version starts with a simple no-bake base of oats, nut butter, a sticky sweetener, salt, and mix-ins. Once that base works, you can adjust it for peanut butter, chocolate chip, protein, low-sugar, gluten-free, vegan, nut-free, cereal-style, or baked flapjack-style bars.

The best part is that these healthy homemade granola bars can fit the way you actually snack. Keep them simple for lunchboxes, add protein powder for a more filling post-workout bar, use sunflower seed butter for a nut-free lunchbox option, or bake the mixture briefly when you want a crunchier texture. Once you know how the oat-binder-sweetener formula works, homemade granola bars become much easier to customize.

Summary guide for healthy homemade granola bars showing the base formula, texture check, and quick fixes for dry, wet, chunky, or crumbly bars.
If a reader only remembers three things, it should be these: use a balanced base formula, make sure the mixture clumps when squeezed, and fix problems before chilling by adjusting binder, oats, seeds, or mix-in size.

If this is your first batch, start with the basic chewy no-bake version. Do not try to make the bars protein-rich, vegan, low-sugar, crunchy, and nut-free all at once. Instead, make one reliable batch first, learn how the mixture should feel before pressing, and then use the variations to change the flavor, sweetness, texture, or diet fit.

Healthy Homemade Granola Bars Guide

Start with the chewy no-bake base, then use the guides below to make the bars firmer, softer, crunchier, lower in sugar, higher in protein, vegan, gluten-free, nut-free, cereal-style, or flapjack-style.

Quick Answer: Healthy Homemade Granola Bars Recipe

To make chewy, healthy homemade granola bars, mix rolled oats with creamy nut butter or seed butter, a sticky sweetener such as honey, brown rice syrup, or date paste, a little salt, and small mix-ins. Then, press the mixture very firmly into a lined pan, chill until set, and slice it into bars.

The bars hold together best when the mixture looks sticky and slightly glossy before it goes into the pan. However, if it looks dusty, it will probably slice dusty. If it feels wet and loose, add more oats, seeds, or ground flaxseed. In the end, the goal is a dense mixture that clumps when squeezed in your hand.

In this recipe, the homemade oat mixture turns into chewy granola-style bars once it is pressed firmly and chilled. That texture cue matters more than any single mix-in, especially if you want a healthier bar that still slices cleanly.

Formula guide showing oats, nut butter, sticky sweetener, small mix-ins, pressing, chilling, and finished homemade granola bars.
In short, the formula is simple: oats give structure, nut or seed butter adds richness, sticky sweetener helps the bars hold, and small mix-ins add flavor without breaking the slab.
At a glance: These are chewy no-bake granola bars made with rolled oats, creamy peanut butter or seed butter, honey or date paste, seeds, and mini chocolate chips. You need about 15 minutes of hands-on time, then the bars chill until firm. For the most reliable first batch, use peanut butter and honey, press the mixture firmly, and chill before slicing.

Why Make Granola Bars at Home?

Making granola bars at home gives you more control over sweetness, texture, binder choice, and mix-ins. That matters because the same basic oat mixture can become a chewy snack bar, a firmer lunchbox bar, a lower-sugar seed bar, a vegan date bar, or a protein-focused bar once you know how to adjust the formula.

Guide image explaining why to make granola bars at home, highlighting control over sweetness, binder choice, texture adjustment, and real mix-ins.
One of the biggest advantages of making granola bars at home is control. You decide how sweet they are, what binder to use, how chewy or firm they feel, and which real mix-ins actually go into the batch.

5-Ingredient Homemade Granola Bars

When you want the simplest possible version, use this 5-ingredient formula. It is the easiest way to make homemade granola bars without turning the recipe into a project.

Because this recipe keeps the bars homemade, you can control the granola-style base, the binder, and the final sweetness without relying on a packaged snack bar.

Five ingredients for homemade granola bars: oats, nut butter, honey, salt, mix-ins, and one finished granola bar.
Because this version starts with only five ingredients, it is the easiest place to learn how the oat mixture should look before you move into protein, vegan, nut-free, or low-sugar bars.
  • Oats for structure and chew
  • Peanut butter or sunflower seed butter for richness and binding
  • Honey, brown rice syrup, or date paste for stickiness
  • Salt for balance
  • Mini chocolate chips, seeds, raisins, or chopped nuts for flavor

If you are making these for older kids, start with oats, peanut butter, honey, salt, and mini chocolate chips. For a nut-free version, use sunflower seed butter and seeds instead. When you want a less sweet batch, use seeds or chopped nuts as the fifth ingredient instead of chocolate or dried fruit.

For a lighter, crispier bar, replace 1/2 to 1 cup of the oats with puffed rice cereal, crisp rice cereal, or crisp oat cereal. Since cereal is lighter than oats, keep the sticky binder strong so the bars hold together.

Choose Your Granola Bar Style

This recipe works because homemade granola bars do not all need the same texture. A lunchbox bar, breakfast bar, protein bar, cereal bar, and crunchy bar each need slightly different handling.

Granola bar style guide showing chewy, crunchy, protein, low-sugar, vegan, and nut-free homemade granola bar options.
Once the base recipe works, you can steer the same homemade granola bar formula toward chewy, crunchy, protein-rich, low-sugar, vegan, or nut-free versions.
You Want Best Version to Make What to Remember
Easiest first batch Chewy no-bake granola bars Use peanut butter and honey, then press hard and chill fully.
Bars that hold together best Honey or brown rice syrup + nut butter Brown rice syrup is especially sticky; honey is easier to find.
Prepared granola version Ready-made granola + sticky binder Crush large clusters first and use less added sweetener if the granola is already sweet.
Nut-free lunchbox option Sunflower seed butter + seeds Skip nuts and use pumpkin seeds, sunflower seeds, sesame, coconut, or mini chocolate chips.
Higher-protein bars Protein granola bars Start with a small amount of protein powder so the bars do not turn chalky.
Less sweet bars Seed-heavy bars with less dried fruit and chocolate Do not remove all sticky binder, or the bars will crumble.
Crunchy granola bars Toasted and briefly baked bars Cool completely before slicing; crunchy bars firm as they cool.
Cereal bars Oats + puffed rice or crisp cereal Use a strong binder and press firmly because cereal is lighter than oats.
Vegan granola bars Date paste or brown rice syrup bars Maple syrup can work, but it usually needs extra support from nut butter or flax.
Soft breakfast bars Oat bars with banana or applesauce These are softer and more breakfast-like than classic granola bars.
Flapjack-style oat bars Baked granola bar variation Use the crunchy baked method, but keep the sweetener measured for a lighter bar.

Recipe Card: Chewy No-Bake Healthy Homemade Granola Bars

Tip: Use your browser’s print option to save this recipe card, or screenshot it if you want to keep the basic formula on your phone.

Saveable recipe card for chewy no-bake homemade granola bars with oats, nut or seed butter, sticky sweetener, mix-ins, pressing, chilling, and slicing notes.
Use this base ratio as your starting point, then adjust the binder, sweetener, and mix-ins depending on whether you want softer bars, firmer lunchbox bars, or a more protein-focused batch.
Before you start: For the easiest chewy bars, use peanut butter and honey. If you have a kitchen scale, weigh the oats, nut butter, and sweetener for the most consistent texture. For vegan bars, use brown rice syrup or date paste instead of honey.

Chewy No-Bake Healthy Homemade Granola Bars Recipe

These healthy homemade granola bars are chewy, no-bake, easy to customize, and made with oats, nut butter, honey or date paste, seeds, and mini chocolate chips. Start with the base recipe, then use the variations below to change the flavor, texture, sweetness, or diet fit.

Yield12 bars
Prep Time15 minutes
Binder Warming2 minutes
Chill Time1 to 2 hours
Total TimeAbout 1 1/2 to 2 1/2 hours

Ingredients for Chewy Homemade Granola Bars

  • 2 1/4 cups rolled oats or old-fashioned oats, about 200 g / 7 oz
  • 3/4 cup creamy peanut butter, almond butter, sunflower seed butter, or tahini, about 190–205 g / 6.7–7.2 oz
  • 1/2 cup honey, brown rice syrup, or thick date paste, about 160–170 g / 5.6–6 oz / 120 ml
  • 1 teaspoon vanilla extract, 5 ml
  • 1/2 teaspoon cinnamon, optional
  • 1/2 teaspoon fine salt, about 3 g, or less if your nut butter is salted
  • 1/3 cup pumpkin seeds or sunflower seeds, about 45–55 g / 1.6–2 oz
  • 1/3 cup chopped nuts, chopped dried fruit, or extra seeds, about 40–55 g / 1.4–2 oz
  • 1/3 cup mini chocolate chips, about 55–60 g / 2 oz, optional
  • 1 to 2 tablespoons ground flaxseed or chia seeds, about 7–18 g, optional

Instructions for Homemade Granola Bars

  1. Line an 8-inch / 20 cm square pan with parchment paper, leaving overhang on two sides. For thinner bars, use a 9-inch / 23 cm square pan. For thicker bars, use a 9 x 5-inch / 23 x 13 cm loaf pan or press the mixture into only part of a larger pan.
  2. In a small saucepan over low heat, warm the nut butter and honey until smooth and pourable. Then, stir in vanilla, cinnamon, and salt. Do not boil for the basic no-bake version.
  3. In a large bowl, mix the oats, seeds, chopped nuts or dried fruit, and flaxseed or chia seeds if using.
  4. Pour the warm binder over the oat mixture. Stir thoroughly until every oat and mix-in is coated. At this point, the mixture should feel sticky and dense, not dry or dusty.
  5. Let the mixture cool for 3 to 5 minutes, then fold in the mini chocolate chips.
  6. Transfer to the lined pan. Cover with parchment and press very firmly into an even layer. Use the bottom of a measuring cup to compact the mixture into the corners.
  7. Chill for at least 1 hour, or 2 hours for firmer bars. Before slicing, the center should feel firm when pressed.
  8. Lift out of the pan and slice into 12 bars. Store chilled for the firmest texture.

Recipe Notes for Homemade Granola Bars

  • The mixture should look sticky and dense before pressing. If dry oats collect at the bottom of the bowl, add 1 tablespoon more nut butter or honey before pressing.
  • When the mixture crumbles before pressing, add more nut butter or honey. If it feels wet and sticky, add more oats, seeds, or ground flaxseed.
  • Use brown rice syrup or thick honey instead of thin maple syrup when you want firmer bars.
  • Vegan granola bars work best with brown rice syrup or date paste.
  • Nut-free bars need sunflower seed butter or tahini, plus seeds instead of nuts.
  • Gluten-free bars need certified gluten-free oats and checked labels on all mix-ins.
  • Protein granola bars work best when you replace 1/4 cup oats with protein powder and add 1 to 2 extra tablespoons nut butter if the mixture feels dry.
  • For a lighter crisp texture, replace 1/2 to 1 cup of the oats with puffed rice cereal, crisp rice cereal, or crisp oat cereal.
  • Bars made with ready-made granola need about 2 1/2 cups prepared granola in place of the oats, with less sweetener if the granola is already sweet.
  • A warm lunchbox needs a firmer binder, so use brown rice syrup or a short-cooked honey binder and pack with an ice pack.
  • Do not use honey in bars for children under 12 months old. Use date paste or another suitable sweetener instead.

Nutrition Estimate for Homemade Granola Bars

Nutrition will vary depending on the nut butter, sweetener, seeds, chocolate, dried fruit, and protein powder you use. As a rough estimate, one of 12 bars from the basic peanut butter and honey version will usually fall in the range of 180 to 230 calories, with most of the energy coming from oats, nut butter, seeds, and sweetener. For a lighter bar, cut the slab into 16 smaller squares.

How to Cut Homemade Granola Bars

Cut the slab into 12 rectangles when you want regular snack bars. For smaller lunchbox portions, slice it into 16 squares. Bite-size freezer snacks work well as 24 mini bars. In general, thicker bars hold together better, while thinner bars feel lighter and chill faster.

Texture Notes for Chewy Homemade Granola Bars

For the most reliable first batch, use peanut butter and honey because both help the oats stick together. Brown rice syrup makes firmer bars, especially if you need them to hold up longer outside the fridge. Maple syrup tastes good, but it usually makes softer, more fragile bars unless you add extra nut butter or ground flaxseed.

Texture checkpoint guide showing sticky granola bar mixture, a hand-squeezed cluster, and a firm pressed slab in a pan.
Before chilling, the mixture should look sticky, clump when squeezed, and press into a compact slab; otherwise, the bars may crumble when sliced.

The mixture should feel sticky before it goes into the pan. If dry oats are still sitting at the bottom of the bowl, do not press yet. Instead, add another spoonful of nut butter or honey, stir again, and test a small handful. Once it clumps when squeezed, it is ready to press.

Texture checkpoints: Before pressing, the mixture should look sticky, dense, and slightly glossy. After pressing, the slab should feel compact and flat, not loose or bumpy. After chilling, the center should feel firm when pressed. If the knife smears, chill longer. If the slab cracks sharply, let it sit for 5 minutes before slicing.

Best Pan Size for Homemade Granola Bars

An 8-inch / 20 cm square pan gives the best balance of thickness, chilling time, and clean slicing. A 9-inch / 23 cm square pan makes thinner bars that chill faster, but they can break more easily if the mixture is not pressed firmly. A 9 x 5-inch / 23 x 13 cm loaf pan makes thicker bars that hold together well, although the yield will be smaller.

Comparison guide showing homemade granola bars in an 8-inch square pan, 9-inch square pan, and 9x5-inch loaf pan, with notes about thickness and slicing.
Pan size changes the thickness of homemade granola bars more than most people expect. An 8-inch square pan usually gives the best balance, whereas a 9-inch square makes thinner bars and a loaf pan gives a thicker, taller bar.

Whatever pan you use, press the mixture into a tight, even layer before chilling. Otherwise, the slab may look set on top but crumble when sliced.

Why These Healthy Homemade Granola Bars Work

Granola bars are simple, but they can fail in frustrating ways. Sometimes they taste good but crumble as soon as you cut them. At other times, they are so sticky that they feel unfinished. Occasionally, they become hard because the binder was cooked too long.

These bars work because the oats, binder, sweetener, and mix-ins are balanced before anything goes into the pan. First, the oats give chew and structure. Then, the nut butter or seed butter adds richness and helps glue the mixture together. Meanwhile, the sticky sweetener holds the dry ingredients in place. Because small mix-ins spread through the bars instead of creating big break points, the slab cuts more cleanly. Finally, firm pressing and proper chilling turn the mixture into sliceable bars.

Guide showing how oats, binder, sticky sweetener, pressing, and chilling help homemade granola bars hold together and slice cleanly.
In other words, bars hold together because each part has a job: oats build structure, binder adds cohesion, sticky sweetener locks things in, pressing compacts the slab, and chilling firms everything up for cleaner slices.

Oats are also a strong base for a filling snack because they are a whole grain and contain beta-glucan, the main soluble fiber in oats. Harvard’s Nutrition Source notes that beta-glucan has been studied for slowing digestion and increasing satiety, which is one reason oats work so well in breakfasts and snacks. Read Harvard’s guide to oats and beta-glucan here.

Are Homemade Granola Bars Healthy?

Homemade granola bars can be a healthier everyday snack, especially when you build them around oats, nuts, seeds, and a measured amount of sweetener. Still, homemade does not automatically mean sugar-free, low-calorie, or high-protein. The real benefit is that you decide what goes in and how sweet, filling, or protein-rich the bars should be.

Plate of homemade granola bars with oats, seeds, chocolate chips, berries, and yogurt, alongside notes about why balanced homemade granola bars can be a healthier snack.
Homemade granola bars can be a healthier snack when they are built with balance. For example, whole oats, nuts or seeds, measured sweetener, and sensible portions make them easier to fit into everyday eating.

For a more balanced homemade granola bar, start with whole oats, a moderate amount of nut or seed butter, seeds for texture, a sticky sweetener used with restraint, and enough salt to make the flavors taste complete. If the bar is meant to replace breakfast, consider protein and fiber. However, if it is meant to be a small snack, keep the portion size realistic.

In practice, a healthy homemade granola bars recipe should not depend only on removing sugar. It should also help the bars stay satisfying, easy to portion, and sturdy enough to eat without falling apart.

Granola Bars vs Oat Bars vs Muesli Bars vs Cereal Bars

These names overlap, but they are not always used the same way. Knowing the difference helps you choose the right style instead of forcing one recipe to do everything.

Comparison image showing a granola bar, oat bar, muesli bar, and cereal bar, with notes on texture, ingredients, and style differences.
Although these snack bars often get grouped together, they are not exactly the same. Granola bars are usually chewier and chunkier, oat bars are softer, muesli bars lean more toward nuts and dried fruit, and cereal bars are lighter and crispier.
Bar Type What It Usually Means Best For
Granola bars Oat-based bars with nuts, seeds, dried fruit, chocolate, and a sticky binder. Classic snack bars, lunchboxes, road trips, meal prep.
Oat bars Often softer, more breakfast-like, and sometimes made with banana, applesauce, or baked oatmeal-style mixtures. Breakfast, kids’ snacks, softer meal-prep bars.
Muesli bars A common name in some regions for oat, nut, seed, and dried fruit bars. Chewy oat bars with fruit, nuts, and seeds.
Cereal bars Bars made with puffed rice, toasted cereal, oat cereal, or similar breakfast cereals. Quick no-bake lunchbox bars and kid-friendly snacks.
Protein bars Bars built around extra protein from protein powder, nuts, seeds, dairy, soy, or other protein-rich ingredients. Post-workout snacks, higher-protein breakfasts, gym bags.
Flapjacks In UK-style usage, usually baked oat bars made with oats, fat, sugar, and syrup. People who want a firmer baked oat bar texture.

For this recipe, rolled oats or old-fashioned oats are the best starting point because they give homemade granola-style bars visible texture and chew. If you are still deciding which oats to use, MasalaMonk’s guide to oats, types, nutrition, and differences explains rolled oats, quick oats, instant oats, and steel-cut oats in more detail.

Ingredients for Healthy Homemade Granola Bars

This recipe uses simple homemade granola bar ingredients, but each one has a job. Once you understand what each ingredient does, it becomes much easier to make substitutions without ending up with crumbly, sticky, or dry bars.

Ingredient guide for healthy homemade granola bars showing oats, nut or seed butter, sticky sweetener, seeds, mix-ins, salt, cinnamon, and sliced bars in a pan.
Before you start, it helps to see the building blocks clearly. Oats provide structure, nut or seed butter adds richness, sticky sweetener helps with hold, and mix-ins bring flavor, texture, and variety.

Rolled Oats or Old-Fashioned Oats

Rolled oats are the best all-purpose choice for chewy granola bars. They are flat enough to bind into the mixture, but they still keep enough texture to feel hearty. Old-fashioned oats and rolled oats are usually the same thing, so either label works here. MasalaMonk has a full guide on substituting old-fashioned oats for rolled oats if you want the details.

Quick oats can work when you want softer bars, although the texture will be less defined. On the other hand, steel-cut oats are not ideal for this no-bake recipe because they stay too hard and do not bind well unless they are cooked or processed first.

Nut Butter or Seed Butter

Creamy peanut butter is the easiest binder for a first batch because it is thick, flavorful, and sticky. Almond butter, cashew butter, sunflower seed butter, pumpkin seed butter, and tahini can also work. If you use natural nut butter, stir it very well before measuring, since separated oil can make some parts of the bars greasy while other parts stay dry.

For peanut butter granola bars, use creamy peanut butter. For nut-free granola bars, use sunflower seed butter or tahini. If you want full control over salt, sweetness, and texture, you can also make peanut butter at home and use it as the binder.

Sticky Sweetener and Best Binders

A sticky sweetener turns oats and mix-ins into bars instead of loose granola. Honey is the easiest choice for chewy no-bake granola bars. Brown rice syrup is even stickier and can help bars hold together more firmly. Date paste works well for a no-refined-sugar version. Maple syrup tastes good, but it is thinner and less sticky, so bars made only with maple syrup can be more fragile unless you adjust the formula.

Binder comparison guide for granola bars showing honey, brown rice syrup, date paste, and maple syrup, with notes on firmness, sweetness, and texture.
Choosing the right binder changes how your granola bars feel and slice. Honey is easy to use, brown rice syrup gives the firmest hold, date paste avoids refined sugar, and maple syrup usually makes a softer bar.

For vegan granola bars, brown rice syrup and date paste usually give a better hold than maple syrup alone. If you use maple syrup, add extra nut butter, ground flaxseed, or a slightly longer chill time. Also, if you are making bars for a baby under 12 months old, do not use honey; the CDC advises against giving honey to children younger than 12 months because of infant botulism risk. Read the CDC guidance here.

The binder is where most granola bars succeed or fail. Use this quick guide when you are choosing between honey, maple syrup, date paste, brown rice syrup, peanut butter, tahini, or seed butter.

Binder Goal Best Choice Why It Works
Best first batch Peanut butter + honey Easy, sticky, familiar, and reliable.
Firmest vegan bars Seed butter + brown rice syrup Brown rice syrup is thick and sticky, so it holds better than thin maple syrup.
No-refined-sugar bars Nut butter + date paste Thick, sweet, and caramel-like, though still naturally sweet.
Flapjack-style bars Honey or golden syrup + butter or nut butter Gives a firmer baked oat-bar texture.
No-peanut-butter bars Almond butter, cashew butter, tahini, or sunflower seed butter Useful for allergies, taste preference, and lunchbox planning.
Lunchbox-firm bars Brown rice syrup or short-cooked honey binder Helps bars hold up better outside the fridge.

Nuts, Seeds, Dried Fruit, and Chocolate

Mix-ins make homemade granola bars more interesting, but they can also make the bars break apart. Large almonds, whole cashews, big chunks of dates, and oversized chocolate chips create weak spots in the slab. Therefore, chop nuts and dried fruit before mixing, and use mini chocolate chips when possible.

Good mix-ins include pumpkin seeds, sunflower seeds, chia seeds, flaxseed meal, sesame seeds, chopped nuts, shredded coconut, dried cranberries, raisins, dates, mini chocolate chips, cacao nibs, and a pinch of cinnamon. In general, smaller pieces make cleaner bars because they compress more evenly into the oat mixture.

Salt, Vanilla, and Cinnamon

Do not skip the salt. A small amount keeps the bars from tasting flat and makes the nut butter, oats, and sweetener taste more complete. Vanilla adds warmth, while cinnamon gives the bars a breakfast-like flavor. You can also use cardamom, ginger, cocoa powder, orange zest, or espresso powder in specific variations.

Optional Protein Powder

Protein powder can turn this into a homemade protein granola bars recipe, but it changes the texture quickly. Whey protein usually blends more smoothly than many plant proteins. Meanwhile, plant protein powders often absorb more moisture and can make bars dry or chalky. Start small, then add more nut butter or a splash of milk if the mixture feels dry before pressing.

For a more protein-focused oat recipe, MasalaMonk already has healthy oat protein bars. If you want to understand protein powder in oats more deeply, this protein oatmeal guide explains whey, plant protein, yogurt, egg whites, paneer, tofu, and other ways to raise protein in oat-based meals.

The Simple Formula Behind Homemade Granola Bars

Think of this recipe as a balance between dry structure and sticky glue. The oats and mix-ins give the bars body, while the nut butter and sweetener hold everything together. If either side gets too heavy, the texture suffers.

Formula guide for homemade granola bars showing oats, nut or seed butter, sticky sweetener, mix-ins, and a finished bar.
Once you understand the base formula, homemade granola bars become much easier to adjust. The oats build structure, while the binder and sticky sweetener help the mixture press into bars instead of crumbling apart.
Ingredient Type Starting Amount Purpose Best Choices
Oats 2 to 2 1/2 cups Structure and chew Rolled oats or old-fashioned oats
Nut or seed butter 3/4 cup Binder, richness, flavor Peanut butter, almond butter, sunflower seed butter, tahini
Sticky sweetener 1/2 cup Glue and sweetness Honey, brown rice syrup, date paste
Mix-ins 3/4 to 1 cup Flavor, crunch, chew Mini chips, seeds, chopped nuts, chopped dried fruit
Flavor boosters Small amounts Balance Salt, vanilla, cinnamon, cocoa, cardamom

As a rule, do not keep adding dry mix-ins just because they sound good. Too many seeds, nuts, dried fruit pieces, chocolate chips, or protein powder will overwhelm the binder. Ideally, the mixture should look compact and sticky before pressing, with no dry oats collecting at the bottom of the bowl.

Can You Make Granola Bars with Ready-Made Granola?

Yes, you can make granola bars with ready-made granola, but the texture depends on what is already in the granola. If your granola is very crunchy, very sweet, or full of large clusters, crush or pulse it lightly before mixing so the bars can compact properly. Large clusters taste good in a bowl, but they can make sliced bars break apart.

Because prepared granola is often already sweetened, use less added sweetener than the main recipe. As a starting point, use 2 1/2 cups granola, 1/2 cup creamy nut or seed butter, 1/3 cup honey or brown rice syrup, and 1/4 to 1/2 cup extra seeds, mini chocolate chips, or chopped dried fruit. After that, warm the binder, mix everything well, press very firmly into a lined pan, and chill before slicing.

Guide showing ready-made granola clusters being crushed smaller, mixed with binder, and pressed into a pan for granola bars.
Ready-made granola can work, but large clusters need to be broken down first. Then, add just enough binder and press the mixture firmly so it slices more like bars than loose clusters.

With ready-made granola, the recipe still works, but homemade-style bars need smaller clusters and a strong binder. Otherwise, the slab may taste good but crumble when sliced.

Texture tip: Granola bars made with ready-made granola work best when the granola pieces are small enough to compress. If the mixture looks like loose cereal even after adding the binder, crush the granola a little more or add another spoonful of nut butter.

How to Make Homemade Granola Bars Step by Step

This step-by-step recipe shows how a homemade granola mixture becomes firm, sliceable bars after warming, mixing, pressing, chilling, and cutting.

Step-by-step guide showing homemade granola bars being warmed, mixed, pressed into a pan, chilled, and sliced.
The method is simple, although the order matters. Warm the binder first, mix until the oats are coated, press the slab firmly, and then chill before slicing for cleaner homemade granola bars.

1. Line the Pan

Line an 8-inch / 20 cm square pan with parchment paper, leaving some overhang on two sides. This makes it easier to lift the chilled slab out cleanly. For thinner bars, use a 9-inch / 23 cm square pan. For thicker bars, use a 9 x 5-inch / 23 x 13 cm loaf pan or press the mixture into only part of a larger pan.

2. Warm the Binder

Add the nut butter, honey or other sticky sweetener, vanilla, and salt to a small saucepan. Warm over low heat just until smooth and pourable. For the basic no-bake version, you are not trying to boil the mixture. Instead, you only want it loose enough to coat the oats evenly.

If you need firmer room-temperature bars, gently simmer honey for about 1 minute before mixing it with the nut butter. This creates a stickier binder, but it can also make the bars harder if cooked too long.

3. Mix the Oats and Dry Ingredients

In a large bowl, combine the rolled oats, seeds, chopped nuts, chopped dried fruit, cinnamon, and any protein powder or flaxseed meal. Keep chocolate chips aside until the binder has cooled slightly, especially if you want visible chips instead of melted chocolate streaks.

4. Combine Wet and Dry

Pour the warm binder over the oat mixture. Stir until every oat and mix-in is coated. Scrape the bottom and sides of the bowl so there are no dry pockets. The mixture should look sticky, dense, and slightly glossy. If it still looks dusty, add another spoonful of nut butter or honey.

5. Add Chocolate Chips Last

Let the mixture cool for a few minutes before folding in mini chocolate chips. Small chips work better than large chips because they spread through the bars evenly and do not create big break points. If the mixture is very warm, the chips will melt, which is fine for flavor but less tidy for slicing.

6. Press Harder Than Feels Necessary

Transfer the mixture to the lined pan. Cover the top with another piece of parchment paper and press down firmly with your hands, the bottom of a measuring cup, or a flat spatula. Push into the corners and flatten the surface. Then press again. This step is what turns a sticky oat mixture into actual bars.

Close-up of a measuring cup pressing homemade granola bar mixture firmly into a parchment-lined pan.
Pressing is where many granola bars succeed or fail. For better structure, compact the corners, flatten the surface, and remove air gaps before the slab goes into the fridge.

7. Chill Before Slicing

Chill for at least 1 hour, or 2 hours if your kitchen is warm. Do not judge the final texture while the slab is still soft. After chilling, lift the slab out using the parchment, then slice with a sharp knife. Press straight down instead of sawing back and forth.

Common Mistakes When Making Homemade Granola Bars

Even a simple homemade granola bars recipe can fail when the mixture is too dry, too wet, too chunky, or not pressed firmly enough.

Common granola bar mistakes guide showing a dry mixture, chunky pieces, and a loose slab with fixes for each problem.
Most crumbly bars come from one of three issues: the mixture is too dry, the mix-ins are too large, or the slab was not pressed firmly enough. Fortunately, each problem is easy to fix before the next batch.
  • Avoid overloading the mix-ins. Too many nuts, seeds, dried fruit pieces, chocolate chips, or protein powder can overwhelm the binder.
  • Keep large chunks out of the mixture. Big almonds, dates, chocolate pieces, and granola clusters create weak spots.
  • Press harder than feels necessary. Otherwise, the mixture may stay loose instead of compacting into one slab.
  • Wait before slicing. No-bake granola bars need chilling time before they cut cleanly.
  • Keep some sticky sweetener in the recipe. Sweetener is part of the structure, not just the flavor.
  • Let protein bars rest before judging texture. Protein powder absorbs moisture as the mixture sits.

Why Homemade Granola Bars Fall Apart

If homemade granola bars fail, they usually fail here. The recipe may taste good, but the slab slices into crumbs. Fortunately, the fix is rarely complicated: use enough sticky binder, chop the mix-ins smaller, press harder than feels necessary, and chill the slab until it is genuinely firm.

Troubleshooting guide showing why homemade granola bars fall apart, including dry mixture, big chunks, loose slab, warm bars, and wet mixture fixes.
When homemade granola bars fall apart, do not guess blindly. Instead, check the texture: add binder if the mixture is dry, chop large chunks smaller, press harder, chill longer, or add oats and seeds if the mixture is too wet.

The Hand-Squeeze Test

Before pressing the mixture into the pan, squeeze a spoonful in your hand. A good mixture should hold together like a sticky cluster after a firm squeeze. When it falls apart immediately, add a little more nut butter, honey, date paste, or brown rice syrup. When it smears and feels wet, balance it with more oats, seeds, or ground flaxseed.

What to Adjust Before Pressing

Crumbly bars usually need more sticky binder, even when the homemade granola mixture looks well mixed. That is why the hand-squeeze test is so useful before everything goes into the pan. Once the mixture clumps in your hand, press it firmly into the pan instead of adding more dry mix-ins.

Clean Slicing Cues

Before slicing, press the center of the slab gently. A firm center means the bars are ready to cut. Deep dents mean they need more chilling time. Smearing on the knife usually means the bars are too warm or too wet, while sharp cracking can mean the mixture is too dry or too cold.

Quick Troubleshooting Guide

Problem Most Likely Cause Best Fix
Crumbles when sliced Not enough sticky binder Add 1 to 2 tablespoons more nut butter, honey, date paste, or brown rice syrup next time.
Breaks around nuts or fruit Mix-ins are too large Chop nuts and dried fruit smaller before mixing.
Falls apart after chilling Mixture was not pressed firmly enough Cover with parchment and press hard with a measuring cup before chilling.
Sticky and messy texture Too much wet binder or not enough dry structure Add more oats, seeds, shredded coconut, or ground flaxseed.
Too hard after setting Binder was cooked too long or too much syrup was used Warm only until smooth for chewy no-bake bars. Avoid over-boiling.
Softens in a lunchbox No-bake bars are warmer than ideal Pack with an ice pack, use brown rice syrup, or make the firmer cooked-binder version.
Chocolate melts into the mixture Binder was too hot when chips were added Cool the mixture for a few minutes, then add mini chocolate chips.
Slab cracks when cut Mixture is too dry or too cold Let it sit for 5 minutes before slicing, and add slightly more binder next time.
Knife smears through the bars Bars are too warm or too wet Chill longer, then slice with a sharp knife. Add more oats next time if needed.

Granola Bar Mixture: Too Dry, Too Wet, or Just Right

Texture guide showing granola bar mixture that is too dry, too wet, and just right, with the note that the mixture should clump when squeezed.
Before you ever press the mixture into the pan, texture tells you whether the bars are likely to work. The mixture should look cohesive and slightly sticky, and it should clump when squeezed instead of scattering or smearing.

Chewy vs Crunchy vs Soft Granola Bars

This homemade recipe can make chewy, crunchy, or soft granola bars depending on how you handle the binder, oats, baking, and chilling.

Comparison image showing chewy, crunchy, and soft granola bars, with notes that chilling makes chewy bars, baking makes crunchy bars, and added moisture makes soft bars.
Texture changes the whole experience of a homemade granola bar. For example, chilling helps create a chewier bite, baking makes bars crisper, and a slightly moister mix gives you a softer, more tender bar.
Texture How to Get It Best For
Chewy no-bake bars Use nut butter + sticky sweetener, press firmly, and chill. Classic homemade granola bars, lunchbox snacks, freezer snacks.
Crunchy granola bars Toast the oats and nuts first, use slightly less wet binder, then bake briefly and cool fully. People who prefer crisp edges and toasted flavor.
Soft breakfast oat bars Add mashed banana, applesauce, yogurt, egg, or flax egg and bake like oatmeal bars. Breakfast, toddlers, softer snack bars, meal prep.
Firm travel bars Use brown rice syrup or a short cooked honey binder and keep mix-ins small. Road trips, office snacks, gym bags, warmer weather.

For Chewy Granola Bars

Use the main no-bake recipe. Keep the oats mostly whole, use creamy nut butter, choose a sticky sweetener, and chill fully. Chewy bars are the best first version because they are easy, flexible, and forgiving.

For Crunchy Granola Bars

For crunchy granola bars, toast the oats, nuts, and seeds at 325°F / 165°C until fragrant, then use slightly less wet binder than the chewy no-bake version. Press the mixture firmly into a parchment-lined pan and bake at 300°F / 150°C for 15 to 20 minutes, until the edges look lightly golden. Let the slab cool completely before slicing. If you cut while warm, the bars may bend or crumble instead of snapping cleanly.

Extra crispness comes from replacing 1/2 to 1 cup of the oats with puffed rice cereal, crisp rice cereal, or crisp oat cereal. Brown rice syrup gives a firmer bite than maple syrup because it is thicker and stickier.

For Soft Breakfast Oat Bars

Use more moisture and a baking method. Add mashed banana, applesauce, yogurt, or a flax egg to the oats. The result will be closer to oatmeal breakfast bars than classic granola bars. If you want a spoonable make-ahead breakfast instead of a sliced bar, MasalaMonk’s high protein overnight oats are a better fit.

Recipe Variations for Homemade Granola Bars

Once the basic healthy homemade granola bars recipe works, the variations become much easier. Keep the oat-binder balance in mind, and change one or two things at a time.

Guide showing six homemade granola bar variations: peanut butter, protein, low-sugar, vegan, nut-free, and cereal-style.
Once the base recipe works, it becomes much easier to branch out. From peanut butter and protein bars to lower-sugar, nut-free, and cereal-style versions, these variations help readers adapt homemade granola bars to different needs.

Peanut Butter Granola Bars

Peanut butter is the easiest flavor to start with because it binds well, tastes familiar, and makes the bars feel richer without extra steps. Use creamy peanut butter with honey, then add mini chocolate chips, chopped roasted peanuts, or a pinch of cinnamon. If your peanut butter is very thick, warm it gently before mixing so it coats the oats instead of clumping.

To make the peanut flavor stronger, use roasted peanut butter and add chopped peanuts as part of the mix-ins. A softer bar needs finely chopped peanuts and slightly more peanut butter. When the bars need to hold up better in a lunchbox, choose honey or brown rice syrup rather than maple syrup.

Chocolate Chip Granola Bars

Mini chocolate chips are better than large chips because they spread evenly through the bars and do not create big gaps. Let the oat mixture cool for a few minutes before adding them. If you add chocolate while the binder is very hot, the chips will melt into the mixture instead of staying visible.

For a more chocolate-forward bar, stir 1 tablespoon cocoa powder into the warm binder before adding the oats. For a less sweet version, use cacao nibs or chopped dark chocolate instead of regular chocolate chips.

Protein Granola Bars

Protein granola bars need a little more care because protein powder absorbs moisture. Start by replacing 1/4 cup oats with protein powder. Then, mix the bars and check the texture before pressing. If the mixture feels dry, add 1 to 2 tablespoons more nut butter or a small splash of milk.

Protein granola bars shown with oats, protein powder, nut butter, seeds, and stacked finished bars.
Protein granola bars usually work best when only part of the oats is replaced. In other words, add enough protein powder to boost nutrition, but keep enough binder so the bars stay chewy instead of dry and crumbly.

Whey protein usually blends more smoothly, while many plant protein powders make the mixture thicker and drier. Do not expect a homemade protein granola bar to feel exactly like a store-bought protein bar. The best homemade version should still taste like oats, nut butter, and real mix-ins, with extra protein added carefully.

For a simple protein version, use 2 cups oats, 1/4 cup protein powder, 3/4 cup peanut butter or almond butter, 1/2 cup honey or brown rice syrup, 1/3 cup seeds, and 1/3 cup mini chocolate chips. If the mixture feels stiff before pressing, add 1 tablespoon milk or extra nut butter at a time until it clumps when squeezed.

Low-Sugar Granola Bars

For lower-sugar granola bars, the goal is not to remove every sweet ingredient. Instead, keep the sticky binder measured, use fewer dried fruits and chocolate chips, and build more of the texture from oats, seeds, nuts, coconut, cacao nibs, or chopped dark chocolate.

Lower-sugar granola bars made with oats, seeds, measured sweetener, nut butter, and a date paste option.
Lower-sugar granola bars do not need to taste flat. Instead, leaning on seeds, oats, nut or seed butter, and carefully measured sweetener helps keep the bars satisfying while cutting back on overall sweetness.

For a lower-sugar batch, use more seeds and nuts, reduce dried fruit and chocolate, and keep the sticky binder measured. If you want a no-refined-sugar version, use date paste. For flavor without extra syrup, try cinnamon, vanilla, cocoa, orange zest, toasted coconut, or a small pinch of salt.

EatingWell’s dietitian guidance on granola bars recommends looking at added sugar, fiber, protein, whole grains, and recognizable whole-food ingredients when deciding whether a granola bar is a healthy choice. Read their granola bar health guide here.

Gluten-Free Granola Bars

For gluten-free granola bars, start with certified gluten-free oats and then check the smaller ingredients too, especially chocolate chips, protein powder, cereal-style mix-ins, and flavorings. As long as the oats and add-ins are gluten-free, the base recipe can be gluten-free too.

Gluten-Free and Vegan Granola Bar Swaps

Swap guide for gluten-free and vegan granola bars showing regular oats changed to certified gluten-free oats, honey to date paste or brown rice syrup, peanut butter to seed butter, and milk chocolate chips to dairy-free chips.
If you need gluten-free or vegan granola bars, the easiest approach is to swap one ingredient at a time. Certified gluten-free oats, plant-based binders, seed butter, and dairy-free chocolate chips usually get you close to the original texture without rebuilding the whole recipe.

Vegan Granola Bars

For vegan granola bars, choose brown rice syrup, date paste, or maple syrup instead of honey. Brown rice syrup gives the firmest result, while date paste adds softer caramel-like sweetness. Also check that your chocolate chips are dairy-free if needed.

Nut-Free Granola Bars

For nut-free granola bars, start with sunflower seed butter, pumpkin seed butter, or tahini instead of nut butter. Then, replace nuts with pumpkin seeds, sunflower seeds, sesame seeds, chia seeds, flaxseed, dried fruit, coconut, or chocolate chips. This can be useful for lunchboxes, depending on allergy rules where the bars will be eaten.

Nut-free granola bars made with seed butter, seeds, small mix-ins, and packed bars for storage or lunchboxes.
Nut-free granola bars can still be rich, sturdy, and flavorful. For best texture, use seed butter, keep the mix-ins fairly small, and check school or allergy rules if the bars are meant for lunchboxes or sharing.

Sunflower seed butter is one of the easiest nut-free binders, and sunflower seeds also work well as crunchy mix-ins. For the best texture, keep the seeds small, use a sticky binder, and press the mixture firmly before chilling.

Muesli-Style Granola Bars

For muesli-style bars, use oats, chopped almonds, pumpkin seeds, sunflower seeds, raisins, dried cranberries, chopped dates, and a little coconut. Because fruit-and-nut bars can become chunky, keep everything chopped small and press the mixture especially firmly.

Breakfast Granola Bars

For breakfast bars, keep the chocolate light and build the flavor around oats, seeds, nut butter, cinnamon, dried fruit, and maybe protein powder. If you want something softer and more filling, use the soft oat bar variation with mashed banana or applesauce.

Date Granola Bars

Blend soft dates with a splash of warm water to make a thick date paste, then use it as part or all of the sticky sweetener. Date paste gives the bars caramel-like sweetness and helps avoid refined sugar. Even so, dates are still sweet, so balance them with salt, seeds, and unsweetened nut butter.

No-Peanut-Butter Granola Bars

If you do not want peanut butter, use almond butter, cashew butter, sunflower seed butter, tahini, or pumpkin seed butter. Almond butter gives a mild flavor, cashew butter makes the bars softer and creamier, sunflower seed butter works well for nut-free bars, and tahini gives a slightly earthy flavor that pairs well with honey, sesame, dates, and dark chocolate.

Cereal Bar Variation

For a lighter, crispier cereal bar, replace 1 cup of the oats with puffed rice cereal, toasted oat cereal, or another crisp breakfast cereal. Keep the binder sticky, because cereal is lighter than oats and can fall apart if the mixture is too dry. For chocolate chip cereal bars, use mini chocolate chips and press the mixture especially firmly before chilling.

For a stronger cereal-bar texture, use half oats and half crisp cereal. However, if you want the bars to taste more like classic granola bars, keep more oats than cereal.

No-Bake Oat Bars

If you want softer no-bake oat bars instead of classic granola bars, use quick oats for part of the oats and add a softer ingredient such as mashed banana, applesauce, or date paste. The bars will be less crisp and less granola-like, but they will feel more like breakfast bars. This is a good direction for kids, softer snacks, and make-ahead breakfasts.

For a simple no-bake oatmeal bar, use 1 cup rolled oats, 1 cup quick oats, 3/4 cup peanut butter or sunflower seed butter, 1/2 cup date paste or honey, and 1/2 cup small mix-ins. Press firmly and chill before slicing.

Healthy Granola Flapjack Variation

If you know flapjacks as baked oat bars, this recipe can move in that direction too. Use the crunchy baked variation, press the mixture into a lined tin, and bake until the edges look lightly golden. Traditional flapjacks are usually richer and sweeter because they often use butter, sugar, and syrup. This version stays closer to a healthy granola bar because it uses oats, nut or seed butter, measured sweetener, seeds, and dried fruit.

For a more flapjack-like texture, use slightly more binder and bake the slab until it looks set at the edges but still a little soft in the center. Let it cool completely before slicing, because baked oat bars firm up as they rest.

Best Mix-Ins for Homemade Granola Bars

The best mix-ins depend on what you want from the bar. Crunchy batches work well with pumpkin seeds, sunflower seeds, sesame seeds, chopped almonds, cacao nibs, or toasted coconut. Chewier batches are better with raisins, chopped dates, dried cranberries, dried apricots, figs, or dried blueberries.

Guide image showing the best mix-ins for homemade granola bars, grouped by crunchy, chewy, protein, lower-sugar, and kid-friendly options, including pumpkin seeds, sunflower seeds, chopped almonds, cacao nibs, raisins, chopped dates, dried cranberries, apricots, hemp seeds, peanuts, protein powder, coconut, mini chocolate chips, and dried banana chips.
The best mix-ins do more than add flavor. They also shape the texture, sweetness, chew, and nutrition of your homemade granola bars, so choosing them with a purpose helps the bars taste better and hold together more reliably.

To add more protein, use hemp seeds, pumpkin seeds, peanuts, almonds, protein powder, or extra peanut butter. Meanwhile, kid-friendly bars work best when the flavor stays familiar, so try peanut butter, mini chocolate chips, cinnamon, vanilla, raisins, or dried banana chips. If you want a lower-sugar feel, lean on seeds, nuts, unsweetened coconut, cinnamon, cacao nibs, or chopped dark chocolate instead of large amounts of dried fruit.

Whatever you add, keep the pieces small. Although that sounds like a minor detail, small mix-ins make a huge difference. They help the slab compress tightly and slice cleanly.

How to Store and Freeze Homemade Granola Bars

No-bake homemade granola bars are firmest when stored cold. Once sliced, place parchment between layers so the bars do not stick together. Therefore, if your kitchen is warm, the fridge is the safest place for clean, chewy bars.

Storage guide for homemade granola bars showing fridge storage for up to 1 week, freezer storage for up to 2 months, and packing chilled bars for lunchboxes.
Homemade granola bars usually keep best when chilled and stored with a little separation between layers. Refrigeration helps preserve texture for the week, while freezing is the better option if you want to make a larger batch ahead.

For lunchboxes, this recipe makes homemade granola bars that slice more cleanly when chilled first. If the room is warm, pack them with an ice pack or use the firmer binder variation.
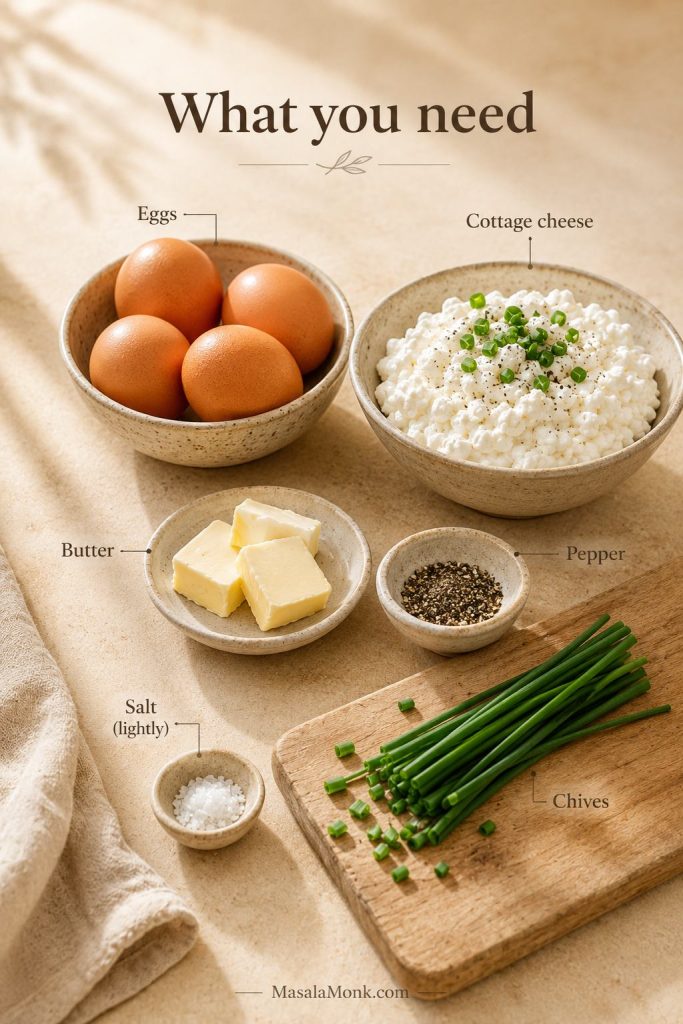
Fridge-firm vs lunchbox-firm: Most no-bake granola bars are best from the fridge. If you need bars that hold up longer at room temperature, use brown rice syrup or a short-cooked honey binder, keep mix-ins small, press very firmly, and chill before packing.

Make-Ahead Plan

For weekly meal prep, make the bars the night before you need them. Chill the whole slab overnight, then slice in the morning. After that, wrap individual bars in parchment and store them in an airtight container in the fridge or freezer. This gives the cleanest slices and the firmest texture.

Storage Method How Long Best For
Room temperature 1 to 2 days, only if firm enough Short-term snacking, cool kitchens, firmer cooked-binder bars.
Refrigerator Up to 1 week Best texture for chewy no-bake bars.
Freezer Up to 2 months Meal prep, lunchbox planning, batch cooking.
Lunchbox Same day Pack with parchment. Use an ice pack if the weather is warm.

To freeze, wrap bars individually or layer them with parchment in an airtight container. Thaw in the fridge or let a frozen bar sit at room temperature for a few minutes before eating. Frozen bars are especially useful in hot weather because they soften gradually instead of falling apart immediately.

As with any homemade snack, store the bars in a clean airtight container and discard them if they smell off, look moldy, or become unusually wet or sticky during storage.

How to Serve Homemade Granola Bars

Homemade granola bars are useful at several points in the day. For example, you can serve one with tea or coffee, pack one in a lunchbox, crumble one over yogurt, eat one before a workout, or keep a few in the freezer for rushed mornings.

Serving ideas for homemade granola bars, including breakfast with yogurt and fruit, lunchbox packing, yogurt topping, and freezer snack use.
Homemade granola bars are more versatile than just grab-and-go snacks. They can double as breakfast with yogurt and fruit, work well in lunchboxes, and even be broken up as a topping when you want a little crunch.

For a more complete breakfast, pair a bar with fruit, yogurt, eggs, cottage cheese, paneer, milk, or a smoothie. The bar gives you oats and energy; the extra protein or fruit makes the meal feel more complete.

FAQs About Healthy Homemade Granola Bars

Why do homemade granola bars fall apart?

Homemade granola bars usually fall apart because they do not have enough sticky binder, the mix-ins are too large, the mixture was not pressed firmly enough, or the bars were sliced before chilling. Use enough nut butter and sticky sweetener, chop large nuts and dried fruit, press hard, and chill fully.

What is the best binder for homemade granola bars?

A combination of creamy nut butter and honey is the easiest binder for chewy granola bars. Brown rice syrup is even stickier and works well for firm or vegan bars. Date paste is useful for no-refined-sugar bars. Maple syrup tastes good, but it is thinner and usually needs extra support from nut butter, flaxseed, or longer chilling.

Can I make granola bars without peanut butter?

Absolutely. Almond butter, cashew butter, sunflower seed butter, pumpkin seed butter, and tahini can all work. For a nut-free version, sunflower seed butter and tahini are usually the easiest swaps.

Can I use quick oats instead of rolled oats?

You can, although the texture will be softer and less defined. Rolled oats give a chewier, more classic granola bar texture, while quick oats make the bars more compact and softer for kids.

Can I use maple syrup instead of honey?

You can, but maple syrup is usually less sticky than honey or brown rice syrup. If you use maple syrup, add extra nut butter, ground flaxseed, or date paste to help the bars hold together. Chill the bars longer before slicing.

How do I make vegan granola bars?

For vegan granola bars, choose brown rice syrup, date paste, or maple syrup instead of honey. Brown rice syrup gives the firmest result, while date paste adds softer caramel-like sweetness. Also check that your chocolate chips are dairy-free if needed.

How do I make gluten-free granola bars?

Start with certified gluten-free oats, then check the labels on your chocolate chips, protein powder, cereal mix-ins, and flavorings. As long as the oats and add-ins are gluten-free, the base recipe can be gluten-free too.

How do I make nut-free granola bars?

Start with sunflower seed butter, pumpkin seed butter, or tahini instead of nut butter. Then, replace nuts with pumpkin seeds, sunflower seeds, sesame seeds, coconut, dried fruit, or chocolate chips. Depending on allergy rules where the bars will be eaten, this can be a useful lunchbox direction.
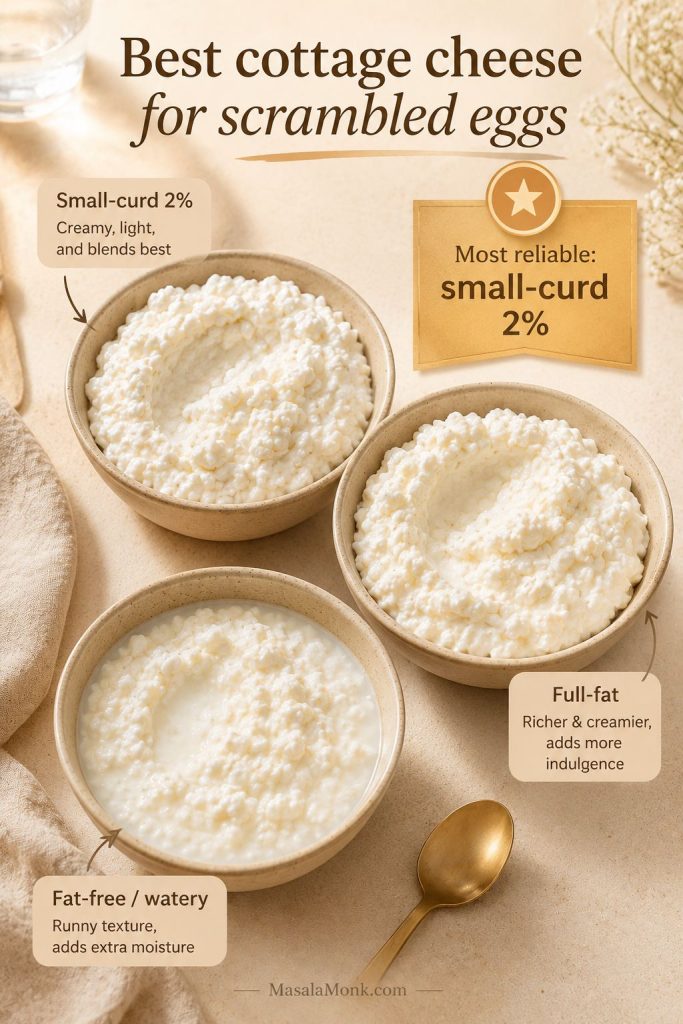
Can I add protein powder to granola bars?

Yes, but start small. Replace 1/4 cup oats with protein powder. If the mixture becomes dry or chalky, add more nut butter or a splash of milk. Plant protein powders usually absorb more moisture than whey protein.

How do I make crunchy or crispy granola bars?

Toast the oats, nuts, and seeds first, then press the mixture into a pan and bake it briefly at a low temperature. Let the slab cool completely before slicing. For a lighter crisp texture, replace part of the oats with puffed rice cereal or crisp rice cereal.

How long do homemade granola bars last?

Chewy no-bake granola bars keep best in the fridge for about 1 week. They can be frozen for up to 2 months. At room temperature, they are best eaten within a day or two unless you make a firmer cooked-binder version.
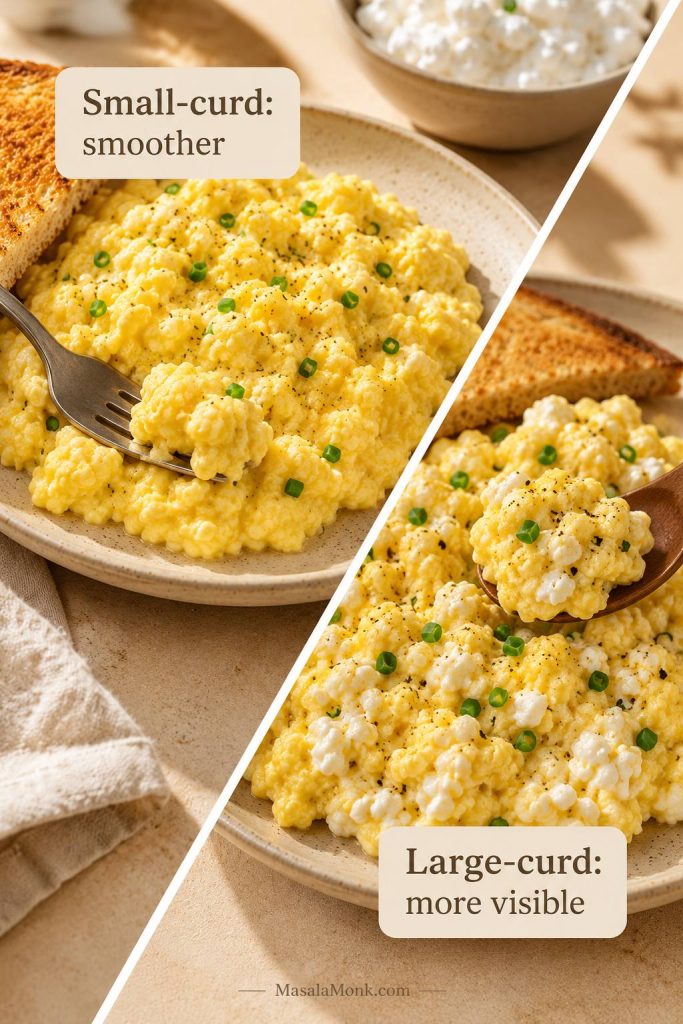
Can I freeze homemade granola bars?

Freezing works well. First, wrap bars individually or layer them with parchment in an airtight container. After that, freeze them for up to 2 months. To serve, thaw in the fridge or let a frozen bar sit at room temperature for a few minutes before eating.

Are homemade granola bars good for breakfast?

They can be, especially if they include oats, nut or seed butter, seeds, and a moderate amount of sweetener. To make breakfast more complete, pair a granola bar with fruit, yogurt, milk, eggs, cottage cheese, paneer, or another protein source.

What is the difference between granola bars and oat bars?

Granola bars are usually chewy or crunchy snack bars made with oats, nuts, seeds, dried fruit, and a sticky binder. Oat bars can be softer and more breakfast-like, especially when made with banana, applesauce, yogurt, or a baked oatmeal-style base.

Can I make granola bars with dates instead of honey?

Yes. Blend soft dates with a small amount of warm water to make a thick paste, then use it as the sticky sweetener. Date paste gives the bars a caramel-like flavor and helps avoid refined sugar, but it still adds sweetness.

Can I make granola bars with ready-made granola?

Prepared granola can work well. As a starting point, use about 2 1/2 cups prepared granola, 1/2 cup creamy nut or seed butter, and 1/3 cup honey, brown rice syrup, or date paste. Since prepared granola is often already sweetened, start with less added sweetener than you would use for plain oats.

Are granola bars the same as flapjacks?

They overlap, especially in UK-style usage. A British flapjack is usually a baked oat bar made with oats, fat, sugar, and syrup, while granola bars are often made with oats, nuts, seeds, dried fruit, and a sticky binder. This recipe is closer to a healthy homemade granola bar, but the baked variation can work like a lighter flapjack-style oat bar.

Can I add crisp rice cereal or puffed rice to granola bars?

Yes. Replace 1/2 to 1 cup of the oats with crisp rice cereal, puffed rice, crisp oat cereal, or another light breakfast cereal. This makes the bars lighter and crispier. Because cereal is less dense than oats, keep the binder sticky and press the mixture firmly before chilling.

What is the best sweetener for granola bars that hold together?

Honey and brown rice syrup are the easiest sweeteners for granola bars that hold together. Brown rice syrup is especially sticky and works well for firm or vegan bars. Date paste is useful for no-refined-sugar bars. Maple syrup tastes good, but it is thinner and usually needs extra nut butter, flaxseed, or longer chilling.

If you try this healthy homemade granola bars recipe, leave a comment with the binder, sweetener, and mix-ins you used. That helps other readers choose their own chewy, crunchy, protein, nut-free, or low-sugar version.
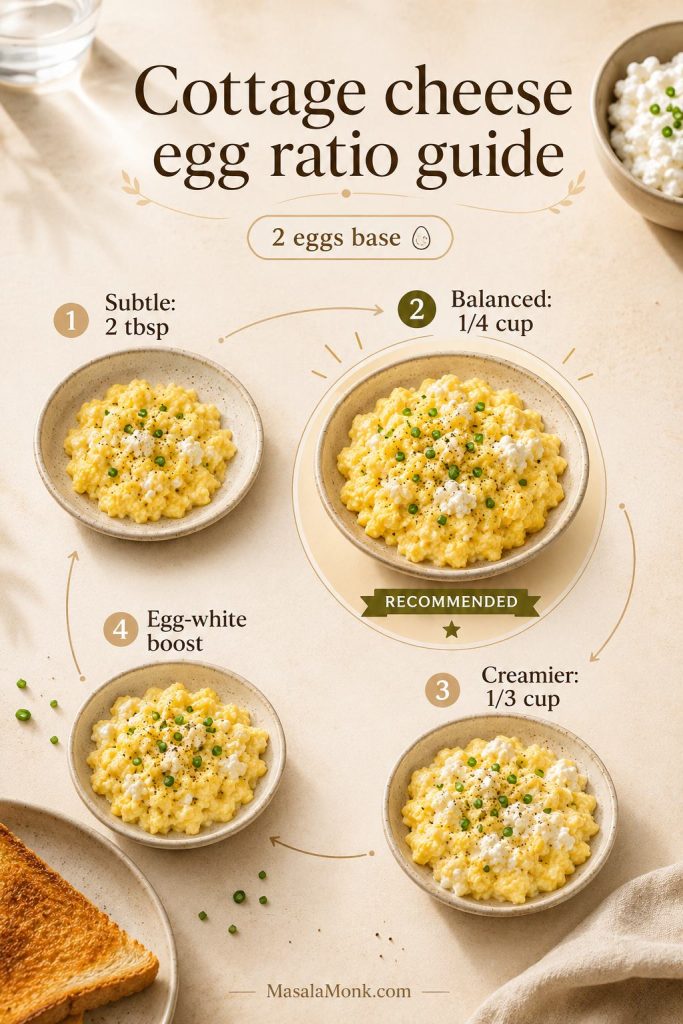
Back to top