
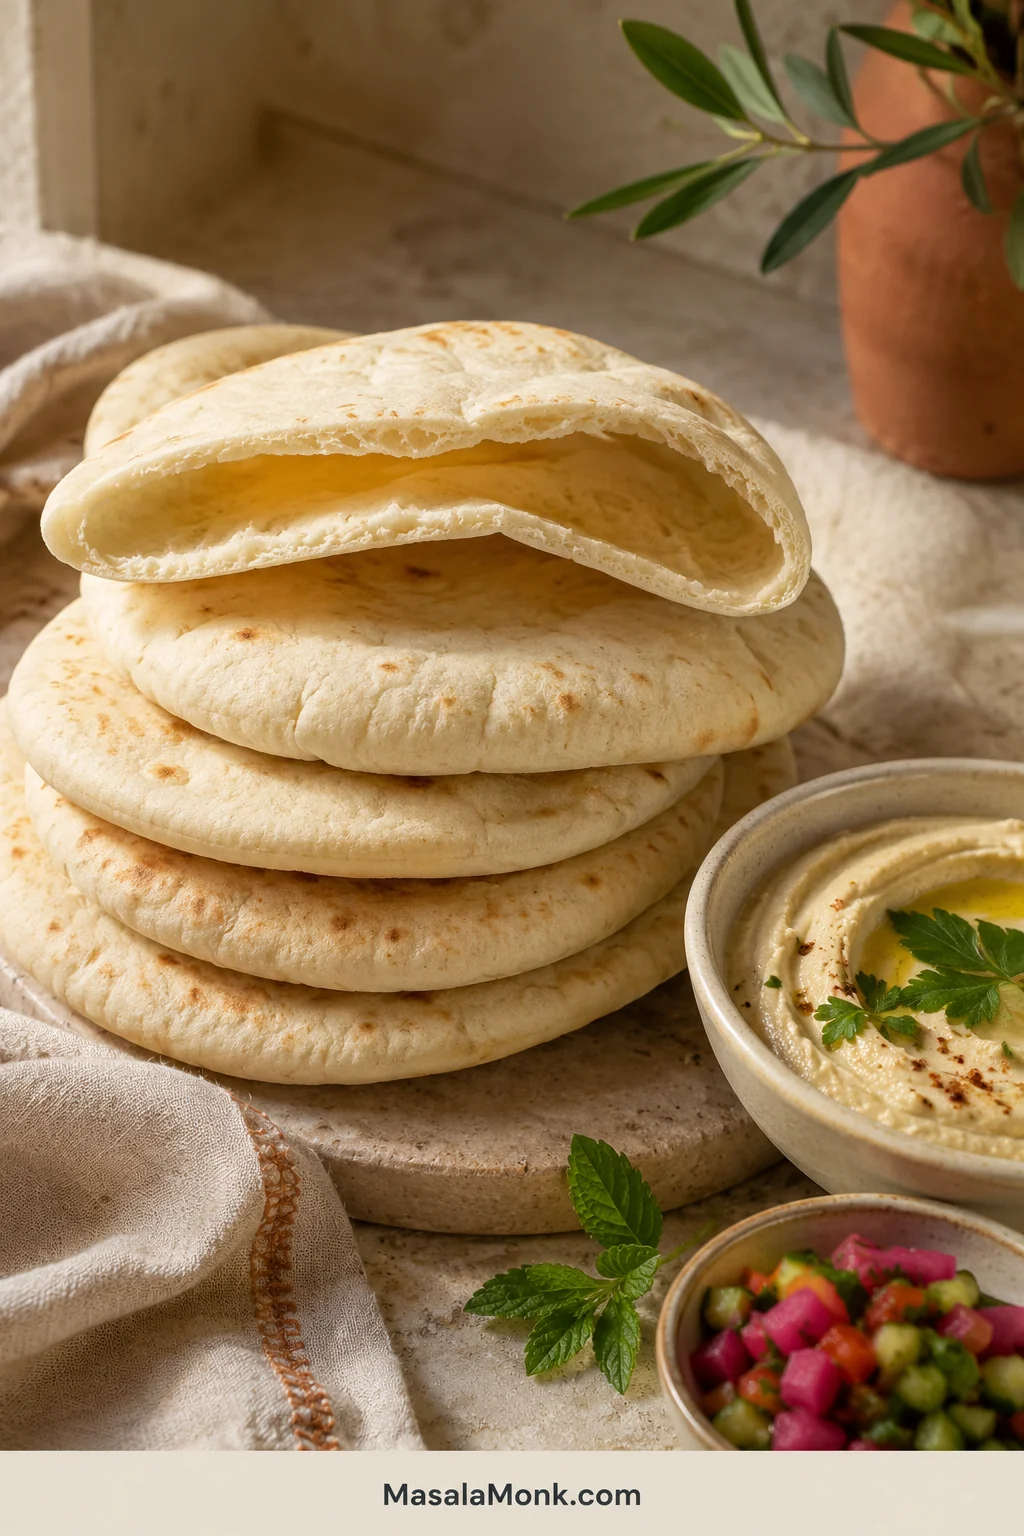
The best part of making pita happens quickly. A flat round lands on the hot surface, a few bubbles appear, and then the bread lifts into a pale balloon. Once it settles, that balloon becomes a pocket ready for falafel, chicken, crunchy salad or the vegetables already waiting in the fridge.
A frustrating batch begins almost the same way. The dough cooks, picks up a few spots and stays stubbornly flat. One half may inflate while the other remains attached. A pocket may also appear, yet the bread can become too crisp to open without tearing.
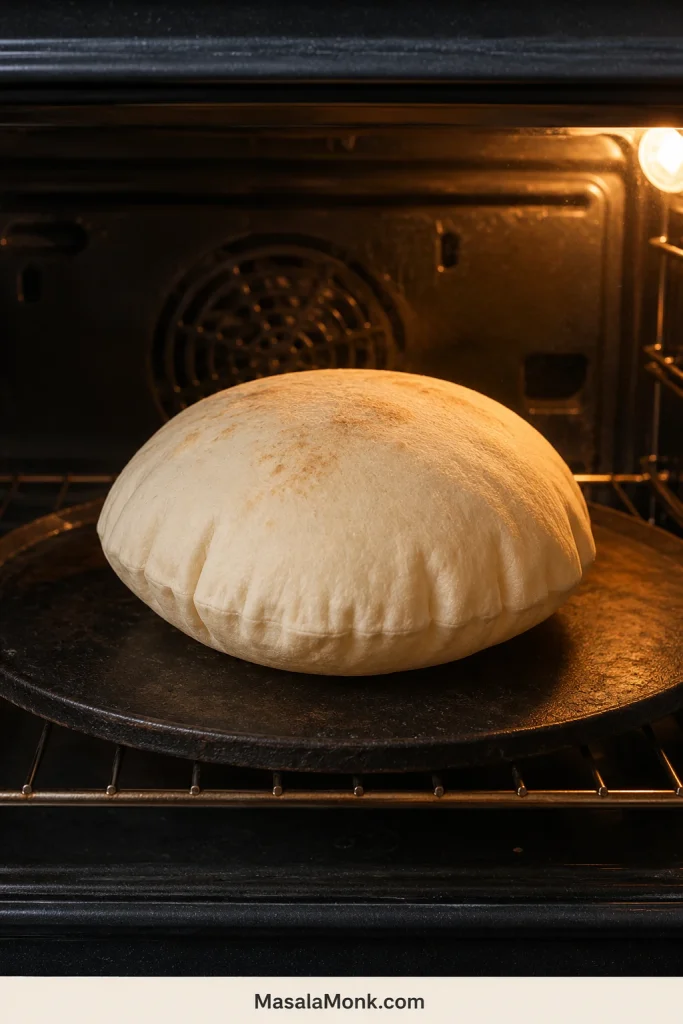
This recipe shows you how to make soft Middle Eastern-style pita that puffs into a pocket you can open and fill. The oven gives you the most reliable pocket; a skillet, griddle or tawa creates more browned flavor, although full pockets are less consistent. Soft dough, even rolling, a thoroughly heated surface and a towel beside the oven or stove do most of the work.
The first round gives you useful clues rather than a final verdict. Its bubbles, color and pocket show what to change before the next round: more heat, a longer rest or more even rolling.
Start here
The Pita Method in One Minute
Make a soft dough with 360 g all-purpose flour and 250 g water. Knead until elastic, let it double, then divide it into eight pieces weighing about 80 g each. After a short rest, roll the pieces to roughly 6½–7 inches / 16–18 cm and 3–4 mm thick.
For the strongest pocket, bake on a steel, stone or heavy inverted tray that has heated for a full 30–45 minutes at 475°F / 245°C. Watch through the oven window from about 2½–3 minutes and remove the pita once it is inflated and set, before deep browning.
No stone or steel? Preheat a heavy uncoated baking sheet upside down and use it as the hot surface.
Roll evenly. Heat fully. Cover quickly. Those three decisions matter more than making a perfectly circular pita.
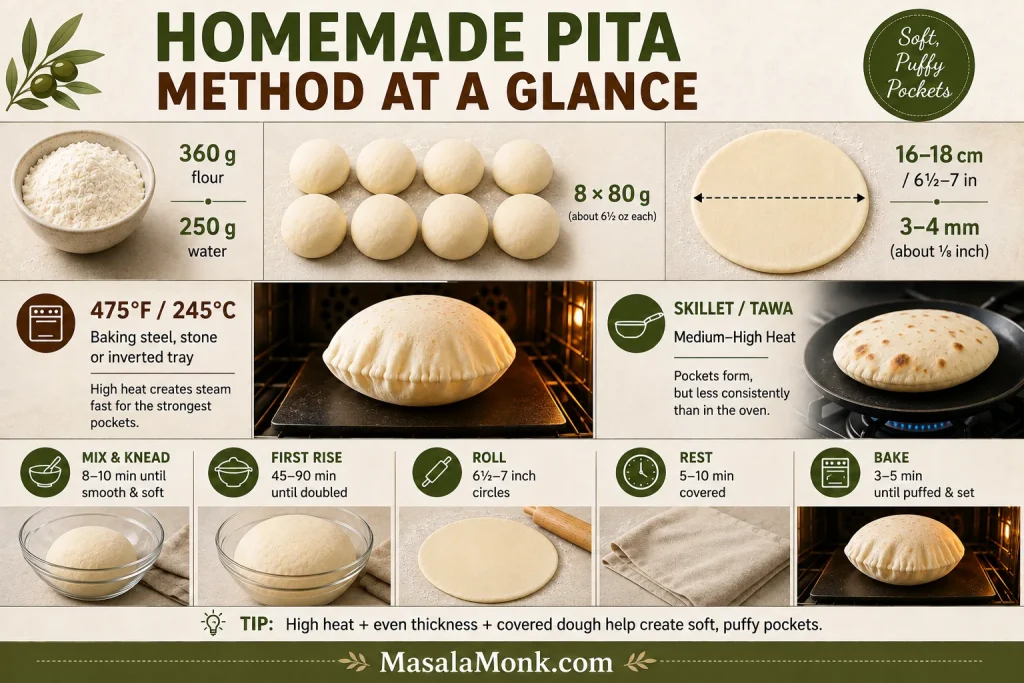
Choose Your Cooking Method
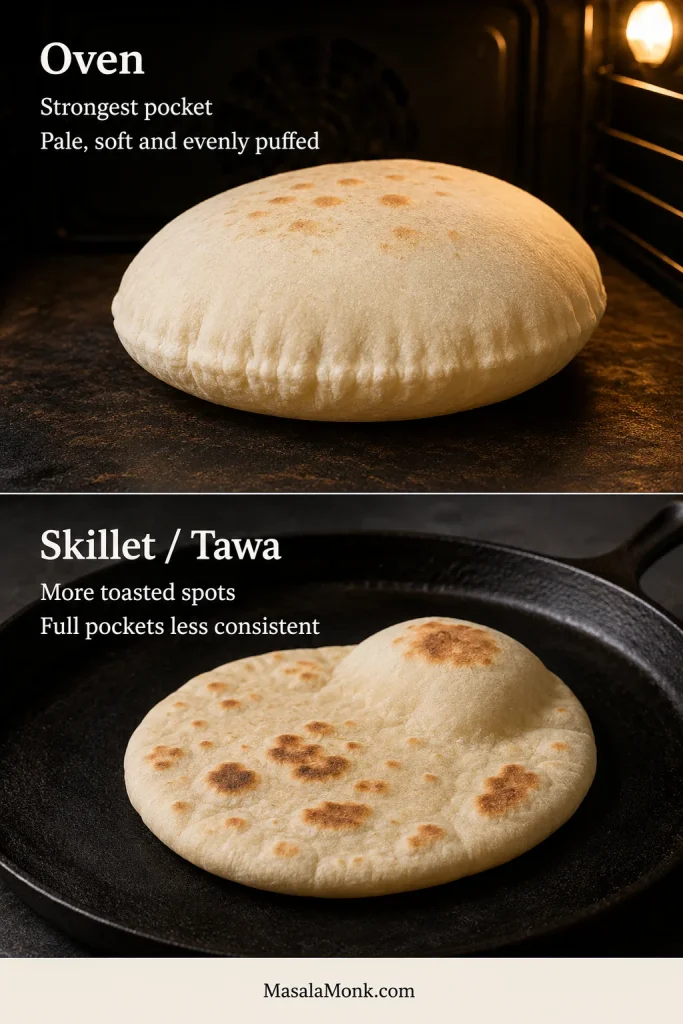
- Choose the oven for the strongest pocket. Intense heat from below gives steam its best chance to separate the two sides before the bread dries.
- A skillet, griddle or tawa gives more browned flavor. Expect darker toasted spots, but full pockets will be less consistent.
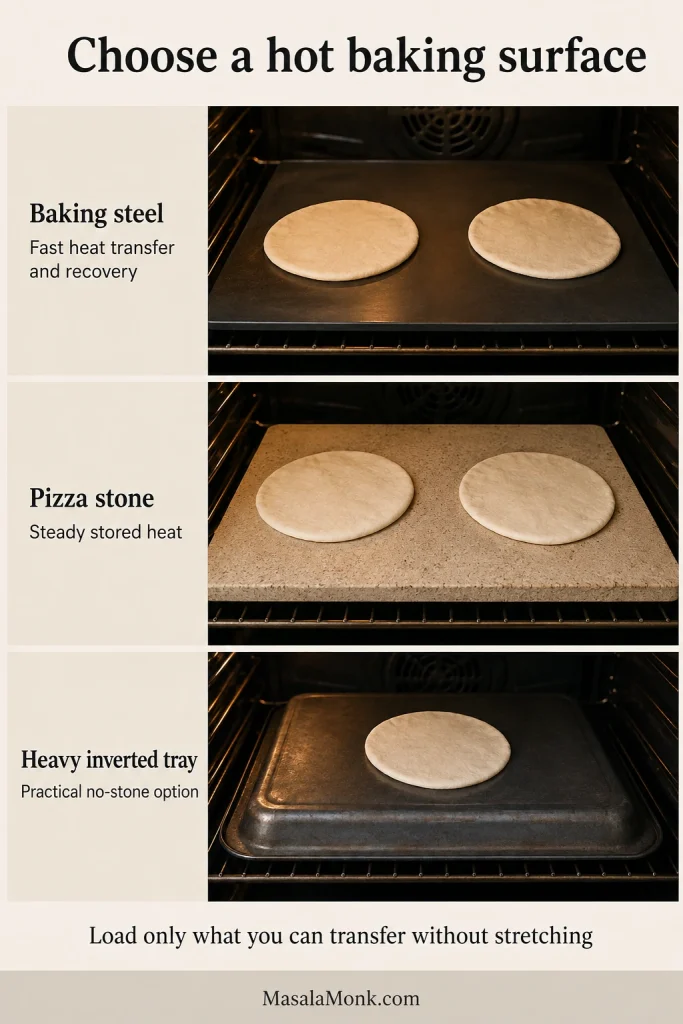
- Without a stone or steel, preheat a heavy inverted tray. It provides a flat oven surface, although it may need more time to recover between batches.
Both methods are useful, but they do not produce identical pita: the oven favors a complete pocket, while direct pan contact develops more toasted color.
Planning ahead? Use the reduced-yeast overnight schedule in the variations section.
Greek pita and quick yogurt flatbread are different breads, not two more cooking methods for this dough. Greek pita is thicker and deliberately pocketless; yogurt flatbread does not rely on yeast or promise a hollow center.
Making a folded Greek-style meal instead? The thicker pita used with chicken souvlaki is designed to bend around the filling; this thinner version is designed for stuffing.
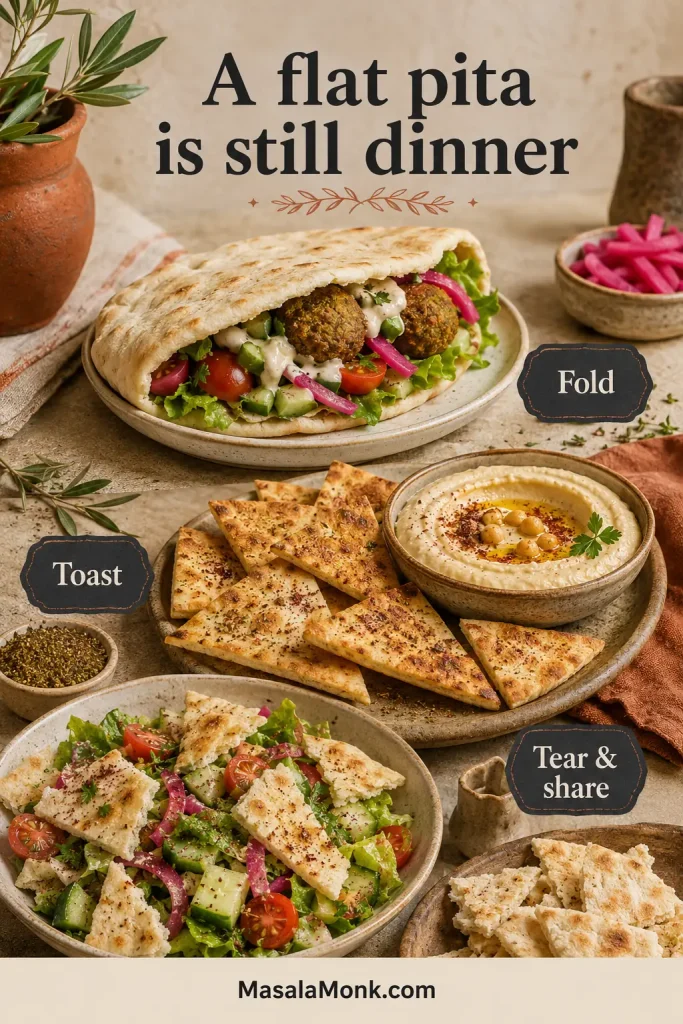
Whichever method you choose, remove the bread before it becomes stiff. A flat pita is still dinner—it can be folded, dipped or toasted later.
Homemade Pita Bread Recipe
Soft, lightly chewy pita that puffs into a hollow pocket on a thoroughly heated surface. Use the oven for the strongest pocket or a skillet, griddle or tawa for a more browned finish.
Recipe at a glance
- Yield: 8 whole pitas
- Serves: About 4 as shared bread or 8 as sandwiches, using one pita per person
- Active preparation: About 35–45 minutes
- Rise and rest: About 65–115 minutes
- Oven cooking: About 15–40 minutes, depending on whether the surface holds one or two pitas and how quickly it recovers between batches
- Stovetop cooking: About 25–40 minutes
- Oven-method total: About 2 hours to 2 hours 45 minutes
- Stovetop-method total: About 2 hours 10 minutes to 3 hours
- Oven temperature: 475°F / 245°C
Some stages overlap: Later rounds are rolled while earlier batches cook, so the preparation, resting and cooking ranges should not be added separately. Most of the elapsed time is hands-off rising, resting and preheating.
Equipment
- Digital kitchen scale
- Large mixing bowl
- Dough scraper or sturdy spatula
- Rolling pin
- Clean kitchen towels
- Baking steel, pizza stone or heavy uncoated baking sheet for the oven method
- Heavy cast-iron skillet, carbon-steel pan, griddle or tawa for the stovetop method
- Optional: Stand mixer with dough hook; infrared thermometer
Ingredients
Use the weights when possible. Flour and salt can vary noticeably by scooping method and crystal size.
- 360 g all-purpose flour (12.7 oz / about 3 cups, spooned and leveled), plus a little for dusting
- 250 g water (250 ml / about 1 cup plus 1 tablespoon)
- 5 g instant yeast (about 1½ teaspoons)
- 6 g granulated sugar (about 1½ teaspoons)
- 8 g fine salt (about 1¼ teaspoons, depending on the salt)
- 14 g olive oil (15 ml / 1 tablespoon), plus a few drops for the bowl
Using active dry yeast: Check the brand instructions before substituting. Some active dry yeasts can replace instant yeast 1:1 by weight; others recommend a slightly larger amount. Dissolve it first only when directed by the manufacturer, and allow more time if the dough rises slowly.
Make and shape the dough
Mix, rest and knead
- Mix the dry ingredients. Whisk together the flour, instant yeast, sugar and salt in a large bowl.
- Add the water and oil, then rest. Use room-temperature water in a hot kitchen or lukewarm water, about 90–105°F / 32–41°C, in a cool room. Stir until no dry flour remains. Cover and rest the rough dough for 10 minutes.
- Knead until elastic. Work the dough by hand for 8–10 minutes, or with a dough hook on low to medium-low speed for 6–8 minutes. It should become smooth, soft and slightly tacky.
Rise, divide and roll
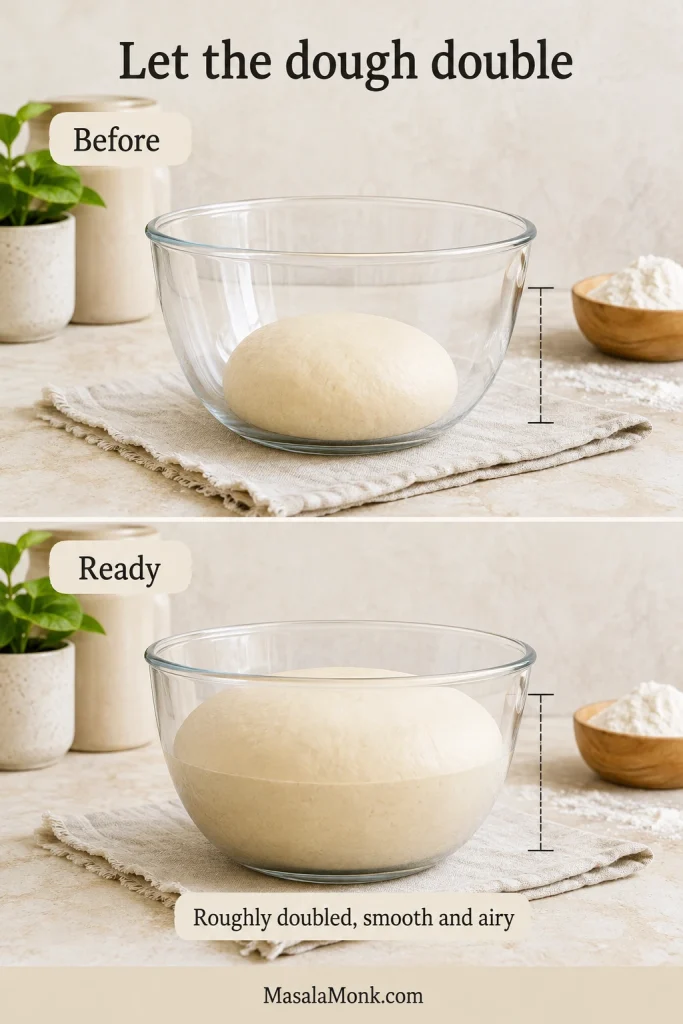
- Let the dough double. Place it in a lightly oiled bowl, cover and leave until roughly twice its original volume, about 45–90 minutes. A clear or straight-sided bowl makes the increase easier to judge.
- Begin preheating early. For the oven method, start heating the steel, stone or inverted tray when the dough has risen by roughly half to two-thirds. Give the surface a full 30–45 minutes before the first pita goes in. For the stovetop method, begin heating the pan when the shaped rounds are nearly ready.
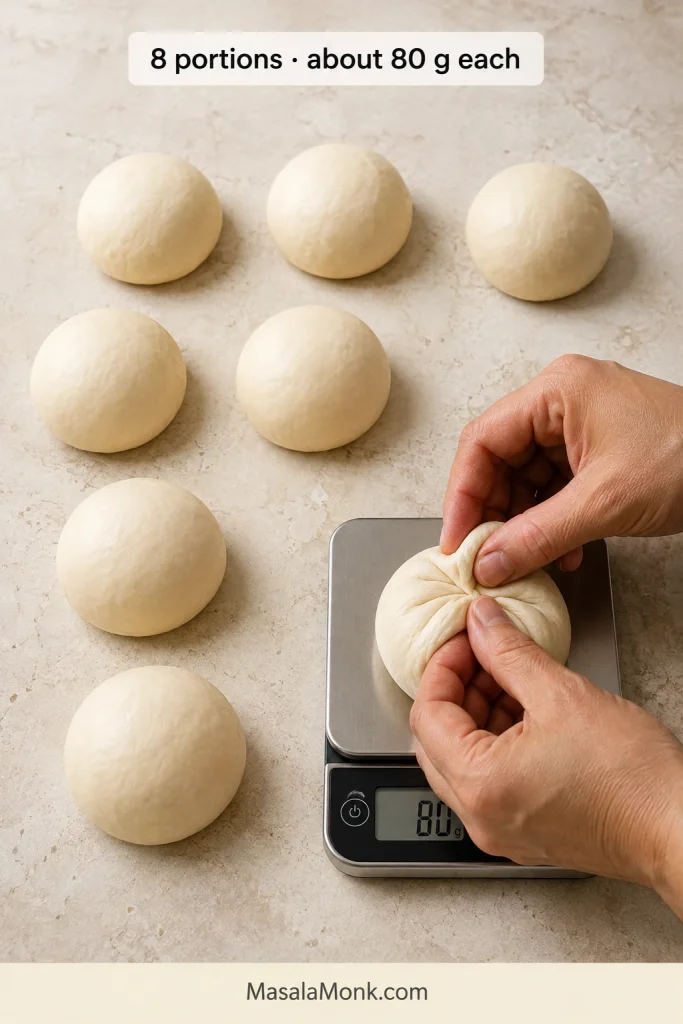
- Divide and shape. Cut or weigh the dough into eight portions of about 80 g each. Draw the edges underneath each portion to make a smooth ball, cover and rest for 15 minutes.
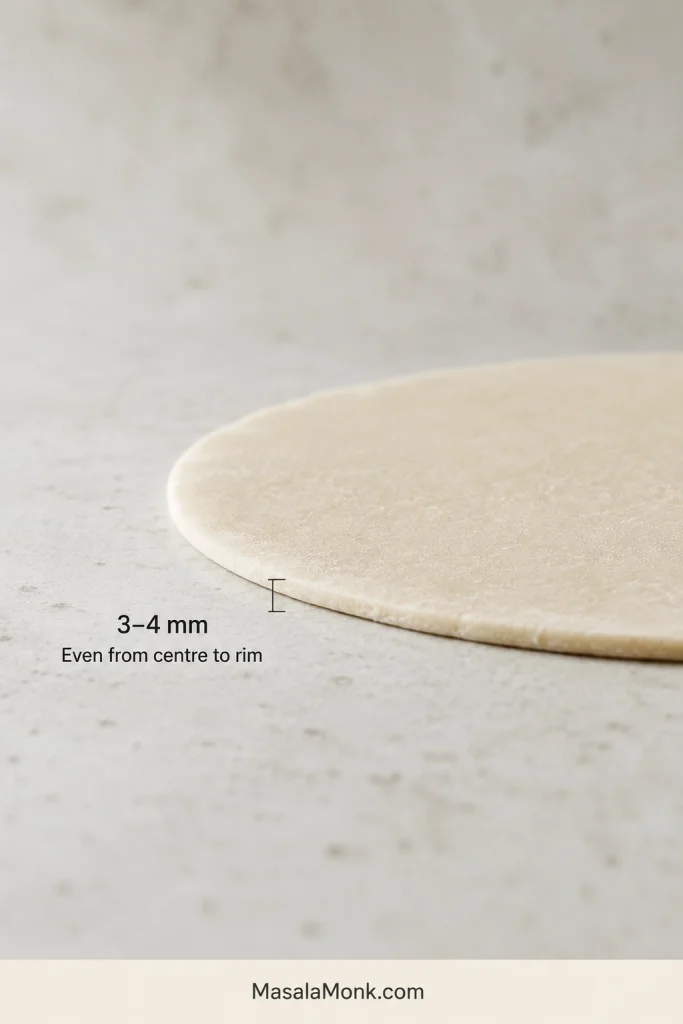
- Roll only enough for the next one or two batches. Working from the center outward, roll each ball while lifting and turning often, until it measures about 6½–7 inches / 16–18 cm and 3–4 mm thick.
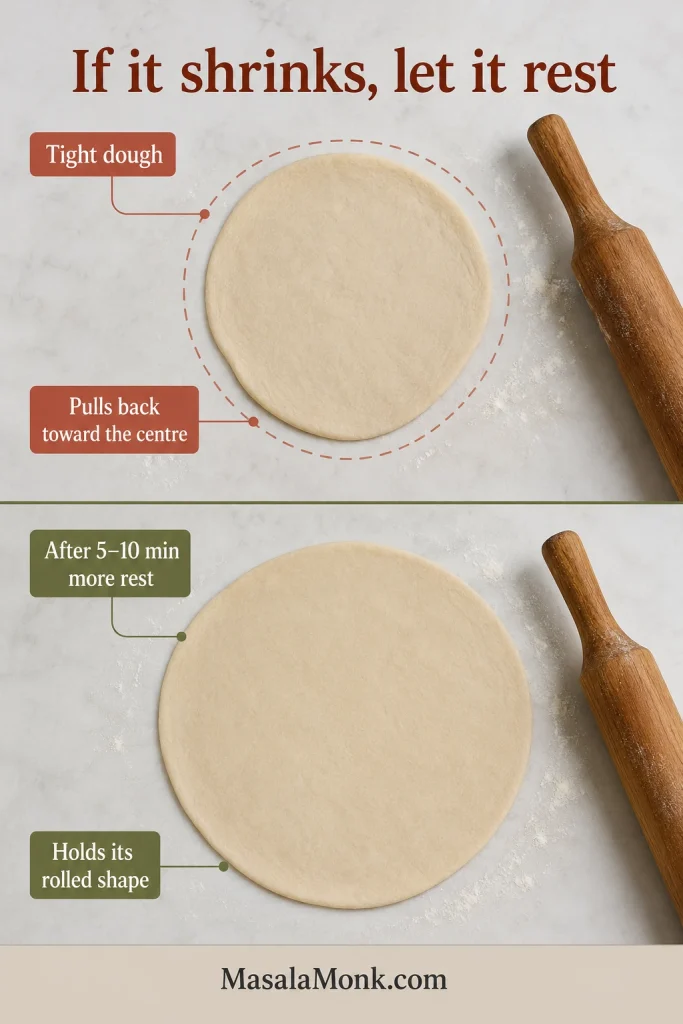
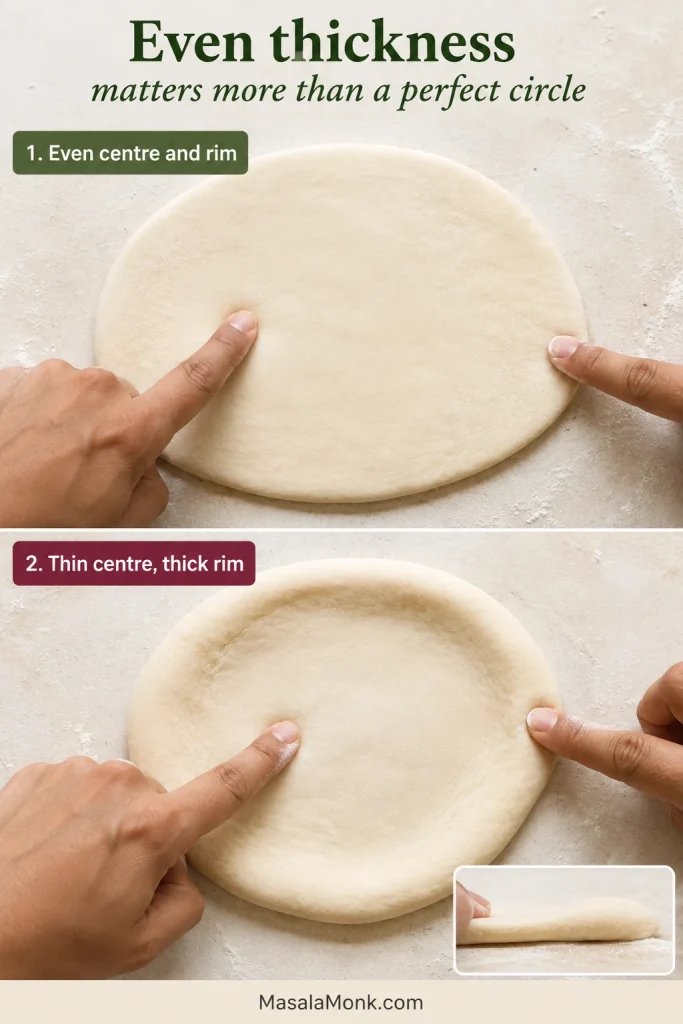
- Rest the rounds. Run your fingertips over the center and rim. Your pita does not need to be perfectly round, but it should feel evenly thin. Place each round on a lightly floured cloth, board or peel and cover for 5–10 minutes, until relaxed but not noticeably puffy.
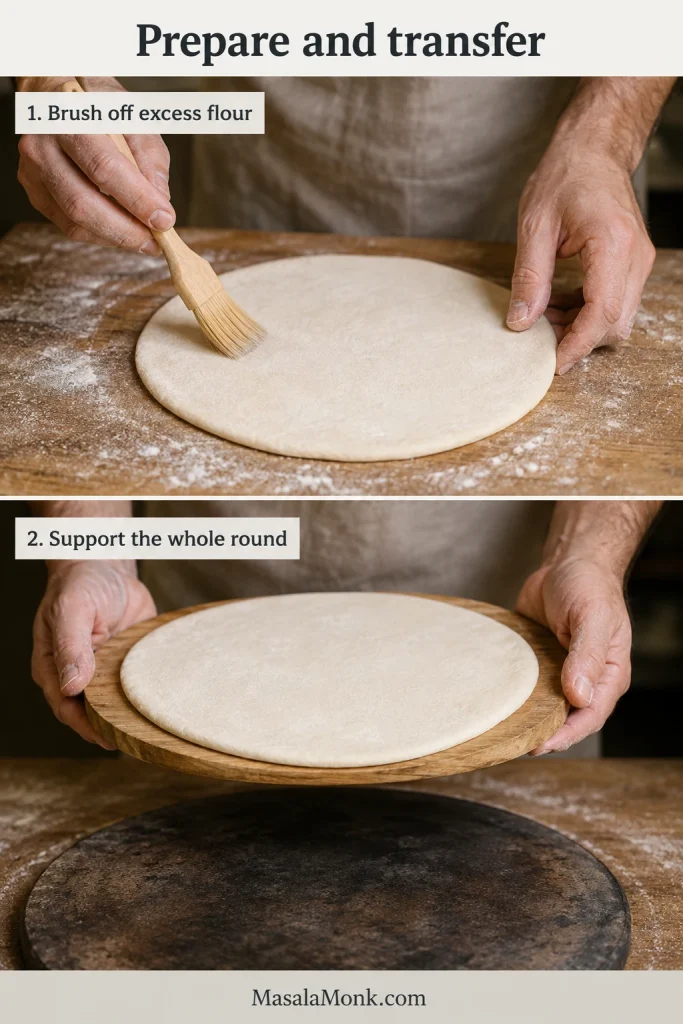
- Keep the remaining dough covered. Roll the next set while the first batch cooks. Before transferring a round, brush off visible excess flour so it does not scorch on the hot surface.
Cook the pita
Have the towel ready before the first round goes in; once the first blister appears, the batches can move quickly.
Oven method
- Give the surface its full preheat. Place the steel, stone or inverted tray on the middle rack and heat the oven to 475°F / 245°C. Position it slightly below the middle when the top of your oven browns aggressively.
- Check parchment before using it at 475°F / 245°C. Follow the manufacturer’s maximum temperature and transfer the pita directly to the hot steel, stone or tray whenever possible.
- Transfer without stretching. Place one or two rounds on the hot surface, depending on its size. Leave enough room to load and remove each pita without pulling, folding or crowding it.
- Watch for the first lift. Begin watching through the oven window after about 2½–3 minutes. Avoid repeatedly opening the oven; when the view is poor, make one quick check at about 3 minutes.
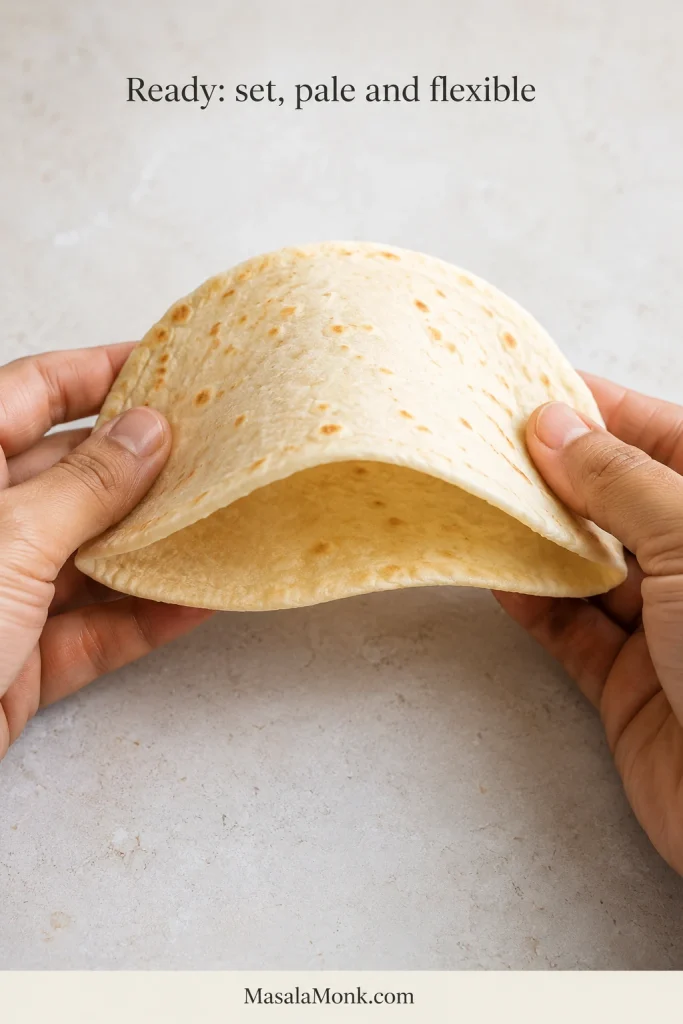
- Take it out before deep browning. Most pitas need about 3–5 minutes. Remove each one when most or all of the round has inflated and the surfaces look set but remain pale enough to bend.
- Cover immediately to keep it soft. Move each pita directly beneath a clean towel.
Stovetop, griddle or tawa method
- Preheat a heavy dry pan until evenly hot. Medium-high heat is a sensible starting point. When measured, aim for a surface temperature around 425–450°F / 218–232°C.
- Add one pita and watch for bubbles. Cook for 20–30 seconds, then flip when the first bubbles appear.
- Keep turning every 20–30 seconds. Cook until the pita inflates or the raw, damp-looking patches disappear. It should remain soft enough to bend, usually after about 2½–4 minutes in total.
- Cover before cooking the next round. Move the pita beneath the towel before it stiffens.
Pita bread guide
Pita Dough, Heat and Troubleshooting
You can begin with the recipe above. The guide below shows what to look for at each stage and what to change before the next round.
Why Pita Puffs Into a Pocket
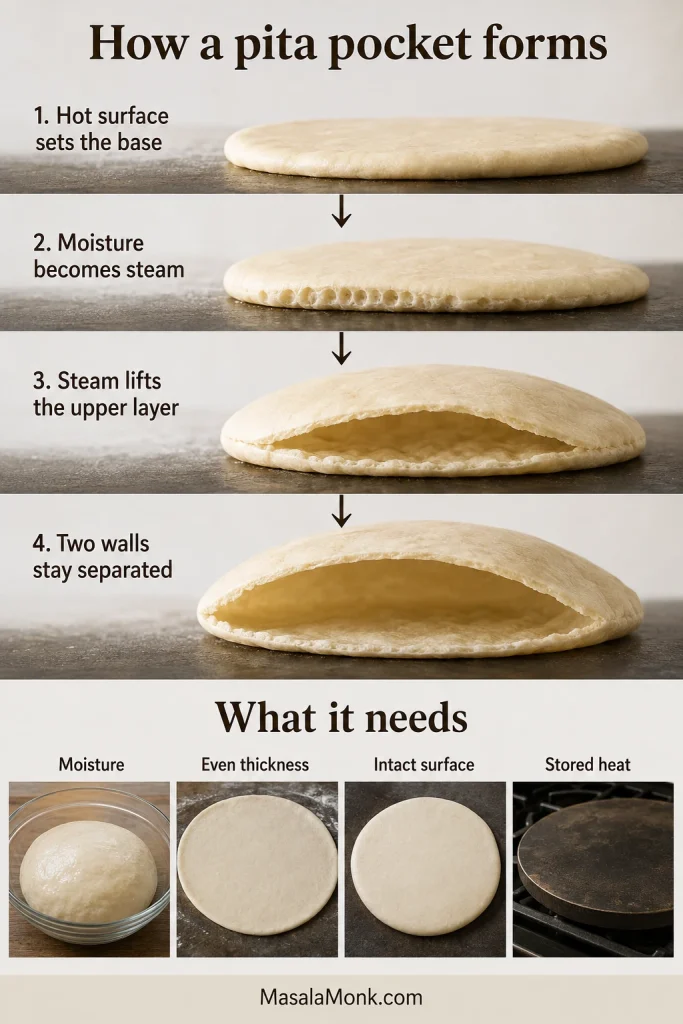
The pocket is created by steam. Fermentation makes the dough lighter and easier to stretch, but the dramatic balloon happens when moisture inside the thin round heats rapidly.
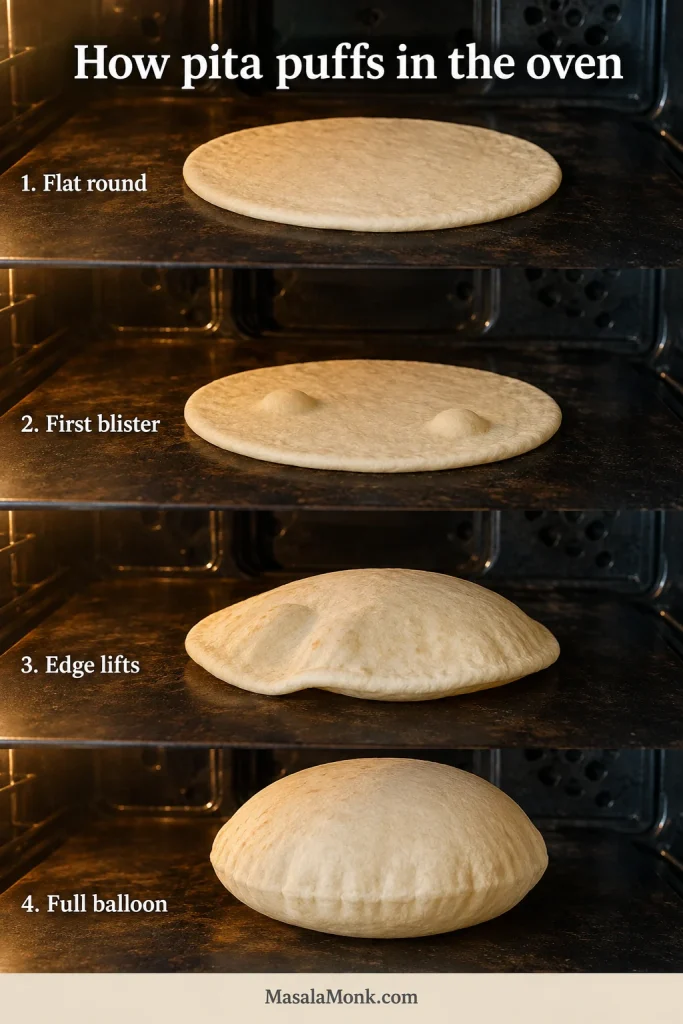
As the bottom touches the hot surface, it begins setting almost immediately. Moisture trapped inside turns to steam and lifts the upper layer away from it. Once both sides have set, the bread can hold the balloon long enough for the pocket to move across the round. The pita settles as the steam escapes, but the two layers remain separated.
Four things open the pocket
- Moisture: Soft dough supplies the steam.
- Even thickness: The round heats at a similar rate from edge to edge.
- An intact surface: Steam remains inside instead of escaping through a tear.
- Stored heat: The pan, stone or tray sets the bread before it slowly dries.
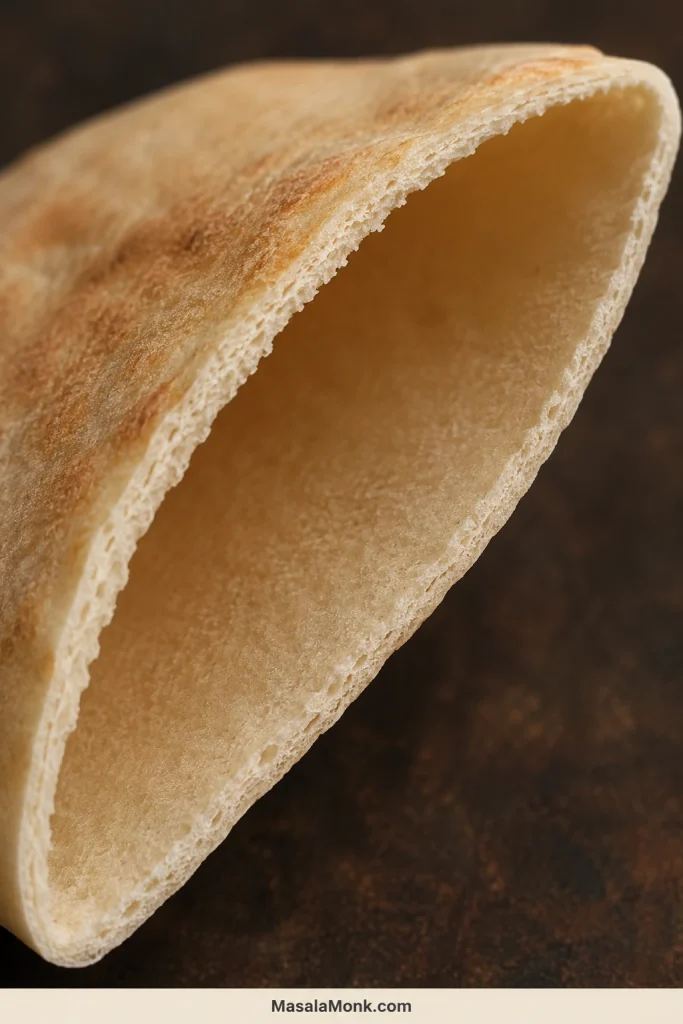
After the balloon settles, the two cooked layers should remain separated through most of the round; a few isolated bubbles are not the same as a usable pocket.
Pita Bread Ingredients and Dough Texture
Flour and water control structure and steam
All-purpose flour develops enough gluten for the dough to stretch and hold steam without making the bread excessively chewy. Bread flour can also work, although it may need a little more water and usually produces a firmer bite.
Milk Street’s pita troubleshooting identifies the same problem: excess flour creates a drier, thicker round with less moisture available for steam. Water hydrates the flour, helps the dough stretch and becomes the steam that opens the pocket. Its temperature mainly controls the pace of fermentation; it does not need to be hot.
Flour absorption varies by brand, climate and storage, so give the rough dough its 10-minute rest before deciding it needs more flour.
Yeast, salt, sugar and oil shape fermentation and texture
Yeast produces gas and flavor during the first rise, but steam performs the final lift. Salt seasons the pita, strengthens the dough and steadies fermentation. Sugar supports light browning without making the bread sweet, while olive oil helps the cooled pita remain tender and flexible.
Both sugar and oil can be omitted for a leaner dough. The pita may color more slowly and feel less tender after cooling, but neither ingredient creates the pocket.
Soft dough is better than easy, dry dough
Sticky dough makes many bakers nervous. Stiff dough creates the harder problem here.
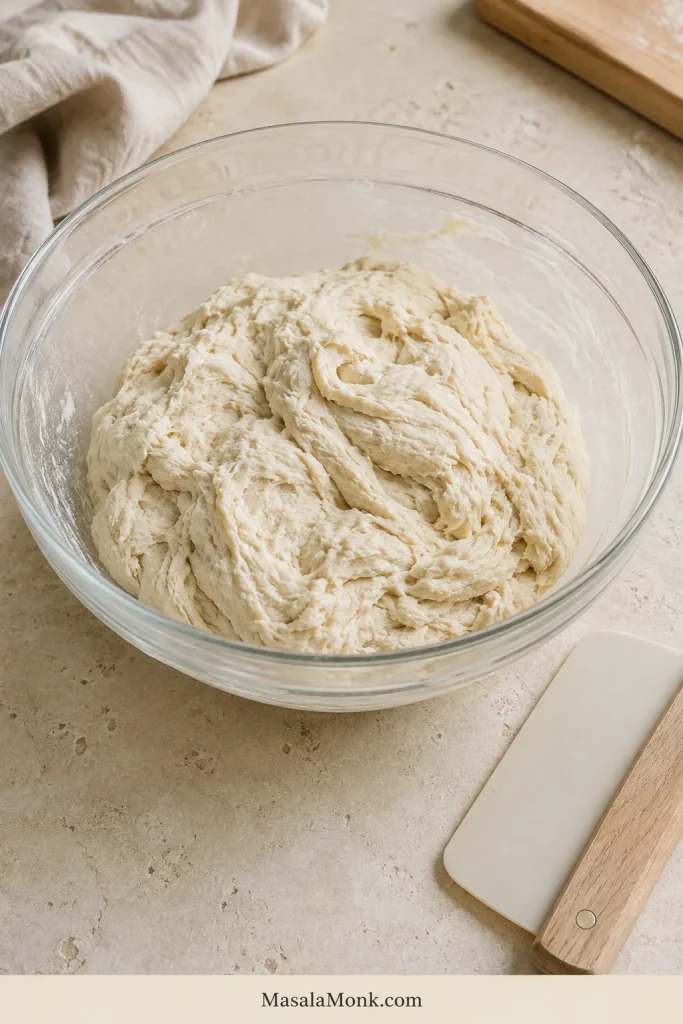
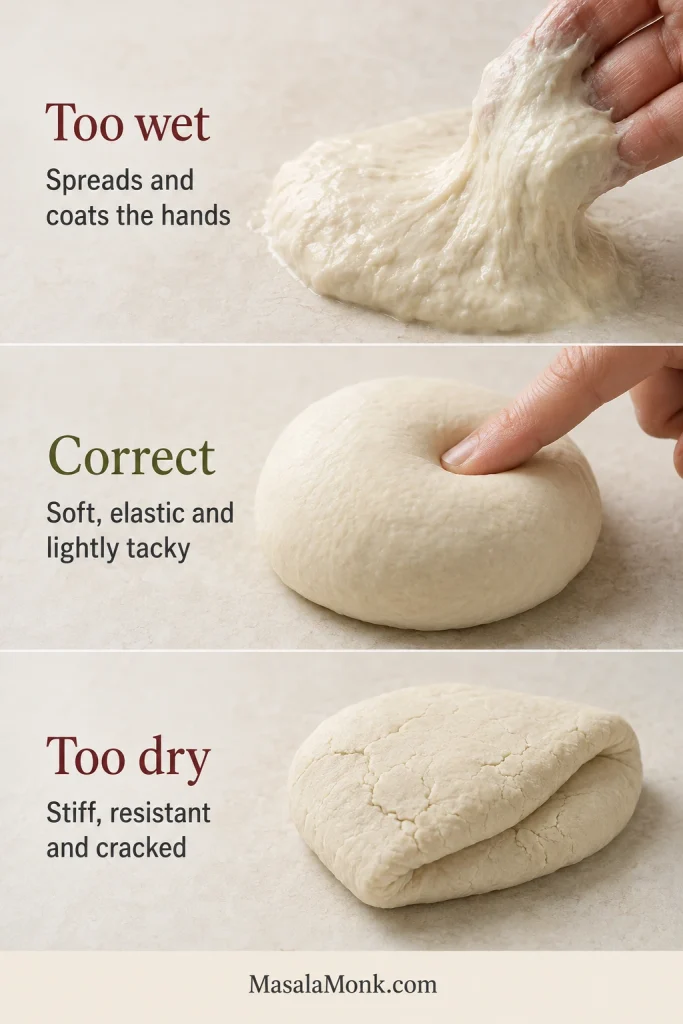
During the first minutes of mixing, the dough may cling to your fingers. After resting and kneading, it should gather into a smooth mass. If it clings lightly and then releases, you are closer than you may think. Do not make the dough dry simply because dry dough feels easier to handle.
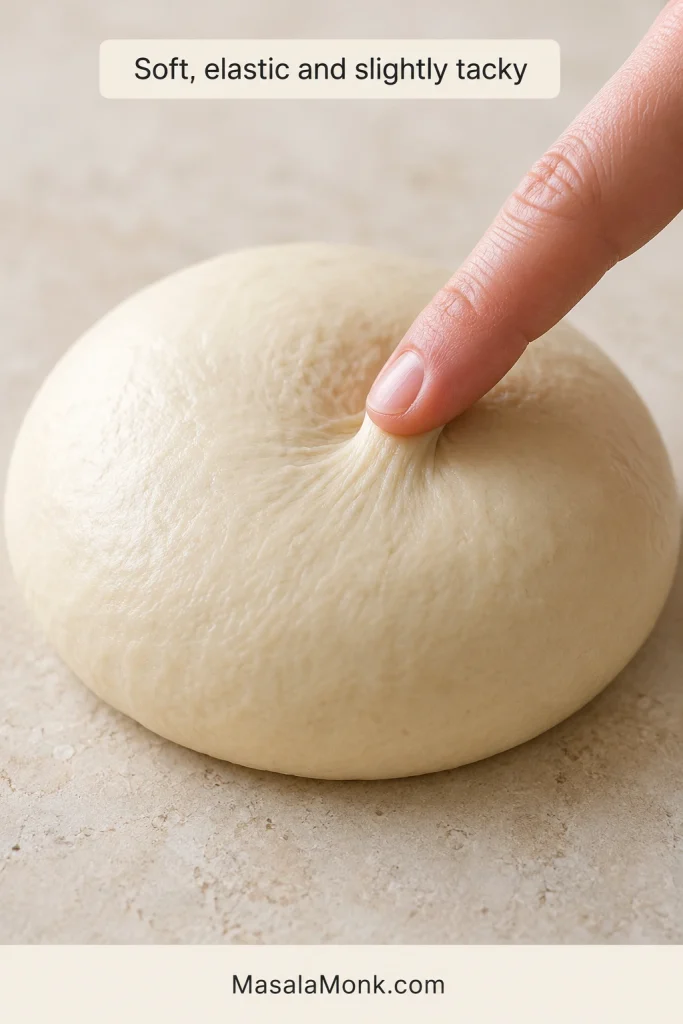
- Correctly tacky: Soft, elastic and lightly clinging before releasing.
- Too wet: Flowing, spreading quickly or coating the hands heavily after kneading. Add flour one teaspoon at a time.
- Too dry: Stiff, resistant or cracking around folded edges. Add water one teaspoon at a time during early mixing.
This is usually where another handful of flour feels tempting. Give the dough its rest first; it may become far easier to handle without changing the formula. A dough can look lively in the bowl and reveal its dryness only beneath the rolling pin.
Let the dough double
Once the dough feels soft and elastic, give it enough time to rise and become airy. The rise may take 45–90 minutes. Move on when the dough has roughly doubled, the surface looks smooth and gently domed, and the dough feels lighter than it did after kneading.
How to Roll Pita So the Pocket Can Open
Portion and rest the dough
Keeping each piece close to 80 g makes it easier to roll every pita to the same diameter and thickness. Draw the rough edges underneath, close the seam at the base and rest the covered balls for 15 minutes.
When a ball keeps shrinking toward the center, it is asking for more rest, not more force. Cover it, roll another piece and return in 5–10 minutes.
Roll to an even 3–4 mm thickness
Roll outward from the middle, rotate the dough and lift it frequently. Frequent turning spreads pressure more evenly than repeated passes in one direction.
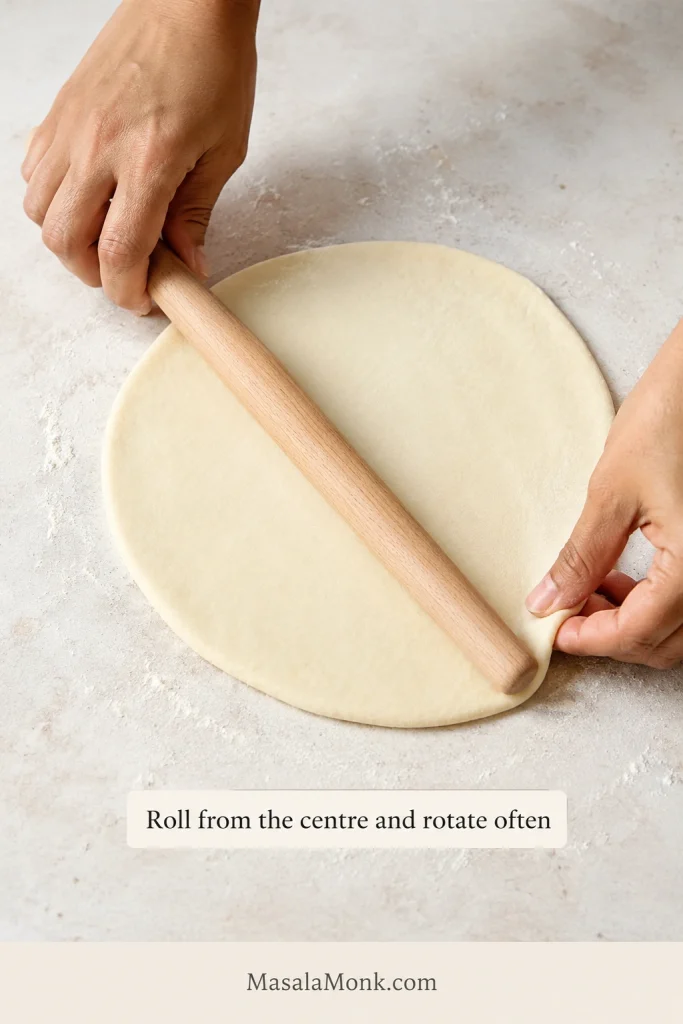
Use light, consistent fingertip pressure to compare the center, middle and rim. The target is an even 3–4 mm round without a paper-thin weak spot.
Shape matters less than thickness. A slightly irregular outline can still puff well, while a thin middle surrounded by a padded rim heats unevenly.
Keep the rounds covered and intact
Roll only enough for the next one or two cooking batches. A large steel may hold two pitas; a small oven-toaster-grill (OTG), skillet or tawa may cook only one. Keeping the remaining dough as covered balls prevents later rounds from drying while they wait.
Keep each rolled surface smooth and intact. Dust lightly, brush away visible excess flour and support the round during transfer instead of pulling it from one edge.
Pita Temperatures for Ovens, OTGs and Skillets
A modest oven can make excellent pita. The important question is how much heat the surface beneath the dough has stored. Begin with these settings, then watch the first round. Fast bubbles signal strong heat; slow drying means the surface needs more time.
| Equipment | Begin with | Watch from | Remove when |
|---|---|---|---|
| Conventional oven | 475°F / 245°C; steel, stone or heavy inverted tray heated for 30–45 minutes | 2½–3 minutes through the window | Inflated, set and flexible |
| Fan or convection oven | About 450°F / 230°C; conventional mode when available | About 2½ minutes | The pocket opens before the exterior dries |
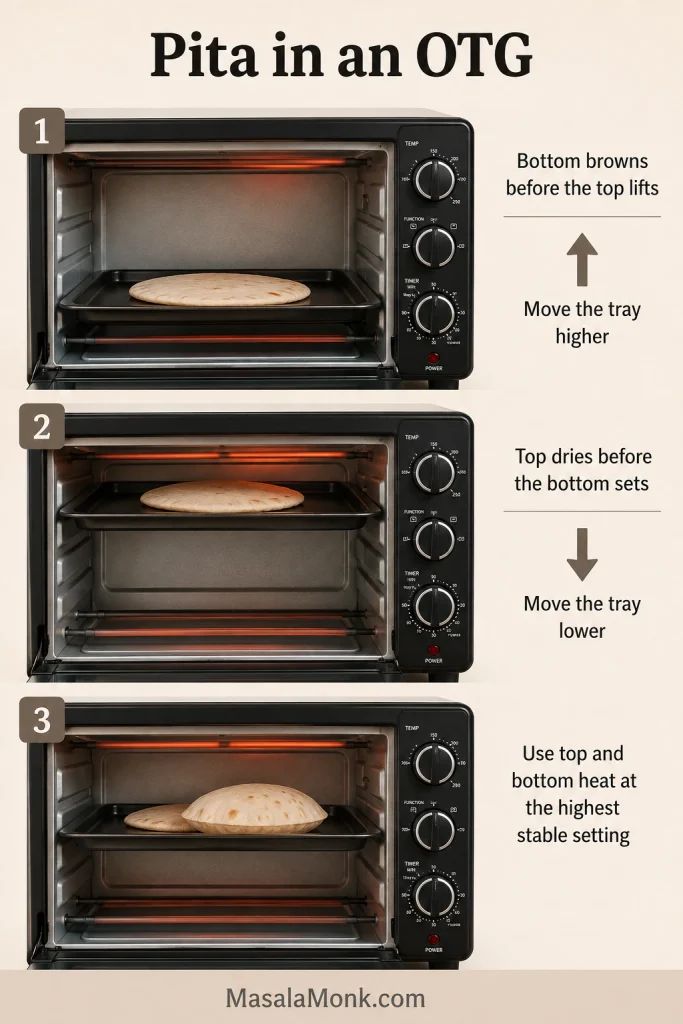
| Small OTG | Highest stable setting near 230–250°C; top and bottom heat where available | About 3 minutes | The pita inflates before either side hardens |
| Oven limited to 220–230°C | Maximum heat; warm the surface for the full 45 minutes | About 3 minutes | The layers have separated and the bread remains flexible, even without a complete balloon |
| Skillet, griddle or tawa | Heavy dry surface; approximately 425–450°F / 218–232°C when measured | First flip after 20–30 seconds | No raw-looking patches remain and the bread bends easily |
In a small OTG, move the tray higher when the underside darkens before the top lifts. Move it lower when the upper surface dries while the underside remains pale.
For the oven, preheat the surface—not only the air
The oven may announce that it is ready while a thick stone or steel is still catching up. Give the surface the full 30–45 minutes before loading the first pita. Steel transfers heat quickly and recovers well, stone gives steadier heat, and a heavy inverted tray offers an affordable alternative that may need a little longer between loads.
Support the round with both hands, a peel or a wide spatula during transfer. With enough stored heat, the first blisters appear quickly and one edge may rise before a wave of inflation moves across the bread.
Remove the pita as soon as its surfaces are set and the bread still bends easily. Waiting for deep color can leave the pocket walls brittle.
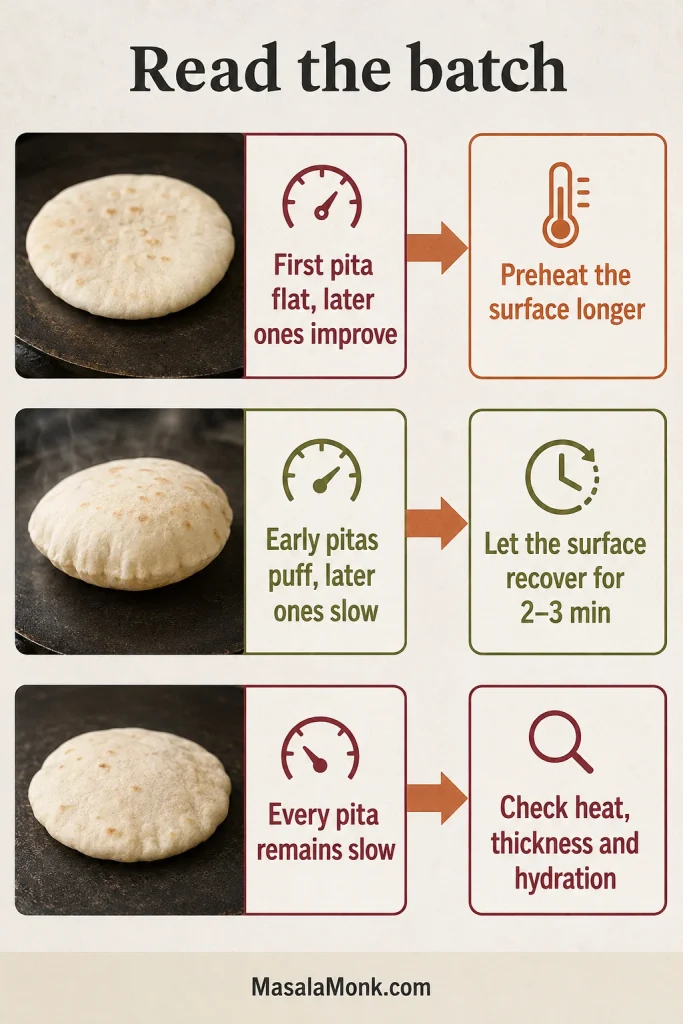
The order matters. A flat first pita and a slow final pita usually point to different problems. If the first round barely bubbles, remove it while soft and give the surface another 10 minutes before loading the next one. A flat first pita is disappointing, but the other seven are still covered and waiting. When the early pitas puff and later ones slow down, close the oven for 2–3 minutes so the surface can recover.
For the skillet, griddle or tawa, watch the bread
A surface around 425–450°F / 218–232°C is a useful starting range. King Arthur uses a similar measured range for its stovetop sourdough pita.
If the pita sits quietly and dries slowly, raise the heat. Dark spots appearing before the center cooks mean the heat should come down. Flip when the first bubbles appear and continue turning every 20–30 seconds.
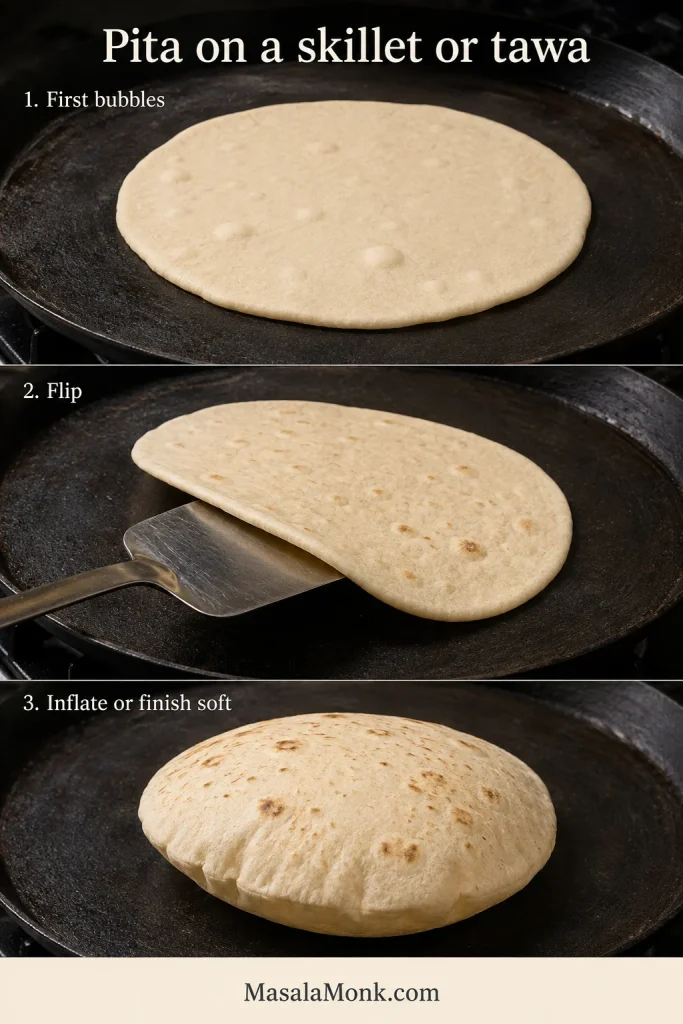
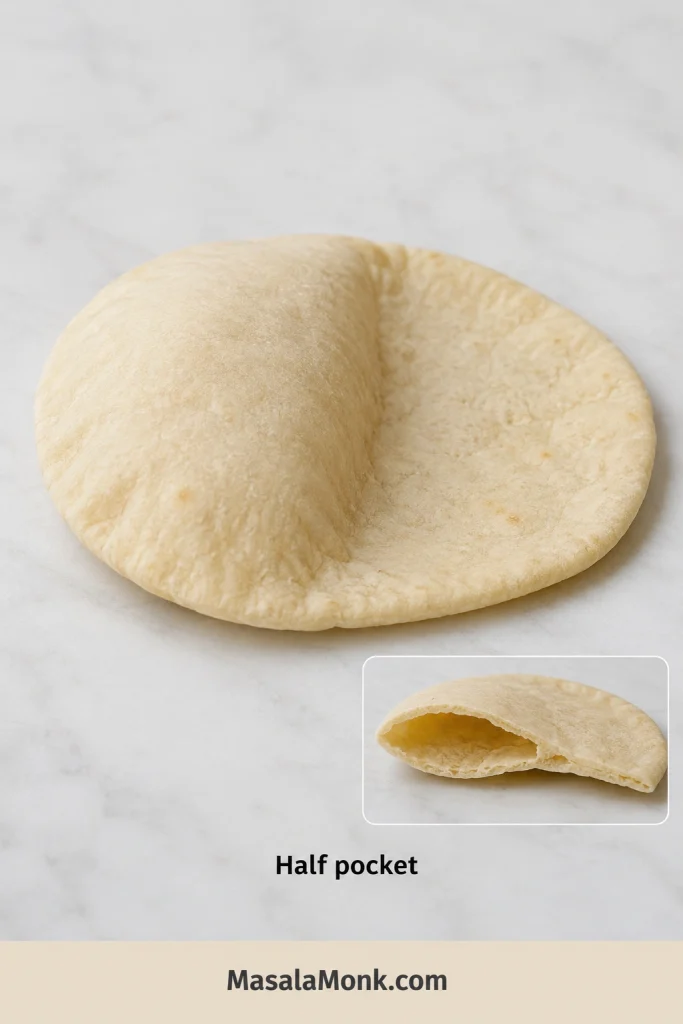
When one section inflates while another stays attached, press briefly beside the flat portion with a spatula without pressing directly on the balloon. Half a pocket does not mean the recipe failed; one area of that round may simply have been thicker or made weaker contact with the pan.
Once the damp-looking patches disappear, several more minutes usually produce a cracker instead of a late pocket. Remove the bread while it bends easily.
Why Your Pita Did Not Puff—and What to Change Next
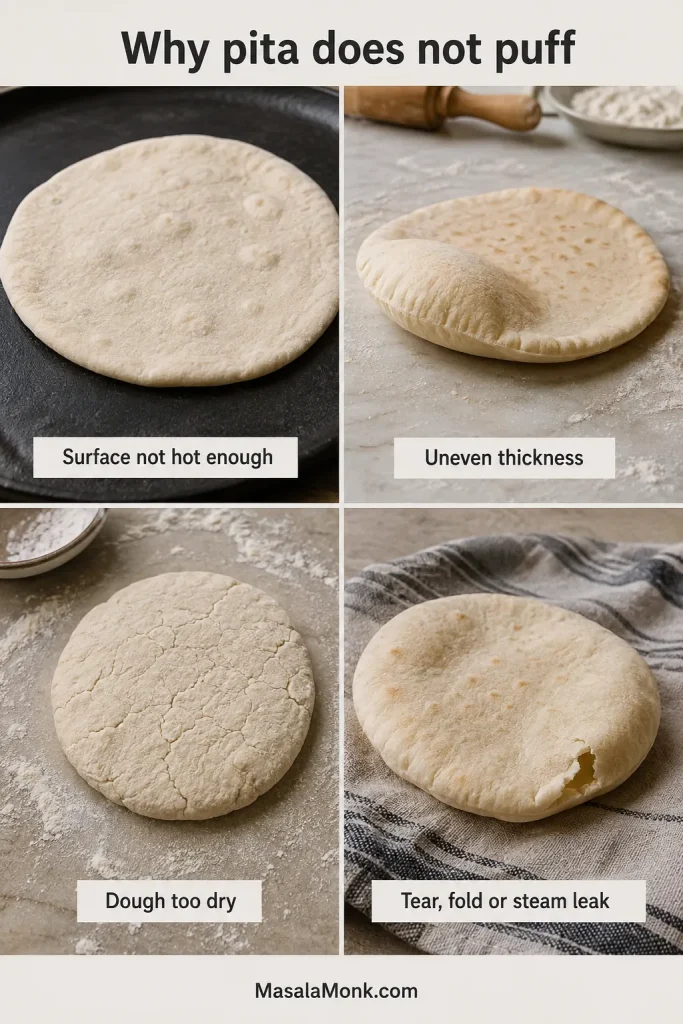
Most flat pitas come back to four things: heat, thickness, moisture or a steam leak. Match what you saw to the most likely cause, then change one thing on the next round.
| What you saw | Likely cause | What to change |
|---|---|---|
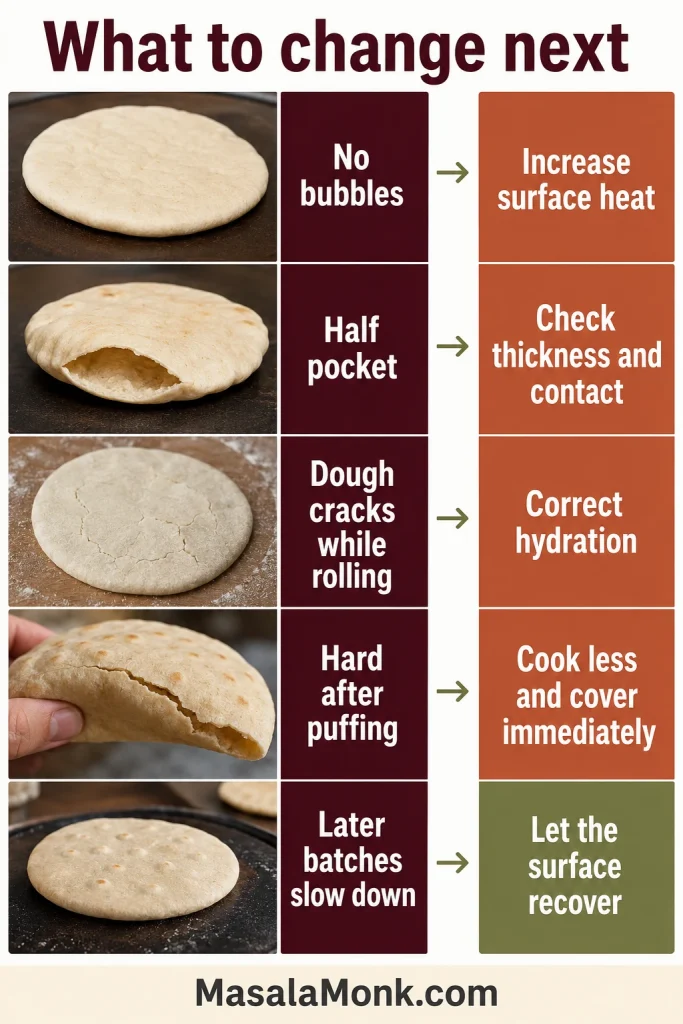
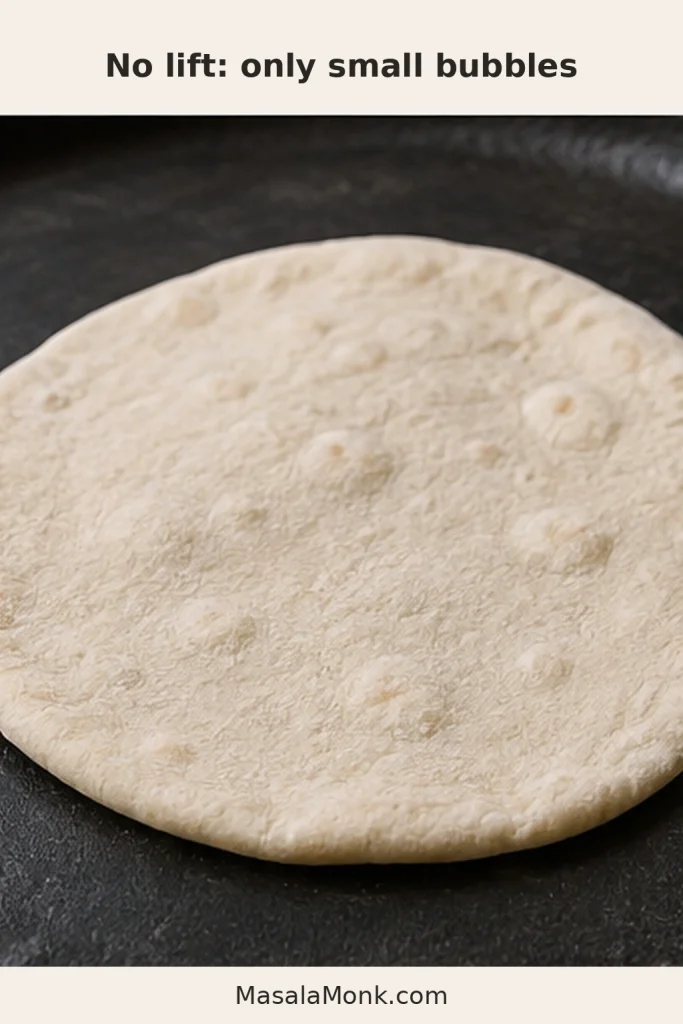
| No lift: no bubbles, tiny bubbles or only the first pita stayed flat | Cool surface, thick round or dry dough | Preheat longer, check thickness and weigh the flour and water |
| Uneven lift: half inflated or the pocket stopped partway across | Uneven rolling, padded rim, fold or steam leak | Compare the center and rim and inspect the round for damage |
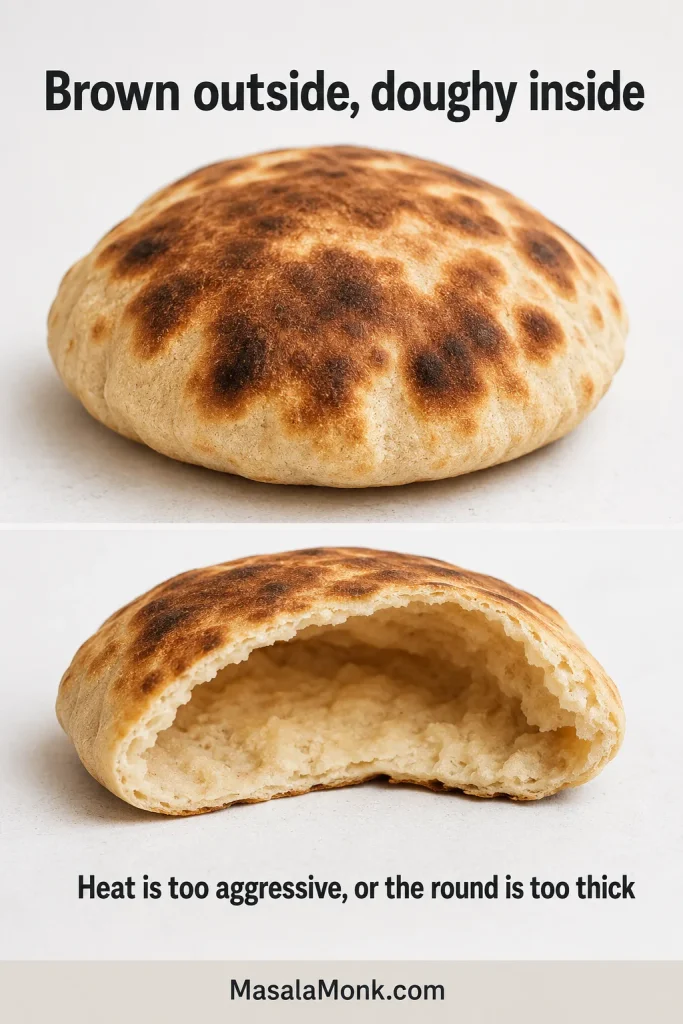
| Poor cooking: brown outside and doughy inside, or puffed but hard | Excess heat, excessive thickness or too much cooking time | Lower the heat, roll evenly and remove the next pita sooner |
| Dough trouble: shrinking, sticking, cracking or excessive stickiness | Insufficient rest, kneading or hydration adjustment | Rest tight dough and adjust flour or water one teaspoon at a time |
Use the first visible symptom to choose one adjustment. Keeping the other variables steady makes the next pita a useful test rather than another guess.
When the surface is too cool
An underheated surface produces slow bubbles and gradual drying instead of a quick wave of inflation. Give the steel, stone or tray more time before loading the next round.
When the round is uneven
Only one half inflated. The tempting response is to keep cooking, but the problem probably began beneath the rolling pin. Compare the center and rim of the next round by touch, then rotate it more frequently as you roll.
When the outside browns before the center cooks
Strong color with a damp or dense center means the exterior set before heat reached the thicker interior. Lower excessively aggressive heat, roll the next round more evenly or correct both problems together.
When the dough is too dry
Dry dough may rise in the bowl but resist every pass of the rolling pin. Weigh the ingredients, allow the hydration rest and avoid adding large handfuls of flour simply to make the dough easier to handle.
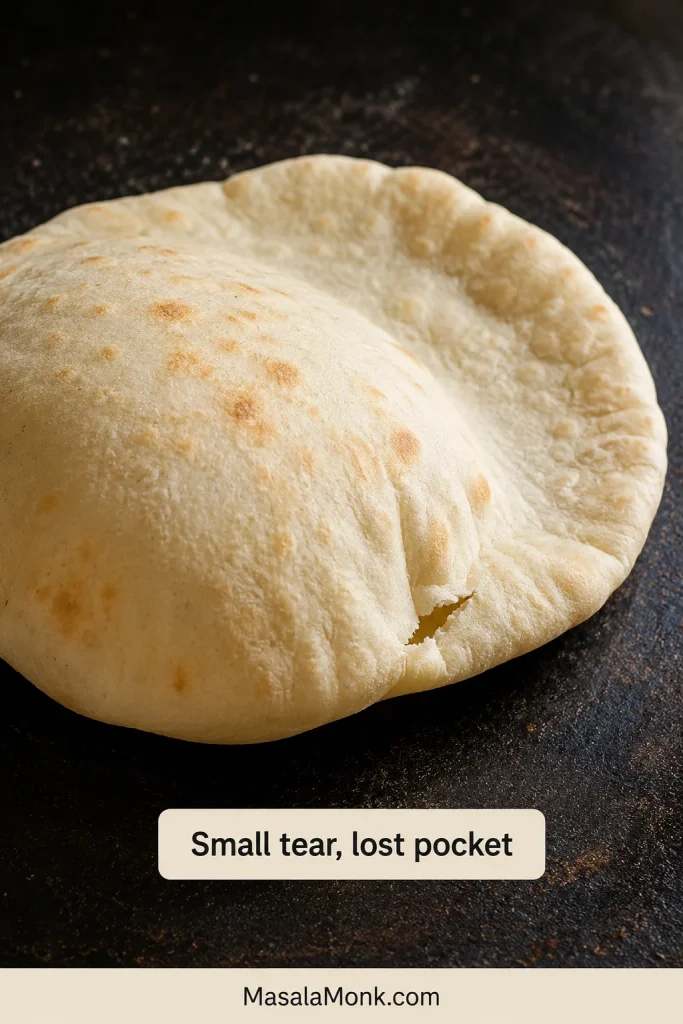
When steam finds a way out
A small tear, dry crack, folded edge or stretched patch releases steam before the two sides separate. Loosen stuck dough gently instead of pulling it from one edge.
When puffed pita turns hard
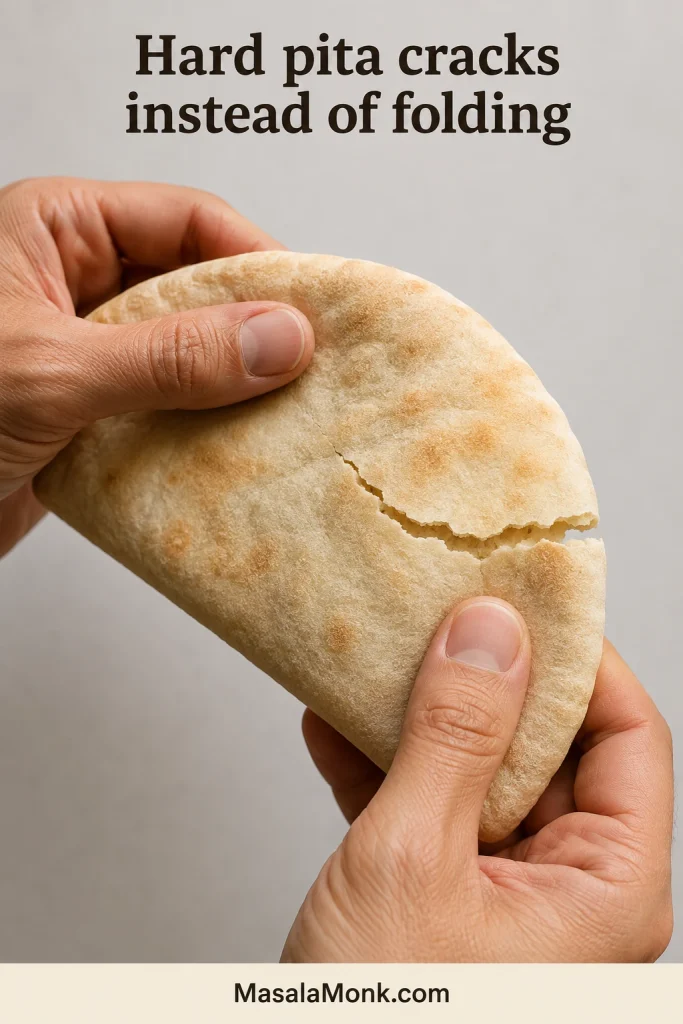
Hard pita usually points to excess cooking, overly dry dough or a delay before covering. Remove the next bread once it has puffed and set, then place it beneath a clean dry towel immediately.
A pocketless pita still earns its place at the table: fold it while soft, toast it into chips or tear it into salads and dips.
Recheck the three stages most likely to change the next batch: dough texture, rolling thickness or surface heat.
Back to recipe cardBack to the top ↑
Keep Pita Soft, Then Store or Freeze It
The final texture is decided during the first few minutes after cooking. Lift the towel after a minute or two and the stack should feel warm, supple and lightly steamy, with the dry surfaces beginning to soften.
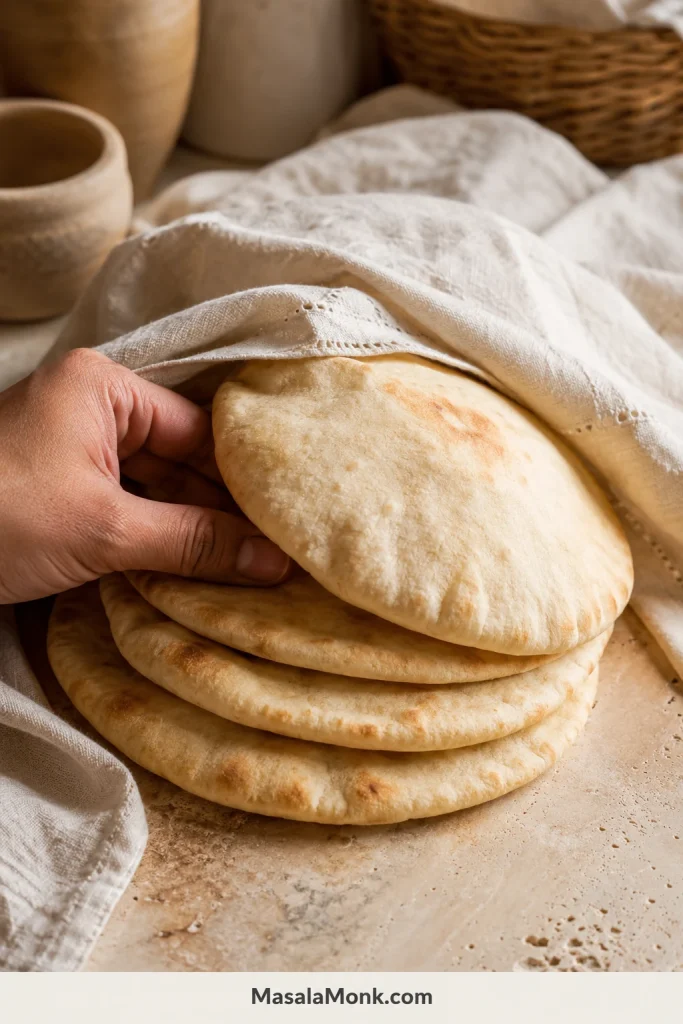
- Place each cooked pita directly beneath a clean dry towel.
- Stack the pitas loosely so their shared warmth softens the surfaces.
- Open the towel slightly once the completed stack stops steaming heavily.
- Cool completely before sealing the bread in a bag or container.
Pita is one of those breads worth freezing on purpose. A brief reheat restores it more successfully than several days in the refrigerator.
Store at room temperature or freeze
Store completely cooled pita in an airtight bag or container at room temperature for up to two days for the best texture. Refrigeration may delay mold, but it also makes pita stale and firm more quickly. Freeze the bread instead when it will not be eaten within two days.
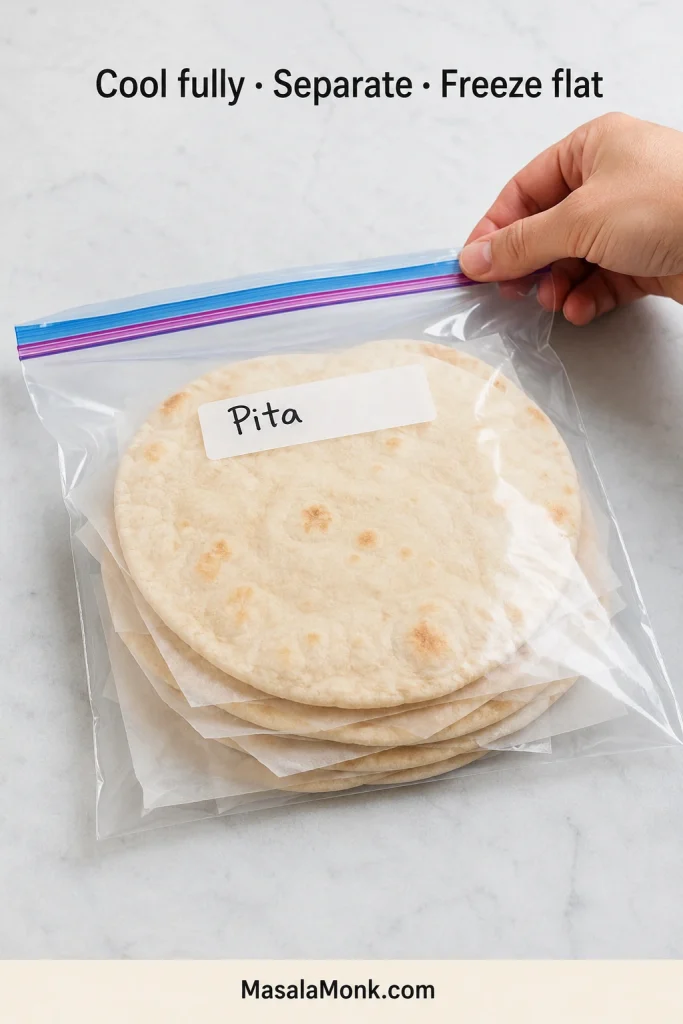
- Cool the pita completely.
- Place parchment between the rounds.
- Slide the stack into a freezer bag.
- Remove excess air and seal tightly.
- Freeze flat for up to three months.
Freezing the stack flat and separating the rounds prevents them from sticking together, so one pita can be removed without thawing the rest.
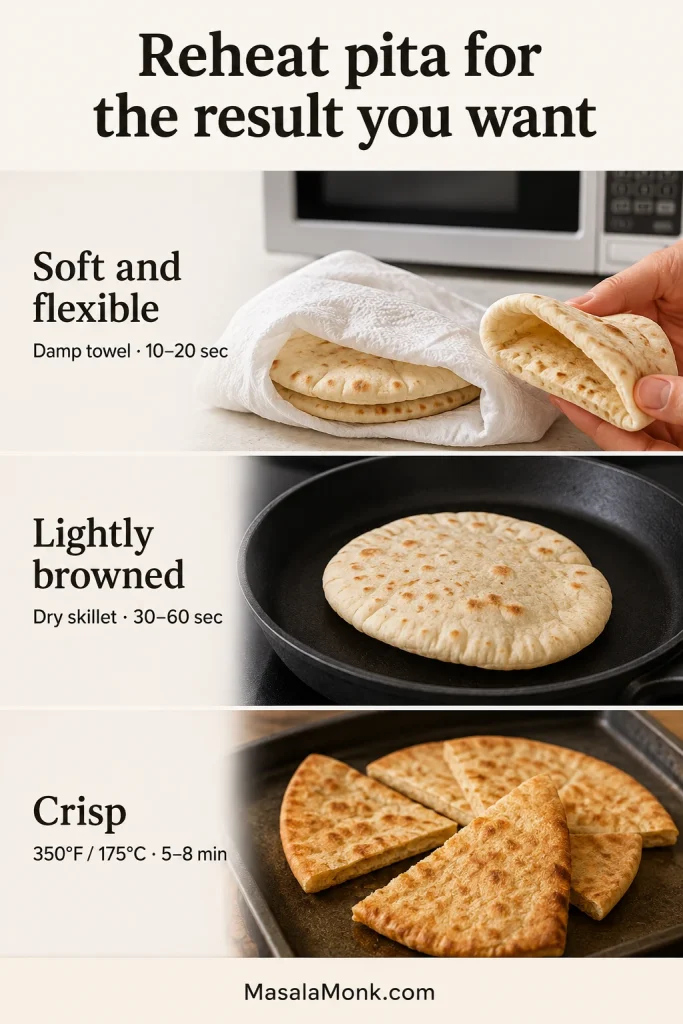
Reheat for the texture you want
- Soft for opening and filling: Add a few drops of water to a skillet, add the pita, cover for 15–20 seconds, then uncover and heat for about 20 seconds per side.
- Lightly browned: Heat in a dry skillet for about 20–30 seconds per side.
- Several pitas together: Wrap the stack in foil and heat at 350°F / 175°C for about 5–8 minutes.
- A fast single pita: Wrap it in a lightly damp towel and microwave for 10–20 seconds.
- Crisp pita: Heat uncovered in the oven or air fryer, checking frequently.
- Straight from frozen: Use gentle steam in a covered skillet or foil-wrapped oven first, followed by a short dry finish.
Begin with the shortest reheating time. Another ten seconds is easier to add than moisture is to put back.
How to Open a Pita Pocket Without Tearing It
Let the pita rest beneath the towel until it is warm and comfortable to handle. Cut the round in half with a sharp knife instead of pulling it apart from the edge.
Along the cut edge, you should see two thin walls with a clear space between them. Ease the sides open with your fingers. A small blunt knife can loosen one lightly attached patch, but do not force a section that never separated.
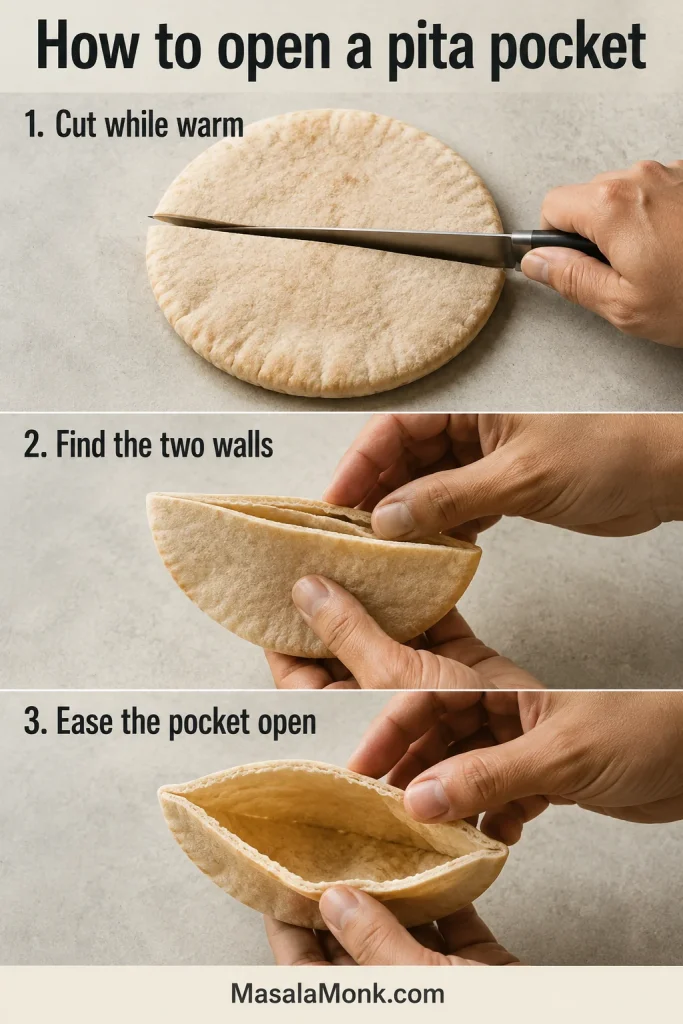
When the cut edge separates cleanly beneath your fingertips, you know the pocket formed: two soft walls, open and ready to fill.
Partially puffed pita can still hold a compact filling. Use the open portion, fold the whole round around the food or cut it into wedges.
What to Serve With Homemade Pita
Fresh pita needs very little. Tear one while it is warm and drag it through hummus or olive oil, or cut it open while the bread is still soft enough to bend around the filling. Stuffing the bread rather than folding it? First see how to open a pita pocket without tearing it.
Fill or fold
- Homemade falafel, chopped salad, pickles and tahini
- Sliced baked chicken breast, lettuce, tomato and yogurt sauce
- A lightly mashed chickpea salad that stays together inside the pocket
- Eggs, spinach and feta for breakfast
- Kofta or seasoned minced meat with onion and parsley
- Roasted vegetables with labneh, tahini or thick tzatziki
Keep the filling compact when using a pocket. A thicker Greek-style pita is better suited to folding around a large gyro-style meal.
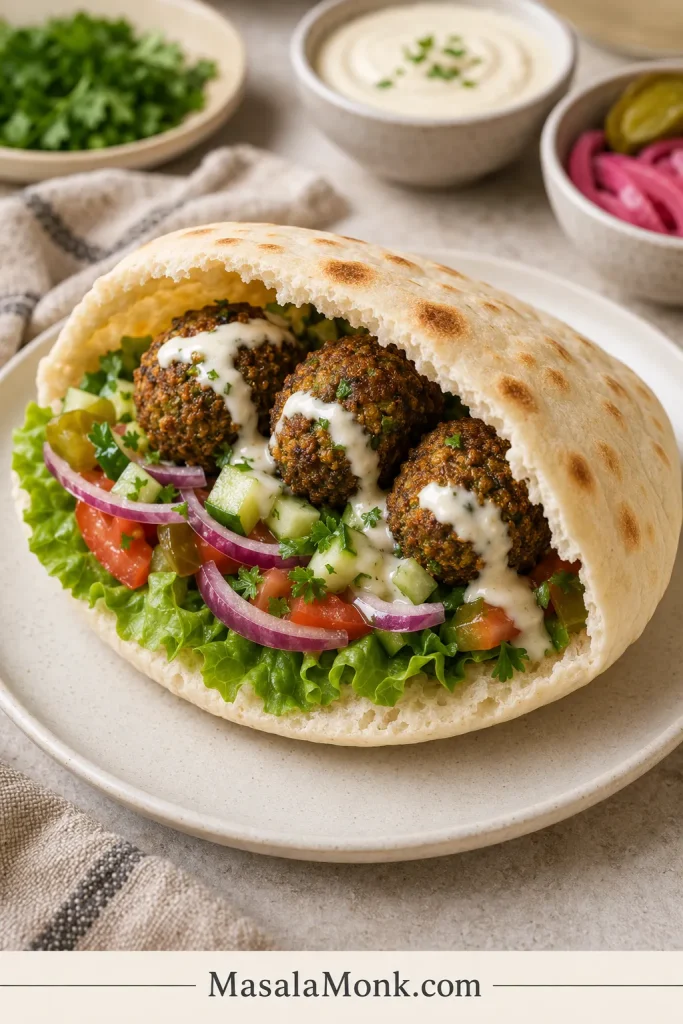
For more sharpness, add a small spoonful of tangy amba sauce. Its sour mango, turmeric, chili and fenugreek work especially well with falafel, chickpeas, roasted vegetables, eggs and shawarma-style fillings.
Tear and share
- Hummus
- Baba ganoush
- Labneh with olive oil and herbs
- Olive oil with za’atar
- Fresh tabbouleh with parsley, tomato, mint and lemon as part of a mezze plate
Use leftover pita
- Cut it into wedges for pita chips
- Toast pieces for fattoush
- Spread a whole round lightly with pizza sauce, add cheese or vegetables and bake until the edges crisp
- Toast and crush it over soup or salad
Pita Bread Variations and Scaling
Make the base recipe once before changing it. Once you know how the dough should feel, small variations become much easier to judge.
Flour variations
Use all-purpose flour as the baseline. Bread flour and partial whole wheat can work with small hydration adjustments, while fully whole-wheat pita needs a separately balanced formula.
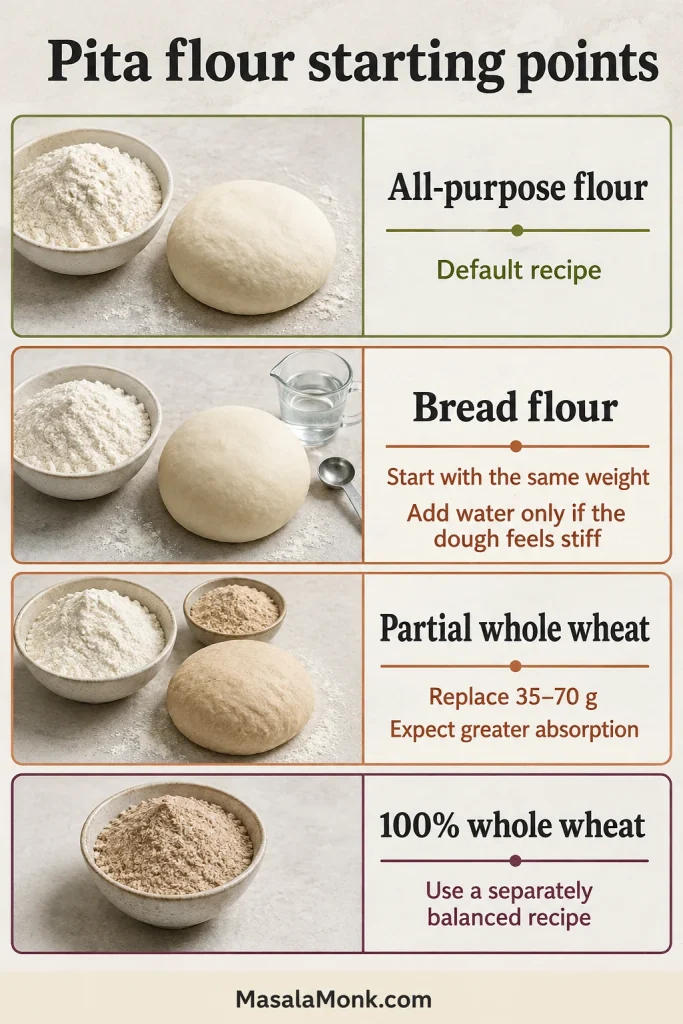
Bread flour gives a slightly chewier pita; replace the all-purpose flour with the same weight. After the hydration rest, add a teaspoon or two of water only when the dough feels noticeably firm.
To make part-whole-wheat pita, replace 35–70 g of the all-purpose flour with fine whole-wheat flour. That gives roughly 10–20% whole wheat, with a nuttier flavor and slightly greater water absorption. A 100% whole-wheat pita needs its own water range, resting strategy and handling guidance.
Make-ahead starting point
An overnight schedule works better with less yeast, so reduce the instant yeast to about 2 g / ⅔ teaspoon. Knead the dough as usual, leave it covered at room temperature for 20–30 minutes, then refrigerate for about 8–16 hours.
The next day, let the dough stand until relaxed and no longer refrigerator-cold—often 45–75 minutes—before dividing. Refrigerator temperature and yeast activity vary, so judge its softness instead of relying only on the clock.
Scale the batch
Scale every ingredient by weight and keep each dough ball close to 80 g. The oven temperature remains the same. For a double batch, use a larger bowl, roll in small waves and pause when the baking surface begins losing heat.
Changes that need more than a simple substitution
No-yeast yogurt flatbread, Greek pocketless pita, sourdough pita, gluten-free pita and 100% whole-wheat pita behave differently enough to need separately balanced recipes. Removing the yeast or replacing the flour in this dough will not reliably produce the same pocket.
Baker’s percentages for scaling
Flour 100% · Water 69.4% · Salt 2.2% · Instant yeast 1.4% · Sugar 1.7% · Olive oil 3.9%
Frequently Asked Questions
Puffing, texture and equipment
Why did my pita not puff?
The usual causes are insufficient surface heat, uneven thickness, dry dough or a tear that releases steam. Use the troubleshooting guide to match what you saw to the next adjustment.
Why did my pita turn hard or crisp?
Pita usually turns hard because it was cooked too long, made from overly dry dough or left uncovered after cooking. Remove it once it has inflated and set, before deep browning, and place it beneath a clean towel while warm.
Can I make pita without a baking stone?
Yes. Preheat a heavy uncoated baking sheet upside down to create a flat loading surface. It may need more recovery time between batches than a stone or steel.
Make-ahead, ingredients and pita styles
Can pita dough be made ahead or frozen?
For make-ahead dough, use the reduced-yeast starting point in the variations section, then let the refrigerated dough soften and relax before dividing. Baked pita freezes more predictably than raw dough, so freeze the cooked and fully cooled bread unless you already know how your dough behaves after thawing.
Can I omit the sugar or olive oil?
Yes. The pocket can still form without either ingredient. With no sugar, fermentation and browning may be slower. Without oil, the pita will be leaner and may feel less tender after cooling.
Is pita bread the same as naan?
No. Pita is rolled thin and heated quickly so steam can separate it into two sides. Naan is usually softer, thicker and more enriched, often with yogurt, milk, butter or ghee. Both are flatbreads, but they are made for different textures.
Is Greek pita the same as pocket pita?
No. A Greek-style pita is generally thicker, softer and deliberately pocketless. It is normally cooked in a skillet and folded around fillings. Pocket pita is rolled thinner and exposed to intense heat so steam can push the two sides apart.
The First Pita Is Allowed to Teach You
The first round may rise cleanly, or it may show that the surface needs another ten minutes. Either result tells you something before the other seven reach the heat.
Keep the remaining dough covered, adjust one thing and try again. When everything lines up, the change happens in seconds: the bread lifts, the pocket travels from one edge to the other, and the towel begins filling with warm, soft pitas.
How did your first pita behave—full balloon, half pocket or stubbornly flat—and were you using an oven, OTG, skillet or tawa?
Roll evenly. Heat fully. Cover quickly. The pocket may be the dramatic part, but those three quiet decisions are what make it possible.








