Bombay is a heaven for food lovers, with street foods that are rich in flavour. From spicy pav bhaji to crispy vada pav, the city’s street food is a delightful exploration of taste and culture. Bombay grilled sandwich is popular Maharashtrian street food and if you are a sandwich lover, then you definitely need to try this recipe. This sandwich can be quick prepared without much hassle. This Bombay sandwich is a sweet, salty, spicy and savory recipe filled with a flavor that will leave you wanting for more and more. The best part is that this veggies – loaded sandwich can be given in kids lunch boxes or taken to your office too. Just use the below given ingredients and make the easy tasty sandwich for you and your family.
Ingredients:
- Bread slices
- Boiled potatoes, sliced
- Cucumber, thinly sliced
- Capsicum, thinly sliced
- Onion, thinly sliced
- Chat masala
- Salt, to taste
- Green coriander chutney
- Butter
- Tomato slices (optional)
- Besan bhujiya
Method:
Begin by spreading a thin layer of butter on one side of each bread slice. On the unbuttered side of one bread slice, spread a generous layer of green coriander chutney. Adjust the amount based on your taste preference. Place the sliced boiled potatoes evenly on top of the chutney.

Layer cucumber, capsicum, onion, and tomato (if using) slices on top of the potatoes. Sprinkle a pinch of chat masala and a bit of salt over the vegetables for added flavor. If desired, you can spread a bit more green chutney on the unbuttered side of another bread slice before placing it on top of the assembled vegetables.

Heat a tawa and Spread a small amount of butter on tawa. Carefully place the assembled sandwich on the tawa. Allow it to cook for a few minutes on one side until it turns golden brown and crispy. Cook the other side until it becomes crispy and golden brown as well. Once both sides are nicely grilled remove the sandwich from the tawa.

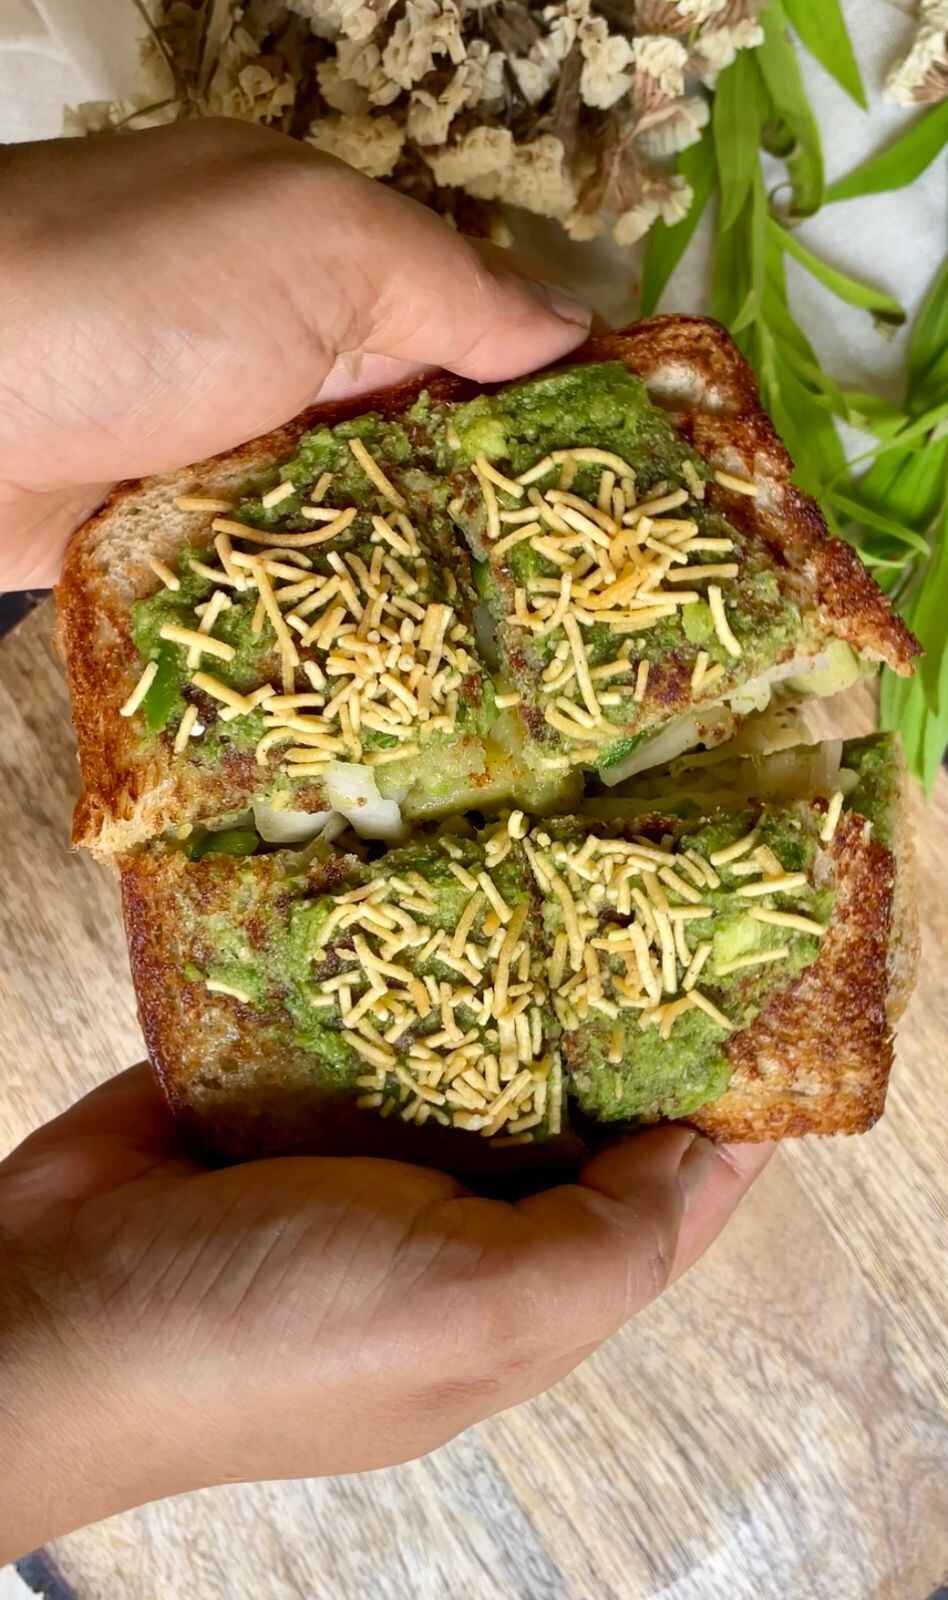
Place the sandwich on a cutting board and cut it into halves or quarters as desired. Spread a final layer of green coriander chutney on top of the grilled sandwich. Sprinkle a generous amount of besan bhujiya over the chutney layer. This adds a delightful crunch and flavor to the sandwich.

Your mouthwatering Bombay sandwich is now ready to be served! This Bombay grilled sandwich is just of the many delectable treats that Bombay street food has to offer. Easy to prepare and incredibly satisfying, this veggie-loaded sandwich is a fantastic option for a quick meal at home.
Explore More Delicious Sandwich Recipes
If you enjoyed this sandwich, be sure to check out our other sandwich recipes for more tasty ideas!
I would love to see your creations. If you tried this recipe , just click a pictures and tag us on @masala.monk or use the hashtag #MasalaMonkRecipe and share on Instagram and Facebook. Happy cooking!