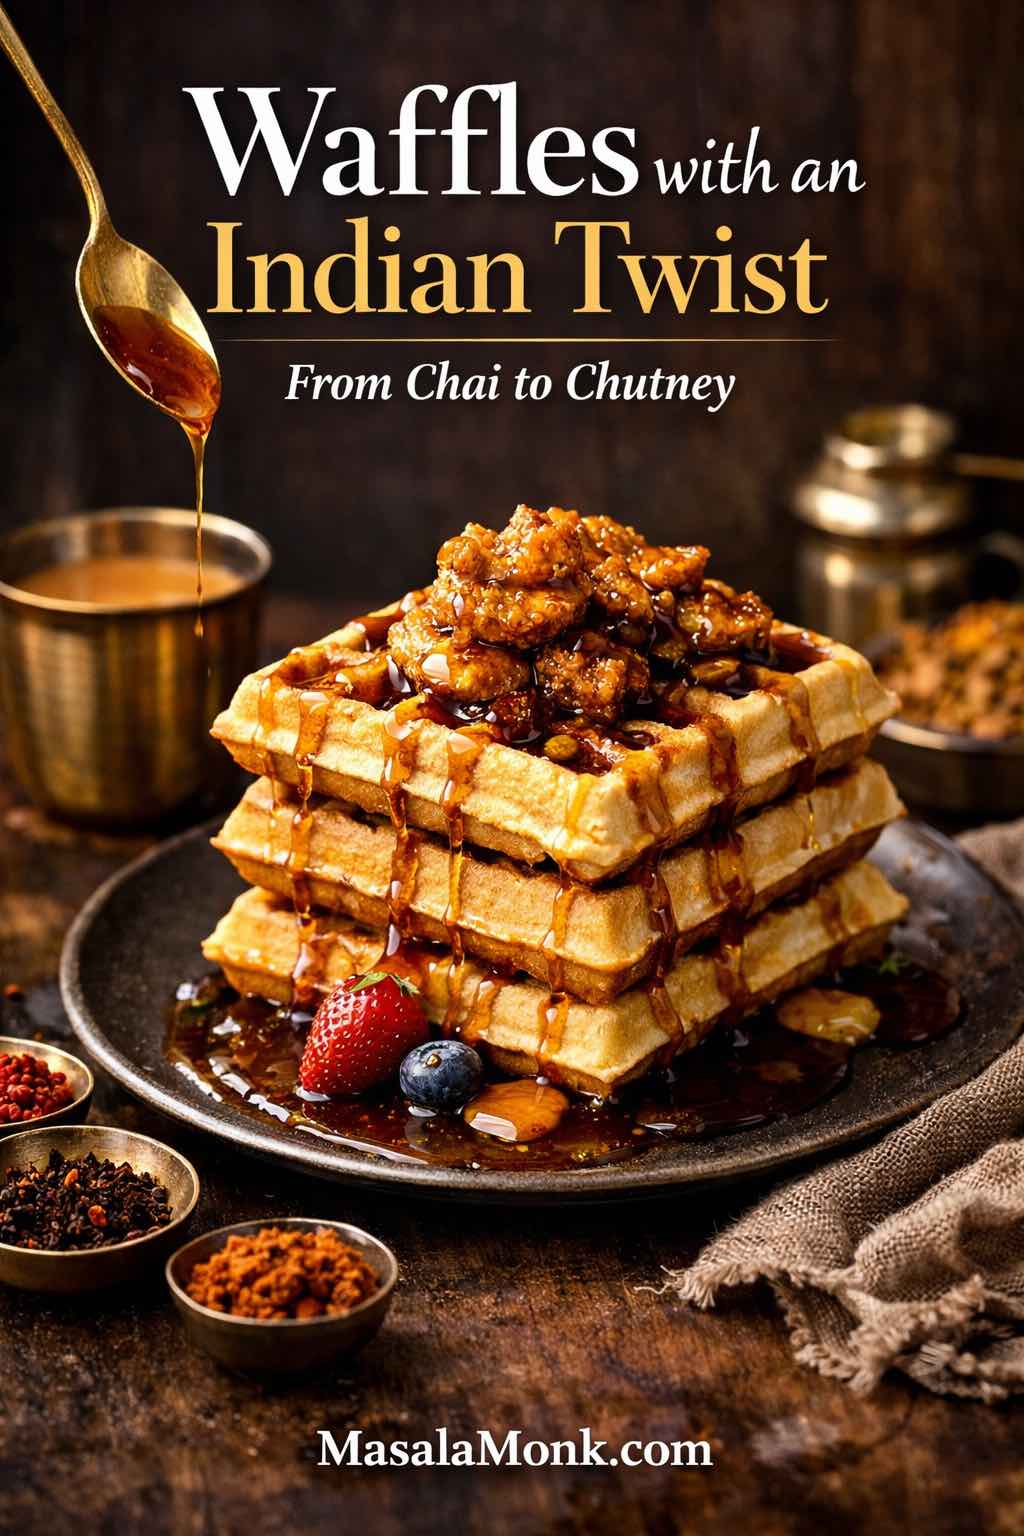
A Belgian waffle recipe has a particular kind of charm. To begin with, it’s the sound: the soft click of the waffle maker closing, the gentle hiss as batter hits heat, the tiny pause while steam builds. Then comes the moment the lid lifts and a golden grid appears—crisp at the edges, tender at the center, and made for whatever you’re craving: syrup, fruit, chocolate, chutney, even spicy chicken.
If you’ve been looking for a recipe that feels dependable and still leaves room for playful Indian flavours, you’re in exactly the right place. We’ll start with a classic Belgian waffle batter you’ll want to keep forever. After that, we’ll take five Indian detours that feel completely natural rather than forced: a coconut–jaggery waffle recipe without milk, peanut butter waffles with chikki-style crunch, a “paneer-style” protein waffle recipe using cottage cheese, soft yogurt waffles with dahi and elaichi, and finally a bold tandoori chicken and waffles sandwich that turns brunch into a proper event.
Before long, you’ll also have a simple waffle mix recipe you can stash in a jar for quick mornings, plus a handful of desi-leaning drizzles and toppings that make every plate feel intentional. So, with that in mind, let’s warm up the waffle iron and get into it.
Belgian Waffle Recipe, Desi Edition: Why This Waffle Recipe Works Every Time
A great waffle is all about contrast. On one hand, you want a crisp exterior that holds its shape and tastes lightly toasted. On the other, you want a soft interior that feels comforting—almost like cake, but lighter. Meanwhile, you also want pockets deep enough to catch every last drop of syrup, sauce, or chutney, so each bite tastes complete.

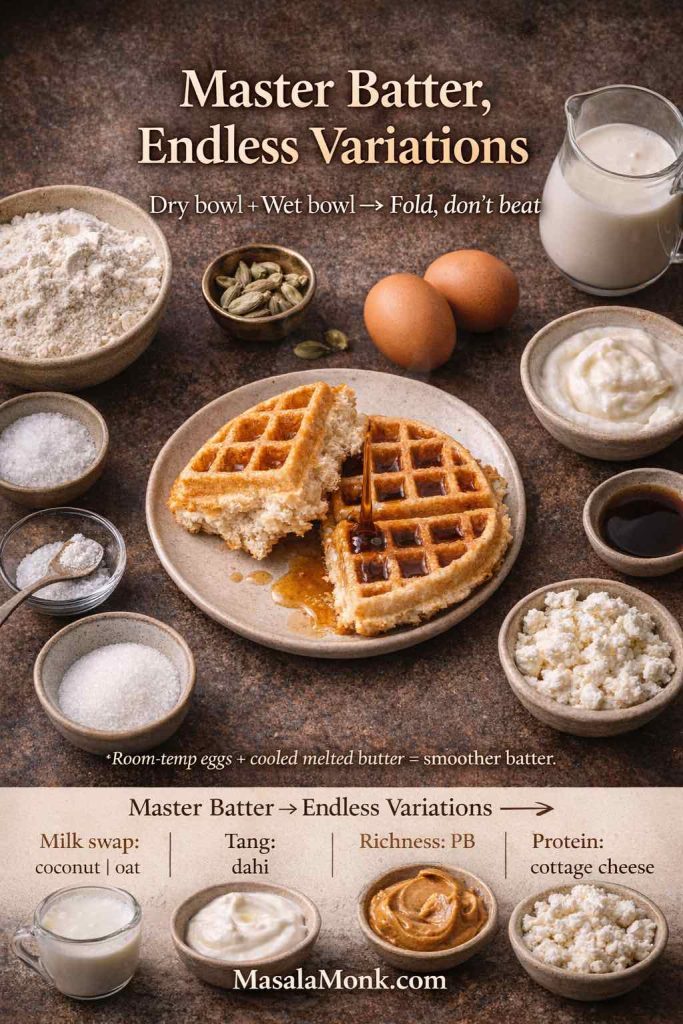
That balance is why a classic Belgian waffle recipe is such a keeper. Better still, it’s one of those bases that welcomes small, smart changes. Swap milk for coconut milk and suddenly you’ve got a no milk waffle recipe that tastes like dessert. Stir in peanut butter and the waffle turns richer and more filling. Add yogurt and the crumb gets tender with a pleasant tang. Fold in cottage cheese and it becomes a true protein waffle recipe without tasting “diet.” Push it into savoury territory and it becomes a full waffle breakfast sandwich experience.
In other words, you’re not learning five different recipes. Instead, you’re learning one waffle batter and then remixing it with purpose.
If you like comparing your fundamentals to well-known technique sources, this classic approach to waffles from King Arthur Baking is a steady reference point for ratios and method: classic waffles. Likewise, if you enjoy the “why” behind crispness, browning, and texture, Serious Eats explains waffle mechanics beautifully here: buttermilk vanilla waffles.
Now, let’s build the foundation.
Also Read: Mayo Recipe: 15+ Homemade Mayonnaise Variations
Belgian Waffle Recipe Batter: Ingredients for Belgian Waffle Batter
This Belgian waffle batter is your master key. Even though the twists will change the flavour, the structure stays steady.
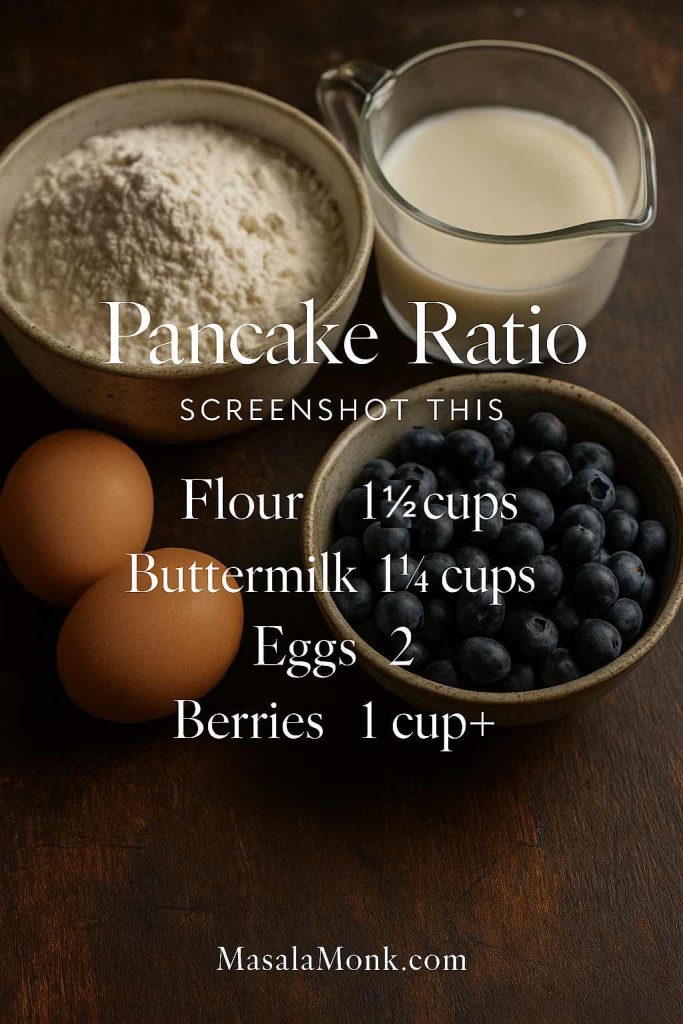
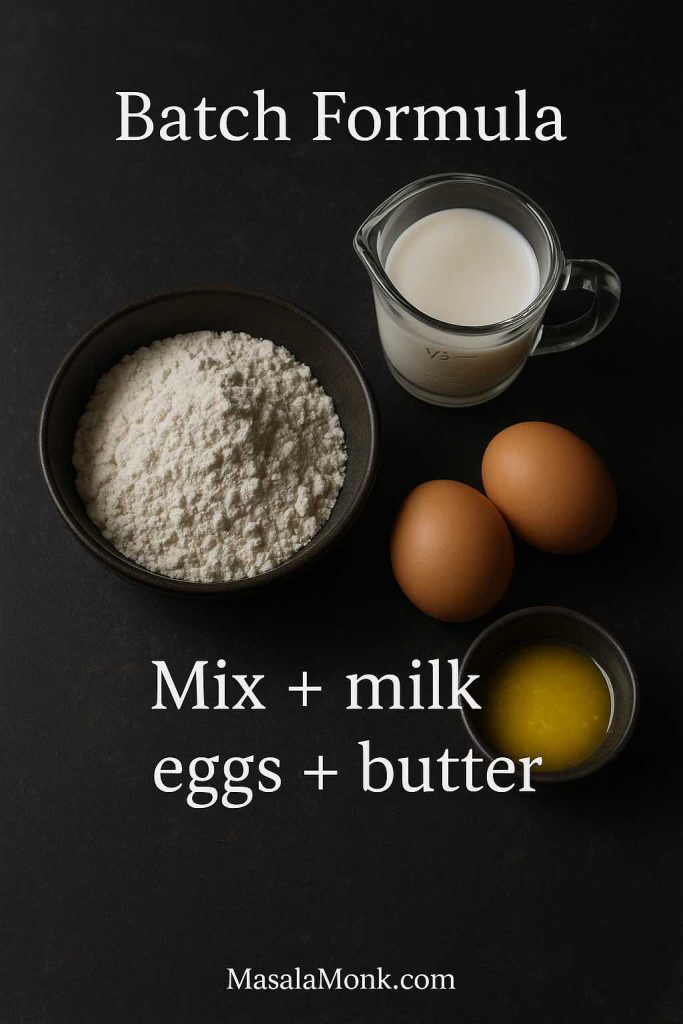
Belgian waffle batter ingredients (makes about 6–8 waffles)
- 2 cups (260 g) all-purpose flour
- 2 tbsp sugar
- 2 tsp baking powder
- 1/2 tsp baking soda
- 1/2 tsp salt
- 2 large eggs
- 1 3/4 cups milk
- 1/2 cup melted butter (or neutral oil)
- 1 tsp vanilla extract
At first glance, it’s simple. Nevertheless, each ingredient has a job—especially once we start making variations like waffle recipe without milk, vegan waffle batter, or oat flour waffles.
What each ingredient is doing in this Belgian waffle recipe
Flour gives structure. Without enough structure, waffles tear when you lift them out or collapse under toppings. With too much, they turn bready.
Baking powder gives the main lift. That lift creates the light interior that makes Belgian waffles so satisfying.
Baking soda supports browning and helps the waffle colour evenly, particularly when the batter includes something slightly acidic (like yogurt later on).
Eggs bring richness and help the waffle set. They also support browning and help waffles hold together when you’re building bigger plates like a chicken and waffles sandwich.
Milk provides moisture, flavour, and tenderness. Still, it’s also one of the easiest ingredients to swap—coconut milk makes a dreamy no milk waffle recipe.
Butter (or oil) helps the exterior crisp while keeping the interior tender. Butter brings flavour. Oil brings practicality. Both work.
Sugar isn’t just sweetness. It encourages browning and that faint caramel flavour that makes waffles taste “toasted” instead of pale.
Vanilla and salt are the quiet heroes. Vanilla adds warmth. Salt sharpens everything so the waffle tastes alive rather than flat.
With the ingredients ready, it’s time to cook.
Also Read: Whole Chicken in Crock Pot Recipe (Slow Cooker “Roast” Chicken with Veggies)
How to Make Waffles: Belgian Waffle Recipe Method in a Waffle Maker or Waffle Iron
The method stays the same for every twist. Consequently, once you learn this rhythm, all the variations feel easy.
Step 1: Preheat the waffle maker properly
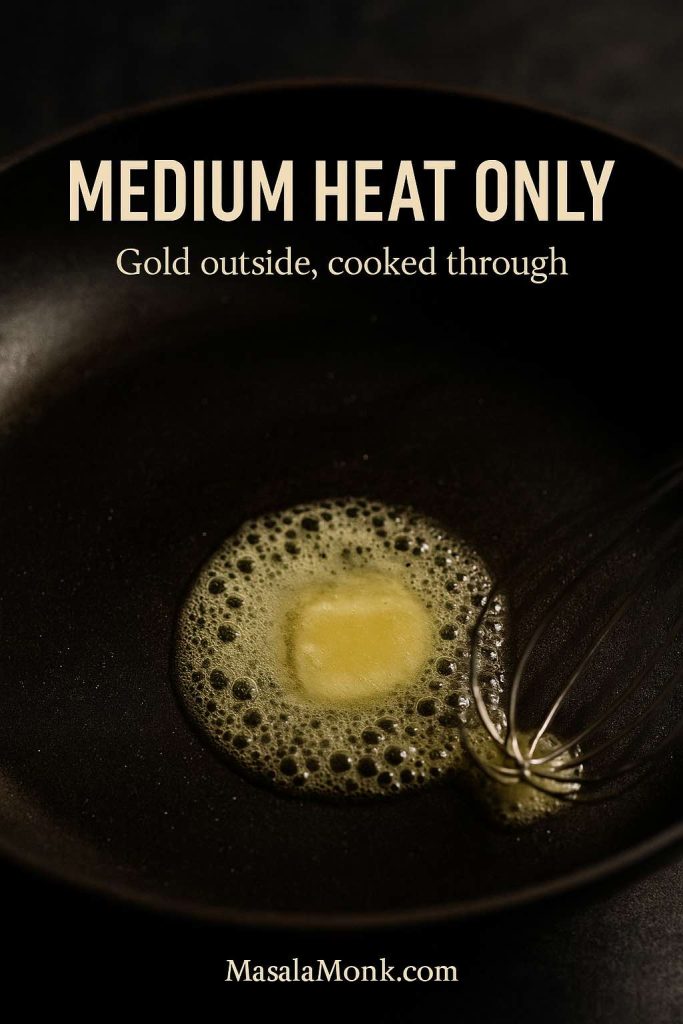
Start by turning on your waffle maker (or waffle iron) and letting it fully preheat. If it has a readiness light, wait for it. Even so, don’t rush—give it another minute after it signals hot.
Why? Because heat is the secret behind crispness. When the iron is truly hot, the batter sets quickly at the surface, creating that crisp shell. When the iron is only “kind of warm,” the batter steams and stays soft.

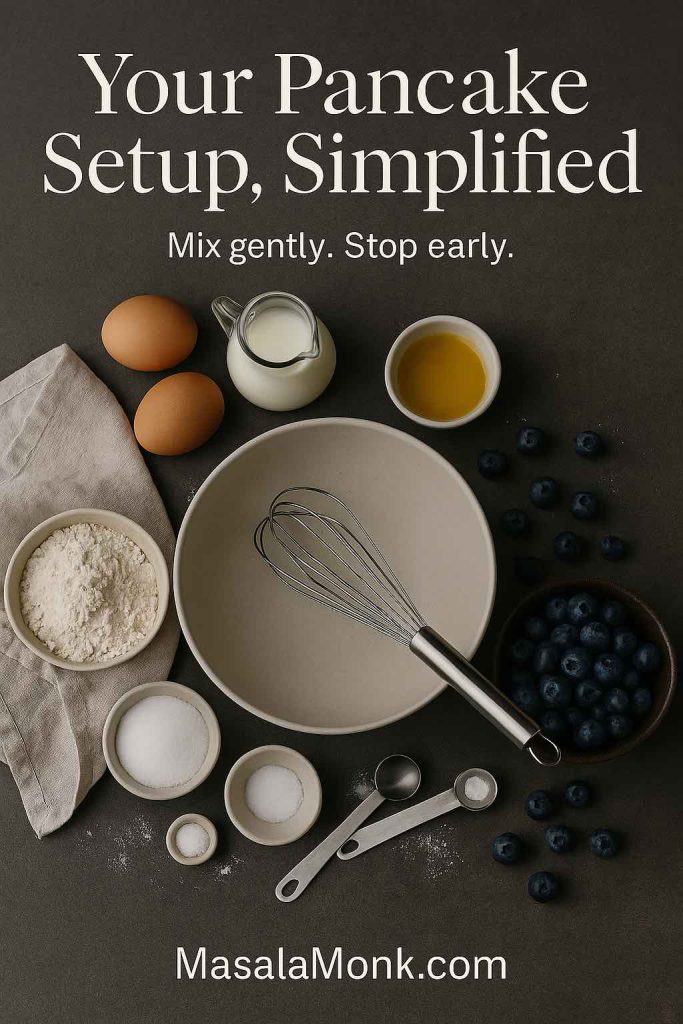
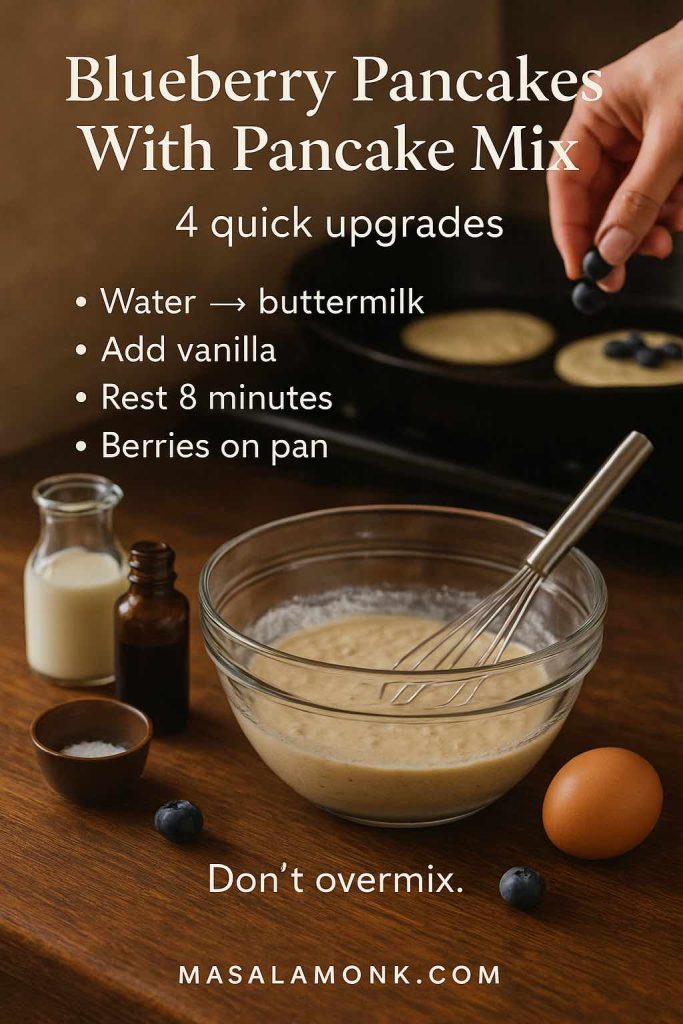
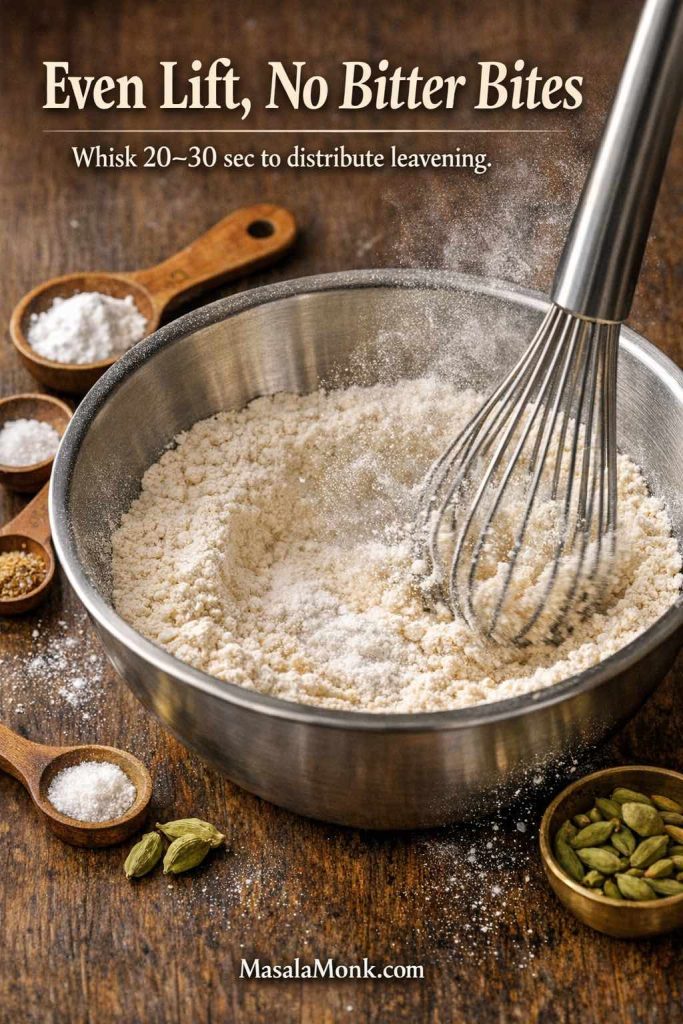
Step 2: Whisk the dry ingredients
In a large bowl, whisk together flour, sugar, baking powder, baking soda, and salt. This isn’t busywork. Rather, it spreads the leavening evenly so every waffle rises and browns consistently.
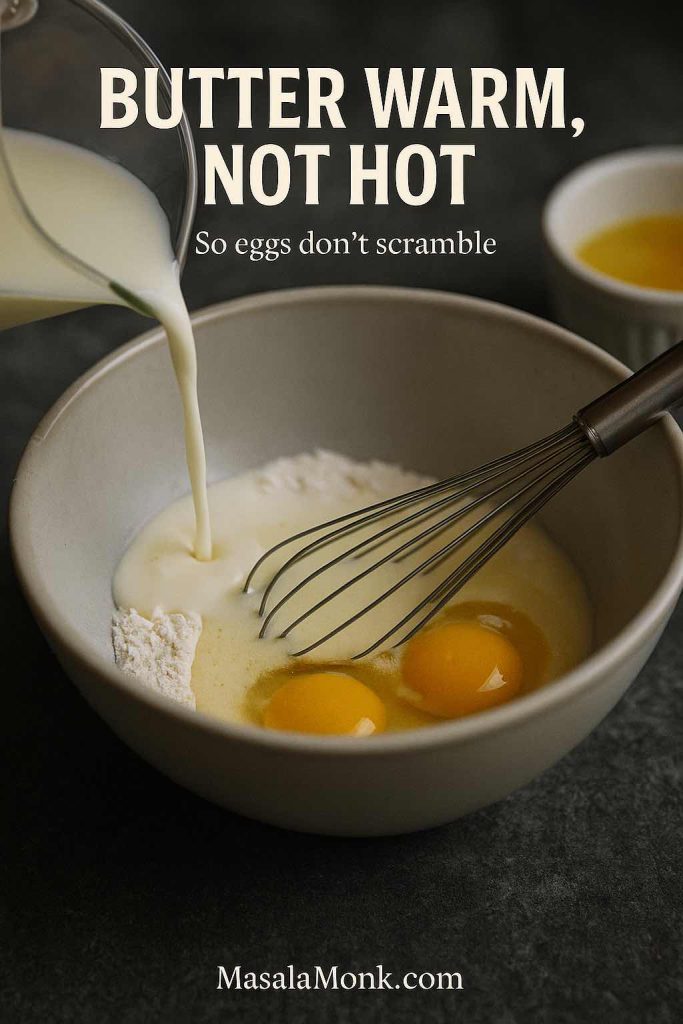
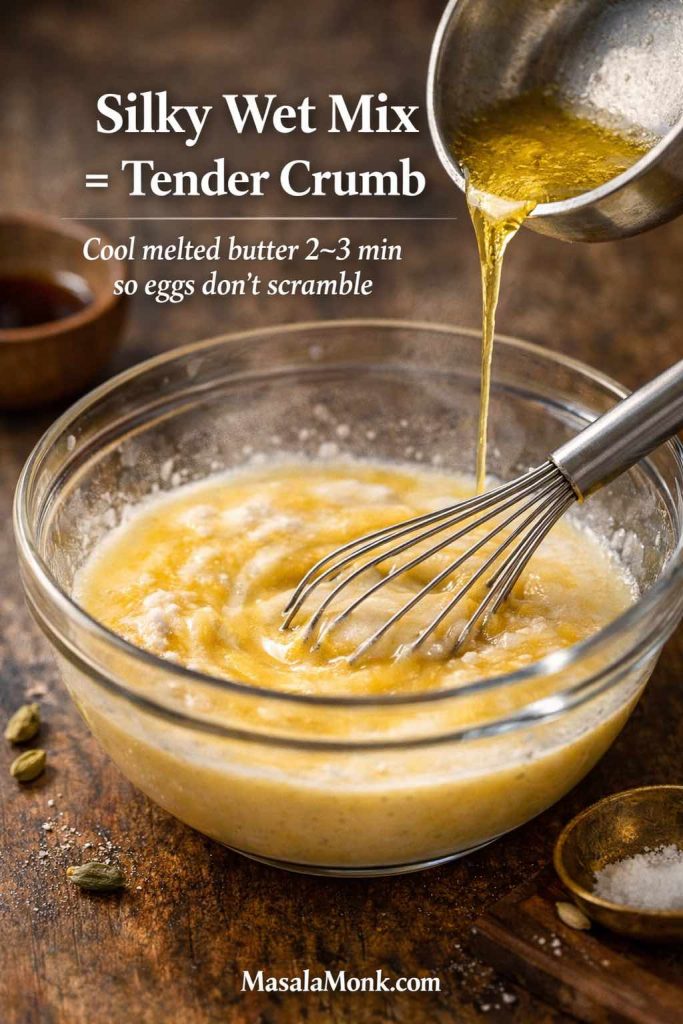
Step 3: Whisk the wet ingredients
In a second bowl, whisk eggs, milk, melted butter (or oil), and vanilla until smooth. If your butter is very hot, let it cool slightly first—warm is fine, scorching is not.
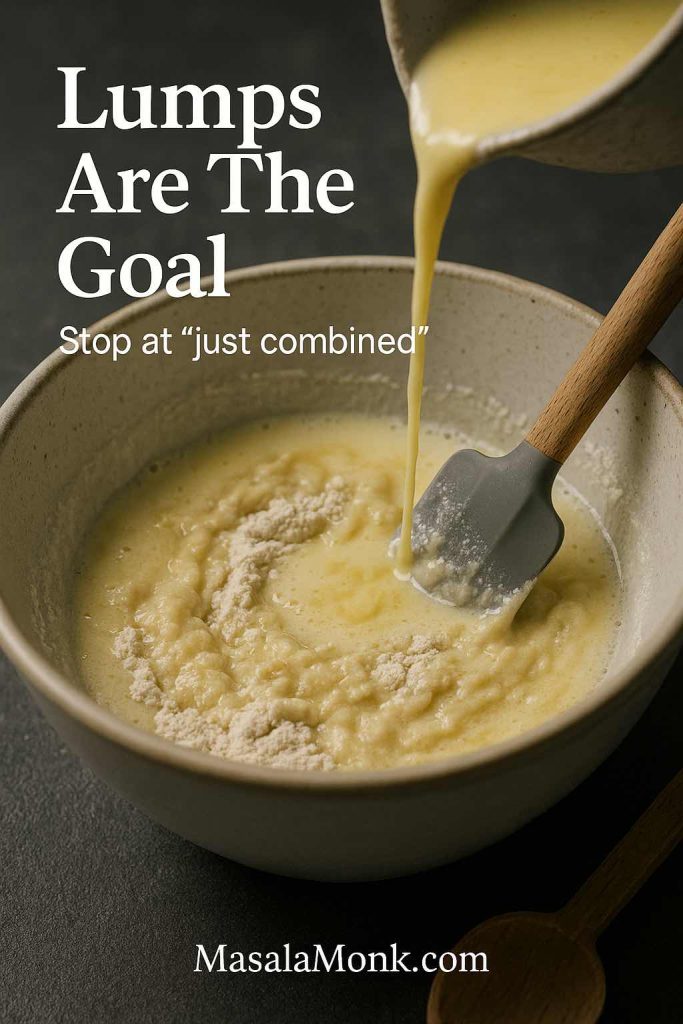
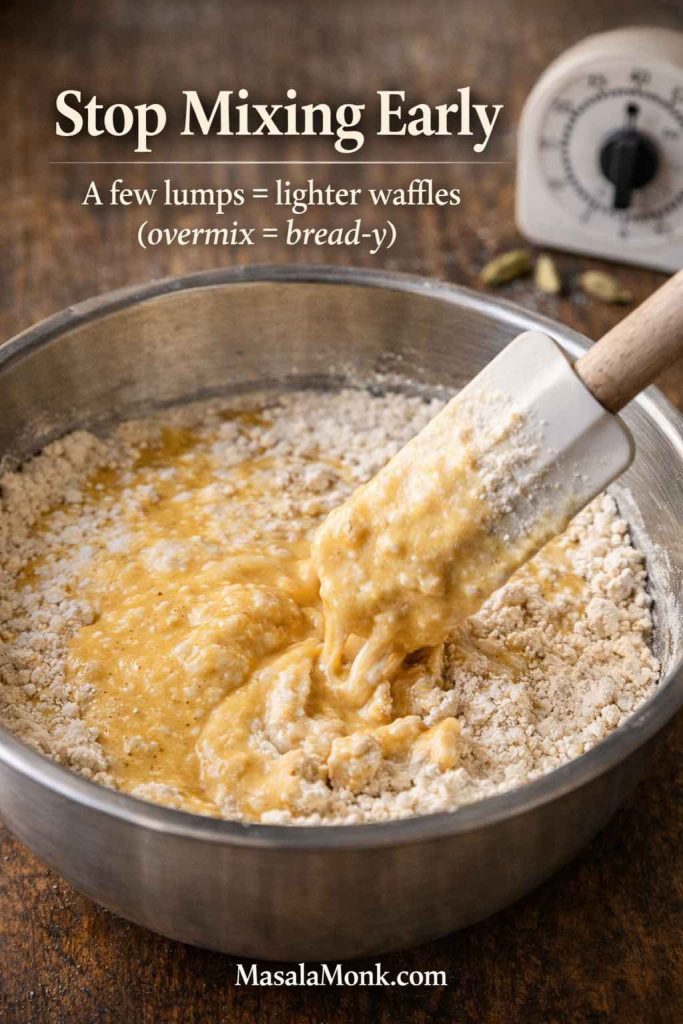
Step 4: Combine gently
Pour wet into dry. Stir until you don’t see dry flour. Then stop. A few small lumps are fine. In fact, chasing perfectly smooth batter often leads to overmixing—and overmixing is the fastest route to dense waffles.
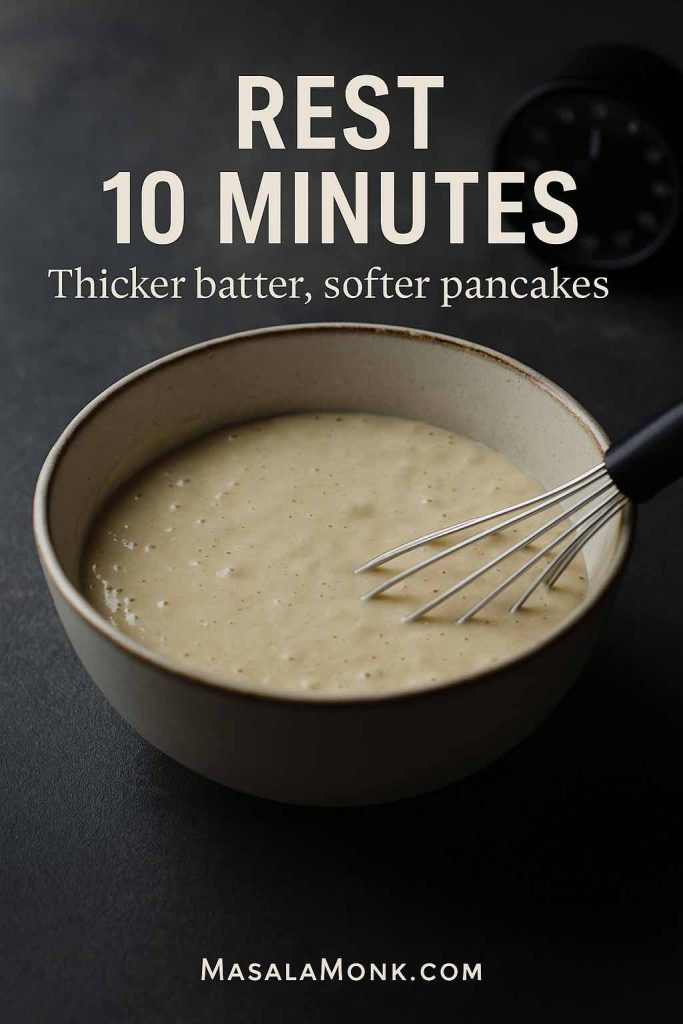
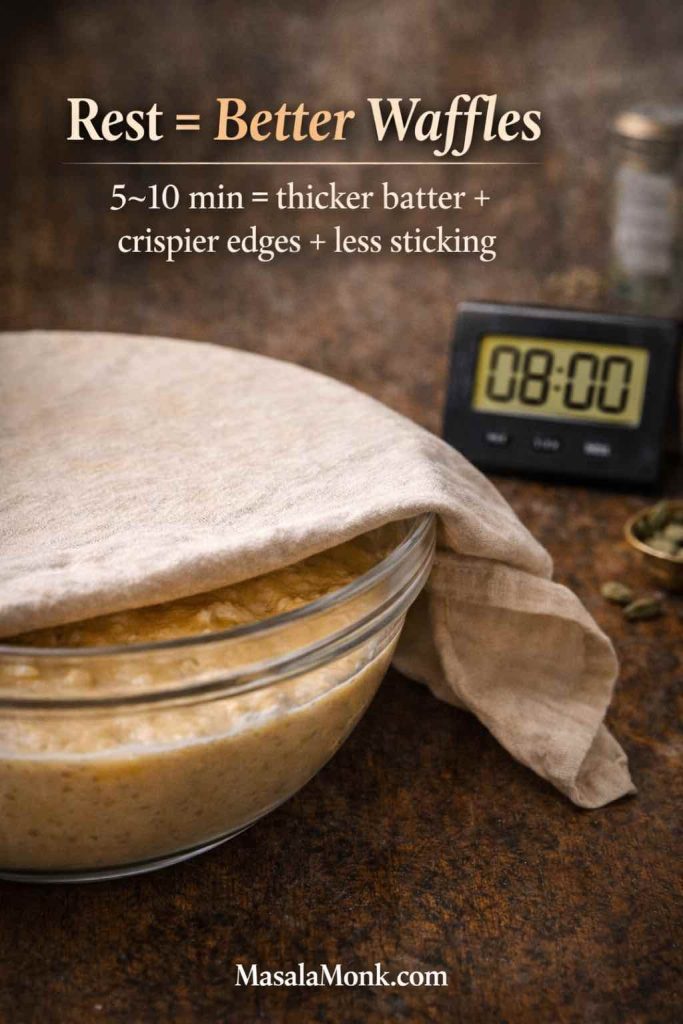
Step 5: Rest the waffle batter briefly
Let the batter rest for 5–10 minutes. Meanwhile, keep the waffle maker hot. During the rest, flour hydrates and the batter settles into a better consistency.
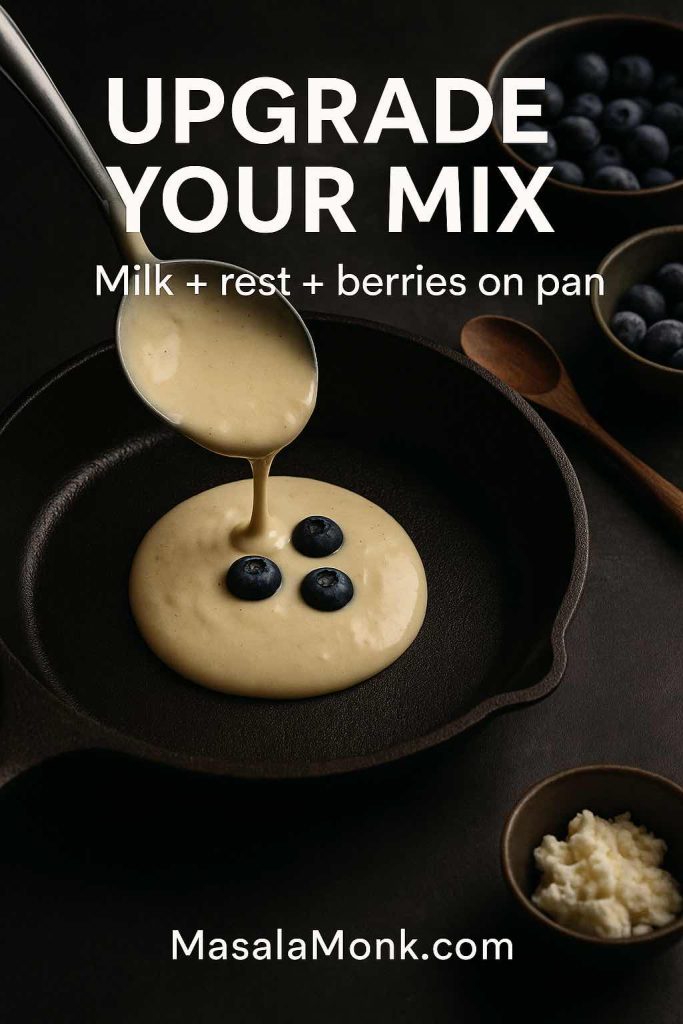
Step 6: Cook until deep golden
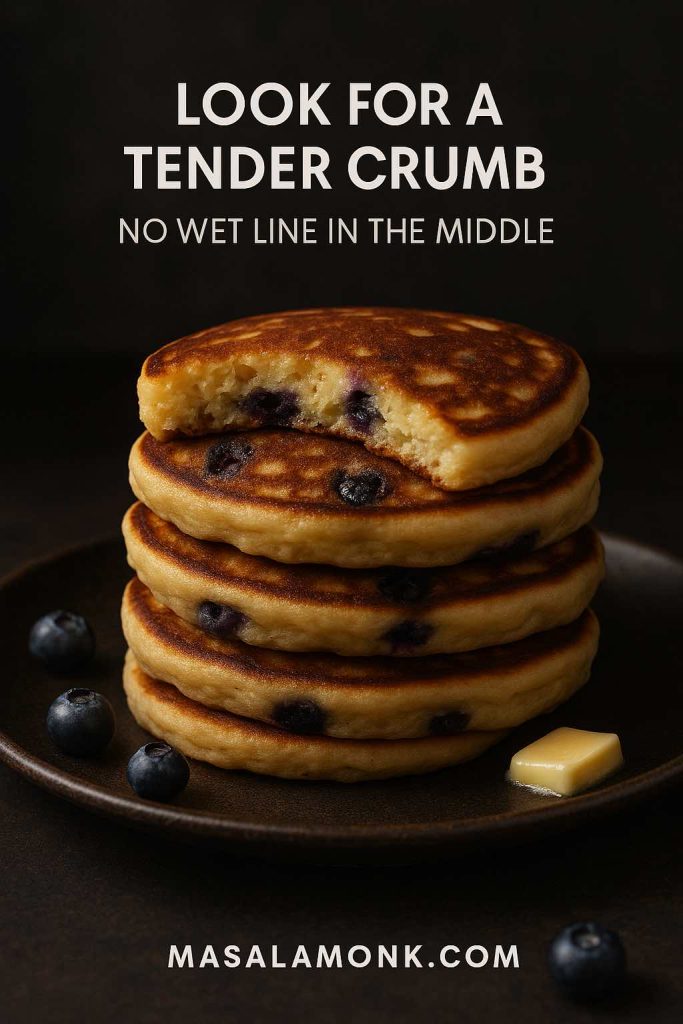
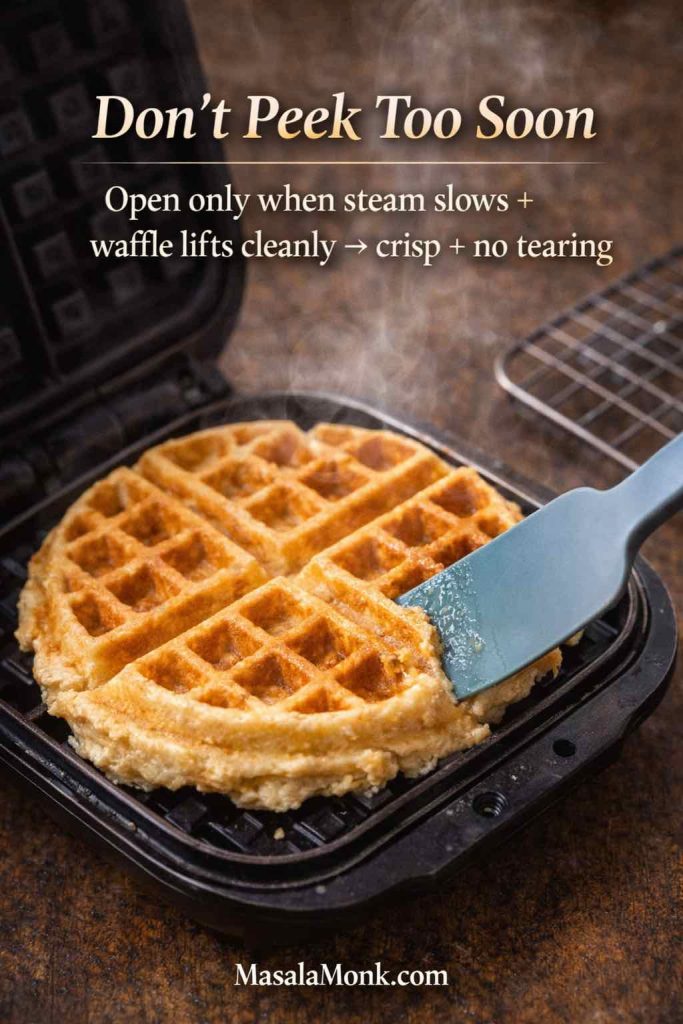
Lightly grease the plates if your waffle iron tends to stick. Pour in batter, close the lid, and cook until the waffle is richly golden and smells toasted. Don’t pull it out too pale. In contrast to pancakes, waffles often benefit from deeper colour.
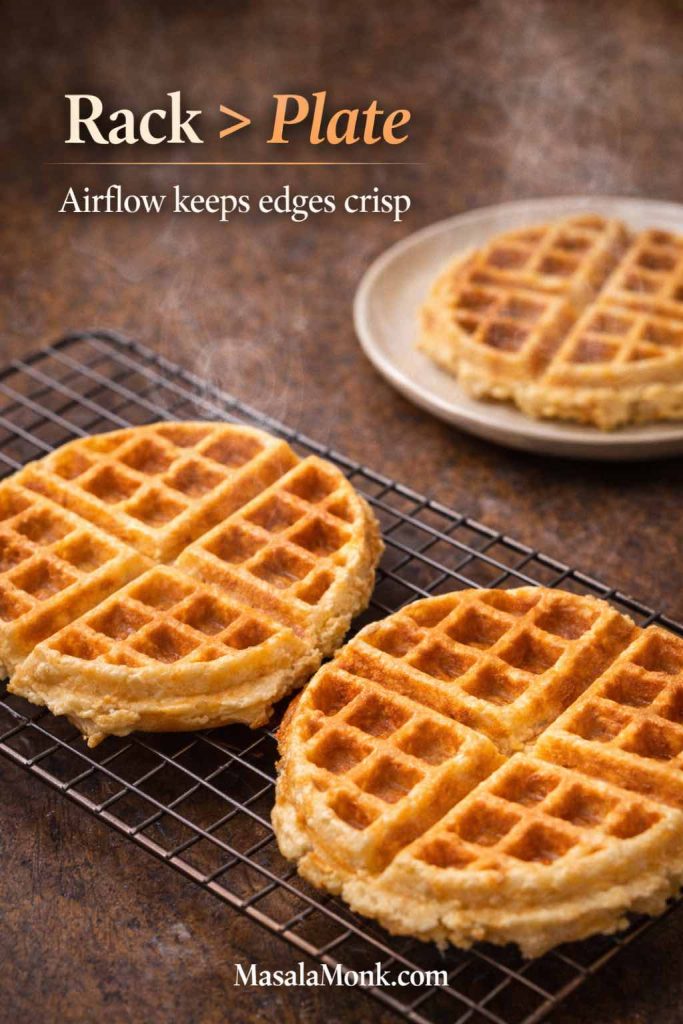
Step 7: Cool on a rack
Move each waffle onto a wire rack, not a plate. Otherwise, steam trapped underneath softens the crust. On a rack, air circulates and the waffle stays crisp longer.
That’s the base. Before we get into crisp vs fluffy, let’s cover two common situations: making waffles without a waffle maker, and making eggless waffles without losing texture. Even without a waffle iron—or if you’re cooking egg-free—you can still use the same batter ideas. Here are two practical routes that work beautifully in an Indian kitchen.
Also Read: Air Fryer Hard-Boiled Eggs (No Water, Easy Peel Recipe)
How to Make Waffles Without a Waffle Maker (Skillet / Pan Method)
No waffle iron? You can still make a satisfying waffle-style breakfast at home using a heavy skillet or tawa. You won’t get the deep grid pattern, yet you can still achieve crisp edges and a soft center.
Use your regular waffle batter (the Belgian waffle batter works here too). Aim for a slow-pouring consistency: thicker than crepe batter, but not so thick it sits in a lump. If it feels runny, whisk in 1–2 tablespoons flour. If it feels too thick, loosen it with a small splash of milk, coconut milk, or water.
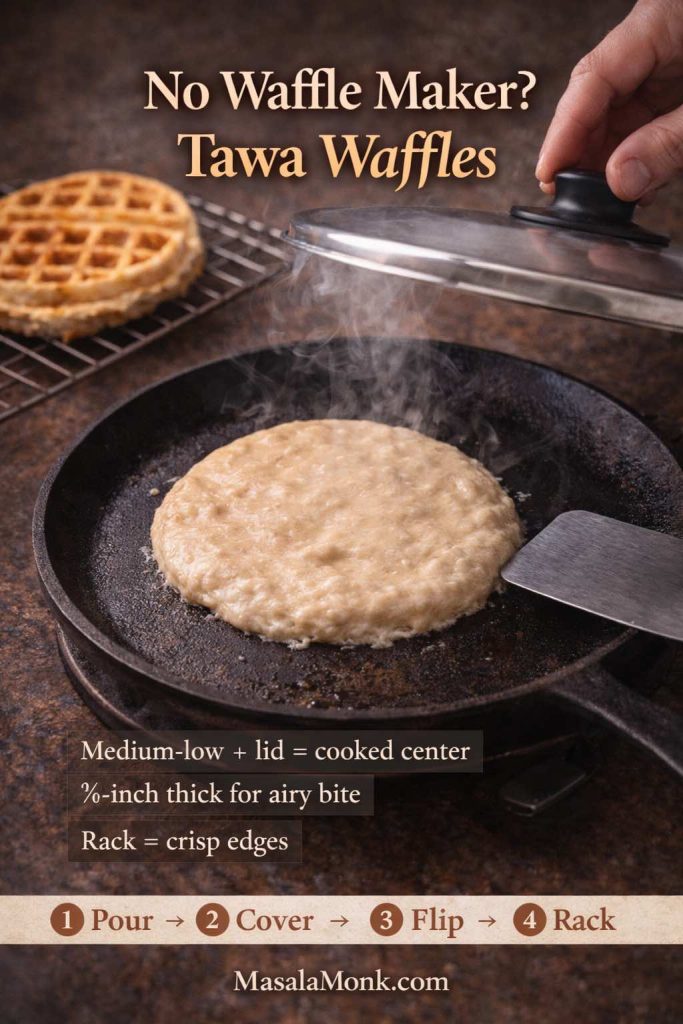
Quick skillet checklist (waffles in a skillet):
- Heat a heavy pan/tawa on medium-low for 2–3 minutes
- Grease lightly (too much oil can fry the surface)
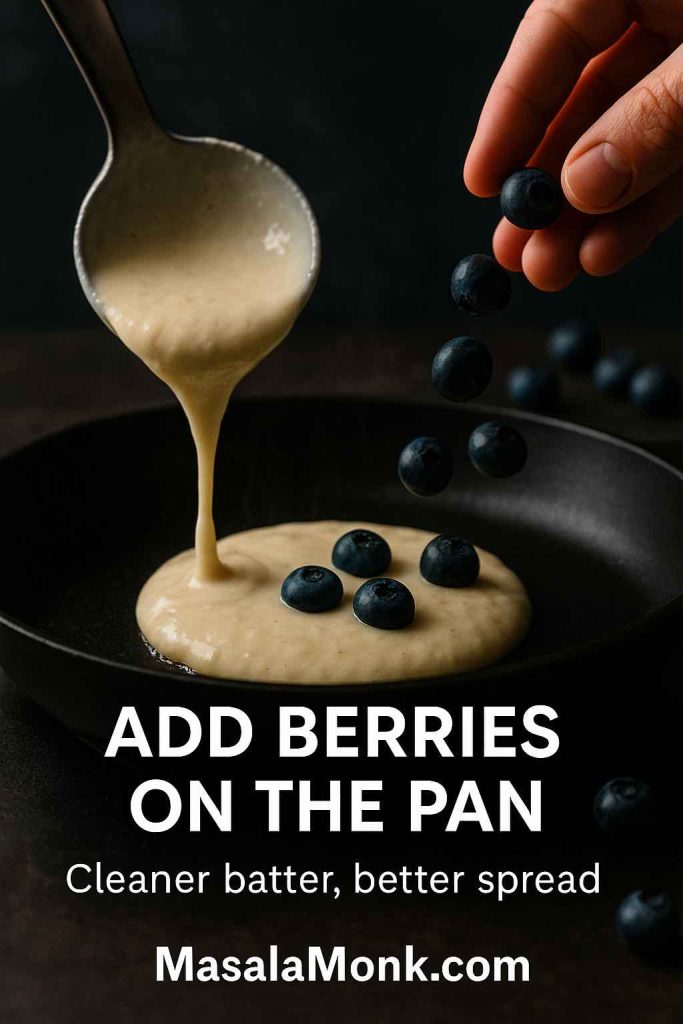
- Pour batter, spread to about ½ inch thick
- Cover with a lid so the center cooks through
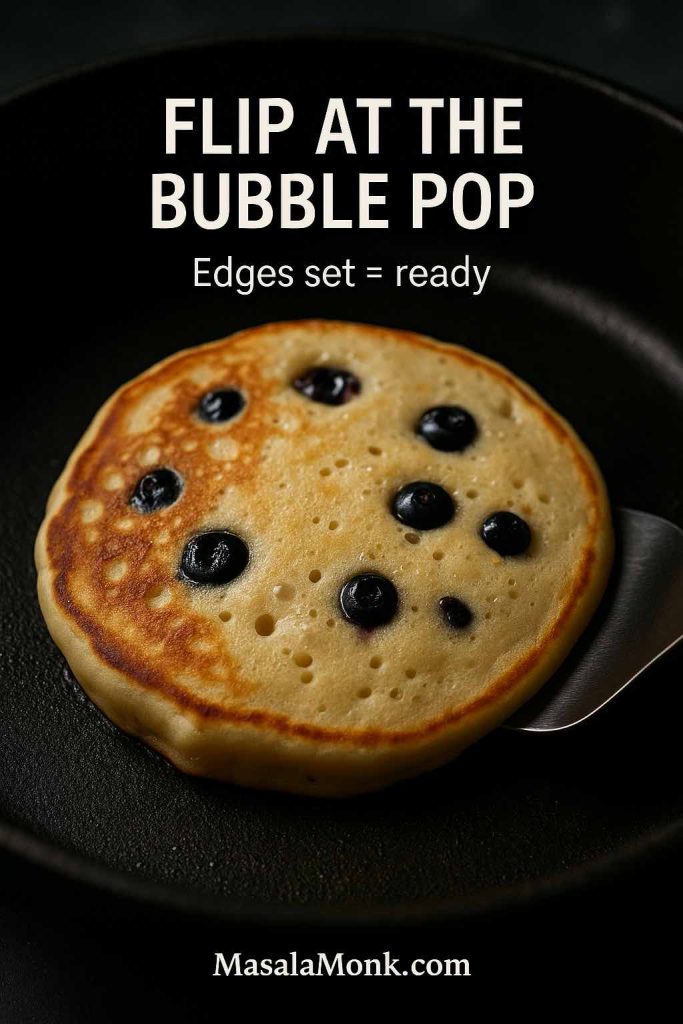
- Flip once set, cook until deep golden
- Rest on a wire rack for crisp edges
Now cook it: heat the pan, grease lightly, then pour about ⅓ to ½ cup batter into the center. Spread into a round about ½ inch thick and cover with a lid immediately. The lid matters because trapped heat helps the center cook through without burning the base.
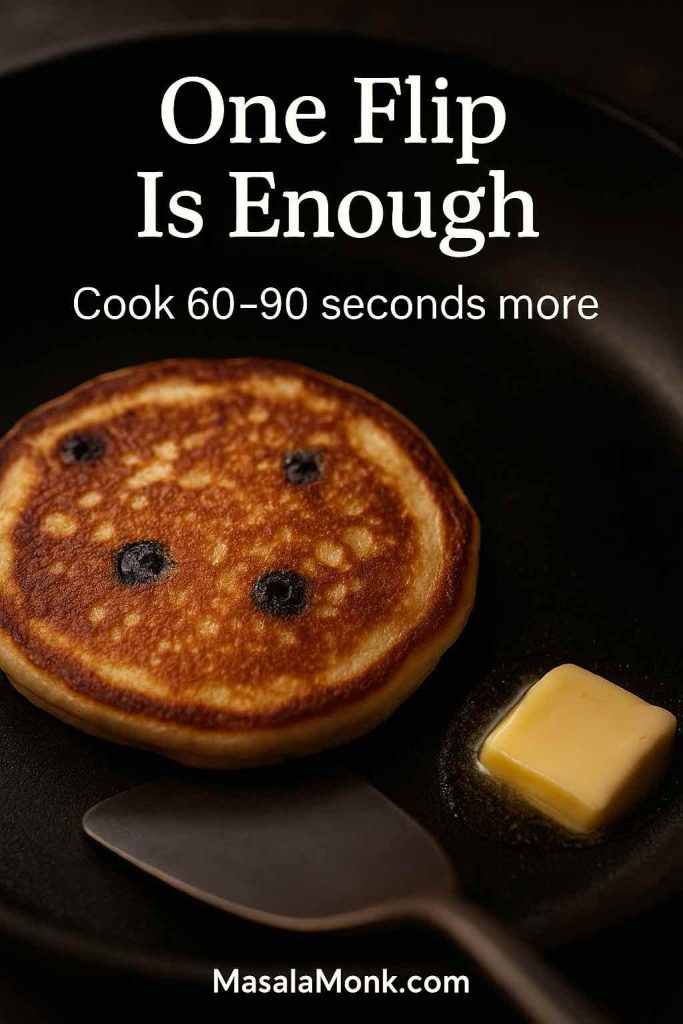
Cook for 2–3 minutes until the underside is deep golden and the top looks mostly set. Flip carefully and cook the second side for 1–2 minutes until it smells toasted. If you want extra crispness, flip once more for 20–30 seconds per side.
Finally, rest it on a wire rack for a minute instead of a plate. That quick step helps waffles without a waffle iron stay crisp instead of steaming soft. Serve like a classic pan waffle with jaggery drizzle, yogurt, peanut butter, fruit, or a savoury filling.
Also Read: Authentic Louisiana Red Beans and Rice Recipe (Best Ever)
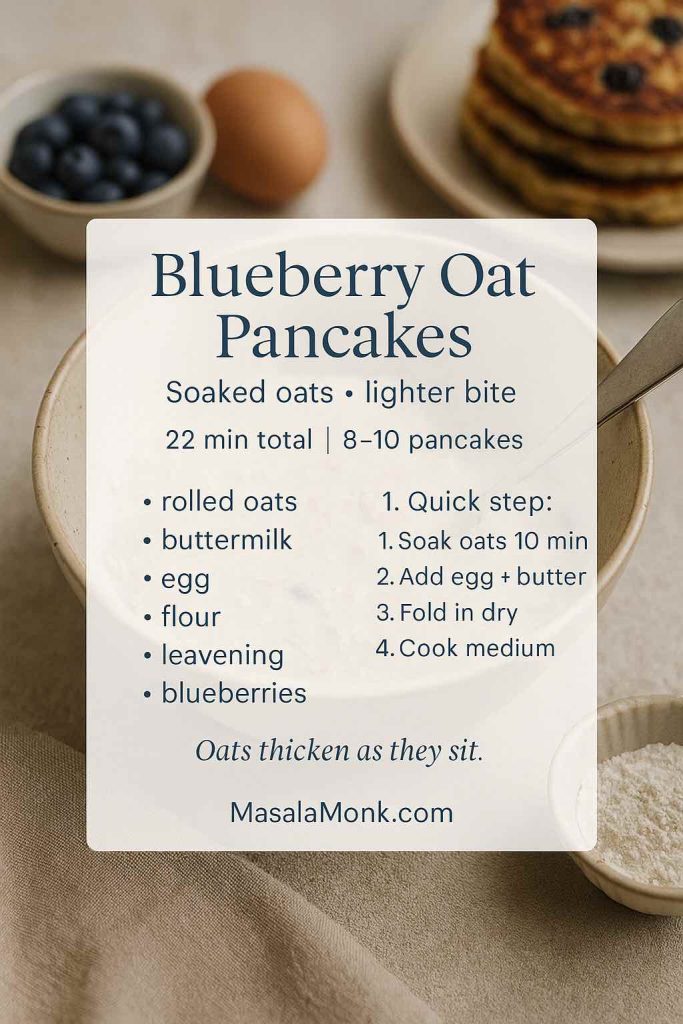
Eggless Waffles (Waffle Recipe Without Egg)
Eggless waffles are a natural fit for Indian kitchens. The goal is to replace what eggs usually do—binding and structure—so your waffle recipe without egg still holds together, tastes rich, and cooks up golden.
Keep your dry ingredients exactly the same as the base recipe. Then choose one of these eggless methods depending on what you have.
Option A: Dahi method (most “desi”, very dependable)
In your wet bowl:
- Skip the 2 eggs
- Add ½ cup thick dahi/curd (plain yogurt)
- Add 2 tablespoons extra melted butter or oil (to bring back richness)
- Keep milk the same, or reduce milk by ¼ cup if your curd is very thick
- Add an extra ½ teaspoon baking powder for lift
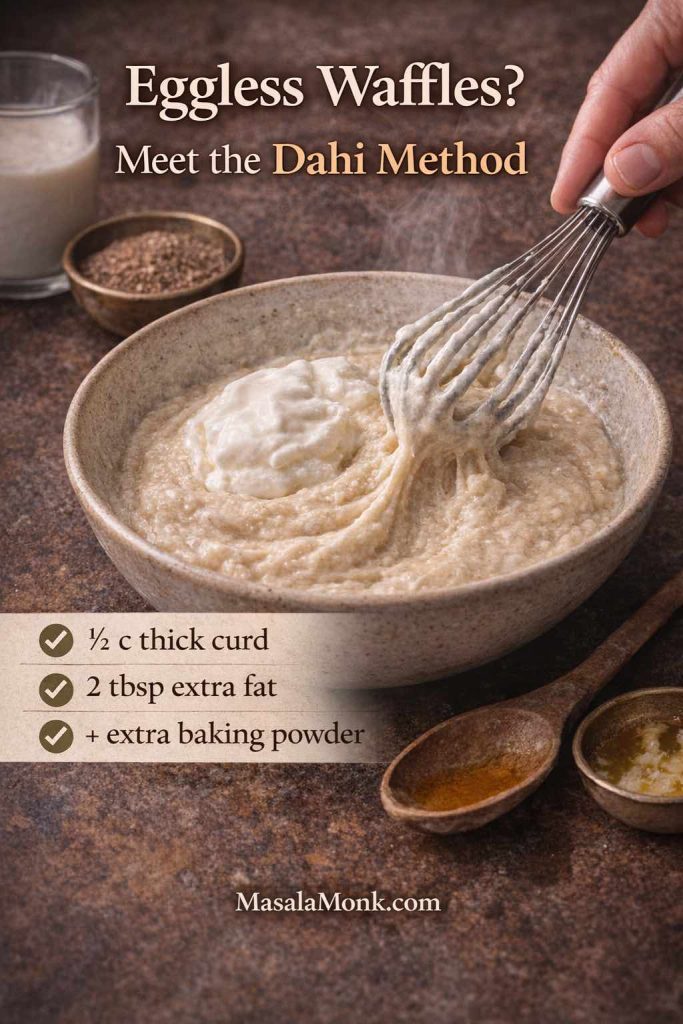
Whisk until smooth, combine wet into dry gently, and rest the batter for 10 minutes. Cook until the waffles are a deeper golden than usual—eggless batters often need that extra minute to set firmly and release cleanly.
Option B: Flax method (eggless and vegan-leaning)
Replace 2 eggs with 2 flax eggs:
- Mix 2 tbsp ground flaxseed + 6 tbsp water
- Let it sit 8–10 minutes until gel-like
- Whisk it into the wet ingredients
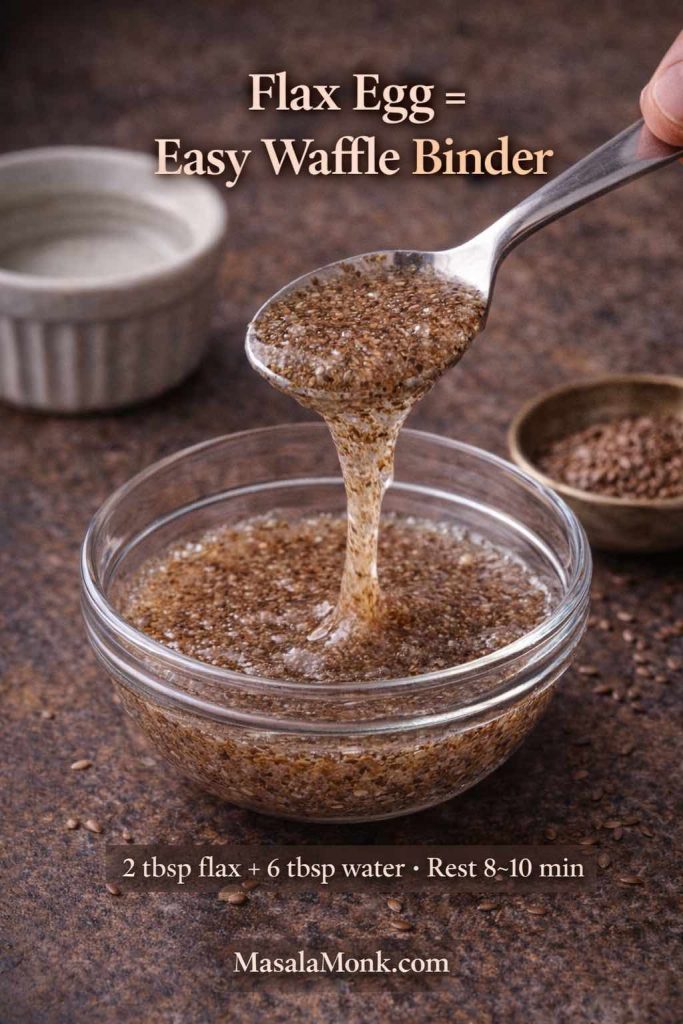
This option pairs especially well with coconut–jaggery, peanut butter waffles, and oat flour swaps.
One last tip: once cooked, rest waffles on a wire rack for 1–2 minutes. That short pause helps eggless waffles firm up and keeps the edges crisp. For a straightforward reference recipe style, you can look at vegan waffles.
Now that you can make waffles with or without eggs—and even without a waffle iron—let’s talk texture and choose your ideal finish.
Also Read: Double Chocolate Chip Cookies – Easy Recipe with 7 Variations
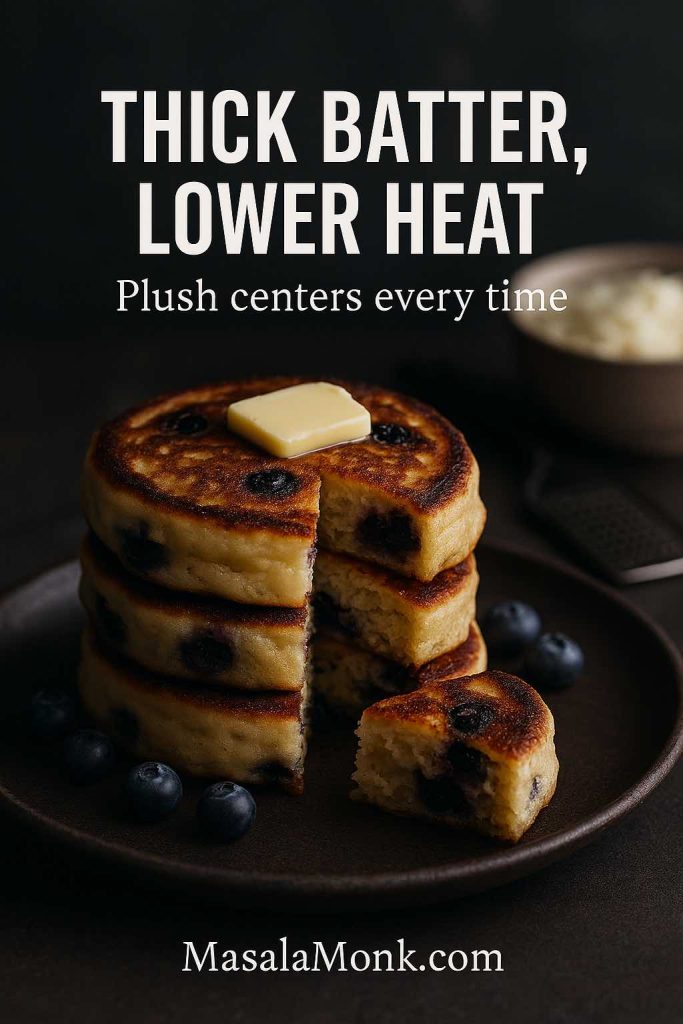
How to Make Belgian Waffles Crispy or Fluffy: Crispy Waffle Method vs Fluffy Waffle Method
Different mornings call for different waffles. Sometimes you want a crispy waffle recipe style bite with crackly edges. Other times, you want a fluffy waffle recipe feel—soft, tender, and comforting.
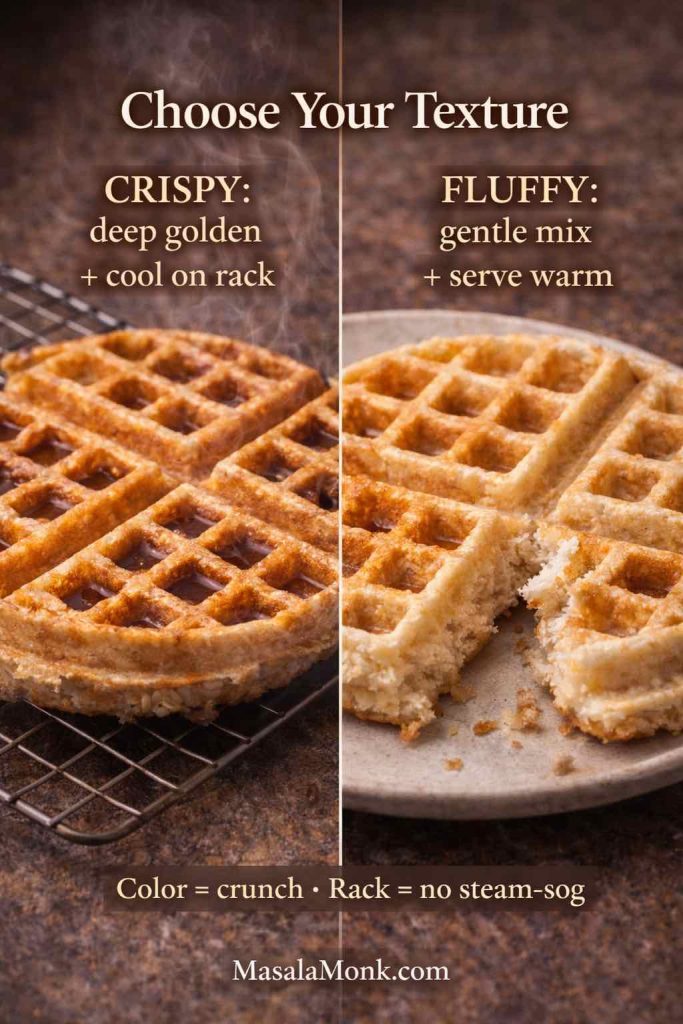
Crispy waffle method (for crisp outside, tender inside)
- Preheat the waffle maker thoroughly
- Cook to deep golden brown
- Cool on a wire rack
- Avoid stacking waffles on a plate
Fluffy waffle method (for soft, cake-like tenderness)
- Mix gently and stop early
- Rest the batter
- Cook until golden (not too dark)
- Serve soon after cooking
The sweet spot (what most people love)
Cook until richly golden, then let the waffle sit on a rack for a moment. The crust sets. The interior stays tender. You get the classic Belgian waffle contrast without effort.
Now we can start the Indian twists.
Also Read: Negroni Recipe: Classic Cocktail & Its Variation Drinks
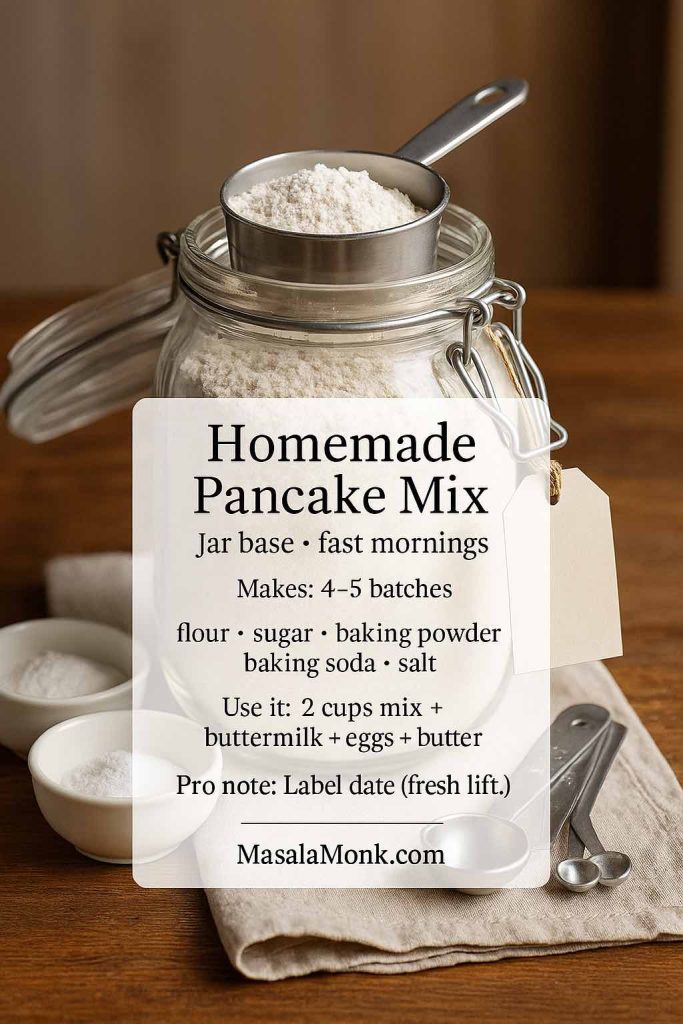
Homemade Waffle Mix Recipe: DIY Waffle Mix for Quick Mornings
Sometimes the craving hits, but you don’t want to measure five powders while half awake. That’s when a jar of homemade waffle mix makes life easier. Additionally, it keeps your base consistent, which means your flavour experiments taste more controlled.
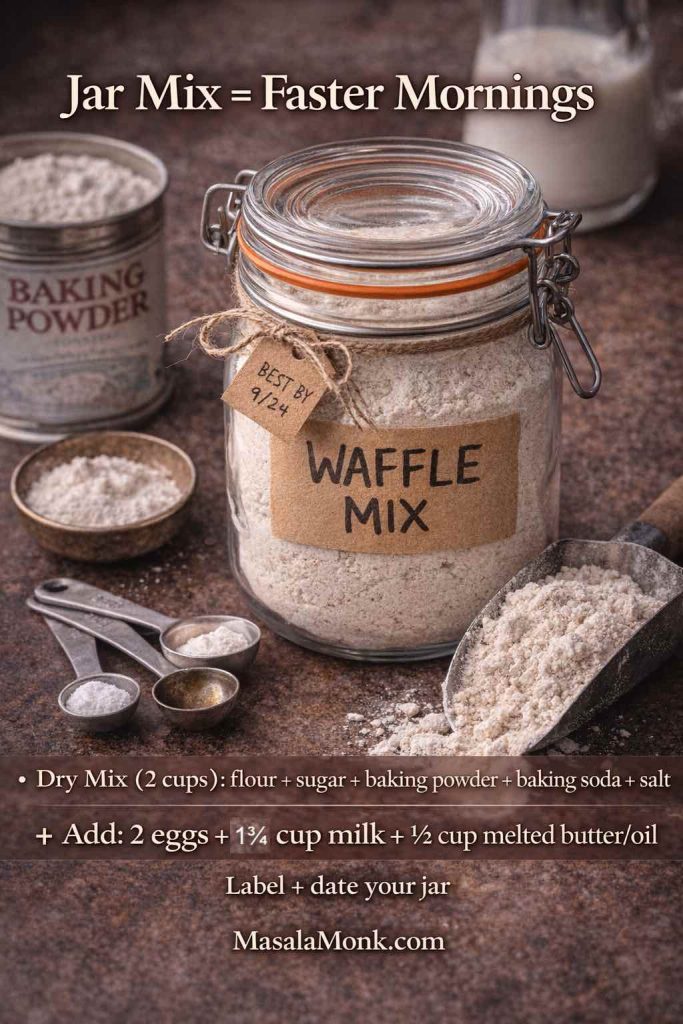
DIY waffle mix (dry)
Whisk together and store airtight:
- 2 cups flour
- 2 tbsp sugar
- 2 tsp baking powder
- 1/2 tsp baking soda
- 1/2 tsp salt
How to use waffle mix in a waffle maker
For every 2 cups of dry mix, whisk:
- 2 eggs
- 1 3/4 cups milk
- 1/2 cup melted butter or oil
- vanilla (optional)
Then combine wet into dry, rest briefly, and cook as usual.
From here, you can transform the batter by changing only the wet bowl: coconut milk, yogurt, peanut butter, cottage cheese, jaggery. As a result, you can create a full waffle spread without making five separate batters.
Also Read: Béchamel Sauce for Lasagna: Classic, Vegan & Ricotta Sauce Recipe
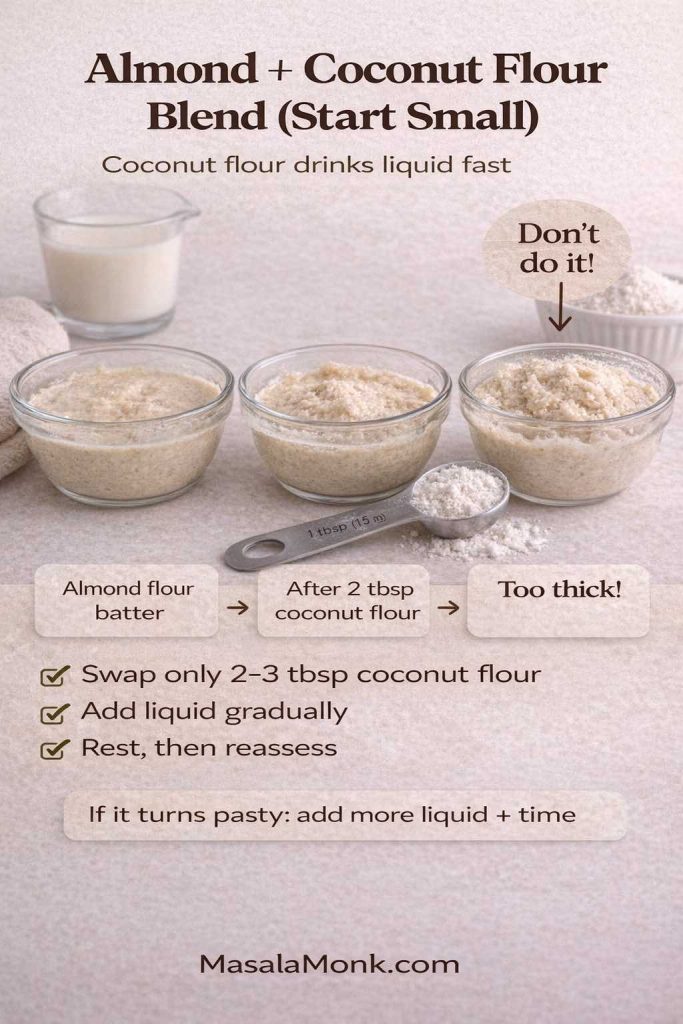
Waffle Recipe Without Milk: Coconut–Jaggery Belgian Waffles
If you’ve ever needed a waffle recipe without milk, you already know the risk: some no-milk batters taste thin. Coconut milk fixes that immediately. It adds richness and aroma, while jaggery brings that deep caramel warmth that feels unmistakably Indian.
If you’d like a simple explanation of jaggery for anyone unfamiliar, this is a clean reference: jaggery.
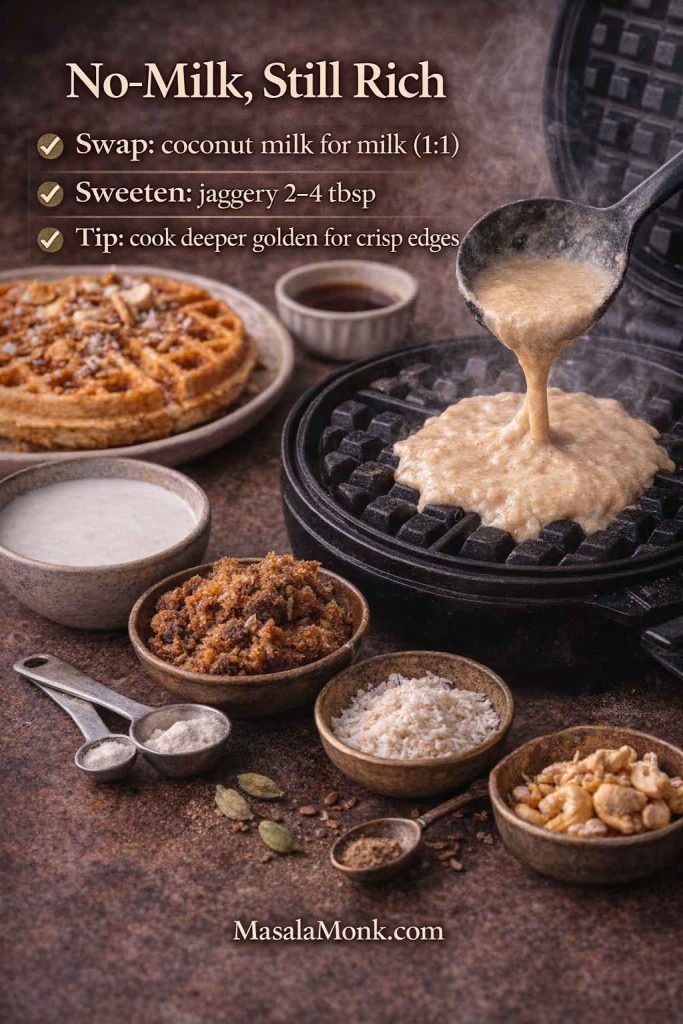
Dairy-free waffle batter variation (coconut–jaggery)
Start with the base Belgian waffle batter, then swap and add:
- Replace milk with coconut milk (same quantity)
- Replace butter with neutral oil or melted coconut oil
- Replace sugar with grated jaggery (2–4 tbsp, to taste)
- Add 1/2 tsp cardamom
- Optional: 2 tbsp desiccated coconut
Cooking coconut–jaggery waffles
Because jaggery browns quickly, trust aroma and colour. Wait until the waffle is deep golden and smells toasted, almost like caramelised coconut. Then cool it on a rack so crispness sets.
Coconut jaggery waffle topping ideas
- Quick jaggery syrup (jaggery warmed with a splash of water until glossy)
- Toasted coconut + chopped cashews
- A tiny pinch of salt to sharpen sweetness
- Thick curd on the side if you enjoy sweet-tang contrast
If this flavour feels like your comfort zone, you’ll probably love the coconut dessert world too—these traditional coconut ladoos share a similar coconut-forward warmth.
Peanut Butter Waffles With Chikki Crunch: Peanut Butter Waffle Recipe Twist
Peanut butter waffles are comforting on their own. However, once you bring in jaggery and roasted peanuts, the flavour becomes distinctly Indian—like chikki in waffle form.
If readers want context for the “chikki” idea, this quick reference works neatly: chikki.
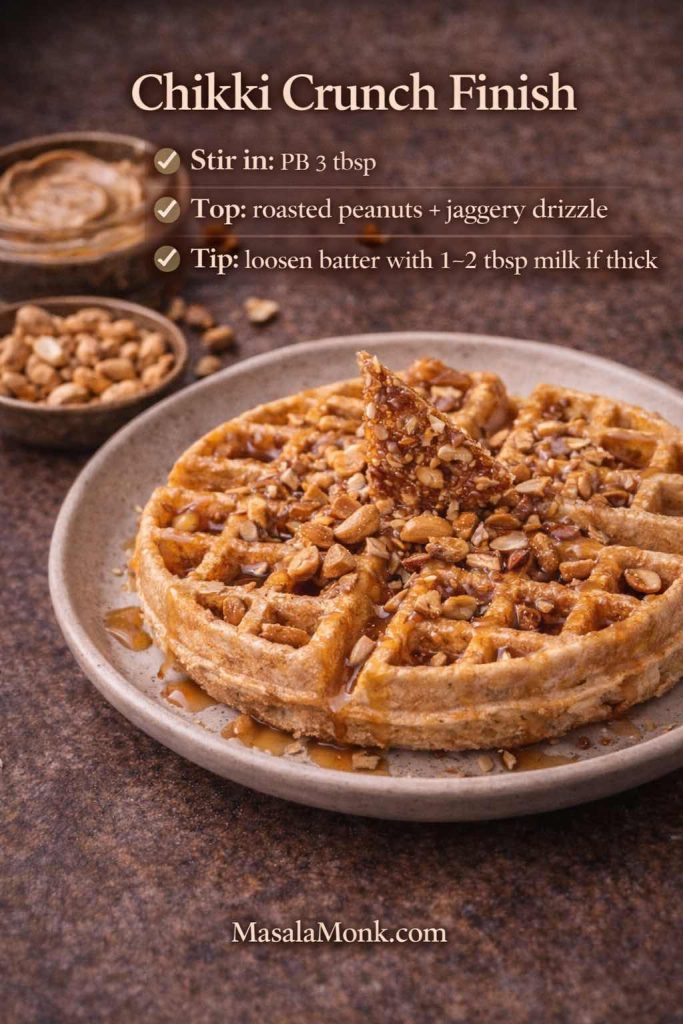
Peanut butter waffle batter add-ins
Start with the base batter and add:
- 3 tbsp peanut butter (creamy works best)
- 1–2 tbsp jaggery or brown sugar (optional)
- 1/4 tsp cardamom or cinnamon (choose one)
Peanut butter thickens batter. If it seems too stiff, add a splash of milk or coconut milk until it pours smoothly.
Cooking peanut butter waffles
Cook until deeply golden. Peanut butter tastes best when it’s a little toasted, so let the waffle develop colour. Afterward, cool it on a rack for a minute so the surface stays crisp.
Chikki-style topping for waffles
- Crushed roasted peanuts
- Warm jaggery drizzle
- Pinch of salt
If you like a sweet-and-spicy plate, peanut flavours pair surprisingly well with chutney too. This spicy peanut chutney (no onion, no garlic) is a punchy companion, especially when you want contrast.
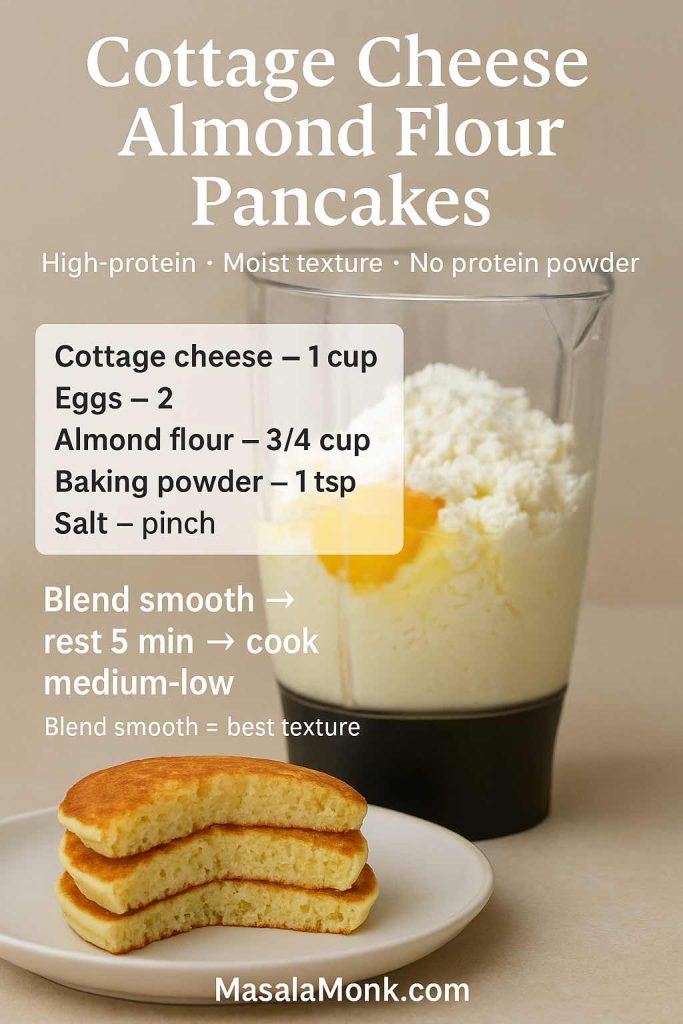
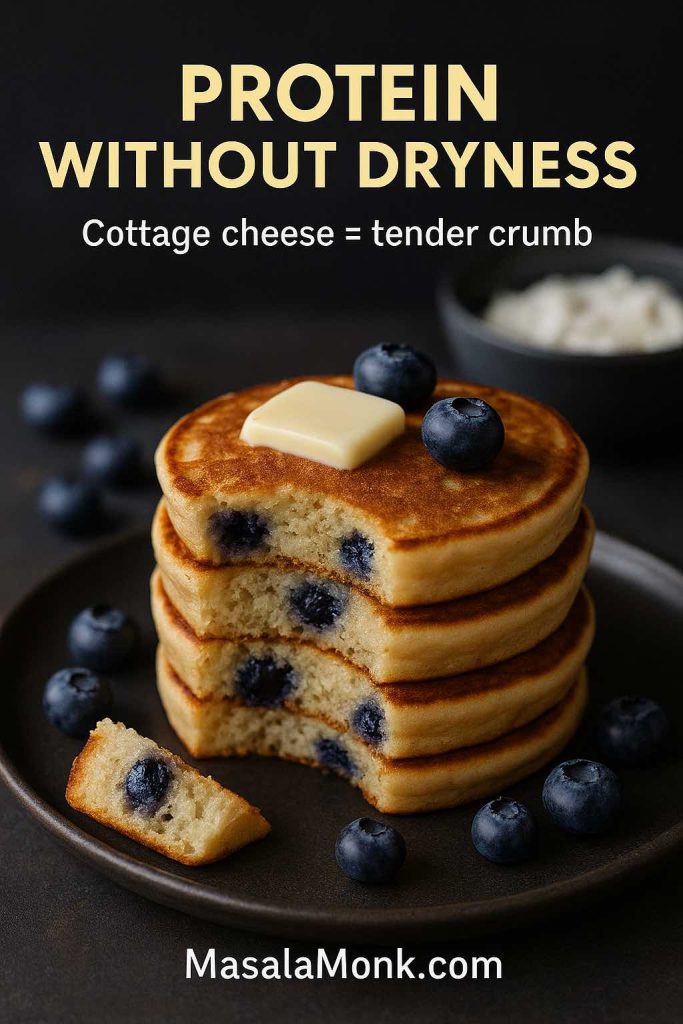
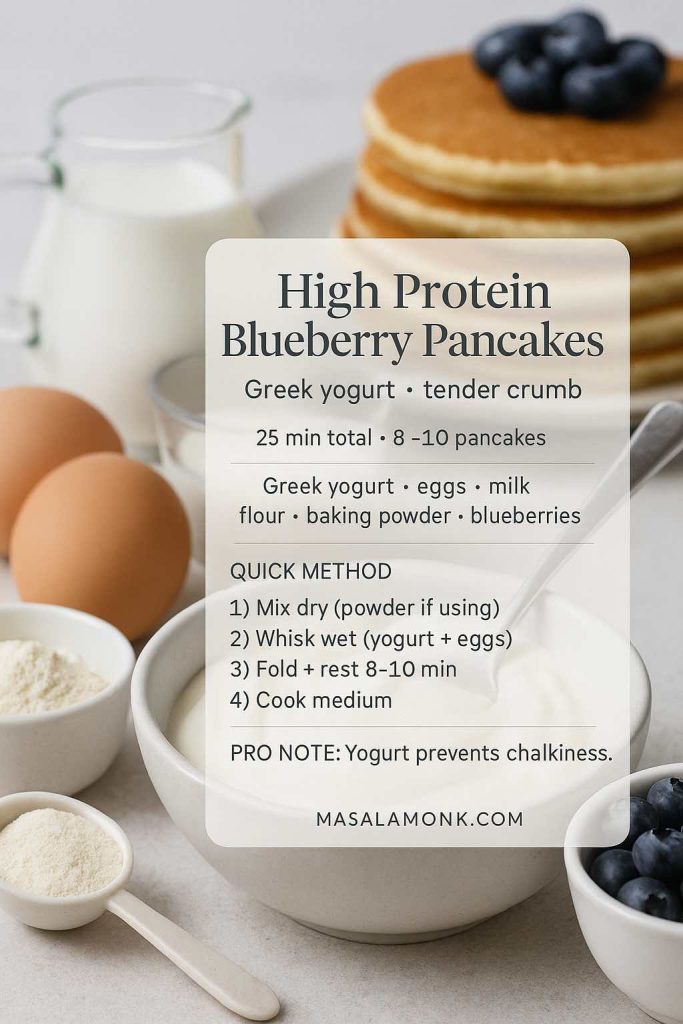
Protein Waffle Recipe: Cottage Cheese Belgian Waffles, Paneer-Style
A protein waffle recipe doesn’t have to feel like a compromise. Cottage cheese makes waffles tender and rich, with a mild flavour that takes beautifully to cardamom, nuts, and honey. If you’ve ever loved paneer-based sweets, this “paneer-style” direction will feel familiar in the best way.
This twist also fits naturally with what many people look for when they want cottage cheese waffles: satisfying, filling, and still delicious.

Cottage cheese waffle batter (paneer-style)
Add to the base batter:
- 1/2 cup cottage cheese, blended smooth
- 1/2 tsp cardamom
- 2 tbsp chopped pistachios or cashews
- Optional: 1 tbsp honey or sugar if you like it sweeter
Blend the cottage cheese first; otherwise, the batter can feel bumpy rather than creamy. Then whisk it into the wet ingredients before combining wet and dry.
Cooking protein waffles without losing crispness
Because cottage cheese adds moisture, cook until deep golden and let the waffle rest on a rack. That extra browning helps the outside stay crisp while the inside stays tender.
High-protein waffle toppings (still indulgent)
- Thick yogurt + honey + pistachios
- Saffron honey drizzle
- Mango slices when in season
- A spoon of something creamy and fragrant
If you enjoy protein-focused breakfast ideas beyond waffles, you might also like these high-protein plant-based breakfast ideas.
Yogurt Waffles: Dahi–Elaichi Belgian Waffle Recipe, Waffle Yogurt Variation
Yogurt waffles are quietly wonderful. They come out tender, lightly tangy, and perfect with fruit and nuts. Using dahi keeps it familiar; adding cardamom keeps it fragrant.
This is also a natural home for what people mean by “waffle yogurt” or “yogurt waffle batter,” except we’re leaning into Indian pantry logic rather than forcing an imported style.
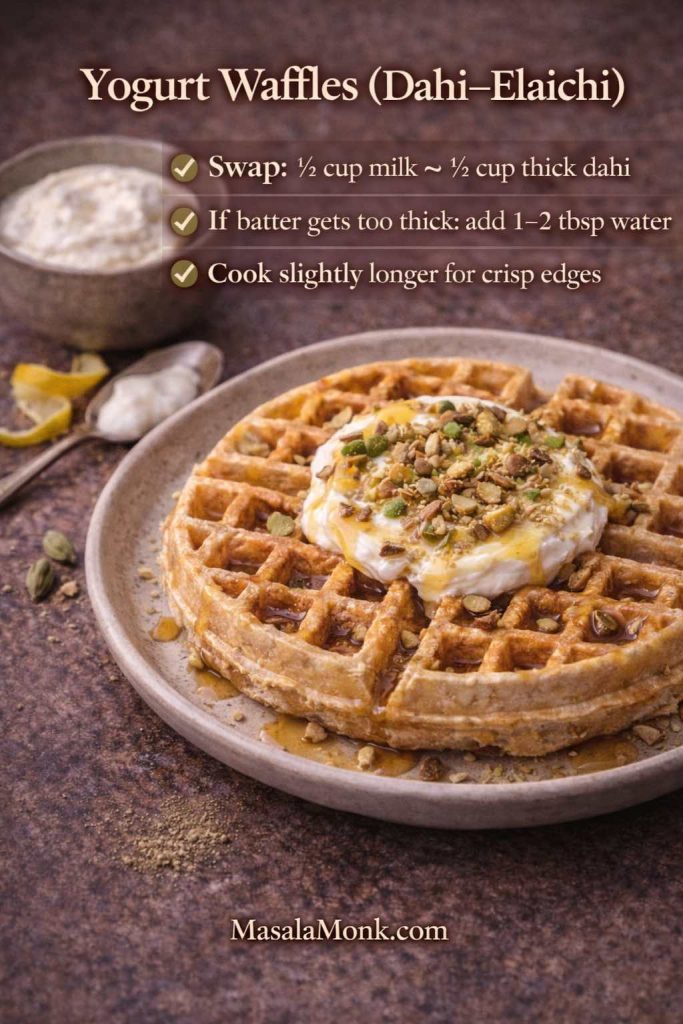
Yogurt waffle batter (dahi–elaichi)
Start with the base batter, then adjust:
- Replace 1/2 cup of milk with thick yogurt/curd
- Add 1/2 tsp cardamom
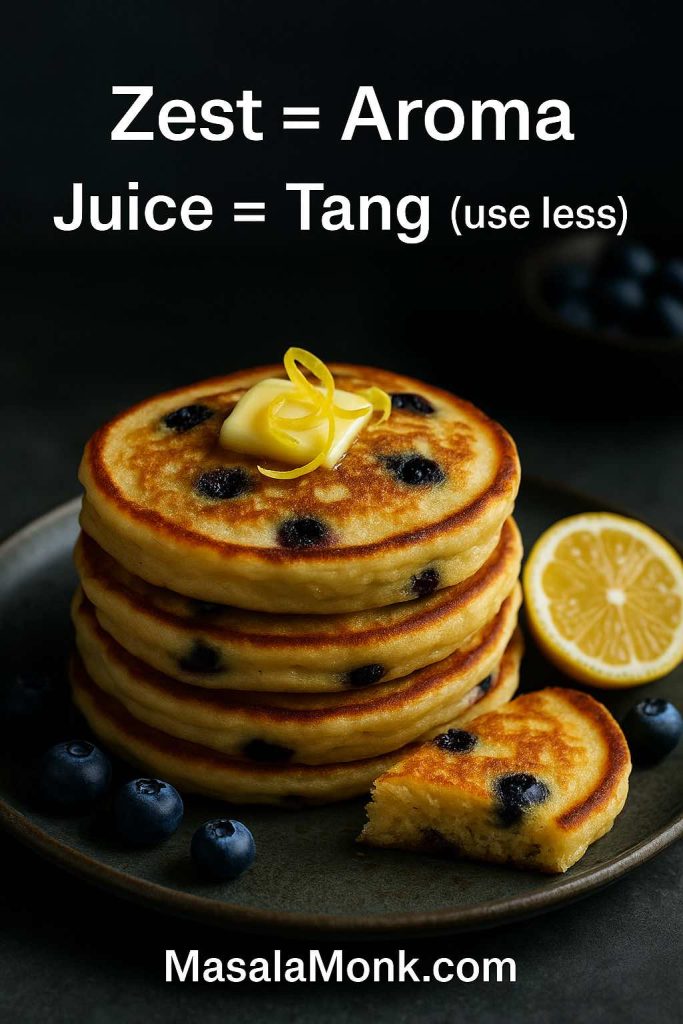
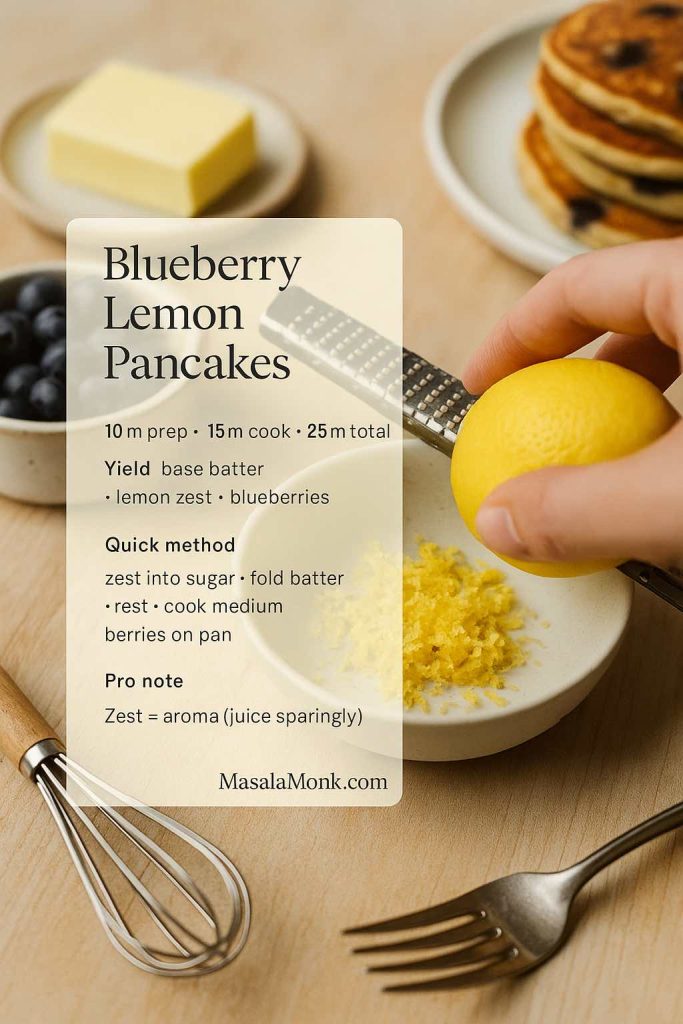
- Optional: lemon zest for brightness
- Optional: 1 tbsp sugar if the yogurt is very tangy
Whisk yogurt into the wet ingredients until smooth, then combine gently with the dry bowl.
Cooking yogurt waffles
Since yogurt adds moisture, cook slightly longer for a crisp exterior. Even so, the inside stays plush and soft, which is exactly what you want in this variation.
Mango shrikhand topping for waffles
When mangoes are in season, this combination is hard to beat: warm waffle + chilled creamy topping + pistachios. If you want inspiration for that topping, this mango shrikhand direction is perfect for waffles.
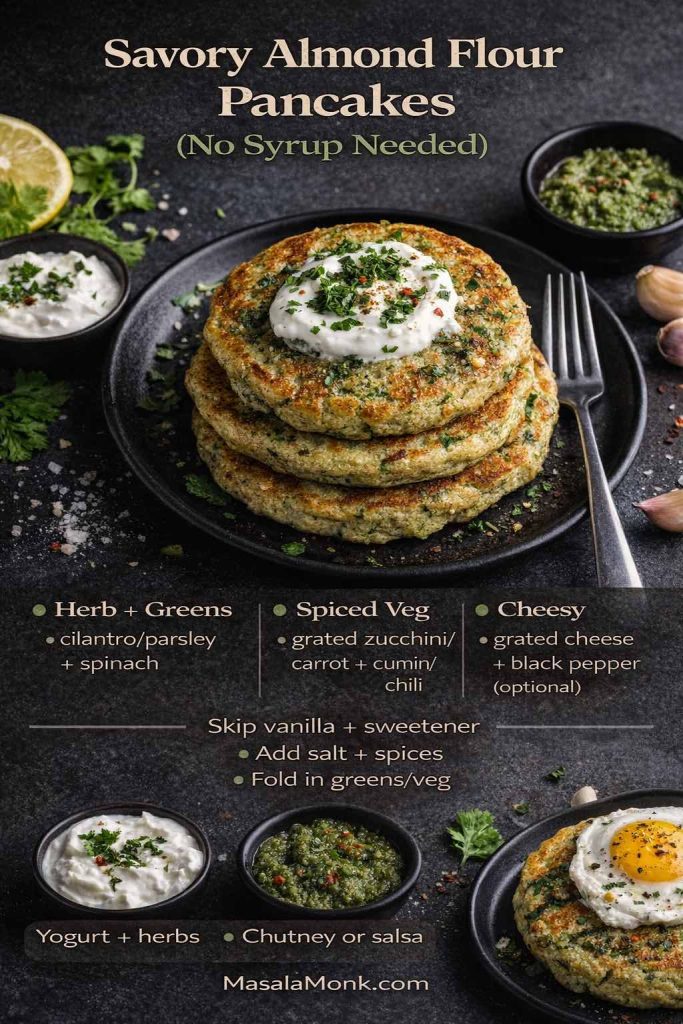
Chicken and Waffles Sandwich, Tandoori Style: Waffle Breakfast Sandwich
Now we go savoury, and not subtly.
Classic chicken and waffles works because it’s built on contrast: crisp waffles, juicy chicken, savoury seasoning, and a sauce that pulls everything together. The Indian version keeps that logic and changes the flavour language—tandoori spice, chutney, yogurt, onions, lemon.
For a simple reference on the classic pairing, this is unobtrusive: chicken and waffles.
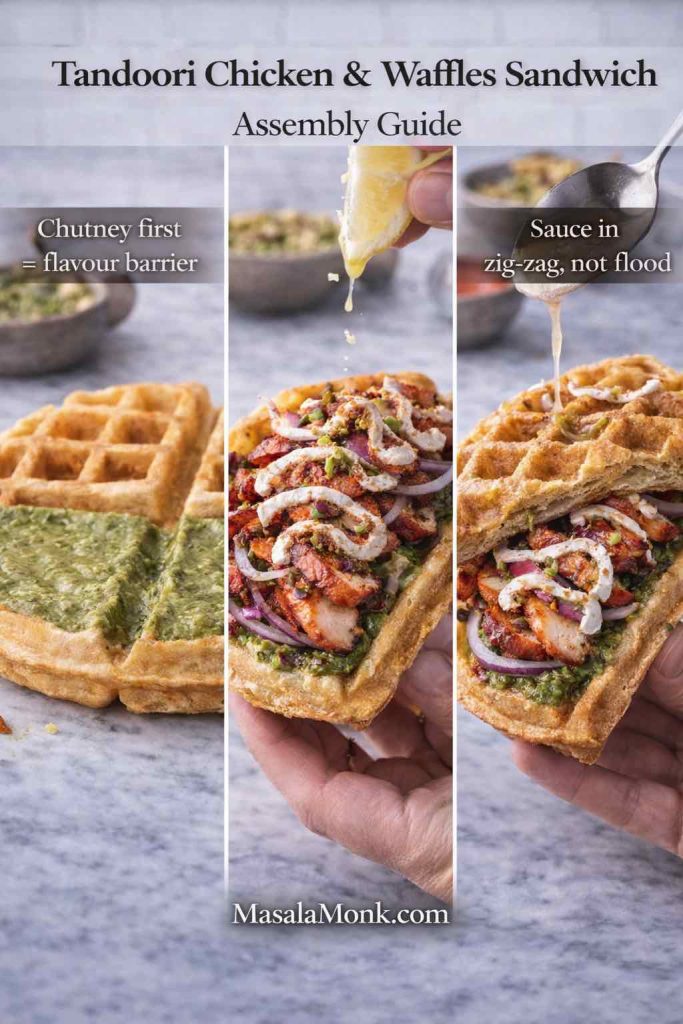
What you need for a chicken and waffles sandwich
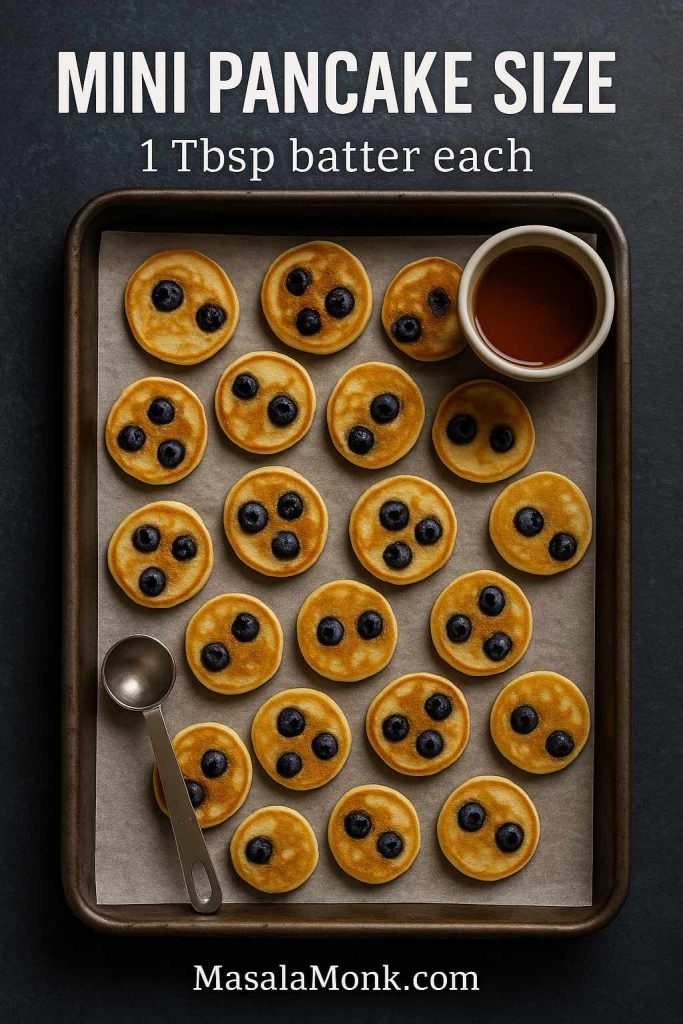
- 2 waffles (smaller waffles are easiest as a sandwich)
- Cooked tandoori-style chicken, sliced thin
- Thin onion slices
- Lemon wedge
- Yogurt sauce: yogurt + salt + pinch of chaat masala
- Chutney
For a bold chutney option that brings heat and depth, this kara chutney works beautifully with chicken.
Waffle breakfast sandwich assembly
Spread chutney on the first waffle. Layer chicken. Add onions. Drizzle yogurt sauce. Squeeze lemon. Close with the second waffle and press gently.

Variations that keep the same spirit
- Paneer tikka waffle sandwich for a vegetarian version
- Butter chicken filling for a richer, saucier plate—this butter chicken recipe is a natural fit
- Add cucumber slices for freshness
- Add a tiny honey drizzle to the yogurt sauce if you love sweet-savoury contrast
Belgian Waffle Recipe Variants: Chocolate Waffles, Banana Waffles, Cinnamon Comfort
Once your base Belgian waffle recipe is second nature, classic flavours become easy. Besides, they’re perfect when you want variety without planning a whole new list of twists.
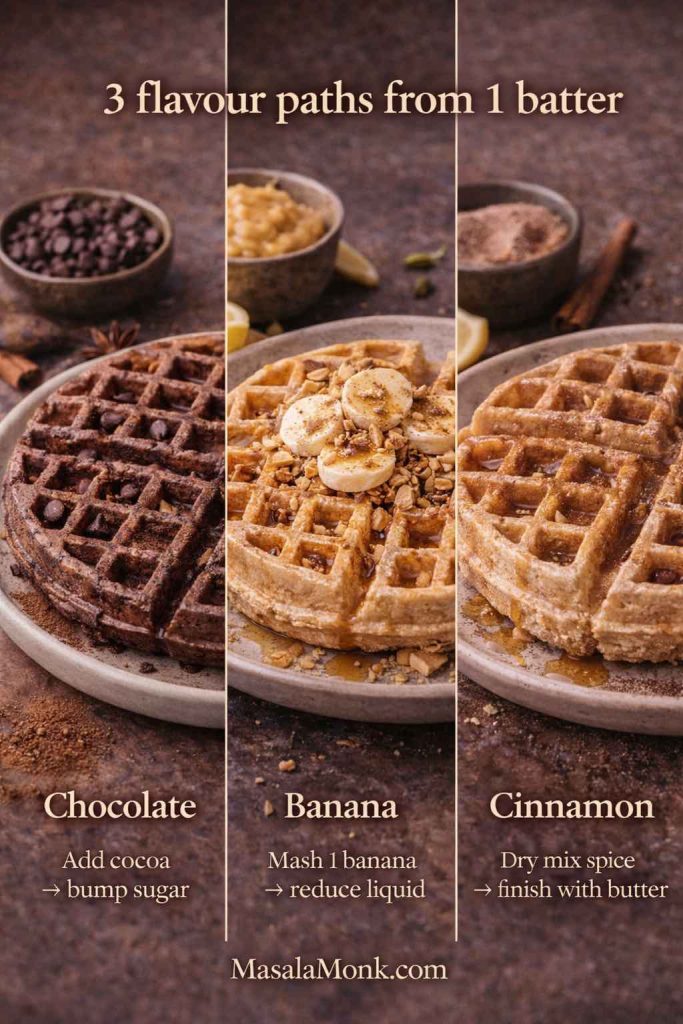
Chocolate waffles: Belgian waffle recipe with cocoa and warm spice
To make chocolate waffles, add to the dry ingredients:
- 1/4 cup cocoa powder
- 2 tbsp extra sugar (cocoa needs balance)
- Pinch of cardamom or cinnamon
Cook until deep golden, then top with chocolate sauce, nuts, or fruit. Alternatively, add a jaggery-cocoa drizzle for a deeper sweetness that feels less “candy” and more “grown-up dessert.”
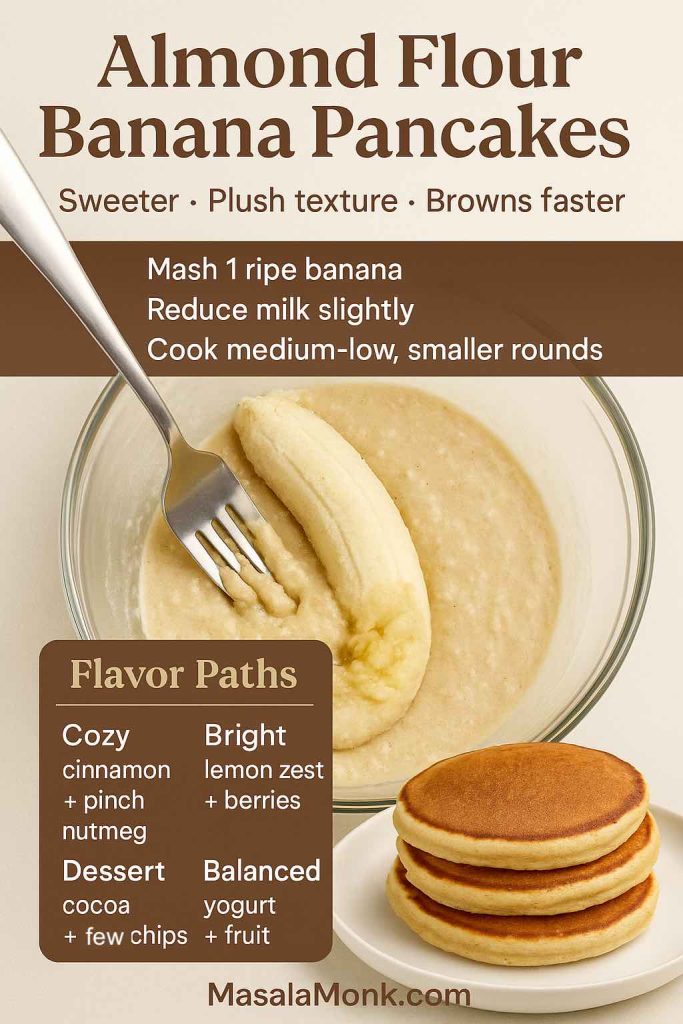
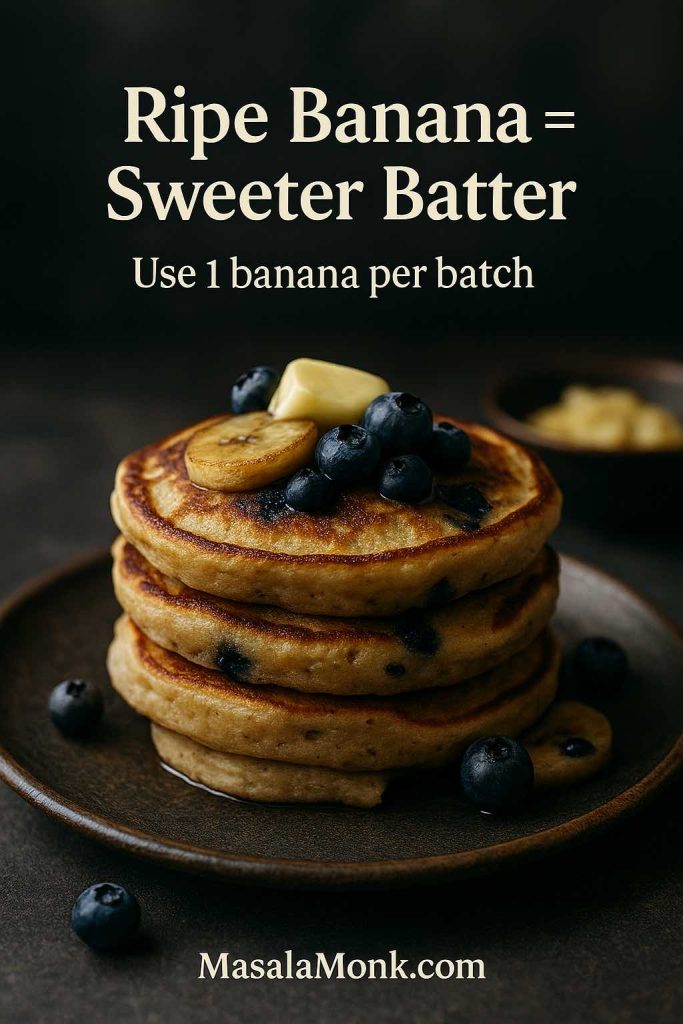
Banana waffles: Belgian waffle recipe with jaggery and cinnamon
Mash 1 ripe banana into the wet ingredients, then add:
- 1/2 tsp cinnamon
- Optional: swap some sugar for jaggery
These banana waffles are especially good with peanut butter, roasted nuts, and honey. In fact, they’re a natural bridge between comfort and indulgence.
Cinnamon waffle recipe comfort, without rewriting the batter
Add 1 tsp cinnamon to the dry mix and finish with butter and cinnamon sugar. On cooler mornings, this tastes like instant coziness.
Also Read: Greek Tzatziki Sauce Recipe (1 Master Sauce + 10 Easy Variations)
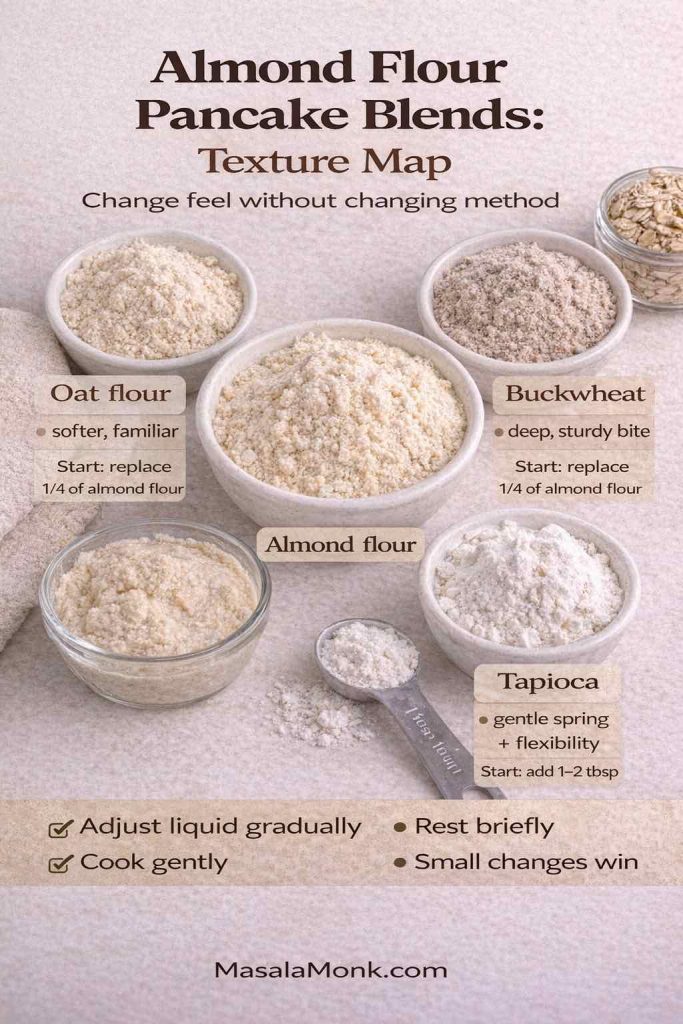
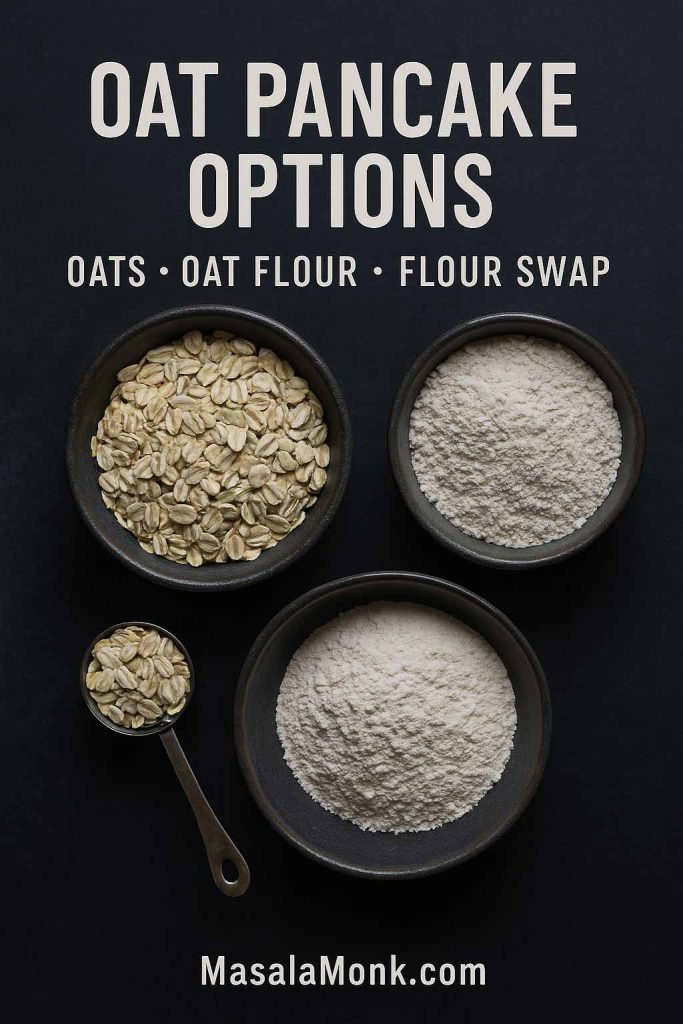
Oat Flour Waffles and Oatmeal Flour Waffles: Belgian Waffle Recipe With a Hearty Swap
Oat flour waffles are popular because they taste hearty and pair beautifully with bananas, peanut butter, and honey. Still, oat flour can weaken structure if you swap too much at once. So, rather than going all in immediately, start gently.
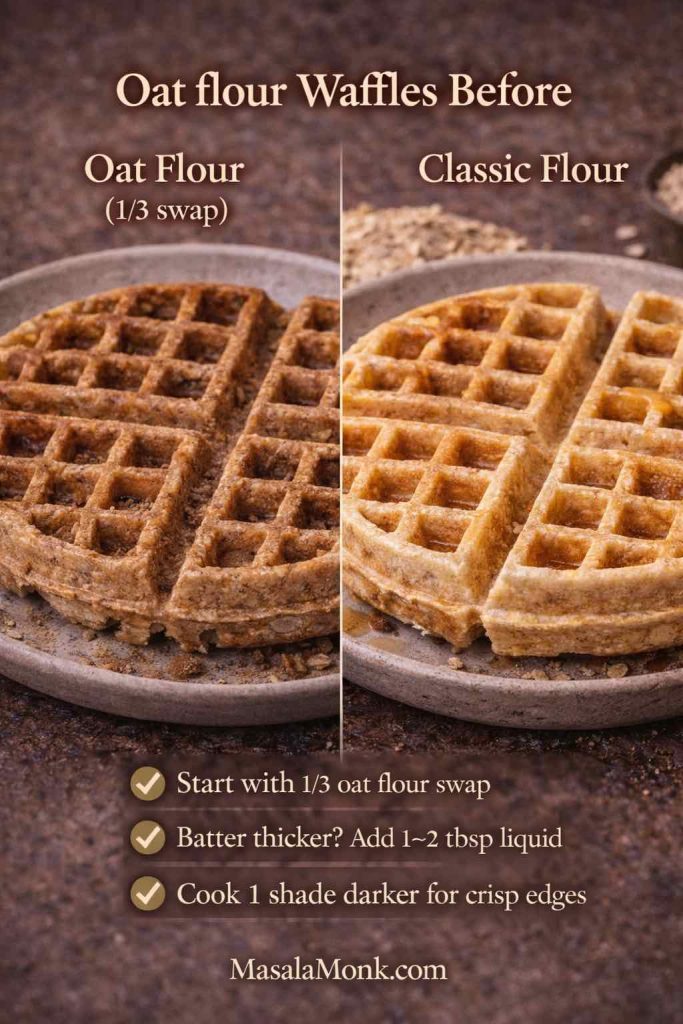
Oat flour waffle batter approach
Replace one-third of the all-purpose flour with oat flour. Keep the rest the same. Then cook until deep golden and cool on a rack.
Once you like the result, you can increase the oat flour portion. Either way, the flavour pairs naturally with jaggery, cinnamon, banana, and nuts—so it fits perfectly with the Indian direction of this post.
Also Read: Healthy Oat Protein Bars – 5 Easy No Sugar Recipes for Snacks
Waffle Recipe Without Milk, Again: No Milk Waffle Recipe Shortcuts That Still Taste Rich
If you’re returning to the waffle recipe without milk idea on busy mornings, coconut milk is the easiest win. Yet there are other workable no-milk directions too.
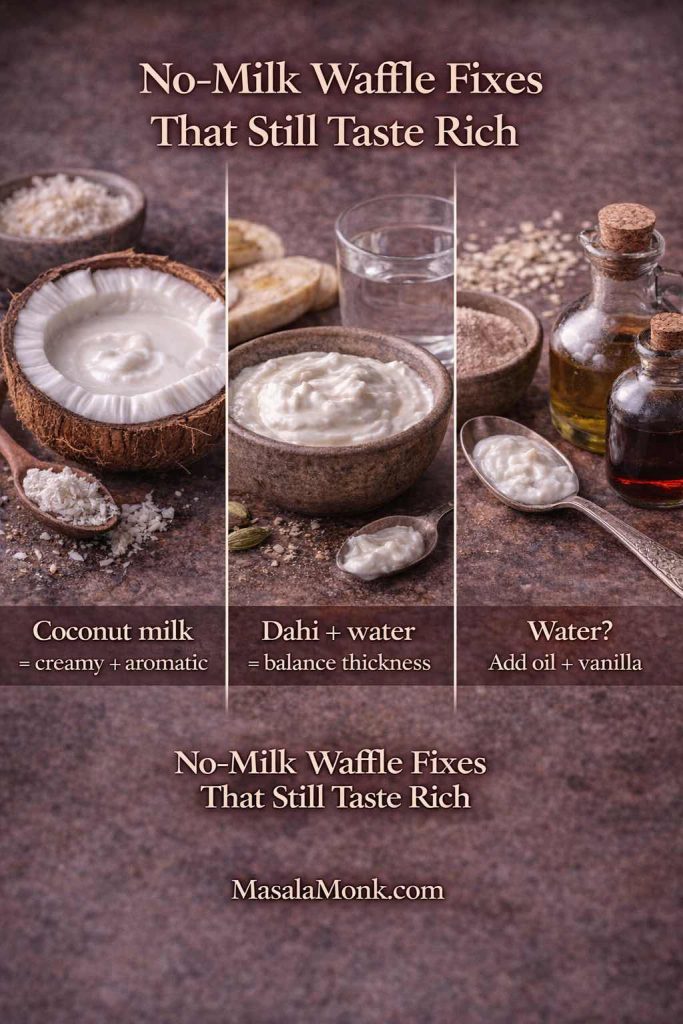
- If you have coconut milk, use it.
- If you only have water, add a little extra fat (oil) and a touch more vanilla to keep flavour rounded.
- If you have yogurt but no milk, use yogurt plus water to thin it slightly, then whisk until smooth.
Even when you’re improvising, the key is to keep batter pourable and cook until the waffle is deeply golden so it tastes toasted, not pale.
Also Read: 10 High Calorie Protein Shakes & Smoothie Recipes for Healthy Weight Gain
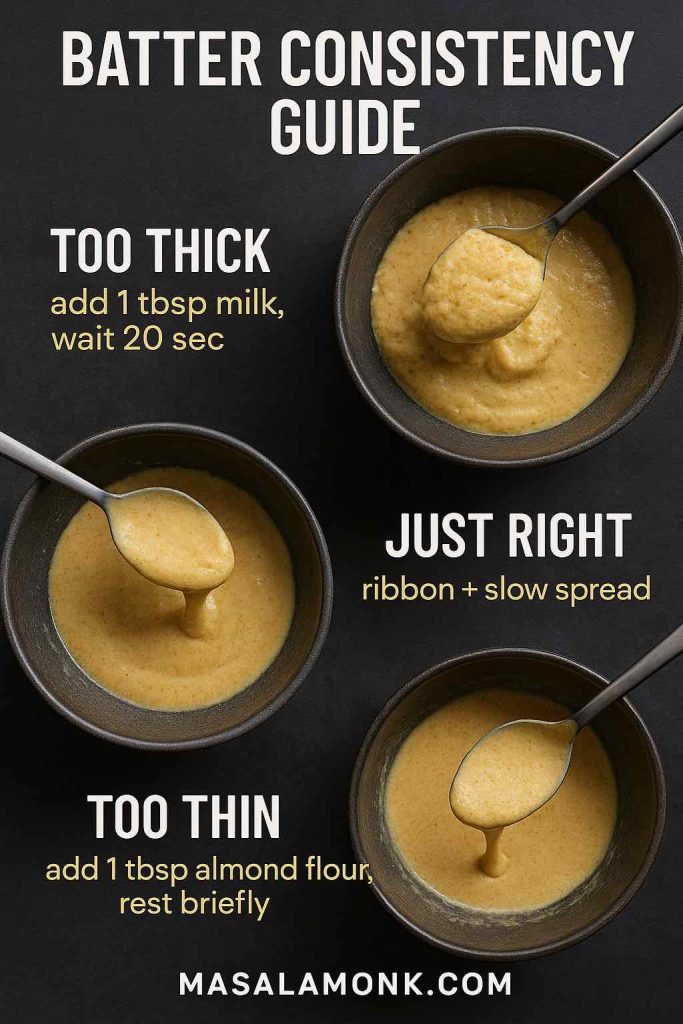
Waffle Batter Confidence: How to Tell When Waffle Batter Is “Right” Without Overthinking
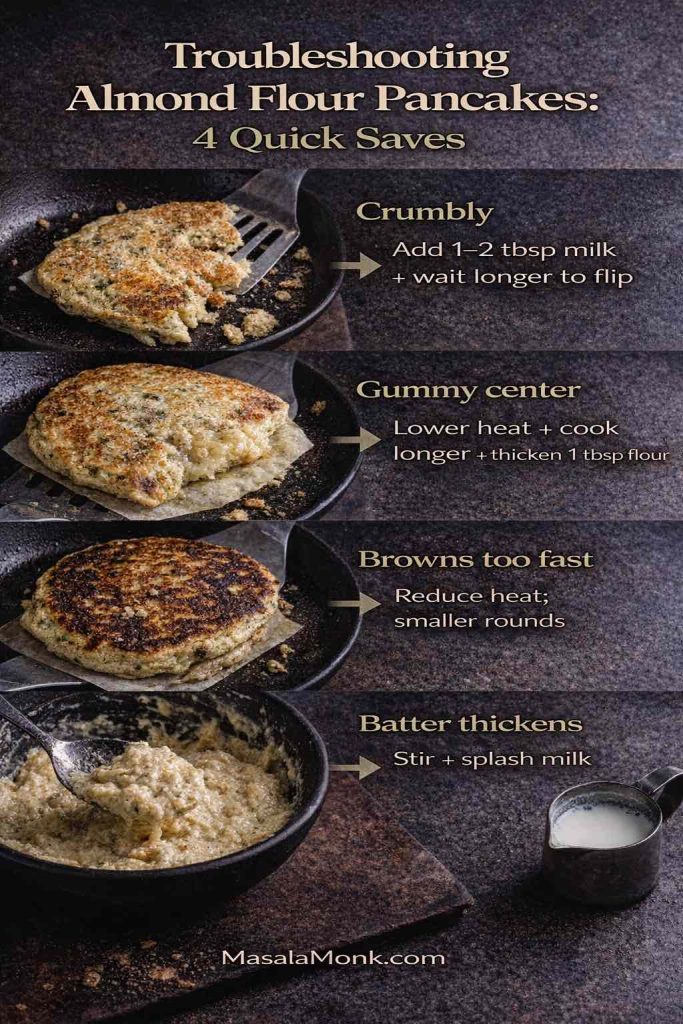
Batter consistency matters, yet it doesn’t need to become stressful. A good waffle batter should pour, but not run like water. It should settle into the grid when you close the lid, not explode out the sides immediately.
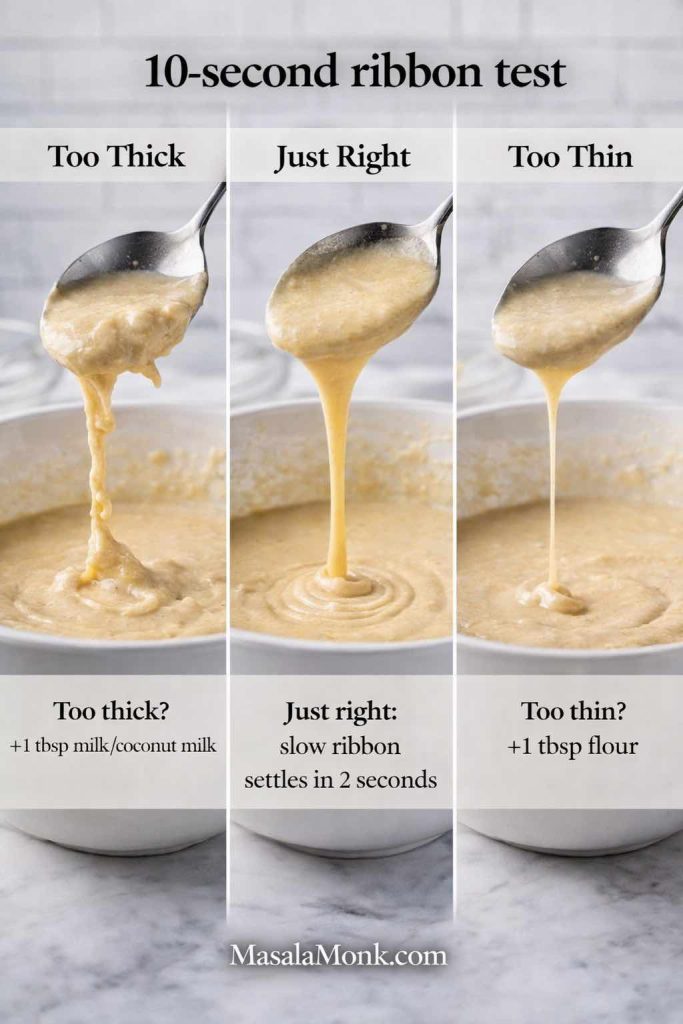
If your batter is too thick, add liquid one splash at a time. If it’s too thin, add a spoon of flour and whisk gently. Then, once you cook one waffle, you’ll know exactly what to adjust.
With that settled, let’s make toppings feel as exciting as the waffles themselves.
Also Read: Simple Bloody Mary Recipe – Classic, Bloody Maria, Virgin & More
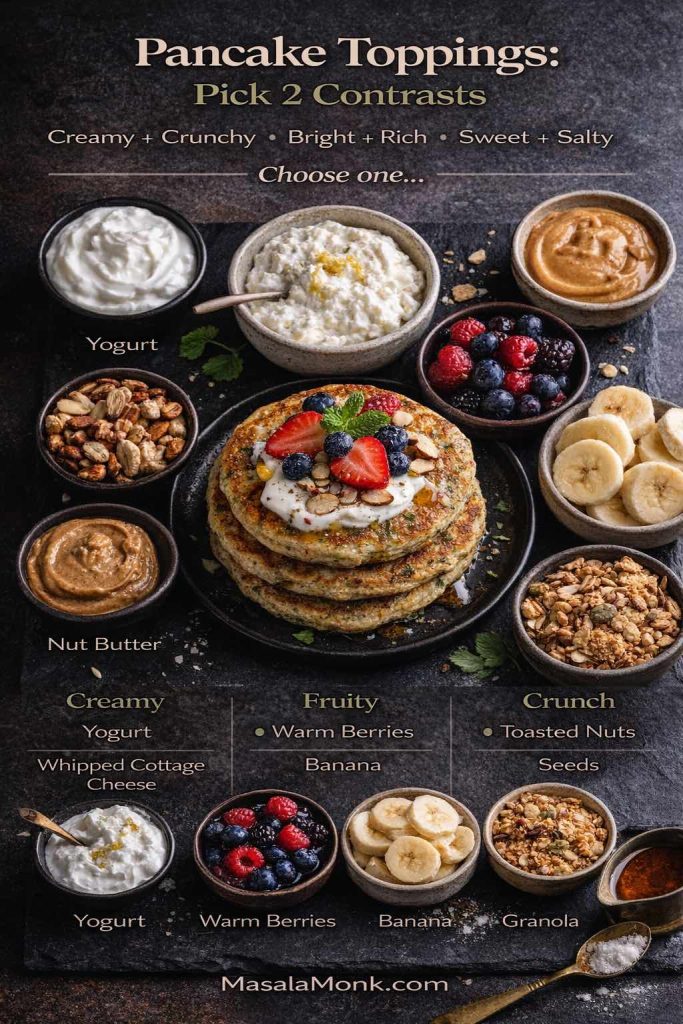
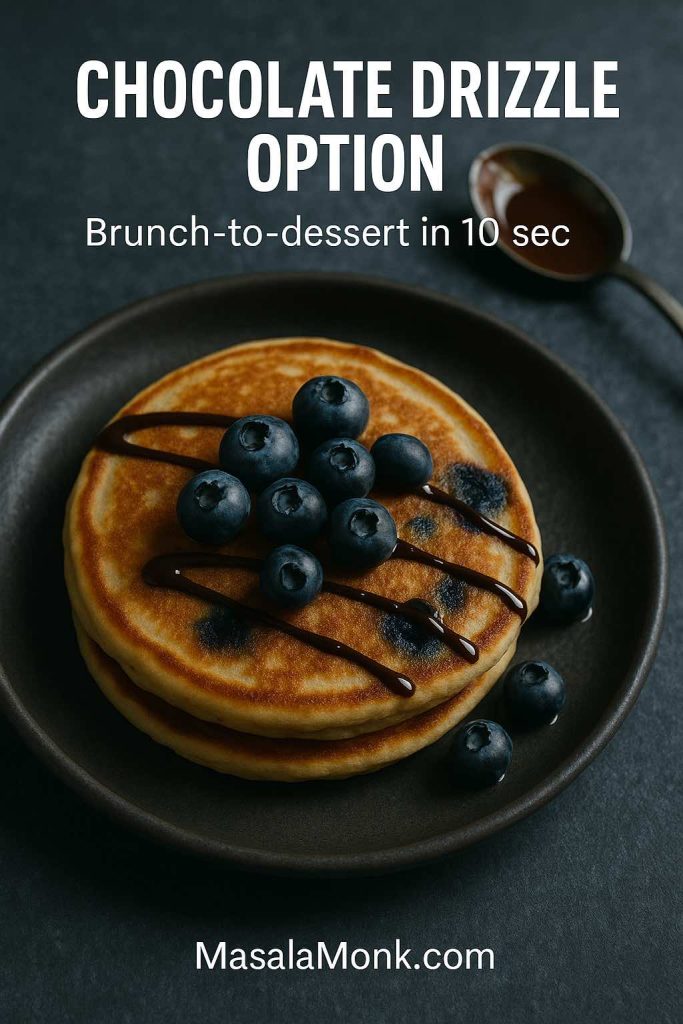
Waffle Syrup and Waffle Toppings, Desi Style: From Jaggery Drizzle to Saffron Honey
Waffles exist for toppings. The pockets practically demand syrup. Maple is lovely, of course, but Indian pantry drizzles can feel even more exciting with coconut, jaggery, peanut butter, yogurt, and cardamom.
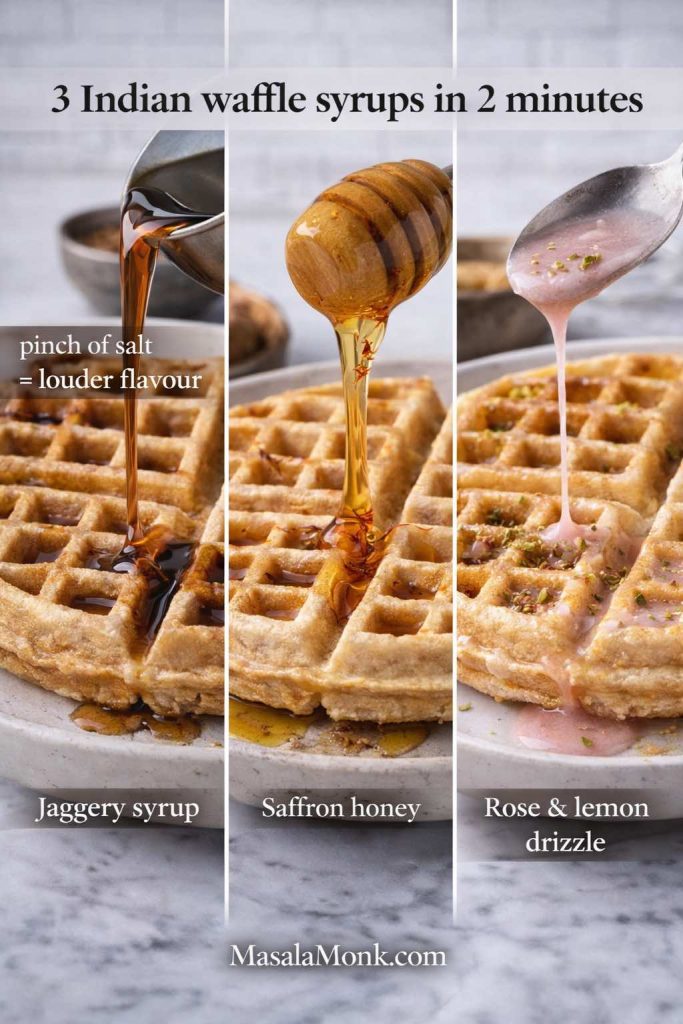
Jaggery waffle syrup
Warm jaggery with a splash of water until glossy. Then add cardamom and a pinch of salt. This syrup is perfect for coconut–jaggery waffles, banana waffles, and peanut chikki waffles.
Saffron honey drizzle
Warm honey gently and steep saffron strands for a few minutes. This tastes especially good on yogurt waffles and cottage cheese protein waffles.
Rose drizzle
Rose syrup with lemon and a tiny pinch of cardamom turns waffles into something festive—especially with pistachios.
Ice cream and waffle dessert plates
If you want a dessert moment, warm waffles plus ice cream is always a win. For mango season inspiration, these mango kulfi ideas are brilliant as waffle toppings too.
Bubble Waffles and Hong Kong Waffles: Street-Style Filling Ideas That Feel Indian
Bubble waffles—often called bubble waffles, bubbles waffles, or Hong Kong waffle—are lighter, snack-like, and made for stuffing and folding.
If you want a quick reference for the style, this explains it clearly: egg waffle. For a baseline recipe format, this is approachable: bubble waffles.

Bubble waffle filling ideas (Indian street-dessert style)
- Kulfi scoop + nuts + rose syrup
- Rabri-like drizzle + pistachios + saffron
- Chocolate + banana + crushed biscuits
- Mango ice cream + cardamom sugar + toasted coconut
Even if you don’t have a bubble waffle maker, the flavour ideas still work with Belgian waffles. Make smaller waffles, fold them like cones, fill them, and eat them like street food.
Also Read: Peanut Butter Cookies (Classic Recipe & 3 Variations)
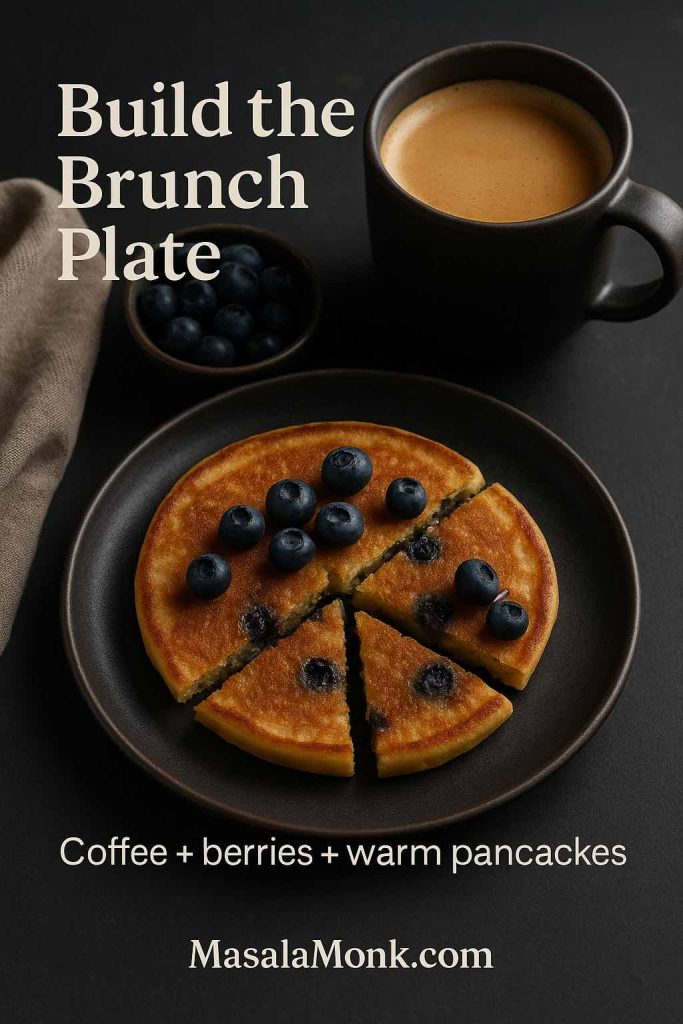
Belgian Waffle Recipe, One Base, Endless Plates
Ultimately, the reason to keep a Belgian waffle recipe in your back pocket is simple: one batter, many moods.
Sometimes you want coconut–jaggery comfort from a waffle recipe without milk. Other times you want peanut butter waffles with chikki crunch. On busy days, a “paneer-style” protein waffle recipe feels like a gift. When you want soft and fragrant, yogurt waffles deliver. And when brunch needs to be bold, a tandoori chicken and waffles sandwich becomes the centerpiece.
If you want another India-leaning waffle idea to explore next, these sabudana waffles are a fun companion read—especially if you enjoy Indian pantry twists.
FAQs
1) What is a Belgian waffle recipe, and how is it different from regular waffles?
A Belgian waffle recipe typically makes waffles that are thicker, airier, and built with deeper pockets. As a result, they hold syrup, sauces, and toppings more generously than thinner, “regular” waffles.
2) Can I make a Belgian waffle recipe without a Belgian waffle maker?
Yes. Even if your waffle iron makes thinner waffles, the same batter still works; the main change is that cook time may be shorter and the waffles may turn out crispier rather than thick.
3) How do I make waffles crispy on the outside and soft inside?
For that classic contrast, preheat the waffle maker thoroughly, cook until deep golden, and place cooked waffles on a rack instead of stacking them. That combination helps the crust stay crisp while the center remains tender.
4) Why are my waffles turning out soggy after cooking?
Most often, waffles go soft because steam gets trapped—especially when waffles are stacked on a plate. Instead, let them cool briefly on a rack so moisture can escape.
5) What’s the best waffle batter consistency for a Belgian waffle recipe?
The ideal waffle batter should pour easily but still feel slightly thick—similar to a smooth pancake batter. If it runs like water, it may spread too fast and steam; if it’s too stiff, it may cook unevenly.
6) Can I make waffle batter ahead of time for breakfast?
You can mix the dry ingredients ahead, and you can also whisk the wet ingredients ahead. However, once everything is combined, it’s usually best to cook within a few hours so the leavening stays effective.
7) What is a waffle mix, and can I make waffle mix at home?
Waffle mix is a pre-mixed dry blend (flour, sugar, salt, leavening) that you combine with wet ingredients later. Homemade waffle mix works well and makes weekday waffles much faster.
8) How do I make a waffle recipe without milk that still tastes rich?
Use coconut milk, oat milk, or another creamy plant milk, and include enough fat (oil or dairy-free butter). In addition, vanilla and a pinch of salt help round out flavor.
9) Are dairy-free waffles the same as vegan waffles?
Not always. Dairy-free waffles avoid milk and butter, but they can still include eggs. Vegan waffles avoid all animal products, so you’ll replace both dairy and eggs.
10) How do I make vegan waffles that don’t fall apart?
Use a good binder such as a flax “egg” (ground flax mixed with water) and cook waffles until fully set and golden. Also, avoid opening the waffle maker too early.
11) Can I make eggless waffles that still rise properly?
Yes. Eggless waffles can rise well with fresh baking powder and a binder like flax, yogurt alternatives, or fruit puree. Even so, slightly longer cooking helps them set firmly.
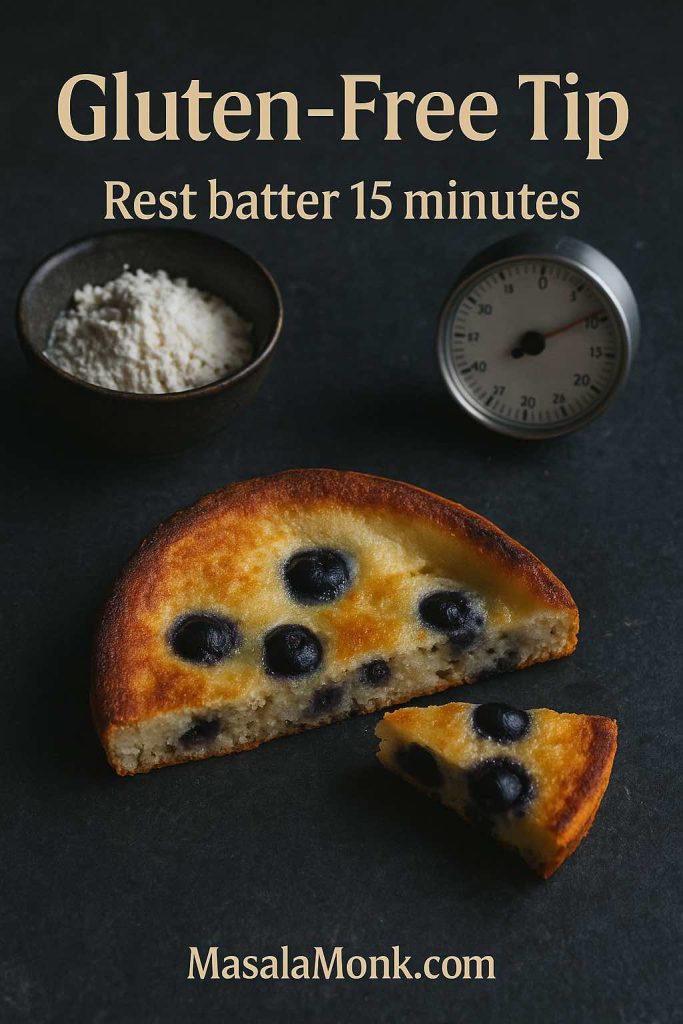
12) What’s the easiest way to make gluten-free waffles?
A reliable gluten-free flour blend is the simplest option because it’s designed for structure. If you’re experimenting, start with a blend before trying single flours.
13) Can I make oat flour waffles with a Belgian waffle recipe?
Absolutely. Replace part of the all-purpose flour with oat flour to keep structure. Gradually increasing oat flour works better than swapping all flour at once.
14) How do I make protein waffles that still taste good?
A protein waffle recipe tastes best when the “protein” comes from ingredients that also improve texture, like cottage cheese or yogurt. Furthermore, balanced sweetness and vanilla keep flavor pleasant.
15) Are cottage cheese waffles the same as paneer-style waffles?
They’re not identical, yet cottage cheese waffles can feel “paneer-style” in spirit—mild, creamy, and perfect with cardamom, nuts, and honey.
16) Can I add peanut butter to waffle batter?
Yes, peanut butter waffles are a popular variation. Since peanut butter thickens batter, add a splash of milk (or plant milk) if the batter becomes too dense.
17) How can I make peanut butter waffles taste more “Indian”?
Try adding jaggery and cardamom, then top with roasted peanuts for a chikki-like finish. This approach creates a warm, nutty profile rather than a plain “PB” taste.
18) What are yogurt waffles, and why add yogurt to waffle batter?
Yogurt waffles use curd or yogurt in the batter to add tenderness and a gentle tang. Consequently, they pair especially well with fruit, honey, and nuts.
19) Can I use thick curd (dahi) instead of milk in waffles?
Yes. You can replace a portion of milk with thick curd, then whisk until smooth. If the batter becomes too thick, thin it with a small splash of water.
20) What toppings go best with Indian-style waffles?
Jaggery syrup, saffron honey, rose drizzle, chopped nuts, coconut, shrikhand-style toppings, and fresh fruit all work beautifully. Additionally, savory waffles pair well with chutneys and yogurt sauces.
21) What is the best syrup for waffles if I don’t have maple syrup?
Jaggery syrup is a great alternative, and honey works well too. For a more festive vibe, saffron-infused honey or rose-lemon drizzle can feel special.
22) Can I make a chicken and waffles sandwich at home?
Definitely. Use waffles as the “bun,” then layer spiced chicken, onions, and a yogurt-based sauce. For extra punch, add a chutney spread.
23) What kind of chicken works best for chicken and waffles?
Crispy fried chicken is classic, yet grilled or tandoori-style chicken works beautifully with Indian flavors. The key is juicy chicken with bold seasoning.
24) Can I make a vegetarian version of chicken and waffles?
Yes. Paneer tikka, crispy tofu, or spiced potato patties can stand in for chicken, especially when paired with chutney and a creamy sauce.
25) What are bubble waffles, and how are they different from Belgian waffles?
Bubble waffles (often called Hong Kong egg waffles) are lighter and designed to be folded and filled. By comparison, Belgian waffles are thicker with deeper pockets meant for syrup and toppings.
26) Can I make bubble waffles with Belgian waffle batter?
Not exactly. Bubble waffles usually use a different batter and a different waffle maker. Nonetheless, you can mimic the “filled-and-folded” idea using smaller Belgian waffles.
27) How do I stop waffles from sticking to the waffle iron?
Preheat fully, grease lightly if needed, and cook until the waffle releases easily. Often, sticking happens when waffles are undercooked and tear during removal.
28) Why do my waffles taste bland even when they look good?
Bland waffles usually need more salt, vanilla, or sweetness. Also, cooking a bit longer to deepen browning can intensify flavor noticeably.
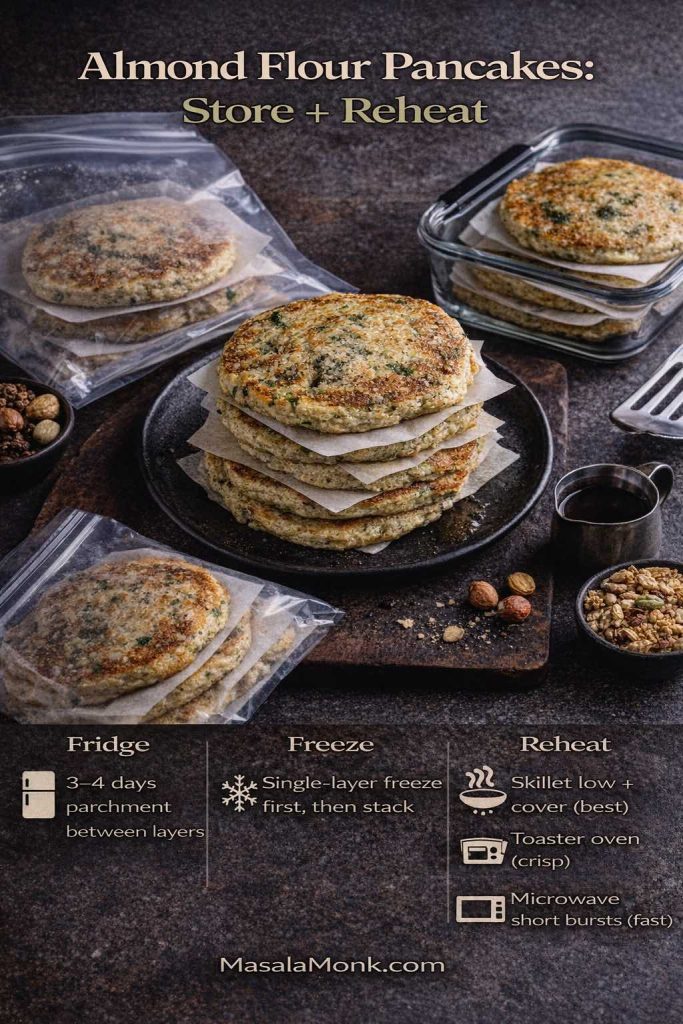
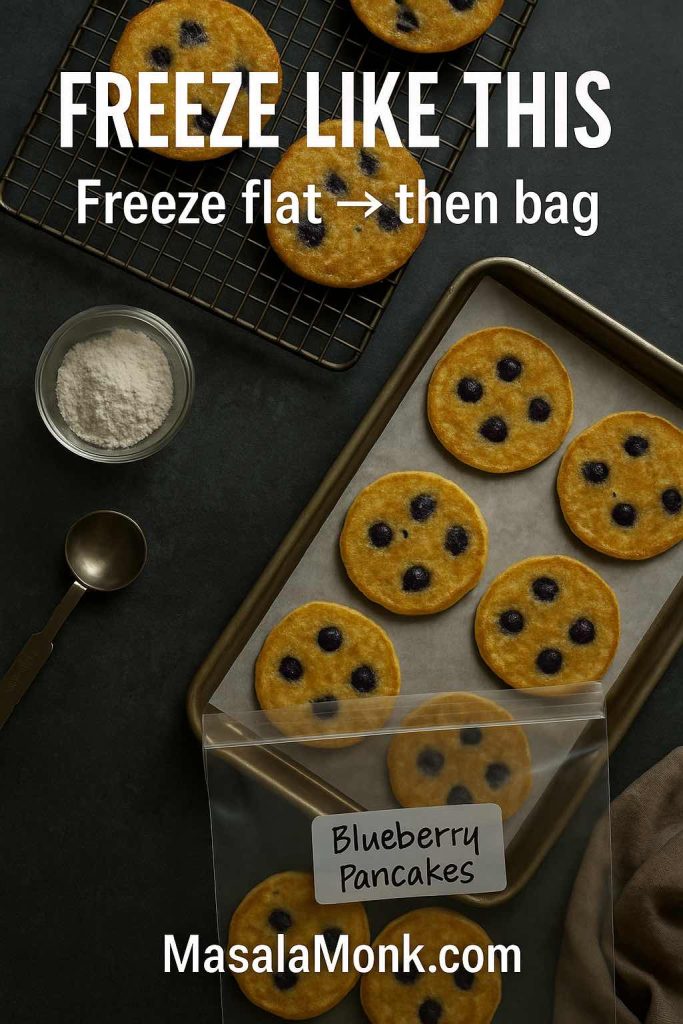
29) Can I freeze waffles and reheat them later?
Yes. Let waffles cool completely, freeze in a single layer first, then store in a bag. Later, reheat in a toaster or oven so they crisp up again.
30) What’s the best way to reheat waffles so they stay crispy?
Use a toaster or an oven rather than a microwave. The microwave adds moisture; meanwhile, dry heat restores crisp edges and keeps the center warm.