
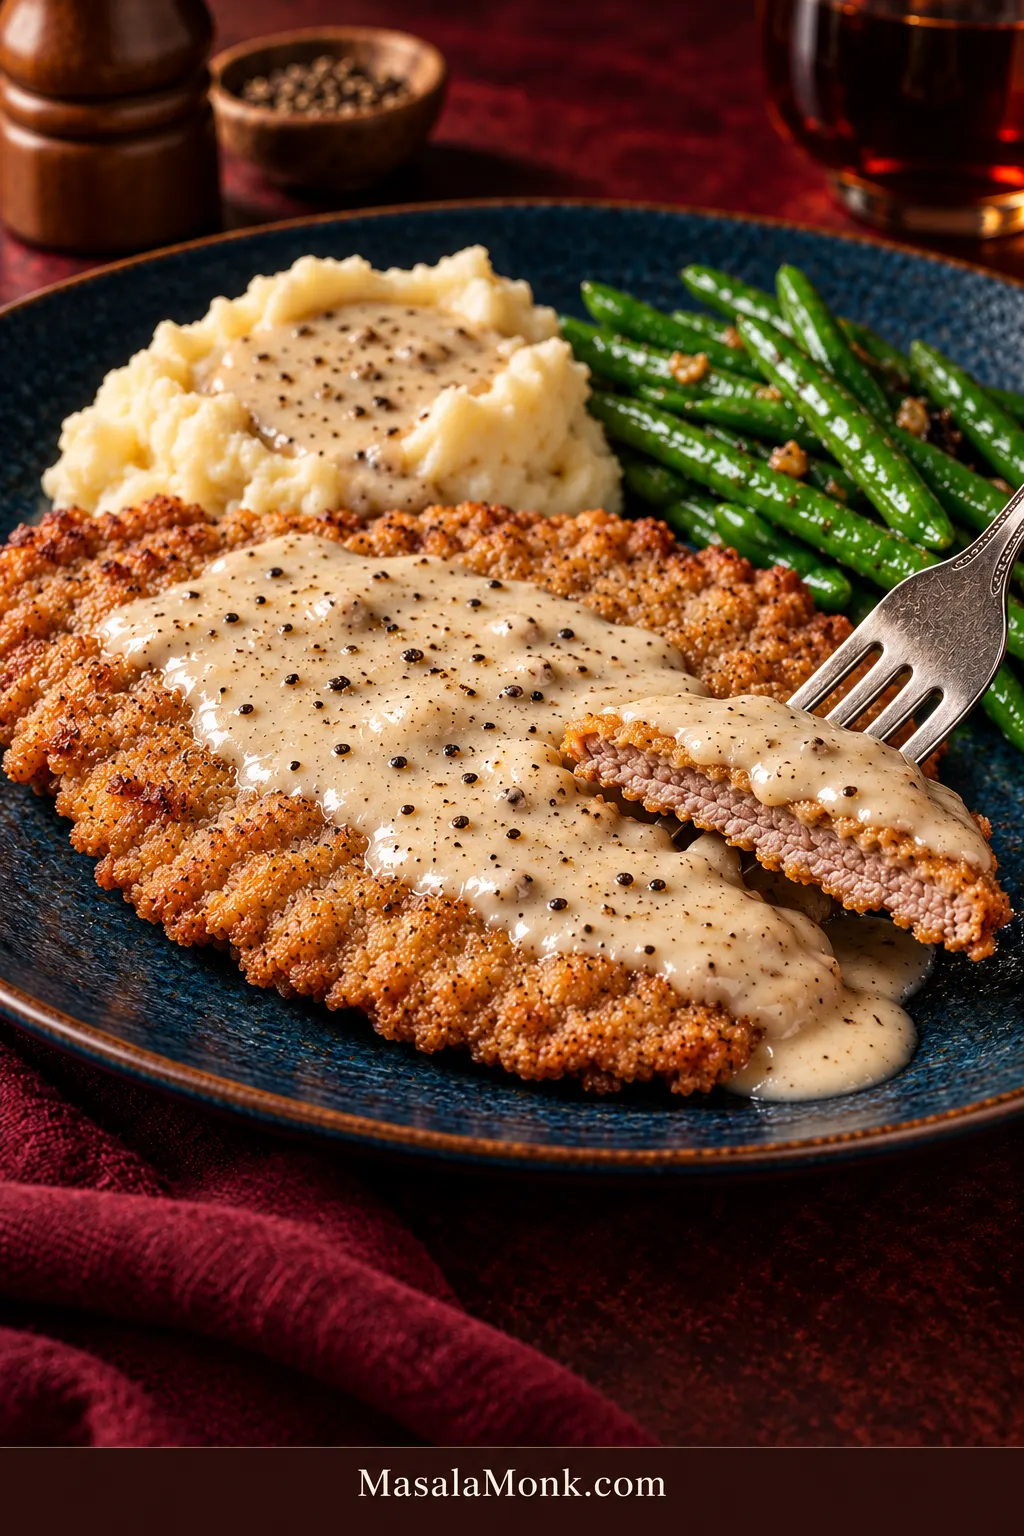
Cut into a good chicken fried steak and the crust should crack before the fork reaches the tender beef underneath. Hot black pepper gravy can run over the middle, while the outer edges should still have some crunch when the plate reaches the table.
Despite the name, chicken fried steak is beef—usually tenderized cube steak—breaded much like fried chicken and finished with peppery white gravy.
Most chicken fried steak problems start with thick beef, loose breading, or oil that has drifted too cool. Keep the steak thin, dry the surface well, give the breading time to grip, and let the skillet recover between batches.
Three Numbers Worth Remembering
Keep those three in range and the frying becomes much easier to manage. The last trick is getting creamy gravy onto the steak without burying every crisp edge.
Chicken Fried Steak Recipe with Pepper Gravy
Thin cube steaks get a seasoned flour coating, a short rest to help it grip, and a quick skillet fry. No deep fryer is needed. The steaks stay warm on a rack while the same pan becomes creamy black pepper gravy.
Equipment
- 12-inch heavy skillet, preferably cast iron
- Wire rack and rimmed baking sheet for the cooked steaks
- Separate clean tray or second rack for the raw breaded steaks
- 2 wide shallow dishes
- Instant-read thermometer for the beef
- Frying thermometer for monitoring the oil
- Tongs
- Whisk
- Meat mallet, if needed
- Heatproof container for excess frying oil
Chicken Fried Steak Ingredients
For the steak
- 4 cube steaks, about 5–6 oz / 140–170 g each
- 1 teaspoon fine sea salt, about 6 g
- 1 teaspoon freshly ground black pepper, about 2 g
For the coating
- 2 cups all-purpose flour, about 240 g
- ½ cup cornstarch, about 60 g
- 2 teaspoons baking powder, about 8 g
- 1 teaspoon fine sea salt, about 6 g
- ½ teaspoon freshly ground black pepper, about 1 g
- 1 teaspoon garlic powder, about 3 g
- ¼ teaspoon cayenne pepper, optional
- 1 teaspoon paprika, about 2 g
- 1 cup buttermilk, 240 ml
- 2 large eggs
- 1 tablespoon hot sauce, 15 ml, optional
For frying
- Vegetable, canola, peanut, or another neutral high-heat oil, enough to reach ½ inch / 12 mm deep; the exact amount depends on your skillet, but many 12-inch skillets need roughly 3 cups / 720 ml
For the pepper gravy
- Up to ¼ cup / 60 ml clean reserved frying fat
- Unsalted butter as needed to bring the total fat to ¼ cup / 60 ml, usually no more than 1–2 tablespoons / 14–28 g
- ¼ cup fresh all-purpose flour, about 30 g
- 2½ cups whole milk, about 600 ml
- 1½ teaspoons coarsely ground black pepper, plus more to taste
- ¼ teaspoon fine sea salt to start, then more only if needed
How to Make Chicken Fried Steak
Prep the Steaks
- Get the holding rack ready. Heat the oven to 200°F / 95°C. Put a clean wire rack over a rimmed baking sheet for the cooked steaks, and keep a separate tray or rack for the raw breaded beef. Measure the gravy flour, milk, and pepper now too.
- Even out, dry and season the steaks. Check for thick connective-tissue seams or uneven areas. Gently pound thicker sections until each steak is close to ¼ inch / 6 mm thick. Pat thoroughly dry, then season both sides with the 1 teaspoon salt and 1 teaspoon black pepper. Blot any moisture that beads back onto the surface.
Build the Breading
- Mix the coating and wet dip. In one wide dish, combine the flour, cornstarch, baking powder, salt, garlic powder, paprika, black pepper, and cayenne if using. In a second wide dish, whisk together the buttermilk, eggs, and hot sauce if using.
- Work a few rough bits into the flour. Drizzle 2 tablespoons of the wet mixture into the dry coating and rub it through lightly with your fingertips. Add up to 1 tablespoon more if the flour still looks completely fine and powdery. You want scattered damp flakes and small clumps, not wet dough.
- Coat the steaks. Press each steak into the flour, dip it into the buttermilk mixture and let the excess run off, then return it to the flour. On the final dredge, press the coating onto both sides and around the edges. Shake off only what is genuinely loose. Keeping one hand for the flour and the other for the wet dip makes the job much less messy.
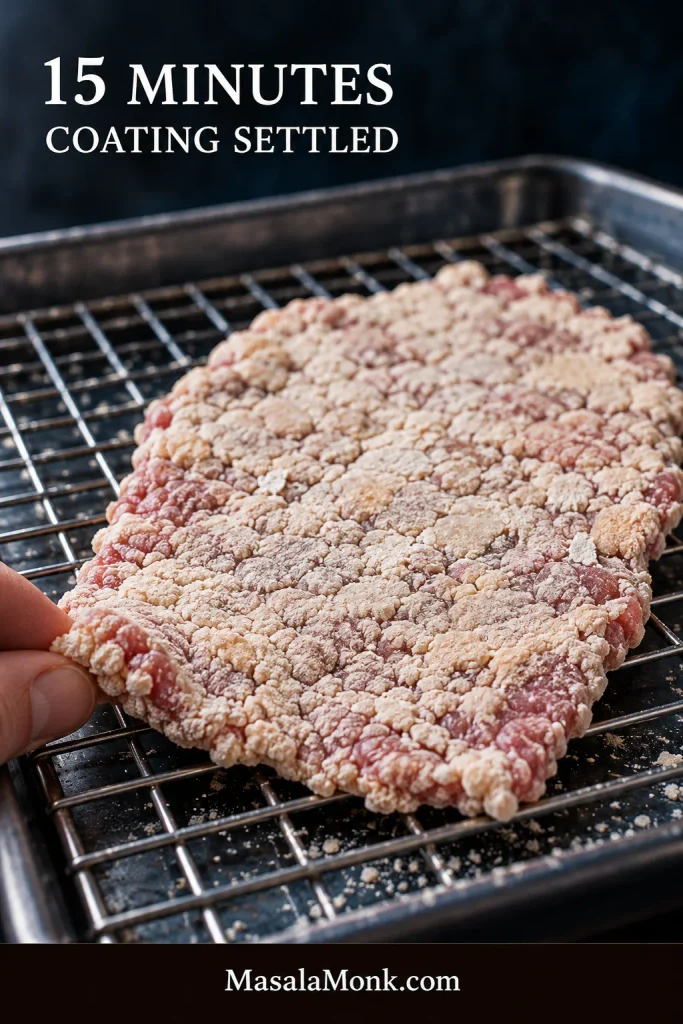
- Give the breading 15 minutes. Put the coated raw steaks on their separate tray or rack and leave them alone for 15 minutes. If your coating has slipped off before, refrigerate the steaks for 20–30 minutes.
Fry & Hold the Steaks
- Heat the oil. Pour enough neutral oil into the skillet to reach about ½ inch / 12 mm deep. Bring it to 350°F / 177°C.
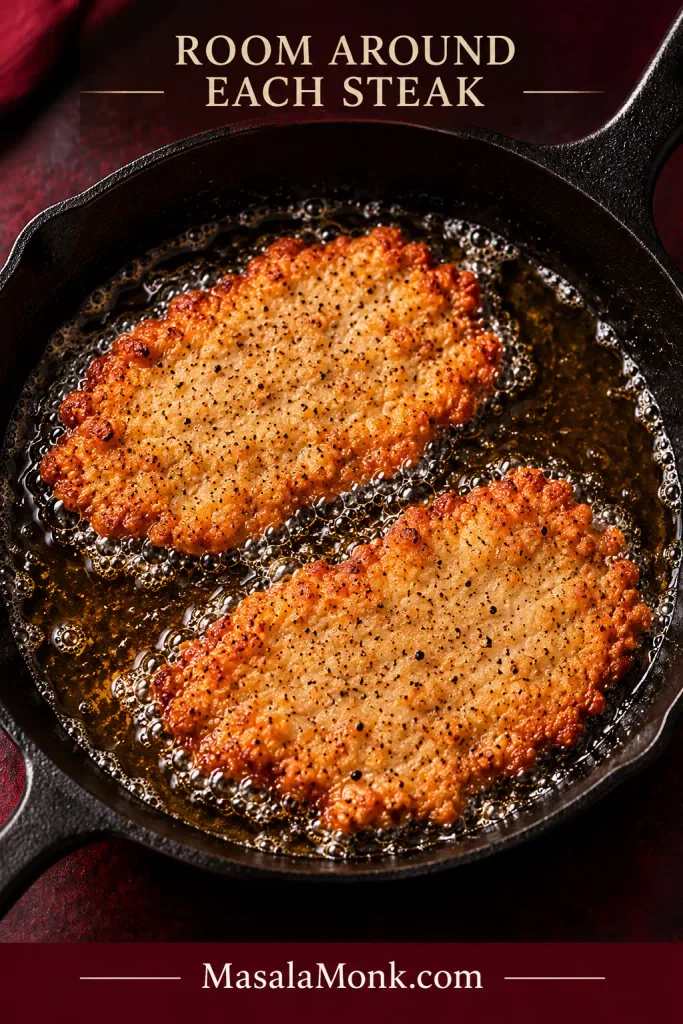
- Give the steaks room. Add up to two at a time, provided they fit without touching. Broad cutlets may need to fry one at a time. The oil should sizzle actively but should not smoke. A temperature drop when the beef goes in is expected; give the pan a moment before making a big burner adjustment.
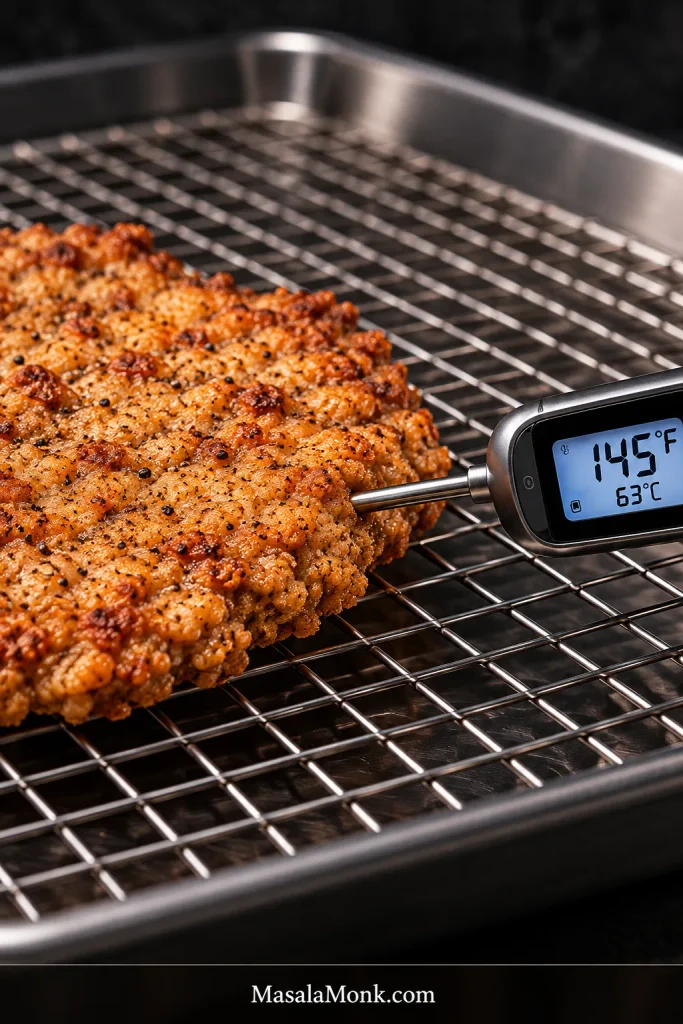
- Set the crust, turn once, and check doneness. Start looking around the 2-minute mark. If the coating is still pale and soft, leave it alone. When it is deep golden and feels firm enough to move without tearing, turn the steak and cook the second side. Check the thickest part from the side with an instant-read thermometer; the beef should reach at least 145°F / 63°C before it leaves the skillet. Thin steaks usually take roughly 2–3 minutes per side.
- Rack the steaks and let the oil recover. Using clean tongs, move the cooked steaks to the clean wire rack and place them in the 200°F / 95°C oven, uncovered and in a single layer. Make sure at least 3 minutes pass after frying before serving or cutting each steak. Remove very dark loose crumbs from the oil, then let the oil return to frying temperature before the next batch.
Make the Pepper Gravy & Serve
- Reserve clean frying fat for the gravy. Once the last steak is done, carefully pour the excess oil into a heatproof container. Measure as much clean frying fat as you have, up to ¼ cup / 60 ml, back into the skillet. Add enough butter, if needed, to bring the total fat to ¼ cup / 60 ml.
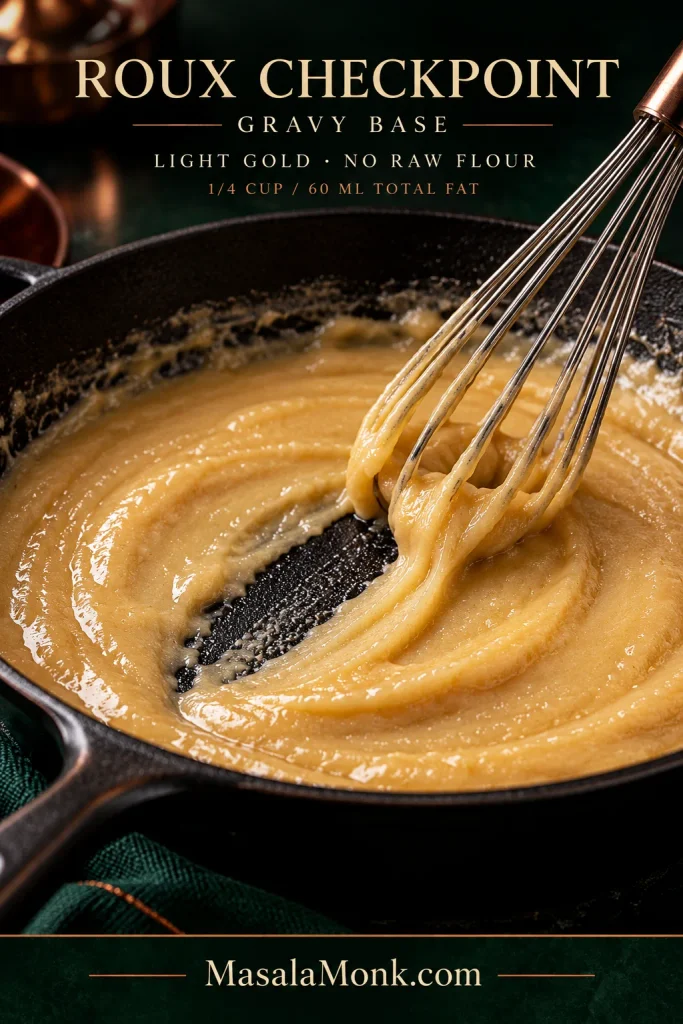
- Cook the roux. Whisk in the fresh ¼ cup / 30 g flour and cook over medium heat for about 2–3 minutes, until it is smooth, lightly golden, and no longer smells raw.
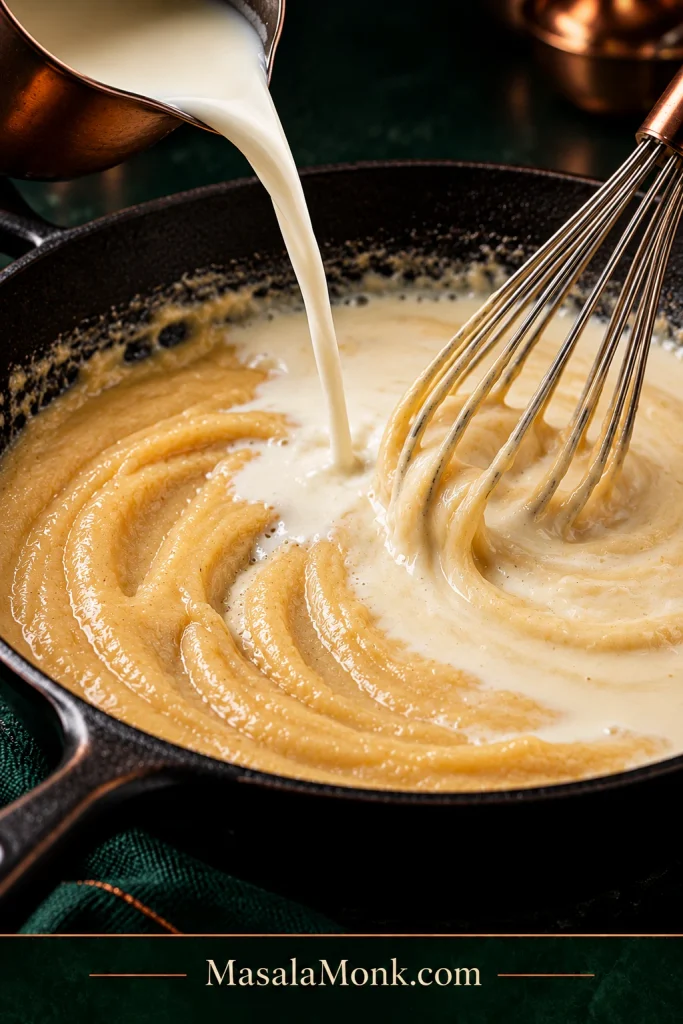
- Finish the pepper gravy. Add the milk gradually while whisking. Start with a small addition and whisk until the roux loosens smoothly before adding more. Continue in stages, then bring the gravy to a gentle simmer and cook until it falls from a spoon in a thick ribbon but slowly settles back into itself. Stir in the black pepper, then taste before adding more salt.
- Leave some crisp edges exposed. Spoon hot gravy over the middle of each steak rather than covering the whole crust. Pass the rest alongside.
Doneness & Food Safety
Food-safety note: Cube steak is mechanically tenderized. The USDA recommends cooking mechanically tenderized beef to at least 145°F / 63°C, followed by at least 3 minutes before carving or eating. With steaks this thin, inserting an instant-read thermometer from the side makes it easier to reach the center.
Recipe Notes
- No buttermilk? Use the same amount of whole milk and keep going. You lose a little tang, not the recipe.
- Keep fresh flour aside for the gravy. The dredging mixture is intentionally generous, and some will probably be left over. Discard anything that has been exposed to raw beef.
- Take the gravy off slightly loose. It thickens further while you bring dinner to the table.
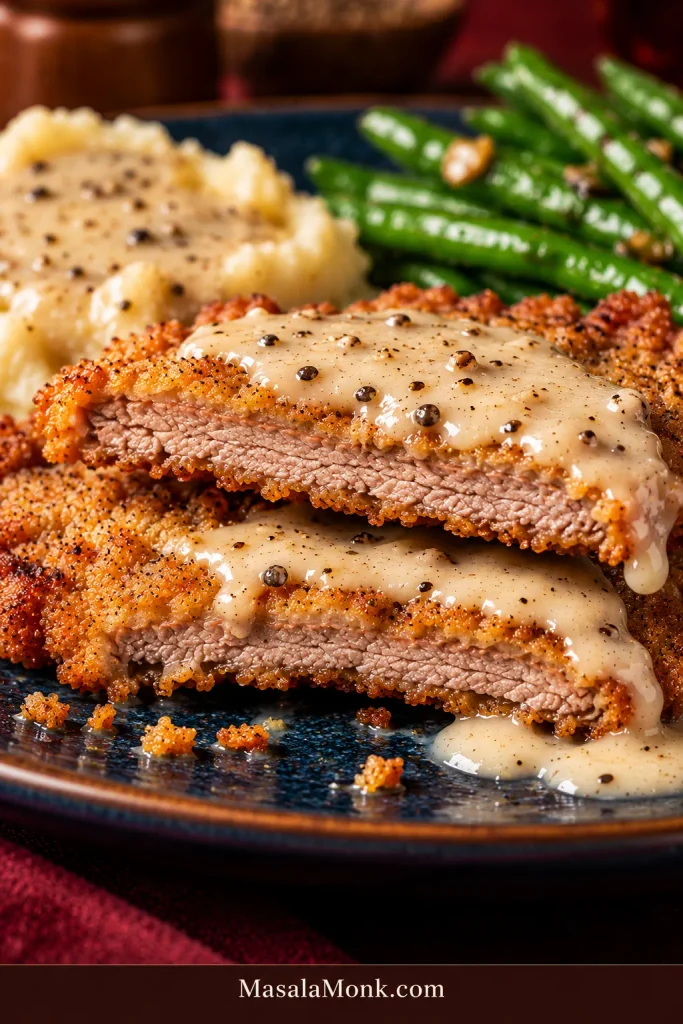
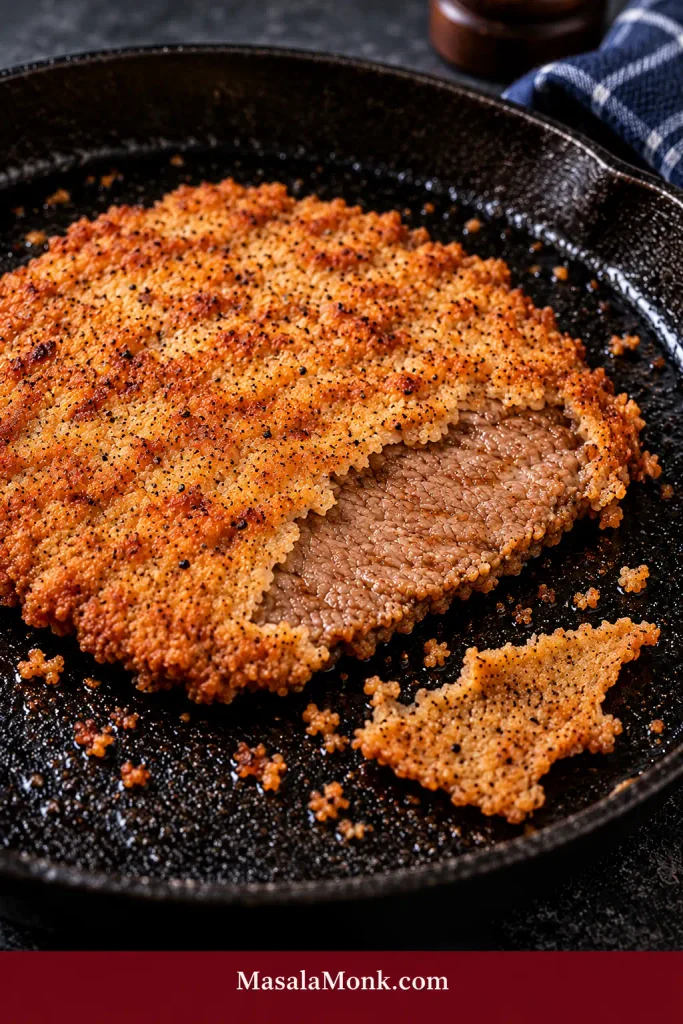
A cut edge gives the fastest visual check on whether the coating stayed attached and the beef still reads clearly beneath the crust.
Steak, Crust & Gravy Guide
Which Steak Is Best for Chicken Fried Steak?
Cube steak is the easiest traditional choice. It is inexpensive, usually already thin, and has been run through a tenderizer before it reaches the meat case.
Quality still varies. A beautiful crust cannot rescue a thick seam of gristle, and the word cube on the package does not guarantee that every part of the steak is equally tender or even.
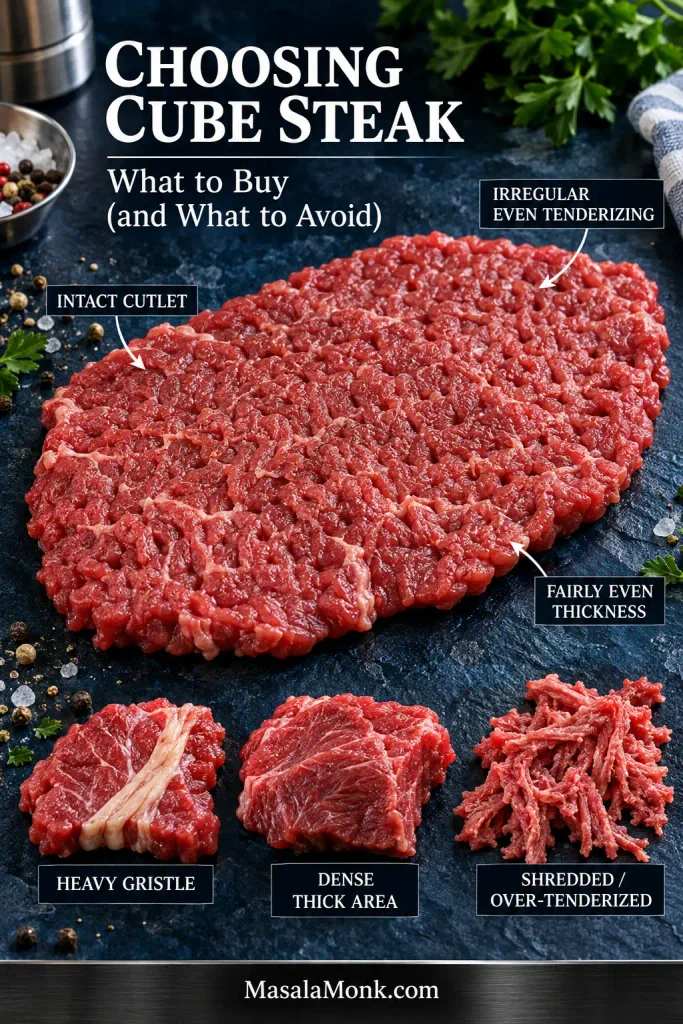
| Look for | Try to avoid |
|---|---|
| Even tenderizing across the steak | Areas that remain thick and dense |
| Fairly even thickness | A heavy gristle or connective-tissue seam |
| Meat that still holds together | Pieces already shredded from over-tenderizing |
| A broad cutlet shape | Tiny scraps or extreme thick-and-thin sections |
Does cube steak need more tenderizing?
Usually not. If the steak is already evenly thin, leave it alone. Gently pound only the thicker patches so the cutlet cooks at the same rate from edge to edge.
The aim is even thickness, not maximum force. Pound an already tenderized steak too aggressively and it can start falling apart before it ever reaches the breading.
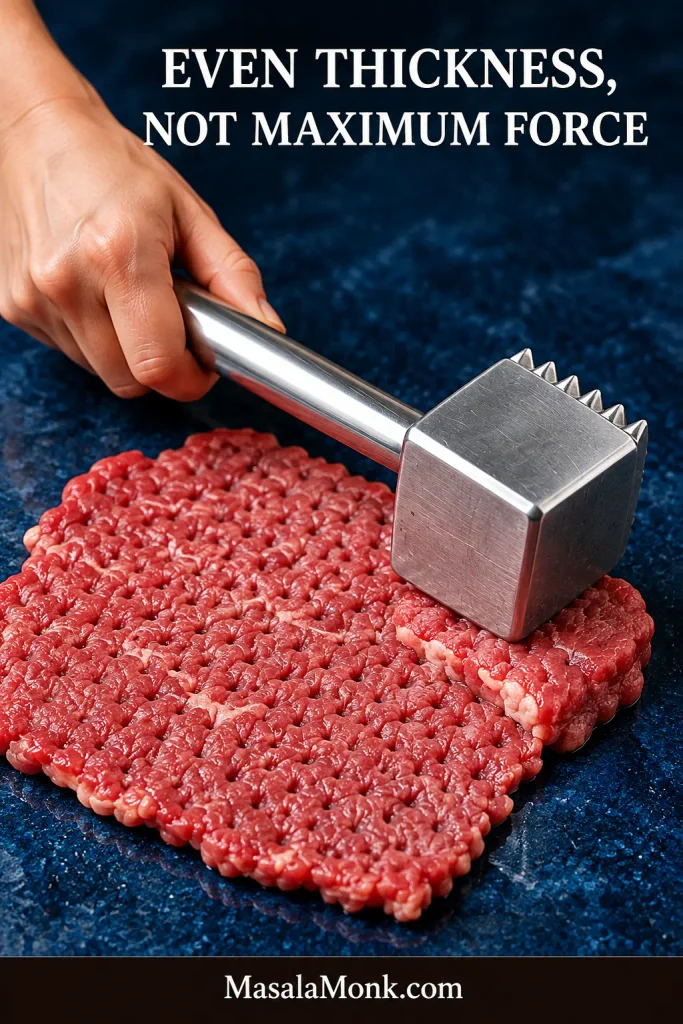
A long buttermilk marinade is unnecessary too. Good chicken fried steak starts with suitable beef at the right thickness; an overnight soak cannot turn a thick, gristly cut into a great one.
How Thin Should the Steak Be?
Aim for about ¼ inch / 6 mm thick. At that thickness, the crust and beef can finish at about the same time. Leave the steak too thick and the coating may already be beautifully brown while the center is still lagging behind. Another few minutes in hot oil rarely does lean cube steak any favors.
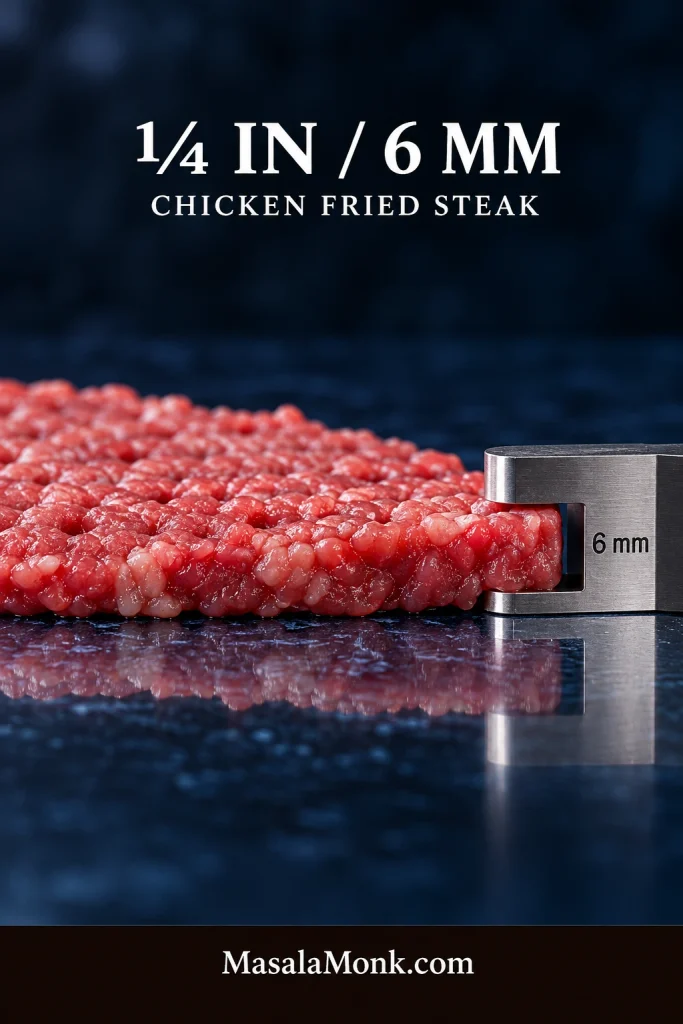
If the crust is brown before the beef is ready: check the thickness of the steak before changing the breading.
What if you cannot find cube steak?
Sirloin tip is an excellent alternative when you want to control the thickness and tenderizing yourself. Top round works too, though it needs thorough tenderizing. Pound either cut thin before breading.
A tight strip of membrane or connective tissue around an edge can make the steak curl in the skillet. Trim or snip it before pounding.
Chuck is better saved for a slower method. In beef tips and gravy, chuck gets the longer cooking it needs to become fork-tender.
Keeping the Breading Attached
Most breading failures begin before the steak reaches the oil. Surface moisture, a loose final dredge, or coating that has not had time to settle can all create separation once frying begins.
Start with dry beef
Dry beef gives the first layer of flour something solid to hold onto. Leave too much surface moisture underneath and steam can start pushing the crust away as soon as the steak hits the oil.
Pat the steaks dry before seasoning. Moisture that returns while they sit can simply be blotted away.
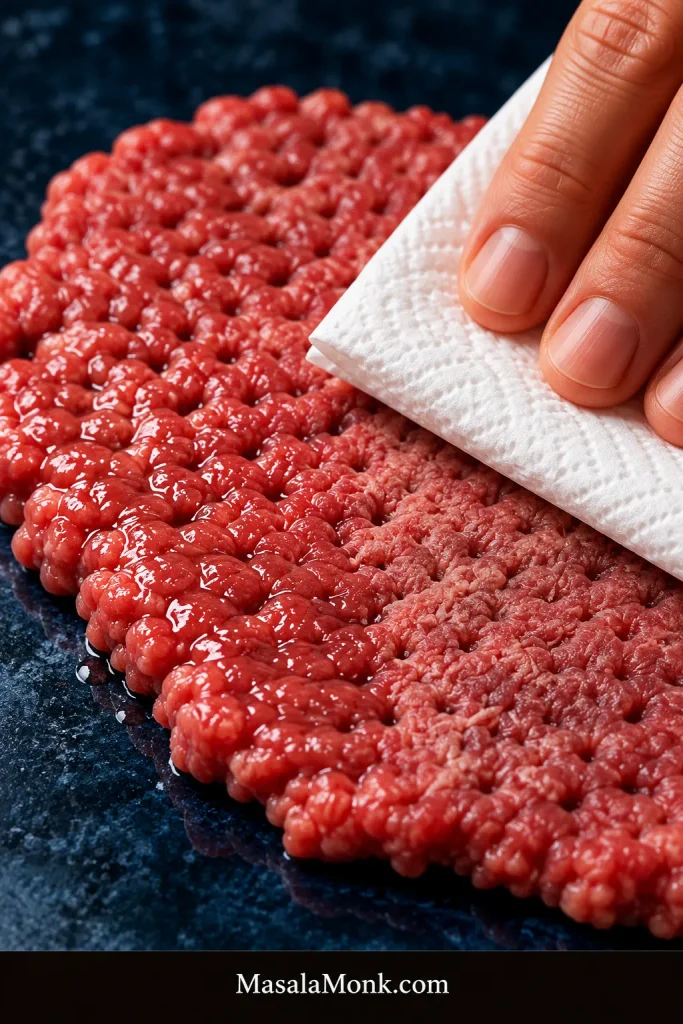
One good dredge is enough
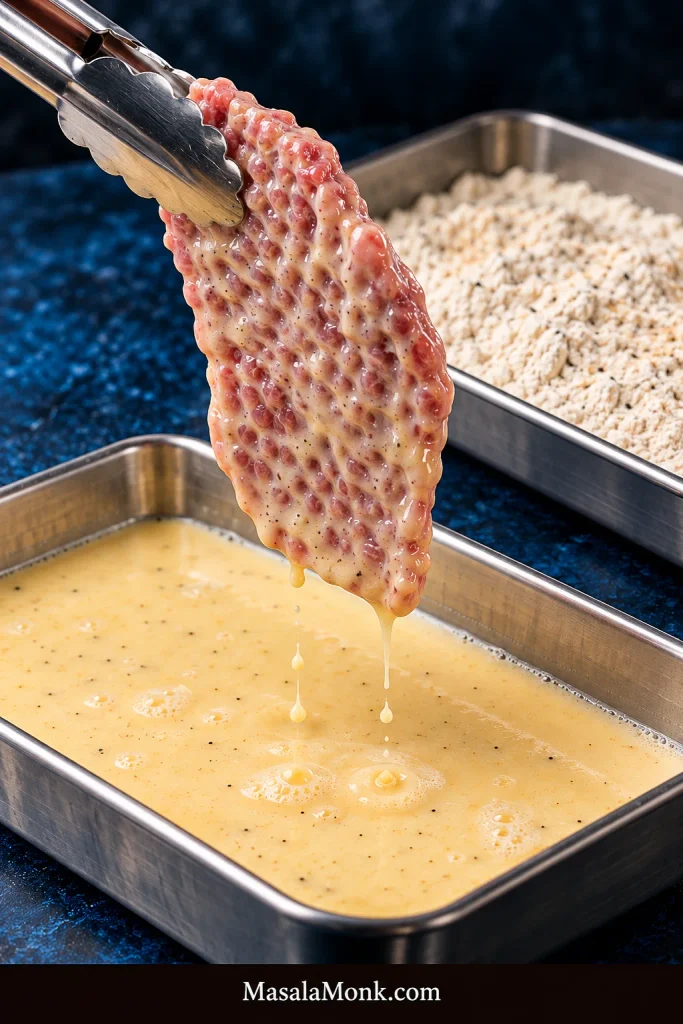
This recipe uses one dry → wet → dry cycle. Let the extra buttermilk run off before the final flour coat, then press the flour onto the surface and edges instead of piling on another full round of breading.
If there’s buttermilk left in the carton, Southern buttermilk biscuits are a natural place to use it—and they’re particularly good with extra pepper gravy.
Build texture, not thickness
After mixing the dry coating, rub 2 tablespoons of the wet mixture through it with your fingertips. You want damp flakes and little clumps. In hot oil, those rough bits fry into ridges and small peaks instead of one flat shell. Add the third tablespoon only if the flour still looks completely fine and powdery.
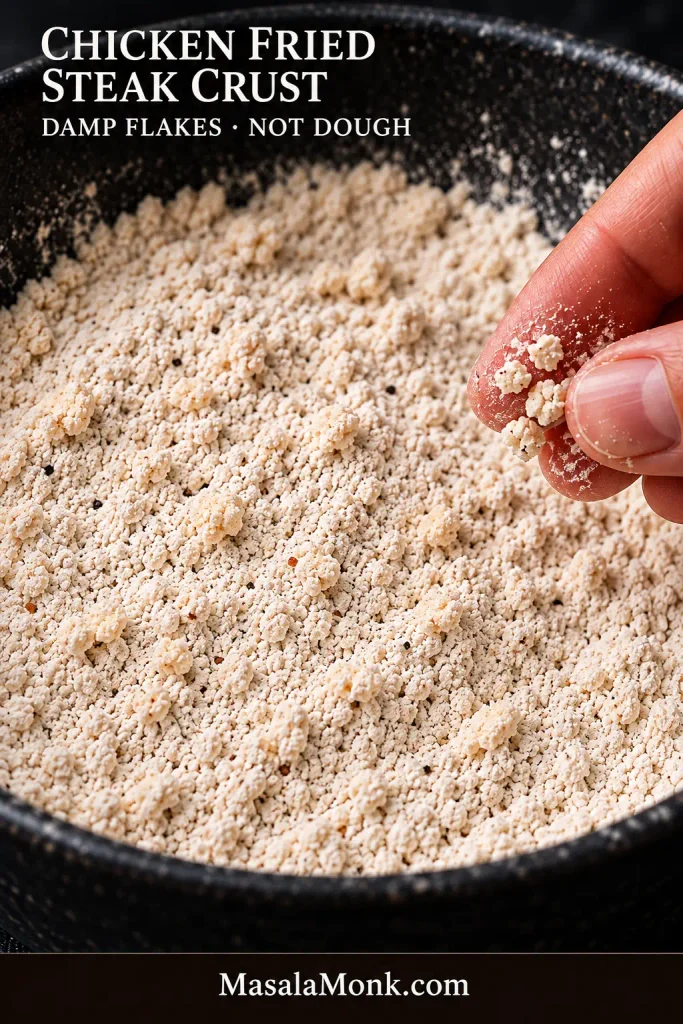
If those rough, crunchy flour flakes are your favorite part, the hot honey chicken tenders use a similar crust.
Give the coating time to settle
Once breaded, leave the steaks alone for 15 minutes. The flour absorbs some of the moisture underneath and gets a better hold on the meat before frying.
If breading has slipped off on you before, give the steaks 20–30 minutes in the refrigerator.
Oil Temperature Matters More Than Burner Setting
Bring about ½ inch / 12 mm of oil to 350°F / 177°C before the first steak goes in.
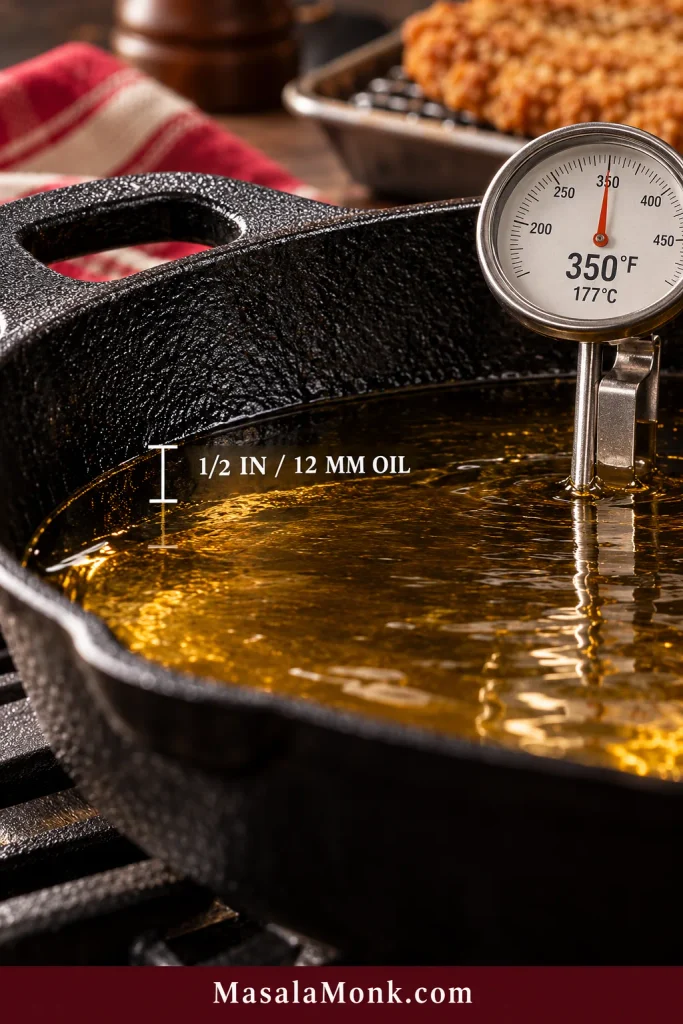
At this thickness, the steaks cook quickly in a shallow skillet fry, so there is no need for a full pot of oil or a separate deep-fry setup.
The temperature will drop when you add cold beef. That’s expected. Give the oil a moment before touching the burner, then make small adjustments if it is recovering too slowly. Cranking the heat immediately can leave you with a pan that overshoots just as the crust starts browning. Batch size matters here too: leave visible channels of oil around each steak so the skillet is not trying to recover from too much cold beef at once.
What good frying looks and sounds like
- Look for a steady, active sizzle around the coating.
- Wait for the crust to firm before you try to turn the steak.
- A ready steak releases without the breading tearing away.
- Meanwhile, the oil should stay hot without smoking.
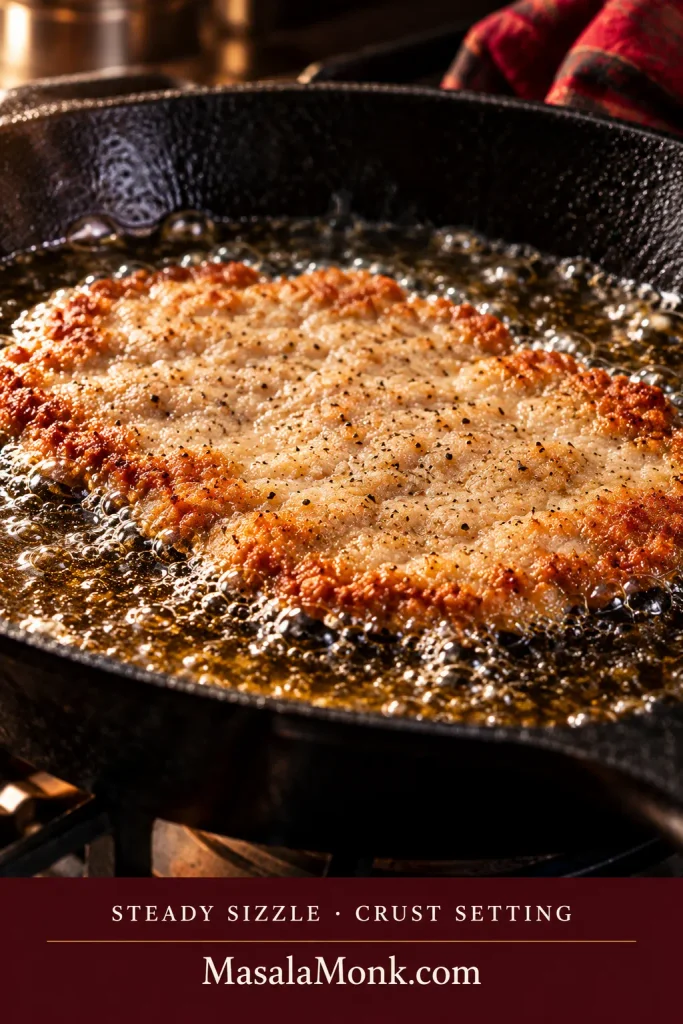
Once the steak is in the skillet, give it a chance to fry. Repeated lifting and poking only make a fragile new crust easier to damage. Let it set, then flip once.
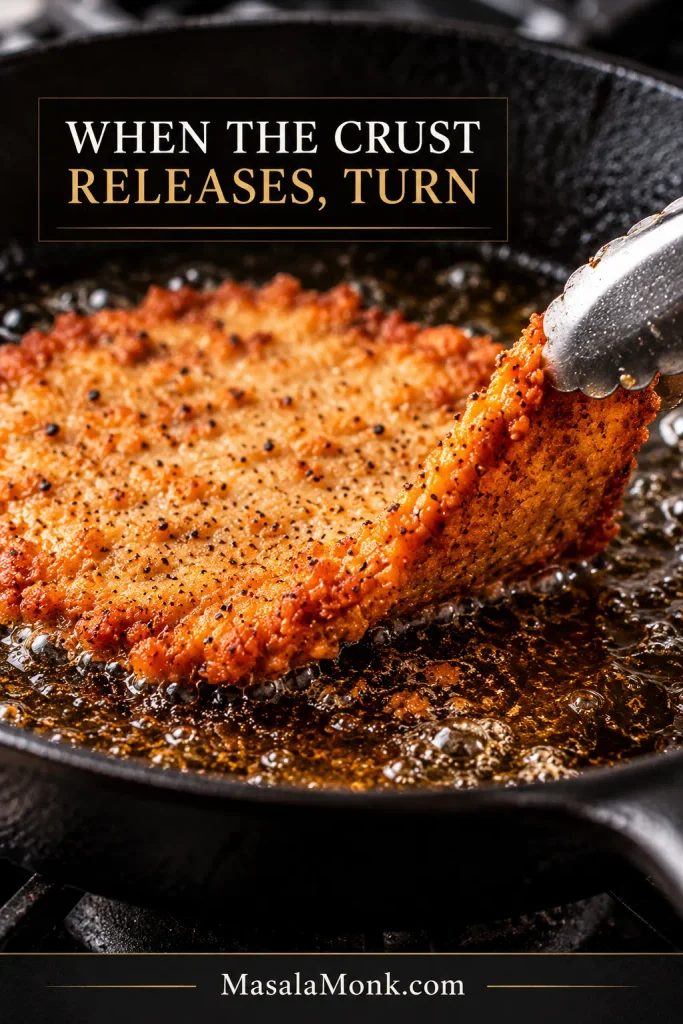
Let the First Steak Calibrate the Skillet
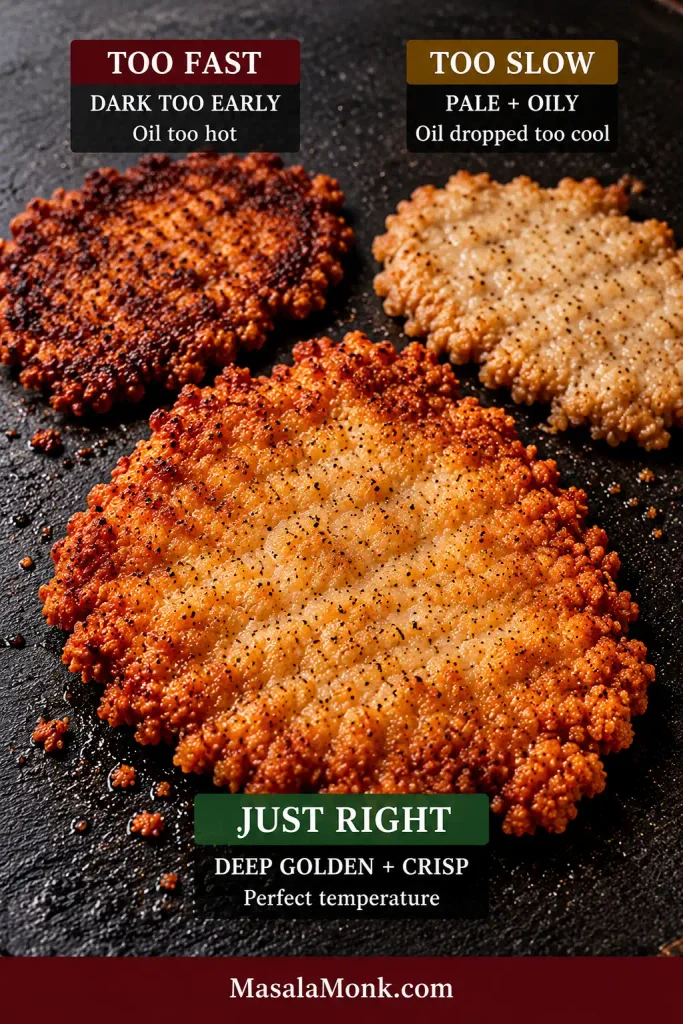
The first steak is your best read on the pan. If it comes out a little pale or browns too quickly, use that information before steak two. Its color and texture tell you whether the oil is too hot, needs more recovery time, or can stay exactly where it is.
| What you see | What it means | Before the next batch |
|---|---|---|
| Crust darkens very quickly | The oil is running too hot | Lower the heat slightly and let the oil settle before adding more beef |
| Coating stays pale and starts looking oily | The oil temperature fell too far | Give the oil time to recover before adding the next steak |
| Crust turns deep golden with a steady active sizzle | The skillet temperature and batch size are working well | Keep the setup where it is |
Keeping the Crust Crisp
Move each fried steak straight to a wire rack and keep it uncovered in a 200°F / 95°C oven while the next batch cooks. Air underneath keeps the bottom from steaming against a plate, while leaving the steaks uncovered lets moisture escape from above.
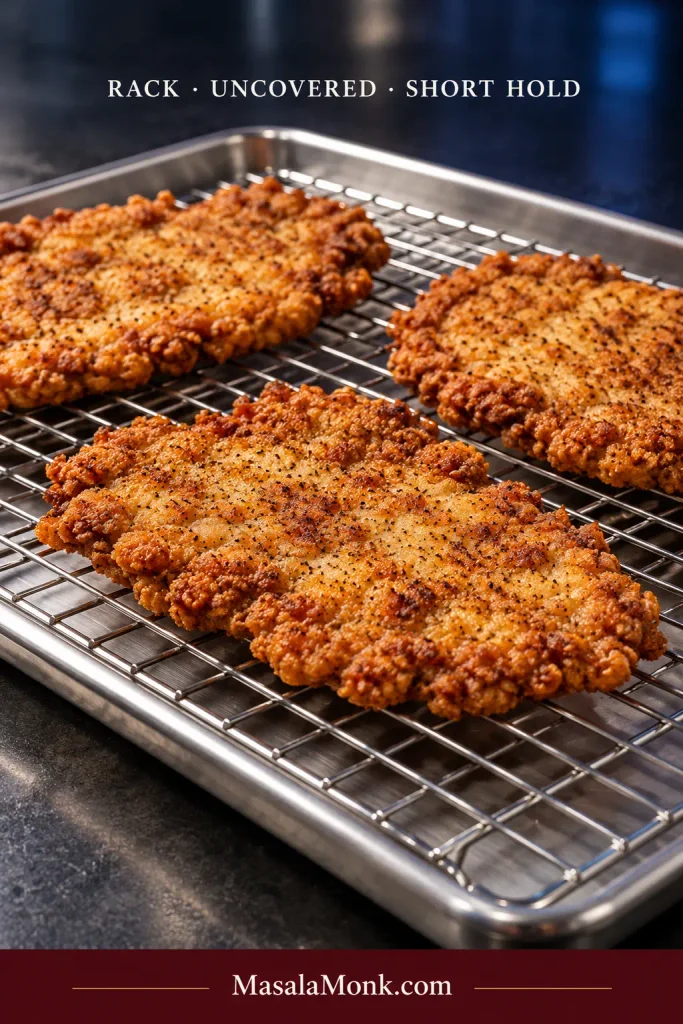
Keep the hold short. Foil traps moisture, and too much time in the oven dries the beef. Because the gravy ingredients are already measured, this part moves quickly—the sooner the steaks reach the table, the better the crust will be.
Making the Pepper Gravy
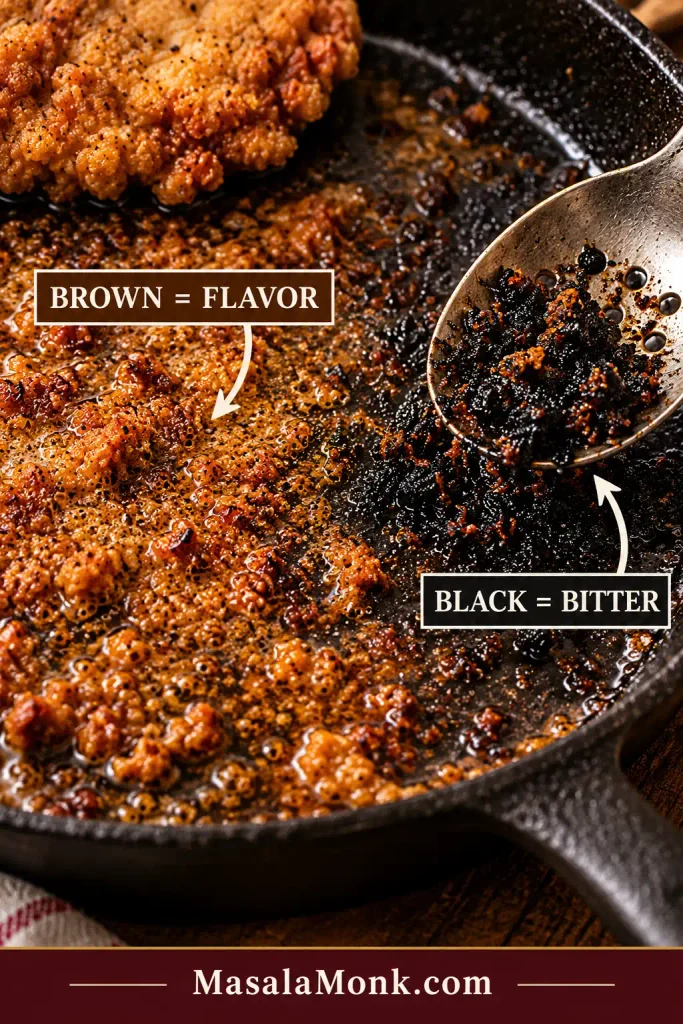
With the last steak on the rack, the skillet is already holding the beginning of the classic white country gravy: clean frying fat and the good browned flavor left behind.
Brown bits are flavor. Black crumbs are not.
Browned bits left from frying deepen the gravy. Loose breading that has gone nearly black tastes bitter, so those pieces belong out of the pan.
Build the Pepper Gravy
Use ¼ cup / 60 ml total fat in the skillet, combining clean frying fat with butter if necessary. Whisk in the fresh flour and cook for about 2–3 minutes, until the roux is lightly golden and no longer smells raw.
Add the milk gradually while whisking. Start with a small addition and whisk until the thick roux loosens smoothly before pouring in more. Once that first addition is completely incorporated, continue adding the milk in stages so the gravy base stays smooth rather than forming floury lumps.
You are looking for gravy that clings to a spoon in a thick ribbon, then slowly settles back into the pan.
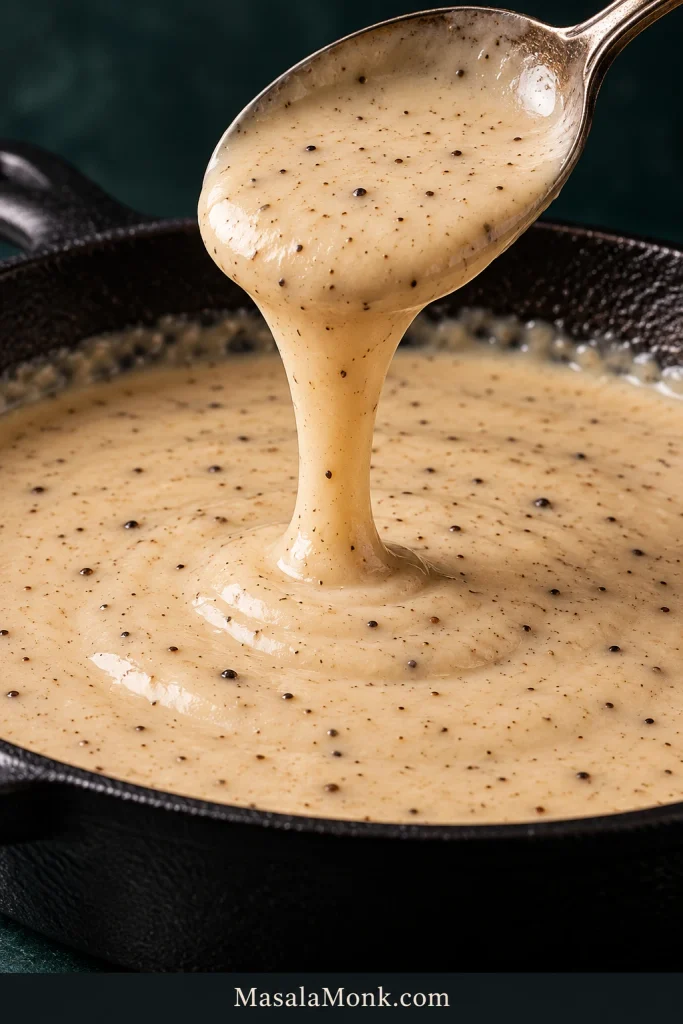
It should taste peppery first, creamy underneath, with a little browned frying flavor in the background—not floury or flat. Taste before reaching for more salt.
That flowing consistency is also what you want over creamy mashed potatoes—thick enough to catch in the soft ridges, loose enough to run into them.
Troubleshooting
Change one thing at a time. Match what you are seeing to the most likely cause, make the smallest useful correction, and see what the next steak tells you.
Steak & Crust Problems
| What happened? | Why it happened & what to do |
|---|---|
| Breading slid off | Why: Wet meat, coating that had not set, or too much handling. Fix: Dry the beef well, press on the final dredge, give it the full rest, and flip once. See Keeping the Breading Attached. |
| Crust puffed away from the beef | Why: Excess surface moisture turned to steam beneath the coating. Fix: Keep the meat thin and dry, and let the breading set before frying. |
| Steak was tough | Why: Tough or heavily gristled cube steak, meat that was too thick, or too much cooking. Fix: Choose a more evenly tenderized piece with less gristle, keep it thin, and avoid overcooking. See Which Steak Is Best? |
| Crust softened while waiting | Why: Trapped steam or too long a hold. Fix: Use an uncovered rack and make the gravy promptly. See Keeping the Crust Crisp. |
| Later batches tasted bitter | Why: Loose breading burned in the oil. Fix: Remove very dark crumbs between batches. See Brown Bits vs. Black Crumbs. |
Gravy Problems
For the full sauce method and visual checkpoints, see Making the Pepper Gravy.
| What happened? | Why it happened & what to do |
|---|---|
| Gravy tastes floury | Why: The roux did not cook long enough. Fix: Cook the flour in the fat until lightly golden and no longer raw-smelling. |
| Gravy is lumpy | Why: The milk went in too quickly or the roux was not smooth. Fix: Add milk gradually while whisking. If lumps remain, take the pan off the heat and whisk hard; strain the gravy if necessary. |
| Gravy is too thin | Why: It has not simmered long enough. Fix: Give it another minute or two before reaching for more thickener. |
| Gravy is too thick | Why: It reduced too far or thickened while standing. Fix: Whisk in milk a splash at a time until it flows again. |
What to Serve With Chicken Fried Steak
The classic plate works for a reason: mashed potatoes catch the pepper gravy, green beans or collards bring something fresh, biscuits handle whatever gravy is left, and something sharp such as coleslaw or pickles cuts through the richness.
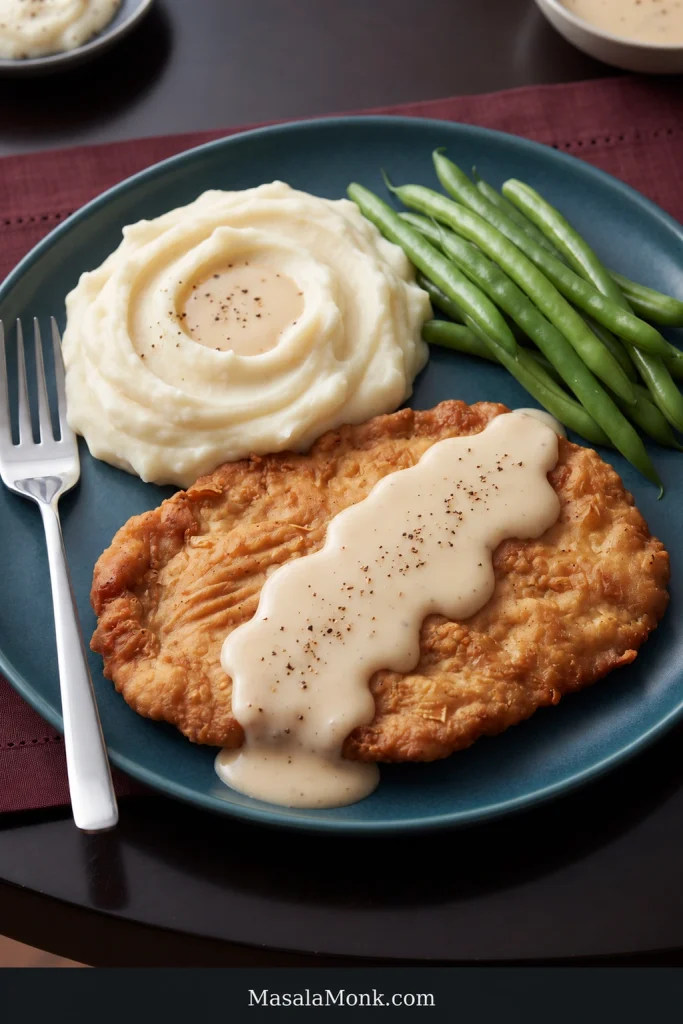
For something fresh alongside the steak, green beans almondine add tender-crisp beans, toasted almonds, and lemon, while creamy coleslaw brings colder crunch and tang. Plain greens, a lightly dressed salad, or something pickled can do the same job.
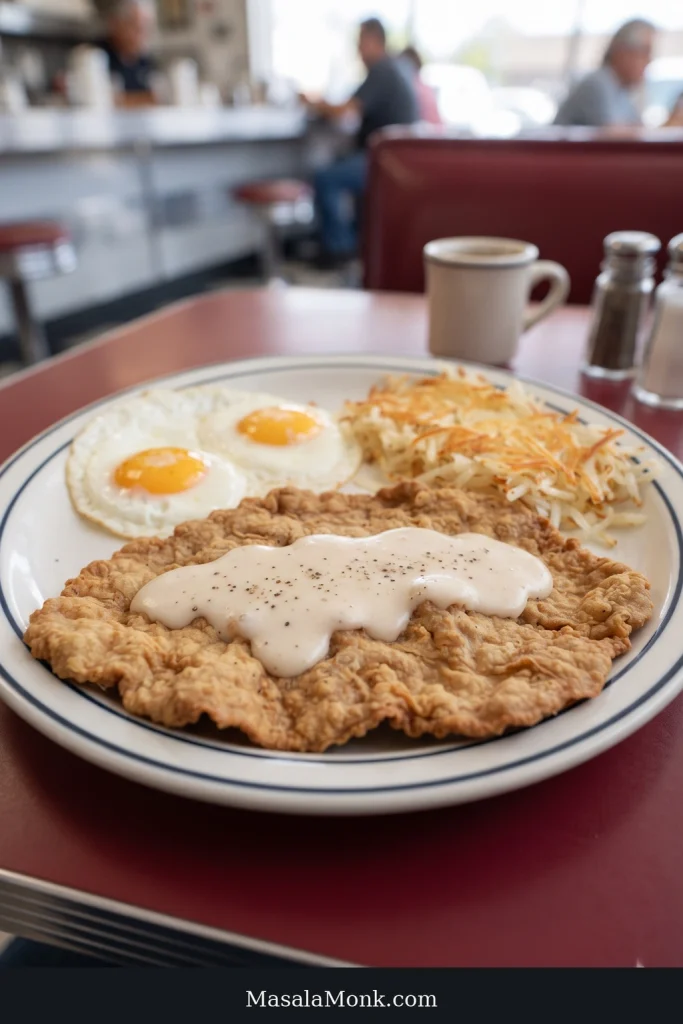
Chicken fried steak works at breakfast too. Add eggs and crispy hash browns and you have the diner-style plate without needing another skillet of hot oil.
Chicken Fried Steak vs Country Fried Steak
Chicken fried steak usually has a craggier egg-and-flour coating with peppery white gravy. Country fried steak is often more lightly floured and served with brown or onion gravy.
The names still overlap regionally, so treat that as a useful distinction rather than a rigid rule.
Storage and Reheating
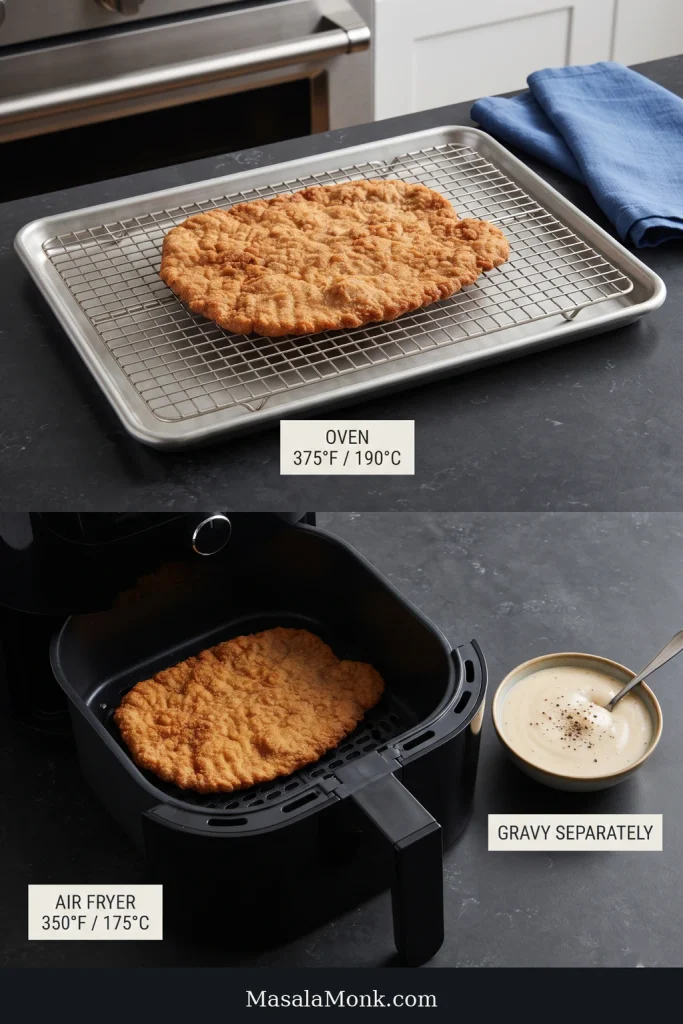
Store the steak and gravy separately. Reheat the steak with dry heat, then warm the gravy on its own.
Keep both in airtight containers in the refrigerator for up to 3 days. Once gravy soaks into refrigerated breading, getting the original crust back becomes much harder.
Oven
Heat the oven to 375°F / 190°C. Put the steak on a wire rack over a baking sheet and begin checking around 8 minutes. Thin steaks usually need about 8–12 minutes. For food safety, USDA advises reheating leftovers to 165°F / 74°C.
Air Fryer
Air fry at 350°F / 175°C for about 4–6 minutes, checking early so the lean beef does not dry out. Aim for the same 165°F / 74°C target.
Gravy
Reheat the gravy in a saucepan, stirring, until it comes to a boil. If it has tightened in the refrigerator, whisk in a splash of milk until it becomes smooth and pourable again. Spoon the hot gravy over the reheated steak only when you are ready to eat.
Fresh from the skillet, though, this is a dish to eat while the gravy is hot and those uncovered edges still crack under the fork.








