
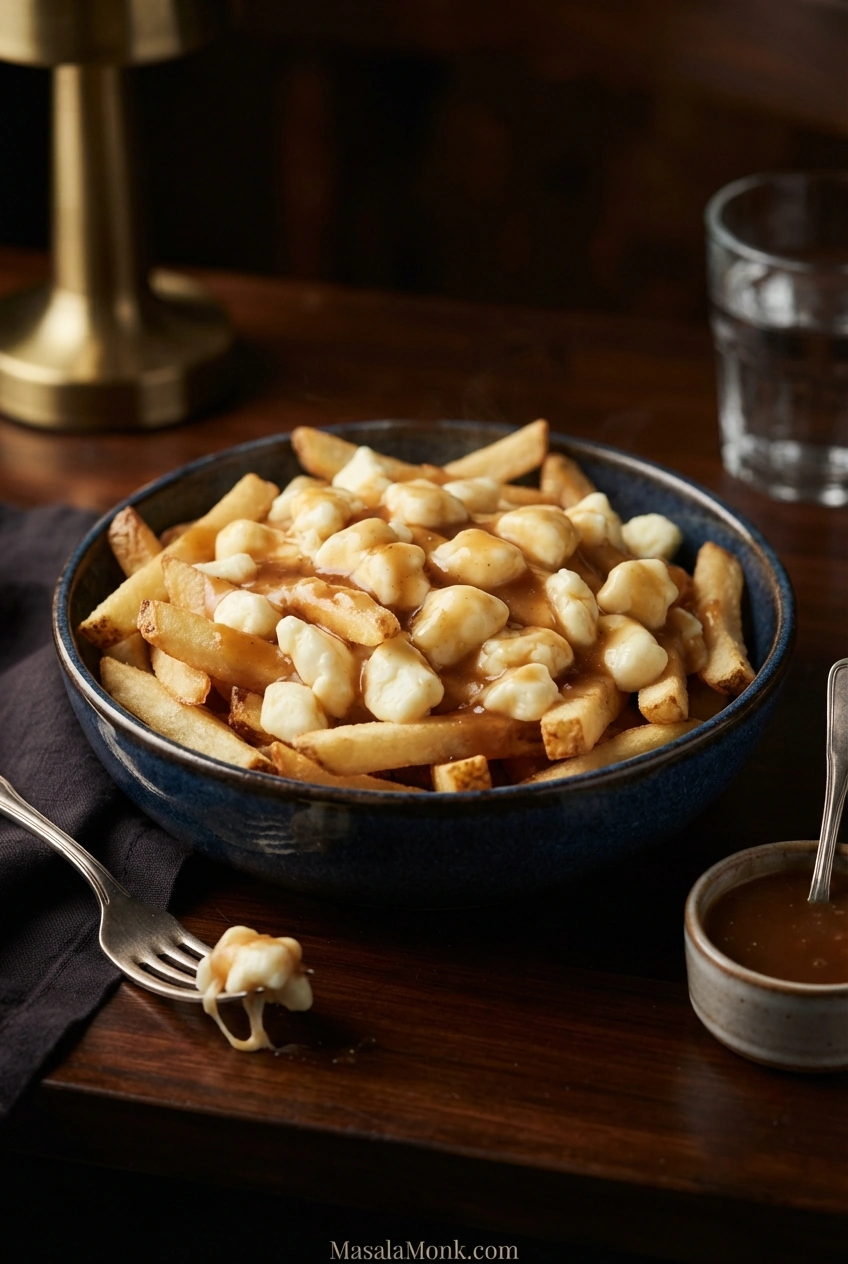
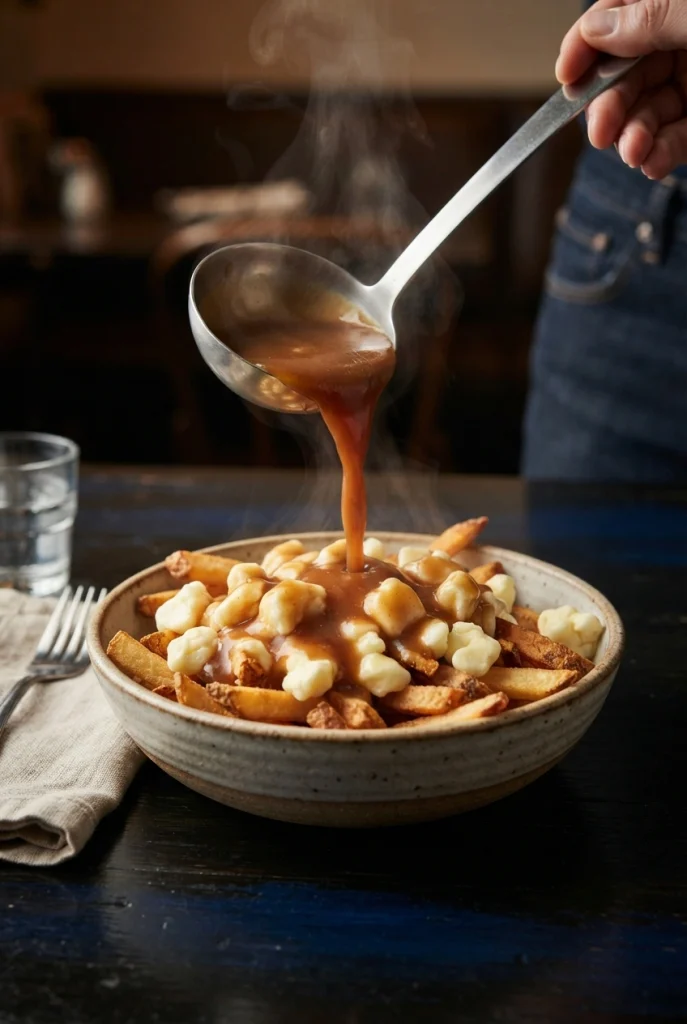
Hot gravy slips between the fries, warming the fresh cheese curds while a few golden edges stay crisp. Poutine is a Québécois dish from Canada made with French fries, fresh cheese curds and brown gravy. This poutine recipe covers both double-fried potatoes and quicker oven or air-fryer alternatives.
Here, thick-cut russet potatoes get two turns in the oil: first to cook through, then to turn golden outside. The beef-and-chicken gravy cooks while they rest, so the final minutes are spent frying and assembling rather than making sauce.
Making the fries and gravy yourself? Plan on roughly 2 hours, or closer to 3 with a small pot or longer soak. For a quicker dinner, frozen thick-cut fries and prepared poutine sauce take roughly 30–45 minutes in a full-size oven. A small air fryer may need several rounds.
Homemade Poutine Recipe
Servings: 4 meal-size portions. For two, halve the potatoes, curds and gravy; the safe oil level still depends on your pot.
Time breakdown: Prep 15–20 minutes · Soak 30–60 minutes · First fry 4–6 minutes per batch · Make gravy in about 20 minutes after the first fry · Second fry 3–6 minutes per batch, plus oil-heating and recovery time.
Ingredients
Fries and cheese
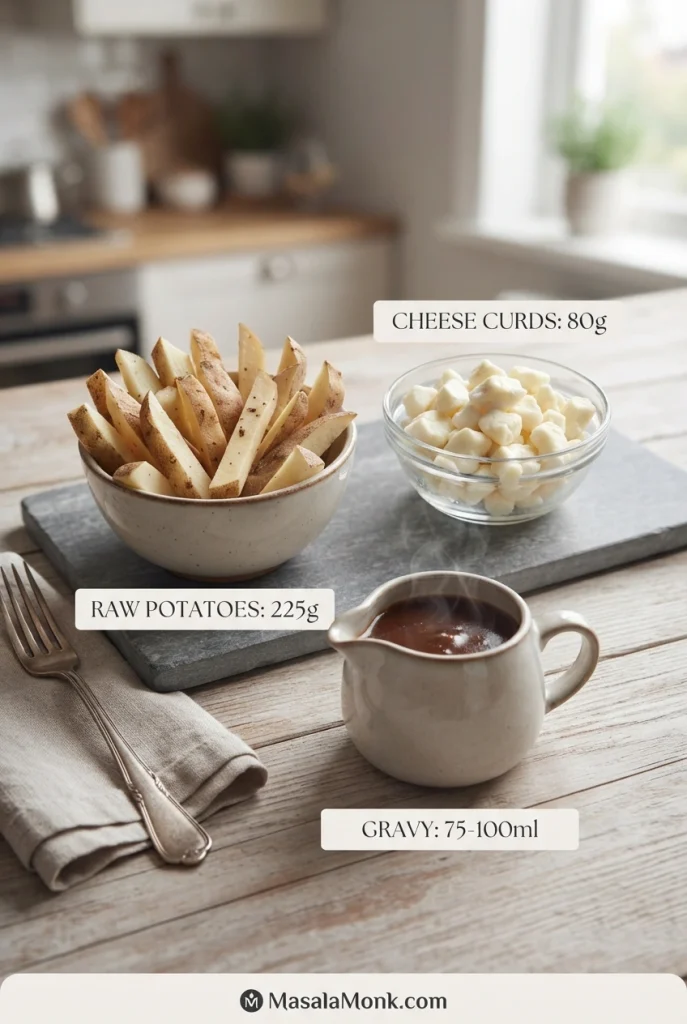
- 900 g / about 2 lb russet potatoes, scrubbed; peeled if preferred
- 320 g / about 11¼ oz fresh cheddar cheese curds, white or yellow, in bite-sized pieces; 80 g per serving (use 400–500 g total for extra-cheesy poutine)
- Neutral oil for deep-frying (canola, sunflower or refined peanut). Having about 2 litres on hand is a shopping estimate, not the amount to pour into the pot; follow the safe fill limit below.
- Fine salt, to season the finished fries lightly
Buying cheese curds: Ask for fresh curds (fromage en grains) at a dairy or cheese counter, and follow the package storage instructions. Without curds, chunks of low-moisture block mozzarella melt more readily, while paneer stays firm. If you need an alternative, compare the five cheeses before buying.
Poutine gravy
- 420 ml / 1¾ US cups low-sodium beef stock, ready to use
- 180 ml / ¾ US cup low-sodium chicken stock, ready to use
- 35 g / about 2½ tbsp unsalted butter
- 30 g / about ¼ US cup all-purpose flour
- 1 small garlic clove, finely minced
- 1 tsp / 5 ml Worcestershire sauce
- ½–1 tsp / 2.5–5 ml apple cider vinegar, to taste
- ¼ tsp ground black pepper; fine salt only if needed after tasting
- Only if needed: 1 tsp cornstarch stirred into 1 tbsp / 15 ml cold water
About the stock: The beef and chicken stocks together make 600 ml / about 2½ US cups of ready-to-use liquid. Prepare cubes or concentrated bouillon according to the label before measuring. Only have one stock? You can use 600 ml beef or chicken stock instead: beef gives a fuller flavor; chicken makes a lighter gravy. Taste for salt at the end.
The three essentials: fries, fresh curds and brown gravy
Before you begin, keep the three components separate: thick-cut fries, small irregular curds, and gravy that is hot but still pourable. They come together only at the table.
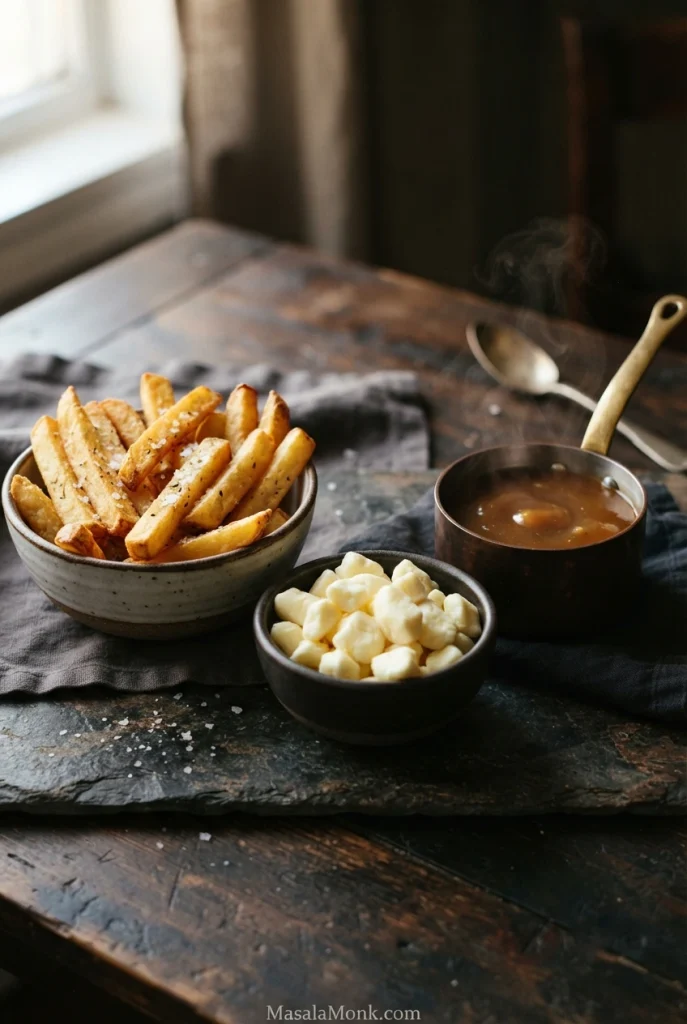
Equipment: A deep, stable pot (about 5–6 US qt / 4.7–5.7 L) or a temperature-controlled deep fryer, a thermometer, long-handled slotted spoon, saucepan, whisk, wire rack set over a tray, clean towels and four shallow bowls.
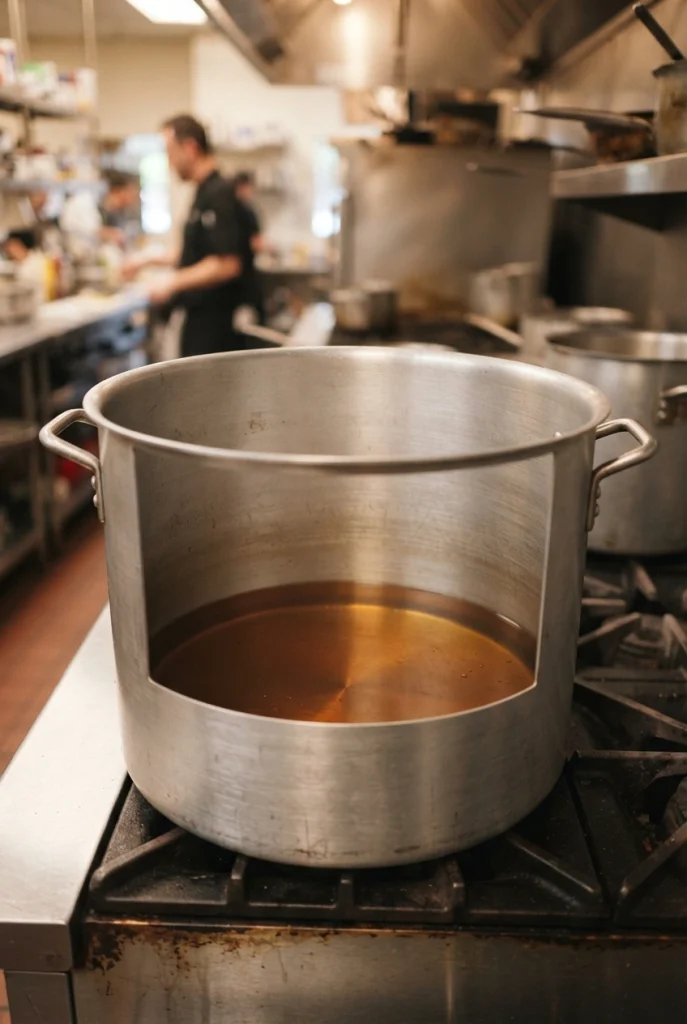
Frying safely: Fill the pot no more than one-third full of oil, leaving room for bubbling when potatoes go in. A 5–6 US qt pot cannot safely take the full 2-litre shopping estimate under that limit. Use a deeper pot or controlled fryer rather than overfill one to reach a 5 cm / 2-inch oil depth. Dry the potatoes completely and stay at the stove. Keep a fitting metal lid nearby. For a small oil fire, cover the pot and turn off the heat only if safe; otherwise leave the area and call emergency services. Never use water on an oil fire.
Method
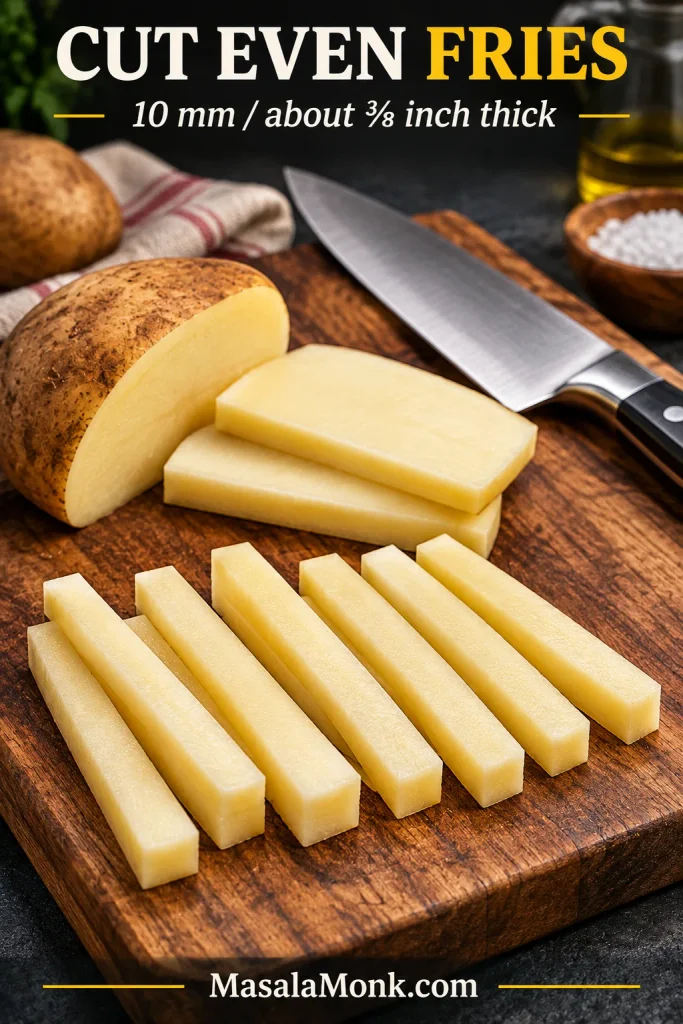
Cut even potato sticks for homemade poutine
- Cut and soak. Slice the potatoes into even 10 mm / about ⅜-inch sticks. Rinse off loose surface starch and cover with cold water for 30–60 minutes. For advance prep, cover and refrigerate in water overnight.
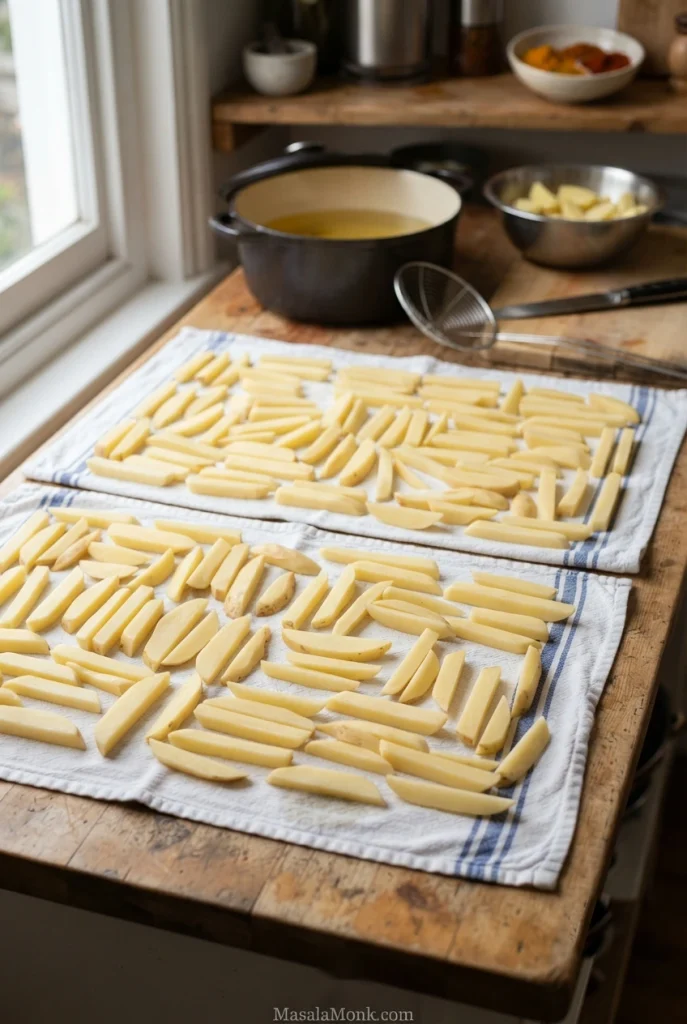
Dry the cut potatoes before frying
- Dry the potatoes and heat the oil. Drain, rinse once more and pat the potatoes completely dry to prevent splattering. Fill the pot no more than one-third full with oil; aim for roughly 5 cm / 2 inches only if the pot can safely accommodate it. Heat to 160–165°C / 320–330°F and stay nearby.
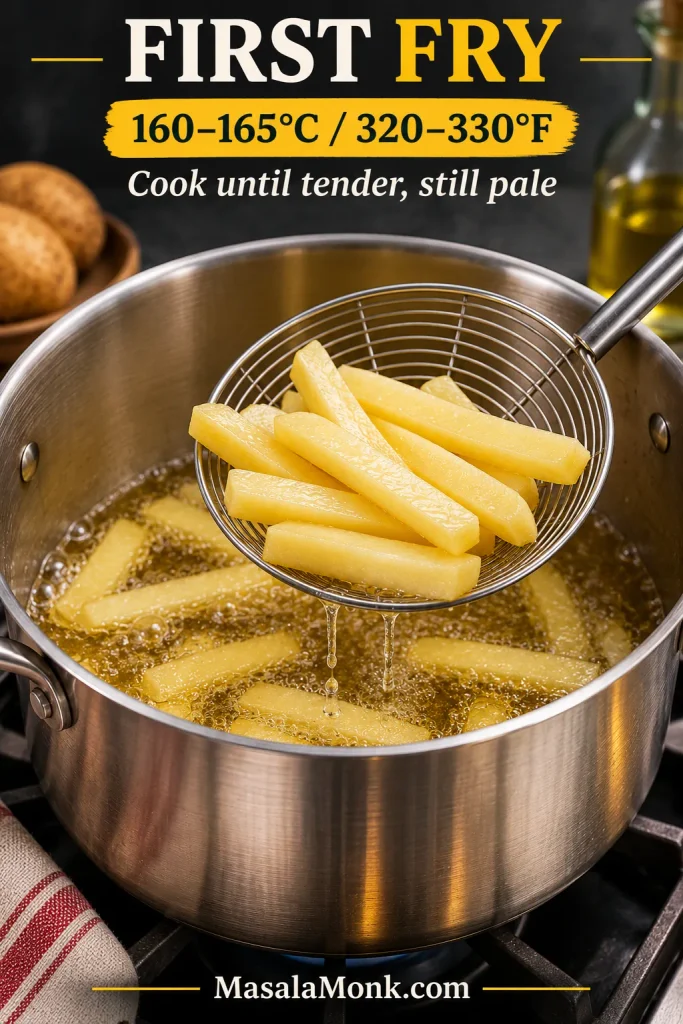
First-fry checkpoint: potatoes stay pale
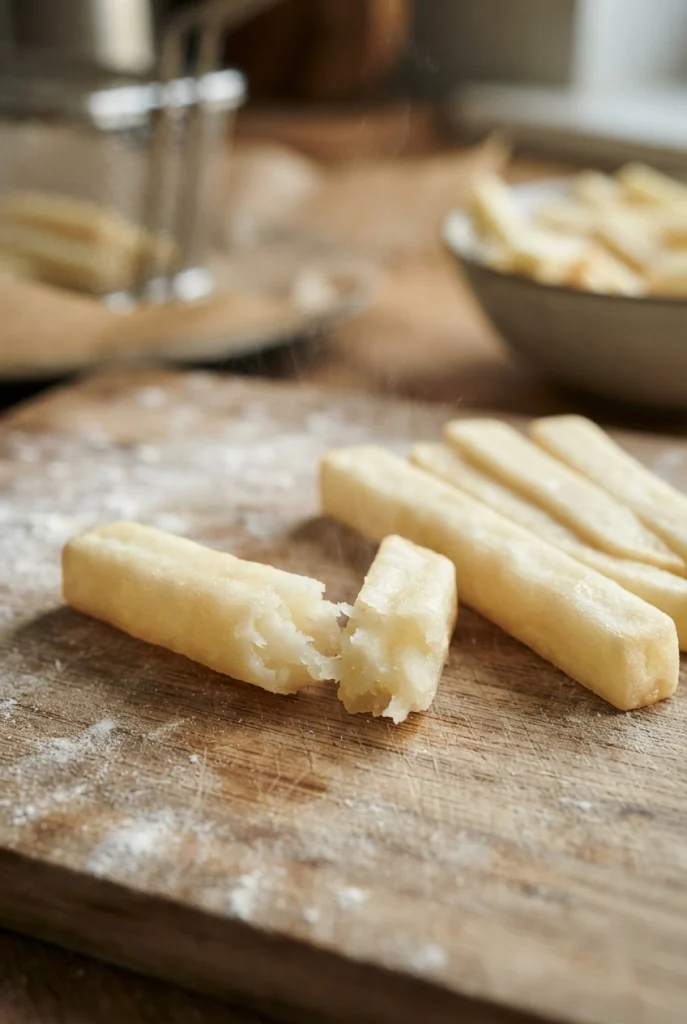
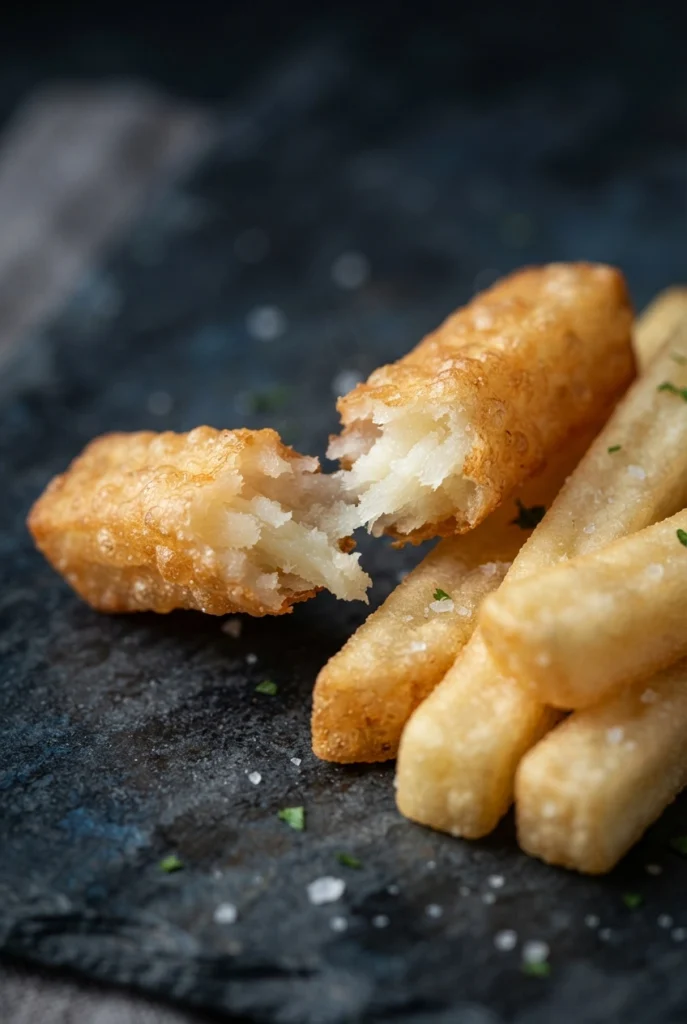
- First-fry until tender. Fry in small batches—often 3–4 for 900 g, more for a small pot—for roughly 4–6 minutes per batch. Let the oil recover between batches. Cut a fry open: its center should be tender and the outside still pale. Go by that cue rather than the clock. Give firm-centered fries more time.
Look inside a pale first-fried potato. A cut-open piece tells you more about tenderness than the amount of bubbling in the oil.
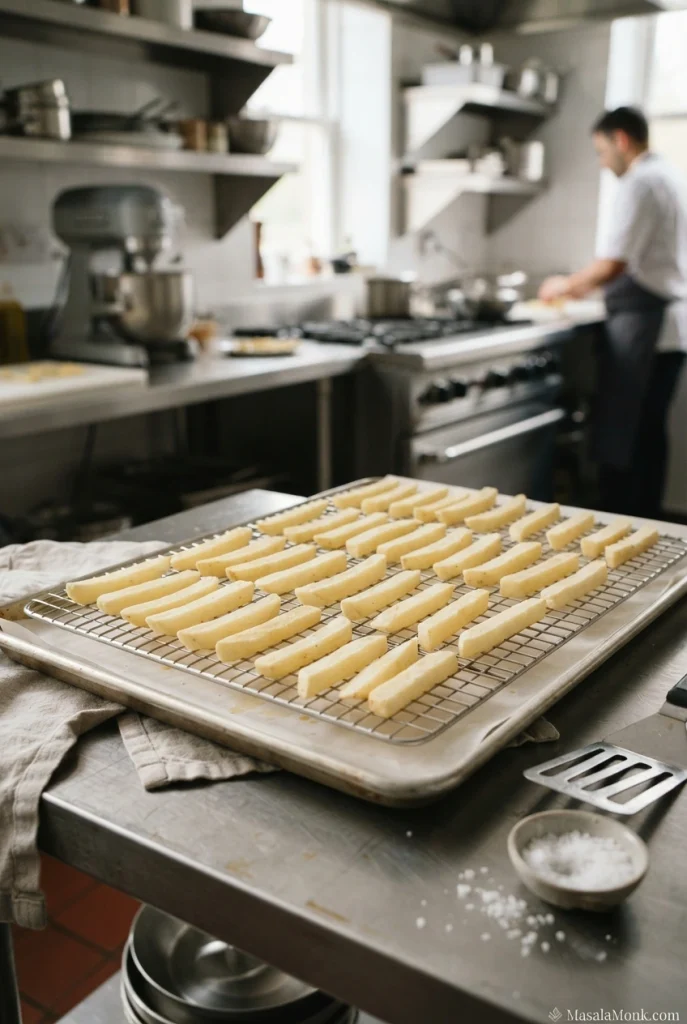
Rest the first-fried fries on a wire rack
- Let the potatoes rest. Transfer each batch gently to a wire rack over a tray. Leave the fries uncovered so steam escapes. Once the last batch is out, set aside at least 15–20 minutes while you make the gravy; earlier batches will have rested longer. Turn down or switch off the oil heat while attending to the saucepan.
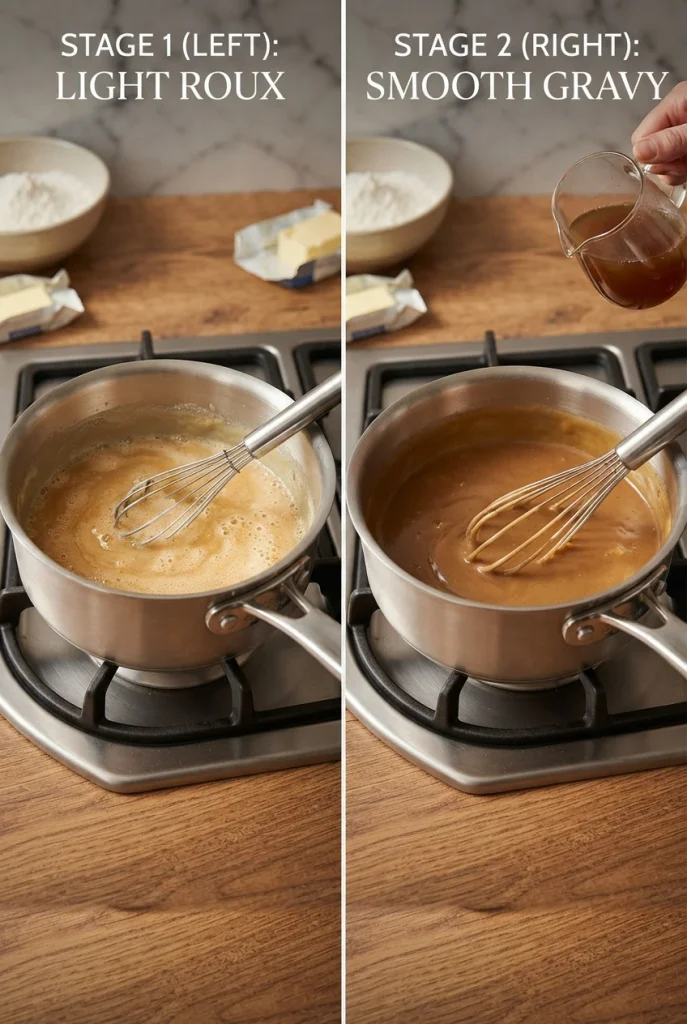
Make a light roux and smooth brown gravy
- Make the gravy roux. Melt 35 g butter in a saucepan over medium heat. Whisk in 30 g flour and stir for 2–3 minutes, until smooth and lightly tan. Add the minced garlic for 20–30 seconds, stirring so it does not scorch.
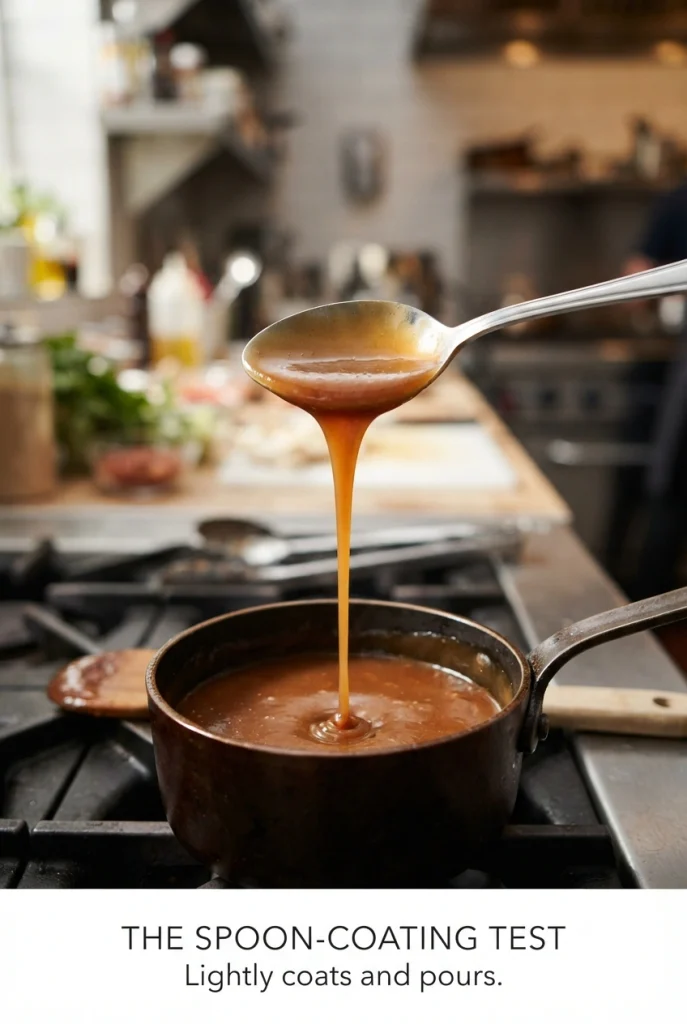
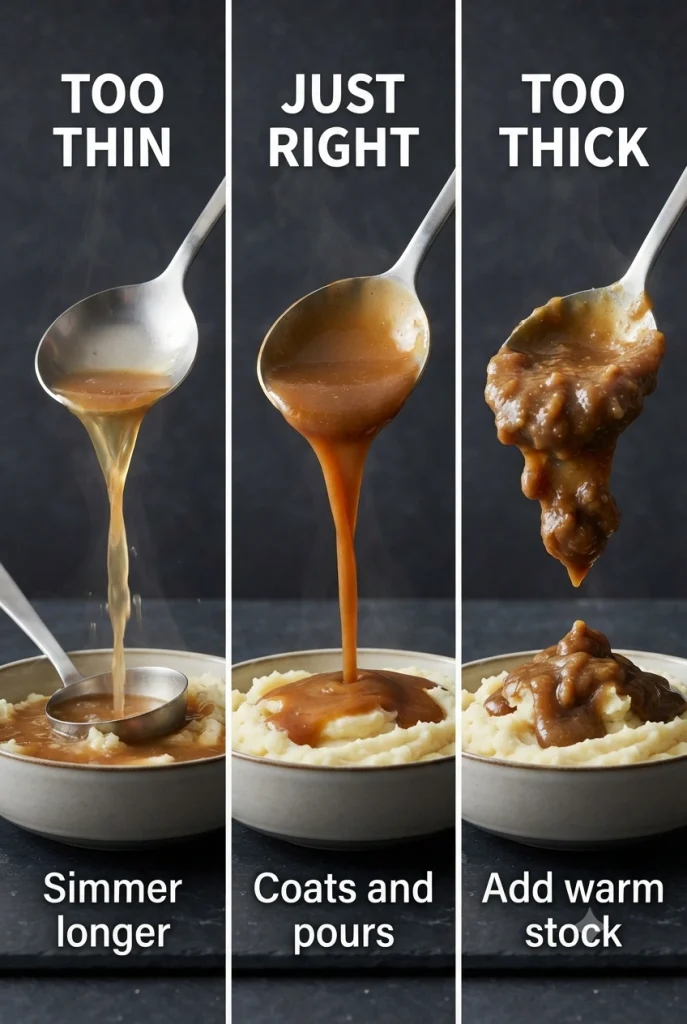
- Simmer and season the gravy. Whisk a splash of the 600 ml measured stock into the roux until smooth, then gradually whisk in the rest. Add Worcestershire and pepper. Simmer for 8–12 minutes, until it lightly coats a spoon but still pours. Start with ½ tsp vinegar; add up to another ½ tsp if it needs brightness, then taste for salt. Still thin? Simmer longer. If necessary, re-stir the optional cornstarch slurry, whisk in a little and bring back to a simmer before deciding whether to add more. Not sure what that looks like? See the spoon-coating test.
- Set up for the final fry. Have the bowls ready and portion the curds. Bring the oil to 175°C / 350°F. Keep the gravy covered and at or above 60°C / 140°F while the fries finish. Loosen it with warm unsalted stock or water if needed.
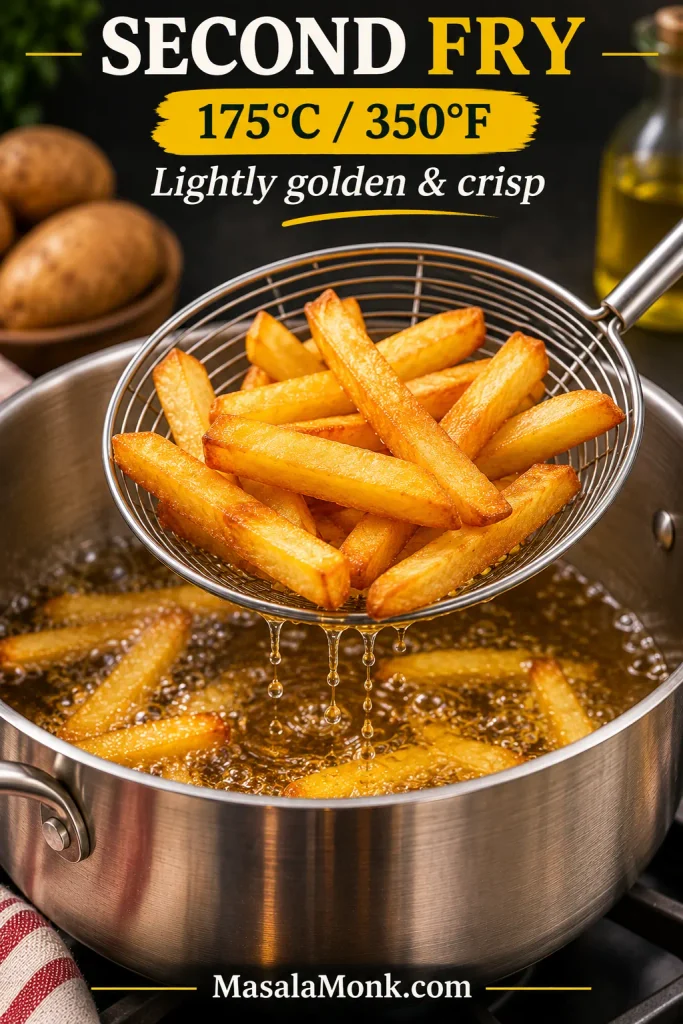
Second-fry checkpoint: golden, crisp edges
- Finish-fry for color and texture. Fry the rested potatoes in batches for roughly 3–6 minutes each, watching for a light-golden exterior and crisp edges rather than following the minutes rigidly. Drain on the rack and salt lightly. Hold early batches only briefly on a rack in a 95°C / 200°F oven, or serve two bowls at a time from a small pot.
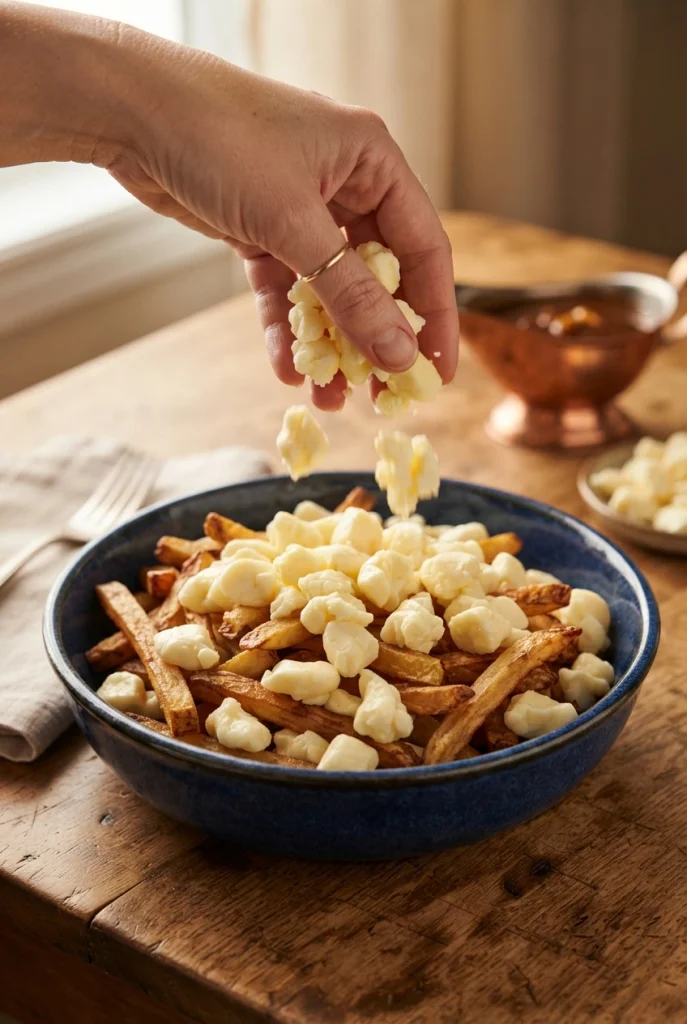
Layer hot fries with fresh cheddar curds
- Assemble and serve. Bring the gravy back to steaming hot and stir. Make two loose layers of hot fries and curds in each bowl, using 80 g curds per serving (or 100–125 g for extra-cheesy poutine). Pour over 75–100 ml / about 5–7 tbsp gravy per bowl and serve. The recipe makes extra gravy for the table. Using another cheese? See how substitutes behave under hot gravy.
Pour the gravy last. Move the ladle across the bowl so the sauce reaches curds between the fries. Leaving a few golden edges uncovered also gives each bite some contrast.
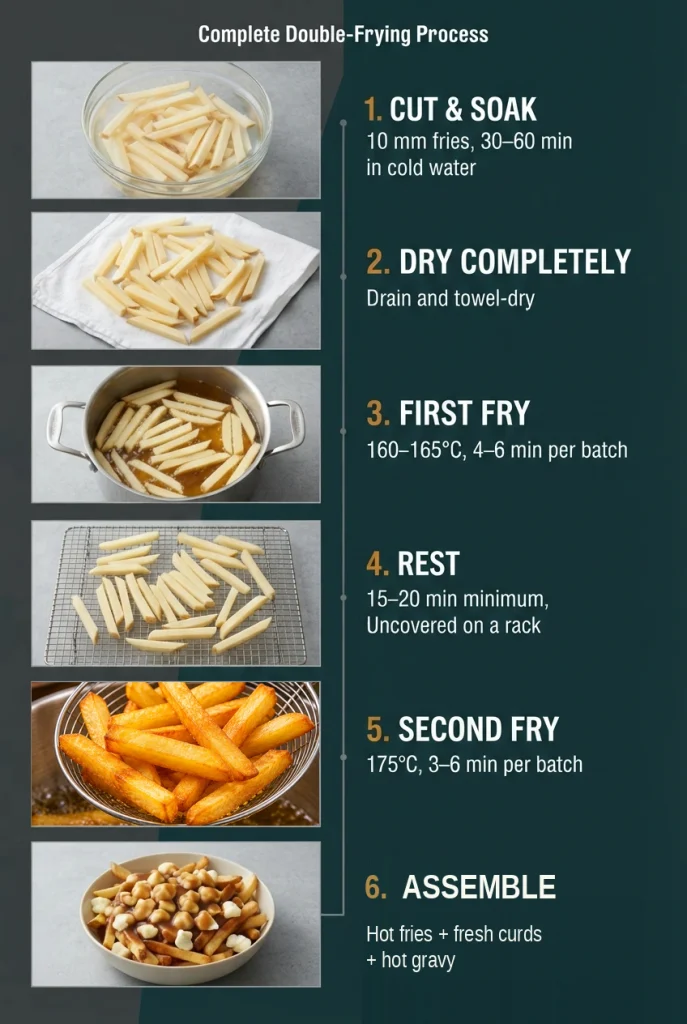
Double-frying method at a glance
Before heating the oil, arrange a wire rack, clean towels and your gravy ingredients. This visual sequence helps you plan the handoff between frying, resting and final assembly without leaving hot oil unattended.
Easy Poutine With Frozen Fries, Oven Fries or an Air Fryer
If you’re deciding between double-frying, the oven and an air fryer, compare the methods first. Then pick the instructions that fit your equipment and the time you have.
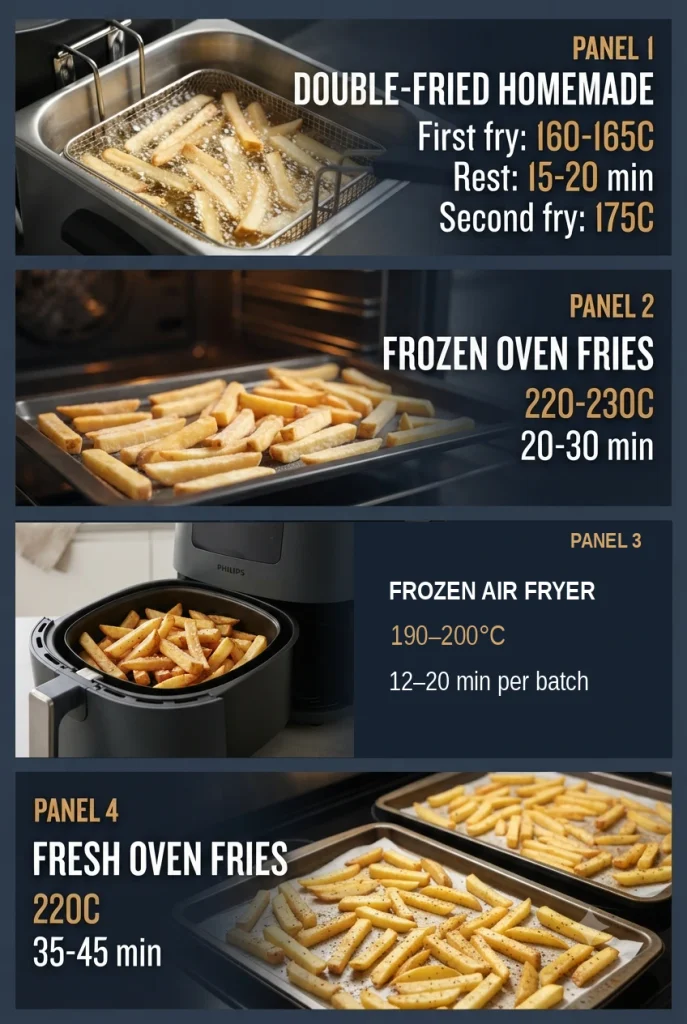
Compare four ways to cook poutine fries
These four options change how you cook the potatoes, not how you assemble the poutine. All finish with hot fries, curds and brown gravy.
Shortcut shopping list for four: 900 g / about 2 lb thick-cut frozen fries, 320 g fresh cheese curds and 400–600 ml prepared poutine gravy. The larger sauce quantity leaves extra for the table. If using concentrate, dilute it according to the package before measuring.
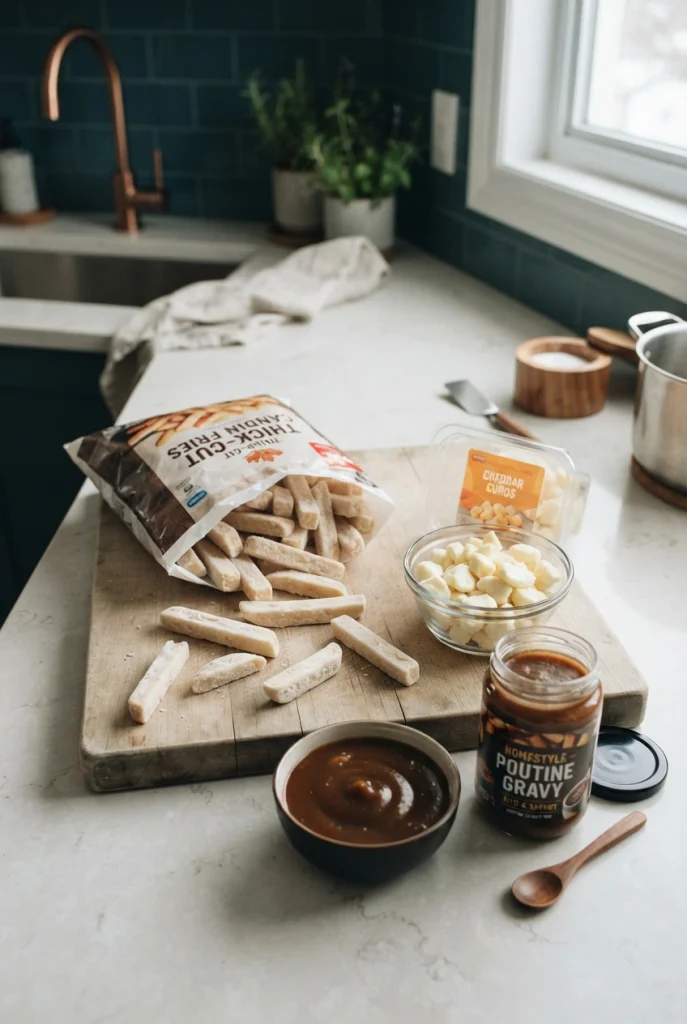
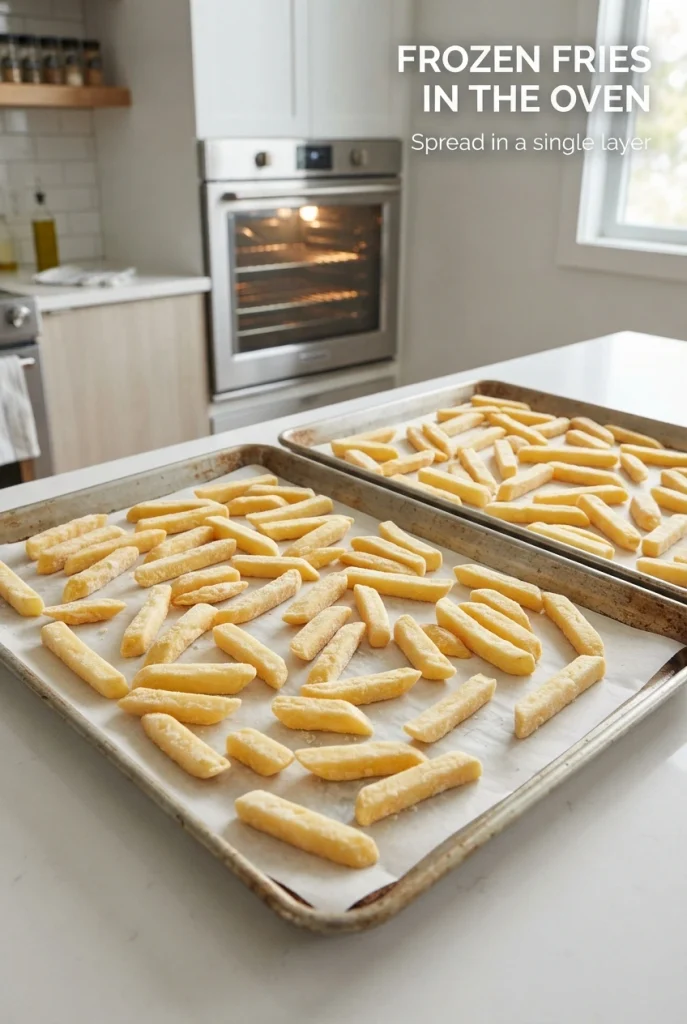
While the fries cook, heat packaged poutine sauce according to its directions so it is steaming hot at serving time. You can also make the gravy from the homemade recipe above. Spread fries in a single layer on trays or cook them in roomy air-fryer batches so they brown rather than steam.
Frozen fries in the oven
Bake straight from frozen according to the package, often around 220–230°C / 425–450°F for 20–30 minutes. Spread across two trays if needed, turn as directed and swap tray positions if they brown unevenly. Count preheating in your plan; warm the gravy while the fries bake.
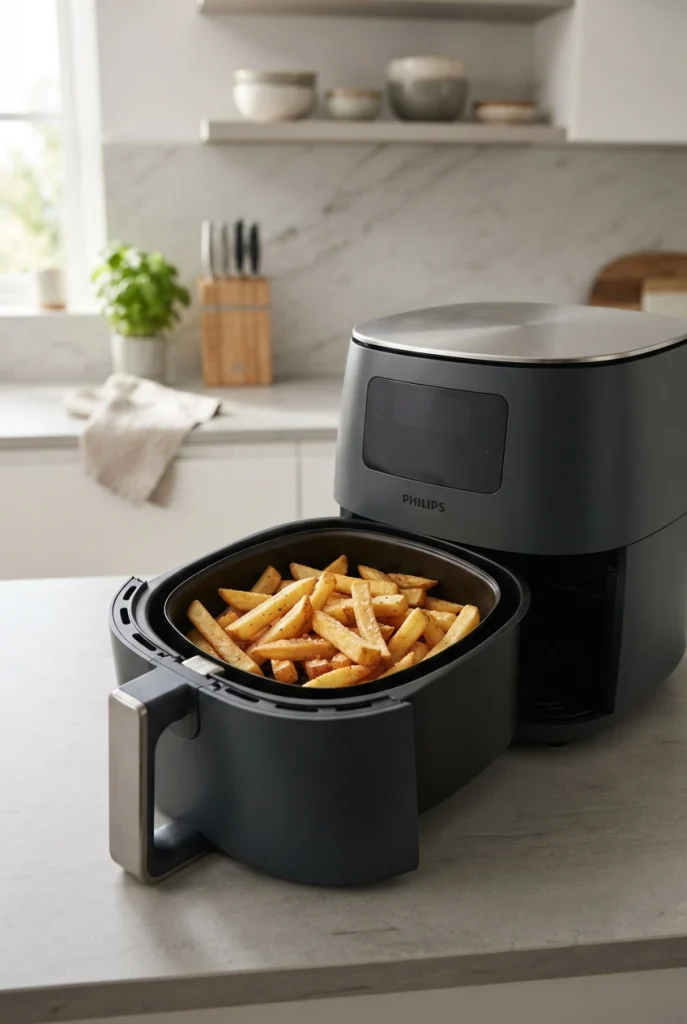
Frozen fries in an air fryer
Follow the package and appliance directions; many frozen fries take 12–20 minutes per batch at 190–200°C / 375–400°F. Shake partway through. If your basket fits only one or two portions, cook in rounds and keep the gravy hot. Sauce each bowl when it’s ready, rather than letting the first batch wait under gravy.
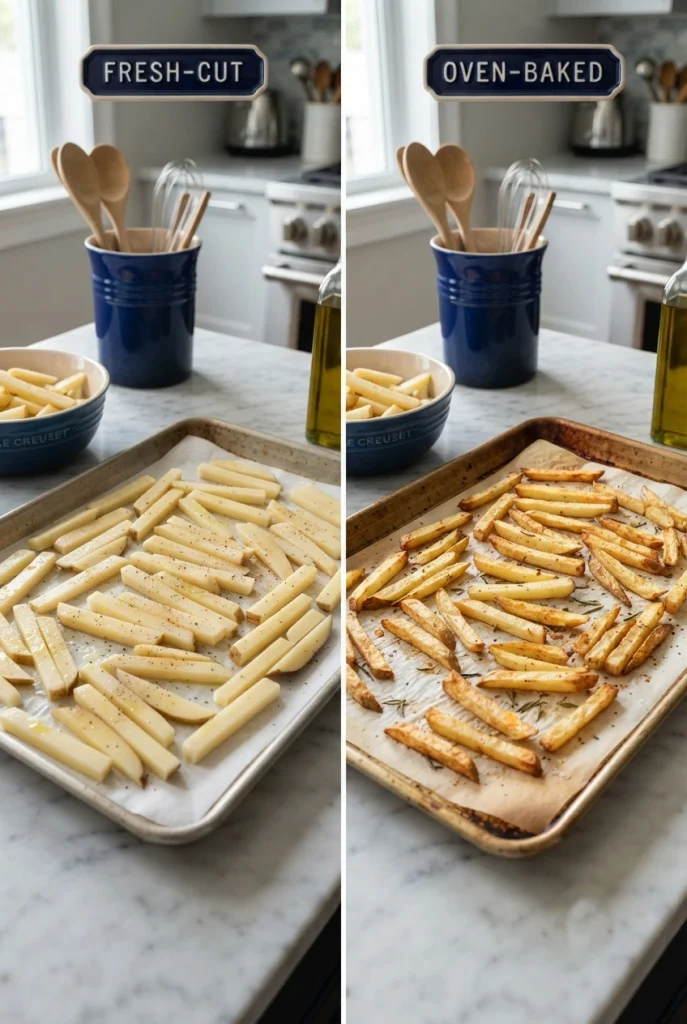
Fresh oven fries (no deep-fryer needed)
For fresh oven fries, cut 900 g potatoes into roughly 10 mm / ⅜-inch sticks, rinse and dry thoroughly, then toss with 2 tbsp / 30 ml neutral oil. Spread across two trays and bake at approximately 220°C / 425°F for 35–45 minutes, turning once or twice and switching tray positions if they brown unevenly. Cook until tender and golden, then salt lightly while hot. These will be softer than twice-fried fries. To see the cut before baking, compare the potato sticks.
To assemble: Divide the hot fries among four bowls, scatter 80 g curds per bowl through the fries, then pour over 75–100 ml steaming-hot gravy each. Serve at once. Planning: Frozen oven fries often take 30–45 minutes including preheating. Fresh-cut oven fries require 35–45 minutes of baking plus cutting, drying and preheating; small air fryers may need several rounds.
The Fries: Tender First, Golden Last
What makes a good poutine fry?
Why a golden edge matters: Gravy softens the outside, so the final fry gives the potato enough structure to hold together as the bowl is sauced.
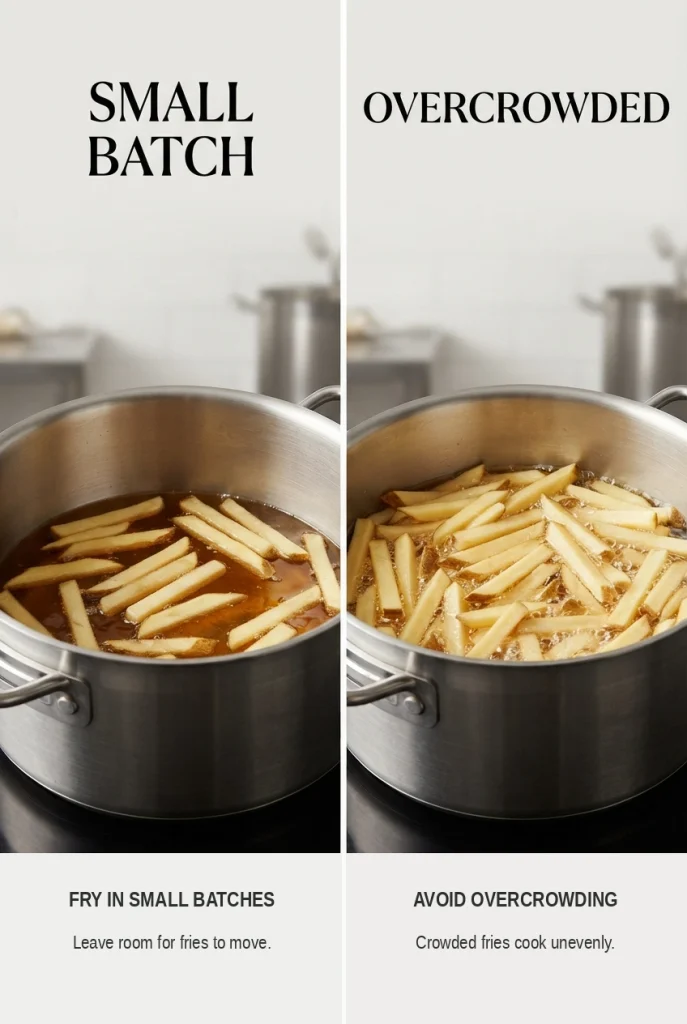
Why batch size changes the result: Overlapping fries cool the oil and restrict its movement. Spread them out across batches for more even cooking instead of trying to make the whole kilo fit at once.
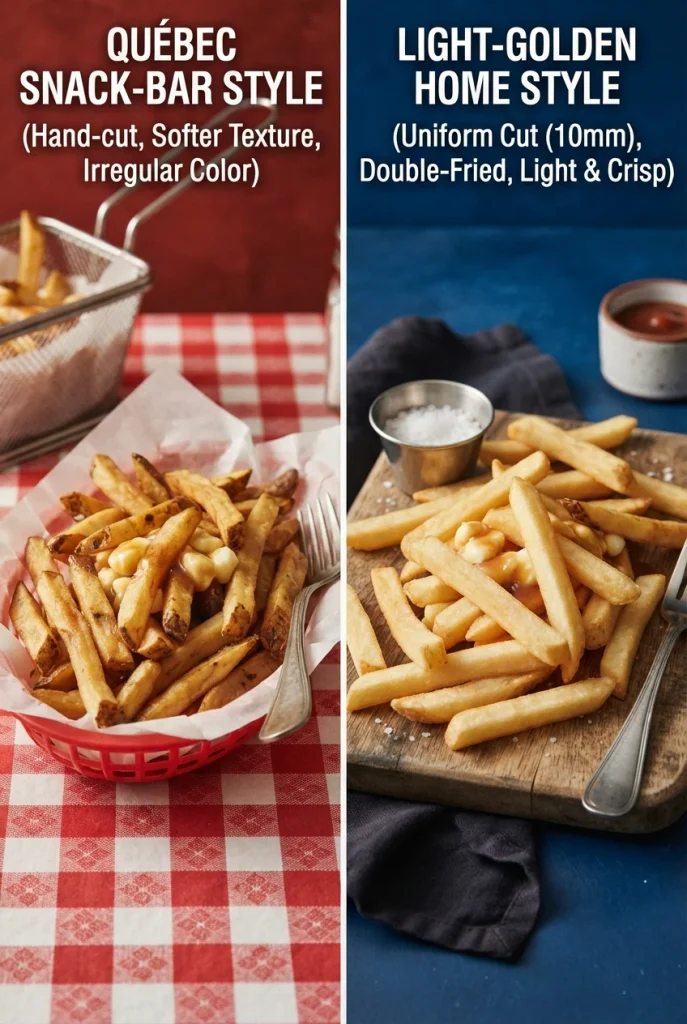
Québec snack-bar fries versus lighter home-style fries
Russets have the starch to turn fluffy inside and golden at the edges. Outside North America, look for a floury, high-starch potato sold for frying; all-purpose potatoes such as Yukon Gold tend to make a creamier, less fluffy center. In Québec snack bars, known as casse-croûtes, poutine often comes with softer, darker fries. The light-golden, slightly crisp version here is one home-style approach, not the only authentic one.
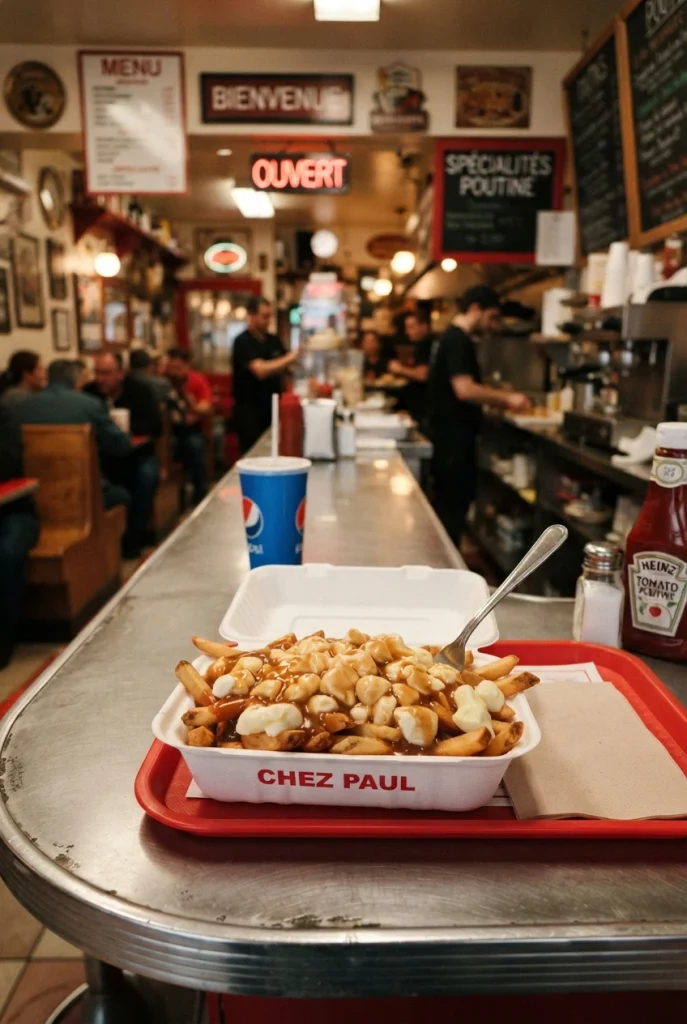
Inside a Québec casse-croûte: In a Québec snack bar, the serving dish may be simple and portions generous. What matters at home is bringing the same three hot components together without delay.
Why the finished fries should be light golden
The potatoes should be fully tender before their second trip into the oil; that final fry is for the surface. Once gravy lands, some edges will soften. That is part of eating poutine—not a failure to keep every fry crunchy. What you want to avoid is a bowl left sitting until everything turns waterlogged. Health Canada recommends deep-frying potatoes to a light-golden color with the oil at or below 175°C / 350°F to help reduce acrylamide formation. If the fries are limp before adding gravy, check the troubleshooting table.
For more on potato cuts and alternative methods, see our homemade French fries guide.
Poutine Gravy: Getting the Consistency Right
Good poutine gravy coats the fries without pooling at the bottom or sitting on top like paste. Its light roux gives it body without roast drippings. In Québec you may hear it called sauce à poutine or sauce brune. If you want to see the roux technique, our turkey gravy recipe shows the process.
Lift a spoonful: the gravy should leave a light coating, then run off in a smooth stream. Watery sauce needs a little more simmering; sauce that hangs on like paste needs a splash of warm unsalted stock. Taste again after reducing, since the salt will be more concentrated. If it has become gummy, see how to loosen thick gravy.
Compare thin, ideal and overly thick poutine gravy
The illustration uses a plain mashed-potato base to compare how three gravies flow. For poutine, aim for the middle consistency: fluid enough to run between fries, thick enough to coat them lightly.
Choosing Cheese Curds and Substitutes
Fresh cheddar cheese curds are the traditional choice for poutine, sold as fromage en grains in Québec. These small, irregular pieces have a mild, milky flavor and a springy bite. Very fresh curds may squeak against your teeth, but that sensation fades; judge freshness by the package date and storage instructions, not squeak alone.
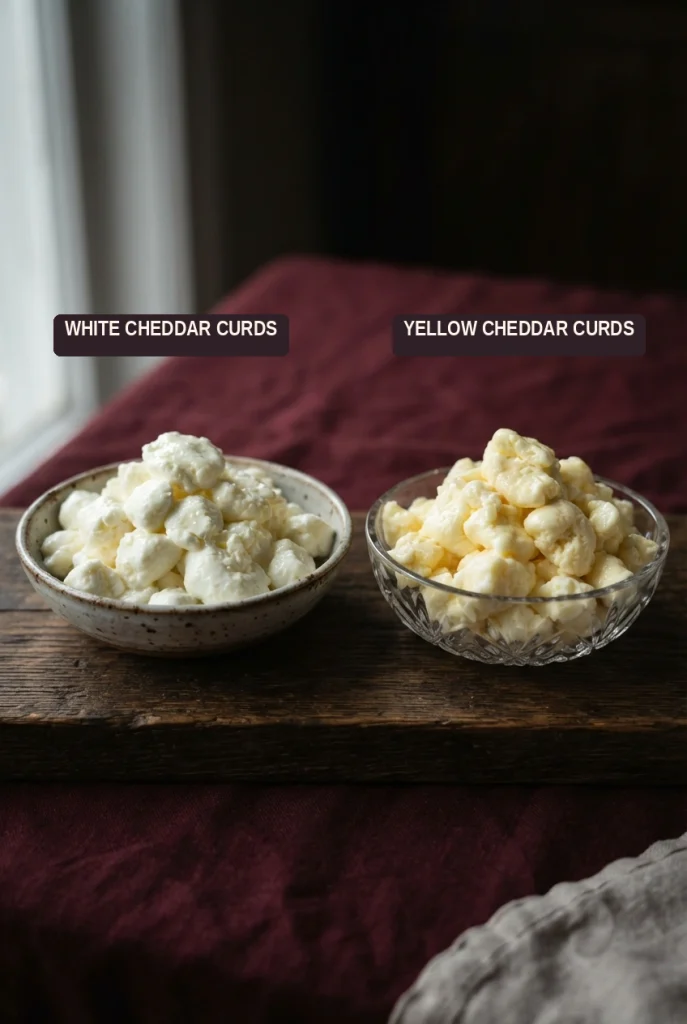
Identify fresh curds and four cheese substitutes
Curds soften under gravy without turning into a uniform layer of melted cheese. Other cheeses change that balance:
| If curds are unavailable | What the substitution changes |
|---|---|
| Low-moisture, full-fat block mozzarella, torn into chunks | Softens and stretches more than curds; use chunks, not shreds. Avoid wet fresh mozzarella balls. |
| Young mild cheddar, in chunks | A stronger cheddar flavor; pieces melt more readily into soft patches rather than staying springy like fresh curds. |
| Halloumi | Chewy and often squeaky, but saltier and far less melting. |
| Paneer | Stays firm and does not soften like cheddar curds. Works best when you want a different, paneer-based version. |
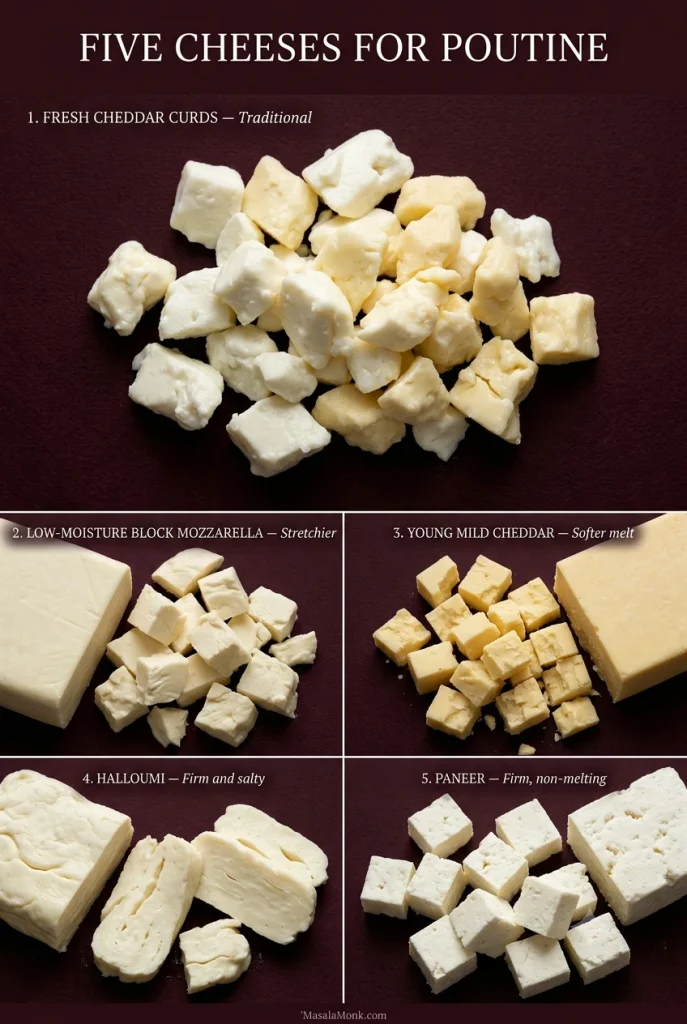
How different cheeses behave under hot gravy
Cheese substitutions can change a bowl even when the fries and gravy remain the same. Watch which pieces keep their shape and which become soft patches.

For fries covered in fully melted cheese, our homemade cheese sauce is a different option. If you made poutine without curds, which cheese worked for you—and did it soften, stretch or stay in pieces?
Serving Poutine While Everything Is Hot
Two hot bowls are better than four lukewarm ones. With a small pot, serve the first pair as soon as they’re ready, then finish the remaining fries for the second pair. Keep the cheese, fries and gravy separate until each bowl goes to the table.
A balanced forkful: Poutine should feel generous and a little messy, but not like fries buried under cheese sauce. You should still be able to identify its three components in a bite.
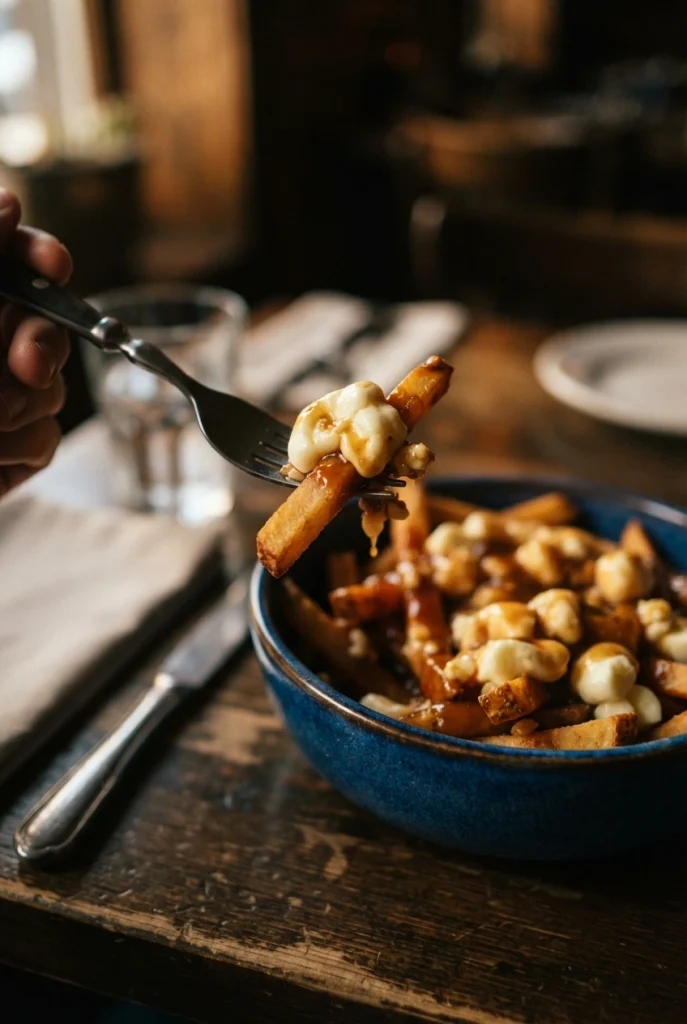
Serve in rounds: Keep the extra gravy in a warm jug so everyone can add more at the table. That way, you can sauce each freshly finished bowl lightly instead of soaking every portion before serving.
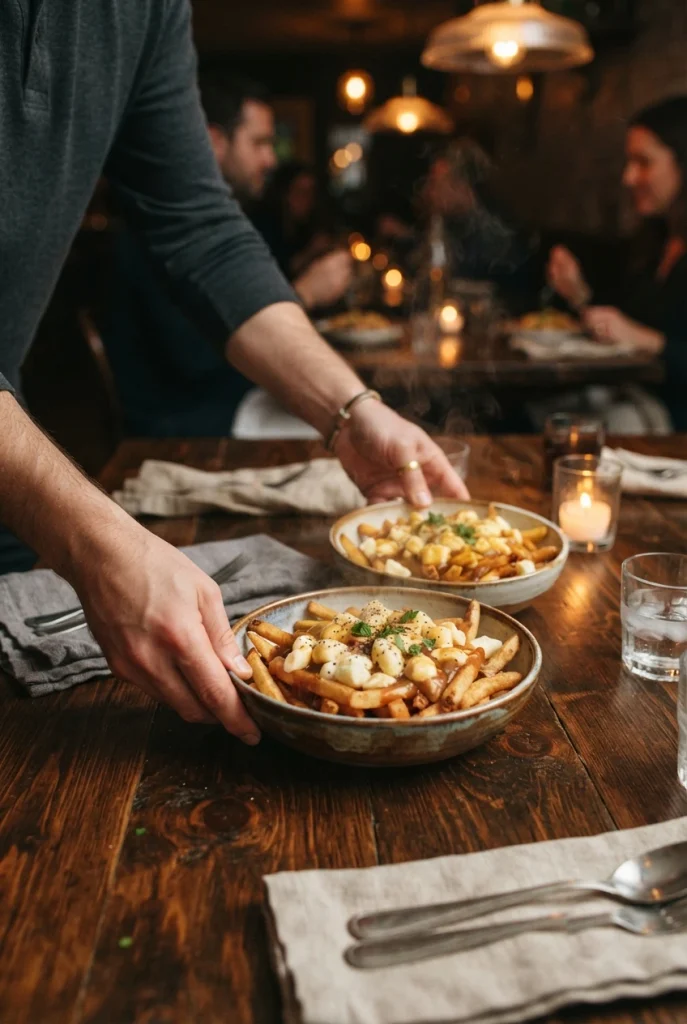
Optional toppings: Warm Québec-style smoked meat or shredded chicken can go on top just before the gravy. Neither is needed for the classic fries-curds-gravy bowl.
Make It Vegetarian, Vegan, or Gluten-Free
Vegetarian and vegan poutine
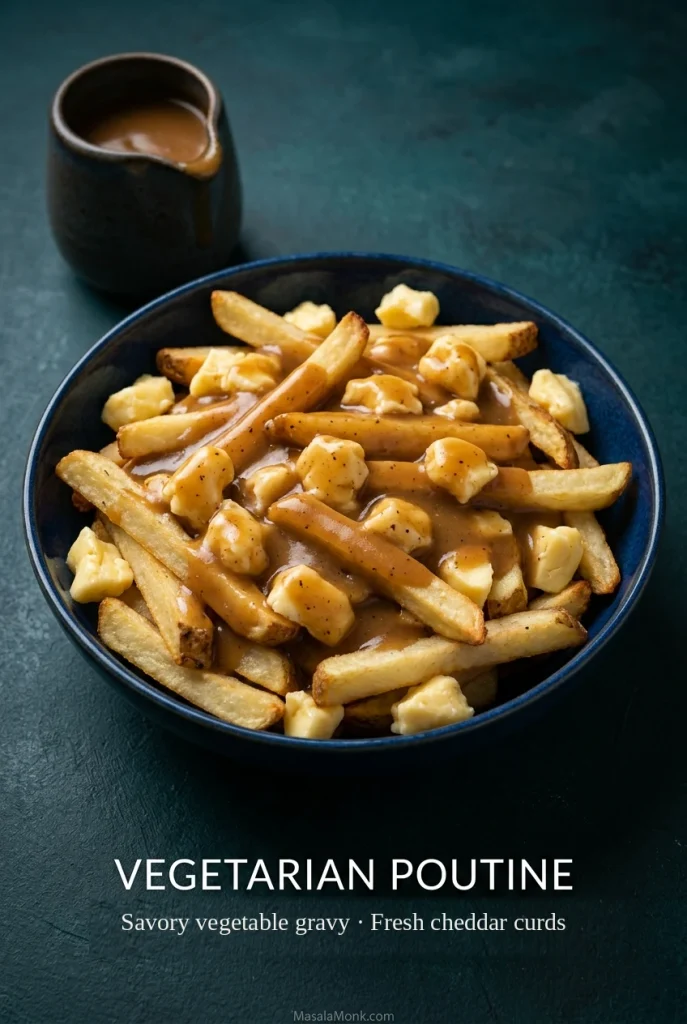
Vegetarian: Replace the meat stocks with 600 ml savory vegetable or mushroom stock and use the same butter-and-flour method. Choose vegetarian Worcestershire-style sauce (ordinary versions may contain anchovies) and curds made without animal rennet, if required. Mushroom stock gives a deeper savory flavor than many light vegetable stocks.
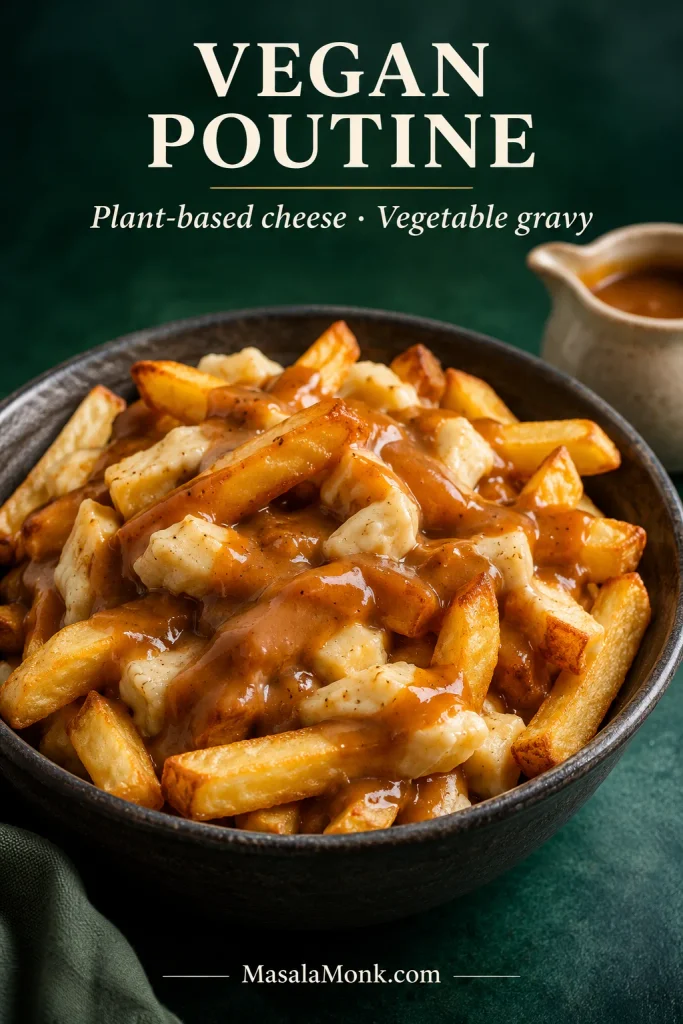
Vegan: Use 600 ml vegetable or mushroom stock, 35 g plant-based butter or suitable oil and 30 g flour, along with vegan Worcestershire-style seasoning. Choose a dairy-free cheese sold for melting that can soften in pieces over the hot fries. Some brands become saucier or stretchier than others; follow the package guidance.
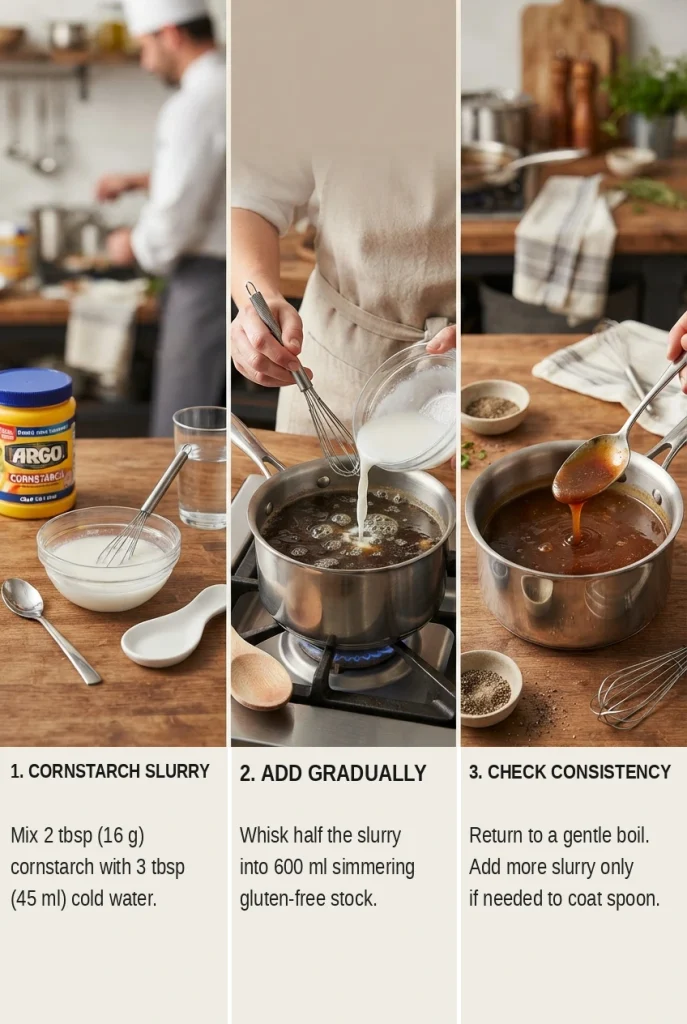
Thicken gluten-free poutine gravy with cornstarch
Gluten-free gravy: Skip the flour roux and use gluten-free ready-to-use stock. Check bouillon, Worcestershire-style sauce and any packaged fries or seasonings. For coeliac disease or strict gluten avoidance, use fresh frying oil and clean utensils, not oil previously used for breaded foods. Then make the gravy as follows:
- Season the stock. Warm 1 tsp / 5 ml oil and briefly cook the minced garlic. Add 600 ml gluten-free ready-to-use stock, ¼ tsp pepper and, if available, 1 tsp gluten-free Worcestershire-style sauce. Bring to a simmer.
- Thicken gradually. Mix 2 tbsp / about 16 g cornstarch with 3 tbsp / 45 ml cold water. Whisk in half the slurry, bring the gravy back to a gentle boil and check the texture. Add more only as needed to coat a spoon; you may not need it all.
- Finish the flavor. Add ½ tsp apple cider vinegar, taste and adjust the salt. The sauce should pour easily; thin with warm unsalted stock if it becomes too thick.
If Your Poutine Goes Wrong
Fries and cheese problems
| What happened | What helps now—or next time |
|---|---|
| Fries are greasy or limp before saucing | Now: Drain on a rack; if still pale, a brief final fry may restore some texture. Next time: Dry the potatoes and fry in smaller batches, letting the oil recover. |
| Fries browned but stayed firm inside | Next time: Keep the first fry at the lower temperature until the center is tender. Once fries are dark outside, further frying may overbrown them before the middle softens. See the first-fry interior. |
| Curds stay cold | Next time: Use smaller pieces and pour steaming-hot gravy over hot fries. More gravy may warm an already assembled bowl, but also softens its fries. |
| Cheese melts into a single layer | Next time: Use fresh cheddar curds. Chunks of low-moisture mozzarella stay more distinct than shreds, but still melt and stretch more than curds. Compare the cheeses under gravy. |
| Fries turned soggy after saucing | Next time: Assemble only when ready to eat and serve extra sauce separately. Already-sauced fries cannot reliably regain their crisp edges. |
Poutine gravy problems
| What happened | What helps now—or next time |
|---|---|
| Gravy is thin or pools below the fries | Now: Simmer a little longer; use a small amount of cornstarch slurry only if needed. It should lightly coat a spoon. |
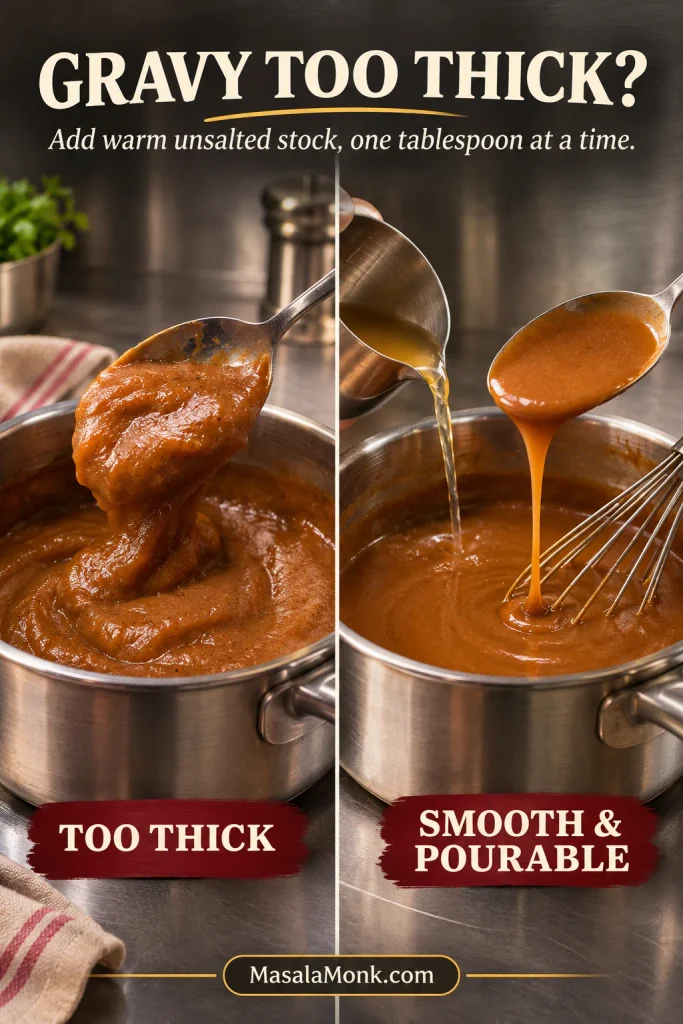
| Gravy is too thick or gummy | Now: Whisk in warm unsalted stock or water a tablespoon at a time until it flows. Next time: Add optional starch gradually. |
| Gravy is too salty | Now: Dilute with unsalted stock or water and recheck thickness. If extremely salty, a larger batch of unsalted gravy may be needed. |
| Gravy tastes flat | Now: Taste for salt, then try a little Worcestershire or vinegar. Don’t add flour to fix flavor. |
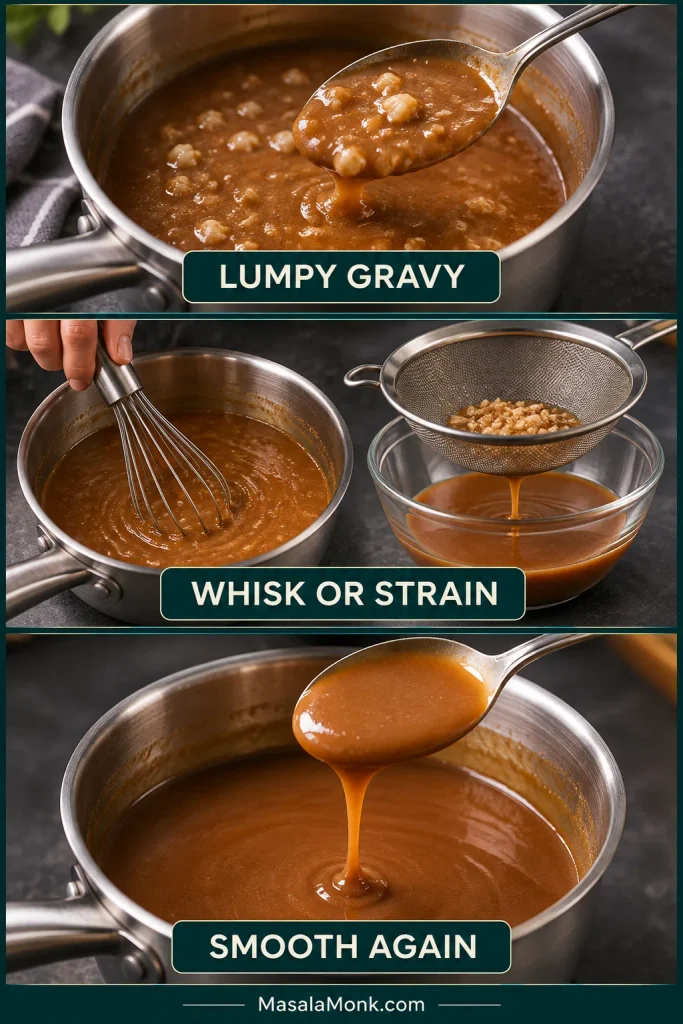
| Gravy has lumps | Now: Whisk vigorously or strain. Next time: Add the stock gradually to the roux. |
Fix poutine gravy that is too thick
Gravy that turns heavy while standing is different from gravy with flour lumps. Check whether it is smooth but slow-moving or uneven and grainy; the fixes below address those two problems separately.
Whisk or strain lumpy poutine gravy
A few stubborn flour lumps are a separate problem from overall thickness. Whisk first; if the sauce remains uneven, pass it through a fine sieve.
Back to the recipe · Back to top
Make-Ahead Poutine, Storage, and Leftovers
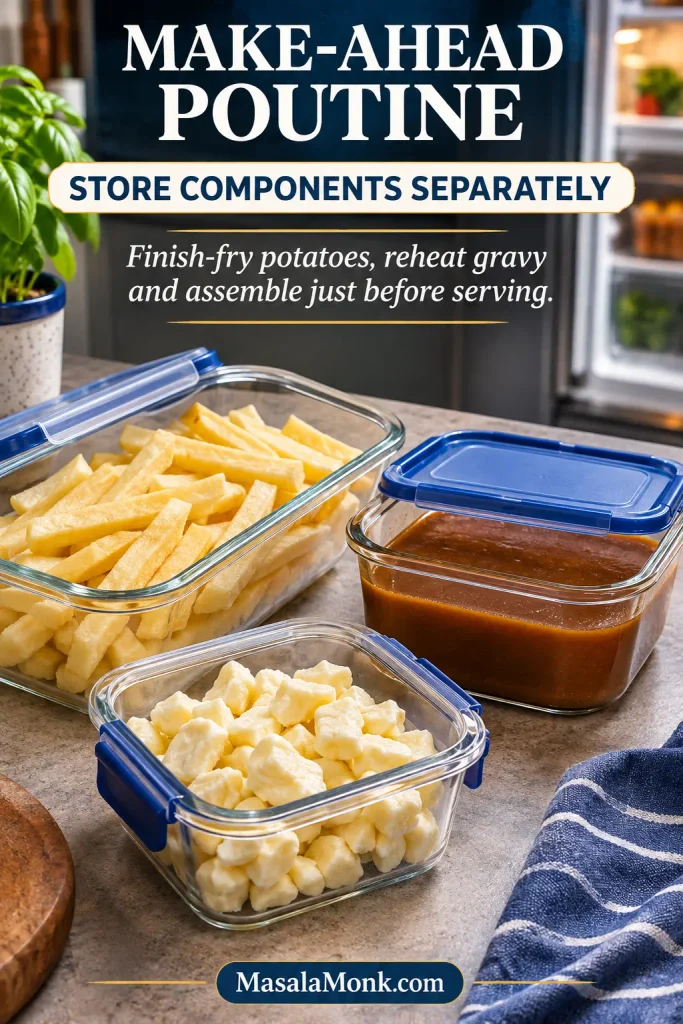
Can you make poutine ahead? Prepare the gravy and potatoes separately, but assemble the bowls only after the final fry. Cool gravy promptly in shallow containers and refrigerate within two hours; use within 2–3 days or freeze. Bring refrigerated gravy to a full boil when reheating, stirring well. For a brief same-day hold, keep it covered at or above 60°C / 140°F and stir occasionally.
Prepare potatoes ahead: Keep whole raw potatoes in a cool, dark pantry. For short advance preparation, refrigerate cut sticks covered in cold water, then drain and dry completely before frying. Alternatively, first-fry the potatoes, cool promptly and refrigerate in a covered container for the next day’s final fry. Check for surface moisture before returning them to hot oil. Keep the cheese curds chilled until the final cooking stage.
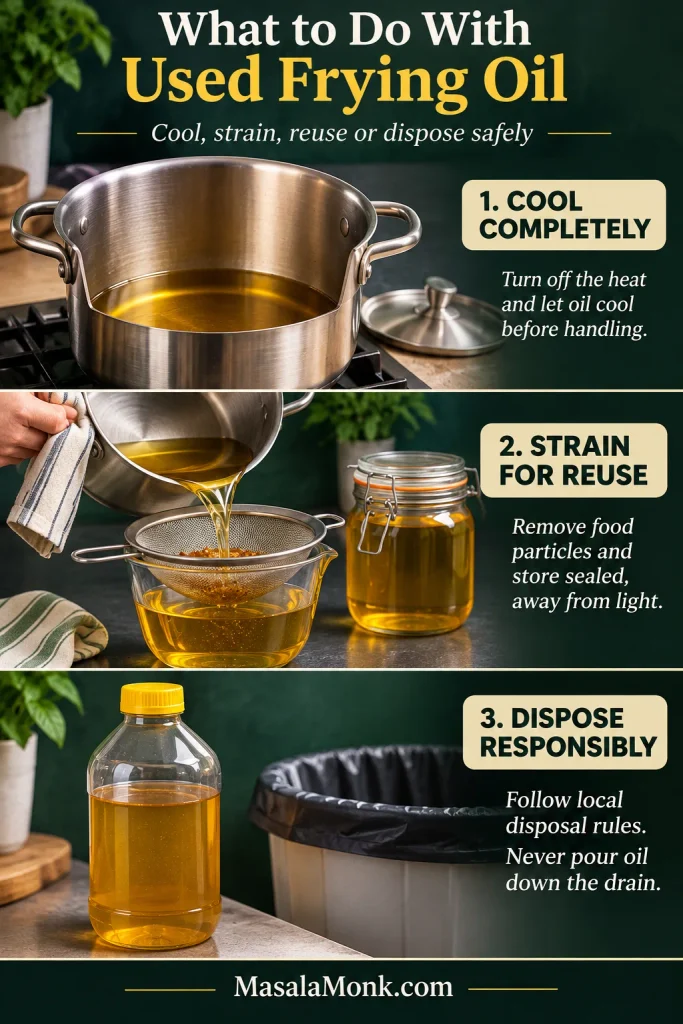
Used frying oil: cooling and storage
After frying: Let the oil cool completely before handling it. If still suitable for reuse, strain it and refrigerate in a sealed, light-proof container. Discard oil that has darkened, foams excessively or smells off; appearance alone cannot guarantee that oil is still good. Use a local oil-collection service or dispose of unwanted oil in a sealed container according to local rules—never down the drain.
Reheating poutine leftovers
Leftovers: Refrigerate perishable components within two hours (one hour when the surrounding temperature is above 32°C / 90°F). Store fries, curds and gravy separately if possible. Reheat leftovers to 74°C / 165°F and bring gravy to a full boil, following Health Canada’s leftover guidance. An oven or air fryer will improve leftover fries, though previously sauced fries will stay softer.
Back to the homemade recipe · Quick poutine methods · Back to top








