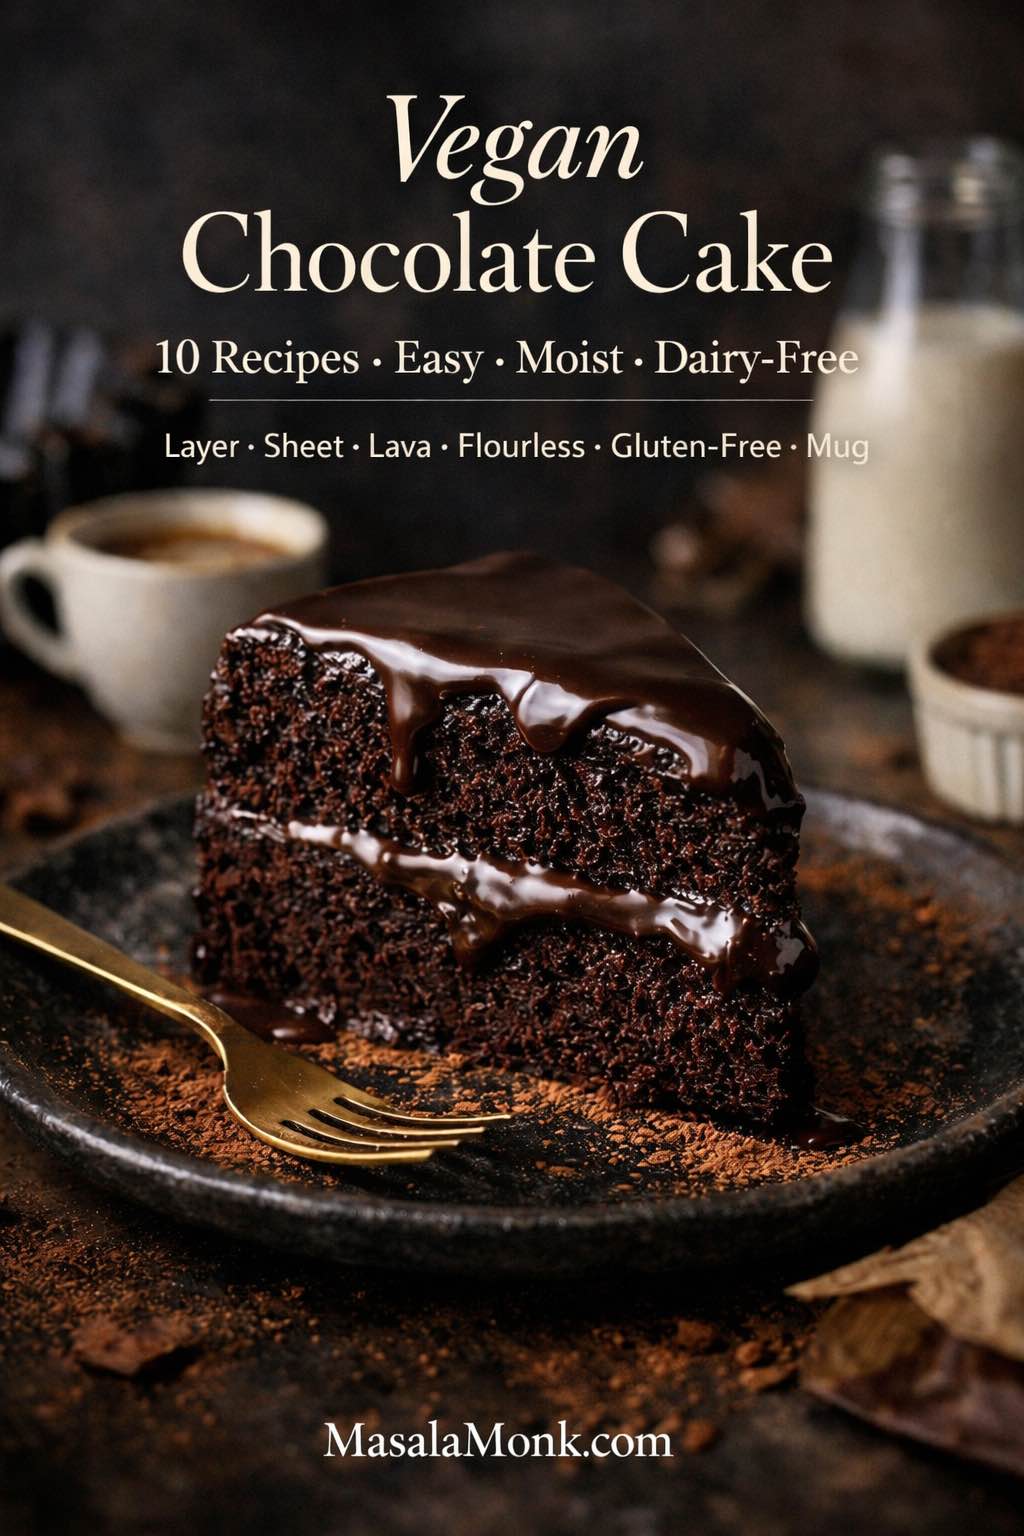
If you want vegan chocolate cake that tastes like the real thing—deep cocoa aroma, soft crumb, and a finish that feels genuinely indulgent—this roundup of Vegan Chocolate Cake Recipes is for you. Not “good for vegan,” not “surprisingly decent,” but the kind of cake you’d happily serve to anyone who loves chocolate. Better still, these recipes are built to be repeatable, so you can bake a simple vegan chocolate cake on a quiet evening, then turn around and make a party-ready vegan chocolate layer cake the next weekend without relearning everything from scratch.
Chocolate cake has a strange superpower: it can be both nostalgic and endlessly new. On one day, you want a plush slice with frosting and candles. On another, you want a quick vegan chocolate mug cake with a spoon straight from the cup. Meanwhile, when you’re feeding a crowd, a vegan chocolate sheet cake is often the most sensible move—easy to transport, easy to portion, and still every bit as satisfying. And then there are the cakes that feel like a dessert menu finale: a flourless vegan chocolate cake that slices like a torte, or vegan chocolate lava cakes that spill molten chocolate onto a plate.
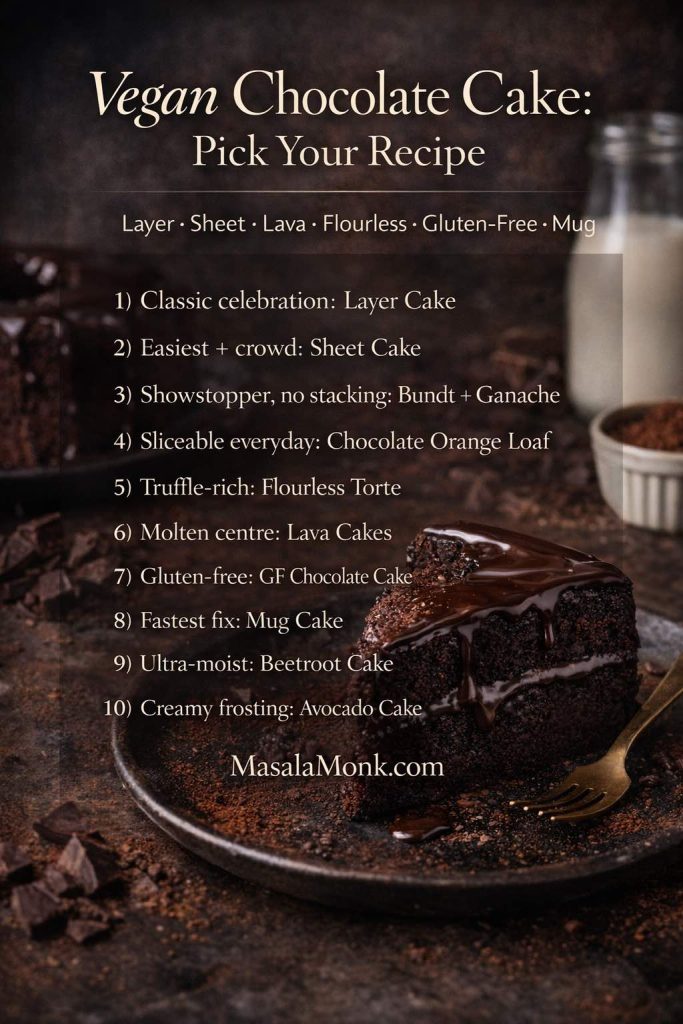
Because each craving has its own logic, the ten recipes below cover a range of textures and formats—layer, sheet, bundt, loaf, flourless, molten, gluten-free, mug, beetroot, and avocado—while staying anchored in the same promise: strong chocolate flavour, reliable structure, and a moist crumb that doesn’t dry out by tomorrow.
Before we start baking, though, it’s worth getting a few fundamentals in place. Once those are clear, every recipe becomes easier, and every variation feels less like guesswork and more like cooking.
Vegan chocolate cake basics that make everything easier
1) Cocoa powder: the flavour choice that also affects rise
Cocoa powder isn’t just flavour. It changes how a cake behaves, especially when baking soda is involved.
- Natural cocoa is typically more acidic. It can taste brighter, sometimes slightly sharper, and it often plays very nicely with baking soda.
- Dutch-process cocoa is alkalised. It tends to taste smoother and darker, and it can make cakes look deeper in colour.
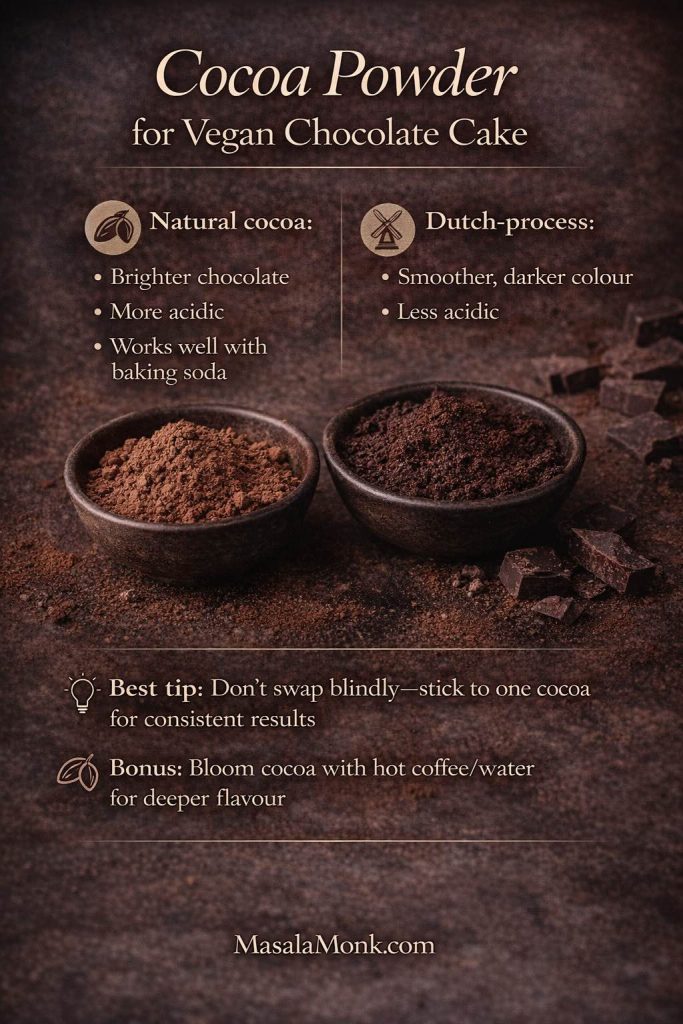
Both are excellent, yet they don’t always perform identically if you swap one for the other without adjusting anything else. If you enjoy knowing the “why” (without it turning into a science lesson), these two guides are genuinely helpful: Dutch-process vs. natural cocoa and The A-B-C’s of cocoa. If you want a broader, easy read on cacao vs cocoa vs chocolate, MasalaMonk’s breakdown is a great companion: What is Cacao?: Cacao vs. Chocolate vs. Dark Chocolate.
Practical way to think about it: pick a cocoa you love, then bake with it consistently. Once you know how that cocoa behaves in your oven, you’ll get “your” signature vegan chocolate cake every time.
2) Plant milk: use what you like, but know what it nudges
Most plant milks will work. Still, they can push texture subtly:
- Oat milk often gives a softer, rounder crumb.
- Soy milk can build structure and height.
- Almond milk is lighter, so cakes may feel a touch less plush (not bad—just different).
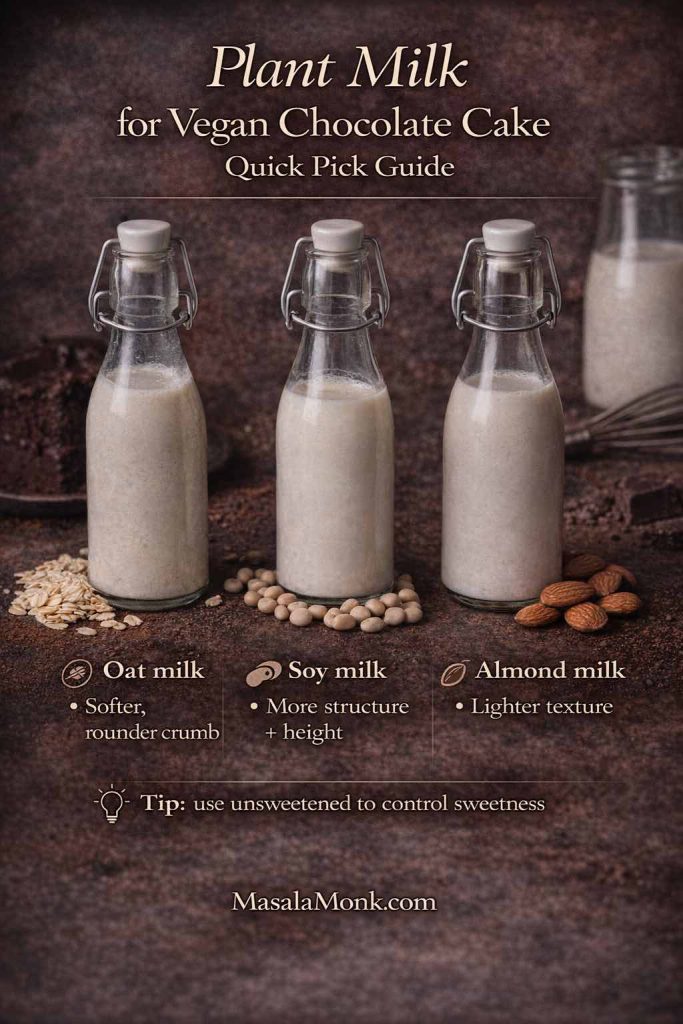
If you like making basics at home, Easy Homemade Oats Milk is a handy internal reference, especially when you want a neutral, budget-friendly baking milk.
3) Oil vs vegan butter: choose based on the texture you want
For many vegan chocolate cake recipes, oil is the shortcut to moisture. Cakes stay tender longer, they resist drying out, and they’re forgiving if you slightly overbake. Vegan butter can be lovely too; however, it firms up in the fridge, so butter-based cakes can feel denser when cold.
If you’ve ever noticed how oil-based cakes stay moist, you’ll see that principle clearly in Orange Olive Oil Cake – Ridiculously Easy and Super Moist. Even though it’s citrus rather than chocolate, the crumb logic carries over perfectly.
4) The acid trick: why vinegar appears in so many dairy-free chocolate cake recipes
A small amount of vinegar (or lemon juice) shows up in vegan baking because it helps baking soda do its job. It isn’t there to make cake taste sour; rather, it supports lift and tenderness. As a result, cakes rise more evenly and feel lighter.
5) “Blooming” cocoa: the easiest way to make chocolate taste bigger
You’ll notice several recipes use hot coffee or hot water. This is one of the simplest upgrades in chocolate baking: hot liquid helps cocoa dissolve and intensifies aroma.
- If you love deep chocolate, use coffee.
- If you don’t like coffee, use hot water. You’ll still get the cocoa bloom effect; you just won’t add coffee’s roast notes.
6) Mixing: stop sooner than your instincts suggest
Chocolate batter often looks gorgeous long before it’s actually mixed evenly, which is why it tempts you to keep going. Nevertheless, overmixing can tighten crumb. Instead, aim for smooth and combined, then stop.
A calm sequence helps:
- Whisk dry ingredients thoroughly (especially cocoa).
- Whisk wet ingredients thoroughly.
- Combine wet into dry until smooth.
- Add hot liquid last, then mix briefly.
7) Baking cues: what “done” looks like in chocolate cake
Because chocolate cakes are dark, they can hide underbaking. Use multiple cues:
- The top springs back lightly when pressed.
- The edges pull slightly away from the tin.
- A skewer comes out with a few moist crumbs (not wet batter).
- The centre doesn’t wobble like liquid.
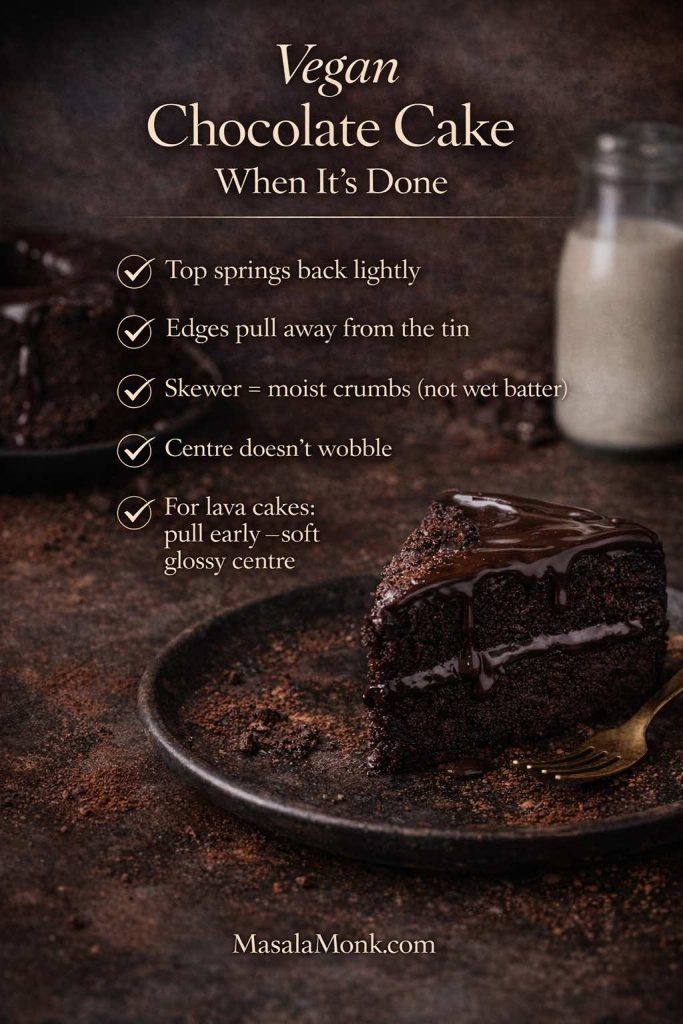
Molten cakes are different—there, you want underdone centres. We’ll cover that later.
8) Tin guide: choose the format that fits your day
Sometimes the best cake is the one that matches your schedule:
- Layer cake (20 cm rounds): celebration vibe, frosting-friendly.
- Sheet cake (23 × 33 cm): effortless portions, travel-friendly.
- Bundt cake (25 cm bundt pan): looks fancy with minimal decorating.
- Loaf cake (10 × 25 cm): sliceable, giftable, everyday perfect.
- Torte (20 cm springform): intense, truffle-like, small slices.
- Mug cake: instant comfort.

9) A note on “eggless” and “dairy-free”
Every cake here is vegan, which means it’s inherently eggless and dairy-free. That said, textures can vary depending on which binder you use (if any). Some recipes rely purely on flour structure and leavening; others use starch or purée for a fudgier crumb. Either way, the outcome is meant to feel like cake—not a compromise.
If you want a clear, trustworthy overview of vegan egg replacers and what each one is best at, this guide is a useful reference: Egg substitutes for baking.
Also Read: Strawberry Smoothie Recipes (12 Easy Blends + Bowls & Protein Shakes)
A quick way to choose your recipe today
If you’d rather not overthink it, start here:
- Want the classic? Make the vegan chocolate layer cake (#1).
- Want the easiest? Make the easy vegan chocolate sheet cake (#2).
- Want “wow” without stacking? Make the vegan chocolate bundt cake (#3).
- Want bright flavour? Make the chocolate orange vegan chocolate loaf (#4).
- Want truffle intensity? Make the flourless vegan chocolate cake (#5).
- Want molten drama? Make the vegan chocolate lava cakes (#6).
- Need gluten-free? Make the vegan gluten-free chocolate cake (#7).
- Want instant comfort? Make the vegan chocolate mug cake (#8).
- Want ultra-moist? Make the beetroot vegan chocolate cake (#9).
- Want creamy frosting that isn’t sugar-bomb sweet? Make the avocado vegan chocolate cake (#10).
Now, let’s bake.
1) Vegan Chocolate Layer Cake Recipe (Classic, Moist, Celebration-Ready)
This is the cake you bake when you want that unmistakable “proper chocolate cake” moment: soft crumb, even rise, and enough structure to stack confidently. At the same time, it’s forgiving—so even if you’re not a frequent layer-cake maker, you’ll still land somewhere delicious.
What makes it work so well
To begin with, oil keeps the crumb tender for longer than butter typically does. In addition, a small amount of vinegar supports lift and keeps the flavour clean. Finally, hot coffee (or hot water) blooms cocoa, so the chocolate aroma feels bigger without adding extra sweetness.
If you ever want the quick explanation of cocoa differences—especially if you’re deciding between natural cocoa and Dutch-process—the two clearest guides are Dutch-process vs. natural cocoa and The A-B-C’s of cocoa. For a broader foundation, MasalaMonk’s What is Cacao?: Cacao vs. Chocolate vs. Dark Chocolate is a satisfying read.
Makes: 1 layer cake (two 20 cm rounds) | Serves: 10–12
Time: 20 mins prep + 28–34 mins bake + 60–90 mins cooling | Difficulty: Easy–Medium
Oven/Tin: 175°C | two 20 cm round tins
Dry
- 250 g plain flour
- 300 g caster sugar
- 70 g cocoa powder
- 10 g baking powder
- 5 g bicarbonate of soda
- 3 g fine salt
Wet
- 420 ml plant milk
- 120 ml neutral oil
- 15 ml vinegar (apple cider or white)
- 10 ml vanilla extract
Bloom
- 180 ml hot coffee or hot water

Method (detailed, step-by-step)
- Prep your tins before anything else. Heat the oven to 175°C. Line two 20 cm tins with baking paper on the base, then lightly oil the sides. If you want extra insurance against sticking, dust the oiled sides with a teaspoon of cocoa powder and tap out the excess.
- Make cocoa behave. In a large bowl, whisk the flour, sugar, cocoa powder, baking powder, bicarbonate of soda, and salt for a full 30–45 seconds. This isn’t busywork—cocoa clumps are stubborn, and thorough whisking prevents bitter pockets.
- Mix your wet ingredients until they look unified. In a jug, whisk plant milk, oil, vinegar, and vanilla until the mixture looks uniform rather than separated. That little bit of emulsifying up front helps the batter come together quickly.
- Combine without overworking. Pour the wet mixture into the dry. Whisk gently—just until the batter looks smooth and you don’t see dry flour at the bottom. If you’re tempted to keep whisking because the batter looks glossy, pause and check the bowl instead: scrape down the sides, then stop.
- Bloom the cocoa at the end. Pour in the hot coffee (or hot water) and whisk briefly until the batter turns evenly silky and slightly looser. Thin batter is normal here, and it bakes up surprisingly plush.
- Divide evenly for level layers. Split the batter between tins. If you have a kitchen scale, weigh the tins so the layers bake to the same height. Next, tap each tin once on the counter to release large air bubbles.
- Bake with cues, not only time. Bake 28–34 minutes. Start checking at 28 minutes:
- The centre should spring back lightly when pressed.
- The edges should pull away slightly from the tin.
- A skewer should come out with moist crumbs, not wet batter.
- Cool in stages (this matters for texture). Let the cakes cool in the tins for 10 minutes. Then turn them out onto a rack, peel off the base paper, and cool completely before frosting. If you frost while warm, you’ll get melting and sliding instead of clean layers.
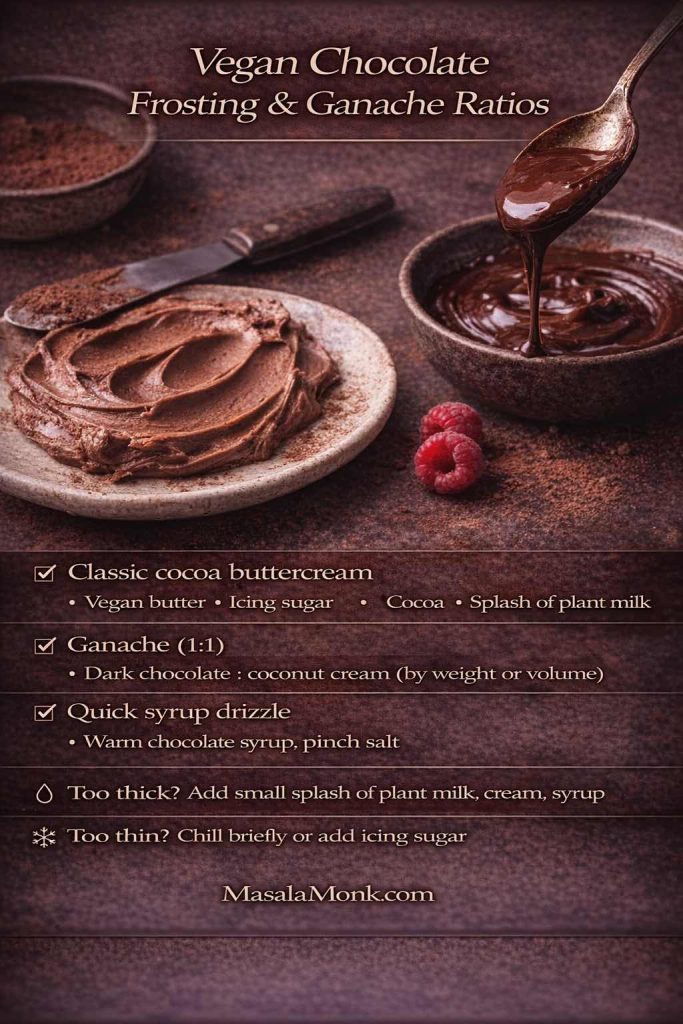
Vegan chocolate cake frosting (classic cocoa buttercream)
This buttercream is dependable and not overly fussy. It also holds its shape well, which helps if you’re doing swirls or a slightly thicker coat.
- 115 g vegan butter, softened
- 300 g icing sugar, sifted
- 50 g cocoa powder, sifted
- 10 ml vanilla extract
- 30–60 ml plant milk (as needed)
- 1–2 g salt (to taste)
How to make it smoothly
- Beat vegan butter for 2–3 minutes until creamy and lighter in colour.
- Add cocoa and icing sugar in 3 additions, mixing gently at first so you don’t get a sugar cloud.
- Add vanilla and salt.
- Add plant milk gradually until spreadable. Stop when it feels soft and swoopy, not runny.
Assemble like a pro (without overthinking it)
- If your layers have a dome, trim the top lightly with a serrated knife for a stable stack.
- Spread a thin layer of frosting on the first layer, add the second layer, then cover the cake.
- For cleaner slices, chill the frosted cake 20–30 minutes before cutting.
Optional upgrade: glossy ganache finish
If you want a more “gateau” look, skip buttercream and use the ganache from recipe #3 instead.
A gentle internal detour (if you love moist oil-based cakes)
If this cake’s tenderness makes you happy, you’ll probably enjoy MasalaMonk’s Orange Olive Oil Cake – Ridiculously Easy and Super Moist. Different flavour, same kind of soft crumb logic.
Notes / substitutions for Vegan Chocolate Layer Cake Recipe
- Plant milk: soy = tallest structure; oat = softer crumb; almond = lighter texture.
- Coffee: hot water works if you don’t want coffee flavour (still blooms cocoa).
- Cocoa: natural cocoa gives brighter chocolate; Dutch-process tastes smoother/darker (either works—stick to one for consistency).
- No 2 tins? Bake in one 20 cm tin longer (expect ~45–55 mins), then slice into layers once fully cool.
Also Read: 7 Pizza Sauce Recipes | Marinara, White Garlic, Alfredo, Buffalo, BBQ, Vodka & Ranch
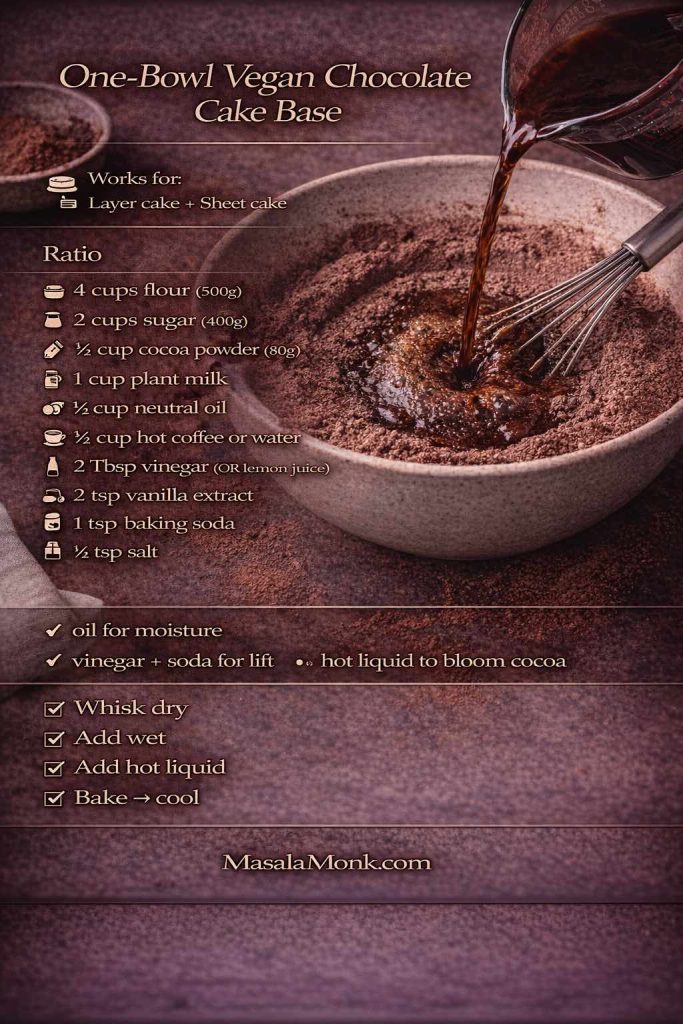
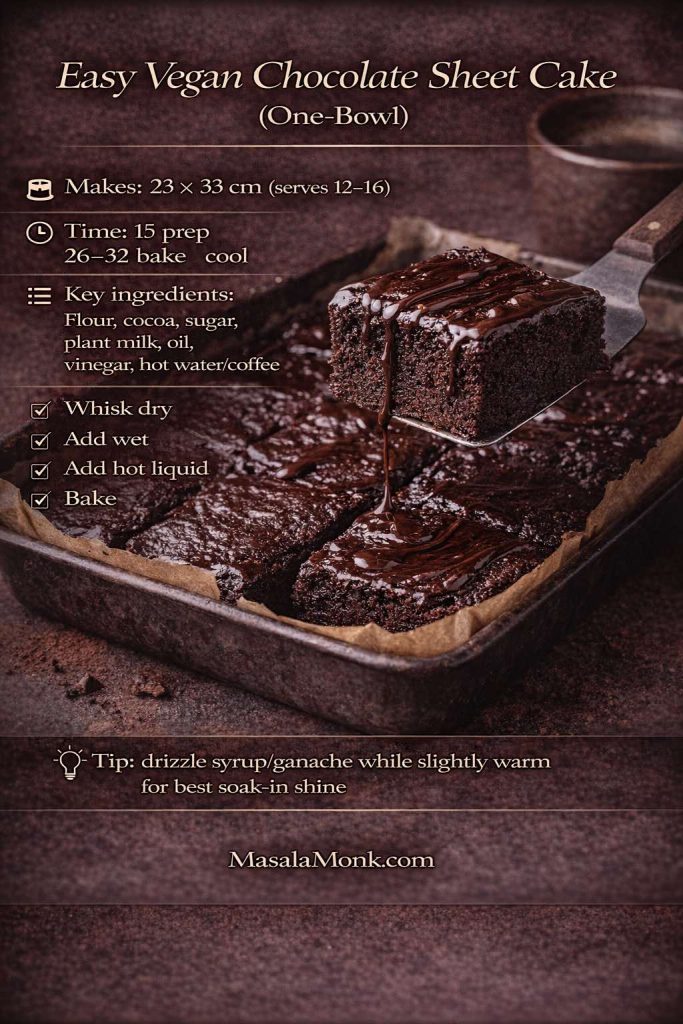
2) Easy Vegan Chocolate Sheet Cake Recipe (One Bowl, Crowd-Friendly)
This is the unfussy hero: mix, pour, bake, slice. It’s the kind of cake that makes you look organised even if you aren’t. Because it bakes in one layer, you get even doneness, easy portions, and less risk of drying out. Furthermore, it’s perfect for quick toppings—drizzle, glaze, or syrup.
Makes: 1 sheet cake (23 × 33 cm) | Serves: 12–16
Time: 15 mins prep + 26–32 mins bake + 45–60 mins cooling | Difficulty: Easy
Oven/Tin: 175°C | 23 × 33 cm tin
Ingredients
- 250 g plain flour
- 250 g caster sugar
- 55 g cocoa powder
- 10 g baking powder
- 3 g bicarbonate of soda
- 3 g fine salt
- 360 ml plant milk
- 120 ml neutral oil
- 15 ml vinegar
- 10 ml vanilla extract
- 120 ml hot water or hot coffee
Method (Eggless Cake Recipe with extra clarity)
- Set up first. Heat oven to 175°C. Line a 23 × 33 cm tin with baking paper, leaving a bit of overhang on the long sides so you can lift the cake out later.
- Whisk dry ingredients thoroughly. In a large bowl, whisk flour, sugar, cocoa, baking powder, bicarbonate of soda, and salt. Keep going until the cocoa looks evenly dispersed; that’s the difference between “good” and “wow” in a sheet cake.
- Add wet ingredients in one go. Pour in plant milk, oil, vinegar, and vanilla. Whisk until smooth. If the batter looks a little thick at this stage, that’s fine.
- Finish with hot liquid. Add hot water or coffee and whisk briefly. The batter will loosen and look glossy.
- Bake and check the centre. Pour into the tin and bake 26–32 minutes. Start checking at 26 minutes; the middle should spring back lightly and a skewer should show moist crumbs.
- Cool for clean slices. Cool in the tin for at least 20 minutes. If you want very neat squares, let it cool fully before cutting.
Fast topping that makes it feel finished
A simple drizzle can transform the whole cake. MasalaMonk’s 3 Minutes Homemade Chocolate Syrup is ideal here—especially if you drizzle it over slightly warm cake so it sinks in just a little.
Variations (easy changes to Vegan Chocolate Sheet Cake, big payoff)
- Fudgier sheet cake: fold in 150 g chopped dark chocolate before baking.
- Chocolate oat cake direction: swap 50 g flour for 50 g oat flour for a softer, warmer crumb.
- Quick party finish: sprinkle chopped toasted nuts or cocoa nibs over syrup while it’s still tacky.
If you enjoy the “one base, multiple personalities” style, MasalaMonk’s Double Chocolate Chip Cookies – One Dough, 7 Ways scratches the same itch.
Notes / substitutions for Vegan Chocolate Sheet Cake Recipe
- Tin size: if smaller/deeper, bake longer; start checking +5 mins and use skewer cues.
- Sweeter/fudgier: fold in 150 g chopped dark chocolate.
- Oil: any neutral oil works; olive oil gives a noticeable flavour (nice if you want it).
- Topping: syrup drizzle for fastest finish; ganache if you want “party cake” vibes.
Also Read: Sandwich for Breakfast: Breakfast Sandwich Recipe + 10 Variations
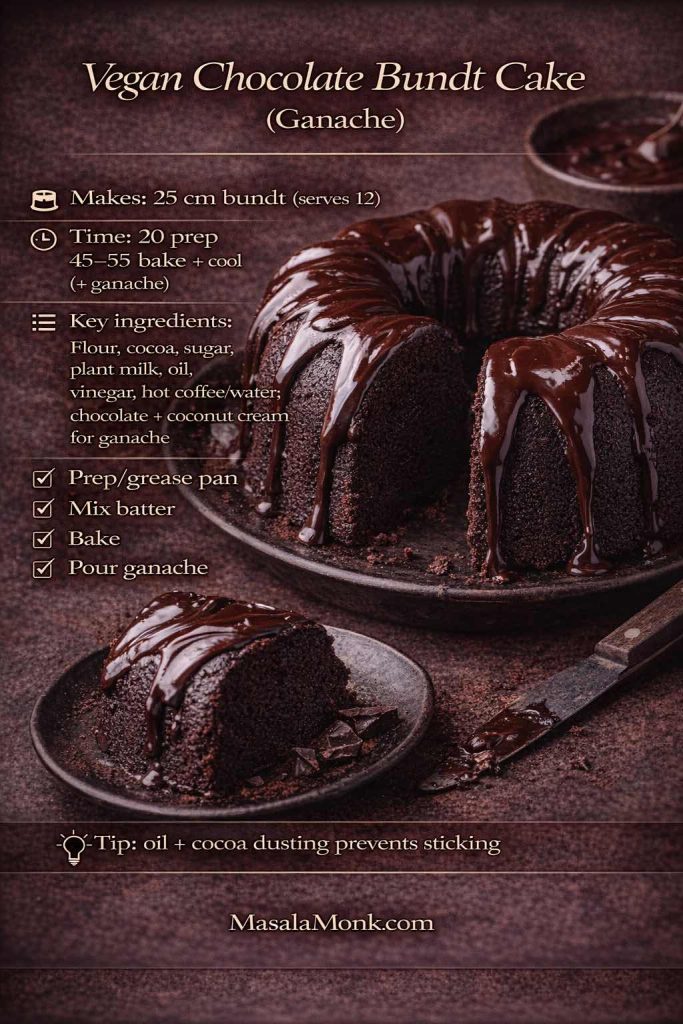
3) Vegan Chocolate Bundt Cake (With Glossy Vegan Chocolate Ganache)
Bundt cakes feel festive without asking you to frost and stack. As long as you grease the pan properly, the rest is straightforward. Afterwards, ganache does the styling for you—no piping bag required.
Makes: 1 bundt cake (25 cm bundt pan) | Serves: 12
Time: 20 mins prep + 45–55 mins bake + 60–90 mins cooling (+ 10 mins ganache) | Difficulty: Easy–Medium
Oven/Tin: 175°C | 25 cm bundt pan
Ingredients
Cake
- 310 g plain flour
- 350 g caster sugar
- 75 g cocoa powder
- 10 g baking powder
- 5 g bicarbonate of soda
- 4 g fine salt
- 480 ml plant milk
- 180 ml neutral oil
- 15 ml vinegar
- 10 ml vanilla extract
- 120 ml hot coffee or hot water
Ganache
- 200 g dark chocolate, chopped
- 200 ml coconut cream (or thick plant cream)
Method (Dairy-Free & Eggless with bundt-specific detail)
- Grease like you mean it. Heat oven to 175°C. Coat every ridge of the bundt pan with oil. Then dust lightly with cocoa powder and tap out the excess. This two-step is worth it.
- Whisk the dry ingredients. Combine flour, sugar, cocoa, baking powder, bicarbonate of soda, and salt. Whisk well so cocoa is evenly distributed.
- Add wet, then bloom. Add plant milk, oil, vinegar, and vanilla. Whisk until smooth. Then pour in hot coffee/water and whisk briefly again.
- Bake until the cake tells you it’s ready. Bake 45–55 minutes. Start checking at 45:
- The cake should spring back when pressed.
- A skewer should come out with moist crumbs.
- The edges often pull away slightly from the pan.
- Cool in the pan, but not forever. Let the bundt cool 15 minutes, then invert onto a rack. Too soon and it can tear; too late and it may stick.
Ganache Recipe (silky, shiny, not grainy)
- Chop the chocolate finely; smaller pieces melt more evenly.
- Warm the coconut cream until steaming (not boiling).
- Pour over chocolate, wait 2 minutes, then stir gently from the centre outward.
- Let it thicken slightly, then pour over the cooled cake.
If you like understanding how cocoa type shifts colour and flavour, this is a good companion: Types of cocoa, explained.
Variations of Vegan Chocolate Bundt Cake
- Add orange zest for a chocolate-orange bundt mood.
- Add espresso powder for a darker, roastier finish.
- Sprinkle chopped nuts on the ganache before it sets for texture.
Notes / substitutions for Vegan Chocolate Bundt Cake Recipe
- Pan release is everything: oil + cocoa dusting prevents sticking better than flour for chocolate cakes.
- Coconut cream: use thick plant cream if preferred; thinner milks won’t set ganache as well.
- No bundt pan? Bake as a 23 × 33 cm sheet (reduce bake time; check at ~30 mins).
- Chocolate: choose one you’d happily eat straight—ganache shows quality.
Also Read: Vodka Pasta (Penne alla Vodka) + Spicy Rigatoni, Chicken, and Gigi Recipes
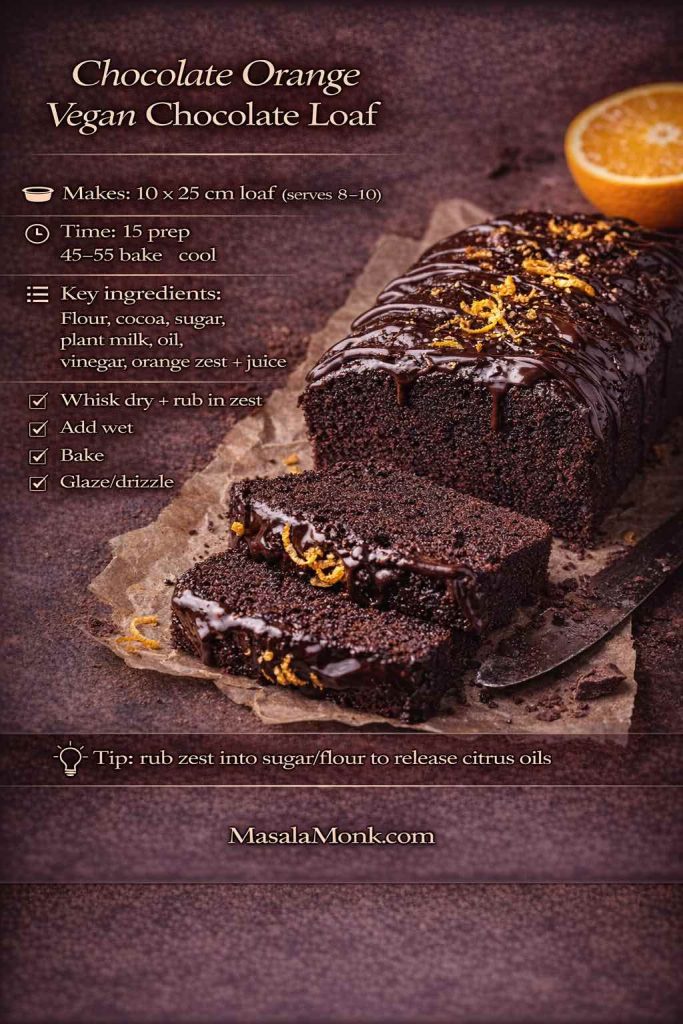
4) Chocolate Orange Vegan Chocolate Loaf Cake (Bright, Sliceable)
This loaf is for the days you want chocolate but also want lift—something fragrant and slightly fresh. Orange zest does that beautifully. Because it’s a loaf, it slices neatly and travels well, which makes it a great “bring along” cake.
Makes: 1 loaf (10 × 25 cm) | Serves: 8–10
Time: 15 mins prep + 45–55 mins bake + 60 mins cooling | Difficulty: Easy
Oven/Tin: 175°C | 10 × 25 cm loaf tin
Ingredients
- 220 g plain flour
- 200 g caster sugar
- 55 g cocoa powder
- 10 g baking powder
- 3 g bicarbonate of soda
- 3 g fine salt
- Zest of 2 oranges
- 300 ml plant milk
- 120 ml neutral oil
- 30 ml orange juice
- 15 ml vinegar
- 10 ml vanilla extract
Method (extra loaf guidance that is Eggless & Dairy Free)
- Heat oven to 175°C. Line the loaf tin with baking paper, leaving overhang for easy lifting.
- Whisk flour, sugar, cocoa, baking powder, bicarbonate of soda, and salt. Then rub the orange zest into the dry mixture with your fingertips. This small step releases citrus oils and makes the loaf smell incredible.
- Whisk plant milk, oil, orange juice, vinegar, and vanilla. Pour into the dry ingredients and whisk just until smooth.
- Pour batter into the tin and level the top. Bake 45–55 minutes. Start checking at 45 minutes; loaf cakes often need the full time.
- Cool in the tin for 15 minutes, then lift out and cool fully before glazing.
Finish options for Chocolate Orange Vegan Chocolate Loaf Cake
- Orange glaze: 180 g icing sugar + 25–35 ml orange juice + zest.
- Chocolate drizzle: a spoonful of MasalaMonk’s homemade chocolate syrup over slices.
If you love citrus bakes in general, MasalaMonk’s Wholewheat Carrot Orange Tea Cake is another bright, cosy option.
Notes / substitutions for Chocolate Orange Vegan Chocolate Loaf Cake
- Orange intensity: use zest + a little juice; for extra punch, add ½ tsp orange extract (optional).
- Loaf pan sizes vary: if your pan is smaller/deeper, bake longer; tent with foil if top browns early.
- Chocolate chips: 100–150 g chips make it more “dessert loaf.”
- Glaze options: orange glaze = bright; chocolate drizzle = richer.
Also Read: Tomato Sauce From Fresh Tomatoes (Food Mill Method & Recipe)
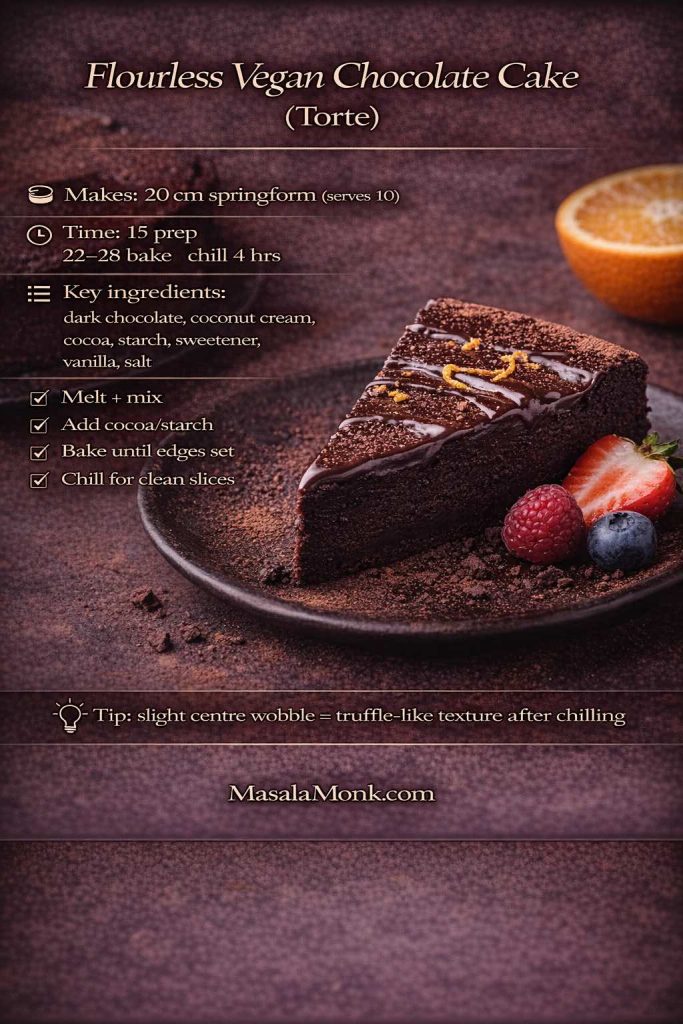
5) Flourless Vegan Chocolate Cake (Torte-Style, Truffle-Rich)
This is the “dessert menu” cake: dense, glossy, and intensely chocolatey. Since it’s so rich, smaller slices feel generous. Additionally, it’s great for hosting because you can make it ahead, chill it, then slice cleanly when guests arrive.
Makes: 1 torte (20 cm springform) | Serves: 10
Time: 15 mins prep + 22–28 mins bake + 4 hrs chilling | Difficulty: Easy–Medium
Oven/Tin: 165°C | 20 cm springform tin
Ingredients
- 300 g dark chocolate, chopped
- 180 ml coconut cream
- 60 ml maple syrup (or 70 g caster sugar)
- 20 g cocoa powder
- 20 g cornflour (cornstarch) or potato starch
- 10 ml vanilla extract
- 2 g fine salt
Method (with torte cues)
- Heat oven to 165°C. Line the base of a 20 cm springform tin and lightly oil the sides.
- Melt the chocolate and coconut cream gently. Stir until smooth and glossy, then remove from heat.
- Whisk in maple syrup (or sugar) while the mixture is still warm. Then whisk in cocoa powder, starch, vanilla, and salt until fully smooth. If you see tiny lumps, whisk a little more—but avoid vigorous beating.
- Pour into the tin and smooth the top. Bake 22–28 minutes. The edges should look set while the centre can still wobble slightly.
- Cool at room temperature, then chill at least 4 hours. This chilling step is what turns it into clean, truffle-like slices.
Serving ideas for Egg & Flourless Vegan Chocolate Cake
- Dust with cocoa.
- Add berries.
- Drizzle with warmed chocolate syrup for shine: 3 Minutes Homemade Chocolate Syrup.
Notes / substitutions for Flourless Vegan Chocolate Cake
- Sweetener: maple syrup or sugar both work—maple adds a gentle caramel note.
- Starch: cornflour/cornstarch or potato starch works; it helps slice cleanly.
- Texture control: slightly underbake (wobbly centre) for truffle-soft slices after chilling.
- Serving: bring to room temp 15–20 mins for best flavour.
Also Read: Green Chutney Recipe (Coriander–Mint / Cilantro Chutney)
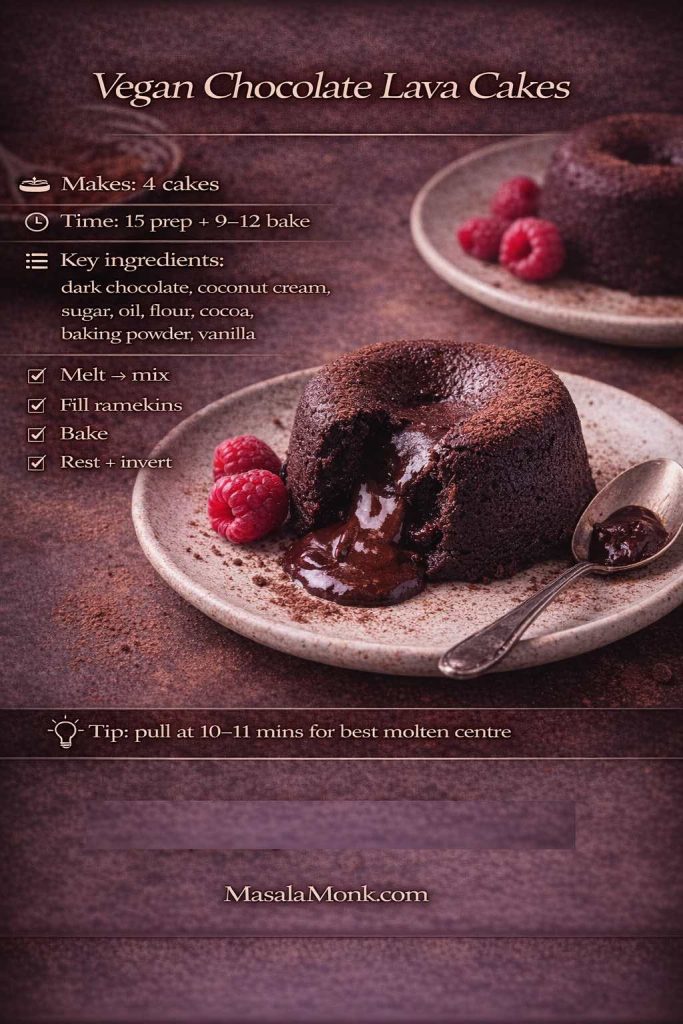
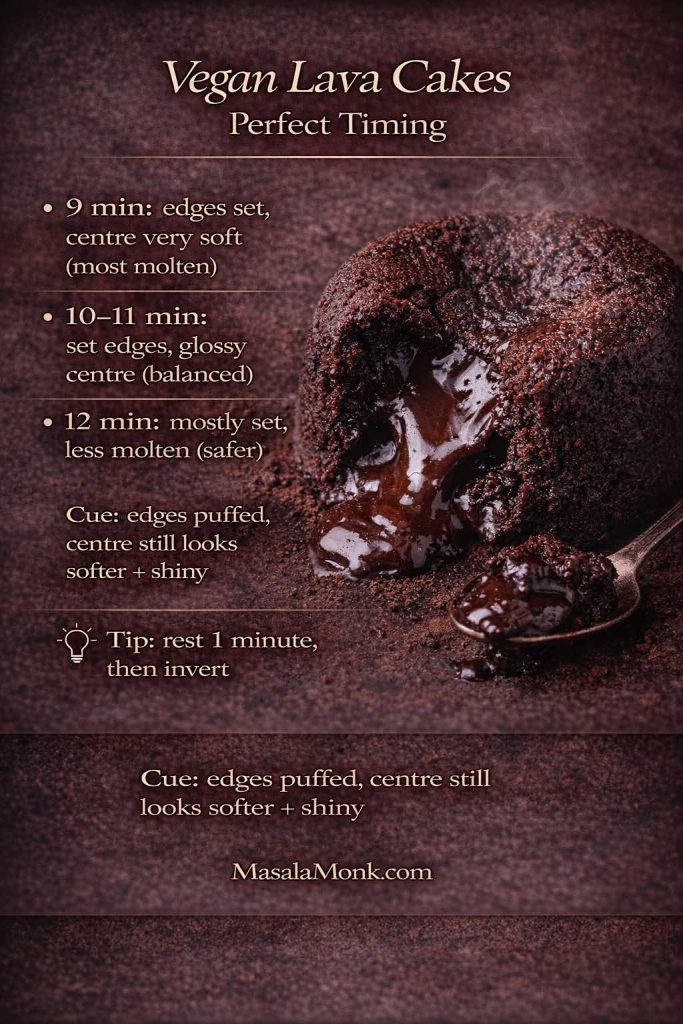
6) Vegan Chocolate Lava Cakes (Molten Centres)
These are dramatic in the best way: warm edges, molten centres, and a spoon-breaking moment that feels like a reward. Even though lava cakes look fancy, the batter is straightforward. The real skill is pulling them at the right moment.
Makes: 4 lava cakes | Serves: 4
Time: 15 mins prep + 9–12 mins bake | Difficulty: Easy–Medium
Oven/Tin: 220°C | 4 ramekins
- 120 g dark chocolate
- 80 ml coconut cream
- 50 g caster sugar
- 60 ml neutral oil
- 65 g plain flour
- 15 g cocoa powder
- 5 g baking powder
- 1 g fine salt
- 5 ml vanilla extract
Method (timing-focused Recipe for Vegan Chocolate Lava Cakes)
- Heat oven to 220°C. Grease four ramekins thoroughly. For extra release, dust with cocoa powder and tap out excess.
- Melt chocolate and coconut cream until smooth. Let it cool for 2–3 minutes so it doesn’t overheat the flour later.
- Whisk in sugar, oil, and vanilla. Then add flour, cocoa, baking powder, and salt. Whisk until smooth and thick.
- Divide batter evenly between ramekins. Place ramekins on a tray for easy movement.
- Bake 9–12 minutes. Start checking at 9 minutes:
- Edges should look set and slightly puffed.
- Centres should still look softer and a little glossy.
- Rest 1 minute. Run a thin knife around the edge, invert onto a plate, then lift off the ramekin.
If you like understanding vegan structure tricks, Serious Eats has excellent aquafaba resources: The Science Behind Vegan Meringues and Aquafaba meringue frosting.
Notes / substitutions for Dairy & Egg Free Vegan Chocolate Lava Cakes
- Molten centre depends on timing: start checking at 9 mins; pull when edges set but centre looks softer/glossy.
- Ramekins: grease thoroughly + cocoa dusting = clean unmoulding.
- Make-ahead: chill filled ramekins 30 mins; add ~1 minute bake time.
- No ramekins: use a muffin tray (grease well); bake time usually similar—watch cues.
Also Read: Iced Coffee: 15 Drink Recipes—Latte, Cold Brew, Frappe & More
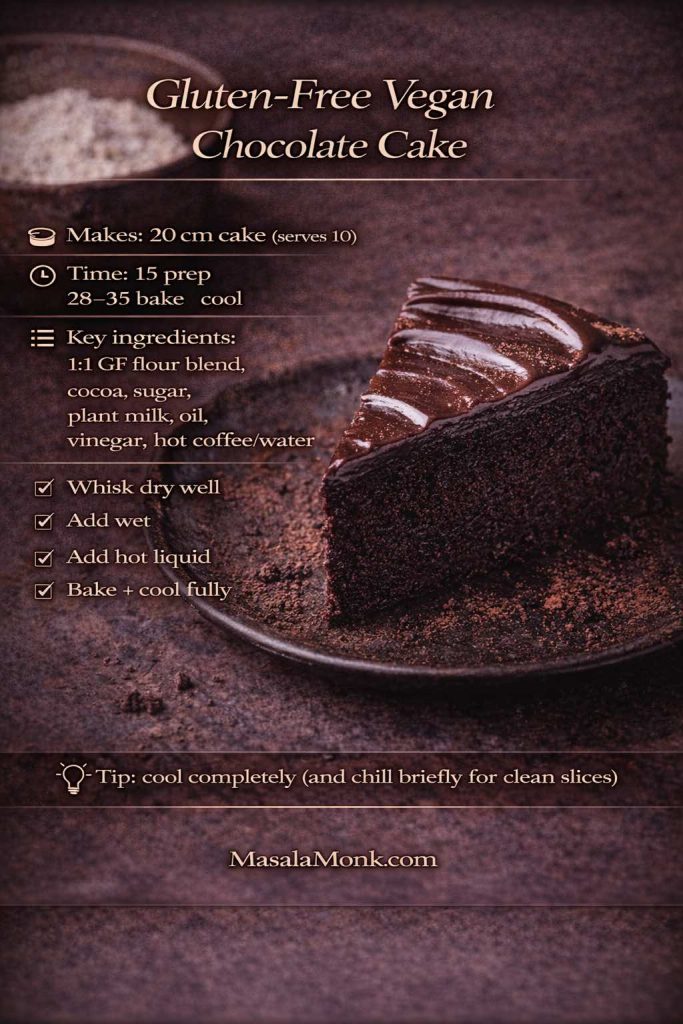
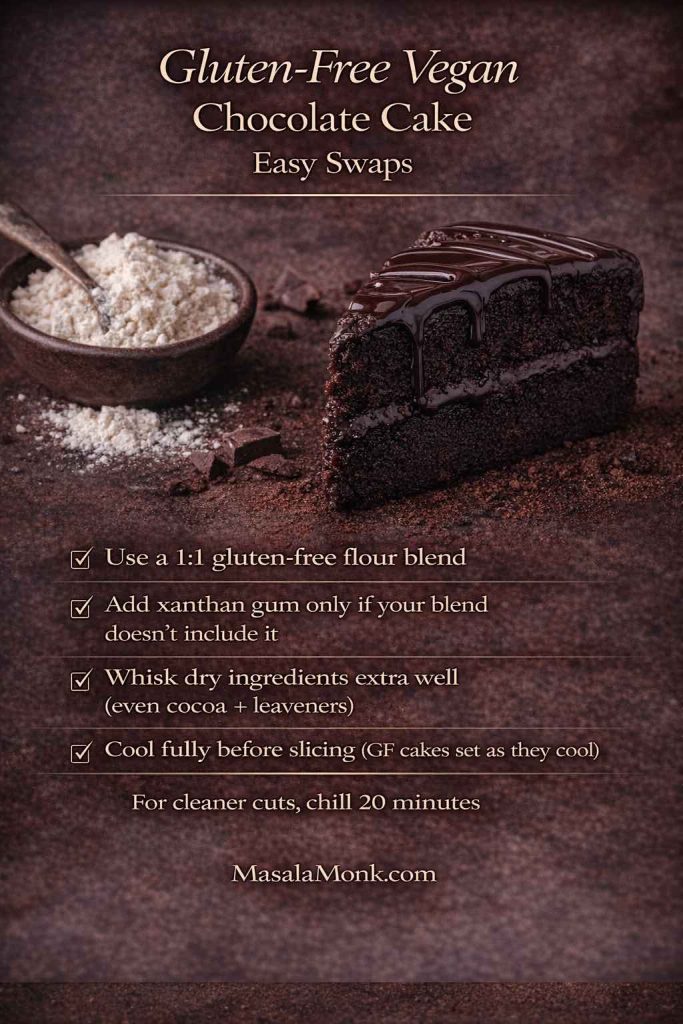
7) Vegan Gluten-Free Chocolate Cake (Tender, Balanced)
Gluten-free cakes can be gorgeous when they’re built intentionally. Here, a 1:1 blend handles most of the work, while careful mixing and cooling ensure the crumb stays cohesive.
Makes: 1 cake (20 cm) | Serves: 10
Time: 15 mins prep + 28–35 mins bake + 60–90 mins cooling | Difficulty: Easy
Oven/Tin: 175°C | 20 cm round tin
Ingredients
- 245 g gluten-free 1:1 flour blend
- 200 g caster sugar
- 55 g cocoa powder
- 10 g baking powder
- 3 g bicarbonate of soda
- 3 g fine salt
- 1 g xanthan gum (skip if blend already contains it)
- 300 ml plant milk
- 80 ml neutral oil
- 15 ml vinegar
- 10 ml vanilla extract
- 120 ml hot coffee or hot water
Method (gluten-free friendly)
- Heat oven to 175°C. Line a 20 cm tin.
- Whisk dry ingredients thoroughly. With gluten-free flour, this step matters even more because you want the leaveners and cocoa evenly distributed.
- Add plant milk, oil, vinegar, and vanilla. Whisk smooth. Then add hot coffee/water and mix briefly.
- Bake 28–35 minutes. Cool fully in the tin for 15 minutes, then transfer to a rack and cool completely before slicing.
Gluten-free Vegan Chocolate Cake success cues
- Let it cool fully before cutting; warm gluten-free cake is more fragile.
- If you want extra security, chill the cooled cake briefly before slicing.
For clear guidance on conversions and xanthan gum, these are helpful: Gluten-free baking conversion conundrum and A guide to xanthan gum.
Notes / substitutions fo Vegan Gluten-Free Chocolate Cake
- GF flour blend: use a 1:1 blend; if it already has xanthan gum, skip extra.
- Cooling matters: GF cakes slice best fully cool (even chilled 20 mins for neat cuts).
- Plant milk: soy helps structure; oat keeps it softer.
- Pan swap: works as cupcakes too—start checking at ~18 mins.
Also Read: Cold Brew Espresso Martini: How to Make It (Step-by-Step Recipe)
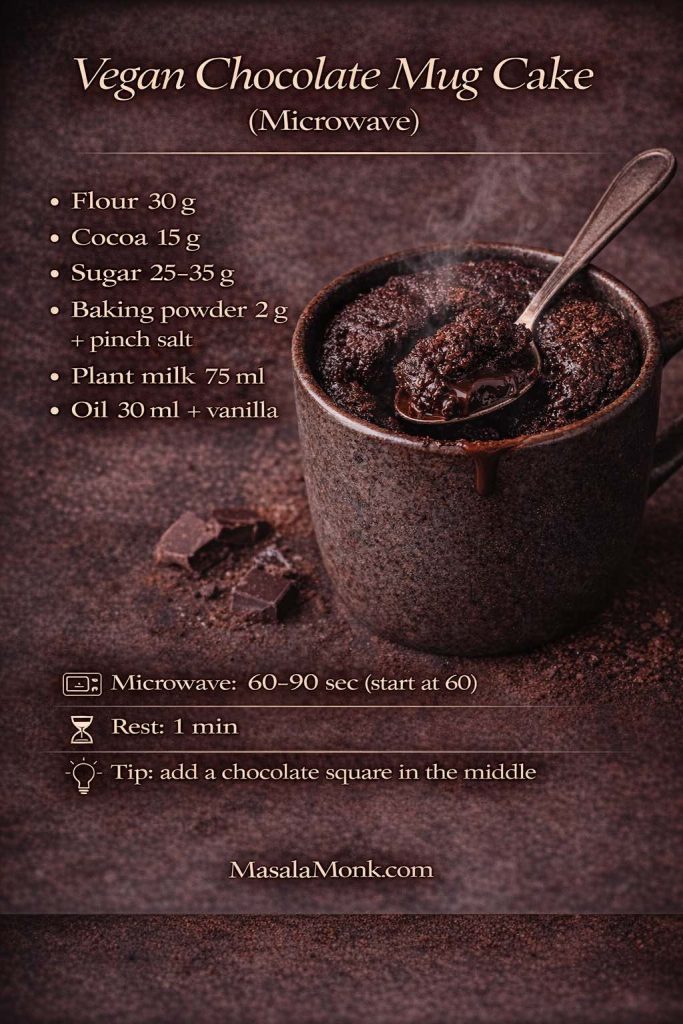
8) Vegan Chocolate Mug Cake Recipe (Microwave Comfort)
This is warm, quick comfort—nothing more and nothing less. It’s also the easiest way to experiment with cocoa, sweetness, or add-ins without committing to an entire cake.
Makes: 1 mug cake | Serves: 1
Time: 5 mins prep + 60–90 secs cook + 1 min rest | Difficulty: Easy
Microwave/Mug: 1 large microwave-safe mug (350–400 ml)
Ingredients
- 30 g plain flour
- 15 g cocoa powder
- 25–35 g caster sugar (to taste)
- 2 g baking powder
- 1 g fine salt
- 75 ml plant milk
- 30 ml neutral oil
- 5 ml vanilla extract
Method (so it stays tender, eggless and dairy free)
- Whisk flour, cocoa, sugar, baking powder, and salt in a microwave-safe mug.
- Add plant milk, oil, and vanilla. Stir until smooth, scraping the bottom so no flour hides.
- Microwave 60–90 seconds. Start at 60 seconds, then add 10-second bursts as needed. Overcooking is the fastest route to a rubbery mug cake.
- Rest 1 minute. This short rest helps the crumb settle and stay softer.
Upgrades for Vegan Chocolate Mug Cake
- Add a square of dark chocolate in the middle for a molten pocket.
- Drizzle with homemade chocolate syrup and finish with a pinch of salt.
- Add orange zest for a brighter aroma.
Notes / substitutions Vegan Chocolate Mug Cake Recipe
- Microwave power varies: start at 60 secs; add 10-sec bursts—overcooking makes it rubbery.
- Oil: keeps it tender; melted vegan butter works but firms as it cools.
- Add-ins: chocolate square in the middle = molten pocket.
- Mug size: use a large mug (at least 350–400 ml) to prevent overflow.
Also Read: Manhattan Cocktail Recipe (Classic + 6 Variations)
9) Beetroot Vegan Chocolate Cake (Ultra-Moist)
Beetroot adds moisture and depth, so this cake stays tender for days. In other words, it’s ideal when you’re baking ahead. The key is blending the beetroot purée until silky smooth so the crumb feels plush rather than fibrous.
Makes: 1 cake (20 cm) | Serves: 10
Time: 20 mins prep + 35–45 mins bake + 60–90 mins cooling | Difficulty: Easy
Oven/Tin: 175°C | 20 cm round tin
Ingredients
- 220 g plain flour
- 180 g caster sugar
- 55 g cocoa powder
- 10 g baking powder
- 3 g bicarbonate of soda
- 3 g fine salt
- 250 g beetroot purée (cooked beetroot, blended smooth)
- 180 ml plant milk
- 80 ml neutral oil
- 15 ml vinegar
- 5 ml vanilla extract

Method
- Heat oven to 175°C. Line a 20 cm tin.
- Whisk dry ingredients thoroughly so cocoa disperses evenly.
- Whisk beetroot purée, plant milk, oil, vinegar, and vanilla until smooth. If the purée is thick, whisk a little longer to loosen it.
- Combine wet and dry until the batter is smooth, then pour into the tin.
- Bake 35–45 minutes. Cool fully before slicing.
Beetroot-specific cues for Vegan Chocolate Cake
- If you want the cake to read “pure chocolate,” use a darker cocoa and consider adding 2 g espresso powder.
- For a brighter edge, add orange zest—especially lovely if you glaze it.
If you want more cozy baking ideas after this, MasalaMonk’s Baking category is a great place to keep exploring.
Notes / substitutions for Beetroot Vegan Chocolate Cake
- Beetroot prep: blend until completely smooth; texture depends on a silky purée.
- Flavour balance: add ½ tsp espresso powder for deeper chocolate (optional).
- Moisture: beetroot varies—if batter seems very thick, add a splash more plant milk.
- Make-ahead: this one stays moist for days; great for baking ahead.
Also Read: Cappuccino Recipe: How to Make a Perfect Cappuccino at Home
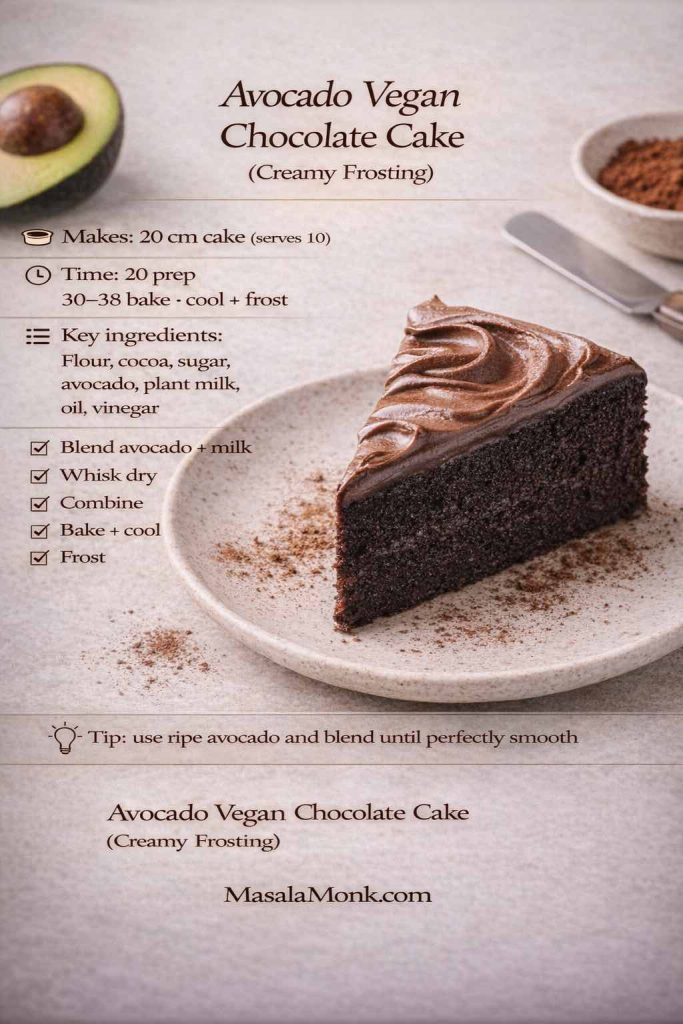
10) Avocado Vegan Chocolate Cake (Recipe With Creamy Chocolate Frosting)
Avocado brings softness and a creamy mouthfeel. Done well, it doesn’t dominate the flavour—it simply makes the cake feel richer. In addition, the frosting can be silky without relying heavily on icing sugar.
Makes: 1 cake (20 cm) | Serves: 10
Time: 20 mins prep + 30–38 mins bake + 60–90 mins cooling (+ 10 mins frosting) | Difficulty: Easy
Oven/Tin: 175°C | 20 cm round tin
Cake
- 220 g plain flour
- 200 g caster sugar
- 55 g cocoa powder
- 10 g baking powder
- 3 g bicarbonate of soda
- 3 g fine salt
- 150 g ripe avocado flesh
- 300 ml plant milk
- 80 ml neutral oil
- 15 ml vinegar
- 10 ml vanilla extract
Creamy avocado frosting
- 150 g ripe avocado flesh
- 25 g cocoa powder
- 60 ml maple syrup (to taste)
- 5 ml vanilla extract
- 1–2 g fine salt
Method
- Heat oven to 175°C. Line a 20 cm tin.
- Blend avocado with plant milk until completely smooth. This matters—any lumps will show up in texture.
- Whisk dry ingredients in a bowl.
- Whisk the avocado mixture with oil, vinegar, and vanilla. Then pour into dry ingredients and whisk until smooth.
- Bake 30–38 minutes. Cool completely before frosting.
Frosting
Blend avocado, cocoa, maple syrup, vanilla, and salt until silky. Chill 10–15 minutes to thicken. Spread over cooled cake.
Serving ideas
- Finish with cocoa dusting for a clean look.
- Add orange zest for brightness.
- Add chopped toasted nuts for crunch.
If you like making plant milk at home for baking, MasalaMonk’s Easy Homemade Oats Milk is a handy reference.
Notes / substitutions for Avocado Vegan Chocolate Cake Recipe
- Avocado must be ripe: blend until totally smooth or you’ll feel lumps.
- Frosting storage: because it’s fresh avocado, keep frosted cake refrigerated; bring slices to room temp before serving.
- Sweetness: maple syrup in frosting is adjustable—start lower, then add to taste.
- No avocado frosting? Use ganache (from #3) or the buttercream (from #1).
Also Read: Baked Ziti Recipe Collection: 15 Easy Variations
Before you go: serving ideas that keep vegan chocolate cake feeling new
Even a truly excellent vegan chocolate cake can start to feel familiar if it always shows up the same way. Fortunately, you don’t need a new recipe to make it feel different—you just need a new finish. With that in mind, rotate your toppings and pairings so each bake has its own personality, even when the cake underneath is a repeat favourite.
Switch the finish, change the whole vibe
- Syrup drizzle (quick, glossy, instantly dessert-like): Warm a spoonful of 3 Minutes Homemade Chocolate Syrup and let it ribbon over slices. As it cools, it clings beautifully, so every bite gets a little shine.
- Ganache pour (sleek, dramatic, surprisingly easy): If you’ve made the bundt ganache, you’re already set. Instead of saving it only for bundt cakes, pour it over sheet cake, loaf cake, or even a simple single-layer round. Better still, if you let the ganache thicken slightly before pouring, you’ll get a slow, elegant drape rather than a runaway puddle.
- Citrus lift (bright, fragrant, not overly sweet): Orange zest over chocolate is a small move with a big payoff. It’s particularly lovely on beetroot cake, where the zest adds sparkle and keeps the chocolate tasting lively rather than heavy.
- Salt finish (tiny detail, big flavour shift): A pinch of flaky salt over warm slices doesn’t make the cake salty—it makes the chocolate taste clearer. In the same way that salt sharpens caramel, it pulls chocolate into focus.
Add texture and contrast without extra work
If you want a little more than a topping, a few low-effort contrasts can make the plate feel complete:
- Crunch: chopped toasted nuts or cocoa nibs scattered over syrup or ganache while it’s still tacky.
- Creamy + cool: a spoon of thick coconut yoghurt or a scoop of dairy-free ice cream next to warm cake.
- Fresh: berries or orange segments to lighten the richness, especially with flourless torte or lava cakes.
Building a dessert table that complements chocolate
When you’re putting together a dessert spread, variety matters more than quantity. So instead of adding another cake, choose one contrasting sweet that brings a different texture—creamy, crisp, or bite-sized.
- Creamy and layered: Savoiardi Chocolate Vanilla Pudding
- Chilled and fruity: No-Bake Blueberry Cheesecake
- Small and celebratory: Easy Festive Irish Rum Truffles
- Warm and crisp (excellent with chocolate sauce): How to Make Churros
Storage, chilling, and freezing vegan chocolate cake
Because most of these cakes lean on oil for tenderness, they keep beautifully. Even so, storage still makes a difference—especially once frosting enters the picture. The goal is simple: protect moisture, prevent off-flavours, and keep texture as close to fresh-baked as possible.
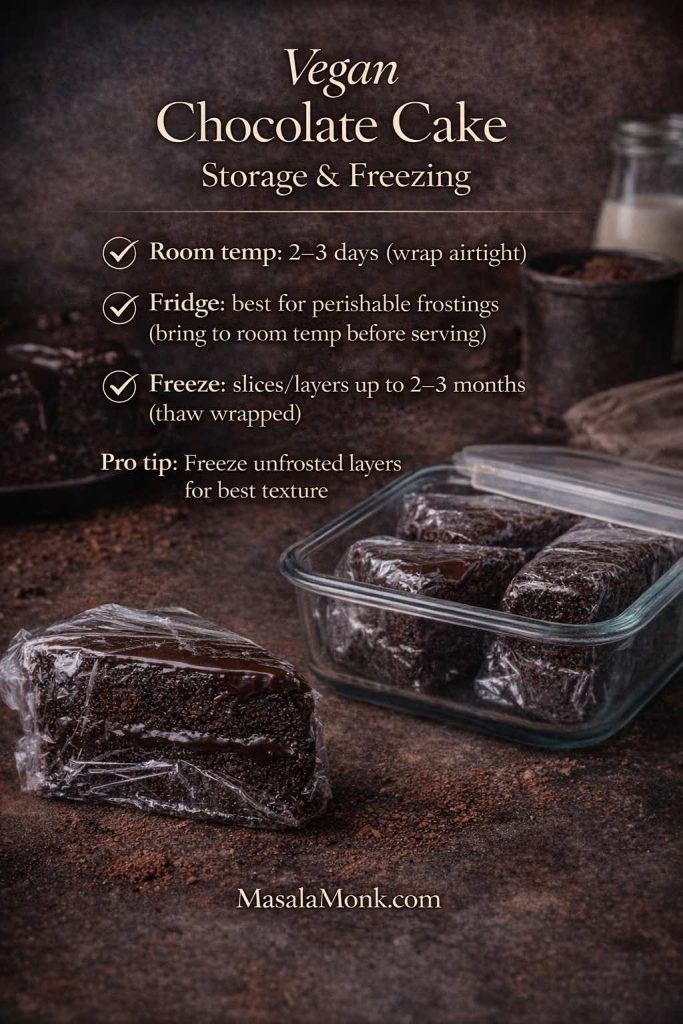
Room temperature (best for most unfrosted cakes)
If the cake is unfrosted—or topped with something stable like a syrup drizzle—wrap it tightly and store it at room temperature for 2–3 days. For loaf and sheet cakes in particular, this often preserves softness better than refrigeration.
How to wrap it well: once the cake is fully cool, wrap it snugly so air can’t circulate. If you’ve sliced it, press a piece of baking paper against the cut side first, then wrap.
Refrigeration (best for perishable toppings)
If you’ve used avocado frosting or you simply prefer a chilled finish, refrigerate the cake. However, for the best flavour and texture, bring slices back to room temperature before serving. Otherwise, the crumb can feel firmer and the chocolate can taste muted.
A good rhythm: slice what you need, then let those pieces sit out for 20–30 minutes before eating.
Freezing (best for planning ahead)
If you like having cake “on standby,” freezing is your friend. Wrap slices or layers tightly, then seal in an airtight container. When you’re ready, thaw at room temperature while still wrapped; that way, condensation forms on the wrap instead of soaking into the cake.
If you want clear, official guidance, here are the references that keep things straightforward: USDA Freezing and Food Safety, the UK’s How to chill, freeze and defrost food safely, and the FDA’s Refrigerator & Freezer Storage Chart (PDF).
Also Read: Hot Chocolate Coffee: 3 Easy Recipes (Cocoa, Mix, or Espresso)
A simple “choose your finish” guide
If you’re ever unsure what topping fits which cake, this quick guide helps you decide without overthinking:
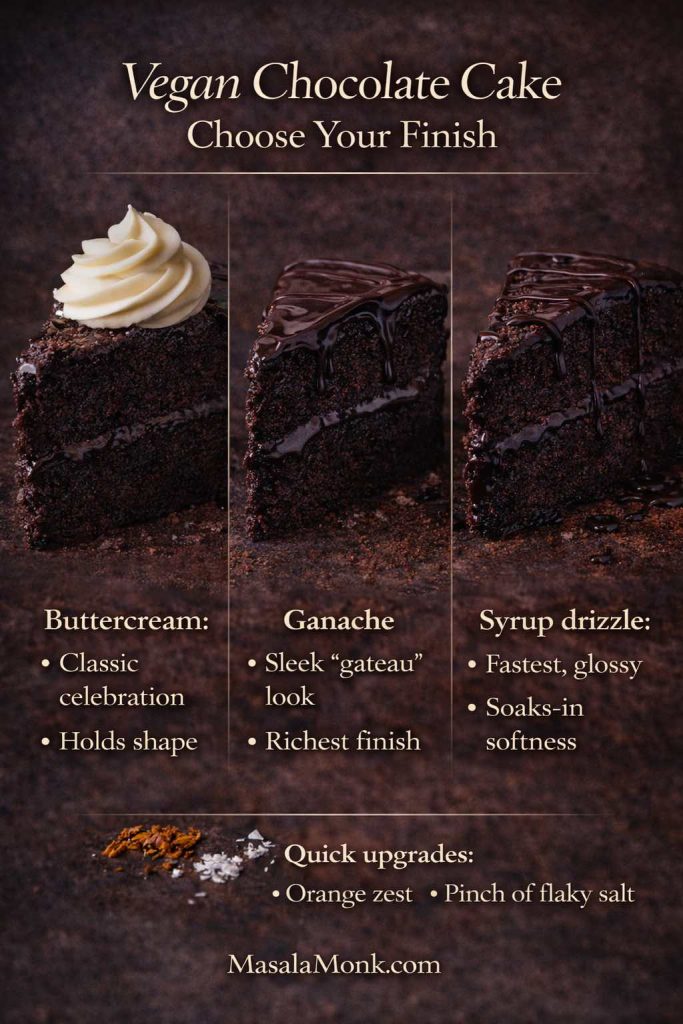
- Layer cake: buttercream for classic celebration, ganache for a sleek “gateau” mood.
- Sheet cake: syrup drizzle for speed, quick glaze for neat slices, ganache if you want it to feel more formal.
- Bundt cake: ganache is the easiest way to make the shape look intentional; meanwhile, a light dusting of cocoa keeps it elegant.
- Loaf cake: citrus glaze or syrup drizzle for simple charm; ganache if you want it to look like a gift cake.
- Flourless torte: cocoa dusting plus berries keeps it refined; alternatively, a thin ganache layer makes it feel ultra-luxurious.
- Lava cakes: keep toppings minimal—syrup, berries, or a pinch of salt—so the molten centre stays the star.
- Mug cake: syrup and salt are all you need; if you want more, add a square of chocolate inside next time.
Also Read: Cranberry Moscow Mule Recipe: A Festive Holiday Cocktail With Easy Variations
One last nudge (because variations are the fun part)
Once you’ve baked one of these cakes, it’s surprisingly satisfying to remix it. Swap the shape. Change the topping. Add orange zest one time and espresso the next. Suddenly, you’re not repeating yourself—you’re building a repertoire.
If you enjoy that “one dependable base, then smart variations” energy, you might also like Double Chocolate Chip Cookies – One Dough, 7 Ways. It’s the same spirit: familiar comfort first, then playful twists that keep baking exciting.
Also Read: Kahlua Drinks: 10 Easy Cocktail Recipes (Milk, Vodka, Coffee)
Vegan Chocolate Cake FAQ
1) What’s the best vegan chocolate cake recipe if I want it truly moist?
Go for an oil-based batter and a “bloom” step with hot coffee or hot water. Oil keeps the crumb tender for longer, while hot liquid wakes up cocoa so the chocolate tastes bigger. Also, bake to cues: stop when a skewer shows moist crumbs rather than waiting for it to come out completely clean.
2) Are vegan chocolate cake recipes automatically dairy-free and eggless?
Yes—vegan means no dairy and no eggs by definition. Still, “eggless” texture can vary because structure comes from different places: sometimes it’s mostly flour + leavening, while other recipes add starch, avocado, or beetroot for a fudgier, denser feel.
3) What’s the easiest vegan chocolate cake for beginners?
A one-bowl sheet cake is usually the simplest starting point. Because it bakes in a single layer, you get more even doneness, fewer steps, and less risk of overhandling. Plus, you can finish it with a quick drizzle or ganache and it still feels special.
4) Can I make a vegan chocolate cake without coffee?
Definitely. Coffee intensifies cocoa, yet hot water gives you the same “blooming” effect without any coffee notes. In other words, you’ll still get a deep chocolate aroma—just cleaner and more neutral.
5) Which cocoa powder should I use: natural or Dutch-process?
Natural cocoa tends to taste brighter and slightly sharper, while Dutch-process usually tastes smoother and looks darker. Either can work, although results won’t be identical. Consequently, once you find a cocoa you love, stick with it so your cake becomes consistent from bake to bake.
6) What plant milk is best for vegan chocolate cake?
Soy milk often gives a bit more structure and height, oat milk tends to make the crumb softer and rounder, and almond milk is lighter and can feel slightly less plush. That said, any unsweetened plant milk will generally work—choose based on what you keep in the fridge.
7) How do I make a vegan chocolate cake more “fudgy” instead of fluffy?
Use more melted chocolate or add chopped dark chocolate to the batter, then avoid overbaking. Additionally, choose a sheet cake format or a flourless/torte-style recipe, since both naturally lean richer and denser. Finally, let the cake cool fully—fudgy texture often sets as it rests.
8) Can I make vegan chocolate cake gluten-free and still keep it tender?
Yes, especially with a good 1:1 gluten-free flour blend. Because gluten-free cakes are more fragile when warm, let it cool completely before slicing. If you want extra neat slices, chill the cooled cake briefly—texture tightens and cuts cleaner.
9) Why do so many dairy-free chocolate cake recipes use vinegar?
Vinegar (or lemon juice) reacts with baking soda, which helps the cake rise and keeps the crumb lighter. Importantly, it shouldn’t make the cake taste sour—the amount is small and it disappears into the chocolate.
10) Why is my vegan chocolate cake dry, and how do I prevent it next time?
Dryness usually comes from overbaking or measuring too much flour. Next time, weigh ingredients if you can, start checking earlier, and pull the cake when the centre springs back and the skewer shows moist crumbs. Moreover, wrap the cooled cake well—air is what steals softness fastest.
11) Can I bake vegan chocolate cake as cupcakes, a loaf, or a bundt?
Yes—this batter family is flexible. Cupcakes bake faster (start checking around 18–22 minutes), loaf cakes need longer and benefit from a foil tent if the top browns early, and bundt cakes demand thorough greasing for clean release. As a result, the format you choose should match your time and how you plan to serve it.
12) How long does vegan chocolate cake last, and can I freeze it?
Most oil-based vegan chocolate cakes keep well at room temperature for 2–3 days if wrapped tightly. For frosted cakes—especially avocado frosting—refrigerate, then bring slices back to room temp for the best flavour. For longer storage, freeze slices or layers tightly wrapped; thaw while still wrapped so condensation stays on the wrap, not in the cake.
13) What’s the quickest vegan chocolate dessert when I want chocolate right now?
A vegan chocolate mug cake is the fastest option. It’s ready in minutes, and you can adjust sweetness or add a chocolate square in the centre for a molten pocket. Just microwave in short bursts, since overcooking is the main reason mug cakes turn rubbery.
14) Which vegan chocolate cake is best for birthdays and celebrations?
A classic vegan chocolate layer cake is the most “party-ready” because it stacks well and holds frosting cleanly. Alternatively, a bundt cake looks festive with almost no decorating—ganache does the work and the shape carries the drama.