
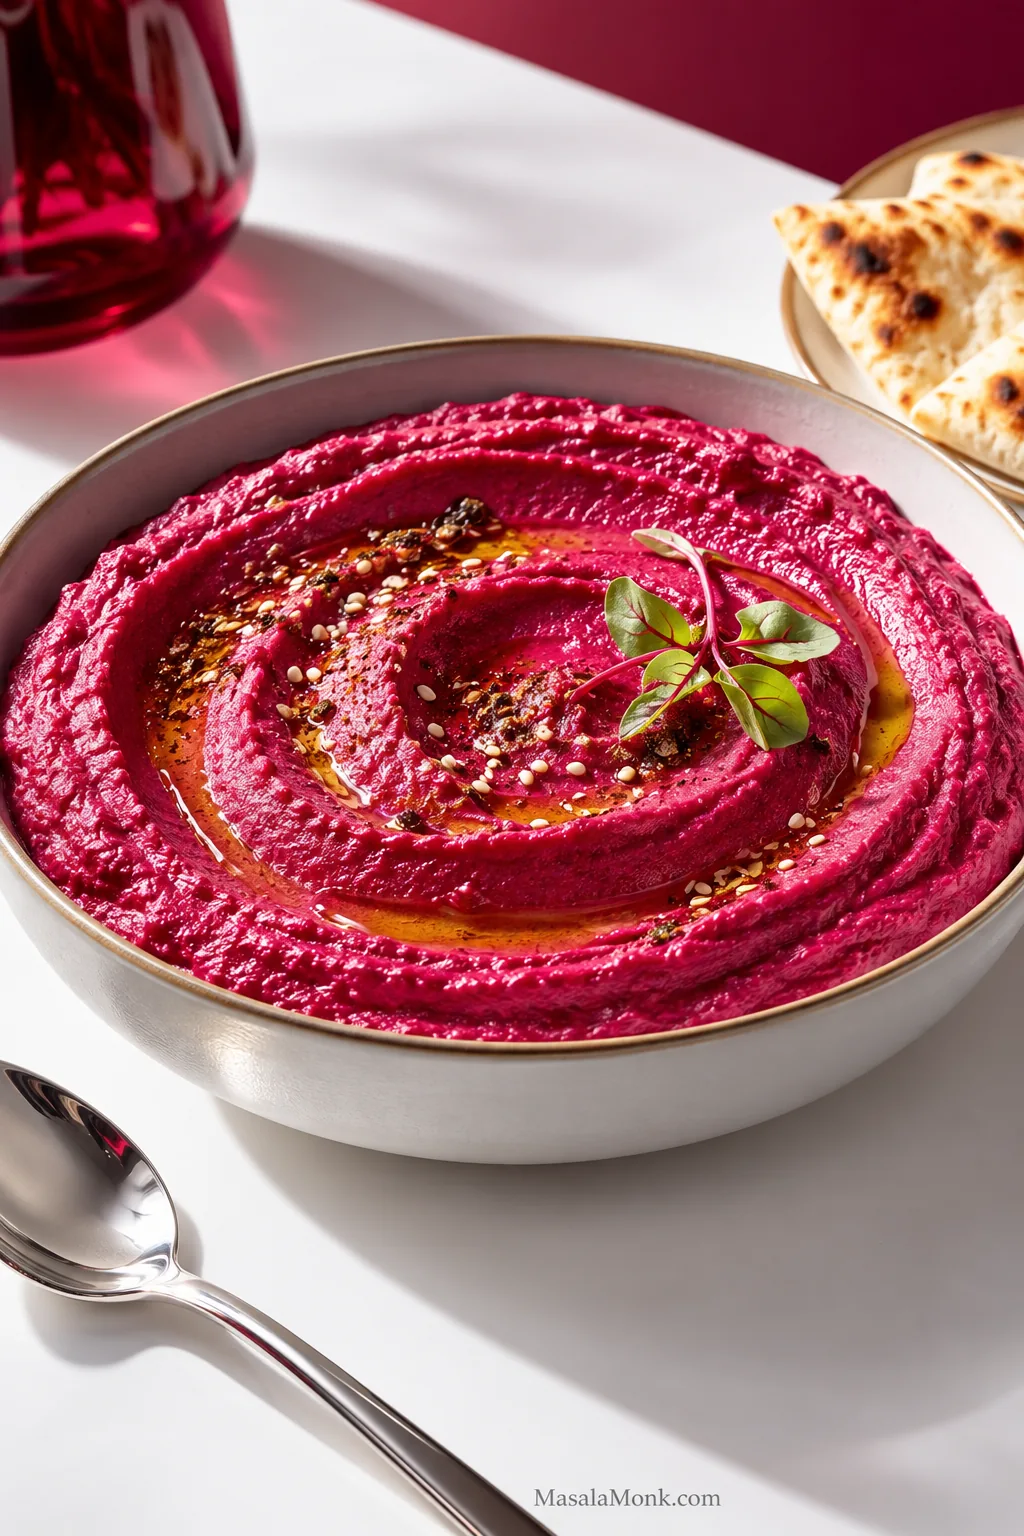
The color arrives first. A bowl of beet hummus can look almost impossibly pink. Yet the first spoonful should still taste recognizably like hummus: nutty tahini and chickpeas up front, with roasted beet underneath. Lemon, garlic and salt should keep everything lively rather than muddy or overly sweet.
This recipe uses enough beet to give the hummus real character without letting it take over. That’s especially useful if you love the color more than you usually love the earthy taste of beets. You should notice the beet, but chickpeas, sesame, lemon and garlic still need room in every spoonful.
The finished hummus should be glossy and creamy, with enough looseness to sweep across a plate. At the same time, it should still cling to warm pita without feeling heavy or pasty.
In This Guide
Make the Beet Hummus
Quick Answer: How Do You Make Creamy Beet Hummus?
For creamy beet hummus, roast a red beet until completely tender. Then blend 150 g cooked beet with 250 g very soft chickpeas, tahini, lemon, garlic, cumin and salt. Purée the beet first, add liquid gradually, and process until the hummus becomes glossy and softly spoonable.
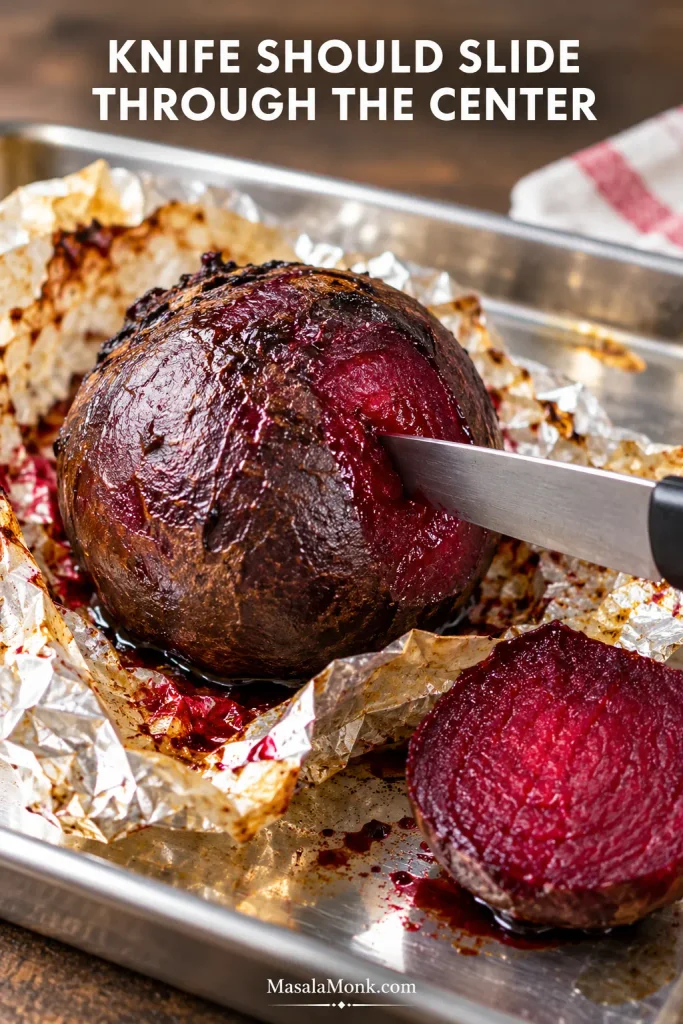
For a fresh whole beet, roast at 400°F / 200°C conventional or 180°C fan. It is ready when a thin knife slides easily through the center. Let the garlic sit briefly with lemon and salt while the beet cools, then loosen the tahini before the chickpeas go in.
Already have cooked beetroot? Skip the roasting step and the hummus itself takes about 15–20 minutes.
Before You Blend
1. Weigh the cooked beet
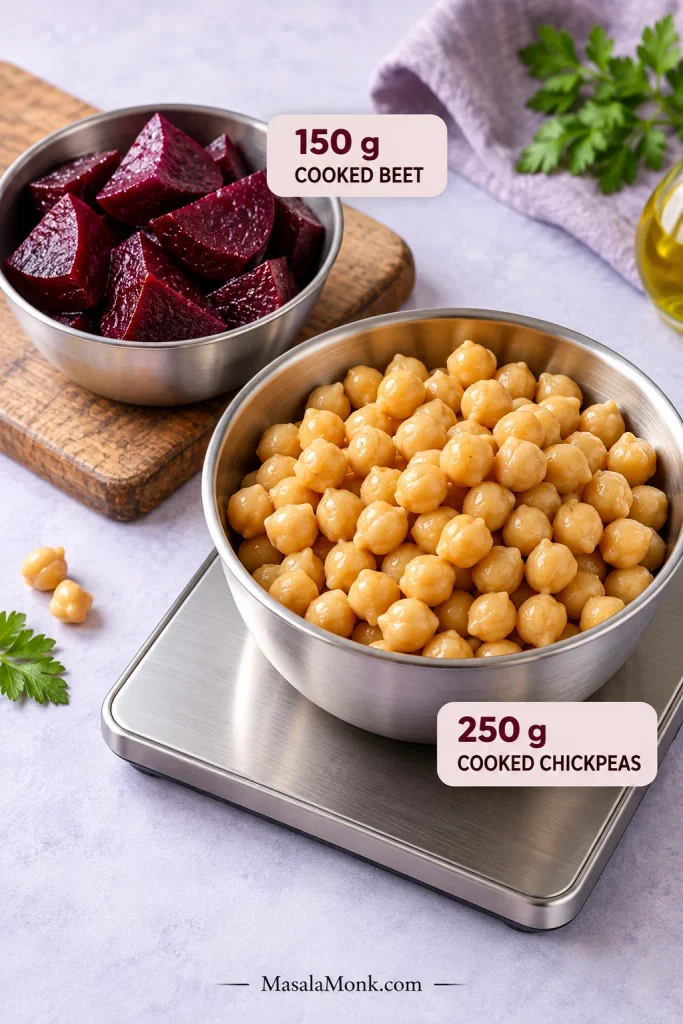
Beetroot brings water, sweetness and earthiness as well as color, so two roots sold as “medium” can behave quite differently. Use 150 g cooked beet with 250 g cooked chickpeas as the starting balance here.
A larger roasted beet doesn’t all have to go into the processor. Save the extra for a roasted beet salad with feta and walnuts.
2. Get the chickpeas softer than salad chickpeas
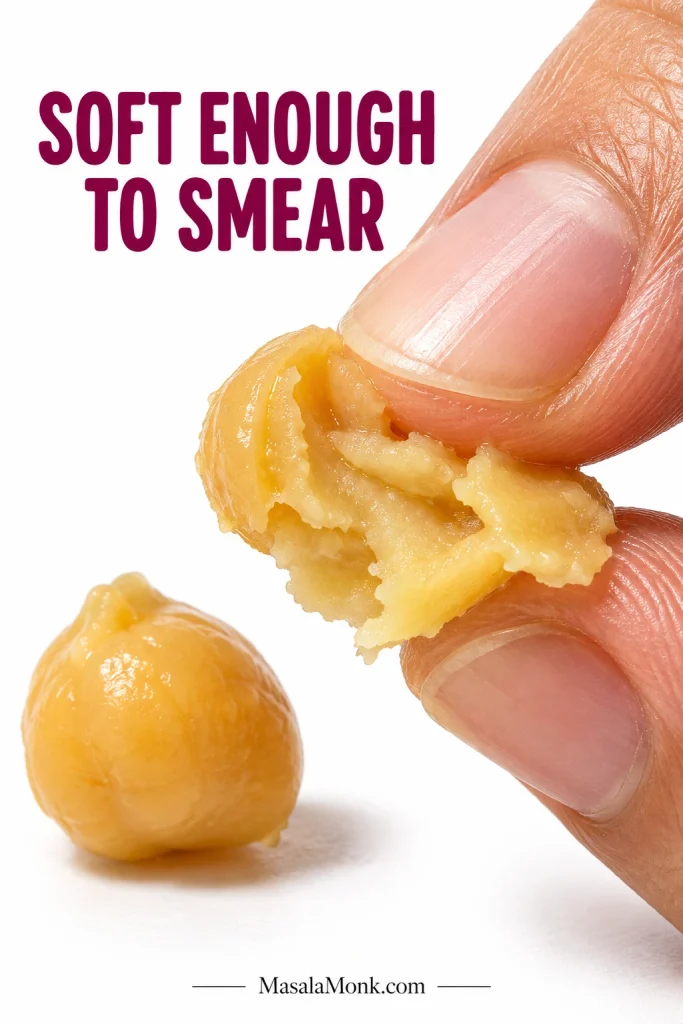
Press one between your thumb and forefinger. It should collapse almost immediately and smear easily. A firm or chalky center is one of the main reasons homemade hummus stays grainy.
Dried chickpeas work perfectly well. Cook them until very soft, drain, then weigh 250 g cooked chickpeas. MasalaMonk’s extra-creamy hummus with canned chickpeas goes deeper into chickpea softness, skins and processor technique.
3. Start cautiously with the water
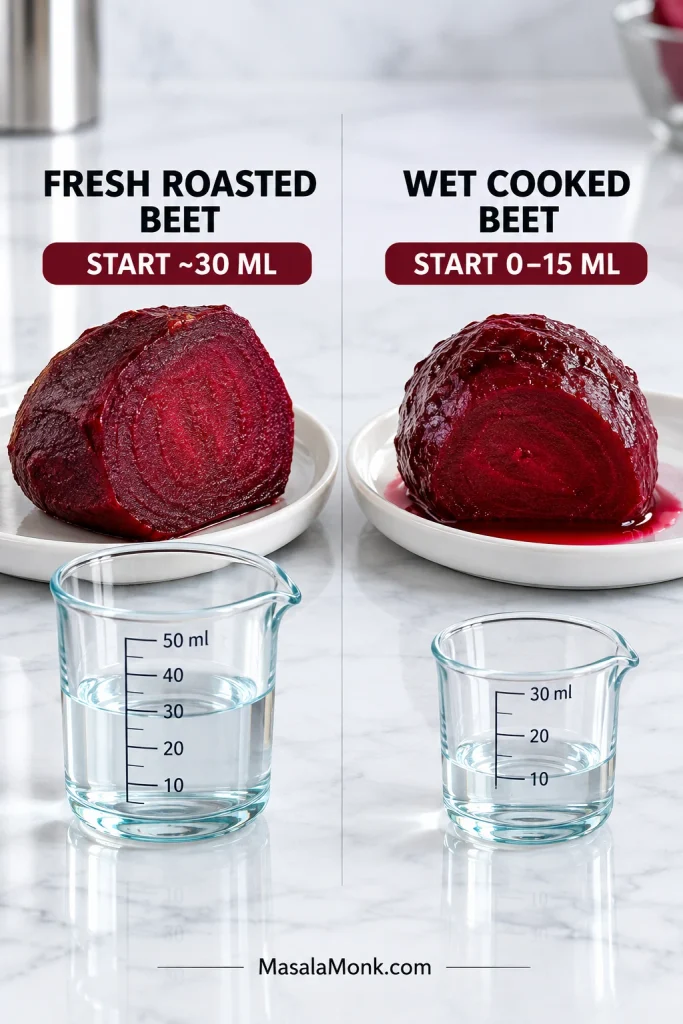
A whole roasted beet may be fairly concentrated. Steamed, vacuum-packed and canned beetroot can be much wetter. Begin conservatively and let the processor run before deciding the hummus needs more water.
A mixture already moving smoothly around the blade needs no extra water simply because some is left in the measuring cup.
Beet Hummus Recipe: Creamy Roasted Beetroot Hummus
Creamy Roasted Beetroot Hummus
Roasted beet, very soft chickpeas, tahini and lemon come together in a hummus that is vivid, creamy and savory before sweet.
Yield: about 2–2¼ cups / 475–530 ml / roughly 520–580 g, depending on the beet and final water adjustment
Servings: about 8–9 appetizer servings of ¼ cup / 60 ml each
Equipment
- Full-size food processor; a high-speed blender also works, although a small batch may need more scraping or tamper use
- Digital kitchen scale
- Baking tray or small covered roasting dish
- Fine-mesh strainer or colander
- Silicone spatula
- Small saucepan if the chickpeas need softening
Ingredients
- 1 medium-large red beet, around 225–275 g / about 8–10 oz raw. After roasting and peeling, weigh 150 g / 5.3 oz for the hummus.
- 250 g / 8.8 oz drained cooked chickpeas, about 1½ cups. That is roughly the drained contents of a 15–15.5 oz / 425–440 g can.
- 70 g tahini, about 4½ tablespoons, stirred smooth before measuring
- 2 tablespoons + 2 teaspoons fresh lemon juice, 40 ml, divided
- 1 small garlic clove, about 3 g, finely chopped
- 4 g fine sea salt, about ¾ teaspoon depending on the salt, plus more if needed
- ½ teaspoon ground cumin, about 1 g
- 2 tablespoons cold water, 30 ml, plus another 1–2 tablespoons / 15–30 ml only if needed. For canned or particularly wet precooked beet, start with 0–15 ml instead.
- ½ teaspoon baking soda, about 2–2.5 g, optional, only if firmer chickpeas need softening
- 1–2 teaspoons extra-virgin olive oil, 5–10 ml, optional for serving
- Optional finishing ingredients: sumac, sesame seeds, parsley, dill, a few whole chickpeas or finely diced roasted beet
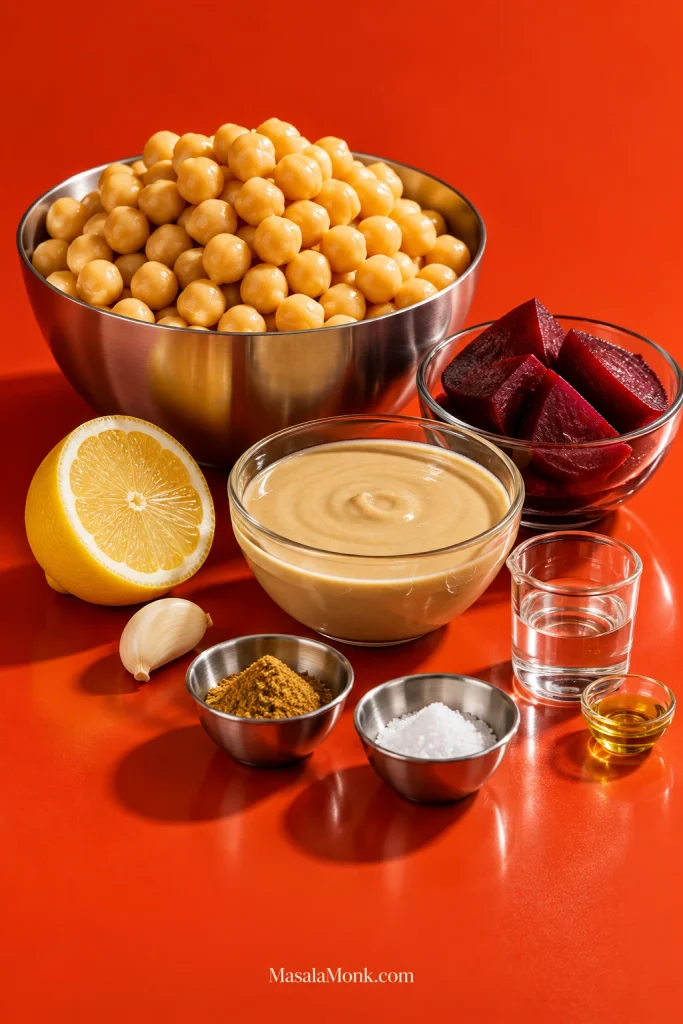
Ingredient checks before you start
Taste the tahini first. It should taste nutty and pleasantly sesame-rich. Stale, rancid or aggressively bitter tahini will carry that flavor into the finished hummus.
Prefer aquafaba? Reserve a little chickpea liquid before draining. Mild, unsalted aquafaba can replace some or all of the water, but plain cold water gives the most consistent result.
This recipe uses measured cold water rather than ice cubes so the hydration stays easy to control. That matters especially when the beet itself may already be wet.
For milder garlic: wrap one small unpeeled garlic clove loosely in foil and roast it alongside the beet. Begin checking around 20 minutes and remove it as soon as completely soft. Squeeze it from the skin and add it with the beet. Skip the raw-garlic rest; add the 30 ml lemon juice and 4 g salt with the tahini in Step 6 instead.
Method
Prepare the beet, chickpeas and garlic
- Roast the beet. Heat the oven to 400°F / 200°C conventional or 180°C fan. Scrub the beet and trim away the leafy top without cutting deeply into the root. Roast covered or loosely wrapped. A medium-large beet usually needs 45–60 minutes and is done when a thin knife slides through the thickest part with little resistance.
- Soften firm chickpeas while the beet cooks. Chickpeas that already crush almost effortlessly can go straight into the recipe. Cover firmer chickpeas with fresh water by about 1 inch / 2–3 cm. Simmer them with ½ teaspoon / about 2–2.5 g baking soda for 10–15 minutes. Drain and rinse extremely well once very soft.
- Rest the garlic with lemon and salt. Combine the chopped garlic with 2 tablespoons / 30 ml lemon juice and the 4 g salt. Leave it for about 10 minutes while the beet cools. The brief acidic rest softens some of raw garlic’s harsher edge.
- Peel and weigh the beet. Once comfortable to handle, rub or peel away the skin. Cool running water or a paper towel can keep some of the pink staining off your fingers and cutting board. Cut the beet into chunks and weigh 150 g / 5.3 oz.
Build the beet hummus base
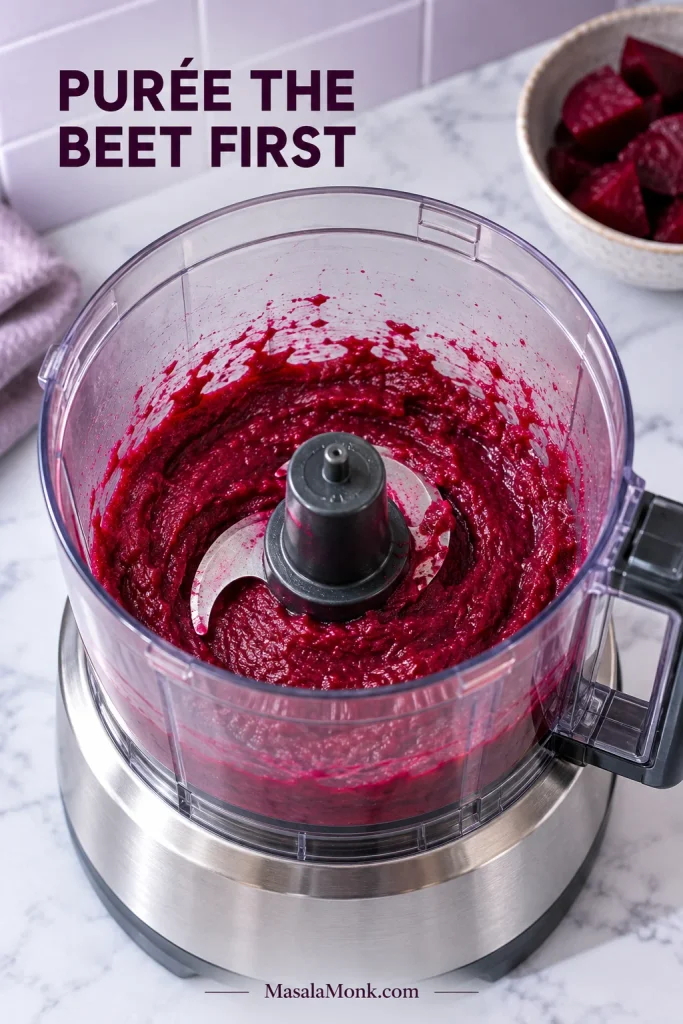
- Purée the beet first. Process the measured beet for 30–45 seconds, until finely broken down, then scrape the bowl.
- Loosen the tahini. Add the rested garlic-lemon-salt mixture, tahini and the starting water. Fresh roasted beet gets 2 tablespoons / 30 ml; canned or particularly wet precooked beet should begin with only 0–15 ml. Process for about 45–60 seconds, scraping as needed, until the mixture looks smooth and creamy.
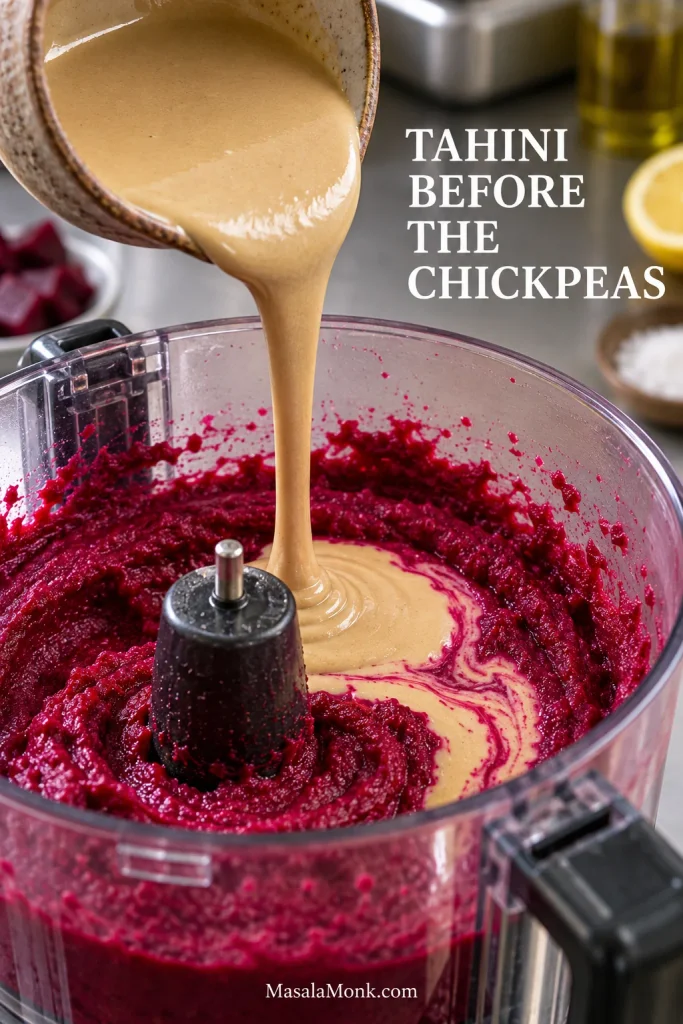
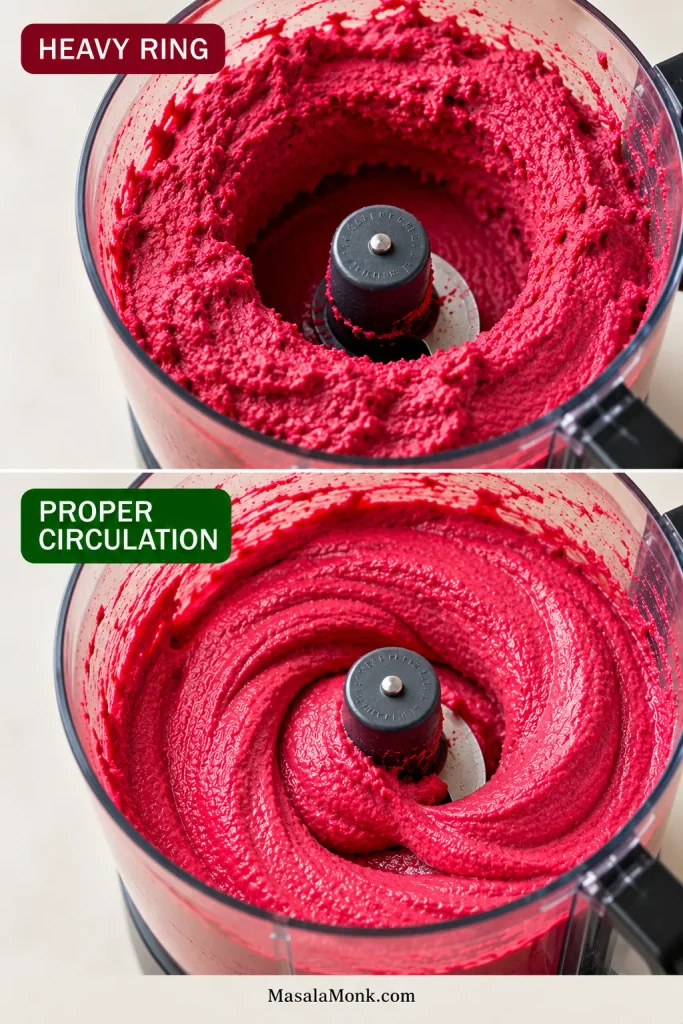
- Add the chickpeas and cumin. Process for 2 minutes, scrape the sides, bottom and area around the blade, then process for another 2 minutes. The mixture should eventually move continuously around the blade rather than sitting in a heavy ring around the bowl.
Fine-tune texture, flavor and finish
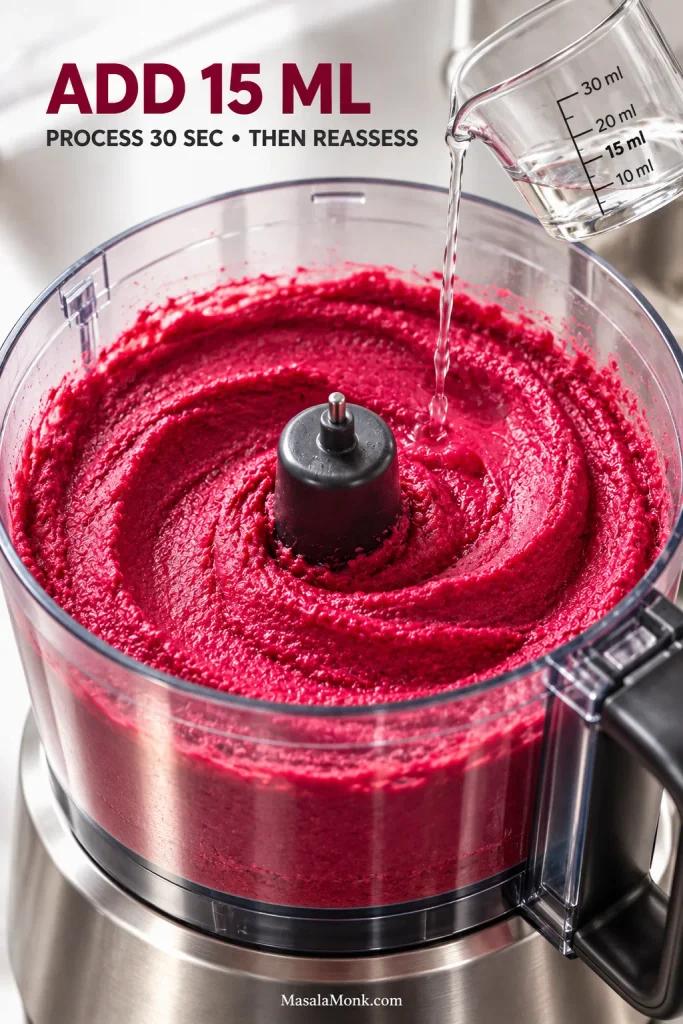
- Check the texture. Heavy hummus that still struggles to circulate can take another 1 tablespoon / 15 ml cold water. Process for at least 30 seconds before deciding whether it needs the final tablespoon. A soft, glossy batch needs nothing more.
- Taste and adjust. Check the salt first. If the bowl still seems dull, overly sweet or strongly earthy, add some or all of the remaining 2 teaspoons / 10 ml lemon juice. Good flavor with a stiff texture calls for water rather than more acid.
- Serve. Spoon the hummus onto a shallow plate or bowl and sweep the back of a spoon through the surface. Finish with olive oil and any garnishes you like.
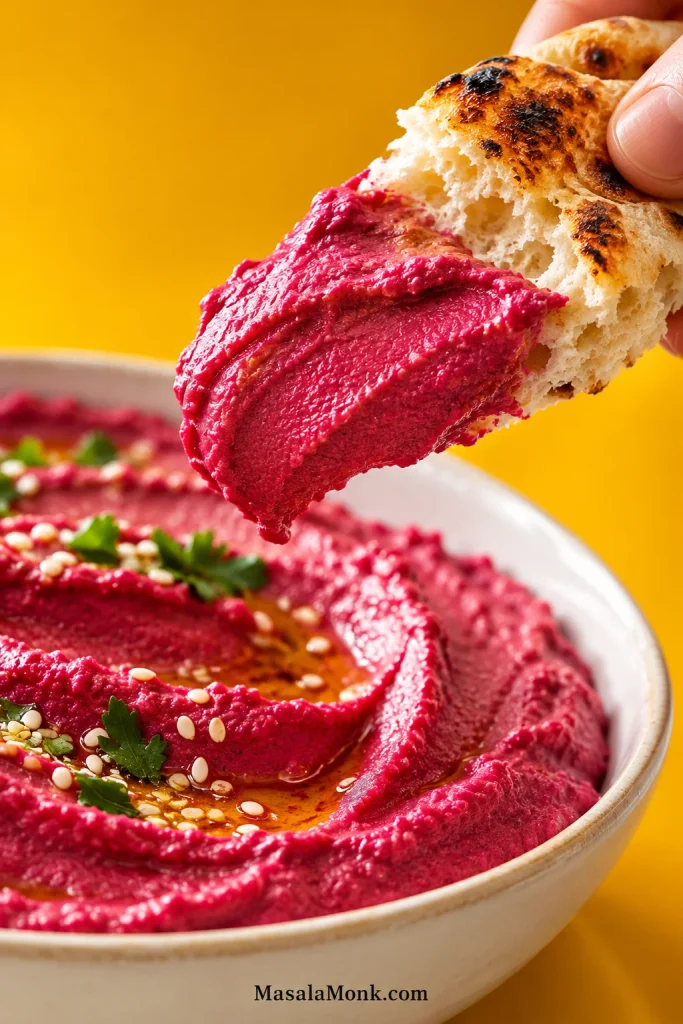
What should the finished hummus feel and taste like? A spoon dragged through the bowl should leave a soft furrow that relaxes slightly at the edges. Chickpea and tahini should arrive first, followed by roasted beet, with lemon cleaning up the finish. It should not taste sugary, aggressively earthy or sharply acidic. Once it tastes good and moves like this, stop adjusting it.
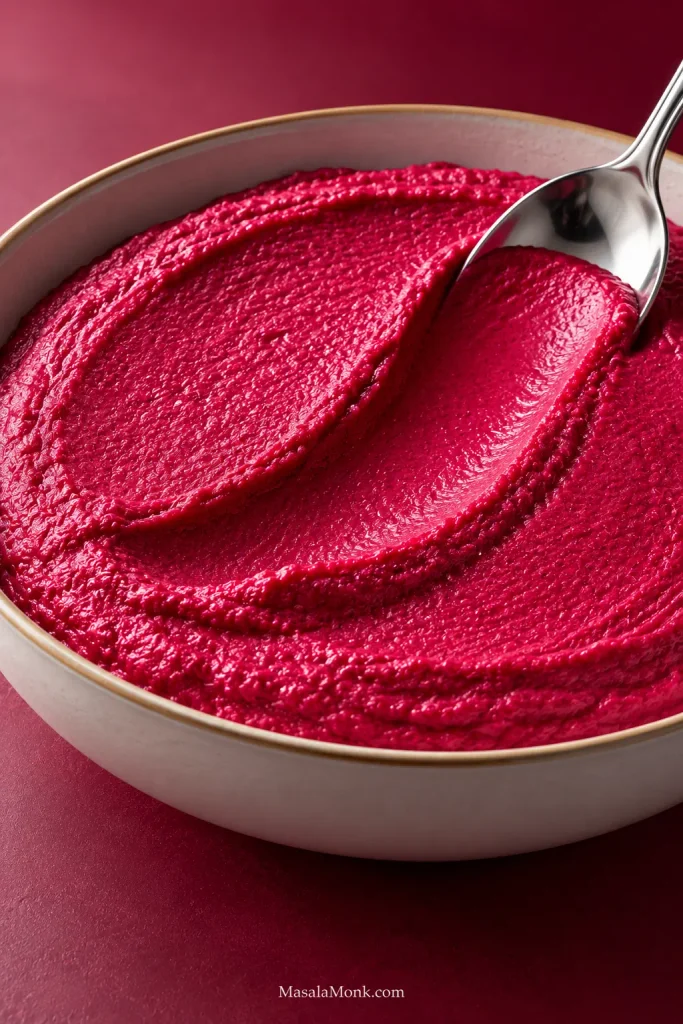
Freshly blended, the hummus is at its softest and most vivid. Spread it onto a plate while the pink is bright, then make a few loose spoon swirls across the surface. Let the texture look as generous as it feels.
Why this sequence works
Puréeing the beet first prevents larger pieces from surviving in the finished hummus. Meanwhile, the garlic gets time to mellow in lemon and salt. Loosening the tahini before the chickpeas arrive also helps the mixture move more freely. Very soft chickpeas matter more here than individually peeling every skin. Once a chickpea smears easily between your fingers, peeling is optional for this recipe.
Choose Your Beet: Fresh Roasted, Precooked or Canned?
A fresh whole roasted beet gives the most control over sweetness, flavor and moisture. However, beet hummus does not depend on starting from a raw root. Precooked beet can turn this into a much faster recipe.
| Beet you have | What to expect | Best adjustment |
|---|---|---|
| Fresh whole roasted | Sweet, concentrated beet flavor; tender and juicy without browned edges | Use the main recipe as written |
| Cubed roasted | Tender centers with darker roasted edges and stronger roasted notes | Cook until completely tender; weigh 150 g afterward |
| Air-fried | Roasted edges without the long whole-beet cook | Cut into roughly 1-inch / 2.5 cm pieces and air-fry around 390°F / 200°C until completely fork-tender. Begin checking around 12–15 minutes; many batches need roughly 15–20 minutes. |
| Steamed or pressure-cooked | Very tender, with less roasted character and often more moisture | Use 150 g, dry the surface and begin with little or no added water |
| Vacuum-packed cooked beet | Convenient, tender and often a little wetter; sweetness varies by brand | Pat dry, use 150 g and begin with little or no added water |
| Plain canned beet | Soft, usually wetter and sometimes milder | Drain and pat dry, use 150 g and begin with little or no added water |
| Pickled beet | Already acidic and often sweet and salty | Not a direct swap; its vinegar, salt and often sugar throw off this recipe’s lemon and seasoning |
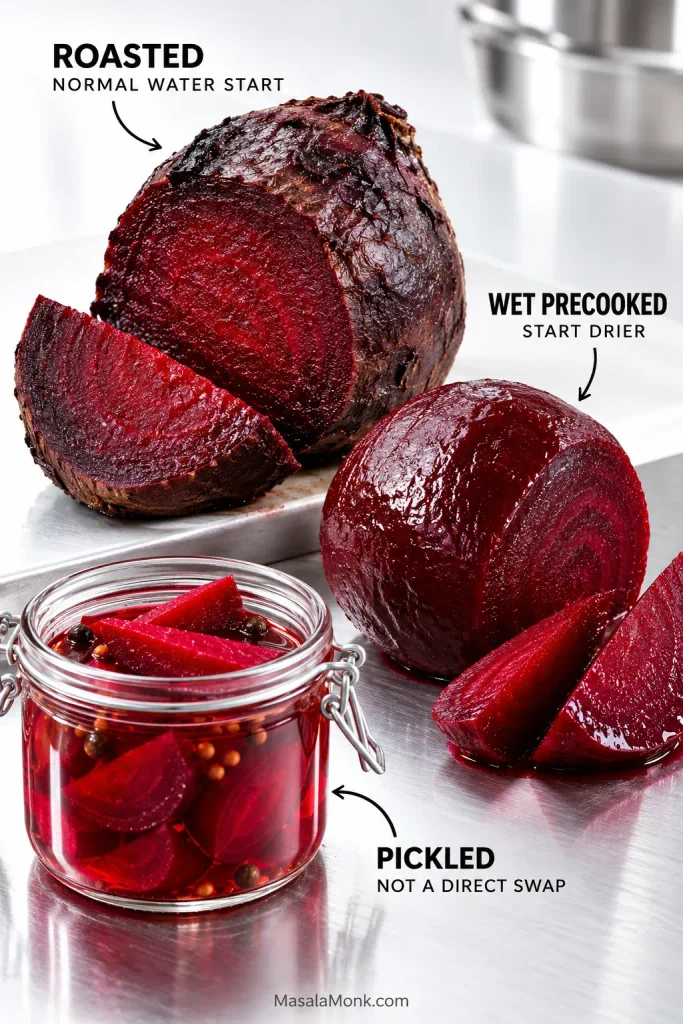
Can I use raw beet for beet hummus?
This recipe is built around tender cooked beet. Raw beet is much firmer and earthier, so 150 g raw beet is not a direct substitute if you want the same creamy texture.
Can I use canned beets for beet hummus?
Yes—use 150 g plain canned beet, drain and pat it dry, and begin with only 0–15 ml water. Process the hummus first, then add more water by the tablespoon only when it actually needs loosening.
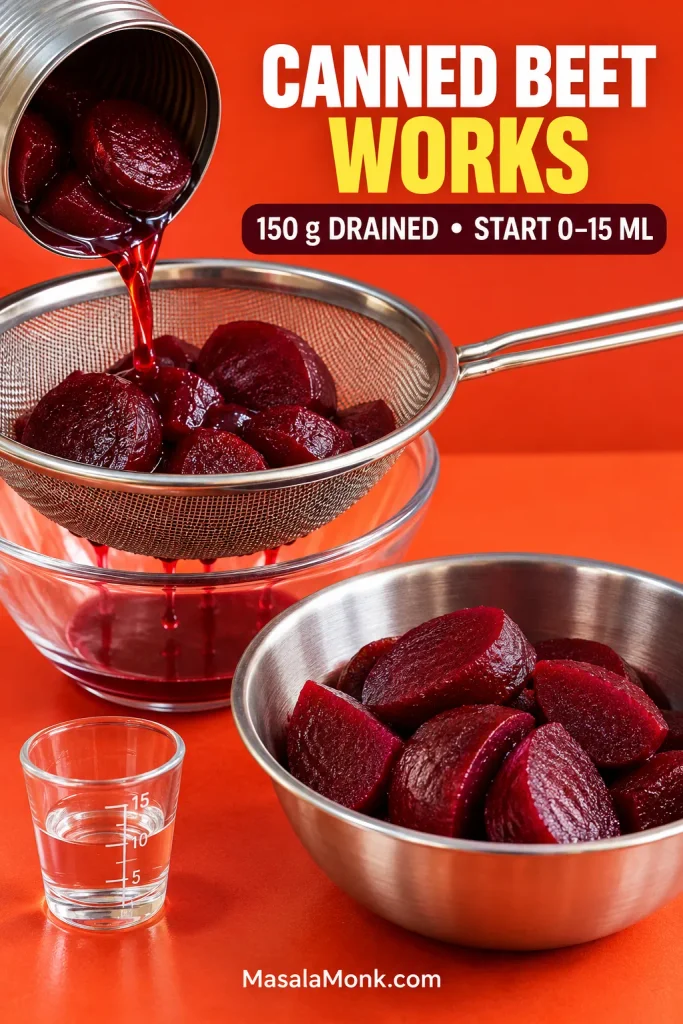
Ready to blend? Return to the full beet hummus recipe ↑
Adjusting Beet Flavor, Sweetness and Color
This recipe deliberately leans toward hummus with beet in it rather than a beet dip built around chickpeas. That’s an intention, not a universal rule. A sweeter, darker and more beet-forward bowl can be excellent too.
Want more beet flavor? Add cooked beet 15–20 g at a time, blend and taste. The bowl gets sweeter, darker and usually a little softer as the beet increases.
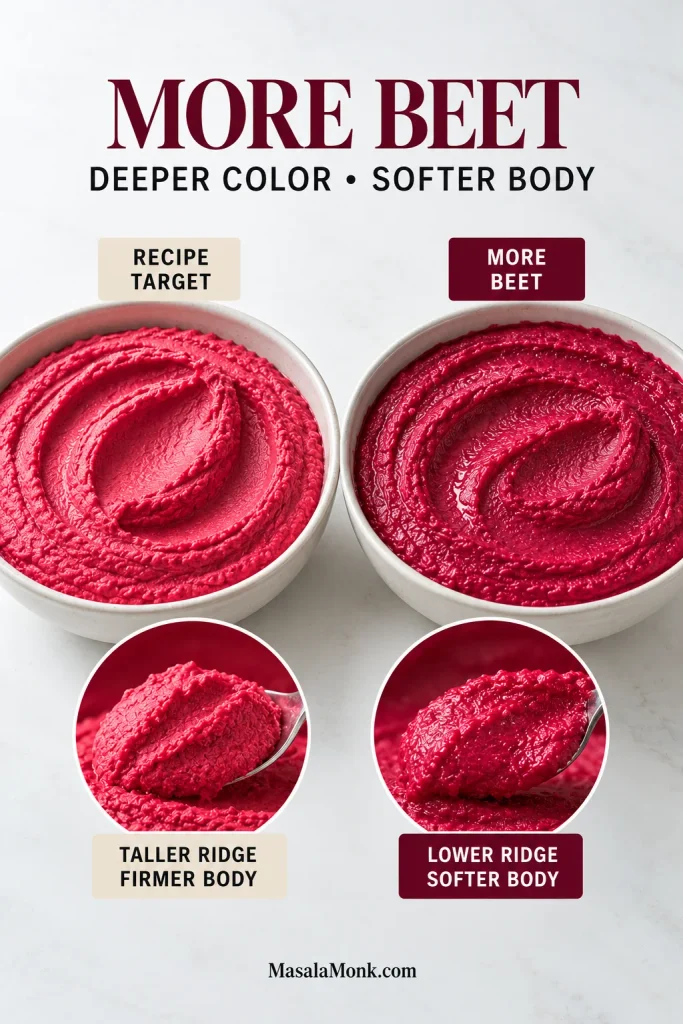
Has the beet taken over? More chickpeas pull the flavor back toward classic hummus. A little tahini restores richness and sesame flavor too, but stop before the sesame starts taking over.
Texture good but flavor flat? Taste for salt first, then lemon. Water loosens hummus; it does not make a dull bowl taste brighter.
Plain hummus already sitting in the refrigerator can be turned pink the same way. Blend in a small amount of cooked beet, taste, then decide whether it needs more. There is no advantage to committing an entire beet at once.
When the beet tastes too earthy
Some beets simply taste earthier than others, and some people notice that flavor much more strongly. Salt often helps first; a little lemon can brighten a bowl that still tastes dull. If beet still dominates after the seasoning is right, add more chickpeas. A little tahini can help too, rather than another pile of garlic.
Something cold and sharply dressed beside the hummus can change the whole plate too. A crisp cucumber salad with vinegar, dill and onion brings cool crunch against the creamy beet.
When the color is softer than expected
Individual beets vary in pigment. Cooking method, beet quantity and the amount of pale chickpea and tahini around them all affect the final shade. Red beet gives the familiar pink-to-magenta hummus; golden or striped beets work too, but naturally produce a different color.
Good flavor and texture matter more than matching a photograph. A bowl that lands closer to rose than neon pink may need no correction at all.
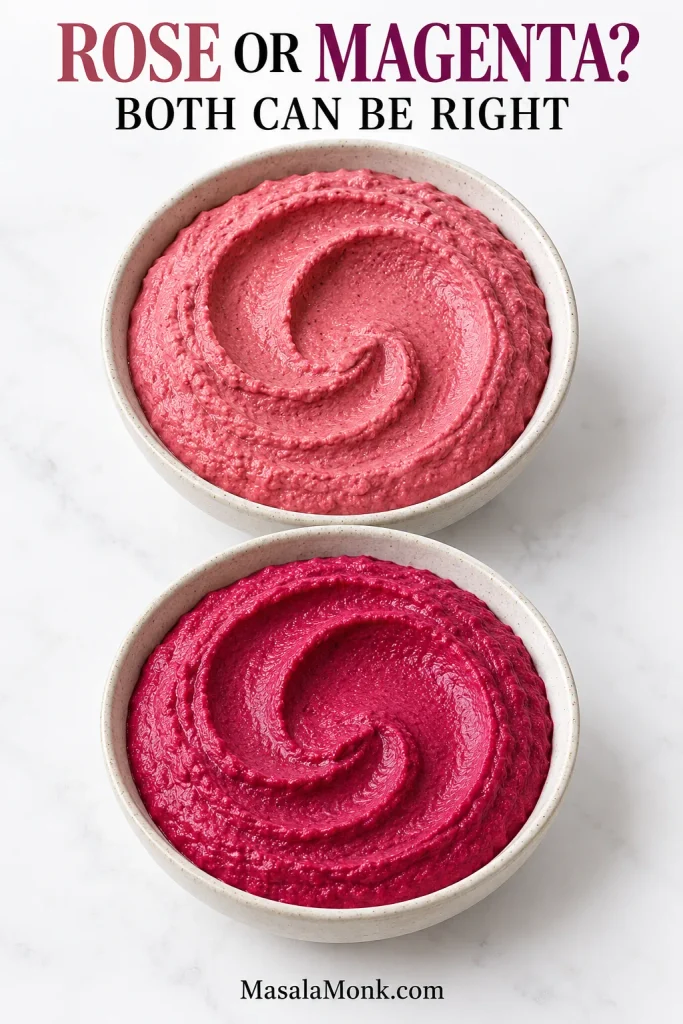
Still not quite right? Go straight to Beet Hummus Troubleshooting → for texture and flavor fixes.
Beet Hummus Troubleshooting
Not every batch needs correcting. If the hummus tastes good and spreads the way you like, small differences from the target are simply variation. Start troubleshooting only when the flavor or texture actually gets in the way of enjoying it.
Taste before changing two or three things at once. Sometimes a little more salt is all the bowl needs; adding lemon, tahini and water together only makes the result harder to read.
Texture problems
| Problem | Check first | Best first move |
|---|---|---|
| Too thin or runny | Wet beet or too much added water | Blend in more chickpeas first; a little tahini can add body too |
| Too thick or pasty | Dry chickpeas, too little water or refrigerator chill | Add water 1 tbsp / 15 ml at a time and process |
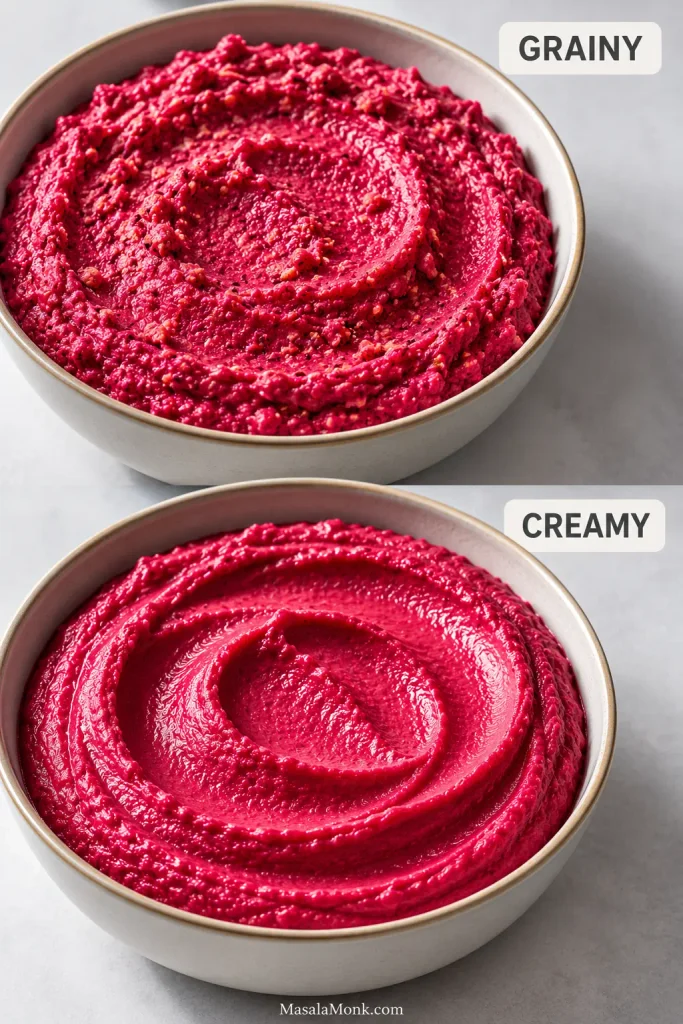
| Grainy | Firm chickpeas, short processing or poor circulation | Soft chickpeas: add a little water and process longer. Firm chickpeas cannot be fully rescued after blending. |
| Blender will not circulate | Batch too small or mixture too dry | Stop, scrape and add the minimum water needed to get it moving—or use a food processor |
| Very firm after chilling | Normal refrigeration effect | Let some of the chill come off, stir, then loosen 1 tsp / 5 ml at a time if needed |
Flavor problems
| Problem | Check first | Best first move |
|---|---|---|
| Bitter | Tahini, harsh raw garlic or poorly rinsed chickpeas after baking soda; bitterness after plating may come from the finishing oil | Work out where the bitterness is coming from before adding more lemon |
| Too sour or sharp | Too much lemon juice | Blend in more chickpeas first; add a little tahini if the bowl then tastes too lean |
| Soapy or alkaline | Too much baking soda or poor rinsing | Mild: blend in more chickpeas, beet and tahini. Strong: remaking the batch usually tastes better. |
| Too earthy | Beet amount, then seasoning | Taste for salt and lemon; add more chickpeas if beet still dominates |
| Too sweet | Beet-heavy mixture | Salt and lemon first, then more chickpeas if needed |
| Bland | Salt | Add a small pinch, mix well and taste before reaching for anything else |
| Too garlicky | A large or particularly pungent raw clove | Blend in more chickpeas, beet and tahini rather than trying to cover the garlic with more acid |
| Tastes mostly of tahini | Too much or very strong tahini | Add more chickpeas and a little beet, then retaste before changing the lemon |
| Barely tastes of beet | Low beet amount or too much pale base | Add cooked beet in small weighed increments |
A bitter batch
Taste the tahini separately if the jar is still nearby. Then consider the garlic or whether chickpeas softened with baking soda were rinsed thoroughly. Bitterness that appeared only after serving points toward the finishing oil. More lemon is not an automatic cure; sourness layered over bitterness leaves you with two problems instead of one.
Hummus that stays grainy
Crush a chickpea between your fingers. A soft chickpea may respond to a little more water and another minute or two in the processor. By contrast, a genuinely firm center will not become creamy through endless processing once everything has already been blended.
That batch is still usable—serve it a little more rustic and soften the chickpeas further next time. Extra oil can make grainy hummus richer while leaving it just as grainy.
Tahini and Other Substitutions
Can I make beet hummus without tahini?
Yes, but tahini contributes sesame flavor, richness and body, so removing it changes more than taste alone. When allergies are not an issue, a mild unsweetened nut or seed butter can replace some of that richness. However, the finished hummus will taste different.
You don’t need olive oil in the hummus itself. Tahini provides the richness; water controls the texture. The finishing drizzle is optional, and the recipe as written is naturally vegan.
Making it sesame-free
For a sesame allergy, choose a substitute the person eating it can safely have. Another nut or seed butter is not automatically safe simply because it isn’t sesame. Thick plain Greek yogurt is another creamy option when dairy is suitable, although it makes the dip tangier and no longer vegan.
Want the beet dip without chickpeas?
You can absolutely make one, but the proportions need rebuilding rather than simply deleting the chickpeas. Beet-and-tahini, beet-and-walnut, yogurt-based and white-bean dips all behave differently from chickpea hummus.
If you’re building a larger mezze spread, roasted red pepper and walnut muhammara makes a good second dip. Its smoky pepper and walnuts bring something completely different beside the cool beet hummus.
What to Serve with Beet Hummus
Beetroot’s mild sweetness is particularly good beside warm bread, crisp vegetables, fresh herbs and something salty or pickled. For simple scooping, soft homemade pita bread is hard to beat.
- Cucumber, radish, carrots, celery, sweet peppers or snap peas
- Olives, pickled vegetables and fresh herbs
- Warm flatbread or crisp pita chips
- Wraps, sandwiches and toast
- Grain bowls and salad plates
- Roasted vegetables or vegetable fritters
Crisp homemade falafel adds hot, crunchy contrast against the cool, smooth hummus.
A parsley-heavy lemony tabbouleh salad brings the opposite kind of contrast: herbs, acidity and chopped-vegetable crunch.
Put the pink hummus beside green tabbouleh, golden falafel and warm pita and most of a mezze table is already there.
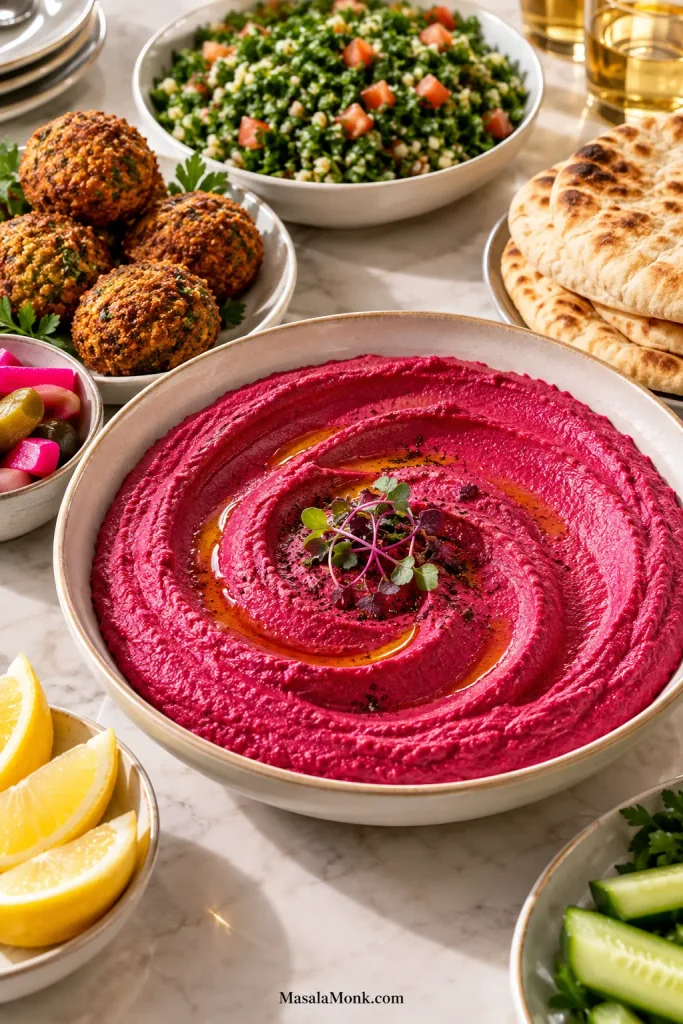
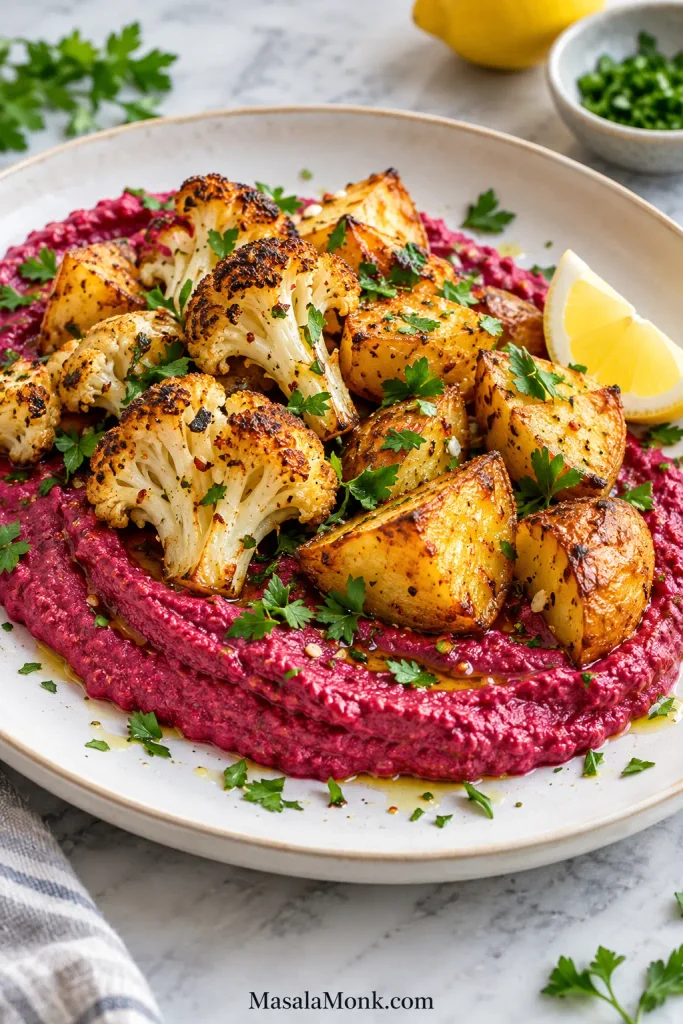
Thicker hummus works especially well spread inside pita, layered into a sandwich or spooned underneath roasted vegetables. For something more substantial, try it with roasted cauliflower and potatoes and finish the plate with herbs and lemon.
Serve the hummus straight from the processor if you like it at its loosest and most aromatic. After refrigeration it becomes denser on the spoon. Giving it 15–30 minutes out of the fridge before serving brings some of that softness and aroma back.
Making it ahead? Jump to storage and freezing → for refrigeration time, color changes and freezing guidance.
Make Ahead, Storage and Freezing
For a conservative home-kitchen rule, keep beet hummus refrigerated for about 3–4 days at 40°F / 4°C or below. That is consistent with FoodSafety.gov’s cold-storage guidance for cooked leftovers. Transfer it to a clean airtight container and refrigerate promptly.
The beet itself can be roasted earlier in the day or the day before. Let it cool enough to handle, then refrigerate it promptly in a covered container. Once the beet is ready, the hummus itself takes about 15–20 minutes.
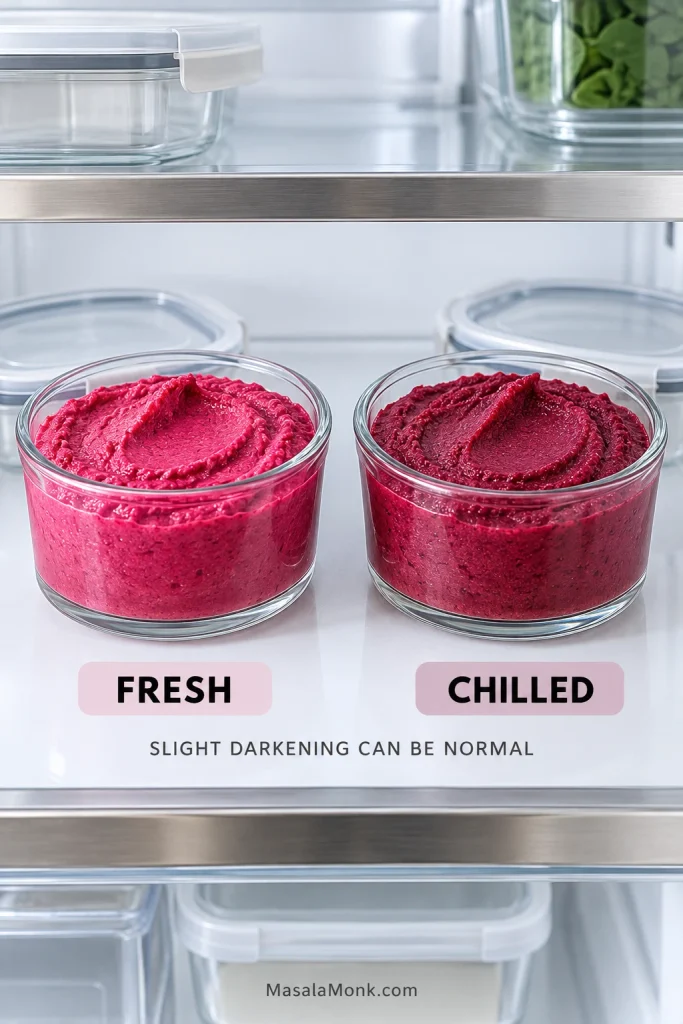
Beet hummus may deepen or darken slightly in the refrigerator; that color change alone does not mean it has spoiled. Stir before serving. After some of the chill has come off, check the texture again. If it still feels too stiff, loosen it with water just 1 teaspoon / 5 ml at a time.
Can you freeze beet hummus?
Yes, although the texture can change. Freeze small portions in airtight containers, thaw overnight in the refrigerator, then stir or briefly reprocess. Hummus that feels heavier after thawing can take a teaspoon or two of water before blending again. For the glossiest texture and brightest presentation, fresh or simply refrigerated hummus is better.
Once the hummus is smooth, softly spoonable and savory, it is ready. Beet should taste like part of the dish rather than the whole story.








